 I MADE THESE!!!
OK, maybe I’m a bit biased here, but to my eyes these are just about the most beautiful things in the world right now!!
So I finally did it! and I’m even extremely happy with them to boot (haha!) and after a month or so of mental anguish and metaphorical hair-pulling even I can find almost no fault with my (eventual) finish. It’s true there were some struggles along the way yes; but I’m so happy now, and those dark moments have faded away in the happy, warm fuzzy pink glow in which surrounds me right now. I even dressed today to match it 😉
 So, the process…

Pattern; self-drafted. I did buy some long black zips, but eventually decided upon a design which I could just pull on, no zip required, and drafted a pattern to accommodate this… Before starting, I padded my lasts with a couple of pairs of thick winter socks so as to give my foot a decent amount of wearing ease and allow enough room for my own feet to be well sock-ed too! and taped them down firmly with masking tape, to protect them from the boot-making process, and made my pattern to fit the padded last, obviously.

Materials; the upper is black vinyl, from Clark Rubber, this comes in two types and I spent a bit extra and bought the UV resistant kind that is highly resistant to whatever the weather may throw at it; sun or rain. Well, since I plan to be wearing them outside most of the time, and given the amount of work you put into making a pair of boots, the small extra cost is completely justified, in my opinion!
The boots are fully lined in faux chocolate-brown suedette (above), bought originally in the Fabric Store in Melbourne, and which I have used to line nearly all my shoes so far. It’s the same stuff I used for my chocolate suedette top, here.
For the soles and heels, I used rubber matting from Bunnings. I cut these to size, and sanded each surface well before glueing them together using contact gel adhesive, also from Bunnings. Inside the boot, I also glued an insole cut from cork matting, and then over that, is laid a foam inner sole (Coles) which I’ve covered with the chocolate brown suedette, to match the interior. Not that you can see it easily, down in the dark innards of the boot, but still

Decorative details: I had “finished” the boots, and they were kinda plain, and I decided they really desperately wanted some hardware, and maybe some straps. I then planned on some “belts” around each boot with buckles… but unfortunately cool buckles are pretty much impossible to find around about here. Everything I saw was either diamante or leopard print plastic and without exception totally hideous. In the end, I compromised with these nickel finished swivel clips to close the “belts” and you know what? I love them SO MUCH and am actually super-happy I couldn’t find the buckles I originally wanted after all! I bought these from Homecraft Textiles. The three “belts” were all sewn on by hand, after the boots were finished. And before you ask; yes, this was pretty difficult. But I reckon it was worth it! Also, I became acquainted at this stage with how very warm the boots were going to be, even before wearing them, since my hands just about broiled while shoved down in the boots, doing this sewing.
Making the boots…

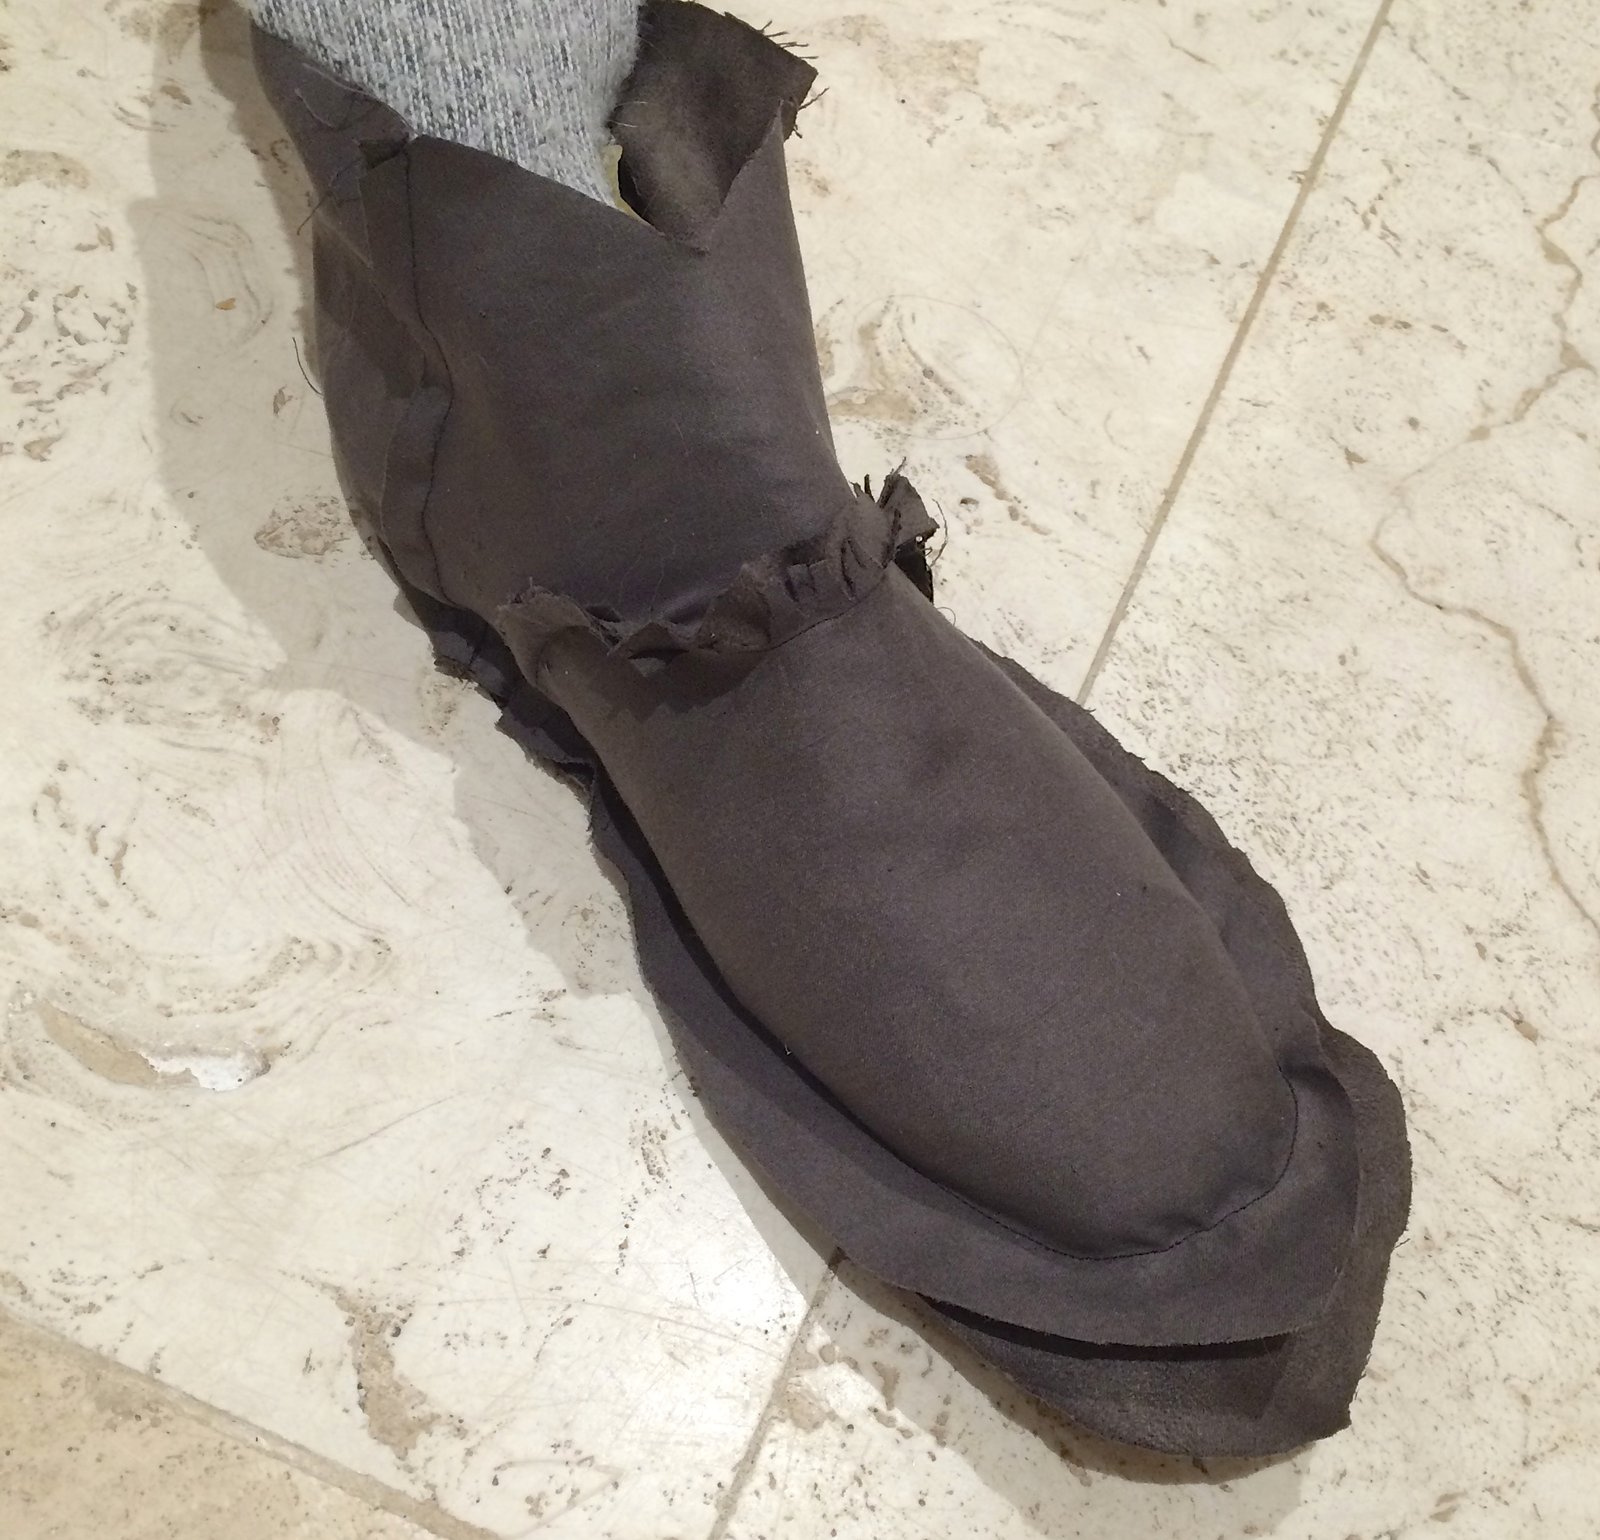
I made the lower part of the boots first, like sort of ankle boots, and did all the lasting and constructing the toe puffs and heels counters using stiff cotton denim with some stretch to it, and PVA glue, just exactly the same way as previously described in the making of my paprika desert boots here.

My vintage wooden lasts are wonderful things, but because they have a metal plate on the bottom it means you can’t nail into them. So, I pulled in the well-glued up (PVA glue) sides in under the shoe by stitching it all in, in like a cobweb of back and forward stitching, using thick strong Gutermann’s upholstery thread (above). You have to do this reasonably quickly, before the glue hardens and dries too much, but it’s not actually difficult. Then I left it all to dry thoroughly, before skiving and trimming much of the bulky folds away underneath. After this, I glued the sole underneath with contact gel adhesive, and glued and nailed the heel into position, just as for all my previous shoes
Once this was finished, I had two completed ankle boots (above), and it was time to add the “calf-tubes”. Yes, I expect there is some proper name for those, but that is how I thought of them! I found it was impossible to machine stitch anything beyond this stage, with my little home sewing machine, and don’t have access to a shoe-maker’s sewing machine, so all the rest of the construction I sewed by hand. I sewed the lining and outer tubes around the top of the “ankle boots” in a way as to enclose the seam within the two layers, then hand stitched the tubes up the centre back seam using a leather needle and tough Gutermann’s upholstery thread. I used back-stitch for the calf-tube to the ankle boot seam, and ladder stitch for up the centre back seam for this.

half sewn up…

Oh, I did manage to sew the upper “hem” by machine! although this was not particularly easy, what with the thick fabric and the boot and all. I cut the lining to sit neatly underneath the hem, glued the layers together as best as I could, then glued the upper vinyl hem down, and stitched it. It’s doesn’t look like it would be hard to sew the top hem by machine but just trust me, a boot is a far from manoeuvrable thing to sew. The final sewing step was to add those three decorative “belts” per boot, as described above.


Then for the finishing off! I’d cut my heels carefully, but they were still a bit uneven. In previous pairs of shoes I’ve sometimes left the unevenness, because I kinda liked the randomness, but in this case I wanted a more smart finish… I sanded the heels till they were all beautifully smooth, and then “blacked” the heels and the sole edges (above). This also camouflaged some stray small blobs of glue that were here and there, that I hadn’t managed to get off with turps. The very final step was to varnish the heels and soles, so they’re all nice and shiny and clean and, dare I say it? almost rtw looking?!

And done!!
 sorry for the picture overload, but honestly; I’m so proud of those boots I could burst!

Details:
Boots; MADE BY ME!!!!!!!!
Jumper; Jo Sharp design and mohair, knitted by me, all details here
Skirt, Paprika patterns Jade skirt, in burgundy silk/cotton knit, details here
Tights; self-drafted, black poly stretch, details here, and my tutorial for making your own custom-fit tights pattern is here
Sienna is thrilled with my boots too; you can tell, yes? 😉

 Fulfilling a need. Plus, I’ve been making some winter boots and it has been such a freaking marathon, cue Munchen scream here, although I am over the difficult bit and on the home straight now, weeeee! anyway I just wanted to whip up something quick and pretty and girly and fun and frivolous. Lingerie! of course! Something to lighten the mental load.

 Fabric and materials: I bought the pretty floral cotton-mix jersey and the lace-y knicker elastic from Fabulous Fabrics during their recent 20% off sale, and the deep teal/navy blue shoulder strap elastic and ribbon are from Homecraft Textiles. I’ve always loved the colour combination of deep blues and teals when mixed with pinks of any variety; such a pleasing colour combination. This set is pretty plain really, all the excitement is in the print. In a rather busy print like this, I prefer for it to do the talking and power down on any lace or decoration or any frippery bits and bobs to distract from it. That print is plenty!!
 All the other innards and bits; the foam, hook and eye closure, rings and sliders, underwire casing and underwires are from my rapidly dwindling


