
I’ve made a new little top… I really wanted to debut it today seeing as it’s strewn with beautiful bouncing bunnies. A bunny-tastic, rabbit-iferous Easter-rockin’ top! 😀
You know when you go to Spotlight for a handful of bits and bobs, not including fabric, but you grab a bit of fabric anyway just so you can pay for everything at the fabric counter and save yourself from queueing at that hideously long queue at the front checkout? No? Just me then… 🙂 #anyexcuse #addictedtofabric #ineedhelp

Well, this was a result of one of those times. I do really love this though. I mean, I don’t know if I’ve ever been to a fabric store and not spotted something I really love?! seriously! but I do manage to restrain myself most of the time. In this case, the soft, washed out, almost-antique-y ink drawing-like look of the bunny print is really beautiful to my eyes, it’s a novelty print and pretty cute but I think it’s also still quite sophisticated in feel. The print is more like a dirty charcoal than black, and the background has a sort of marled oatmeal/ivory blotchiness to it, which is very much my best sort of white. The selvedge says it’s a linen mix, although truthfully think the linen content is not huge.


Pattern; the epaulette cut and sewn, pattern No. 4 from “she has a mannish style”, or “she wears the pants”, by Yuko Takada. I know, I just made another of these very recently… which is why I used it probably, it was handy to pluck out from my pattern stash again, and I didn’t have to put any thought into going through my top patterns searching for a different one. #lazybum Although, to be fair; I knew it’s loose-fitting unstructured lines would be perfect for the flimsy floatiness of the fabric too.

Because the fabric is almost sheer, I lined the body part of the top with a pale coffee-coloured jersey knit, that I bought yeeeeeears ago at a Morrison sale. I’ve used little bits of it here and there, namely for this lingerie set, and also for this one too.
I cut the lining to be the same size as the shell from the armpit up, and just a bit slimmer in the body so the shell could skim over it better. I put quite a bit of thought into the best way of lining it.. should I line it or underline it? have the bottom edge enclosed? neckline binding or clean edge? line the sleeves too? eventually settled upon this way and think it’s turned out a pretty good way to line a loose top like this one. No bindings; it’s attached at the neckline and the sleeves, but otherwise floats freely and separately inside the top.
Construction method is as follows …
Firstly, sew the shoulder seams of the shell, likewise the lining pieces. With this fabric being pretty flimsy and virtually see-through, I finished all seams very close to the stitching with my overlocker.


Pin the shell and lining right sides together around the neckline, stitch and finish.
Understitch.


Sew the side seams of the shell, and separately, the side seams of the lining


Pull the lining inside the shell, wrong sides together and keep both layers together, raw edges even, when stitching the sleeve in the armscye. Sew the sleeve seams, pin sleeve cap in the shell/lining armscye right side of sleeve to right side of shell, stitch and finish edge close to stitching.
Hem the shell and lining separately. I chose to invisibly hand-stitch the lower hems in place.

For the sleeve hems; I really like the raw sheer edge and the way it gently rolls up, and wanted to keep this look, however the knit does fray a little. So I made an attempt to employ something similar to what I’ve seen Sasha of secondopiano do… I was so impressed that Sasha unravels a length of the fabric filament and uses it to properly cast off the edges of her knits in the knitting way! Or is it crochet? I just checked… it’s crochet! Her work looks so beautiful and perfectly finished. Well, I didn’t manage to crochet my edges here, I tried! but failed… I really need to get myself a teeny tiny little crochet hook I think! so instead I did a sort of cheat’s version… I threaded a sewing needle with the same beige all-purpose thread I’d used to sew the top together, and loop-stitched through each loop to finish the edge. It’s secure, it won’t fray and it’s pretty much invisible, and I love how this turned out. Thanks for the brilliant idea, Sasha!

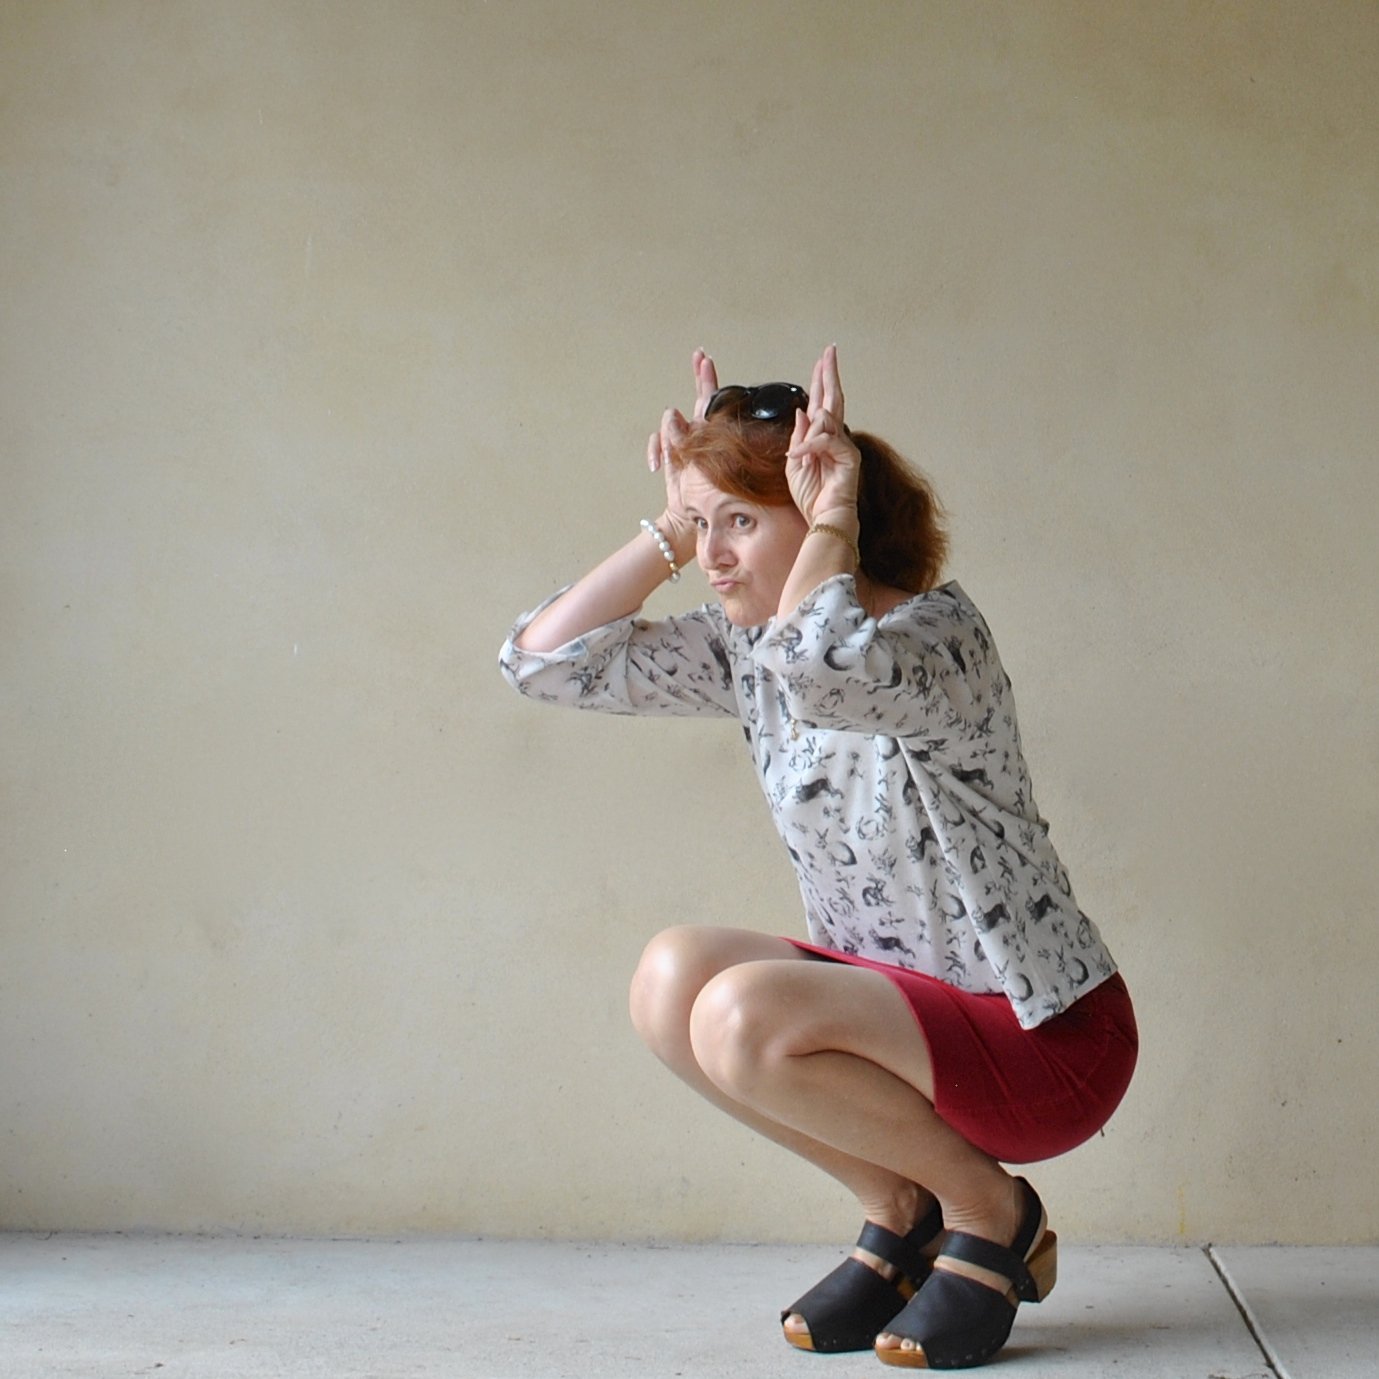
OK, I have no idea what promoted this mad bunny pose… I’m gonna go with too much amaaaazing hot-cross bun?! Or maybe… not enough amazing hot-cross bun? Yep, that sounds far more likely… better hop off and eat another one! 😉

Details:
top, the epaulette cut and sewn, pattern No 4 from “she has a mannish style” or “she wears the pants”, by Yuko Takada, soft linen-mix knit. My previous versions of this pattern are here, here and here
Skirt; Vogue 1247, red velveteen, details here and my review of this pattern here
Shoes: black clogs made by me, here; white oxfords below, also made by me, here I almost cannot believe I have TWO me-made pairs of shoes to choose from when deciding what will go with an outfit… I feel like my self-made shoe collection is taking OFF!!!!


Truly cute fabric! And absolutely sophisticated! 🙂
Haha! I love your bunny hop. What a lovely top and beautifully made, as per usual.
It is very cute and I’m super impressed with how you finished that raw edge.
Your Spotlight must be a different breed from mine as there’s pretty much always an enormous queue at the dress fabrics cutting counter and usually hardly any at the front counter. Many’s the time I’ve scooted round to the furnishings fabric counter in the hope the cutting queue is shorter there but it’s often just as long.
I love this fabric too – when I first looked at it I assumed it was a woven and I thought how creative to line a woven like this with a light jersey knit. On closer examination in your photos I realized it was a knit as well. I really love the finish lining it provided around the neck and I know one of these is in my near future (not perhaps the same pattern but I have several similar ones in my arsenal). I’m always amazed at your finishing techniques Caroline – that finish around the sleeves wow! I looked at that and thought, “Caroline must have a pilot’s eyesight!” 🙂
What a cute hop! You made another lovely version of this versatile pattern! I love how you lined it and the sleeve hem finish is a very good idea!
Hope you have got another hot-cross bun!
This is such a beautiful bunny fabric! Thank you for including how you lined it. I have often wondered about the best way to line blouses. This post is definitely being saved in my tutorial collection, which your posts seem to dominate. LOL
The bunny pose is hilarious! I must remember to copy that pose for IG next year. 🙂
AAAH THAT PRINT! So amazing!
So lovely – I’m very impressed you didn’t stretch out your neckline overlocking the two layers together! Skillz lady skillz!
Thanks Sarah! The overlooking is just to finish off the edges neatly, the neckline had already been stitched using a straight stitch on my regular machine first, so it doesn’t stretch out… in fact I’ve just remembered I actually did 2 passes around on the machine just to make sure! 🙂
I love this sort of knit top. It is so much more than a tee shirt but equally as easy to wear. The bunnies are fun and it looks like you are having fun with it.
That is a flattering easy style. I tried to use some of that knit fabric once and it didn’t work but then I didn’t line it which would have solved the problem – every day is a school day! Jo x
Love your Bunny top and the pose! – I love your sense of humor :: Knits are my favorite fabrics and finding different ways to properly finish them without using specialized machinery is an ongoing obsession of mine … it took me two days to uncross my eyes after I did that crochet edging
Hahaha – that bunny pose. You’re a nut. 🙂 Love this top & thanks for such clear instructions on your lining method – excellent!
What a great top! Love the bunny print!
Amazing fabric!
Haha, great picture! 🙂 And beautiful too too. Thank you for sharing so much of your process, super interesting how you finished the sleeve hems!
Beautiful top and perfect way to line it as well. I appreciate the way you finished the sleeves as this would have been perfect for my cardigan I made last year.