
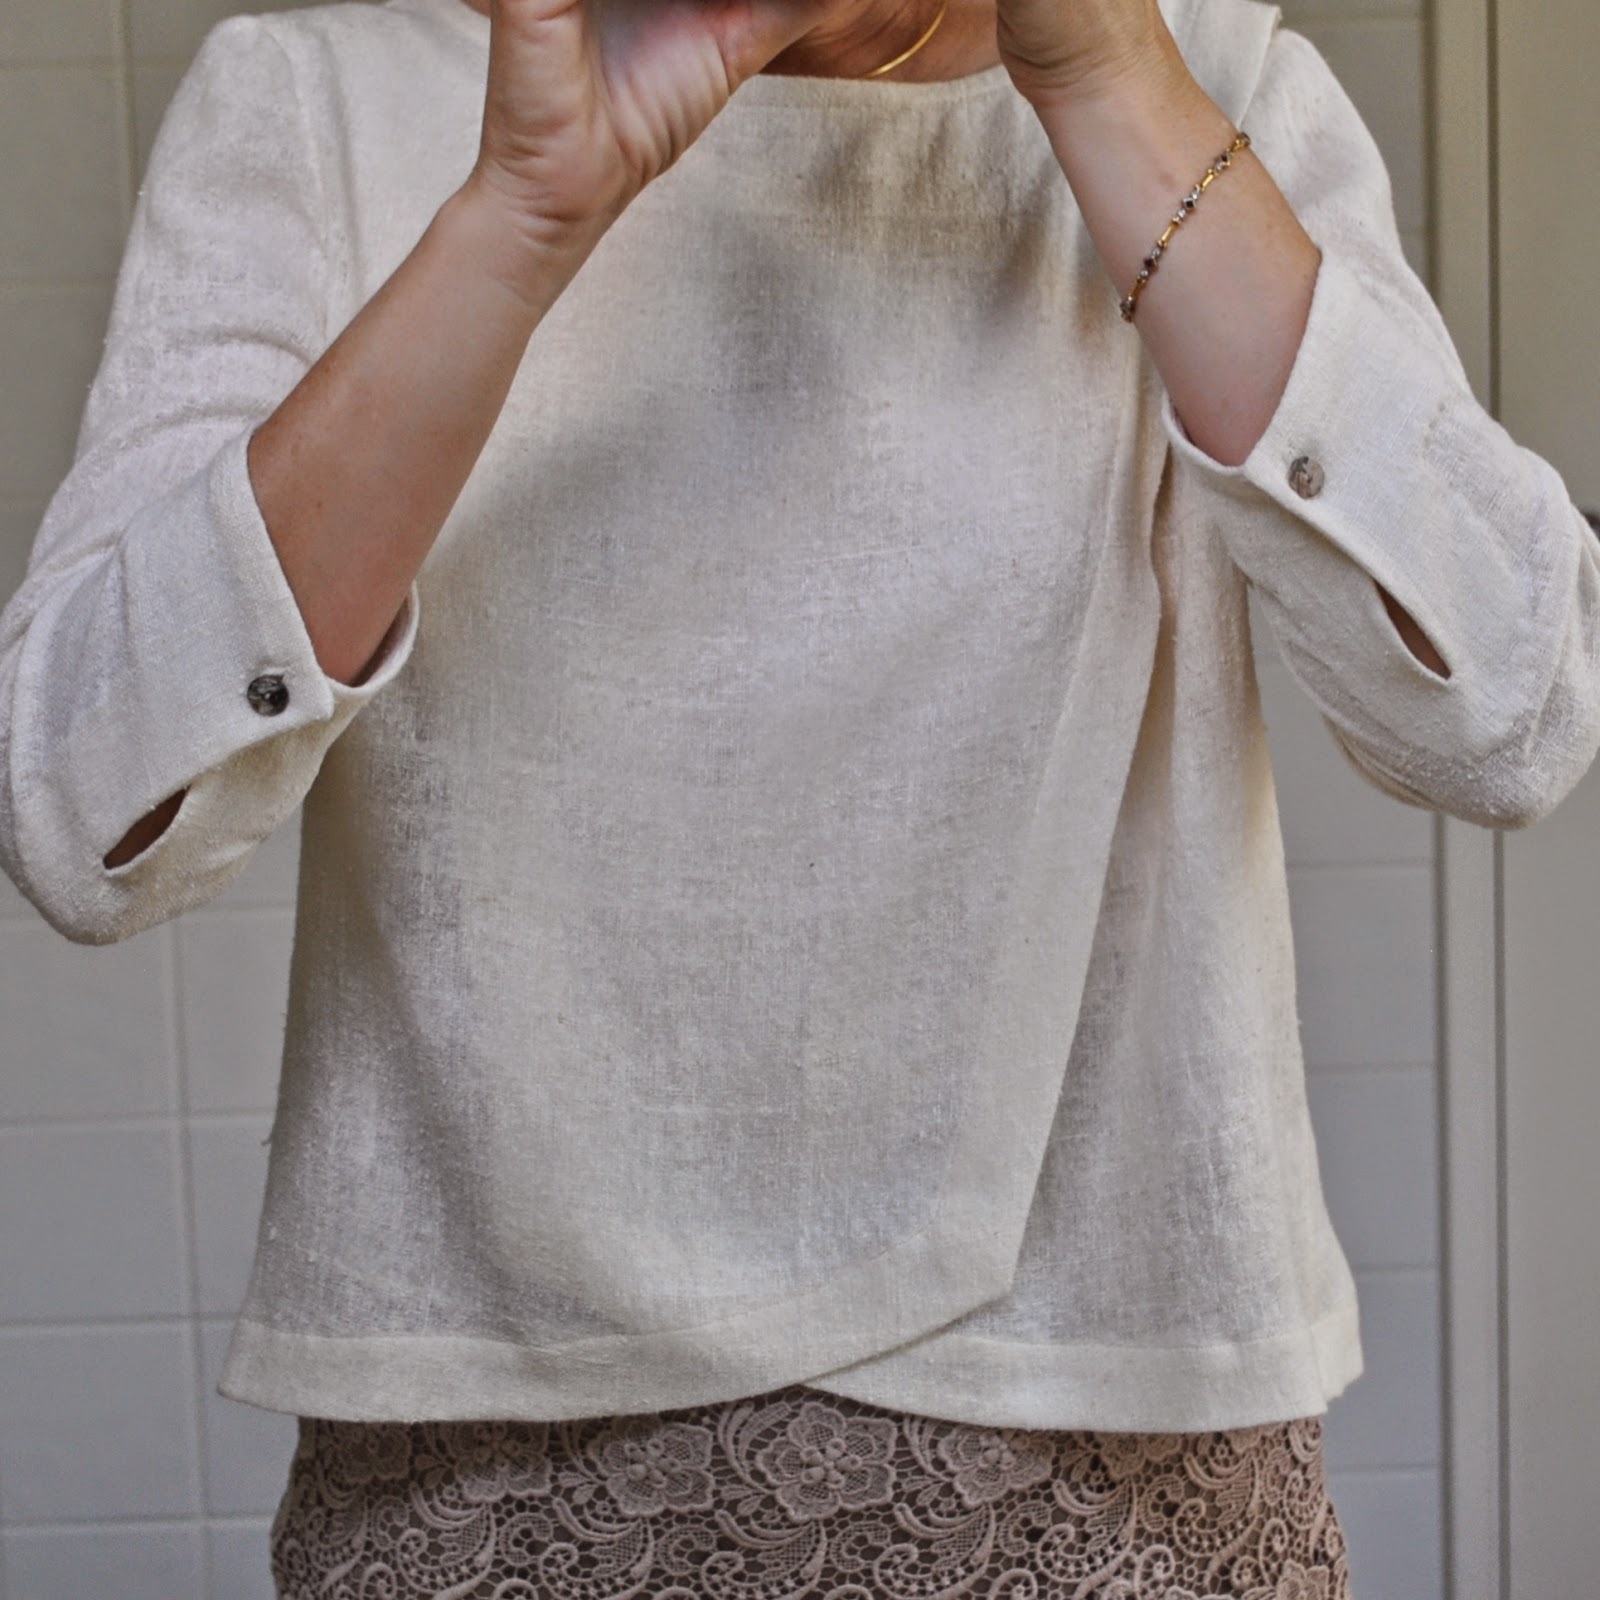
This is an understated little feature to jazz up the end of a plain sleeve. It’s mainly decorative rather than useful, but I think it does look kinda cute 🙂
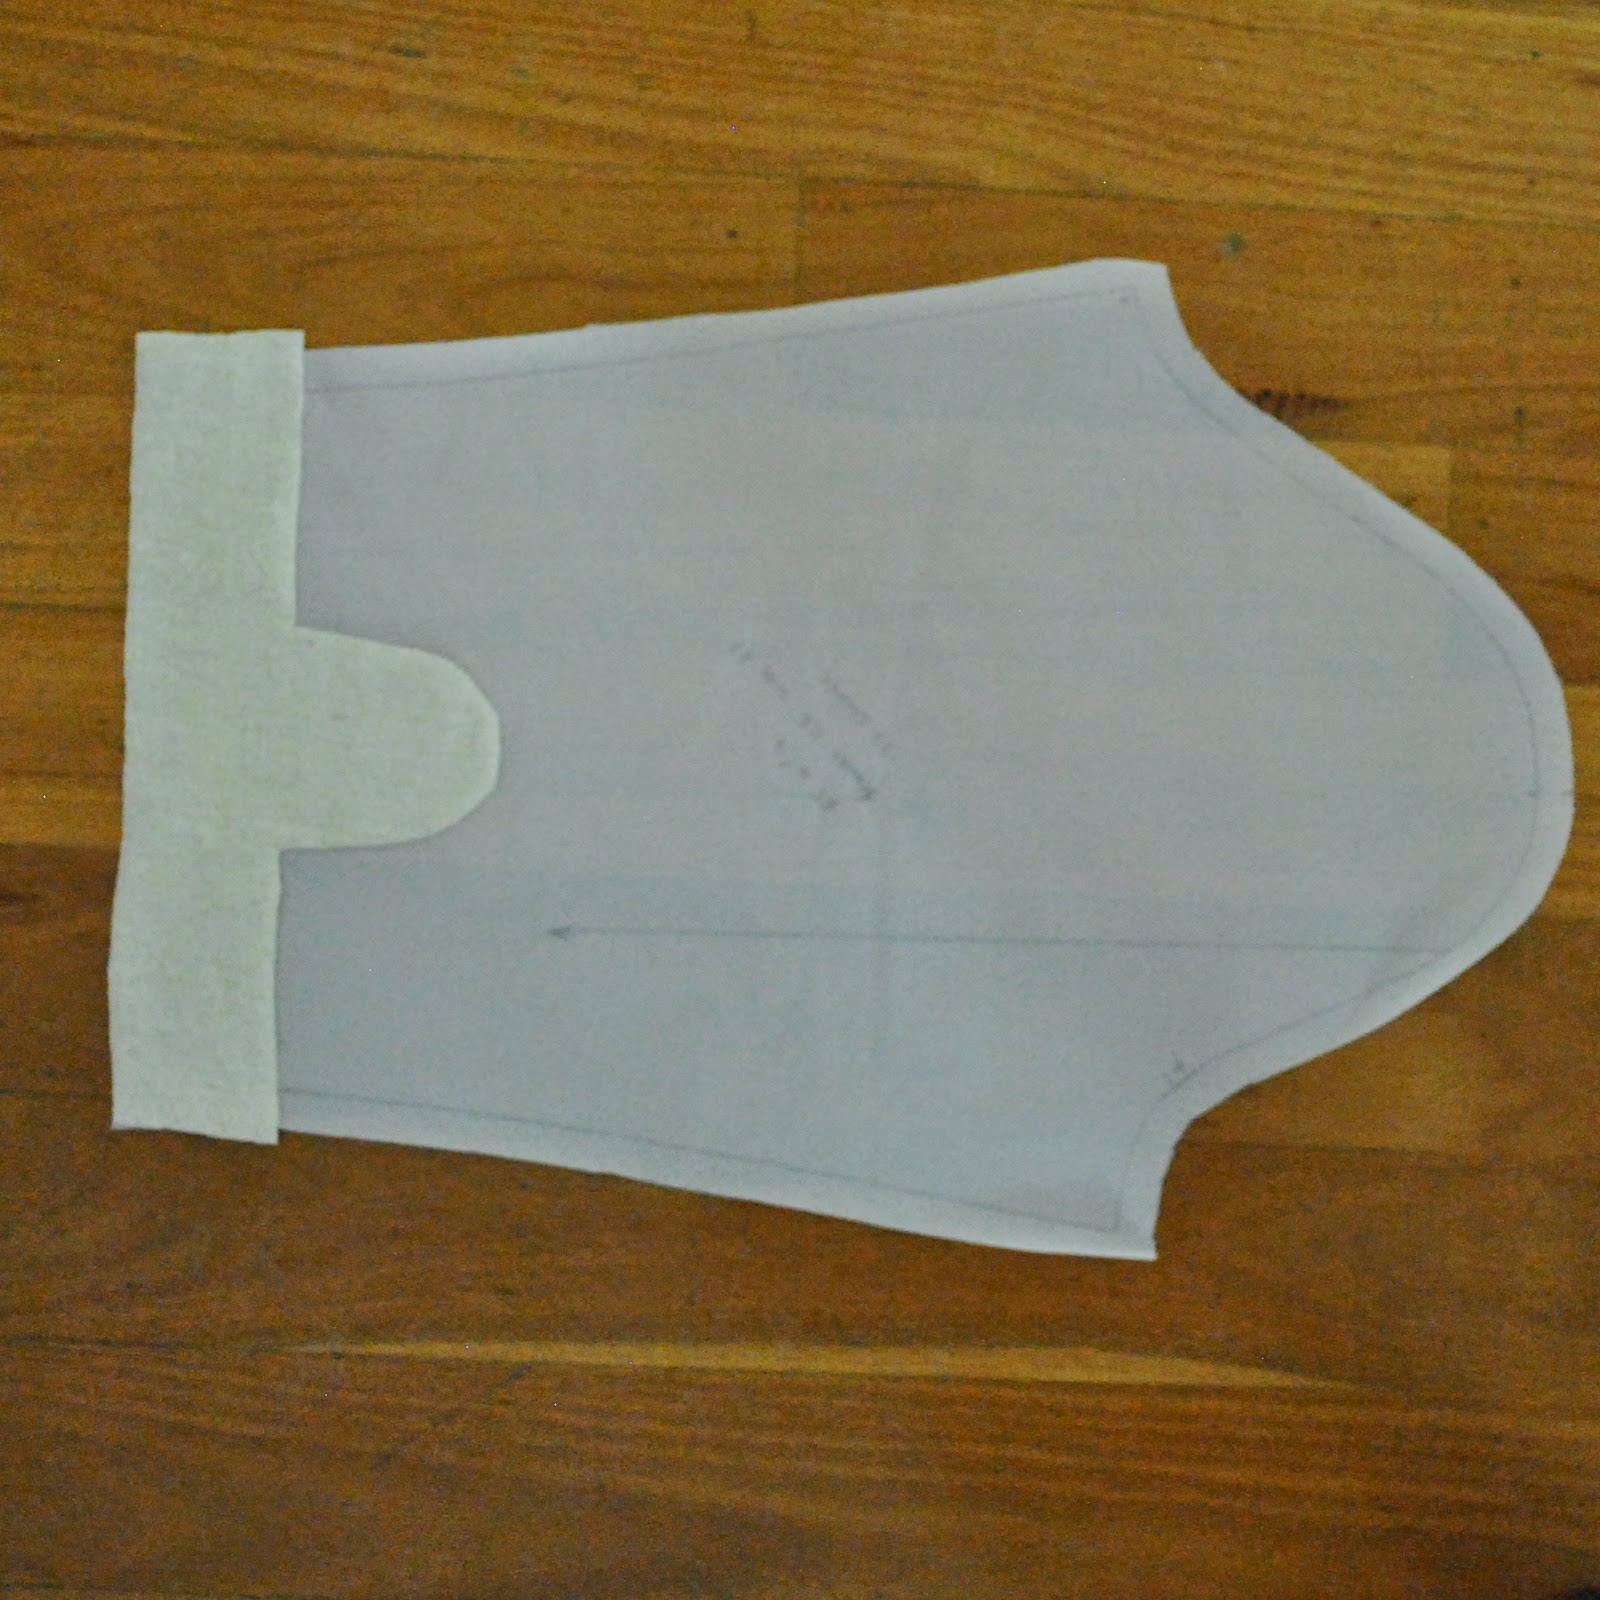
To add this, you will need to cut your sleeves tapered out a little wider at the lower hem end to allow for the overlap. Doesn’t need to be much, about 1.5cm (5/8″) at each side should be sufficient.
Cut a matching facing for each sleeve, with an allowance for the slit facing situated in the centre. Mine is 6cm (2 3/8″) deep for a finished depth of 5cm (2″) , and the slit facing is 7cm (2 3/4″) wide and 13cm (5″) long for a finished slit length of 9cm (3 1/2″).
Interface, finish the outer edge, stitch the short sleeve seam together.
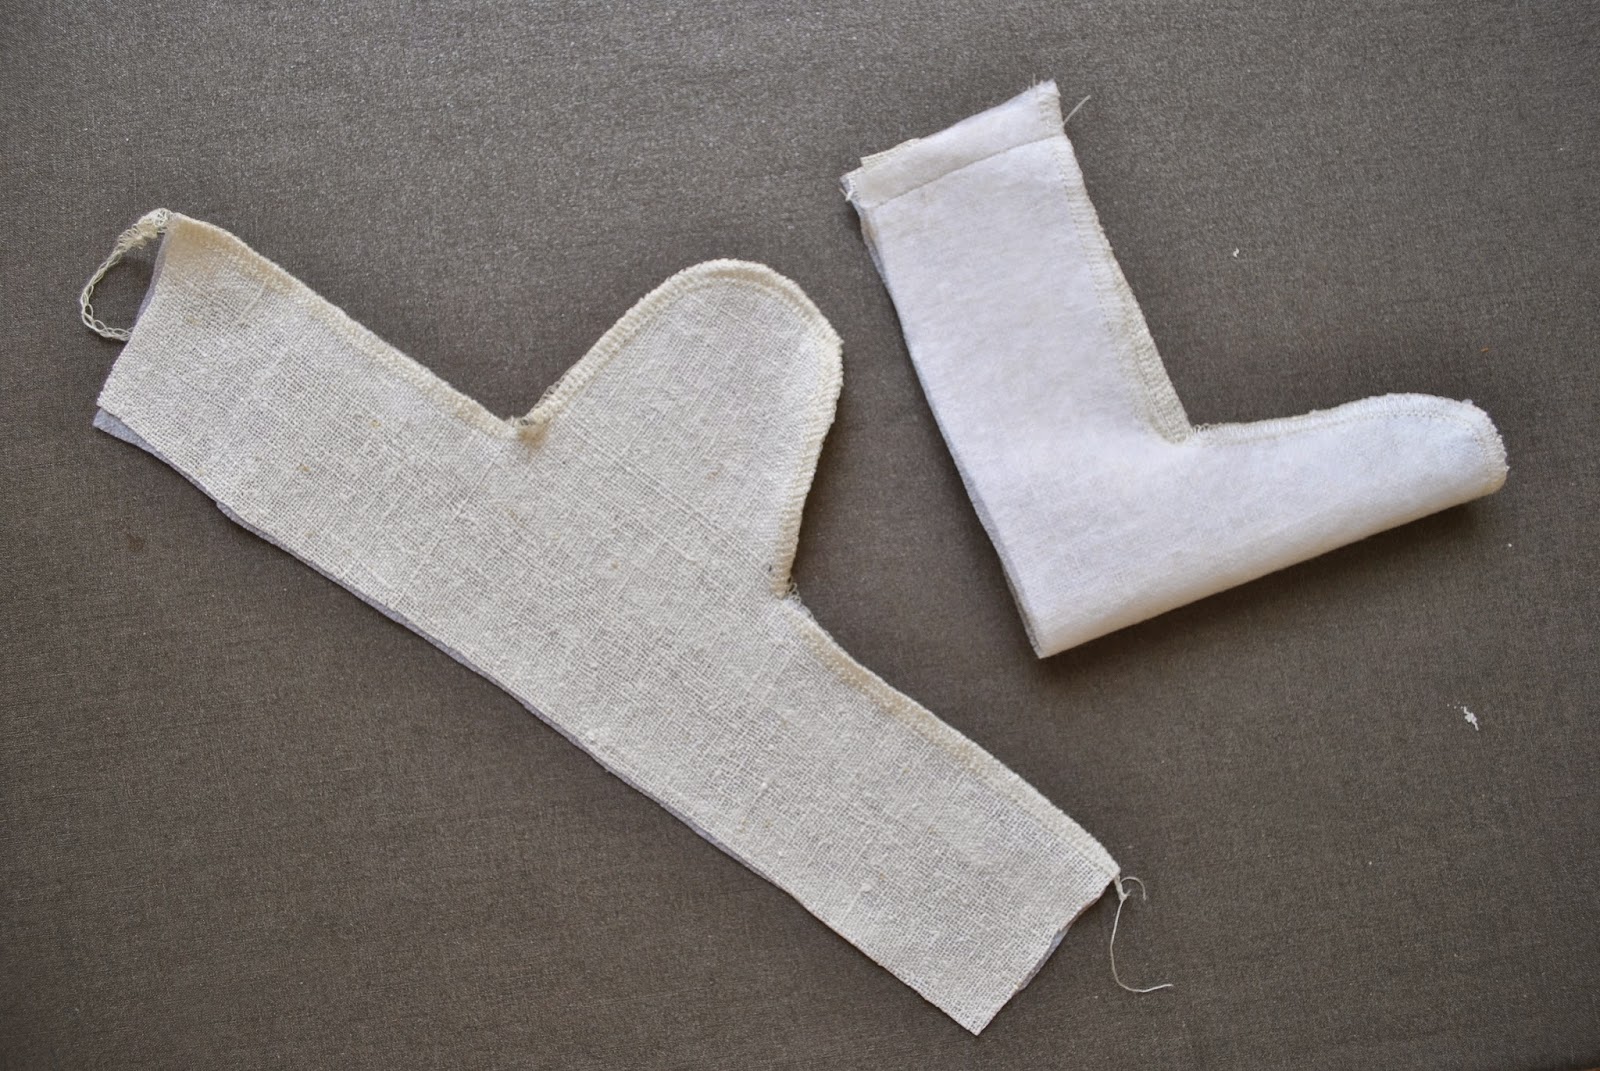
Pin to sleeve edge, right sides together, aligning the seams.
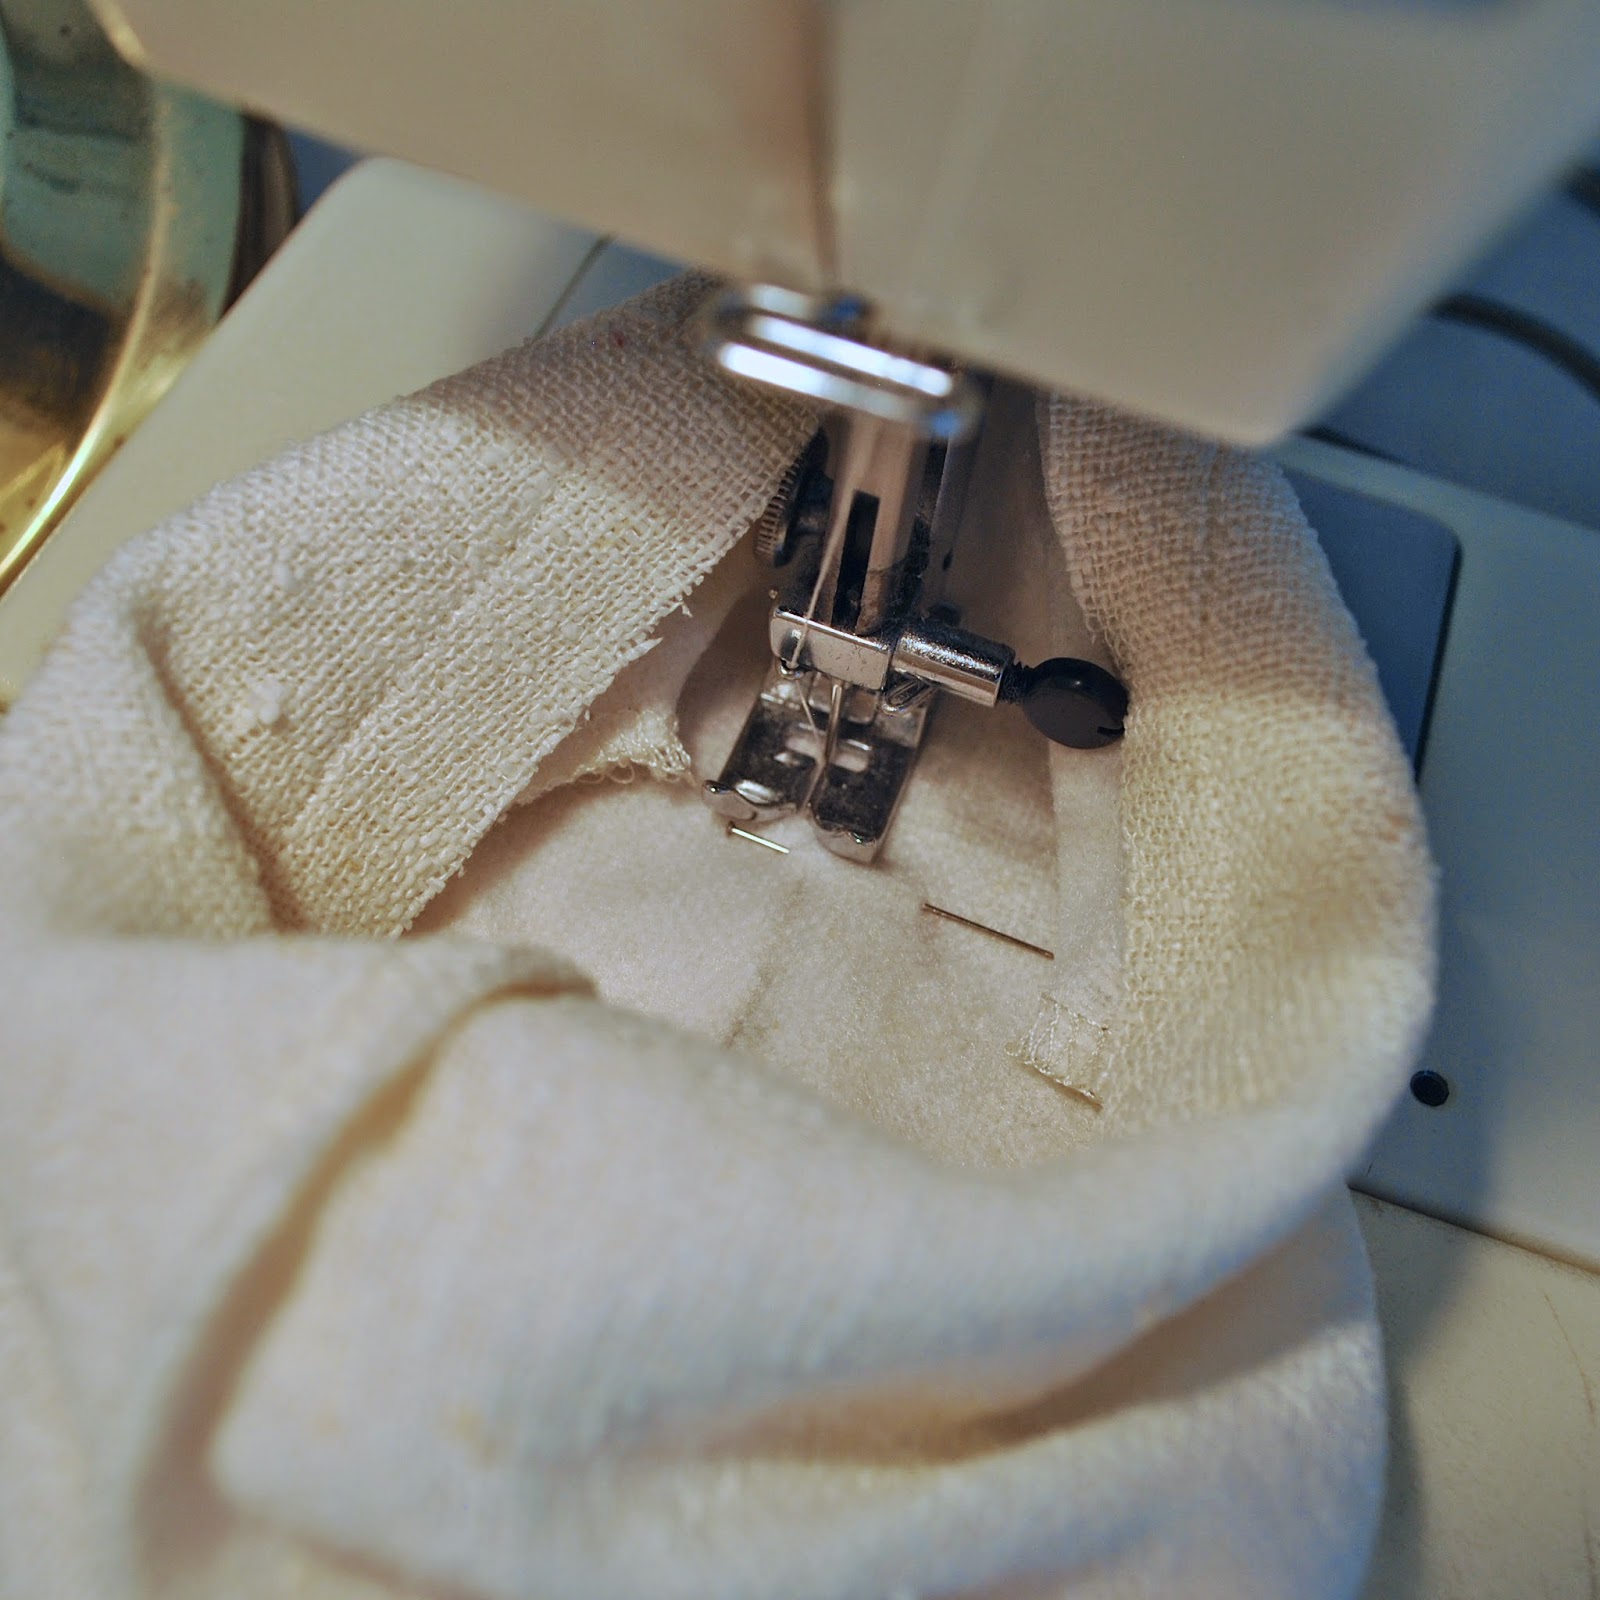
Mark the line of the slit on the wrong side of the facing and pin along its length.
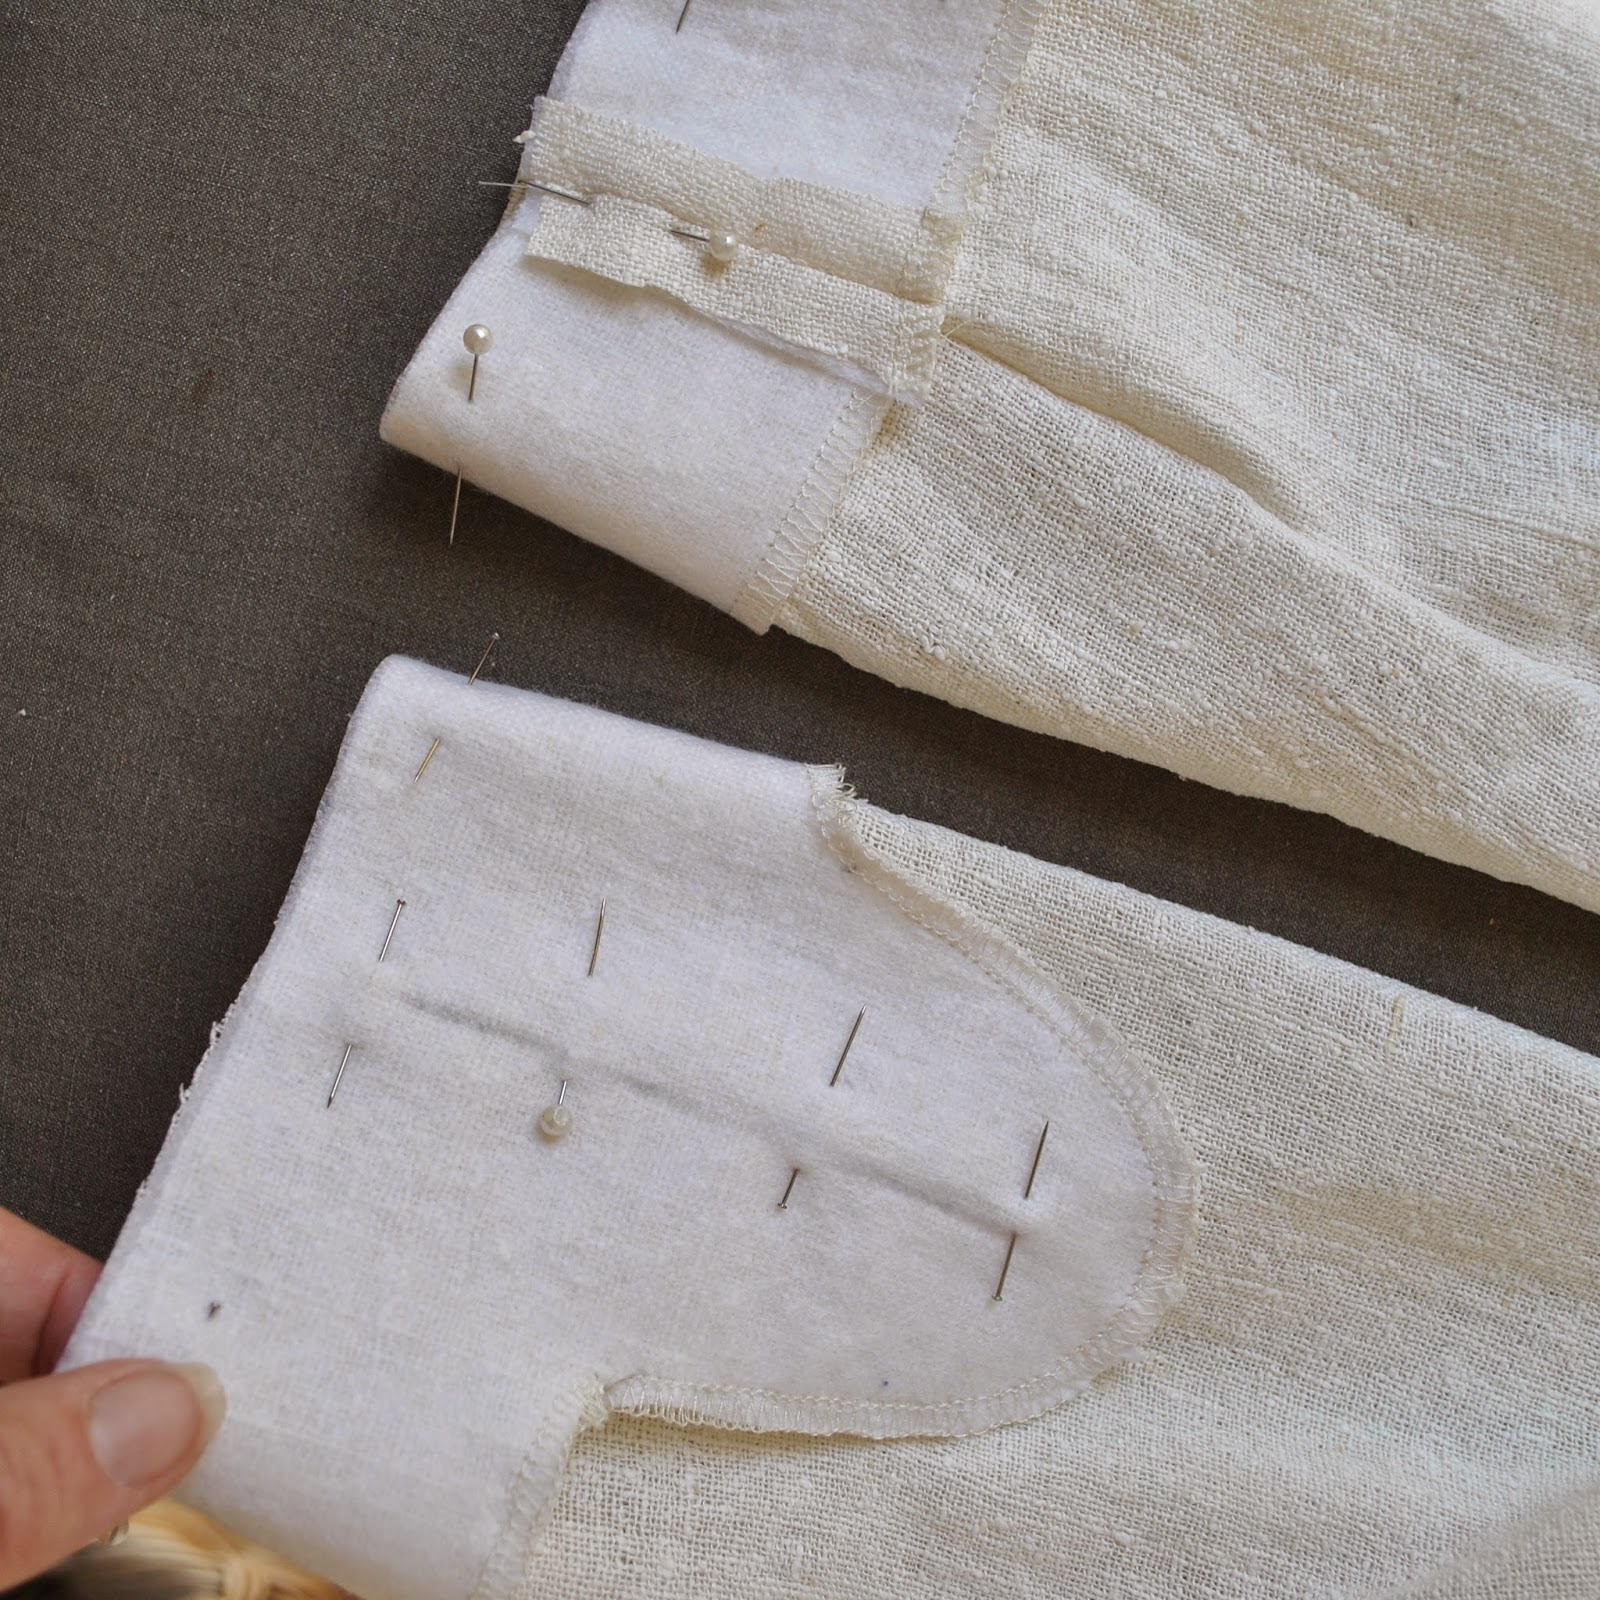
Turn the sleeve so the facing is inside the tube of the sleeve and stitch. btw, always, but always! stitch in the inside of a tube or closed “circle” of any kind, sleeve, leg, armscye, whatever… otherwise you are bound to soon be spending quality time with your unpicker when you find you’ve inadvertently caught the opposite side in there somewhere. Yeah, we’ve all been there, right?!

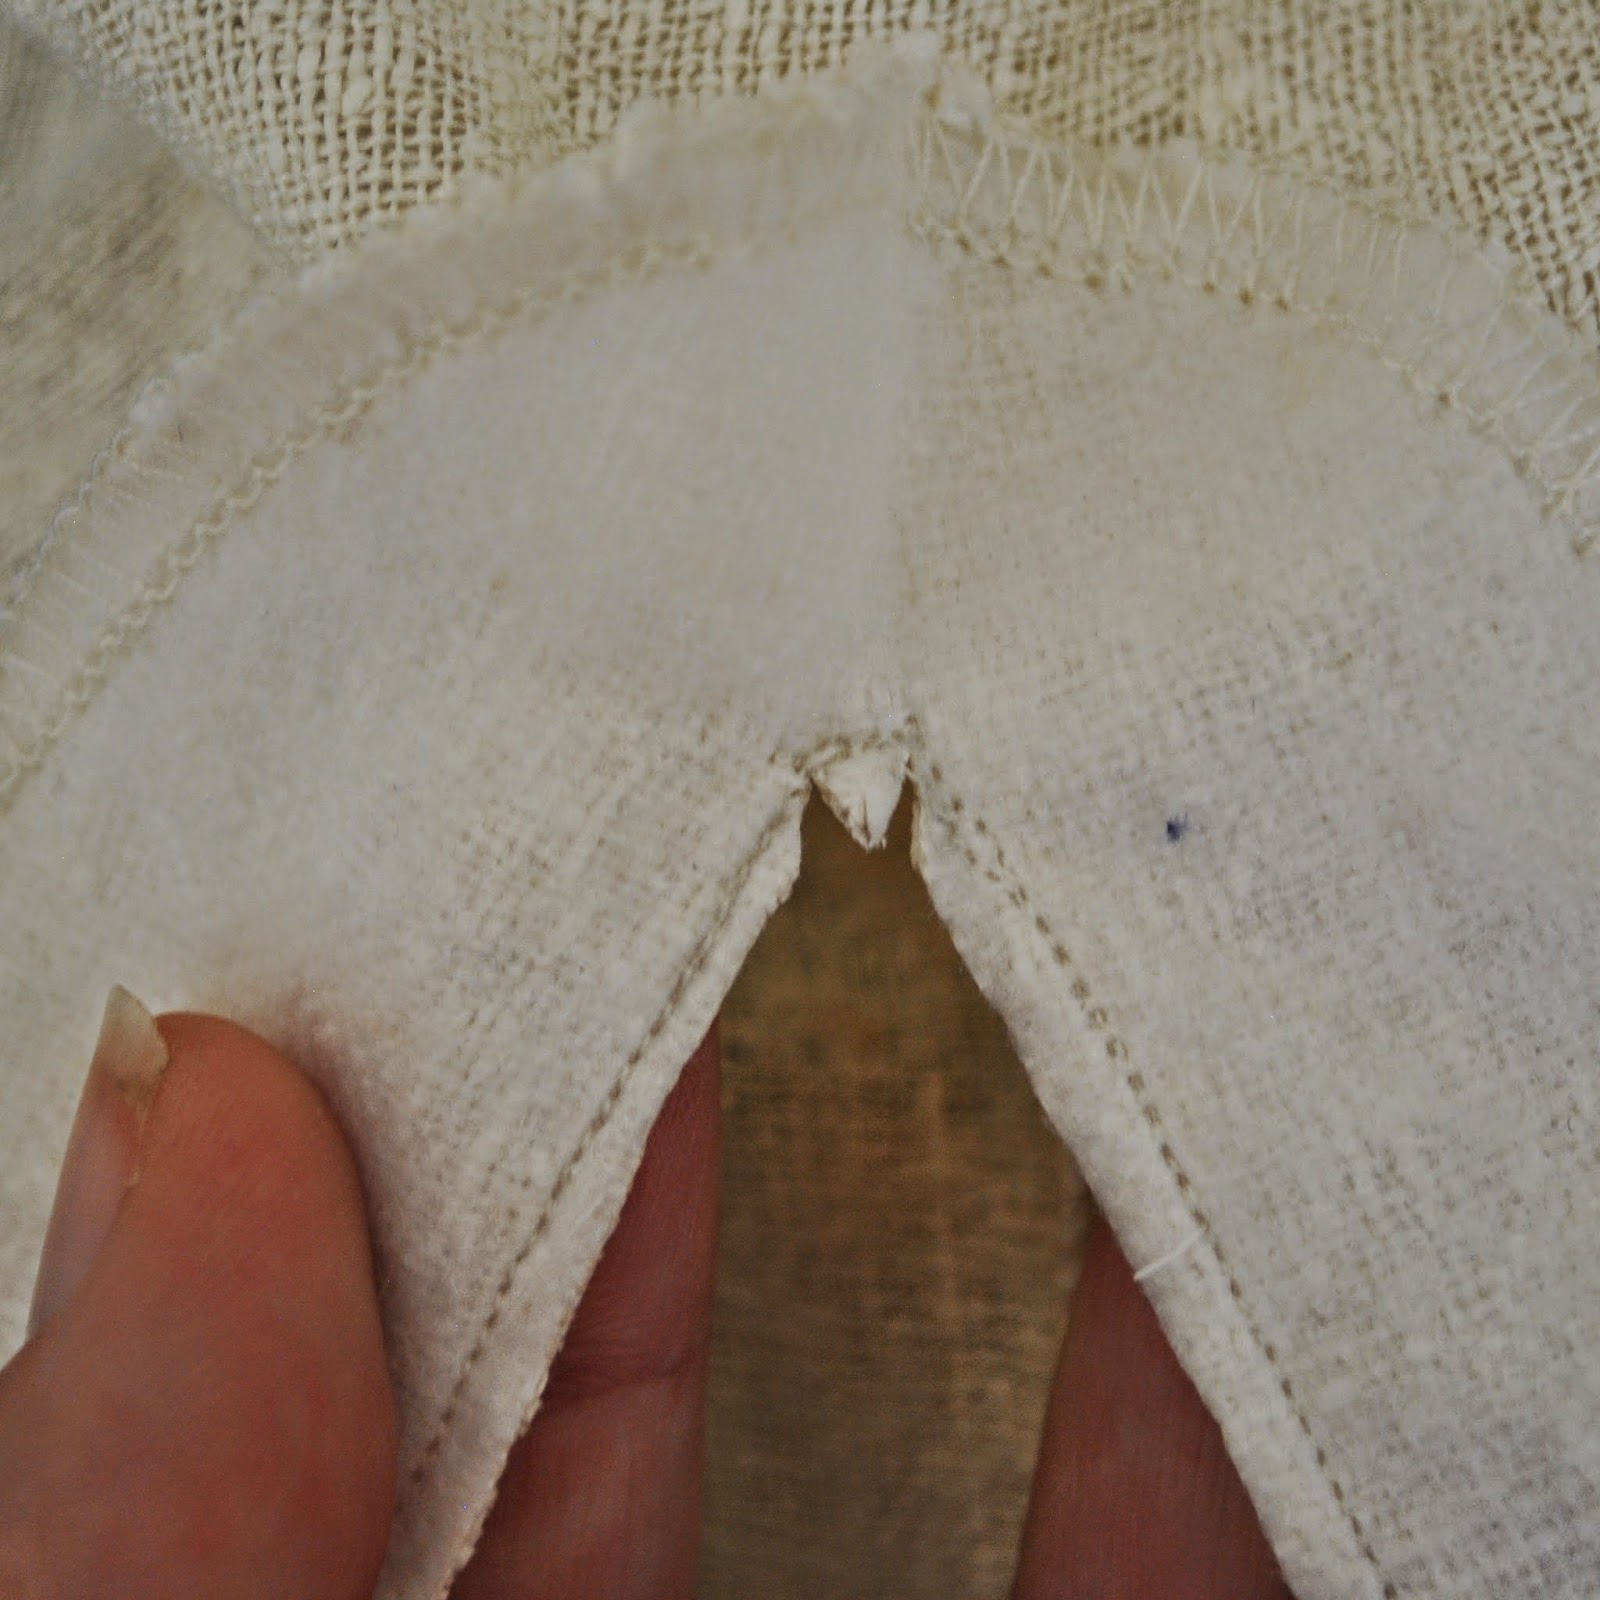
Cut up the middle of the slit stitching, snipping into the corners at the top in a little V shaped snip.
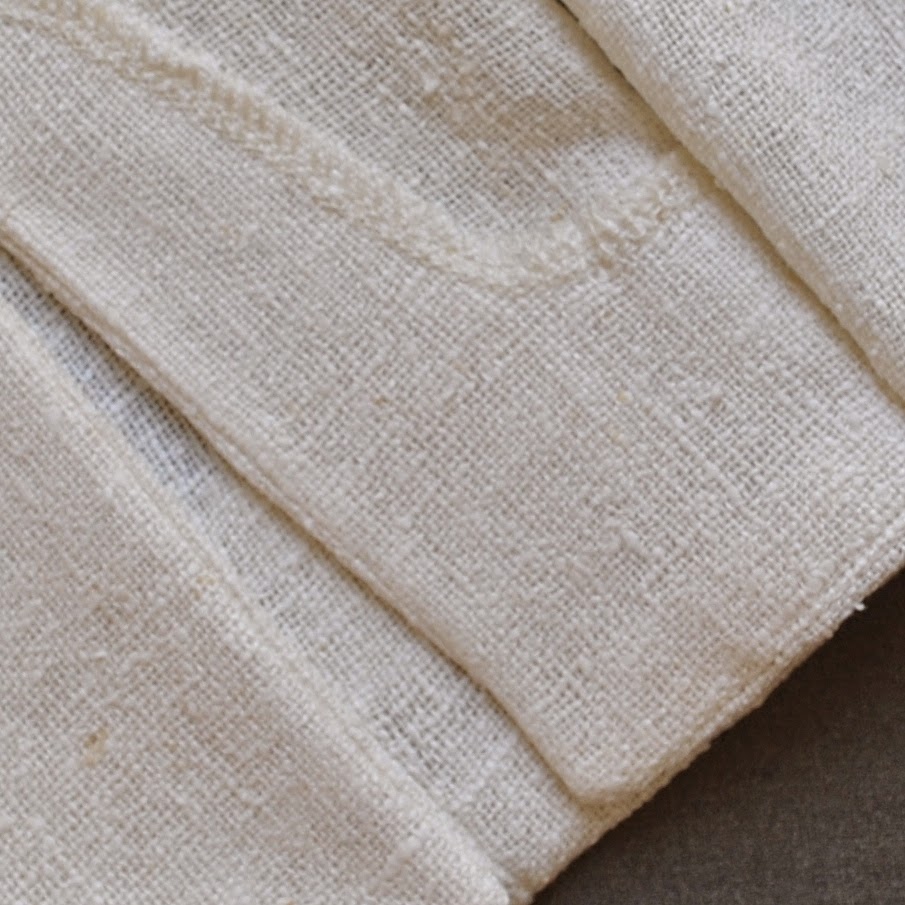
Turn out and understitch the sides of the slip and the sleeve hem as far as possible.
To help keep the facing tucked up inside the sleeve and not fall out, invisibly slip stitch the outer edge of the facing to the sleeve. Only scant, widely spaced stitches are really necessary here.
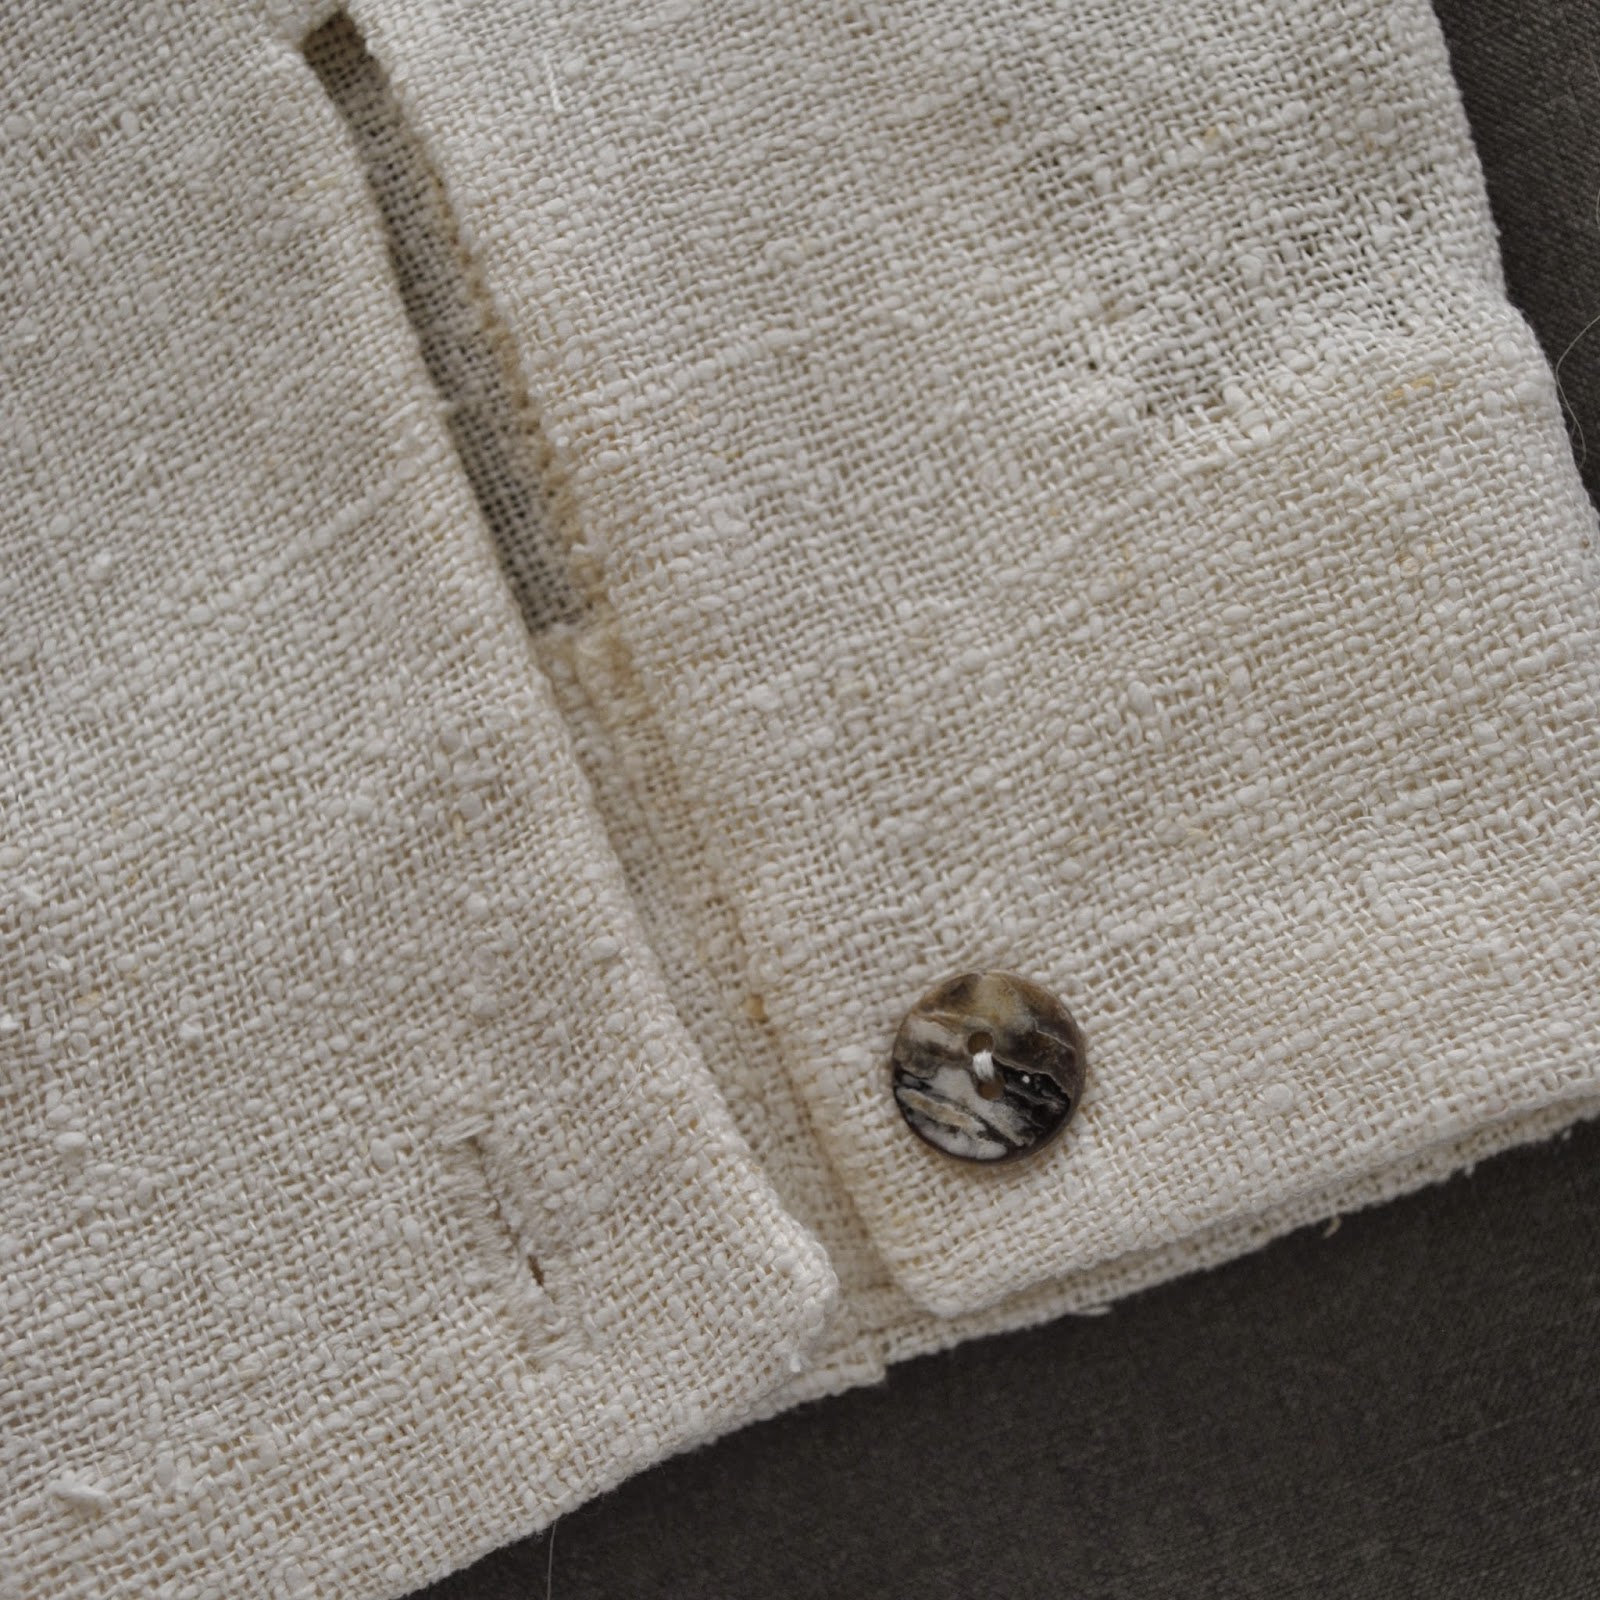
And; buttonhole, button and done!
Carolyn, this is such a great top and looks lovely on you. Thanks for the sleeve finish idea/tutorial too, it it just the right detail.
I like the idea of simple buttoned cuff, it looks really cute. Thank you for sharing 🙂
Love this! Such gorgeous fabric too. Thank you for the tutorial.
The top is lovely on you. I like your faced sleeve fastening, a beautiful pared down detail. Thanks.
I love it! Thank you so much for the tutorial. 🙂 Is that top something you drafted yourself or did it come from a pattern? It's so lovely.
thanks Heather M! it is a Burda blouse, 04/2014-115; blogged here
Thanks so much for that!
I've recently seen this top others have made and really your fabric is the most perfect for it. I love the sleeve cuffs.
Thanks for posting this fabulous little tutorial. Your cuffs are gorgeous!
Beautiful top!
never thought to do a sleeve hem facing! i always fiddle with those continuous plackets, which i'm not very good at… this is such a beautiful top.
Such a simple and brilliant idea to make plain sleeves look much more elegant! Thanks for posting this clever tutorial.
thank you, Helene! 🙂
Thanks for this!
The top is pretty, beautiful fabric and I really like the buttoned cuff! Thank you for the tutorial…I will be using it!!!!!!!!!!!
It's a simple detail, but adds enough to elevate the top just a bit.
What a lovely lovely detail! I just need to think about what upcoming projects I can't try it on! Thanks so much for posting this 🙂
It seams so easy when you teach us !!! Thanks !
What a nice feature to add to a sleeve. Thanks for sharing this!
The buttoned overlap finishes off the sleeve beautifully. Thanks for showing us how.
What a great idea. Thanks
Beautiful!
I love this clean, nonfussy finish to the sleeves. Thanks for the tutorial.
This is perfect timing. I'm making another lisette shirt dress and I have really been lamenting the fact that I didn't go with a true shirt dress pattern with a sleeve cuff (the sleeves are just hemmed). I think I'm going to do this. Love it!
Thank you so much for this, love it.
This is a darling touch to your top!
Very nice look and great tutorial!
This is a pretty top, Carolyn. I love both the look and the idea for a facing to cover the slit. Clever!
Thanks for this. It is a lovely sleeve detail and well written tutorial.
Great tutorial. Thanks for sharing.
Hi! I did love this simple buttoned cuff! I am a beguinner on it. Is that possible to send me a patter on how to make it, I mean, the boddy and the leaves? I will try it by myself alone!