
 I used this great edging for some of my latest T-shirts. This is a nice casual look for thin floppy knits that don’t fray very much. It works really well on those fabrics that want to curl up spontaneously… and it’s always a good idea to listen to what the fabric wants to do and work with it rather than struggling to force it into submission…
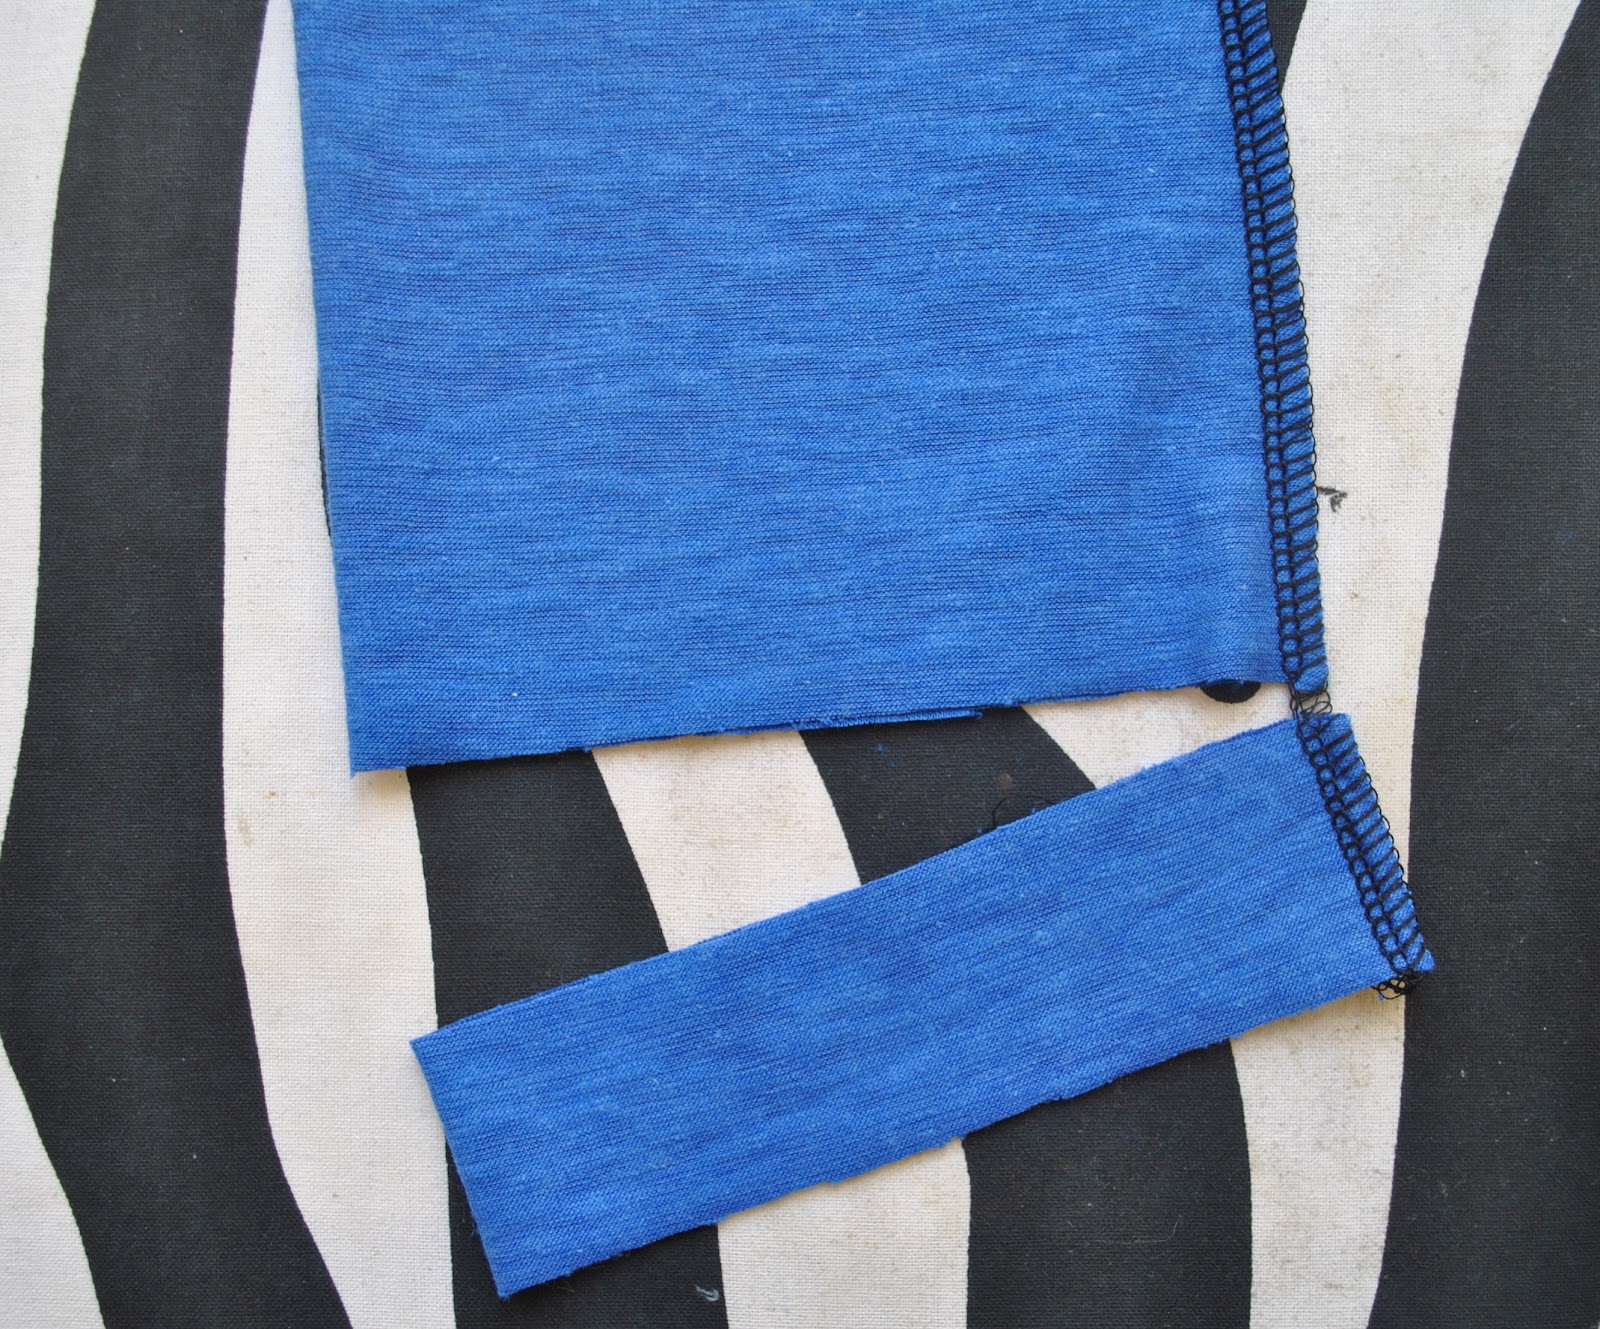
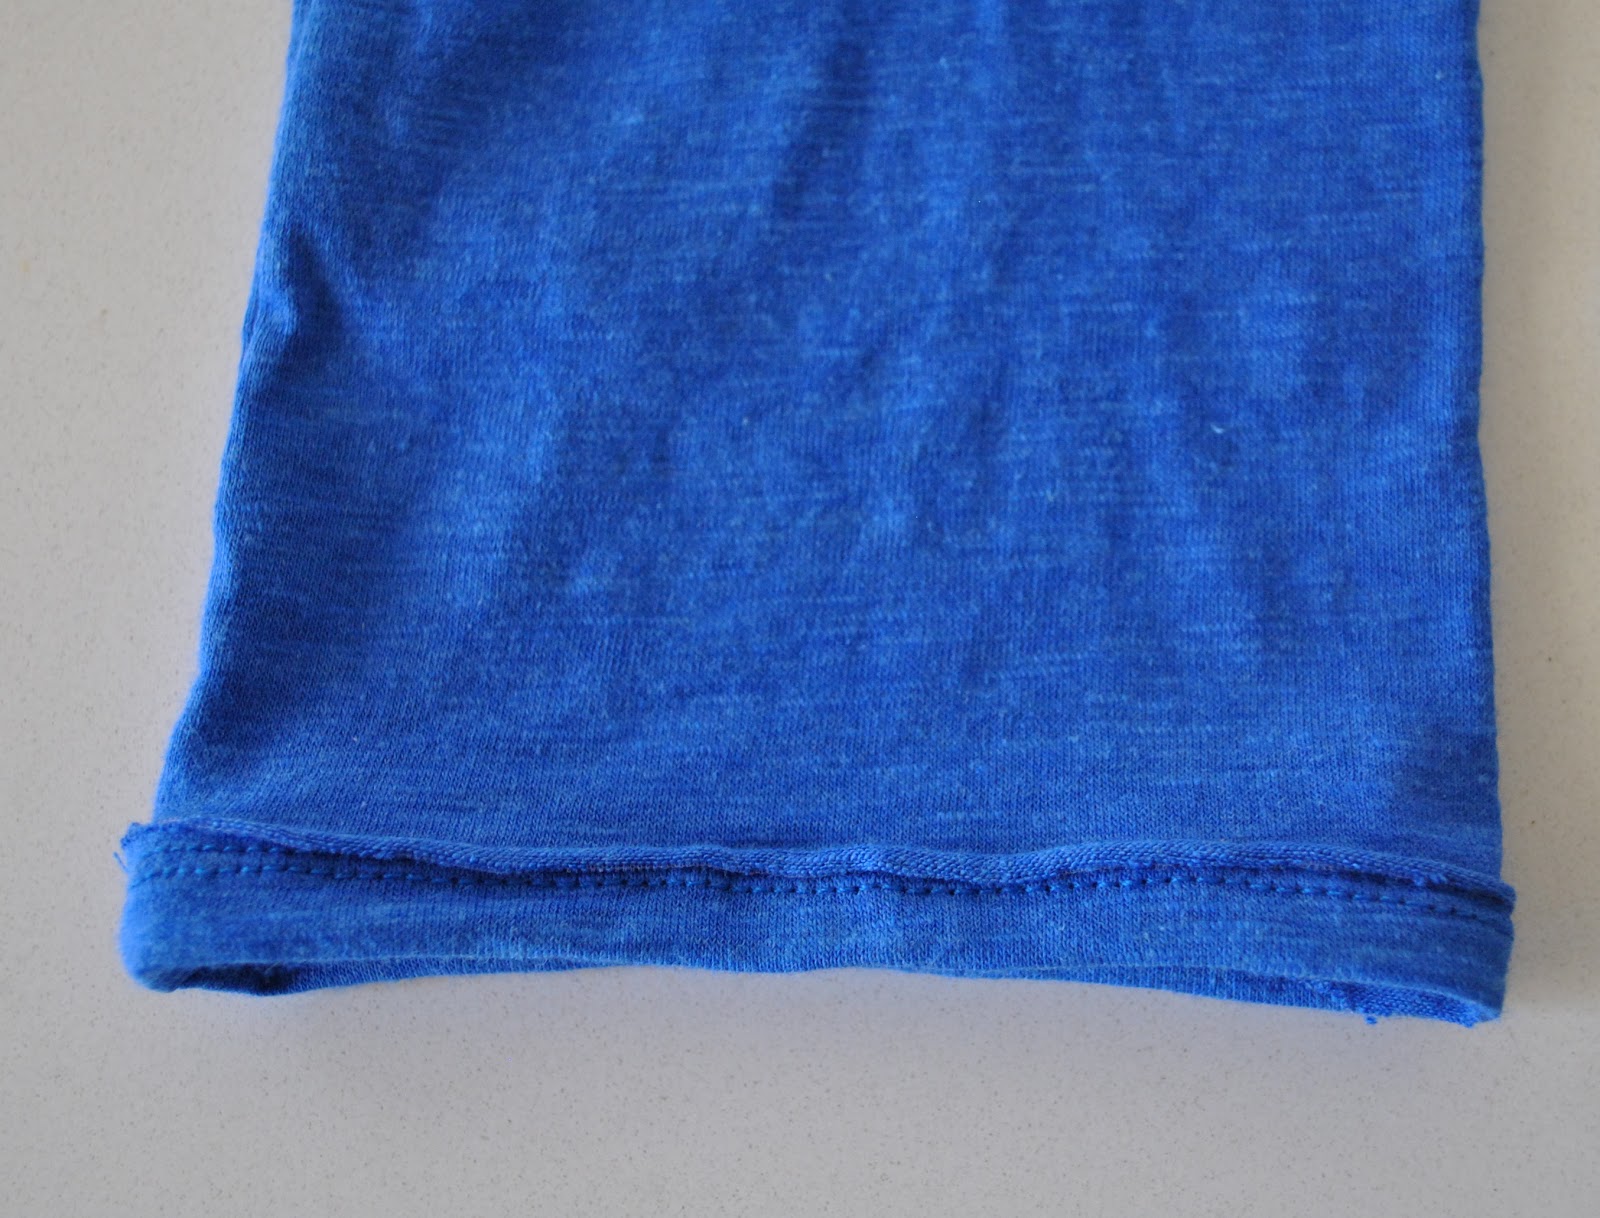
Firstly, when you cut out the sleeves, cut them about 2.5cm longer than you want, and then slice off this extra length.
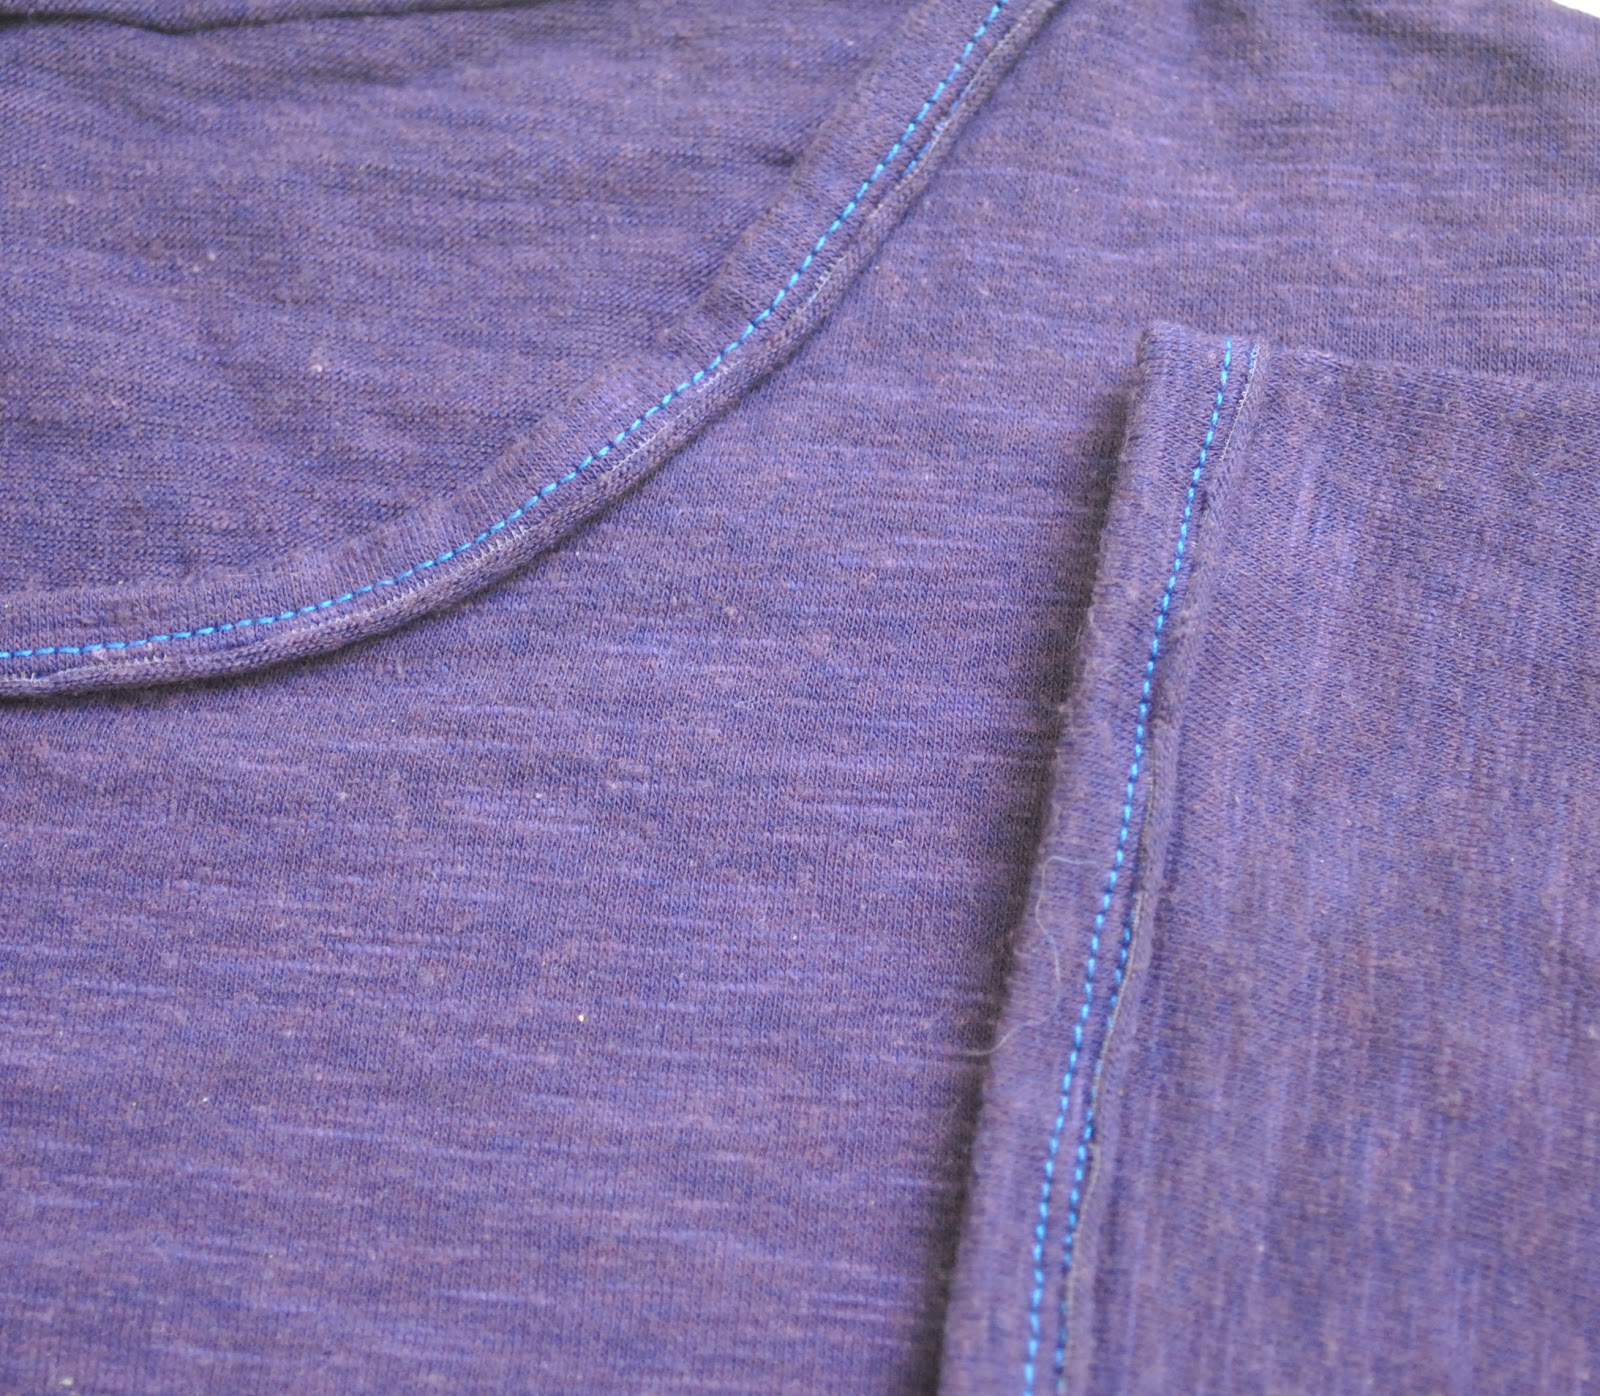
(Oh, for the neckline, you have to measure the finished length of the edge of your neckline, and cut out a 2.5cm width strip (with the length going the stretchy way, natch) the same length, plus 2cm for seaming. I didn’t take any photos of the neckline finishing, sorry…. maybe next time 🙂 but it’s essentially the same process from here on)

With right sides together, sew the sleeve seam, and the seam of the strip to form a ring.
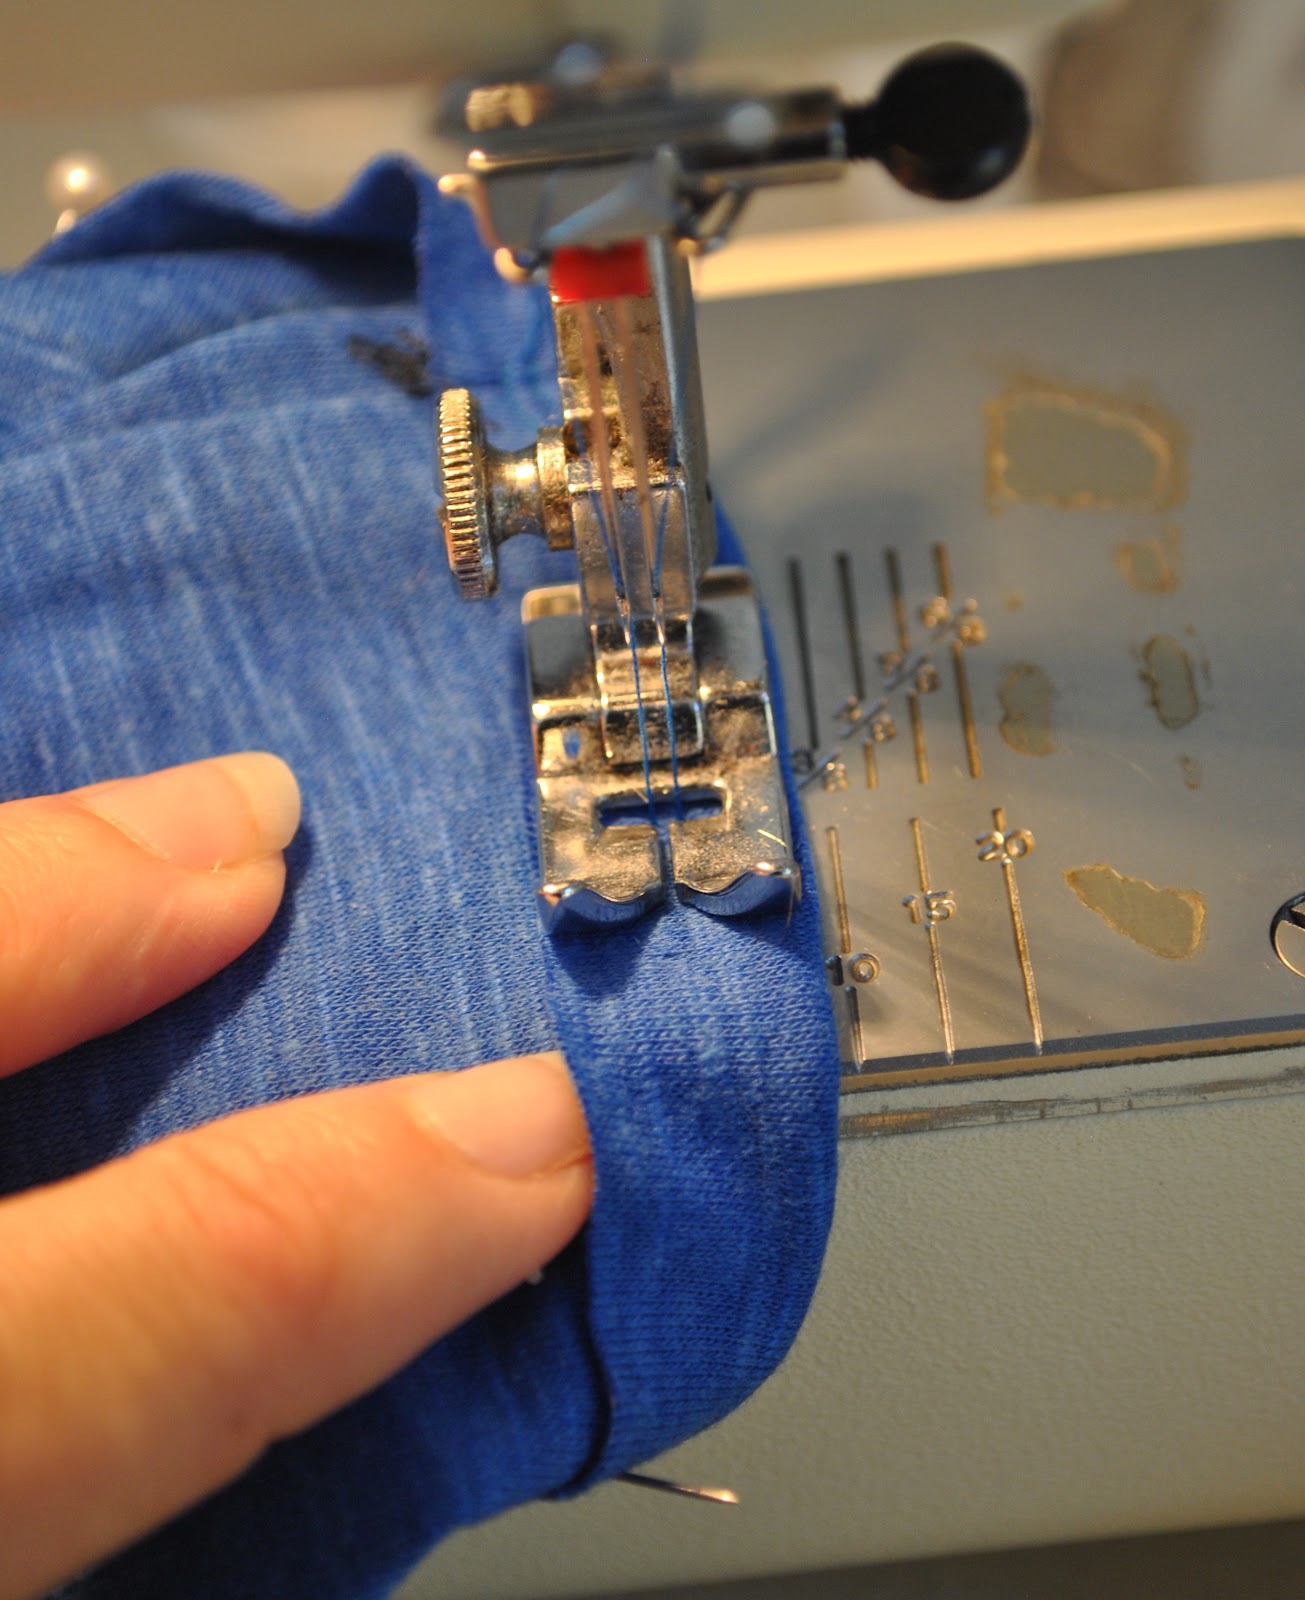
Take your sleeve edge strip and fold it wrong sides together in half along its long length, over and enclosing the raw lower edge of the sleeve.
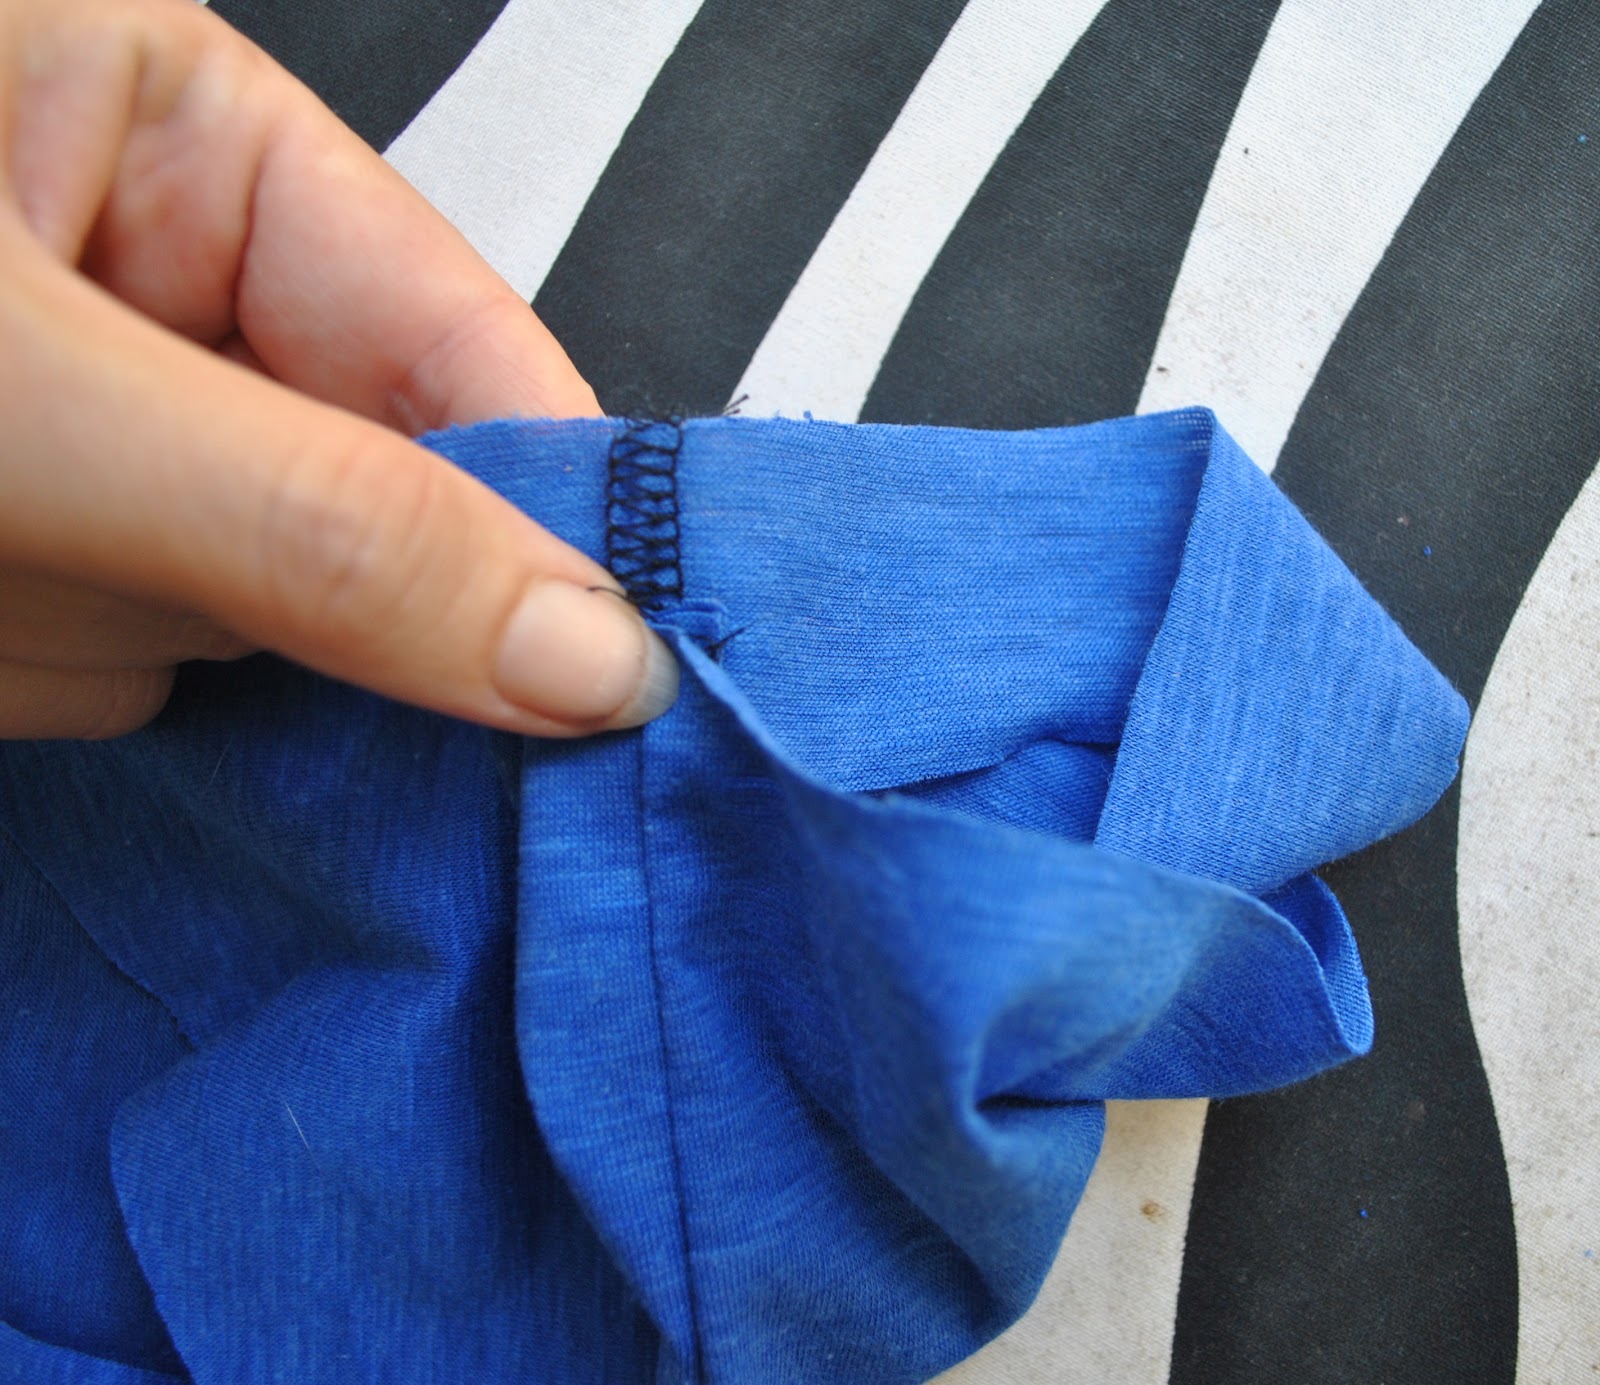
Pin in place.
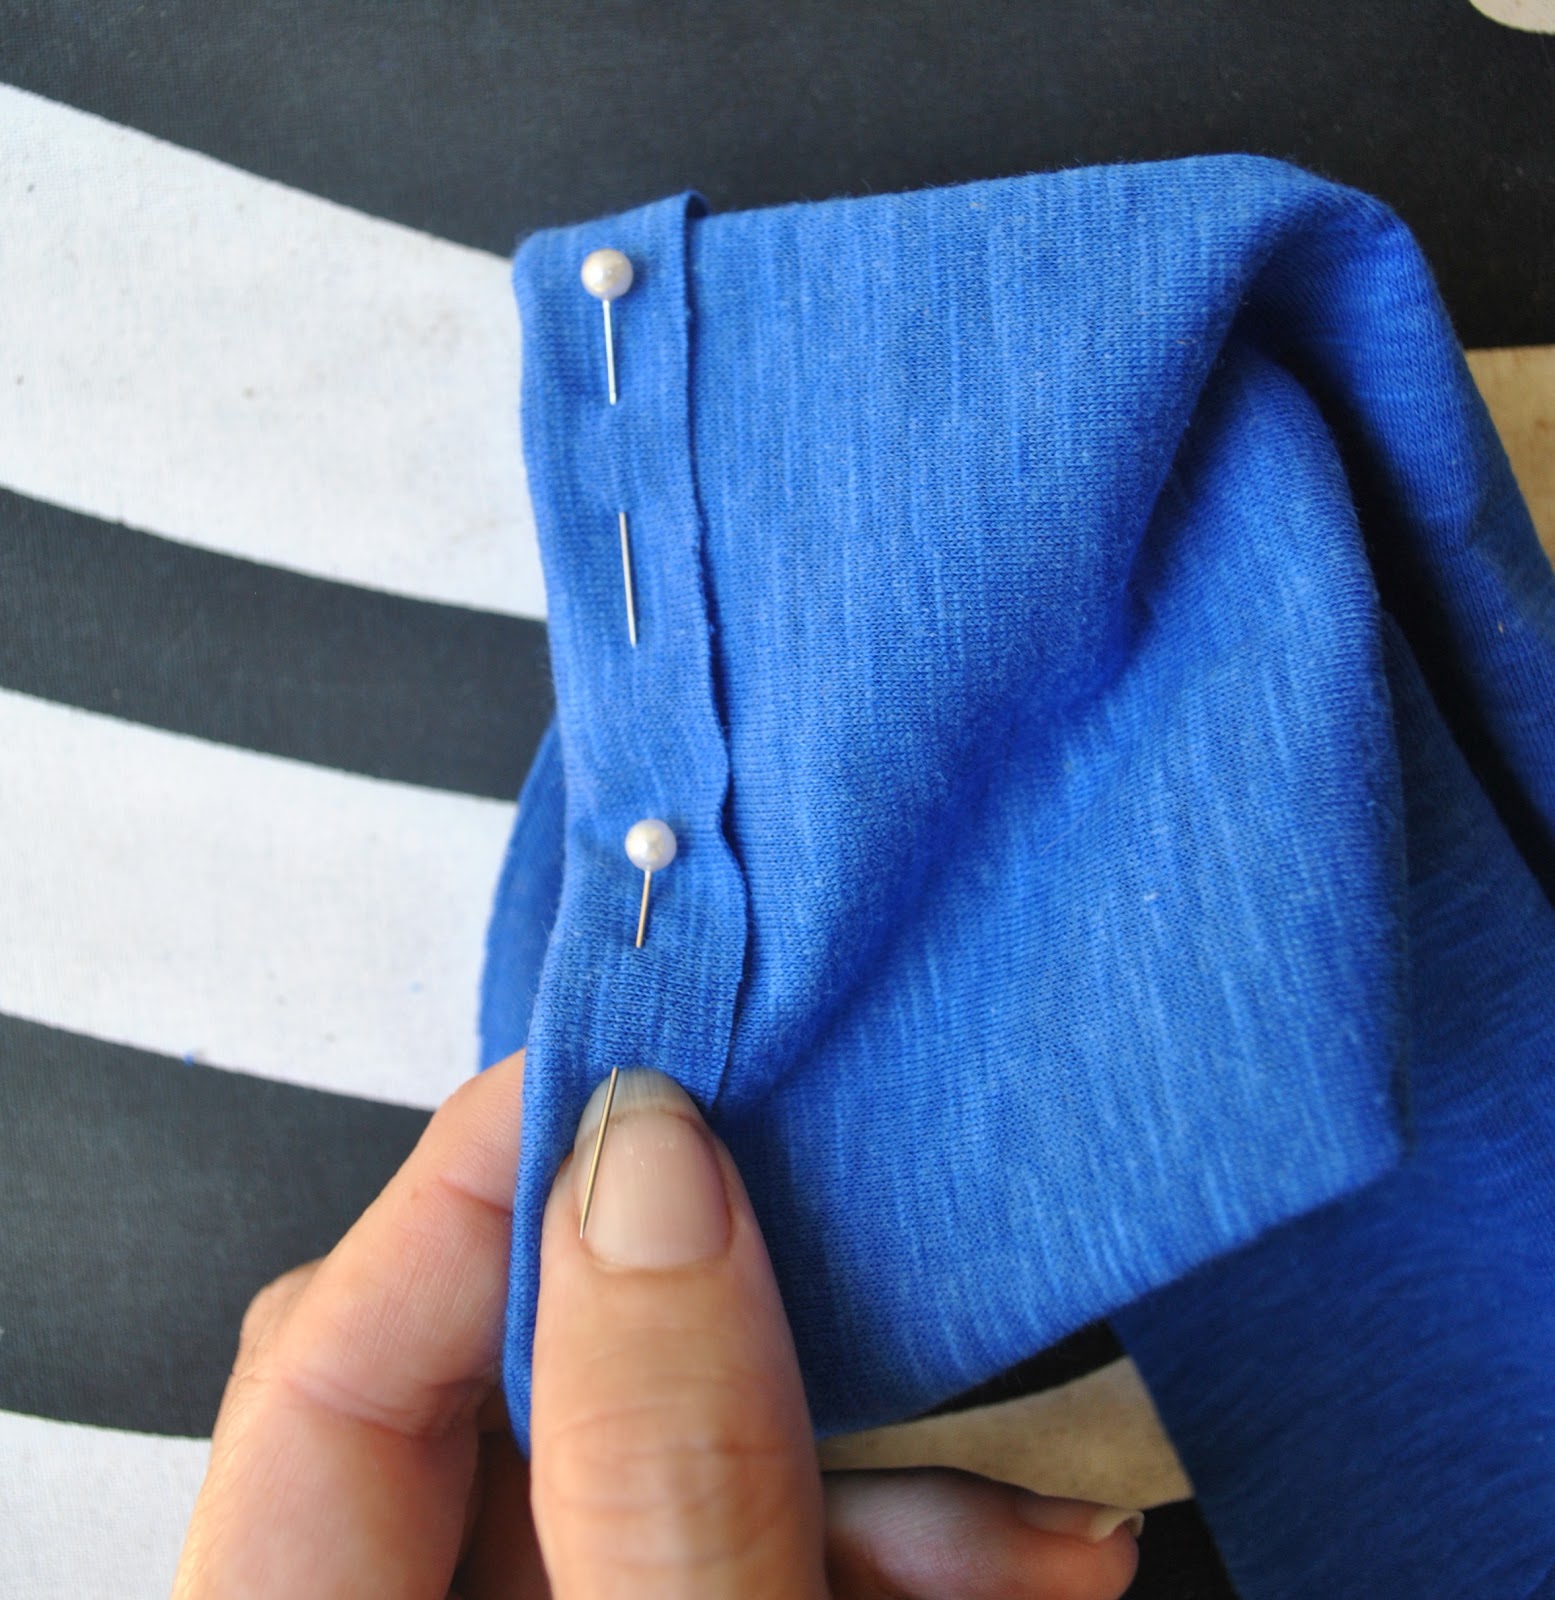
Using a twin needle on your machine, stitch the strip down, keeping the stitching a perfectly even length from the folded edge.
So, you end up with this, which doesn’t look particularly… wow. In its ironed, just-been-neatly-sewn state. But wait…
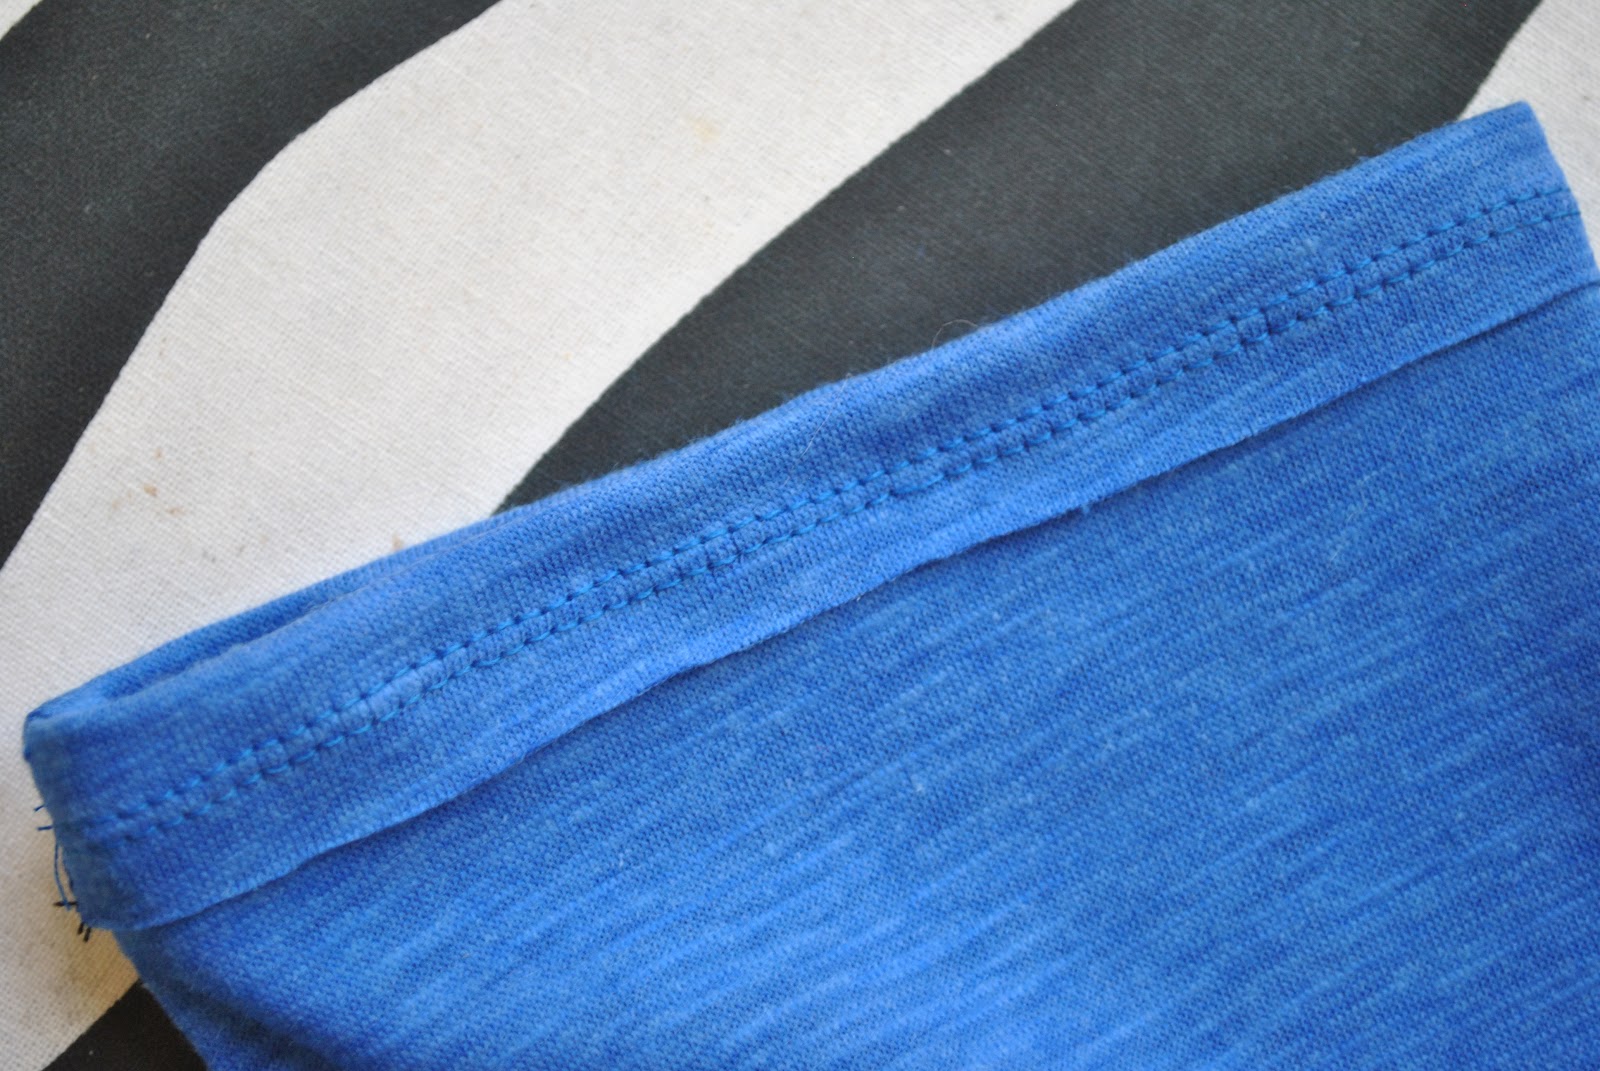
…after washing, the raw edge of the knit will curl up nicely, creating a tight little ridge over the stitching.
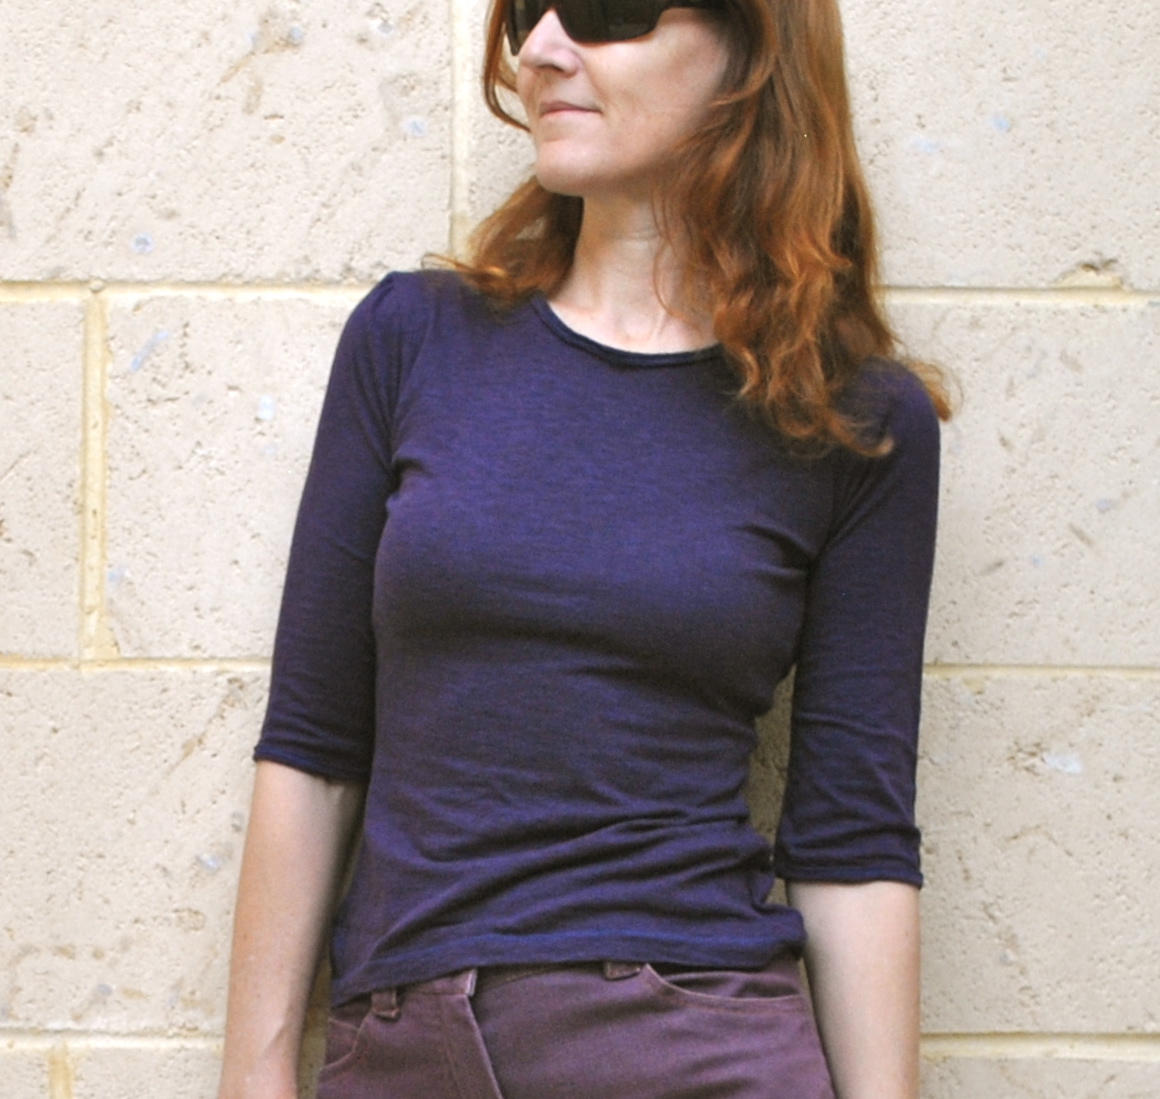
Then I dyed the T-shirt using iDye in Crimson, which throws the blue stitching into focus. Of course, if you don’t want contrasting top-stitching to show up as a feature on your garment; you must choose a thread colour that is going to blend in with your final colour after dyeing, as I did for my “bat” shirt. In that case, I top-stitched with a black thread, since in that design I wanted the top-stitching to blend in, and the shirt was going to become a deep deep brown. But in this case I like the tiny accent of blue on an otherwise very plain shirt. And the way the raw edge of the edging has curled up and over the lower row of stitching is very pleasing. I think it looks a little bit like piping.
You are absolutely inspiring me to try some dying techniques – what a delightful idea to jazz up a casual T!
Interesting, Carolyn! This is similar to a technique I blogged a couple years ago. (http://communingwithfabric.blogspot.com/2009/08/technique-reverse-binding-for-single.html) I'll have to give yours a try.
Thanks for the tutorial.
I thought I recognised that blue fabric the other day when you were talking about a blue fabric you over-dyed. I have the same fabric, but not only this, I was sewing a top with this fabric at the same time you were blogging about your top. Happy co-incidence. 🙂
I like the hem and neck on this top for an interesting change. Well done on 3 tops from the one dress. A great idea for recycling.
I haveseen this on RTW alot. Thanks for sharing.
I don't think I've seen this before. Another one to add to the techniques folder, thanks!
That is a nice detail. I have been aiming for the curled edge by sewing the right side of the binding to the wrong side of the garment, then flipping it over and sewing the raw edge of the binding to the right side of the fabric, but your method looks much quicker.Thank you.
Thanks for showing us how you did that. And thank you for your comments/questions on my most recent blog post. I wrote a (somewhat long!) reply in my comments if you are interested in reading it. 🙂
Great finish for a casual look. thanks for sharing the idea, and thanks for the information you left at my place, I couldn´t make my mind up which one to buy.
Your productivity sewing knits this week is most impressive. Knit tops have been my focus this week and I still have nothing to share.
You are so creative! It's the little details, that elevate basics from blah, to ooooh. Thank you for sharing this technique with all the photos. I'm sure to give it a try.
Thanks for show us this. I might give it a go on the top I'm currently making!
Thanks for show us this. I might give it a go on the top I'm currently making!
Thanks for posting your great ideas on how to deal with long white dresses that simply do not work. I have one I sew ages ago and now I think I might turn it into a blouse and say, a skirt, and color these in different colors.
I love that edge finish – thanks for demonstrating it!
I'm going to start sewing with knits soon, so I am bookmarking this tut.
Great idea for finishing the edges!
That's yellow warp and blue weft on that linen of mine. And … a buttonhole foot is not only for automatic buttonholers – it simply has grooves underneath that line up the two rows of satin stitching perfectly parallel to each other. Usually this comes with the machine. My "new" machine is used, and the previous owner did not turn in all the feet when she traded it in.
I love the edge finish and the blue stitching is a nice touch on the purple top. Cool top.
Carolyn,
I love knits too. It's comfortable and great for a hot place like Rio.
But, here in Brazil, we use to let the 2 rows outside the clothes and the zigzag part inside them.
Kisses,
Your friend from the other side of the globe.
Carolyn,
I love knits too. It's comfortable and great for a hot place like Rio.
But, here in Brazil, we use to let the 2 rows outside the clothes and the zigzag part inside them.
Kisses,
Your friend from the other side of the globe.
So is the curly edge on the outside? I often leave super curly knits un-hemmed but feel really guilty about it… I like this finish.
thanks so much, I am always looking for new ways to finish knits.
Very nice touch! It is funny how some fabrics just have a life of their own.
Oh i haven't tried this technique before, it looks great!
Cute – and simple too. I will have to try this!
This is great! Thank you.
What a clever trick!! I'll have to remember that when I next make something knit.
I've added this technique to my bag of tricks along with some of your other tutorials.
I can't see an email address so i'm putting this in my comment. Potter's Textiles are having the last day of their 50% off sale tomorrow Wed 8th. They are a wholesaler with an outlet store in West Perth and supply to lots of labels in Australia. They have the most beautiful fabrics including digital prints and silk jerseys at amazing prices. I've added a link for more details here if you are interested http://bscperthwa.wordpress.com/2012/02/07/last-day-potters-textiles-sale-wed-8th-feb/
Thank you Vanessa!
Thank you for the tip on the knit hems, I will try it soon.
What a great finish! What a wonderful way to use those little pieces of knit leftover from other projects, especially a colorful print on a solid color t.