
Florencia and Jana (by email) both asked about the lapped, flat-felled split side seam, thank you for asking! Since I finished all my Christmas sewing today… and, can I just say; Whoopeeeeeeeeeee!!!! I had time to get out some scraps and show how I did them…
Bear in mind that a tiny bit of the wrong side of the fabric will show in this technique, so it is best confined to fabrics where this doesn’t matter.
To have this feature, you have to plan ahead and cut an extra little extension, or tab, on the outer edge of either front or back; about 11.5cm in height for a 10cm split. I randomly chose for the front edge to have the tab so as to flat-fell the seams towards the back as my own convention; but it looks equally fine either way.
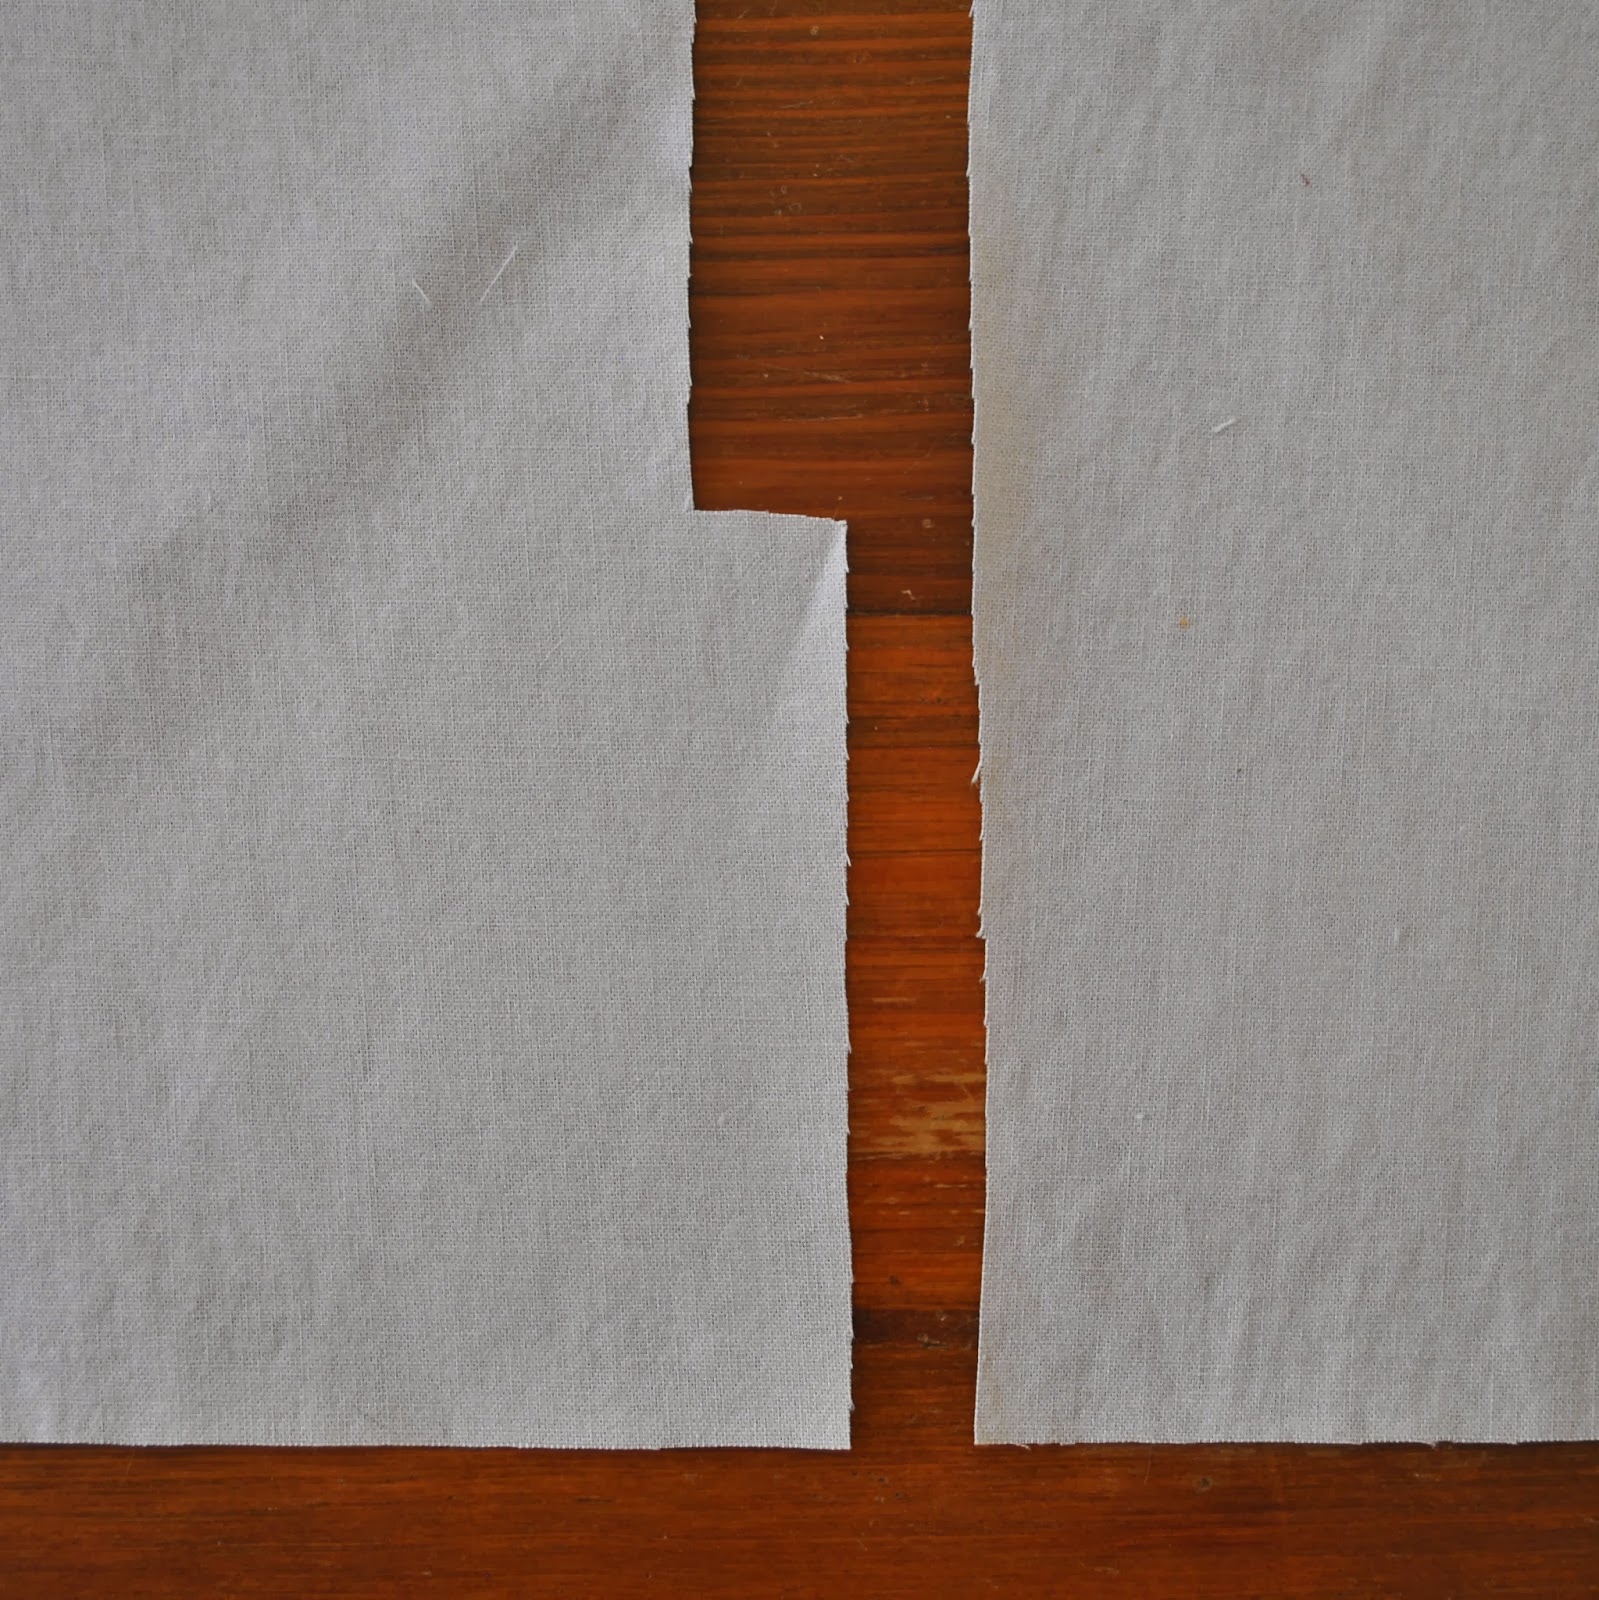
Stitch the side seams to level with the top edge of the tab.
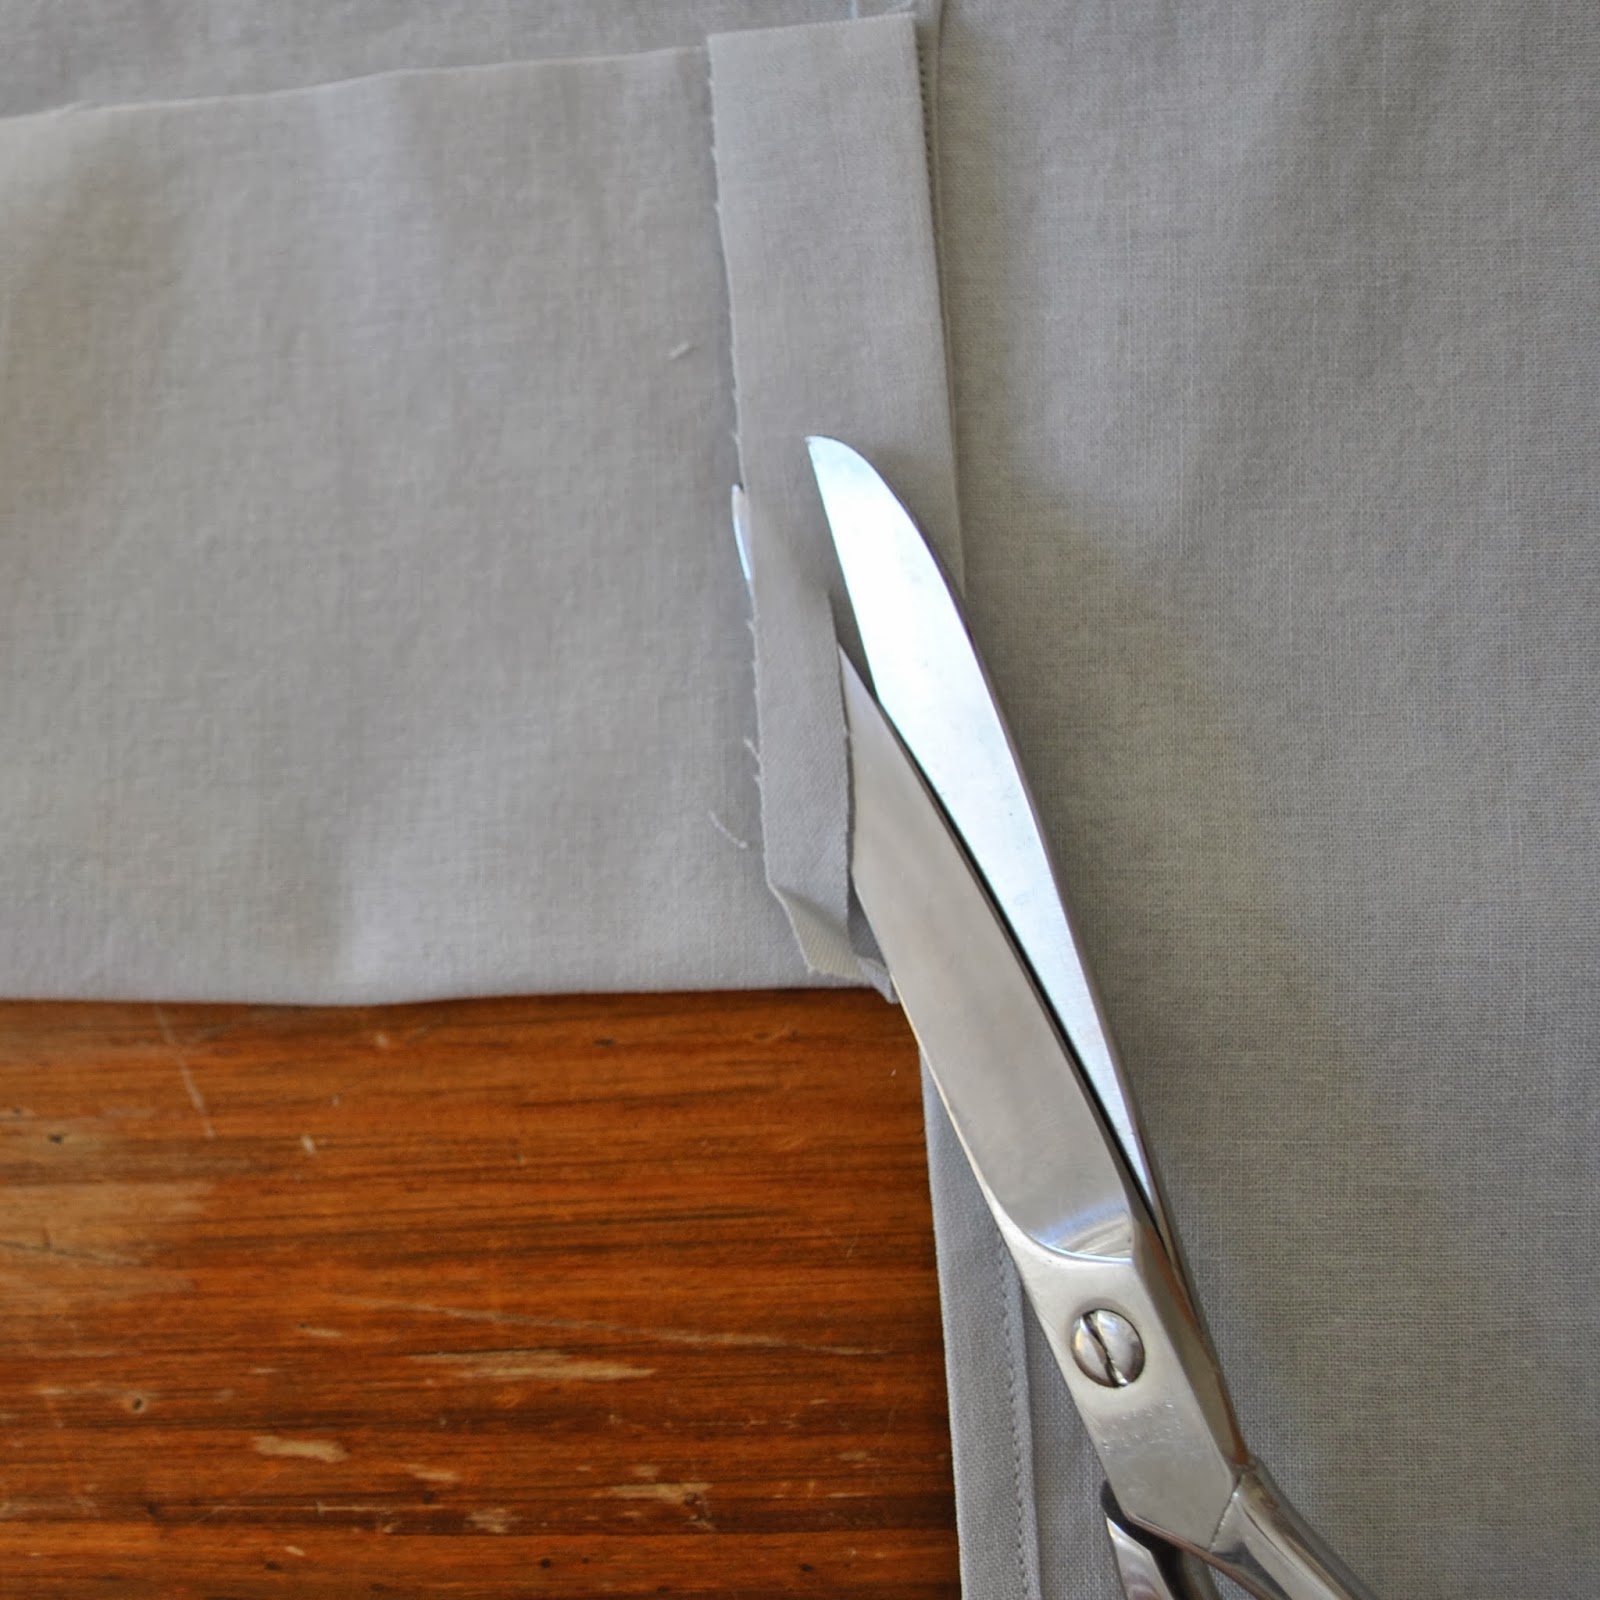
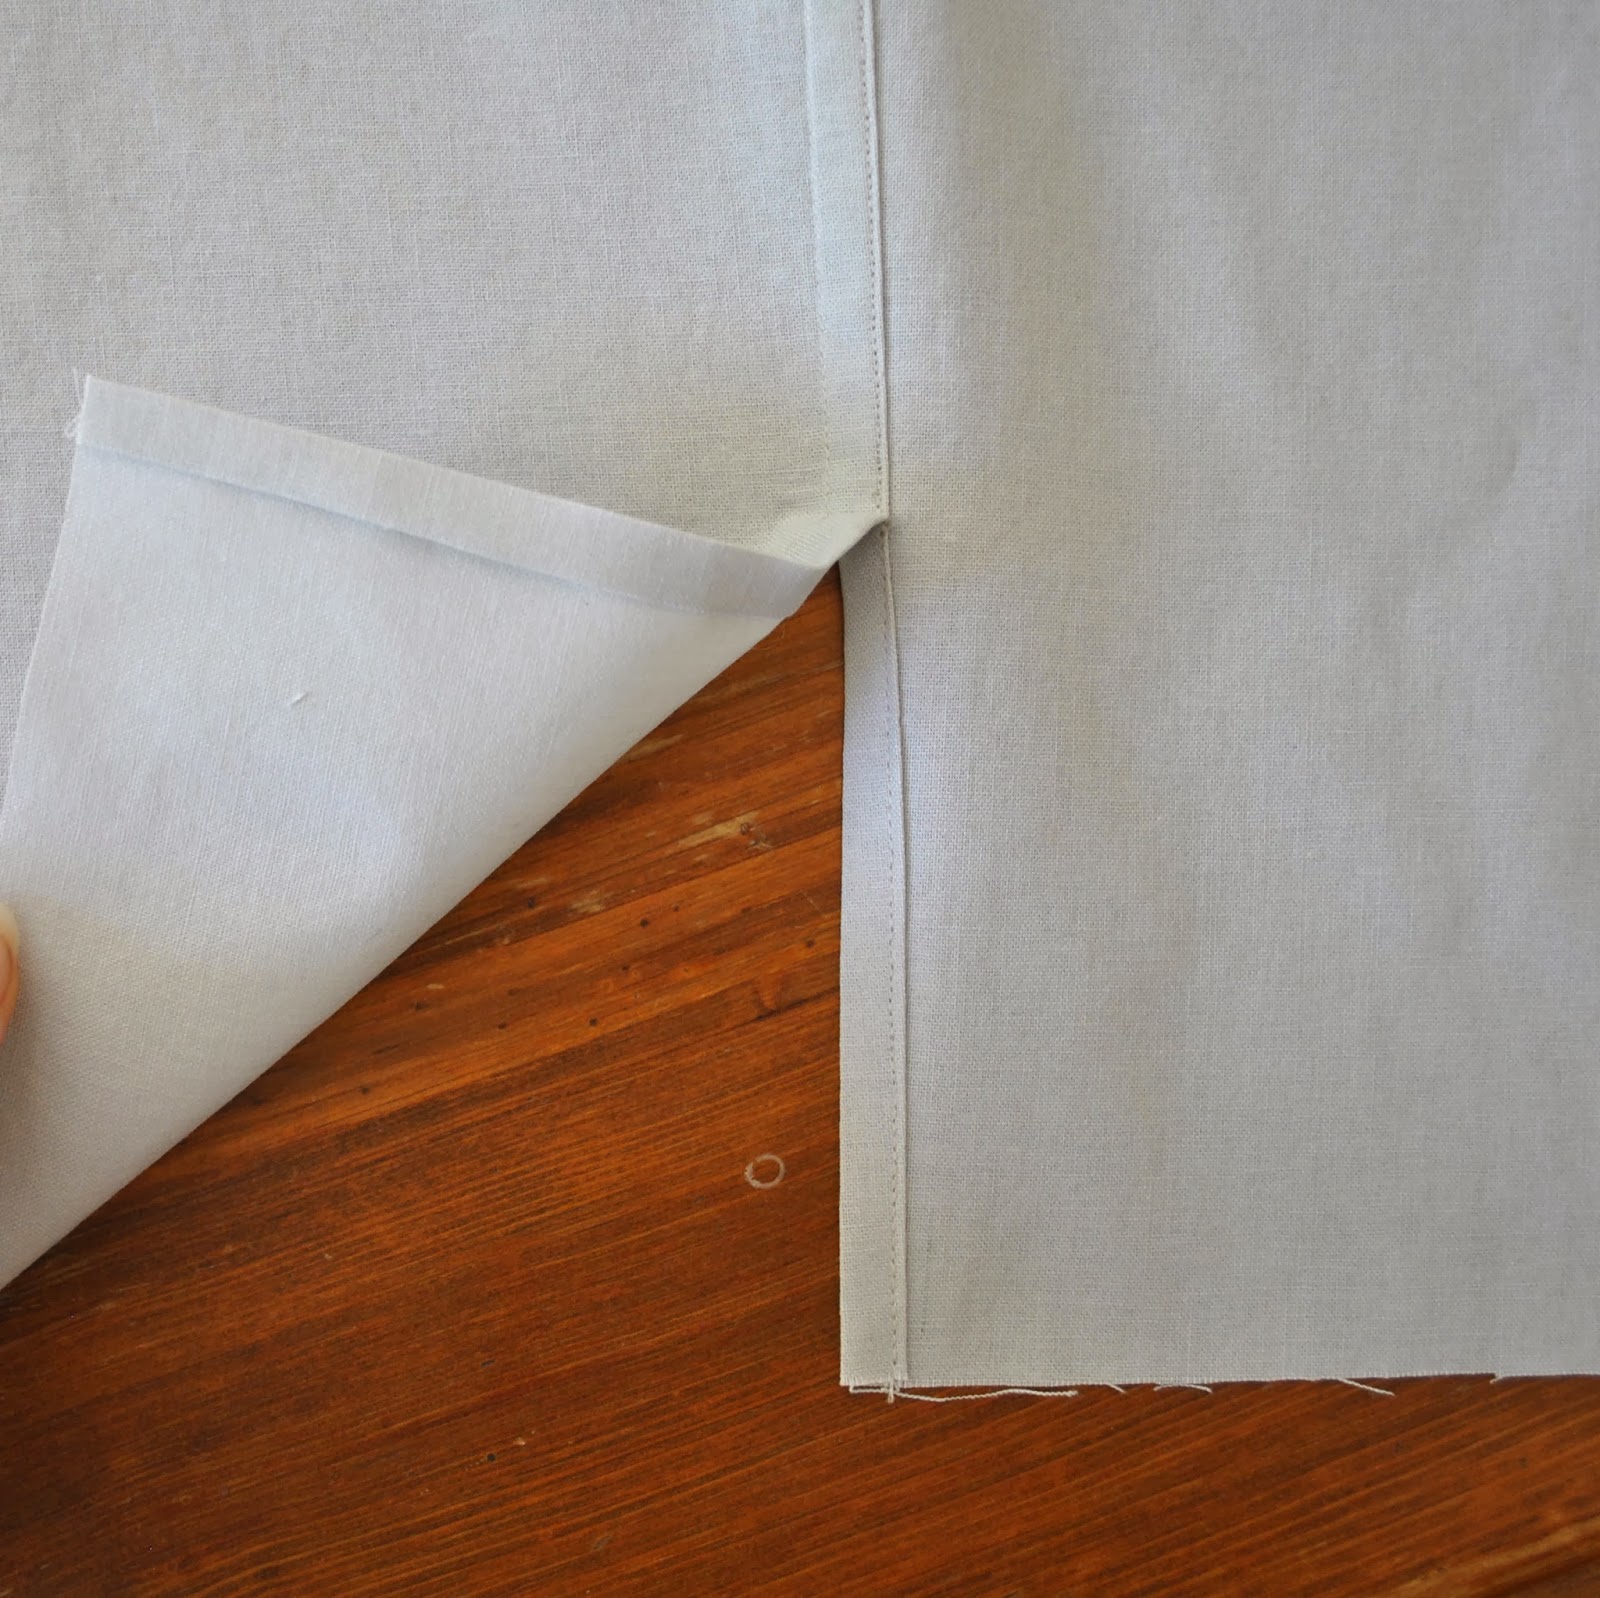
Press the side seam open above the split, at the same time press down the seam allowance on the un-tabbed side and leave the tab un-pressed. Snip the untabbed seam allowance to the endpoint of the previous stitching.
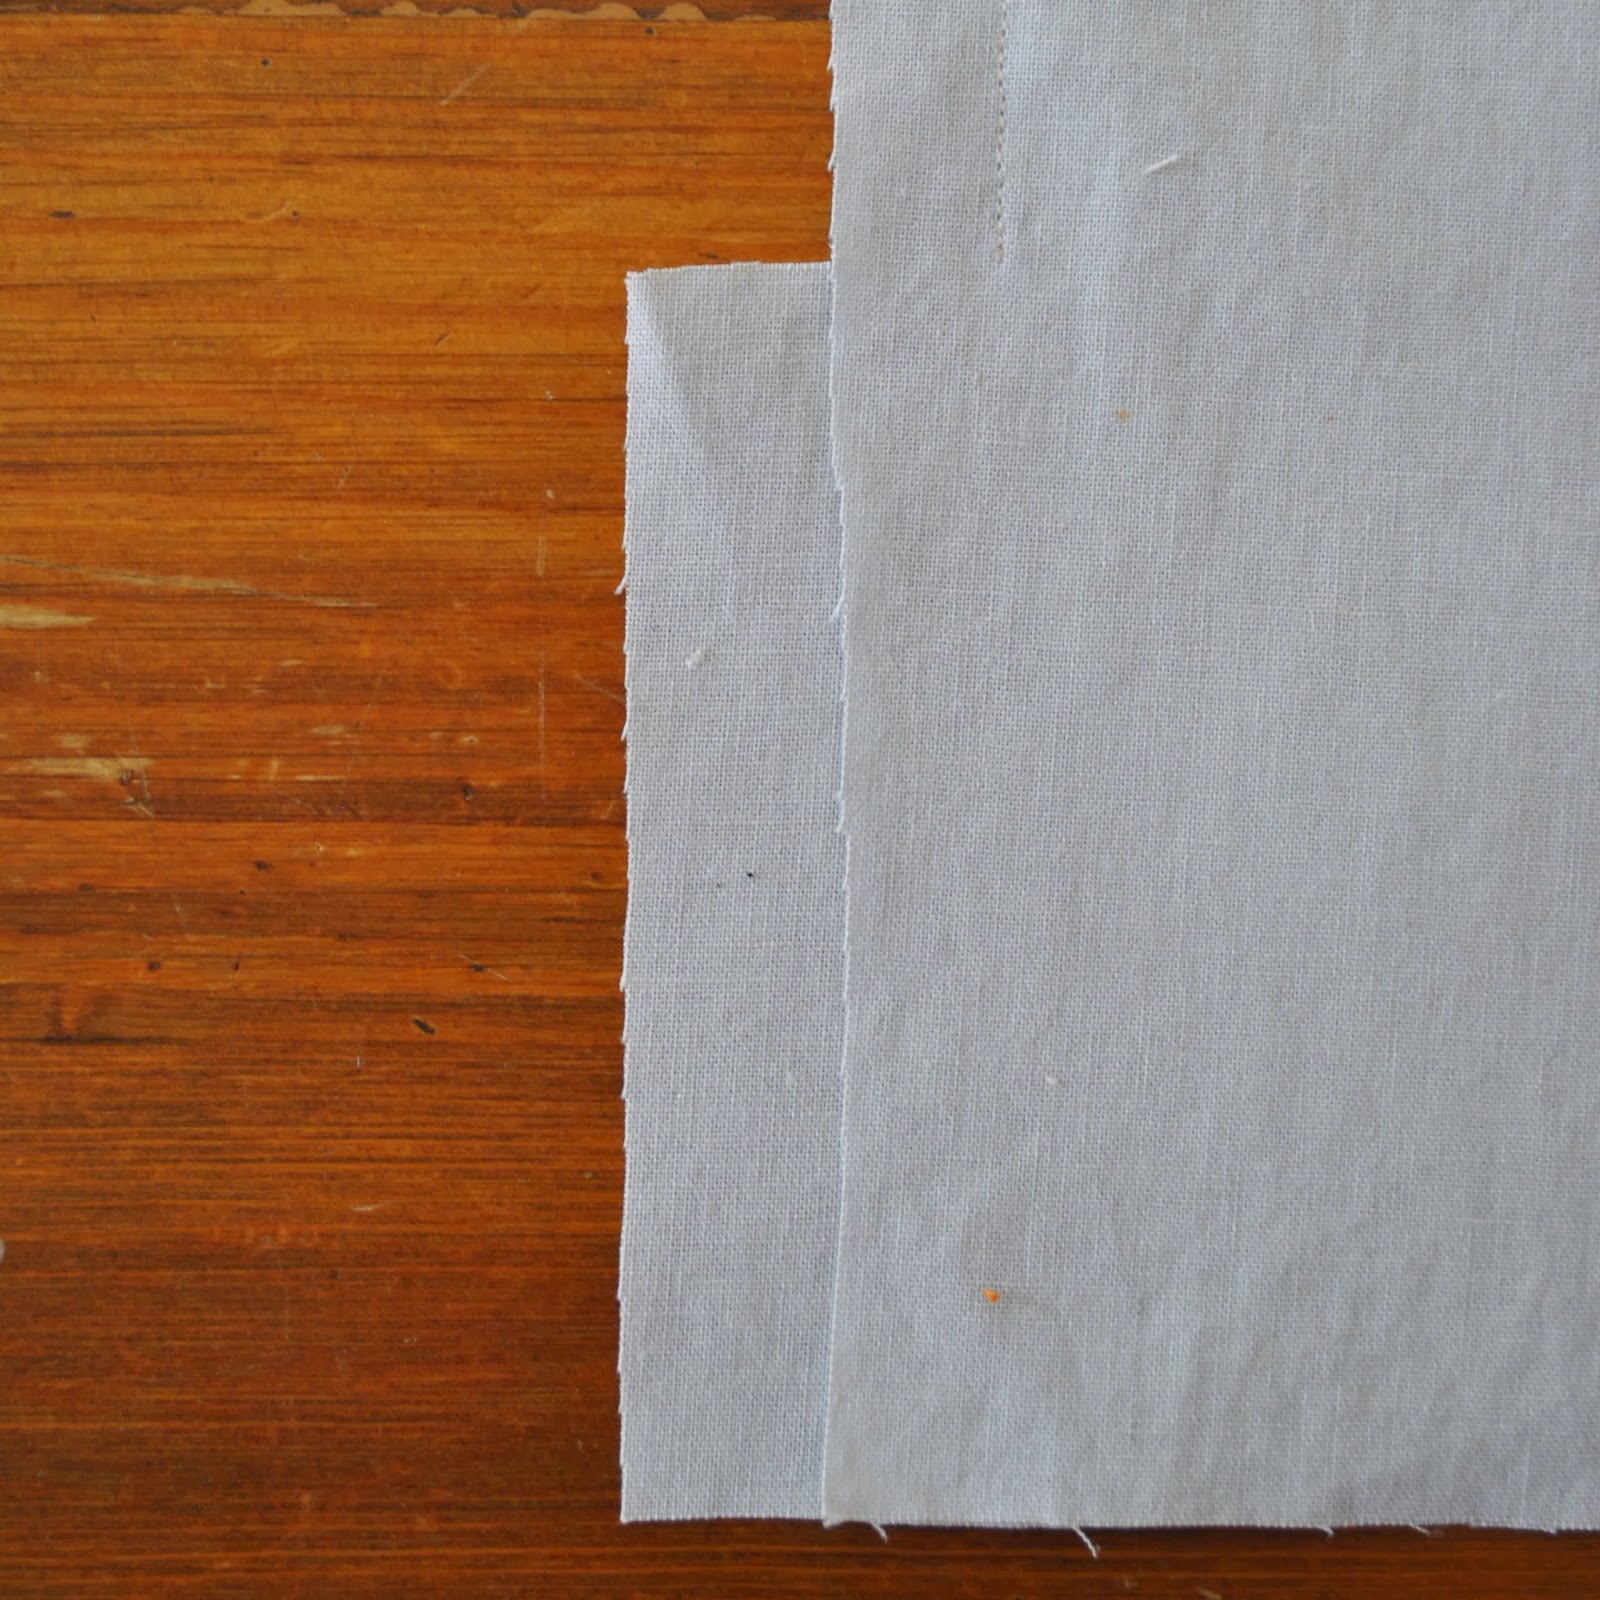
Fold under and press the untabbed seam allowance below the snip, and stitch.
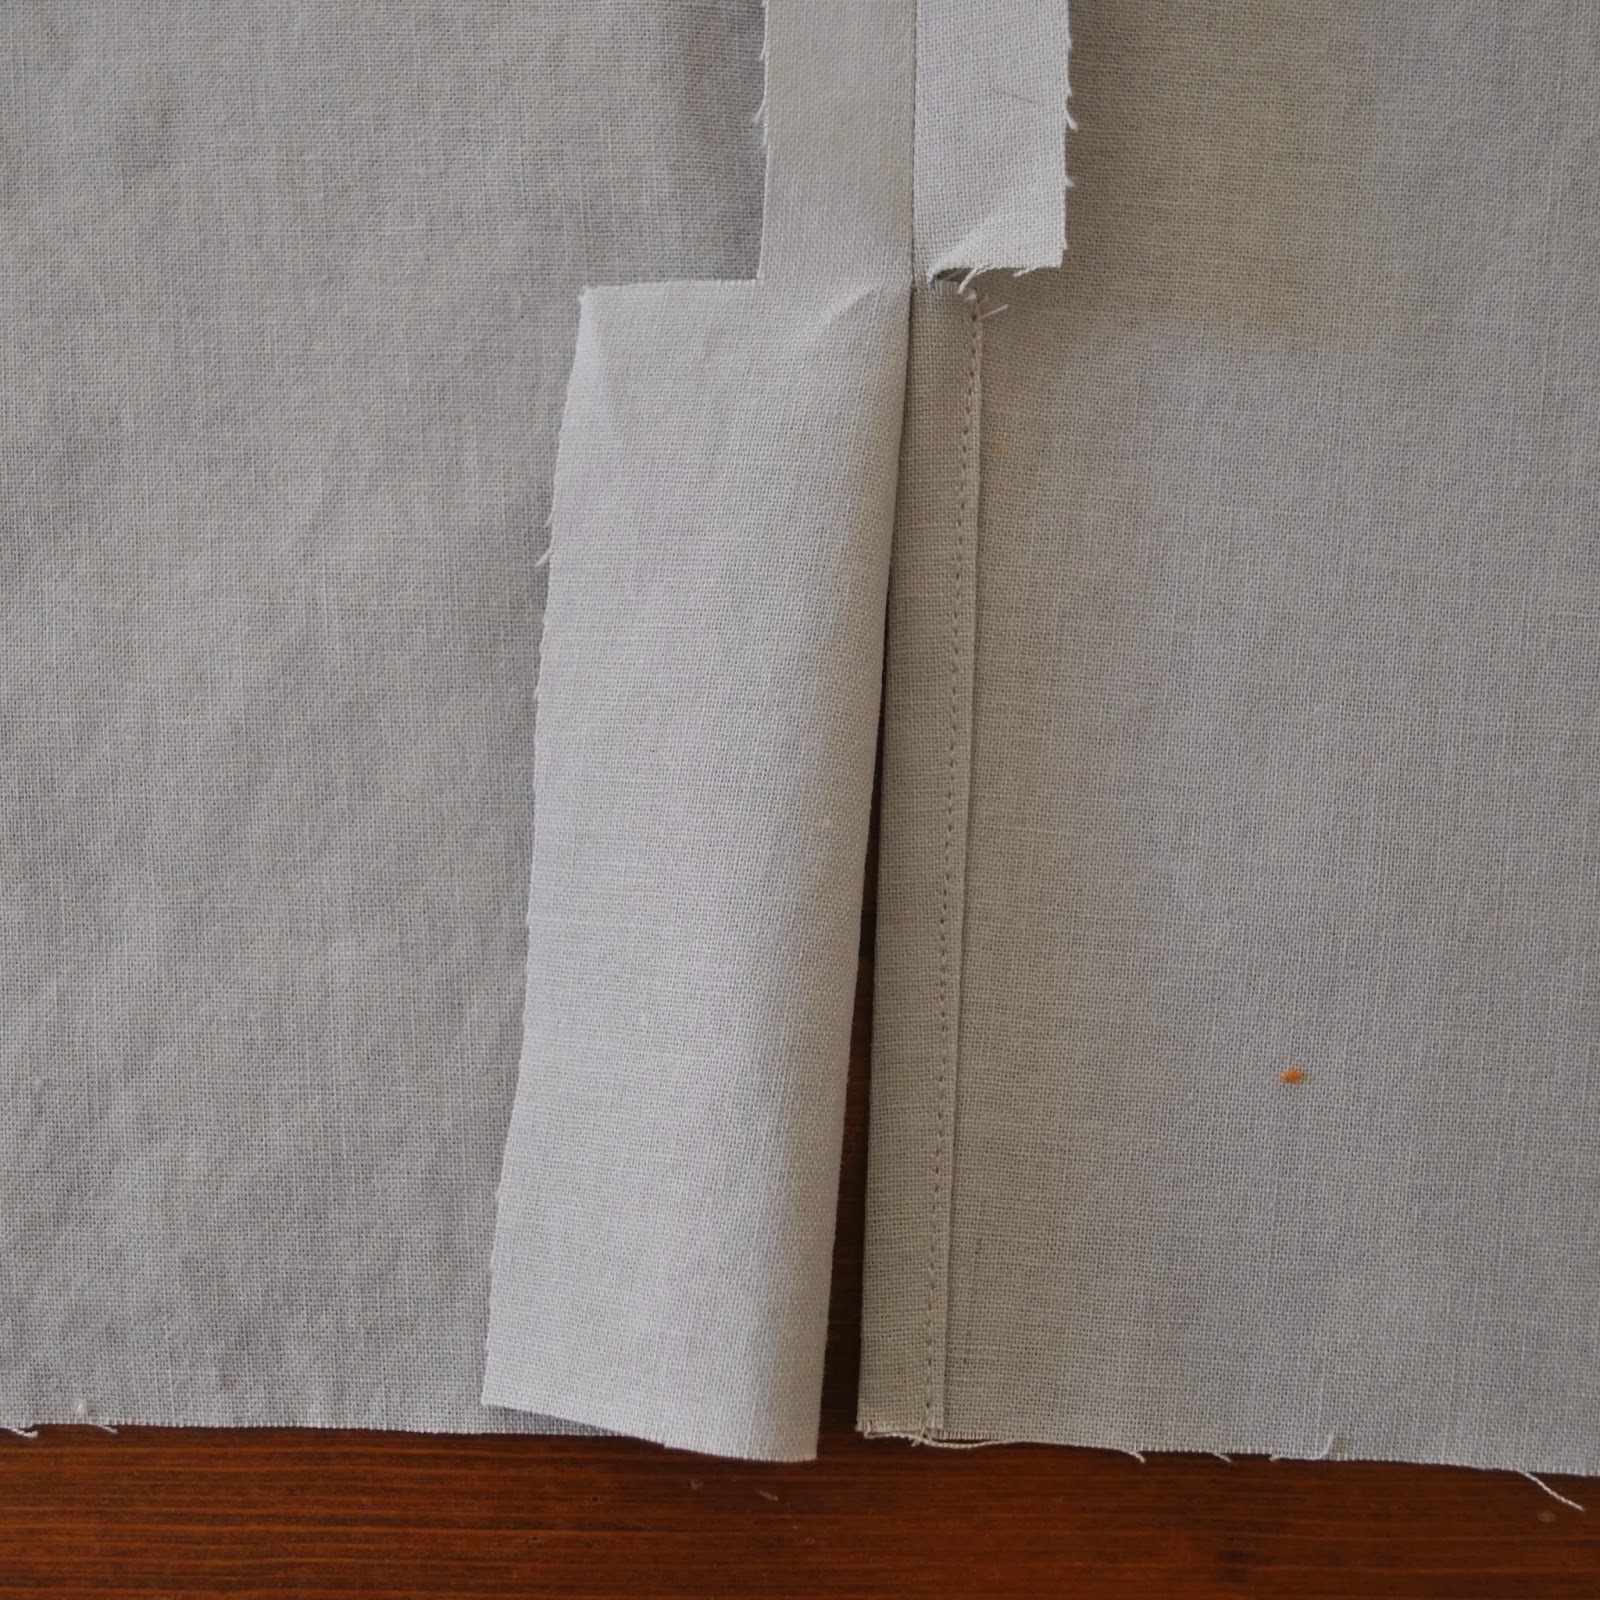
Trim the remainder of the untabbed seam allowance to half its width, along the entire length of the seam.
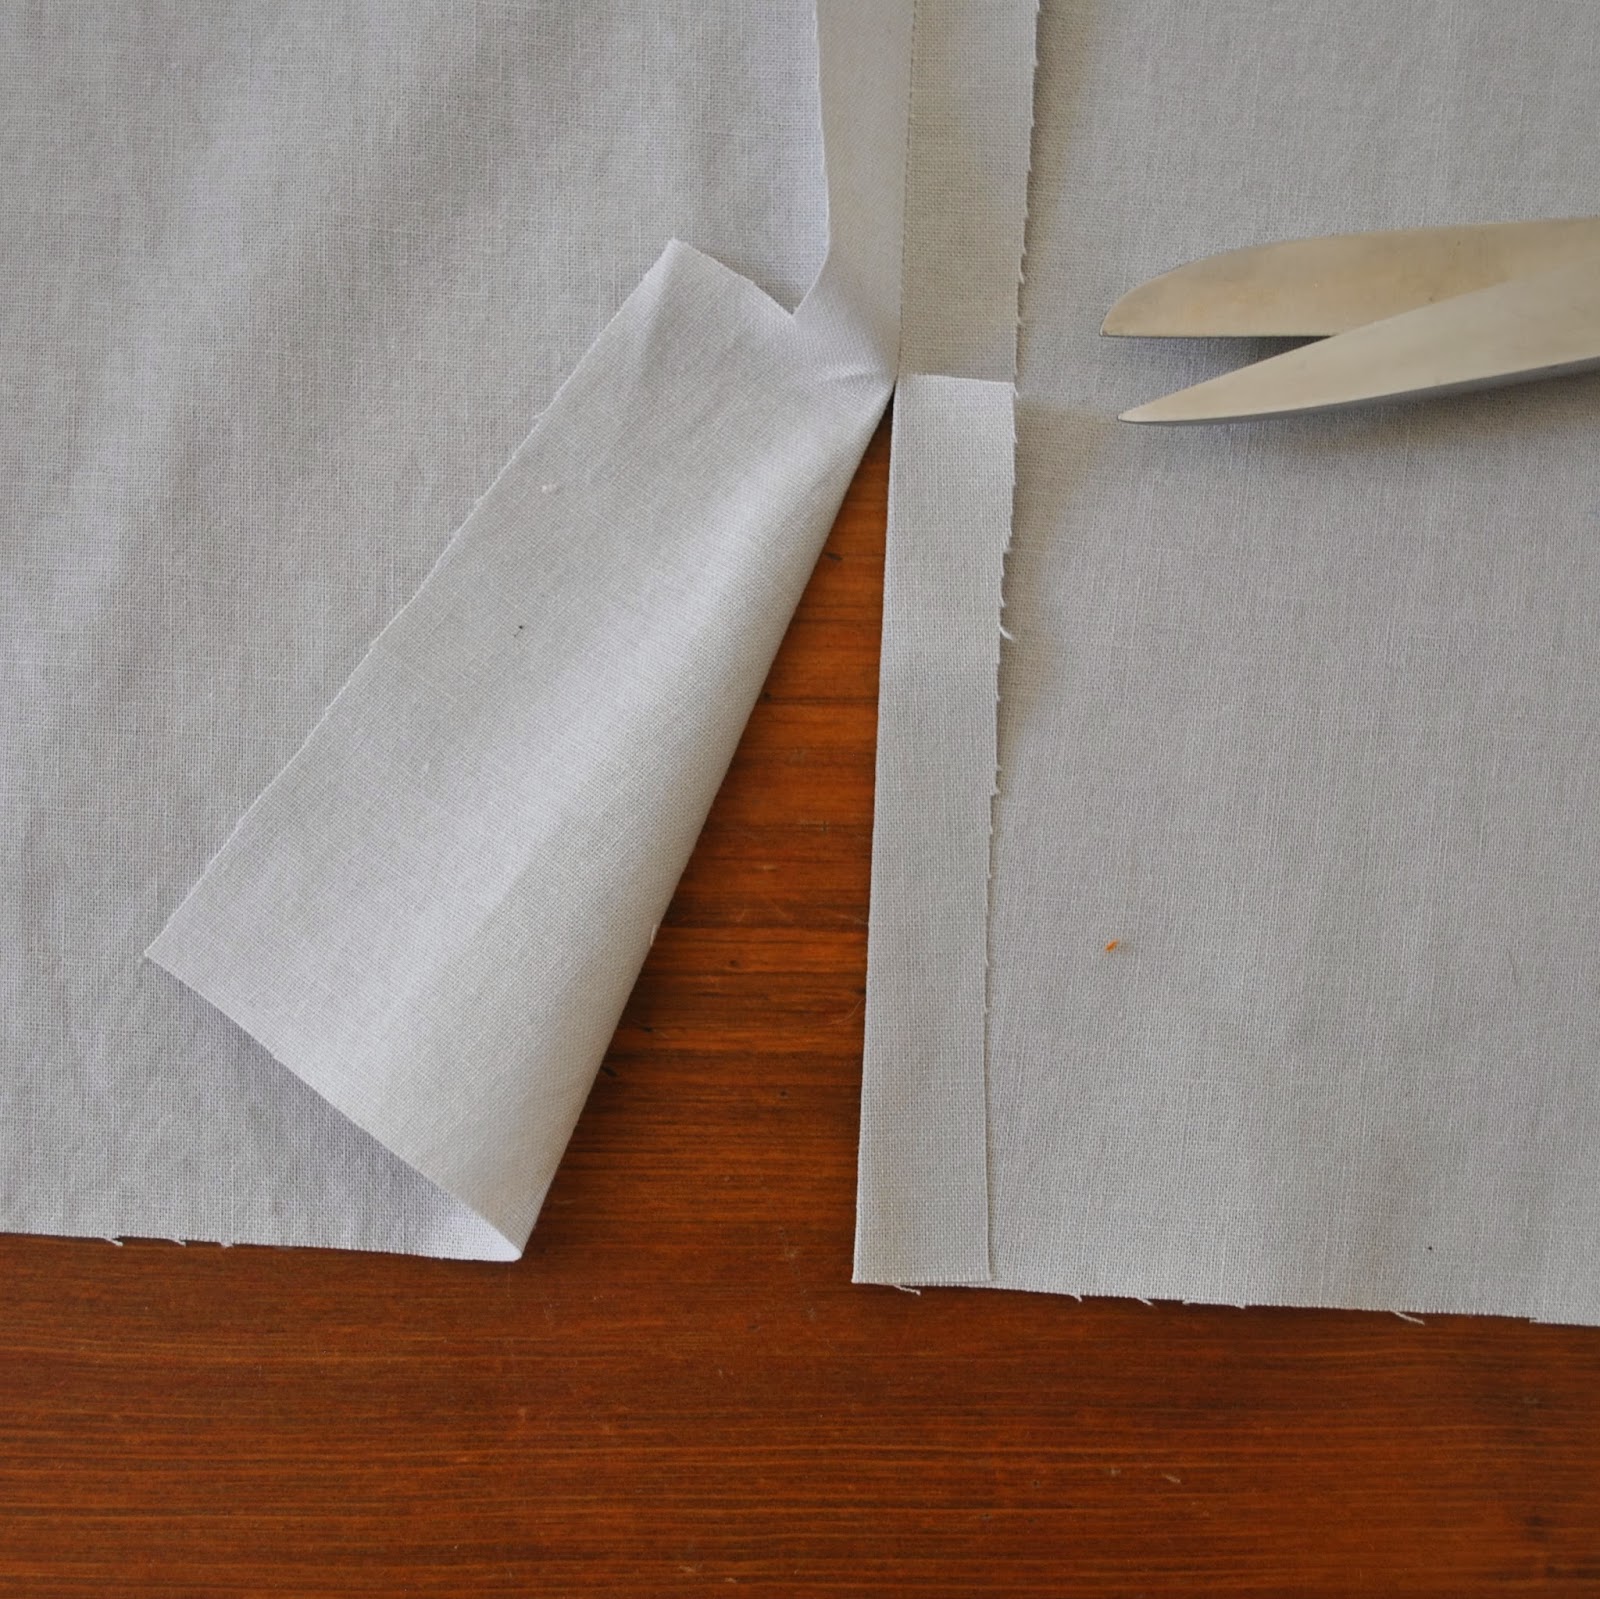
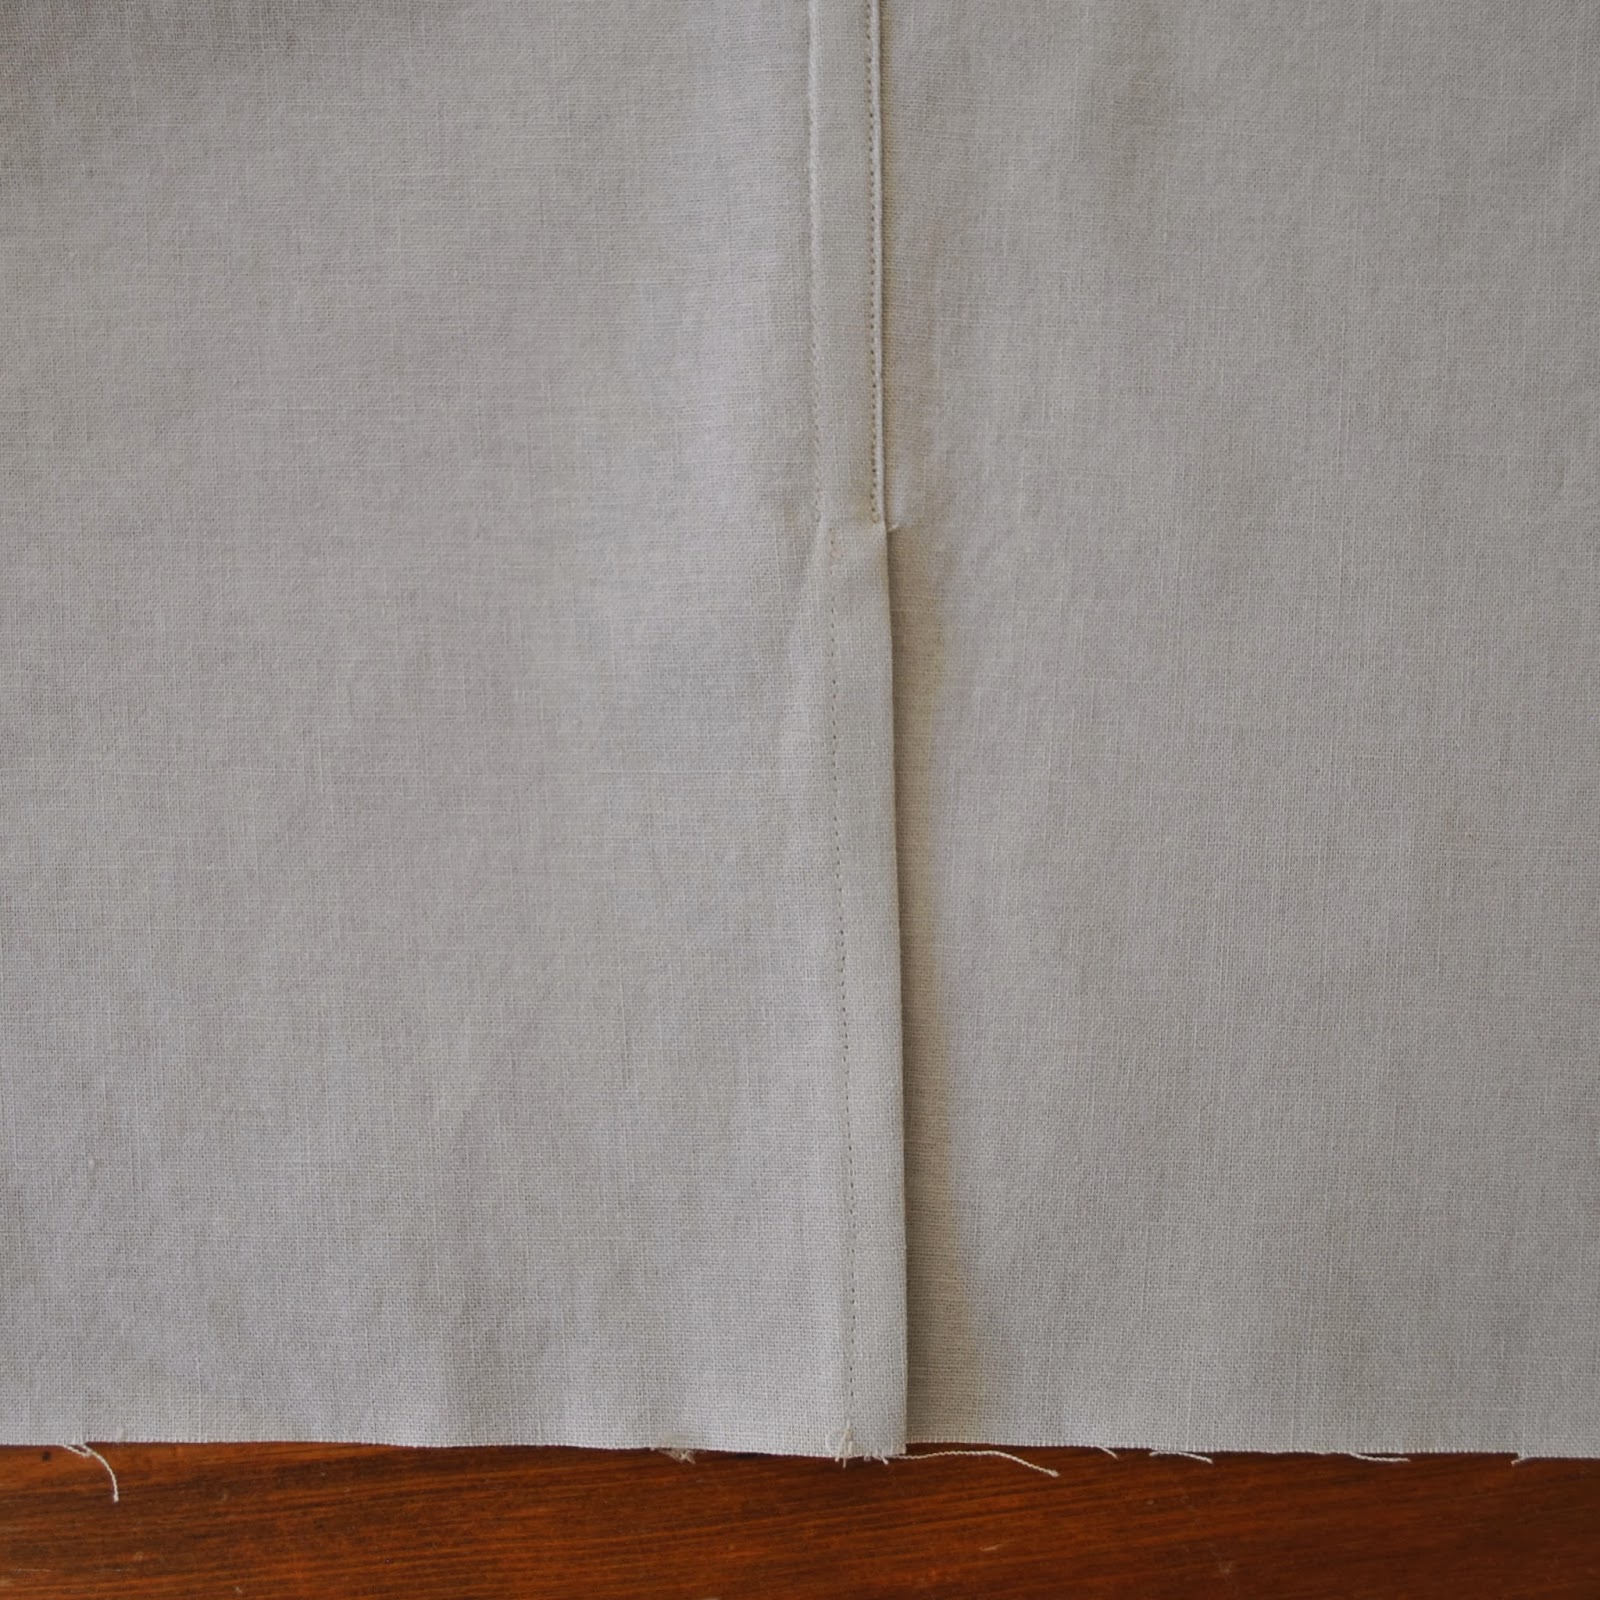
Press the tabbed seam allowance over the trimmed seam allowance, and wrap the raw edge around the trimmed edge of the other side to enclose it, the entire length of the seam. At the same time, press the tab under along the same line to the lower edge. Pin in place.


Stitch the flat-felled seam, stopping at the top edge of the split.
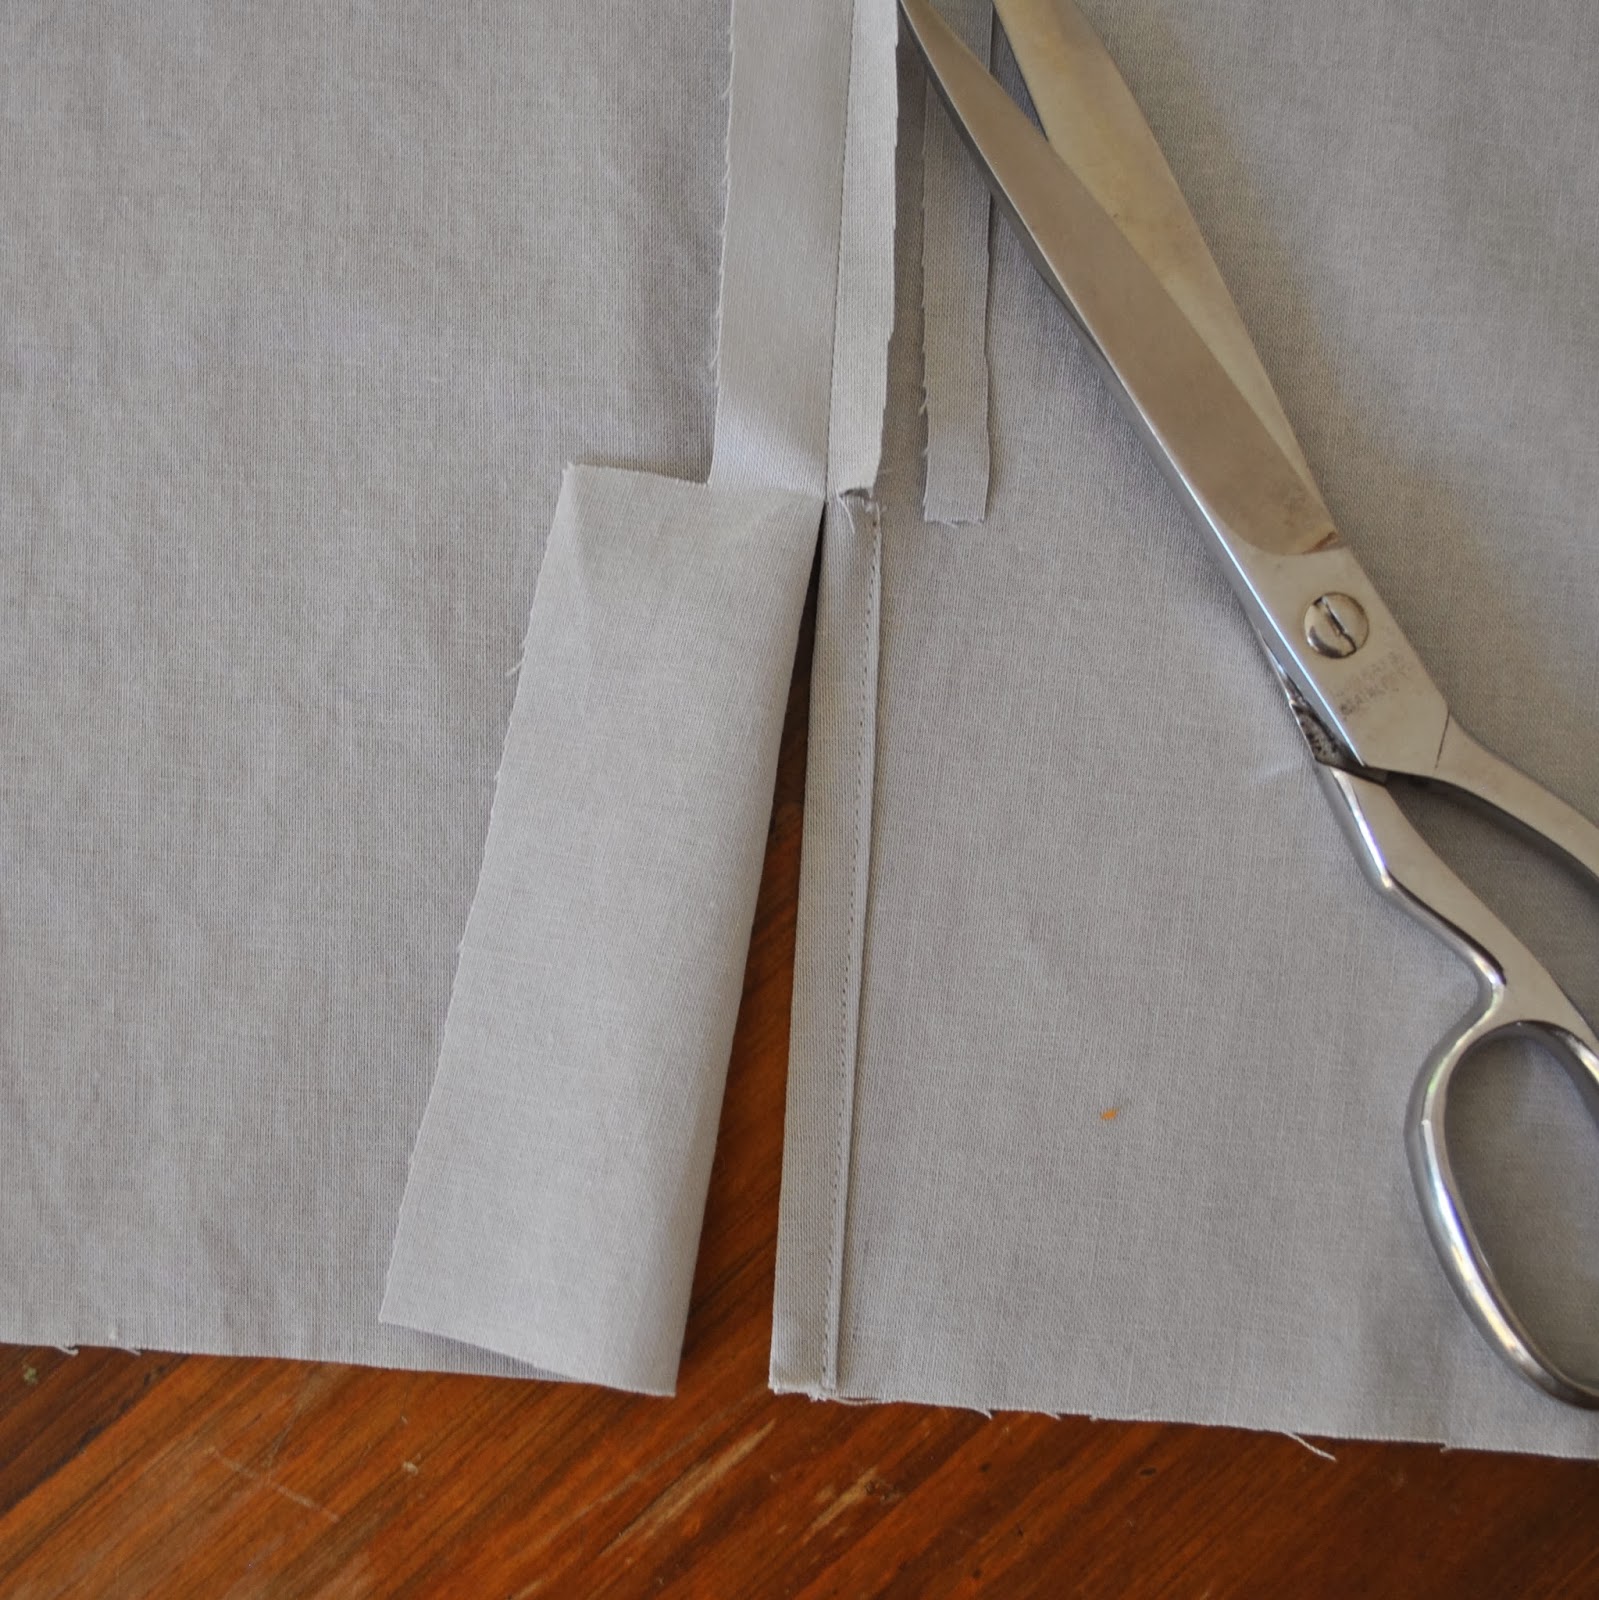
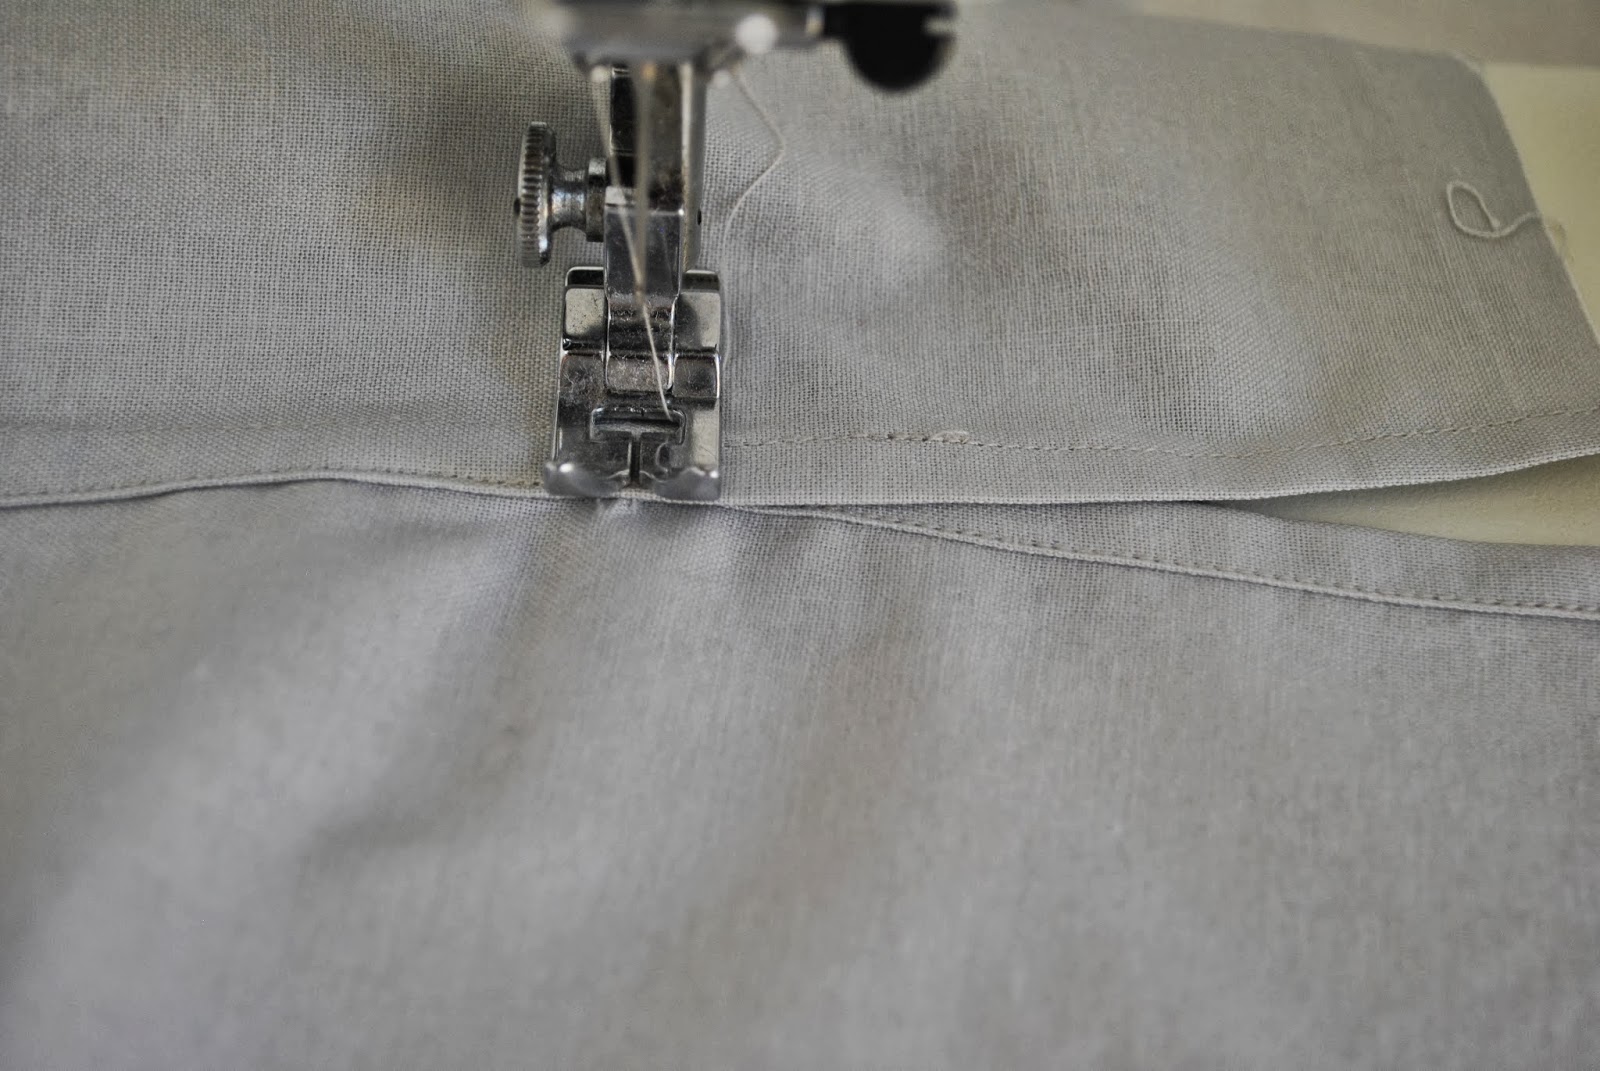
If necessary, trim the tab; then turn under the raw edge and press. Stitch.
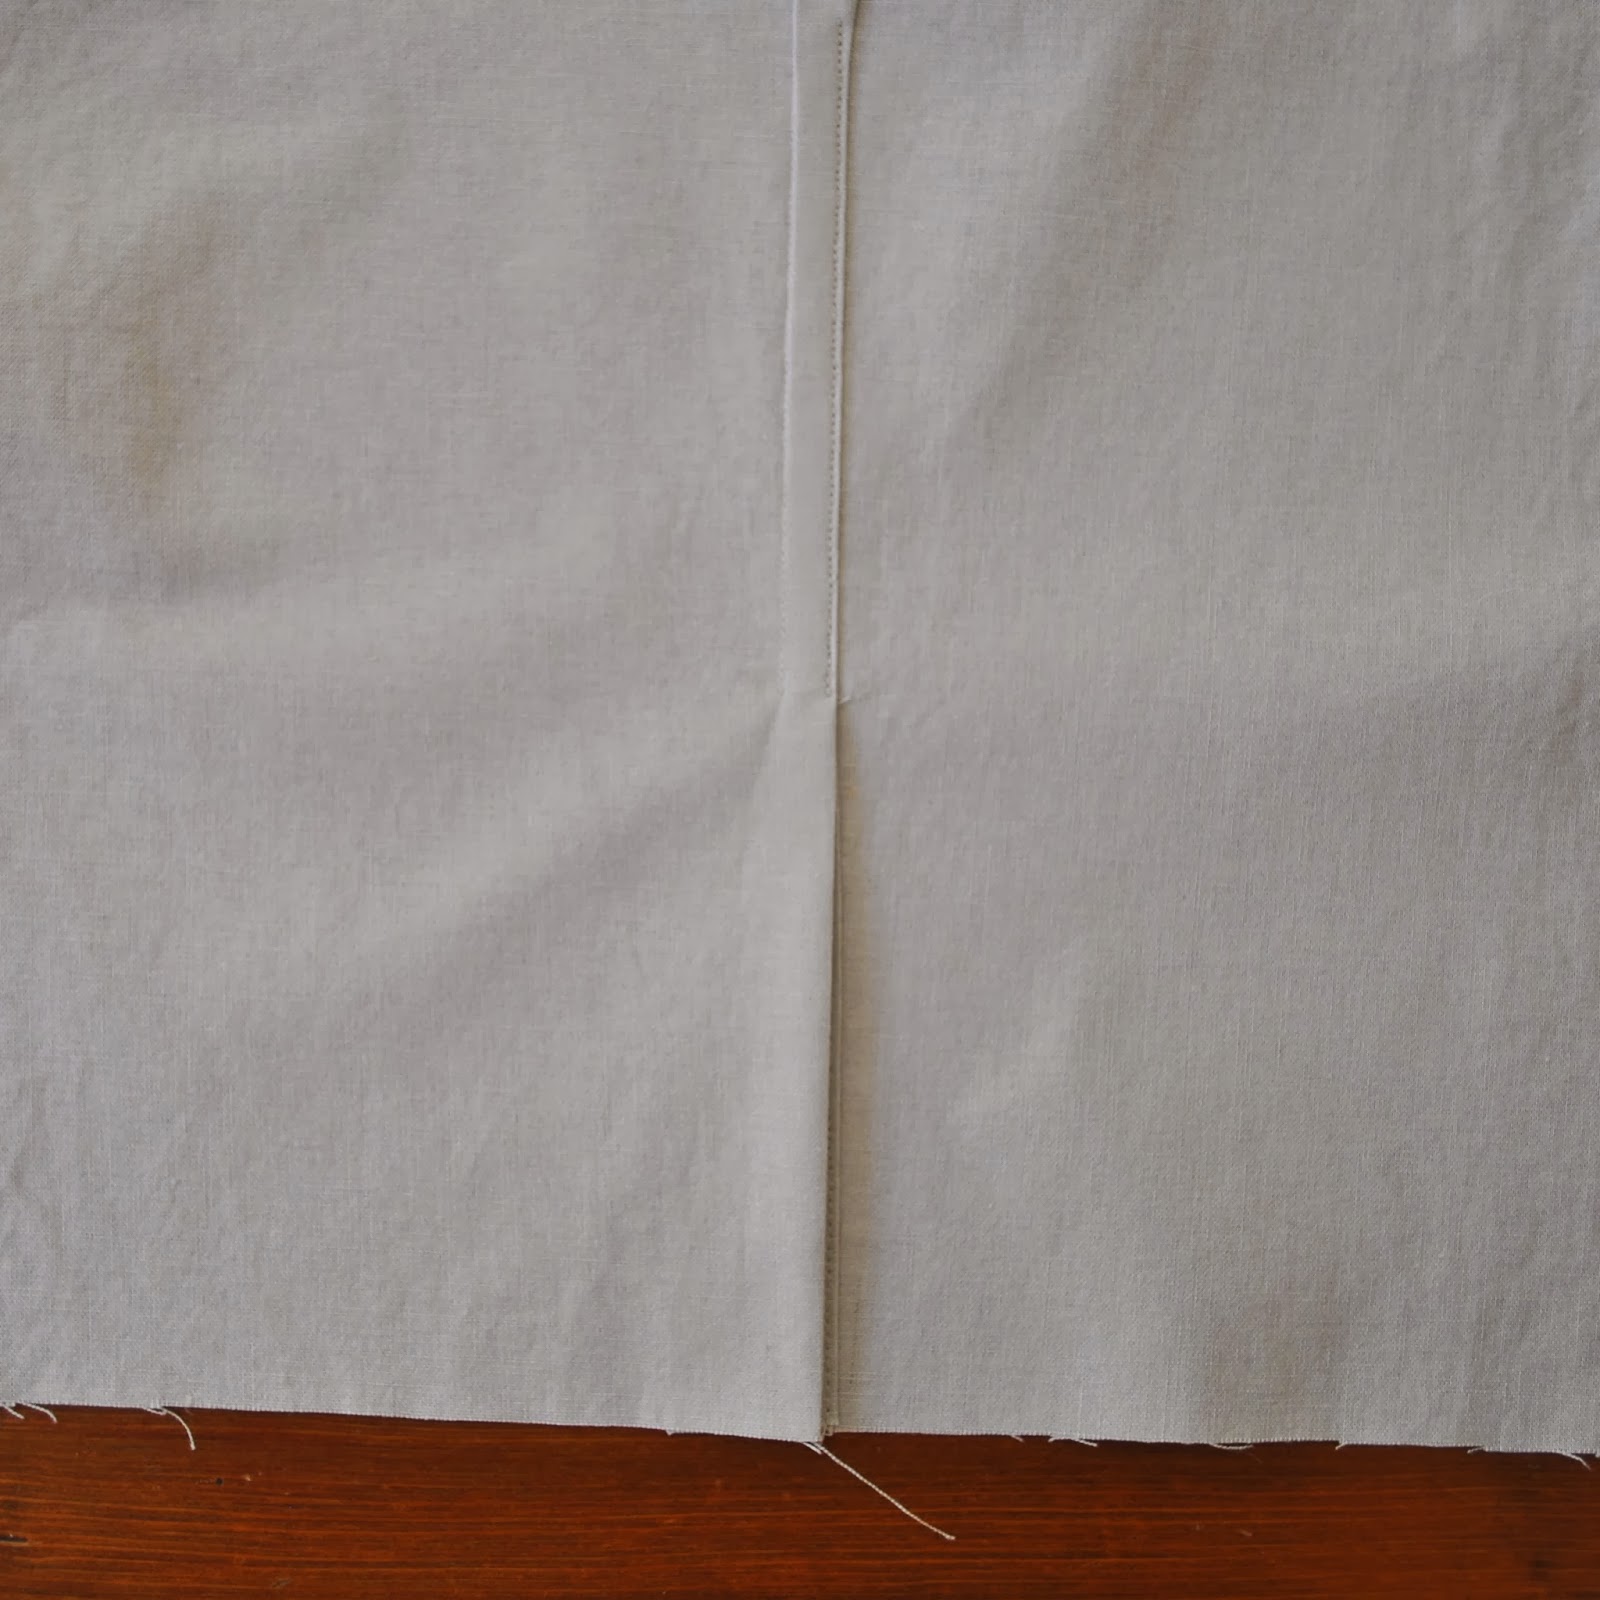
To strengthen, stitch a short row of horizontal back and forth over the top of the split. Alternatively bar-tacking, or narrow, closely spaced zig-zagging can be used at this point.
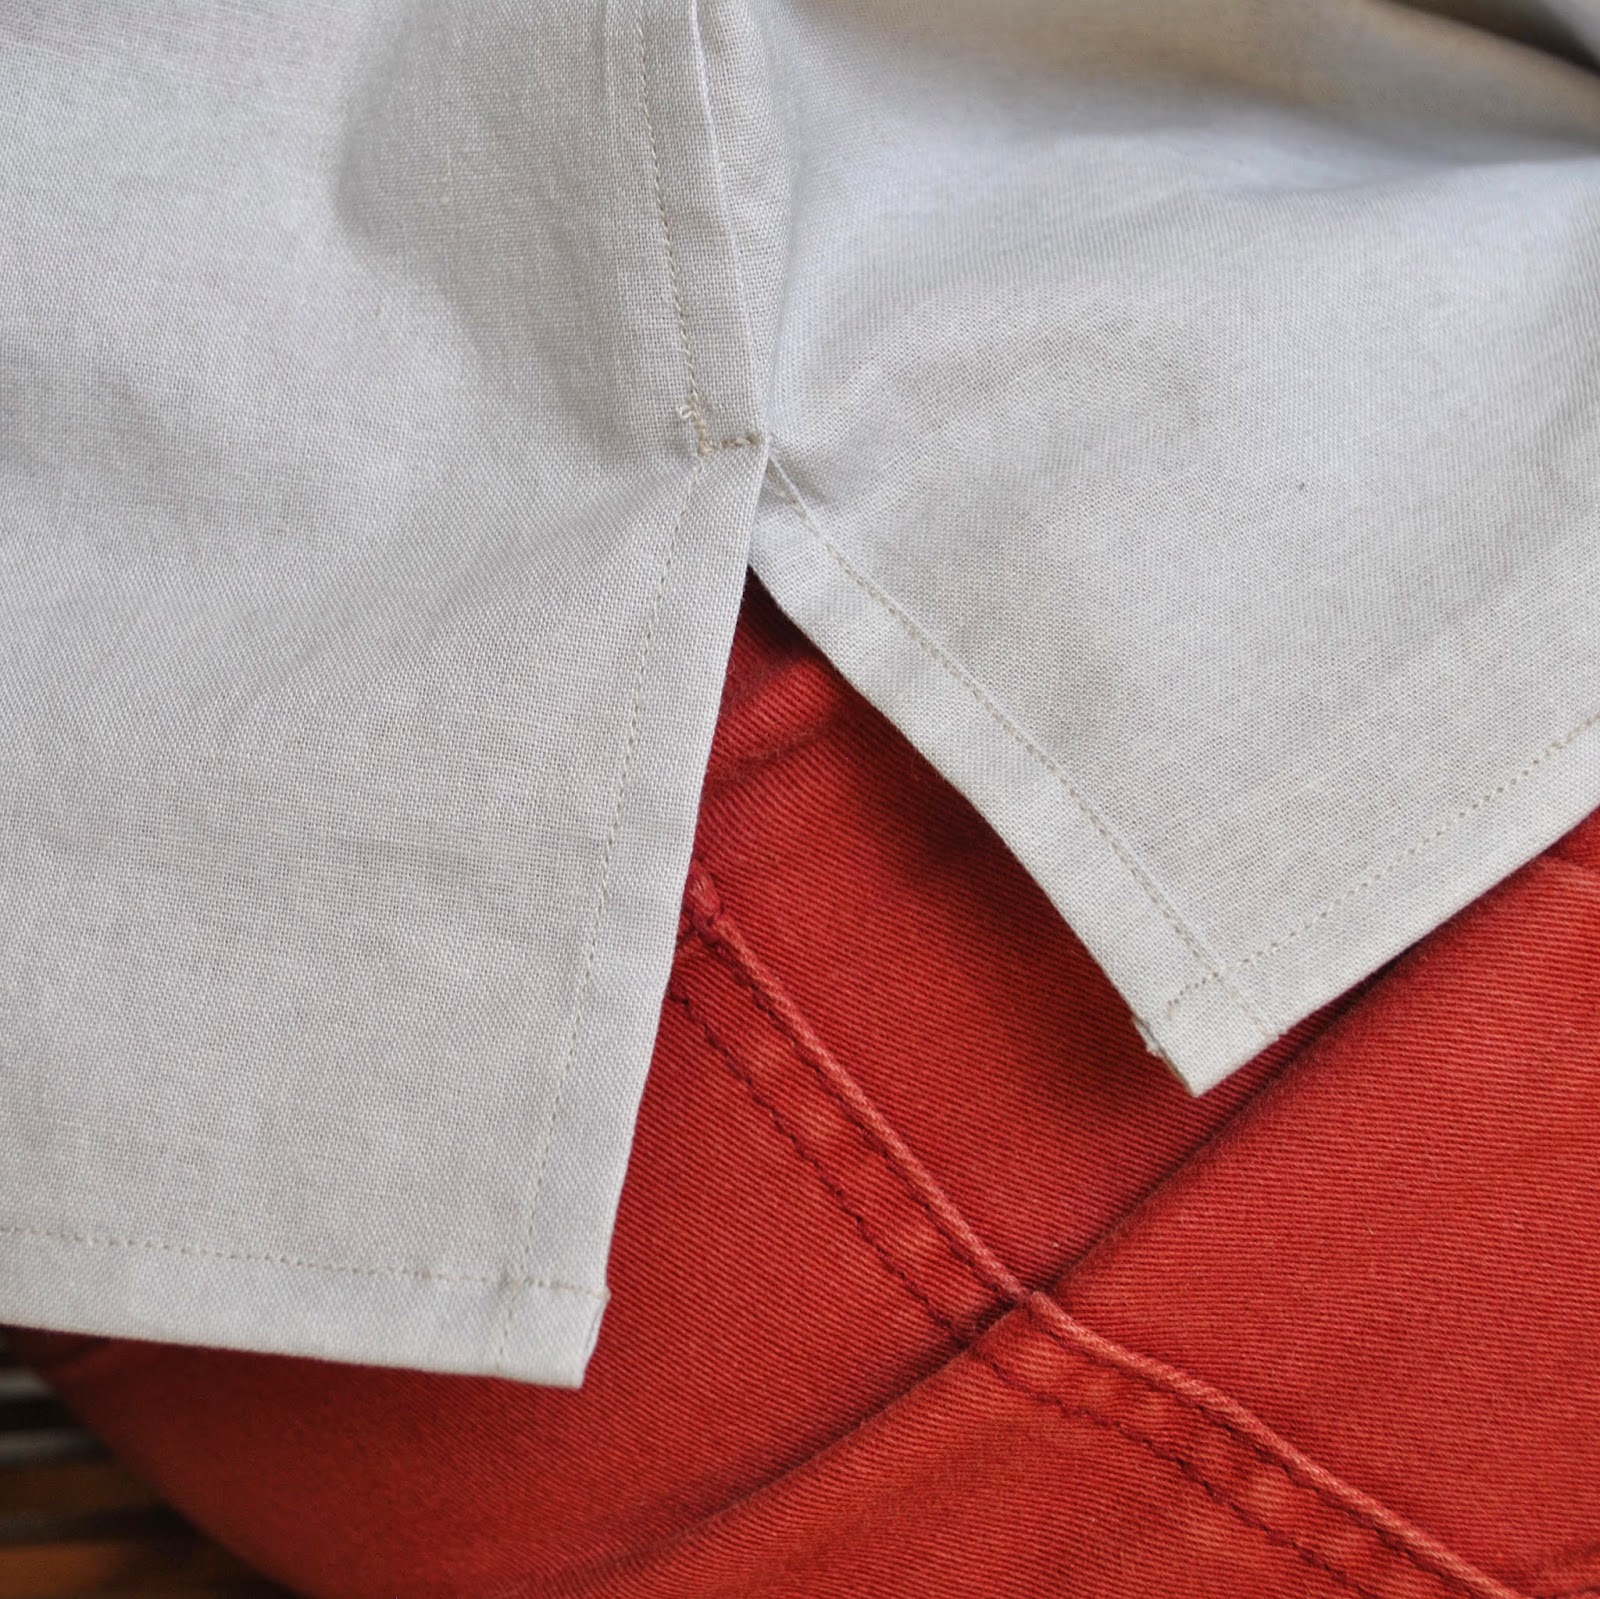
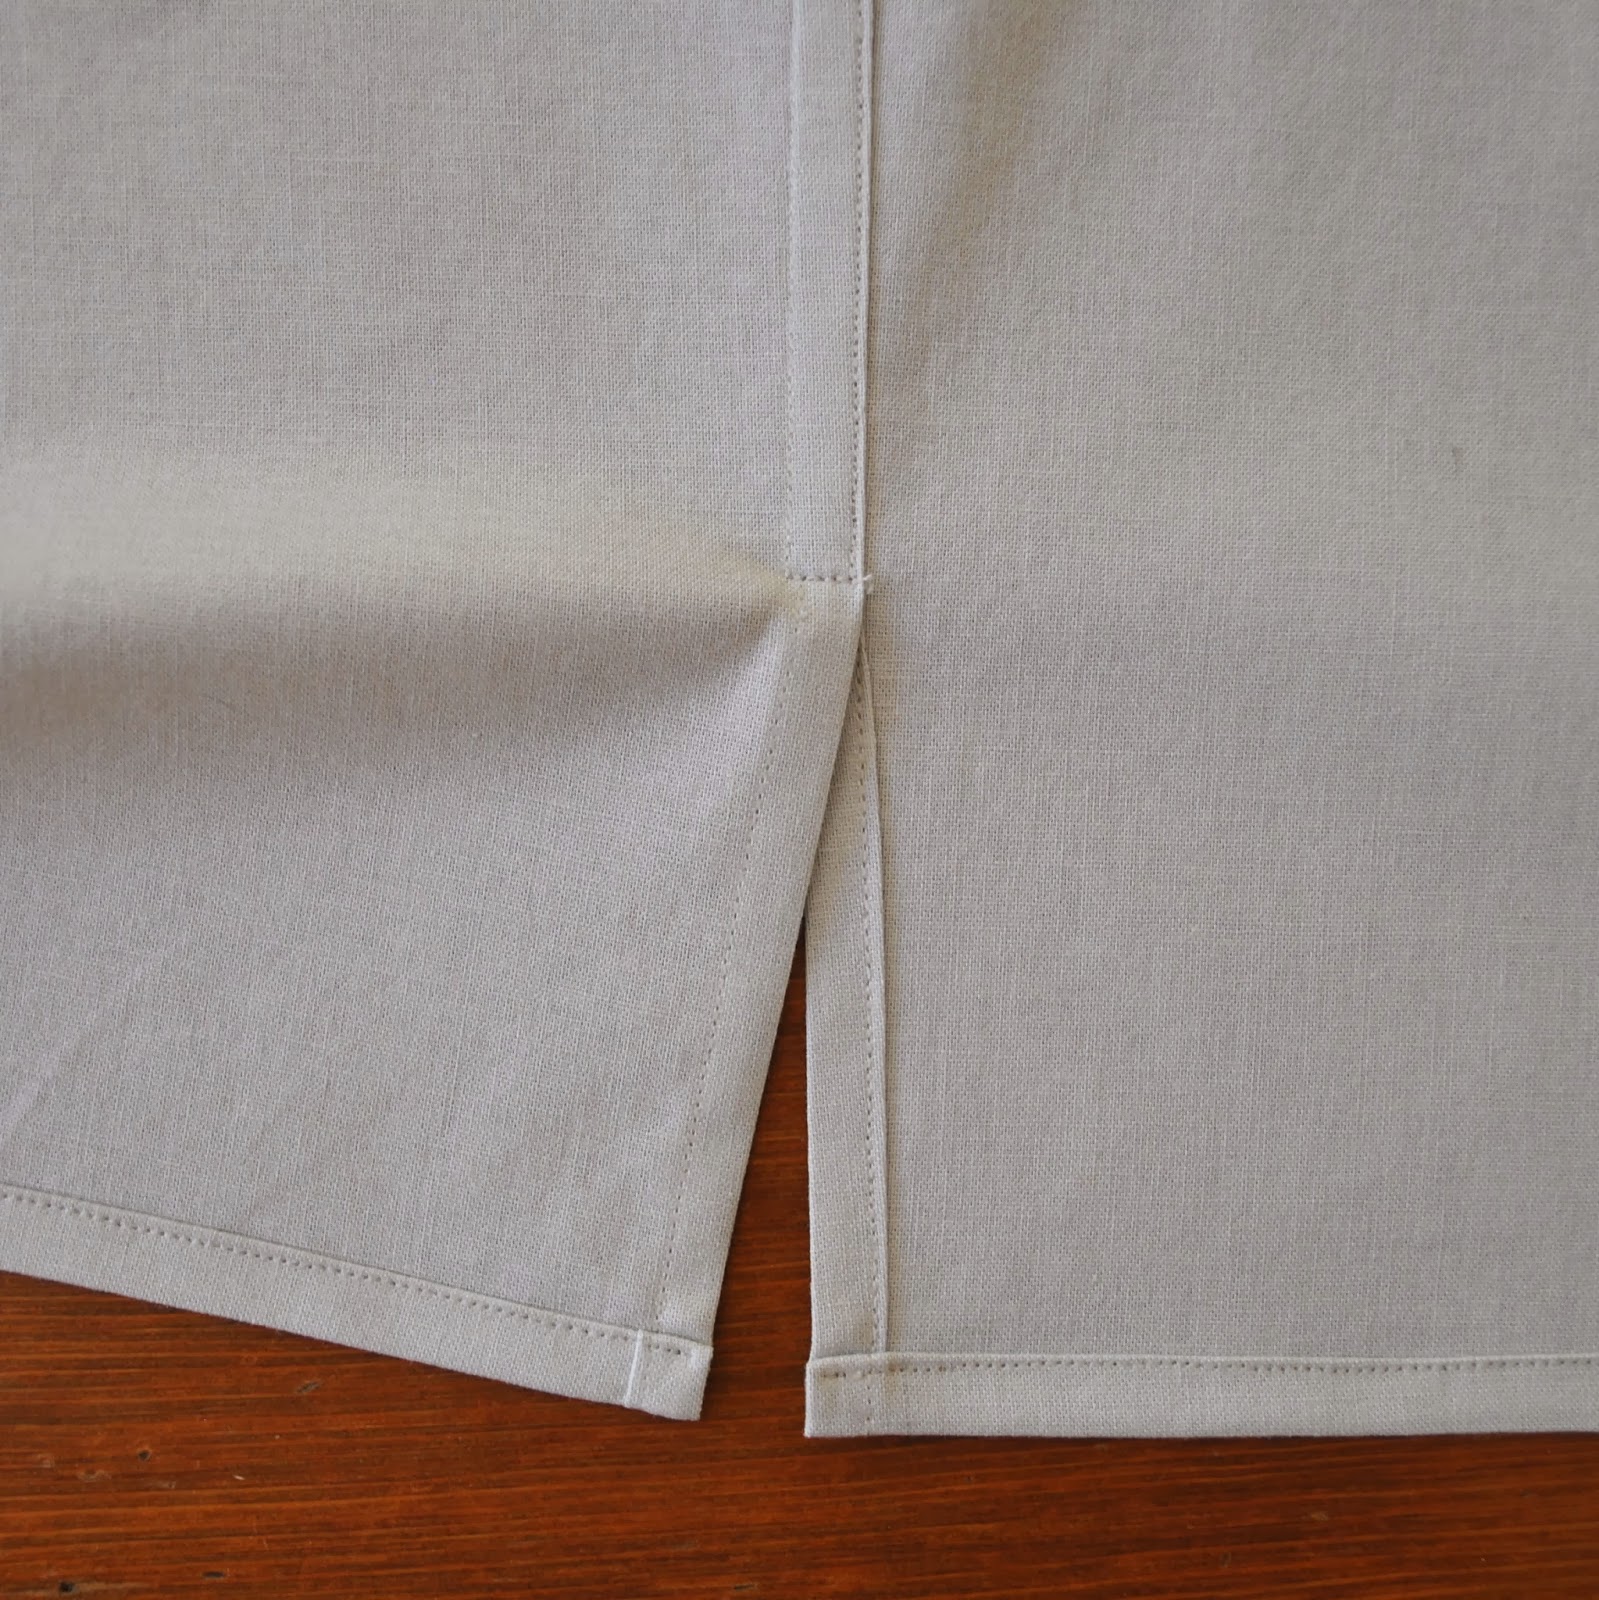
Hem the lower edges. Remember: the underside split is hemmed facing out, so mind you don’t accidentally stitch the hem on the outside on this side! I almost got caught here the first time!
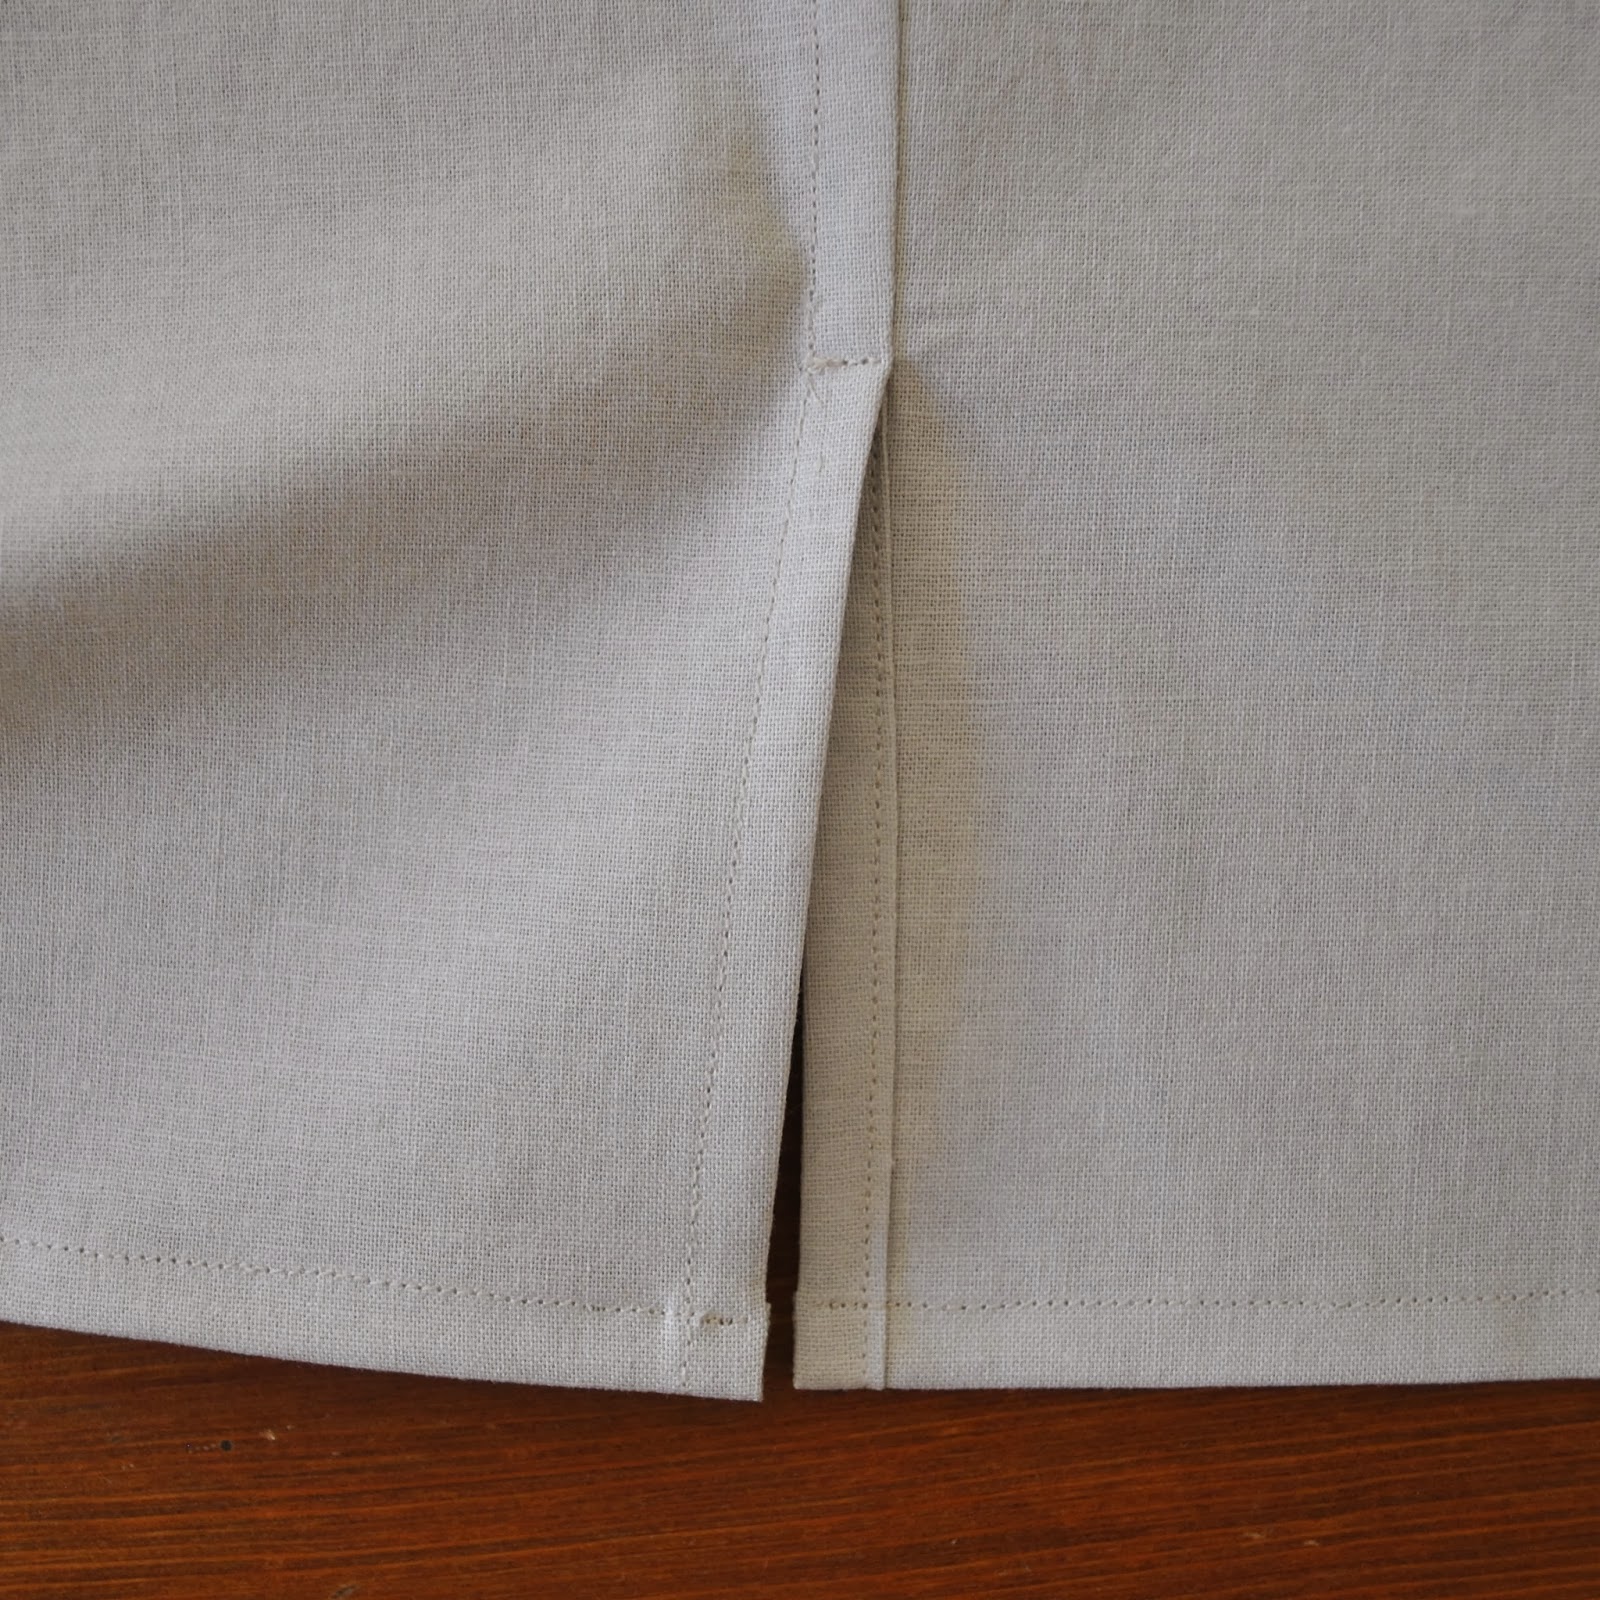
Finished views: below left, the inside; and at right, the outside view
Mükemmel bir iş! Süper.
Thank you,thank you, thank you Carolyn! I'm printing this tutorial and storing it in a little box right near my sewing machine. I only have a couple tutorials in that box, but I use them constantly. Thank you once again for taking the time to make this tutorial.
Have a wonderful Christmas!
Very nice finish Carolyn and Merry Christmas!
Thank you Carolyn, such a useful tutorial, beautifully explained.
Carolyn, those sharp scissors are more than half the battle. Neat tutorial!
Amazing tutorial!! Thank you so much!
Thank you so much Carolyn, for all you share. I learn so much from you, and am inspired always. Merry Christmas to you and your family!
Crystal clear. Thank you for this excellent tutorial, Carolyn.
Thank you!!
Great technique! Perfectly explained, I'll try this next time!
Gorgeous finish!
Wow! Looks fantastic! I am so impressed by your craftsmanship. (Craftswomanship?)
Merry Christas Carolyn! Thanks for all you share on your blog.
Just love this finish ~ thanks for sharing! Merry Christmas and I hope Santa is good to you … J
You are a gem, thank you so much, another post I will be referring back to many times. Wishing you and your family a wonderful Christmas and all the very best for 2014.
beautiful finish!
Thanks Carolyn – I will be trying this so thank you for sharing.
You are such a great sewer! Your photos are always very helpful and easy to follow. Thank you! I love following your blog!
Very clear tutorial, thankyou! Do you have a special flat felling foot? I only read about them recently…. Or is your regular foot just fine? Happy Christmas, hope it's nice and warm in Perth – for once we get a Christmas over 30 here in Melbourne! 🙂
Thanks FabricTragic; I just use a regular sewing foot 🙂
Your tut
Carolyn your tutorials are my go-to when I am looking for good finishes. Thank you for taking the time to take us through precise step by step points to get professional results.
Hi, when you posted your shirt the other day, I was going to ask for a tute. Thank you very much, it's a really nice finish.
Wow! That finish is incredible! I'm always so challenged with the flat-felled seam that I broke down and special ordered some for my machine.
Excellent – thanks for the great photo walk-through of this technique!
thanks a lot for charing this! your work is so neat, it's amazing 🙂
Hey pesto – great technique!
Thankyou for this tutorial- I’ve been searching high and low for some guidance around the lapped seam. Could I apply the same principle to inserting a zip to a lapped seam? thankyou :))))))
Hi Carolyn, you’ll be happy to know this tutorial is still useful in 2021 – I haven’t been sewing long and this is exactly the trick I was looking for to finish the chore coat I’m currently working on