 Like most bloggers, when taking my pictures I usually try to pick some nice location as a backdrop to my creations, something that has the colours and the “feel” and/or just some general overall appropriateness in subject matter or whatever, that I think enhances whatever it is I’m showcasing.
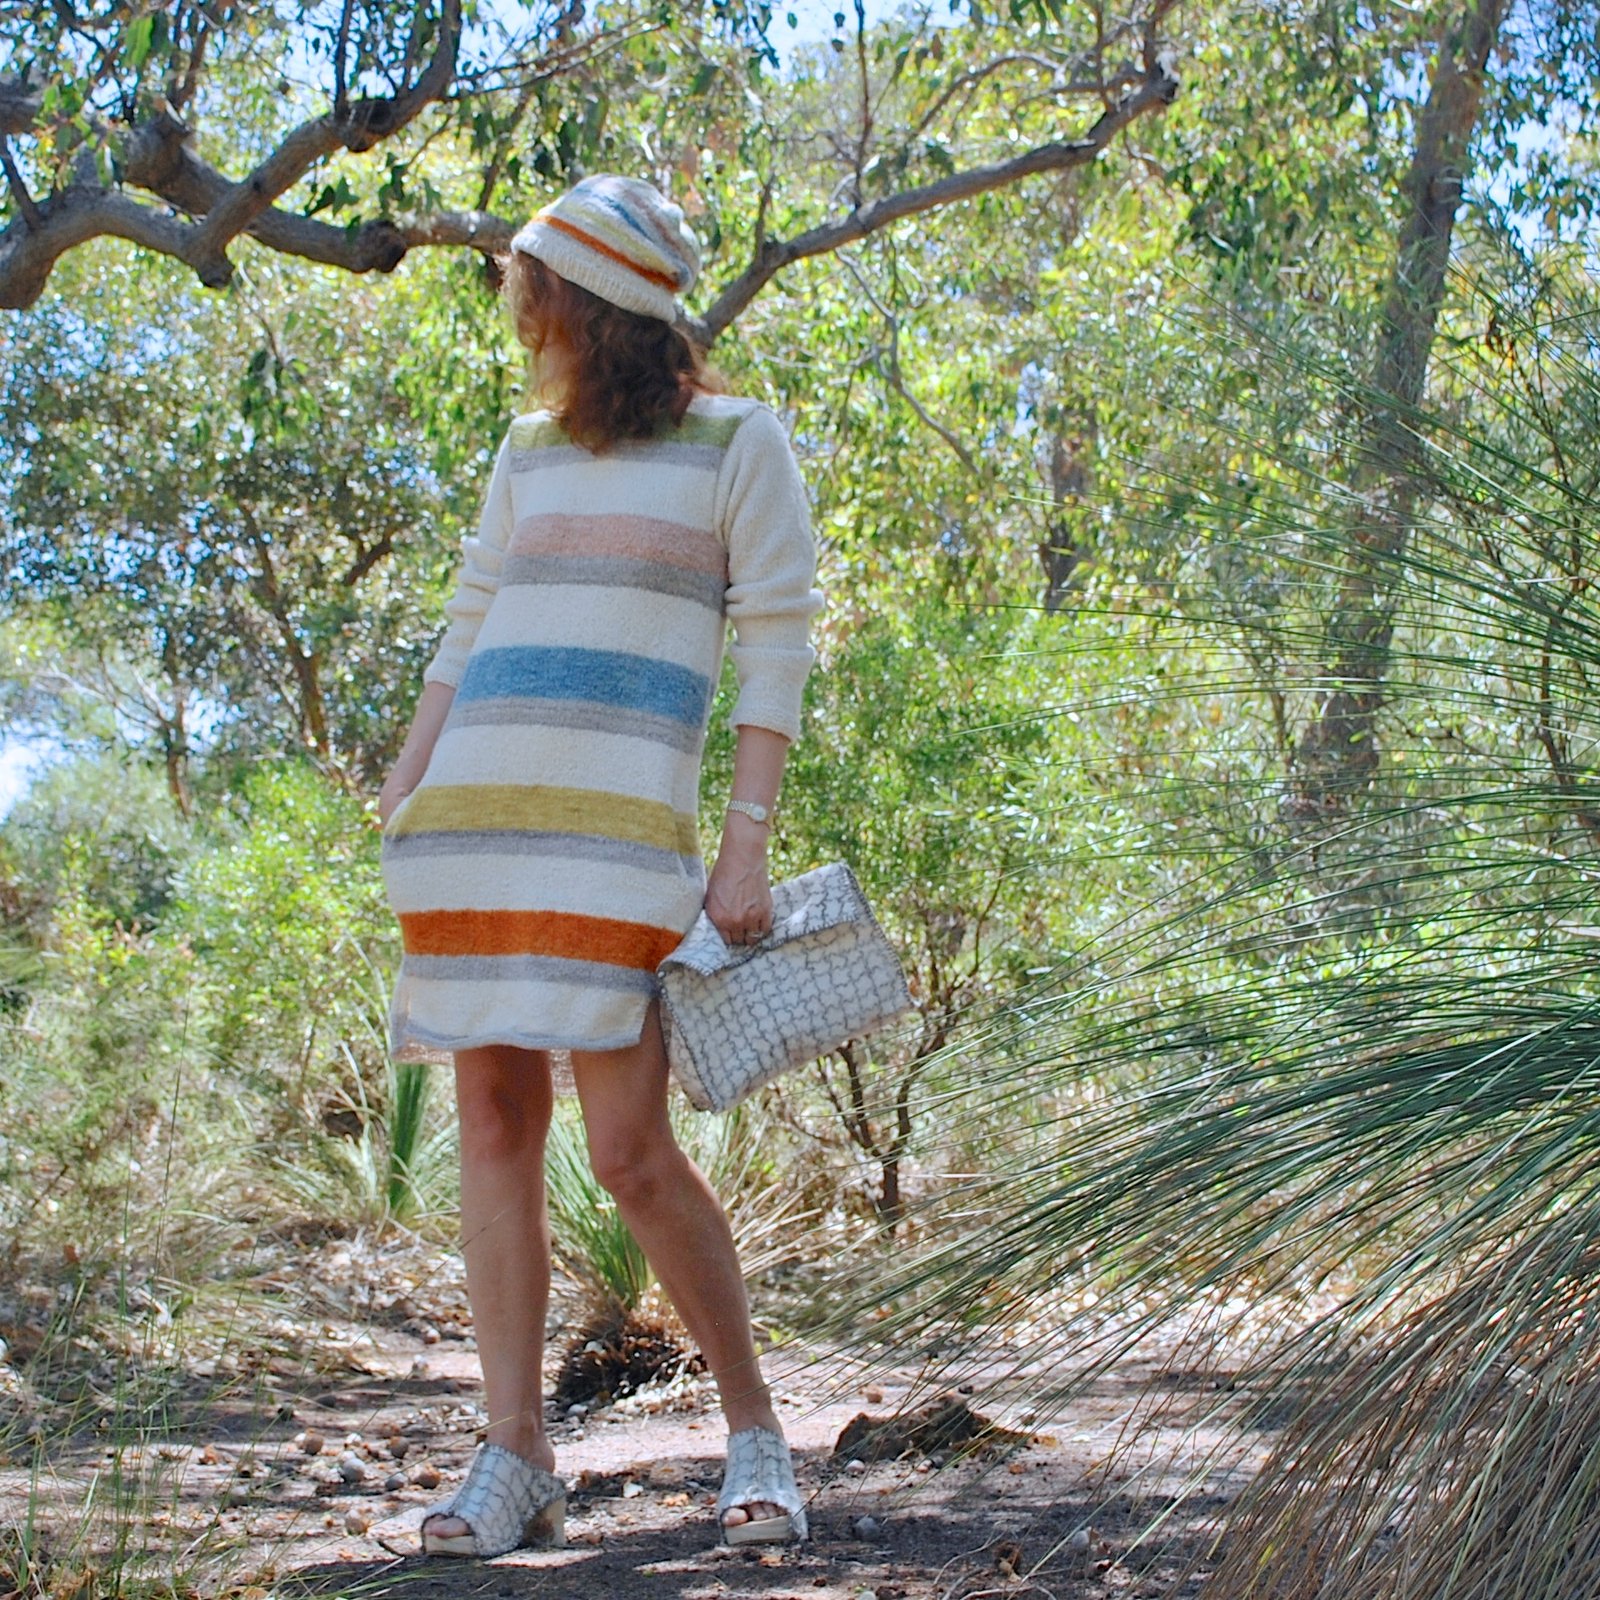
my West Aussie outfit in its place of absolute origin, the West Aussie bush
However, even if you LOVE your background, it can sometimes swallow up your colours into its gorgeousness and your outfit kinda disappears and doesn’t show up very well… And also, sometimes I just like the idea of being able to eliminate the background. I really like that look where you have a black and white background, and the thing you’re showing is in full and glorious colour… and after a bit of fiddling about I’ve worked out an easy way to do it and am sharing it here just in case it helps anyone else who likes this look too! 🙂
SO. You need Adobe Photoshop;
Firstly open your picture in photoshop. Go to Image, Adjustments, and select Desaturate. This makes your picture black and white

Now go to the icons on the left and select the History Brush Tool

On the right in Brush selects, have the brush as the big, round-edged solid one at the top. You can change the width/size of the brush using that size scale just above. For the edges, make it a very small size and zoom right in on your picture so you can get it into the edges and corners as close as possible, getting it all nice and neat and no going over the edges.

For the “colouring-in”, size up the brush width a lot wider, for speed.

Once it’s all done, save it as a new jpeg.
Oh yeah!! Doesn’t it all really POP now?!!!
“POP”: hehe, I never use actually that phrase; I’ve always been like, pop? I heard no pop, am I going deaf? well ahem, ummm ok yes, I am actually… the perils of ageing, you know, but um, oh alrighty then! Guess that explains everything!


Excellent tutorial! I have never really used Photoshop but it is something I would like to learn to do.
How interesting! I have to improve my picture taking skills. Thank you for the tutorial!
Brilliantly explained. I always wondered how that was done so I will definitely be trying it out
Thanks for the tutorial.
you’re welcome! 🙂
this is fun! I’ve done this to remove a lamp cord from a pic 🙂 and to make line art from something laid out on the floor. Love your dress!
thanks coco! that’s great! though I can’t even imagine how you used this particular technique to do those things!! 🙂
That’s so cool! I had such beautiful places to take photos when we lived in Germany, but now we are in a neighborhood in Oklahoma and all I have is my front porch or a wooden fence. Part of the fun of taking pictures for us was walking out to the farm road to do it. This feature would help me!
I’ve never used photoshop either – it’s a bit tricky 🙂 I use paint.net all the time. It’s a free program that’s produced by a university group in the US (you can make a donation to help them out if you choose but it’s not demanded 🙂 ) I took a course on digital photography at a community centre a few years ago which was really helpful and he had us all using paint.net. For those who find photoshop a bit expensive it’s a great way in to fiddling with your photos.
thanks Kathleen! I’ve never tried that site, should give it a whirl sometime 🙂
I forgot to say something REALLY important about paint.net! If you do go to download this program BE CAREFUL to go to the RIGHT place. There are loads of copycat, nefarious sites that try to grab visitors under the same search. I go to my digital teacher’s site to get the download (he’s a retiree that can be trusted 🙂 http://bitsbytes.ca/links.htm ) when you scroll down the page you’ll see the link for paint.net.
Thank you for the tutorial! I haven’t really worked with Photoshop yet, but it is on my list of things to do. Saving this one for sure!!
Thank you for this Carolyn. You have prompted me to explore photoshop and I can now get rid of my hideous backgrounds. Can’t thank you enough! Still loving that dress of yours.
thanks so much Sarah Liz 🙂
Great tutorial, perhaps you missed your true calling? And yes I agree on pop – I have yet to actually say it but never say never I suppose. I’ll resist it though!
And that bush background is gorgeous, coloured or not, perfect to show of your beautiful colours.
That is a great idea, thank you for sharing under explaining Carolyn! I watched ‘Community’ a lot and so I’ve heard a lot of ‘pop’ recently 🙂
Thank you for sharing this technique – so cool.
This is an amazing use of photoshop for designing of handmade dresses. Great work
What a neat technique and you made it sound so easy. Photoshop has always seemed a little (well, okay, monumentally!) arduous of a learning curve for me, so the most I’ve been able to understand is Photoshop Elements 14. Might need to think more about the full Photoshop software someday. Hmmm.
So well explained, thank you.