Macarons!

I’m feeling so clever, right about now  🙂
Please let me affirm, I am NOT a good cook, in fact I am truly disastrous in the kitchen, hehe.
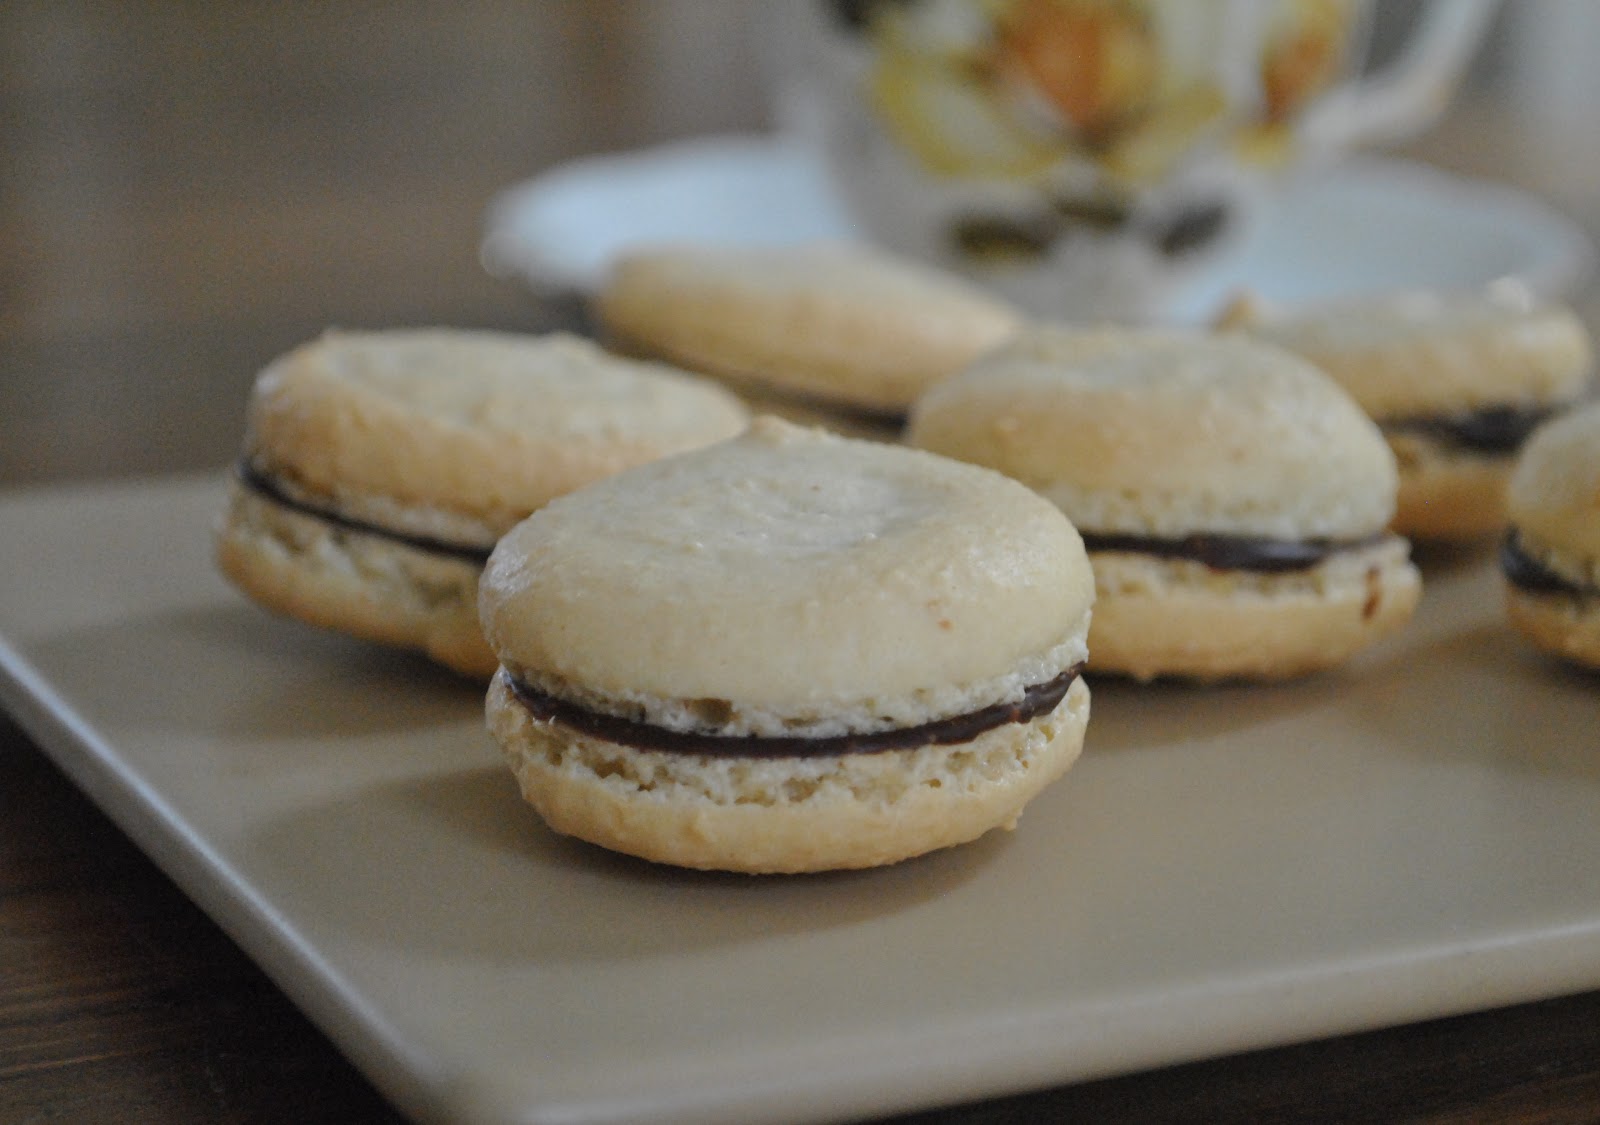
But LOOK!
I found this terrific recipe on homerunballerina (I love her blog, even though I am a horrendously bad cook her recipes are ab fab) and felt emboldened to give it a go.
Now, confession time, my first batch following the linked recipe exactly and to the letter was pretty horrible…  I am thinking though it might have been due to the difference between Australian ingredients and US ingredients, maybe? maybe not?  When we lived in the US I did find that some common ingredients were very very different from ours with the same name.  Some ingredients commonly used here in Australia, for example self-raising flour and golden syrup (and that is just a few of many) are simply not available at all.  A lot of my recipes that worked a charm here at home just did not work in the US.  Particularly baking and cake-y sorts of things.
Anyhoo I made a few minor changes to Audrey’s recipe, both to the macarons, and I made a much thicker ganache too; and my second batch looks and tastes pretty darn goooood if I say so myself! so this might be a good recipe for other Aussies and New Zealanders to try out.
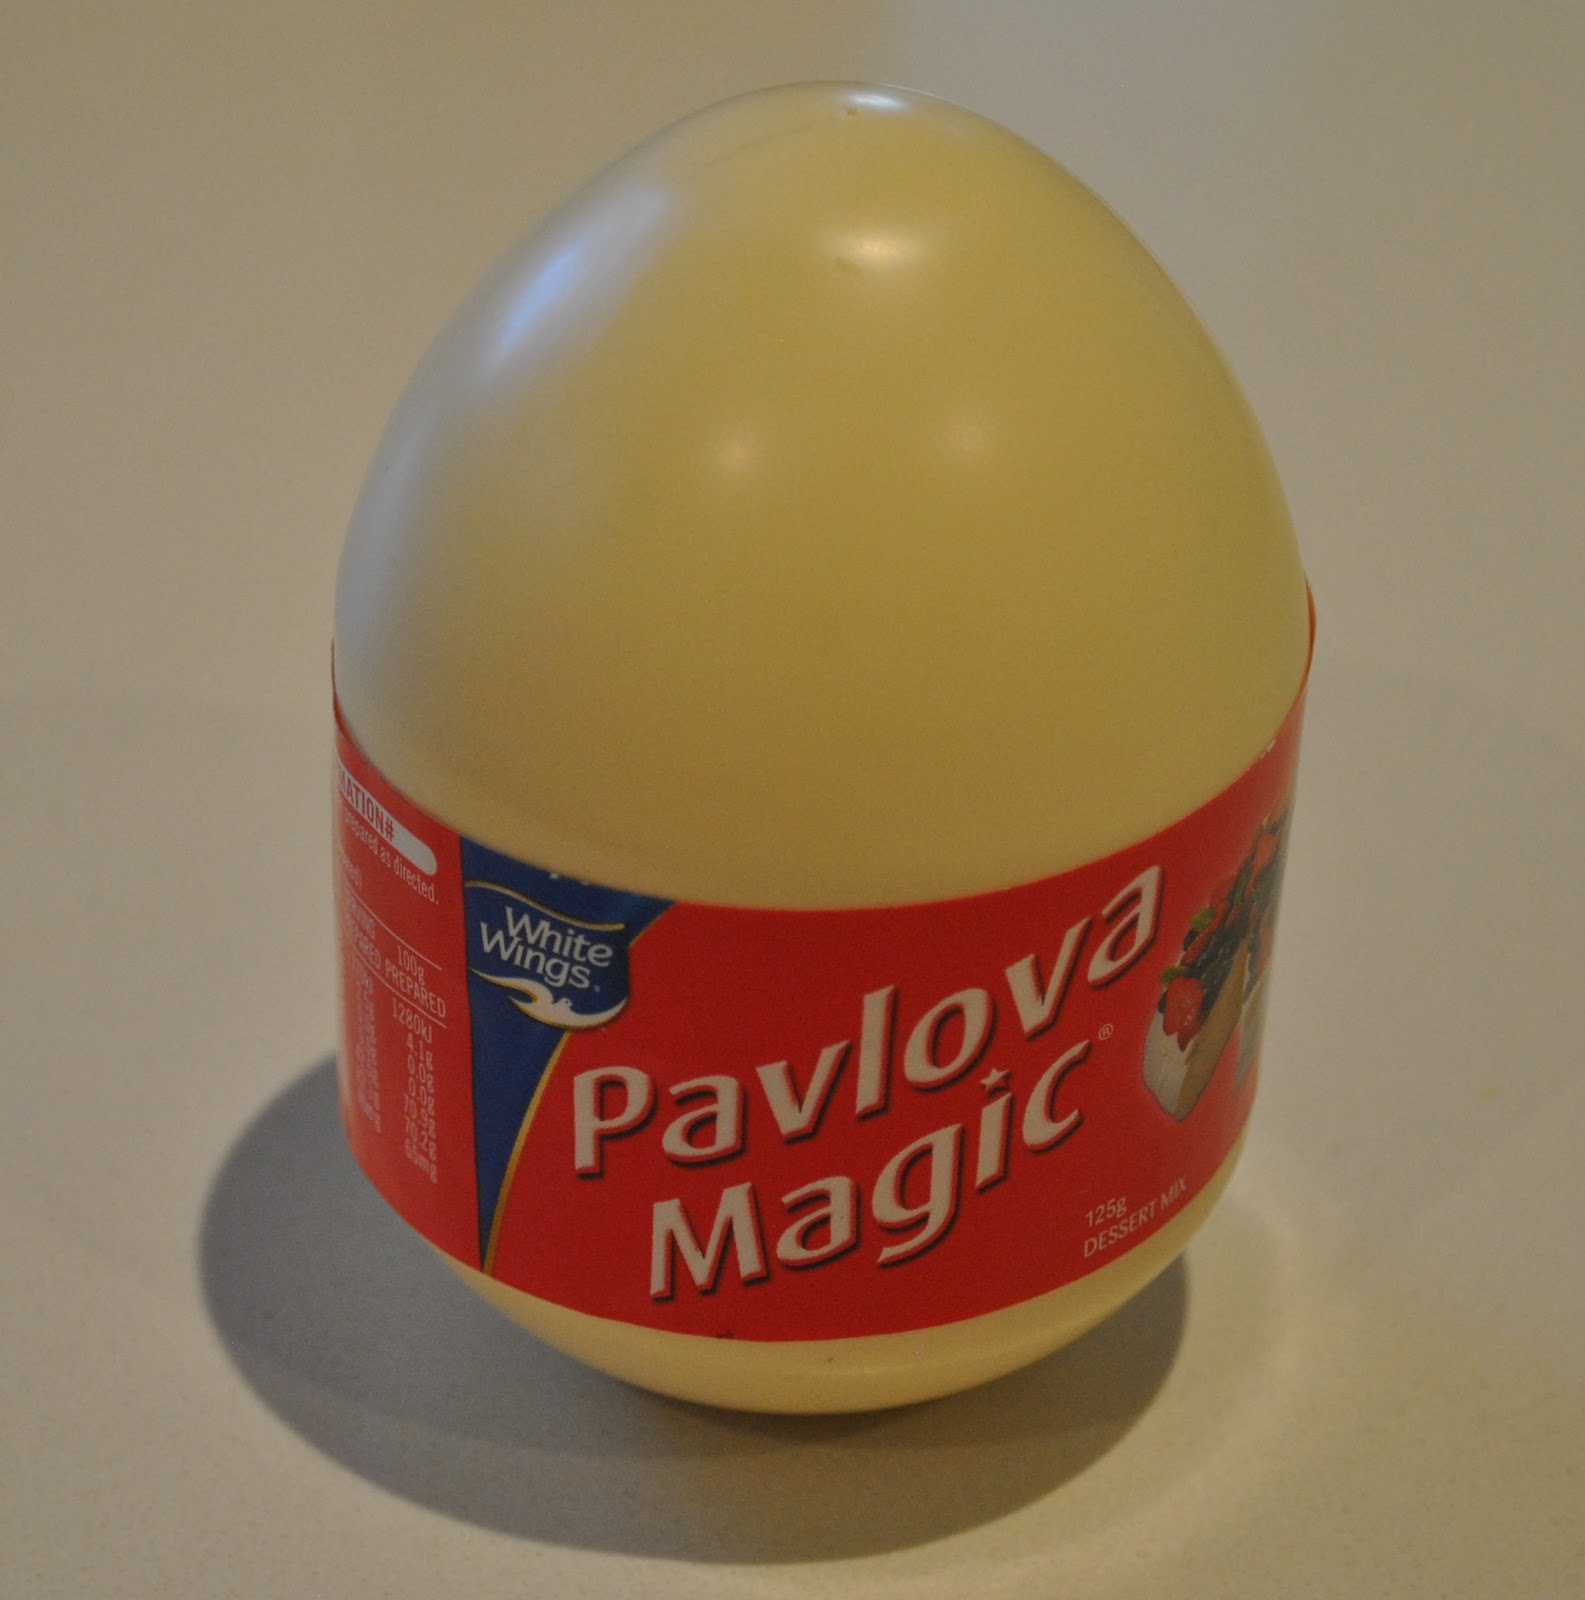
The original recipe specified egg white powder, and I have no idea where or even if one can get such a thing here in sleepy lil’ Perth.  I substituted this stuff called Pavlova Magic, which contains powdered egg white along with other things.  It seemed to do the trick.  It is still a gluten free product, which makes the whole entire recipe gluten free; a definite plus!
My modified version of Audrey’s recipe…

Vanilla macarons with dark chocolate ganache 

3 egg whites, allowed to sit for at least an hour
30g castor sugar
5g powdered egg white (if you can’t get it, Pavlova Magic works)
125g almond meal
200g pure icing sugar
1/2 tsp baking powder
1/2 tsp pure vanilla essence

Sift the icing sugar and baking powder and stir through the almond meal.  Combine castor sugar and powdered egg white (or Pavlova Magic) in a separate little bowl.
Whisk the egg whites until firm and stiff enough to keep its shape when you turn the bowl upside down, I prefer to whisk by hand.  Gradually add the castor sugar/powdered egg white mix whisking continuously and vigorously after each addition.
Add the icing sugar/baking powder/almond meal mix in five batches, stirring until mixed each time.  Lastly, stir in the vanilla essence.
Transfer mixture to a piping bag and pipe rounds onto a baking sheet or baking paper, leaving an inch between each round, and let them sit on the bench for at least another hour or until they have developed a “skin” and do not feel sticky to the touch.  I accidentally forgot mine and left them sitting for over two hours, but apparently that is a good thing  🙂
Bake at 130C for 5 minutes, turn the tray around, bake for another 5 minutes then remove from the oven.  Slide the baking sheet off the tray and onto the bench; partly so you can cook the next batch, but also the cold bench stops the cooking process in its tracks.  When they are completely cold, peel them carefully off the paper.

For the ganache:
150g dark chocolate
75mL whipping cream
Bring the cream to a boil, then take off the heat and add the broken up chocolate, let it sit for a minute then stir in thoroughly to melt.  When it is lukewarm, spread a little onto a macaron like spreading jam thickly on bread, then stick another macaron on top.

Let the ganache set before you let everybody loose onto them.

pinterestmail

Sometimes, doing nothing…

… is all that is needed.
This is a bit of nothingness really, but I am wearing something for the first time here: my floaty cloud of a scarf.  This is one of my Parisian fabric purchases about which I promised to show results… so; ta da!  Fabric in action.
I bought this as a pre-cut piece of divine, very finely woven wool from Sacre Coupons in Paris and showed a close-up of the beautifully wispy, feather-fine weave here.
I didn’t do anything at all; didn’t need to do anything at all to this length of fabric, I reckoned it was simply perfect just as is.
Oui?

Details:
Scarf; a length of finely woven pure new wool, with the edges slightly frayed
Dress; the “hole” dress from the Japanese pattern book Pattern Magic by Tomoko Nakamichi, of charcoal wool mix, details here
Top; sexy woman (second hand)
Tights; Spencer Lacy
Shoes; Django and Juliette, from Zomp shoes

pinterestmail

A Man-hoodie

I sew mostly for myself 🙂  Now my children are all grown up they select and buy their own clothes, of course.  It’s a rare occasion for anyone to make a request  🙁 although I do so love it when they do.
My husband also doesn’t ever ask for very much for himself either, so when he does then I pay attention because I know it is because he really really wants it.
He had a favourite RTW Tshirt hoodie thing, and he wanted one to replace it.  The new one had to be as close to the old one as humanly possible, please.  The old one was thin and brittle from washing and all stretched out and sad, and had some stains on it since as it was truly his favourite favourite Tshirt of all time, he has worn it for everything, including the day he applied wood stain to a set of jarrah chairs.  Woops!  And there were holes too.
Finding the perfect fabric for Craig’s Tshirt has become something of a quest over the past few months.  Seriously, I have searched and searched, and so has he.  In the meantime the old Tshirt got even more truly horrible….
When we were in Europe and visiting the occasional fabric store together, I set him the task of finding fabric for his shirt.  Have you ever asked a non-sewing person to choose a fabric for some garment?  It is at these times that one starts to realise that one has actually learnt some fundamentally important things after years of sewing after all… like that a knit is a knit and that a woven is not going to ever do the job of a knit, no matter how gorgeous it is.  He had a thing for the lovely pin-striped linens in Milan and kept choosing these as the fabric for his new Tshirt.  I explained the difference, and sent him back off to look for cotton jersey knits.  He would come back, triumphantly bearing another bolt of pin-striped linen.  Sigh.
I think we had both started to wonder if I would ever make the Tshirt, when I spotted it.  In Spotlight, of all places.  The perfect fabric.  Really nice quality cotton jersey, in a nice manly pinstripe, in nice manly shades of charcoal and black.  Sheer unadulterated perfection!  I couldn’t believe my luck and I reacted like a frog’s tongue to a passing fly…  pow! the fabric was snatched up and clutched in a death grip to my chest and I rushed straight over to the cutting counter (maniacal witch-cackle mentally sounding in my head)
I drafted a pattern by laying down the old Tshirt and drawing around it.
It does have a pretty cool hood actually… I was intrigued when I inspected it closely and pretty excited to see it drawn out flat.  The hoodie has three pieces; the conventional two “hoodie” pieces cut somewhat shallower than normal, and another self-faced front piece shaped like the letter “U”, that becomes a sort of casing/collar on the front.  I really like this feature, and will probably use it over again.  There are two little holes in it for the drawstring, and I finished the edges of each hole with miniature blanket stitches, having newly re-discovered my latent embroidery skills, hehe  🙂

The self fabric spaghetti drawstring is a long strip of fabric; I folded the two long sides in evenly as I was going along, guiding it through the machine on zig-zag stitch.  The fabric wanted to curl in on itself anyway.

There is a kangaroo pocket on the front, and a deep “Metalicus” band around the lower edge.  The sleeve hems are finished with my twin needle.  I stabilised the shoulder seams with strips of Seams Great (thank you velosewer!) and double stitched the neckline seam down to the back for stability and to lessen the chances of the back neckline stretching out.
Now the favourite old Tshirt looks tired and bagged-out and kinda disgusting compared to the svelte new one in nice new firm fabric!  

the clone and the clone-ee

He is very happy with the new shirt, therefore I am very happy too!

pinterestmail

Bees on white cotton

(to be sung to the tune of Knights in White Satin, of course  😉  )
I was quite taken with the grub roses kbenco has been embroidering onto her knits, and was inspired to follow suit…  so for my latest lingerie set I delved deep into my memory banks and dredged up a few rusty ol embroidery skills…  
There is a single fat little bumblebee on each item.
Tres cute, no?!

The bra pattern is KwikSew 3300 (my review of this pattern here), and the two pairs of matching undies are made using my swimwear pattern, McCalls 2772 view E.  Yup, exactly the same as my previous set.

I used a soft ivory cotton knit from Spotlight.  It is absolutely lovely stuff, but I have only the smallest issue, in that the fabric only stretches one way, so while it all fits just fine it is ever so slightly less easy and comfy than my grey jersey set.   I positioned the pieces so the stretch went where it counts, but I definitely feel a bit more firmly held in place, so to speak.  Maybe that’s a good thing…. 🙂
The fabric is quite soft and spongy, almost with a brushed quality; so to embroider my bees onto those fronts of the undies with just that single layer of the fabric, I ironed a small square of iron-on interfacing onto the back where I wanted my bees positioned.  Then I embroidered the bees, and then ironed a second small square of iron-on interfacing over the back for a neat finished look, ironing carefully so as not to squash the embroidery too much.  I realise the second squares will probably disappear in the wash some day, that iron-on stuff is notoriously prone to unsticking pretty quick.  But it will be fine for a while and I can always iron on a new patch.  The bra joiner bit, having a piece of woven cotton as interfacing sandwiched between the two layers of knit, was easy to embroider on just as is.
For the top-stitching I tried out another of my machine’s decorative stitches… I like how those jagged spikes sorta references a row of bee’s stings.  It’s funny, I use these decorative stitches on my machine like, barely once in a blue moon? and now I’ve used them twice in the past month!  A record!
Oh, and in response to an email question from Sue…  thank you for the interest Sue!  I do all my sewing on these two machines, and in the picture of my Janome in that post you might just be able to make out the small selection of embroidery stitches I have on my machine.  It’s not a fancy machine at all, but it has served me very well for me for many many years and has everything I could want in a sewing machine  🙂
pinterestmail

Red Riding Hood

…along with requisite “wolf” hehehe.
This is the latest in my attempts to make usable things out of things not being used….
I pulled out of my bag of toss-outs this oversized cotton cardigan along with another old Tshirt tossed out by Tim.  I’ve struggled with this cardigan… the cheerful warm tomato-red colour is a plus but the boxy shape and massive size has always been a problem.  Since day dot, really…  I bought it in 2001; my first mail order purchase whilst we were living in the US.  I was a mail order newbie, and just assumed naively that a small/medium would probably be my size.  When it arrived: well, it was ridiculously big!
Lesson learned!  Incidentally, the lesson ultimately learned was “don’t buy mail order, ever”… but that’s a whole other story  😉

Anyhoo I did not think or know at the time how I could go about returning stuff… so it stayed.  The armpits hung down below my bust level and I had to wrap it half again around my body and tie a belt over, to keep even halfway warm in it.  Stylish, not.  It’s basically been in the camping/washing the car and/or the dog in category since new, and then migrated to my re-fashioning bag at least a year ago.
Using my own trusty custom fit Tshirt pattern as a guide; I cut up the cardigan, re-sized the pieces and sewed it all together again: only keeping the shoulder seams of the cardigan intact, since they were already nicely re-inforced.  Also I kept the neckline band and the wrist bands untouched and intact, and the lower band is also original although taken in with the side seams. When refashioning something new outa something old, it is a good idea to keep and incorporate into the finished garment as many of the factory finishes as possible; it ends up looking a lot more professional and pulled together.  Plus makes it a heckuvalot easier.
I’m slightly obsessed with hoodies lately.  Hood = cool, right?  Right!
The red Tshirt was getting pretty fragile and the fabric was not going to hold up to anything heavy duty, but since a hood is something that just hangs there decoratively most of the time and is not “worn” very much, so I thought the fabric might hold up to the task.
Now my hood pattern from KwikSew 3667 is drafted to fit a crew neck, and my cardigan has a deep V neck.  But it is pretty easy to add on an extra wedge section while cutting out, so the hood will fit onto the V neckline…

I overlocked the lower edge of my hood and simply stitched in the ditch along the outside of the cardigan.

I removed the original buttons off the cardigan (green plastic, which I never really liked either) and sewed in a matching red open-ended zip.
I did have fancy plans to sew on a few decorative pockets cut from the Tshirt also, but after a coupla attempts I had to concede defeat; the Tshirt fabric was really too fragile and they looked muchos hideous.  So the cardigan remains pocket-less.  🙁
Yah, so hopefully the hood might hold up for a while yet.  We shall see.  To be honest, I’m still not head over heels in love with this thing, despite its cool new hood.  Y’know how sometimes something just doesn’t push your buttons, even though it ticks all the right boxes?  It’s “my” colour, it’s got a hood, it fits nicely (now).  It’s got a hood.  Did I mention the hood?  Hoods are cool.  I kinda love the hood.
Well, I guess I’ll look a tad more stylin’ around the campfire than I was before.
I’m counting this one a minor league win.

Details:
Hoodie; my own design, with modified hood from KwikSew 3667, made from an oversized old cardigan and an old tshirt
Tshirt; charcoal and black striped cotton jersey, details here
Skirt;  charcoal stretch jersey, details here
Scarf; details here
Tights; voodoo
Shoes; Django and Juliette, from Zomp shoes

pinterestmail

Spiral leggings


From my first flick-through
the book I always knew this project was a must-make… the spiral leggings on p
52 of Pattern Magic 3, by Tomoko Nakamichi.
The design is, like so many
in the Pattern Magic series, excessively cool.  A sorta a-ha design; seemingly simple and obvious when you see it laid out like this, but nonetheless innovative and edgy.
I know I’ve raved about the
Pattern Magic books ad nauseum over and over again before, but just allow me
just another small rave… every time I attempt something from Pattern Magic I feel
like I learn something new and profound about sewing and fabric
manipulation.  OK, OK, I know several of the designs
in the book are barely wearable, true; but they are without exception exciting
and forward-thinking.  The process is
about thinking outside of the box, getting out of the rut.   The designs are never
predictable, and never ho-hum,  I
love this sort of innovation in my sewing as well as in my wardrobe!
above 2 pictures from Pattern Magic 3
The fabric I used is a deep purple-grey, synthetic stretch knit from Fabulous Fabrics.   Actually, I bought this fabric specifically for this
project, it is exactly what I wanted.   I bought this fabric with my birthday gift voucher,
from a group of my friends; the other piece I bought with this voucher became
my red dress, and I still have some more of this grey stretch left too, to make
something else.  I have the best
friends! 
above; mine
I drew up the paper pattern
but there was lots of fiddly diddling.  I
needed legs both wider and a lot longer than the dimensions stipulated in the
book!  Well, that’s hardly
surprising, really 🙂  Also I mentioned my fabric was exactly what I wanted? well it was, but there was only
one small problemmo… the fabric stretched just one way, not two.  Or is that two-way, not four-way?? I
can never get that right.  But
you’re getting my drift here I hope….
My point is that the “girth”
of the leggings stretches around my legs in some but only some parts of the
spiral.  A minor technical complication…
I also made minor modifications
to the style of the leggings: as follows:
The pattern is for straight-ish
legs with very little tapering; and after the first try-on I decided that I wanted mine to be a lot
more tapered, to be skinnier around my calves and ankles.  It’s probably hard to
tell from the pics but I can assure you they are substantially skinnier than
the book version!
The other style adjustment
which is probably easier to distinguish between the two, is that my
leggings are form-fitting and “rumple-less” about my hips, while the ones pictured on the model in the book have the rumples going all the
way up the side of each hip, right up to the waistband.  Since I wanted to wear mine not as
pants, but as leggings underneath a dress or skirt, I wanted for the top part
to be tight and smooth and have no rumply bits that would bunch up to make my
hips look falsely lumpy and bumpy underneath a dress.  I prefer for my hips to look smooth and streamlined, not
lumpy and bumpy, thank you very much 
🙂   Just
a personal preference there, of course 
;D
Consequently I drafted and
sewed the top part of the leggings to fit my abdomen snugly.  I cut a tall waistband to be 3cm shorter than my natural waist measurement and attached the waistband to the top edge
using this method with no elastic, and they sit up quite securely and
comfortably and don’t feel like they are going to slip down.
I hemmed using the twin needle on my sewing machine, instead of the band suggested in the book.
All in all, because of my 1(2?) way stretch issue and desire for a skinny-leg modifications; I probably tried these on, pinned, took them off, did a bit of basting and tried them on again… at least a dozen times over; but y’know what? I’m perfectly satisfied.  Last year I devised and made
a pair of leggings I dubbed scrumpled leggings, and these ones are satisfyingly even more scrumply!
Details:
Leggings; from p 53 of Pattern
Magic 3 by Tomoko Nakamichi, made of grey synthetic stretch knit
Dress; body &soul, a
thing I’ve had for about twelve years.  I
probably should copy this one over again, I love it so.  One of those RTW things that I love so
much I probably never will part with it!
Shoes; Perrini, had these
for even longer than the dress, probably 20 years!
pinterestmail

Lemons, lemons, lemons…

Like many households in Perth at the mo’ we have lemons.  Lots of lemons.  We are overloaded with lemons.  We have lemons coming out of our ears.  To say I have lemons on the brain is no exaggeration!!
Last week I was sad to see one of the boughs on our lemon tree starting to snap from under the weight of a gazillion lemons… so I salvaged all the ripe lemons off of the bough and got this…

D’ya wanna see something scary?  Even after harvesting all those lemons off just one branch, the tree still looks like this…!

So I am on a mission to USE LEMONS…!
I have made lemon curd.  I checked out recipes on the net and found this one, but then made up my own recipe, which uses the whole egg rather than just the yolk.  I consider this to be a far more usable concept in cooking  🙂

Lemon Curd
rind and juice of 4 lemons
6 eggs
1 1/2 c sugar
125g butter

Lightly whisk the eggs and sugar together in a saucepan, then add the other ingredients.  Whisk continually over a medium heat until the mixture has thickened to a custard-like texture then allow to cool in the pan.  Decant into sterilised jars.

I’ve made about twenty jars of lemon curd and given nearly all away to my friends; and they have been surprisingly appreciative, especially considering most of us have lemon trees  😀

Cassie devised this clever idea…

This is mango jelly, made up with the juice from the lemons plus water up to volume, and poured inside the hollowed-out half lemon shells to set.  It can be eaten by scooping the jelly straight out of the half shells, or cut up into wedges like this.  Looks quite pretty on the plate, don’t you think?… Clever and delicious!

Floral arrangement…

I know I know, this isn’t really “using” lemons since they too still have to be consumed at some point.  But one may as well enjoy the visual beauty of laden branches too, yes?  Alongside there is my newest knitting project, hehehe…

I hesitate to mention this last one, since I get a “look” from everyone irl I have mentioned it to…  I am also drinking a lemon a day…  without any added sugar.  I fully realise how strange this sounds but honestly I am enjoying it now.  It only took a few days to get used to drinking unsweetened diluted lemon juice but now I am acclimatised I cannot imagine going back to adding sugar ever again.  I used to add sugar to my lemon juice, but it always bothered me.  I decided I would wean myself off by gradually reducing the amount of sugar I was adding but then I just decided to go cold turkey.  And it worked!  I am getting a good shot of vitamin C, without the extra sugar.   I am cool with it now.  
Juice of 1 lemon, diluted up to a glassful… 

A glass a day keeps the common cold at bay!

I think it is important to note, I am NOT expecting my family to drink unsweetened lemon juice.  For now it’s just me  🙂  For my family, I have been baking a coupla lemon cakes each week.  It’s a good thing everyone loves them….    🙂
And we are slowly getting through those lemons!
Incidentally, does anyone know a good limoncello recipe?
Now perhaps I should start thinking what to do about this…

pinterestmail

Sleeve

Tattoo-ed sleeves are a “fashion” trend just like anything else, and so hot right now!  (ergo, probably destined to be so not some day  🙂  )  in the meantime I’ve made for myself a new Tshirt that is a nod to the trend…

The sleeves of my Tshirt are cut from an old child’s Tshirt with a graphic print on the front, the second, white sleeve is cut from the back obviously! and the body is cut from another white plain Tshirt, both are recent toss-outs from my boys’ wardrobes.  I got the idea for my new Tshirt when it occurred to me that the print reminded me of tattoos; a swirly print in bright children’s paintbox colours with a thick black outline.

Thinking about a real tattoo sleeve: it continues up and over the shoulder smoothly without interruption; and so I decided a conventional set-in sleeve with the seam on the shoulder would truncate the print and end up looking kinda wrong.  The best style for this look would be a raglan sleeve.
For which I did not have a pattern…
It’s funny; a raglan sleeve, whilst a recognised “thing” in the sartorial world, is very poorly represented in the sewing pattern kingdom, don’t you think?  In terms of population: the almighty set-in sleeve is the over-ridingly dominant species in the gene pool, closely followed by the kimono sleeve and the humble raglan sleeve is verging on being an endangered species!
So I set out to make my own pattern.  Luckily, I have a small raglan Tshirt from  many years ago which has long since passed into Cassie’s possession, so I temporarily repossessed it, and laid it down to trace around the sleeve, and then played around with my own self-drafted Tshirt pattern to fit in the new sleeve with a few minor sizing adjustments.  
So now I have a raglan Tshirt pattern  🙂  
The raglan sleeve is a very tall pattern piece compared to one’s common-or-garden, set-in sleeve pattern piece, so it took up practically the entire Tshirt!  But I tried to get in as much of the design as possible…  and I love the wide and flattering boatneck-line.   I preserved the lower hemlines of both the Tshirts intact to be the new Tshirt’s sleeve and lower hemlines respectively.
My family have all voted this their favourite of my new Tshirts!

Details:
Tshirt; self drafted, made using two old Tshirts
Jeans; Burda 7863 modified, black stretch corduroy, details here
Boots; Andrea and Joen
Sienna; wearing her own fur coat

pinterestmail
Switch to mobile version
↓