Tag Archives: Pattern Review

Burda 7834, a pattern review

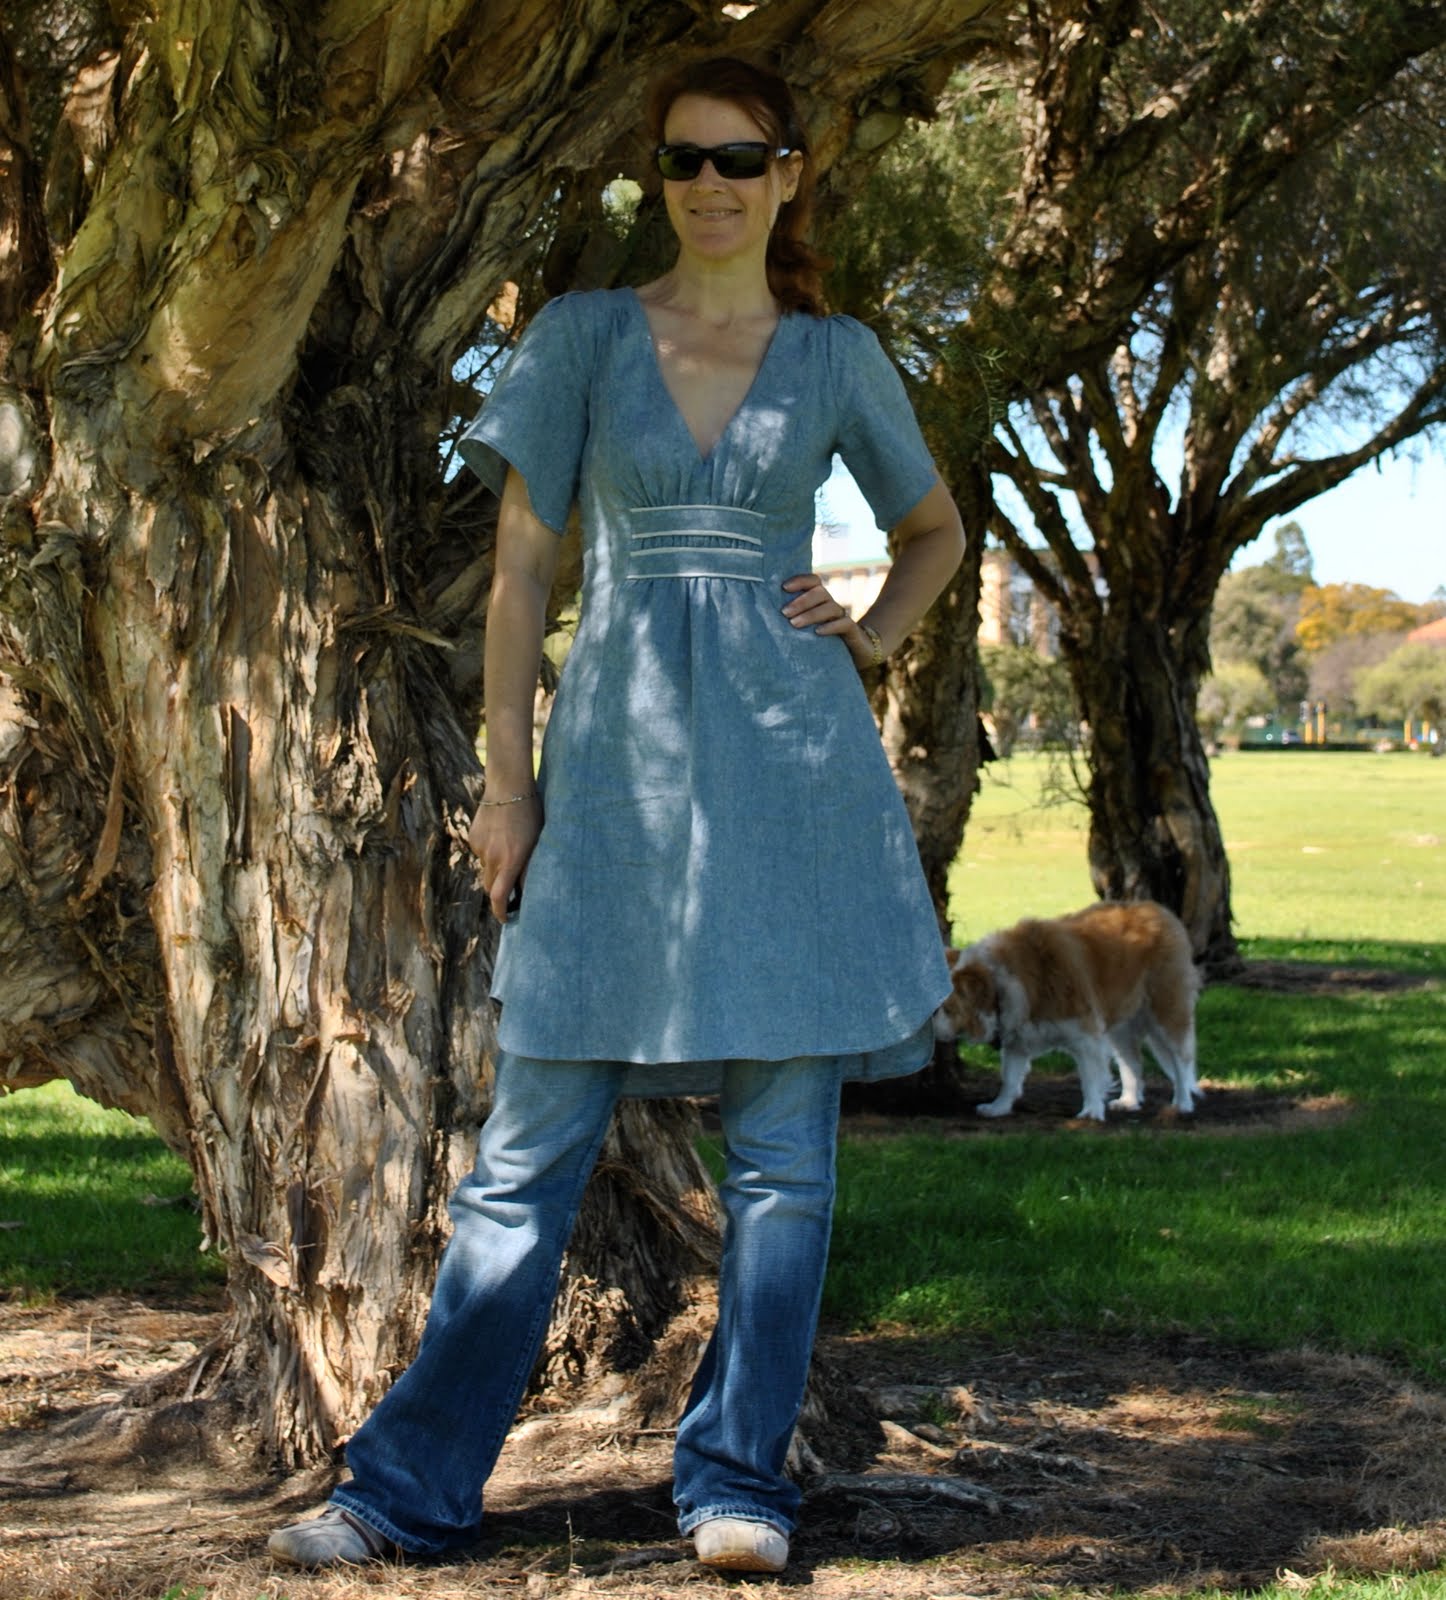
I’ve made another little top using Burda 7834.  It is such a quick and easy little pattern, I can see myself using it a few more times, in spite of the fact I will have to re-grade it each time I use it, as Cassie cut it out to a smaller size than I use…  well, it is her pattern so I suppose that is OK…!
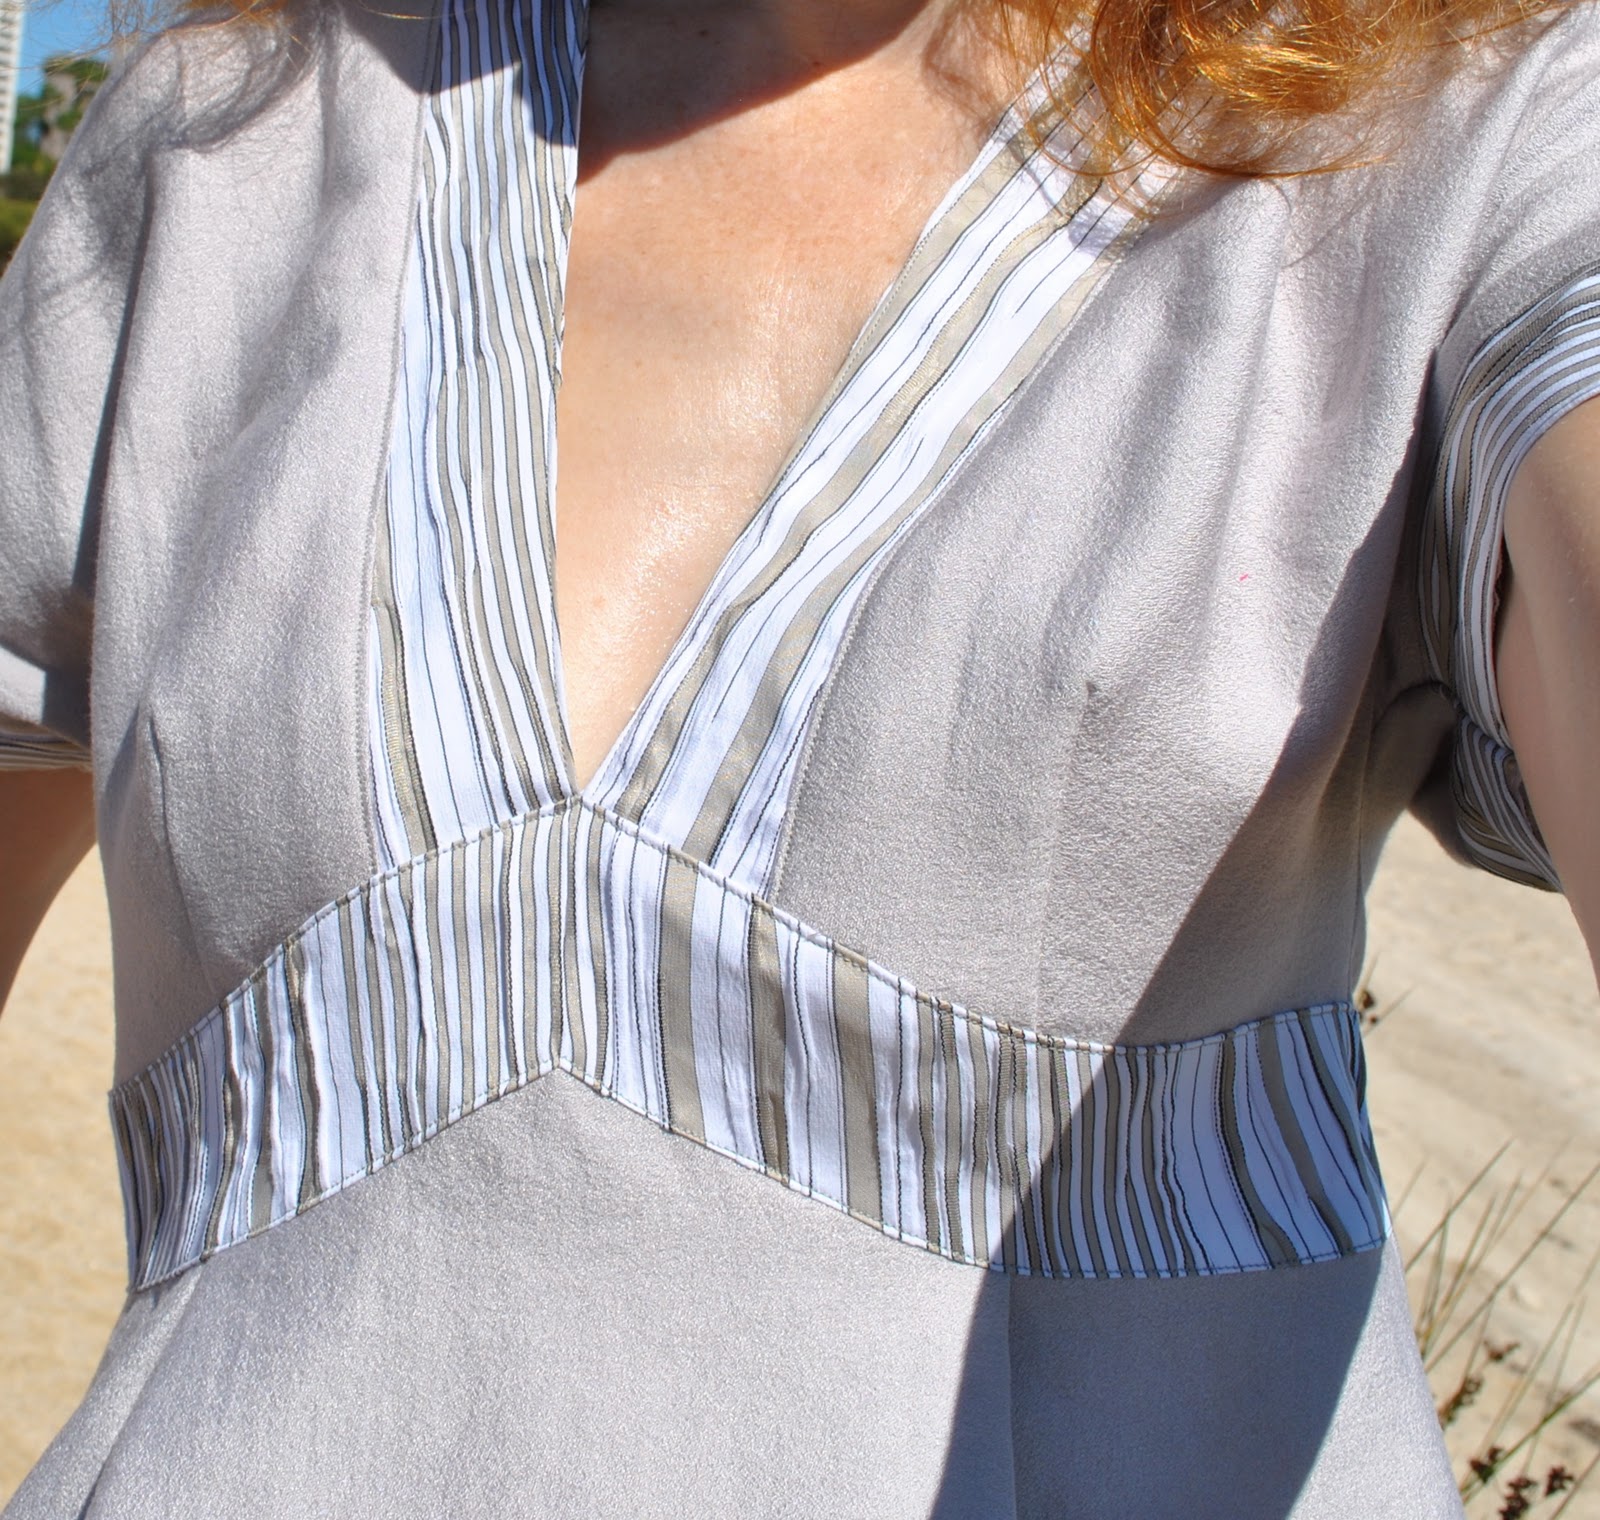
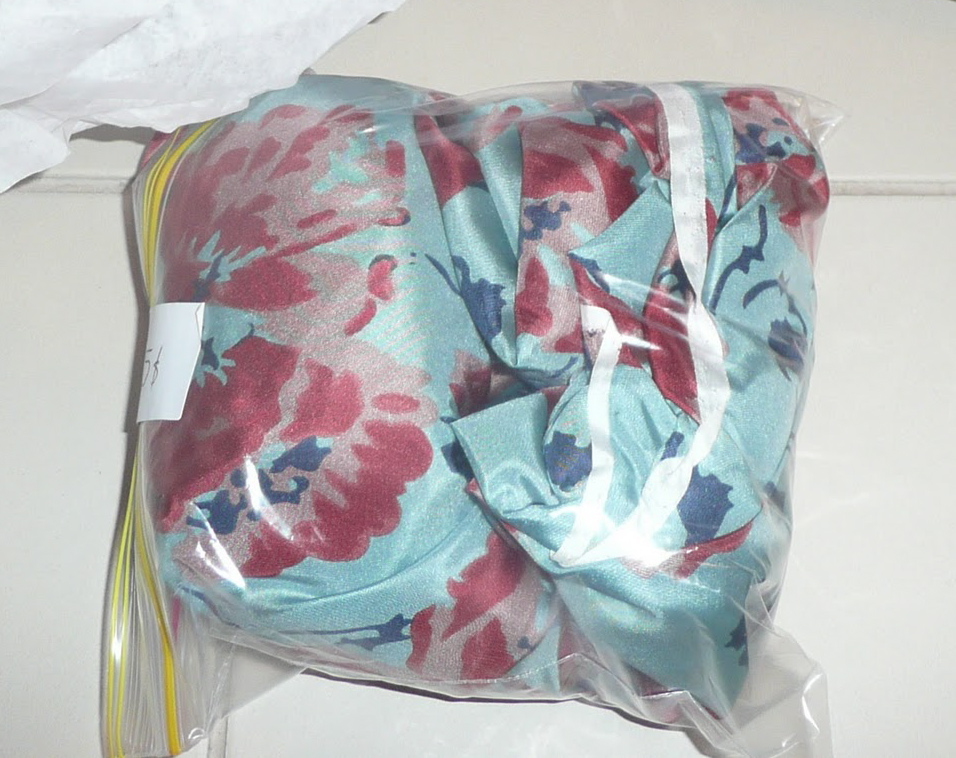
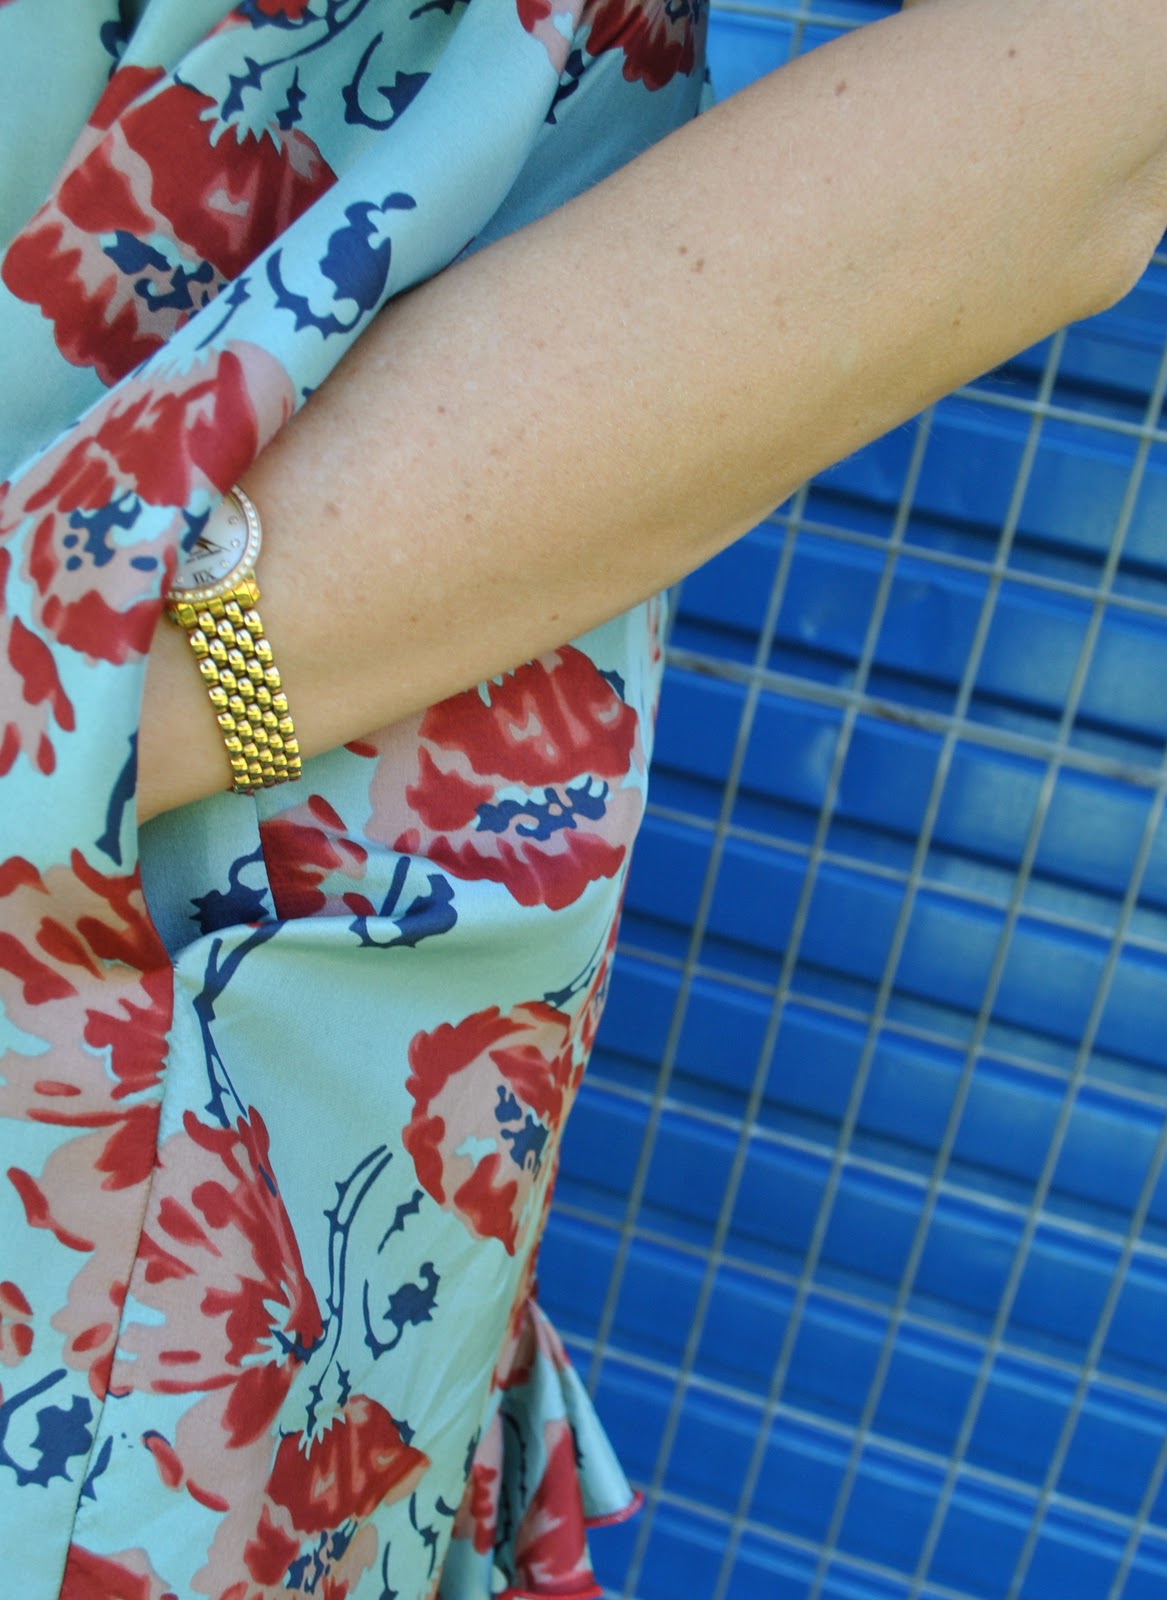
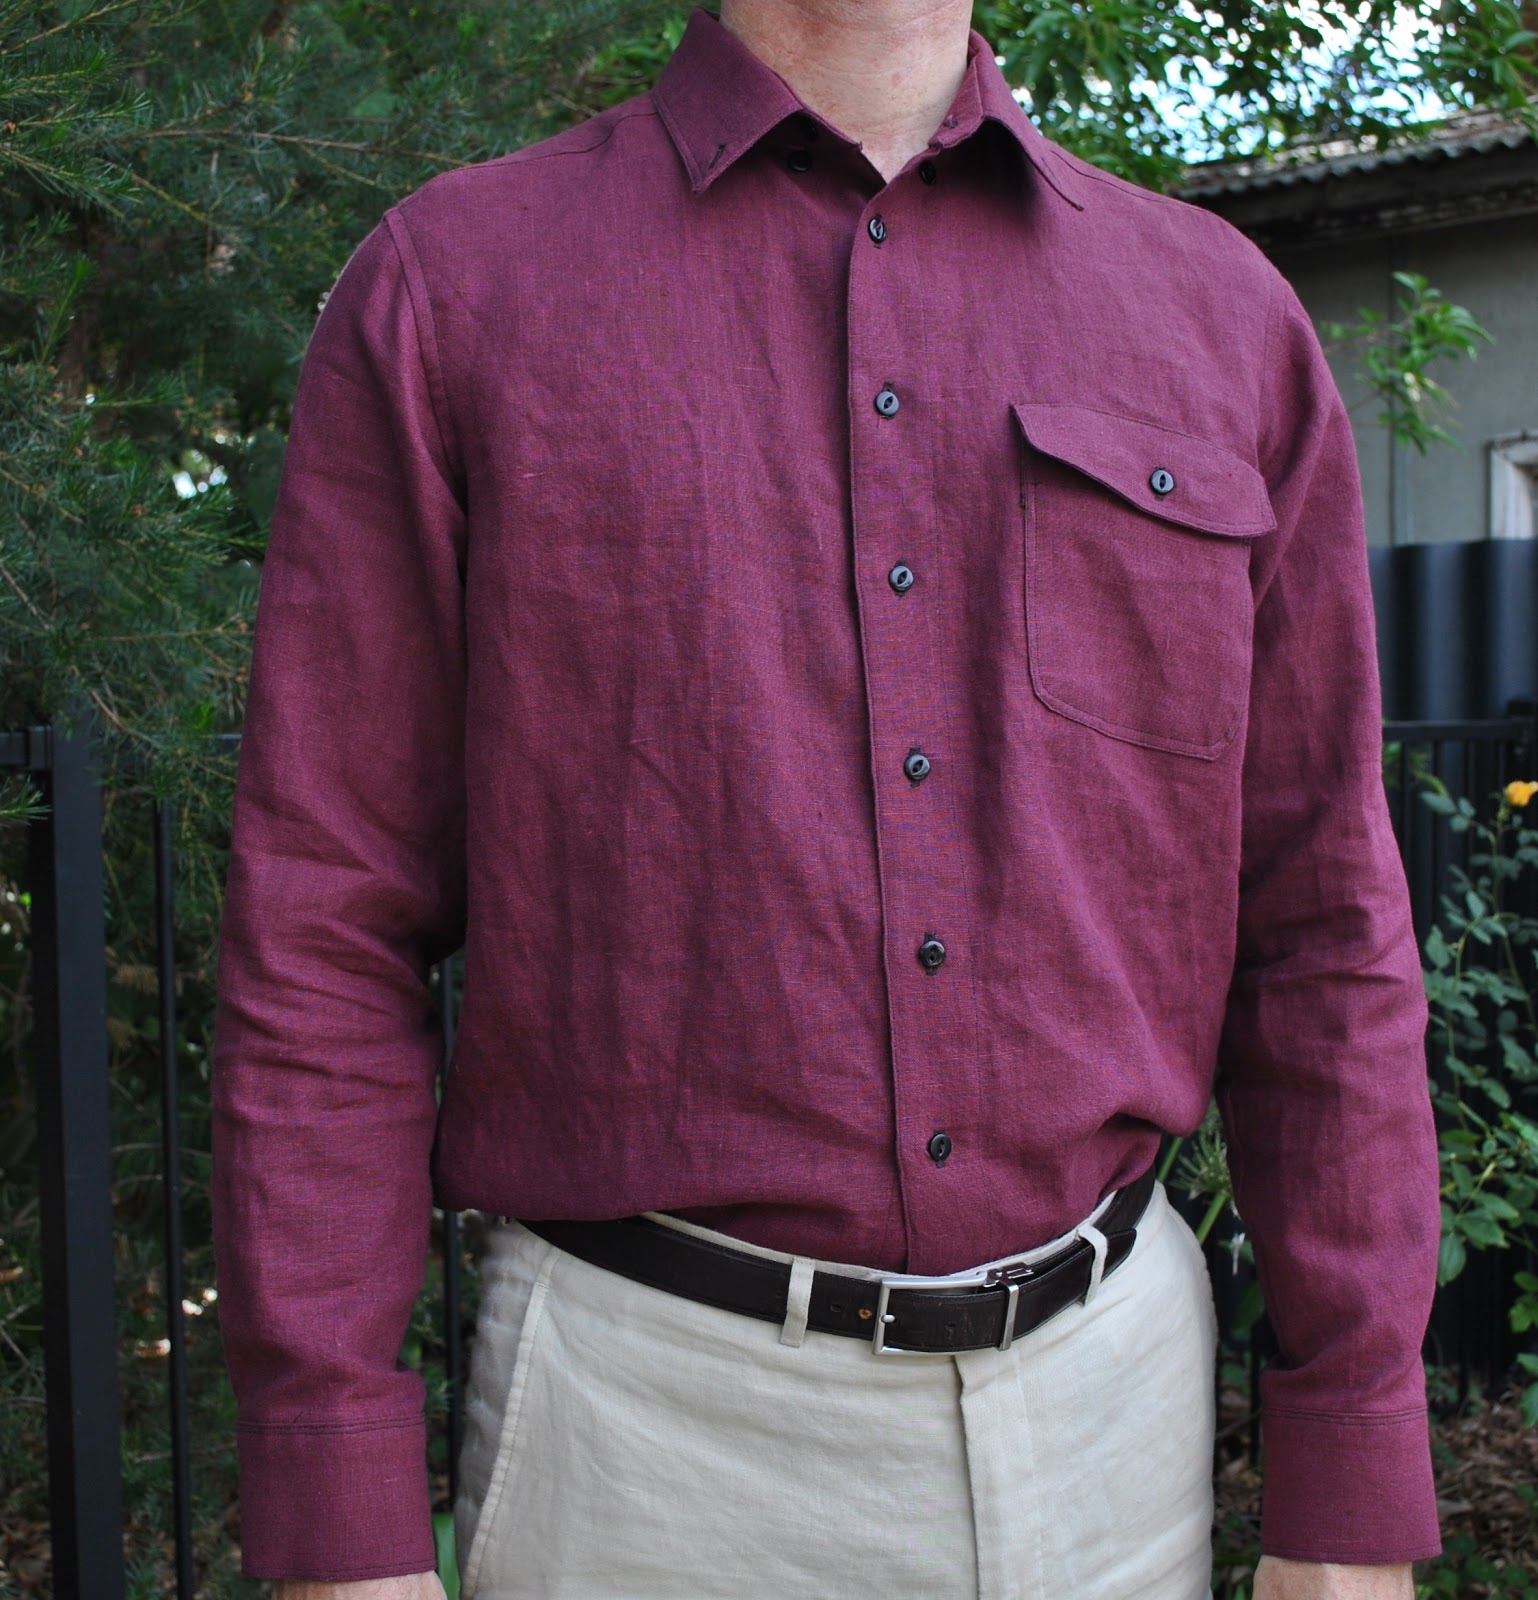
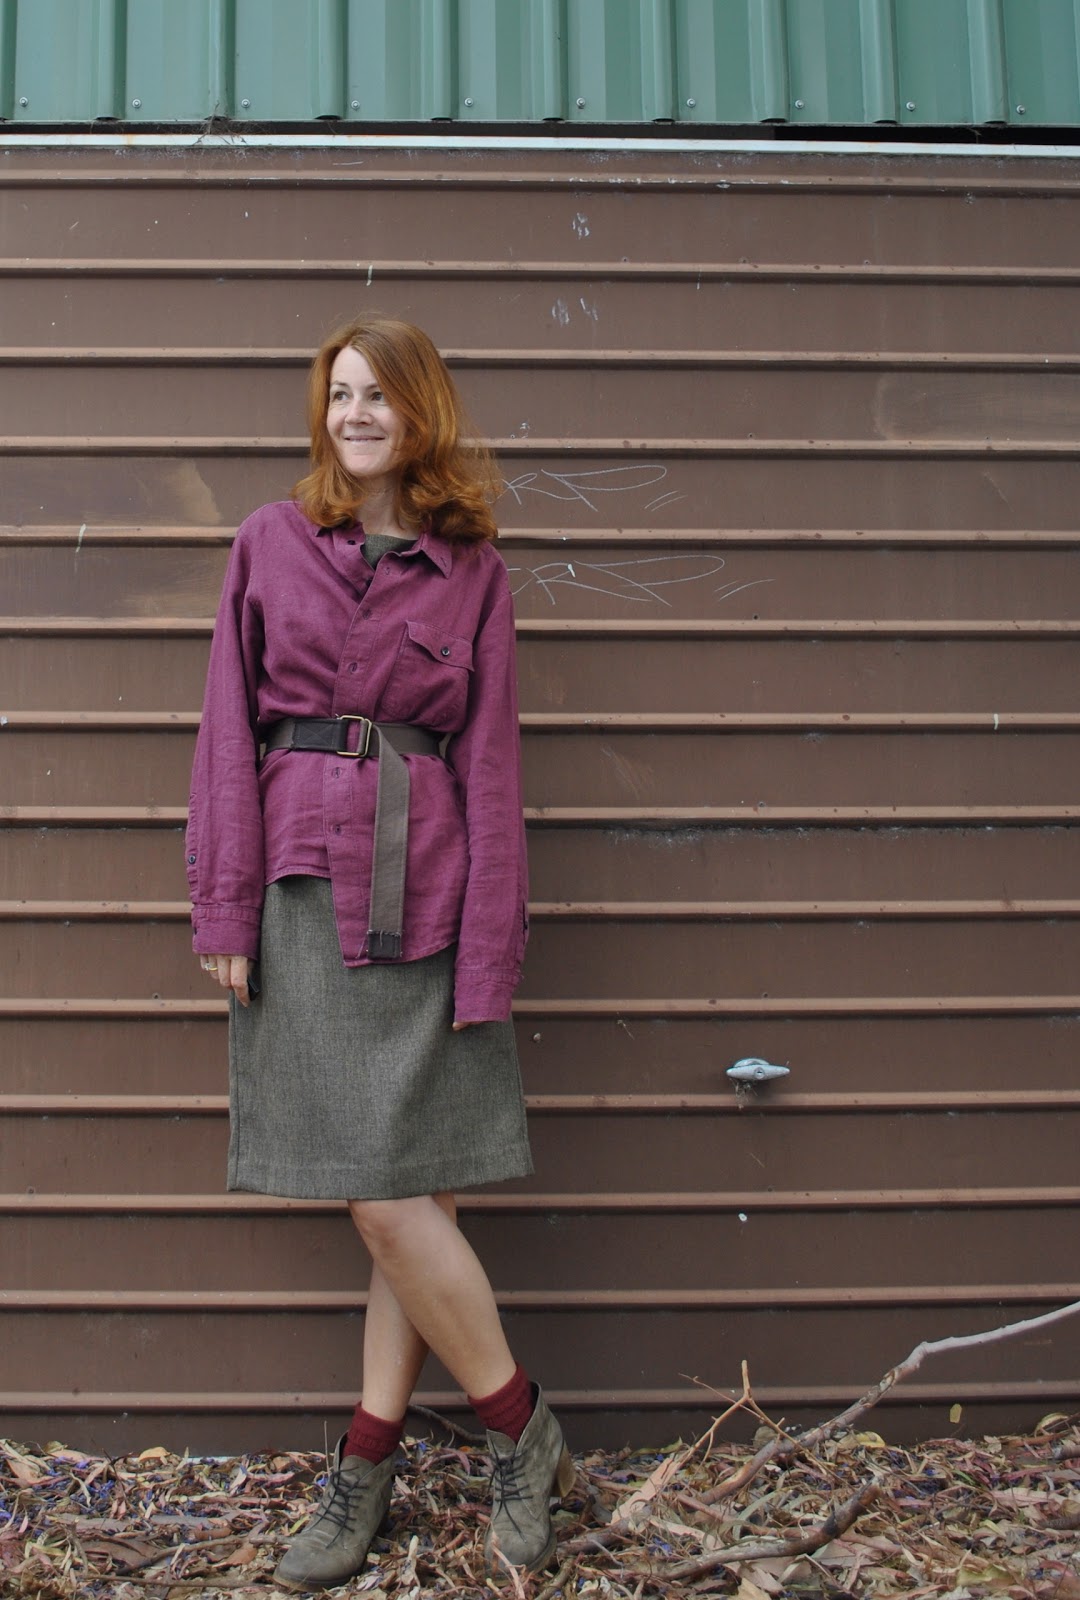
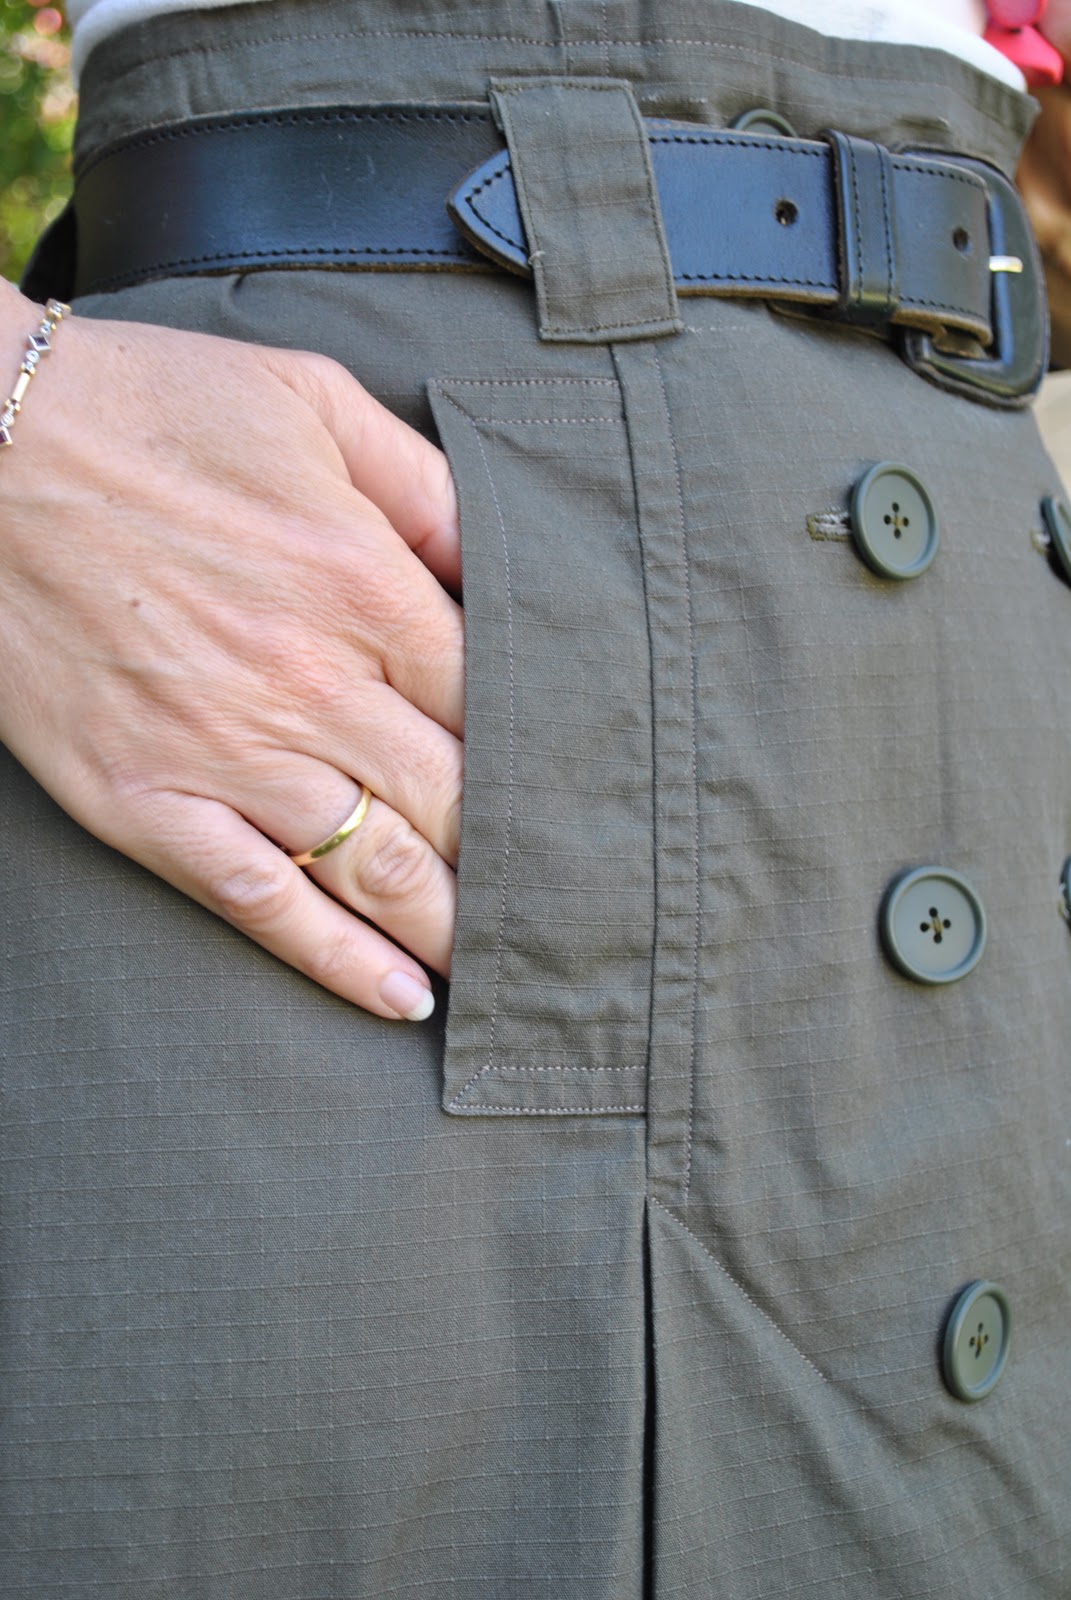
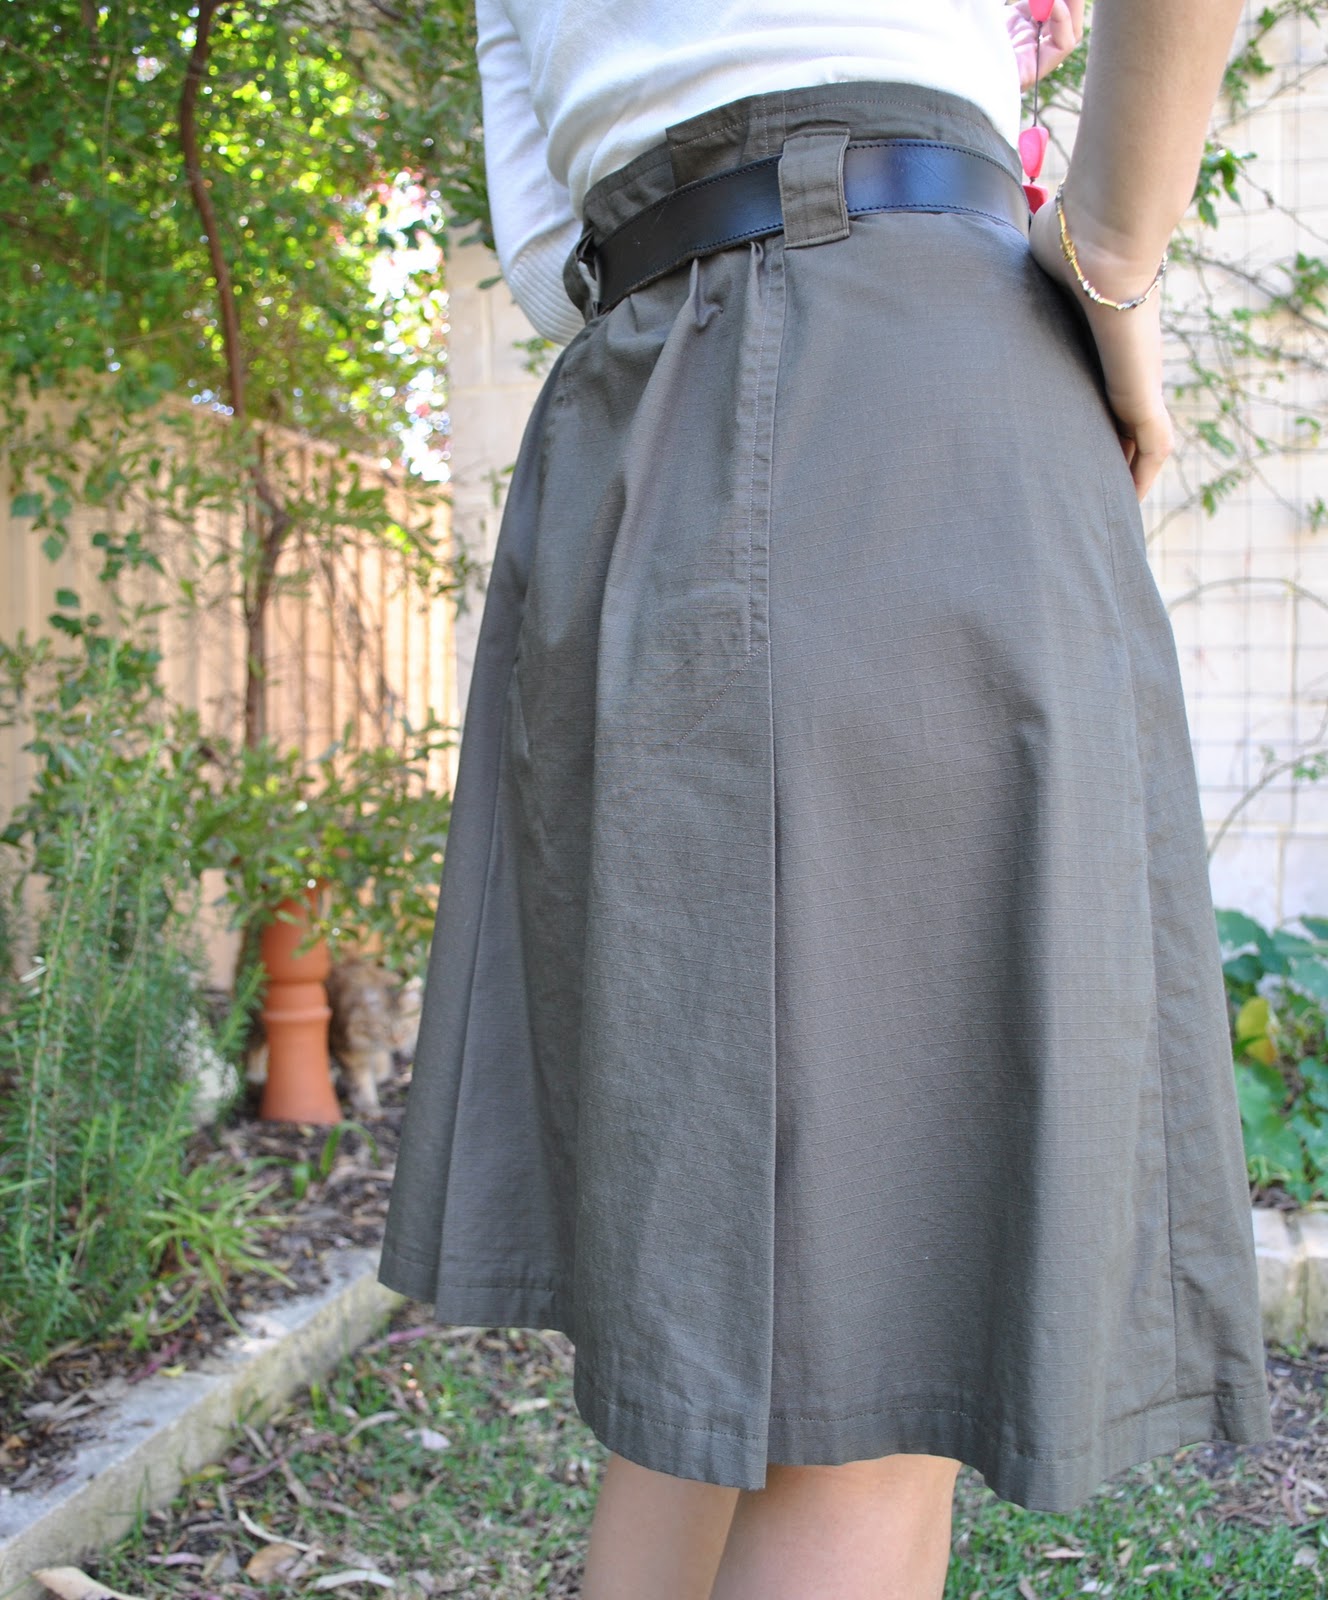
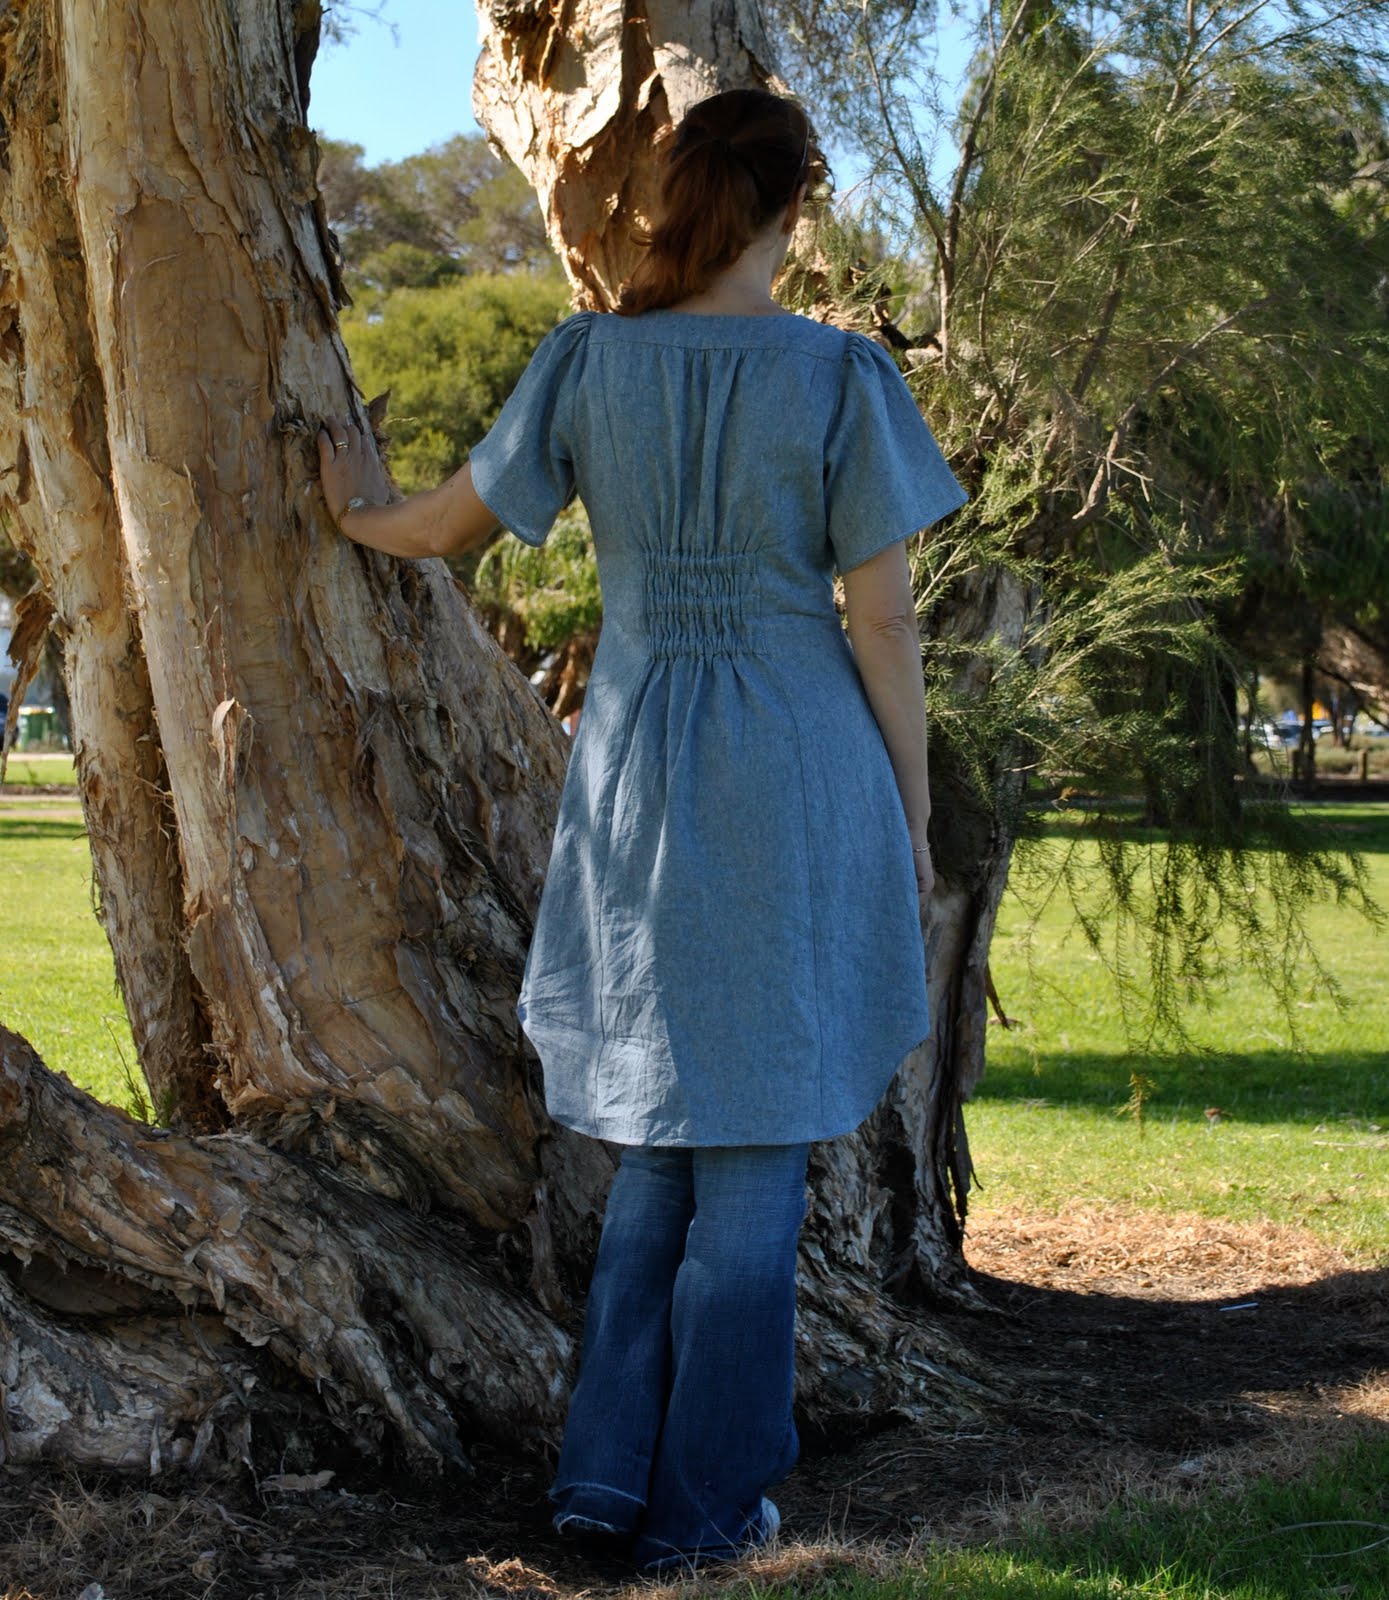
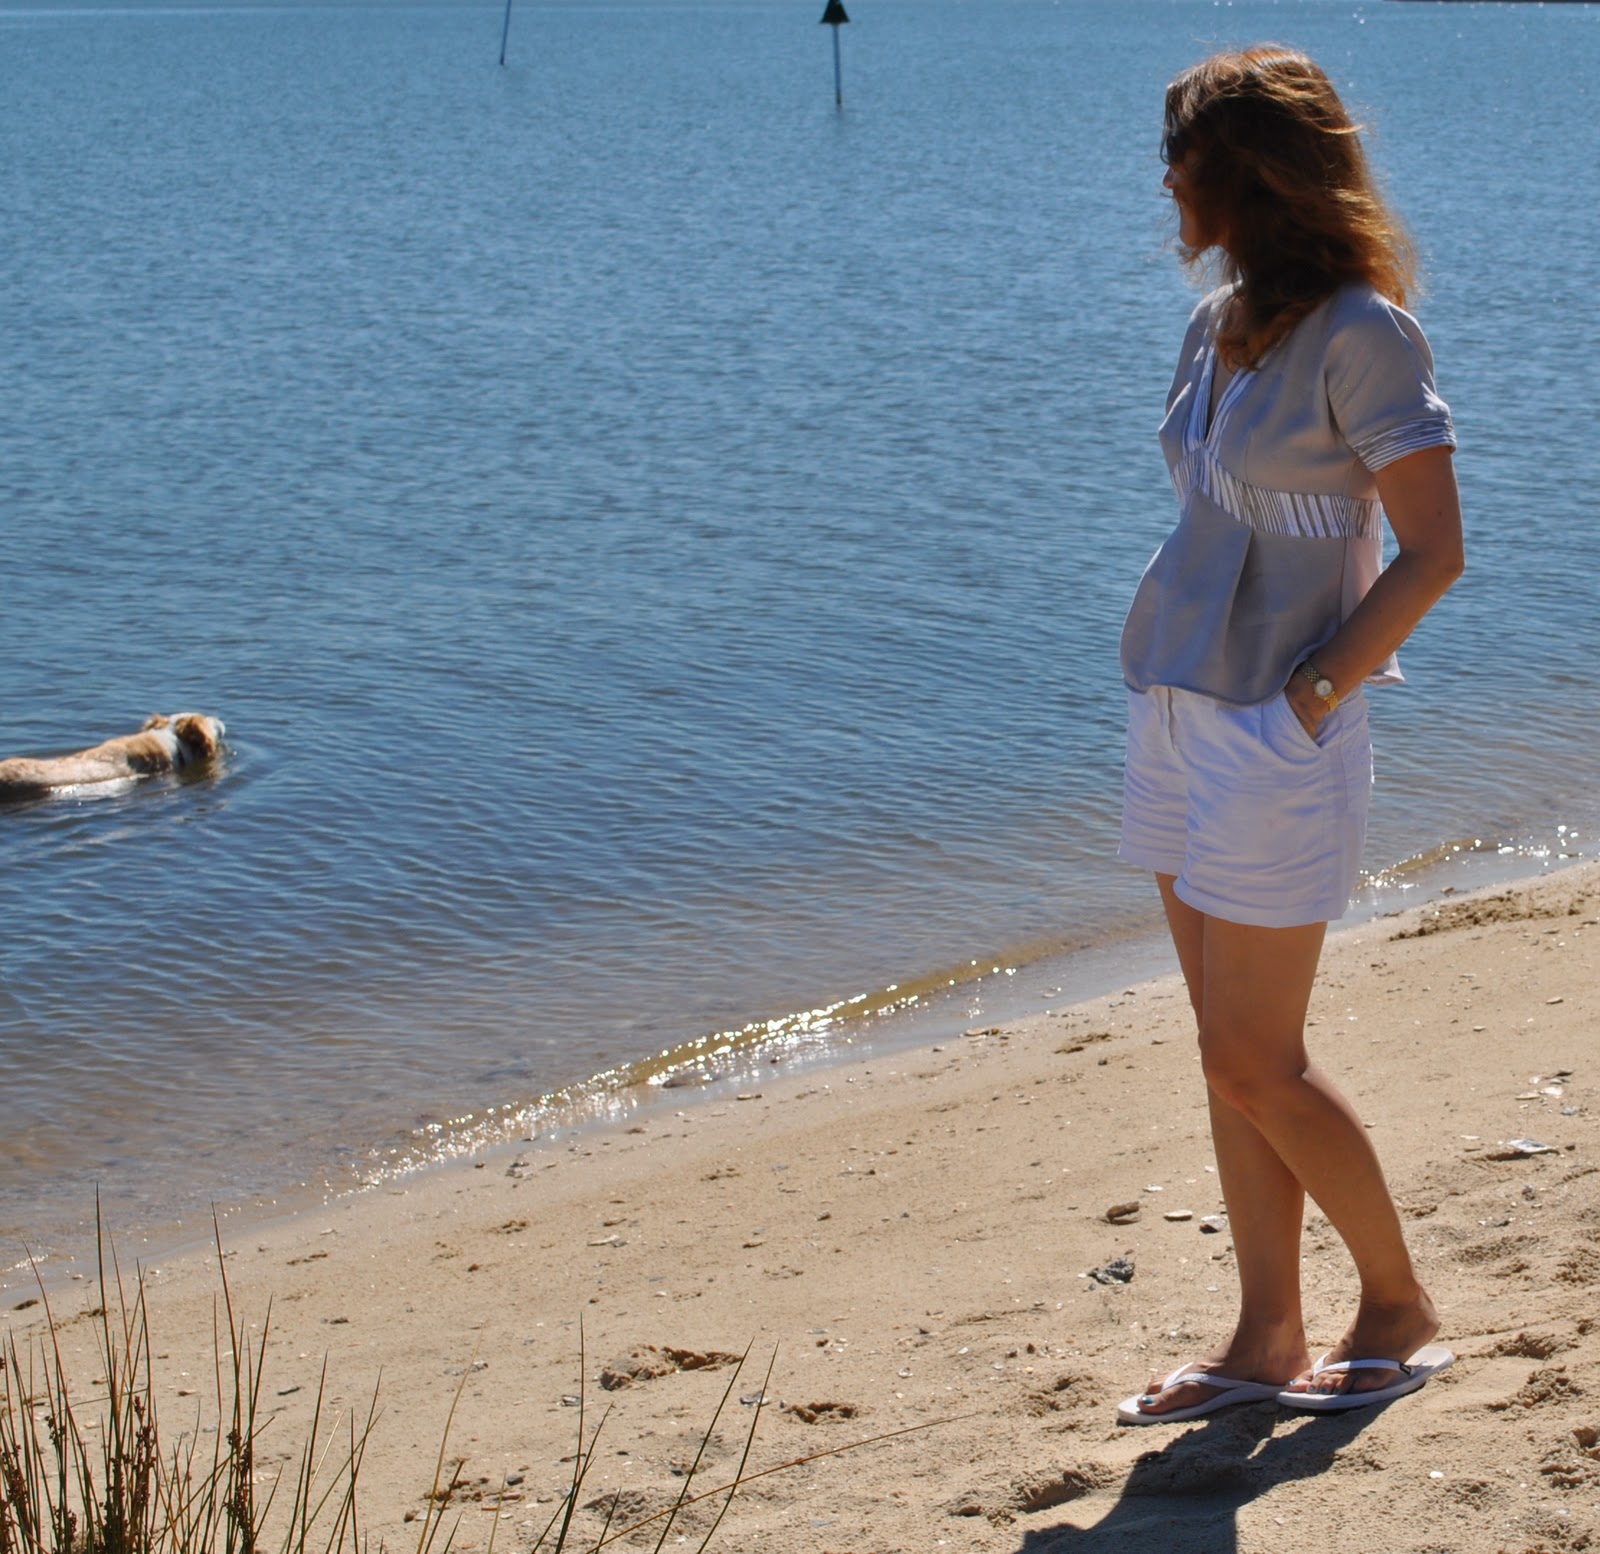
This top is using up some scraps; the silver-grey portion is the last leftovers from this skirt, and the contrasting stripe detail was juuuust squeezed out from the the remaining fabric from this shirt.  Oooh, I just feel so undeservedly virtuous and pat-myself-on-the-back-ish when I use up some leftovers…!  like I’ve been a really good greenie and I’m doing just a tiny weensie little bit to Do My Bit in the planetary scheme of things.  As well as satiating my inner scrooge, by getting a free top from otherwise rubbish-y little scraps!
The funny thing about this top along with its apricot mate, that I made the previous weekend, is that although they are entirely different colours, I used exactly the same topstitching thread, and the same colour zip for both tops; pale grey.  How’s that for weird?  Assessing the zips available, this colour was the logical choice in each case…  which goes to show… something, I don’t know what.  Probably nothing.  Except that colour matching follows no hard and fast rules and can be a purely subjective exercise.
So, on to the review…

Pattern Description
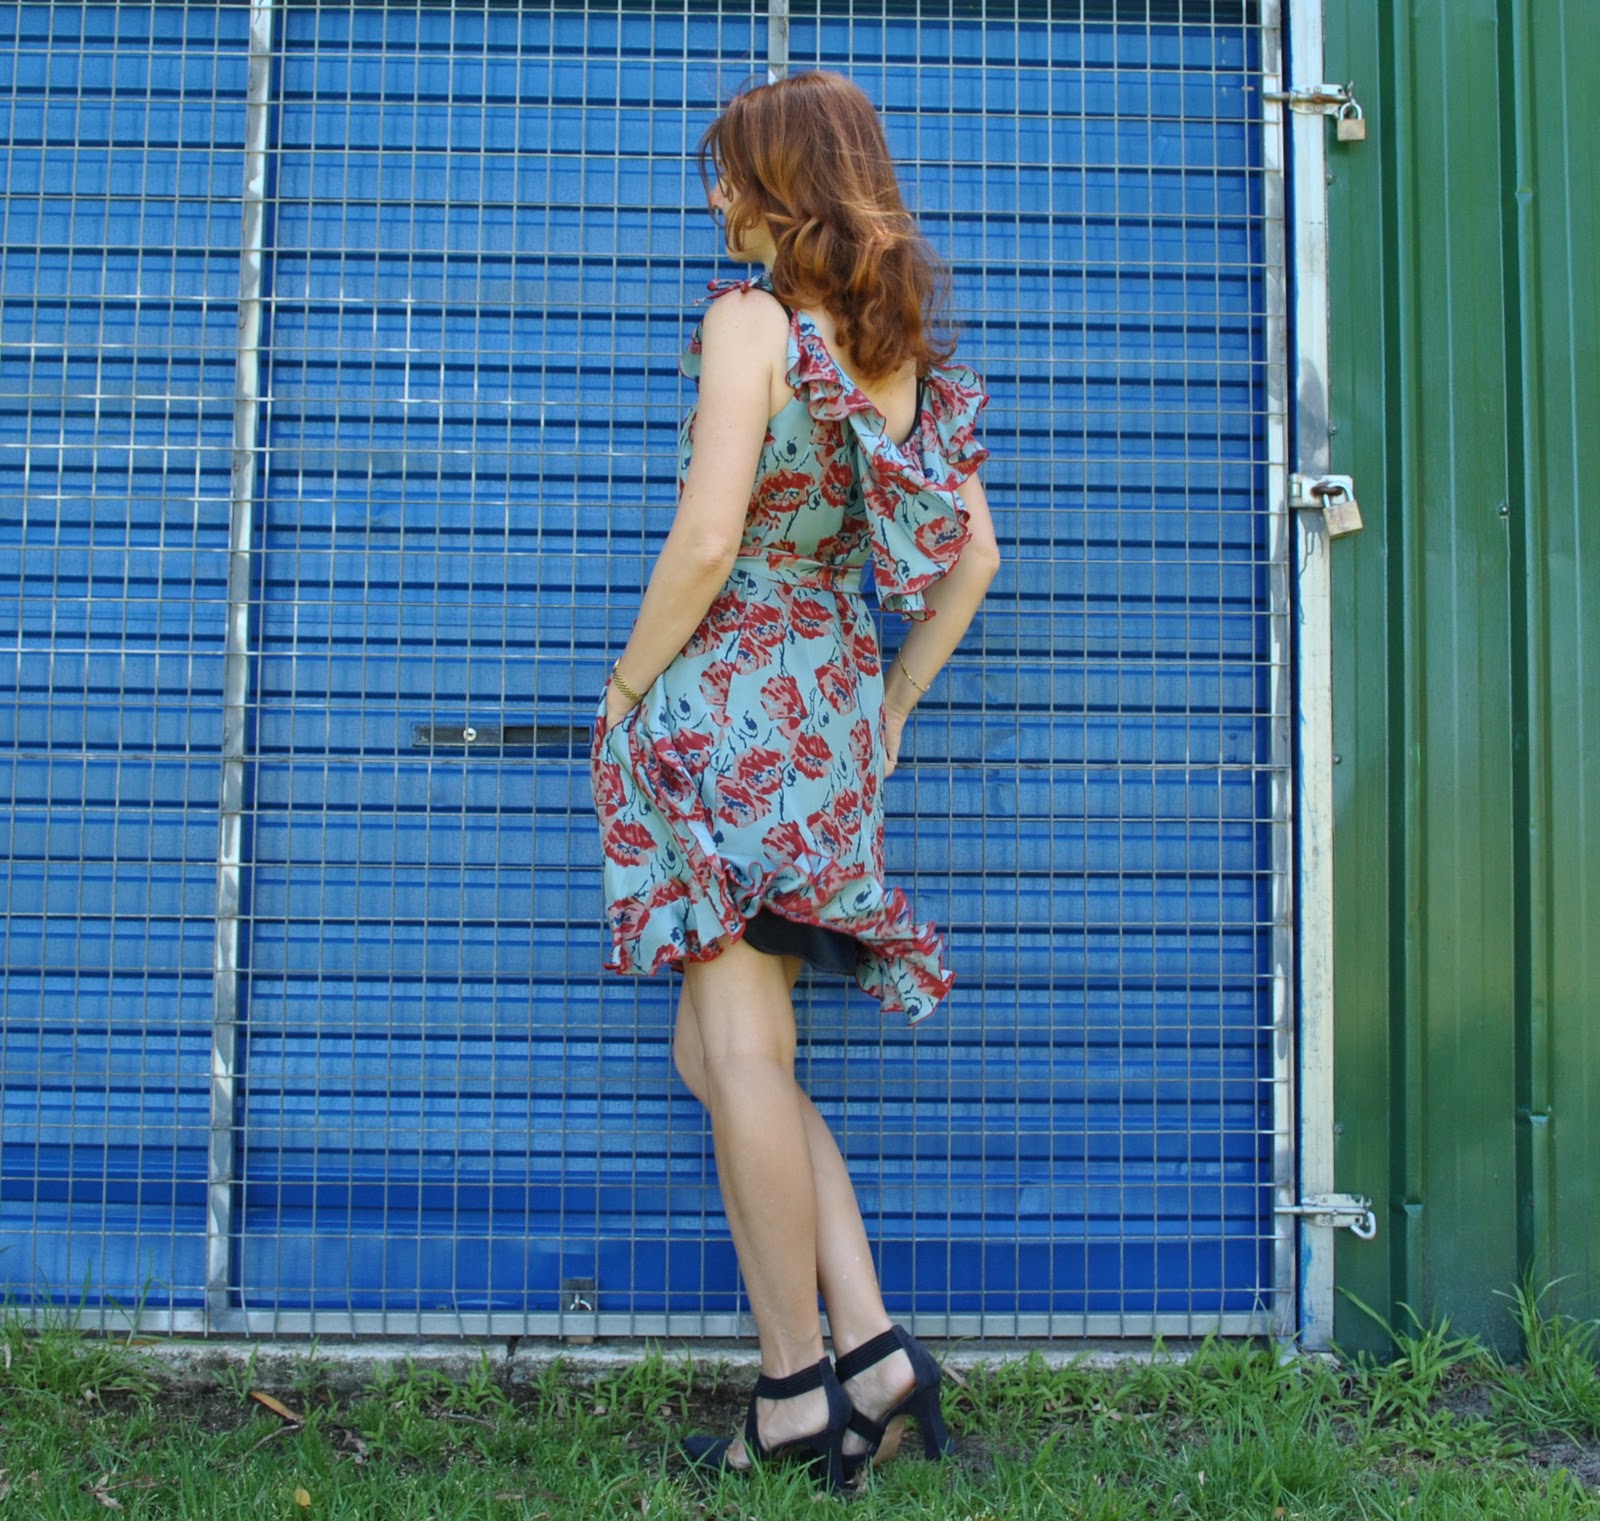
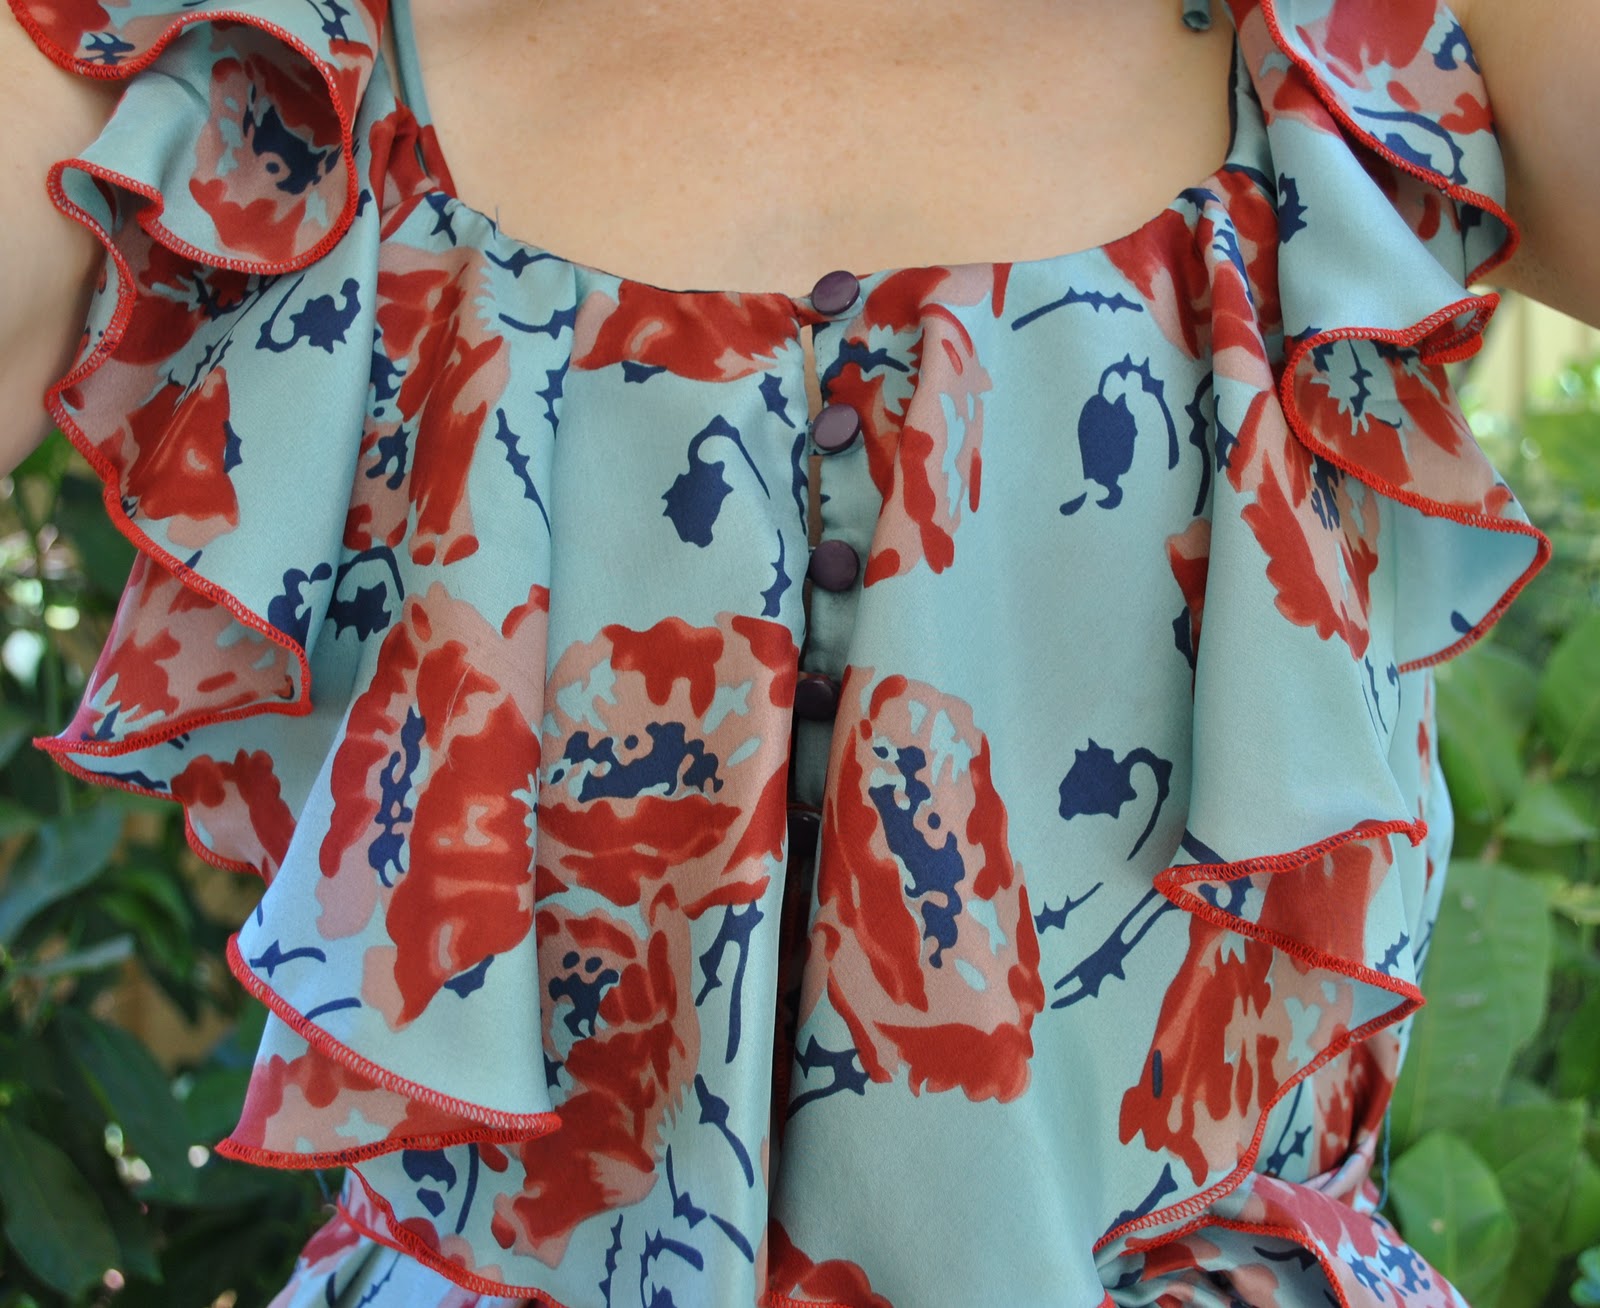
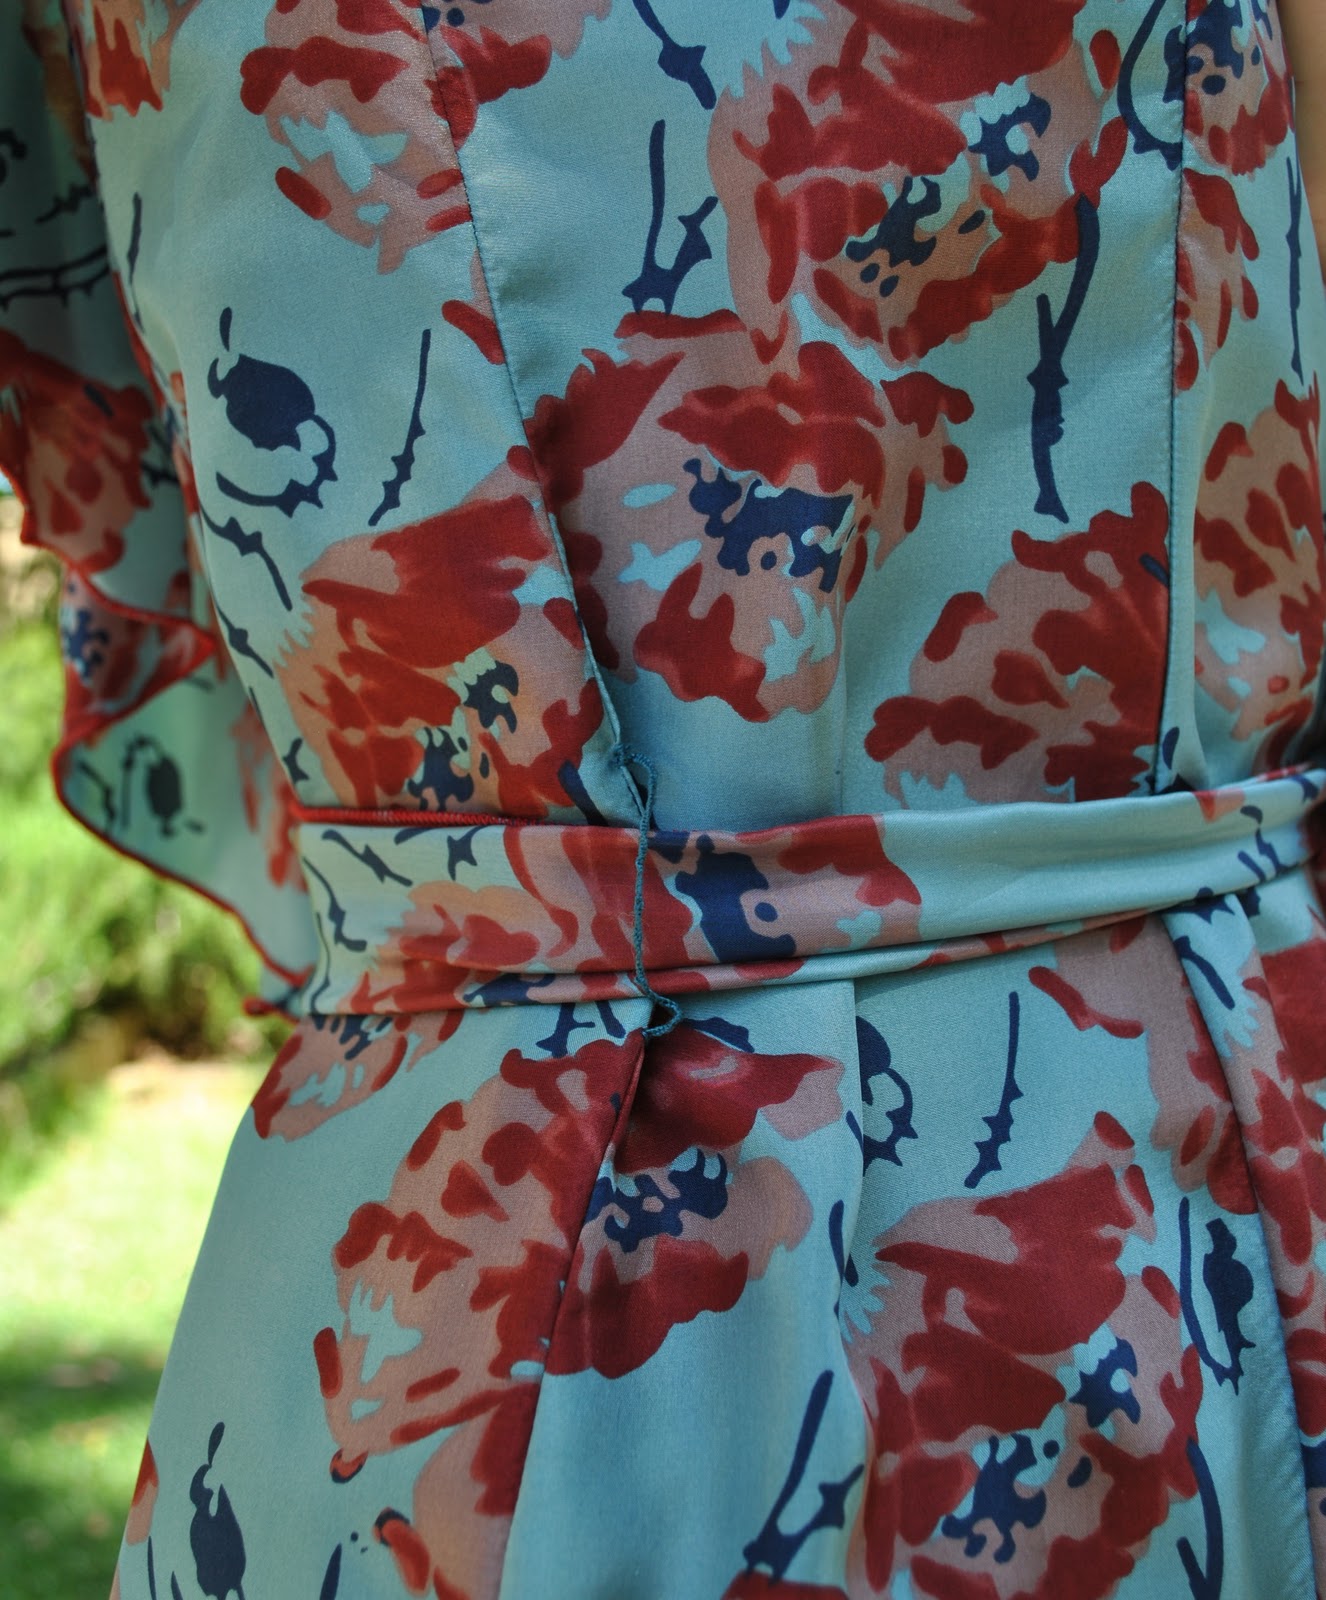
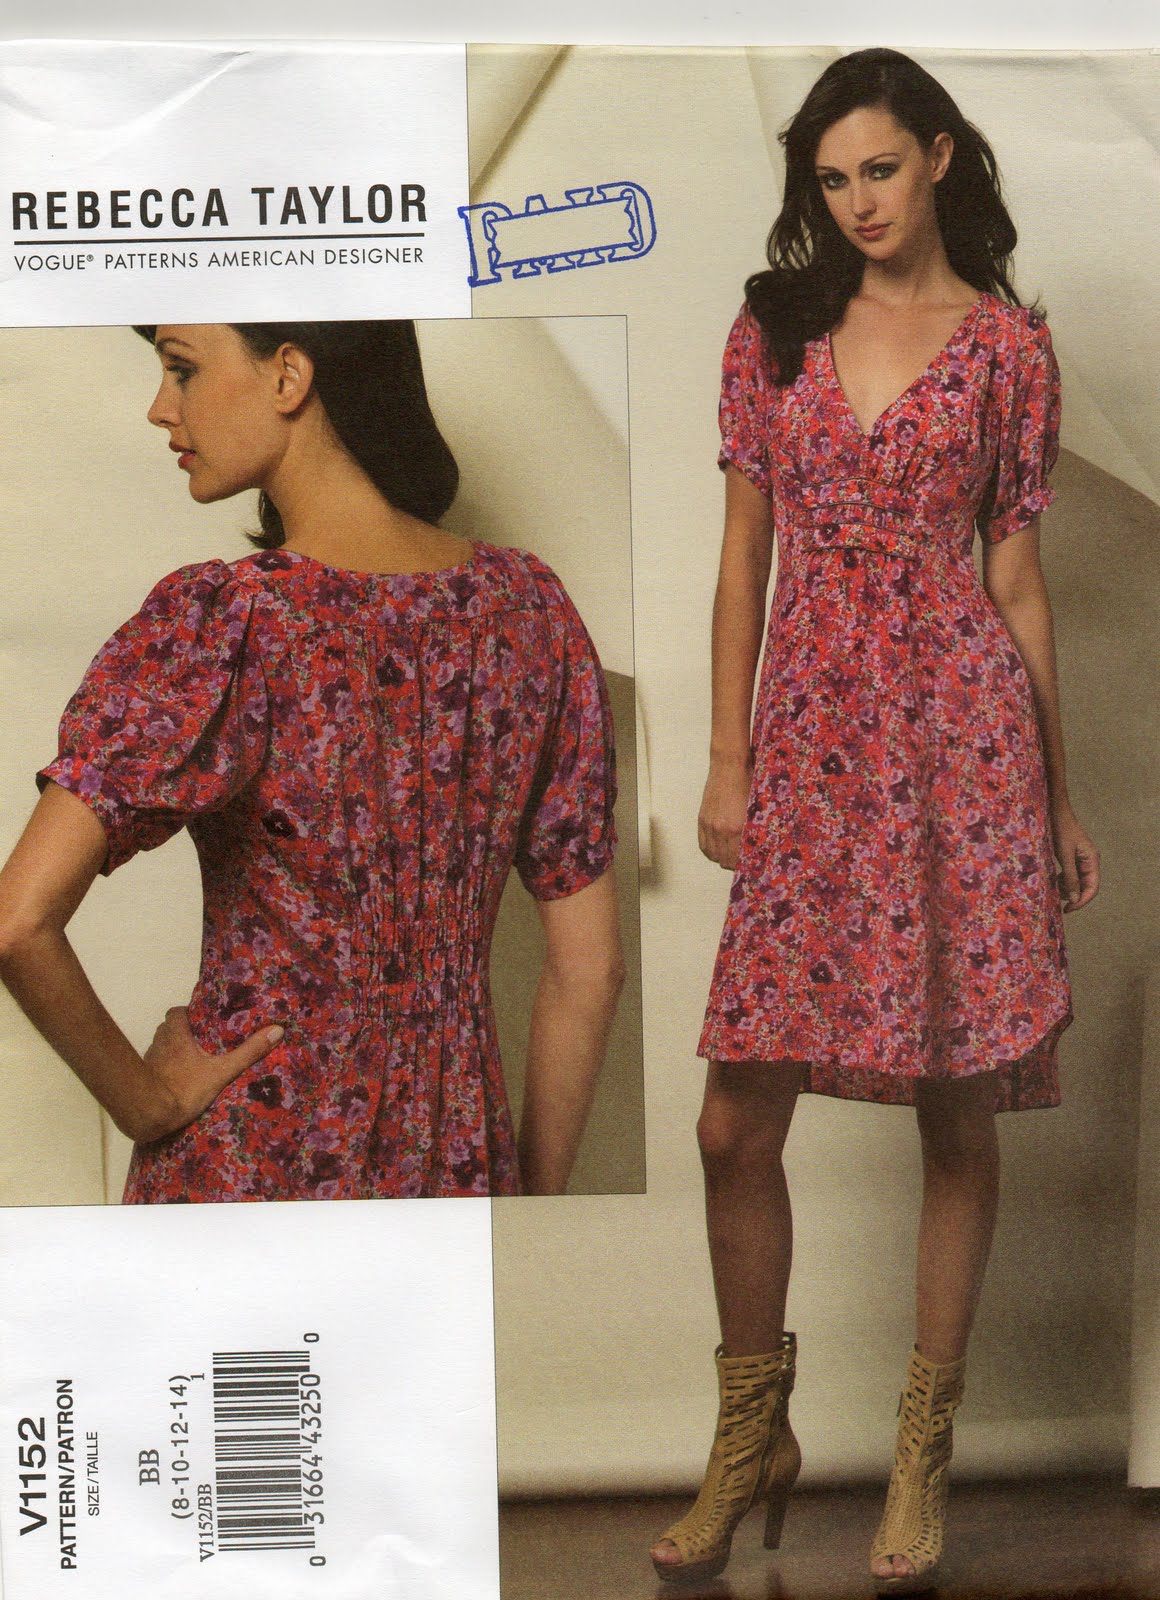
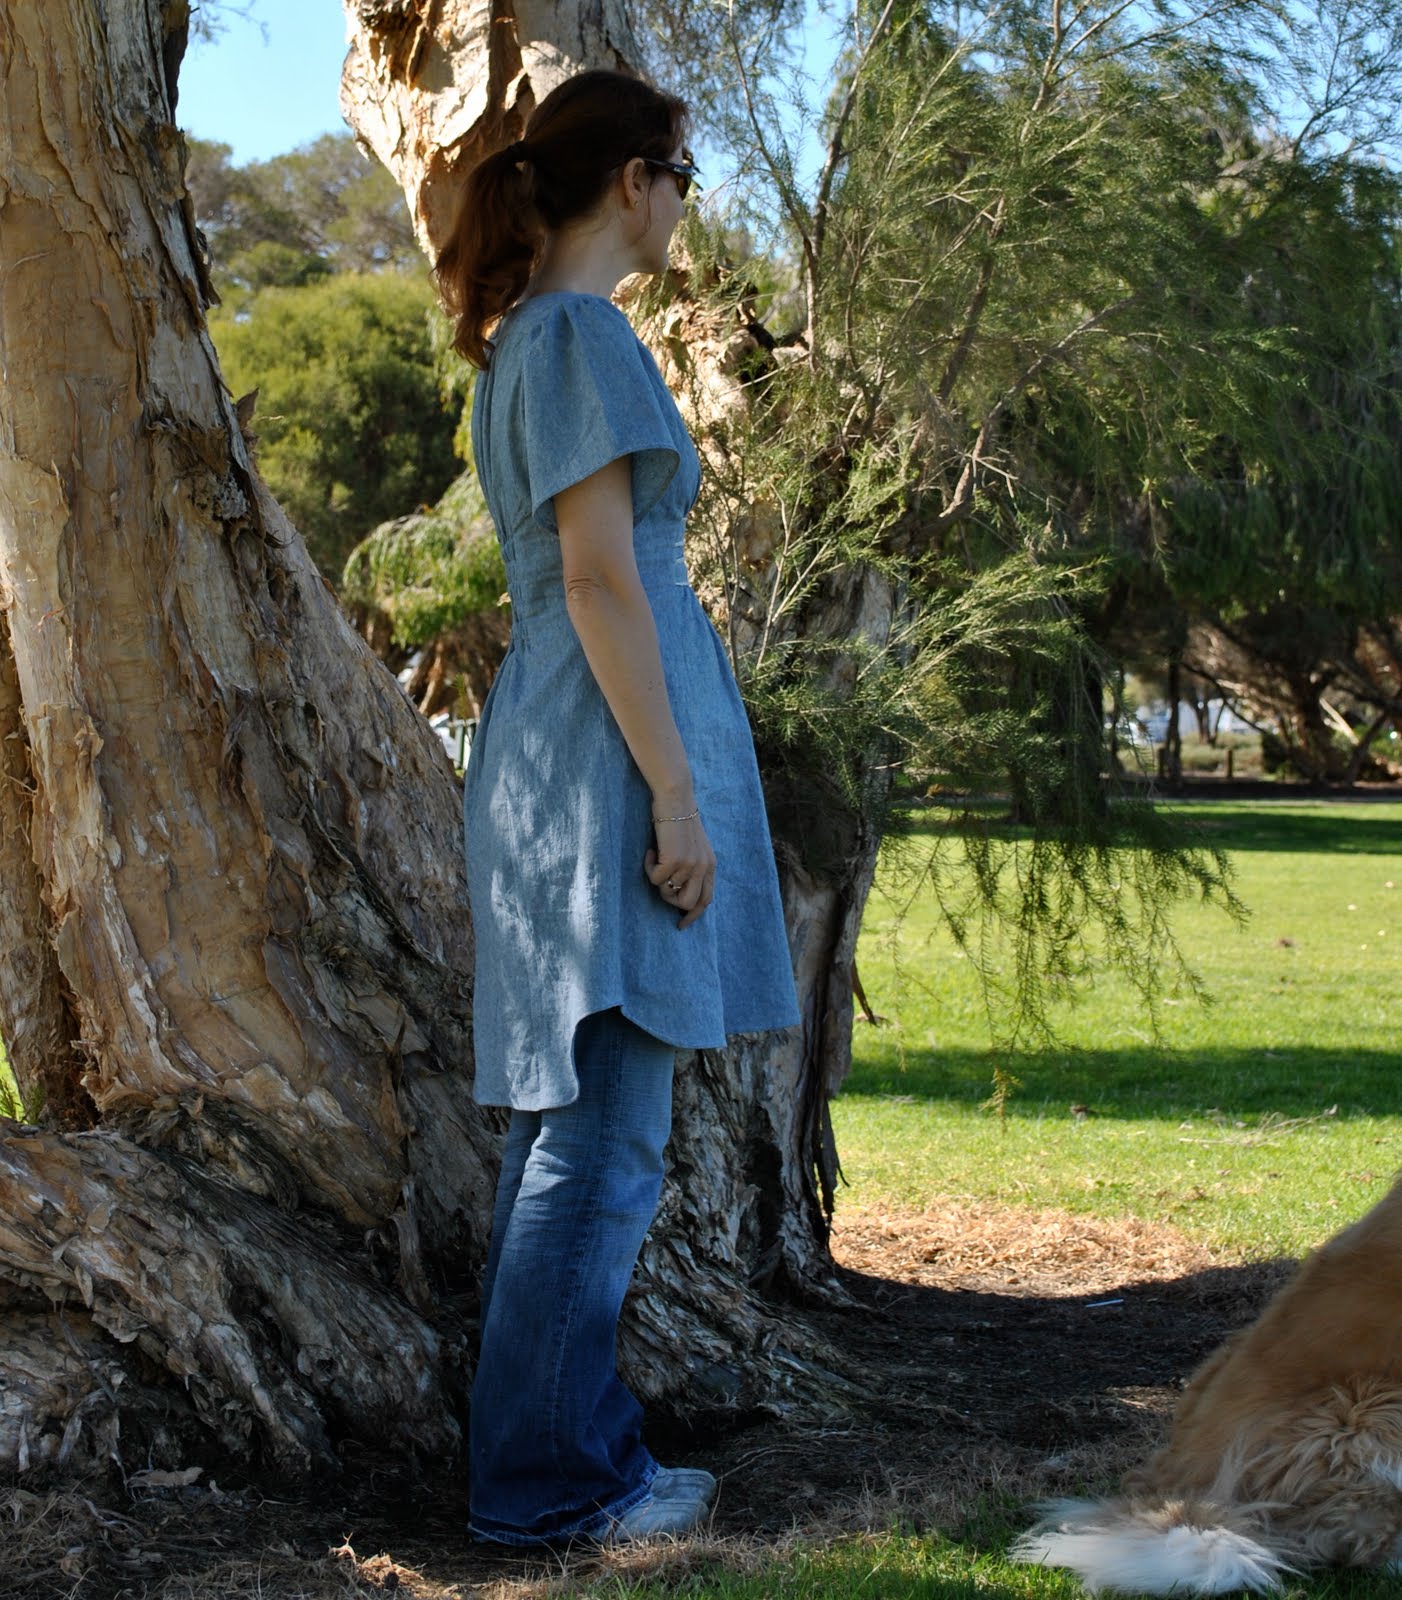
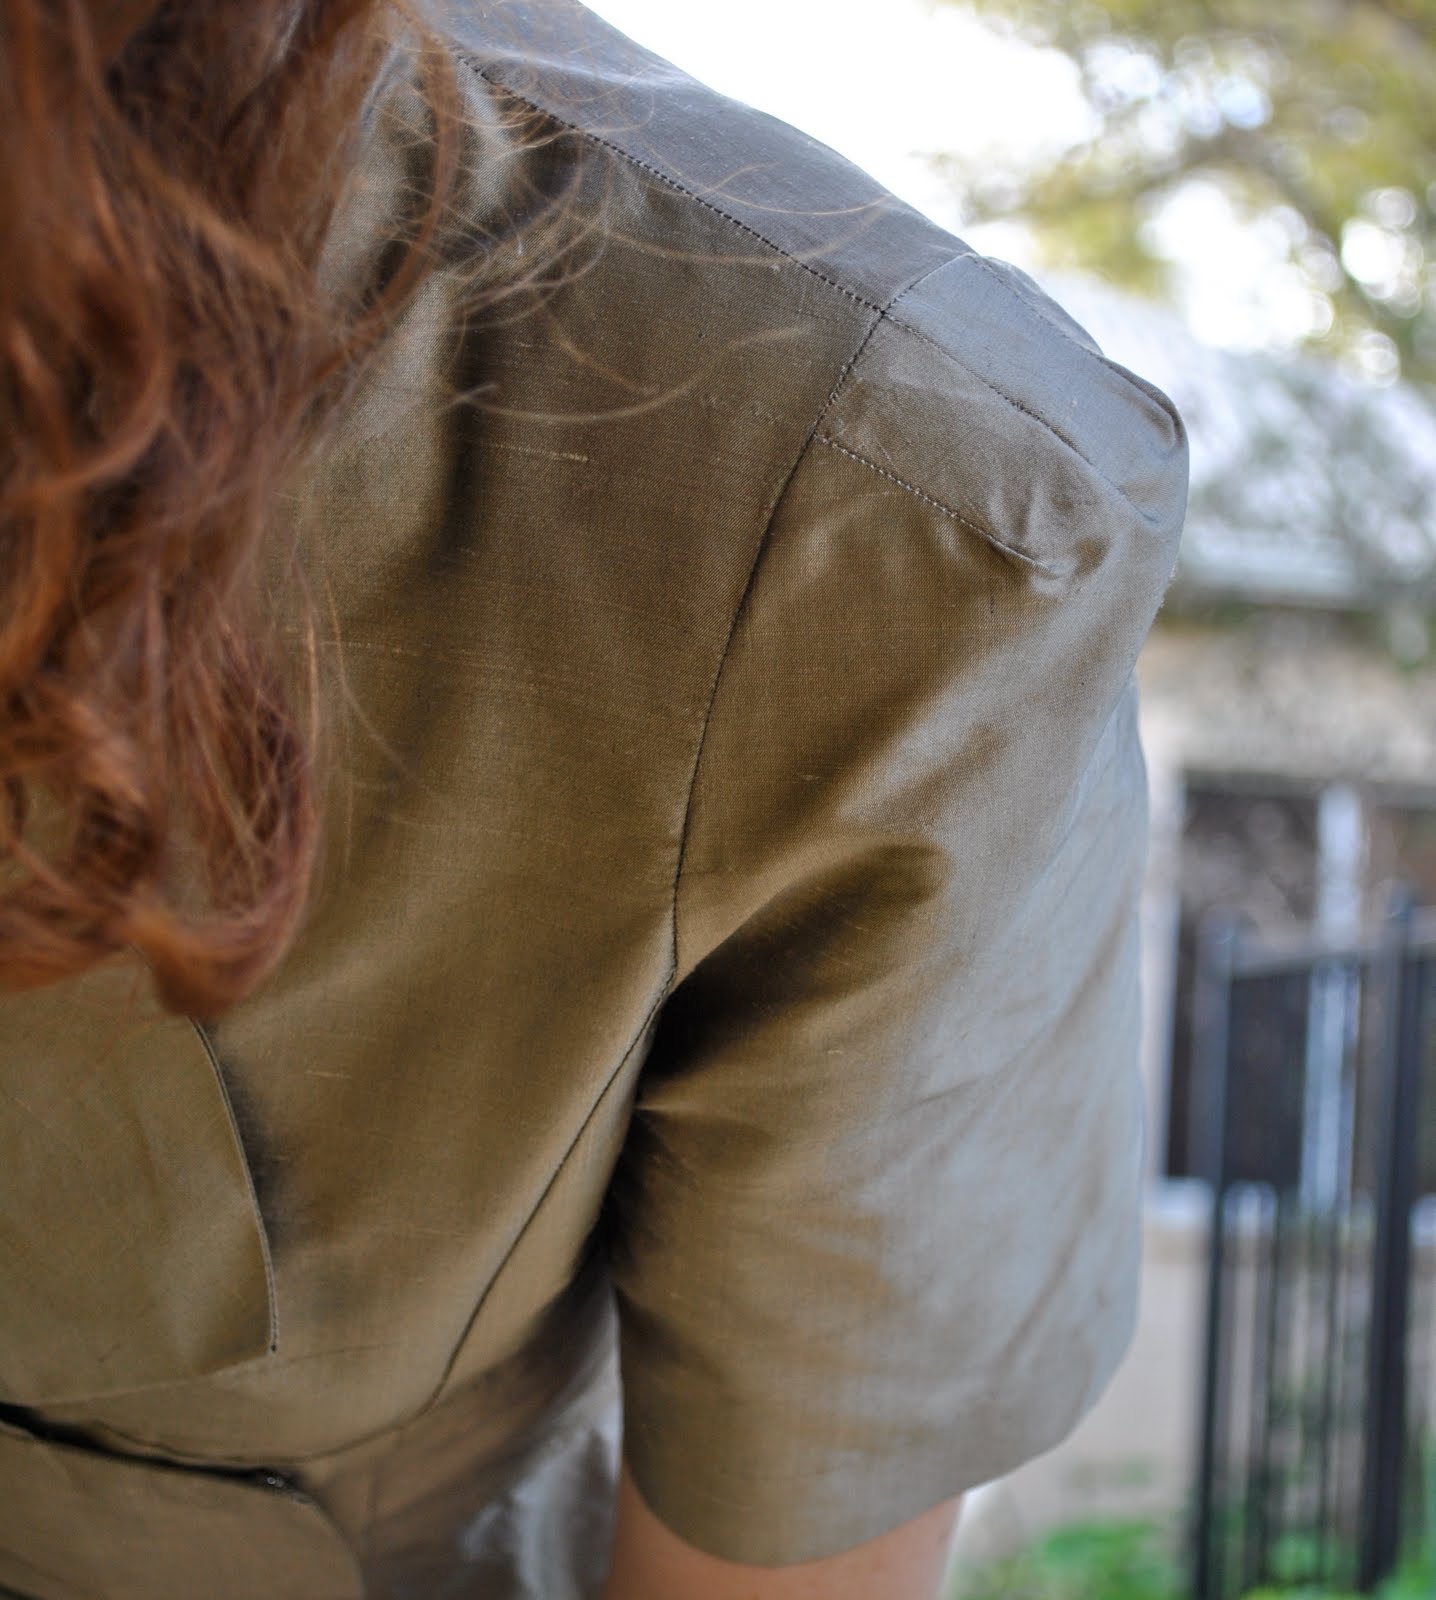
Loose-fitting, short kimono sleeved, V-neck top with a central back zip, and separate pieces for arm bands, neckline band and under-bust band
Pattern Sizing
6-16, European 32-42; I made a size 10
Did it look like the photo/drawing on the pattern envelope once you had finished sewing it?
Yes
Were the instructions easy to follow?
yes
What did you particularly like/dislike about the pattern?
I like that it is a very quick and easy pattern, and makes up a cute little top.
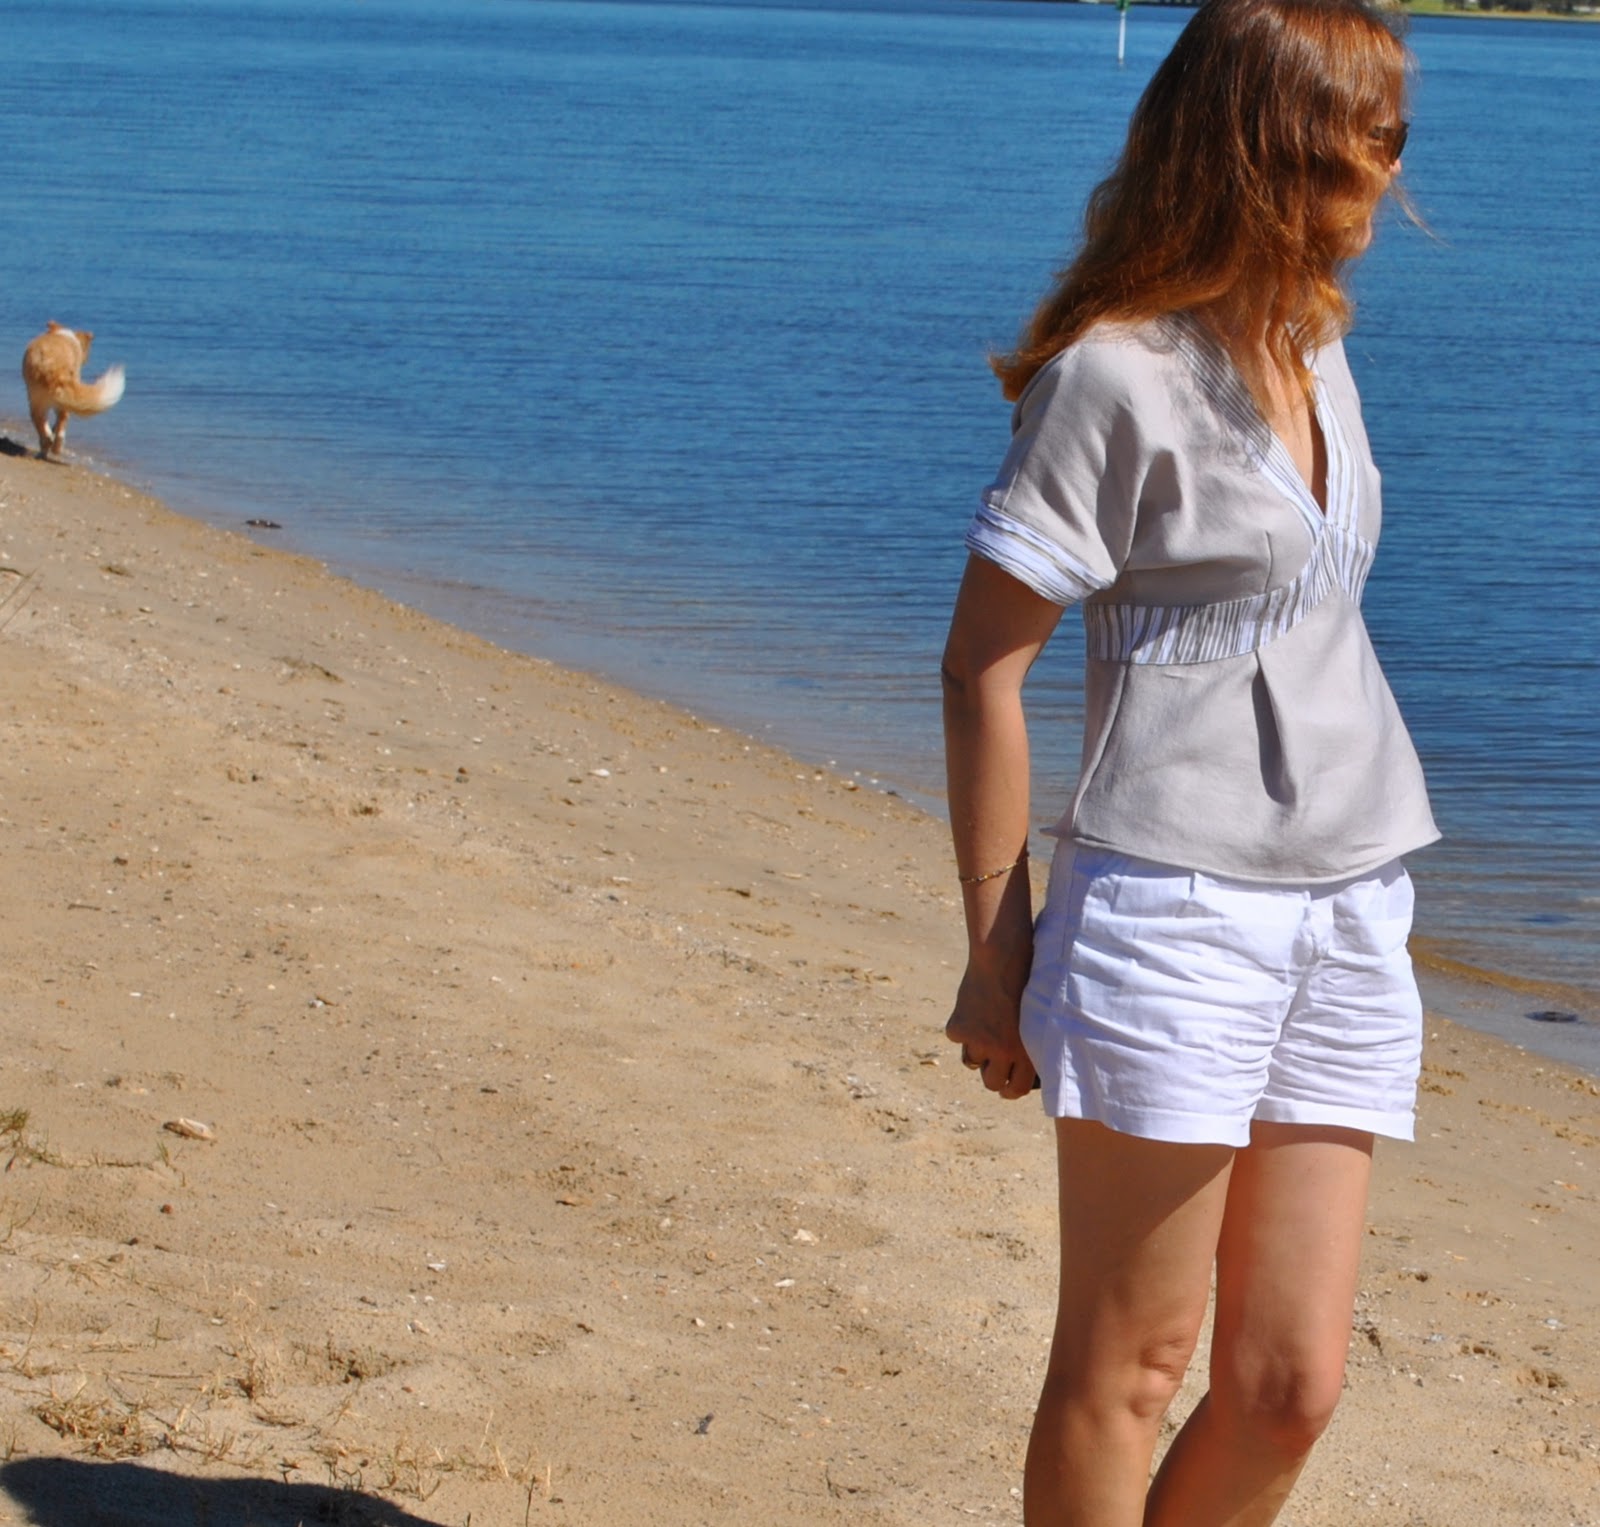
I was only a little unhappy that (when the instructions are followed) it is not finished to super high standards on the inside.  For example, the side seam allowances end up visible on the underarm sleeve edge, whilst I would prefer for them to be encased within the two layers of the sleeve band.  Also, the neckline band at the back has to be folded back over the zip tape and doesn’t enclose it within the two layers, which would be a preferable and neater finish.    However if you don’t mind a bit of extra fiddling you can adjust these features to be more well finished off on the inside.  If you are just after a quick and easy little top and aren’t really worried much about perfect insides, then the method given is just fine.
Just an extra thought; doing up the central back zip might be awkward for some who are no longer super agile.
Fabric used:
I’ve made this up once in crushed silk and once in a synthetic stuff with contrasting cotton mix bands, but I think any crisp light blouse fabrics would be perfect.
Pattern alterations or any design changes you made:
None.
Would you sew this again?  Would you recommend this to others?
Definitely I will sew this again, and I do recommend it to others.
Conclusion:
A nice and simple little top, both in looks and construction.  A useful casual wardrobe-builder to have in your collection.

btw, I just have to say something here, my own opinion… occasionally I come across a review in Pattern Review where under “were the instructions easy to follow?” a reviewer writes something like “didn’t even look at the instructions, lol!” or something equally breezy and dismissive.  In such cases I have to confess I usually read no further as (imo) this is not a review but a seamstress being a bit of a show-off, like the instructions are beneath his/her notice.  If you are not going to even read the pattern instructions, let alone assess them, then your “review” is worth nothing.  There are going to be some beginner seamstress’ out there who will want to know if the instructions have any difficult or unusual techniques, or nasty surprises, etc., before they fork out the money to buy the pattern.   I always thought this was the purpose of Pattern Review, but I get the feeling a few see it as a forum to showcase their creations, nothing wrong with that per se, but we have BurdaStyle for that purpose.  If the instructions are basic and easy to follow, then just say so without the condescending attitude.  Just saying…

Details:
Top; Burda 7834, silver grey crepe-y stuff with striped cotton mix contrasting bands
Shorts; Burda 7723, white linen
Thongs; Mountain Design
Sunnies; RayBan

pinterestmail

The Sandwich Bag dress

I finished a new dress…
I love this new little thing; we are expecting more really hot weather around here and I wanted some more really cool floaty things that can waft around my body, if not picking up any actual real breezes then possibly the swishing about of fabric just might create flurries of pseudo-breezes to cool me off…  I know, could be hopeless wishful thinking but in a heatwave one is willing to try anything.
You’re probably wondering about the strange and seemingly random name I’ve given to this quite romantic little number… well remember this?

The very very sweet but fabric-clueless young man who cut, cut? nay, hacked off this piece of silk for me in the Alannah Hill outlet store in Melbourne then packaged it for me by stuffing it (and by “stuffing” I’m not speaking figuratively but quite literally) into a little sandwich bag, painstakingly sealed closed, and presented thus for me to carry out of the store…  Funny!  I was so entertained by this cavalier treatment of fine, high quality silk that the image just became firmly wedged in my head never to be dislodged…  the Sandwich Bag dress was always going to be its name after that.  
A positive, at a pinch I know I can always fit this dress in a teensy little sandwich bag if an emergency packing situation arises…
I’ve had this Vogue pattern for about a year, and finally have used it.  I had always looked at it a bit sideways and wondered if was a very silly purchase that wasn’t me at all, but I’m over that now.  I’ve decided all those extravagant ruffles that before had me balking are really quite flattering for my figure.  So it does pay to try new things and to stretch oneself out of one’s comfort zone every once in a while.  And fortuitously I had just exactly the right amount of fabric, lucky or what??  That young man with his jaggedy cuts did it just right!
The dress is completely lined with navy blue acetate lining, and all the ruffles and raw edges are finished with a rolled hem using two shades of red overlocking thread, just using threads I had already.  The lining hem is finished in the traditional way.  The buttons are these perfect dark mauve discs found at Fabulous Fabrics.  Aaand, I added pockets… ! (self high five)
Below is the pattern review I submitted, in case you’re interested…

Pattern Description:
Lined dresses A, B, fitted through bust area have princess seams, contrast neck and lower flounce, straps and loop closure, sash with threaded loops.
Pattern Sizing:
Overall 6-20, I bought the AA option with sizes 6-12 and sewed a straight size 10.
Did it look like the photo/drawing on the pattern envelope once you had finished sewing it?
yes, except that I used self fabric for the ruffles, not a contrasting fabric

Were the instructions easy to follow?
yes

What did you particularly like or dislike about the pattern?
It is a loose fitting dress, so precision fitting is not an issue here, simplifying things.
I wasn’t sure about the look of all those ruffles at first and so put off making up this one for about a year.  Now I love them and feel they are very flattering to my figure.  However those same extravagant ruffles are what contributes to the difficulty of getting a good finish, particularly in the neckline/shoulder strap area, sewing dress to lining and turning right side out in step 24.  In this part I fully appreciated how essential thin lightweight fabric is for this pattern to work at all, so you can scrunch up those ruffles up tight enough to be contained with those thin little shoulder areas when sewing.
Understitching around these areas and the button loop area was quite fiddly.  The button loop area was quite fiddly full stop, but I put this down to the delicate and slippery silk I chose to make the dress up in, and not the fault of the pattern.
Fabric used:
Thin silk charmeuse
Pattern alterations or any design changes you made:
I added in-seam pockets in the side seams of the dress.
I used the rolled hem function on my overlocker to finish all raw edges of the ruffles and the sash, rather than the narrow hem method described in step 4 and 5 of the instructions.  So much easier!  Plus instead of double stitching all the seam allowances as described I finished raw edges on the inside by overlocking.
Would you sew it again?  Would you recommend it?
I won’t sew this again in the near future, as it is such an eye-catching thing one of these is enough in my wardrobe.  But when this one bites the dust I might.
I recommend this pattern as a lovely romantic little dress, perfect for summer days.  It is actually simpler than it looks, my only proviso is to be certain to only attempt this with very thin fabric.
Conclusion:
I’m a little surprised myself at how much I love the “adorableness” of this dress, not a style I usually go for.  I feel so feminine in it, plus on a practical note it’ll to be very cool to wear on very hot summer days.

Below: I almost didn’t include this picture, but decided the wind had co-operated by showing off the lining, which I hadn’t photographed otherwise…

Below at left; threaded sash loops, at right; yup, pockets!
pinterestmail

Vogue 8555; a pattern review

(shamefaced) I took some more photos of the dress; inside because the ones Craig took on Christmas Day were a tad blustery.  Yeees, don’t know if you can tell or not but I was being windblasted about mercilessly and those photos are the only ones in which my hair did not look like wild animal on top of my head… so I took some more civilised ones to accompany my pattern review!
High winds, and 40C (104F) and an overnight low of 23C (74F); this is perfect bushfire weather so we are all keeping our fingers crossed for no disasters, please…
Without further ado…

Pattern Description:
Dresses A, B, C, D, E, F have lined bodice, front pleats, front gathers, back darts, self-faced midriff, back zipper and skirt variation.  A. B, C: lined, slim skirt in two lengths with front and back darts, bbac k slit.  D, E, F: skirt in two lengths with front and back pleats, pleat underlay and side seam pockets.  A, D: gathered sleeves with sleeve bands.  A, B, D, E: mid-knee length.  C, F: below mid-calf
Pattern Sizing:
8-22 altogether, I bought the 8-14 option and cut size 10
Did it look like the drawing/photo on the pattern envelope once you had finished sewing it?
I sewed view F but made up a completely different bodice front; otherwise yes.  My personal feeling is that the fabric used for the sample in the pattern photograph does not do it any favours… but that’s just my opinion…
Were the instructions easy to follow?
yes
What did you particularly like or dislike about this pattern?
I didn’t like the bodice, thought it would be too bouffant for my figure so drafted my own more fitted version.  I LOVE the big big skirt of view F!!  
Fabric used:
Printed cotton, with cotton voile for a lining and petticoat
Pattern alterations or any design changes you made:
I constructed a completely different bodice front, details here.  I did this both to get a more fitted bodice, as well as to inject some interest to what is otherwise a pretty basic design…  I also added a waist tie, to tie in a bow at the back and to nip in the waist more.  Also added an attached petticoat to “boof” up that skirt even more, and used an invisible zip in lieu of a dress zip.
Would you sew it again?  Would you recommend it to others?
I will probably sew it again, if not this view then one of the slimline skirt looks.  It is a very easy pattern, with nice variations.   Highly recommend it to sewers of all levels; with this proviso: if you are not buxom then look closely at that gathered bodice front before using it.  You may wish to either modify it, or substitute a different more fitted bodice as I did.
Conclusion:
I love this dress, and anticipate wearing it a lot.  It is super comfortable as well as beautifully feminine with that big twirly skirt, and big deep pockets to shove one’s hands in.  Big pockets on a dress are such a bonus.  However I am also glad I went with a fitted bodice.  In my opinion a more slimline bodice sets off a big skirt better, provides a well proportioned silhouette.

Details:
Dress; Vogue 8555 view F, with bodice of my own design details here, waist tie and added petticoat, printed cotton
Shoes; Sandler, had for donkey’s years

pinterestmail

Burda 7767; a pattern review

Yesterday I surprised myself when I tried to create a link to the review I wrote for this pattern and found out it wasn’t even here!!  I wrote this for Pattern Review; oh, months ago, and …er, forgot? to put it here on my blog too.  I’ve updated the review here only slightly, to take into account the fact I’ve used it an extra five times since writing this review, and to note some of the variations.
I decided today to wear one of the earliest versions of this pattern I made for Craig; as an overshirt, folded over at the front asymmetrically and belted like a sort of coat.  Please note my fabulous salon-styled do; this kind of glamourous hair doesn’t appear here often…

Details:
Shirt; Burda 7767, burgundy linen
Dress; Burda 8511 with fitting, neckline and zip placement variations, brown wool mix.  oh, and fully lined too…
Belt; kept from a pair of old cargos
Socks; knitted by me
Shoes; Francesco Morichetti

So without further ado, here is the review:

 Pattern Description:
Men’s dress shirt, one version with front pintucking option, the other plain fronted and with four collar variations
Pattern Sizing:
European 44 (US 34) to European 60 (US 50)
Did it look like the photo/drawing on the pattern envelope once you were done sewing with it?
I’ve only sewed version B without pintucking, but yes
Were the instructions easy to follow?
very easy
What did you particularly like or dislike about the pattern?
I liked everything about this pattern, nothing to dislike. It’s a basic men’s shirt!
Fabric Used:
Linen
Pattern alterations or any design changes you made:
The first time I made this pattern up it was for a birthday present for my husband and I had to make it in secrecy with no fittings! Luckily it fitted fine, however the subsequent times I’ve used it I fine-tuned the fitting to accommodate my husband’s measurements perfectly. Namely by deepening the armholes and correspondingly widening the sleeve at the underarm point. Obviously this wasn’t the pattern’s fault, that I couldn’t perform progress fittings, however!
Would you sew it again? Would you recommend it to others?
Yes, I’ve sewn this up eight times now; for my husband, our two sons and even for me, and plan to use it many times over again in the future. Would highly recommend to others as a simple basic shirt pattern.
Conclusion:
What’s not to like about this pattern? Men’s shirting needs are often simple and uncomplicated and this pattern serves the purpose exceptionally well. Being such a basic pattern means you can add your own variations such as pocket flaps, welt pockets and fancy topstitching variations as much as you wish. You could also shorten the sleeves to make a summer button-up shirt too. The times I’ve used this pattern I’ve varied the pocket slightly each time, and played around with contrasting topstitching details. It’s a simple matter to lengthen the body pieces to create a curved lower hemline if this is desired also. An advanced seamstress could also play around with varying the yoke.
For the versions for my teenage sons I added tabs inside the sleeves that button back on themselves on the outside of the sleeves to hold up the sleeves when rolled up; I also used press studs in lieu of buttons; sewed on two breast pockets with flaps and angled the pocket flaps and cuffs to give a funkier look to suit a teenager’s tastes. This is only one variation of many one could try out with this great pattern. 
Later edit; looking at the other reviews of this pattern I was reminded that the yoke pattern piece had “cut 1” printed on it by mistake instead of “cut 2”. I think this is a simple typo, and not really a problem as the pattern instructions clearly require for there to be two yoke pieces cut, and the pattern cutting layout also illustrates two yoke pieces laid out.

pinterestmail

Trench Skirt; a pattern review

This is my pattern review, and some close-ups of the trench skirt I completed recently; seen below and a larger view here.
The skirt is pattern 107, from BurdaStyle magazine 8/2009.

Pattern Description:
Knee-length flared skirt that fits smoothly over hips and waist, creating a slim line.  The horn buttons and buckle, welt pockets, self-fabric belt with large carriers, and the double button rows are reminiscent of trenchcoat styling.
Pattern Sizing:
34-42, I cut a 36
Did it look like the photo/drawing on the pattern envelope once you had finished it?
yes
Were the instructions easy to follow?
yes
What did you particularly like or dislike about this pattern?
I love this pattern, and its trench styling.  Love the way it looks like I had taken a trench coat and just chopped the top off…  Because of this styling I think the top ends up a little bunched around the waist, which is just how a trench coat is supposed to look when it is belted, but I’m not sure whether the slight bulkiness that this adds to the hip area is flattering (or not!).  Despite the pattern description; in my opinion this skirt does not create a slim-line, in fact I think the sizing runs a touch big.  But I love this skirt and am definitely going to be in it a lot.
Fabric used:
Sturdy cotton drill
Pattern alterations or any design changes you made:
I made the pockets a bit deeper and wider as the pocket pattern piece looked laughably small (I guess I have big hands!).  I finished the raw edges on the inside with Hong Kong seaming.  The front skirt facing fell short of facing behind all the buttons/buttonholes so I used scraps to sew behind and stabilise the buttons and buttonholes which the facing did not back.
The pattern came with a belt piece, which I did sew up, but actually I prefer to use with this skirt a leather belt I already had; looks more professional.  In my experience self-fabric belts, no matter how sturdily interfaced, do not look so wonderful after half an hour of wear, or even less…
Would you sew it again?  Would you recommend it to others?
I might sew this again.  It is a very handsome skirt with nice details, right on trend for the military look and the current fashion for trench coats.
Conclusion:
Love it!

pinterestmail

Rocking the double denim look

So here is my new dress, Vogue 1152, with more me-appropriate sleeves (for the “before sleeves”, see the post below).  I’m very happy with this now, will be perfect for a casual day-dress suited to the simple warm days not now very far off on the horizon…? (said hopefully)  Today being still just a little cool I’ve opted to try out at styling the latest double denim trend, and wear the new dress with my old jeans underneath… tres cool, no?
So the key to making the new double denim trend work is to definitely not have the same denim head to toe, take a look at the pictures just below…  no no, no and er, no.  Too avoid this very dated “denim suit” effect the modern interpretation is to mix it up in terms of colours/shades and texture.  So on the bottom half I am wearing my trusty ol’ denim jeans which have the two tone stone-washed look we knew and loved er… only a few years ago, and on the top half the lightweight chambray dress in a much paler shade of indigo.  And I’m thinking this isn’t tooooo bad!  But if the double denim thing still offends you;  relax, I will definitely be wearing this sans jeans before too long…!
Below is my review of this pattern.

Details:
Dress; Vogue 1152 with minor variations, cotton chambray
Jeans; Little Big, from Labels


Pattern Description

Loose-fitting dress has front and back princess seams, front and back gathers, front insets with contrast piping, back elastic casings, self-faced yoke, left side invisible zipper, short sleeves with pleated cap and gathered lower edge into self band and curved hem.  Length is 2″ above knee at centre front.
Pattern sizing
8-14.  I cut size 10
Did it look like the drawing/illustration on the pattern envelope once you had finished sewing it?
Essentially.  I altered the sleeves and fiddled about with the fit somewhat.  Also I have a suspicion the dress in the photo on the pattern envelope has a big bulldog clip at the back to make it nip in at the model’s waist like that… either that or the dress has been fitted to her shape like I did with mine.
Were the instructions easy to follow?
yes
What did you particularly like/dislike about this pattern?
I liked the look of it from the envelope photograph; the V-neck, the prettiness and the shirt-dress vibe it has without being a shirt-dress
After finishing I decided the puffy sleeves didn’t suit me, and ended up changing them.
The dress ended up being (for my taste, too) loose-fitting; just as described, and close to how it is illustrated in the line drawing on the back of the envelope but not in line with how the dress appears in the photo.  And the back elastic casings are situated too high I think.  I had to alter it to look less “maternity”
Fabric used:
Cotton chambray
Pattern alterations or any design changes you made:
Shaped the bodice sections to bring it in more at the waistline and also to take away some excess fabric in the bust-point.
Added another single casing with elastic on the back, additional to and underneath the double one stipulated in the pattern; also to help define the waistline better.
Eliminated about 1″ in sleeve width, and the lower gathering and sleeve bands completely.  I simply narrow hemmed the ungathered lower sleeve edge instead.
Would you sew it again?  Would you recommend it to others?
Yes I will sew this again.  I am planning to make this out of a light chiffon-y stuff for a fancy springtime lunch dress, but am going to implement even more design alterations than I did with this one.  I would recommend this pattern; as long as you are aware the dress is looser fitting than it appears in the photo.
Conclusion:
It might sound like a tale of woe, but I am very happy with this dress now.  I definitely prefer my version of the sleeves, although if the dress were out of a lighter weight fabric the sleeves may flop down like in the envelope photo and look better than they did in my cotton chambray version.

pinterestmail

Takes the Bronze

My new cocktail dress…
I’m kind of in love with it.  Wish I could be wearing it all day, if that was in all way appropriate (might attract a few sideways glances in the supermarket, for one)  And as for my work in the office… well the pussycats might appreciate that I went to the effort.  Oh, hey you look great, but really, you shouldn’t have.  Not for us.  Just going to be vying for prime position on your lap as usual, is all…
I did meet some gals for morning tea this morning, but as I was easily the most dressed up (in exactly this outfit, my new favourite since I finished it, and have worn it three times in the last three weeks now) then the new cocktail dress would have been a tad overkill.  Sadly.
The flavour of this design is kinda eighties, I reckon.  The silhouette is reminiscent of the costumes we were treated to on Dynasty; the exaggerated shoulders (and how cool are they?!!!!) the peplum.  The mid-knee length.  The clever designer of this pattern however has taken the essence of that genre and given it a modern little twist.  The asymmetry of the collar treatment.  The jagged uneven teeth on that peplum.  I think that’s why I was drawn to this new design.  Classic shape but with an edgy funky strangeness about it.  A slightly off, not very faithful interpretation of a shape now considered way old hat.

Details:
Dress; Vogue 1155, “antique” silk taffeta
Shoes; Misano, from Labels
Bag; gift from my husband, early on in our marriage

Pattern Description
Semi-fitted, lined, above mid-knee length, fully interfaced dress has princess seams, midriff, peplums, two piece short sleeves, wrap front with buttons, hook and eye closures
Pattern sizing
6-12.  I cut size 10
Did it look like the drawing/illustration on the patten envelope after you had finished sewing it?
yes, except I had added 7.5 cm to the overall length, and ended up overlapping the fronts a bit more to get better coverage
Were the instructions easy to follow?
The instructions were clear.  Bear in mind this is an Advanced/Plus Difficile pattern.  There is a rather bewildering instruction in one part; steps 28-31 would have you sew the midriff section to the bodice, then sew the midriff facing at the ends of the midriff only, turn right side out and handsew the top level of the facing on the inside.  (??)  A far better method to complete this part is the traditional way, ie, right sides of the midriff and midriff facing together encasing the bodice, the sew the three layers together in one clean seam.  This is how I did it.
What did you particularly like/dislike about this pattern?
I love the design, and how it looks.  Totally love those sharp out-there shoulders.  It has pockets!  How many evening dresses have pockets? precious few and there should be more…
The shape is a little boxy for my tastes and not as fitted as I would have liked, so I made a few fitting alterations to get a bit more shape into it.  I  also didn’t like how the entire dress was to be interfaced.  Iron on interfacing has it’s rightful place, but for an entire dress?  I don’t think so…
Fabric used:
Silk taffeta, or silk dupion
Pattern alterations or any design changes you made:
The instruction to apply fusible interfacing to every piece gave me pause.  Eventually, because I was using very stiff fabric which has a lot of its own body already, I decided to just interface the facings, as traditionally.  I also interfaced the sleeve cap pleats once sewn in place, as these need to be quite stiff to look good.
I added 7.5cm to all skirt and skirt facing pieces, as I thought the dress looked very short on the pattern photograph.
Step 28-31, sewed the midriff facing and midriff to the bodice in one clean seam, rather than in the piecemeal method outlined in the instructions.
I have a narrow torso, and removed about 3cm width here overall,  graduated around each of the midriff sections. When it came to sewing on the buttons and hook and eye closures it was still a little loose about the midriff and the skirt gaped a little more than was comfortable for me, so I also overlapped the front pieces a little more (another 3cm) than indicated in the instructions.  Overlapping the fronts a bit more gave a better fit for me and made me feel better covered up.
Would you sew it again?  Would you recommend it to others?
I might sew it again.  I wouldn’t mind a black version now!  I would recommend this pattern to advanced seamstresses who like garments with an edgy look, as well as a sewing challenge.
Conclusion:
Well, I adore my dress!  Although I reckon this could be categorised as much a coat as a dress.  The construction is just like a lined coat.  And the closure, very coat-like too.  But I feel very modern and sharp in this and am excited about wearing it to special occasions!

Later edit: You WILL need a petticoat or slip with this dress as it gapes considerably when you are seated.  I made one using Burda 8071 in silk satin of the same colour, sitting 2cm shorter than the dress.  It works beautifully.  To see the slip, go here.

pinterestmail

Black, gold and beaded cocktail/ball dress

This is not a new dress (although I have finished my new evening dress and will show it here soon!)  This is an old dress I made about  three years ago, out of lovely matte stiff silk taffeta for the overskirt, very fine black tulle for the underskirt; and the bodice is gold satin with a beautiful beaded, embroidered and sequinned black tulle fabric overlay.  There is black satin ribbon sewed as a decorative detail under the bodice and tied in a little bow, and I also added thin black satin ribbon shoulder straps.  The beaded fabric was very expensive, about $80/metre from memory, so I only bought about 40cm, just enough for the width of the bodice!  There were still some scraps, and the beaded tulle was decorated a little sparse IMO, so I cut out quite a few of the beaded/embroidered motifs from the leftovers and hand-sewed them onto the bodice after it was finished to fill in the gaps and make for a super-luxurious, fully sparkly bodice!    The pattern I used was Burda 8046.  I haven’t checked if this pattern is still available, but I’ll review it anyway…

Details:
Dress; Burda 8046, black silk taffeta, black tulle, gold satin, black beaded/embroidered and sequinned tulle
Sandals; Sachi, bought at some little boutique in Melbourne
Bag; gift from Craig, very early in our marriage

Pattern Description
Close-fitting strapless or halter neck dress with under-bust seam, and bolero jacket.  I made the strapless version of the dress
Pattern sizing
European 32-44 (US 6-18); I initially cut size 38 (12) but ended up adjusting the bodice to be quite a lot narrower.
Did it look like the drawing/photograph on the pattern envelope once you had finished sewing it?
yes, except that I added very thin ribbon shoulder straps to hold it up…!
Were the instruction easy to follow?
very easy
What did you particularly like or dislike about this pattern?
The pattern is fine.  It is very easy to sew up.  I chose it because the shape of the dress fitted the vision I had in my head for this particular dress.  I would have preferred a boned bodice with an internal foundation and waist stay and in retrospect should have constructed the bodice to allow for this…  However I am perfectly happy with the outcome
Fabric used:
Fine black tulle for the underskirt, black silk taffeta for the overskirt.  Gold satin for the bodice and a beaded/embroidered and sequinned black tulle for a bodice overlay.  6mm black satin ribbon sewed on as a decorative division between the bodice and the skirt.  3mm black satin ribbon shoulder straps
Pattern alterations or any design changes you made:
I added thin satin ribbon shoulder straps after fearing that bodice wasn’t going to stay up by itself….  They weren’t strictly necessary but I wouldn’t have felt comfortable without them…
Would you sew it again?  Would you recommend it to others?
I would definitely recommend this as a very easy strapless dress pattern.  Sews up very quickly.  With added straps, it is perfect.  Without straps… not so much
Conclusion:
I expect the halter neck version of this pattern is the perfect “very easy ball-gown” pattern, perfectly suited to a beginner project.  The strapless version is easy, but as the design is not fitted very firmly at the waist I can imagine one would be constantly hoinking it up without added shoulder straps…  although maybe a larger-busted woman wouldn’t have the same problem.  I do love my dress however and have worn it to at least four or five formal functions with great success.


pinterestmail
Switch to mobile version
↓