I put these pockets in the two raincoats made recently, and they’re pretty well perfectly waterproof. Yay! See, while we have only had mobile phones, iPods and electronic keyless entry thingys on our car keys for a few years, they are now ubiquitous. And they need to be kept dry. So, when I was thinking about my new raincoat and its pockets, I gave them a lot of thought re waterproofing. Firstly I eliminated as many seams as possible. Water can seep in through any and all unsealed stitching holes in a raincoat; so pocket designs with lots of exposed stitching, like patch pockets, and stitched-on pocket flaps, require tonnes of sealing, which is a messy, smelly and generally horrible job. So it’s a good idea to plan to eliminate them, if possible. Likewise, exposed zips are not good in the rain.
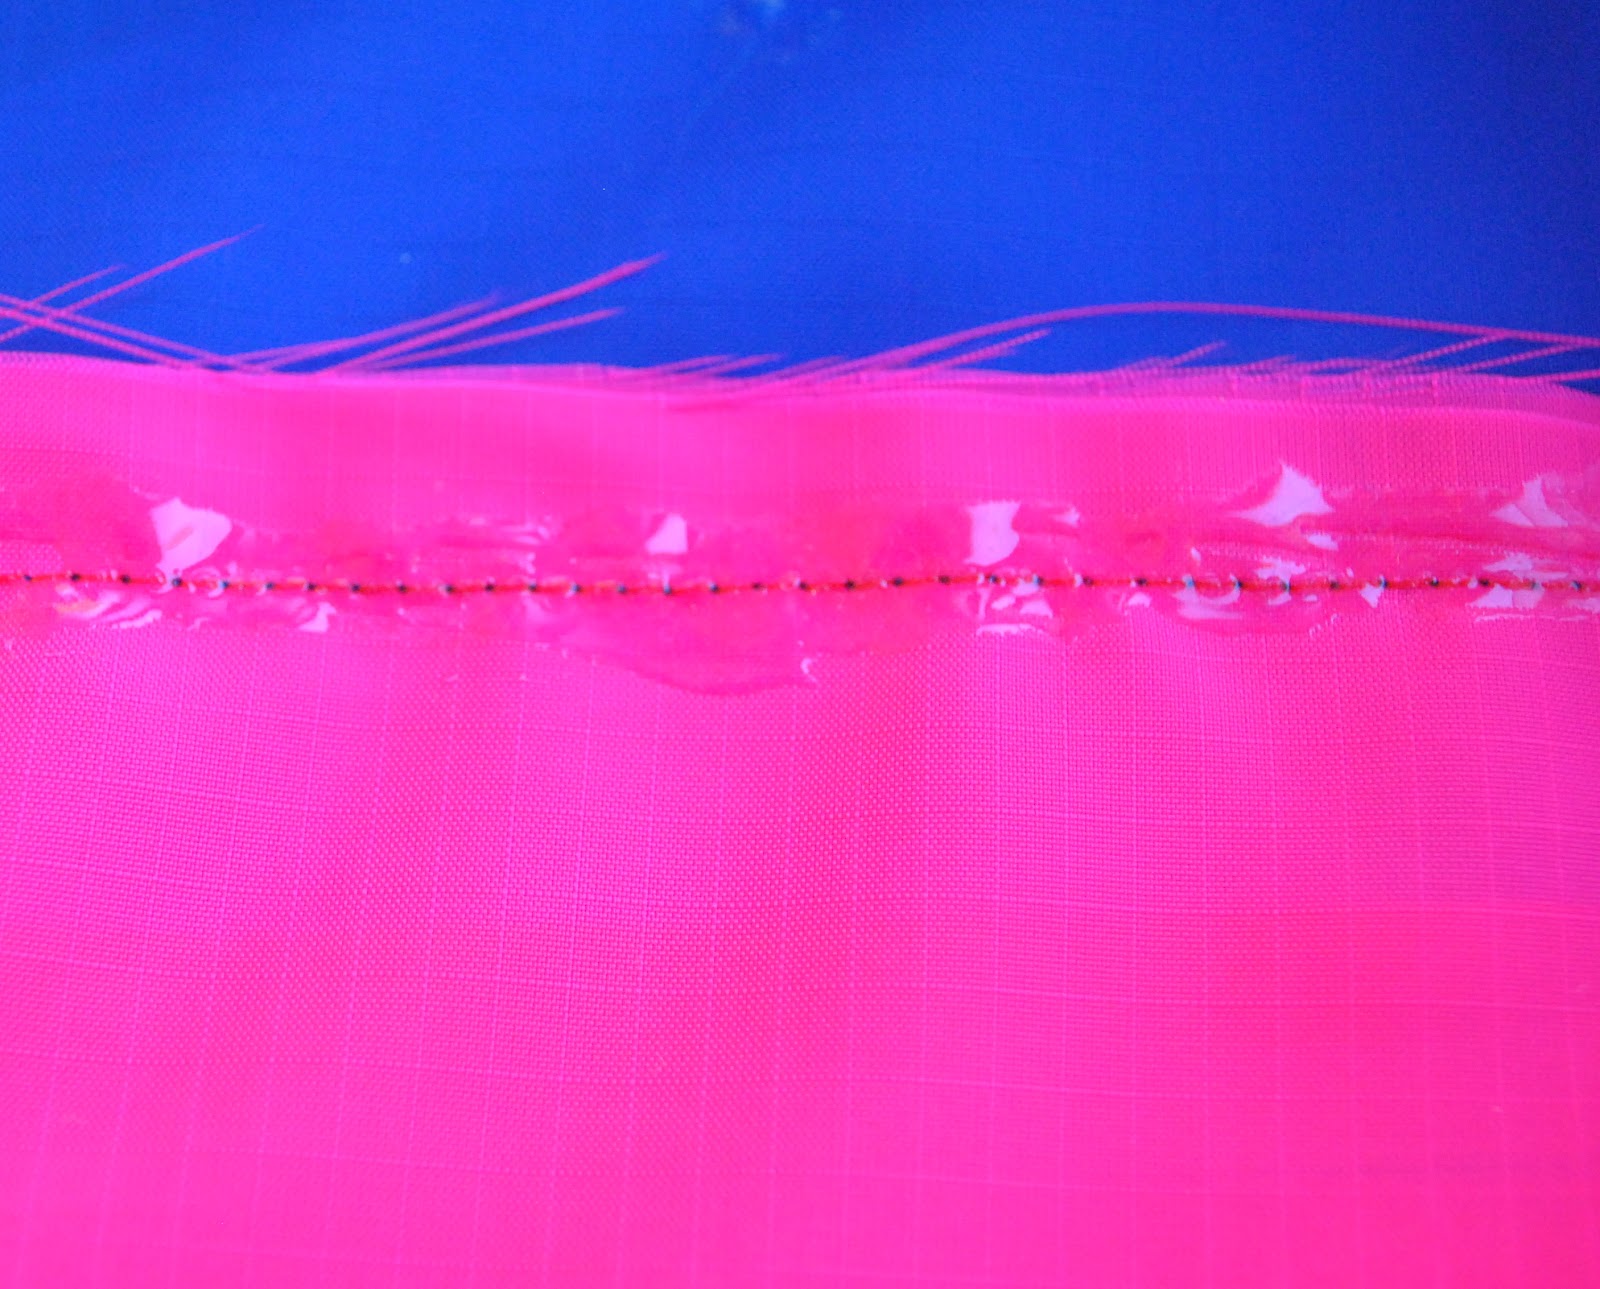
There is only one line of exposed stitching in these pockets, so it’s not too painful to waterproof with a commercial sealer.
This pocket eliminates some seams by extending out to the side seams at one side, and into the placket, at the centre front. So all of the pocket pieces are cut the full width of each front of the jacket.
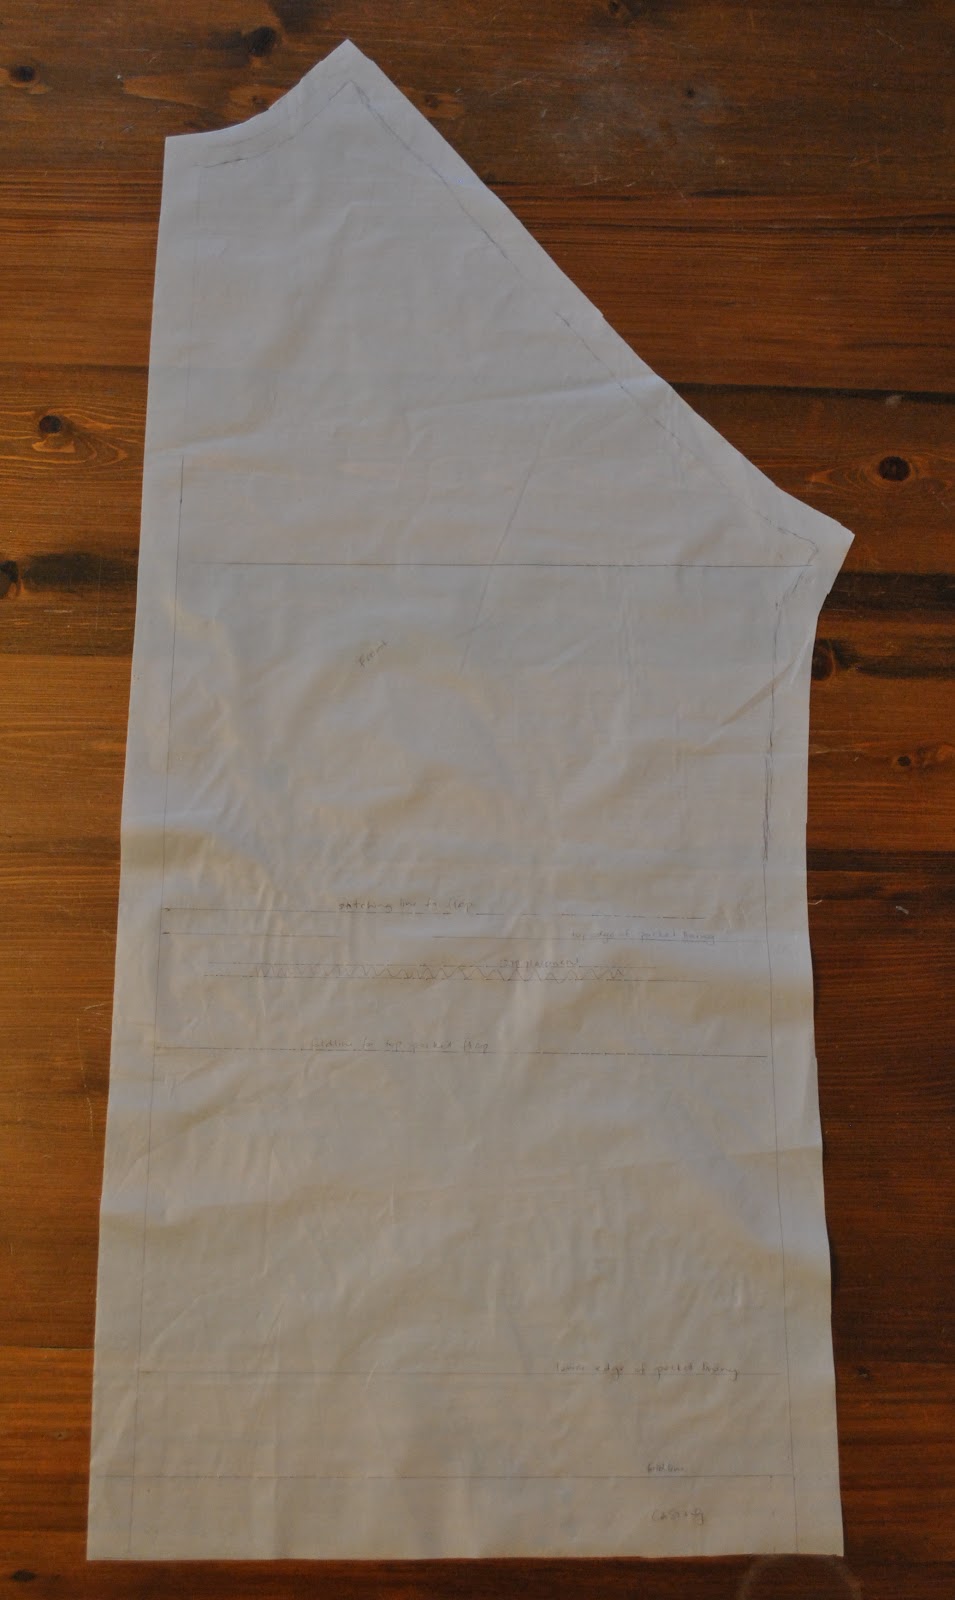
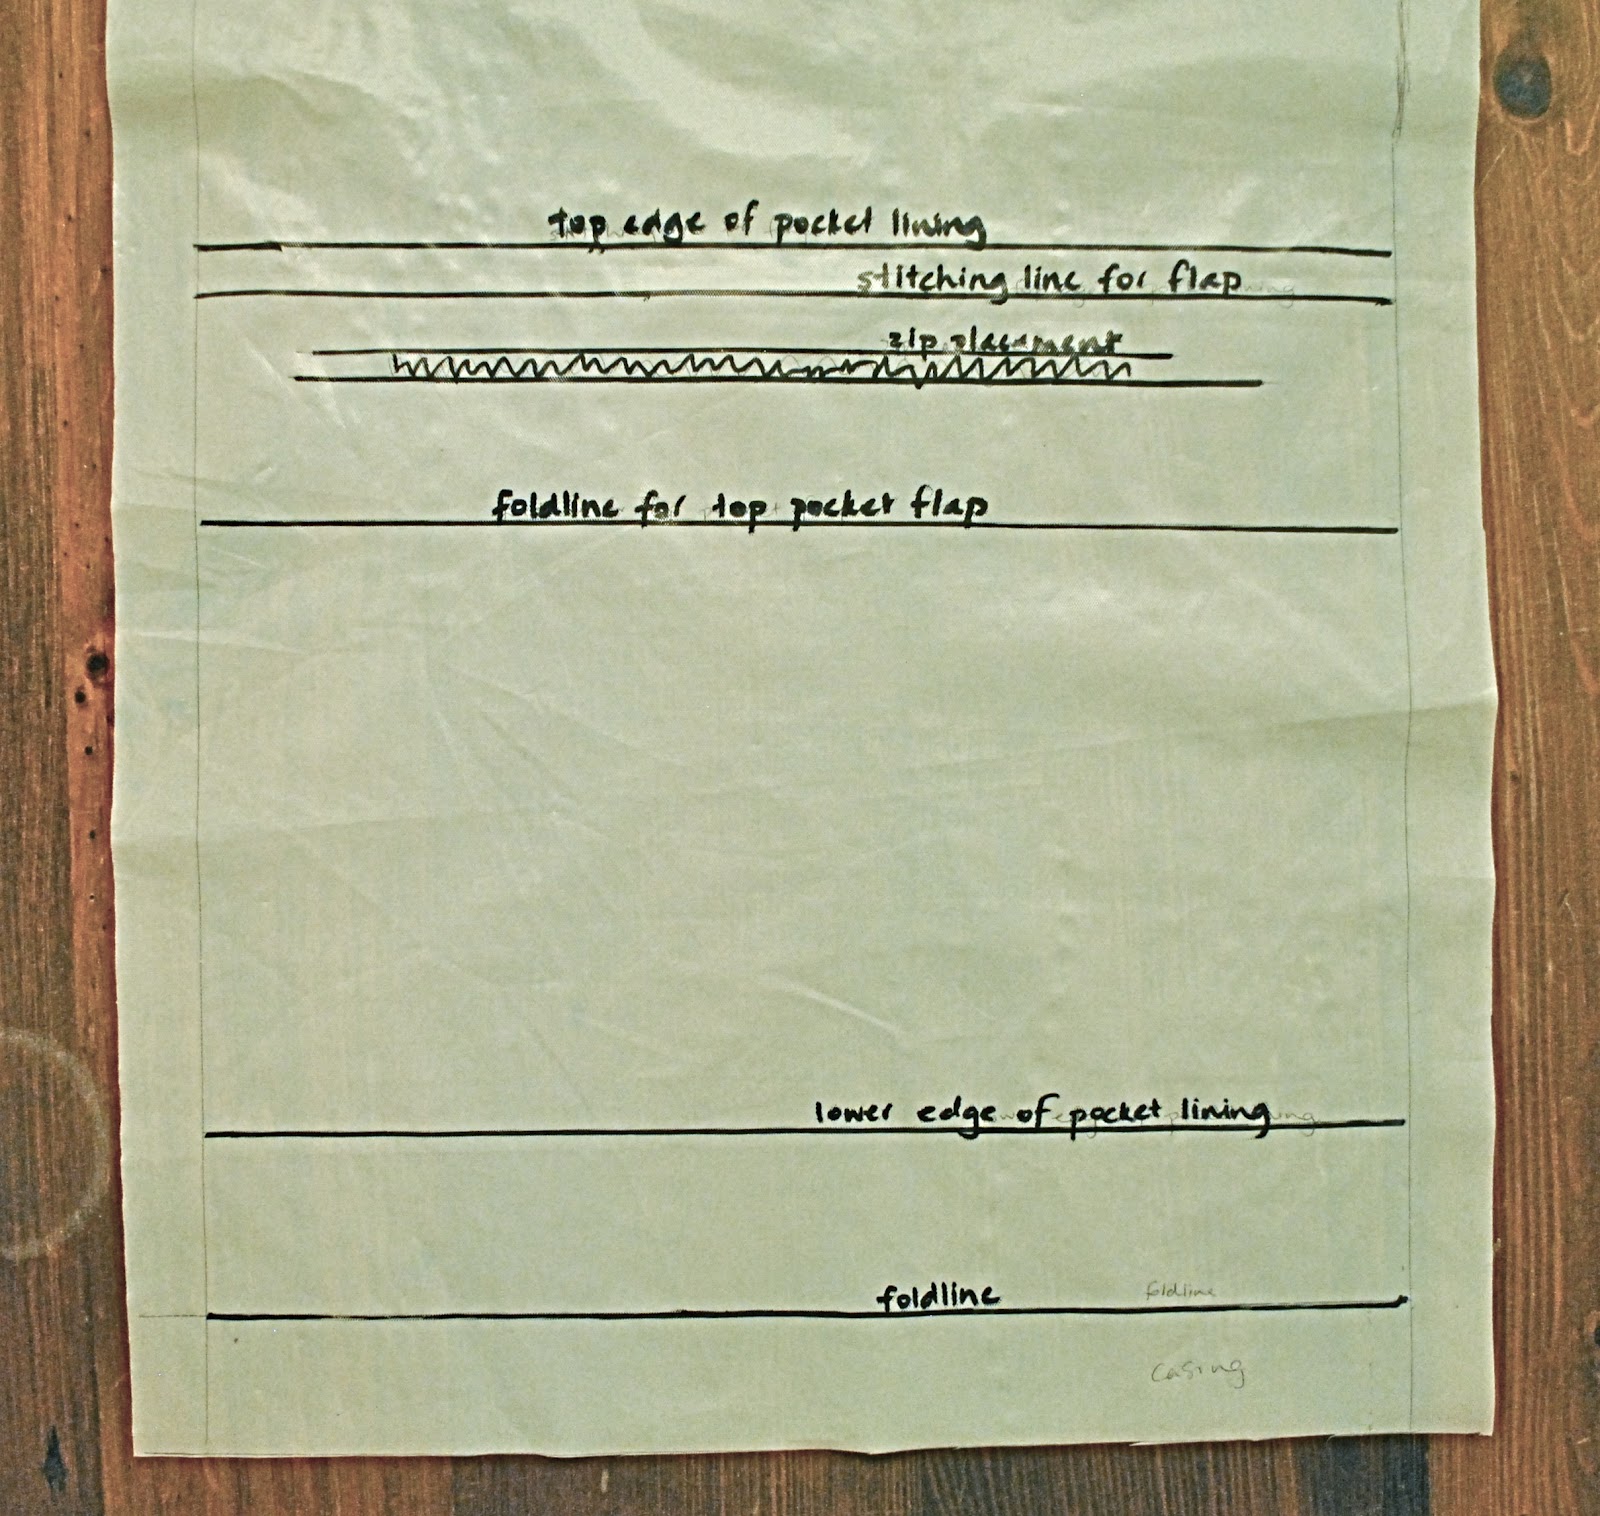
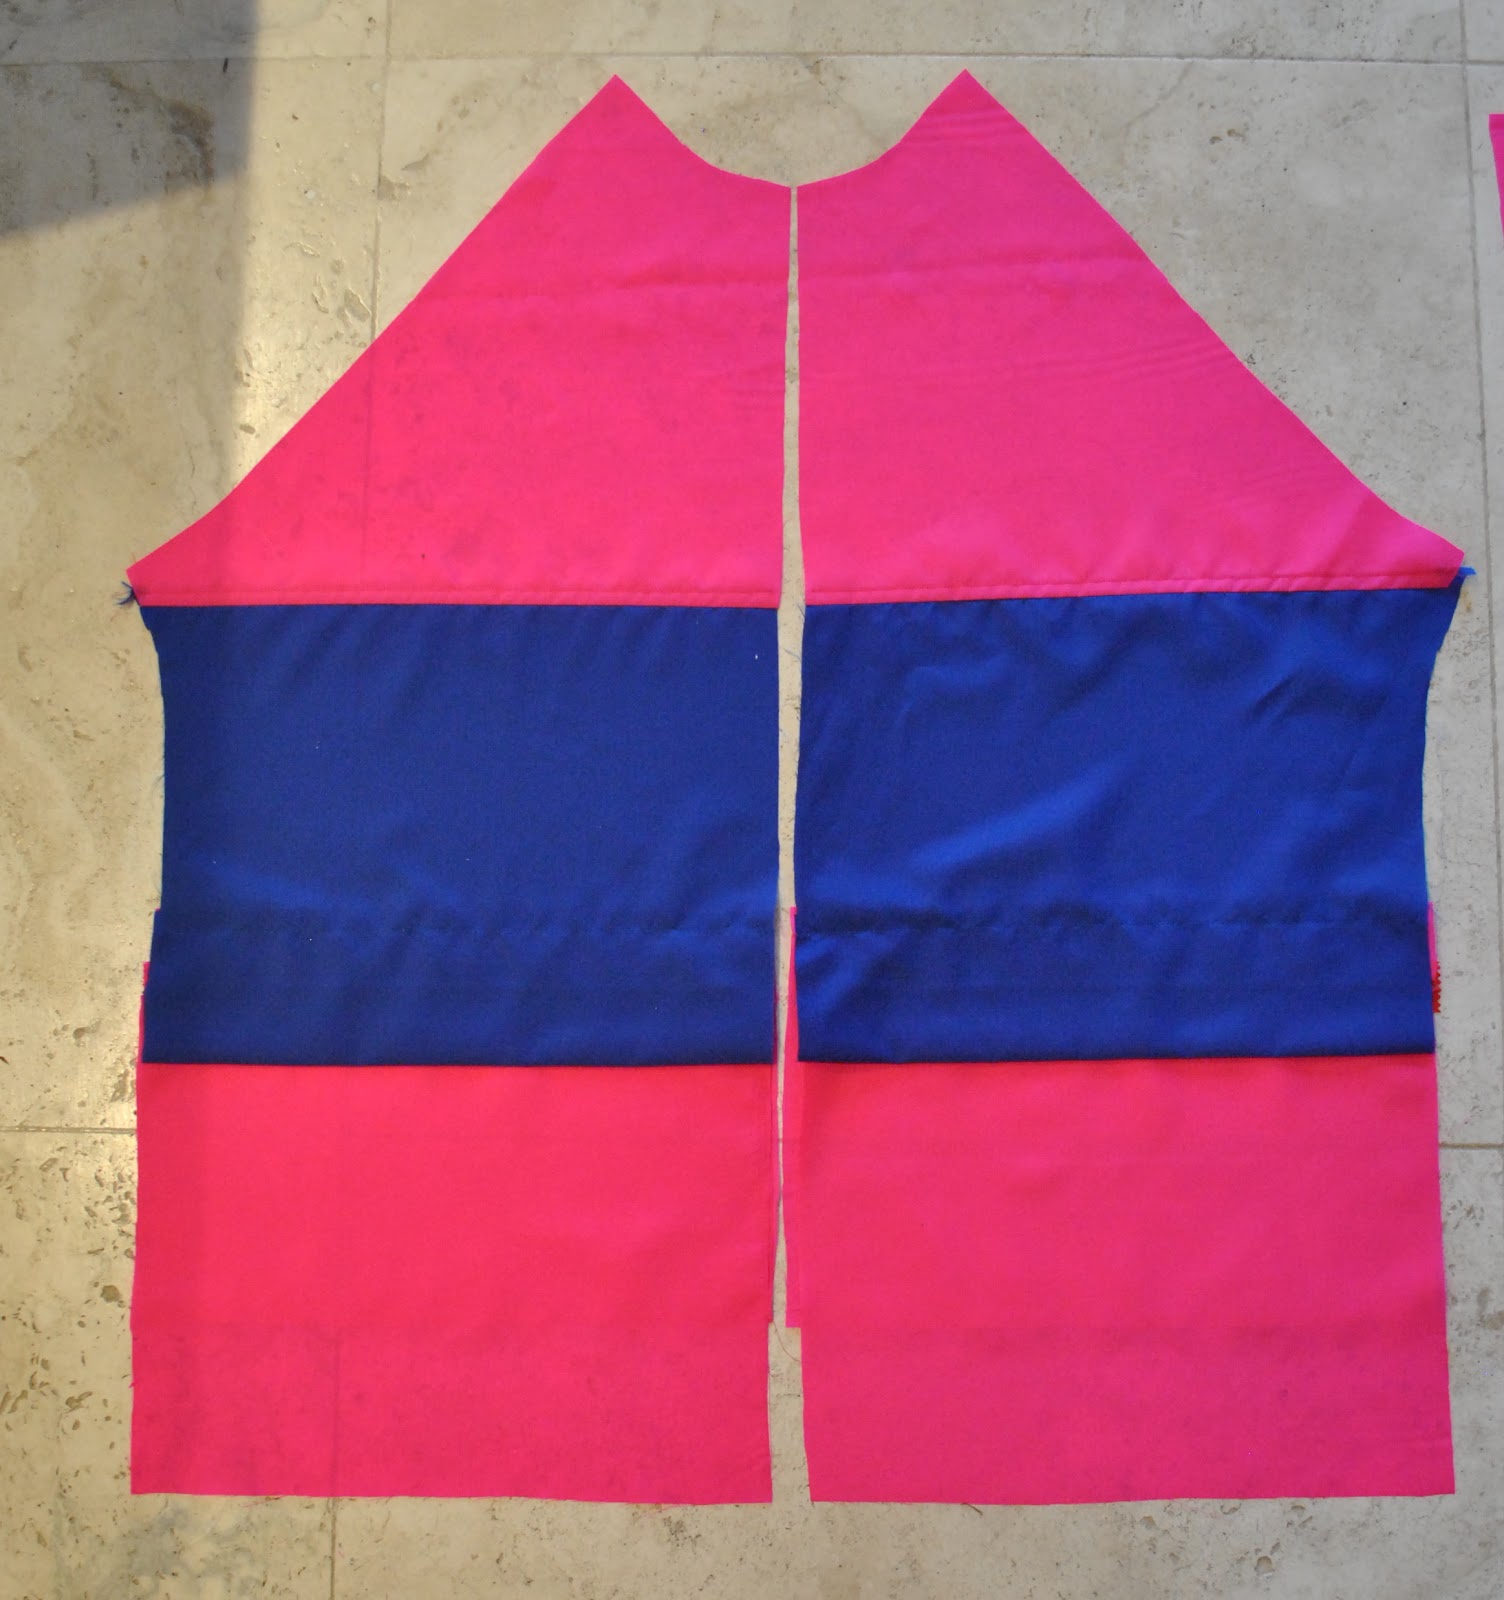
The front jacket piece looks like above, and the close-up below shows the relevant markings for the front pockets. I’ve re-marked them but I apologise that it is still difficult to read them; they read, from the top:
- top edge of pocket lining
- stitching line for flap
- (two lines with a zig-zag between them) zip placement
- foldline for top pocket flap
(and much lower)
- lower edge of pocket lining
- foldline (indicates the lower edge of the finished jacket, below this is the hem allowance)
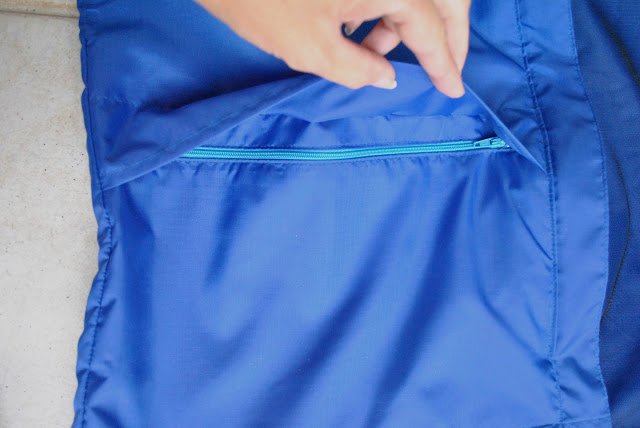
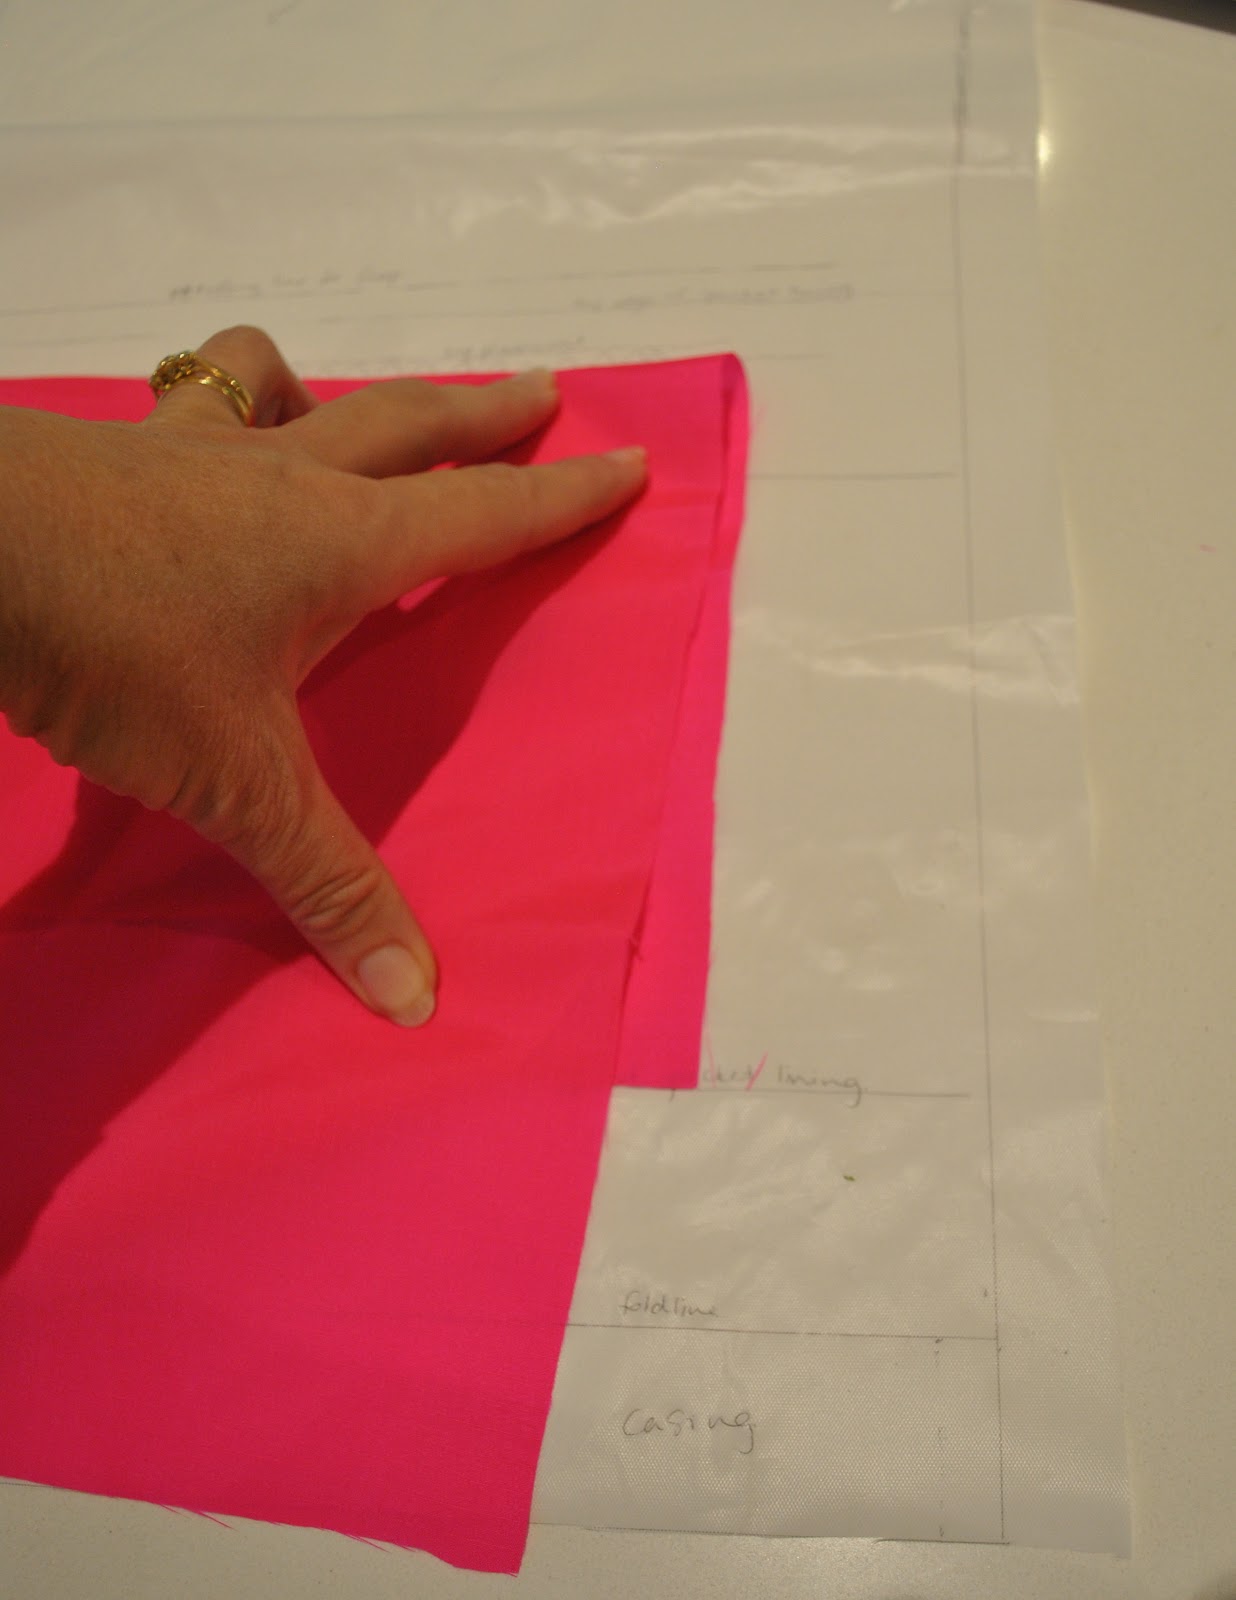
First, cut the two lower front pieces… these should be long enough to extend from the lower edge of the pattern piece above; up to the lower edge of the “zip placement”, and then fold here to finish at the “lower edge of the pocket lining”. I’ve pictured it splayed out here to show the length and how it folds at the zip placement line…
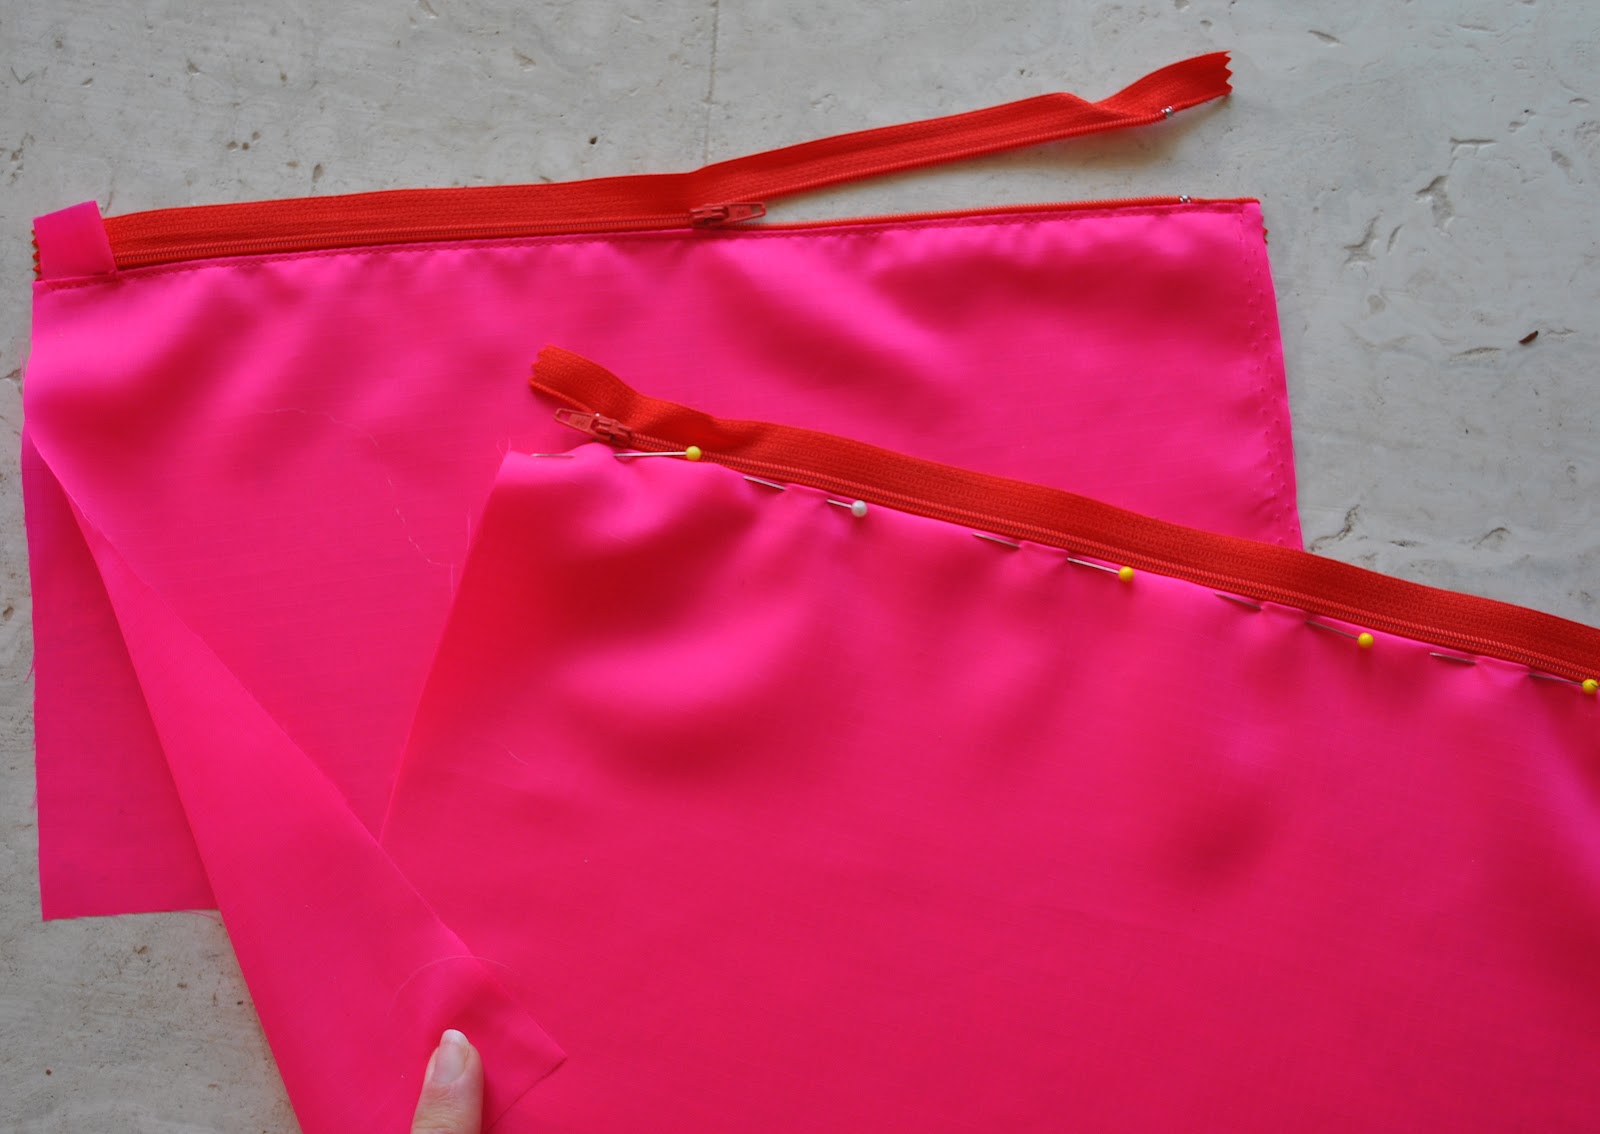
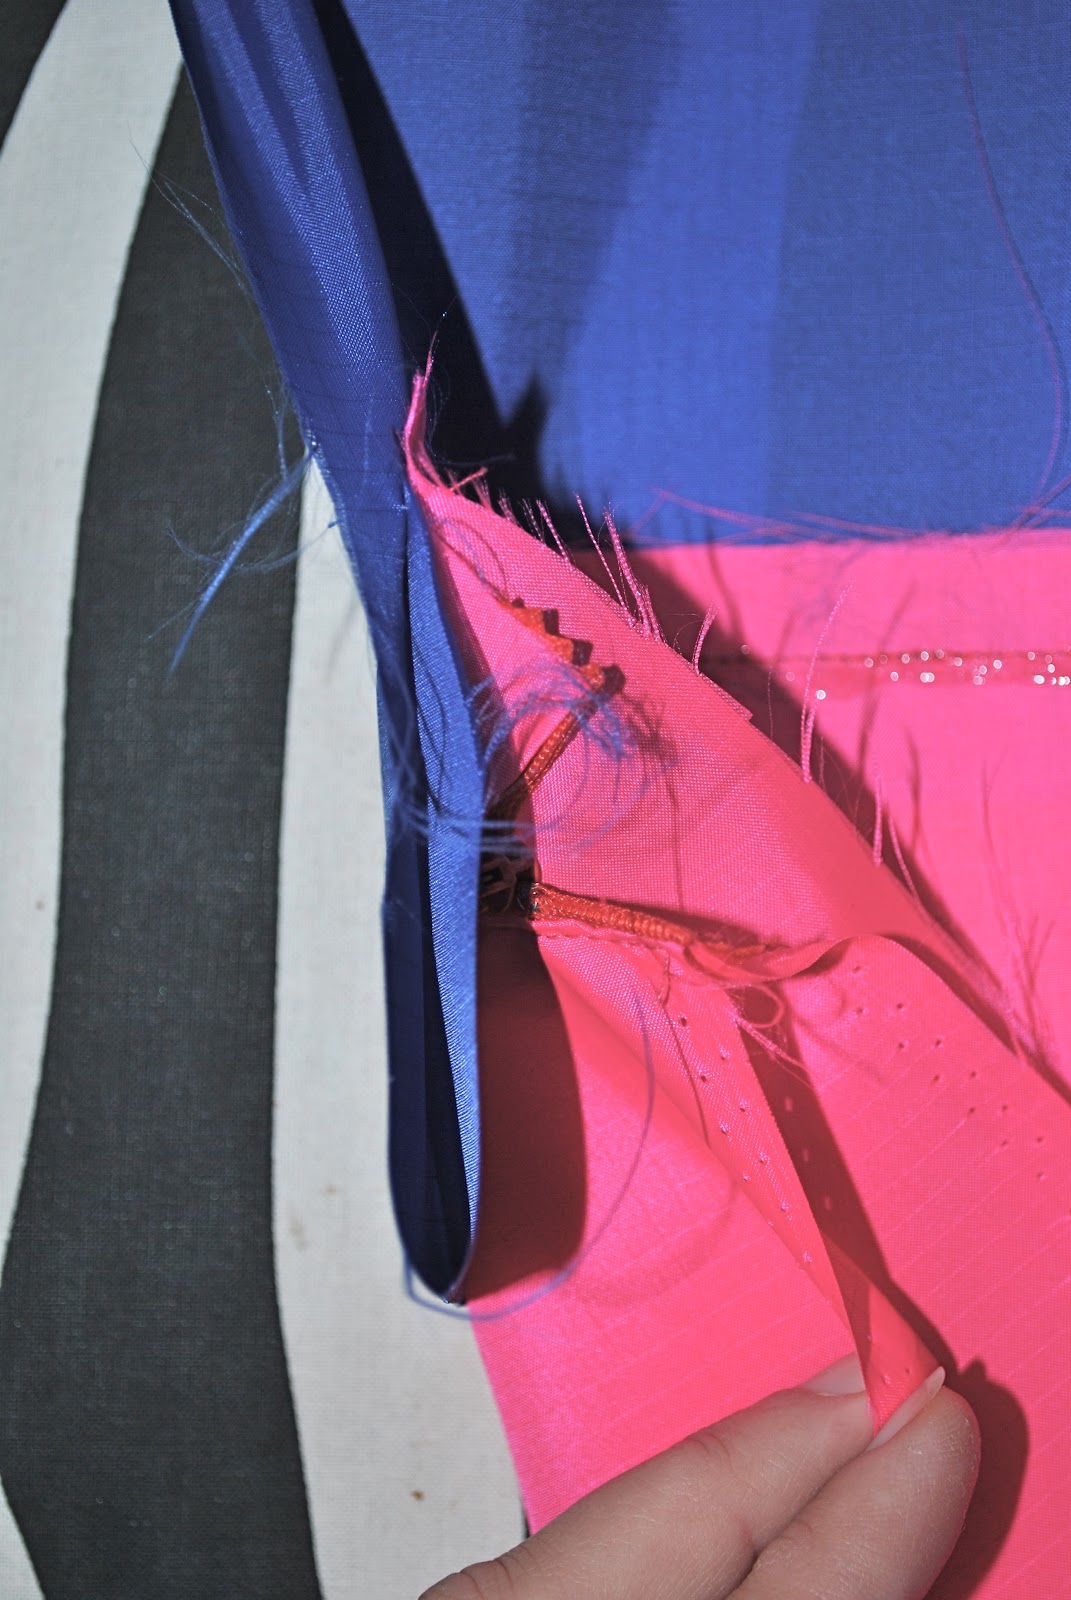
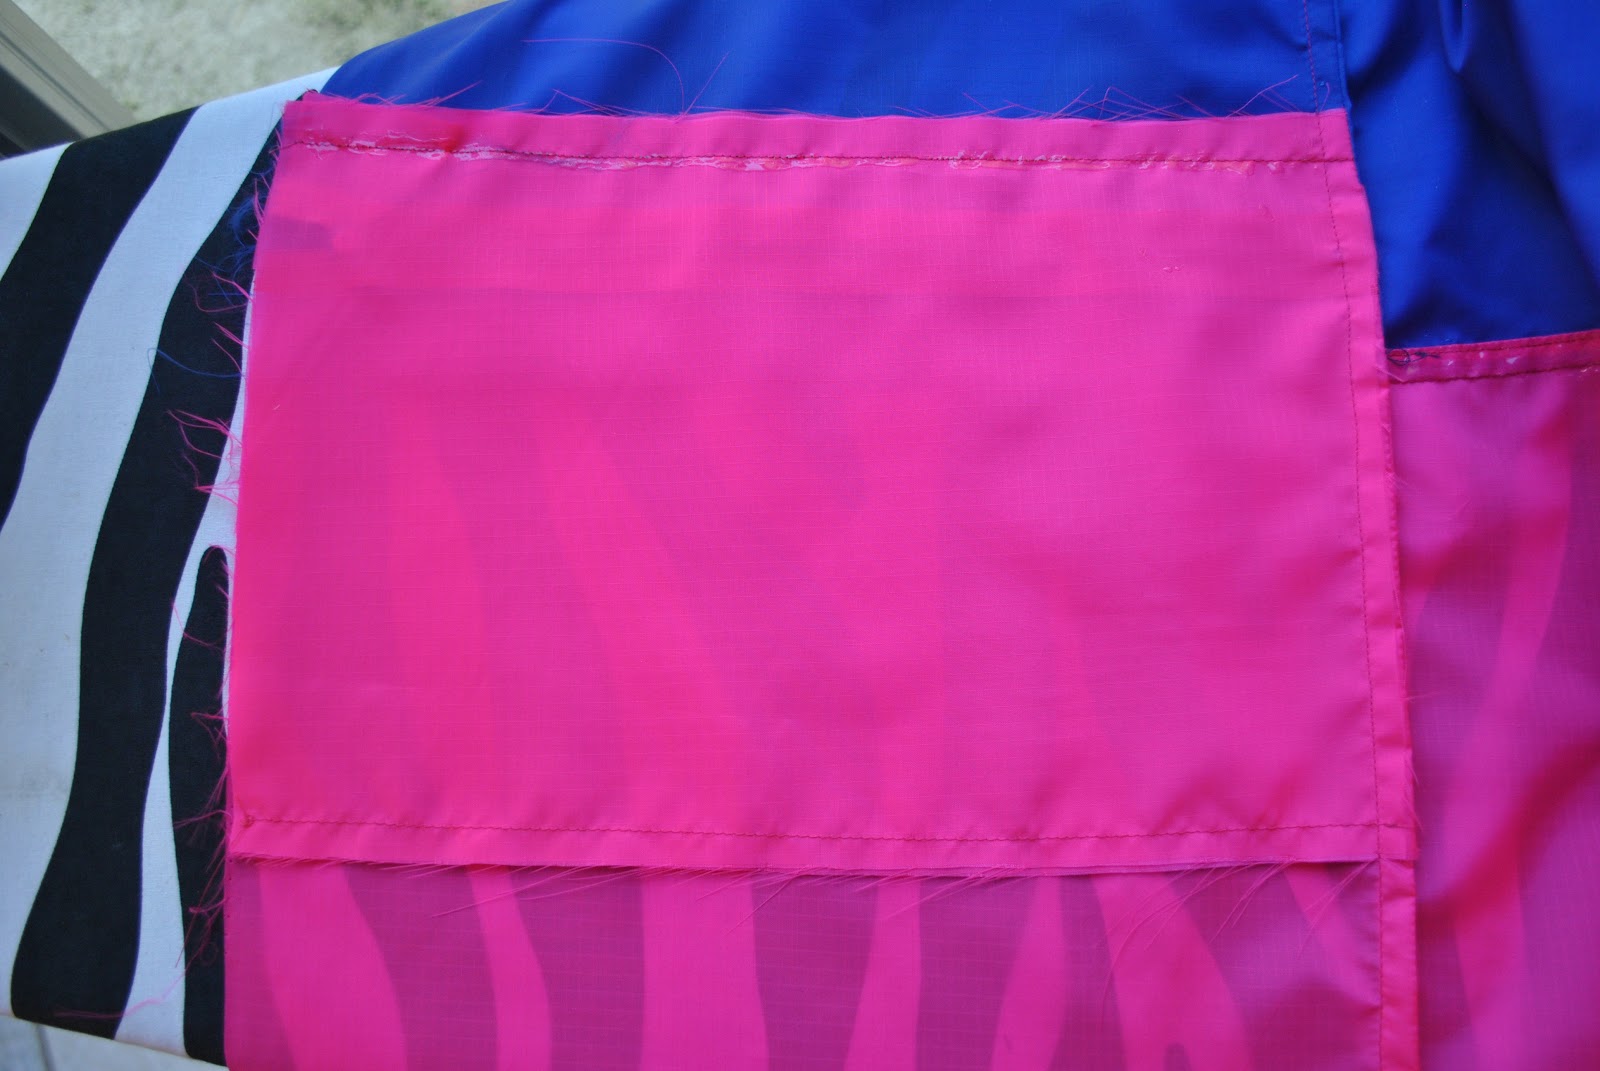
Press the fold in place. Pin and topstitch in place the two zips at the pressed foldline, remembering to place them to open at opposite ends to each other. At the upper left edge of the top pocket piece can be seen a small piece of folded fabric, stitched inside the seam to cover the metal zip stop and the bottom of the zip… even though you won’t be able to see this in the final pocket I still like to have this covered like so…
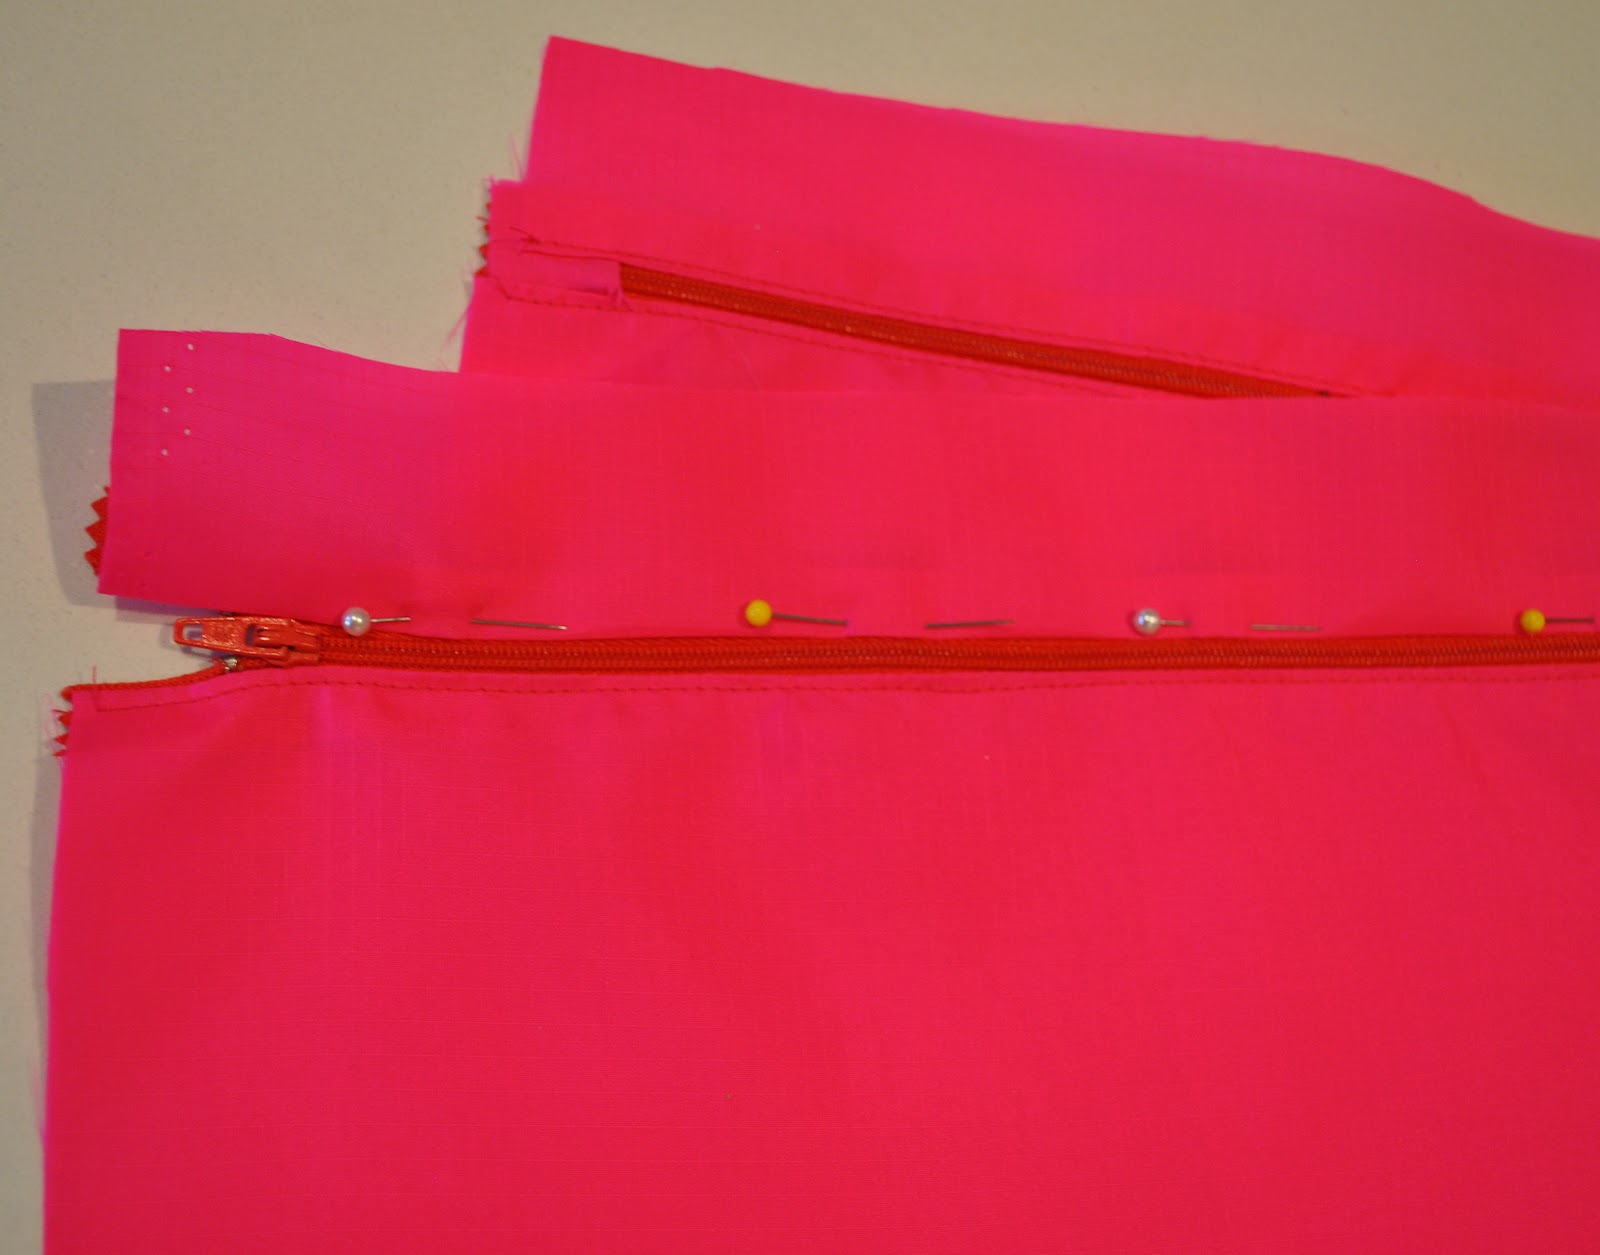
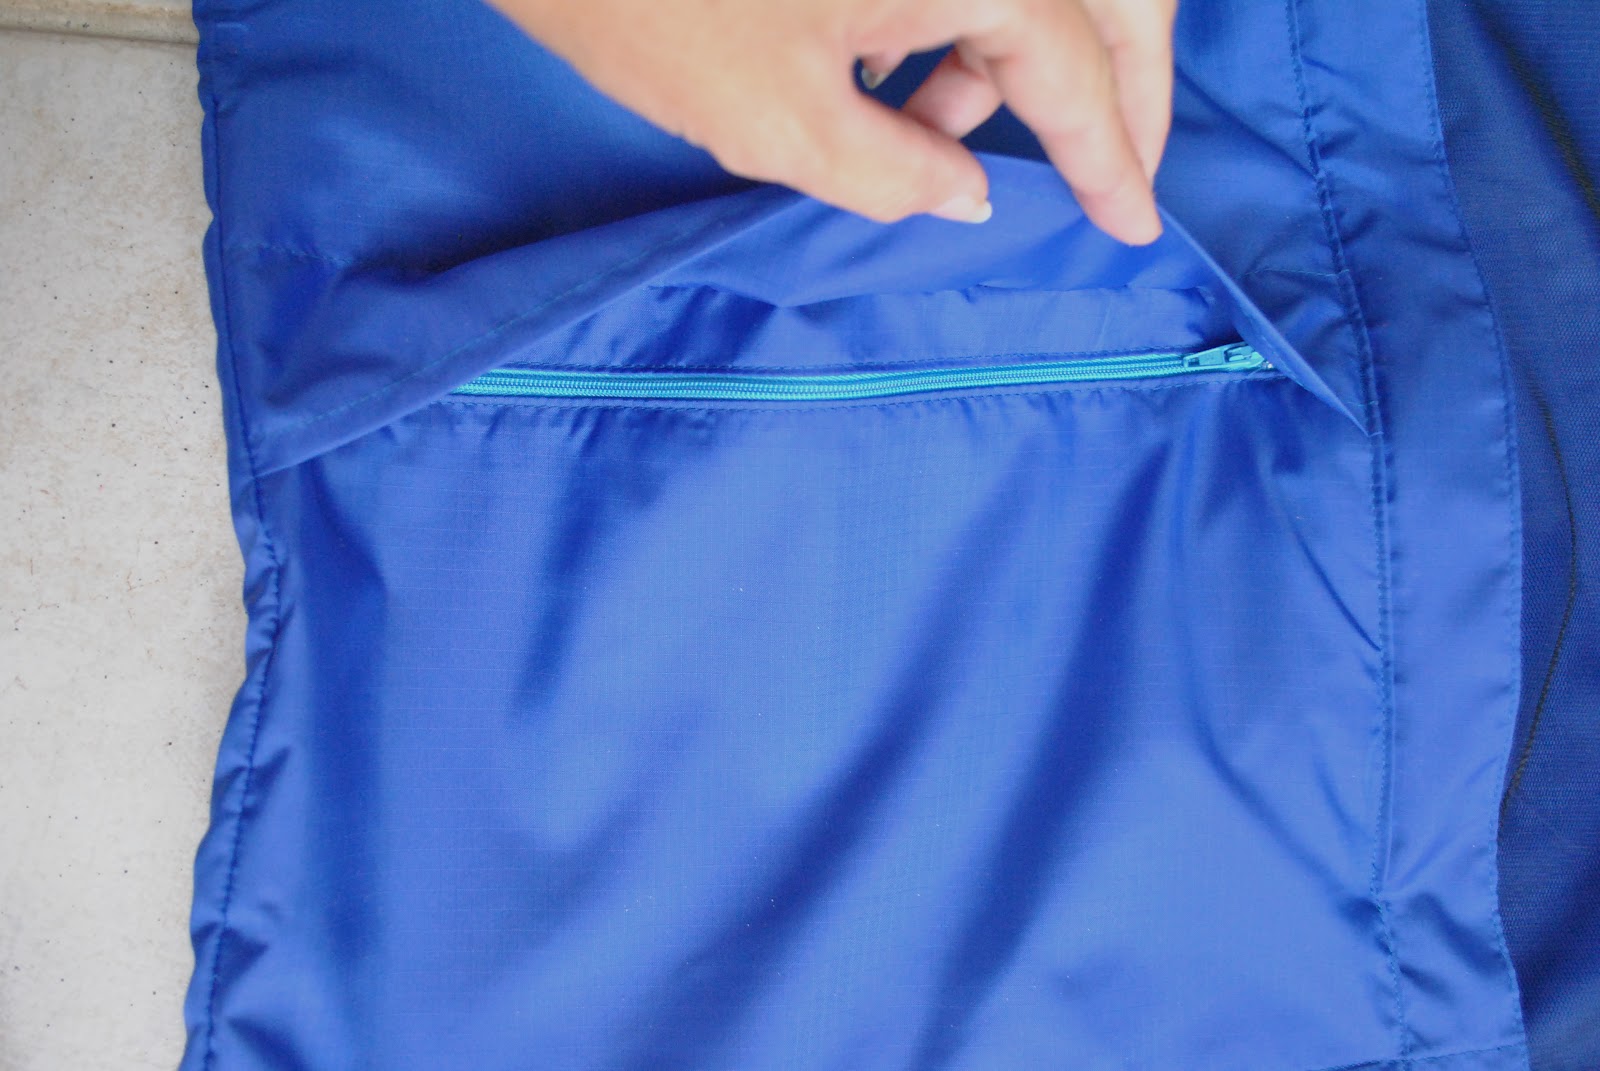
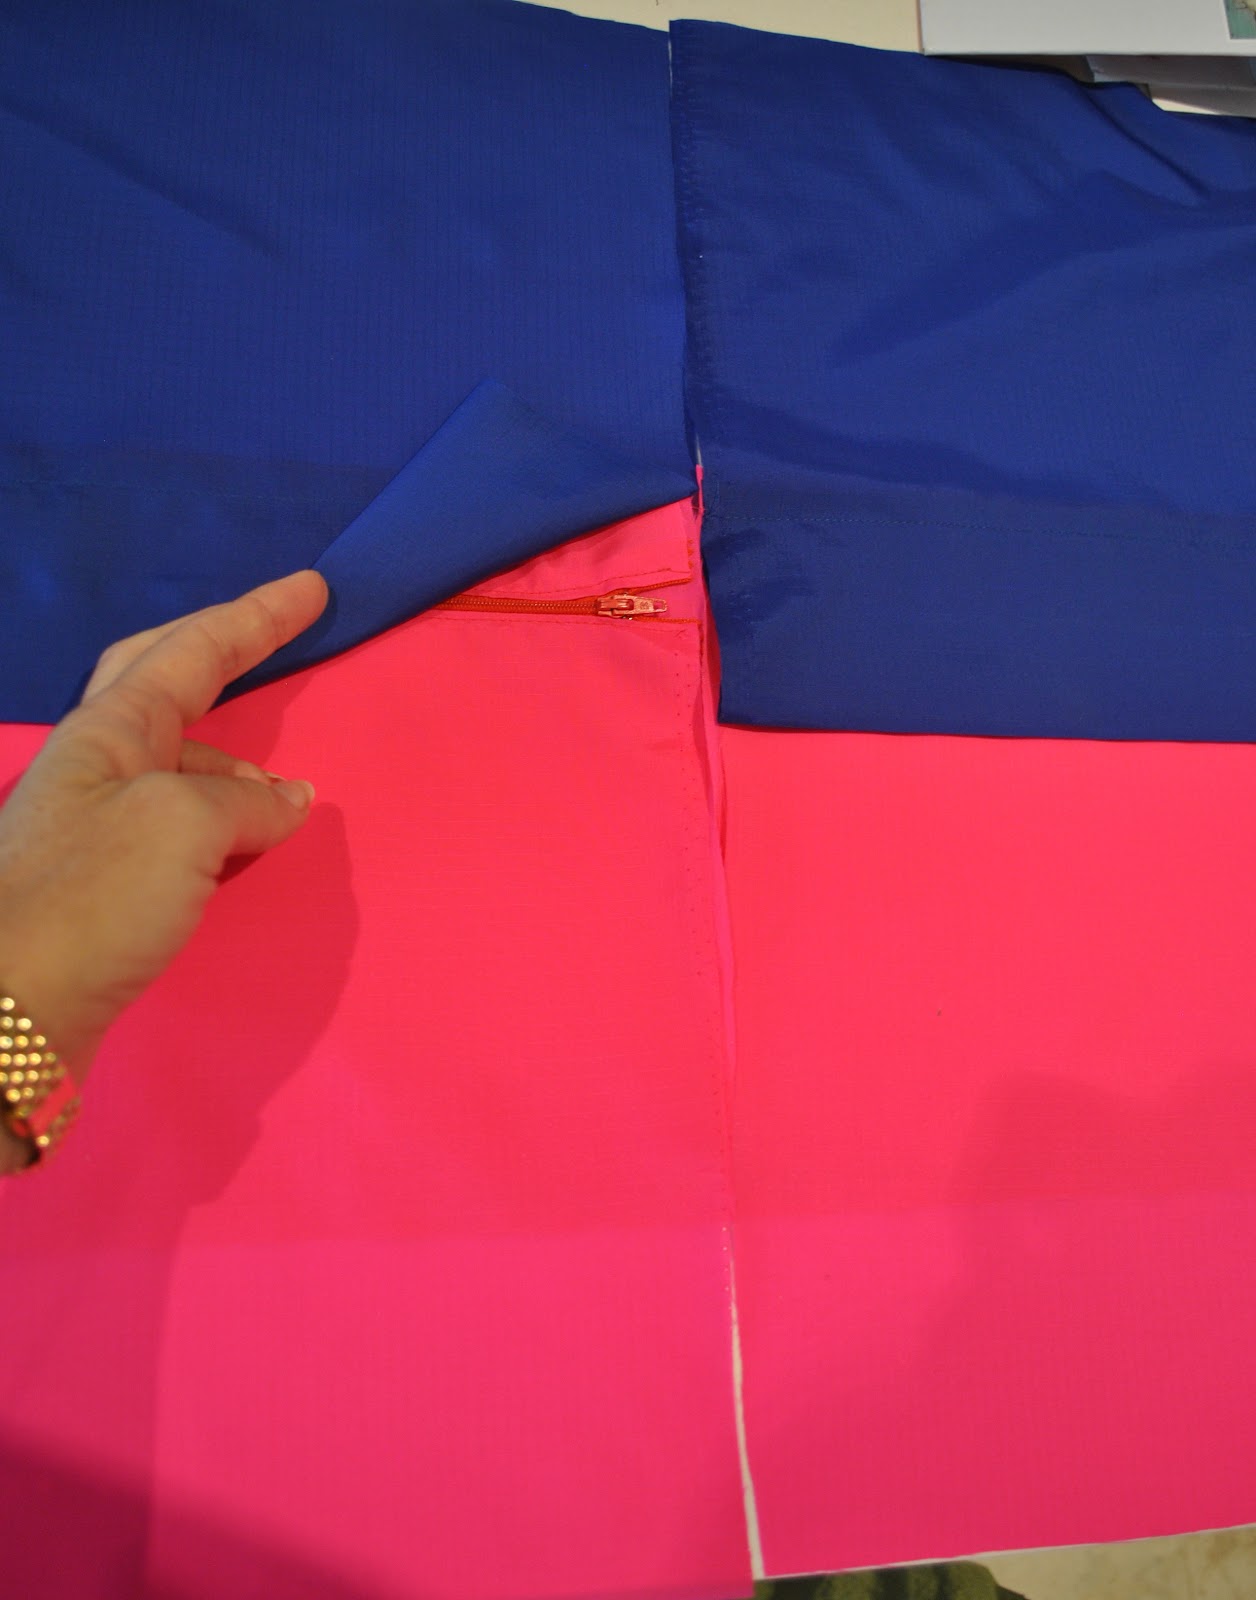
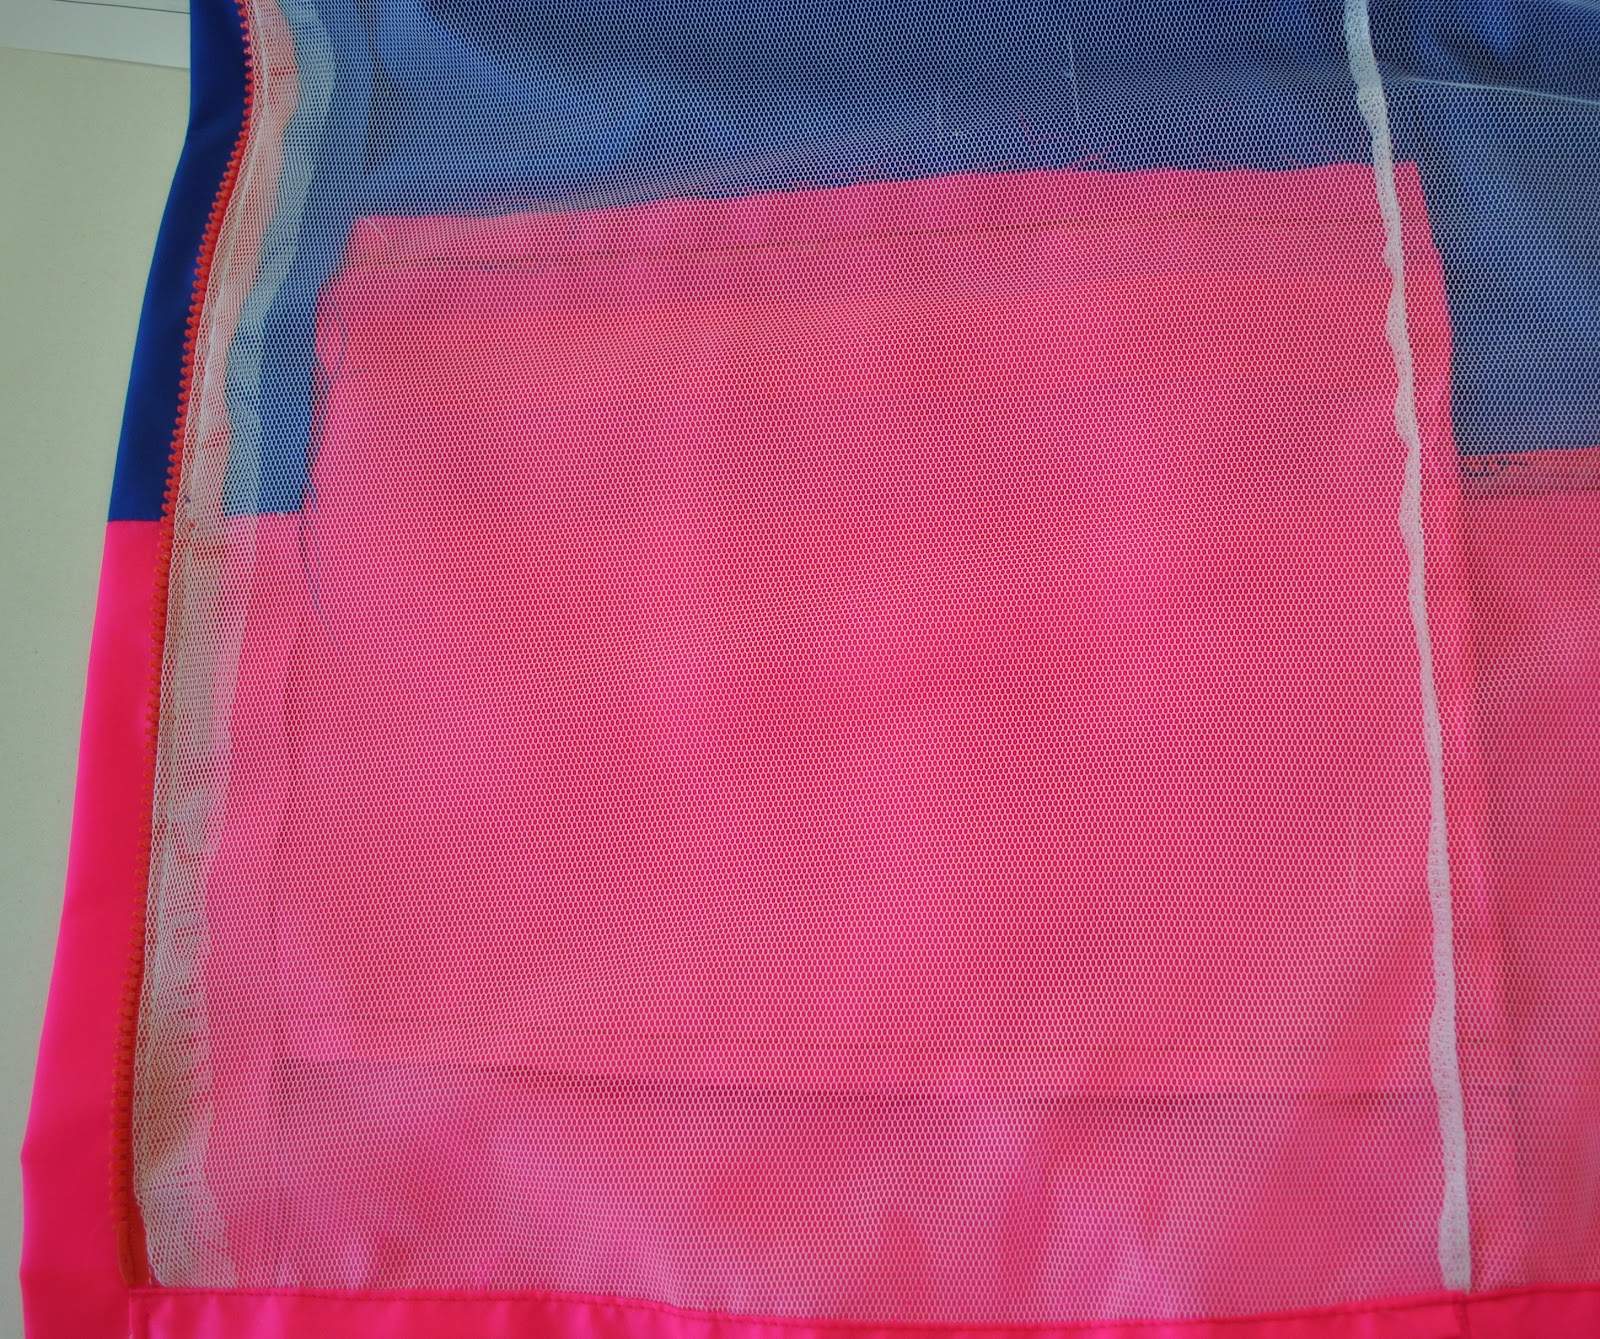
Now cut a full width piece to form the back lining of the pocket… these should be long enough to extend from the “top edge of the pocket lining” mark to the “lower edge of the pocket lining” mark. Stitch the upper edge of this to the upper edge of the piece on the zip, and the lower edge to the lower shorter edge behind that long front piece, as pictured below…
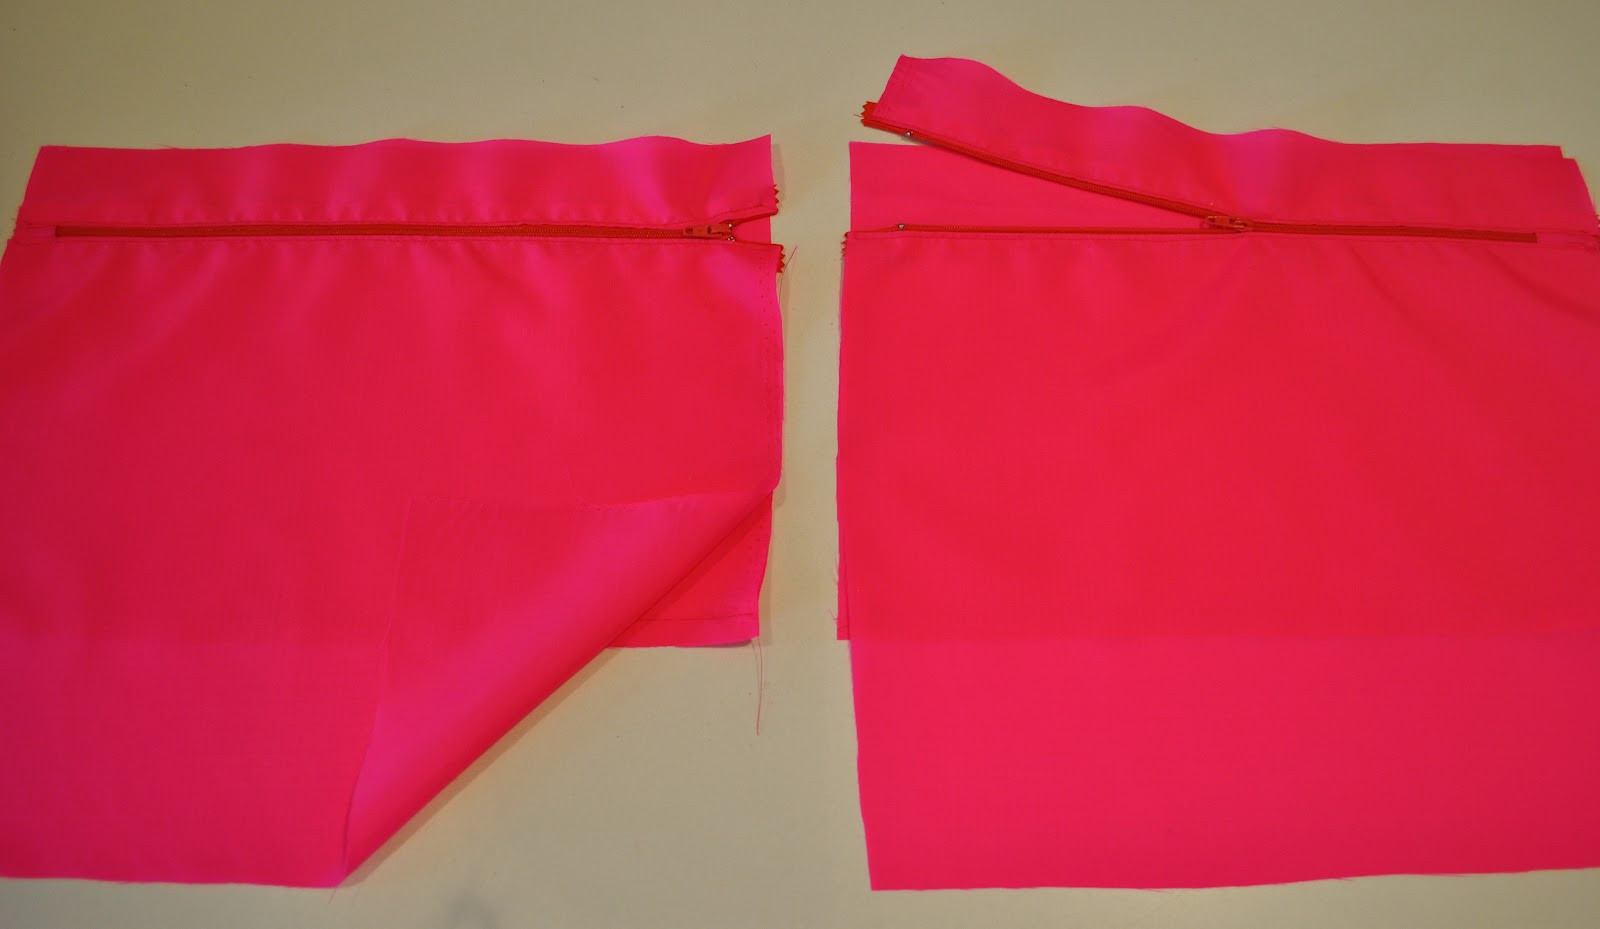
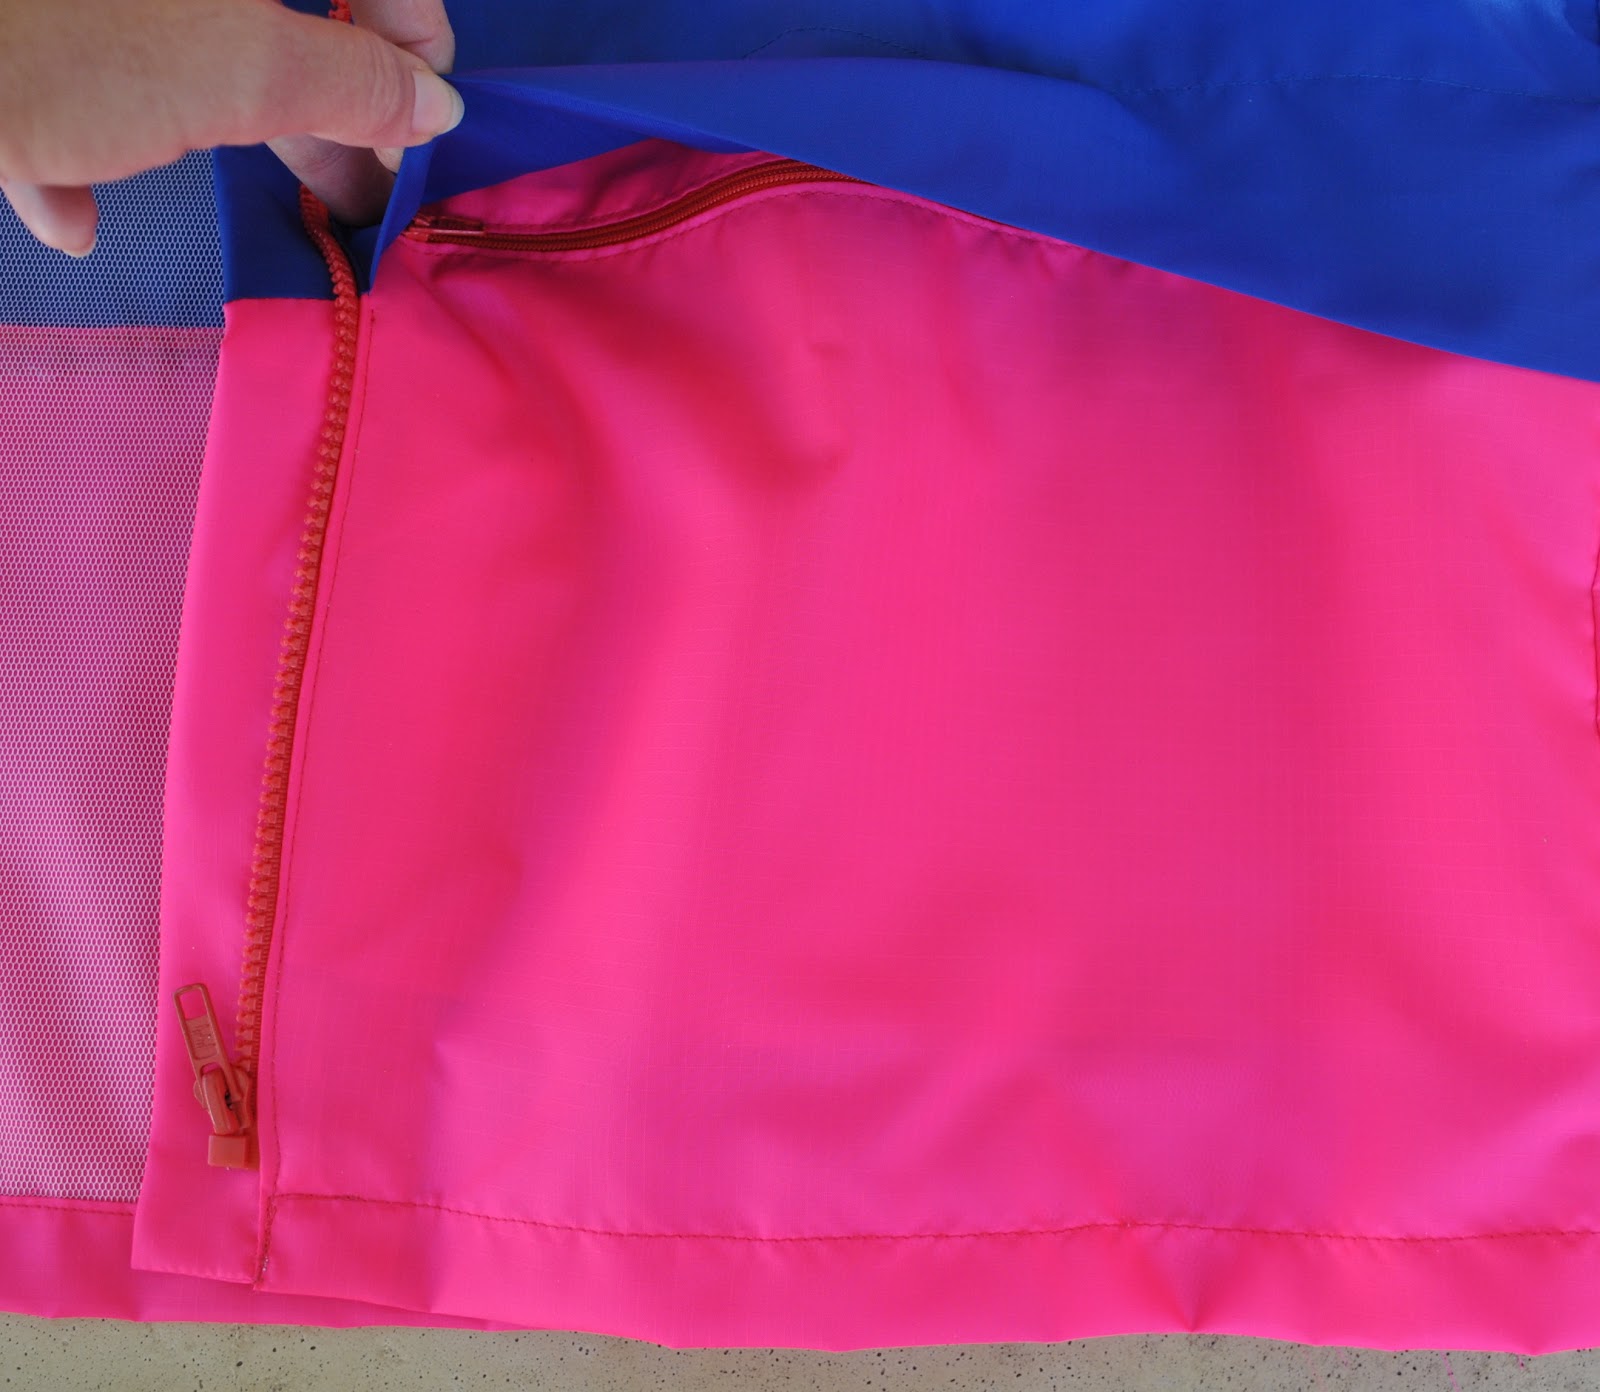
In the picture above, the lower edge of the left jacket front is folded back to reveal the pocket underneath, and the zip of the right pocket is partly open to reveal the pocket lining underneath. it can be seen that the top edge of the pocket is still unstitched at this stage.
Now for the upper edge of the jacket front; cut a piece to be long enough to come down to the “foldline for top pocket flap” mark , and fold back at this point and extend back up to the “top edge of pocket lining” mark (which is the top edge of the pocket so far). Press along the foldline.
Pin and topstitch along the “stitching line for flap”, catching also the upper two edges of the pocket underneath in the same line of stitching. The below picture is a side view of the layers and folds in the pocket.
Thanks for this; I'll need to remember this when I eventually make my raincoat. Is that just white mesh you have lined it with? Mine is see through so that's a good idea. Looks like you have your own stash of fluro pink ripstop! Although looking at yours (Cassie's?) it is much brighter than mine even.
It's very generous for you to share your new-found info. And I'm sure Bunny wasn't referring to you. Though the technique might be new to you, you are a consummate and advanced sewist.
Thanks for sharing this. I think it will be very useful when I make my Minoru.
Great post, thank you! I've starred this to refer to when I finally get to my raincoat, which really MUST get done before this winter!
Very clever and tidy rain gear pockets. There are also waterproof zips available, if any drops have the audacity to work their way past all those fabric folds.They are not at all fun to sew though! I have used them mostly for kayaking gear, but am considering them for a serious hiking raincoat.
you have researched your jacket painstakingly and this will benefit many sew-ers.
Very clever! Should I ever decide to make a really rainproof coat, I'll be sure to refer back to your instructions and experience. (But I do prefer staying indoors in wet weather.)
Keep sharing your techniques. I think most people on the net realise that when somebody shares a technique it is the way they do things and not necessarily the only way to do something. I personally think life would be a very boring place if we kept doing things the way we have always been told and didn't try something new once in a while. With my sewing I try new things all of the time a lot of which I find on blogs and I have been sewing for 35 years.
Very generous and useful tutorial.
Thanks, I am bookmarking this!