Taurus

 
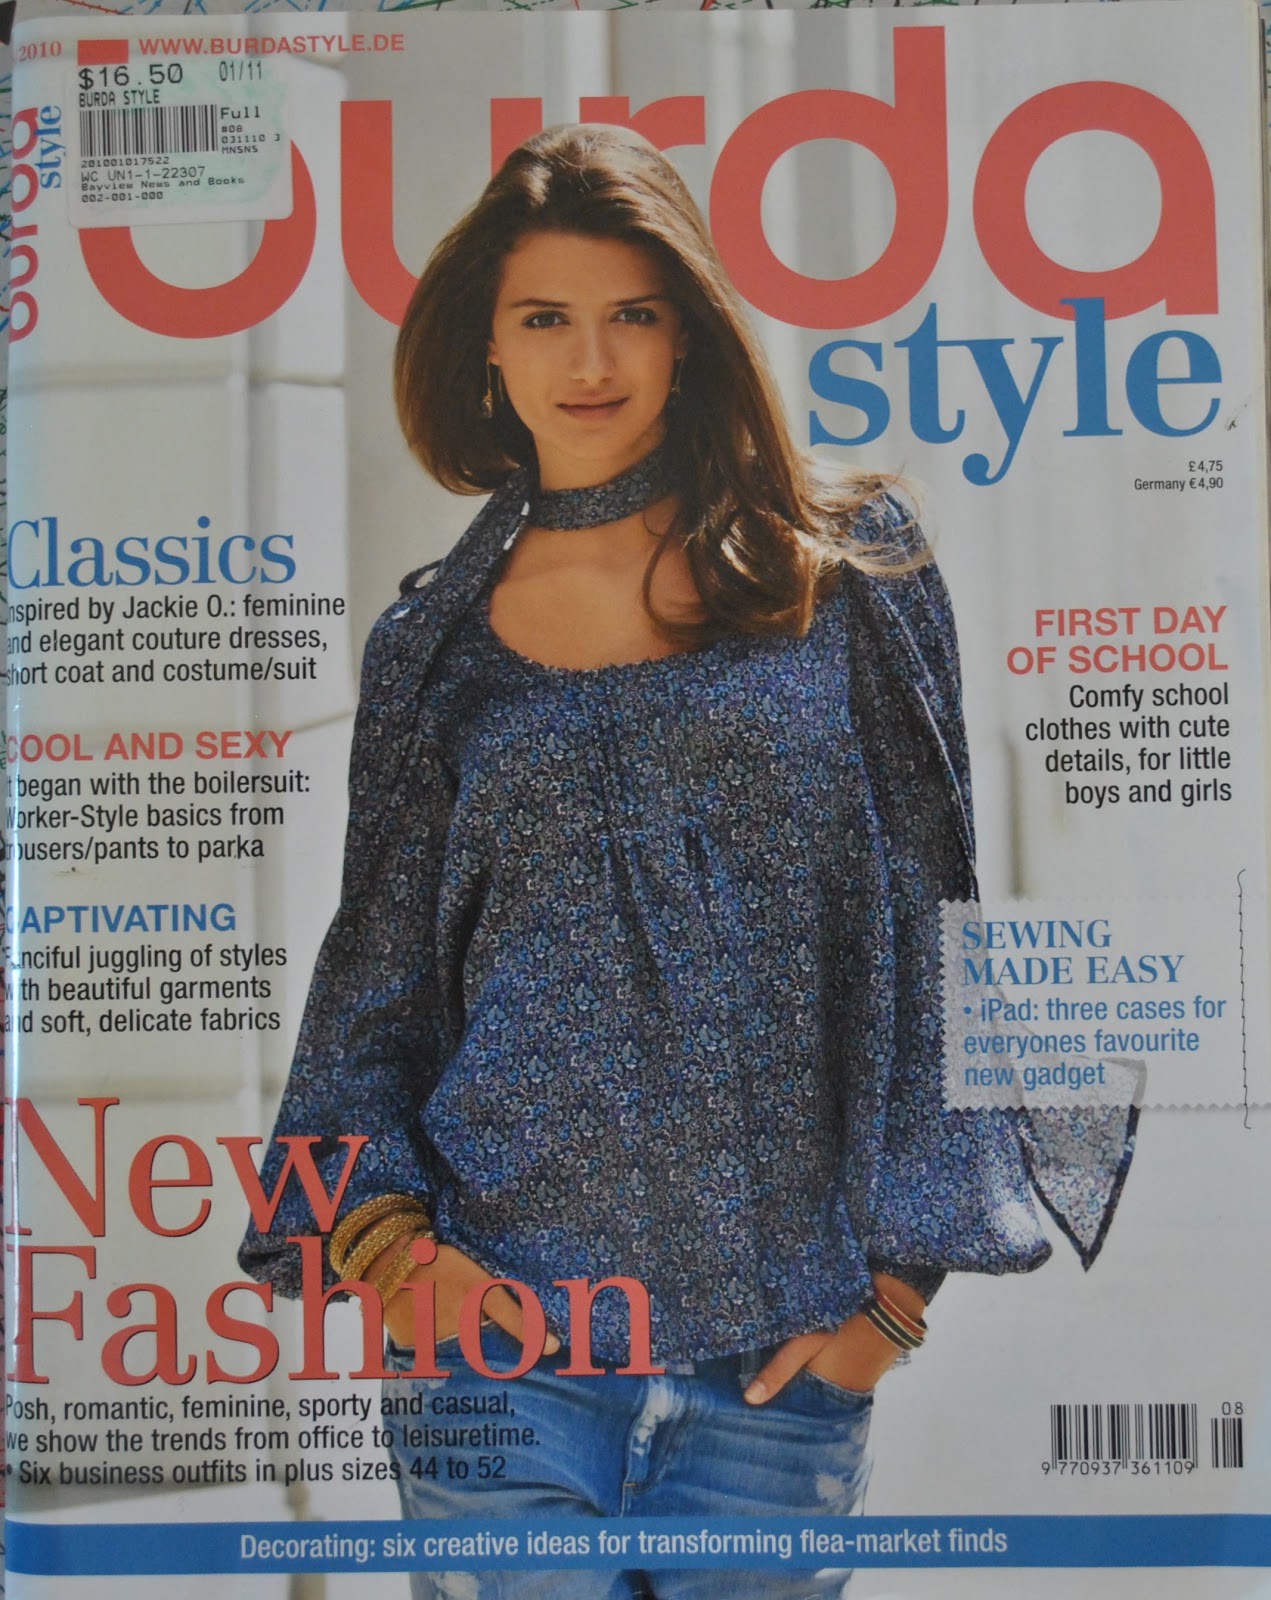
I have made a new leather jacket.  Well…  it’s “pleather” really.  A faux leather jacket; or maybe we can call it a fleather jacket… ha!   I’m going to go with that.  I’m pretty happy with how it turned out!  I’ve been thinking wistfully about a leather jacket for years, and I was super impressed with kbenco‘s gorgeous leather jacket.  So, while I was staying at my parents’ place over Easter I noticed this pattern, designed for leather in one of Mum’s old Burda style magazines. I found this very nice chocolate brown and black-splodged PU laminate in Fabulous Fabrics; the texture is very realistic, semi-matte and soft and very faintly “crazed” like very well-loved, well-worn old leather.  I bought up and got cracking.
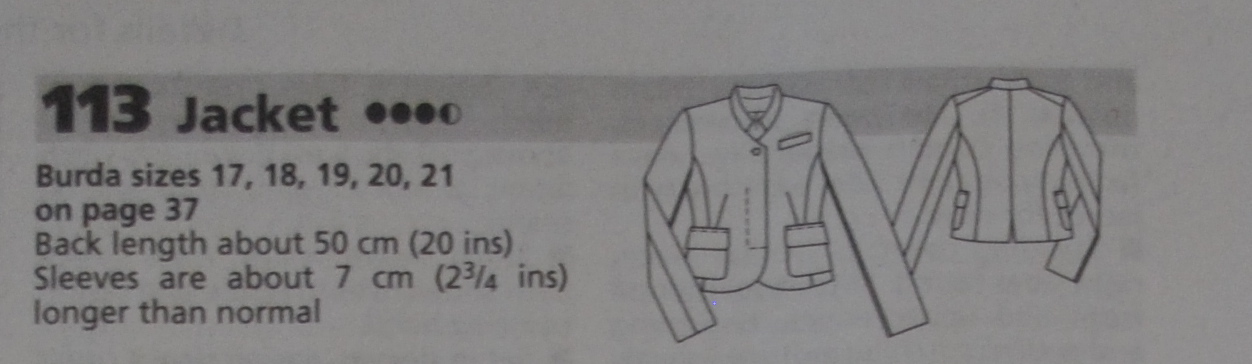
The jacket is pattern number 113 from Burda style magazine, 08/2010.  I made no modifications, excepting multiple teeny modifications to get a good fit.  There were plenty of these, but I’m only listing them in my review below if you feel like plodding through the nitty gritty, since reading about personal fitting modifications is the most boring thing on the planet.  The only one really worth mentioning is that the sleeve cap to this pattern is rather high and leather is not a fabric that lends itself well to easing.  So I shaved off quite some height off the top of the sleeve cap, just over 1cm tapering off to the gathering start and end points.

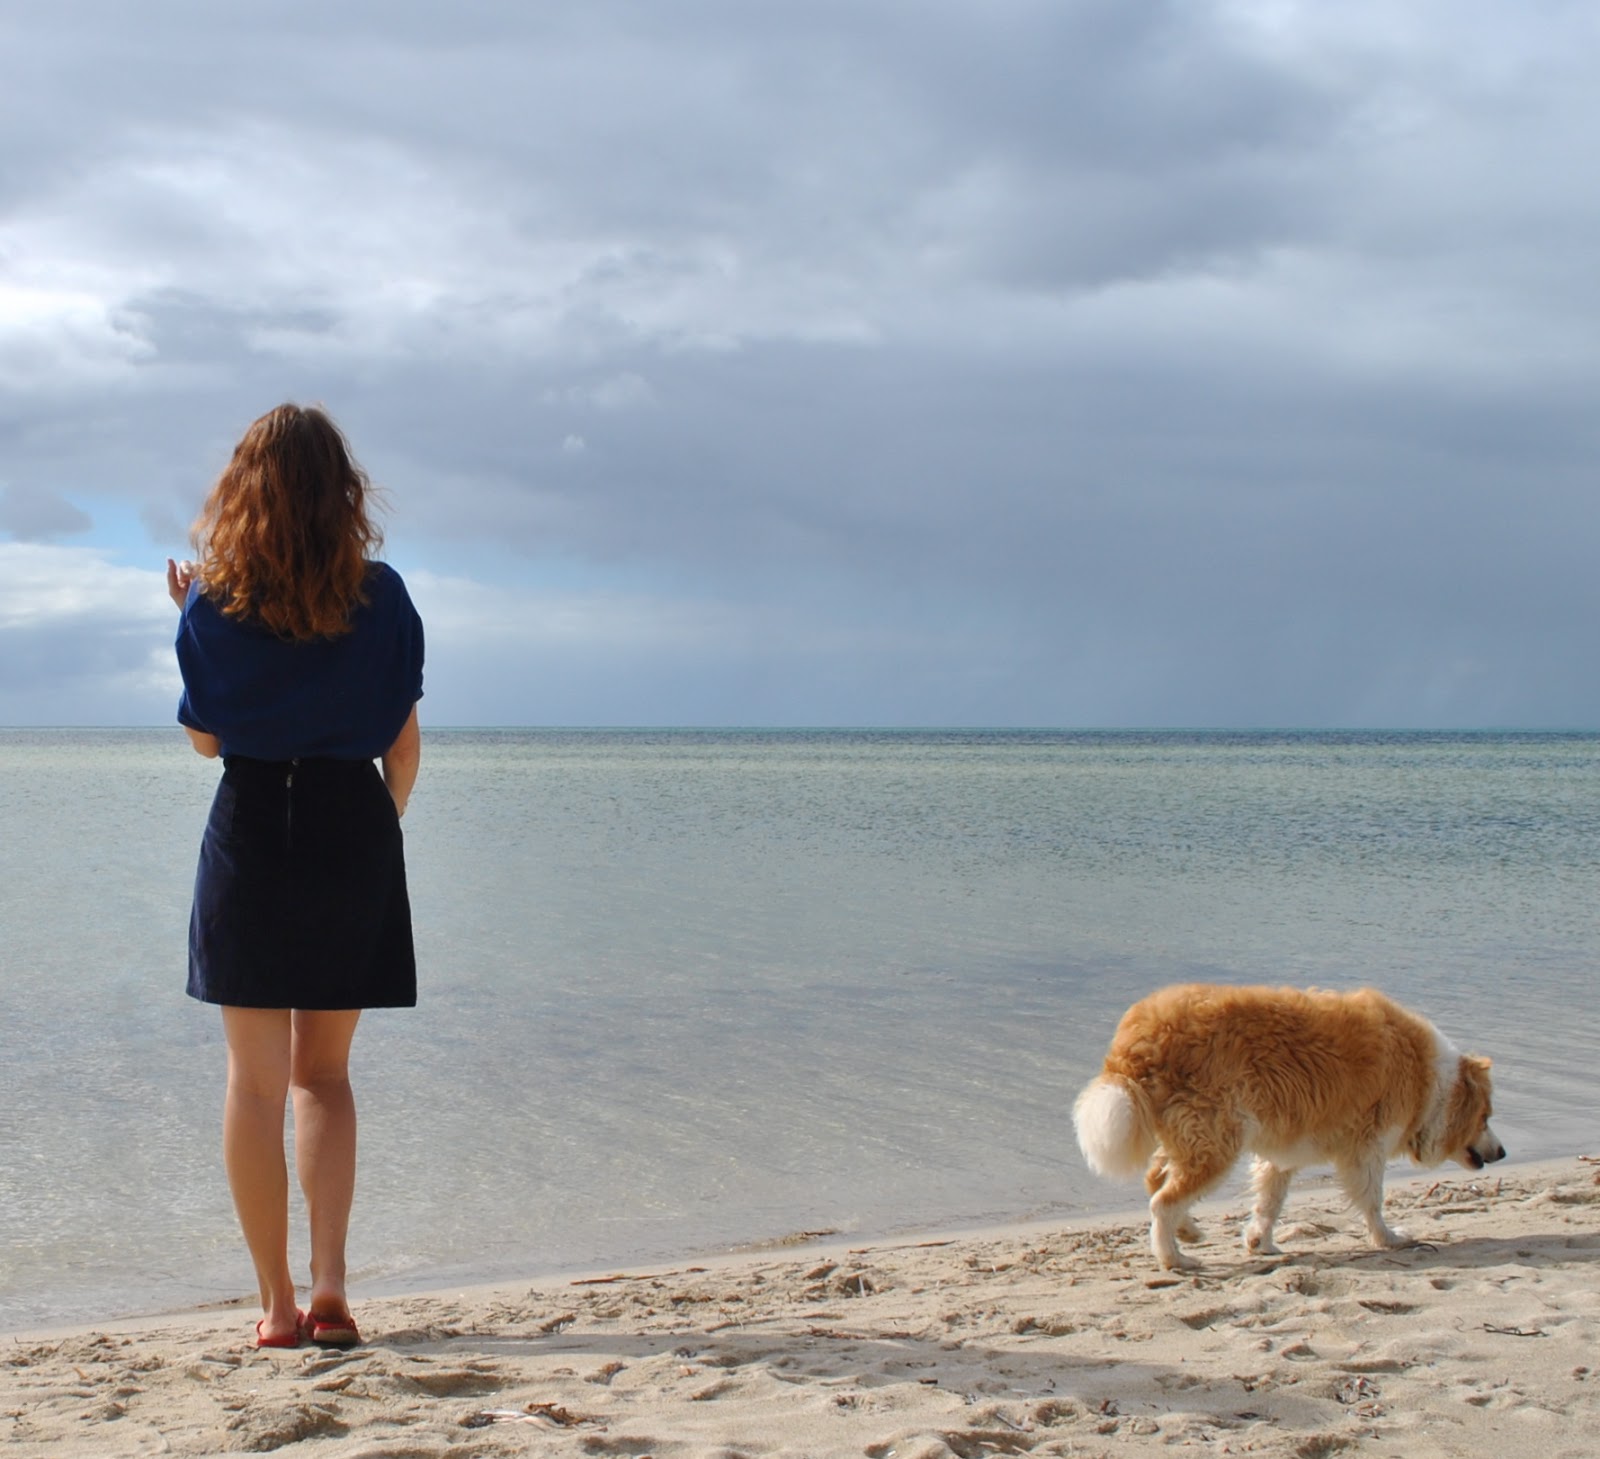
I’m not completely sure about that slit at the lower edge of the centre back seam.  I don’t really see the point of it.  I’m giving it a fair go though.  It’s on trial.  I might decide to sew it up sometime down the track…
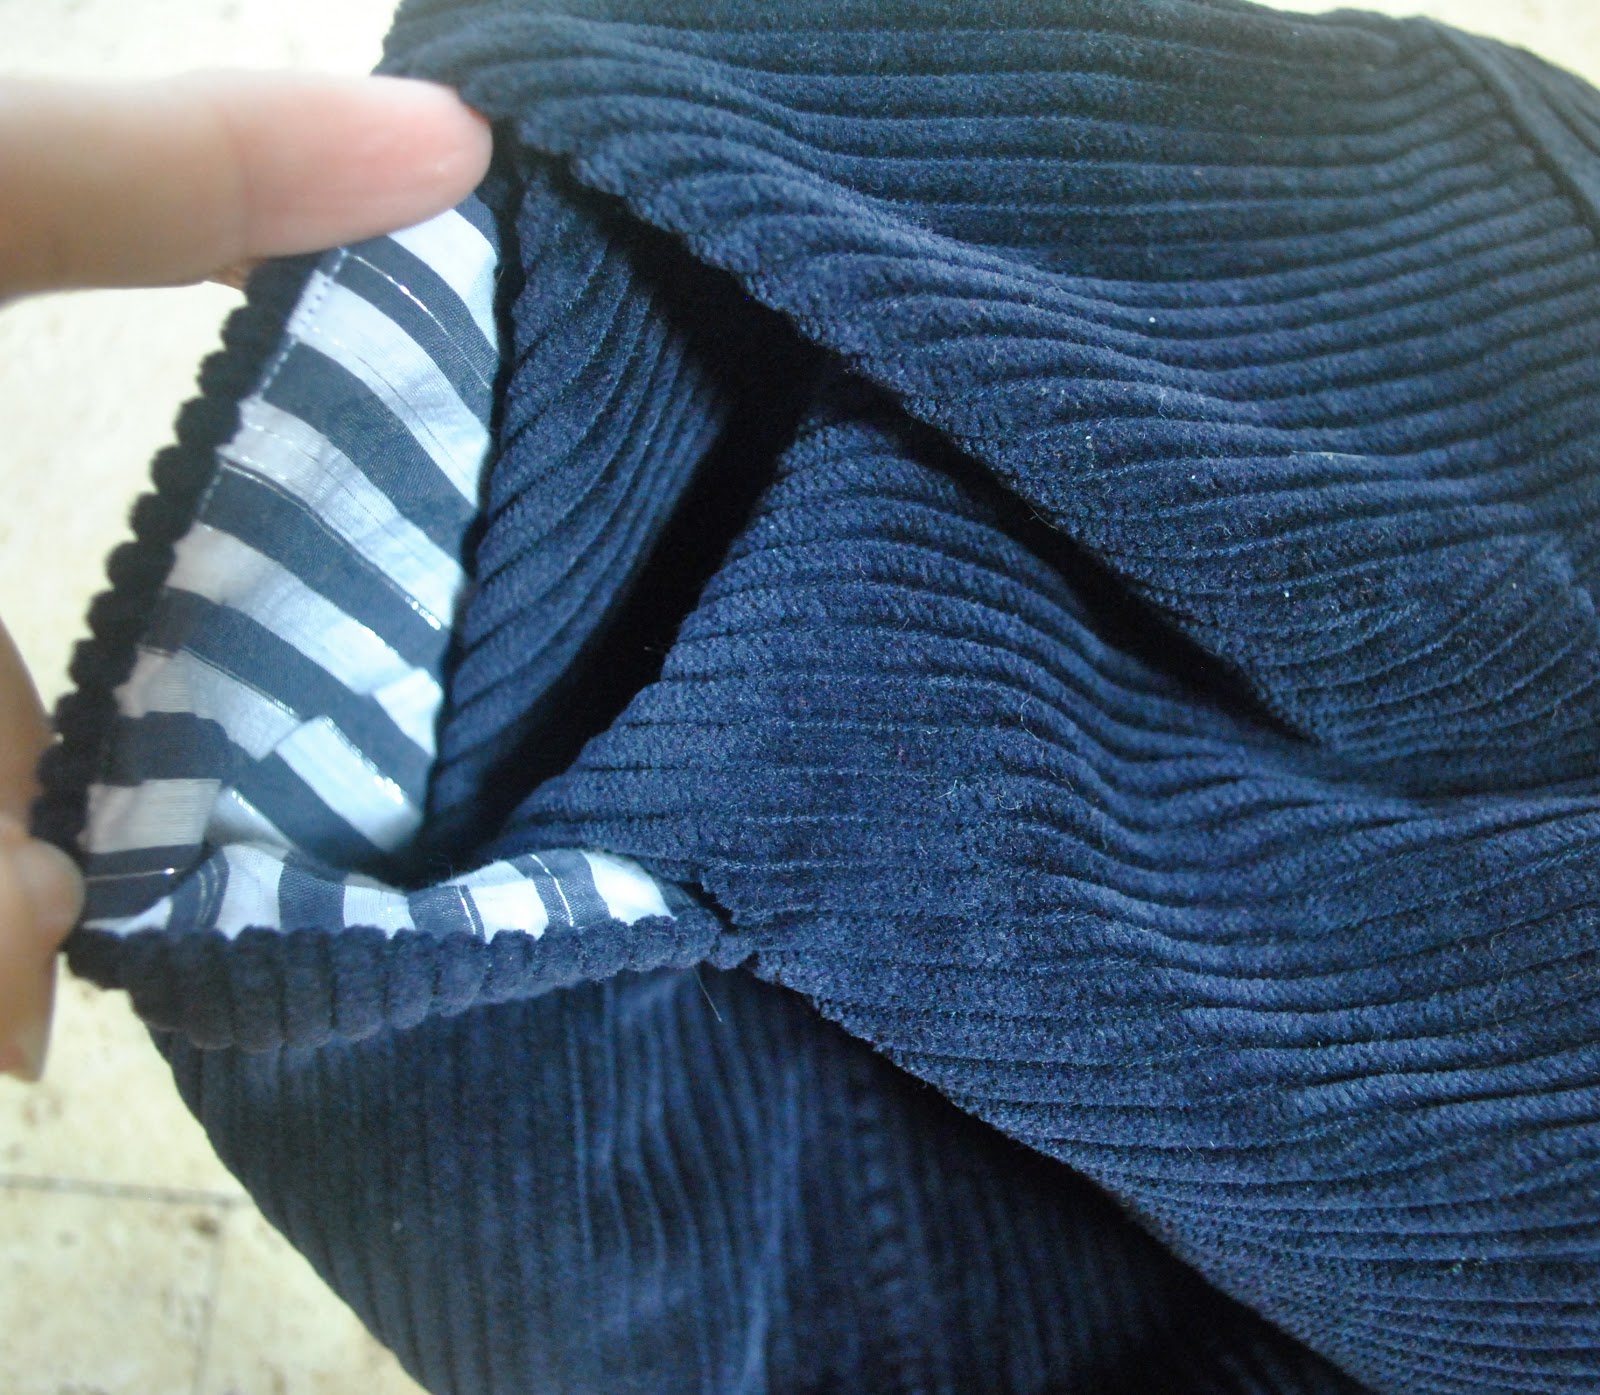
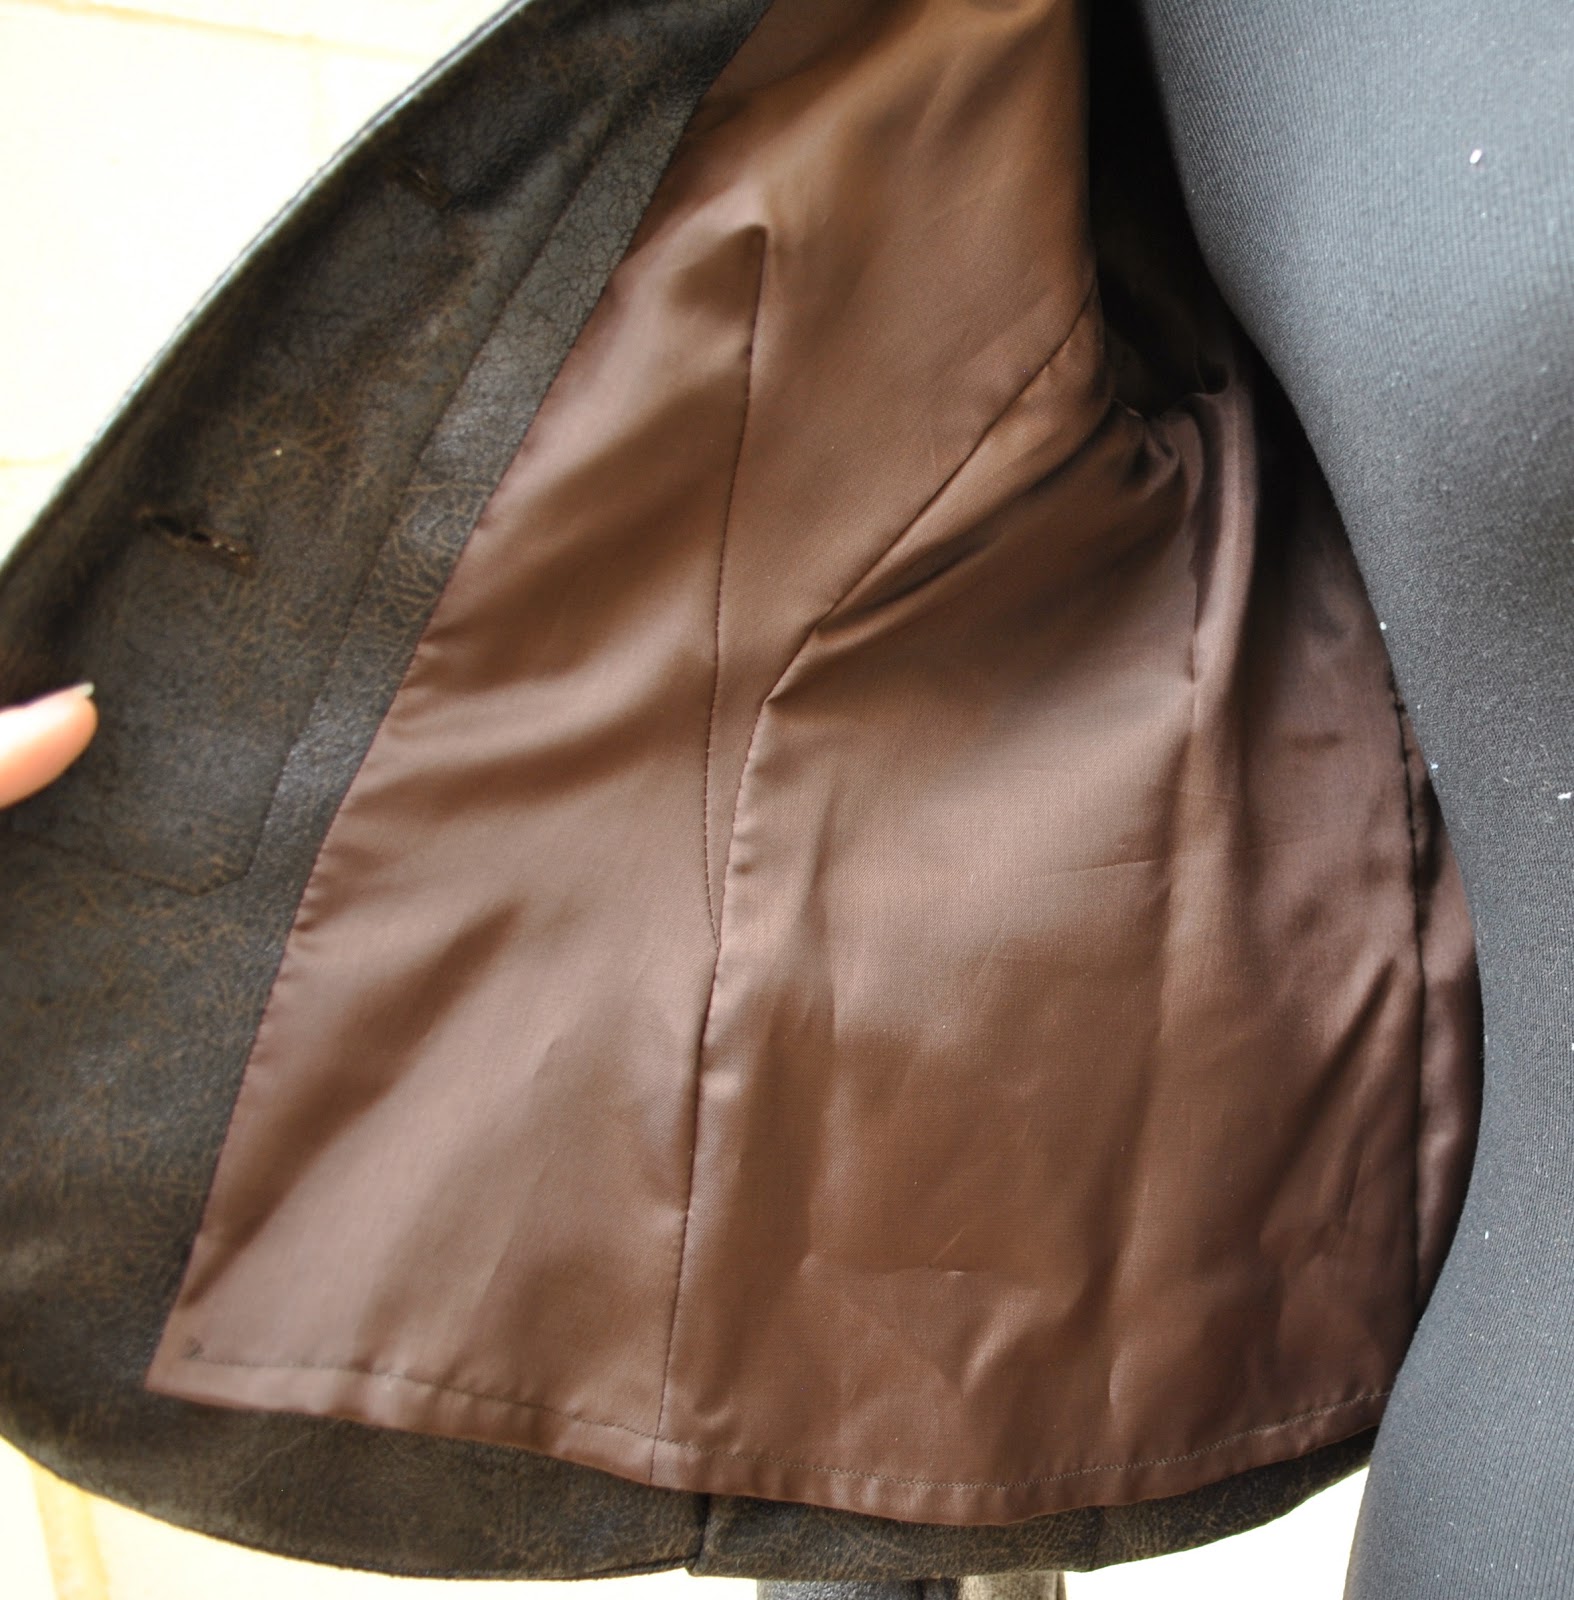
The jacket is fully lined with chocolate brown polyacetate lining fabric.  

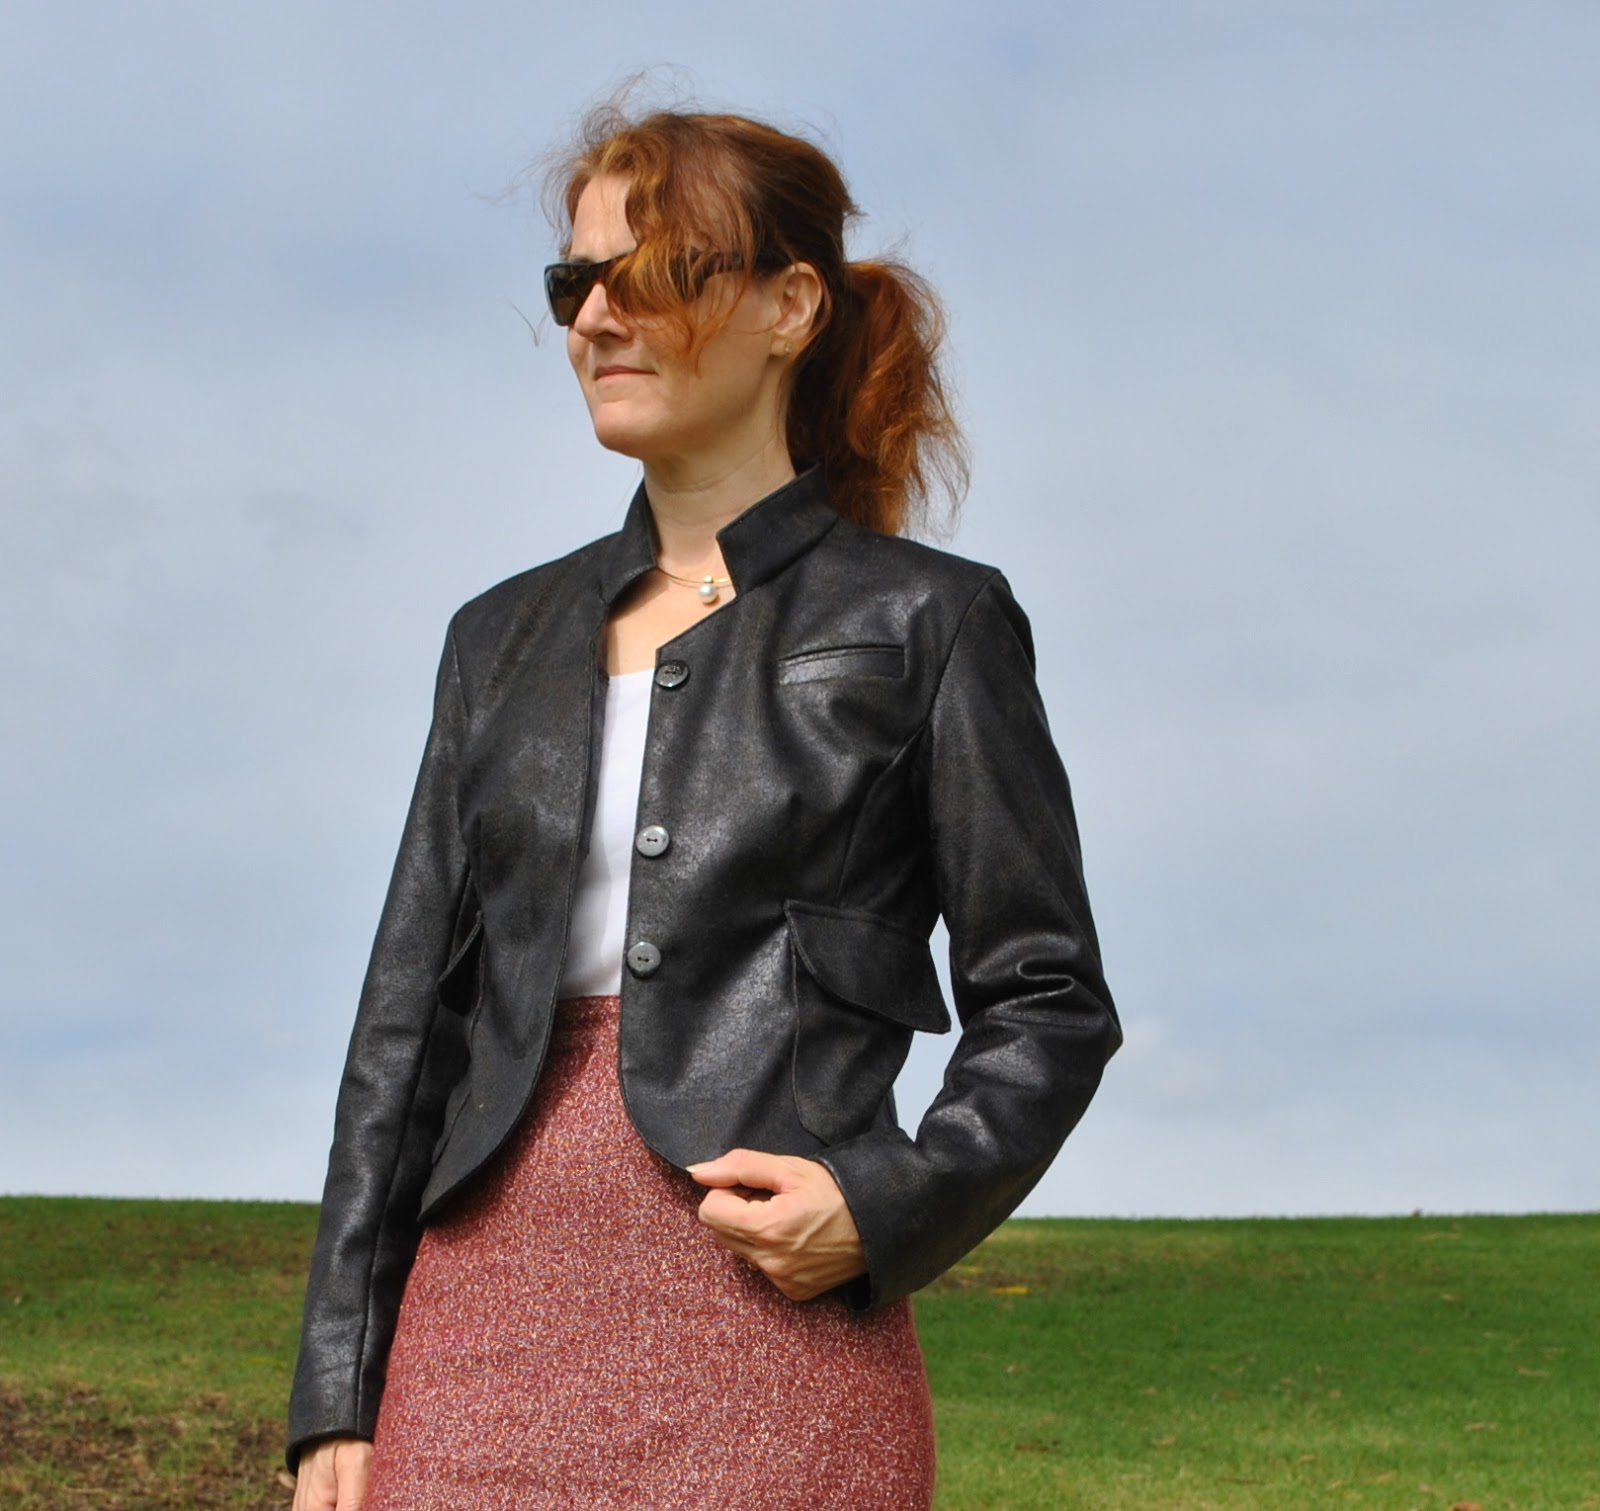
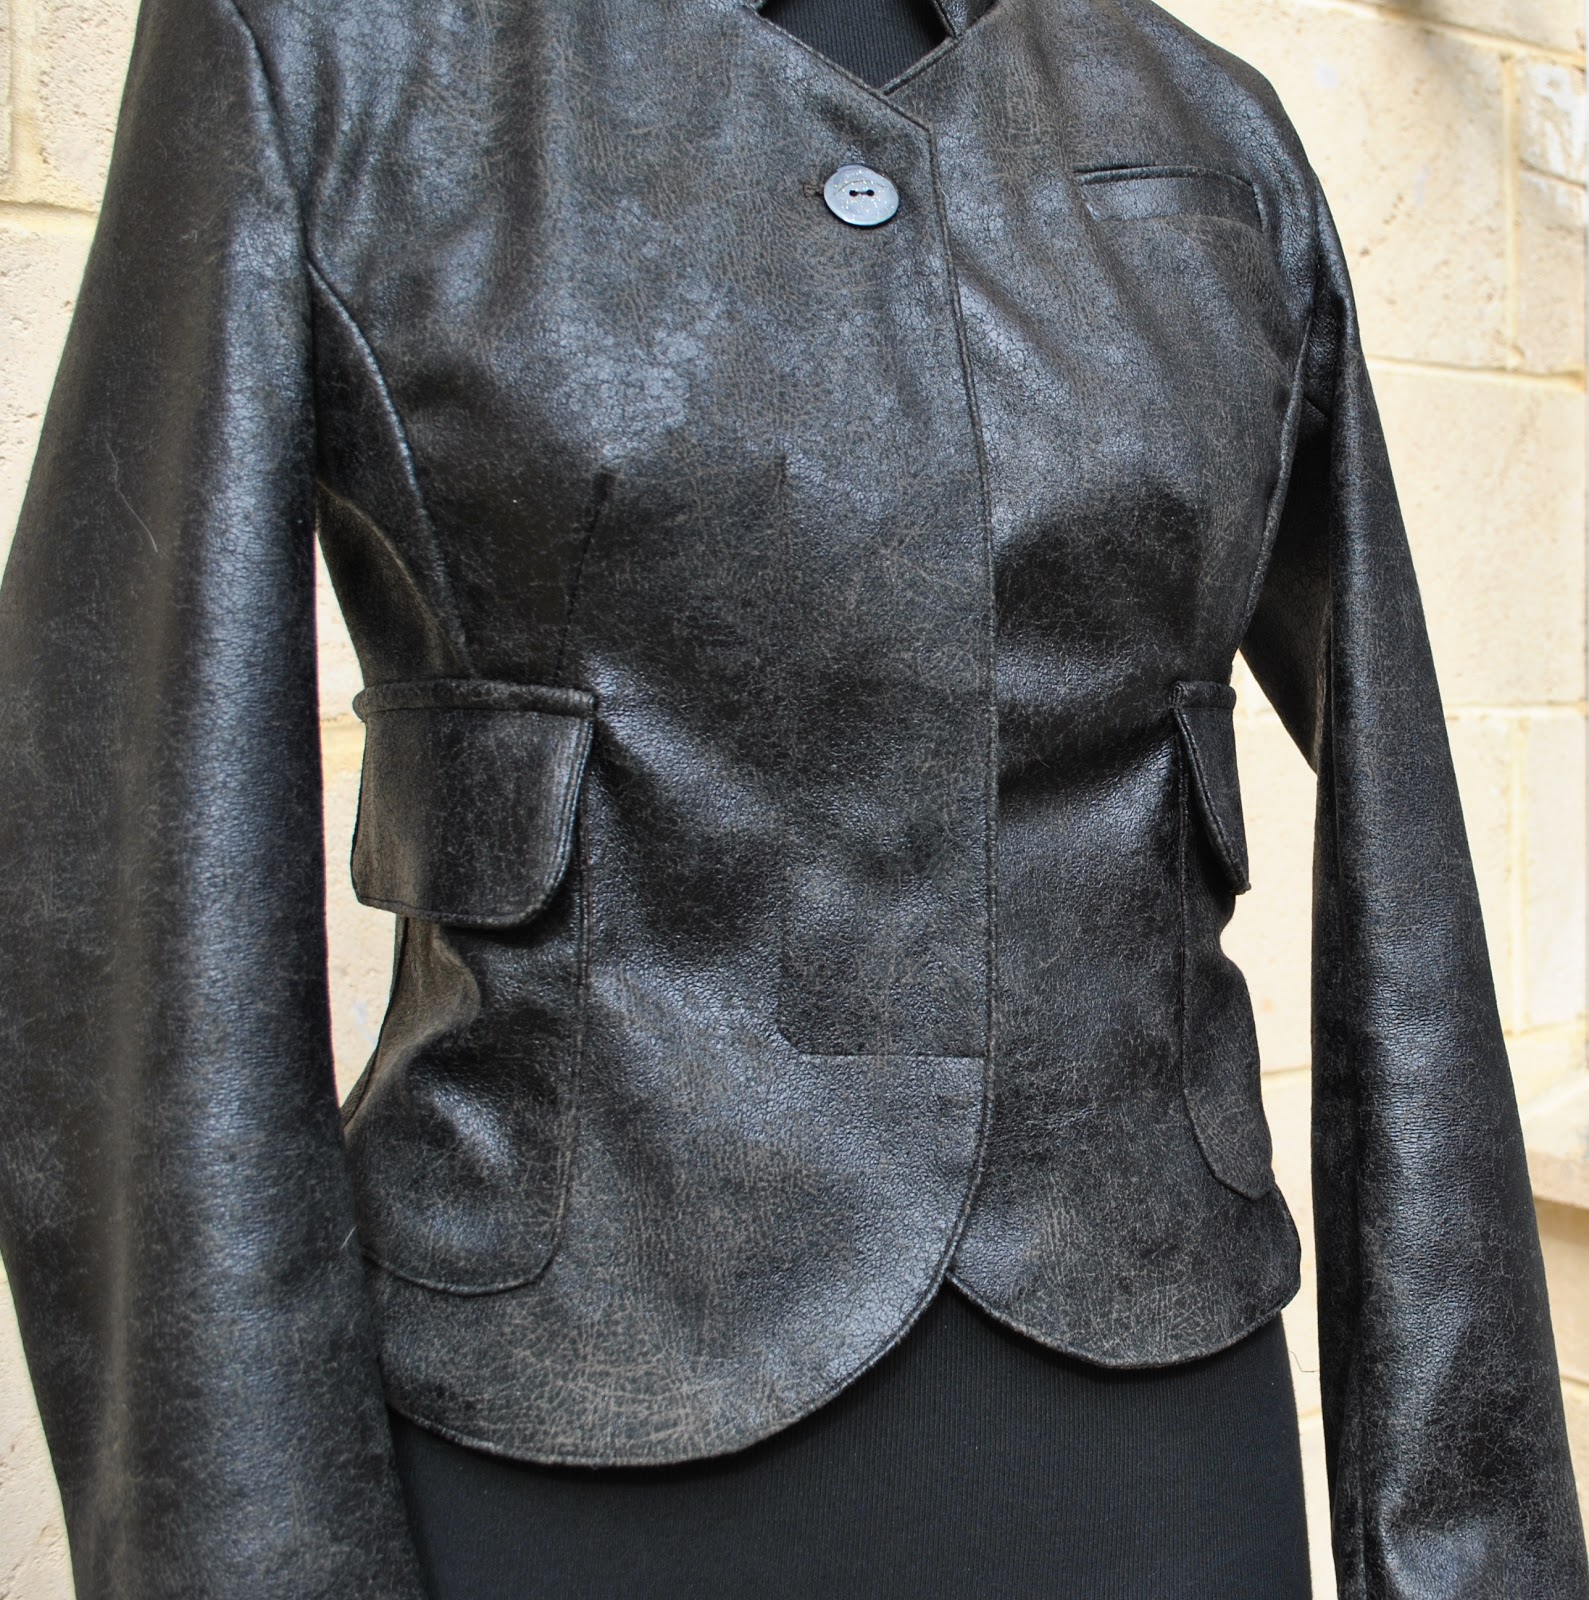
It has a hidden button placket for two hidden buttons, and two large, lined, flapped patch pockets at the hips, which are unfortunately not situated very conveniently for actually putting your hands in (sad face)  But you can still put things in them, and they do look pretty cool.  I like leather jackets to have lots of things and detailing and stuff on the outside.  In my opinion details really up the cool quotient on a casual jacket and lend it a young, urban aesthetic.

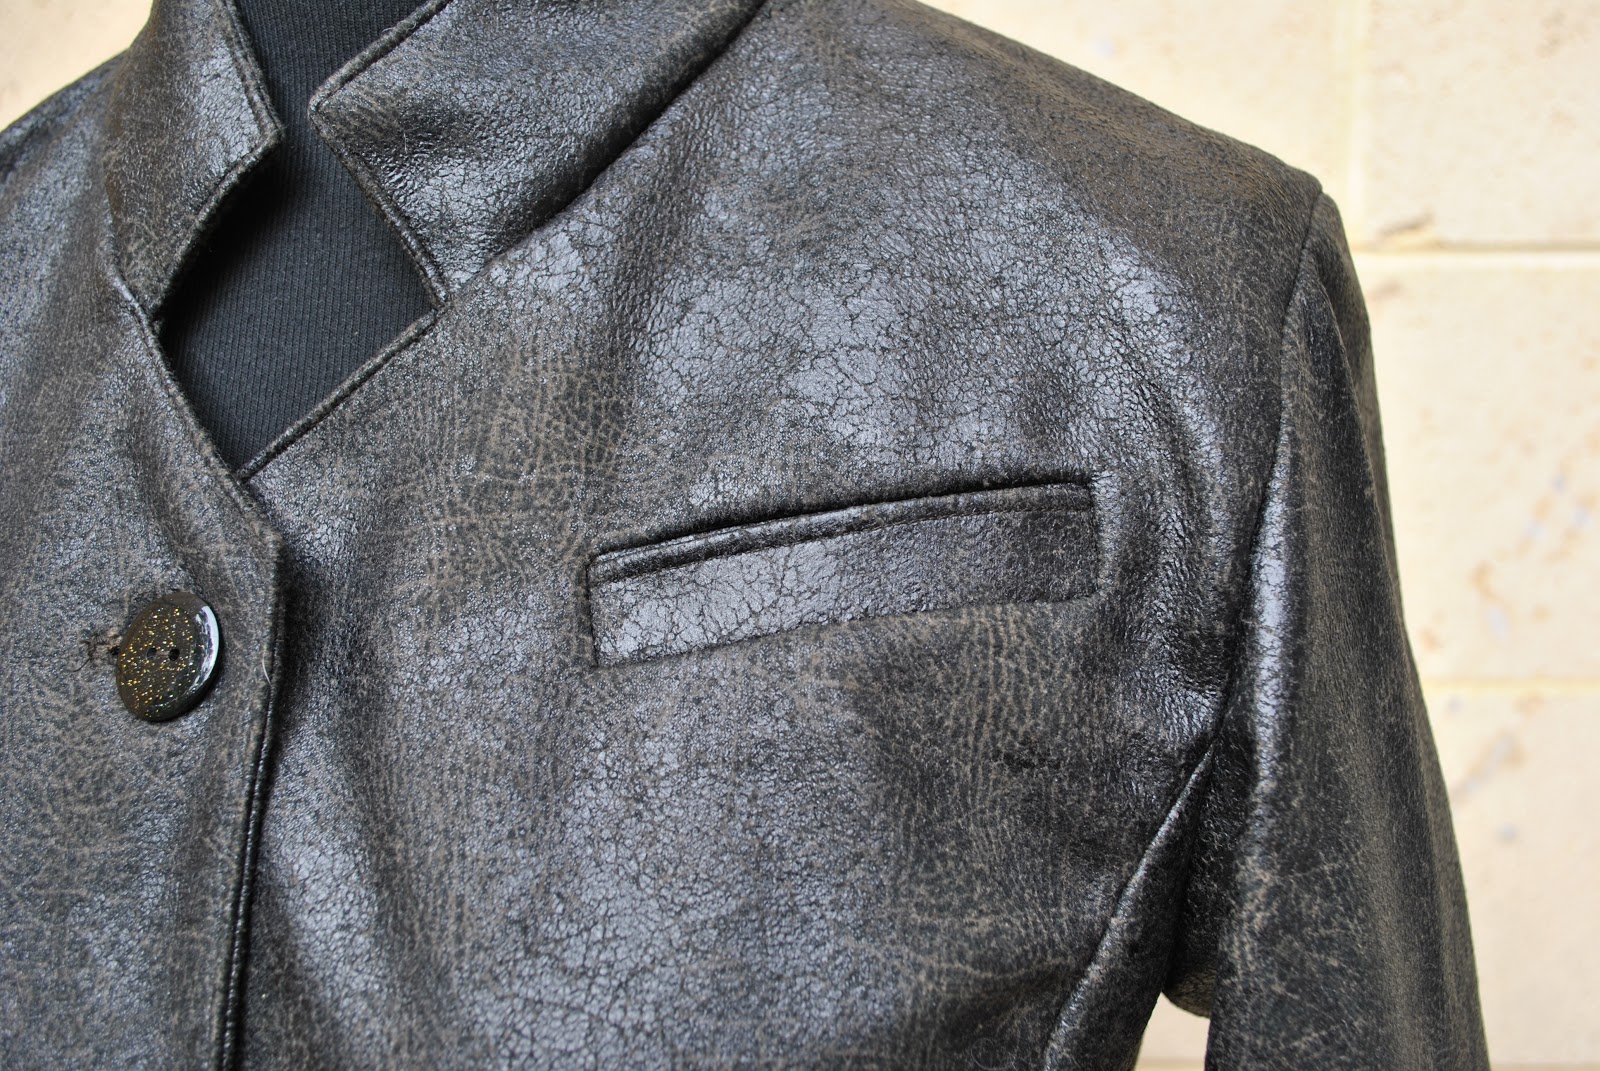
The jacket also has one small welted pocket on the upper left.  My fabric tended to “bounce” out of a fold, so I edge-stitched the welt, as well as the collar and front opening edges, to give them a flat sharp edge.  
The pattern called for the pocket bag under the welt to be inserted in line with and perpendicular to the pocket, which would have meant it would sit stuck out at a slight angle.  Whaaaa?  So I changed it so it hangs down vertically from the welt.  It’s hidden in between the lining and the jacket, so you can’t actually see the pocket bag at all, but I just didn’t like the idea of it sitting out all skewiff, defying gravity like that; it seemed an oddly imperfect and unbalanced way of doing the pocket, and it would have flopped in on itself a bit.  I think Burda probably did it this way to make the pattern piece and the instructions easier; but I just had to alter it to have a straight-hanging pocket.
Apparently the sleeves are 7cm longer than normal so that the wearer can roll or fold them back.  Well, I love this longer length.  This is great for winter.  I always get really cold wrists in winter, and so I won’t be rolling or folding them up at all!

Details:
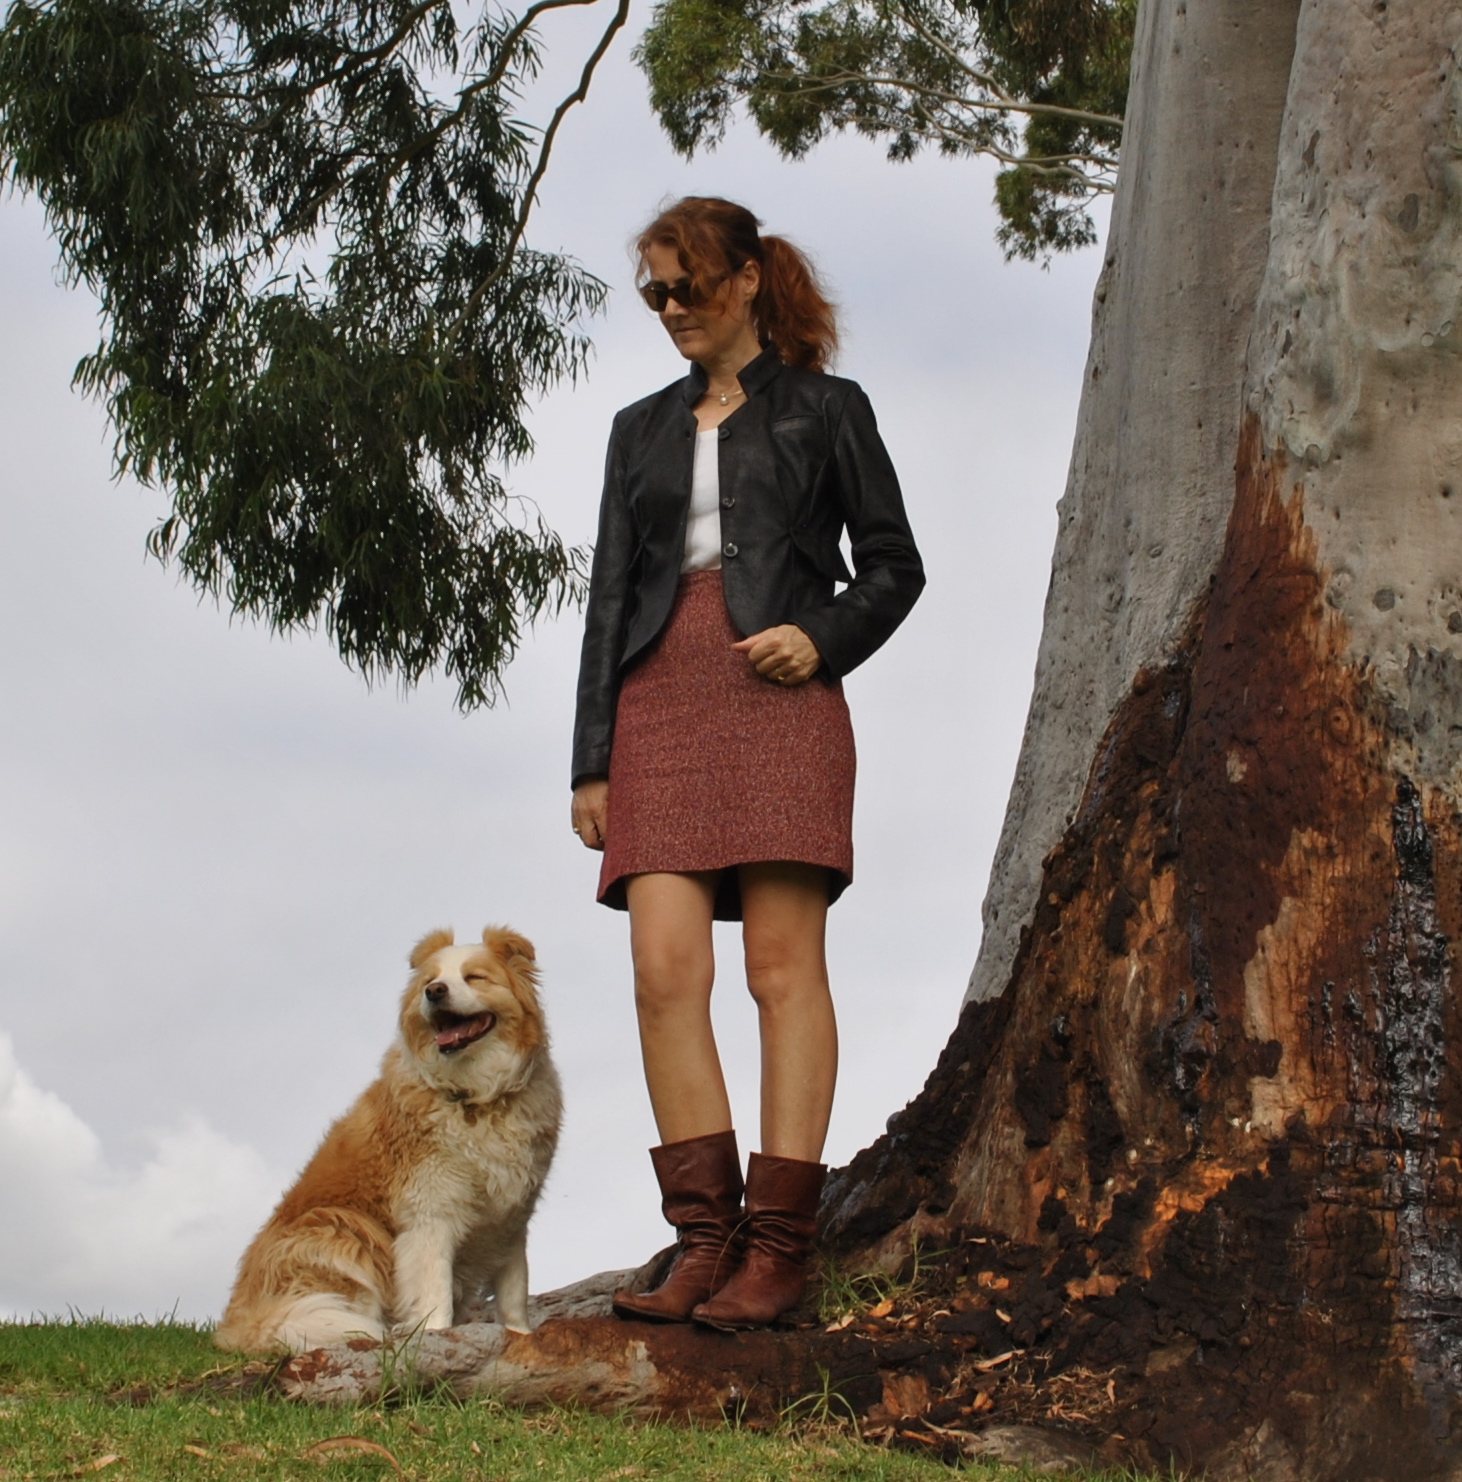
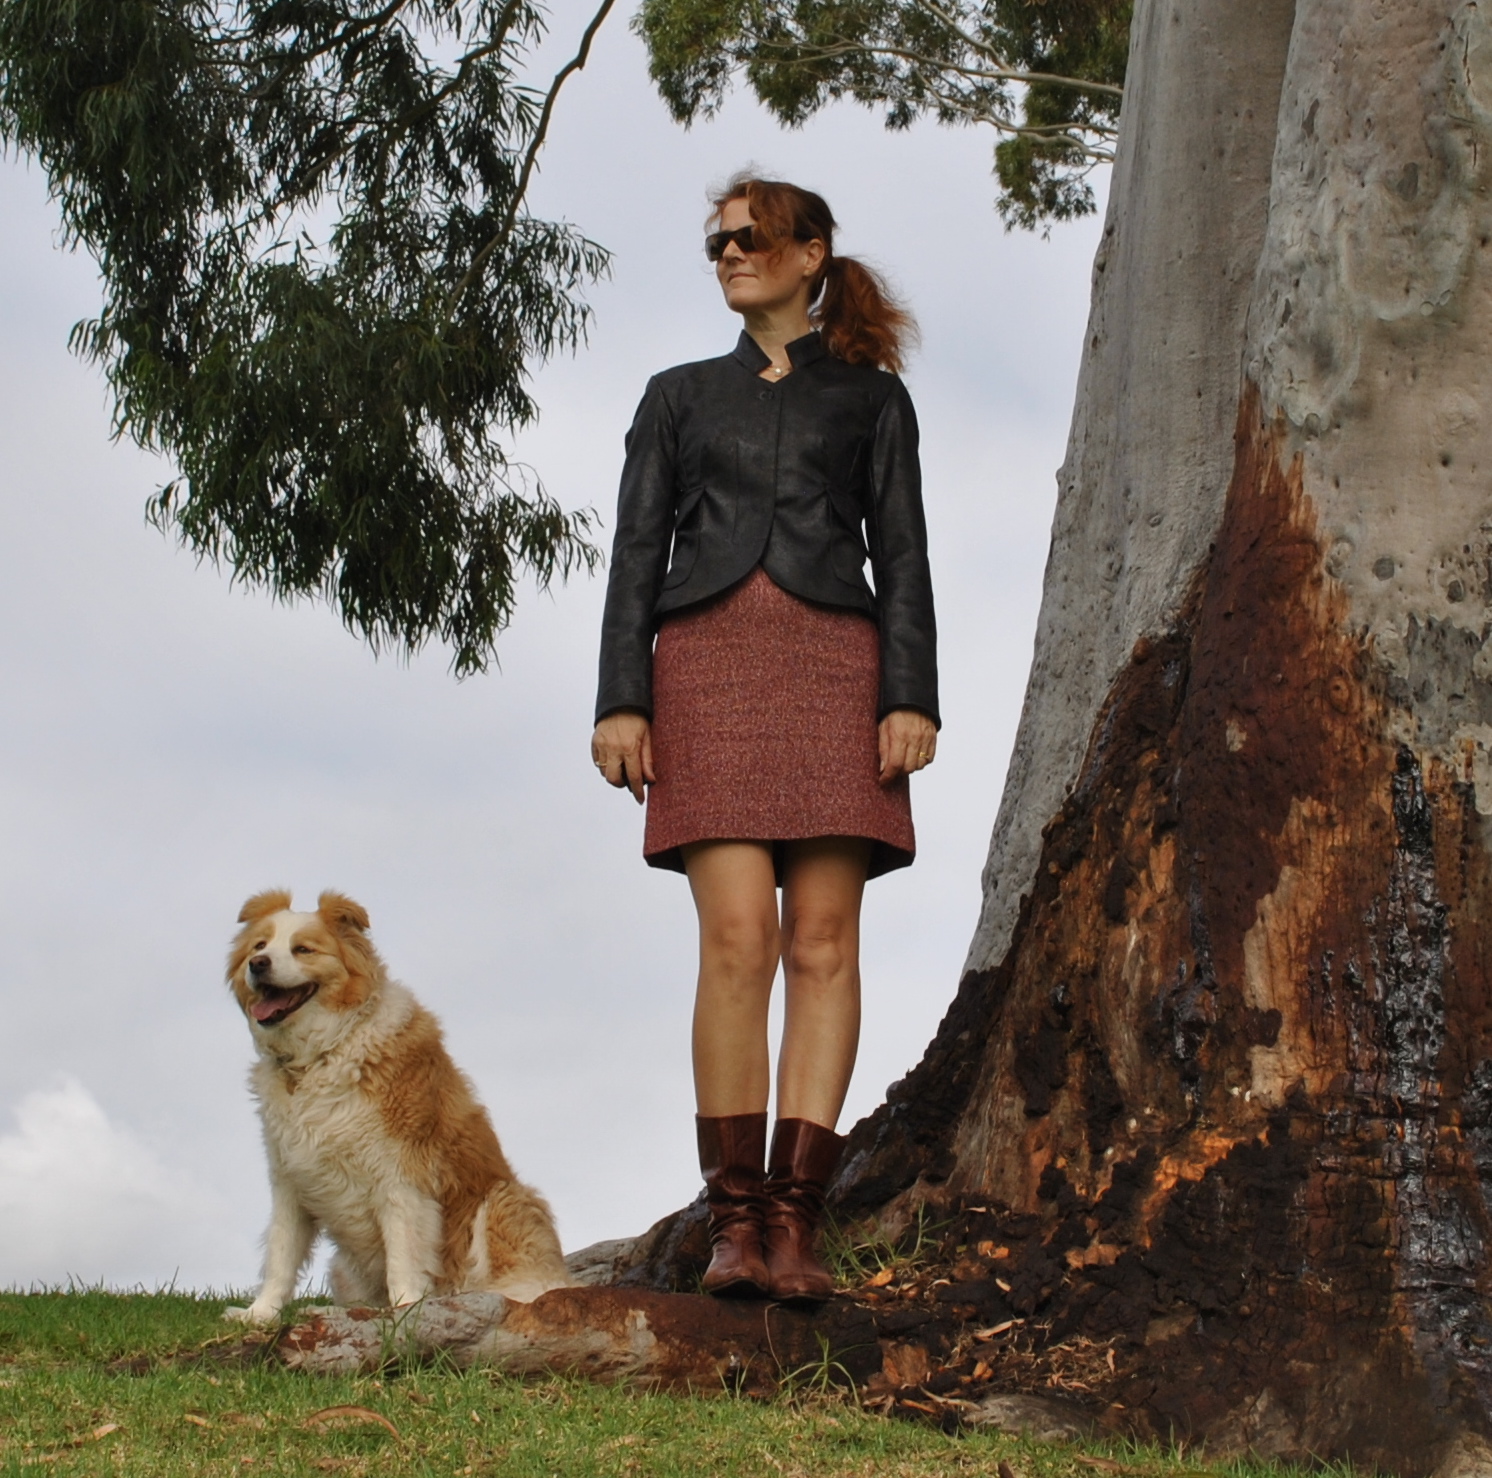
Jacket; Burda style magazine 08/2010, 113, pleather
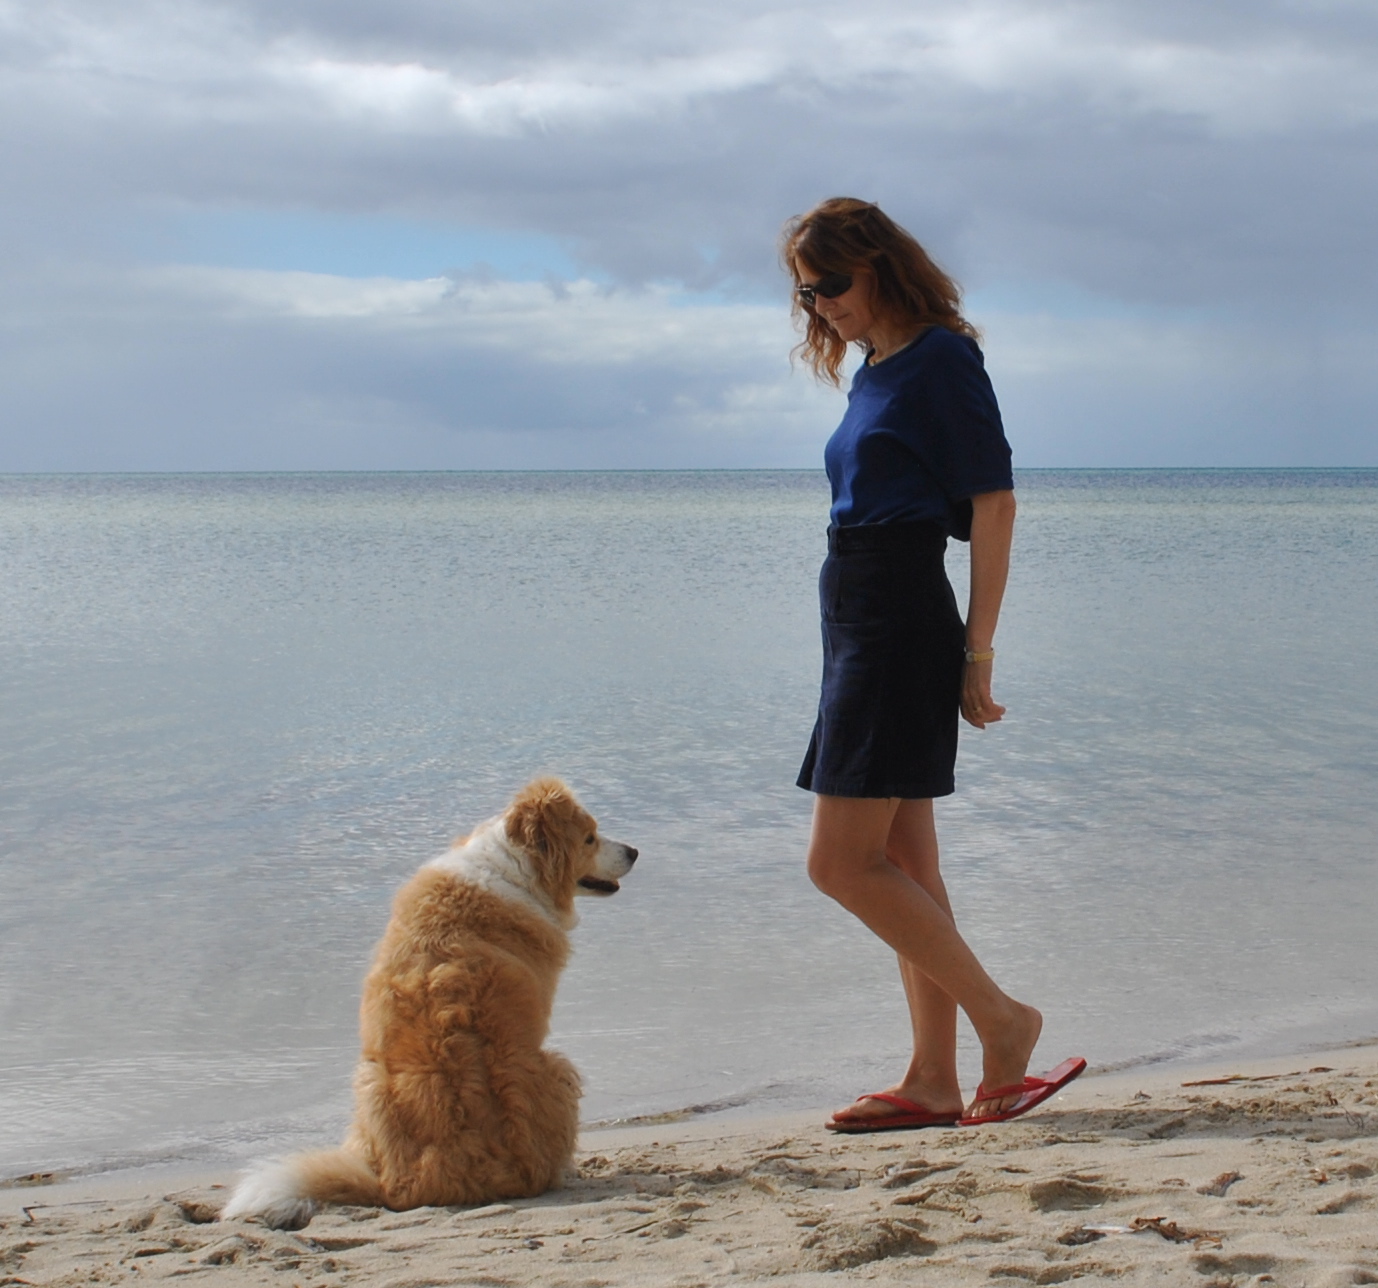
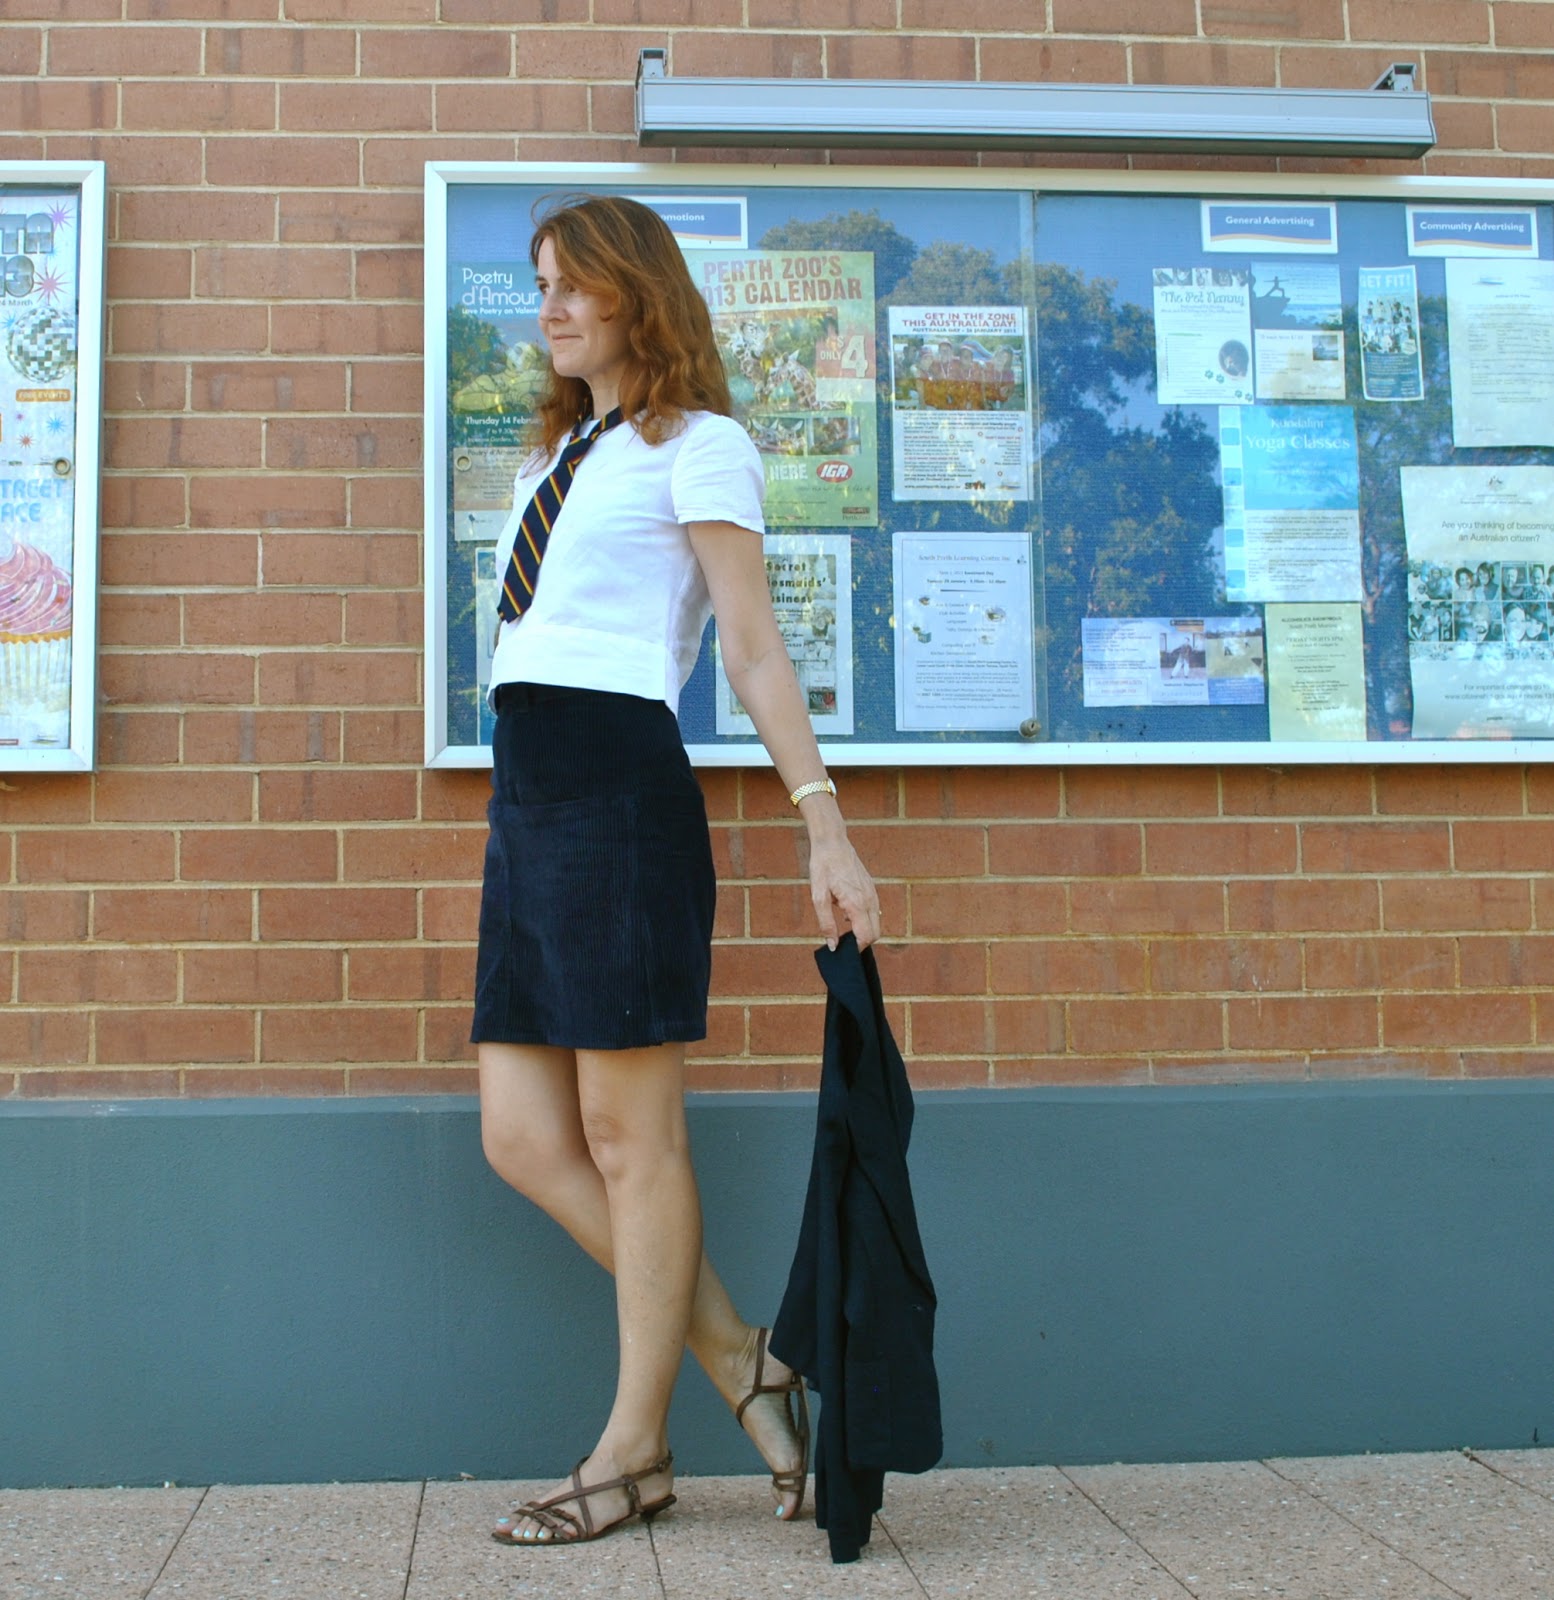
Skirt; Vogue 8363 with modifications, rusty red wool/silk mix, details and my review of this pattern here
Tshirt; self-drafted, white cotton, details here
Boots; Enrico Antinori

By the way, I often state that whatever I am wearing in my picture is what I am wearing that day, that I keep it real and never ever “dress up” just for the camera.  Well obviously, everyone in Perth will know straight away that it is a bit too warm for a winter-y get-up like this today! so in this case I am “dressing up”  (blush)  Sorry, but I just couldn’t wait for winter to show off my new jacket!

Pattern
Description:

Fitted
jacket with a short V-neckline, narrow standing collar, single welted breast pocket and two flapped patch
pockets.  Long two piece sleeves,
front has two darts for shaping, the back features a short lower hem vent and
the front closes by partially hidden button placket
Pattern
Sizing:
Petite/half
sizes 17-21; I made the size 19
Did
it look like the photo/drawing on the pattern envelope once you had finished
sewing it?
Yes.
Were
the instructions easy to follow?
Yes
What
did you particularly like or dislike about the pattern?
Well; I think the styling is great; a mixture of classic blazer and motorcycle jacket with a neat and nifty, waist-defining shape, and cute detailing.  I really like the pockets and I think they look really great in leather.  The sleeves are 7cm longer than normal.  I love this, they will keep my wrists nice and warm this winter.
I’m not completely sold on that centre back slit at the hem.  I don’t really see the point of it.  This may or may not get sewn up in the future, if it lets too much cold air in.
Fabric
Used:
Faux
leather, with polyacetate lining fabric for the lining
Pattern
alterations or any design changes you made:
I didn’t make any design changes, but I made tonnes of small modifications for fit.  Considering leather is not a fabric that eases at all, I think the sleeve cap is drafted too high and would have been too difficult to ease into the armhole.  I shaved off about 1cm in height off the top, and also took about 1cm off the edge of each shoulder seam, the latter a fit modification.  I took in all the seam allowances at the waist to bring the jacket in to hug my waist; the shaping as it was a tad boxy for what I wanted.  The faux leather fabric I used didn’t take creases at all, so I edge-stitched all around the front edges of the jacket and collar, as well as the fold of the welt, to give a nice sharp edge.
Would
you sew it again? Would you recommend it to others?
Maybe….
so many patterns, so little time! 
But yes, of course I recommend this classic yet cool pattern to others.
Conclusion:
Well
I now have a cool new (f)leather jacket. 
I’m totally happy with it.  ‘Nuff
said  🙂

pinterestmail

Navy bloo-p

Hello  🙂
So, it turns out that navy blue is just as difficult to photograph as black… oh well!
I have made a skirt.   This used to be a pair of extra-huge, navy blue, corduroy jeans, that I bought from the op shop yonks and yonks ago for a fancy dress party.  They’ve been sitting in my refashioning pile, awaiting a new life.  The fabric is perfectly good but they haven’t been worn ever since the aforementioned fancy dress party, because they did not fit anyone in my family.

My new skirt is based upon a firm favourite skirt pattern, Vogue 1247.  I unpicked and re-used the sturdy silver jeans zip from the old jeans in the centre back, as well I took off and re-sized the waistband with its attached belt loops, and managed to retain the silver jeans button and its corresponding buttonhole, both in situ from the original jeans.
The pockets are lined with blue-and-white stripe fabric, leftover from Sam’s Christmas shirt.

Due to the fabric limitations, I had to cut the skirt to have a centre front seam, as well as the standard centre back seam.

Now you might be thinking; if the jeans were so big to start with, how could you possibly have “fabric limitations” in making a rather small skirt out of them?  Well, when it comes to re-fashioning a new garment from an old, even if your old garment has plenty of fabric it still can be quite a trick to get even a smaller new garment out of it.  This can be due to several factors, such as awkwardly placed seams, or if your fabric has a nap.  In the case of this old jeans to new skirt refashion, there were both of these factors to contend with.  Even though I was starting with satisfactorily extra-big trousers, they were cut in an old-fashioned, late 80’s, early 90’s style, with wide hips tapering down into narrower ankles.  This is the exact opposite of what I wanted in my little skirt; which is narrowest at the waist and gets wider going down to the lower hem; plus there was the nap of the corduroy which you always want to be running down the garment, never ever up the garment.  Plus there were big slanted hip pockets in the jeans, getting in the way of cutting anything out from the top of the jeans.  Plus, a lot of the old bar-stitching was done with an incredibly strong thread, almost like fair dinkum fishing wire or something, making unpicking a sheer joy.  That was heavy sarcasm just there, by the way.  So in the end, it took quite some careful measuring and giving and taking a few centimetres here and a few centimetres there from different pieces, to get out the pieces I wanted.  This is a lengthy justification for why my skirt has a centre front seam, as well as a centre back seam.  So not ideal, I know, but it was the only way the skirt could be!

Details:
Skirt; Vogue 1247 modified, refashioned from a pair of old navy blue jeans/trousers… my review of this pattern here
Top; the hoodie from Pattern Magic 3, blue knit, details here
Thongs; Havaianas

D’ya want to hear/see something funny?  This will give everyone a laugh…. I actually made this skirt back in January of this year, specifically for my high school reunion! and wore it, and photographed it on that day for the blog, but I never put the photo up here…  I decided I just looked silly.  Now I’ve decided that it’s not toooo bad, so here it is!  I made the skirt because I got this whacky idea in my head to kinda reproduce my old school uniform for the reunion.  I found my old school tie, which is tiny! and wore it.  The other pieces are from my regular handmade wardrobe, but it was such a hot night that I left that blazer in the car…
Yes, it was silly… but it was fun!
So, this outfit below is a pretty close representation of what I used to wear to school, every day  😀

Details:
Skirt; Vogue 1247, as above
Top; the bamboo shoot top from Pattern Magic, white linen, details here
Tie; my old school tie
Blazer; Simplicity 4698, navy blue silk, seen first here, and also worn in 6 different ways here
Sandals; Vincenza, from Soletta shoes

pinterestmail

Desert Island Sewing

I’m a desert island castaway!
The wonderful whimsical Winnie of Scruffy Badger Time, is hosting an awesome (virtual) getaway and I am now (virtually) kicking back on my little lonesome on my very own fantasy island.  By fantasy, naturally that means one that has all the essentials for nonstop sewing.  And g&t’s too, of course.  
There is but one limitation; we are allowed to have with us eight patterns, and eight patterns only.  If you had to narrow down your selection to just eight patterns, which would you choose?  
My choices are here.
Thank you so much for the (virtual) beautiful beachy sewing paradise Winnie  🙂

pinterestmail

Frozen yoghurt

We are a frequent-yoghurt-eating family, but sometimes I get a half a tub of yoghurt sitting in the fridge getting too close to its use-by date.  Well I can’t have that!!  Just like with fabric, I cannot bear the idea of throwing food out, and I just have to find a way to use it…

I adapted this recipe here, and it couldn’t have been easier.  I don’t have an icecream maker, nor did I “strain” my yoghurt though.   I just tipped the sugar and vanilla essence directly into the half tub of yoghurt and froze it in its own container.
I kinda guesstimated while I was making my batch but I reckon a good ratio to work with is:

1/2 cup of sugar, to every
3 cups of yoghurt,
plus 1/2 tsp pure vanilla essence
Stir it all together thoroughly to dissolve the sugar and then stick it in the freezer.  I gave it a good stir every hour or so, to break up the ice crystals, for the first five hours, and then left it overnight.  The next morning the texture is absolutely perfect; it is not too sweet and deliciously tangy.

No icecream maker required!  🙂

pinterestmail

new toy

After tonnes of deliberation, I’ve bought a new lens; an early… something? present for myself  🙂
My old lens is a 18-55mm 1:3.5-5.6, which is a really fantastic little lens that produces great shots.  But for a while I have been really wanting to up the ante on my pictures and it has been frustrating that I have not been able to change the settings just how I would like.  So I’ve bought the 50mm f/1.4.

The top photo was taken with the new f/1.4, and the lower picture with my older lens, both adjusted to shady conditions.
I’ve still got quite a way to go with learning how to best appreciate it, but I’m pretty excited at the prospect of experimenting…  what do you think?
Details:
Top; the bamboo shoot top from Pattern Magic, white linen, details here
Skirt; based upon Vogue 1247, coffee coloured lace with silk lining, details here
Sandals; Misano, from MarieClaire boutique 
pinterestmail

8th -13th April
(I’ve pledged to wear only clothes handmade by me this year and to sketch my daily outfits in my Fashionary.  I’m calling this the paper doll project)

from left:
Aquarius dress
dress with wavey welted pockets
clementine top + lime print skirt
bamboo shoot top + coffee lace skirt
bell-sleeved top + re-fashioned denim skirt
chambray shirt + dusky pink Japanese design skirt

The weather is cooling down beautifully.  I love the heat, but extended heat is hard to take.  Of course, hark to me in three months time when no doubt I’ll be hypocritically complaining about feeling cold….  And I’m a terribly stubborn eco-minded individual who refuses to put on the air con unless we’re all fair dinkum dying.  Or unless we have company.  Ha!  Don’t worry about the family, but heaven forbid visitors might feel uncomfortable!
I’ve finally adjusted the coffee lace skirt I am wearing in the following post…. the linen waist bit had started to bother me, that it wasn’t a proper waistband.  I took it off and re-sewed the waist-hip side seams of the skirt and underskirt, taking in about an inch total at each side of the waist; and straightened the waistband up to be a high, straight waistband.  I think the skirt fits me a lot better now, and the waistband sits up at my true waist.

before, shaped
after, straight
pinterestmail

tea infusers

This post is apropos of nothing handmade at all really, but these tea infusers are such a cute and relatively newish thing in my/our lives that I just wanted to share…

When it comes to imbibing; tea is my number one choice.  I used to have it listed along with some other of my favourite things in the “about me” blurb up here on the ol’ bloggeroonie, when I eventually decided to change that to something that better described what my blog is actually about… but tea is a huge part of my daily routine.  I won’t even drink any other kind of hot drink at all, that’s how boring dedicated I am!  
Oh OK then; I make an exception for Melbournian Koko Black hot choccie… but that’s a kinda special, going away on holiday treat!

Cassie likes tea too, so much that she is known for it amongst her friends and these adorable little tea infusers have all been given to her for birthday pressies.  I’m allowed to use them sometimes too  😉  and think they are so sweet I amused my tiny mind by taking a few pictures.

Each occasion I have met up with other sewing ladies who blog, have been marked by the consumption of tea; I enjoyed an interesting, delicious and unusual herbal fruity tea with Donna in Paris and was treated to a perfectly wonderful, traditional Japanese green tea with Yoshimi and Novita in Tokyo.  That was a completely new experience for me, and how I wish I could repeat it… in fact how much I wish I could go back and meet up with all those ladies again!
Just for comparison; this last one is “my” tea infuser, the everyday one I use by default.  Not quite so cute, huh?  Well, as long as it gets the job done!  Random fact; the tea in this last picture is what I am sipping right this very second…

pinterestmail

me-made may

2nd April – 7th April
(I’ve pledged to wear only clothes handmade by me this year and to sketch my daily outfits in my Fashionary.  I’m calling this the paper doll project)


from left:
white Tshirt + lacey layered skirt + hand-knitted socks
billowy white shirt + hot pink shorts
Japanese print sundress
chambray dress + ecru scarf
blue dress
eggplant dress

And in synchronous news, I’m taking part in Zoe’s challenge again.  This will be my sixth time participating!  Since I am making and wearing exclusively my own handmade lingerie now I can go the whole hog and declare myself totally self-stitched this time around….  Woot! 

I, Carolyn of “handmade by Carolyn”, sign up as a participant of Me-Made-May ’13. I endeavour to wear entirely self-stitched clothing each day for the duration of May 2013′

So I will be aiming to take photos of myself every day, which I guess is the actual true part of the challenge for me  😉 since, y’know, I’m wearing all my own clothes this year, and all.  The photo bit is easily the toughest component! but I might not bore y’all with my drivel in the form of a post every day.  Although mebbe, if I have something bubbling in my head to say, since I actually really like looking back on these months myself and seeing what was going on in my life. 
I’m pretty sure I won’t trouble you with my paper doll drawings during May, although I will still be drawing them in my fashionary, for sake of continuity.
pinterestmail
Switch to mobile version
↓