Blue-bell sleeves

Hello  đꙂ
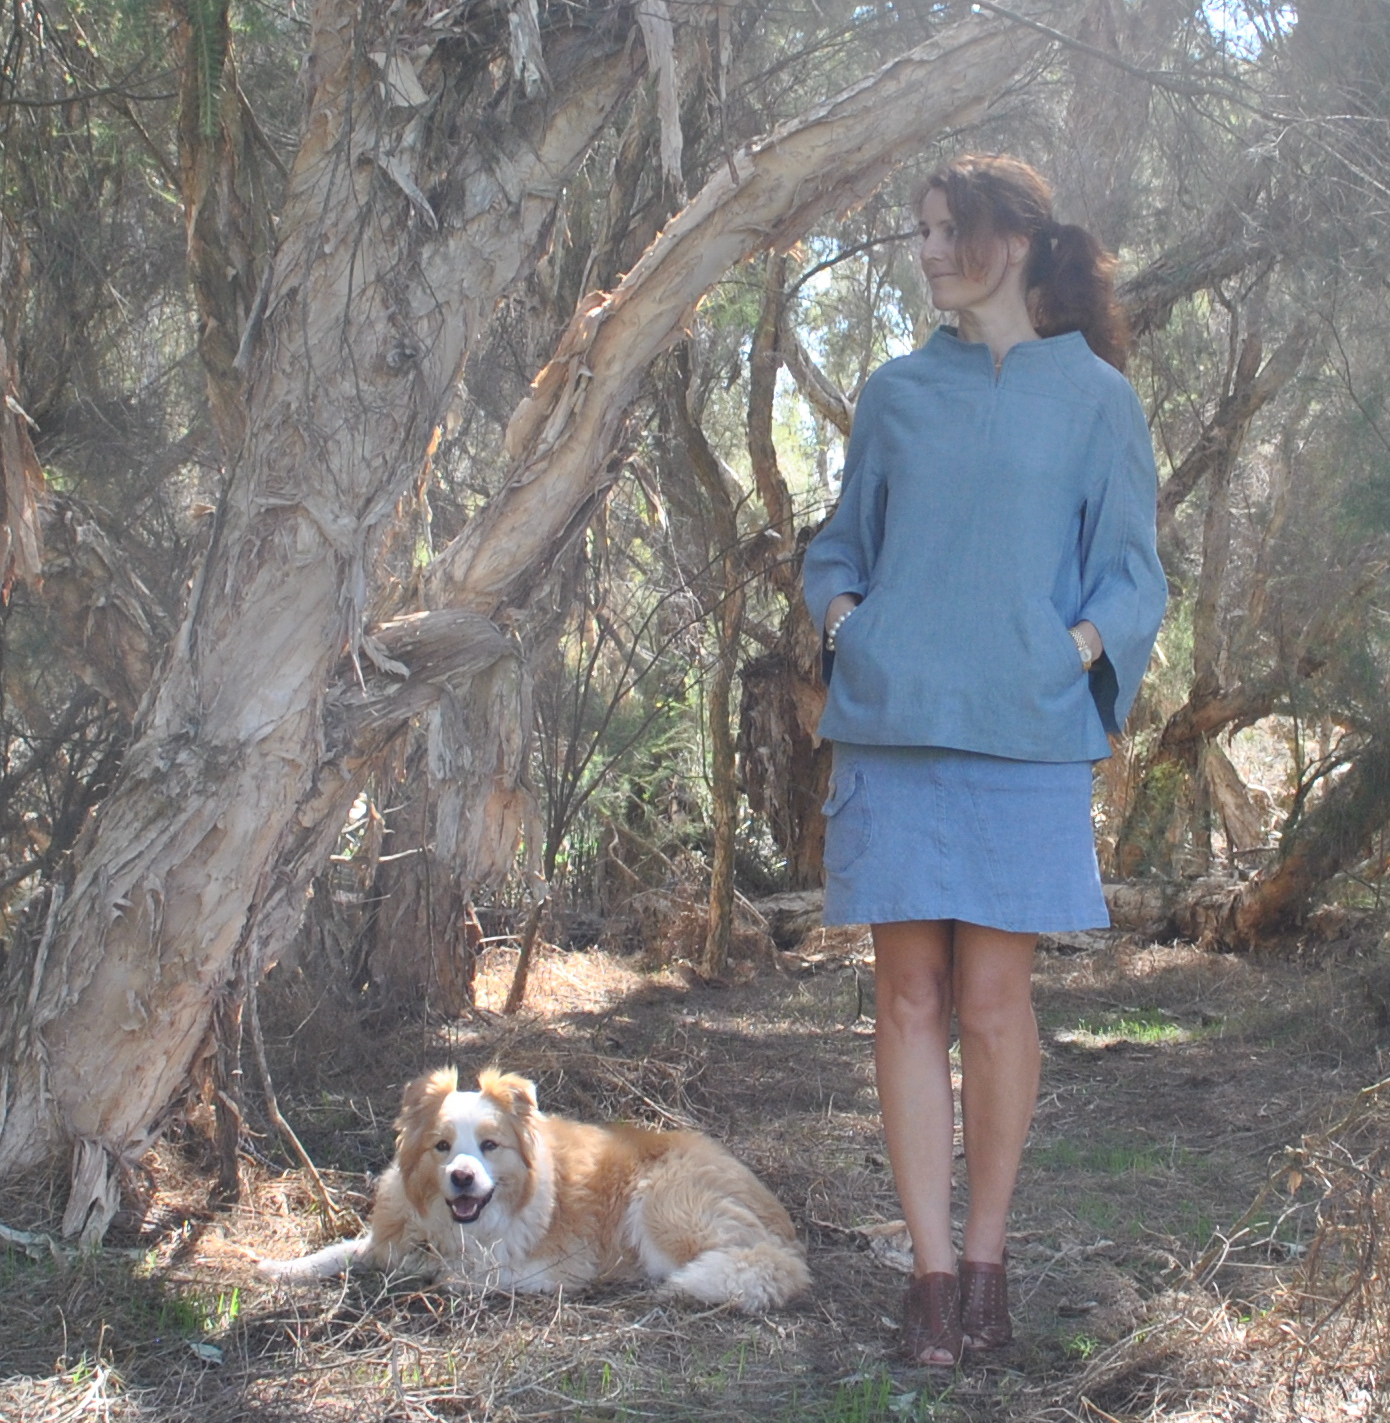
I’ve made a new top.  Actually I made this a little while ago, and I’ve suddenly came to the glorious realisation that hey! the autumnal weather is here and it’s actually beautiful enough to wear it.  I love this time of the year!
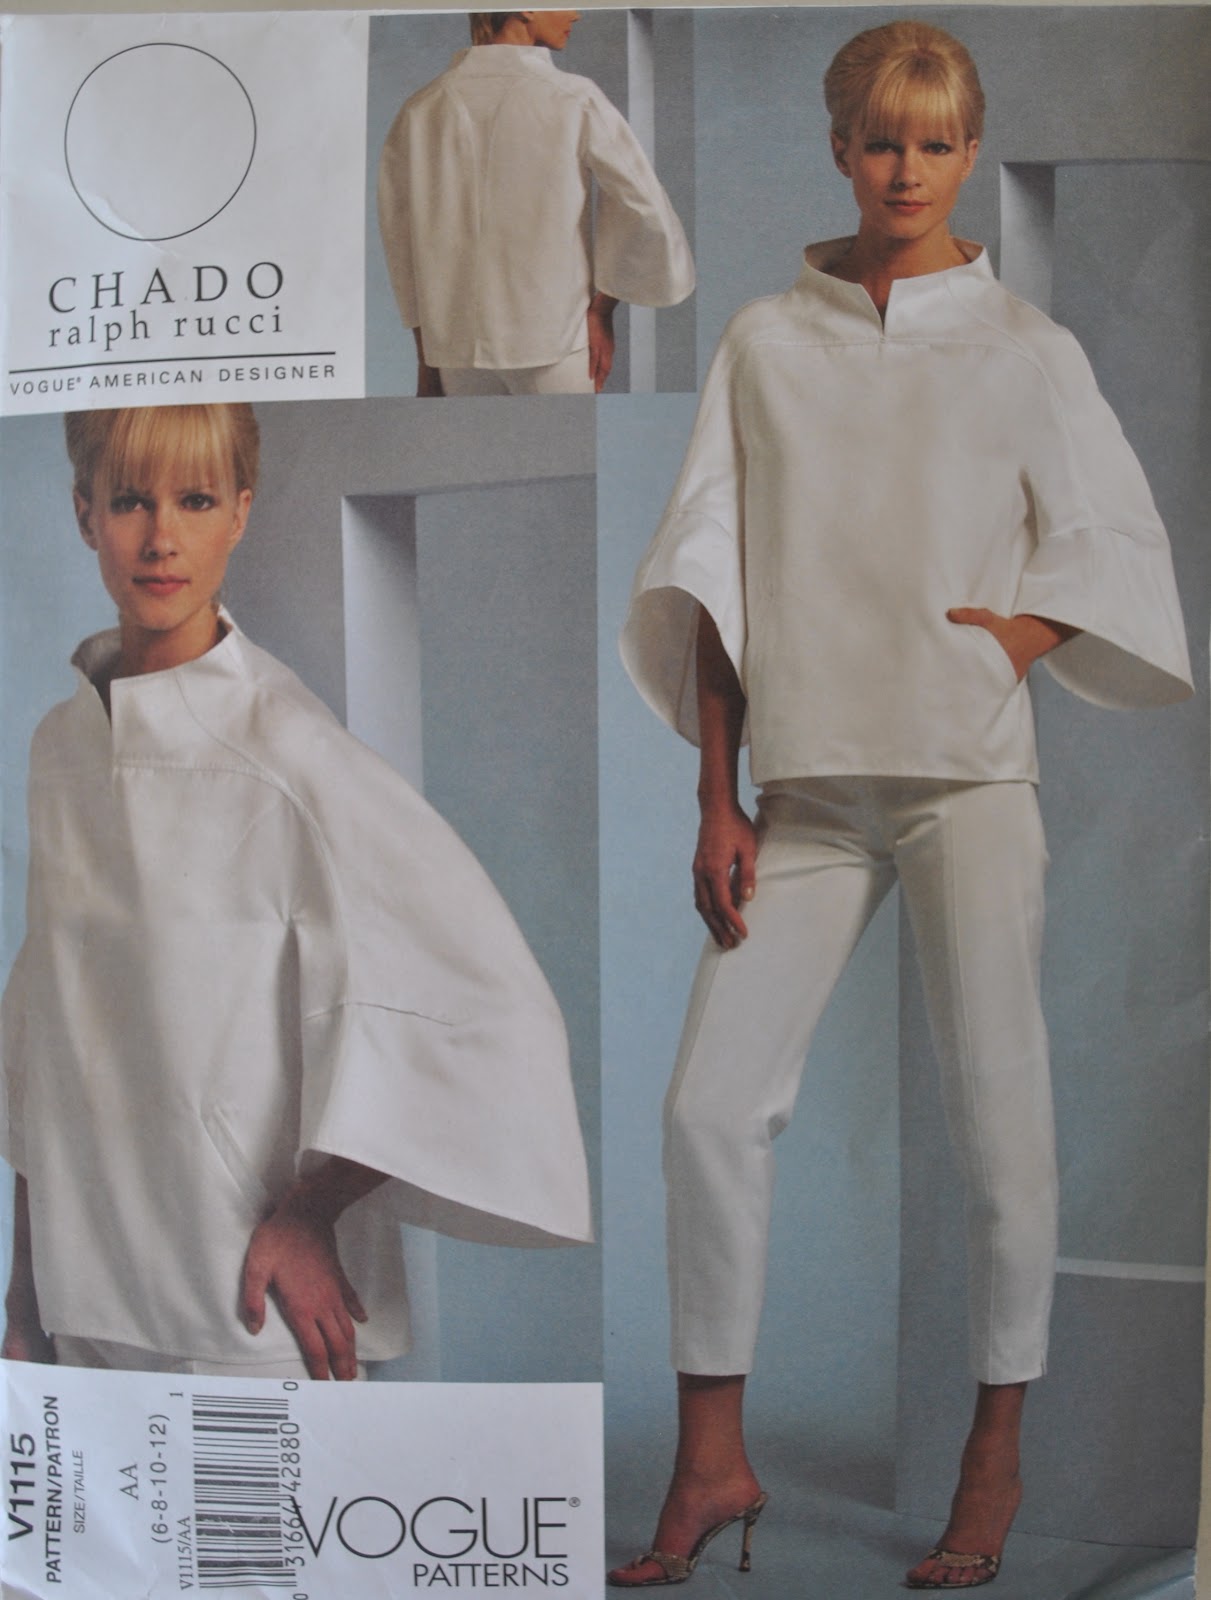
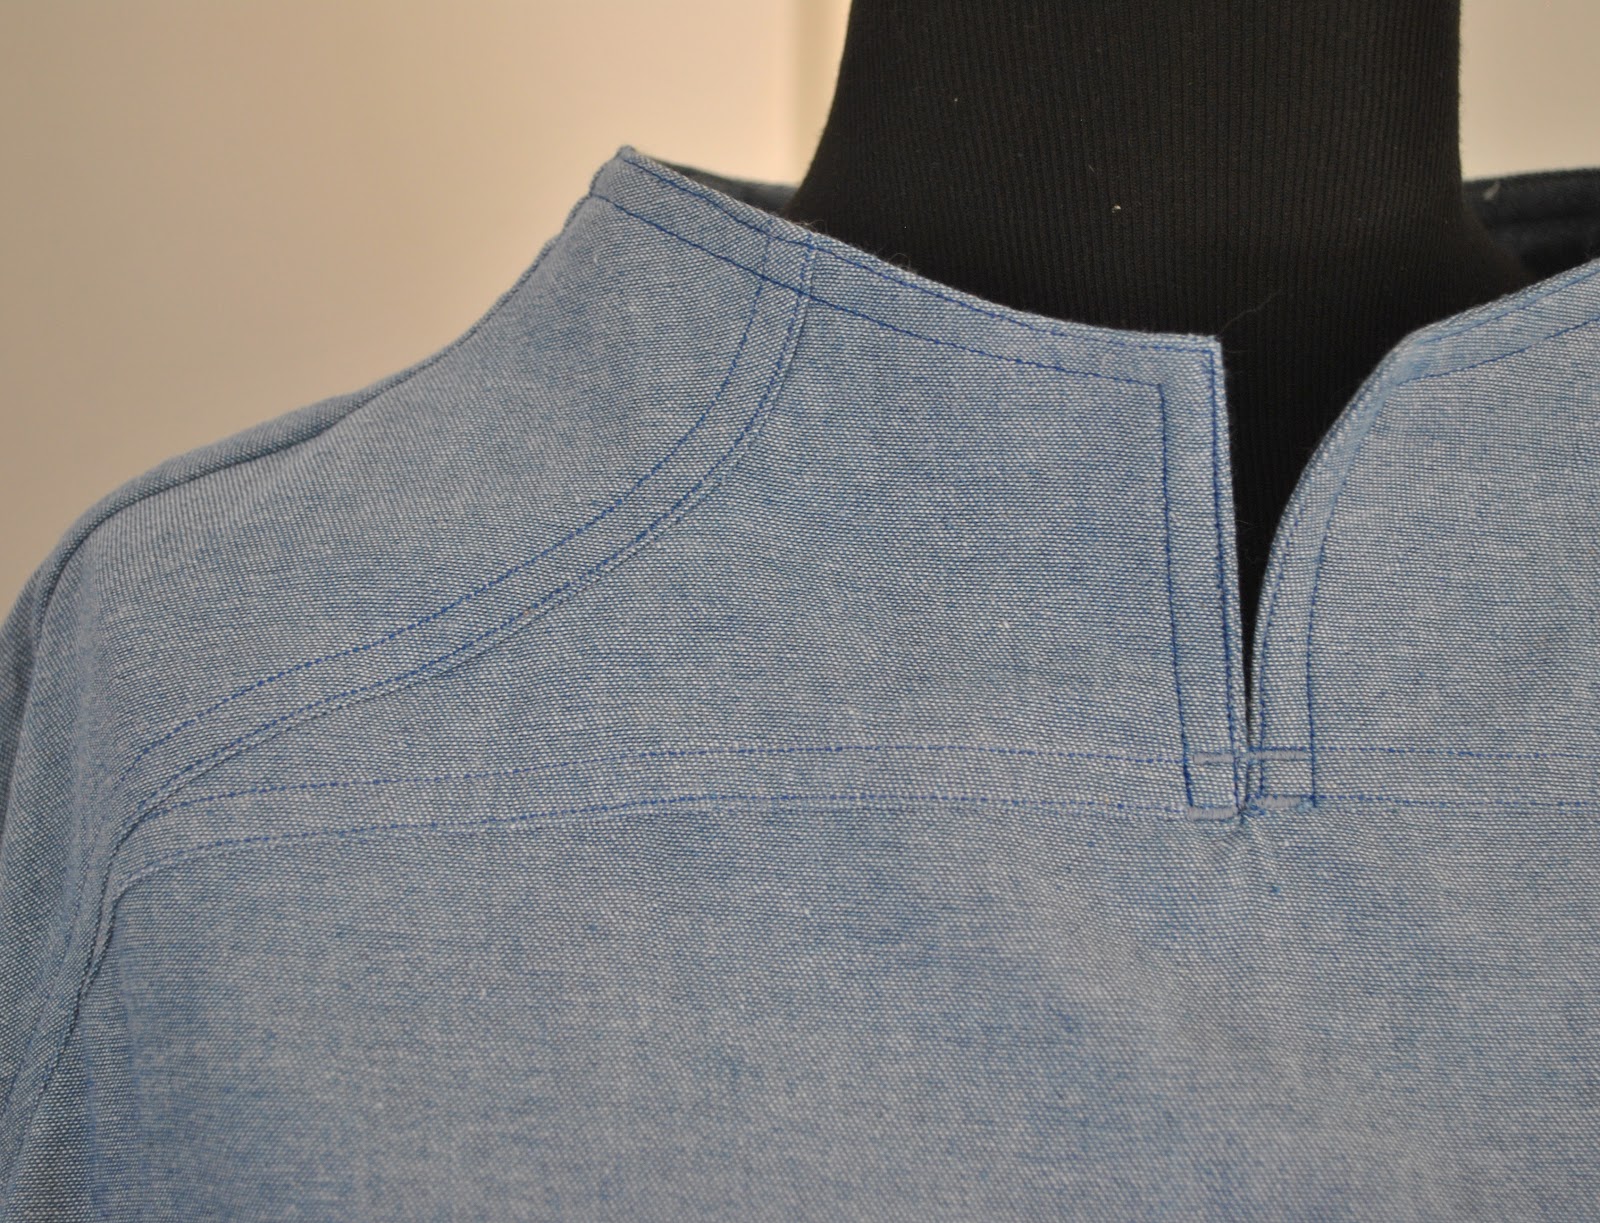
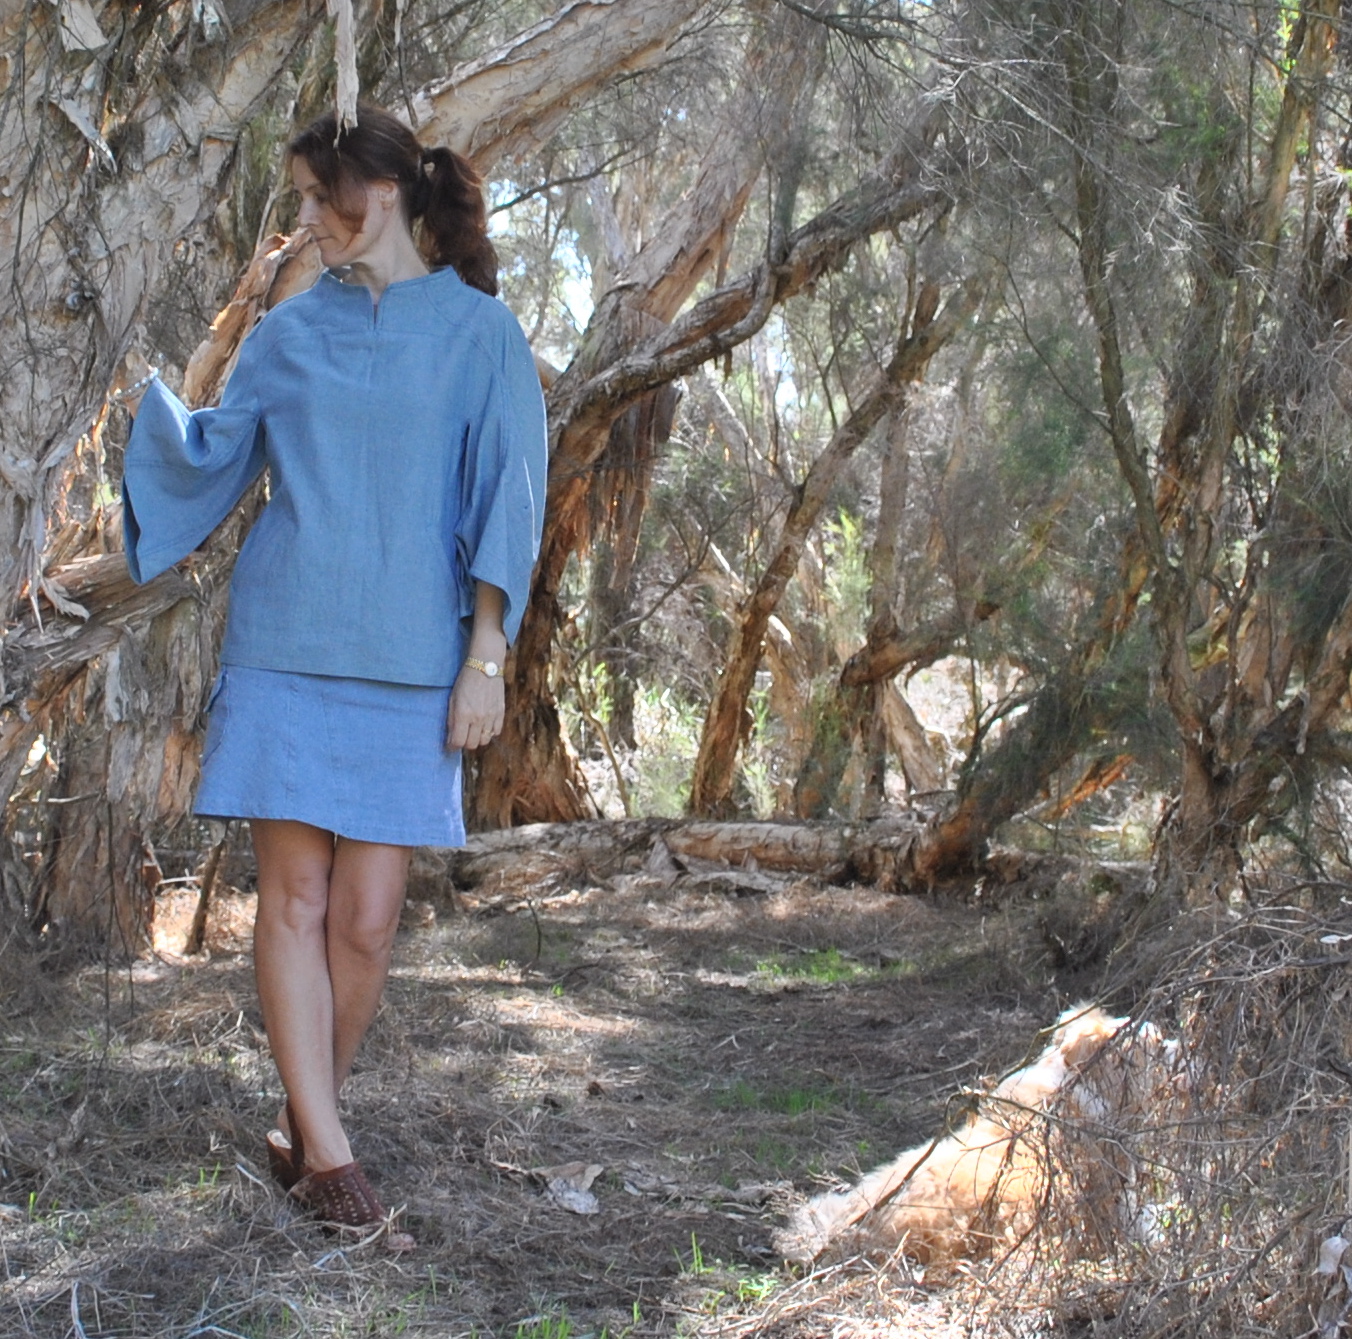
This is made using Vogue 1115 with the body lengthened by about 2.5cm, and used a piece of thin blue woven cotton denim-y stuff.  I chose to use the fabric wrong side out, since I preferred the muted, slightly undefined, yellow-y tone of the blue of the wrong side.  The right side is a stronger blue, which I didn’t think did wonders for my complexion.
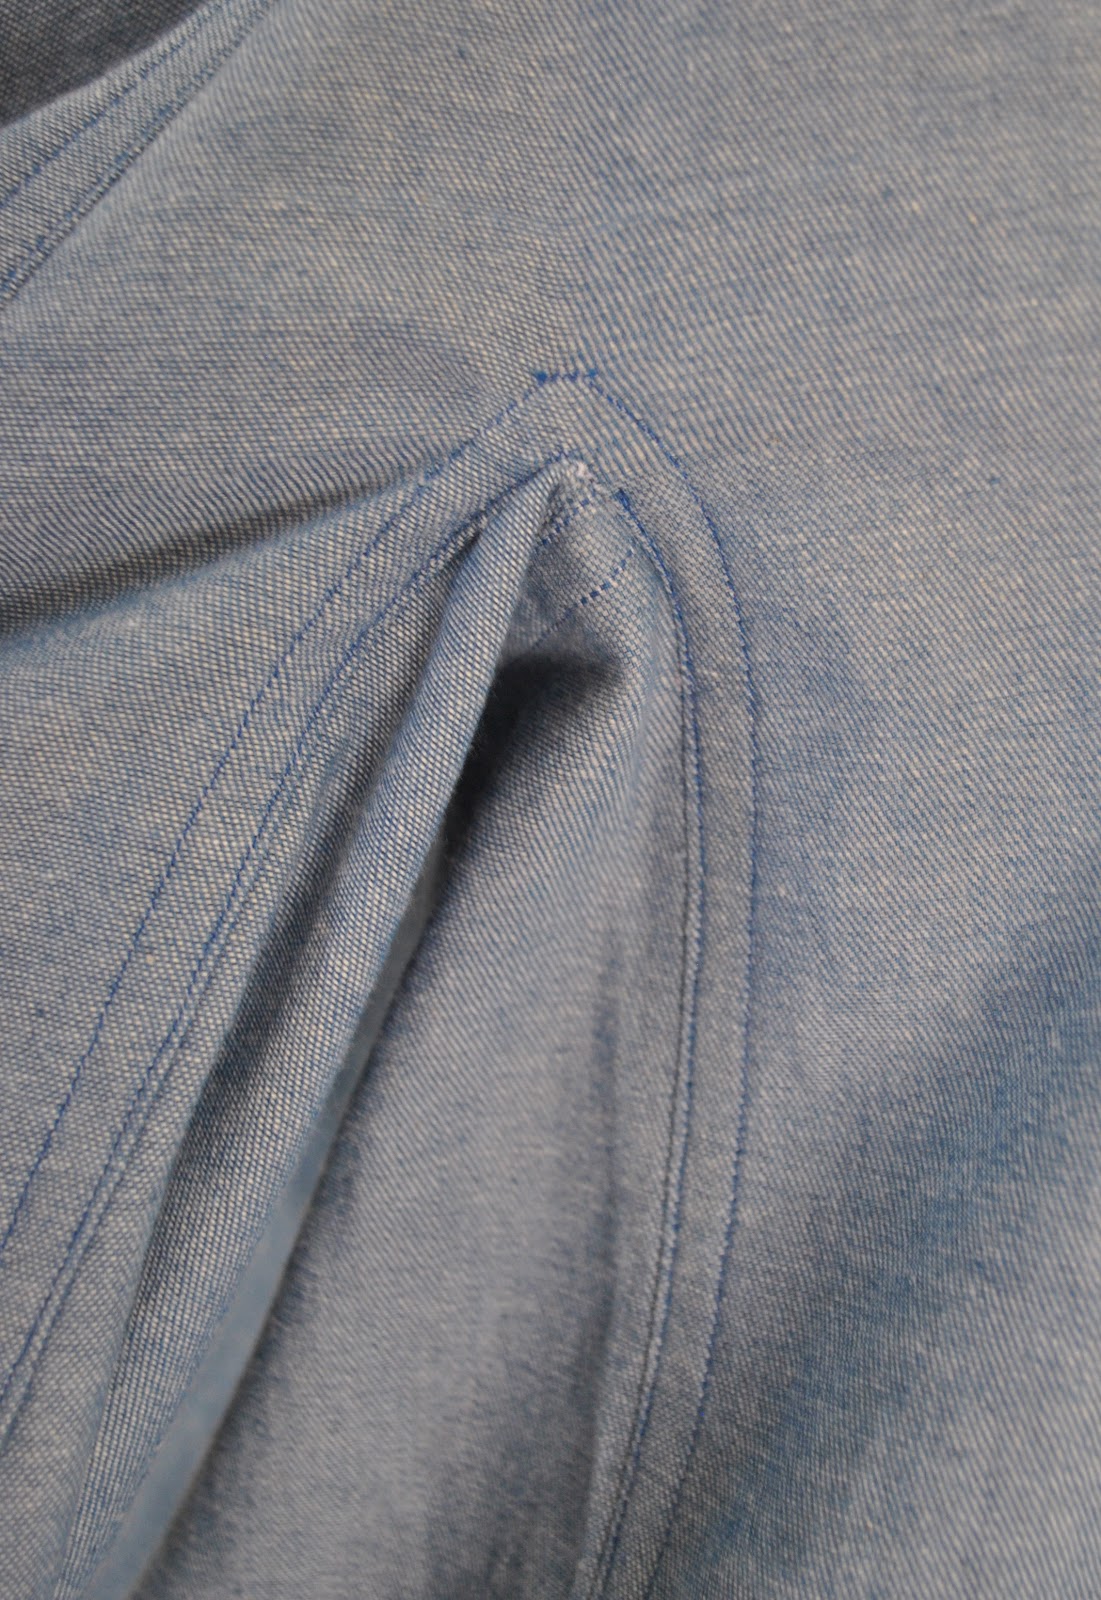
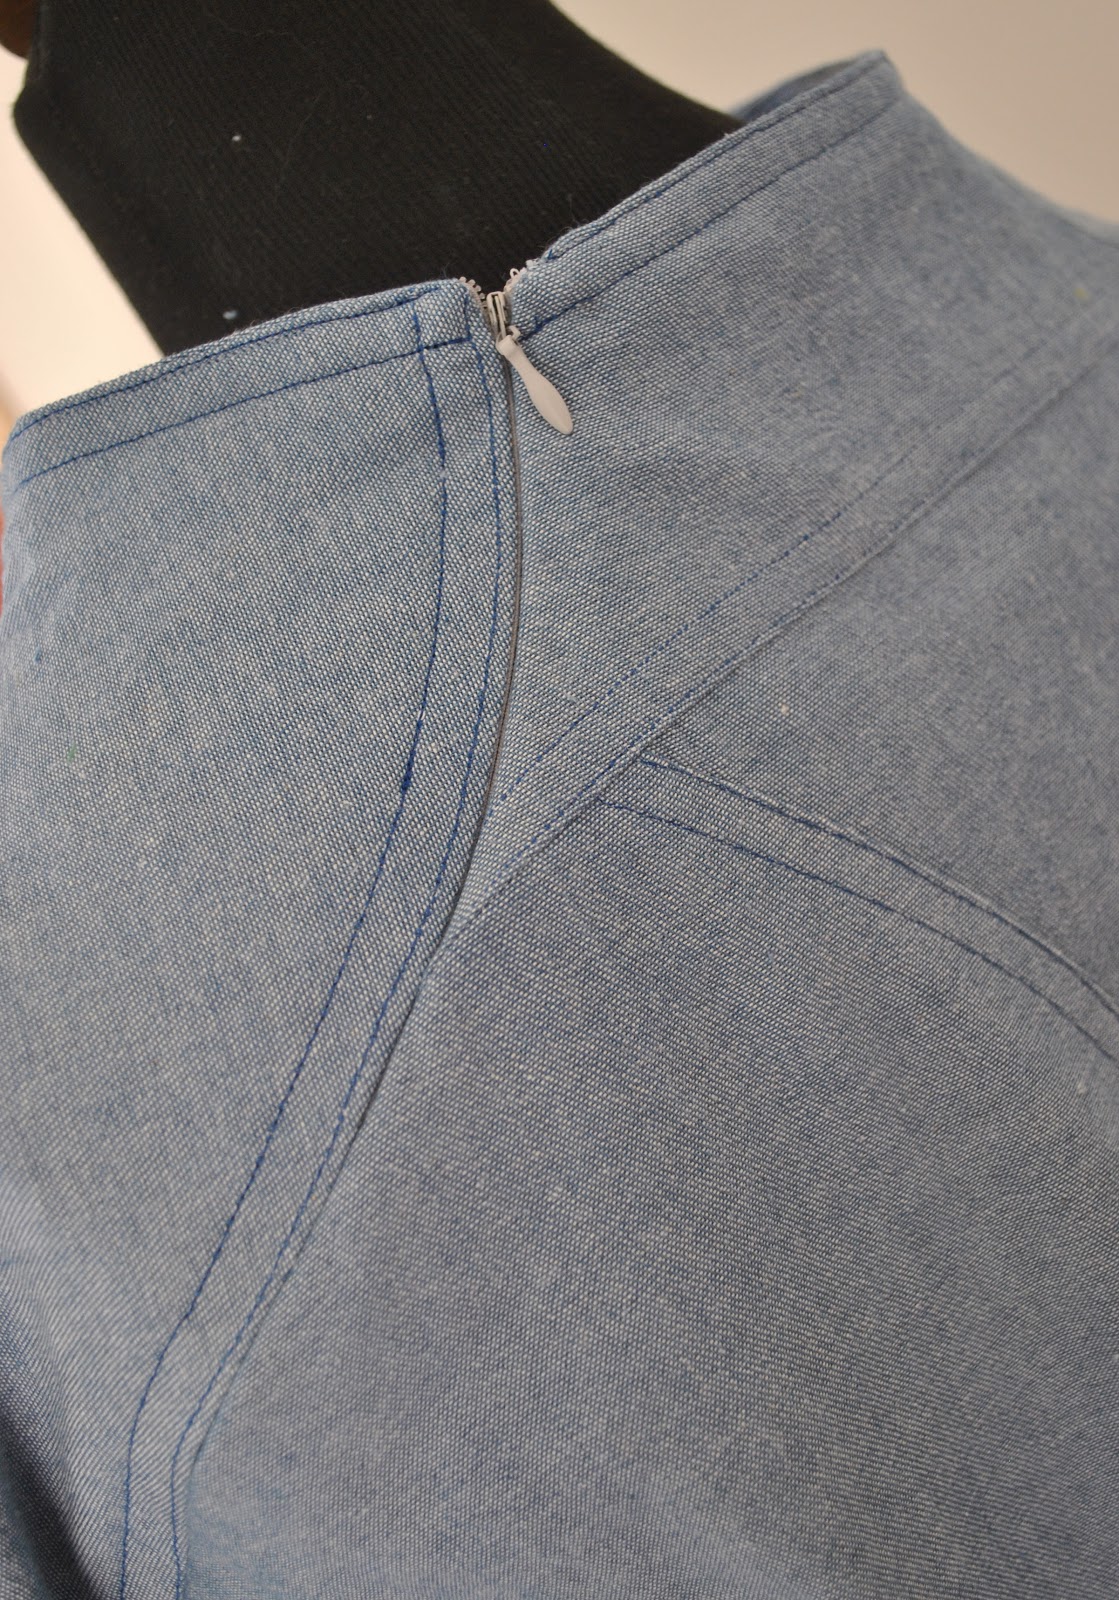
I’ve written a pattern review below for anyone interested, but there really is one important thing to know about this pattern, it is rated Advanced/Plus Difficile, and yes, that is a well deserved rating.  The undersleeve/side piece when joined together is pretty tricky to insert neatly; and sewing down the seam allowances of said sleeve gusset with a double row of topstitching? … seriously tricky.

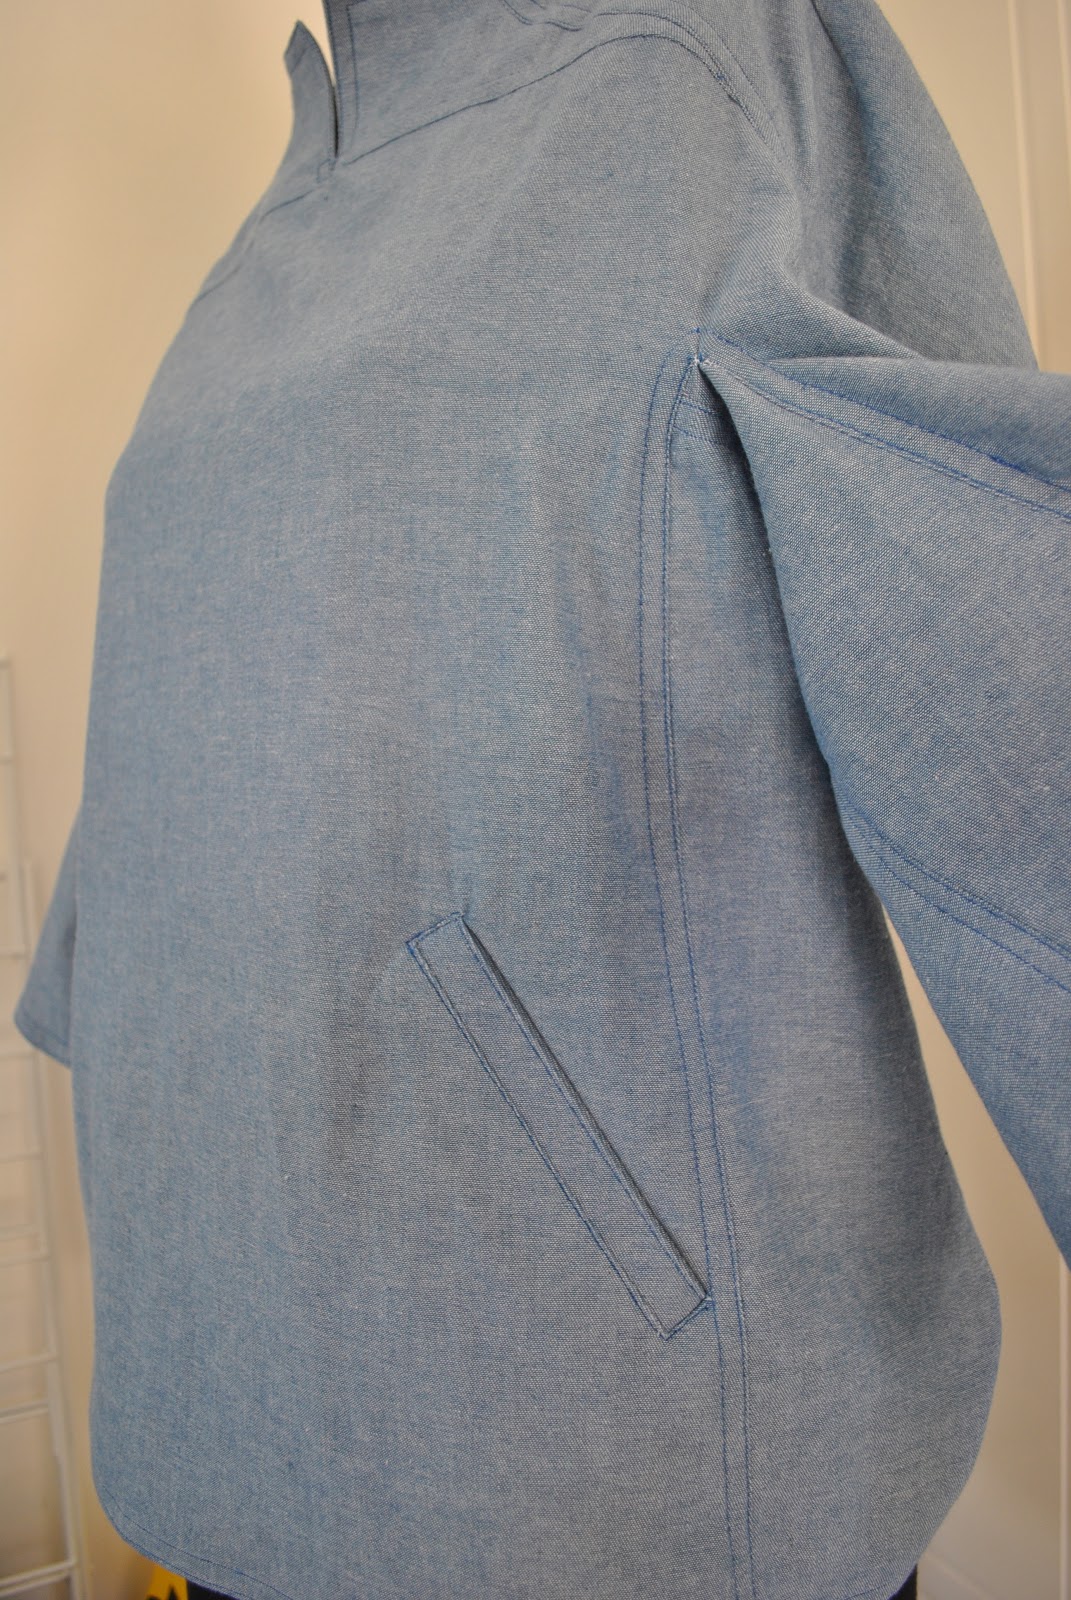
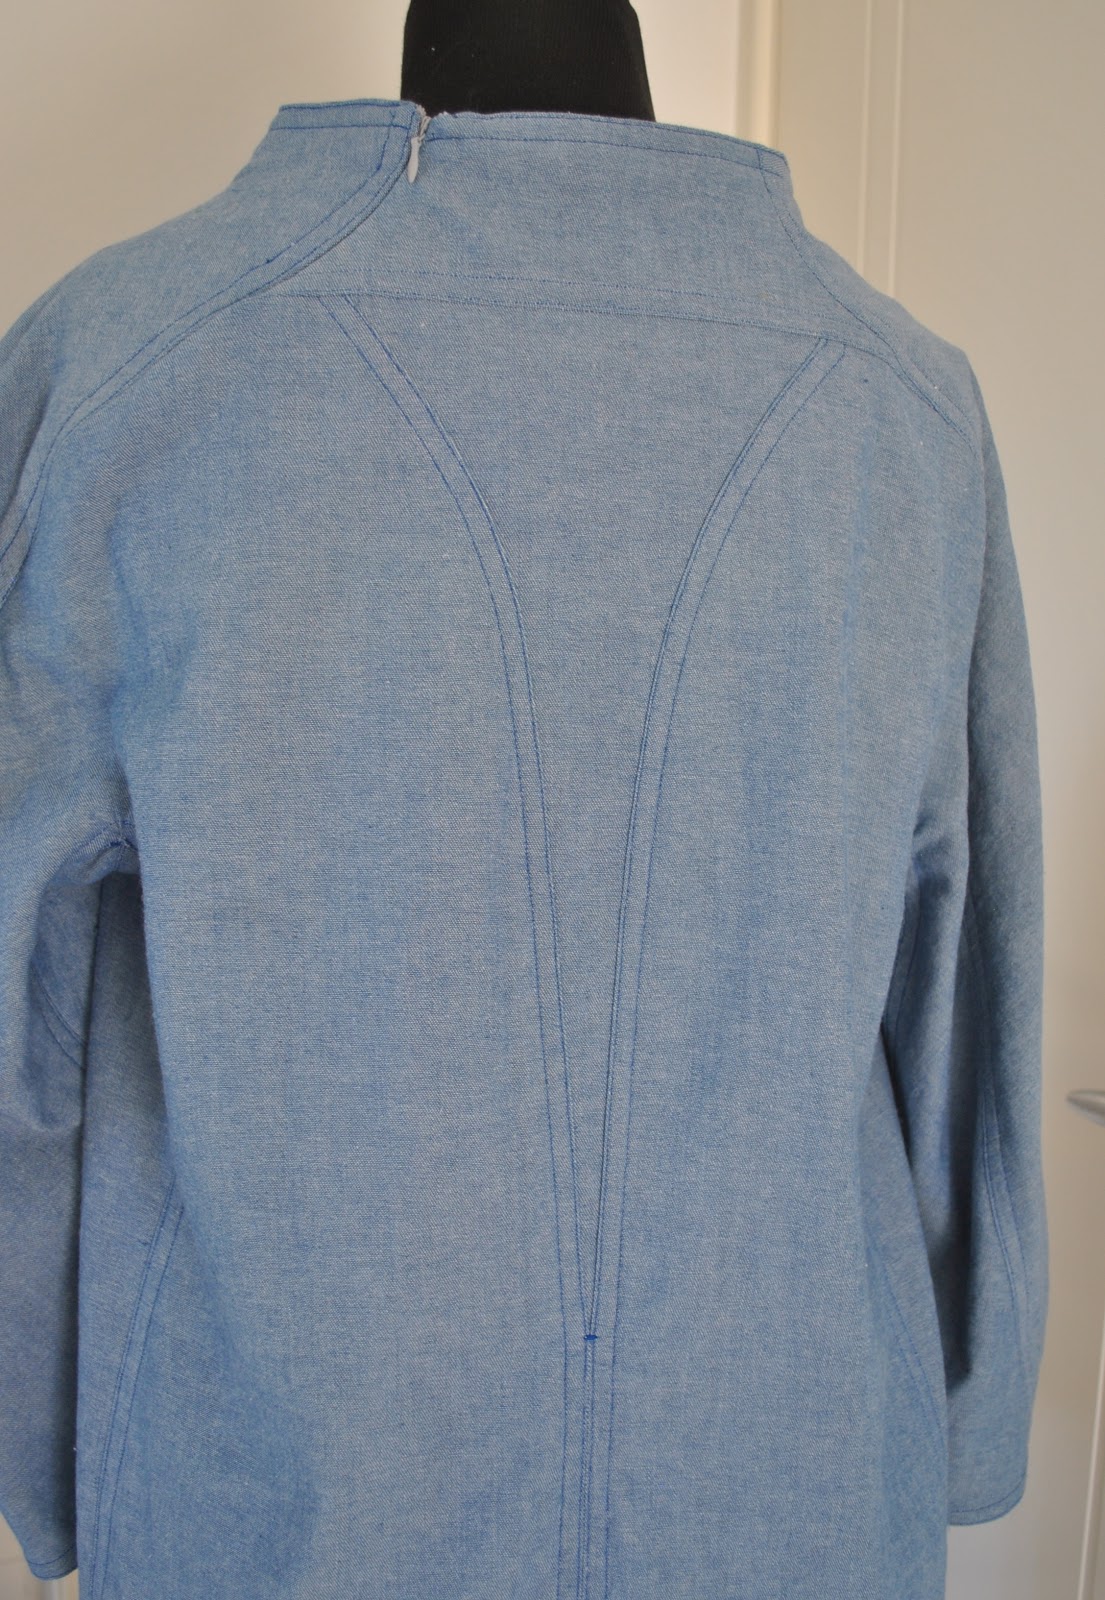
Most of the topstitching I used a deeper blue thread which was painstakingly colour matched to the blue in the fabric weave.  Haha, kidding; actually it is just leftover thread that I already had in my stash  đꙂ the fact that it matched is fortuitous!  I used a lighter shade of blue for the bar tacks.

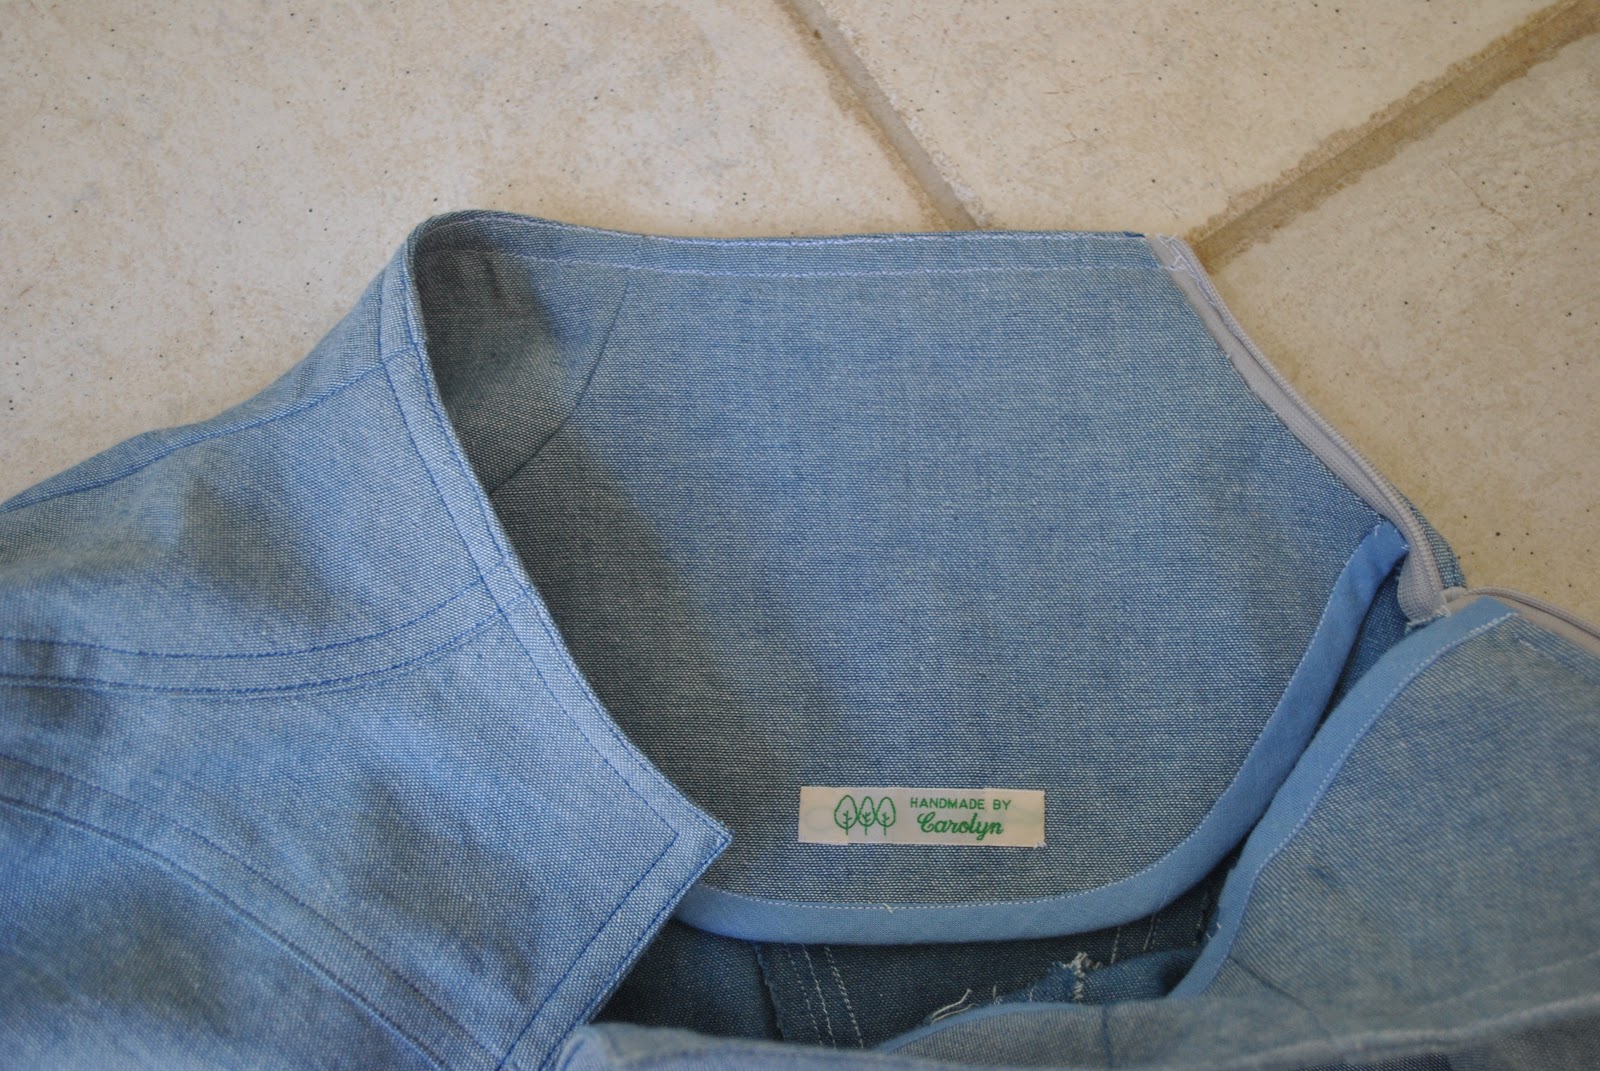
Installing that invisible zip, another seriously tricky procedure.. since I prefer to insert the zip before sewing up the seam below it; and since the seam allowance has to be finished with a double row of top-stitching to stylistically match all the other seams on the garment; this is an area that needed a bit of nutting out.  I’m pretty pleased with the nice even finish I got in the end  đꙂ

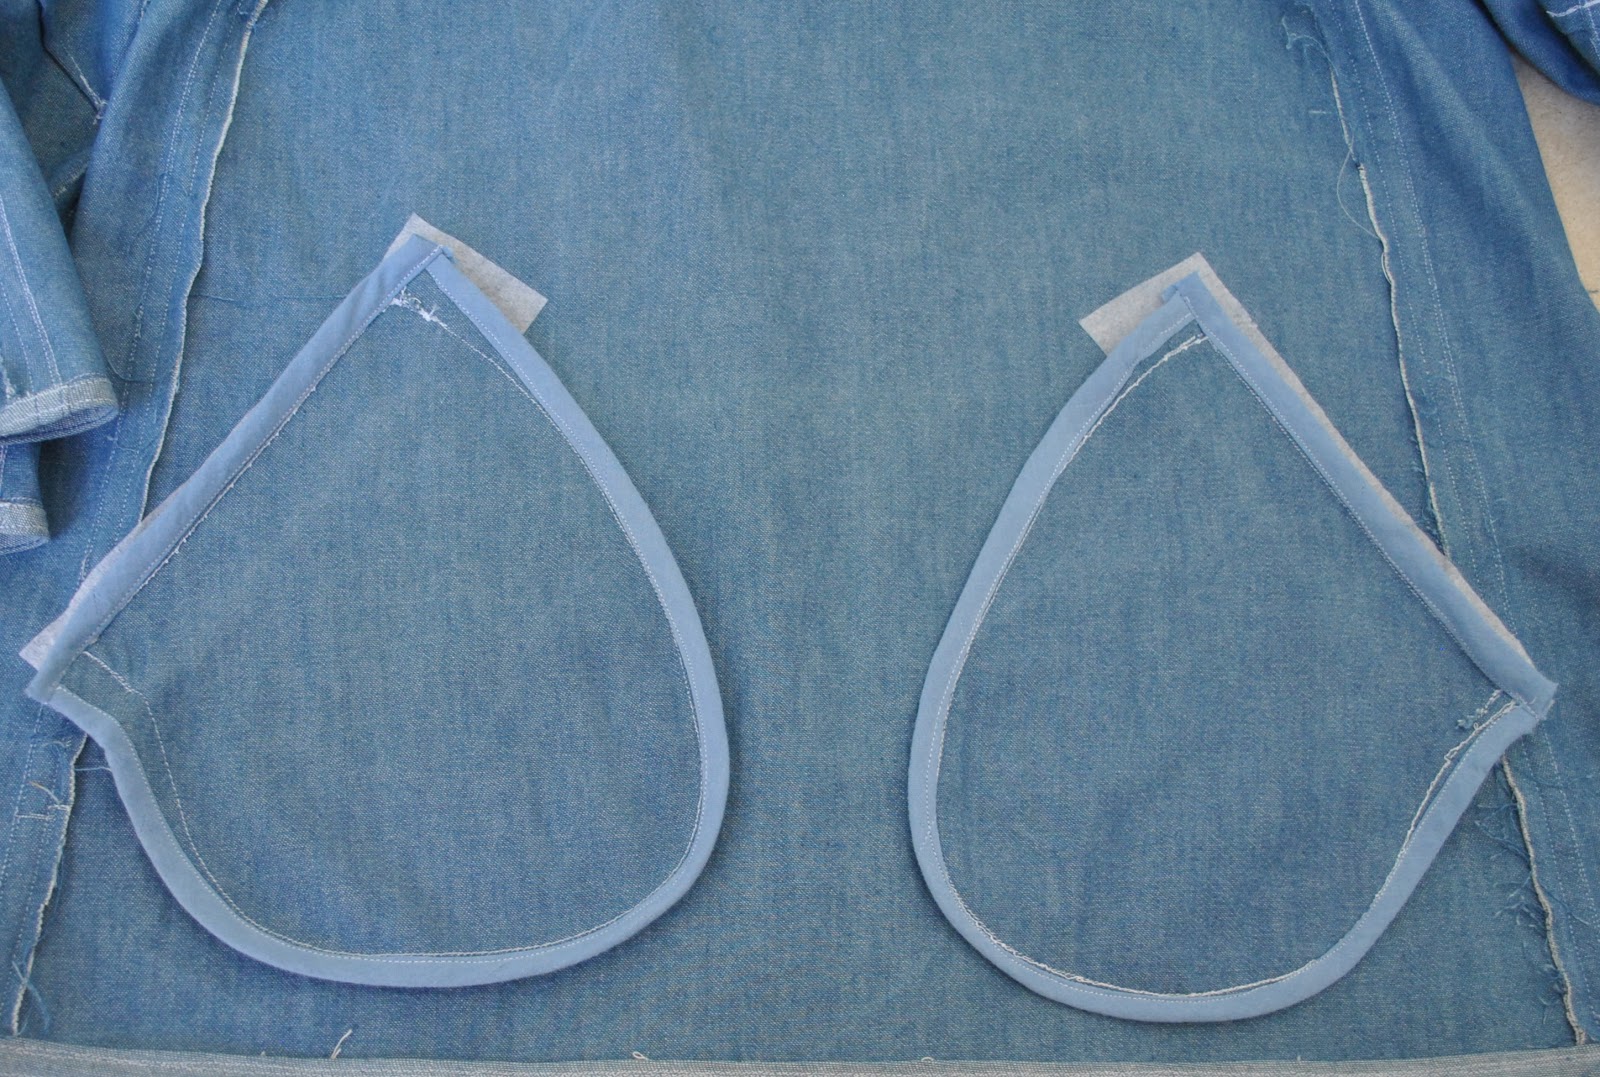
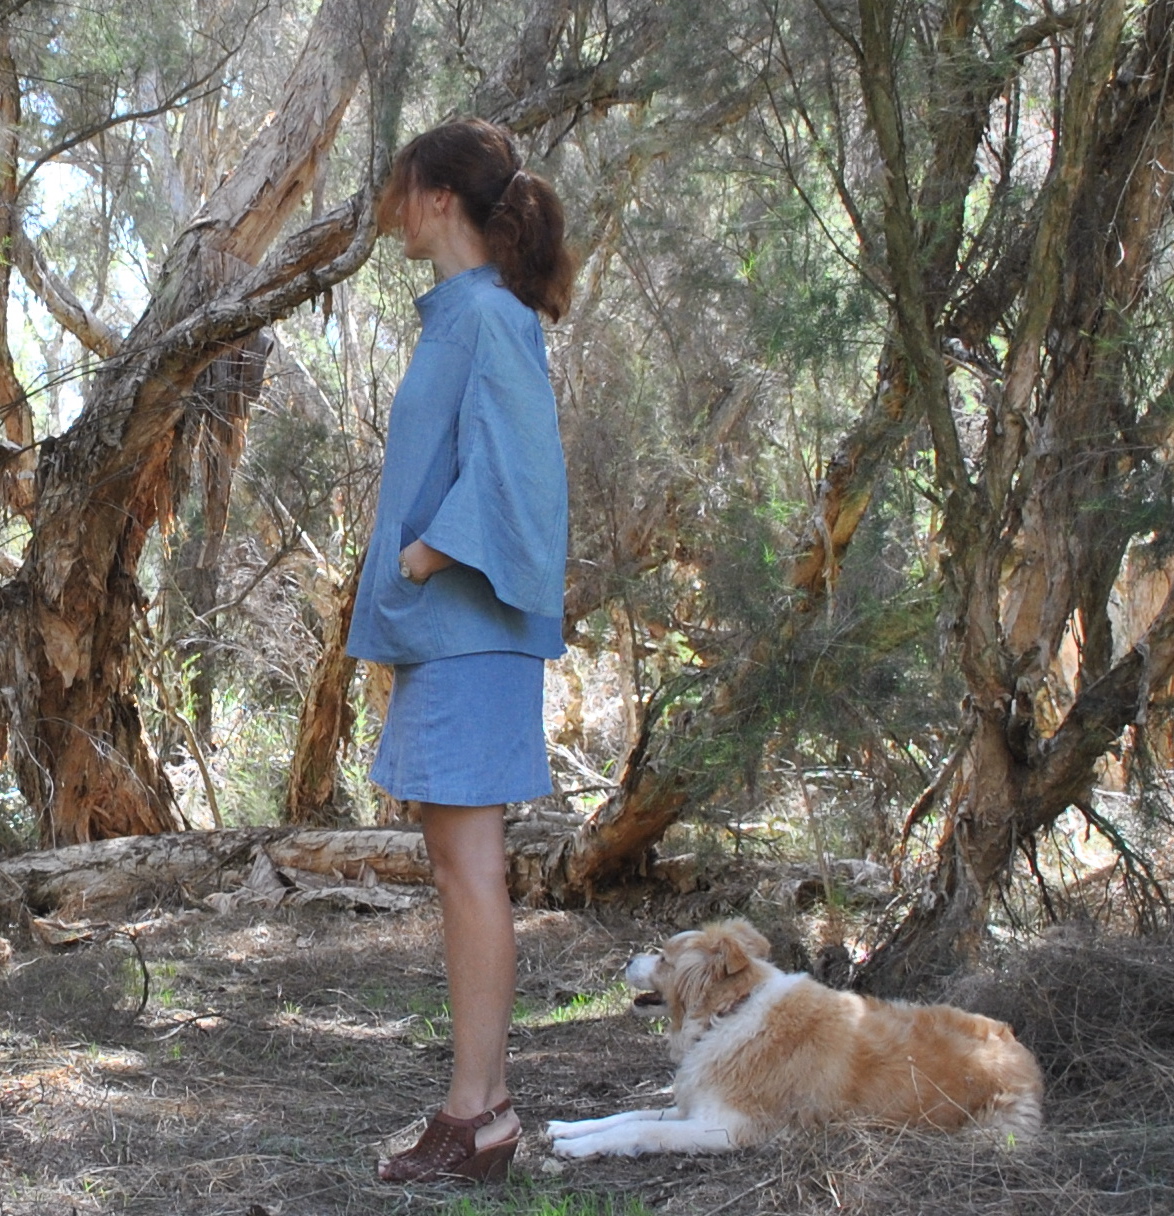
Look at those blissfully deep, welted inner pockets (satisfied sigh)  I made them a smidge deeper and bigger, and the edges are finished with HongKong seaming.

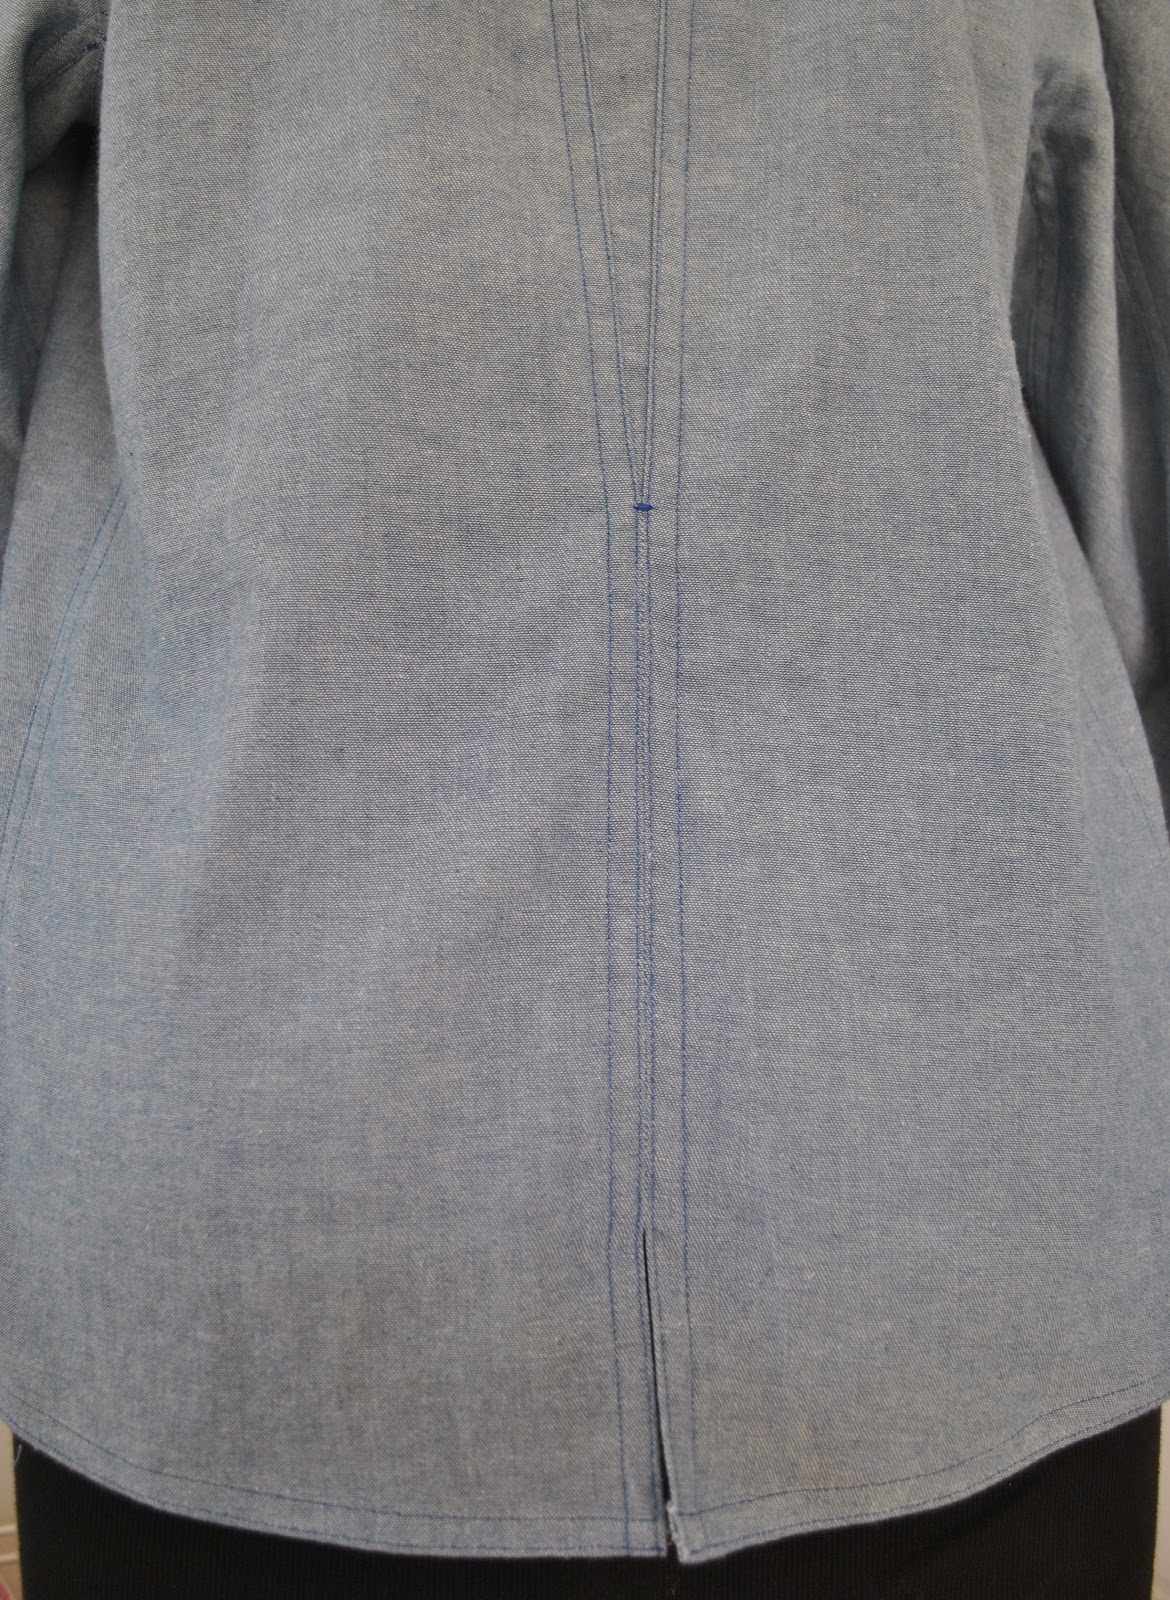
The graceful curve of those pieces in the back is so elegant and stylish.  I just love the seaming lines here!  I also like how the slit at the lower back stylistically matches the slit at the upper front neckline.  imo, it’s the little details like this that set the designer patterns apart from the others.

Those wide bell sleeves… I wasn’t absolutely certain that I would adore these, but they’ve grown on me.  They are certainly comfortable and feel nice to wear, no constrictions whatsoever! and I think they look quite designer-y and interesting.  I worried that the size of them would make them annoying, that they would get in the way of my daily activities, but I’ve worn my new top all day and barely noticed the sleeves.  No worries there!


Details:
Top; Vogue 1115, blue cotton denim
Skirt; based on Vogue 1247, refashioned from another skirt, originally Vogue 8561, details here
Sandals; c/o Misano

Pattern
Description:
Loose-fitting,
hip length, pull-over top has wide funnel neckline with slit, front and back
armhole gusset seaming, bell sleeves, welt pockets, back  inset, slit, side back zip and flat
fell seams.
Pattern
Sizing:
American
sizes 6-12; I cut the size 10
Did
it look like the photo/drawing on the pattern envelope once you had finished
sewing it?
Yes.
Were
the instructions easy to follow?
In my
opinion the instructions are straightforward but this pattern is rated
Advanced/Plus Difficile for a reason!
What
did you particularly like or dislike about the pattern?
Well
I do so love a sewing challenge, and there are a few in this pattern… this is
not a top that can be whipped up in one day, no sirreee!  I dug down deep into my reserves of
patience and only allowed myself to work on the tricky bits when I was feeling
fresh and not tired!  For example:
stitching those double rows of topstitching to the undersleeve and side / front
and back seams was tricky, and also attaching
the neckline facing neatly to the top curved edges of the zip tape quite
tricky.
Fortunately,
I really love the final product!
Fabric
Used:
Lightweight cotton
denim
Pattern
alterations or any design changes you made:
I
lengthened the body pieces by 2.5cm at the hem, and cut the pockets to be 1.5cm
deeper…
Step
16, I chose to reinforce underneath the single layer of fabric with a small
bias cut square of interfaced cloth before stitching the bar-tacks.
Step
35; I prefer to insert the invisible zip before
sewing together the seam underneath, I think you can get a much neater finish
Step
49; I think it is supposed to read “with right sides together” but in any case
I didn’t stitch the welt together like this, just folded it wrong sides
together and continued with step 51 with the edges raw and unstitched, and then
in step 56, slipped them between the pocket and triangular ends, stitching them
in place in the pocket seam, a more elegant and less bulky way of finishing the
welt considering the raw edges are bound with HongKong seaming in step 57.
I didn’t do the following, but if I was
making this again I would…!
Step
3 and step 20 have you slash the underarm/sleeve between stay-stitching… I
recommend instead that you leave the actual slashing until just before step 45, when you pin
and attach the undersleeve and side. 
There’s no need to make the cuts so early, and if your fabric is subject
to fraying then I think it’s best to leave it until the last minute,
particularly since you are cutting so close to the stay-stitching and into the
armhole corner.
Would
you sew it again? Would you recommend it to others?
I do
recommend this pattern to the advanced seamster, and I think I will sew this one up again.  And,
ahem, I can get the top on and off without having to even use that
difficult-to-insert zip as long as I don’t mind my hair getting a bit
messy.  Which I don’t.  So, maybe I have a tiny head but
looking at the pattern envelope I think the model probably could do the
same.  The next time I might not
even bother with that zip. 
Conclusion:
I’m very happy with my new top, and I think it is a great
designer take on comfortable and
chic.  I was a bit worried about
those wide bell-sleeves before I started, that they would get in the way of daily activities, and/or look awkward and
stand out stiffly in a difficult-to-wear way but I needn’t have been; the sleeves feel great and look quite cool, and are very comfy in this loose floppy fabric.

pinterestmail

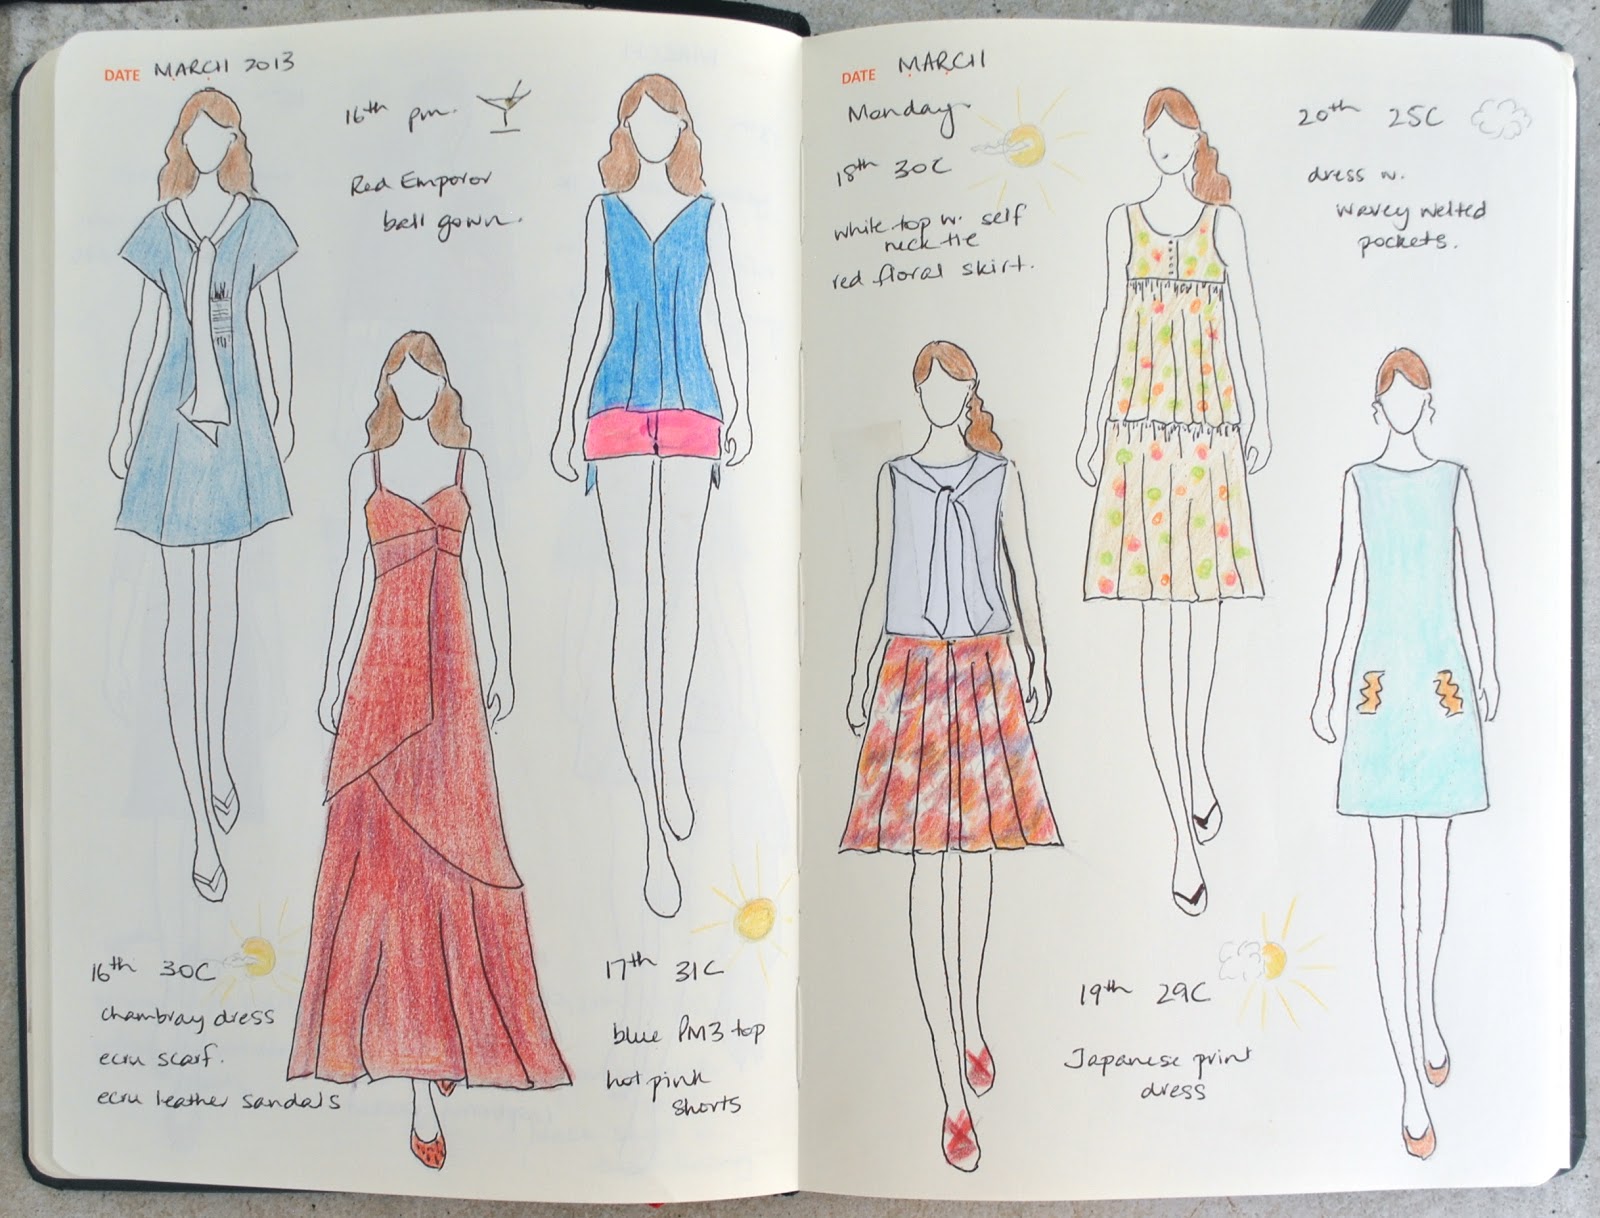
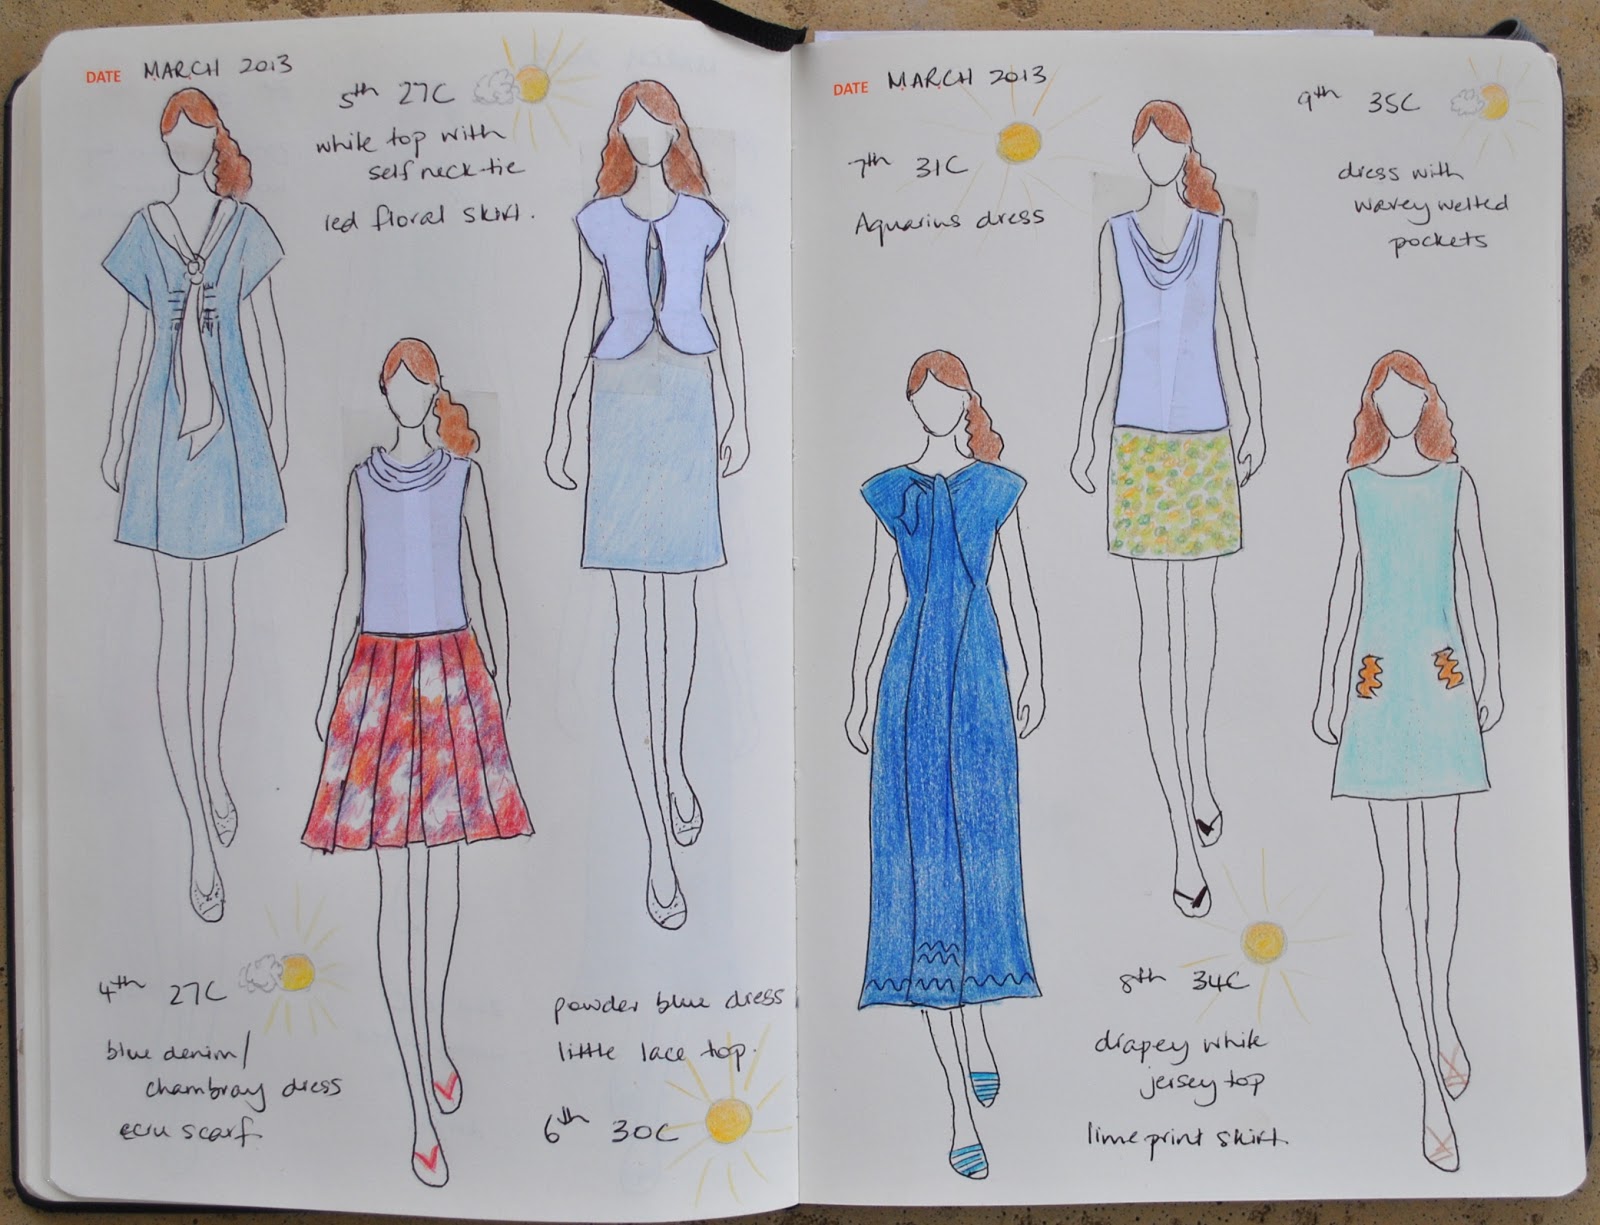
16th – 20th March
(I’ve pledged to wear only clothes handmade by me this year and to sketch my daily outfits in my Fashionary.  I’m calling this the paper doll project)

from left:
blue chambray dress + ecru scarf
red silk ballgown
blue Pattern Magic top + hot pink shorts
white top with self necktie + red floral skirt
Japanese print dress
aqua dress with wave-y welted pockets

Definition of “fun”:  a old-school glamour-fest …  we attended a friend’s Oscars themed birthday party last weekend.  I frocked up! and so did everyone else.  It was pretty fantastic to have an opportunity to wear one of my ballgowns again, and I just love the rich and royal crimson rustling that comes with this one  đꙂ Makes me feel a bit Downton Abbey or something.
My husband wore his tuxedo.  Oh my: is there any sexier attire for a man than a well-tailored suit?? (fans oneself) I do not think so!!
The temps and humidity is easing off as of today, which is pretty fab.  I’m getting a bit bored with my summer clothes and I’m looking forward to branching out!

pinterestmail

apparently necessary…

Follow my blog with Bloglovin

sorry everyone, I am not trying to beg for followers but the bloglovin’ site requires this post in order for me to claim my blog, whatever that means.  I thought I had better do that!

And I made a button!!
My first.
Believe me, I have close to non-existent Photoshop expertise, but I found this great article and used the excellent Glass Button tutorial.  The process is broken down into steps of one syllable, making it reasonably easy for a beginner.  I chose an oceanic, bluey-greeny colour for my button; because blue-green glass is purdy  đꙂ and the background is transparent, meaning you can see the background colour of your blog underneath it.
If anyone else wants to use it that is fine, just remember to change the link to have your blog address on bloglovin’, not mine.

pinterestmail

Just a spot of emerald

Top o’ the mornin’ evenin’ to you!!
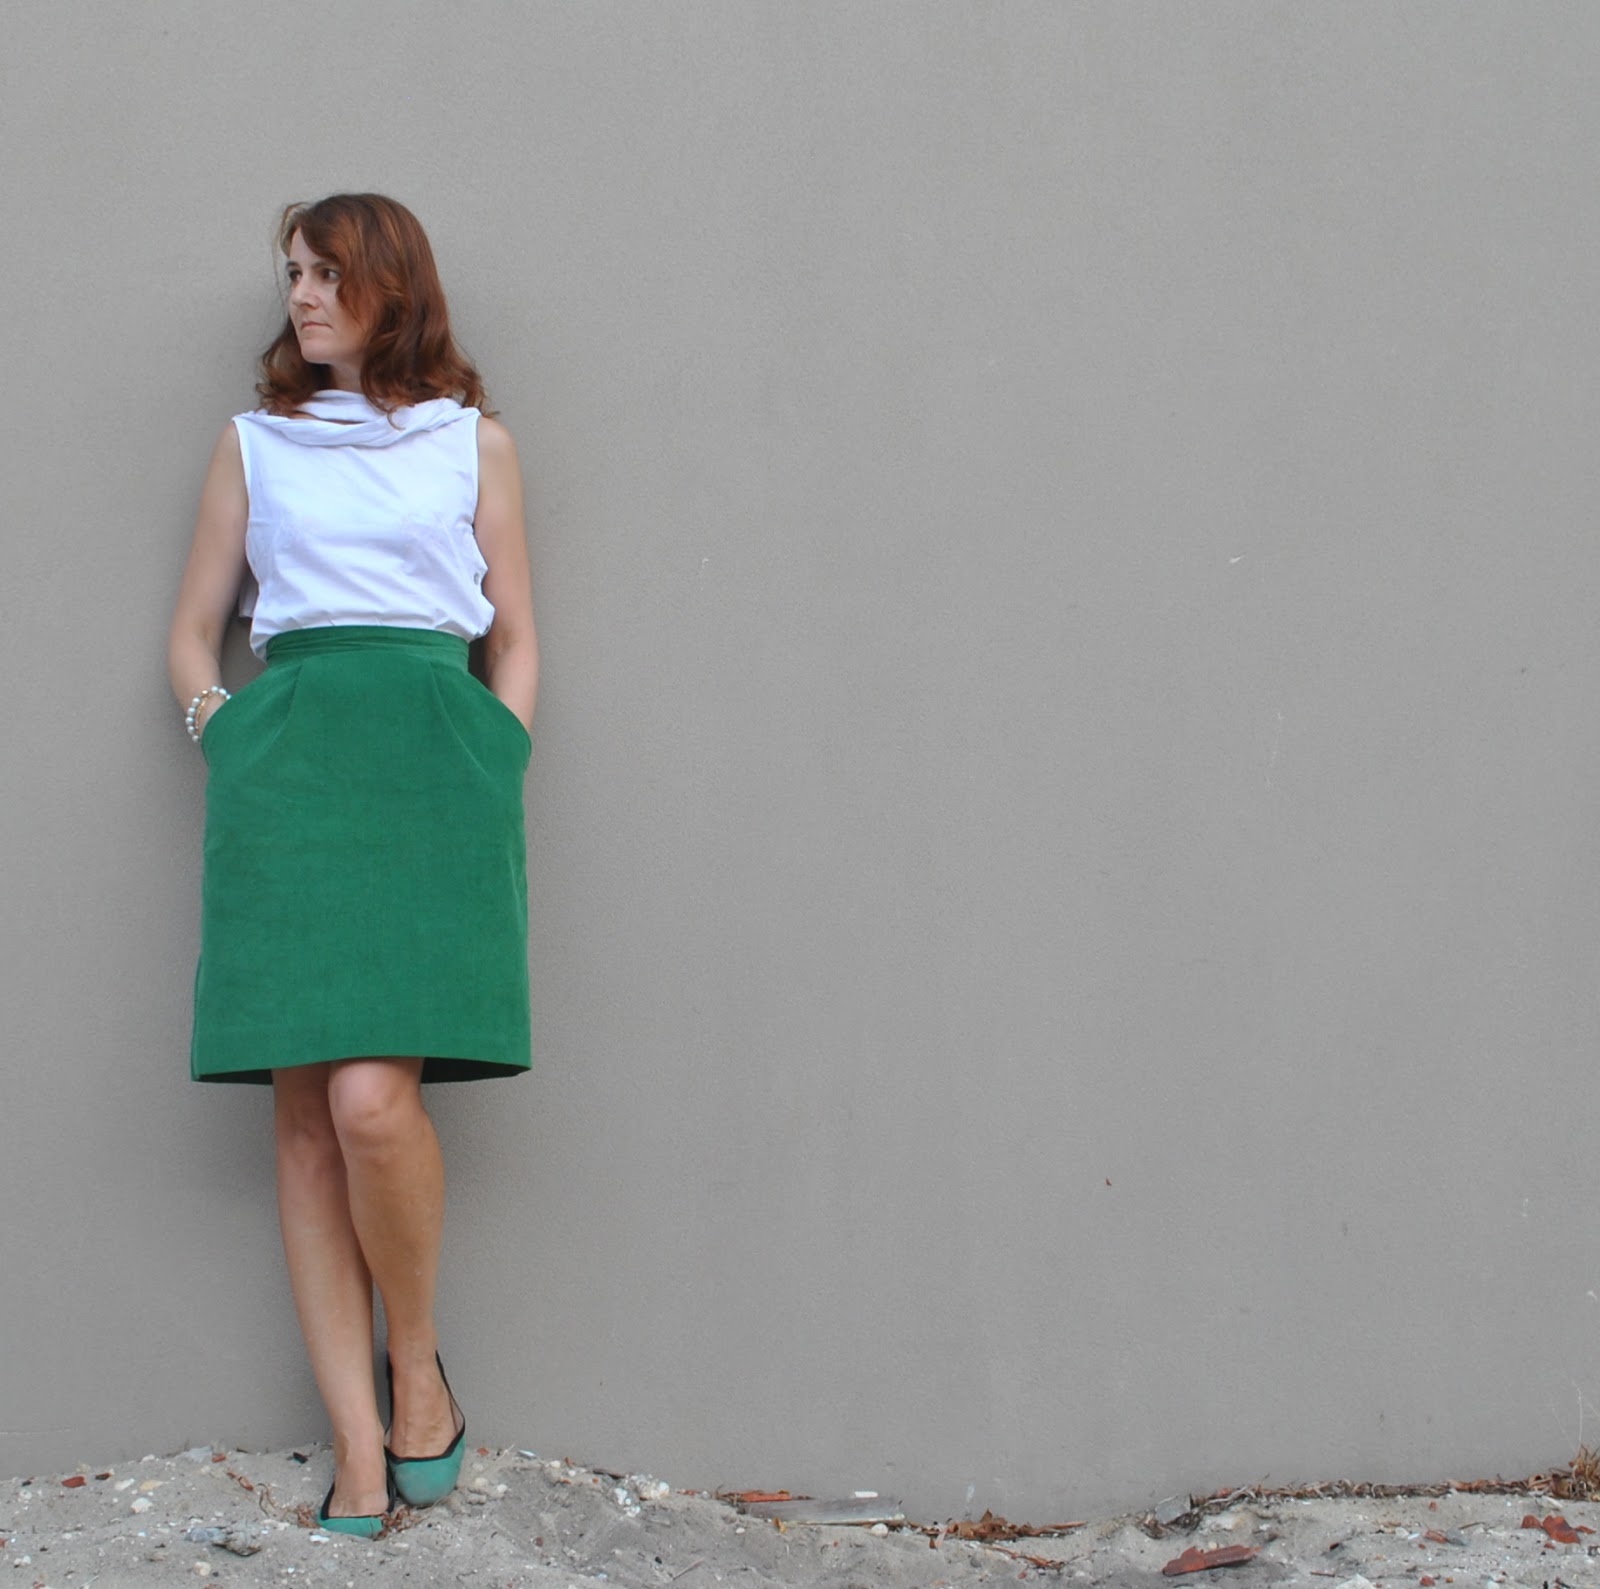
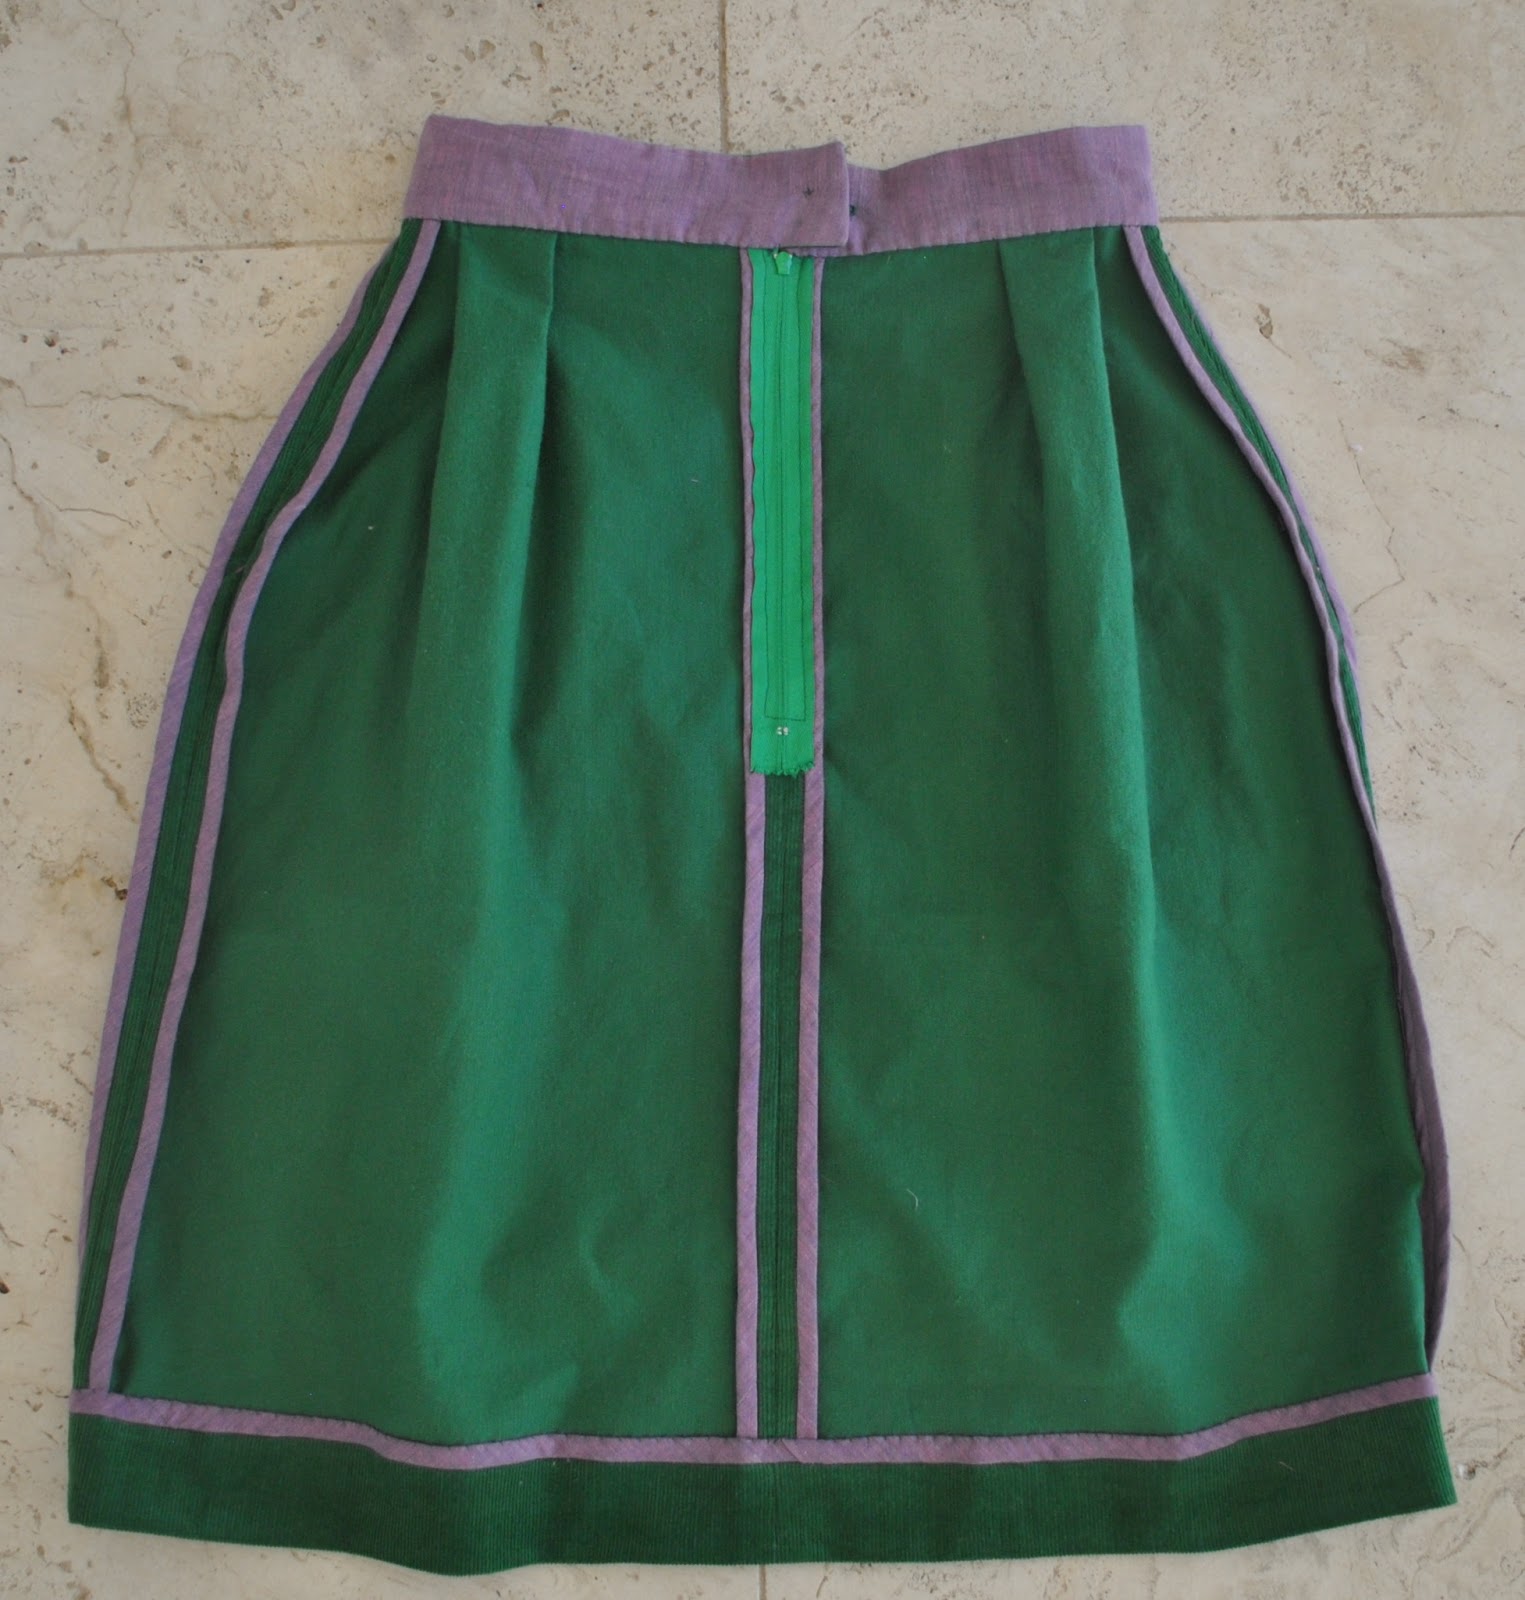
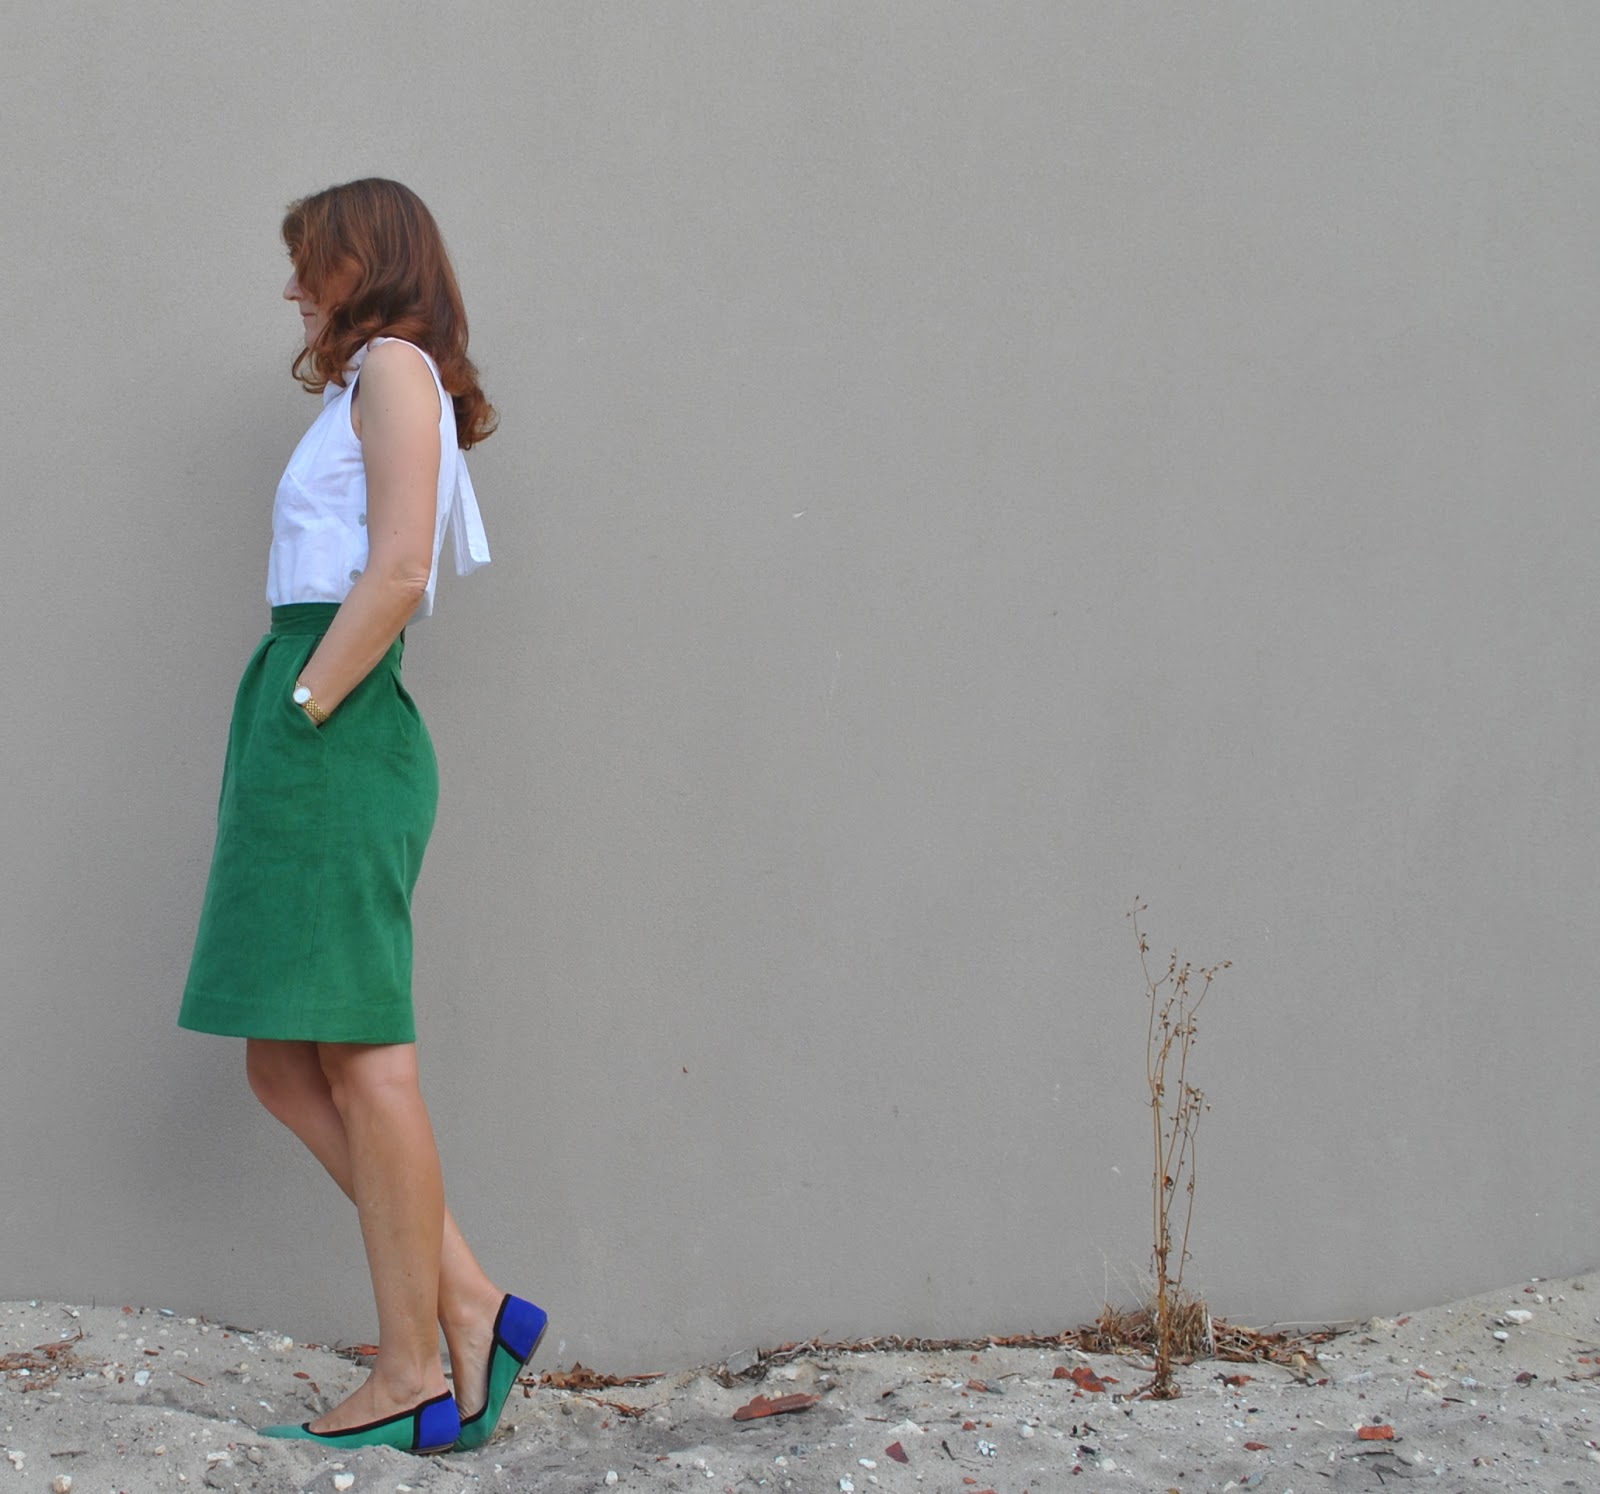
St Patricks day seemed an appropriate occasion to pull out this length of emerald green corduroy from the stash and make it up into something.  Anything.  I bought this fabric from Spotlight, last year.  Of course it’s kinda ludicrous for me to be wearing a corduroy skirt today since it is a warm 31C here in Perth! but here ’tis, all the same.  A corduroy skirt is not so much weather-appropriate right now as it is weather-anticipatory… but I’m sure I’ll be grateful for it when more winter-y temperatures kick in.  And hey, isn’t Emerald the Colour of the Year, or something??  Woa!  Definitely a good day to be adding a little emerald green to my wardrobe!
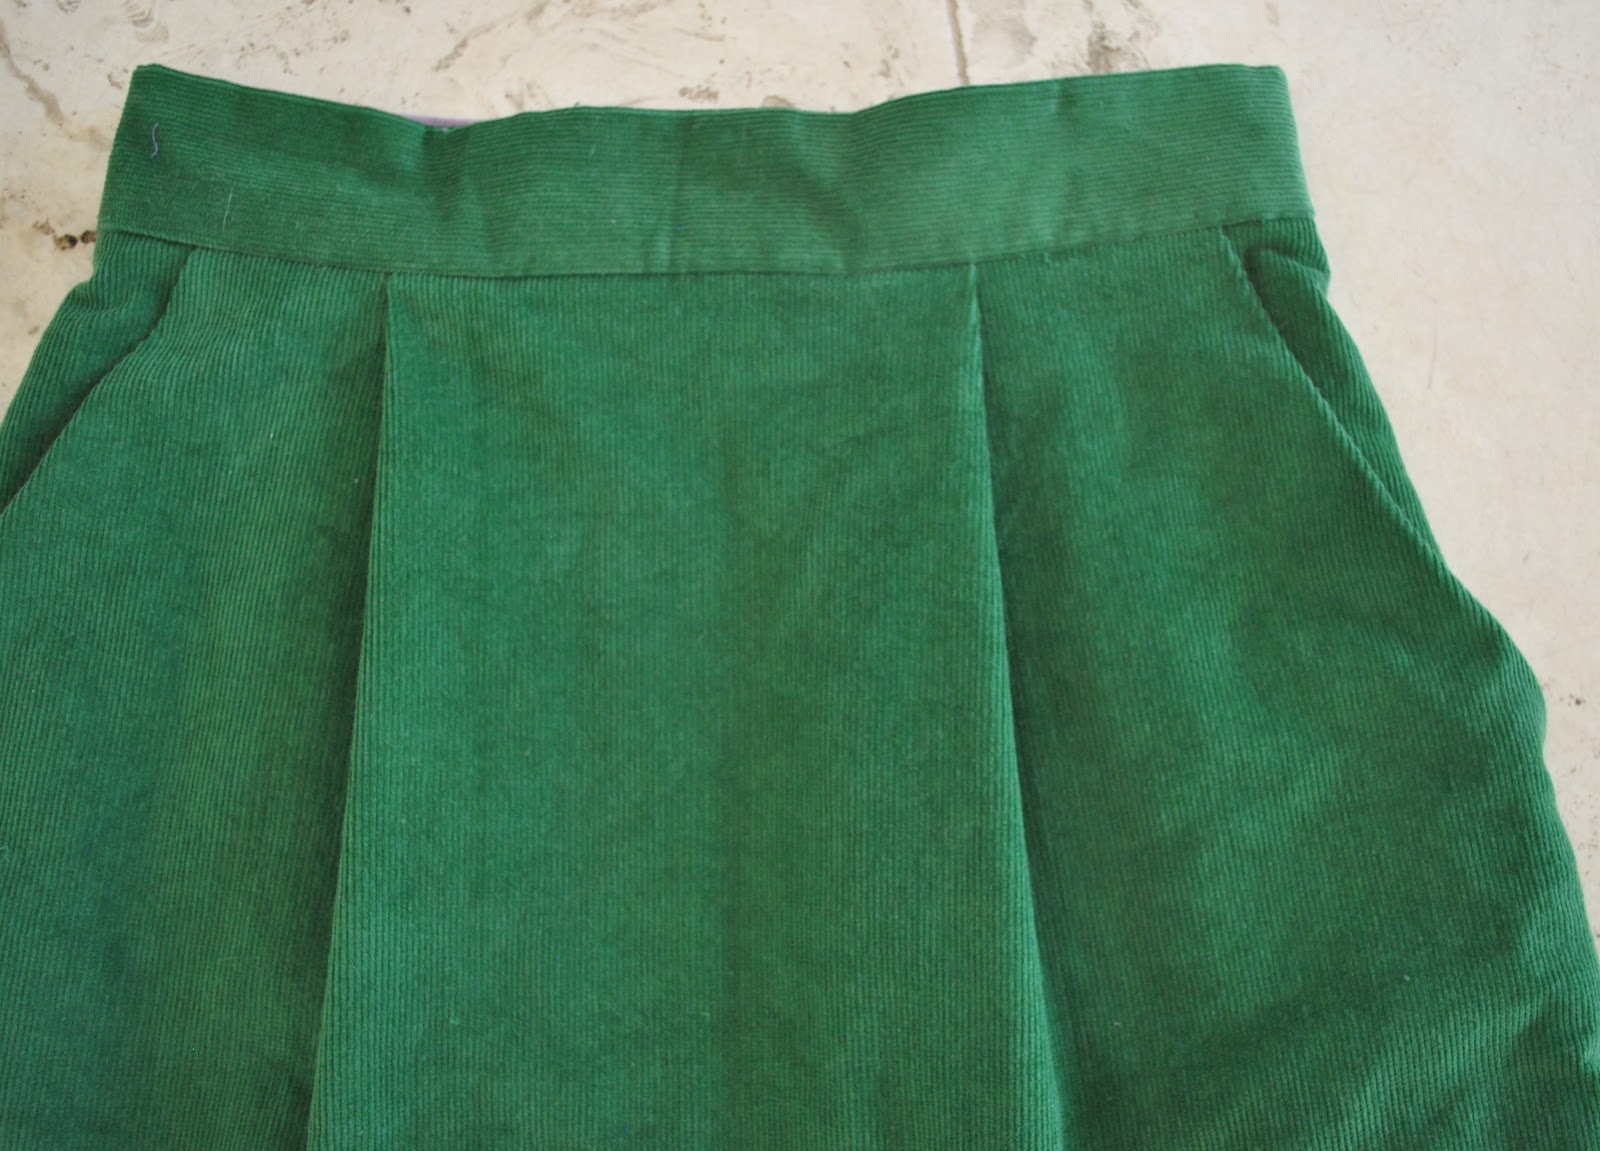
I wanted a skirt that was a little boxy, blocky and oversized, rather than the usual, streamlined little A-line/pencil hybrid silhouette that I usually go for… so I started with a favourite basic pattern Vogue 8363 and played with the proportions.  I cut the skirt pieces a lot wider; probably roughly equivalent to a size 18 front/20 back; and  a waistband to be my usual size 10, and folded the excess width in pleats into the waistband; two single pleats at the front and two box pleats at the back.

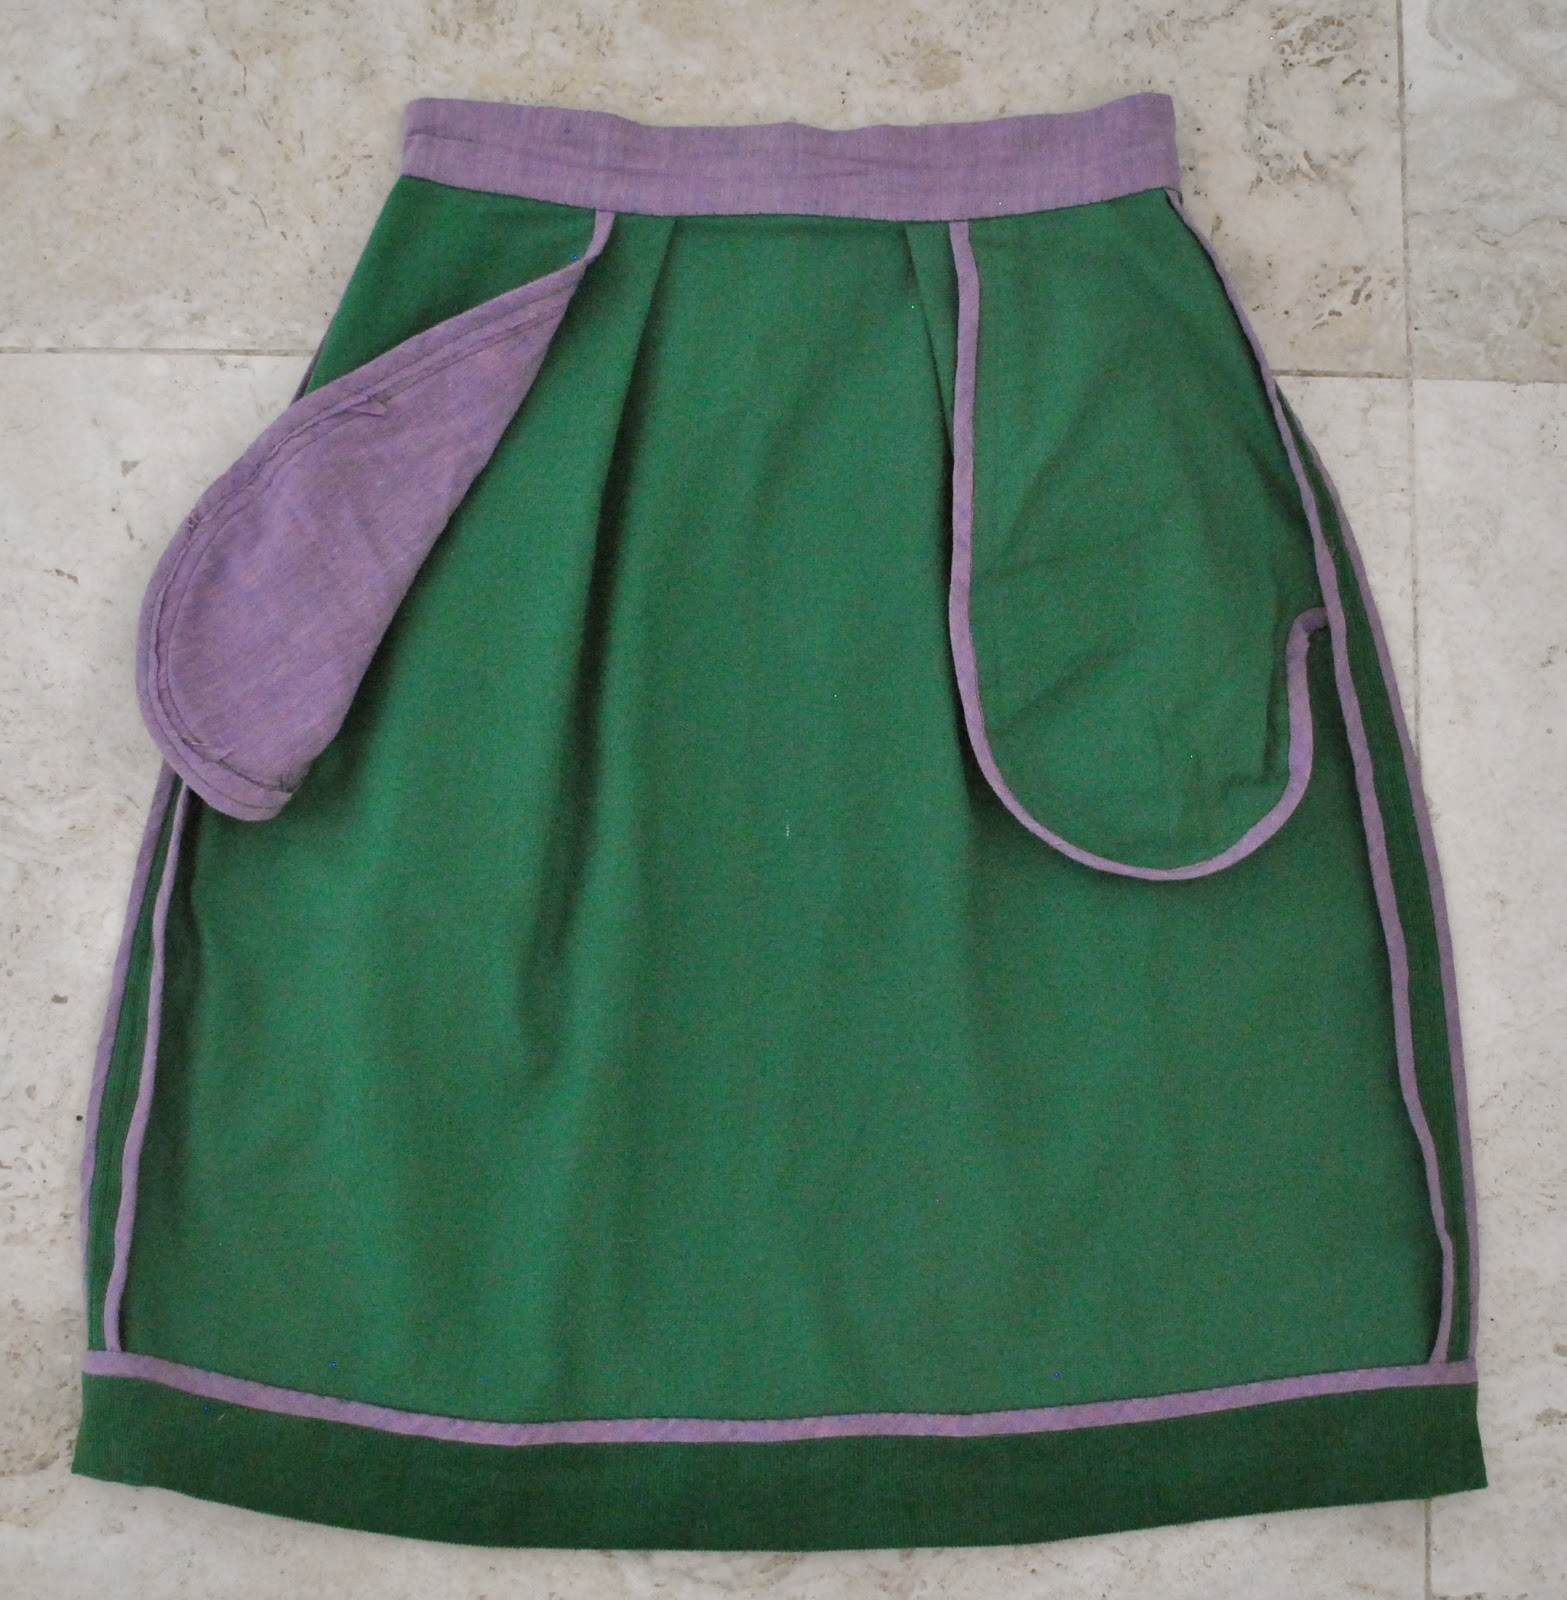
I put in those fabulously deep, slanted front pockets in the pattern and left off a lining, since I think the oversize factor, or looseness of the skirt will help stave off any tights/skirt static electricity problem.  I’m thinking of making a separate petticoat if the tights adhesion issue does rear its ugly head.
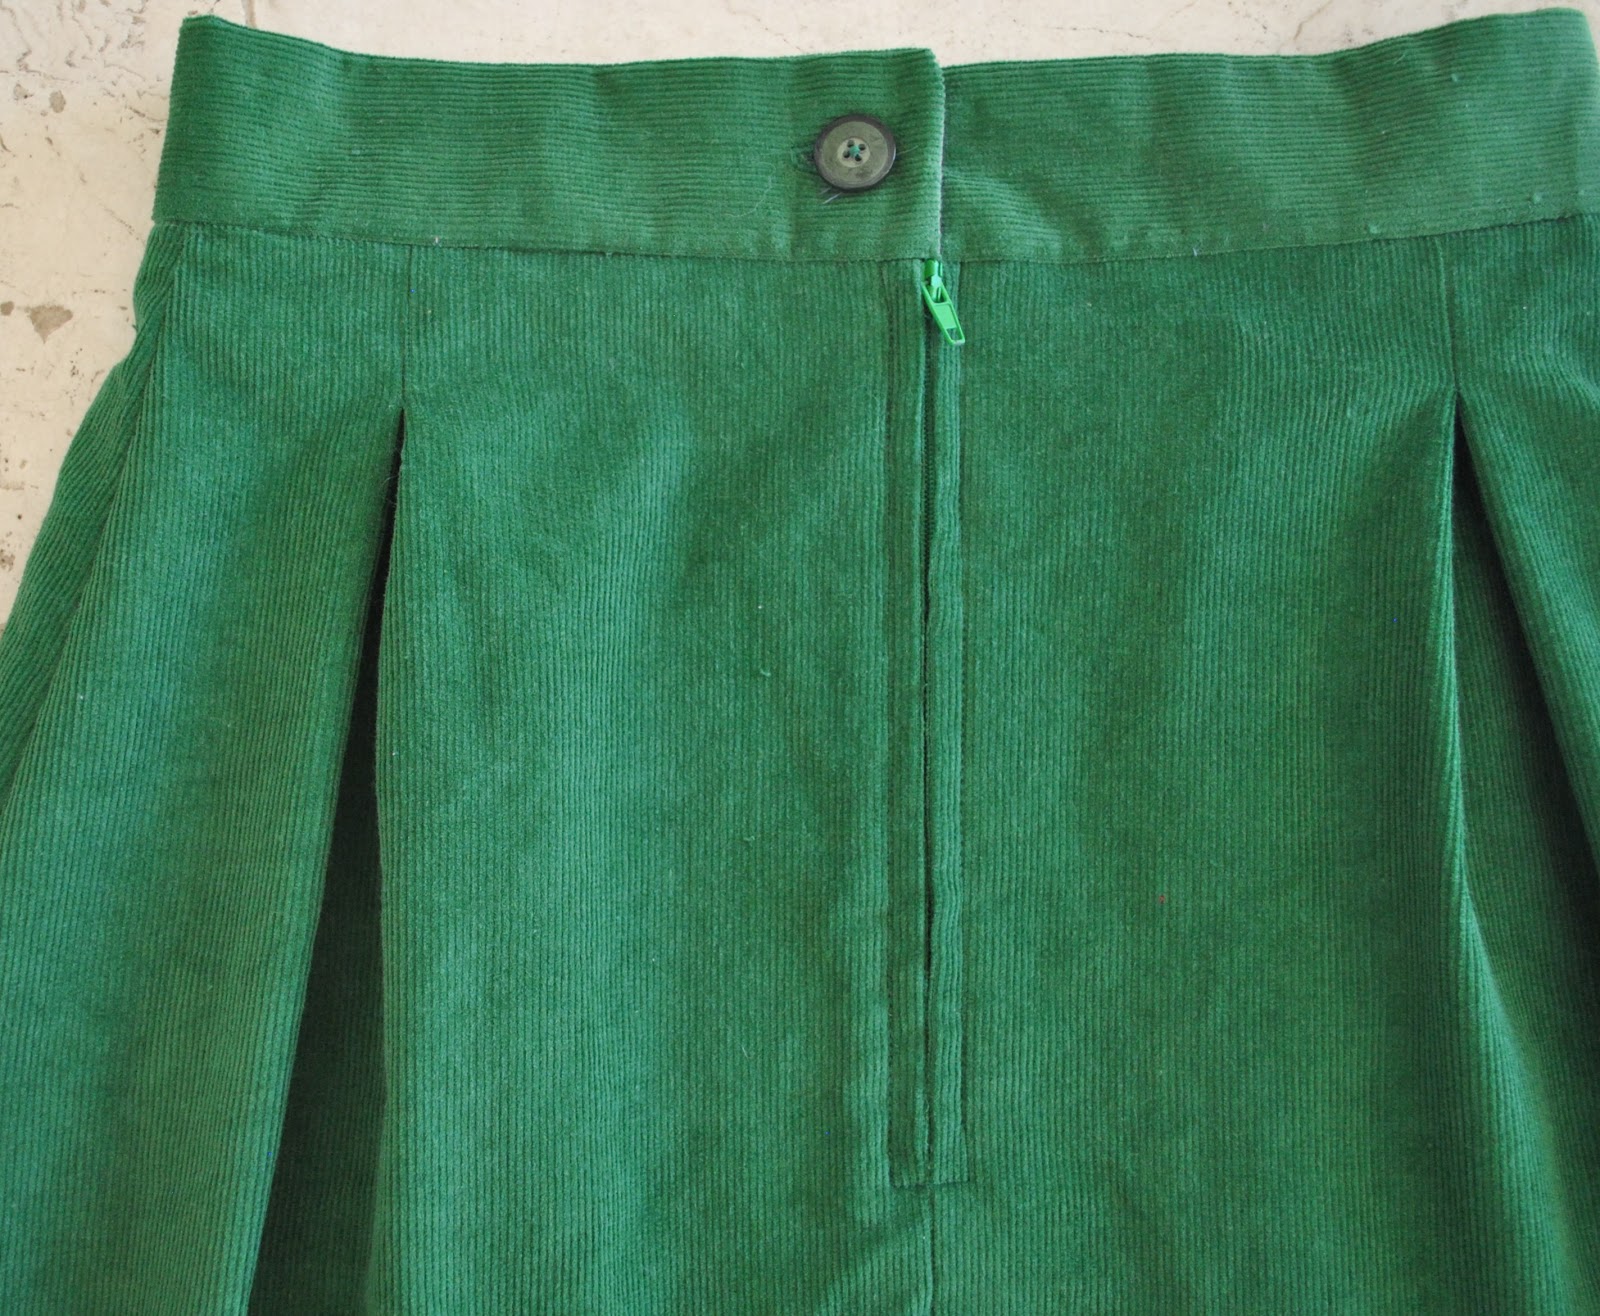
Perusing the zips; usually an invisible zip would be my first choice but all the available colour options looked terrible with this rich emerald green; either too dark or too bright.  Nothing looked right.  The best colour match was this bright green dress zip, and I finally decided I could live with a dress zip in a skirt; sure, it is a casual choice but so is corduroy a casual fabric.  It’s been ages since I’ve put a dress zip in a straight seam without a fly, and I had to stop for a second and think it through again!
I got creative with the insides.  Do brightly contrasting “fun” interior details bother you?  Then look away now!  I’m afraid, without going out and buying new fabric, and I am trying to shop my stash as much as possible this year; the least offensive option was this violet/mauve shot cotton, leftovers from this top that I made for Mum.  I finished all the raw edges with HongKong seaming, and the waistband facing and pocket linings are also cut from this fabric.  The ultra good news: I have barely any scraps at all leftover from these two lengths of fabric now!
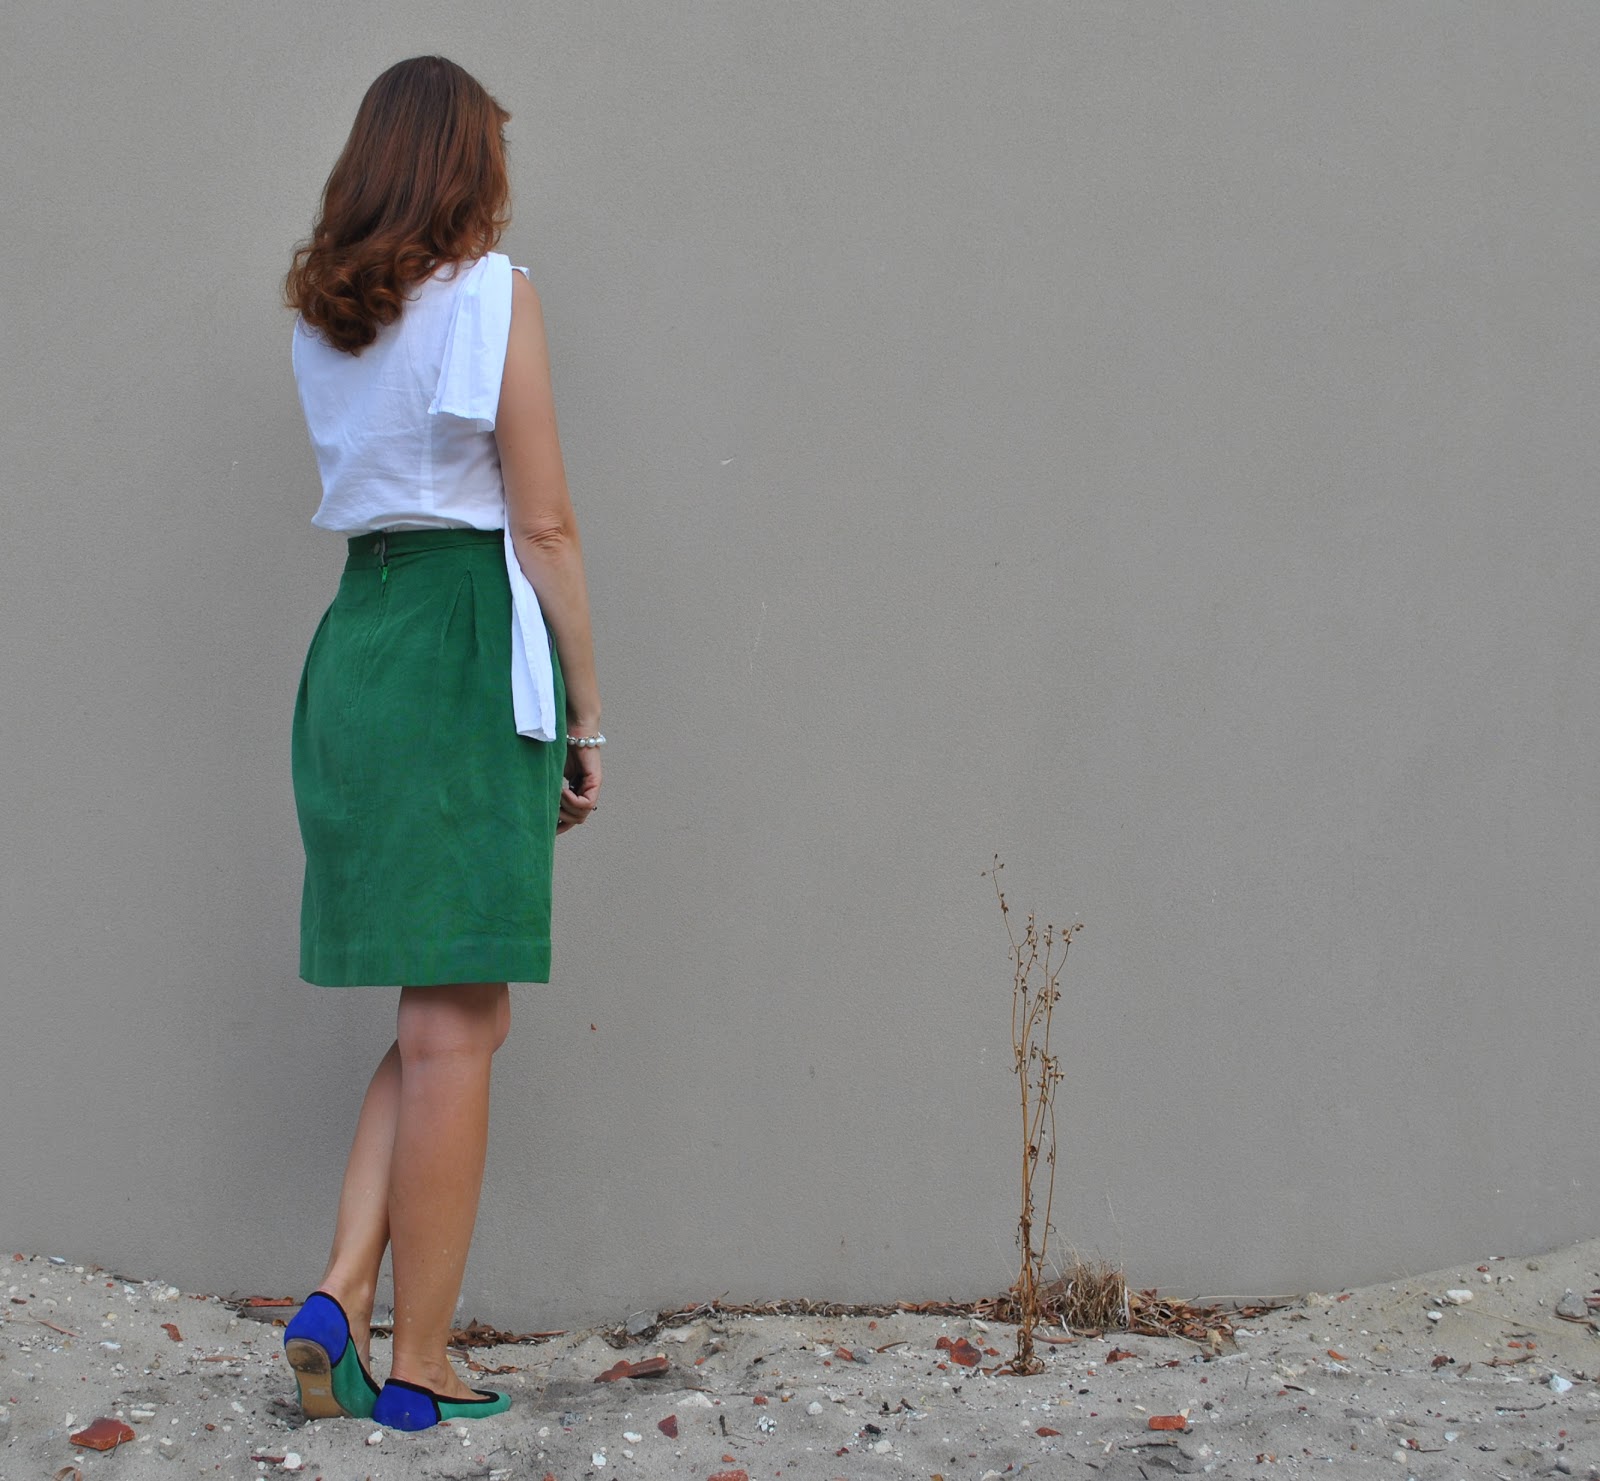
I’m very very happy with my boxy new skirt: I think it looks stylish and smart and it feels very easy wearing and comfortable. I think it will look terrific in winter; with my fitted cardigans, with button-up shirts tucked in, and tights and boots underneath.
Details:
Top; top “a” from shape shape (fornerly known as Unique Clothes Any Way You Like) by Natsuno Hiraiwa, white cotton, details here
Skirt; Vogue 8363 modified, emerald green cotton corduroy, my review of this pattern here
Shoes; c/o Misano

pinterestmail

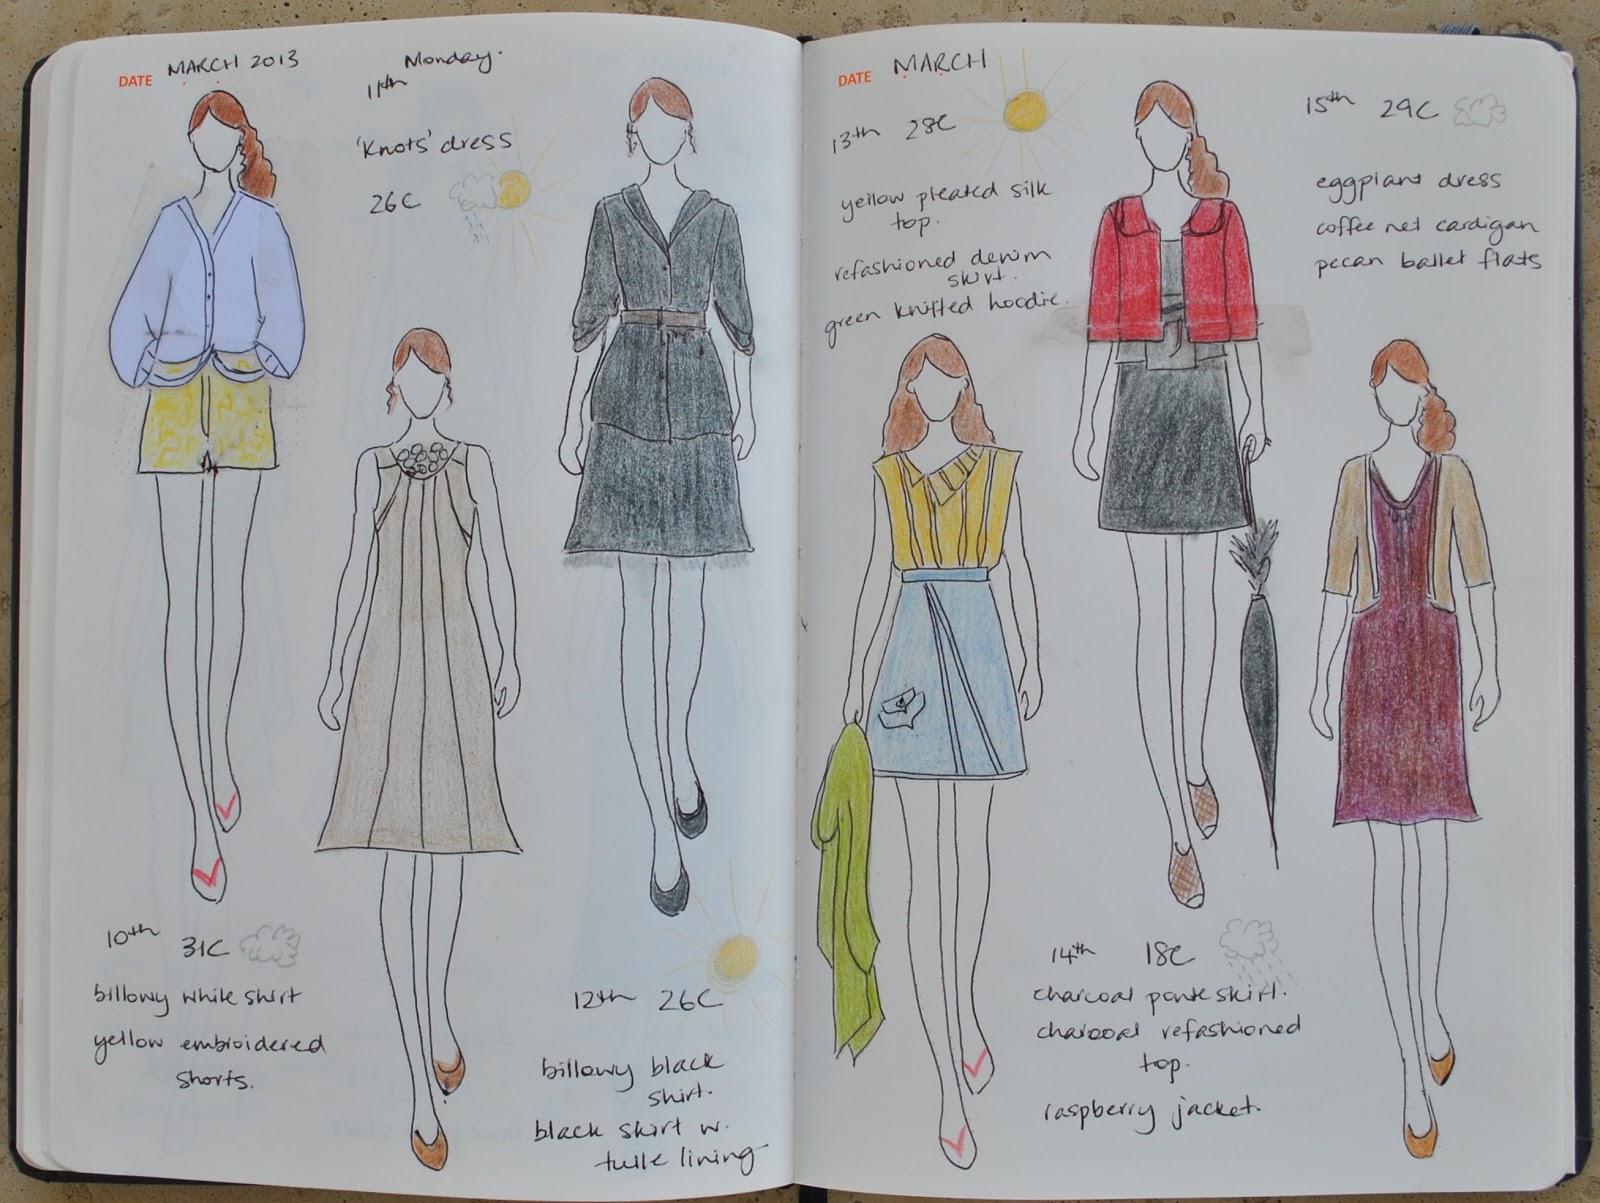
10th – 15th March
(I’ve pledged to wear only clothes handmade by me this year and to sketch my daily outfits in my Fashionary.  I’m calling this the paper doll project)

from left:
billowy white shirt + embroidered yellow shorts
knots dress
billowy black shirt + black silk skirt w tulle underskirt
yellow pleated top, denim skirt, knitted green hoodie
charcoal refashioned top + charcoal skirt, raspberry jacket
eggplant dress, coffee net cardigan

pinterestmail

Knots

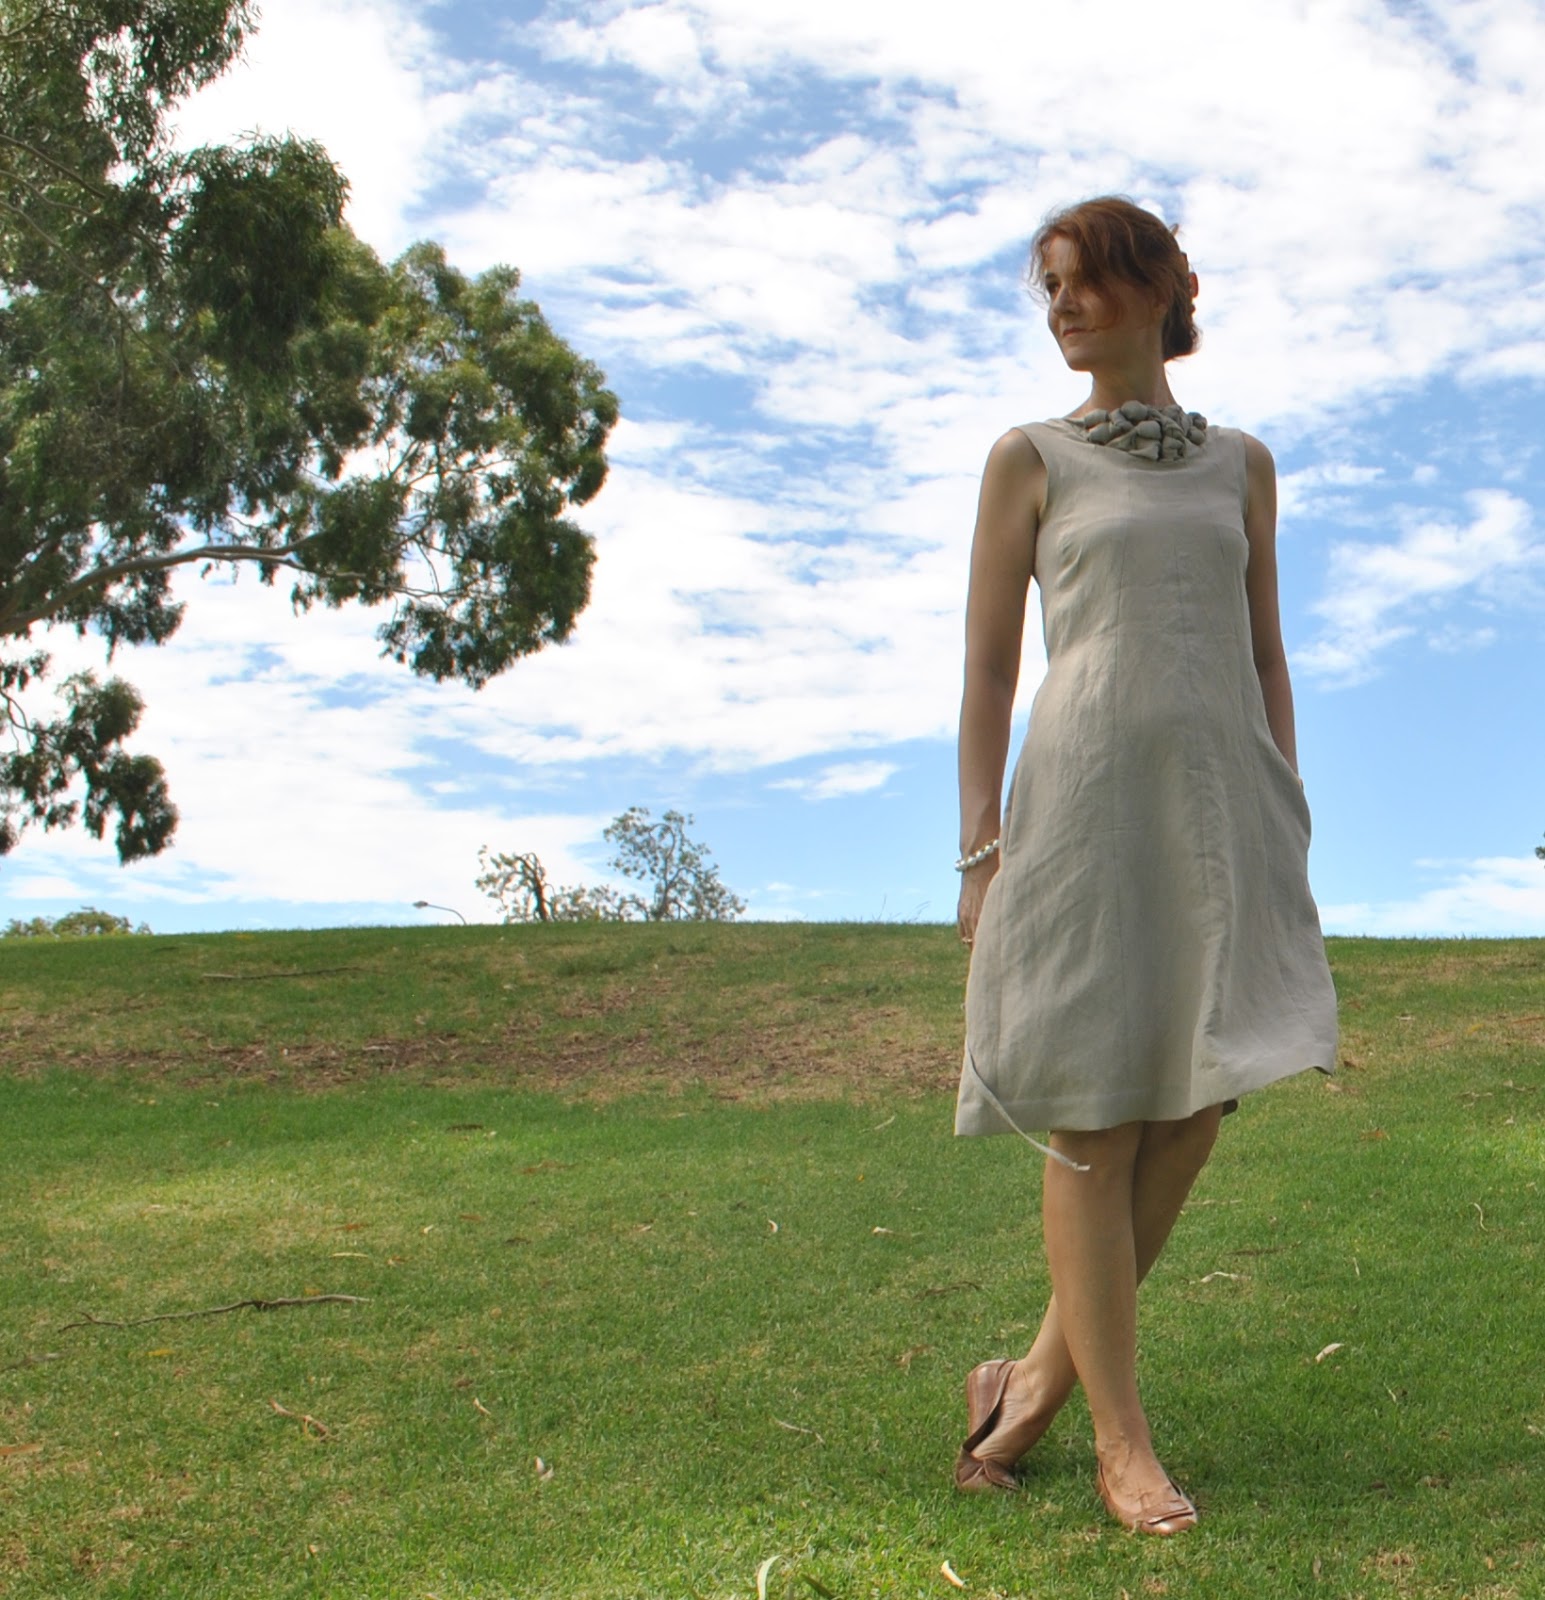
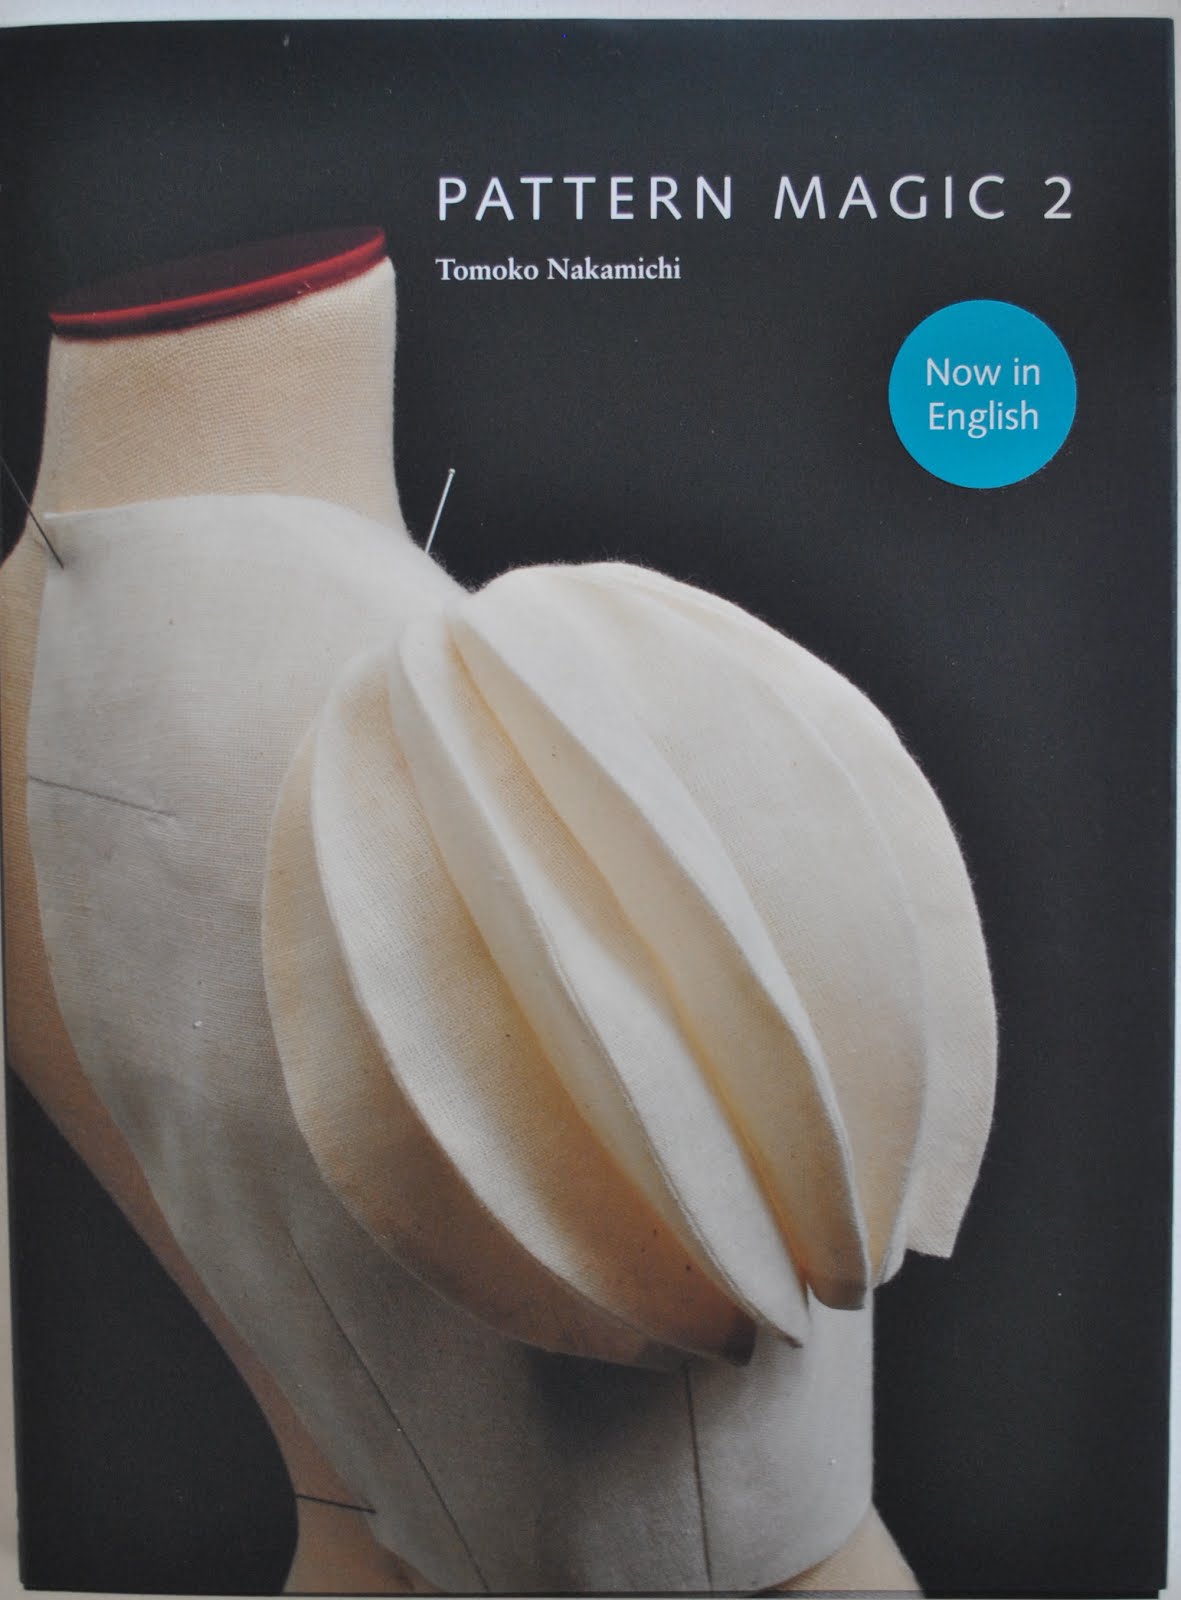
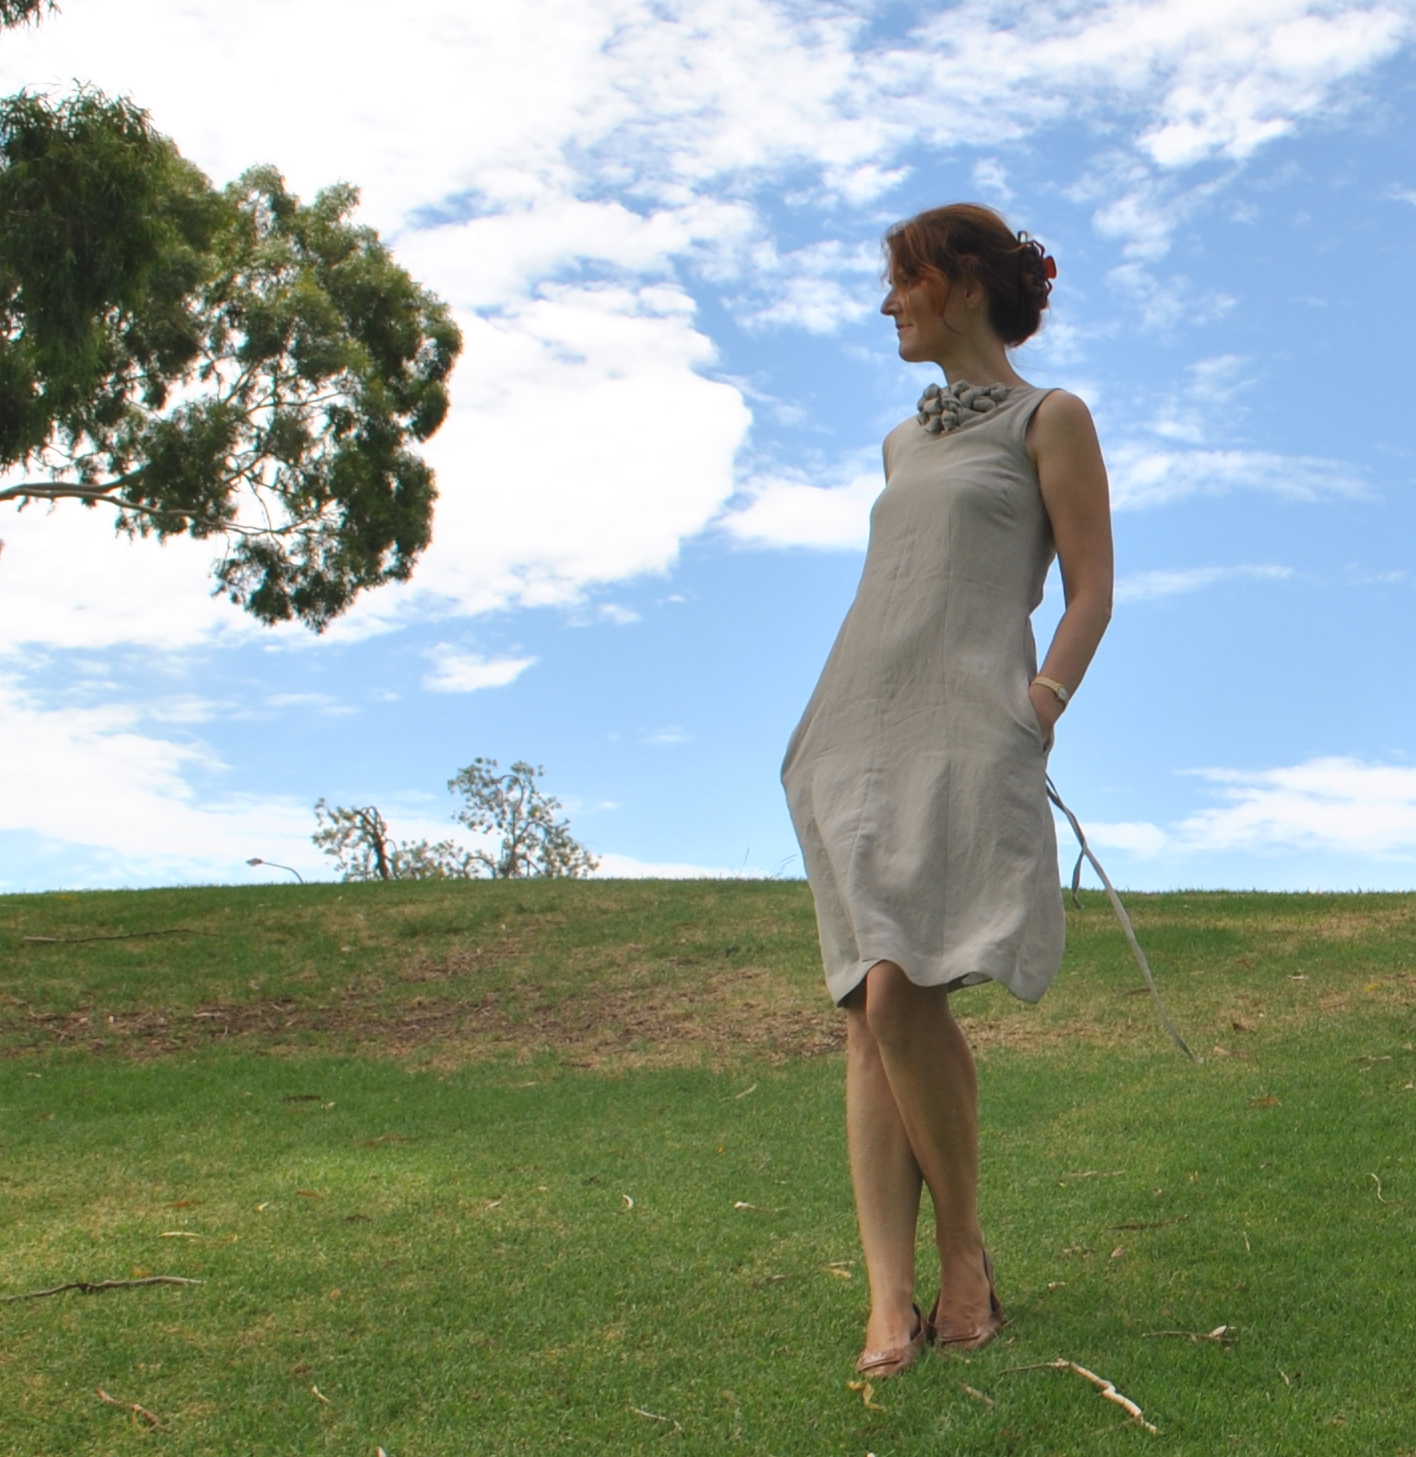
I’ve made a dress, utilising the design on p52 of Pattern Magic, by Tomoko Nakamichi.
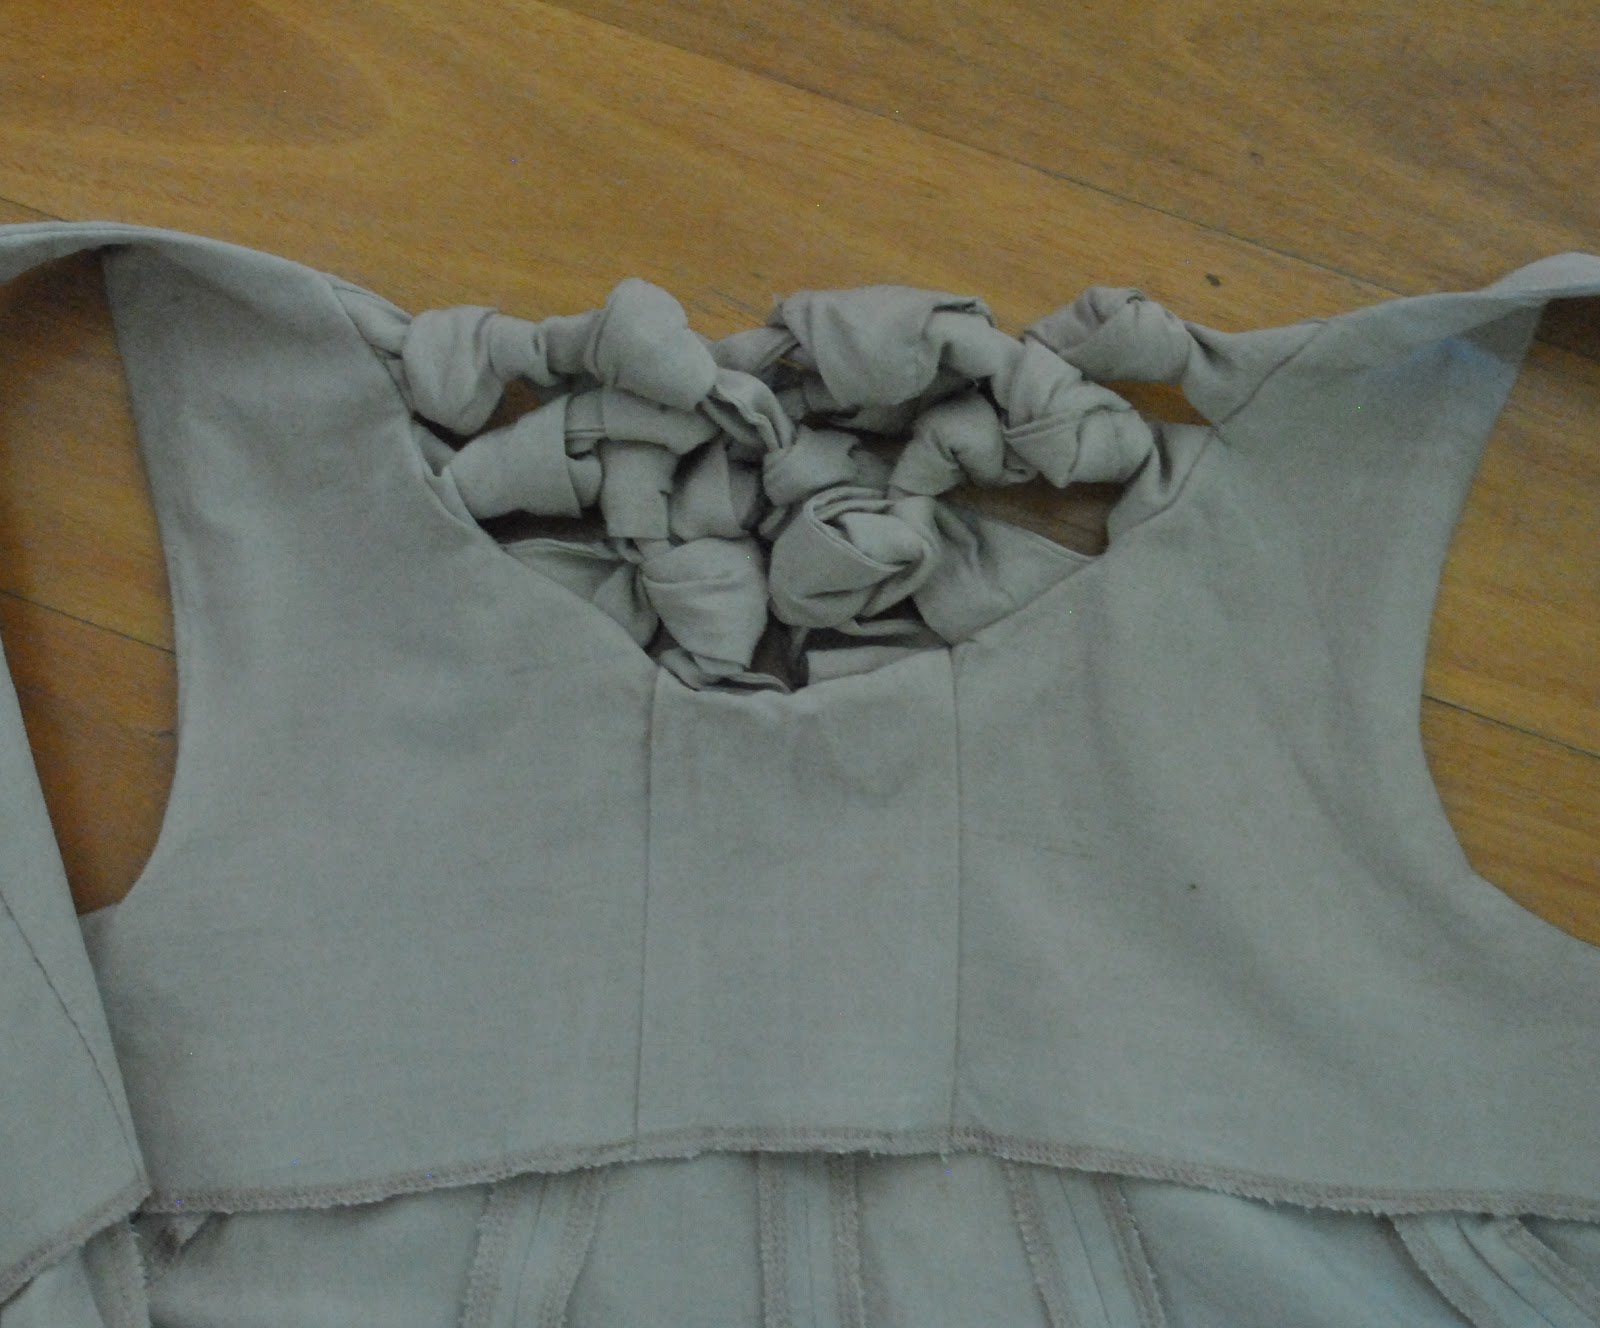
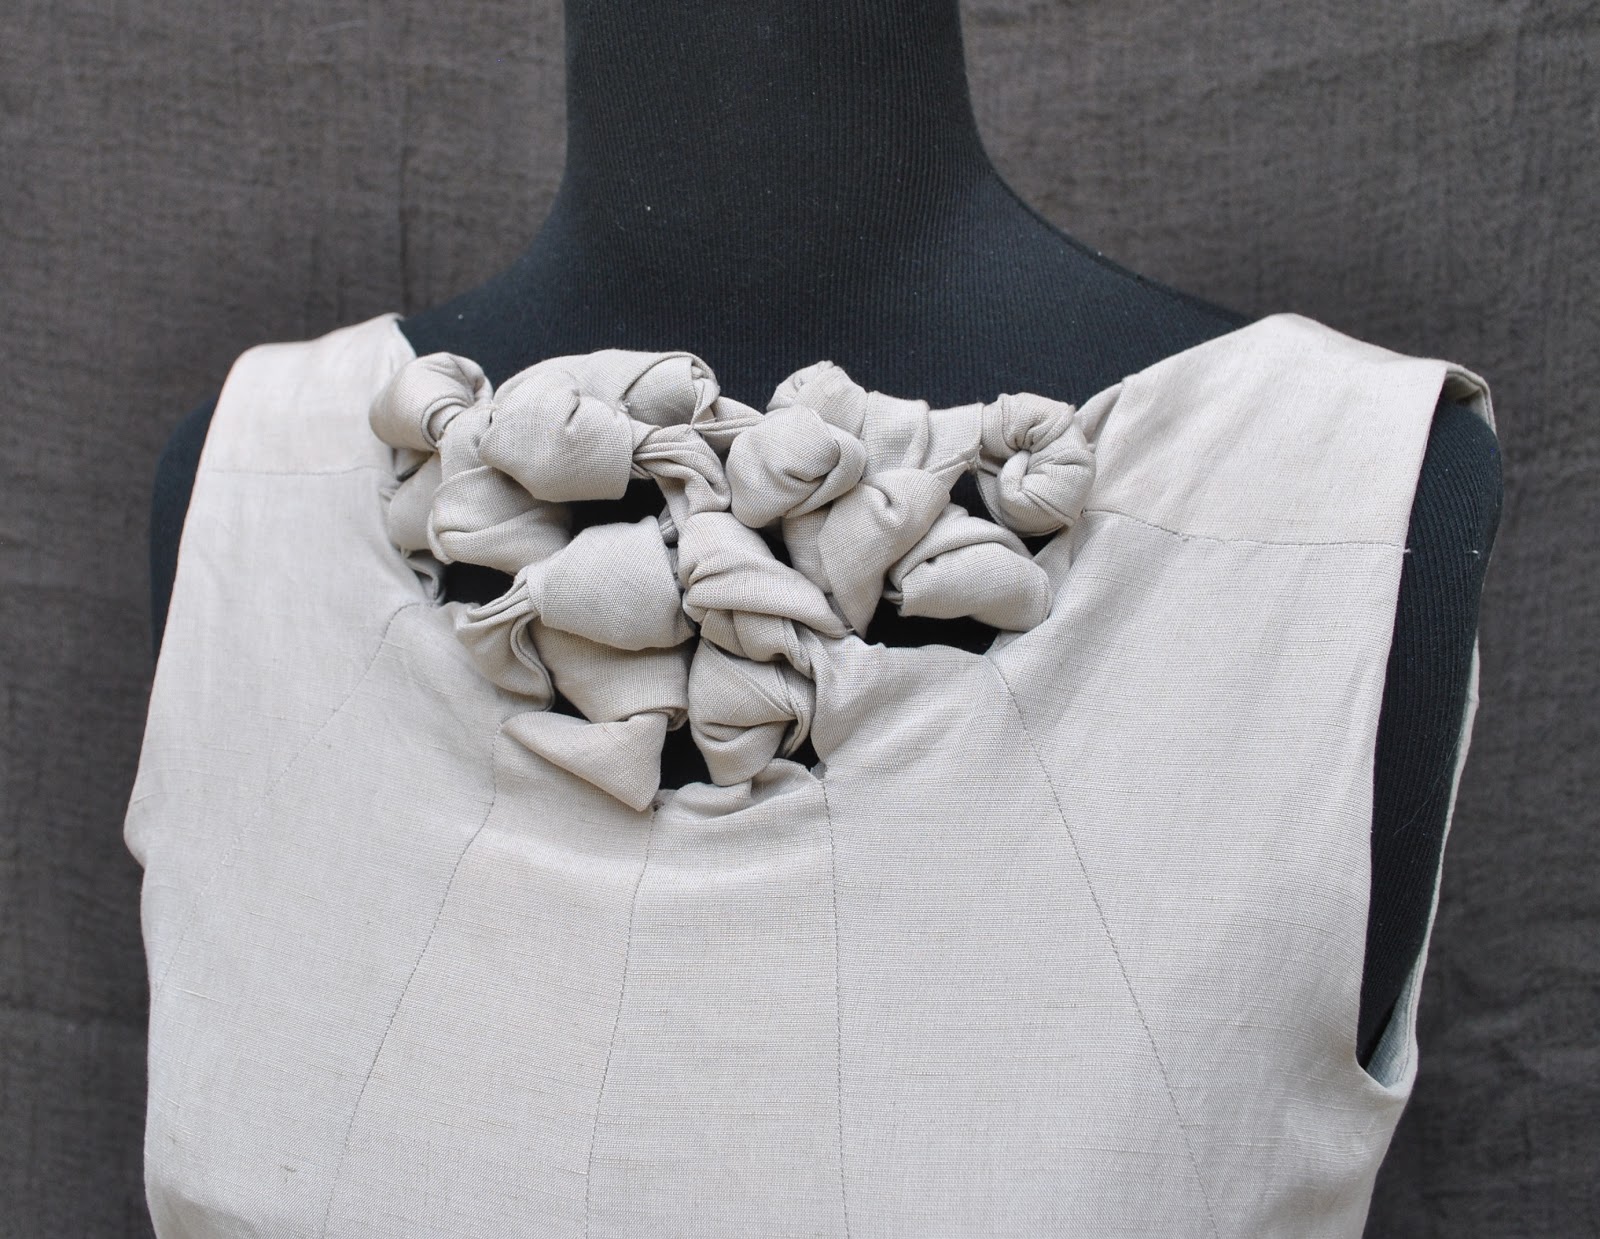
This appears to be a fairly plain dress on a casual glance.  But it is not.  It has a “feature”:  a feature that like many Pattern Magic features, seems to the casual, non-sewing observer to be a superficially simple thing, like “so? what could possibly be difficult about that??” but in actuality, getting to the nitty gritty of it, is a fair dinkum epic saga to put together seamlessly and successfully.  In this case, the feature is that the bodice explodes out into an incorporated posy of entwined knots that looks sorta like a statement neckpiece, or maybe a 3D sculptural bib.  Prof Nakamichi describes it as “By bringing together several knots that resemble tiny bells I have created a unique garment that evokes the sounds of bells ringing”
This is achieved by the front being six pieces… four of these end in a long strip; which is later tied into knots which you weave together as artistically as you can.  Counting from a shoulder; sections 1 and 6; and sections 3 and 8; are each one piece; comprising two sections joined by a bridge, so these joining bridges have to be knotted before you can sew the top sections to the rest of the front. 

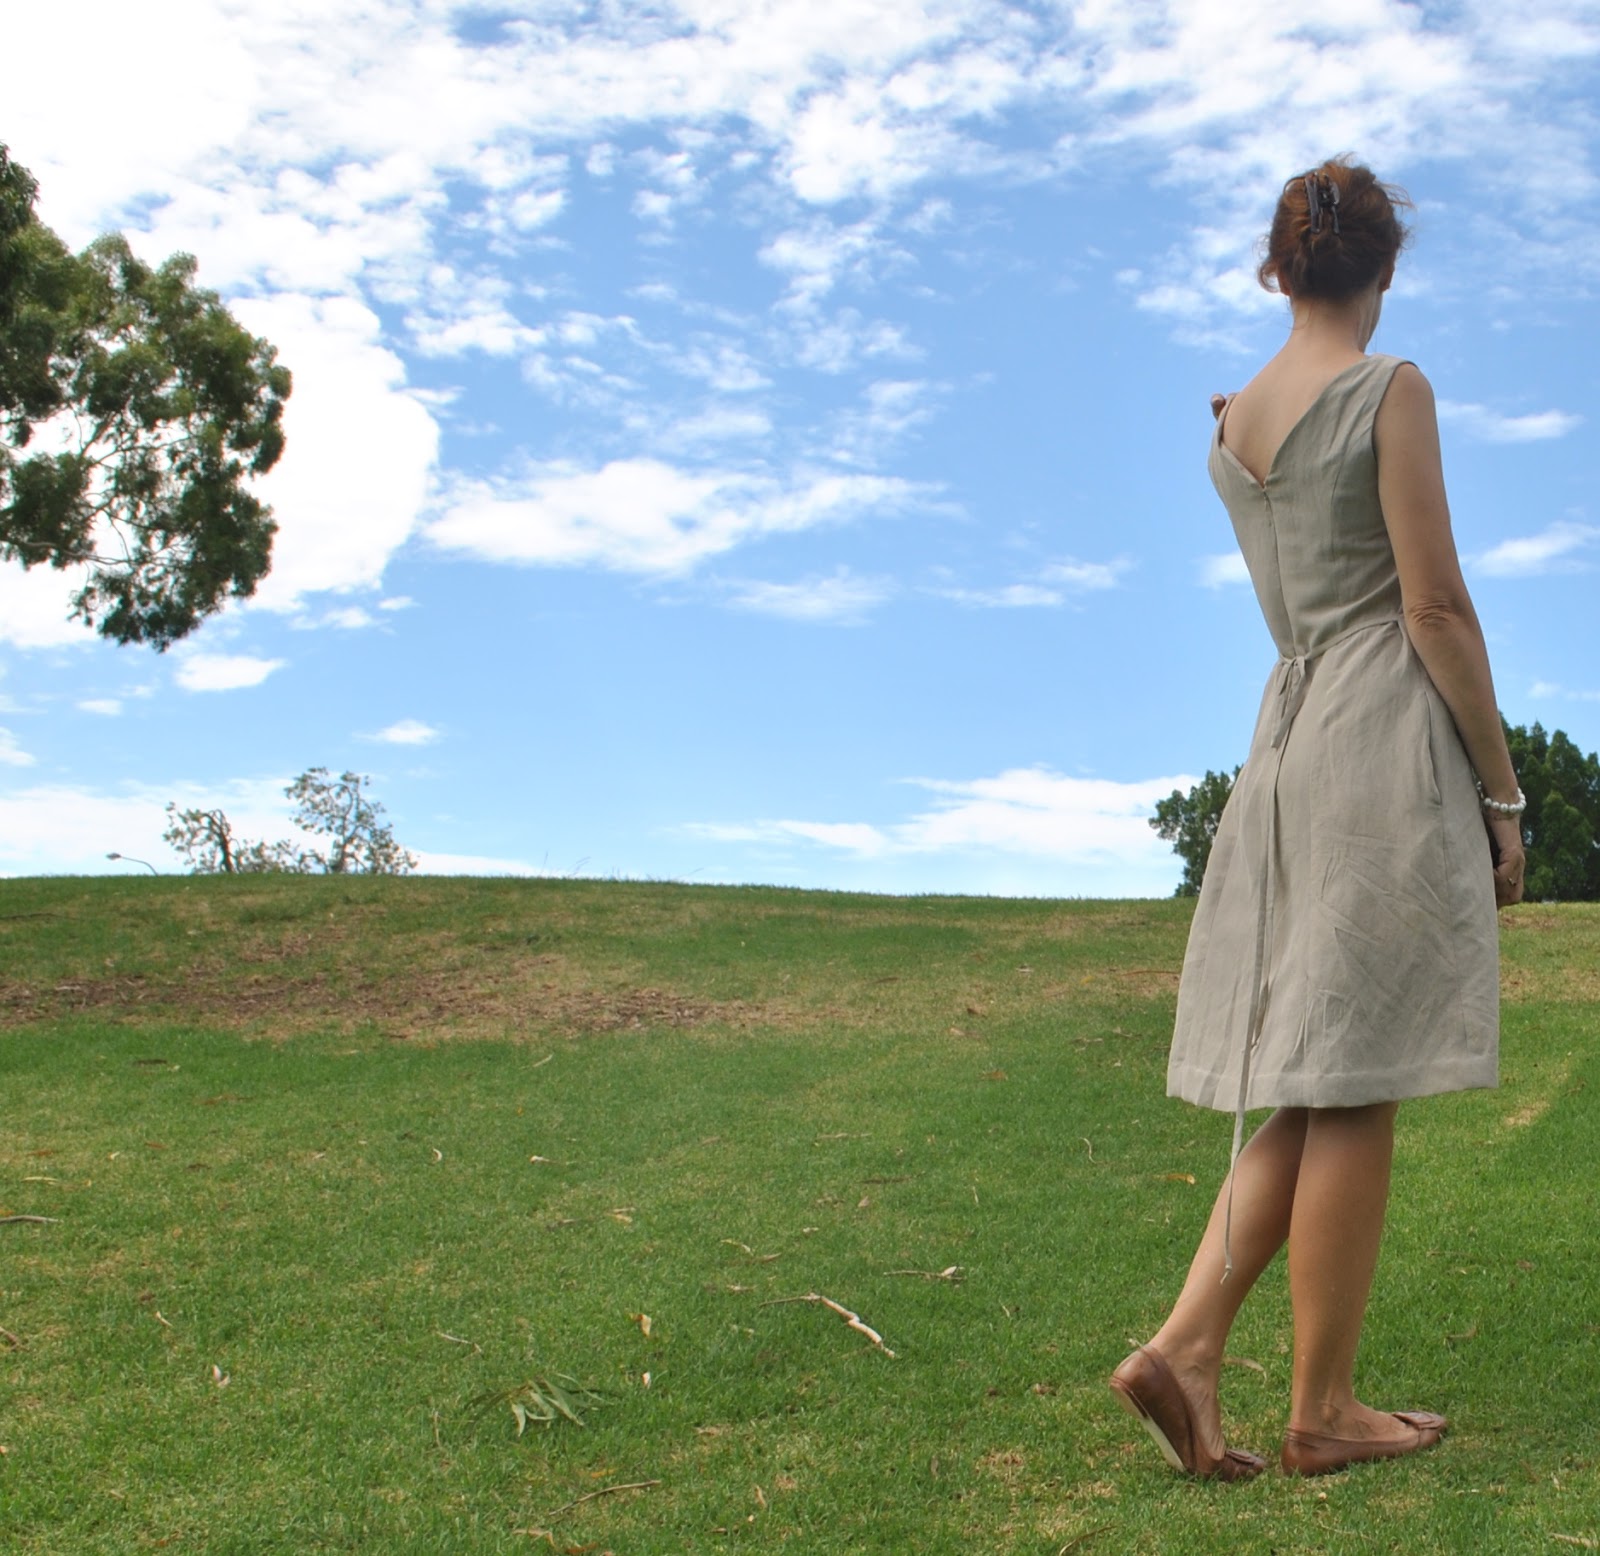
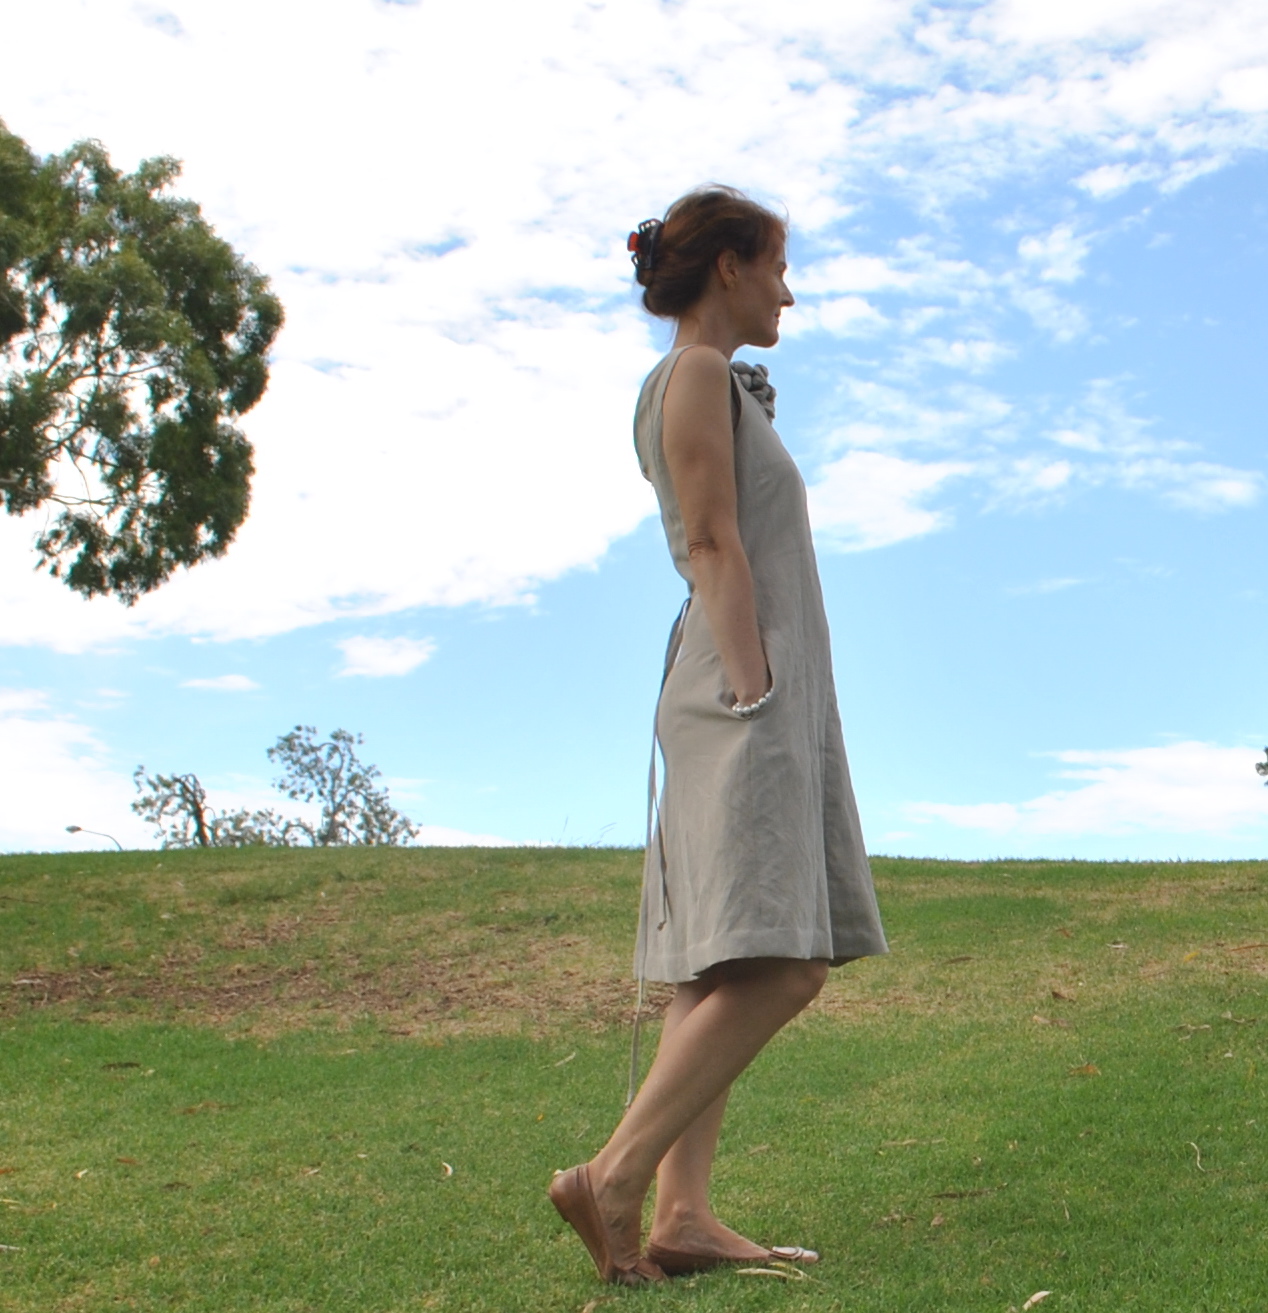
I made my dress using a light stone coloured, linen/silk mix, bought from Fabulous Fabrics about four years ago.  Yes! a long time ago!  This was another length of fabric previously Too Good To Actually Use.
Due to the nature of the design; some of the strips are cut on the bias and some on the half bias.  To save fabric and add stability I cut all the facing strips on the grain.  I faced and turned out each strip separately, and then later sewed on the bodice facings.  When it came to facing that front neckline, I sewed each section at a time and checked each obsessively for a smooth finish before proceeding to the next one; shoulders first and finishing at the centre front.

front bodice facing

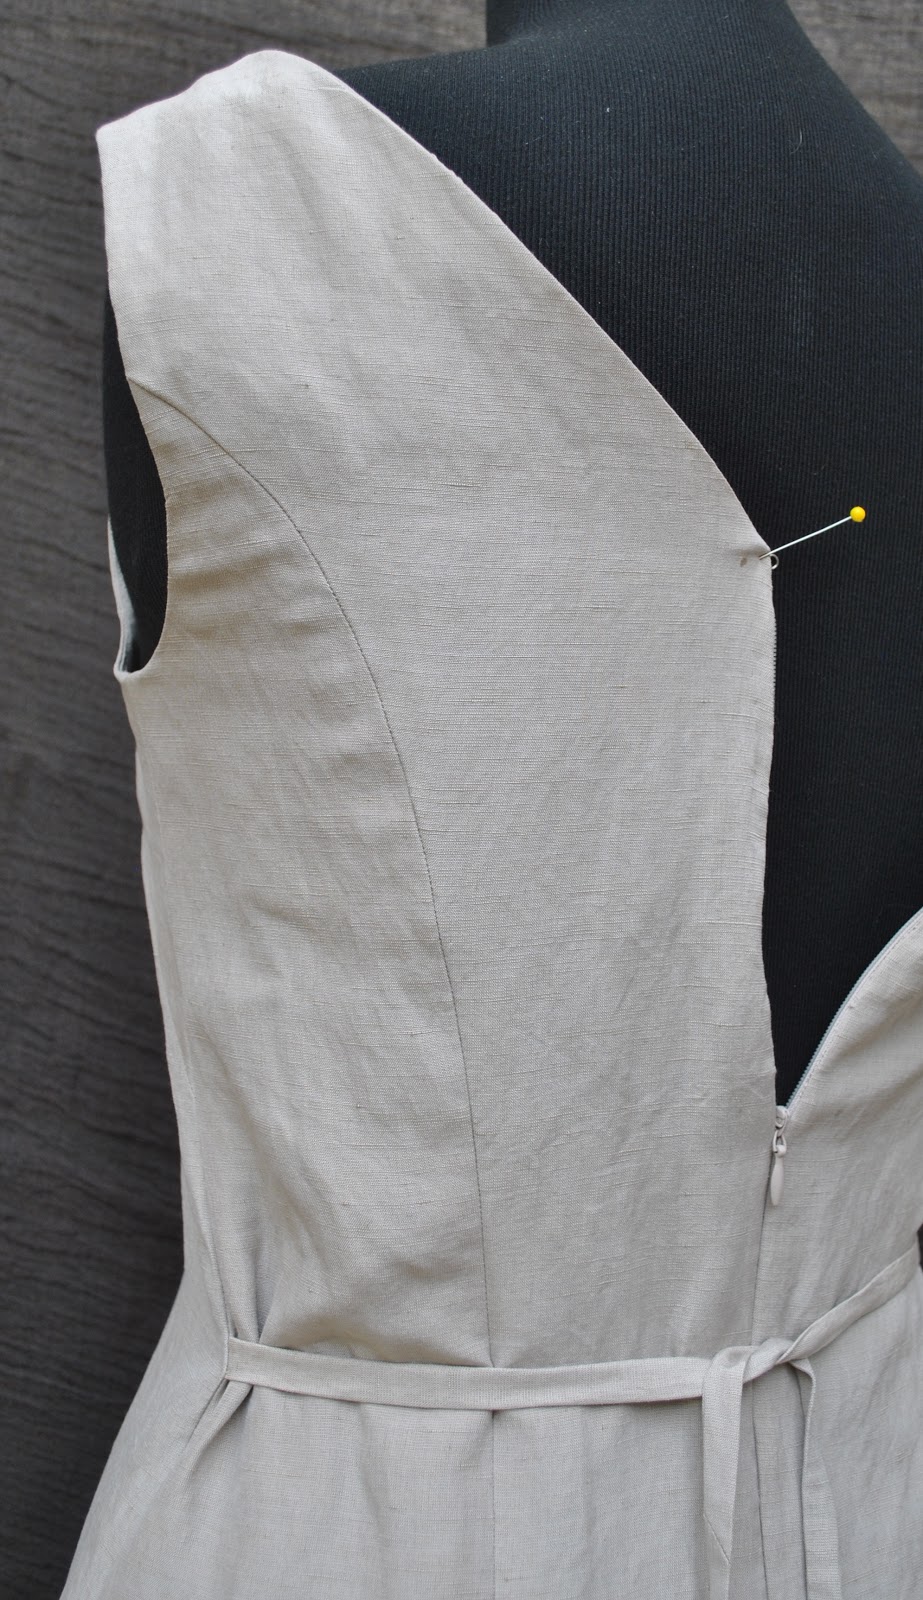
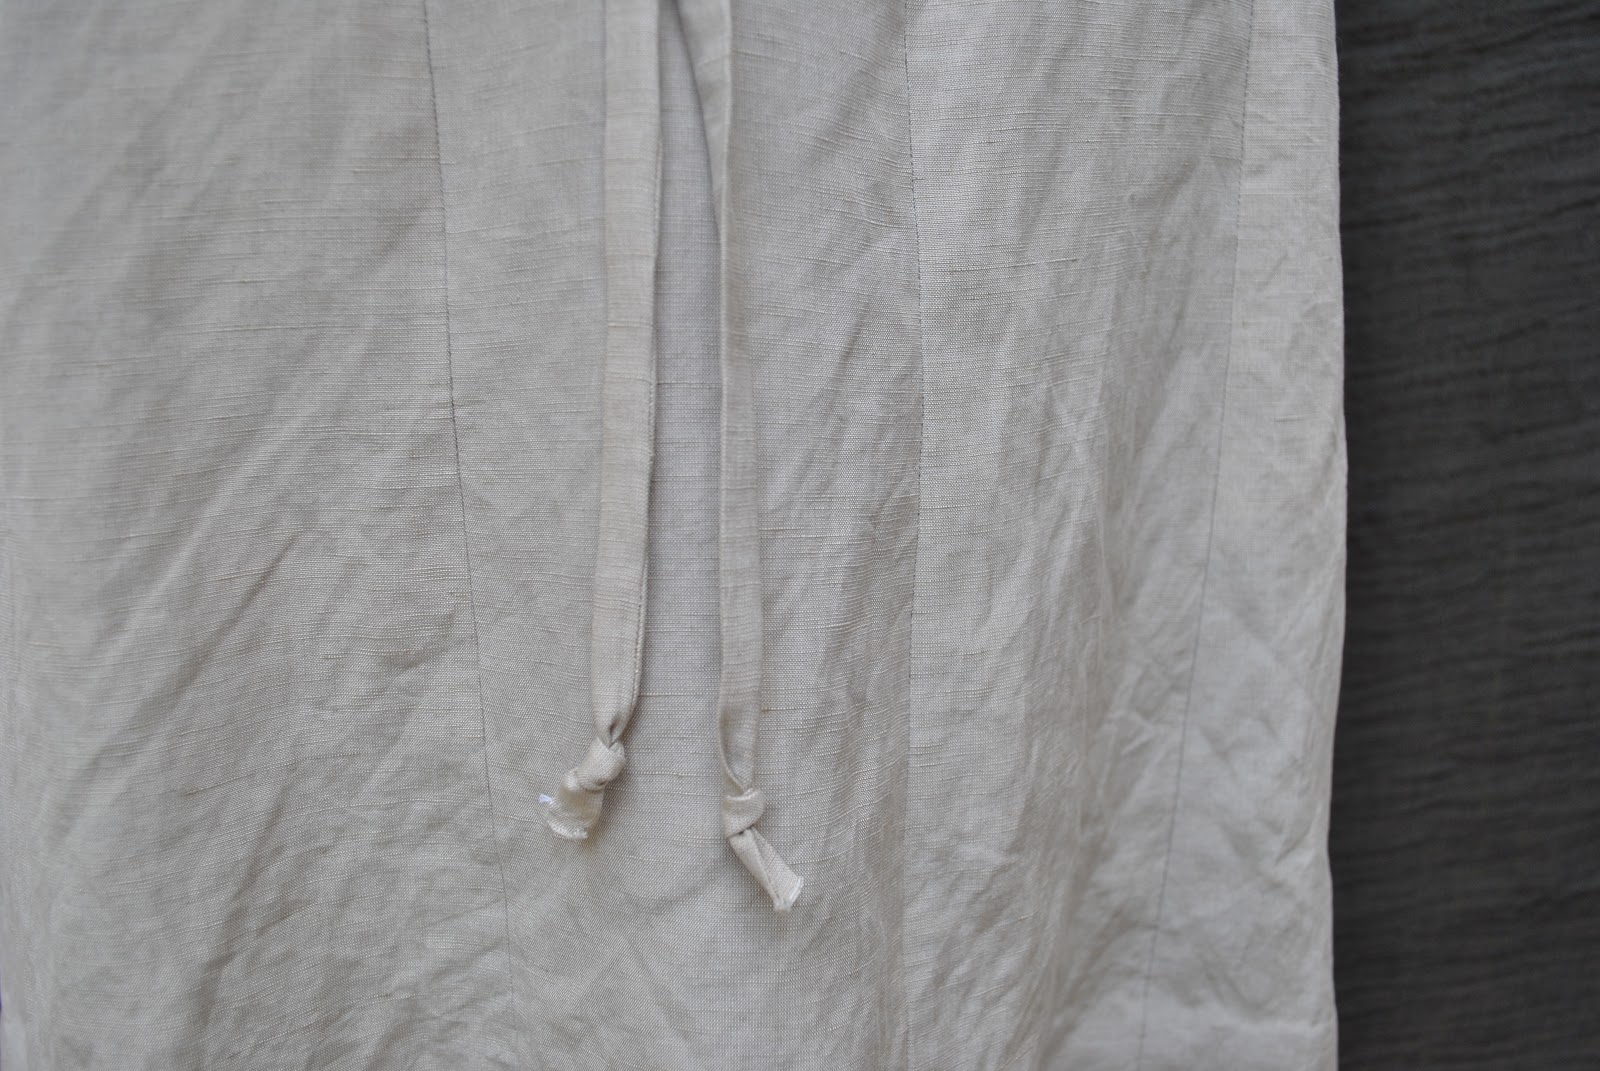
The back is four pieces; interestingly in a princess seamed arrangement.  The dress closure is by invisible zip in the centre back seam, and the back neckline is a modest V-line.  I added deep, inseam side pockets, and attached a self skinny belt in the side seams to tie at the back.  This adds a bit of shape to it, and provides some visual interest at the back, which is otherwise rather plain.  The ends of the belt are tied in little knots, a tiny design echo of those knots at the neckline at the front.

This is probably one of the top ten most difficult makes I’ve ever attempted.  Vogue Advanced/Plus Difficile?? pfff, Pattern Magic farts in your general direction!*
However I am, in inverse proportion to the degree of difficulty involved; stupidly pleased with it.  I think maybe I am a sewing room masochist, deriving a perverse enjoyment from the torture of difficult dressmaking challenges.  What a weirdo, huh?  But I’m thinking of something easy next.

Monty Python of course!

Details:
Dress; adapted from the design on p53 of Pattern Magic 2 by Tomoko Nakamichi, light brown silk/linen
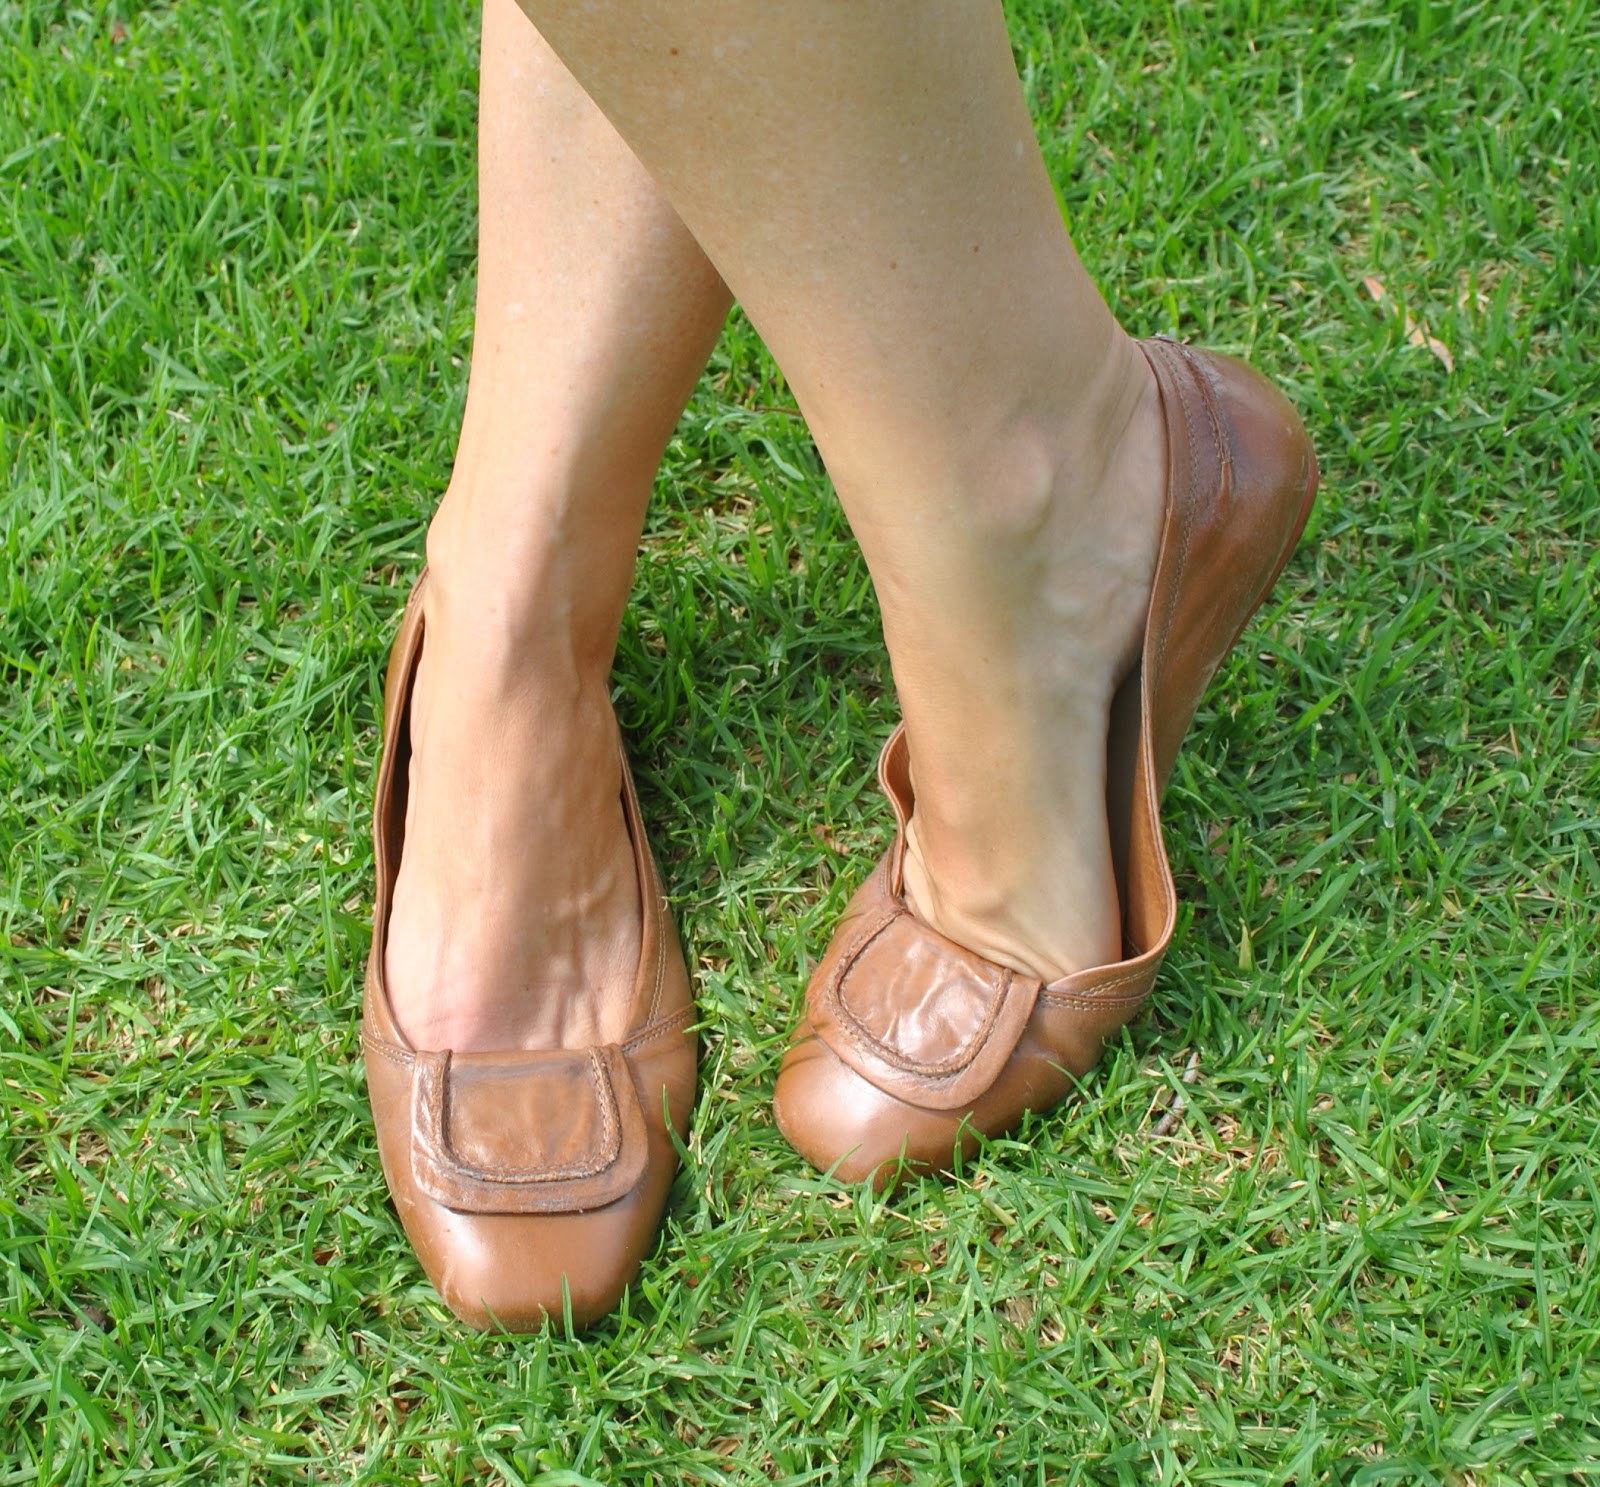
Shoes; new! for autumn!!  c/o Misano

pinterestmail

hello

4th – 9th March
(I’ve pledged to wear only clothes handmade by me this year and to sketch my daily outfits in my Fashionary.  I’m calling this the paper doll project)

from left:
blue denim/chambray dress + ecru jersey scarf
white cotton top with self necktie + red floral skirt
powder blue dress + white embroidered cut-out top
blue dress
white drape-y jersey top + lime print skirt
aqua dress with wave-y welted pockets

The last few days have been up and down.    More down than up, I’m afraid.  We are mourning the loss of my grandmother; in a not unexpected, but still very sad conclusion to a long illness.
My grandmother right up until quite an advanced age was just like all or any one of us who love to sew for ourselves and take pride in wearing our own creations.  She was a very accomplished self-seamstress and frequently made a lot of her own clothes.  I inherited a lot of my enthusiasm for sewing from her excellent example.  She favoured an early Jackie O silhouette, and tended to wear simple, solid colour sheath dresses with matching tailored cropped jackets and blazers when the weather permitted.   In winter she lived in straight pencil skirts with solid coloured sweaters and jackets, or plain twinsets.  Her tastes leant towards the unadorned.  My own style is moulded on this look to some extent too… she was a big influence.
She lived a wonderful, fulfiling and very long life, so I’m not writing this here to be sad, but just to give acknowledgement.  It didn’t feel right to not mention it at all, like nothing had happened.

On an up note; we’ve just attended Cassie’s graduation ceremony, and proudly watched as she received her Bachelor’s degree.  She has kept her job part time and is concurrently continuing with her Master’s degree this year, just as planned.

It’s funny/strange how life’s lows can be juxtaposed against life’s highs, side by side like that.  I’m just feeling … odd.

pinterestmail

Cut-out things

I made this little lace jacket/cardi/top thing many years ago, probably ten years ago! way before I started my blog, but even though it has appeared here a coupla times I’ve just realised it’s never been shown, as it were.  So here it is, up close and personal.
The design is my own, perhaps copied from something I saw in a magazine, I think.  It only took up a very small piece, about 50cm of embroidered cut-out linen from Fabulous Fabrics.  The sleeves are just little caps, extensions of the armholes.  All the raw edges are simply encased in self-made bias binding of white cotton, and at the waist is a drawstring in an inner casing, both also made from bias cut white cotton strips.  The neckline closes with a button and a little ribbon loop.  I used a tiny length of pale lavender satin ribbon for the loop because I didn’t have any white at the time, and it’s always bugged me that it’s not white.  Not so much that I’ve ever changed it, though!! so I guess it’s not that much of an annoyance to me, reeeally.  You can’t even see the ribbon when it’s buttoned up anyway  đꙂ
It’s still going strong, probably because it doesn’t get worn a whole bunch!  but I’ll never toss it out.  It’s nice to have as a hot weather “cardi”, for when I want to look smart.  And I’ve discovered it goes really nicely with these cut-out ballet flats… (woot)

Details:
Top; my own design, embroidered cut-out linen
Dress; Burda 8071, of pale blue silk, details here
Shoes; c/o Misano

pinterestmail
Switch to mobile version
↓