Tag Archives: Buttons

a cheerful dress

New dress!  And, how gorgeous is this cheerfully splashy fabric?!!!  Ohmigosh, but I love it so much!  You cannot possibly be sad whilst wearing this stuff.  The very instant I saw it I was just like, YES.  MUST HAVE.

SO! every year, my lovely friends give to me a Fabulous Fabric voucher for my birthday… and this year I treated myself to this truly lovely, fine, handkerchief linen, printed in a glorious array of golden mustard, tomato red, toxic-waste lime green, moody purple and a splash of tranquil turquoise thrown in too because sure why not? let’s just let alll the autumn-y colours join in the splashy fun!  Not only are the colours absolutely luscious together, but the feel and weight of the fabric is quite perfectly and exquisitely summery.  LOVE.


I didn’t actually use the actual voucher to buy this fabric, to be honest I used the real-life voucher to buy wedding dress lining, haha, as you do!!  but I mentally made a note to myself that as soon as I saw something worthy I would spend the equivalent and that was going to be my birthday fabric.  Confusing?  Yes I know I know, hehe.  Well I know what I mean anyway.  Just very recently Fabulous Fabrics got in a fresh shipment, and I saw this, and knew it was The One.

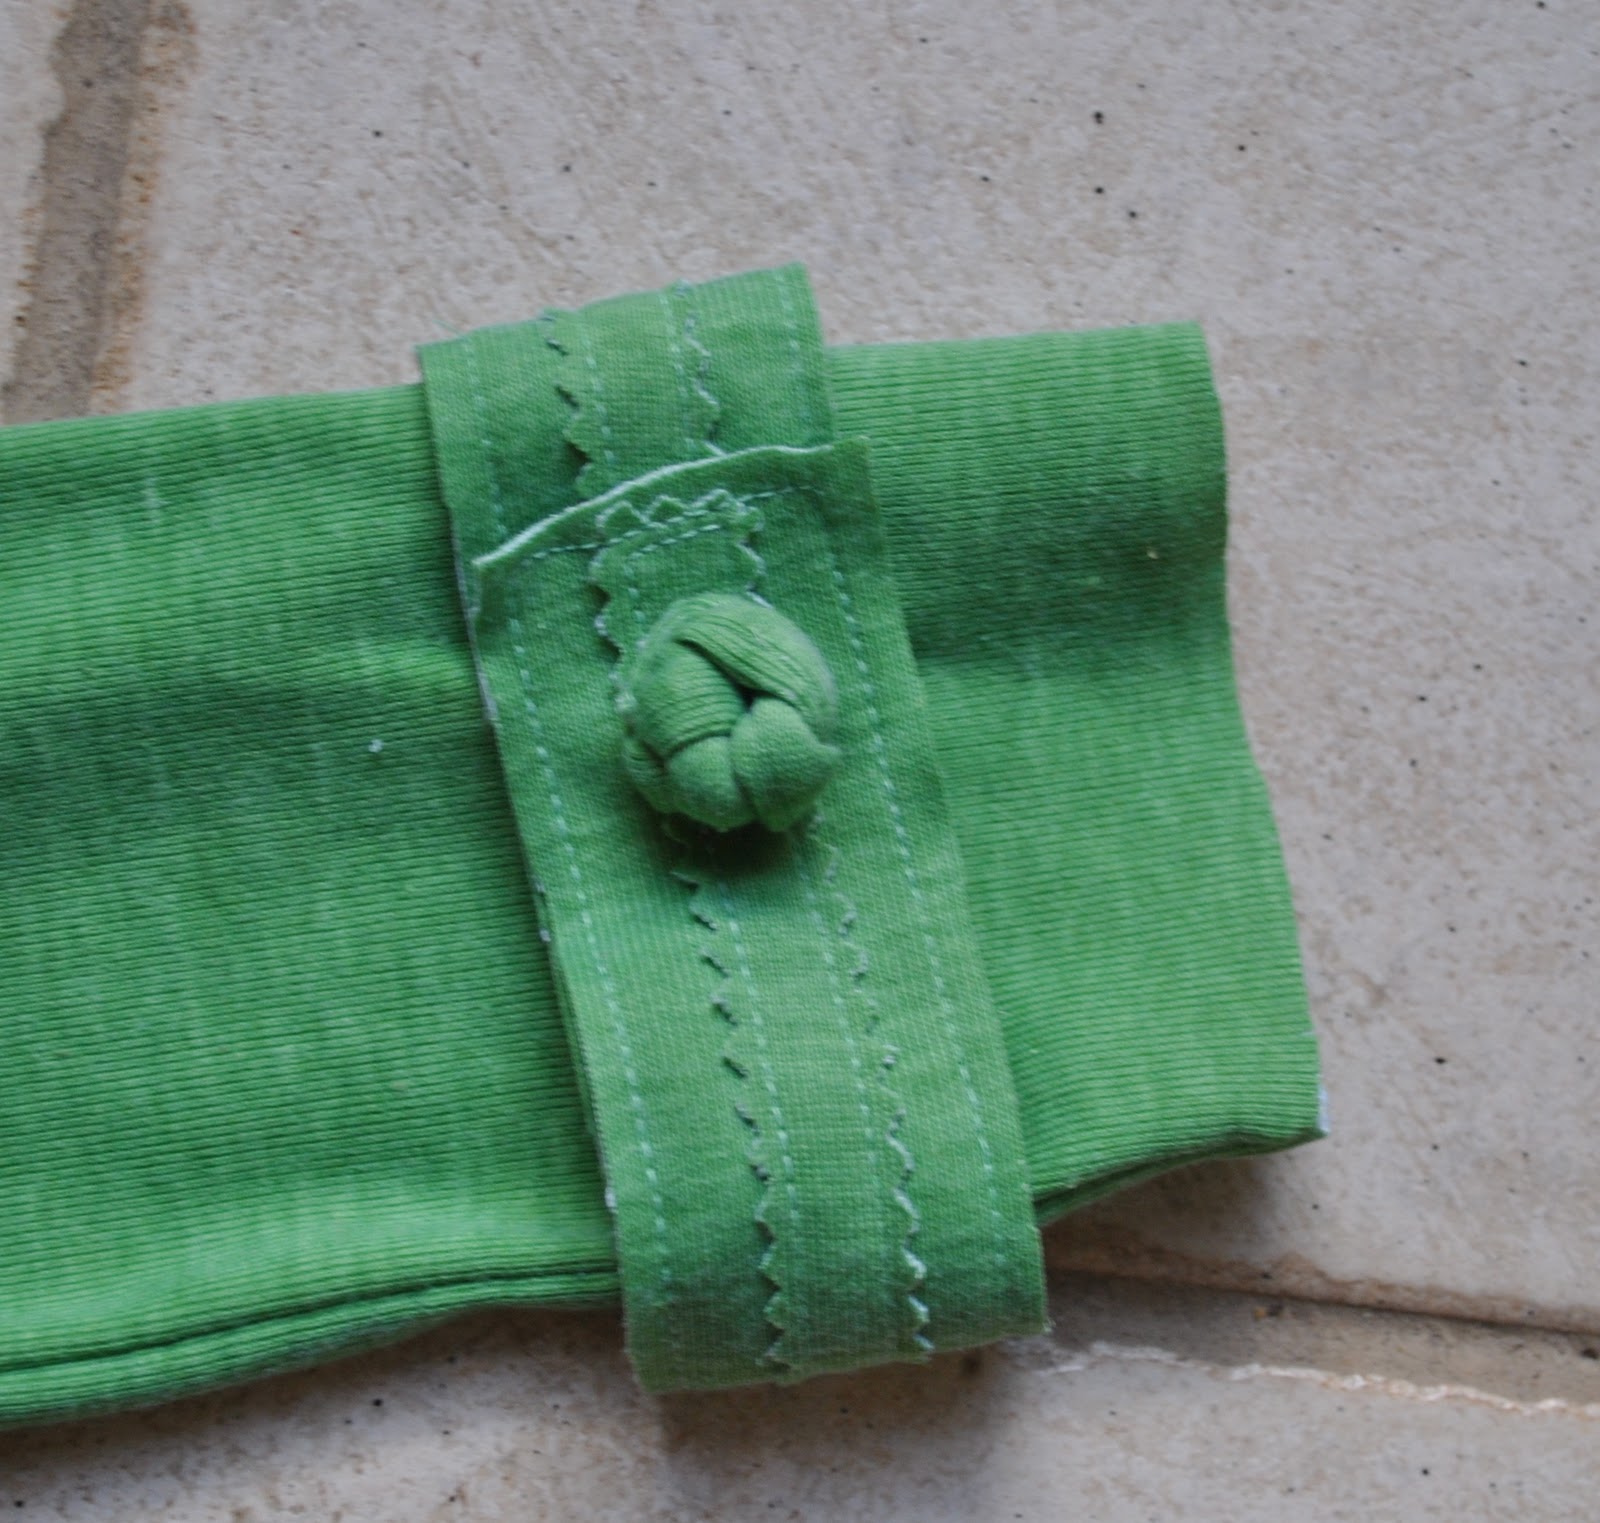
The pattern is the Ariane dress, designed by C’est Moi Le Patron by Coralie Bijasson.  The pattern is described as a gypsy style dress with shoulder princess seams, buttoned, with a gathered skirt & long sleeves with elastic in the hem.   The instructions also include a note to insert piping in those princess seams, so obviously I did so like the obedient little seamster that I am.  Well, I am the hugest of huge detail freaks so yeah.  My piping looks black in these pictures, but actually it is a really deep navy, and the fabric is from a pair of Sam’s old work trousers.  I’d previously used these same trousers to cut the lining for his and Cassie’s man D’s Christmas hats, blogged here.

Variations; the dress pattern doesn’t include pockets, so I added in some simple inseam pockets (my tutorial for adding inseam pockets here).  The skirt is supposed to be gathered into the waist, and while I did initially do this it created some pouffiness that I decided I just did not need! so I unpicked that and instead pleated the extra width of the skirt into five tiny pleats on each side; just outside of the princess line of the bodice.  Same for both front and back.  I think that pleating/folding is a bit more age-appropriate than gathering… I can’t explain what I even mean by that! but maybe I mean it just feels a bit more “me”?  Not that I even know what that means either,  Anyway, I really like how this turned out!

The sleeves are long with elastic inserted in a hem.  I love the sleeves, and especially pushed up to my elbow length like this.

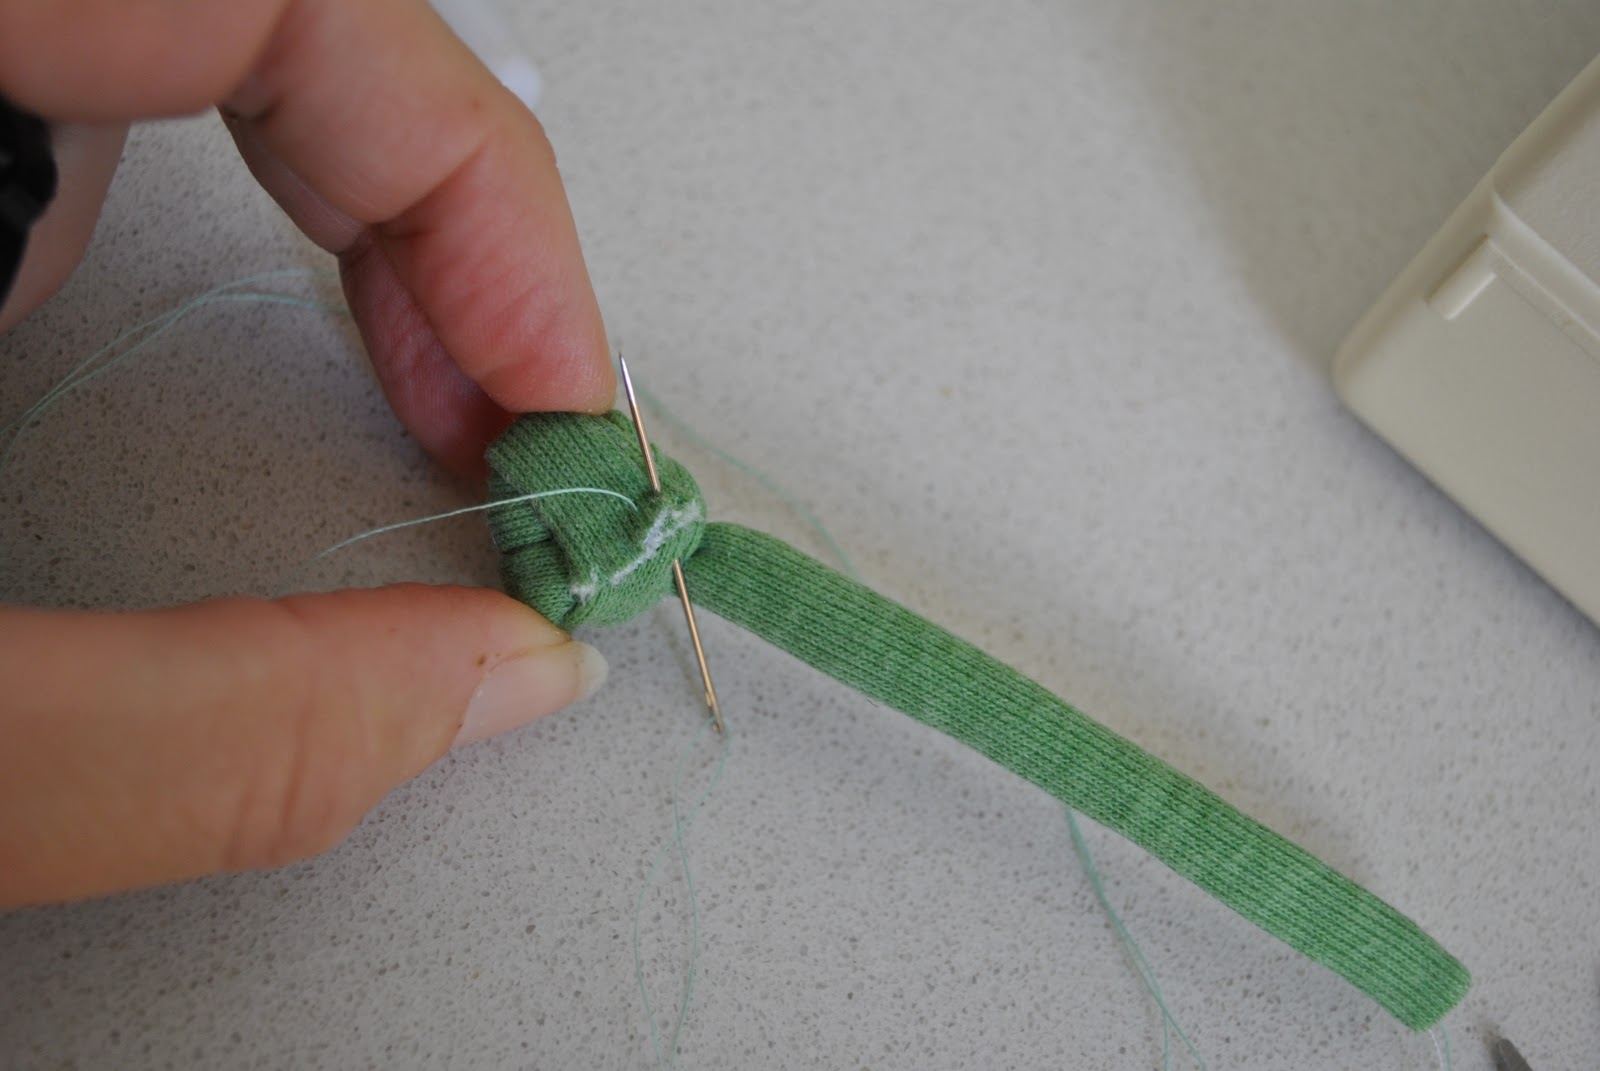
Oh! the buttons! I almost forgot!  SO, I’ve been covering buttons for Kelly’s wedding dress, 100, to be precise!  Yes, 100, blinking, covered buttons.  This took, HOURS.

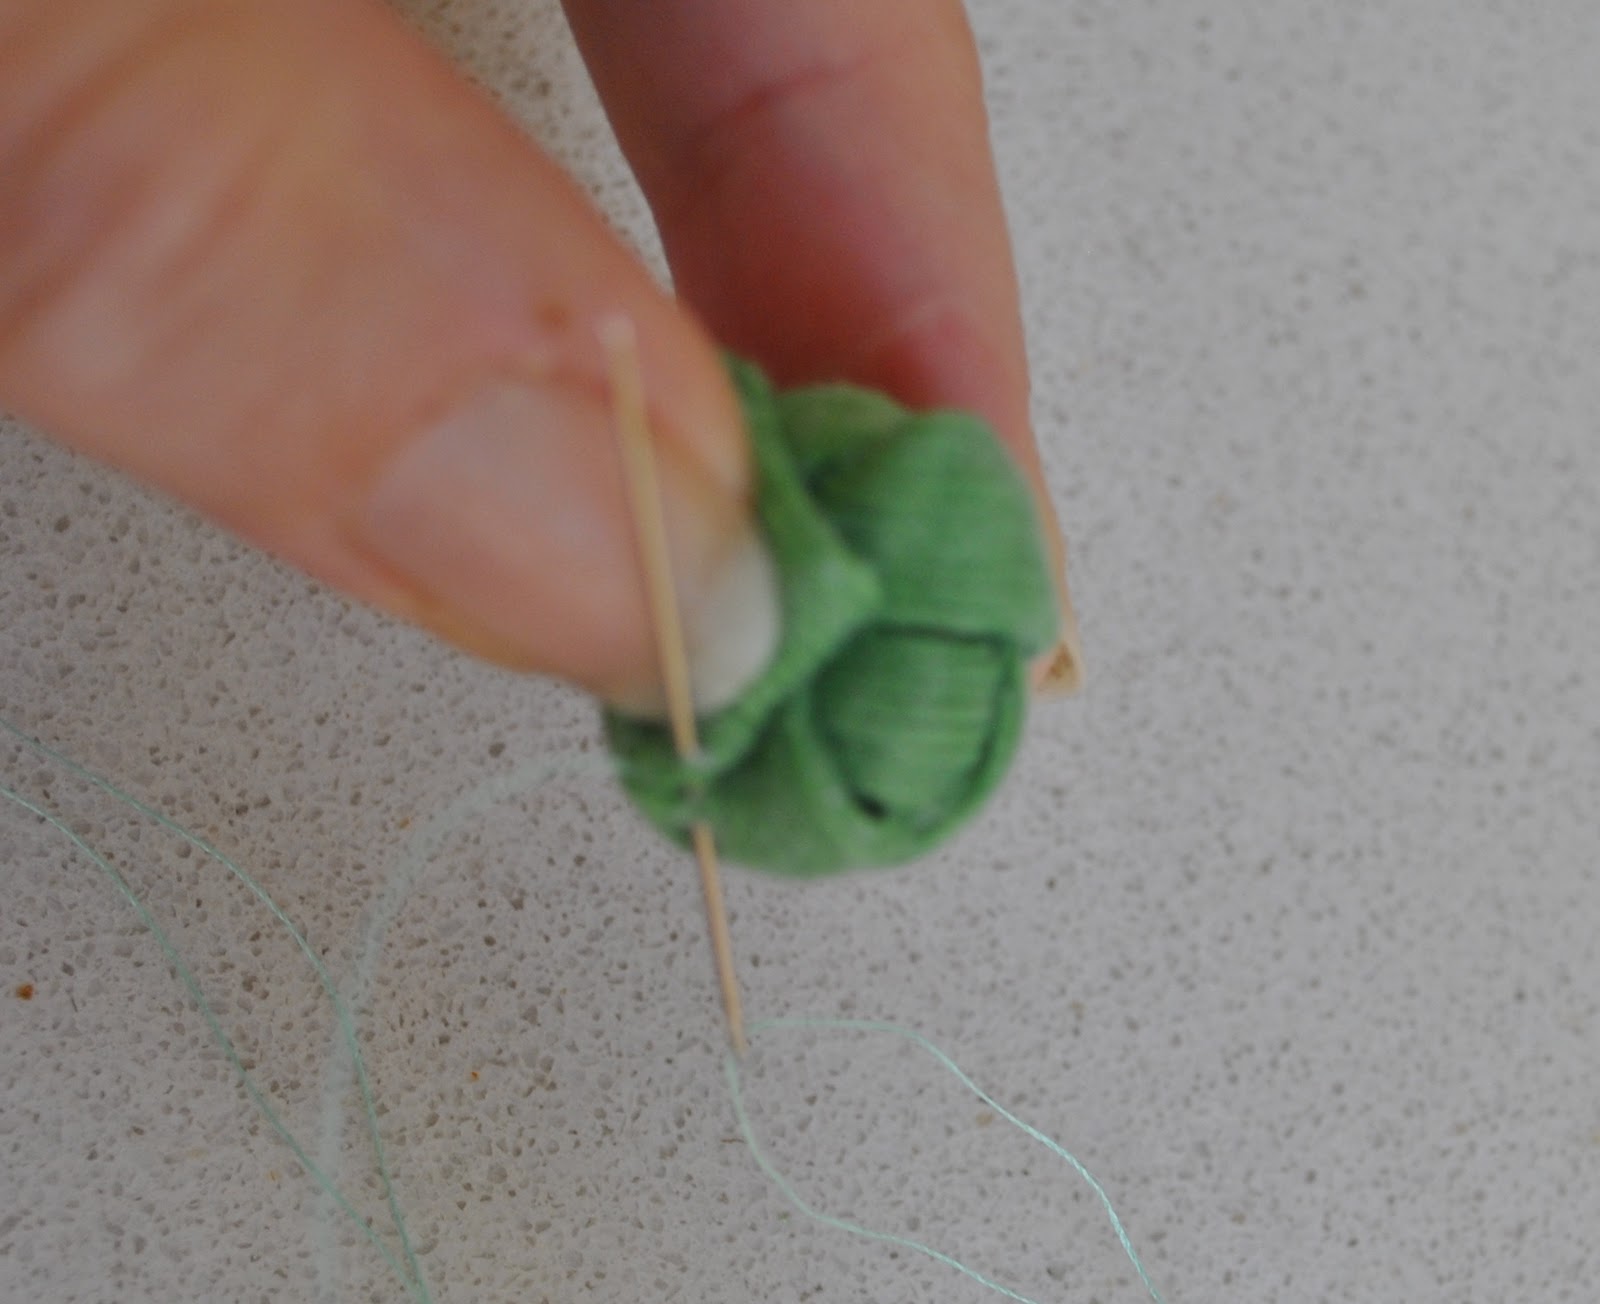
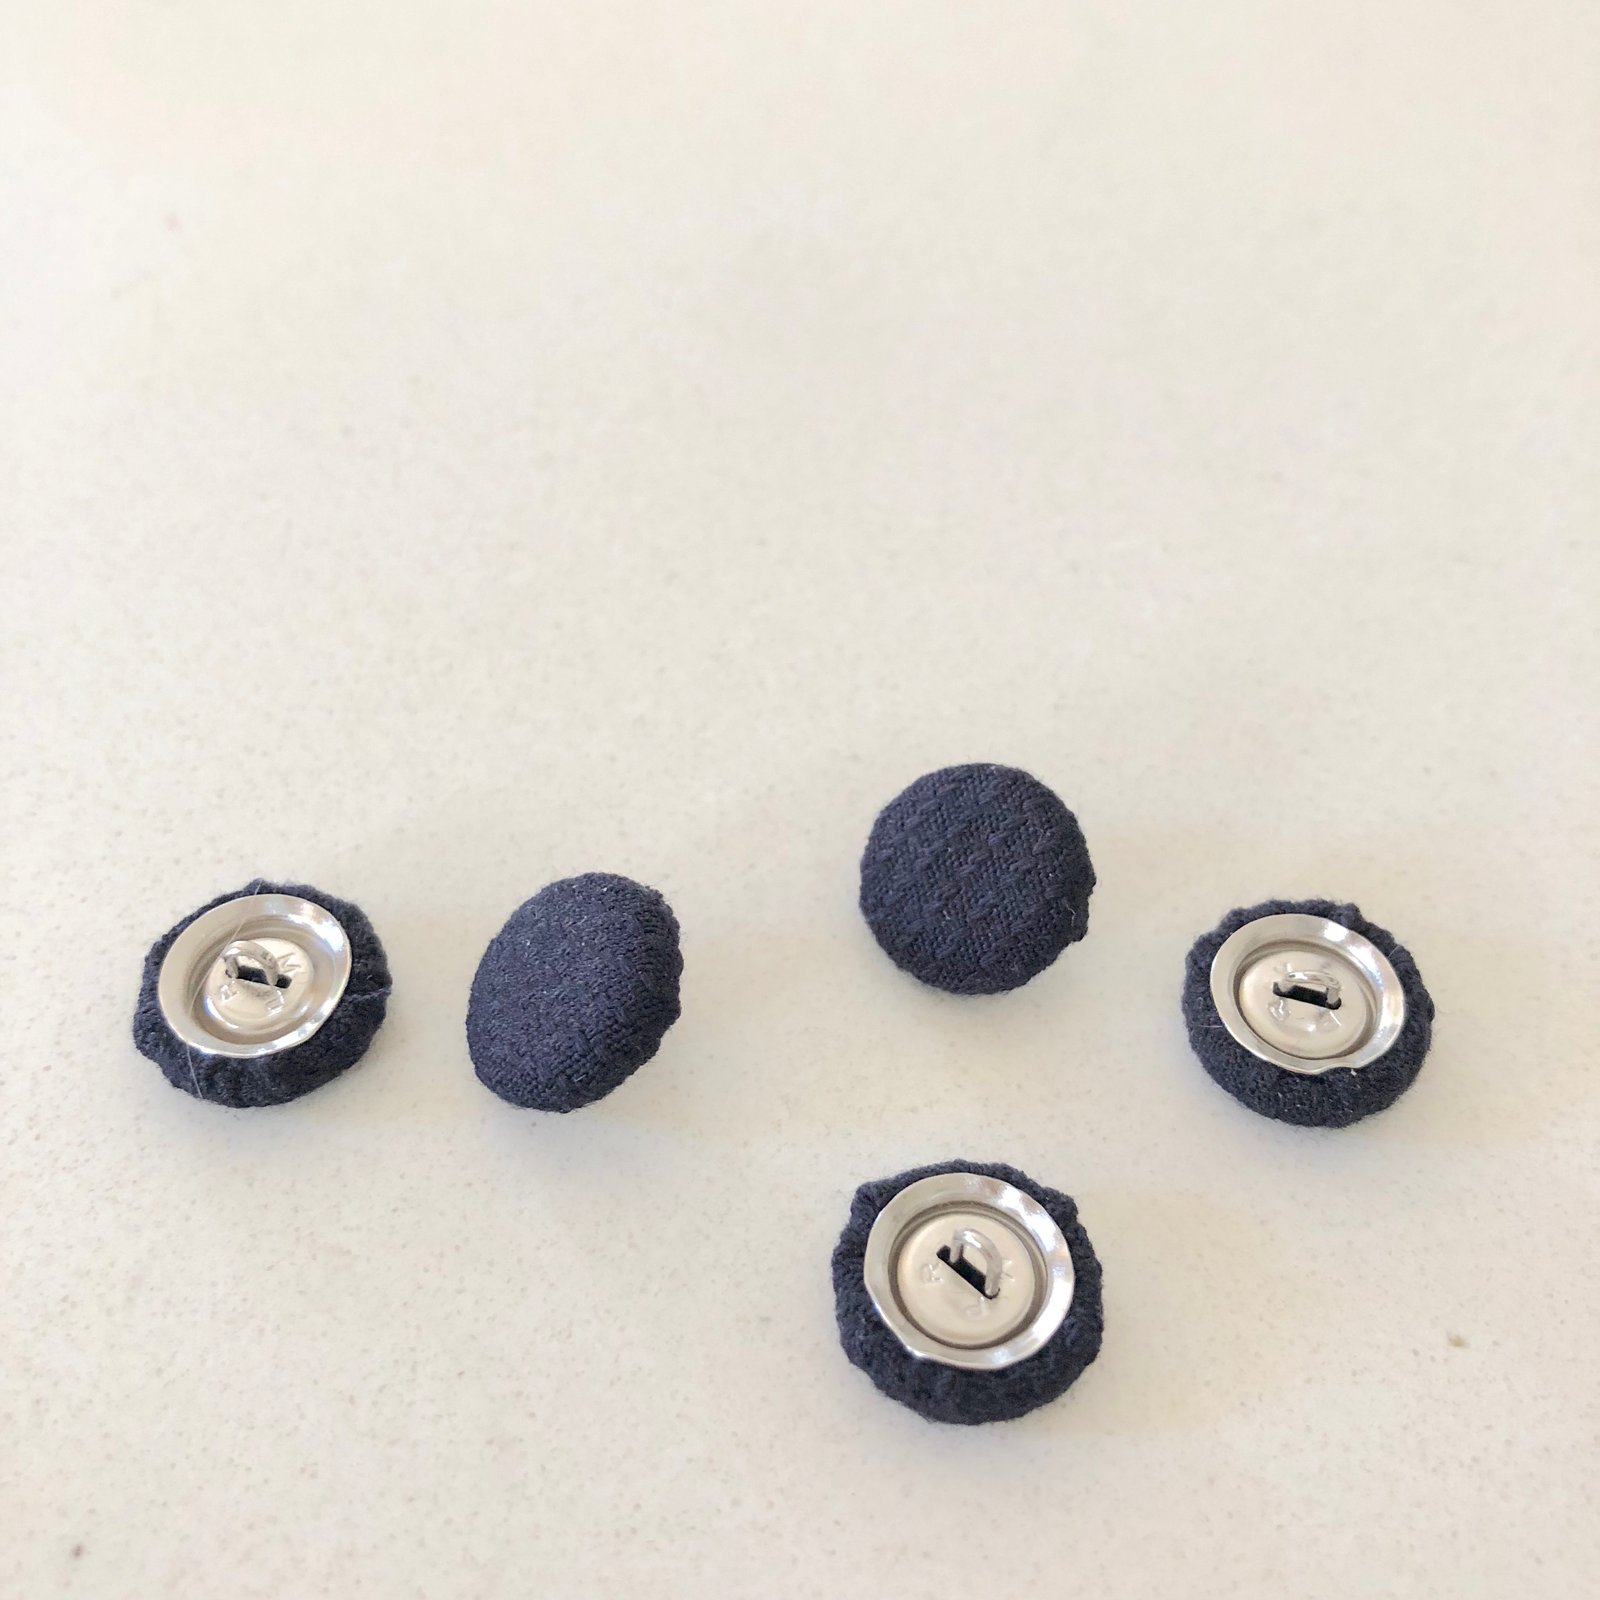
But I absolutely adore how they look! and since I was using a particular colour fabric for the piping I thought it would be nice to have the same particular colour buttons for this project too… so I ordered some more of the 11mm buttons.  I bought my buttons here.  By the way; the “naked” buttons are actually silver, and for Kelly’s buttons, I’d covered a few experimentally and we thought the silver showed through the ivory fabric a little, giving the buttons a slightly grey tinge.  SO I painstaking lined up all the bare silver buttons along bamboo skewer tracks and spray-painted them creamy-ivory before covering with our ivory crepe.  The spray-paint I already had, leftover from when I made my Queen Rutela costume.

Spray painting the buttons is as fiddly as all get out and I’m not going to lie, actually quite a pain in the neck to do… but it does give some really good advantages.  Number one, the silver doesn’t shine through a “porous” or very light coloured fabric, and secondly, and maybe even more importantly, spray paint makes the surface of the buttons a little “sticky” which is definitely a plus when you’re trying to put the buttons together. When I was covering the naked buttons, the fabric slipping and sliding about over the smooth shiny surface was driving me a little mad, and I really noticed a huge improvement with a grippier spray painted surface instead.  So, while I didn’t really need to worry about silver showing through in this darker fabric, I did the spray painting gig again for these buttons too, simply for that grip factor.

So that’s it!  I’m wearing the dress today.. and while I didn’t get a proper “out and about” picture of the dress, I did snap this… hehe, so silly I know, but I was randomly loving  how the lovely floaty linen was rippling in the breeze.  I’ll get a proper photo some other day because right now I am getting strrrrrapped for time!! to say the very least.  In the meantime… it’s back to the wedding and bridesmaid’s dress for me!  Panic stations!!

Details:

Dress; Ariane dress, designed by C’est Moi Le Patron by Coralie Bijasson in a floaty printed linen
Shoes; Zomp, from Zomp boutique

pinterestmail

buttonhole loop; a tutorial

Aaaages ago, Susan asked me for more information about the buttonhole loop used in this top, and I totally forgot!  I’m so sorry! right up until yesterday when Pencil Girl asked the same thing about Cassie’s top.  Ladies, thank you so much for asking!  I hopped to and wrote up my method… and if you dislike sewing tutorials then please skip over this… we’ll just pretend that this isn’t even here and we can still be friends, yeah?  winkwink ;D

The buttonhole loop is a quick, easy and very unobtrusive button closure, made using thread alone.  It is most often used for a short slit opening at the top centre back of a dress, blouse or a top, where two finished edges abut each other with no overlap; it is practically invisible as well as a quicker alternative to a rouleau loop.  My grandmother used it aaallll the time, and taught me how to make one…

also, please let’s just pretend that this is the back of a divine little blouse made of Liberty lawn or something, and not what it is.  Which is two measly scraps of  leftover upholstery fabric from my recently made duffle bags… #notliberty #notsilk #ohtheshame

Stitch the button in place.  Which side is up to your personal preference… although to have the button on the right hand side is conventional

Cut about 30cm (12″) of the thread you’re going to use.  Buttonhole twist is traditional and the best if you are lucky enough to get hold of it, I am using upholstery thread here which is an excellent substitute.  You can also just use regular, all-purpose thread or even embroidery thread if you like, it will probably be just fine if a little more difficult to work with.  Reason being, regular thread is thinner and twists and tangles more easily, so is more likely to develop knots, and also results in a flimsier loop, naturally; and embroidery thread, being stranded, is more difficult to pull firmly into the knots you are forming with each stitch.  But either would work out ok, in a pinch.  There are no rules in sewing!

Secure the thread at the top of the left hand side of the opening.  This should be at a level with the top of the button.

Lay it over the button so the thread lies around the button shank/stitching, and pull firmly until thread and two garment sides are sitting in the desired position.  It’s more neat to have the sides abutting each other closely, although if you want a bit of a gap between the sides make the loop longer.

Stitch the thread once in the left hand side, level with the bottom of the button.

Lay the thread back around the button again, and stitch back in the top edge.

Being careful not to pull the loop out any looser or tighter, undo the button… now you’re going to work buttonhole stitch to totally cover up that two-stranded loop…

Bring the needle over the loop, insert it back under the loop and over the working thread on the other side… this is the buttonhole stitch.  It’s basically the same as blanket stitch, but instead of doing it into the edge of fabric, you’re doing it over a thread in mid air, so to speak.

please excuse my dodgy drawing skills…

Pull it down firmly, and repeat; just keep going, going, going; pulling each stitch firm and trying to keep it all flat and even and straight; and not to rotate around the loop as you’re going along.

When you get to the end, secure the thread into the bottom of the loop by sewing three tiny stitches  into the same spot three times.

aaand; done!

pinterestmail

buttonholes in shearling; a tutorial

P1130091When making my shearing jacket I came up to the important matter of buttonholes… what to have?  I’d googled and pinned a few shearling jackets when planning the details and features that I wanted to have in my new jacket, but it’s not always easy to make out the finer construction details of the nitty gritty like buttonholes in far-away, full-length pictures on the net.  As usual, it came down to knuckling down and working out how to do it myself.

I trialled several different types of buttonholes but am only sharing here the details of my two “finalists”, the two types I eventually decided upon using for my jacket.

Sewing details: I’m using a faux shearling, but this technique would be fine for real shearling too, as well as for thick leather or other thick and bulky, non-frayable fabrics.  For real leathers which can be very thick and tough, use a leather needle and sturdy threads like upholstery or topstitching thread.

The first buttonhole, pictured above; is designed to look well-finished and to look identical from both sides of the fabric, meaning, both the suede outside and the woolly inside of the shearling fabric.  I used this technique for down the front opening edges of my jacket and on the buttoned wrist bands.  It is like the shearling version of a bound buttonhole, if you like.

IMG_9943

Mark the buttonholes on the suede right side to be the same length as the buttons; in this case 2.5cm (1″), and cut two rectangular, self-fabric “bindings” per buttonhole, each the same width as the buttonhole – 2.5cm (1″) wide, and 2cm (6/8″) long.  Trim away the shearling from the wrong side of the bindings as closely as possible, and cut the buttonhole slit in the fabric between the marking pins.  I used a rotary cutter for the middle bit, for straightness and for a clean cut, then clipped into the ends with small sharp scissors.

IMG_9944

Trim away the wool from around the buttonhole slit on the wrong side out to a width of 1cm (3/8″) each side

Wrap the bindings around the buttonhole edges and align edges top and underneath as neatly and as evenly as possible; pin.  Stitch carefully along the long edge just inside the cut edges.  Also, stitch-in-the-ditch along the short edges of the buttonhole also, to strengthen the slit and help prevent it from ripping out.  Truth be told, I wouldn’t think ripping is all that likely in a tough fabric like shearling, but not impossible of course, so I reckoned it was better to be safe rather than sorry!

IMG_9946IMG_9950

It’s more important for the stitching to be perfectly neat and even on the right side of the jacket than the wrong side, obviously.  If the inside shows uneven edges, they can be trimmed off with small, sharp scissors.

IMG_9952

And that’s it! pretty simple really.  Apart from the fact that it looks almost smart and sorta polished as much as a raw-edged rustic technique can look, the beauty of this buttonhole is also that it looks identical from both right and wrong side of the fabric.. also I think the suede wrapped edges looks quite attractive against the woolly insides too!

IMG_9955

The second type of buttonhole I devised is an easier, more workmanlike, “invisible” buttonhole, which is situated on the lapels and collars of my jacket.  I wanted this one to be less obtrusive; to still look acceptably nice if seen from the outside of the coat, but more importantly to be as invisible as possible on the wrong, woolly side of the fabric.  Reason; I wanted to have the option to wear the coat sometimes with the lapels and collar fully buttoned up, and also sometimes unbuttoned; and when unbuttoned I didn’t want them to show at all.

IMG_9956

This one is like a letterbox-on-a-door, with an outside facing to reinforce and strengthen it on the right side.  Cut a rectangle of shearling, 4cm (1 1/2″) wide and 1.5cm(5/8″) long, for each buttonhole, and trim away most of the wool from the wrong side.  You can trim away the wool as completely as possible if desired, or if you want a frame of wool to fluff out around the edges,  leave a slim border untrimmed around the edge.  I decided a lightly woolly frame looks pretty cute, and couldn’t resist having it for my buttonholes.

fluffy edges are cute!!!
IMG_9960IMG_9962

Pin the trimmed rectangle to the right side of the fabric where the buttonhole will be, and stitch just inside each edge.  Remember to use white or ivory thread in the bobbin!  Cut the buttonhole through both layers, using a rotary cutter for the middle bit, and snipping out to the edges with small sharp embroidery scissors.

IMG_9971

I think it looks nice from the outside, but the best bit is that it is almost completely invisible on the wrong side!

For the button inside the collar, I needed something matching the woolly interior; and found the perfect, ivory tweed, covered button, originally from my grandmother’s stash and, knowing my grandmother, I expect it was salvaged from off of an old coat or skirt or something.  Waste not want not! and I’m glad she did because it has finally found the perfect home  🙂

IMG_9967

I hope my tutorial proves useful to someone… as always if it is helpful then please do leave a comment saying so.  Thank you!

pinterestmail

Knot buttons; a tutorial

I made knotted buttons of self fabric for my Kelly-green cardi; and Gail asked for a how-to… well I had taken a few photos while I was making them but had sorta decided against posting a lengthy series of pictures in that post because I thought people might find it not interesting; so thank you Gail, for asking!
I saw this knot in a Vogue pattern (1107) and even though the Vogue instruction sheet has a nice computer-drawn set of diagrams, a lot cleaner and neater than my efforts here; I have re-drawn them because I’m not sure whether for me to photograph even one step from the Vogue pattern instruction sheet and put it here is trampling copyright (does anyone know??)  But just in case I am not going to even go there….!!  But I can’t see how a knot is “owned” by anyone so I did my own drawings and instructions and I hope they are clear enough.  It is not a particularly difficult knot.
Firstly I made two long spaghetti tubes of the fabric.  You make these by folding a 2.5cm (1″) x (roughly) 25cm (10″) long rectangle right sides together and sewing along one long edge in a narrow 6mm (1/4″) seam, cutting the two machine threads to be nice and long long long.  Trim the seam allowances of the tube and thread those long tail threads into a needle; and feed back through the tube to turn right side out (with the blunt end of the needle leading, for obvious reasons!)  to make a long narrow cord for knotting.

Now for the knot…
(Note: in each step; the new instruction is in bright green, with the previously executed steps in grey.)
Firstly hold the cord with your left hand with a short tail and loop the end over itself and to the right…

Then loop the long end back over the first loop again and under the first junction…

Thirdly; take that long end and weave it through the four loops of cord created in the first two steps; first over, then under, then over, and finally under and out…

Gradually tease closed and tighten the loops of the knot together to be a nice, firmly and evenly arranged knot.

One at a time, cut the ends, turn under and slipstitch the ends neatly and invisibly on the underneath of the knot.

Voila! C’est fini!

pinterestmail
Switch to mobile version
↓