Tag Archives: Fabulous Fabrics

Cardigan plus top equals a twinset!

So I originally bought 1.5m of this thin but warm leopard print jersey, and the cardigan only used up about 70cm so I still had bit to play around with.  At first I just tossed it back into the cupboard where I store all my fabric but then it occurred to me; if I made a matching top then I would have a twinset!  How quaint and fifties and prim and proper!  And using the leopard print, which is kinda exotic and has a slightly decadent seventies vibe to it saves it from being too prim and gives it a bit of an edge…
Tops are so easy; I can see no need to buy a pattern; here I simply did just like I did for the cardigan and traced around a top I already had…

Sewed the shoulder seams…

Luckily I had a tiny bit of the same grosgrain ribbon left that I had used for the cardigan here, and used this to stabilise the shoulder seams the same way, now they match too!  Satisfies the obsessive side of me…

Sewed up the side seams…

Now as there was still a little bit of leftover fabric to play with I decided to try out a different hemming technique than I used for the cardigan, which was all invisibly hand-stitched.  I cut strips of about 4cm in width and used these to bind the raw edges on the wrists, the lower hem and the neckline.  All these edges were finished in the following way; firstly the strips are cut to the same length as the edges to be finished.  Then sew together the short ends of the strip to form a loop; this is one of the wrist loops…

Fold the strip in half longitudinally with wrong sides together, and apply to the right side of the edge to be finished, raw edges together.  Sew all around…  Here are the wrist edges finished, one of them inside out to display the loop edges from the inside, and one right side out to show how it looks when finished.  If you do have enough fabric leftover, this is a good way to finish the raw edges of jersey knits.

And here is my new twinset…

pinterestmail

A very simple cardigan

I made myself a cardigan; a quick fix project out of some stash fabric… and put together a little tutorial.  I did another cardigan tutorial back here, but this one is a leeetle different, although using the same pattern…
The fabric I am using is a thin but closely knit, slightly fluffy leopard print stretch jersey, and I have planned a simple single thickness cardigan.  I’m using grosgrain ribbon tape to strengthen and stabilise some seams, and have got five tiny pearl buttons to finish.
First I turned to my standby basic cardigan pattern; this I drafted using an old favourite cardigan as a basis.  I just laid down the cardigan as flat and as straight as possible and drew around all its edges… then once I had cut out the paper pattern I re-checked it against the original fabric cardigan to see it was close enough to the right dimensions.  This is a style and shape that has proven to fit me and (I think) to flatter me, so I’ve used it several times…  The back piece is laid on the fabric fold at right, the front is in the middle and the sleeve is laid out   left hand side of the fabric.  btw, this is a half sleeve, and has to be flipped over halfway through cutting to get the whole sleeve, er… now you can see how slapdash a cutter I can be…! lol.  Even though it looks a bit makeshift, and why don’t I get serious and just cut out a whole sleeve paper pattern piece; it has actually worked very well for me like this every time, so I haven’t bothered.  Lazy, I know…  Oh, and I cut the body and the sleeves longer than these pieces since I had enough fabric to do so.

I sew the shoulder seams first, then fit the sleeve cap into the arm scye and sew these seams next…

Then sew the underarm seam in one go, from the bottom hem edge right up the sides of the cardigan and on under the sleeve to the wrist edge, making sure to match up those sleeve-to-body seams to each other.

Use a short strip of grosgrain ribbon, sew it on over the shoulder seam and catching it under.  This will stabilise this seam and prevent it from stretching through wear…

Pin the grosgrain ribbon, right sides together, all around the front and neck edge…

Sew the grosgrain ribbon to the edge,  as close as possible to the ridge of the ribbon edge…

Turn the ribbon to the inside of the cardigan and invisibly hand-sew the edge of the ribbon on the inside…  Make sure the edge of the ribbon is cut off evenly on both fronts of the cardigan, and level with where you want the bottom edge to be…

Turn up the lower edge of the cardigan twice, press and invisibly hand-stitch hem in place, also the wrist hems…

Measure where buttons and buttonholes are to be, and sew them in position.  Using a grosgrain ribbon to line the neck-edge enables you to machine sew buttonholes straight onto delicate knit fabrics easily, and also to stitch buttons on securely through the two layers without risk of light knit fabrics pulling out of shape; which they would without a strong backing…

Et voila, a very simple cardigan to provide an extra layer of colour to your ensemble, if not some warmth!

pinterestmail

Data Irretrievable

I hate technology.  No, an exaggeration, I just don’t trust technology.  Just when you come to depend upon it, wham! it lets you down.  And when it happens, it’s always big-time.
Over the weekend my computer crashed.  As my husband says; there are two types of hard drives, one that has crashed, and the other that is going to crash.  When you least expect it.  I’m a wee bit sad.  I’ve probably lost a lot of stuff.
Actually, you know what?  I confess, I’m a mite relieved too.  It’s too easy to build up such a lot of “stuff” on your computer, info you can’t possibly delete voluntarily, but is actually pretty useless when you get down to it…  Old letters I’d kept copies of “just in case”, funny emails, links to handy websites I’d discovered along the way, massive email address book of which I was only using about 5%…  I had a lot of downloads sitting there, probably that I was never ever ever going to get around to doing anything at all about.  Free downloadable patterns, both sewing and knitting.  Inspirational ideas, photos from style.com of garments that had me all fired up at one point or another that I was going to try to re-create in some way…  well now it’s clean slate time.  Through no fault of my own (that I am aware of) I’ve lost a whole lot of … well, I won’t use as strong a word as junk, but certainly a whole heap of things that may have a certain burden-like nature to them.  
I’m looking on the bright side.

This morning: on my way to morning tea with the gals…

Details:
Skirt; my own design, based on Vogue 7303, black lace
Top; Sexy Lady, second hand
Cardigan; Wheels and DollBaby, second hand and repaired to look like new
Tights; Kolotex
Booties; Django and Juliette
Bag; Gucci
Gloves; not sure now, from David Jones

pinterestmail

A visit to the Art Gallery…

Paid a visit to the Art Gallery of WA today, to view an exhibition and also to celebrate a birthday of a dear friend in our group…
I won’t mention the name of the artist because to be blunt I thought the works were quite hideous and grotesque although on a small (very small) positive note they did make food for thought.  All I could think touring through the exhibits is how on earth the artist was getting funding to put out the work, because the works were very costly and labour intensive.  They were sculptures, mostly very realistic “monsters” made out of silicone and adorned with real human hair and glass eyes to look like horrible deformed creatures out of a very unethical geneticist’s chamber of horrors of cloning/genetic experimentation gone wrong…  just shudder-ous (not a real word, just describing my reaction)  Our tour guide was excellent, raising discussion questions about the future of genetic research and experimentation into issues such as cloning and surrogacy and how far we human beings are prepared to go in these areas, and how much more accepting are our children of scientific “fiddling about” with the natural order of things than the current generation.  These are issues that I, with my scientific background, am already fairly familiar with and have already had some debate …
Viewing this exhibition has made me wonder about the point of art, all over again.  Beauty or politics?  Political art is so far removed from artistic art that I wonder if we should find some other category for it to reside in…  I personally thought this artist’s talents would be put to better use for humanity manufacturing limbs and prostheses for landmine victims (say) or amputees and that is the pragmatist’s view…  but then the scientific debate is important, and how important is the art in the role of stimulating that debate?   There was no beauty and we are accustomed to expecting some beauty in our art.  I do like some beauty, sorry.

A definite feeling of spring in the air, today is practically hot!  Am feeling a bit too wintery in this outfit even…  I’m starting to think about the upcoming Self Stitched September.  Should I try to go all self stitched, or (as is my usual habit) incorporate a few store bought basics?  Maybe I’ll start out going all self-stitched and see how I go.  And as for taking my photo everyday… this will be a time challenge.  But I’m still excited about it.

Details:
Dress; Burda 8511 with some modifications, purple silk hessian
Cardigan; Country Road
Belt; had since a teenager
Tights; Kolotex
Booties; Django and Juliette, from Zomp
Bag; Gucci

pinterestmail

Takes the Bronze

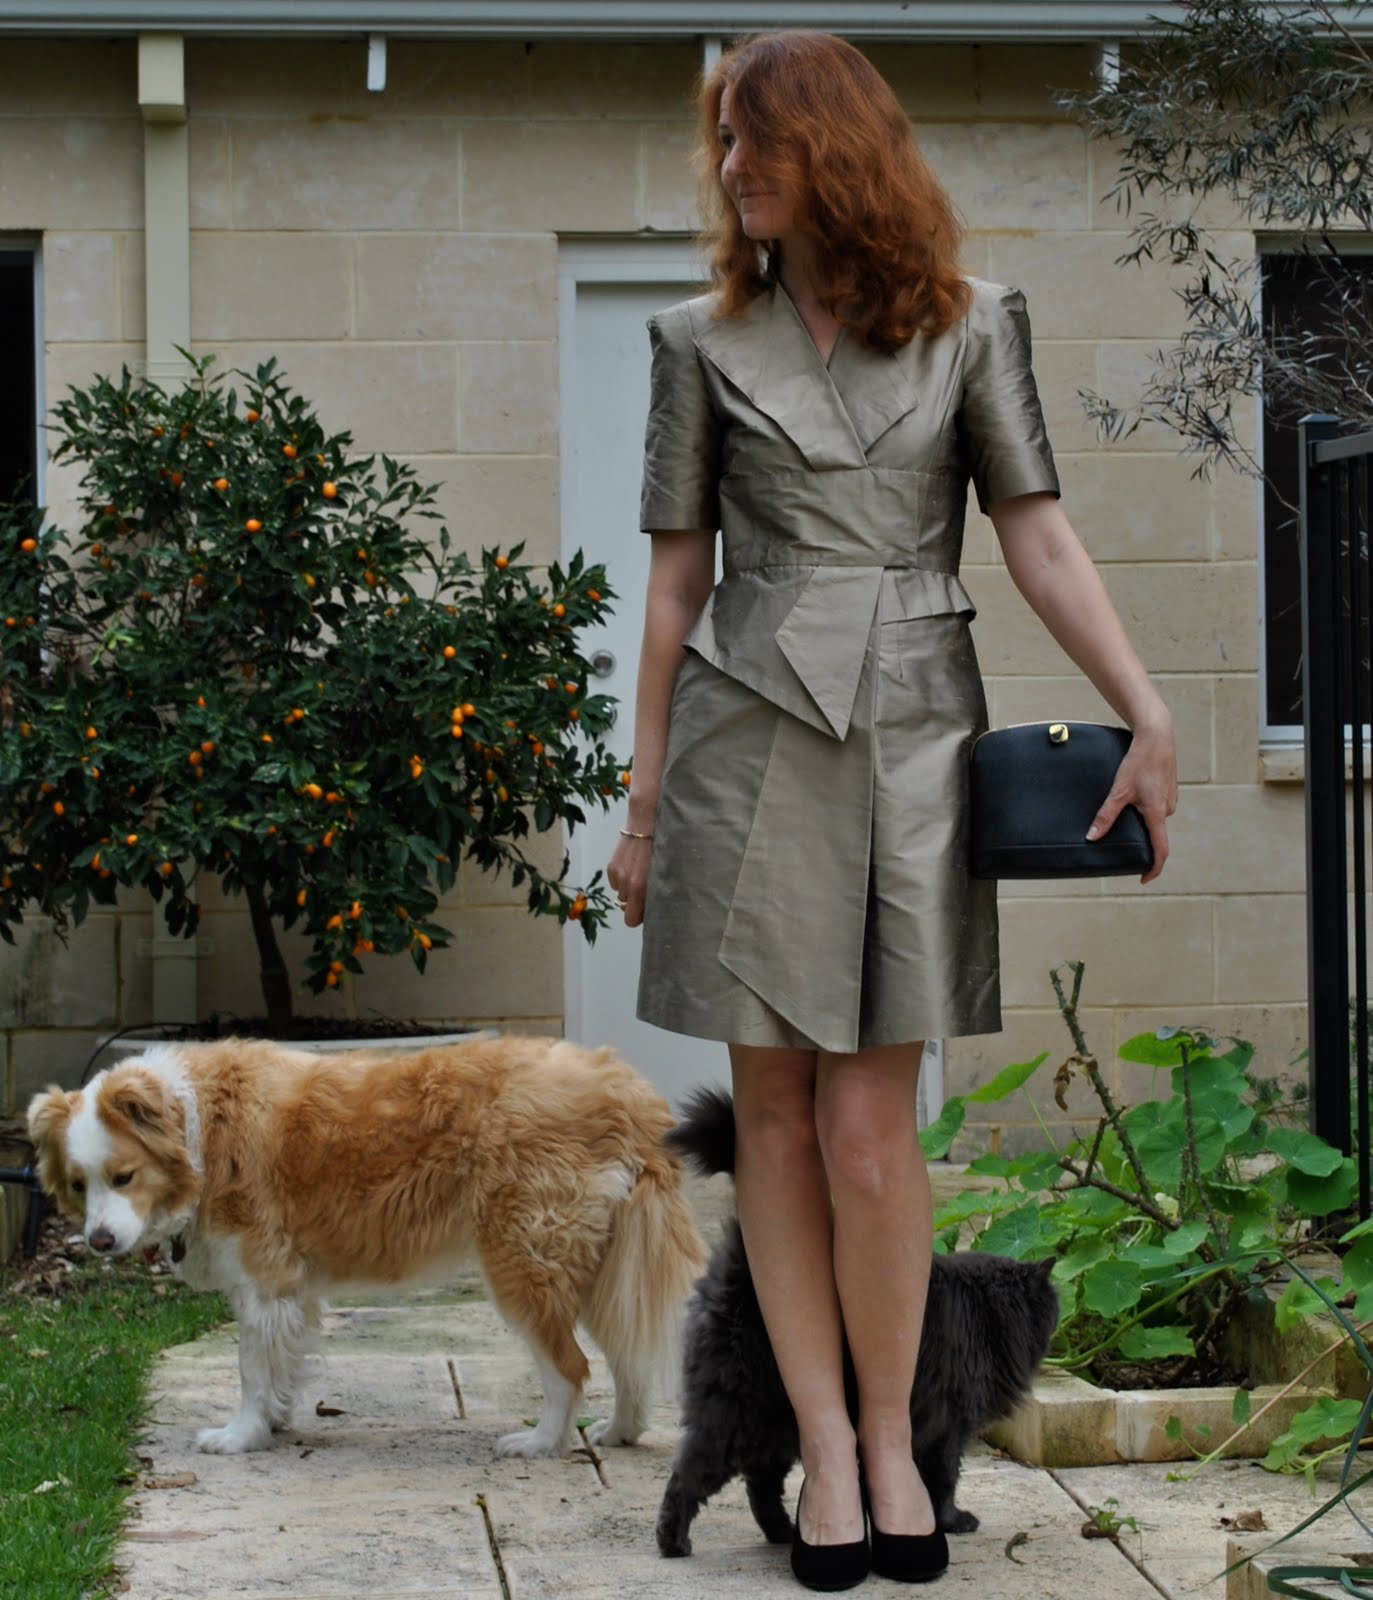
My new cocktail dress…
I’m kind of in love with it.  Wish I could be wearing it all day, if that was in all way appropriate (might attract a few sideways glances in the supermarket, for one)  And as for my work in the office… well the pussycats might appreciate that I went to the effort.  Oh, hey you look great, but really, you shouldn’t have.  Not for us.  Just going to be vying for prime position on your lap as usual, is all…
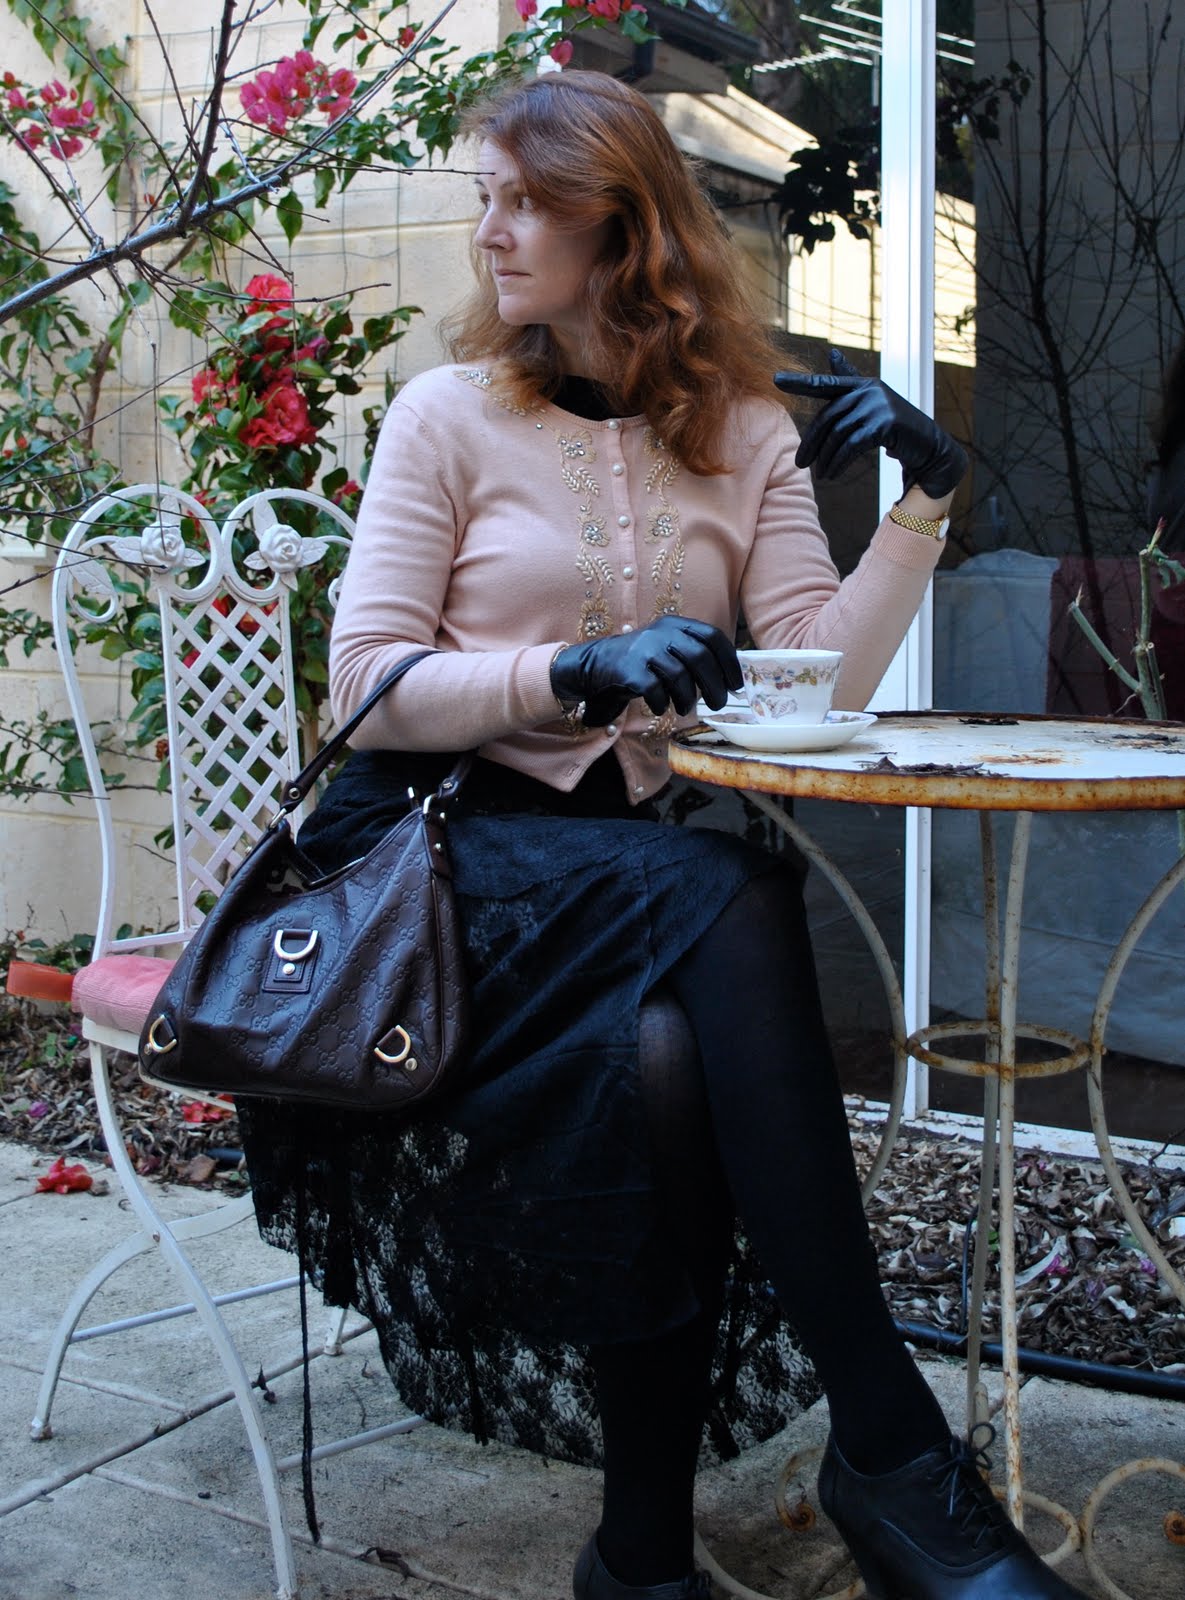
I did meet some gals for morning tea this morning, but as I was easily the most dressed up (in exactly this outfit, my new favourite since I finished it, and have worn it three times in the last three weeks now) then the new cocktail dress would have been a tad overkill.  Sadly.
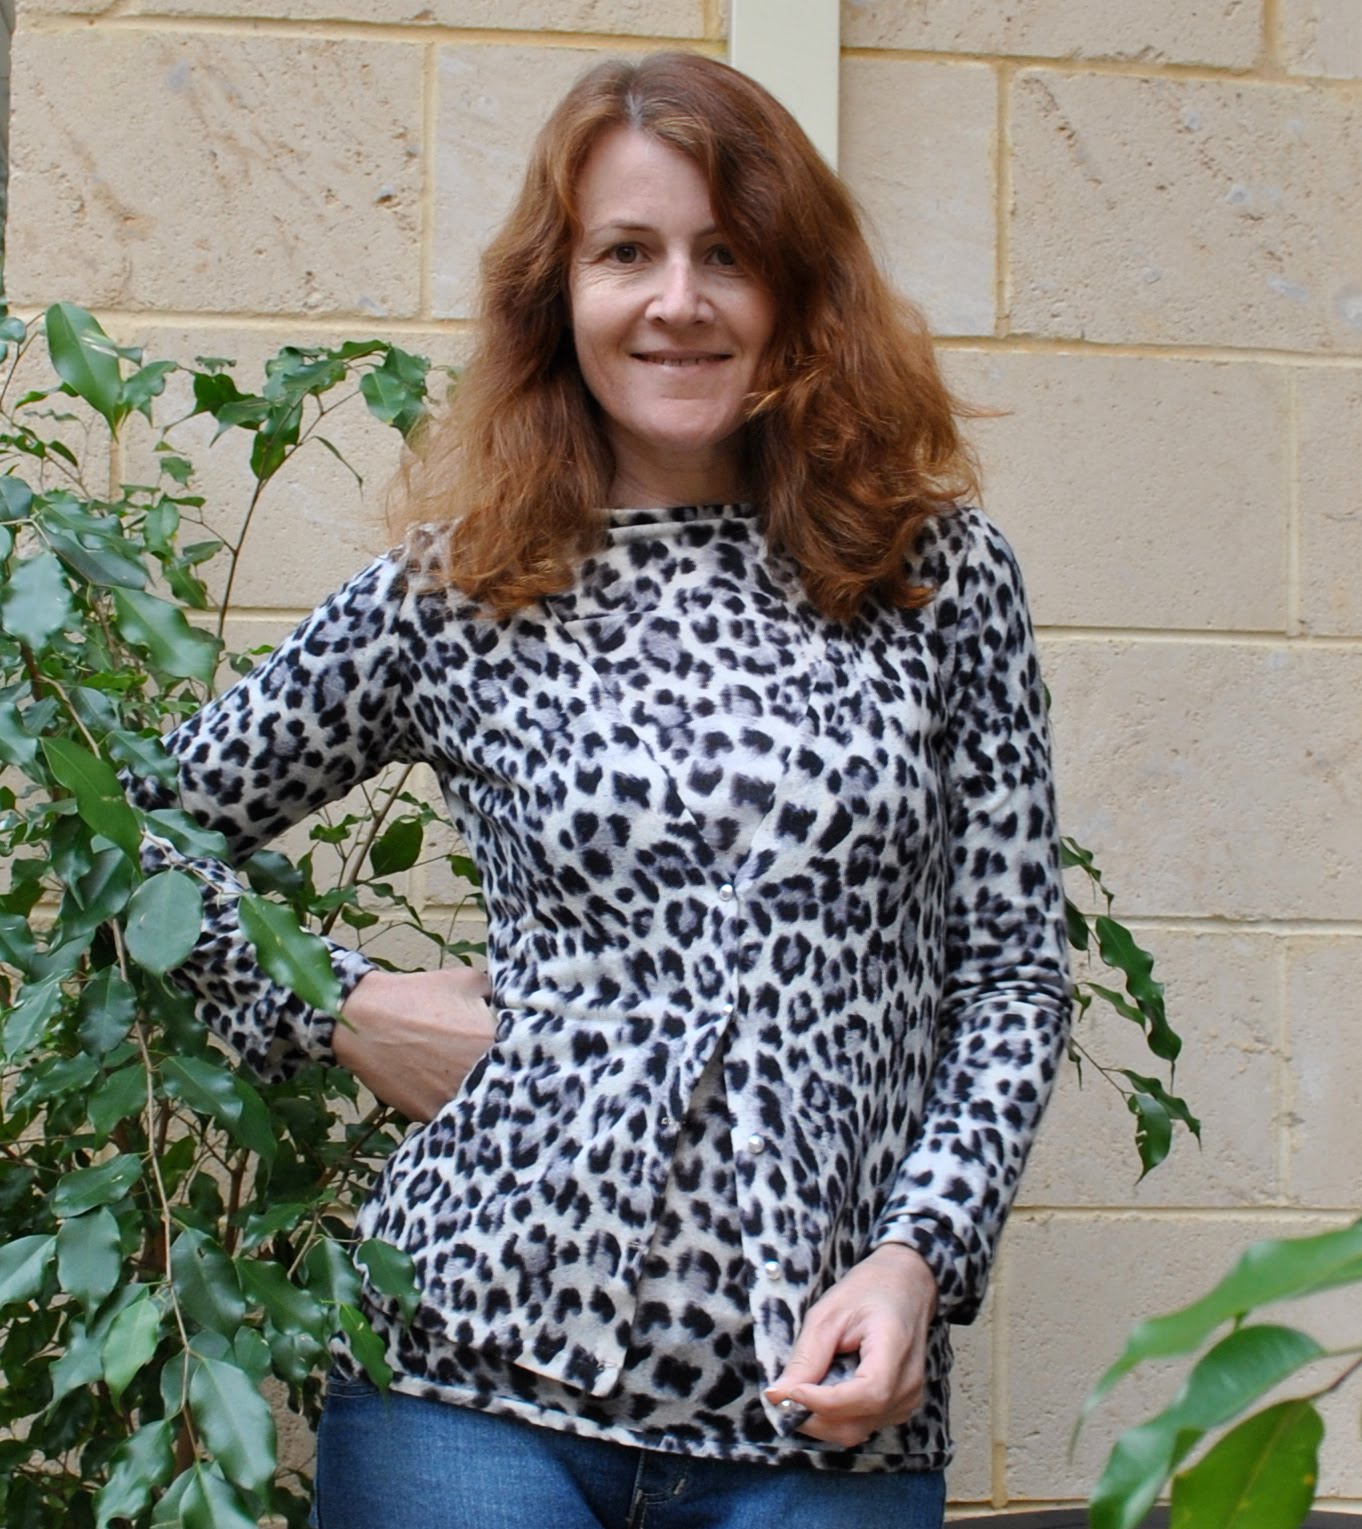
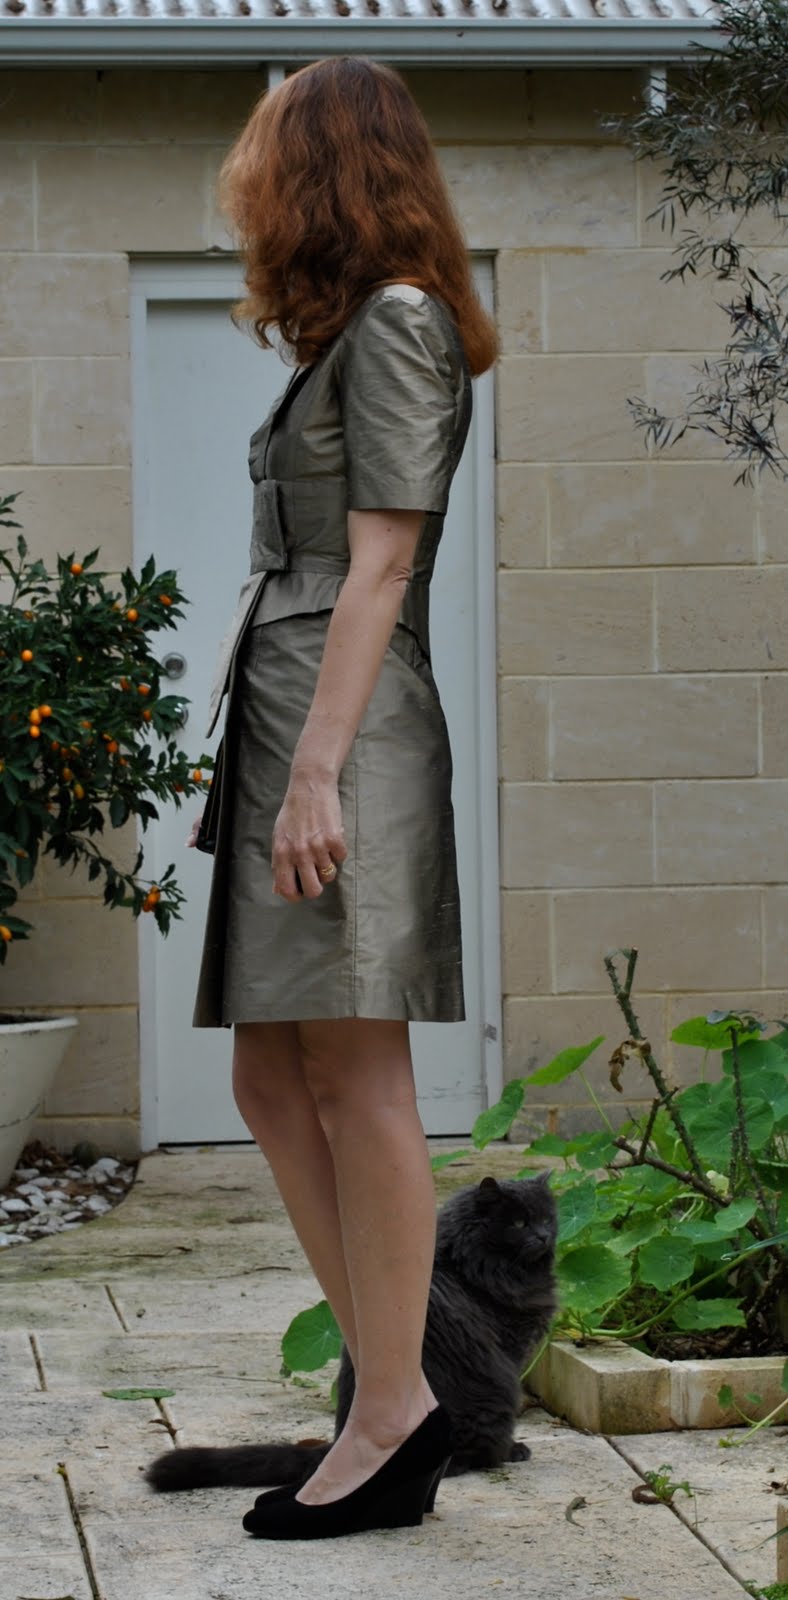
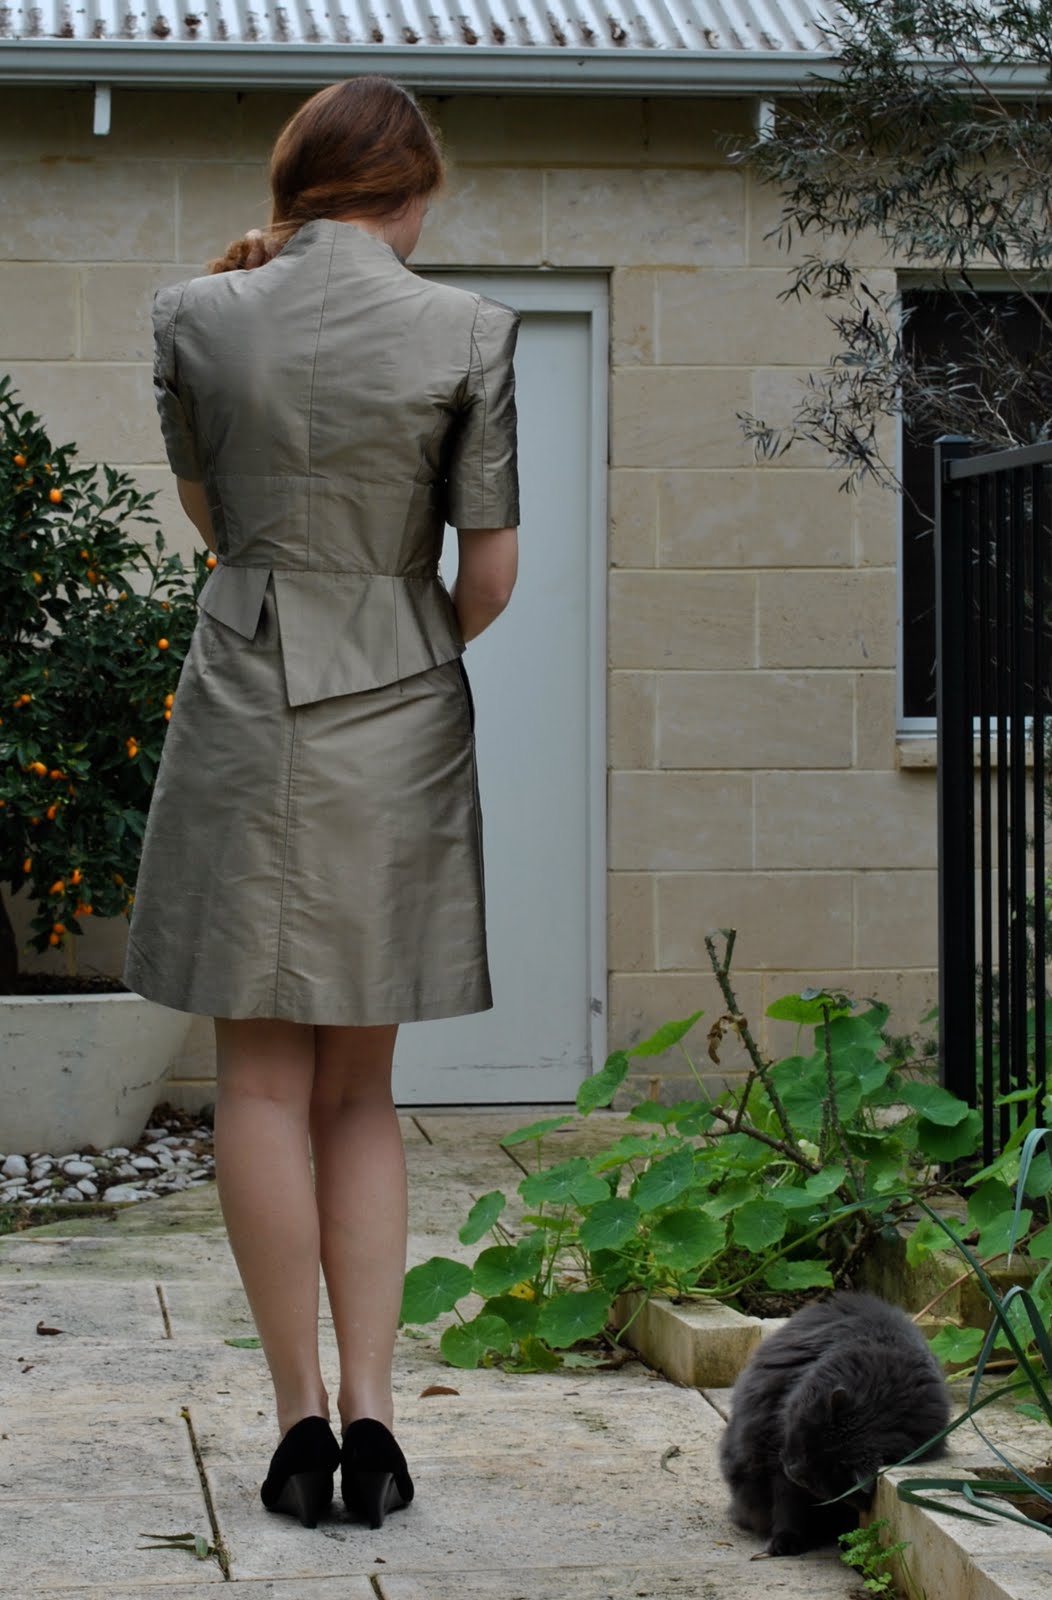
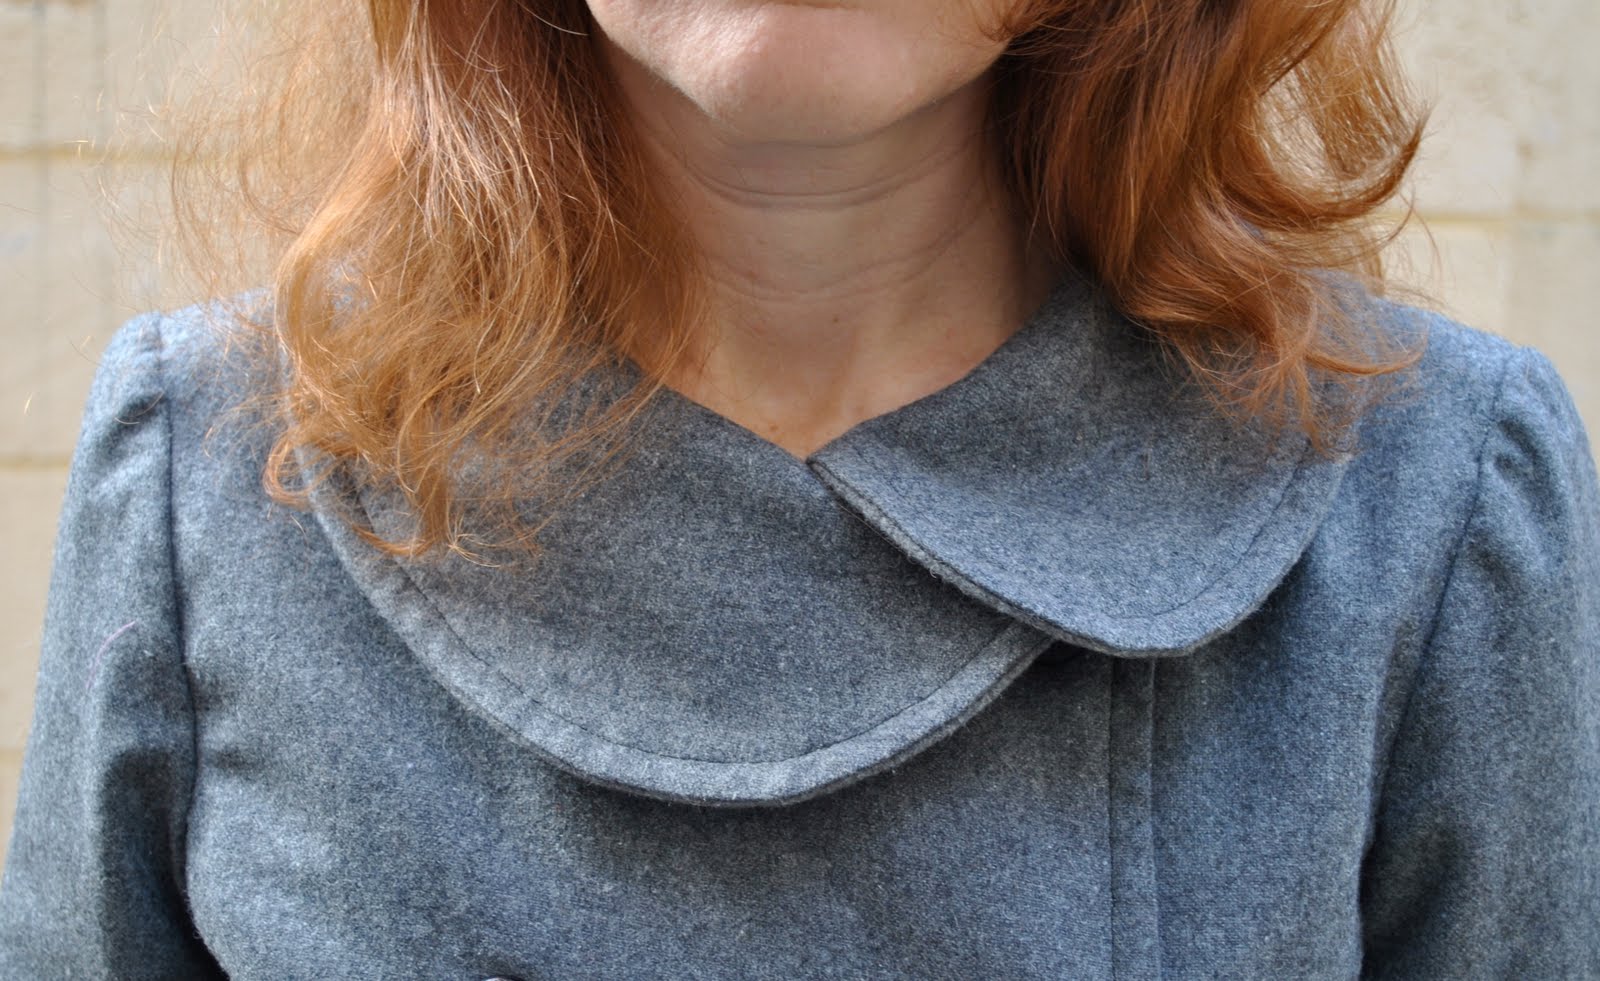
The flavour of this design is kinda eighties, I reckon.  The silhouette is reminiscent of the costumes we were treated to on Dynasty; the exaggerated shoulders (and how cool are they?!!!!) the peplum.  The mid-knee length.  The clever designer of this pattern however has taken the essence of that genre and given it a modern little twist.  The asymmetry of the collar treatment.  The jagged uneven teeth on that peplum.  I think that’s why I was drawn to this new design.  Classic shape but with an edgy funky strangeness about it.  A slightly off, not very faithful interpretation of a shape now considered way old hat.

Details:
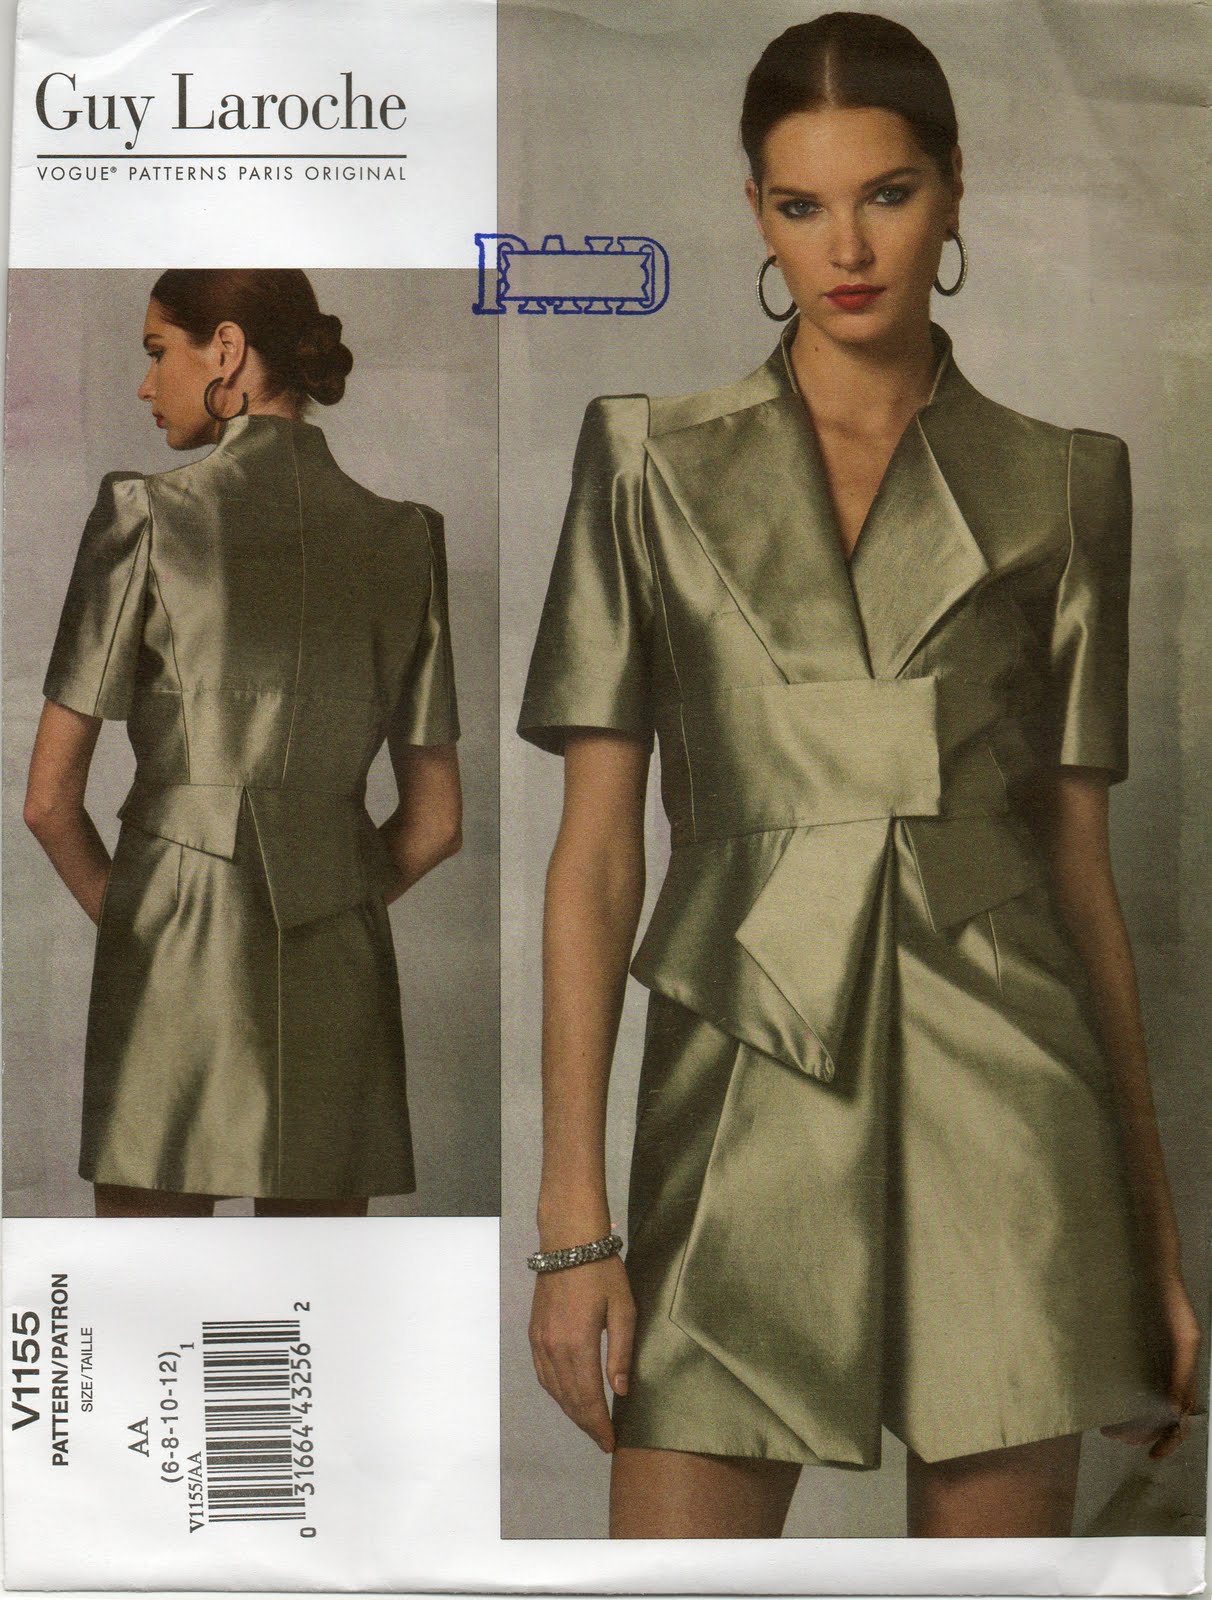
Dress; Vogue 1155, “antique” silk taffeta
Shoes; Misano, from Labels
Bag; gift from my husband, early on in our marriage
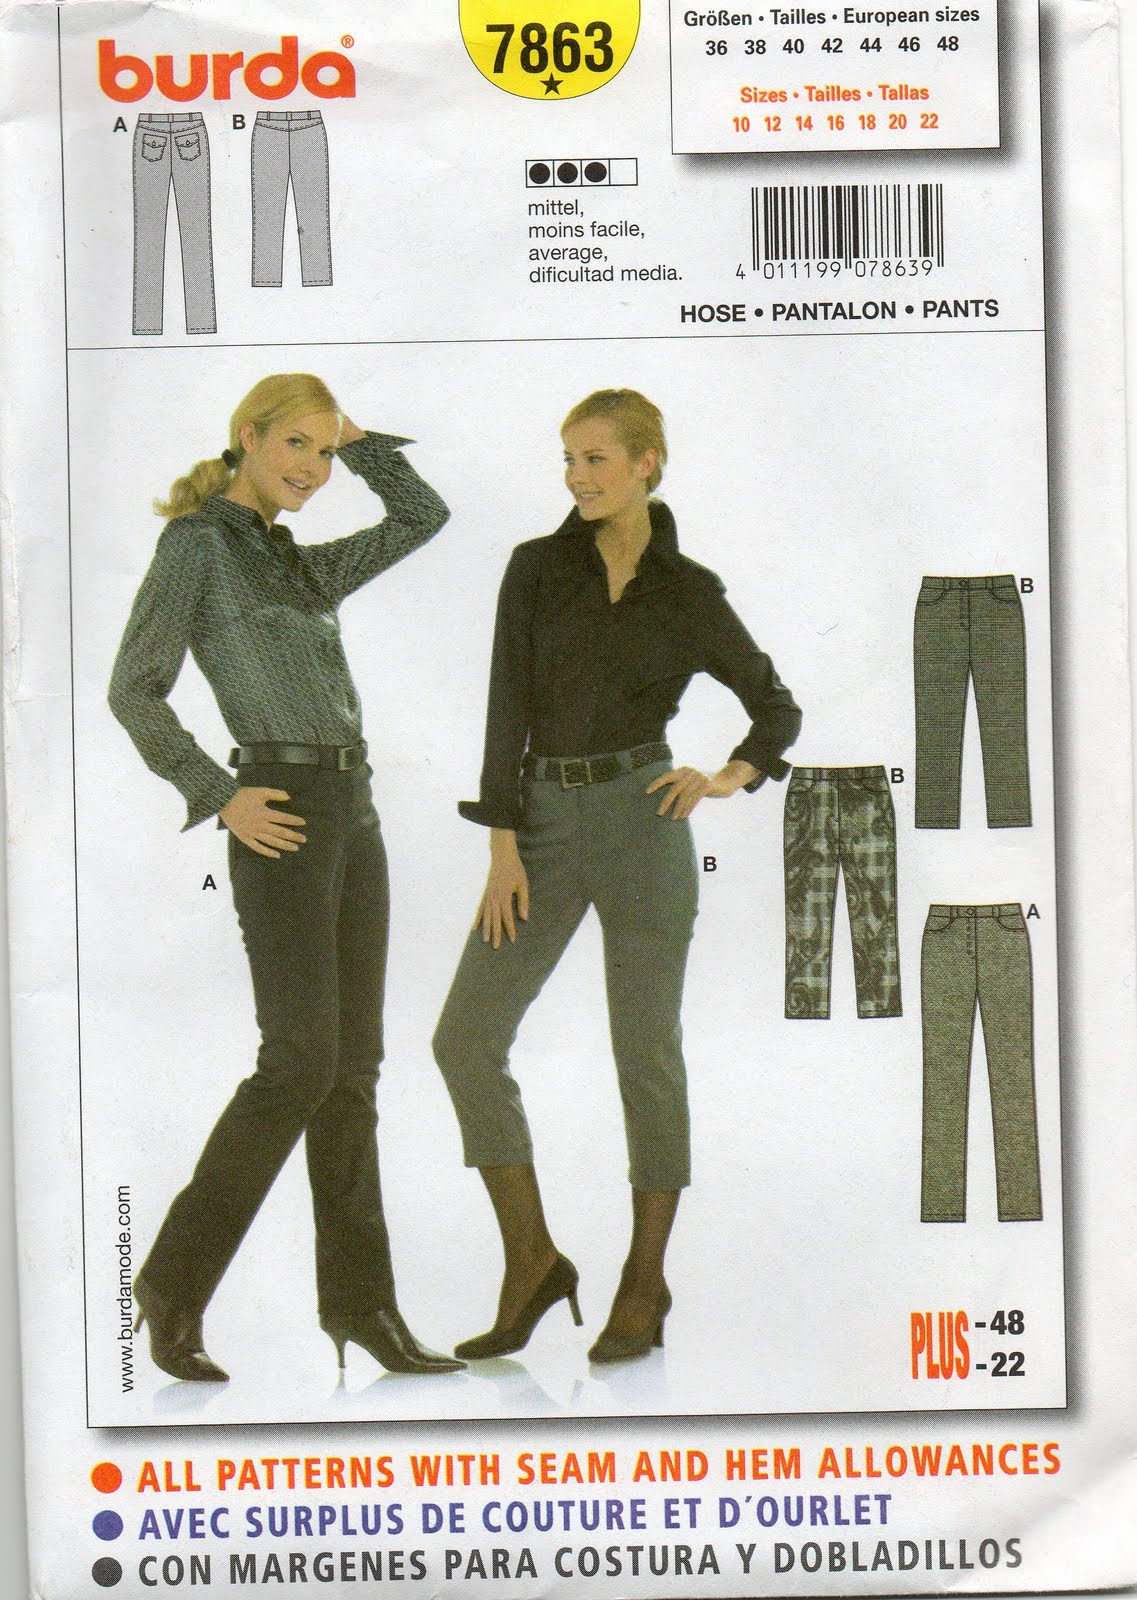
Pattern Description
Semi-fitted, lined, above mid-knee length, fully interfaced dress has princess seams, midriff, peplums, two piece short sleeves, wrap front with buttons, hook and eye closures
Pattern sizing
6-12.  I cut size 10
Did it look like the drawing/illustration on the patten envelope after you had finished sewing it?
yes, except I had added 7.5 cm to the overall length, and ended up overlapping the fronts a bit more to get better coverage
Were the instructions easy to follow?
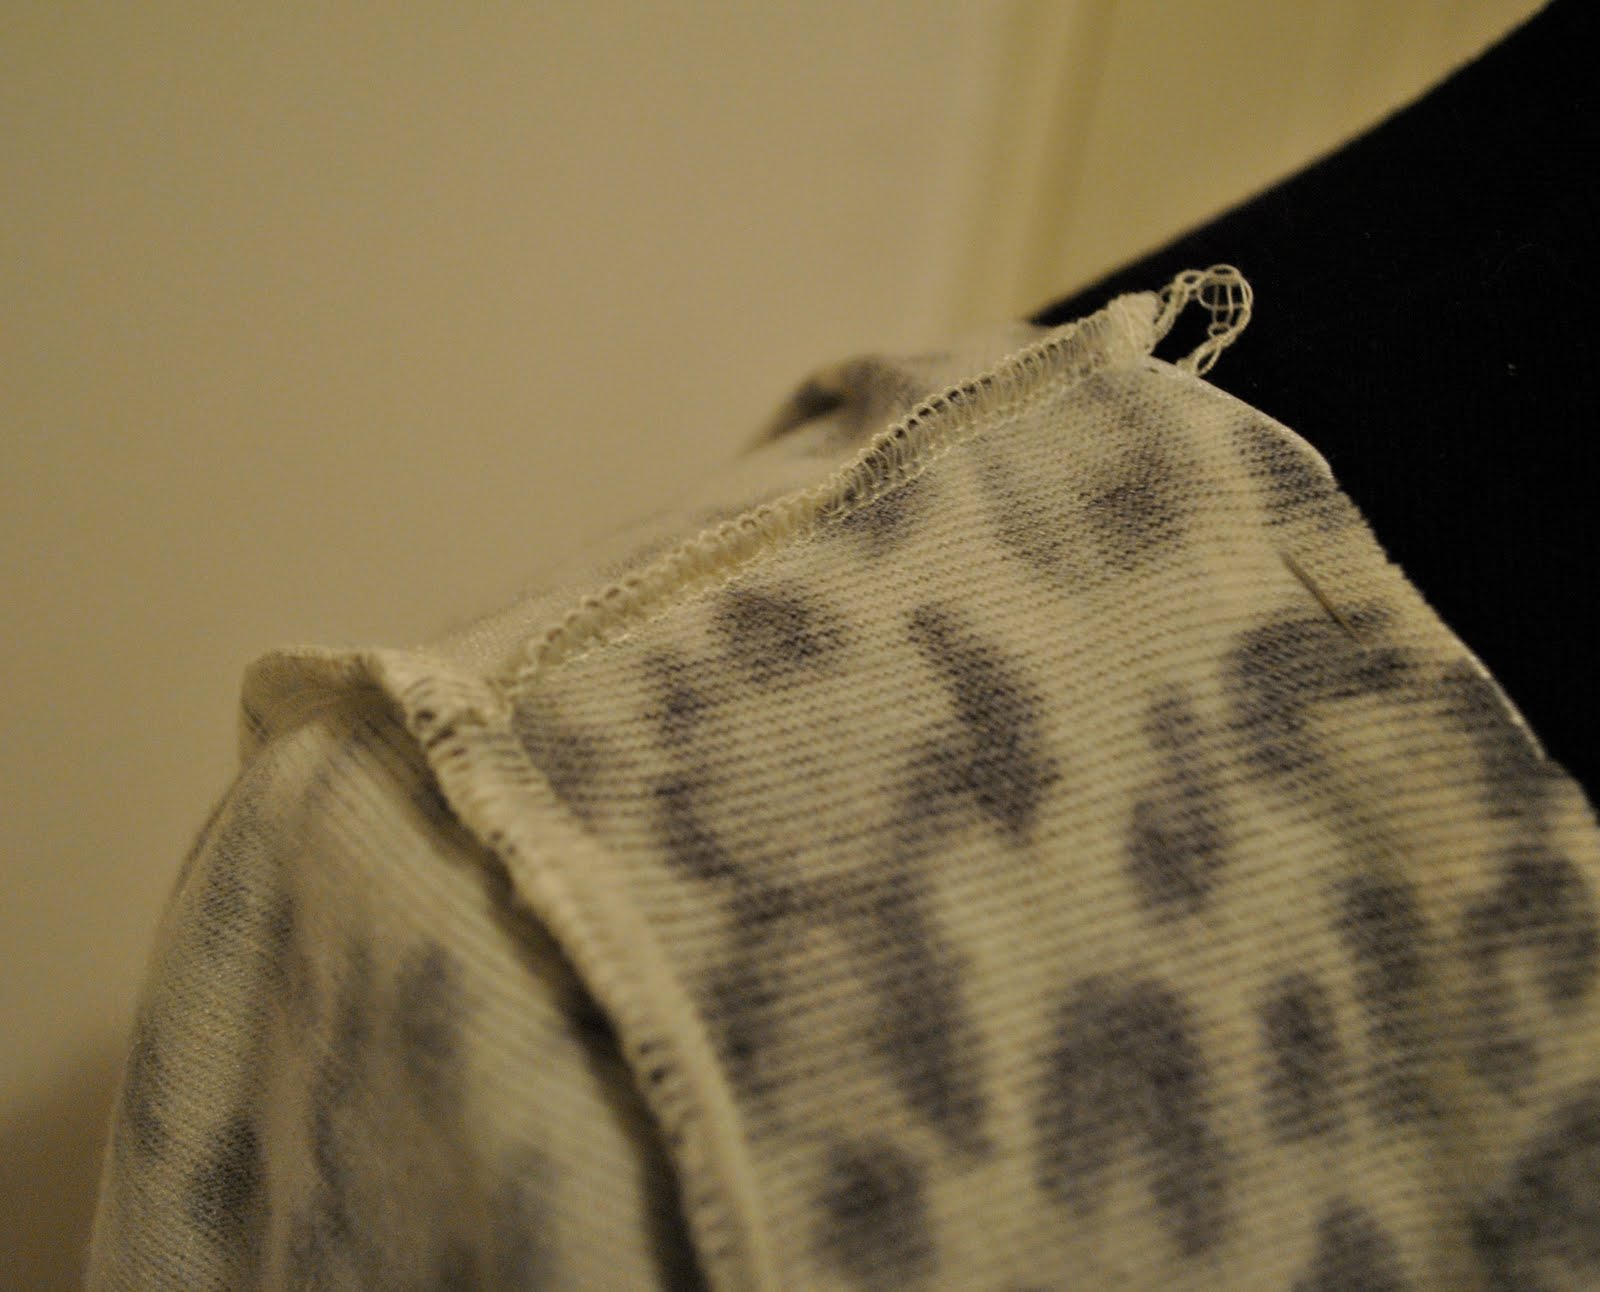
The instructions were clear.  Bear in mind this is an Advanced/Plus Difficile pattern.  There is a rather bewildering instruction in one part; steps 28-31 would have you sew the midriff section to the bodice, then sew the midriff facing at the ends of the midriff only, turn right side out and handsew the top level of the facing on the inside.  (??)  A far better method to complete this part is the traditional way, ie, right sides of the midriff and midriff facing together encasing the bodice, the sew the three layers together in one clean seam.  This is how I did it.
What did you particularly like/dislike about this pattern?
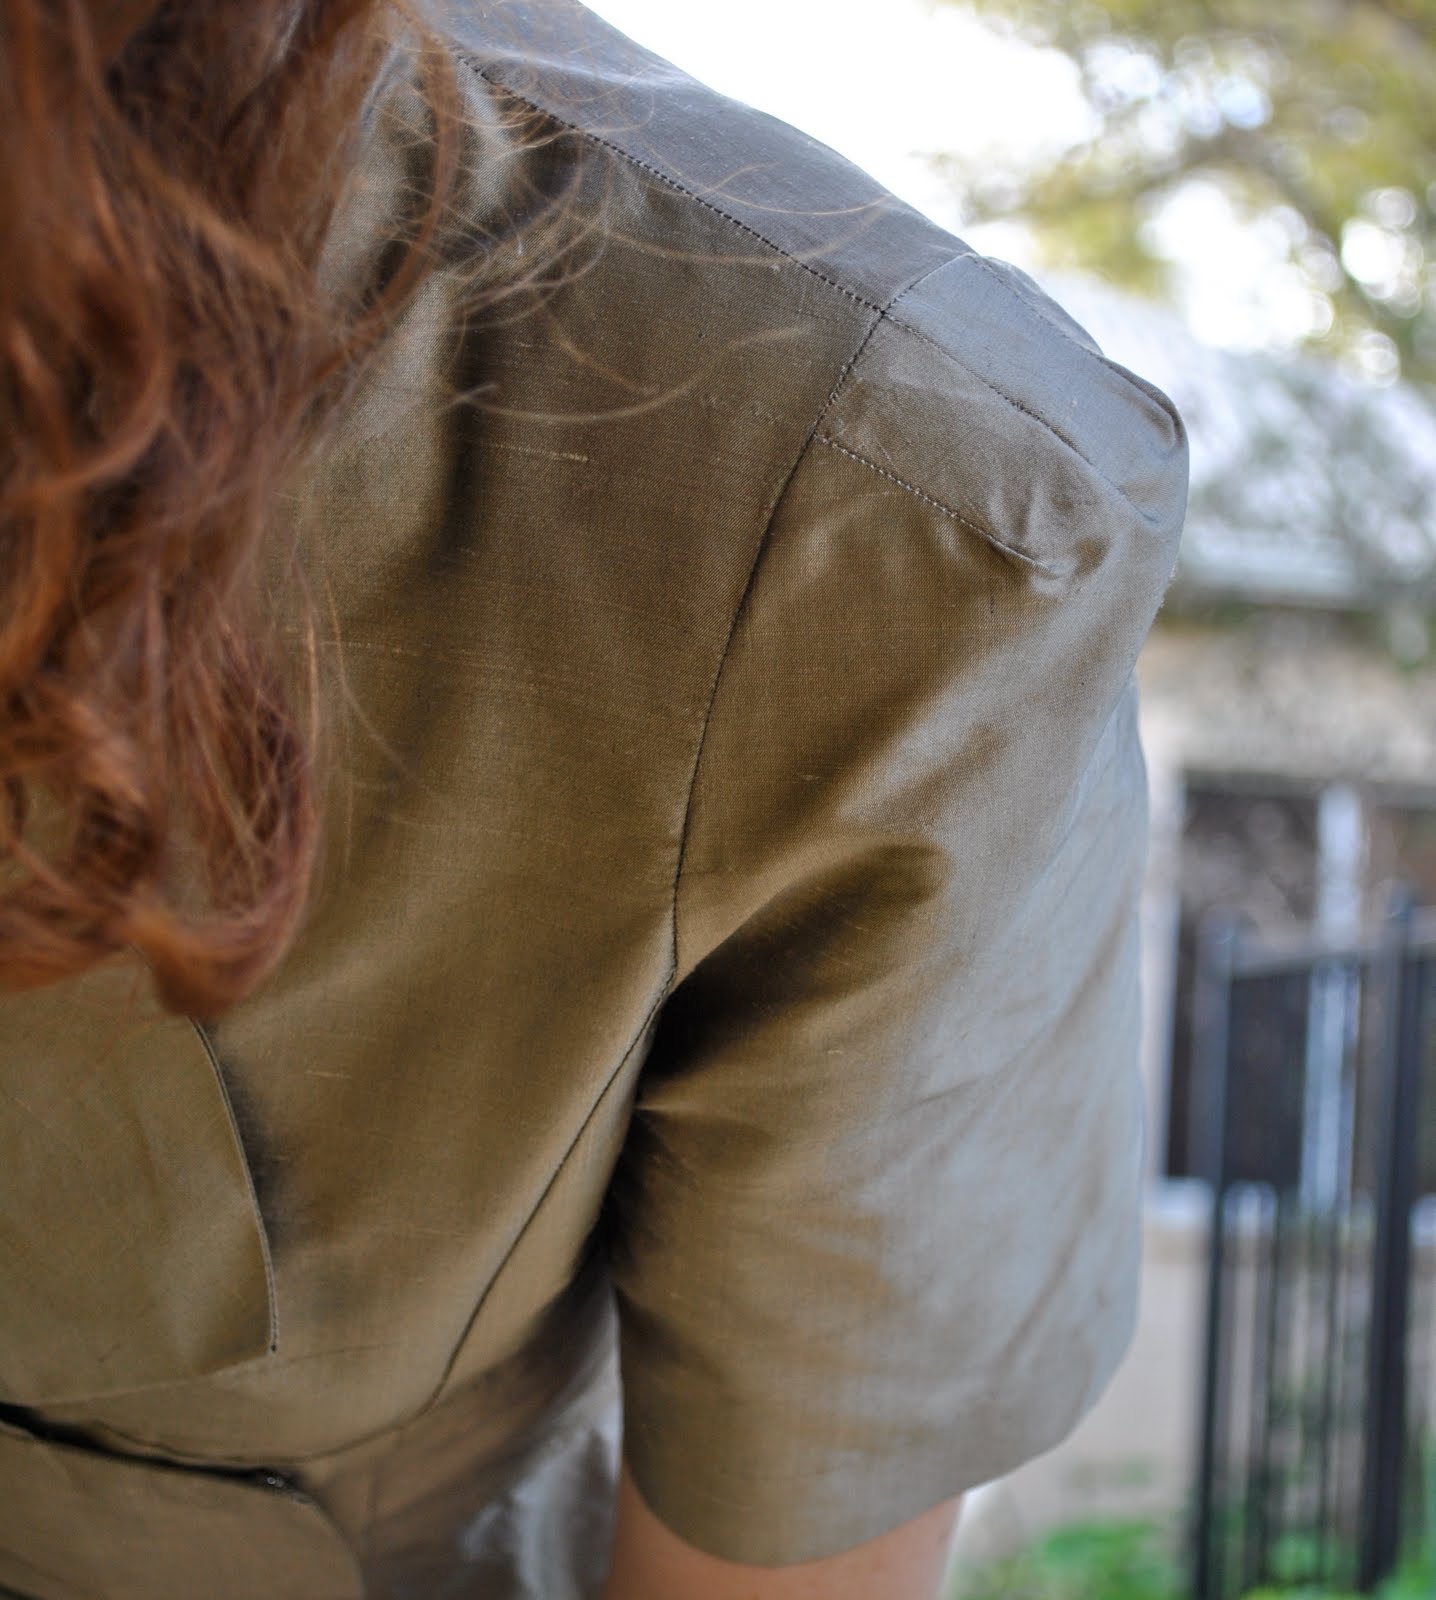
I love the design, and how it looks.  Totally love those sharp out-there shoulders.  It has pockets!  How many evening dresses have pockets? precious few and there should be more…
The shape is a little boxy for my tastes and not as fitted as I would have liked, so I made a few fitting alterations to get a bit more shape into it.  I  also didn’t like how the entire dress was to be interfaced.  Iron on interfacing has it’s rightful place, but for an entire dress?  I don’t think so…
Fabric used:
Silk taffeta, or silk dupion
Pattern alterations or any design changes you made:
The instruction to apply fusible interfacing to every piece gave me pause.  Eventually, because I was using very stiff fabric which has a lot of its own body already, I decided to just interface the facings, as traditionally.  I also interfaced the sleeve cap pleats once sewn in place, as these need to be quite stiff to look good.
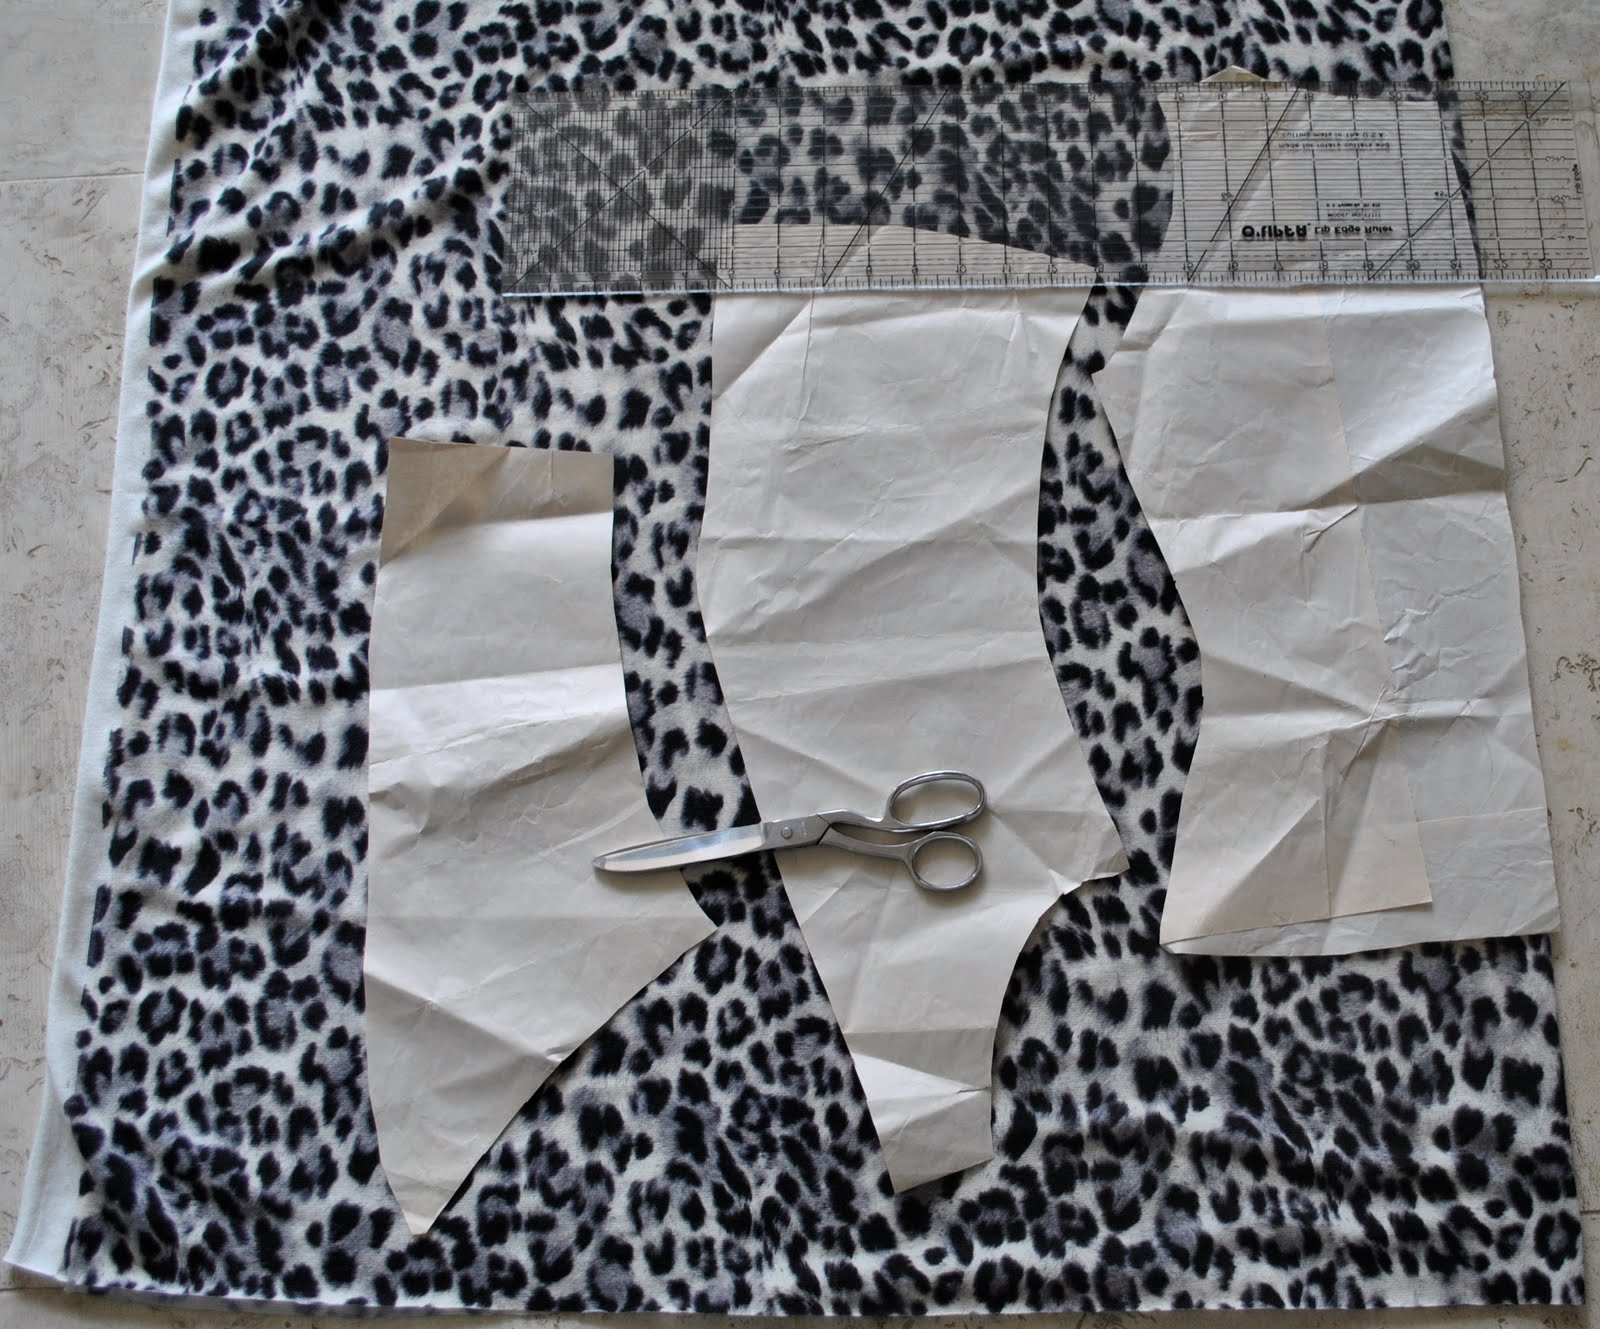
I added 7.5cm to all skirt and skirt facing pieces, as I thought the dress looked very short on the pattern photograph.
Step 28-31, sewed the midriff facing and midriff to the bodice in one clean seam, rather than in the piecemeal method outlined in the instructions.
I have a narrow torso, and removed about 3cm width here overall,  graduated around each of the midriff sections. When it came to sewing on the buttons and hook and eye closures it was still a little loose about the midriff and the skirt gaped a little more than was comfortable for me, so I also overlapped the front pieces a little more (another 3cm) than indicated in the instructions.  Overlapping the fronts a bit more gave a better fit for me and made me feel better covered up.
Would you sew it again?  Would you recommend it to others?
I might sew it again.  I wouldn’t mind a black version now!  I would recommend this pattern to advanced seamstresses who like garments with an edgy look, as well as a sewing challenge.
Conclusion:
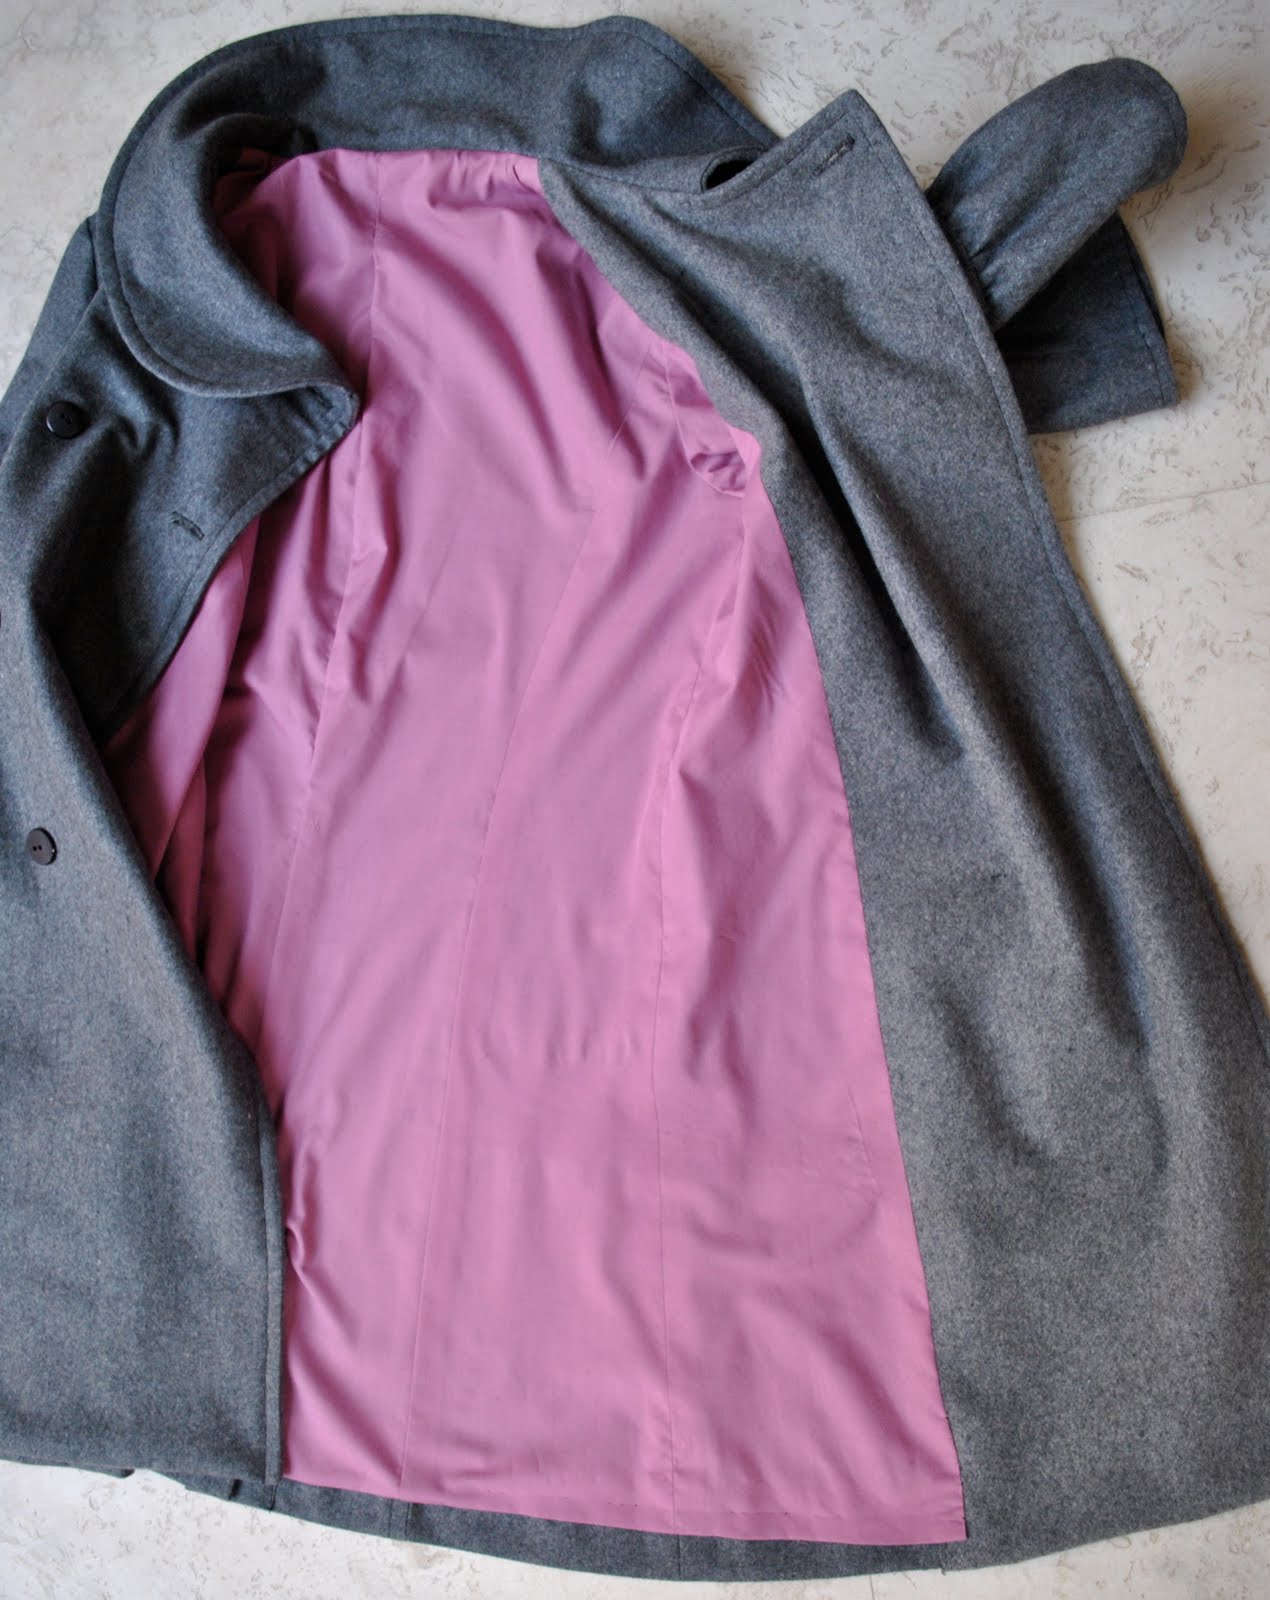
Well, I adore my dress!  Although I reckon this could be categorised as much a coat as a dress.  The construction is just like a lined coat.  And the closure, very coat-like too.  But I feel very modern and sharp in this and am excited about wearing it to special occasions!

Later edit: You WILL need a petticoat or slip with this dress as it gapes considerably when you are seated.  I made one using Burda 8071 in silk satin of the same colour, sitting 2cm shorter than the dress.  It works beautifully.  To see the slip, go here.

pinterestmail

TGl Friday

Today was meeting friends for morning tea, and another friend for a walk later (and afternoon tea afterwards, no doubt!)  It’s a tough life.  My office work can wait until tonight, methinks… and it would be a crying shame to waste a beautiful day like today.  Of course if I said that every day I would get absolutely no work done whatsoever…! but meh.
This is the “Weird Bodice” dress from last winter, that I love for its flattering olive shade, flattering for me, that is; and cute flippy skirt, but has a strange bodice design that needs covering up.  I went for some cheerful happy colours to go on over the top.  I’ve always had a thing about red, and have always worn a lot of it.  I think it suits my hair colour.  This winter it seems to have dropped off the fashion radar, apart from the currently all-the-rage LRD (little red dress for evening wear).  The shops are filled with drab putty neutral shades, and the ubiquitous BLACK.  Seriously, I was out with a friend a week or so ago, and we passed a boutique where everything on the racks was black, and I mean everything.  It was a marvellous thing, well, it certain had us marvelling, but not in a good way.  Are Perthies so boring in our colour choices, that an all-black shop would stay happily in business?  (bearing in mind it was in a high-ish rent area too)  Bizarre…

Details:
Dress; Burda 7897, olive bamboo/cotton mix
Cardigan; Metalicus
Scarf; Frangi, from Tie-Rack
Tights; Kolotex
Shoes; Django and Juliette, from Zomp shoes
Bag; Gucci

pinterestmail

Grey wool coat for Spring

I made myself a coat for spring, using McCalls 5525, view B and grey wool fabric, bought back in March on a whim.  So, it took some cutting magic to get this coat out of the small amount of wool I had bought because there really wasn’t enough for this pattern!  When I realised this and went back to the store to get some more it had all been sold and I needed to buy a small amount of a different grey wool fabric which I used for the under collar and front facings, you can probably see on the close-up pictures the different fabric on the under/in-side of the coat but I think it’s not so different as to stand out in an ugly way.  Actually I think it worked out to be a blessing in disguise, because the second fabric is a much stiffer and thicker felted wool than the outer woven wool fabric, so I decided there was no need to interface, and I think it was the right decision not to do so.  The weight of the two wool layers together feels quite thick and stiff enough…
I lined it with a purply-pink cotton poplin, which makes the weight of the coat perfect for Perth’s sometimes chilly but sometimes warm spring weather.  I’m looking forward to wearing it more!

Details:
Coat; McCalls 5525 view B, grey wool flannel
Skirt; my own design, charcoal stretch jersey knit
Shoes; Misano, from Labels

Pattern description
Semi-fitted, lined, double-breasted jacket and coat have collar, lengths and sleeve variations, princess seams and side front pockets.  Here I made view B with back vent, sleeves with button bands, topstitch trim and button closure
Pattern sizing
8-16, I made size 10
Did it look like the photo/drawing on the pattern envelope once you had finished sewing it?
yes
Were the instructions easy to follow?
very easy
What did you particularly like or dislike about this pattern?
I loved everything about this pattern!  I like that it is fully lined, not half lined as some coat patterns are; the inset pockets are in a good position on the front, and the one-piece sleeves are an easy feature
Fabric used:
Woven grey wool for the outer, purple/pink cotton poplin for the lining.  Thicker felted wool fabric for the under collar and facings (because I didn’t have enough of the outer fabric)
Pattern alterations or any design changes you made:
I made the pockets slightly larger as I thought the ones in the pattern looked too small for comfort
Would you sew it again?  Would you recommend it to others?
I highly recommend this pattern, the variations mean you can achieve so many looks from this one pattern and I do plan to try some of the others
Conclusion:
This is such a stylish and versatile coat pattern.  The pattern is well designed; it went together very easily, all the pieces fitting together as they should with no difficulty.  The one piece sleeves make this a breeze to sew.  I made view B, and I particularly love the flattering asymmetrical collar, very “designer” and slightly retro.  I think this view would work beautifully in heavy satin for an evening coat.  I also particularly like the button bands on the sleeves of this view.  I hand-tacked these bands to the sleeve seams to lessen the risk of them “rotating” around the sleeve during wear.

pinterestmail

Oversized knitwear

The latest Vogue magazine has been singing the virtues of oversized knitwear for this winter.  This isn’t a look I go for very often, but I thought for once in a while, why not?  Granted the fashionable colours for this year are more of your putty greys, beiges, caramels, charcoal and black.  Sometimes it is nice though to splash out with a taste of cheery warm scarlet to brighten up the day.
For today I dug out this jumper that I had made for my husband, very early in our marriage.  Definitely pre kiddies, anyhow…  I don’t think he’s worn it for at least ten years.  I mentioned in a previous post how I occasionally borrowed my husband’s clothes, and Caroline commented how her husband’s clothes would be HUGE on her, well, lookie here, people, at what my husband’s clothes actually look like on me, too!  I think “oversize” and “loose” are being achieved here satisfactorily, no?  I think an oversize jumper can look very cute and sexy, when it is styled right.  It’s best worn with close-fitting, if not tight, pants or a skirt; so the big loose top part of your ensemble is balanced out by a sleeker, streamlined lower part.  We have no desire to go out looking at all “dress-up box”, now, do we?
This jumper is made using Patons 8 ply, an Australian pure merino wool that sadly seems to have disappeared from the knitting aisles… it came in a fabulous range of pure self colours which lent itself beautifully to fair isle designs as well as one colour affairs such as this one.
I followed a pattern which has long gone so I can’t share with you here, sorry.  It was my first go at cables, and once these were de-mystified for me in the making of this jumper I’ve not looked back.  Now I’m just like, cables? meh… no biggie.

Details:
Jumper; made by me, using Patons 8 ply to a Patons pattern
Jeans; made by me, Burda 7863, khaki stretch gabardine
Top (underneath); Metalicus

pinterestmail
Switch to mobile version
↓