Monthly Archives: May 2011

You are browsing the site archives by month.

A little bit of Lagerfeld

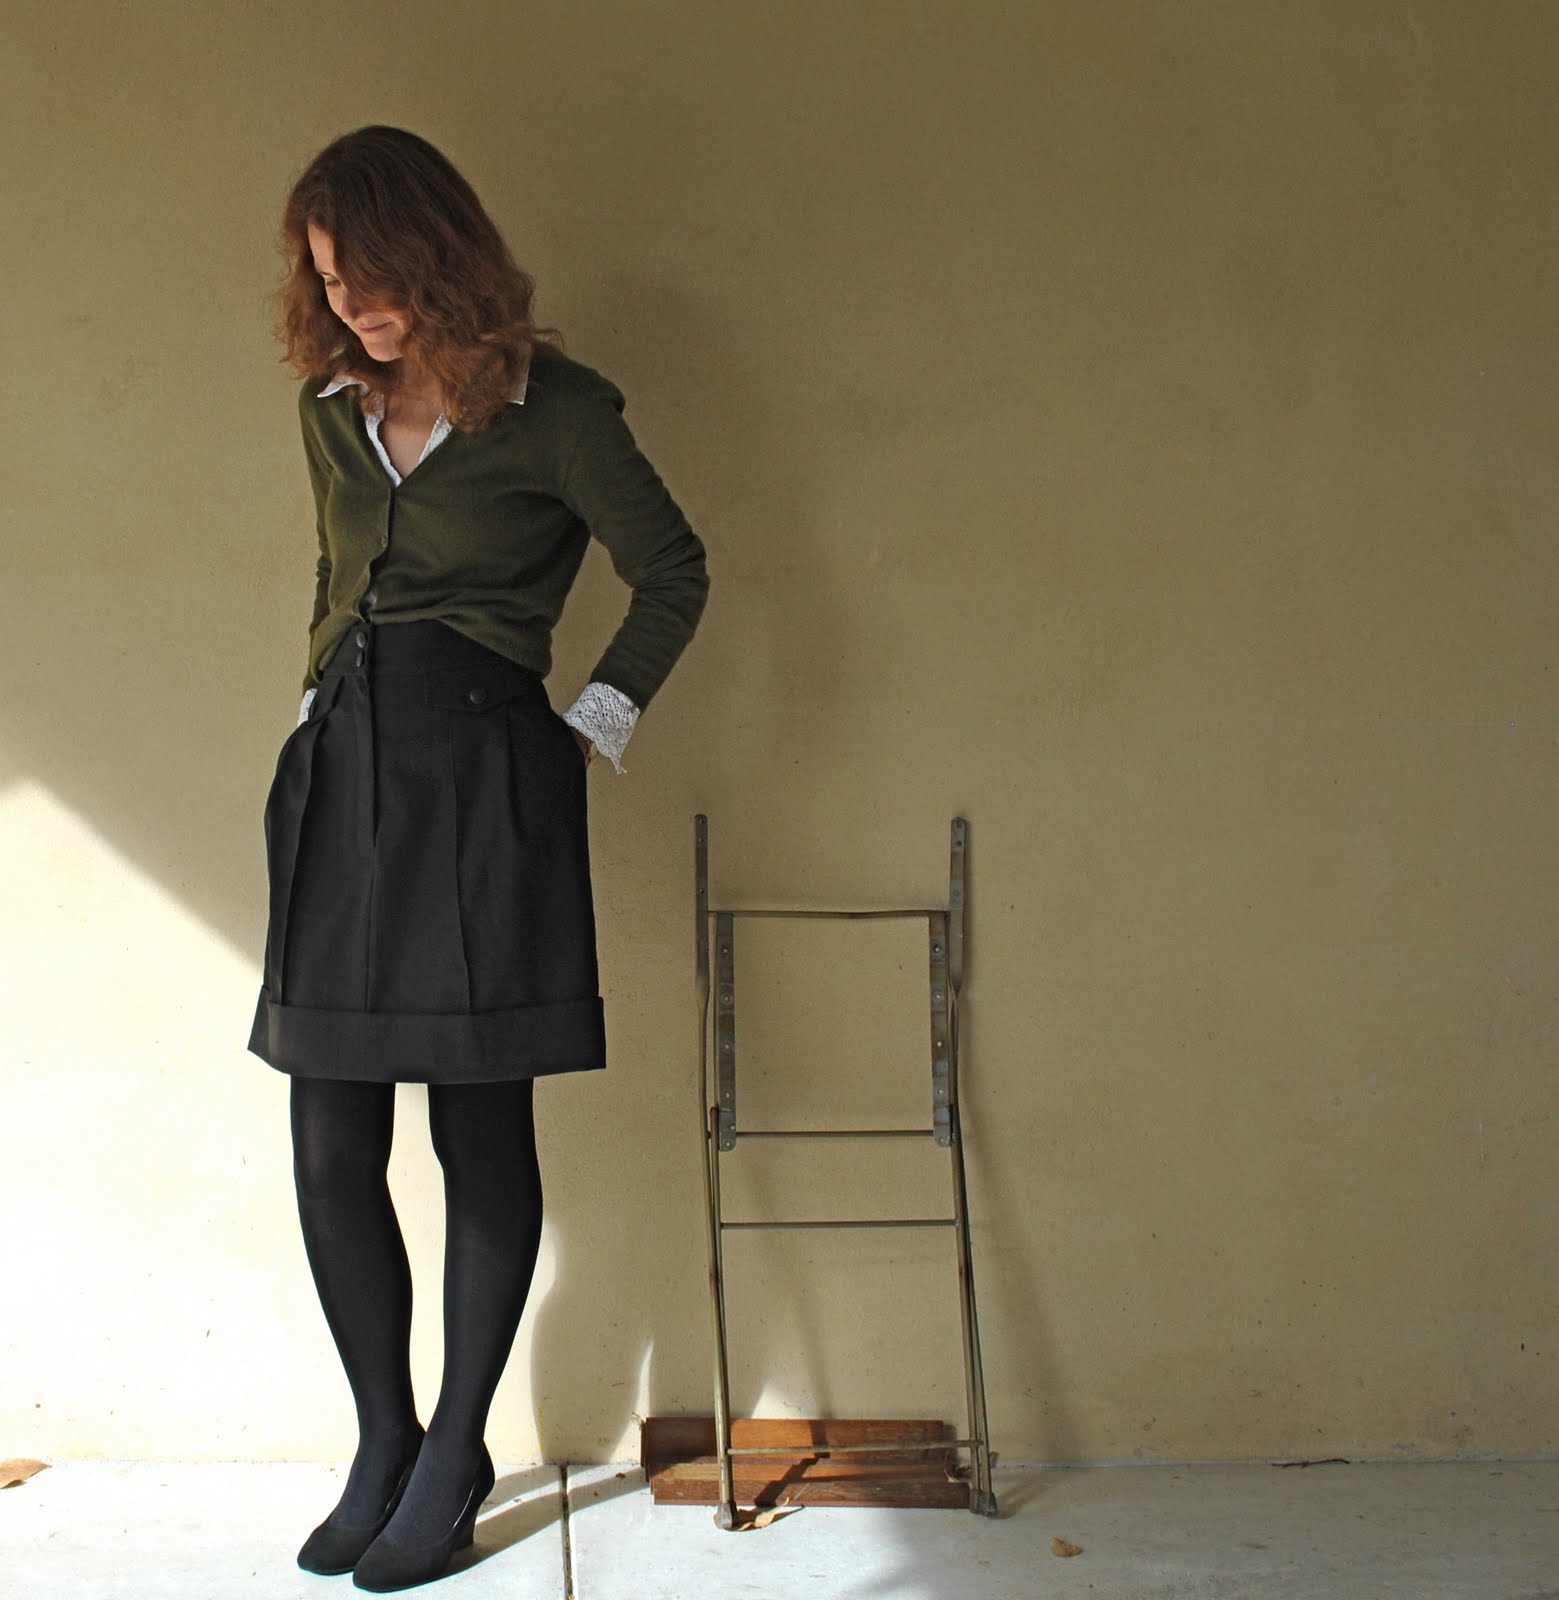
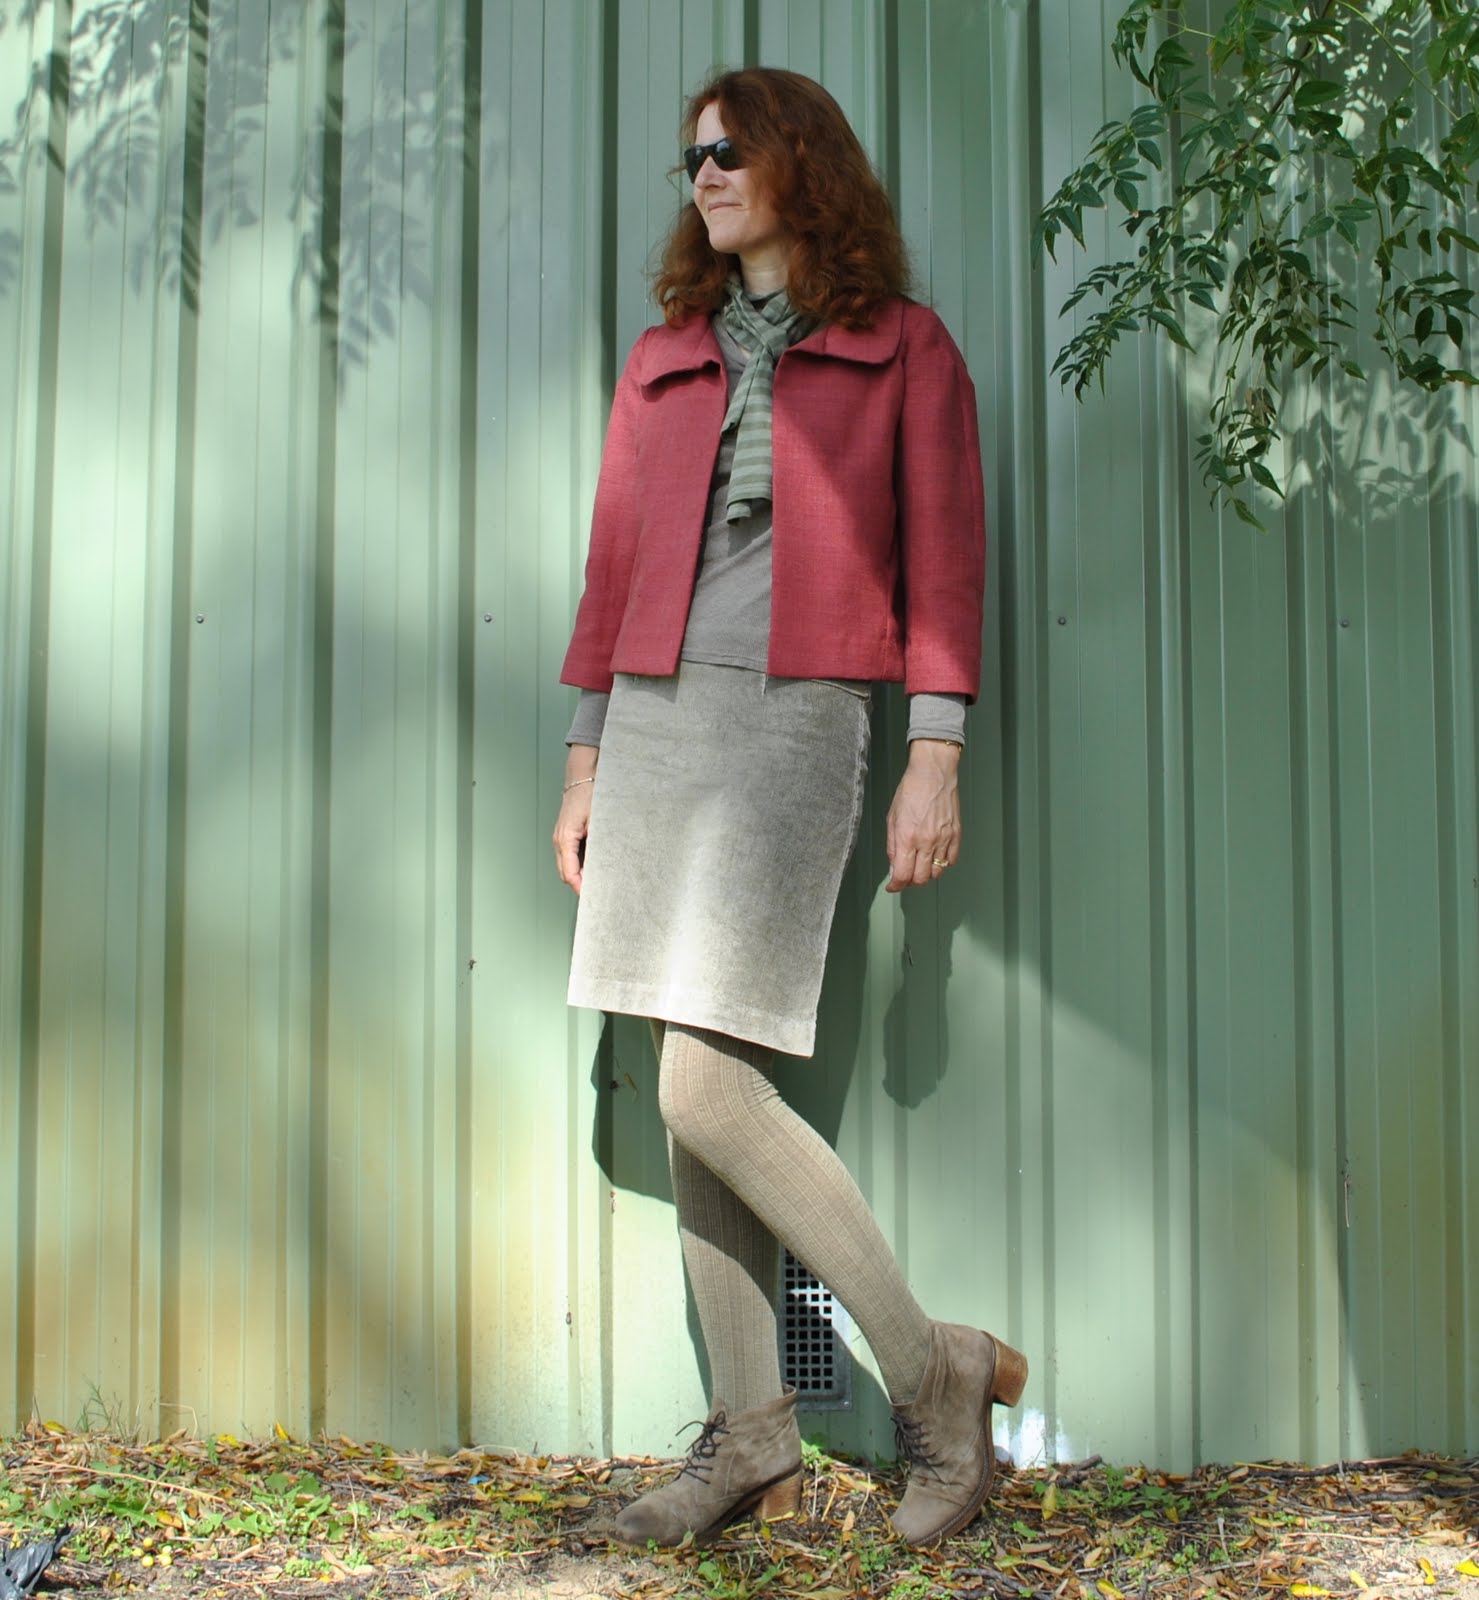
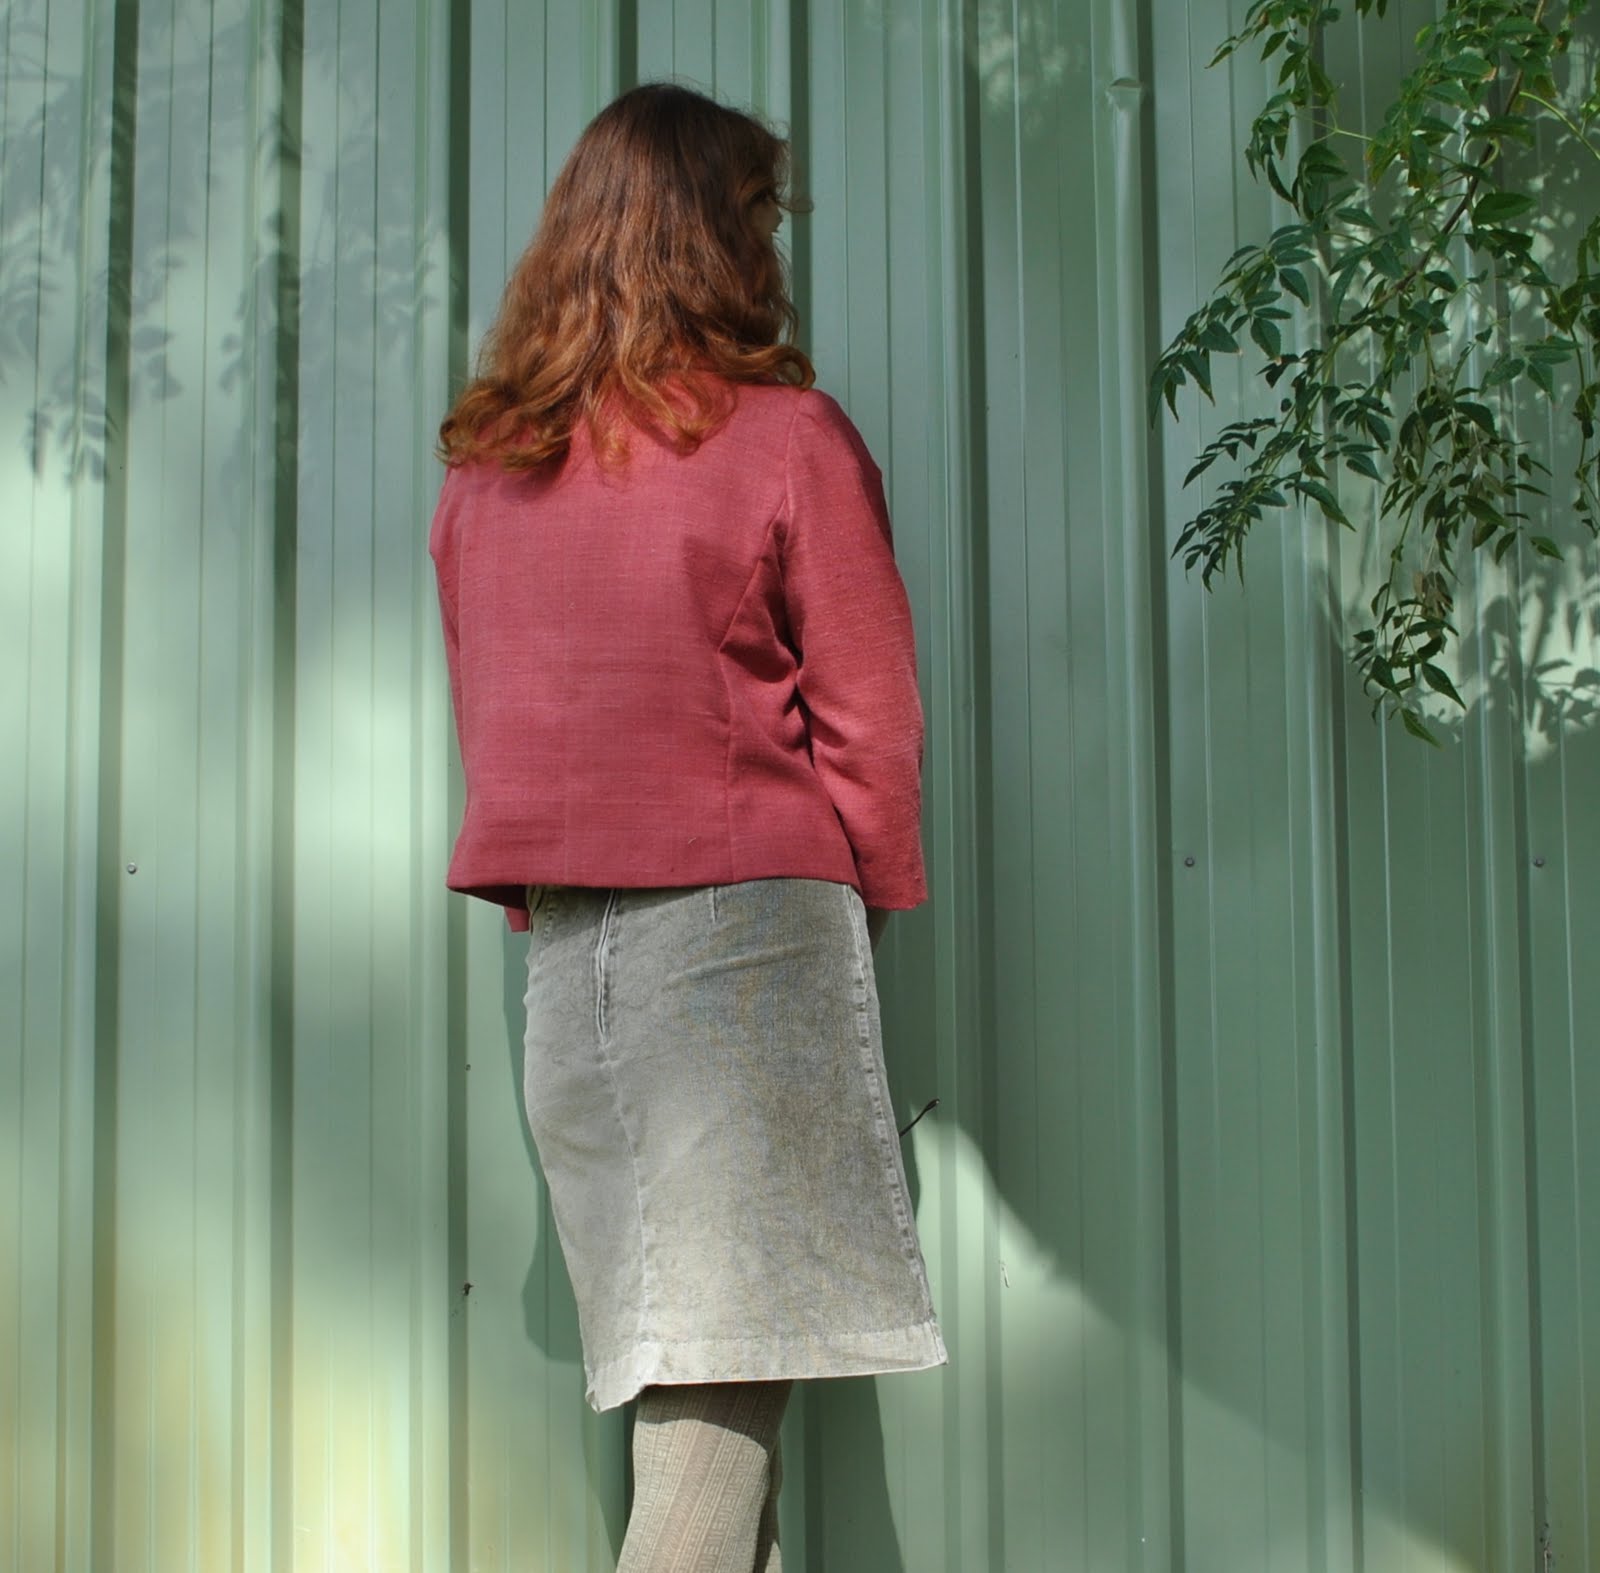
Filling another (so-called) must-have void in my wardrobe; the little black skirt.  I do have a charcoal skirt already, that is a much worn little thing, but the classic black was missing; well, no more.  I really made this about a month ago, and am only now getting around to wearing it and photographing it.  With Me-Made June floating around soon I thought I’d better get onto keeping up with documenting my actual sewing in these posts, I still have a few newies that haven’t appeared here yet…
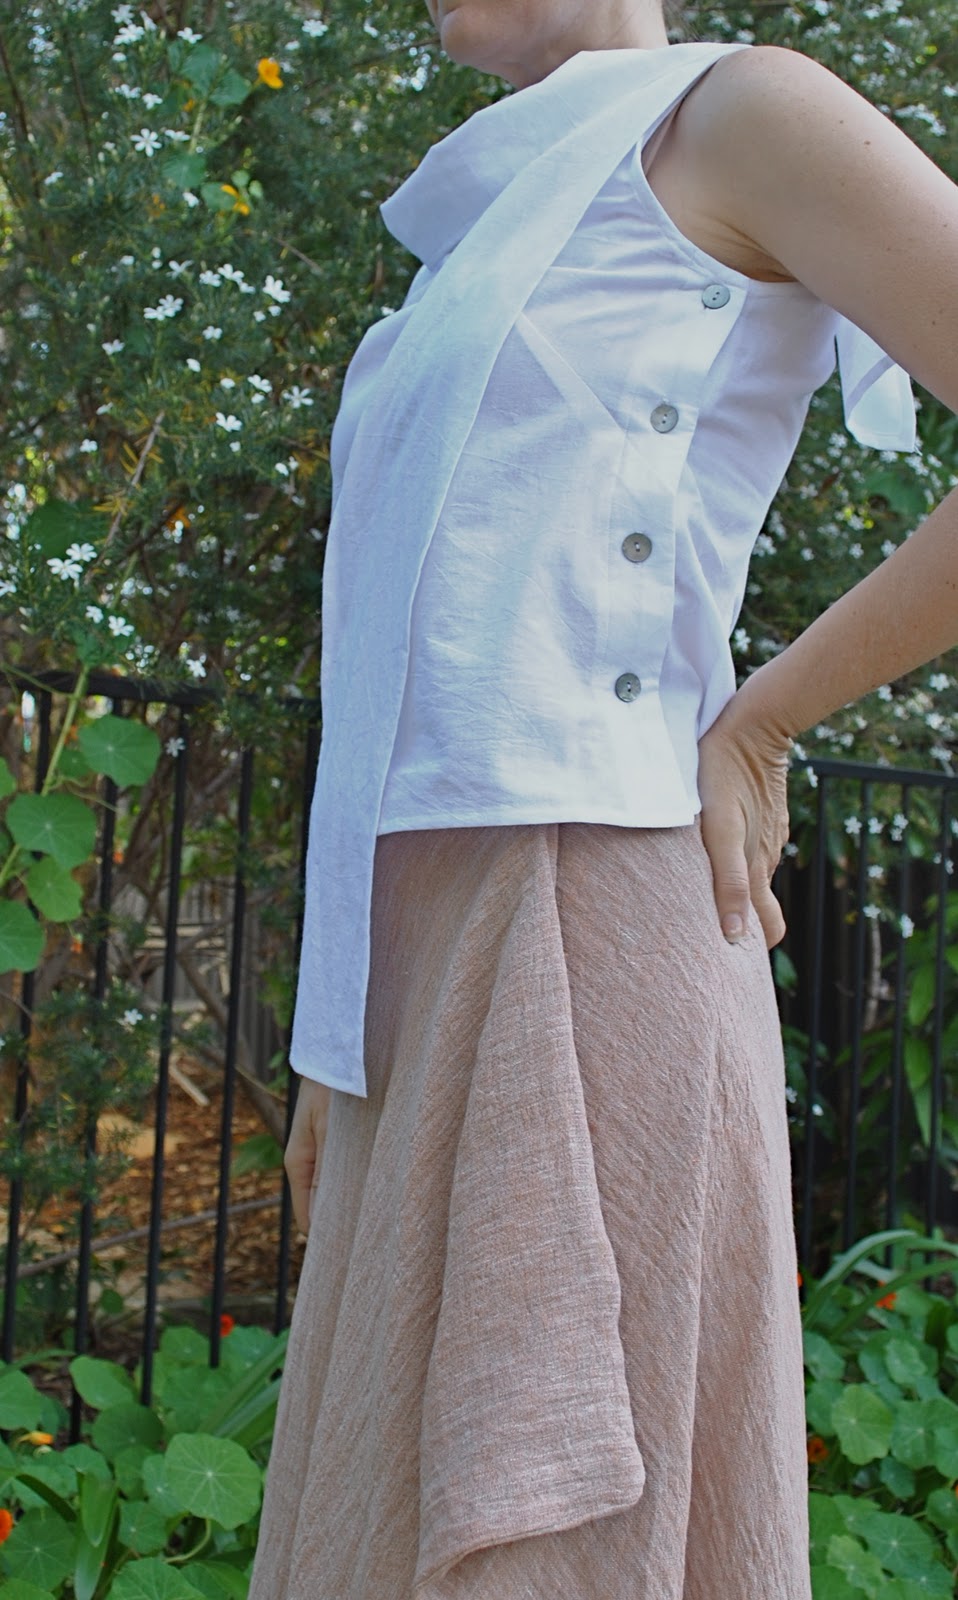
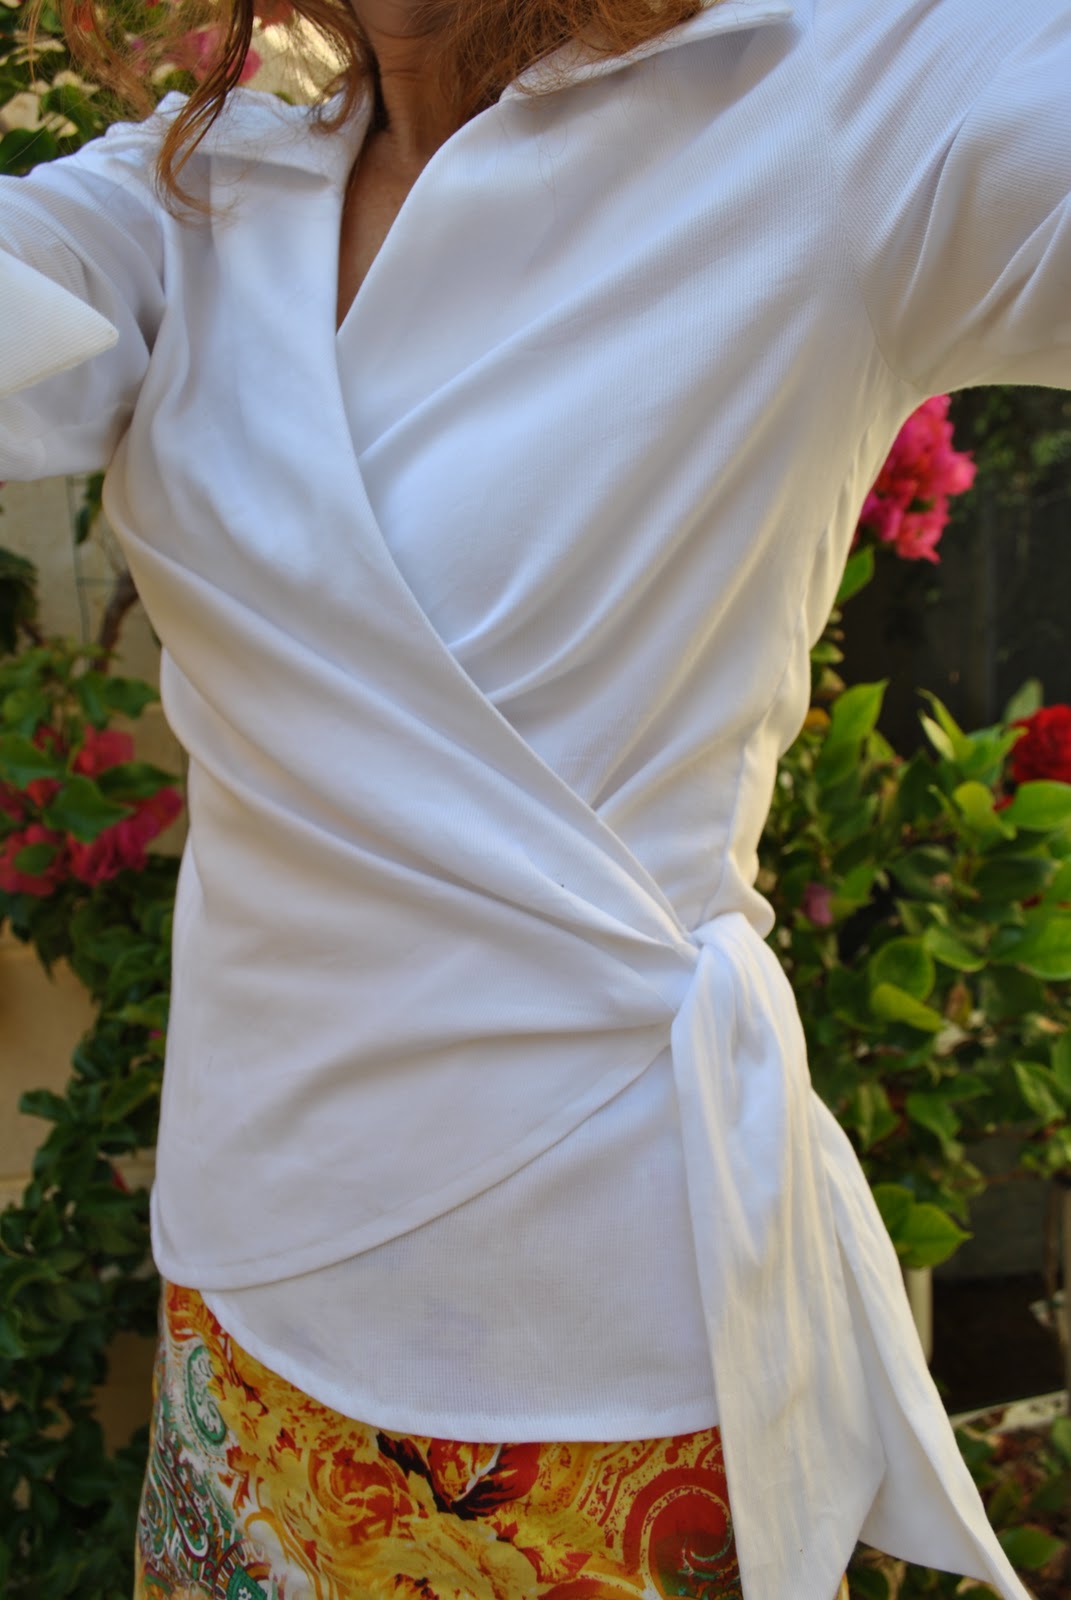
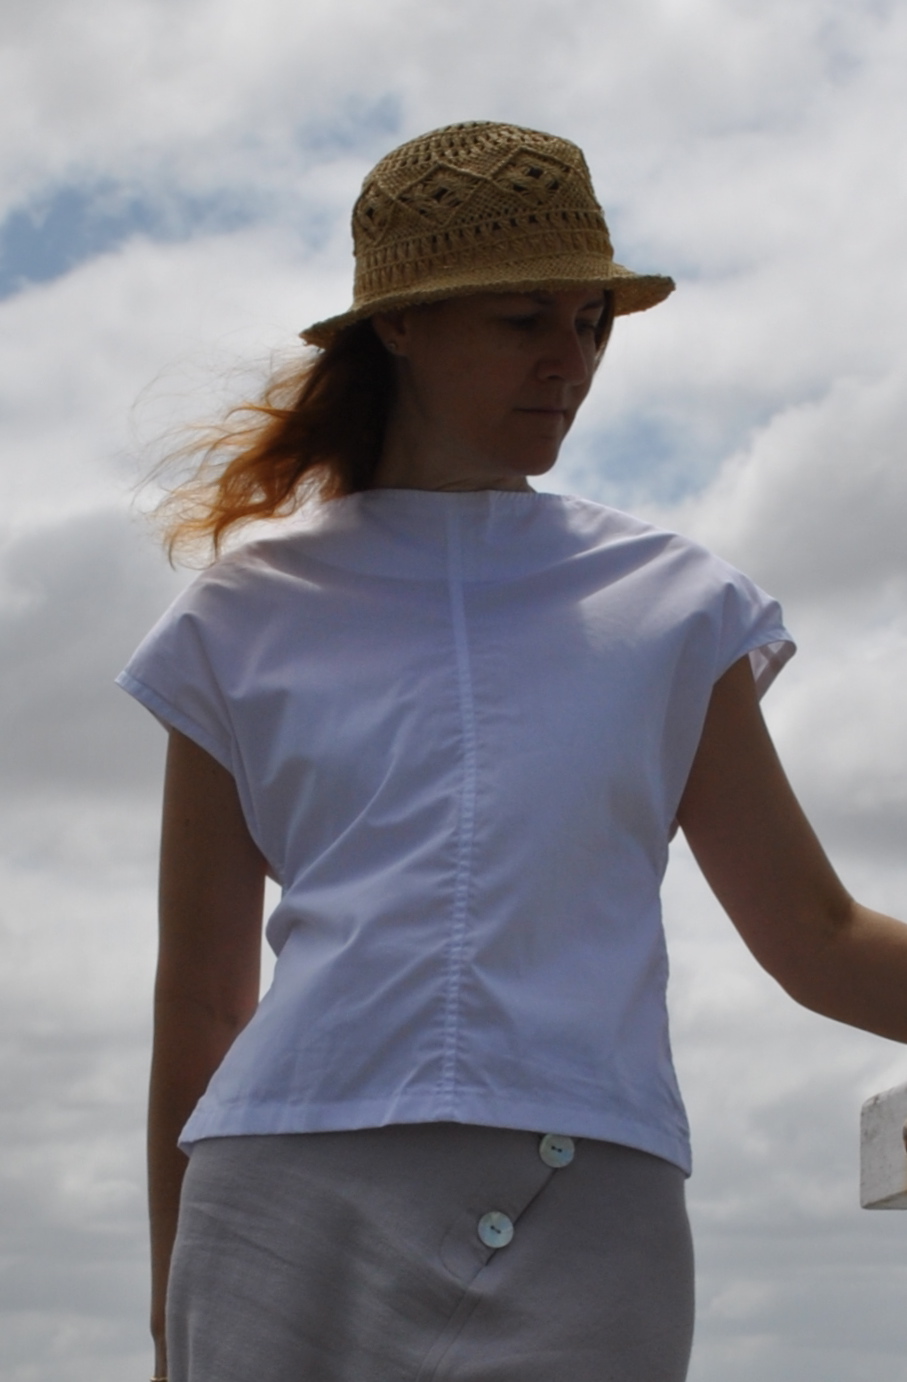
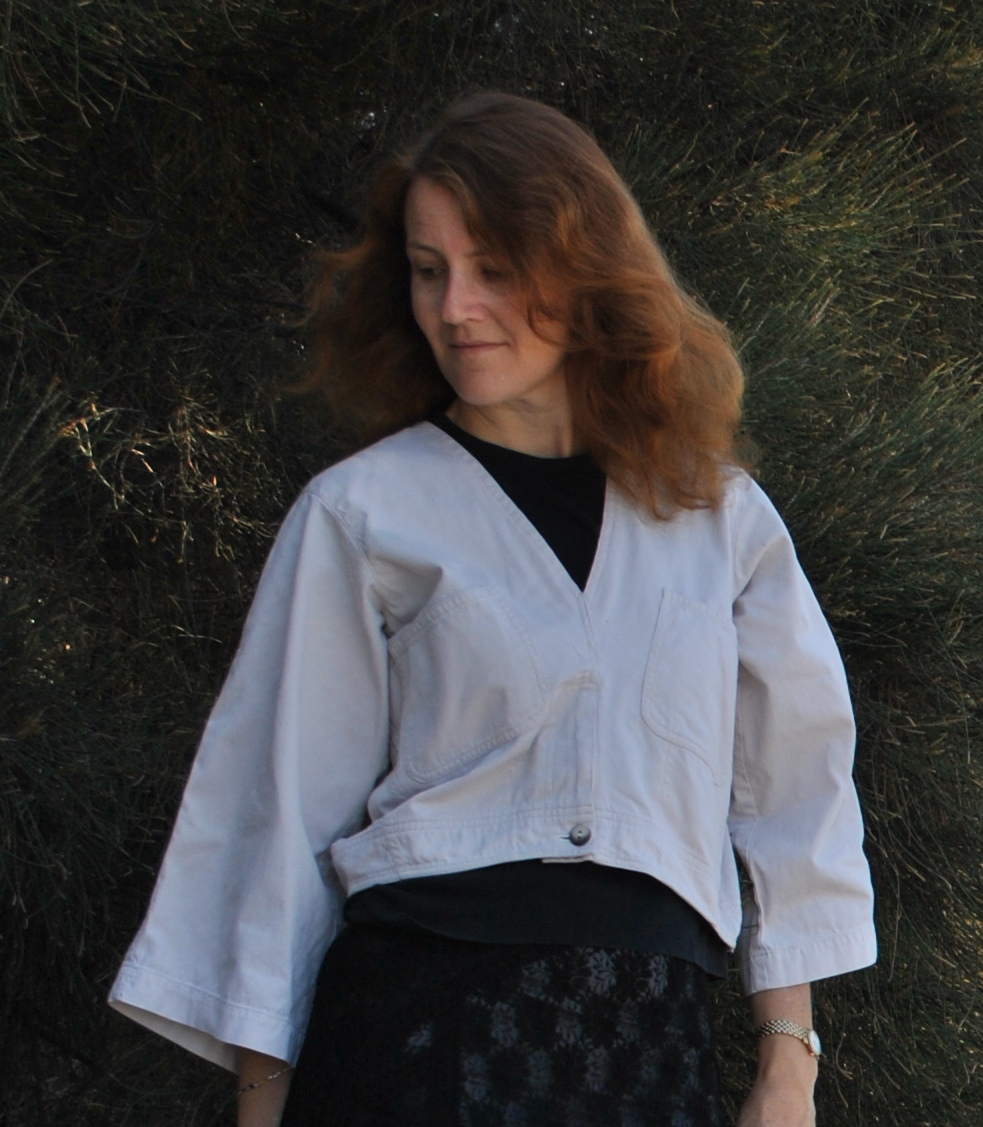
So now I have my classic black skirt I should be set for winter, although as Donna rightly pointed out yesterday I rarely wear the “classic white shirt” much either.  Maybe I’m not classic enough?  Paradoxically I often find my more out-there and distinctive garments such as my bright orange skirt, a lot easier to work into my daily ensembles.  Hmmm, ridiculously still don’t really know what my “style” is; this requires more thought…
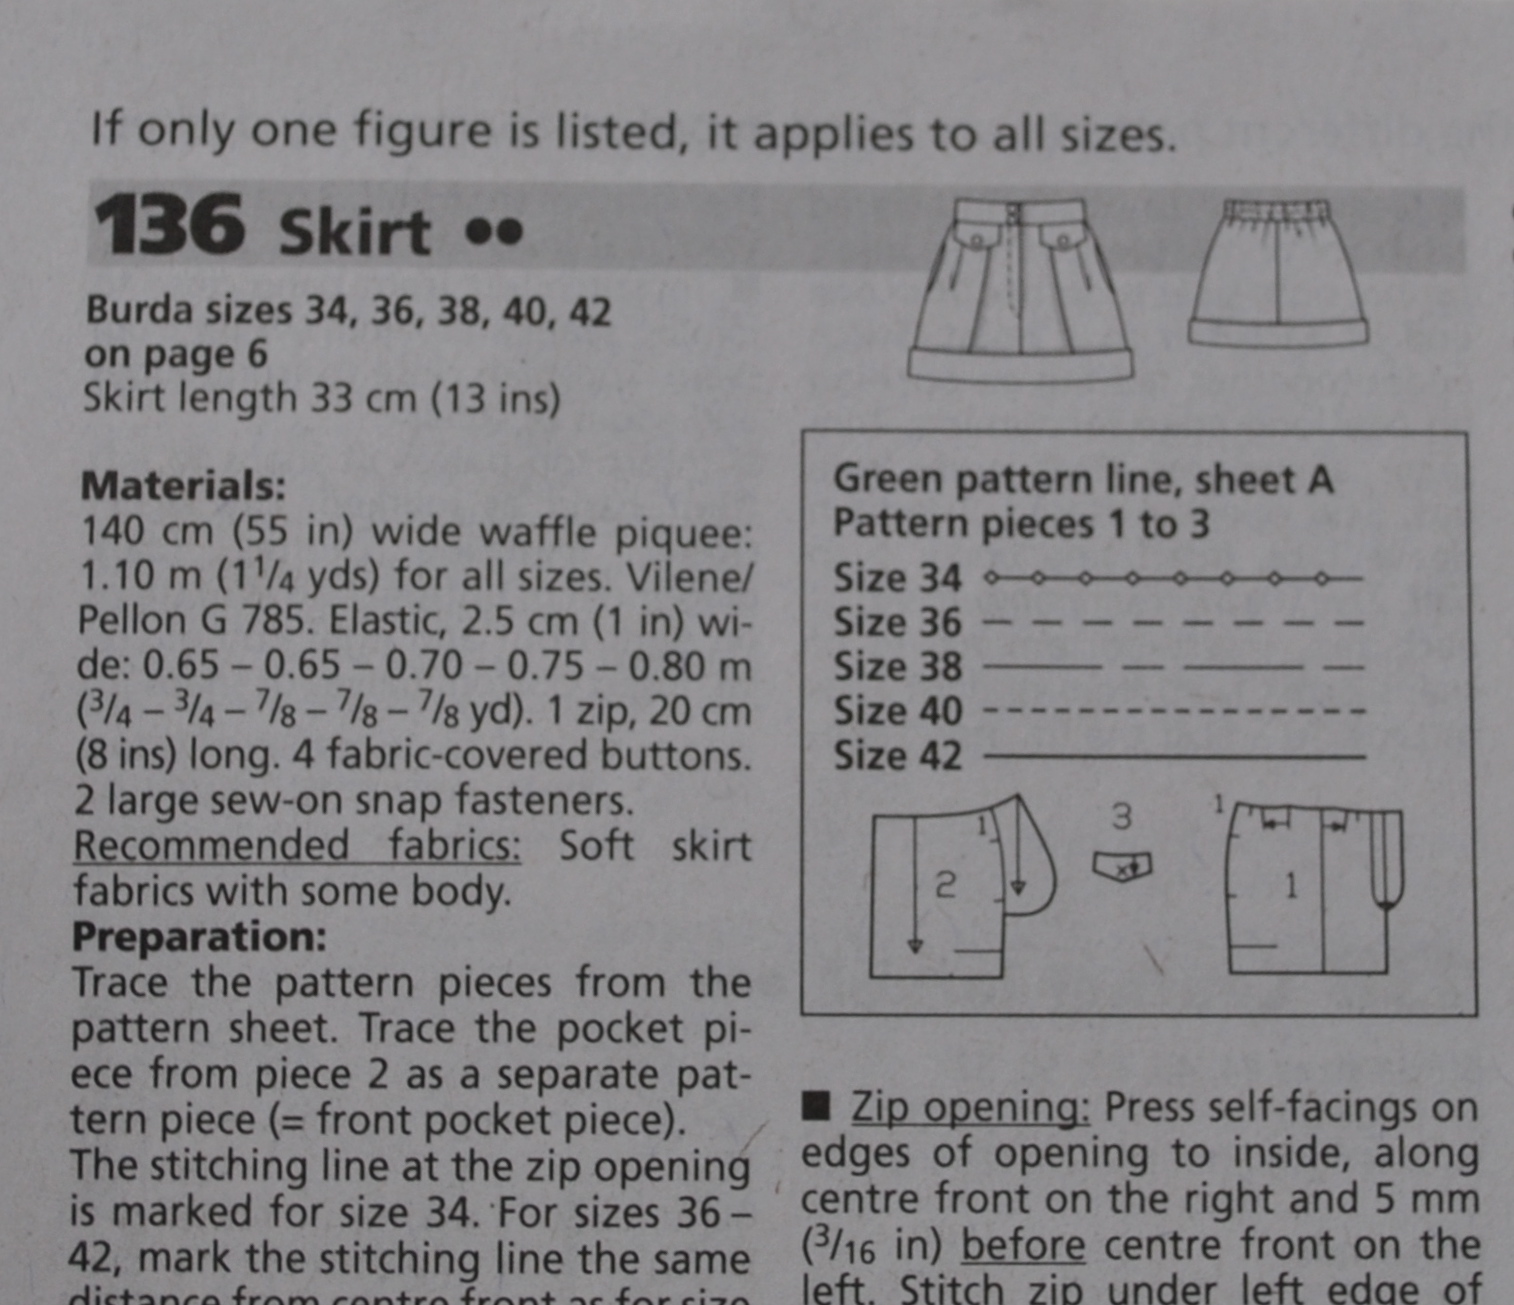
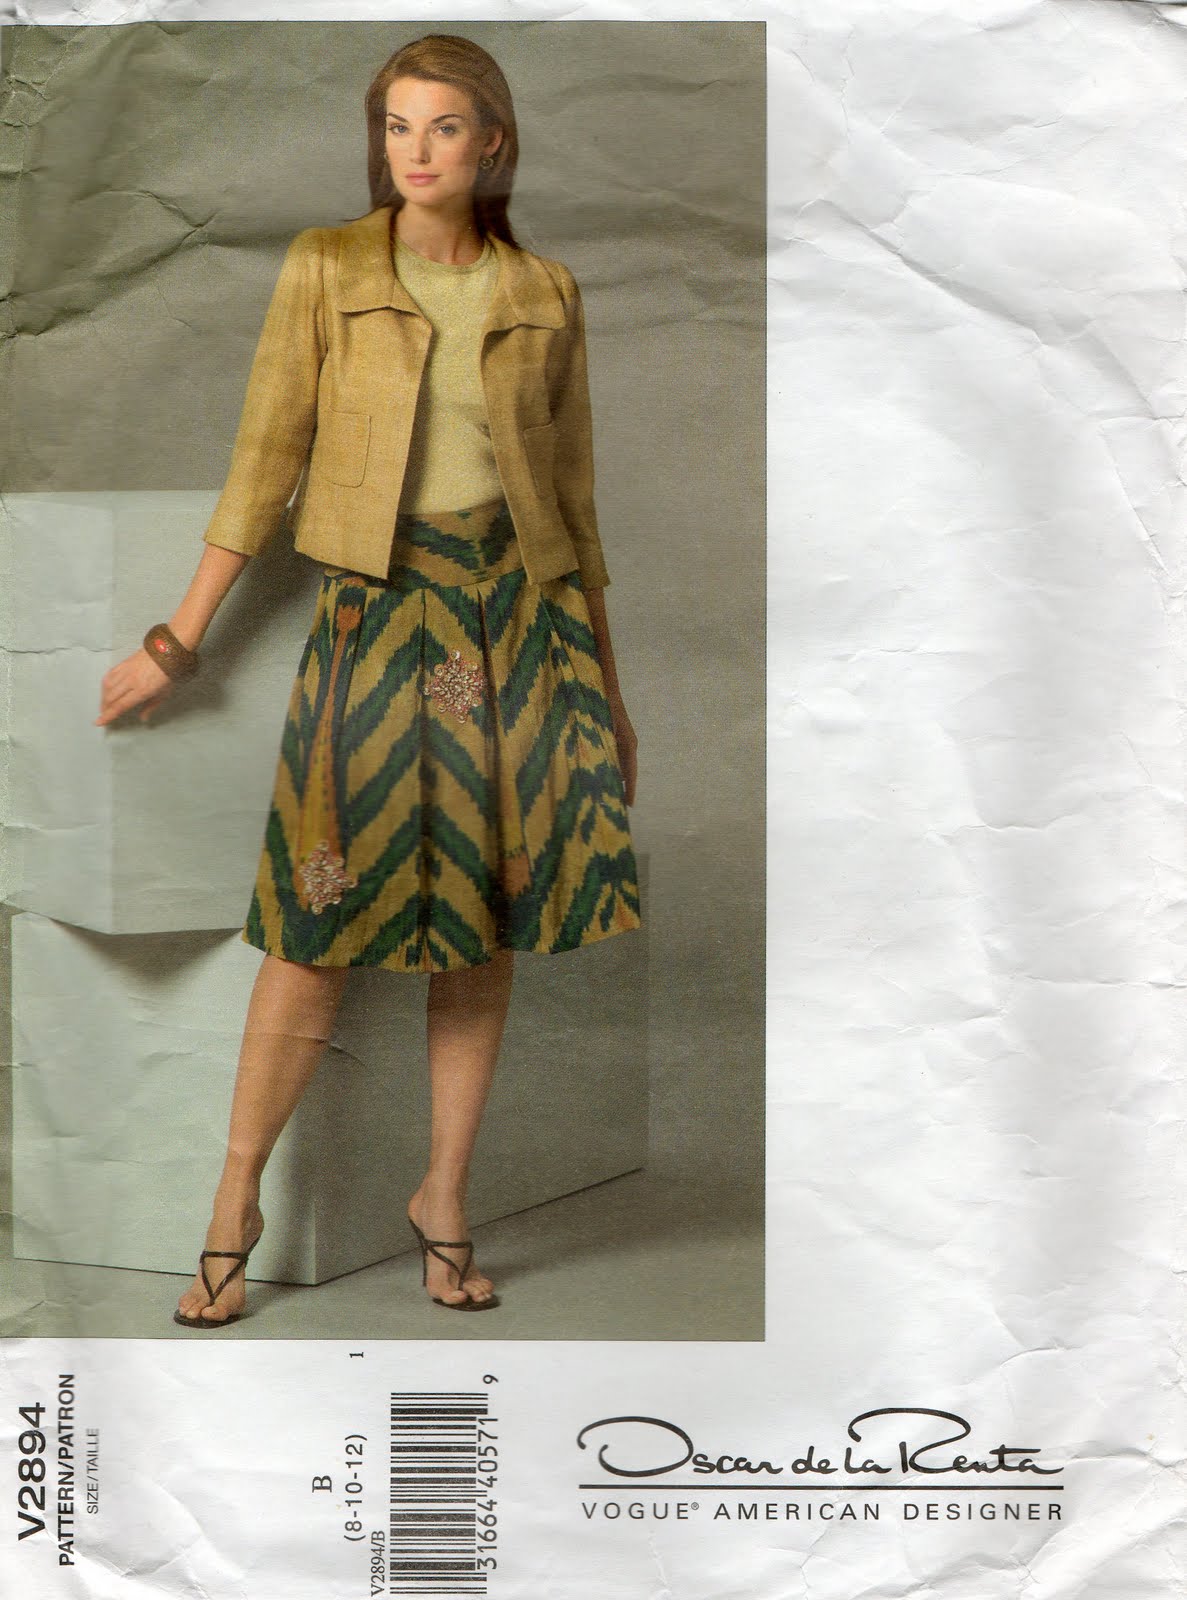
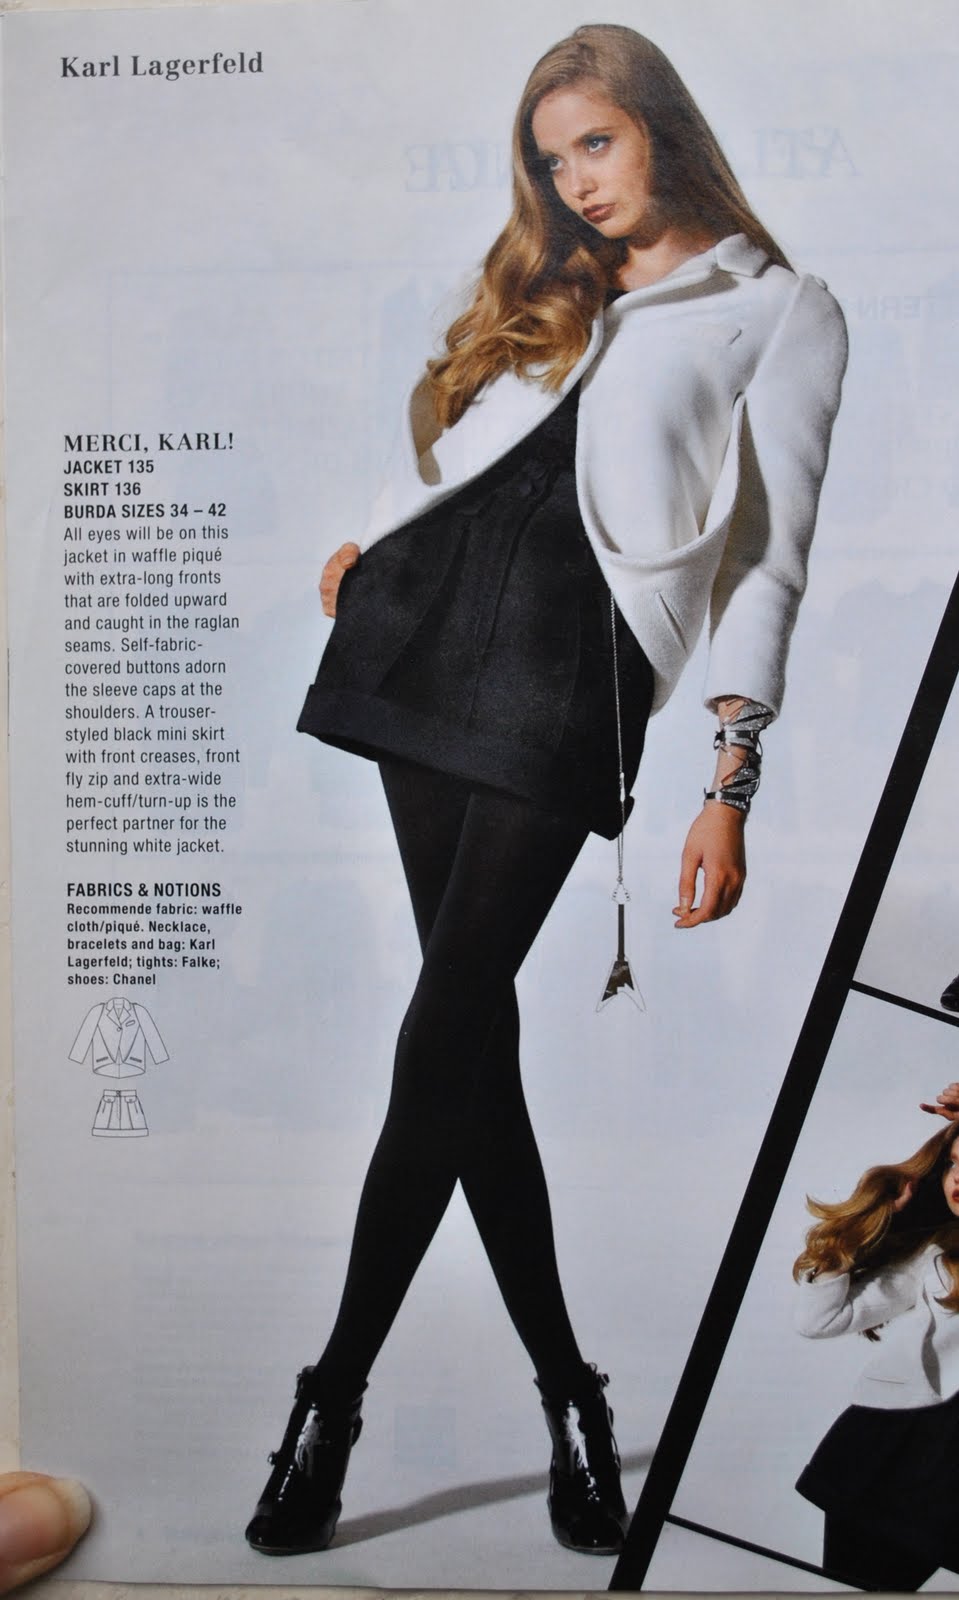
Whastevs, I always intended to have a go at this allegedly Karl Lagerfeld designed skirt from the 10/2010 issue of Burdastyle magazine, the reason I bought this magazine, actually.
I used up another piece of leftovers from my stash, this a piece of black gabardine leftover from a long gone skirt I made back in 2007.  Yah, ’bout time it got used up, huh…?
I feel hugely and disproportionately chuffed when I do reduce the stash, especially when it’s a piece of fabric I’ve had this long.  And, confession time, the stash is still getting added to, all too frequently…  it’s like a one step forward, two steps back kind of thing.  I wonder if I will ever be at a point when I have no fabric, and need to go fabric shopping?  Hard to imagine… (insert literal lol here)
Back to the skirt…
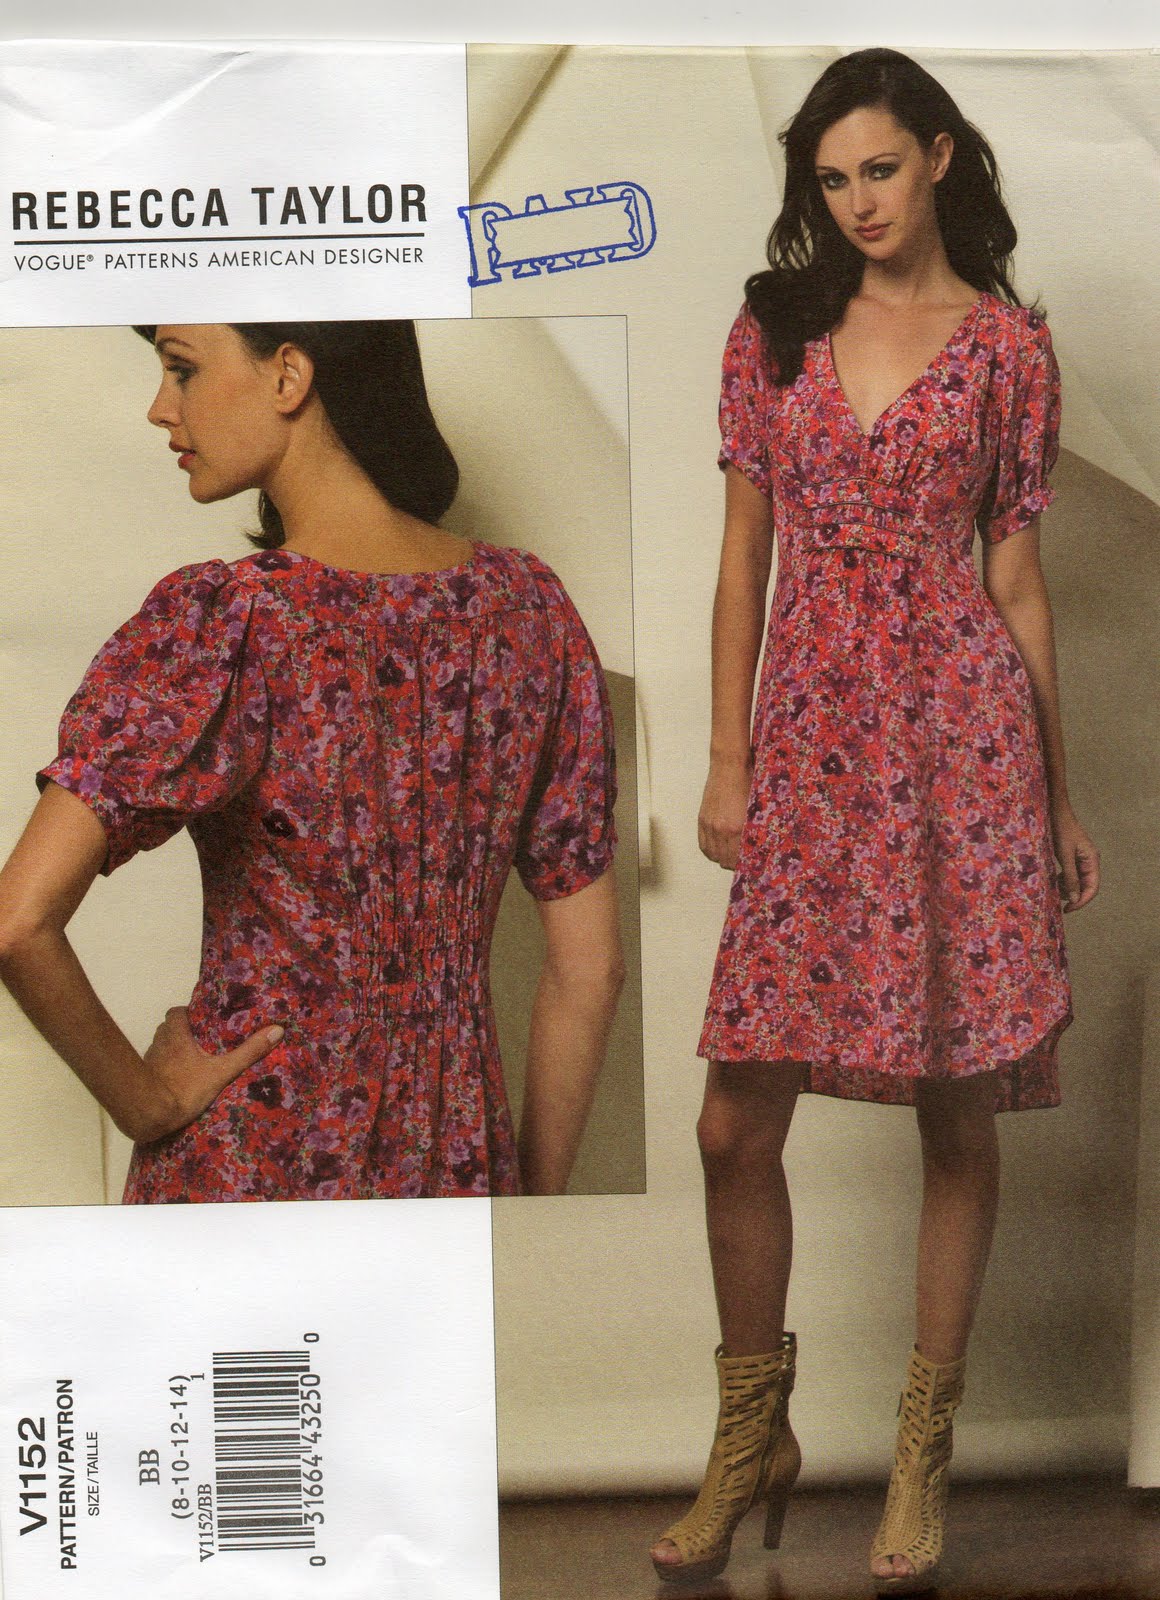
I did incorporate a few modifications, as usual.  The blindingly obvious is that I lengthened it by about 12cm, or as much as my piece of fabric would allow me.  Would you look at the skirt length on that model?? (at right)  Granted, she could be over six foot tall, but still.  Almost more like a belt, really.  My husband has a term to describe skirts like that, but I won’t reproduce it here… family viewing and all that…
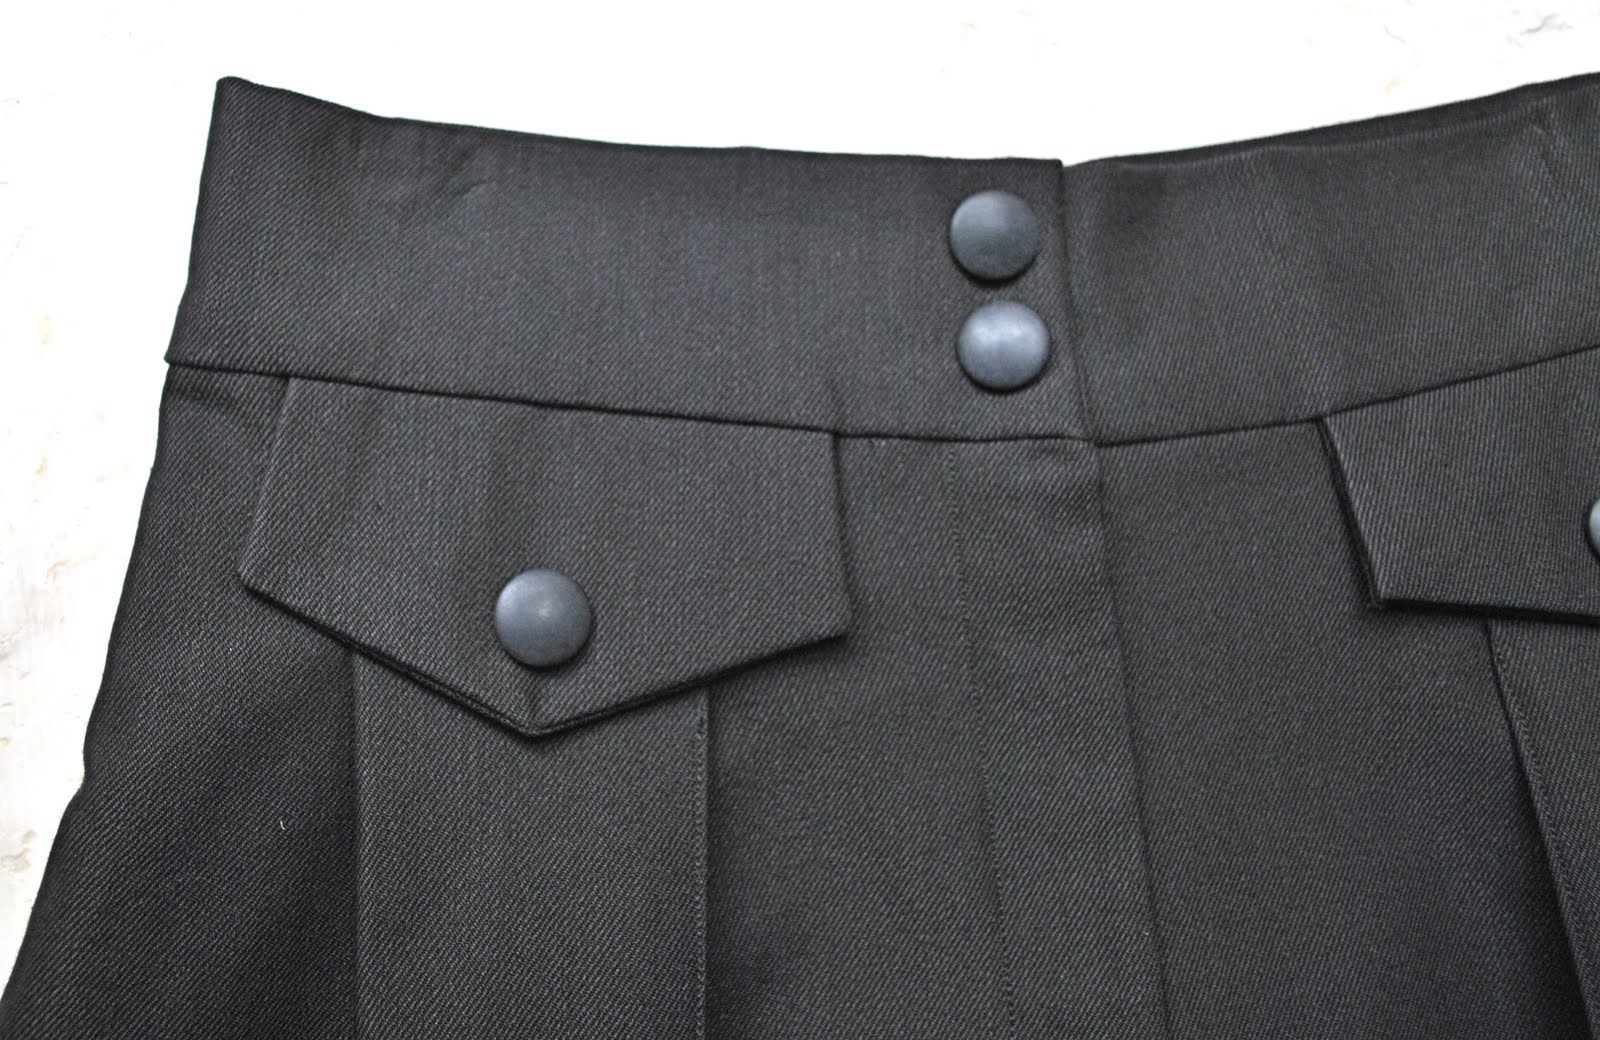
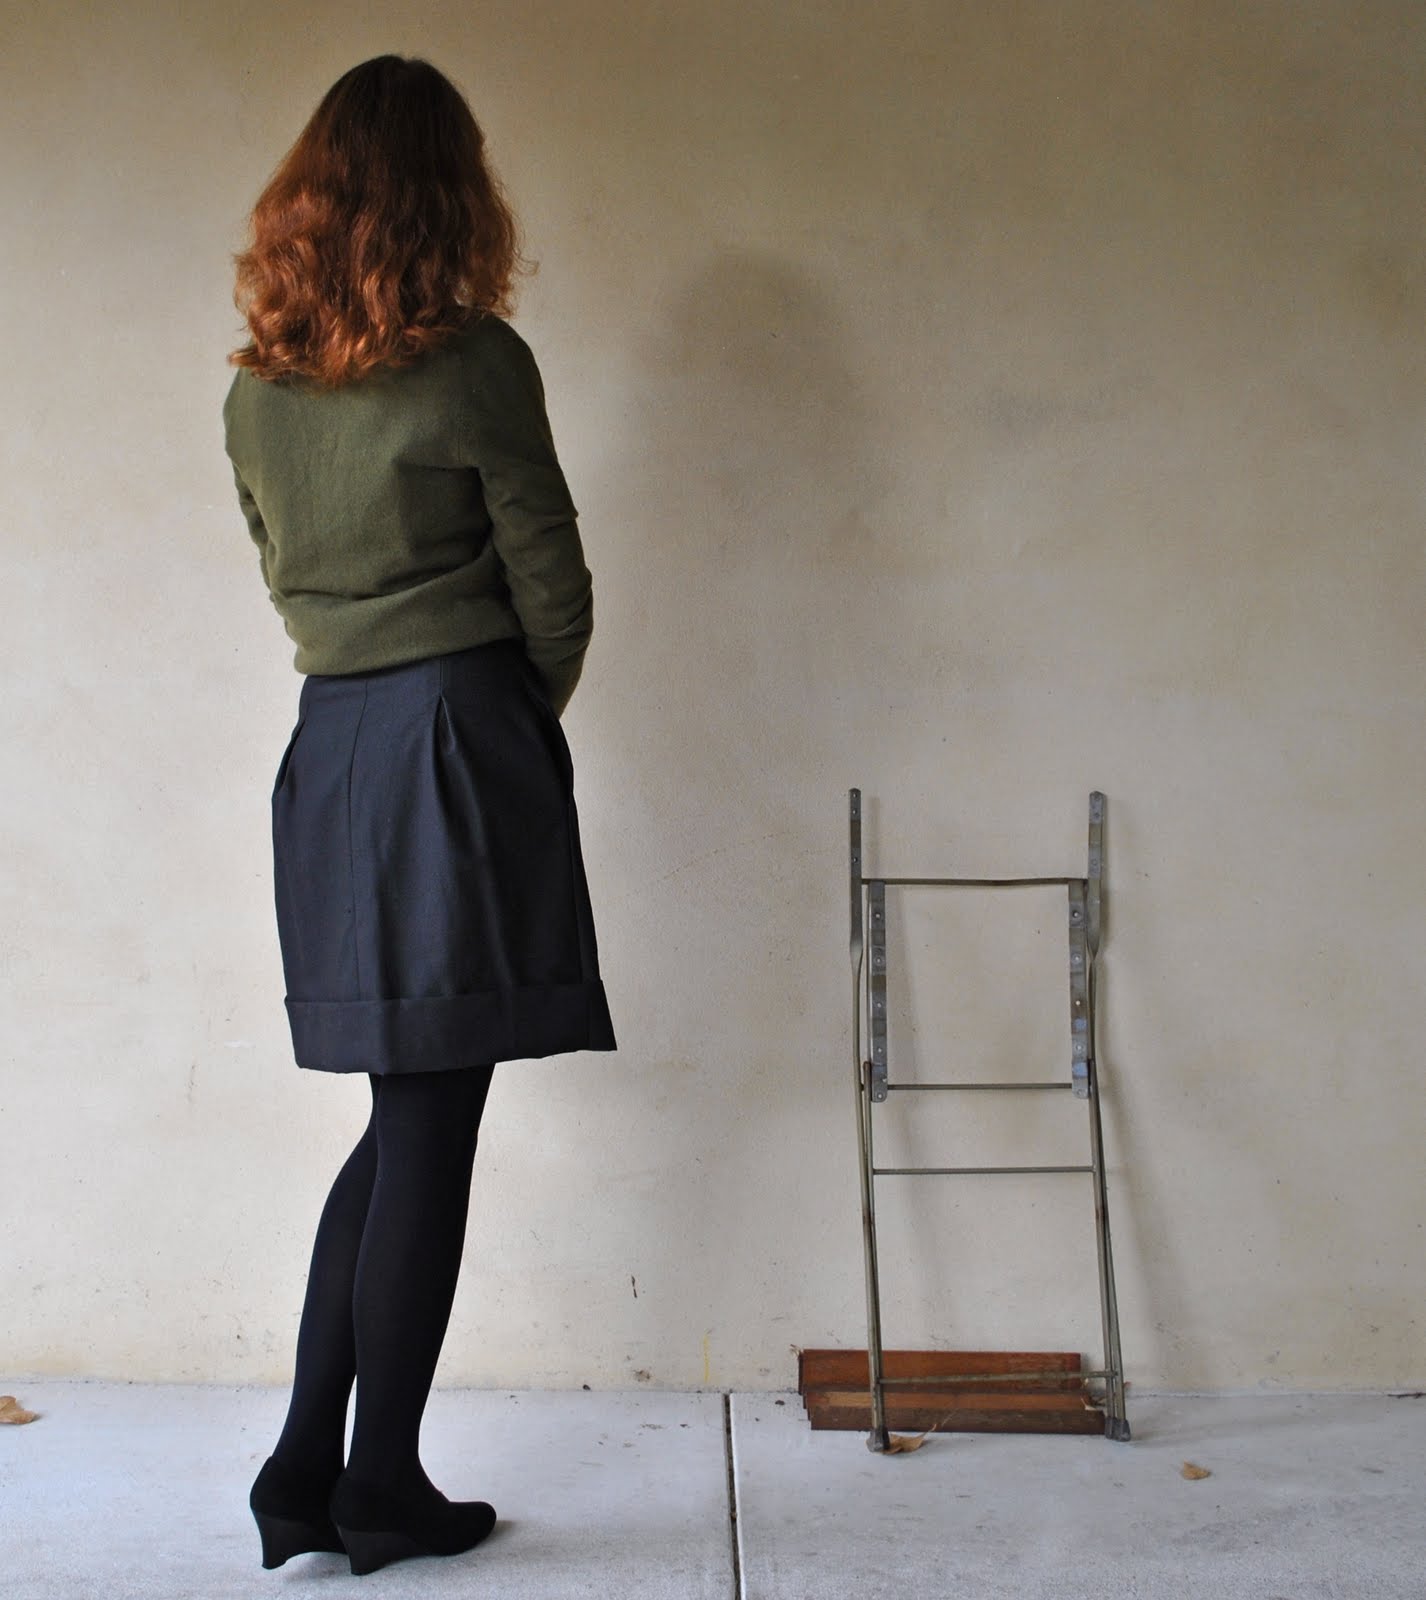
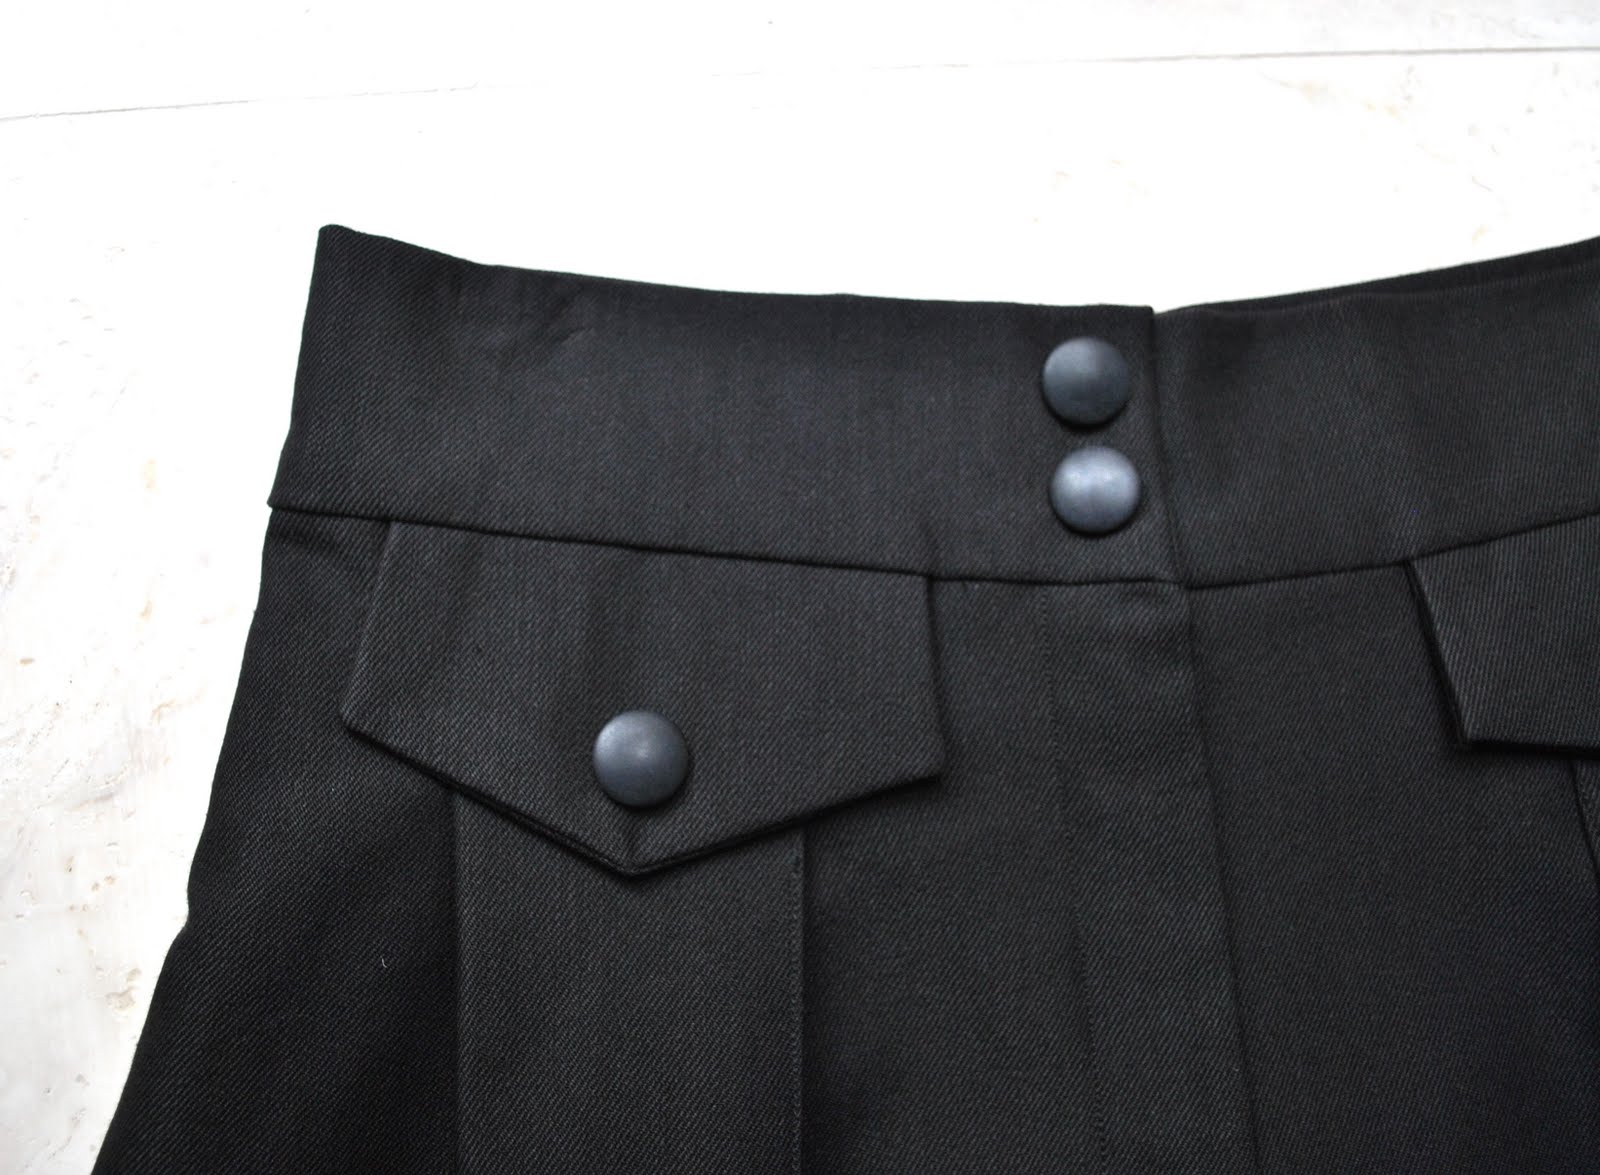
Another obvious modification I made is to the back of the skirt; if you look at Burda’s line drawing you can see the original design has a gathered elasticised waistband at the back.  Gathered elasticised waistbands are an anathema to me.  Like, no way…  So I made a slightly curved back waistband fitted to my waist, and dealt with the fullness of the skirt by incorporating two big inverted box pleats, sewed to about 7cm long, in the usual dart position.  Pretty pleased with how this looks too.  I like my version, a lot.  I think the pleats are far more pleasing to the eye that a gather would be, and the look of them fits in a lot better with the look of the front of the skirt, which has some pleating too.
The other modification; a minor one, is to increase the size of those laughably small inseam side pockets.  No kidding, those pockets as they were were designed for children.
So there you have it.  My new skirt, a little bit of Lagerfeld in my wardrobe!

Details:
Skirt; Burdastyle magazine 10-2010-136 with some modifications, black gabardine
Shirt; Brown Sugar
Cardigan; Allude, from Ricarda
Tights; Kolotex
Shoes; Misano, from Labels

Above and below; the buttons are decorative, closure is by hidden snaps sewn inside the front waistband
The back view, with box pleats sewn in the skirt back instead of the gathered elasticised waistband

Below is my pattern review…

Pattern Description:
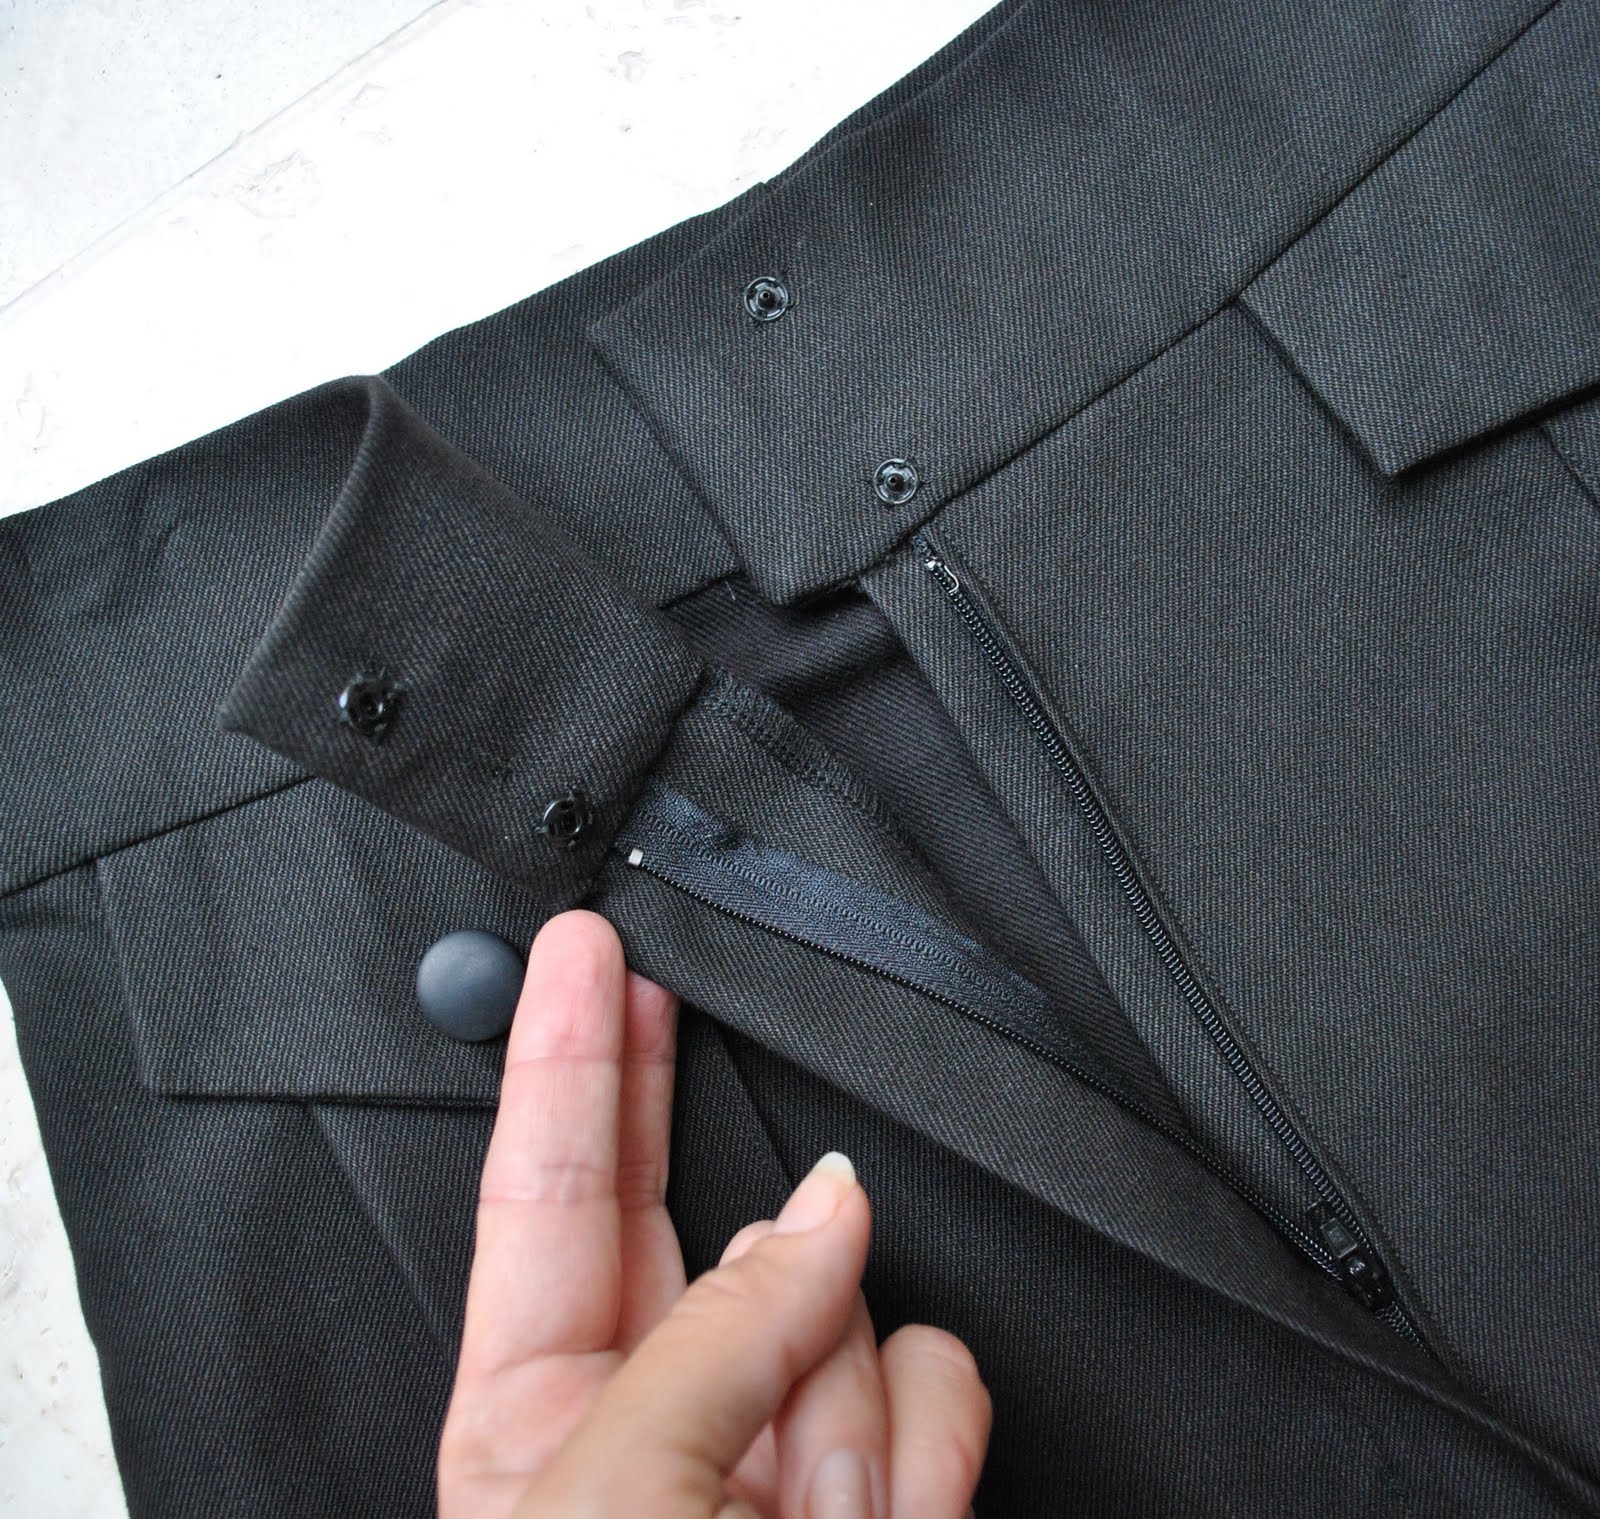
Trouser styled mini skirt with front creases, front fly zip and extra-wide hem-cuff/turn-up.
Pattern Sizing:
34-42, I made a size 38
Did it look like the photo/drawing on the pattern envelope once you had finished sewing it?
yes, except that mine is about 12cm longer.
Were the instructions easy to follow?
Pretty easy.
What did you particularly like or dislike about the pattern?
I particularly like the “trouser” styling of the skirt. It’s a really tailored kind of looking skirt, and yet still manages to look cute and funky.   The front pleats are sharp; in the cool and stylin’ sense of the word…  I also love the interest of the little flaps over the front pleats.  The turn-up at the hem is yet another interesting feature in a little skirt packed with interesting features.
I didn’t like how the back was to be gathered into an elasticised waistband, but that is just my personal taste; I loathe elasticised waistbands with a passion.  So I modified mine to be NOT elasticised.
Fabric Used:
Gabardine, the sort men’s business suits are made of
Pattern alterations or any design changes you made:
I lengthened the skirt pieces at around hip level,  by about 12cm.  The original is SHORT!
To replace the elasticised waistband; I made a slightly curved back waistband fitted to my waist, and folded and sewed box pleats (7cm long) on each of the skirt backs in the usual dart position, to take in the extra fullness of the skirt pieces into my waist measurement.  I really like how my skirt back turned out, much much better than an elasticised waist… sorry, Mr Lagerfeld.
The inseam side pockets as they are, are tiny, so I made mine a bit bigger.
Would you sew it again? Would you recommend it to others?
I’m sure when this distinctive little skirt is worn out, I will sew a replacement!
Conclusion:
I bought this issue of the Burdastyle magazine, just because of the Lagerfeld patterns, and this skirt didn’t let me down.  I adore the styling of it!  It is tailored, classic and smart, and yet has interesting and distinctive features.  With that bit of added length I think it would make quite a witty office skirt too.

pinterestmail

White Shirt Day

Showing my support for this inaugural initiative by the Ovarian Cancer Research Campaign.  Wear a white shirt as a silent but visual show of support for women and their families affected.
Happily with my tastes, it’s pretty easy for me to lay a hand on a white shirt in my wardrobe…
Which brings me to Barbara’s White Shirt Challenge I started last year.  The brief was to make ten white shirts.  Well, not strictly ten, but just however many you wanted, exploring new and different patterns and techniques.  White shirts are dear to my heart, so I leapt on the bandwagon immediatemente.
So today I am wearing my second white shirt in the series, perhaps the only really “proper” white shirt I’ve made for this challenge so far?!  Thankfully Barbara created the challenge to be a flexible one, open to interpretation by the participants themselves.  Allowing one to go with few ivory and cream options also, which made it good for me with my colouring.  Pure white can be quite harsh on most women, just a lucky few being able to rock it gooood.  And I decided to allow myself to include tops and jackets as well.  This could be considered cheating, but I am still going to go there, why?  Because when I think “shirts” the classic button-up shirt is what springs immediately to mind, but I do not want to limit myself so severely in style as this.  Because I want to make and wear tops and jackets that are white too.  I wanted to consider my challenge to be more of a general exploration of white-ish or light-ish things that are worn on the torso or top half of the body.  So it seemed logical and OK for me to include these. But I also get that my version as stated there is a very inelegant and unwieldy name to have to fit onto a button….  so yeah.  Just “shirts” will have to suffice.
Anyhoo, I thought today an appropriate day to provide a quick summary of my progress in this challenge.  So far I have completed six white or white-ish, shirts or shirt-ish type things, displayed below.

And onto new sewing stuff; because we all love a challenge, I am also participating in Joy’s Bellbottom challenge.  See the adorable button at right?  Happily this is also one fitting in with my current plans for my winter wardrobe; a few pairs of jeans are always a necessary annual addition, and I’ve been quite inspired by one or two examples I’ve seen in blogland lately…  stay tuned.  At least I’m only making one of these…hehe.

Details:
Top; Burda 8497, white cotton
Pants; Burda 7944, gunmental linen, to see these pants styled in 6 different ways, go here
Shoes; Country Road

the White “Shirt” gallery so far…
below left; top”a” from Unique Clothes Any Way You Like, by Natsuno Hiraiwa: below right; Burda 8497

pinterestmail

Bracelet-sleeve jacket in raspberry

I finished my jacket for Sherry’s RTW Tailoring sew-along!  Finally…
Hehe, I wouldn’t blame poor Sherry for giving up on me in disgust, what with my intermittent effort thanks to pattern indecision, as well as the interruption of hiking trips and charity balls, both of which required some intervening sewing effort from me, but here is my RTW jacket, finally finished.  Of course eagle eyed readers will notice immediately that this is a completely different jacket from my original good intentions (snort).  No really, I still do intend to get onto that pattern and that fabric properly.  One day…
Now did I employ the couture techniques learnt from the wonderful Vogue 8333 in the making of this simple little thing?  (pause for effect..)  no.
I basically followed this pattern, and just made a few adjustments for fitting considerations.  Namely, took some width off those grid-iron shoulders, and removed considerable width from the top half of those weight-lifter-worthy sleeves.  
The thing I’m fairly proud of is that I only had about 1.3m of this raspberry-red hessian silk in my stash, enough for a good length skirt.  Not really enough for a jacket!  Thus the choice of this pattern, a simply proportioned cropped jacket with bracelet length sleeves.  And even so, my sleeves are about 5cm shorter than specified in the pattern, and I barely squeaked the pattern pieces out of my length of fabric.  And I had to leave off the pockets (sigh, I do love pockets…)

If you look at the front facings inside the jacket, you will see more evidence of my lack of fabric, see that triangular patched in bit?  It looks the same on each of the facings, and was necessary because I really didn’t have enough fabric.  Usually I hate that sort of messy piecing together of bits to get a pattern piece out of the available fabric, but every now and again it has to be done, in emergencies.  This was an emergency.  I even traipsed out to the fabric shop to get a bit extra of the same fabric… you guessed it, it had sold out and the colour was discontinued.  That will teach me, for hanging on to fabric for years before using it…  Thankfully the patch is completely unseen when I am wearing the jacket, or I wouldn’t have considered it.

The pattern incorporates a very interesting sleeve design, a design I’ve not come across before.  They are two pieced sleeves, but not the usual kind.  Instead, they have an under-sleeve seam, hitting right at the lowest point of the armscye, and a top of sleeve seam, running along the top of each arm.  The top shaping of the sleeve cap is enhanced by two darts.
Also, the coat has side pieces, with no side seams; resulting in princess-like seams on the front and the back.  So that under-sleeve seam doesn’t meet up with a side seam.  A unique design in my experience.  

The jacket is completely lined with raspberry coloured acetate lining. 
I chose not to block-fuse the entire jacket.  This is because I like my jackets to be soft and comfy, like a cardigan.  I used fusible interfacing on the front facings, the collar and on the hem allowances of the jacket and sleeves.
However, patched-together facing pieces aside, I do love my new jacket.  It is a colour I love, in a comfortable easy to wear style that I love.  I’m sure it will be appearing a few times here, come Me-Made June.

Details:
Jacket; Vogue 2894 with some fitting modifications, raspberry hessian silk
Skirt; Vogue 7303, olive green corduroy, to see this skirt styled in 6 different ways go here
Scarf; made by me, a re-fashioned Tshirt, see here
Top and tights; Metalicus
Shoes; Francesco Morichetti, from Zomp shoes

And if you are interested, below is the review of this pattern I submitted to Pattern Review…

Pattern Description:
Loose-fitting fully interfaced, lined jacket with collar, patch pockets and three-quarter length sleeves.  Pleated skirt, 2″ below waistline with yoke, side pocket opening and below mid-knee length.  I have made the skirt as well but this review is just for the jacket.
Pattern Sizing:
8-10-12, I used size 8.  I would usually fit a size 10, but the 8 is still quite a loose-fitting jacket on me.
Did it look like the photo/drawing on the pattern envelope once you had finished sewing it?
yes
Were the instructions easy to follow?
very easy
What did you particularly like or dislike about the pattern?
The sizing runs quite big.  Even though I went down a size, the shoulders were still very grid iron on me, and the sleeves themselves so puffy as to make me look like a weight-lifter on my day off.
But after removing fabric off each of these areas I’m very happy with the boxy yet streamlined shape of the jacket.
I like that it didn’t require much fabric.  I only had 1.3m, from which I just managed to squeeze out the pattern pieces.  Admittedly, I had to make a small patch on the front facings, but I still managed to get out my jacket!
The design is quite unusual, which I really like.  The sleeves are two-pieced, but not in the usual way.  Instead there is an underarm seam, joining up with the lowest point of the arm-scye, and a top of sleeve seam, meeting up with the shoulder seam.  The sleeve cap is shaped with two darts.  I’ve never come across this sleeve design before.
The body of the jacket has side pieces, meaning there are princess like seams on the front and back of the jacket, but no side seams.  Meaning that under-sleeve seam doesn’t meet up with a matching side seam… interesting.
Fabric Used:
Silk hessian
Pattern alterations or any design changes you made:
Because of the grid-iron shoulders, I took off about 4cm off the width of the shoulders, and graded in the arm-scye and top of the torso area accordingly.  The sleeves are also very roomy.  I took in about 2.5cm from the width of the top of the sleeves.  I sadly had to leave off the patch pockets, and my sleeves are about 5cm shorter than the pattern, thanks to lack of fabric…
I chose not to fully interface the jacket, as I like my jackets to be soft.  I used fusible interfacing on the front facings, the collar, and on the jacket and sleeve hem allowances.
Would you sew it again? Would you recommend it to others?
Definitely I will sew this cute little jacket again!
Conclusion:
Great little pattern with some unusual design features, and very very easy!

pinterestmail

Fishing lure jewellery

I did take a few photos while I was making the fishing lure jewellery for last weekend’s ball, and I hope this is inspirational and instructive if anyone else wishes to do the same sort of thing.  This is jewellery making, made easy!
Firstly, fishing stores and suppliers!
Well worth a visit!  Who knew they could be stocked with such wonderful and beautiful things??  Since my immediate family is not hugely fishing-oriented, I have not had the opportunity to closely inspect the great beauty and variety of fishing lures available.  Fishing lures are an art unto themselves, and deserve to be shown off more!  In our local fishing store I was spoilt for choice and it was very difficult to narrow it down to just one kind of lure to go with my dress.  In the end I chose iridescent blue fishies; one large and two matching small ones, the same colour as the bright blue fishing net that I had.
To make your own earrings, you will need a couple of earring loops; because I didn’t actually have any I took apart another pair of earrings to get these.  Hmmm, will have to stock up on another packet next time I go to Spotlight…  And to make the necklace I used two split rings, a lobster claw catch with loop, a bit of fishing cord, harvested from some bits that came with my net, and some 32 gauge jewellery wire.  

Fishing lures are equipped with some vicious barbs, so the very first thing to do is to cut those off!!  Use heavy duty wire cutters…  otherwise you will be “caught” just like a hapless fish, and if you have ever been unfortunate enough to get up close and personal with a fish hook on a fun family day out fishing you will know that getting those things out is not fun.  If the wire ends are still a bit sharp after cutting off those barbs, you can file them down a bit using a metal file, and bend them in further in a tighter curl, as I did.  You do not want to be snagged on your own jewellery when you are supposed to be looking glamorous now…
Because fishing lures usually come with their own handy rings attached, I simply hooked the smaller lures directly onto the earring loops.  Voila, earrings finished!

For the necklace I threaded a few strands of fishing cord through the loop of the larger lure, and tied it in a knot to keep it stationary and in place.
I attached a split ring onto each of the necklace catch findings, truly the most difficult part of the whole operation.  Split rings are fiddly!

Then threaded the cords through the split rings and measured on my neck to get the lure hanging at just the right length that I wanted.  Then tied the cord in a knot over the split ring to keep it at that length, and did a quick check that each side was the same length.

Then I cut off the loose ends of cord; not too much, because fishing cord has that stiff frictionless quality that will “un-knot” itself very easily.  You want to keep a few centimetres length just to keep the knot nice and stable. 

 The I took the fine-gauge jewellery wire (yes, I wish I had had some gold coloured wire!) and closely wrapped up the lower end of the knot and down the length of the loose ends of the cord.  I made this wrapping as close, tight and as firm as I could.  When you are satisfied that those cords ends are as mummified as possible, snip off the wire and tuck or fold the end down smooth.

Finished!  And it was funny how many people were fascinated by my jewellery that night, and came up for a closer look.  If I say so myself, almost as effective as the diamonds and pearls in the room?

pinterestmail

Red Emperor, or Catch of the Day

The theme for this year’s Amanda Young Foundation Ball was “Nautical, but Nice”  
(If you have time, click on the link and view the information video on meningococcal disease.  Having this knowledge could save a life…)
As usual I had about a zillion ideas for a dress.  Was so so sorely tempted to make a completely brand new gown.  In fact originally I had every intention of making a whole new ballgown for this event.  This was a very enticing thought, there’s nothing I like more than delving into the glamour of the eveningwear section of the fabric store…  but I confess not an very eco friendly option really (sigh)  After much enjoyable fantasising about such nautical fabulousness as mermaid-like dresses or dresses looking like a breaking ocean wave (I had visions of a turquoise sheath, with a frothy white lower skirt section to represent the surf), eventually I directed my thoughts to my collection of evening gowns already sitting in my wardrobe, and working with something I already had.  Last year’s gown had possibilities; this is what it looked like last year…
I decided to re-work this gown and be a Red Emperor, as in, the fish…hehe.  In the end, of course, the gown was almost completely re-constructed and is pretty much a new dress.  
I removed the red velvet bodice and silk midriff section, and made a new red silk skirt to go over the old lining/petticoat with its attached grand silk flounce around the bottom.  Then re-attached the midriff and bodice.  I thought this would be OK, but unfortunately the red velvet just looked wrong on top of the dress, otherwise composed entirely of red silk. So I unpicked that off of the midriff section and away from the zip, un-picked and kept the red velvet ribbon shoulder straps to re-use, and made a new bodice, out of the pieces of red silk left over from cutting out the new skirt.  
All the un-picking and re-sewing together of seams took ages, about five days.  All the skirt sections are hand-hemmed, and I estimated there is between five and six metres of hem altogether in this dress.  (Later edit; I just measured, 8.5m!)  Luckily, I already done the lower skirt and petticoat last year….!
The new parts are: the wrap-over upper skirt and the bodice.  The old, re-used parts of the dress are: the lining/petticoat with the lower silk flounce, the midriff section, the velvet ribbon shoulder straps, and the invisible zip.  Yes, I re-used the ZIP!  I think I’m most proud of that part of the whole she-bang, silly as it sounds. 
If you look really closely enough, under a strong light, you can see that the lower flounce and the midriff section are a different shade of red than the upper skirt and the bodice…  from floor up the fabrics sections are old, new, old, new but meh.  I think they are close enough to be good enough.  Also the different shades are divided up over the dress, so it still looks OK.
So when I had finally finished, I had a kinda new red dress that I am completely thrilled with, even more than last year’s version I think!
But even though it was “red” and sort of “royal”, fitting in with my plan to be a Red Emperor, it didn’t scream “nautical” by any stretch of the imagination.  So I gathered a few fishy accessories; the fishing net to be my stole, and I also bought a few lures and a bit of fishing cord from the fishing store to make some jewellery.
So sufficiently nautical, yes?
And when I came out to show the children my costume and asked them what they thought I was, Sam immediately said, “the catch of the day?”  
And I wondered if that was a better title than my Red Emperor idea…

Details:
Dress; based on Butterick 4657, petticoat and lower skirt of my own design.  Originally looked like this, and my other dress using this same pattern here
Gloves; Vogue 7949, red jersey knit, my review of this pattern here
Stole; fishing net
Jewellery; made by me from fishing lures…
Shoes; Raymond Castle.  These are my oldest shoes, I’ve had them since I was about 19…! 😀

a side view…

a back view…
pinterestmail

Introducing Mum…

I will say straight out this amazingly beautiful ensemble is not made by me but by my Mum here.  I had to put a picture of it here, because I couldn’t resist; Mum will never ever get herself a blog and this outfit is too creative, clever, immaculately made and finished, and lovely in itself not to share.
My parents have been staying with us recently, and when Mum came downstairs one morning in this ensemble on her way to attend Grandparent’s Day with my Dad and Sam, I literally stopped in my tracks.  Then raced to get my camera, simultaneously begging Mum to let me post her outfit on the blog.  She graciously agreed.
(Of course I would not be human if a little bit of me thought it might not be a good idea, posting Mum’s creations here on the blog.  After all, they will just serve to highlight how my skills are but 1% of Mum’s.  But let’s not be petty now…)
The jacket:  Mum bought these tweed fabrics, sold as small patches or “salesman’s samples” from a shop called Peppertree in NSW which she visited as part of the Australian Sewing Guild convention last year.  She pieced the different sized pieces together in an attractive random patchwork pattern… and anyone who has attempted patchworking will know that randomly shaped rectangular and square patches are not easily put together.  There are also one or two patches harvested from my Dad’s old tweed sports coat that has finally bitten the dust after many years of good service (a Re-fashion!).  The pattern for the jacket is a Vogue pattern by Donna Karan, (pattern number to be provided when Mum looks it up and tells me)  Please note the perfectly constructed welt buttonhole, made from tweed too.  And I have to especially point out, see the piece of mustard/dark green houndstooth-y looking fabric, on the right, or buttonhole opening side of the front, just under and by the lapel?  Mum knitted that bit in fair isle, to tone in with the other tweeds.  On a seamstress’ note, she wanted it mentioned that the knitted section required extra underlining and stabilising, as of course knitted fabric is not as sturdy as woven tweed.  
The jacket is fully lined in dark grey acetate lining.
Mum made the skirt too, from charcoal jersey knit.  I think she might have made the pattern for that herself.
Thank you Mum, for this bar-setting self-sewn moment!
Later edit: Jacket: Vogue 8605, shortened; Skirt: Vogue 2911

pinterestmail

Me-Made June; a new challenge

I’ve signed to take part again in Zoe’s seasonal challenge, this time to be called Me-Made June 11.

I, Carolyn of “Handmade by Carolyn”, sign up as a participant of Me-Made-June ’11. I endeavour to wear as much handmade as possible each day for the duration of June 2011′

And I’m not going to be so hard on myself this time; I will not (sternly shaking my finger at my always-makes-things-too-hard-for-myself self) make too much of an effort to not-repeat.  Just maybe a small, teensy-tiny effort, to stave off boredom.  Hehe…
And since June is newly winter for us southern hemisphere dwellers I may have to pop on a few RTW thermals or Tshirts once in a while for a bit of extra warmth!  I may need to, I may not.  We’ll have to see how we go with that one.
See, here’s the dilemma, the same ol’ dilemma.  I have a collection of perfectly serviceable Tshirts and cardigans.  I like challenging myself to wear all me-made, but I still have to make use of the garments I’ve got, right?  Otherwise, I am just being wasteful of my current resources, er wardrobe.  It’s silly for me to go out and, source, say, black stretch fabric to make myself useful black Tshirts and cardigans, when I have some RTW ones already.  So, yeah…
And yesterday, with all the new technological lessons being introduced into my sad, old brain such as a) how to film myself, talking all by myself and b) learning how to upload a video onto YouTube (they didn’t teach this in school in my day), it slipped my mind that I had taken an outfit photo on our walk that morning.  So there it is, what I was wearing yesterday.  In the vlog too.  I’m just putting it in here, just because.  The weather has been such that one has to start the morning with a cardigan, but before one has got more than 100m on one’s walk one needs to take it off.  And then one needs it again as the sun drops below the yard-arm (there’s that random saying again, what does that even mean?)
And sewing-wise, I will just hint that I have been sewing up a veritable storm lately!  I have lots of newly constructed stuff to show, with which I’m extremely pleased… but I’m waiting for the right moment.  You’ll see soon.  Promise.

Details:
Dress; Vogue 1152, cotton chambray, details and a review of this pattern here
Scarf; re-fashioned from an old Tshirt, tutorial here
Cardigan; Country Road found secondhand, and dyed yellow by me here
Sandals; Anna, from Marie-Claire shoes

pinterestmail

My Voice!

Inspired by Tanit-Isis I have added my bit to the dialect and accent vlog that has been going around a bit over the last few months? (or longer??)
While of course this has nothing to do with my usual sewing or fashion-y stuff I really enjoyed viewing other people’s vlogs, devoting some time to tracking back links and viewing a whole lot of them last night.  It’s addictive!  So I decided to do my own.  It’s nice to have a real voice, not to mention a real accent in your mind which can add a whole new dimension when reading static written words!

The list of words is:
Aunt, Route, Wash, Oil, Theatre, Iron, Salmon, Caramel, Fire, Water, Sure, Data, Ruin, Crayon, Toilet, New Orleans, Pecan, Both, Again, Spitting Image, Alabama, Lawyer, Coupon, Mayonnaise, Syrup, Pyjamas, Caught
And (face-slap) the word “Probably” is supposed to be in there also, but in my stage-fright and nervousness I forgot to read that one!  Woops!
Plus I added a few bonus words for fun:
About, Aluminium, Apricot, Schedule, News

And the questions are:
What is it called when you throw toilet paper on a house?
What is the bug that when you touch it, curls into a ball?
What is the bubbly, carbonated drink called?
What do you call gym shoes?
What do you say to address a group of people?
What do you call the kind of spider that has an oval shaped body and extremely long legs?
What do you call your grandparents?
What do you call the wheeled contraption in which you carry groceries at the supermarket?
What do you call it when rain falls while the sun is shining?
What is the thing you change the TV channel with?

I hope you enjoy this, in spite of the fact that apparently I look a bit self-conscious according to the family… nerves!  Also I’d like to point out that I said “…a series of questions”, not as it sounded “…. serious questions”, which would be a bit silly, no?
I hope to see some more of these out in blogland, please send me your link if you choose to do one of these yourself.  It would be fun to compare all our various manners of speaking, and I would love to see some other accents joining in here!
Some others I’ve seen:
Louise
Steph
Franca

pinterestmail
Switch to mobile version
↓