
eleynagomez asked how I made the thumbhole bands on my Nettie bodysuit, thank you so much for asking!
I didn’t take any pictures while I was making the real thing but I sat down this weekend and ran up a little mock-up band … basically it is the exact same procedure as if you are adding a neckline or armhole band to a Tshirt but just on a much smaller scale!
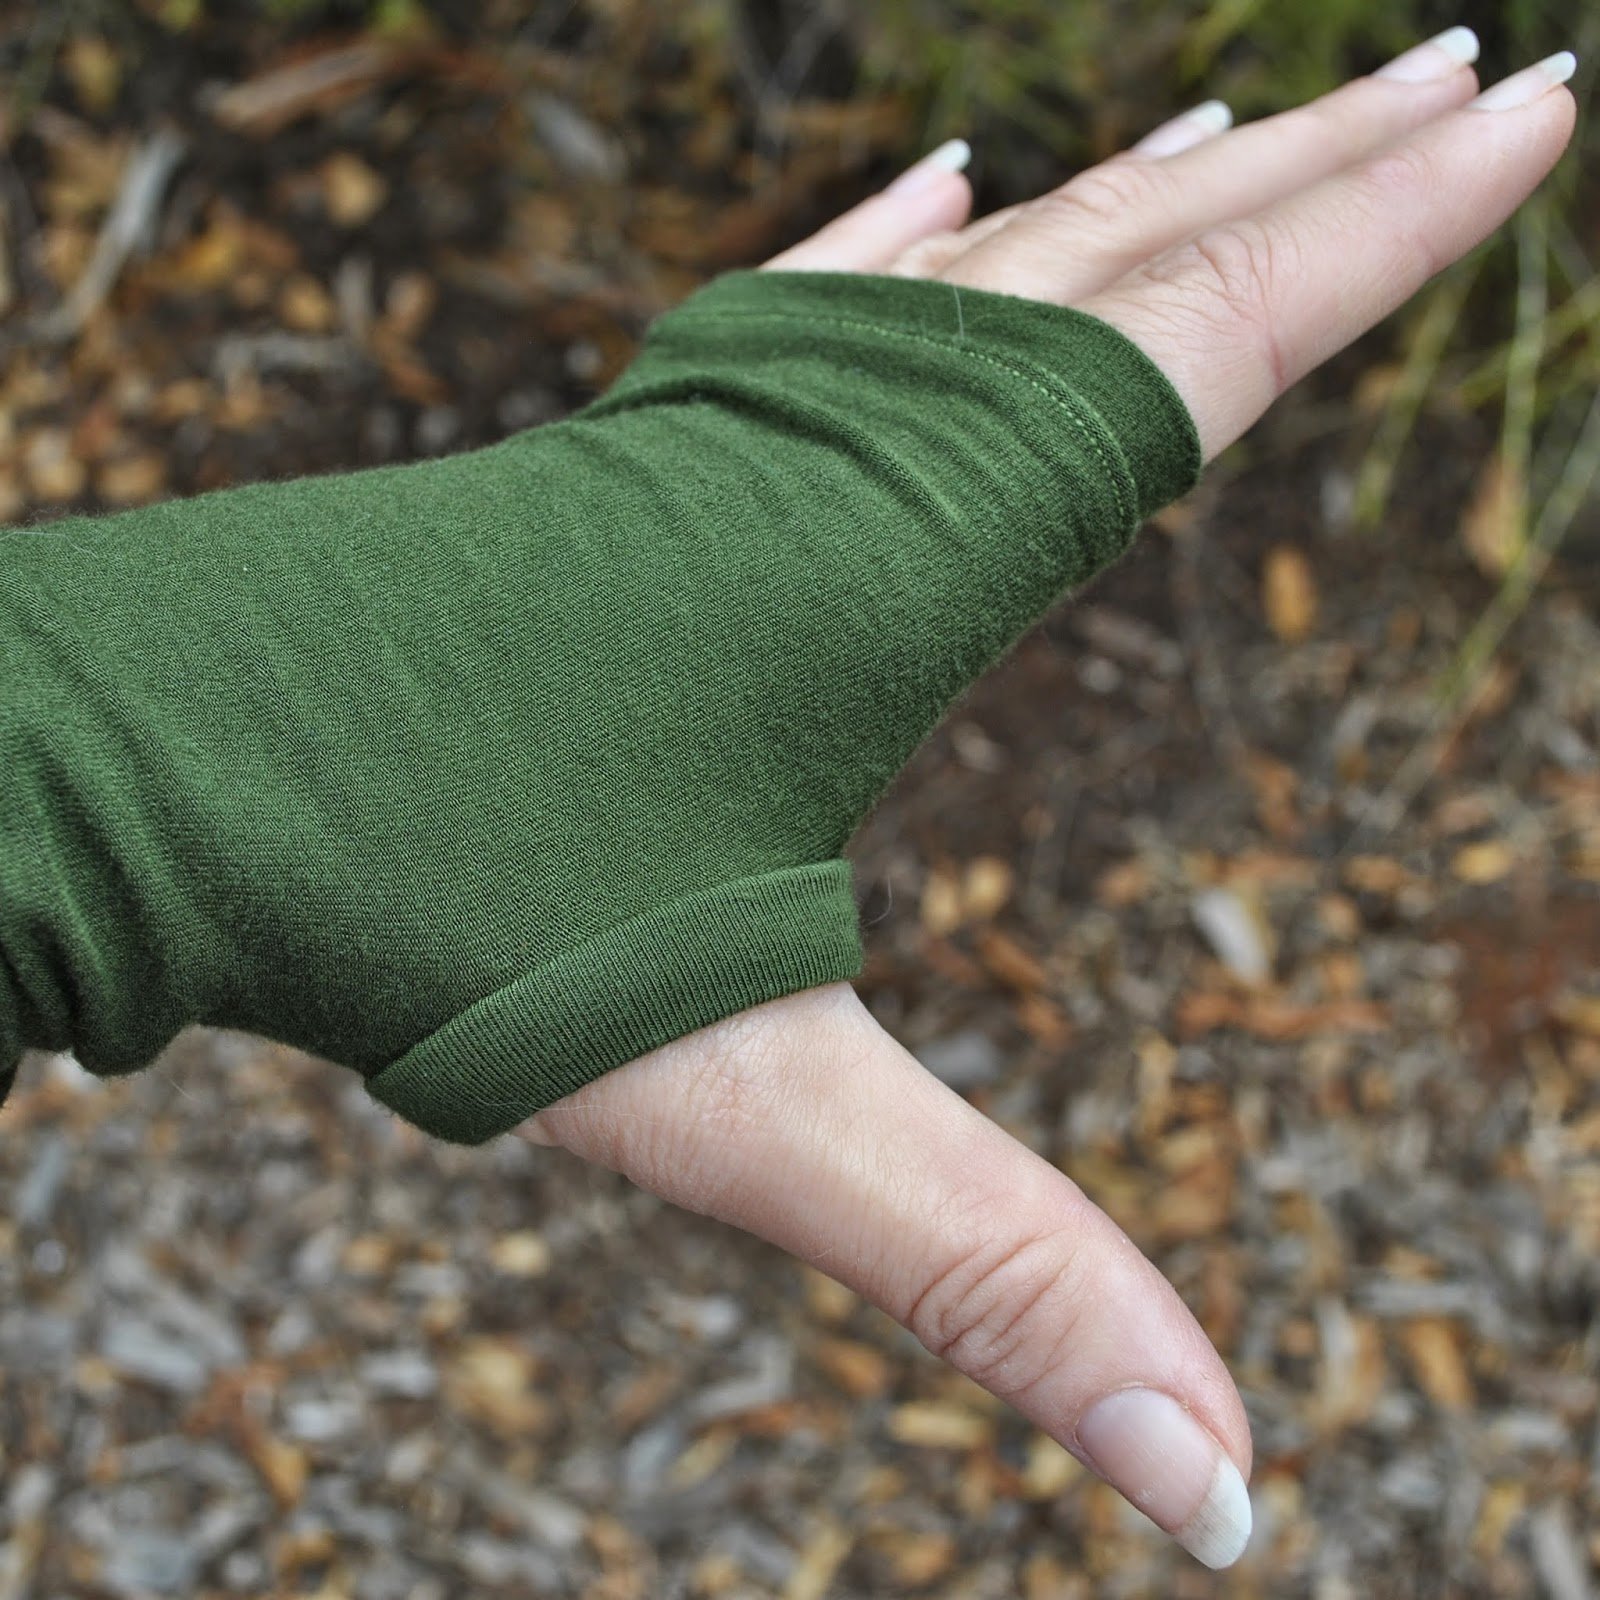
Firstly, when you cut your Tshirt or bodysuit pieces cut the sleeves long enough that they will cover over your hands, as above. Make the Tshirt.
Try on and mark with a pin where you want the thumbholes to sit on the sleeves.
Now, measure around the base of your thumb and cut 4cm wide bands to fit, adding 0.5cm seam allowance onto each short end.

Sew the band in a ring, press the seam allowance open.

Fold in half, long edges together. Cut an on-grain slit in the sleeve at where the thumbhole is marked; make it just a bit shorter than the length of the folded band. It is best to make it a bit short, you will stretch the hole to fit the band as you are sewing. If the hole turns out to be too small to stretch out sufficiently to fit the band; you can always nick the end of the slit a little bit longer while sewing. But if you make it too long to start with then the thumb-band might stretch out and be too loose around your thumbs.

And no one wants *horrified gasp* floppy thumb-holes!
Pin from the band side, since stitching is to be done with the band side up.

Also… important: whenever you do sew a ring or a tube of fabric like this, be sure to always sew from inside the tube rather than the outside; to avoid sewing down the opposite or underside by mistake!

Because it is such a tiny weeny little band; just go slow, keeping an even distance from the folded edge of the band at the left of the needle, and checking constantly to make sure the slit edge is being caught underneath into the seam. Stretch out each end of the slit to fit the band as you go.

If desired, the seam allowance can be neatened by overlocker.

Also, I mentioned previously about sewing the joining seam in a band on the bias… I did say I would write a how-to, but this really only qualifies as a “tip”, I think!

When sewing a jersey band onto the neckline or armhole or any aperture really! of a knit garment, I’ve generally gone for a straight seam just because it’s easy.
But because there are almost double the number layers of fabric sitting at that joining seam point compared to elsewhere along the band this area is can sometimes be a bit bulky and you sometimes end up with a slight bump no matter how carefully you guide that seam through the machine. Seriously, getting a nice smooth and even-width band all the way around is often the hardest part about making a Tshirt!
So lately I’ve been cutting and sewing the join on the diagonal, reducing the number of layers at the joining seam, and I think it’s been an improvement with almost no bumpy bit at all!!
It is a particularly good idea for bands like a cardigan button band, on which slight bumps and irregularities in thickness and width are particularly noticeable.

You do have to be careful while sewing that joining seam, since the fabric is on the bias along that edge you have to watch out that you’re not stretching the fabric at all while you’re sewing that short seam. If you’re in any doubt as to whether the fabric will distort during stitching it would help to pin and sew to a backing piece of tissue paper, which can be ripped away after it is sewn.
Later edit in response to an email question; just to be clear, the band is NOT a bias-cut band, it is still cut cross-grain just like you normally would and it is just the short joining ends that are being cut on the diagonal 🙂

And yes, the thumbhole bands I described above are so tiny it was really too tricky to mess about with bias joining seams and I just cut those on the straight. Choose your battles!
Thanks! Great tips Carolyn.
Great tutorial! I love that look!
thank you for the tip about the bias being less bulky!
What a great idea! Thank you for sharing the bias cut tip! I would never have thought about this.
That little tip about seaming the bias tip so it will be less bulky – genius! And, THANK YOU for the photo showing how you twisted the strip to sew it like that, I needed to see it to make it work. I will be using that tip today!
Thank you so much for this tutorial and the genius tip! I have learned so much with you over the years and always come back to your instructions when I am working on my projects. Many thanks for being such an inspiration! 🙂
Great tips. Thanks for taking the time to share.
Reading your tip on cutting/sewing bands on the bias, I had one of those "der!" Moments……this is something I always do for quilting projects ( and for the same reason) but had never thought of transferring to dressmaking! From now on….
I had never considered adding bands to thumbhole slits–where is the underarm seam then on the shirt if you're cutting the slit into the fabric and not making an opening in the seam?
Kyle; I positioned the thumb-holes opposite to the sleeve seam, so that seam sits along the outside of my arm and hand 🙂
Great tip about cutting the ends of the band on the bias. I just did this now and my coverstitch machine loves it! No more skipping stitches over the bumpy bit.
Great tutorial, and very pretty knit bands:)
Thank you, Carolyn.
Thanks Carolyn, I've often thought about the thumbholes and then dismissed the idea as being too hard. I might give it a go following your tutorial.
Great tips! Thanks for sharing.
Carolyn, I've admired your work for some time now – and you continue to wow us with your skills! Thank you so much for sharing. I do have a question – in the picture of the sleeve with the thumb hole, it appears that you did the band around the fingers differently than the band around the thumbhole. They look different, and I like both looks – but I would love to understand the nitty-gritty of HOW you did them differently? I can see the topstitching around the finger hole band, but the one around the thumbhole seems fuller also – or is that just my aging eyes? In the past month I have been practicing how to make smooth neck and sleeve bands on knit shirts, so this post is just perfect!! I would SO very much appreciate anything you can add.
Also, the sweater with the dots – the band lays down so smoothly, so flat, but I can't tell that you did topstitching on the outside to get that to happen. How did you finish it? Or did you do stitch-in-the-ditch so beautifully that no one can see the stitches?
Again, thank you for the helpful posts, I've learned quite a few things from you!
Hello Angela M, and thank you! The sleeve hem I simply overlocked the raw edge, turned the hem under and hemmed using the twin needle on my sewing machine, which is the simplest option imo for hemming knits. The thumbhole I finished with a separate fabric band as described in this post. And my polka dot cardigan, I sewed on the band right sides together, turned it over to encase the seams allowances and handstitched it down on the inside of the band, All the finishing methods I used in that cardigan are pictured and described more fully in the previous post entitled "little black polka dots". I hope this helps 🙂
Thank you for such a sweet answer! As far as the dotted cardigan post before – I went back to it and realized that I must have been interrupted the first time I read it, because I had read the first part but not further on for the nitty-gritty details. THANK YOU for such details – now I have more confidence to try a cardigan on my own. Those "little" details can make such a difference in the outcome. A strip of interfacing only 1/4 the width of the band? I wouldn't have thought of that.
And, yes – I can now see how the sleeve hem was finished, turned under and hemmed with a twin needle.
The only last thing I'm not sure of – if I may ask – on the thumb hole you finished with the separate band – did you tack it down by hand on the wrong side? It seems to lay down so nicely, as though it was tacked down, but I don't see any topstitching, etc.
By the way – I DID use the technique of the bias seam on a neck band for a Renfrew top for my daughter just today, and it worked beautifully! Definitely less bulky, thank you for that advice. The fabric has stripes, so I had to make sure that my strips were sewn so that they were not interrupted, and all turned out beautifully. 🙂
Thank Angela M, and no, I didn't tack anything down for the thumb-hole band, it was all done just exactly as outlined in this post, with nothing extra.
And thank you for letting me know the bias joining seam was a success for you, I am very pleased to hear it! 🙂
Thanks for your tips, I've often made a thumbhole for the teenage fashion panel's long slouchy warm up tops for sports/dance, but never thought to finish it with a band for a look they could actually wear as proper clothes, I'll give this a try and anticipate an enthusiastic reception.
Dang, this is excellent! I've done a 'bound buttonhole' finish for the thumbhole, as the teeny knit facing has always stretched out too far for me (I stink at that, it's my summer learning goal). Thank you!
Thank you for this tip can see this for some warm tops if winter ever arrives.
I love what you did with the sleeves! In the winter my hands are always cold and I usually rock a pair of gloves that I cut the fingertips out of, my oldest daughter says I look like a 'homeless' person when I do that. She would much rather see wear this! Now if I can only remember where I saw it when winter arrives again!
So fiddly doing the little thumb holes, very hard to get neat I would think. Thanks for the tip about joining bands with bias cuts – makes total sense.