Tag Archives: Lining

adding lining to a skirt; some tips

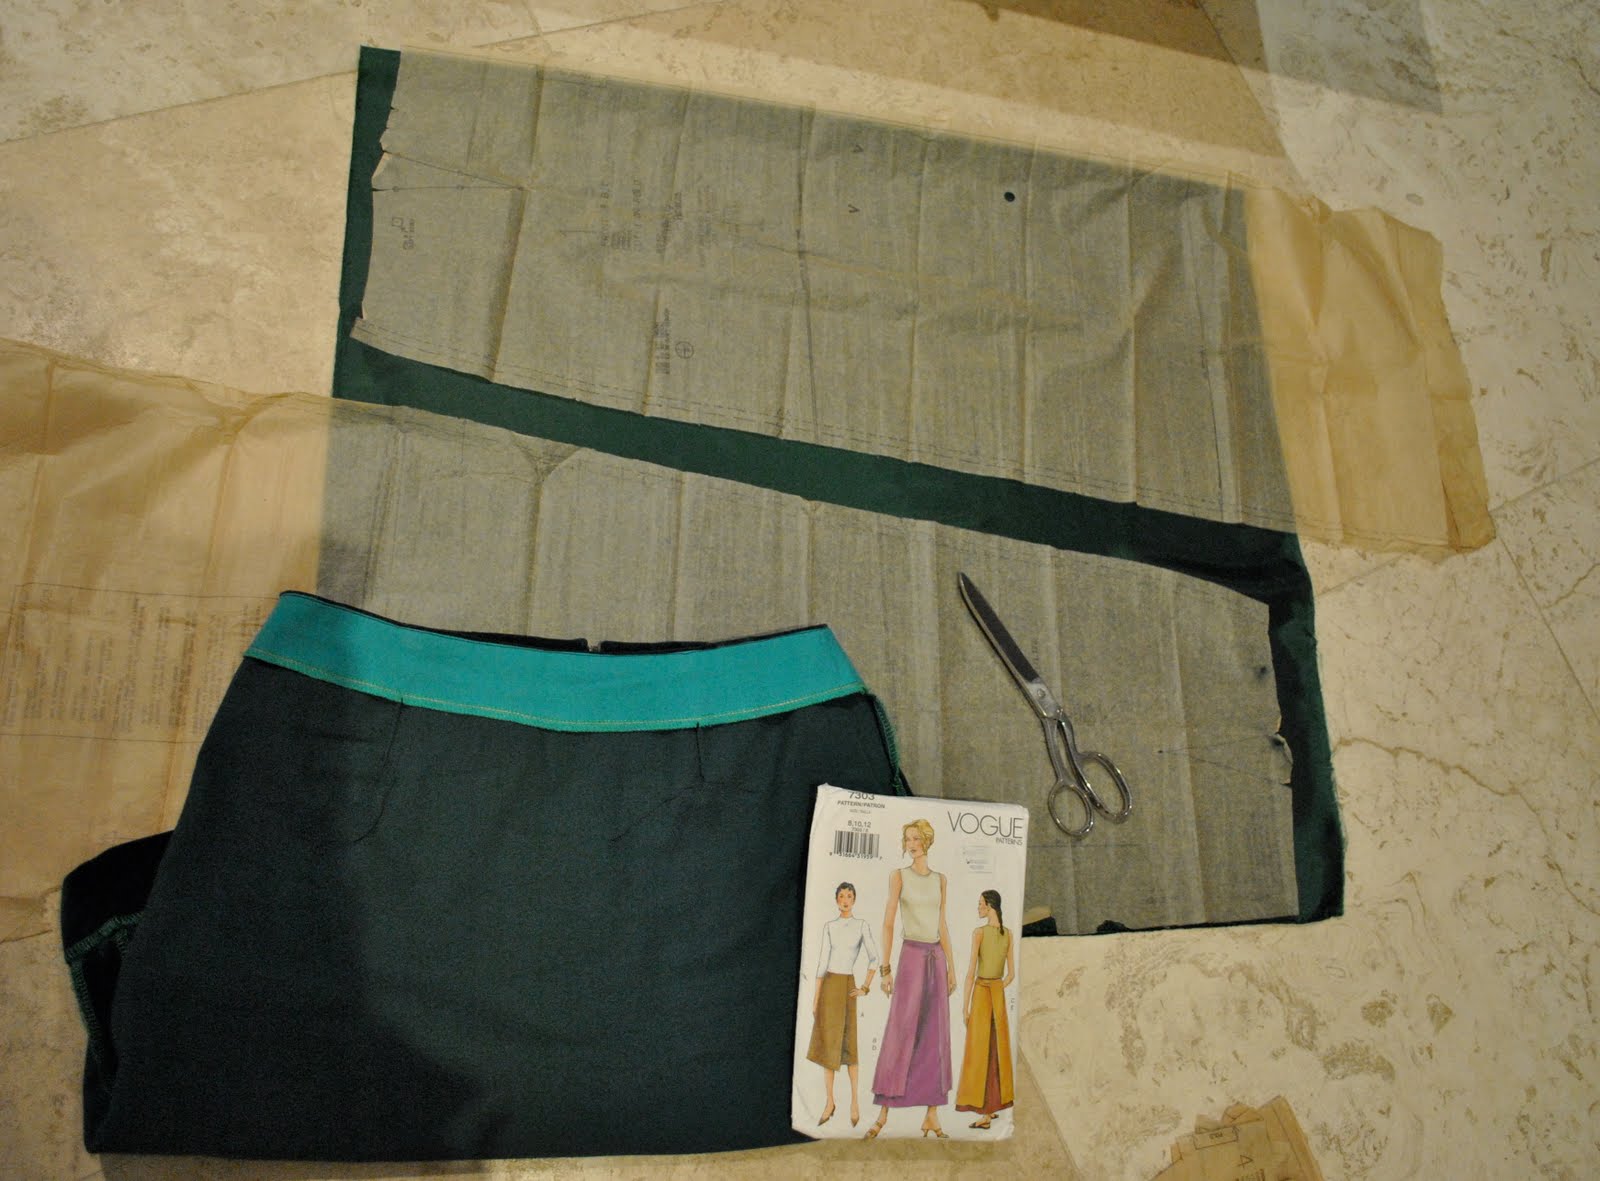
Plenty of skirt patterns do not come with separate pieces nor instructions for adding a lining to the skirt.  And often you want a lining; particularly in a winter skirt that you wish to wear with tights.
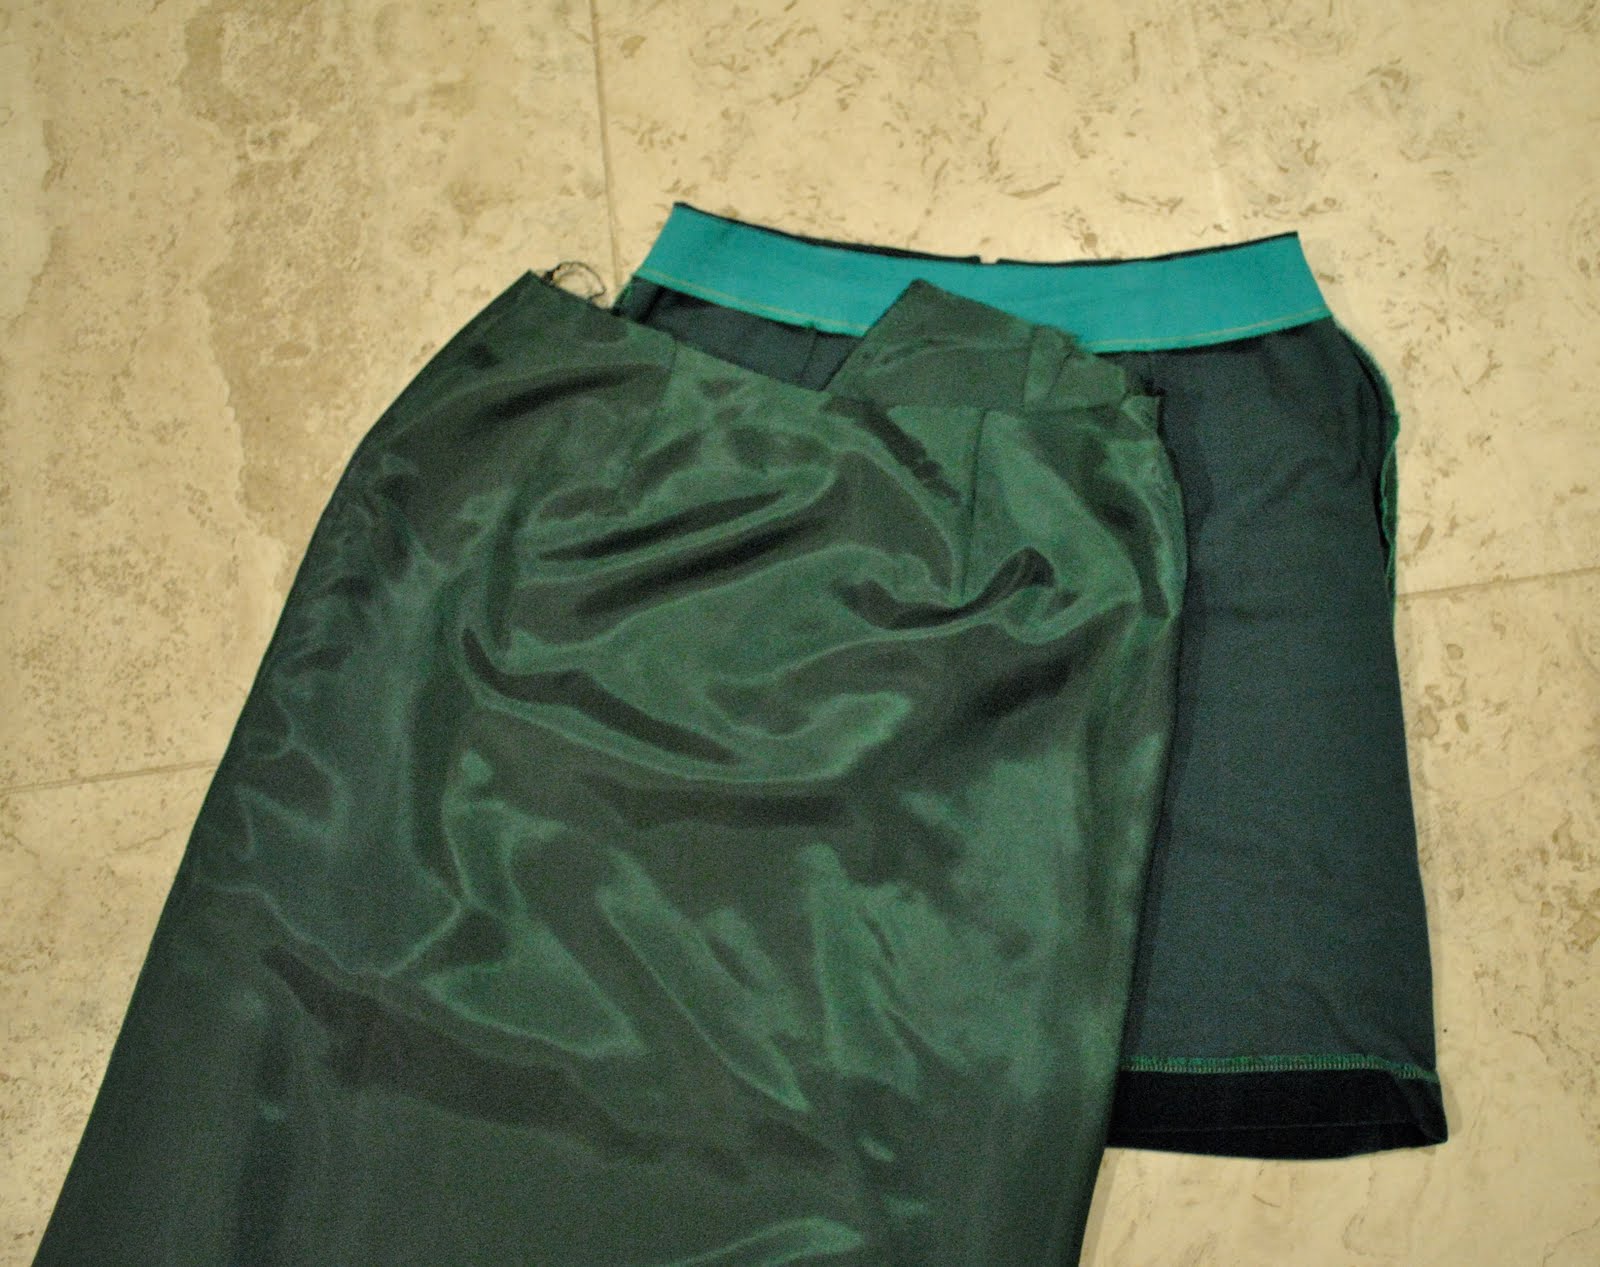
In a nutshell: my own method for adding this is now to generally to cut a skirt lining using the same pattern pieces as the skirt, and — critical difference — sew them together using narrower seams.  So your lining has a wider girth than the skirt itself, i.e. a nice dose of extra wearing ease… this is a small thing but makes a big difference for slimline or pencil skirts particularly!  Why? well, a few ripped linings later…! haha! I jest! but seriously; in my experience sometimes I would find that linings would habitually start to pull away from the zip tape right at hip level.  I re-stitch them back on, only for them to pull away yet again.  

old skirt

When I did start making my linings just a touch roomier than the skirt itself, this pesky little problem has not recurred!

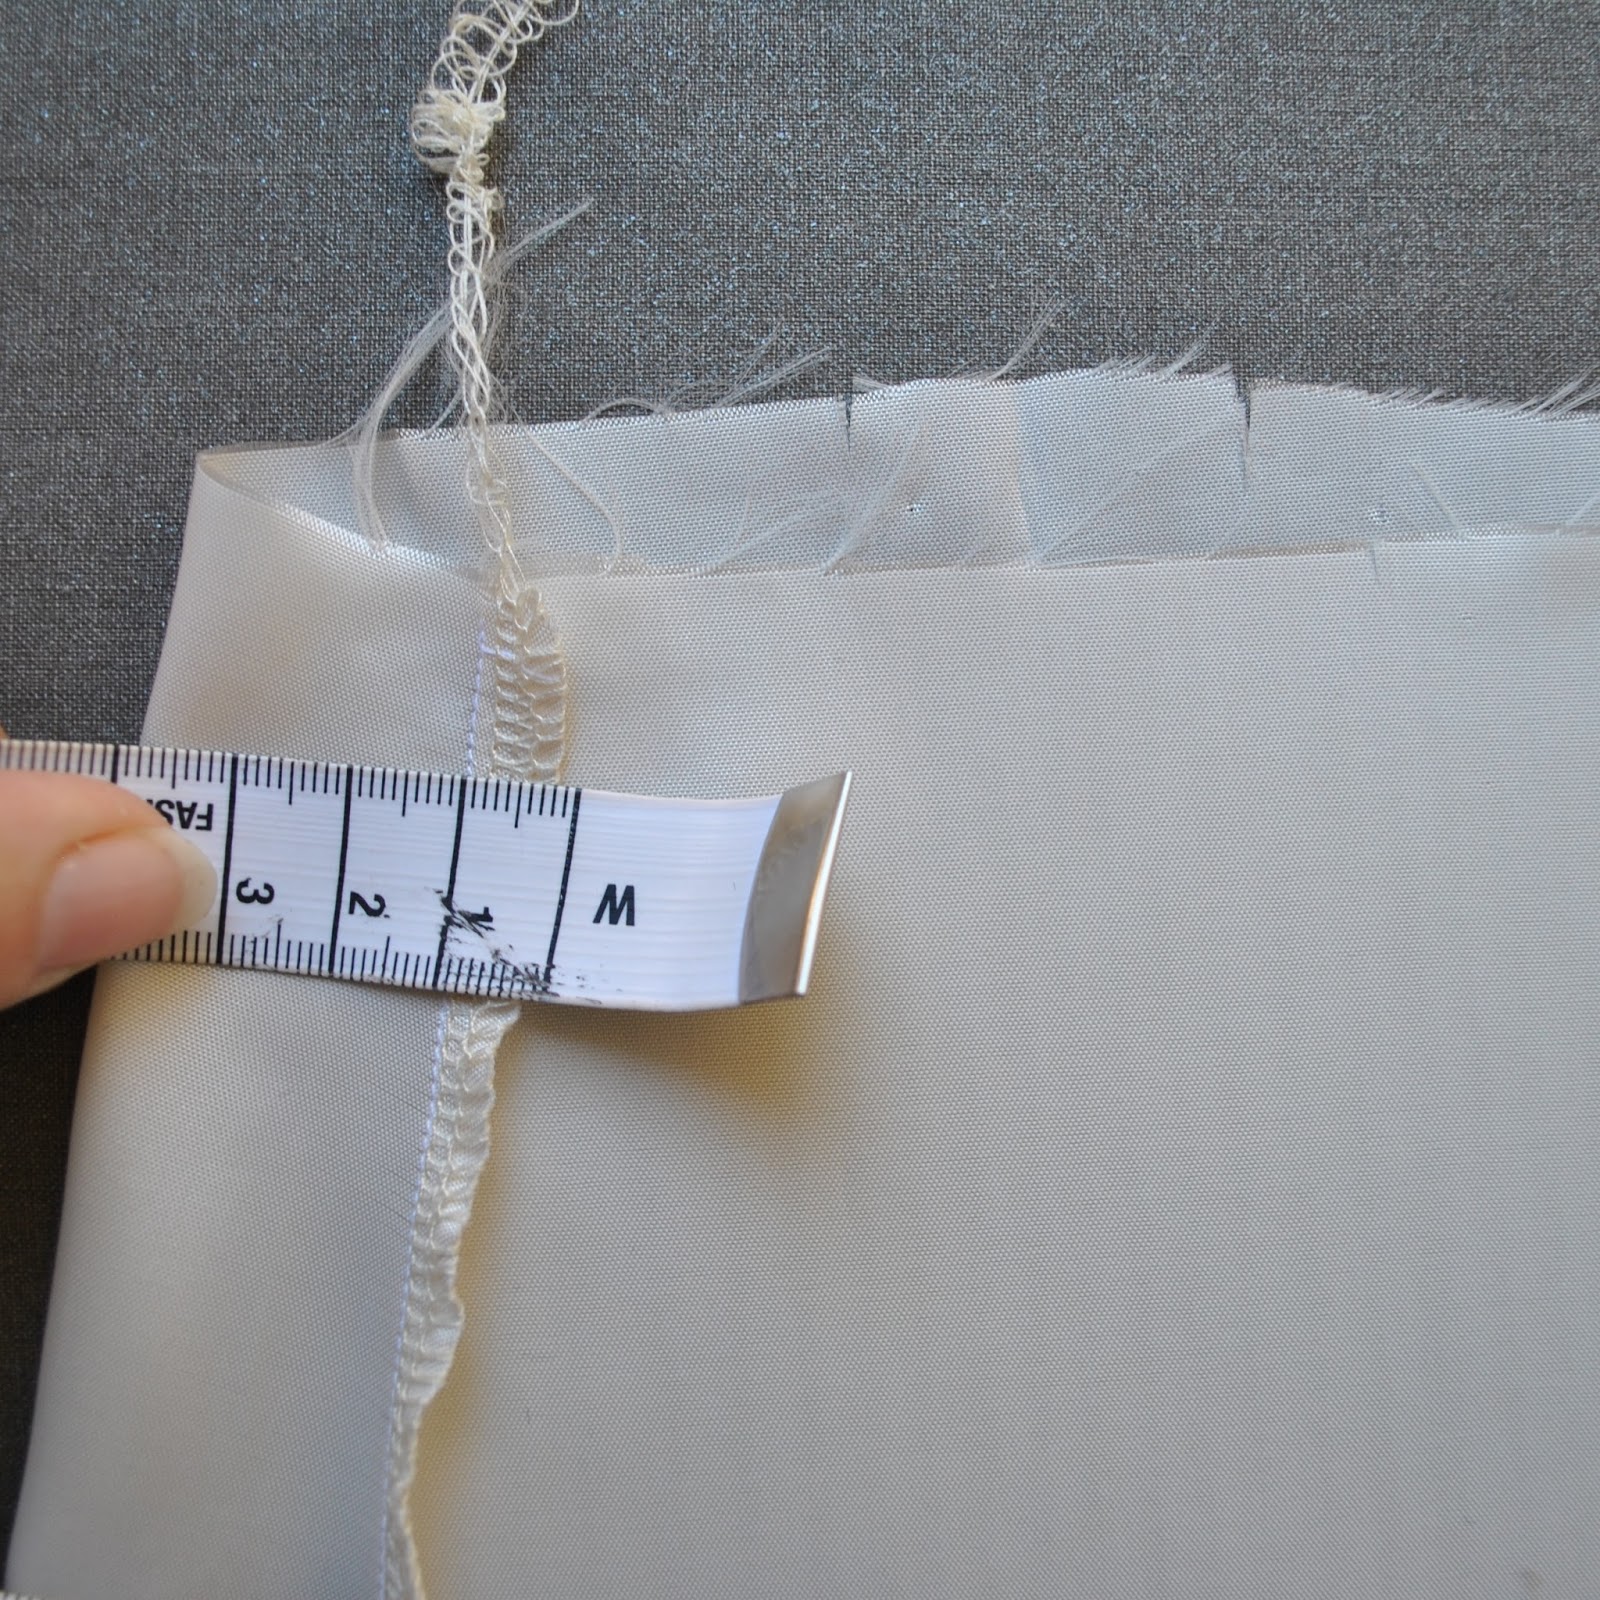
I just sew the side seams using the narrowest possible seam allowance, around 6mm(1/4″).  For a plain skirt pattern with a standard 1.5cm (5/8″) seam allowance, this alone gives around 3.5cm (1 1/4″) extra wearing ease in there.
Another, equally viable option would be to cut the lining just one size bigger instead.  

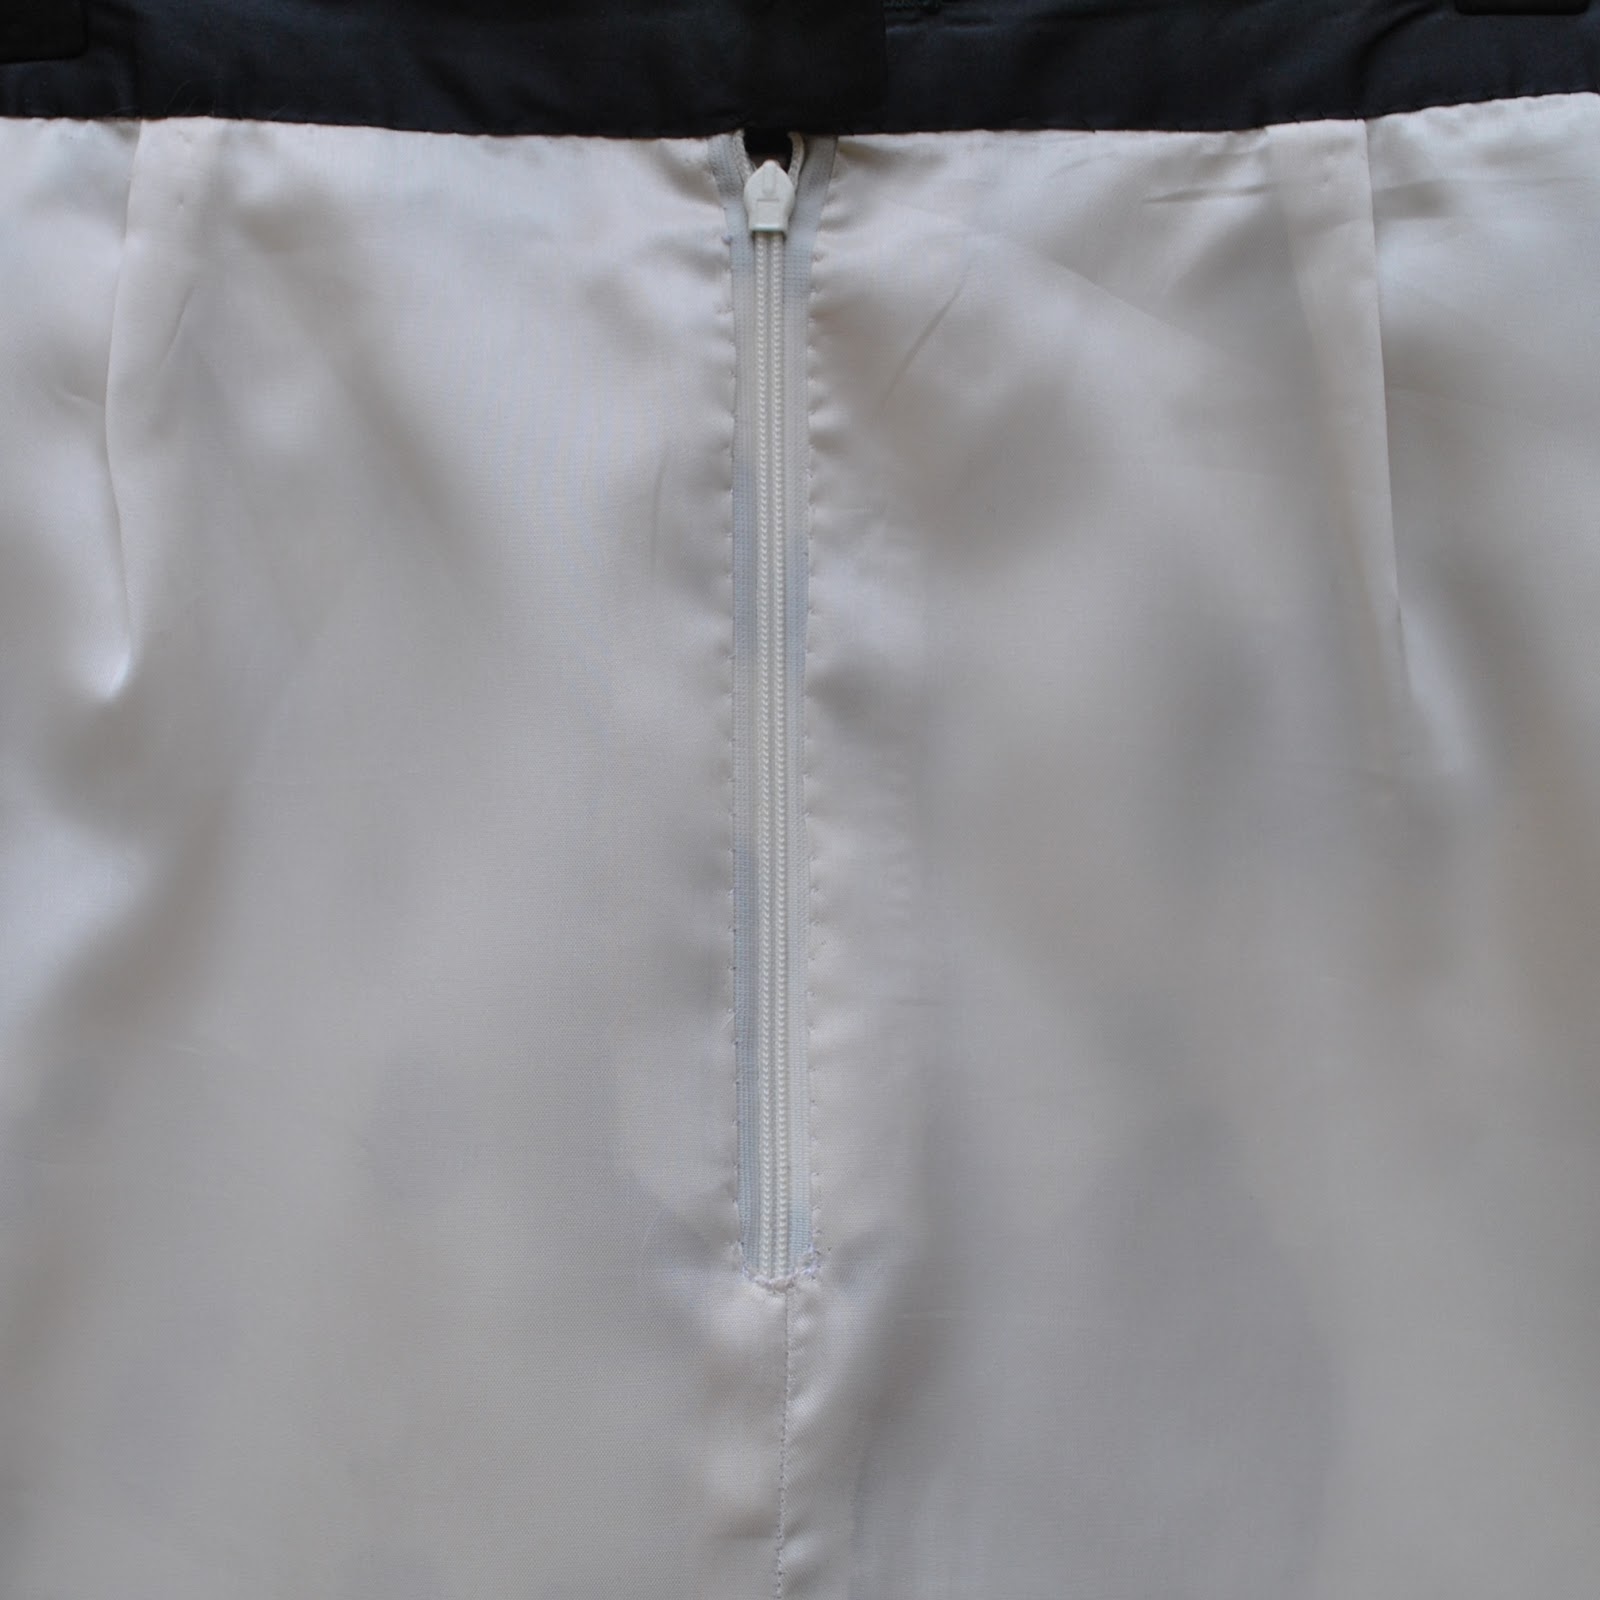
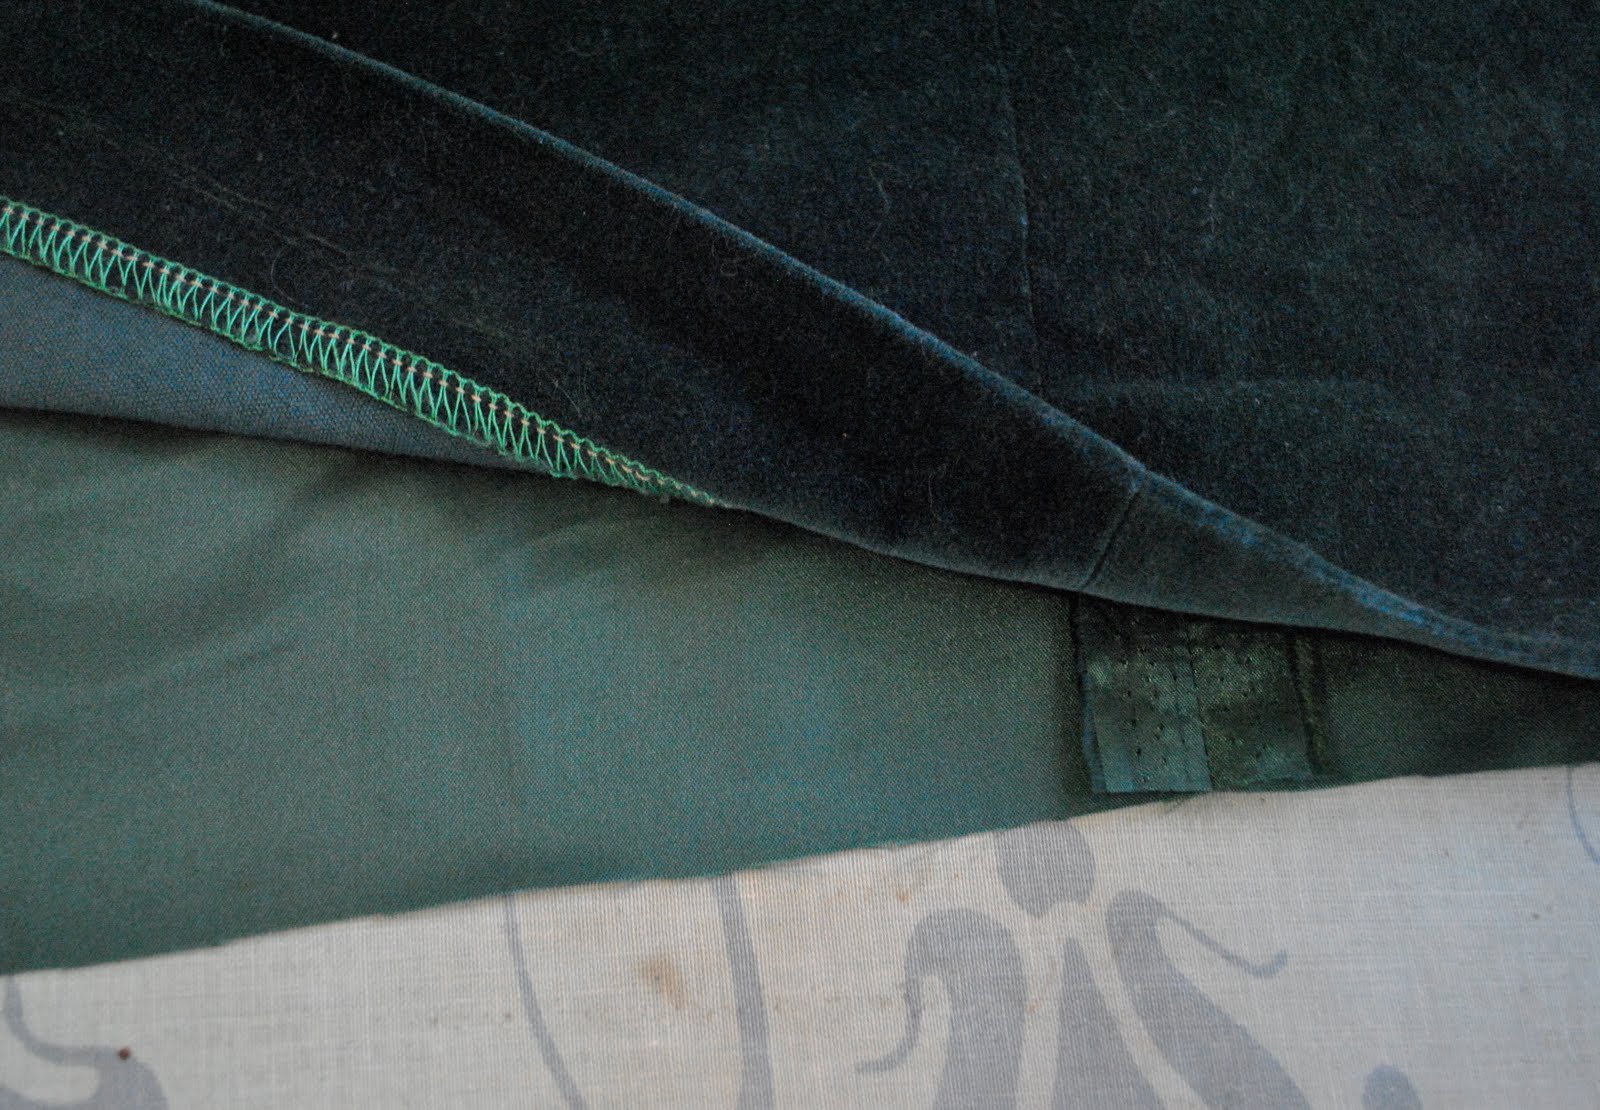
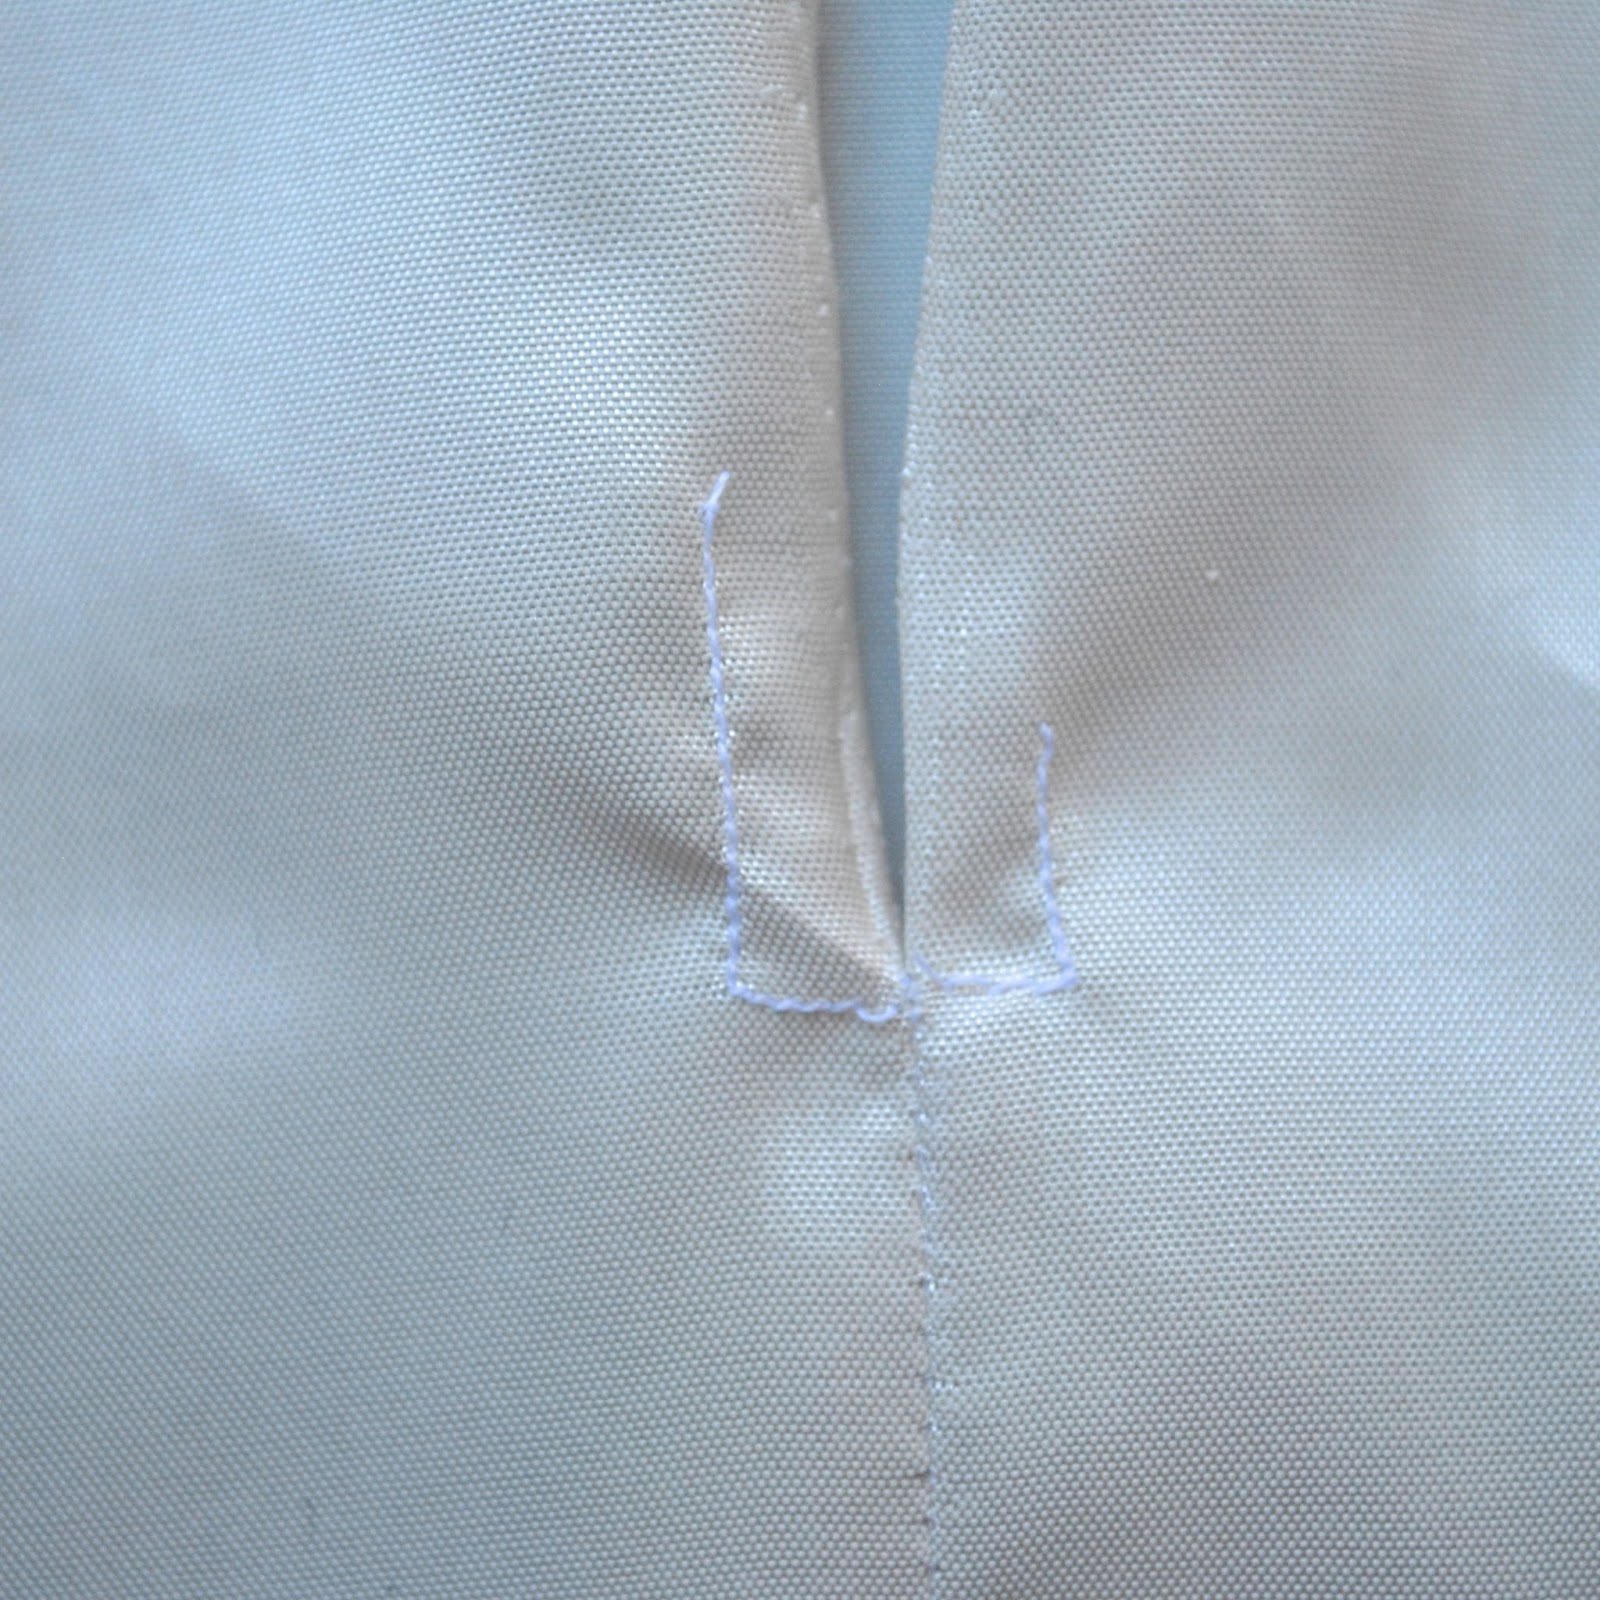
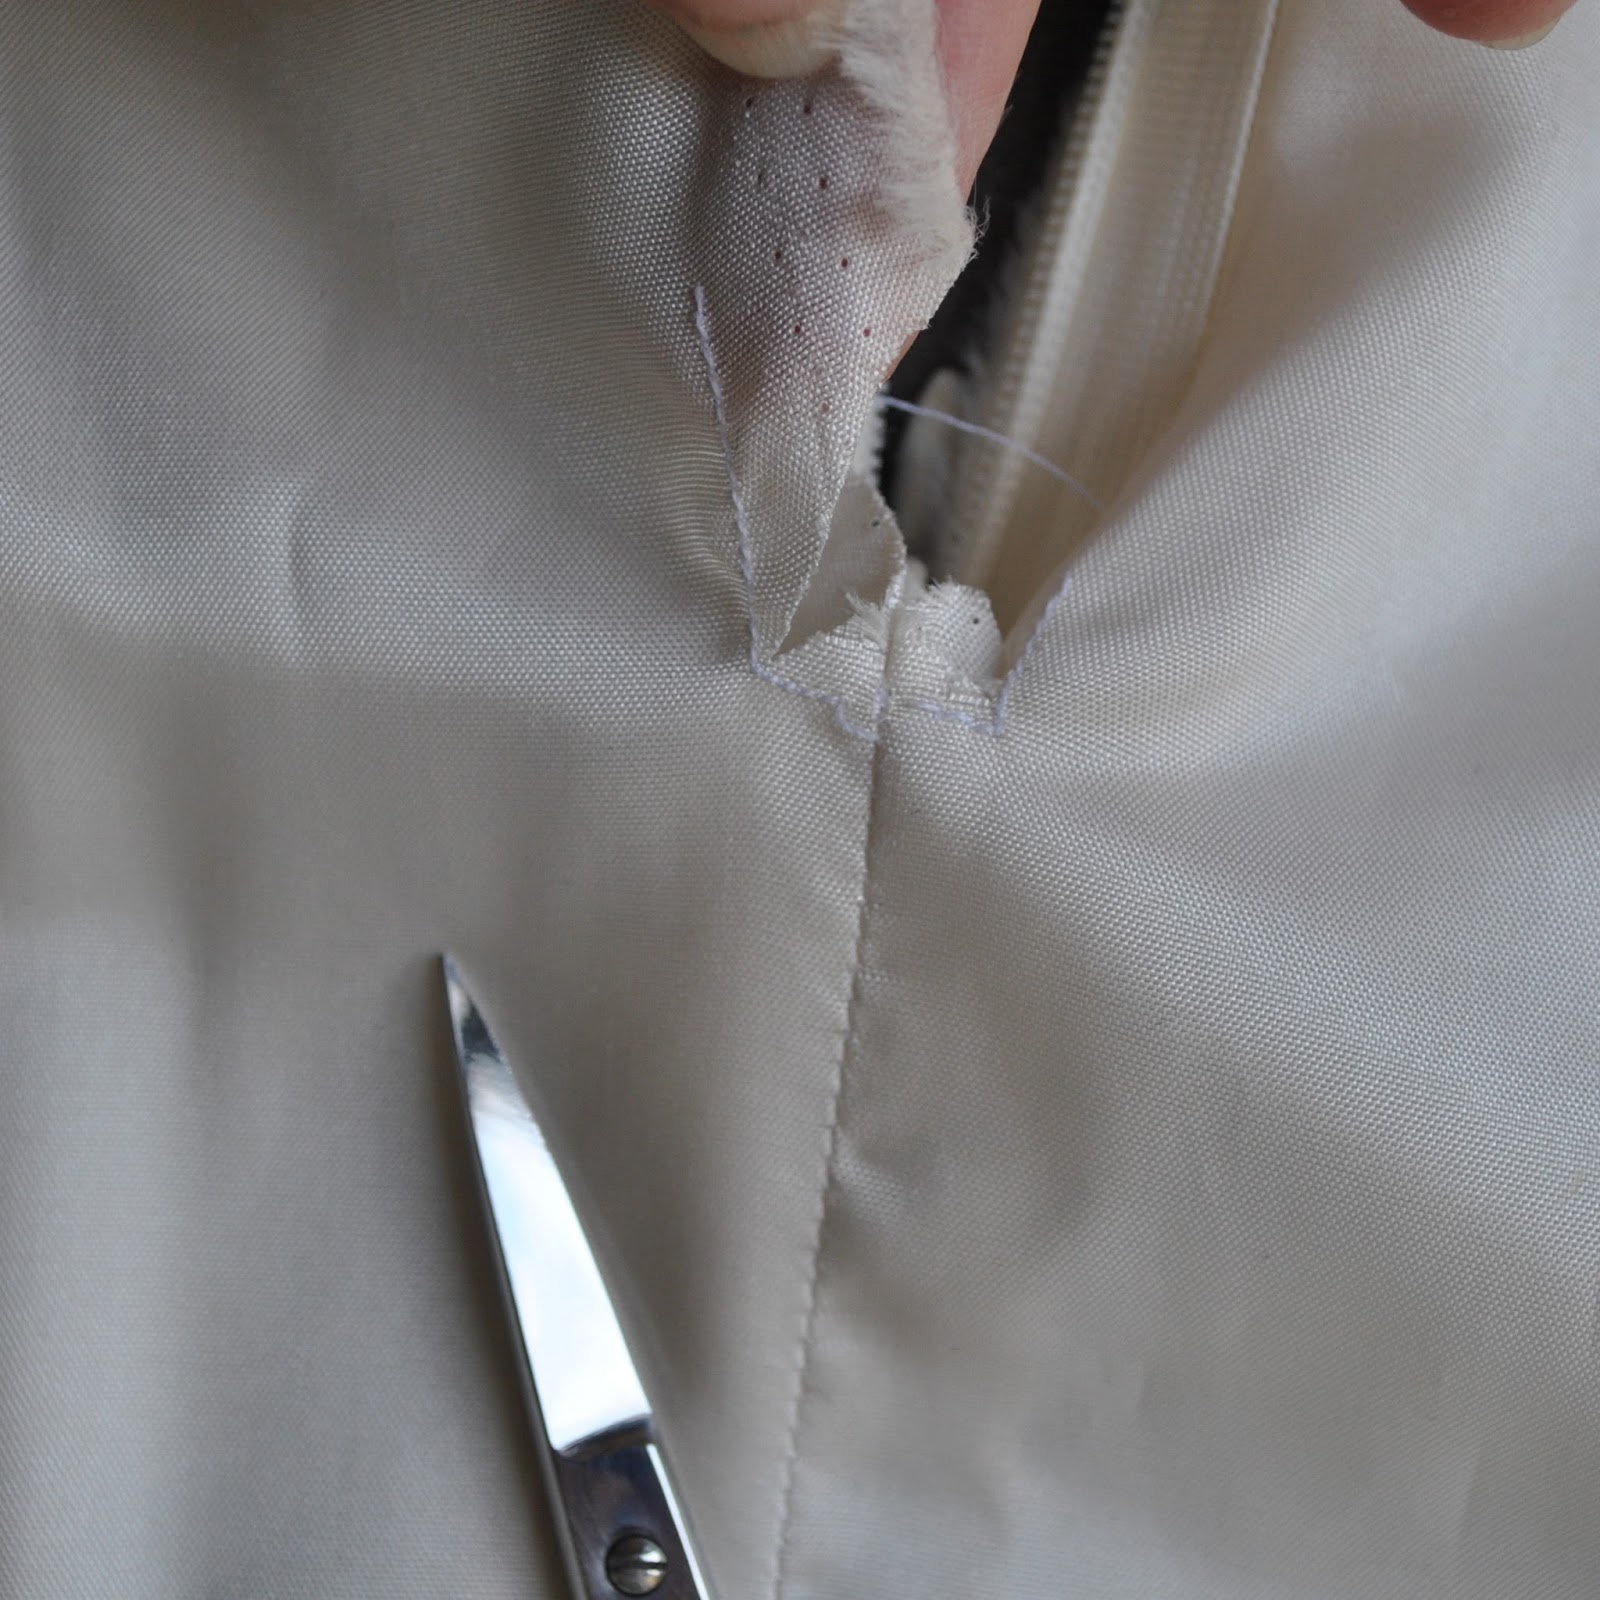
The CB seam of the lining; stitch with the regular 1.5cm (5/8″) seam allowance up to the bottom edge of the zip opening, then re-enforce the stitching line at the lower edge of the zip opening with stay stitching; stitching each side separately and keeping the seam allowance free of the stitching.  Snip into the corners, fold the seam allowances under and press.

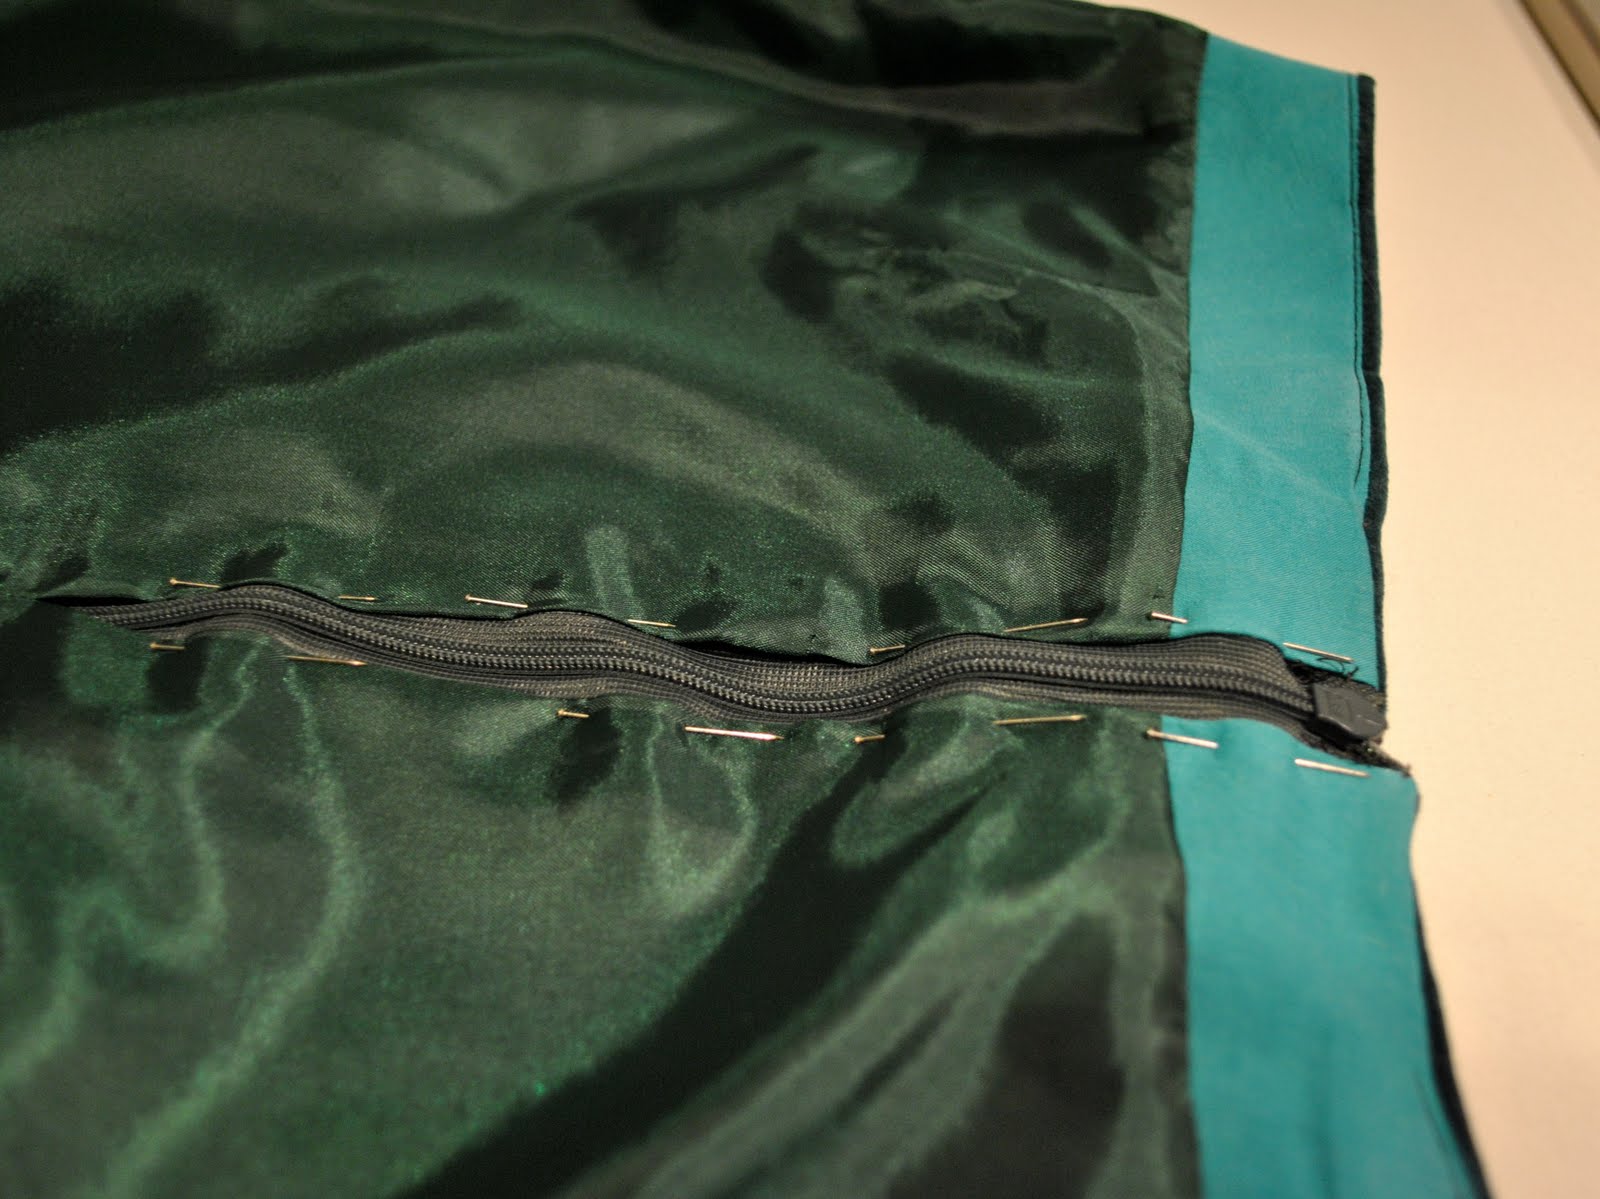
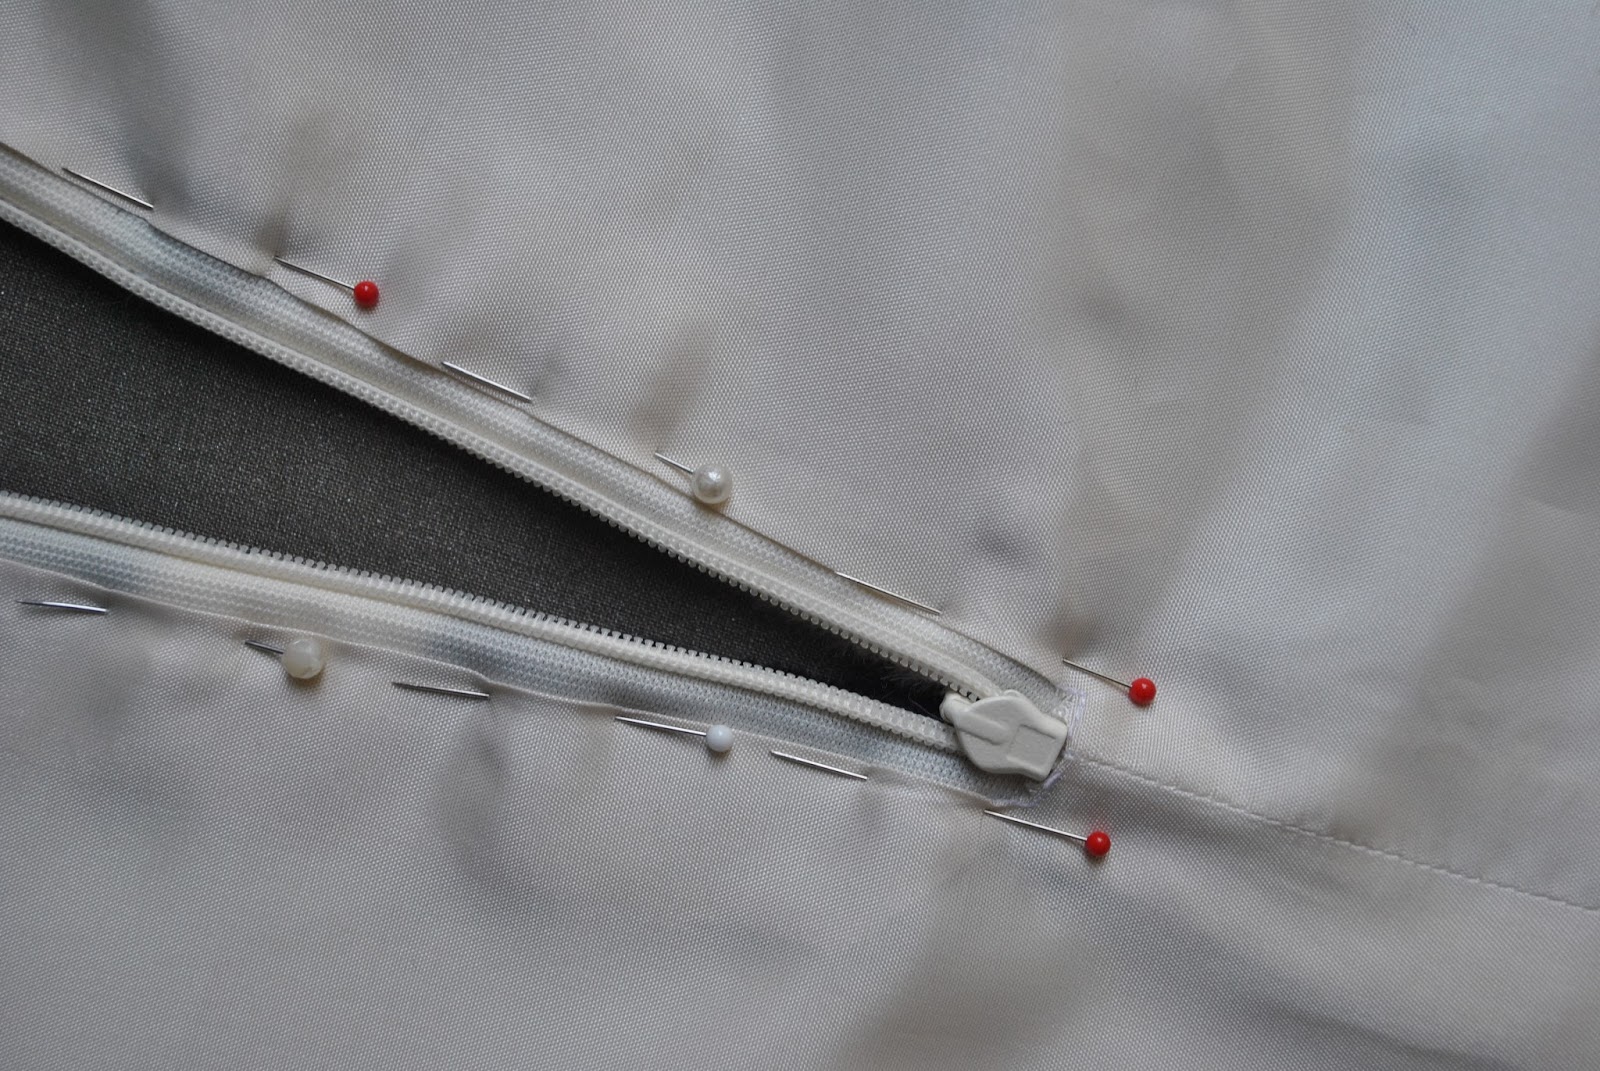
With wrong sides together, pin the lining to the skirt at the side seams.  Pin the zip opening of the lining skirt to the zip tape of the skirt.

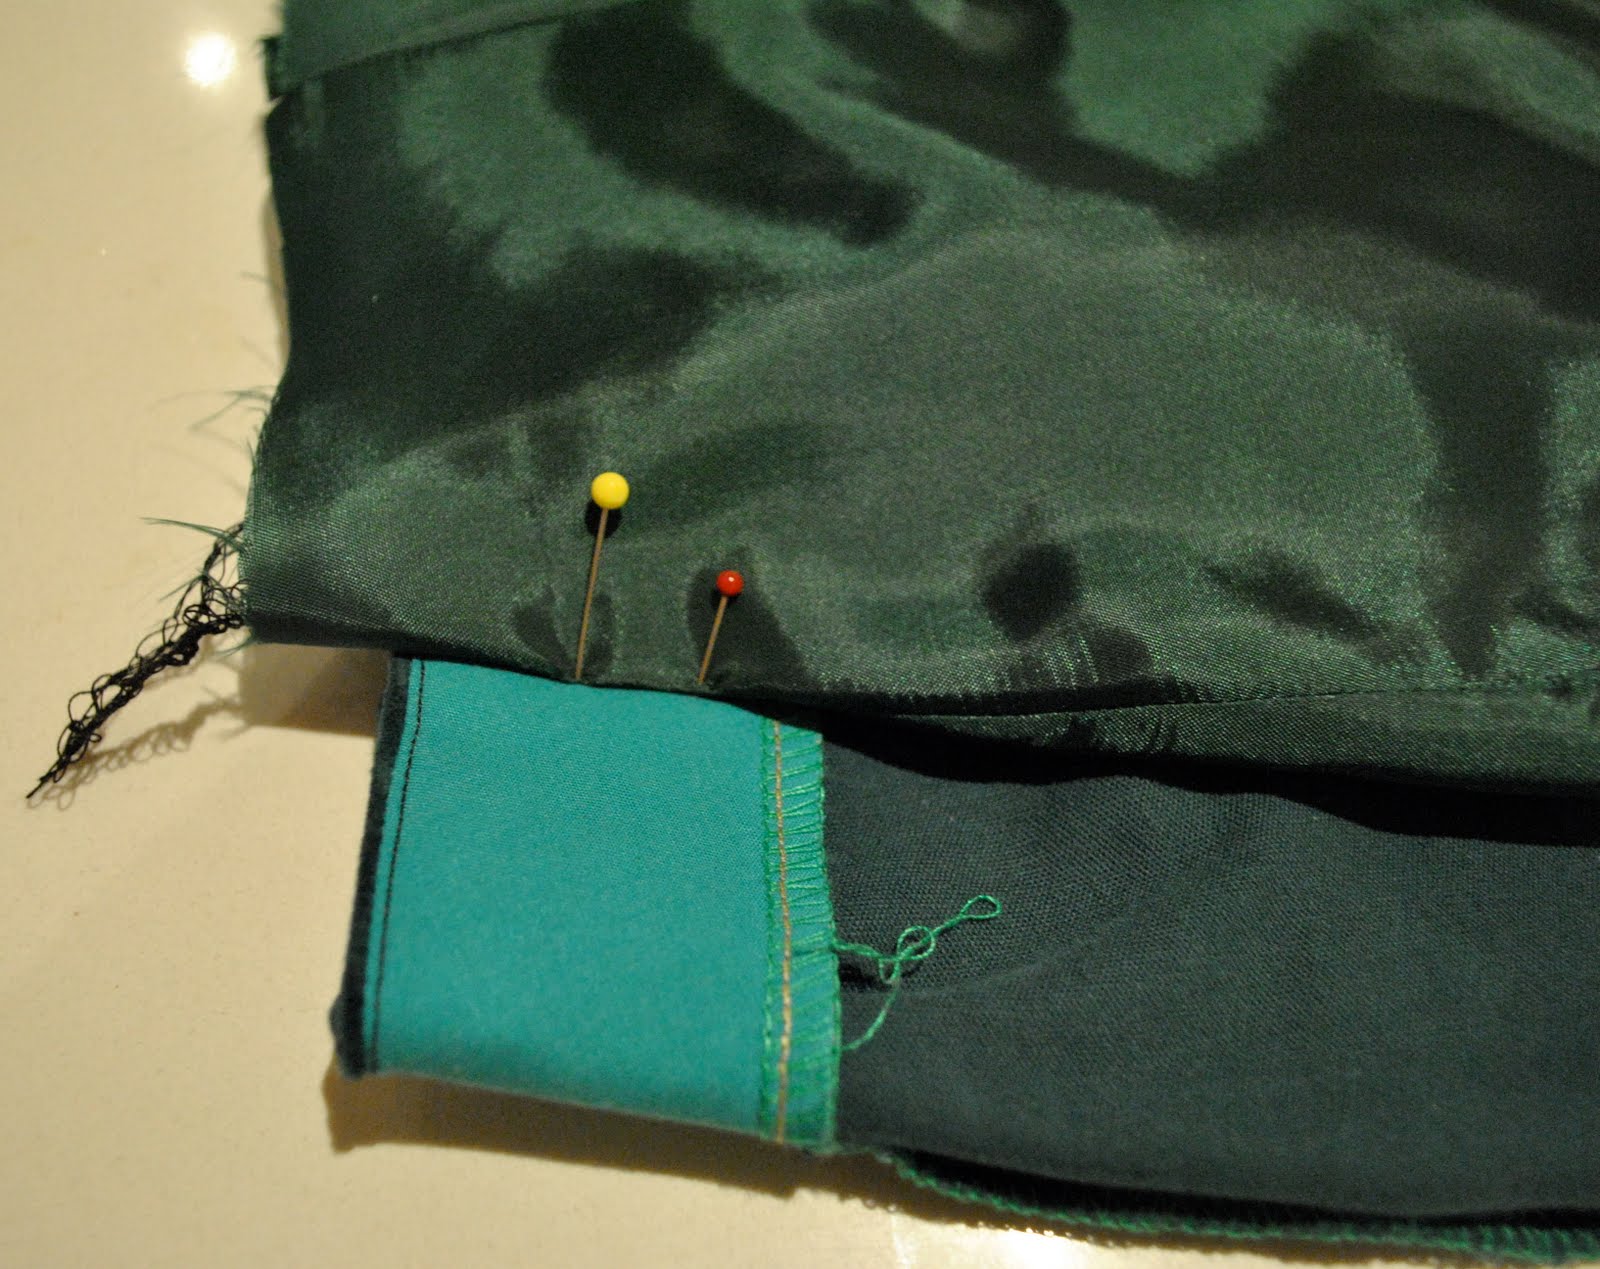
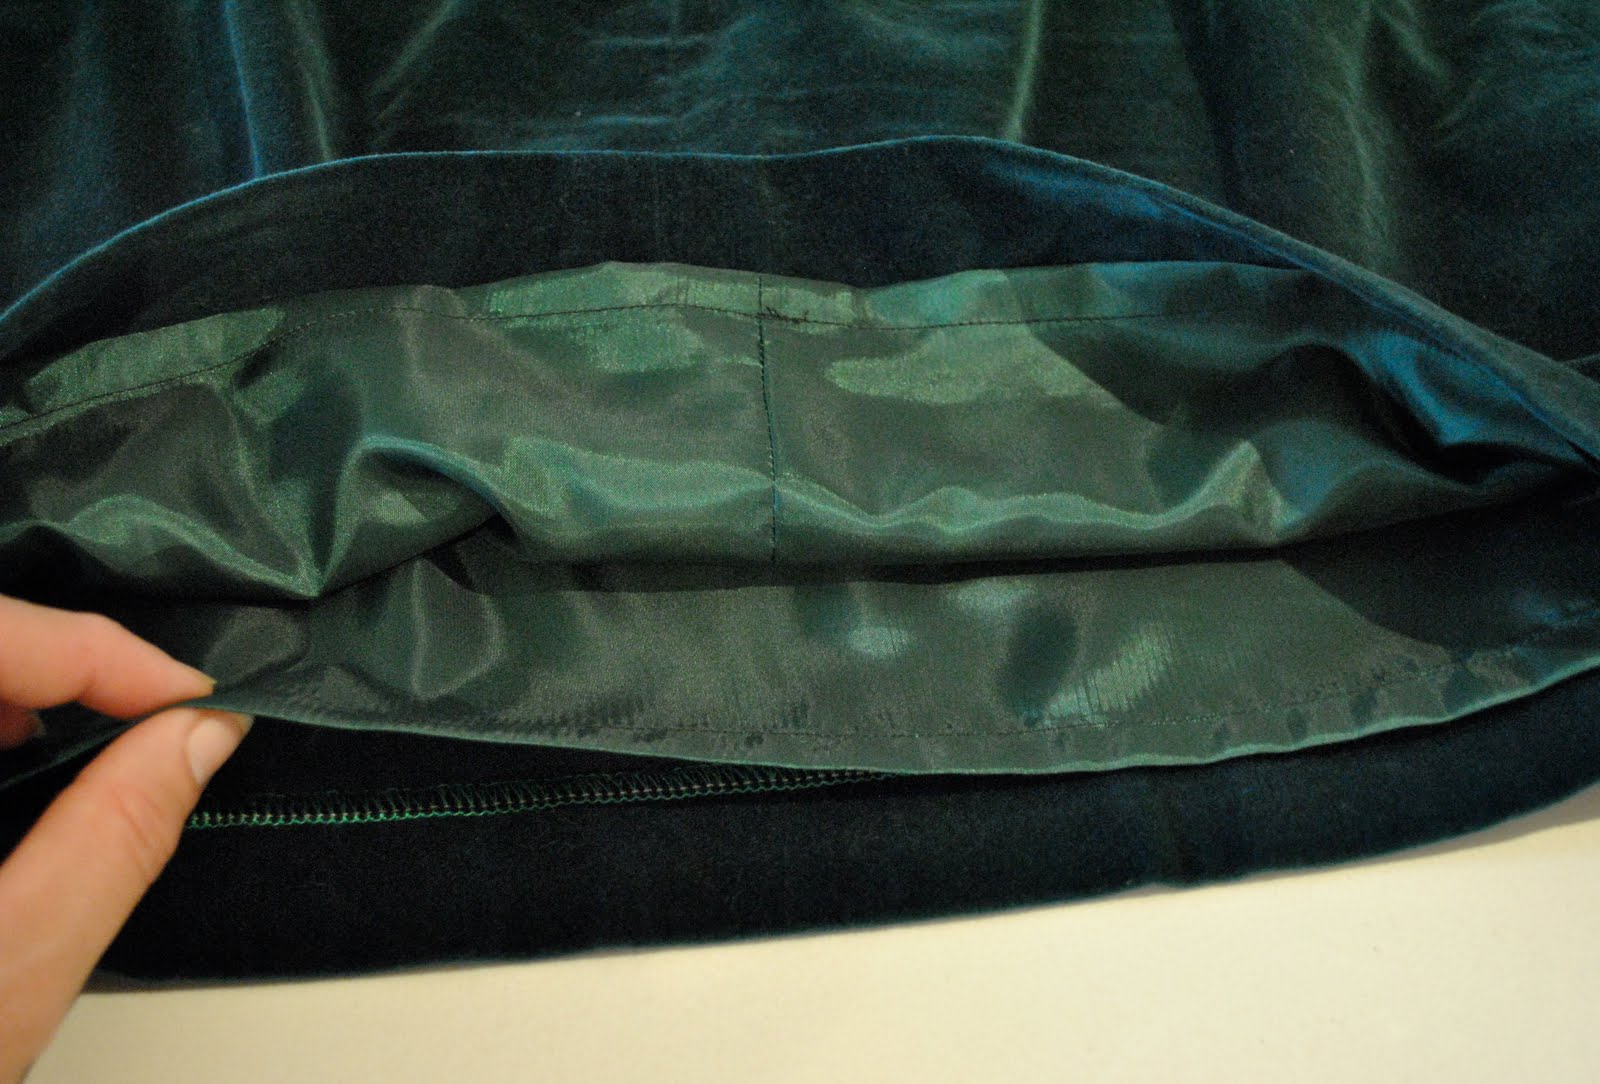
Also; do not stitch waist darts but merely fold the excess width of the lining at the waist dart point into a pleat and pin.  As expected, thanks to those narrower seams, these will be slightly deeper pleats than the skirt darts.  Pleating the wait darts rather than stitching them down also builds just a touch more ease into the lining.

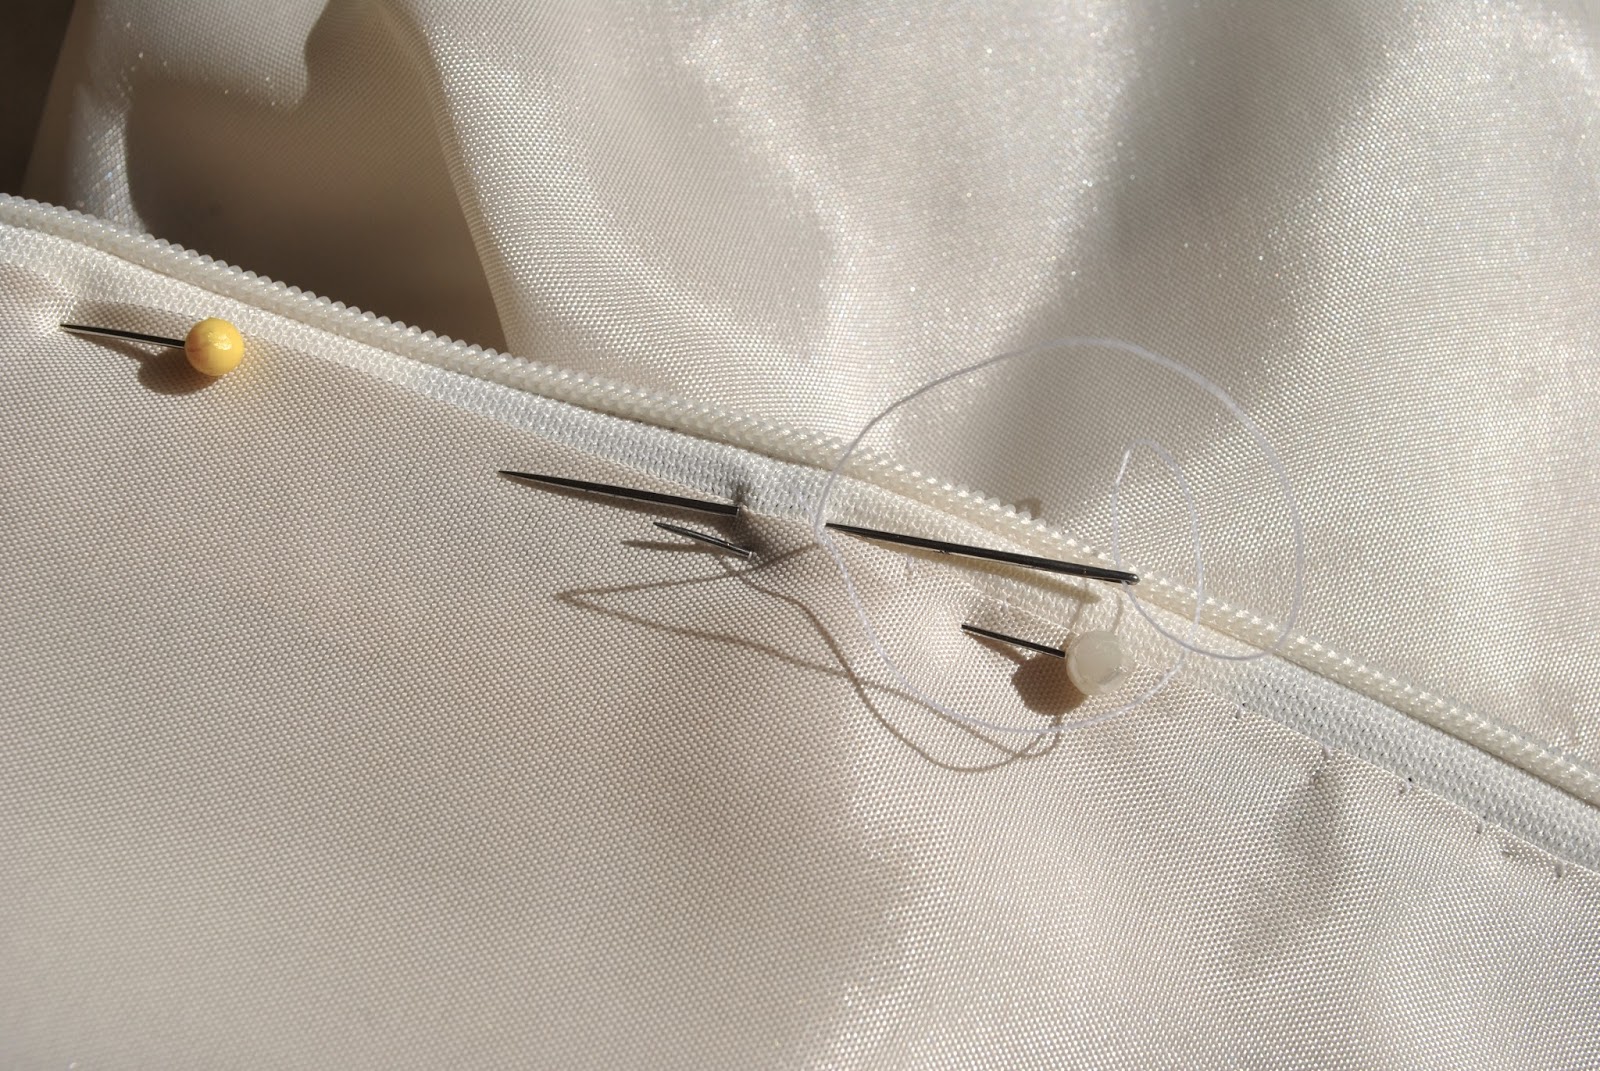
Hand-stitch the skirt lining to the zip tape around the zip opening.

Attach the waistband as normal, and hem.  I generally hem a lining to 2.5cm (1″) shorter than the skirt, but this is a matter of personal taste.

pinterestmail

Adding a lining to a finished skirt

My bottle green basic skirt has had an update!  Well, not one you’d see, but one that will make it tons more wearable in my winter repertoire; I’ve added a lining.
The first few times I wore this in autumn I wore it on its own (see left) and all was hunky-dory.  Then as the weather turned brisker I started donning tights to keep the pegs warm and an immediate problem reared its ugly head… barely half a day had gone by before the skirt sticking to my textured tights as I walked and riding up in a most unladylike fashion became an issue… something had to be done and fast before I could decently wear this thing out in public again!!  So the next time I visited my favourite fabric shop I bought 70cm bemsilk lining in emerald green.
The pattern I used for this skirt Vogue 7303 is ordinarily an unlined skirt with an internal waistline facing and a centre back zip, which is how I made it up for this skirt (this pattern has been used a multitude of ways as followers may have noticed!).
So to line it, this is what I did…    I cut out a front (on the fold) and two backs (laid on the selvedge to get a ready-made finished edge for those centre back edges) from the lining fabric (here the skirt is inside out to show the turquoise facing band, this is invisible when the skirt is right way out);

I made up the lining skirt identical to the pattern, leaving the centre back seam un-sewn, and serged the side seams to finish;

Then the precision measuring bit (not being facetious here, it is pretty important to get these measurements as spot on as possible for a good fit).  I laid the lining skirt onto the finished skirt, so the seam allowance (1.5cm) is overhanging the top of the skirt.  In the picture the red pin is marking a point 1.5cm (5/8″) above the bottom edge of the facing, this will be the stitching line where your lining will be joined onto the facing of the skirt.  The yellow pin is marking a spot 1.5cm (5/8″) above this point; this will be the cutting line for where you can cut away the top of the lining skirt.  Mark both of these lines on your lining skirt all the way around with pins or tailors chalk.  Carefully cut along the cutting line (yellow pin line) around the top of the lining skirt.  

Unpick where you’ve previously joined the facing to the zip tape, and with right sides together and using a seam allowance of 1.5cm (5/8″), sew the lining skirt at the stitching line (red pin line) to the facing.  Serge to finish and press down.  Now sew the centre back seam of the lining skirt to finish at the base of your zip, iron down the seam allowances of the lining and pin to the zip tape.  Hand stitch lining to your zip tape…

Cut away the lining level with the base of the skirt…

Fold up 1cm, then 1cm again, press, pin and stitch as normal for a lining.

Finished!  Now I can wear my skirt with tights and no more constant re-arranging of the skirt to hang properly.

pinterestmail

Unexpected inner workings…

Most of the time I make predictable choices in lining by carefully matching my lining fabric to the outer layer to get as close a match as possible, but every so often I go for something completely different.  A little burst or jolt of surprising colour just to give a little zing of unexpected pleasure when I catch sight of it, and what are our clothes if not to give us pleasure as well as the necessary warmth and modesty requirements?
Even on my wedding dress I chose a soft rose pink lining to go under the ivory silk taffeta of my dress, because I wanted to project a sort of rosy pink glow on my wedding day… I know it is kind of funny, we were quite young when we married and features such as a pretty pink glow rated highly on my scale of ideal looks.  Wouldn’t be a look today’s bride would go for I think, my friend E and I the other day were discussing how sophisticated bridal fashions are now compared with the “princess” look most of my generation sported back then.  My wedding dress was heavily influenced by Princess Diana’s, who was the absolute epitome of chicness and coolness when I was a teenager….  sigh, lapsing into nostalgia somewhat here…
Back to the subject I went through my wardrobe and selected some samples of contrasting linings/facings I’ve utilised recently:
You’ve probably never seen the purple underskirt to this floral number before;

I used some leftovers of this floral fabric to edge the seams of my burnt orange skirt; (I’ve already shown this picture recently, but it fitted in with my theme for today so sorry to rehash this one…)

This pale blue/silver lining adds a cool futuristic metallic touch to this black lace gothic inspired skirt;

I saw a divine vintage black velvet evening coat in Melbourne with an unexpected and stunning primrose yellow satin lining which I have regretted ever since not buying; I have since bought some fabric and am still working on the perfect evening coat shape;

For the record I DIDN’T make this corduroy coat, but its quirky lining always brings a smile to my face;

And this vintage fur coat which I was so lucky to have been given recently (please don’t be cross PETA supporters, this coat is old, probably older than anybody reading this blog) has a gorgeous warm tangerine lining;

My snakeskin print outfit?  Finished and ready to show to you soon, and here is a preview…. A lining for a satin skirt is essential if you don’t want it clinging to your legs closer than leggings, I chose a jungly shade of rich green for the lining;

Confession: I had vowed recently not to buy any more fabric until I’d finished my stash.  Well, I’ve been a bad girl.  To paraphrase Beyonce (to Lady GaGa) I’ve been a very very bad bad girl…  I read a review by Erica B on how very difficult this Vogue 1087 dress was to make.  Then I read in Australian Stitches how Cate can Reyk found the same to be an extreme challenge.  Well, I didn’t need any further encouragement.  I just love a challenge.  I’m pretty competitive that way.  So this is now been added to my to-do list….

Keep you posted!

pinterestmail
Switch to mobile version
↓