Tag Archives: Sienna

On mittens, and making time for sewing

Rootling around in my winter woollies; I realised that I had never devoted a post before now to these mittens.
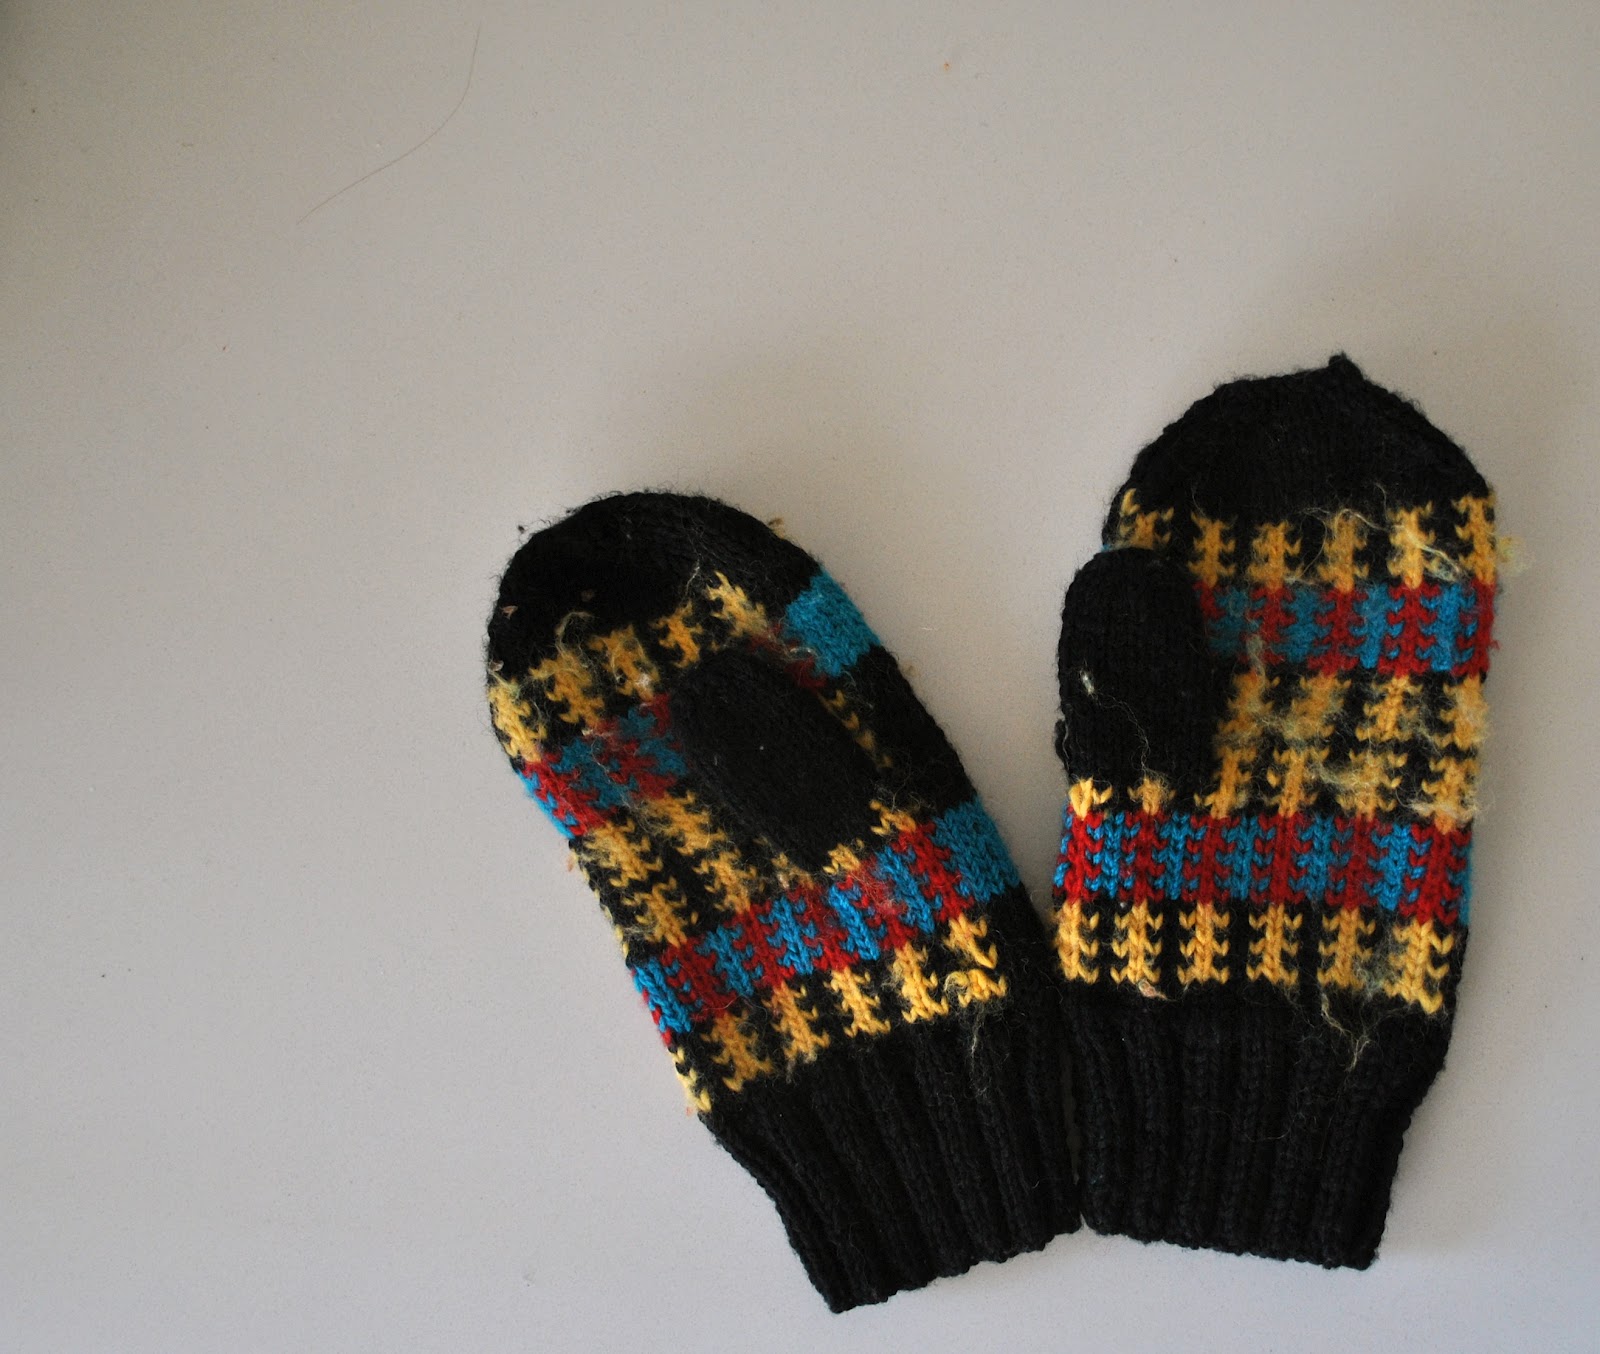
I knitted them yonks ago: probably when the children were really tiny, and probably using leftovers from one or another of my hand-knitted fair isle cardigans and jumpers that I was very keen on making at the time, and which have mostly appeared on this blog already.  The yarn is Patons 8ply, my yarn of choice for years and years and years because it came in a gloriously huge range of colours, tailor-made for lovers of fair isle knitting, and which sadly seems to be no more.
I have no memory of the pattern I used, but it is obviously a Scandinavian design, no?  (Later edit; Lydert advised that it is likely a true Fair Isle design from Scotland… thank you Lydert!)
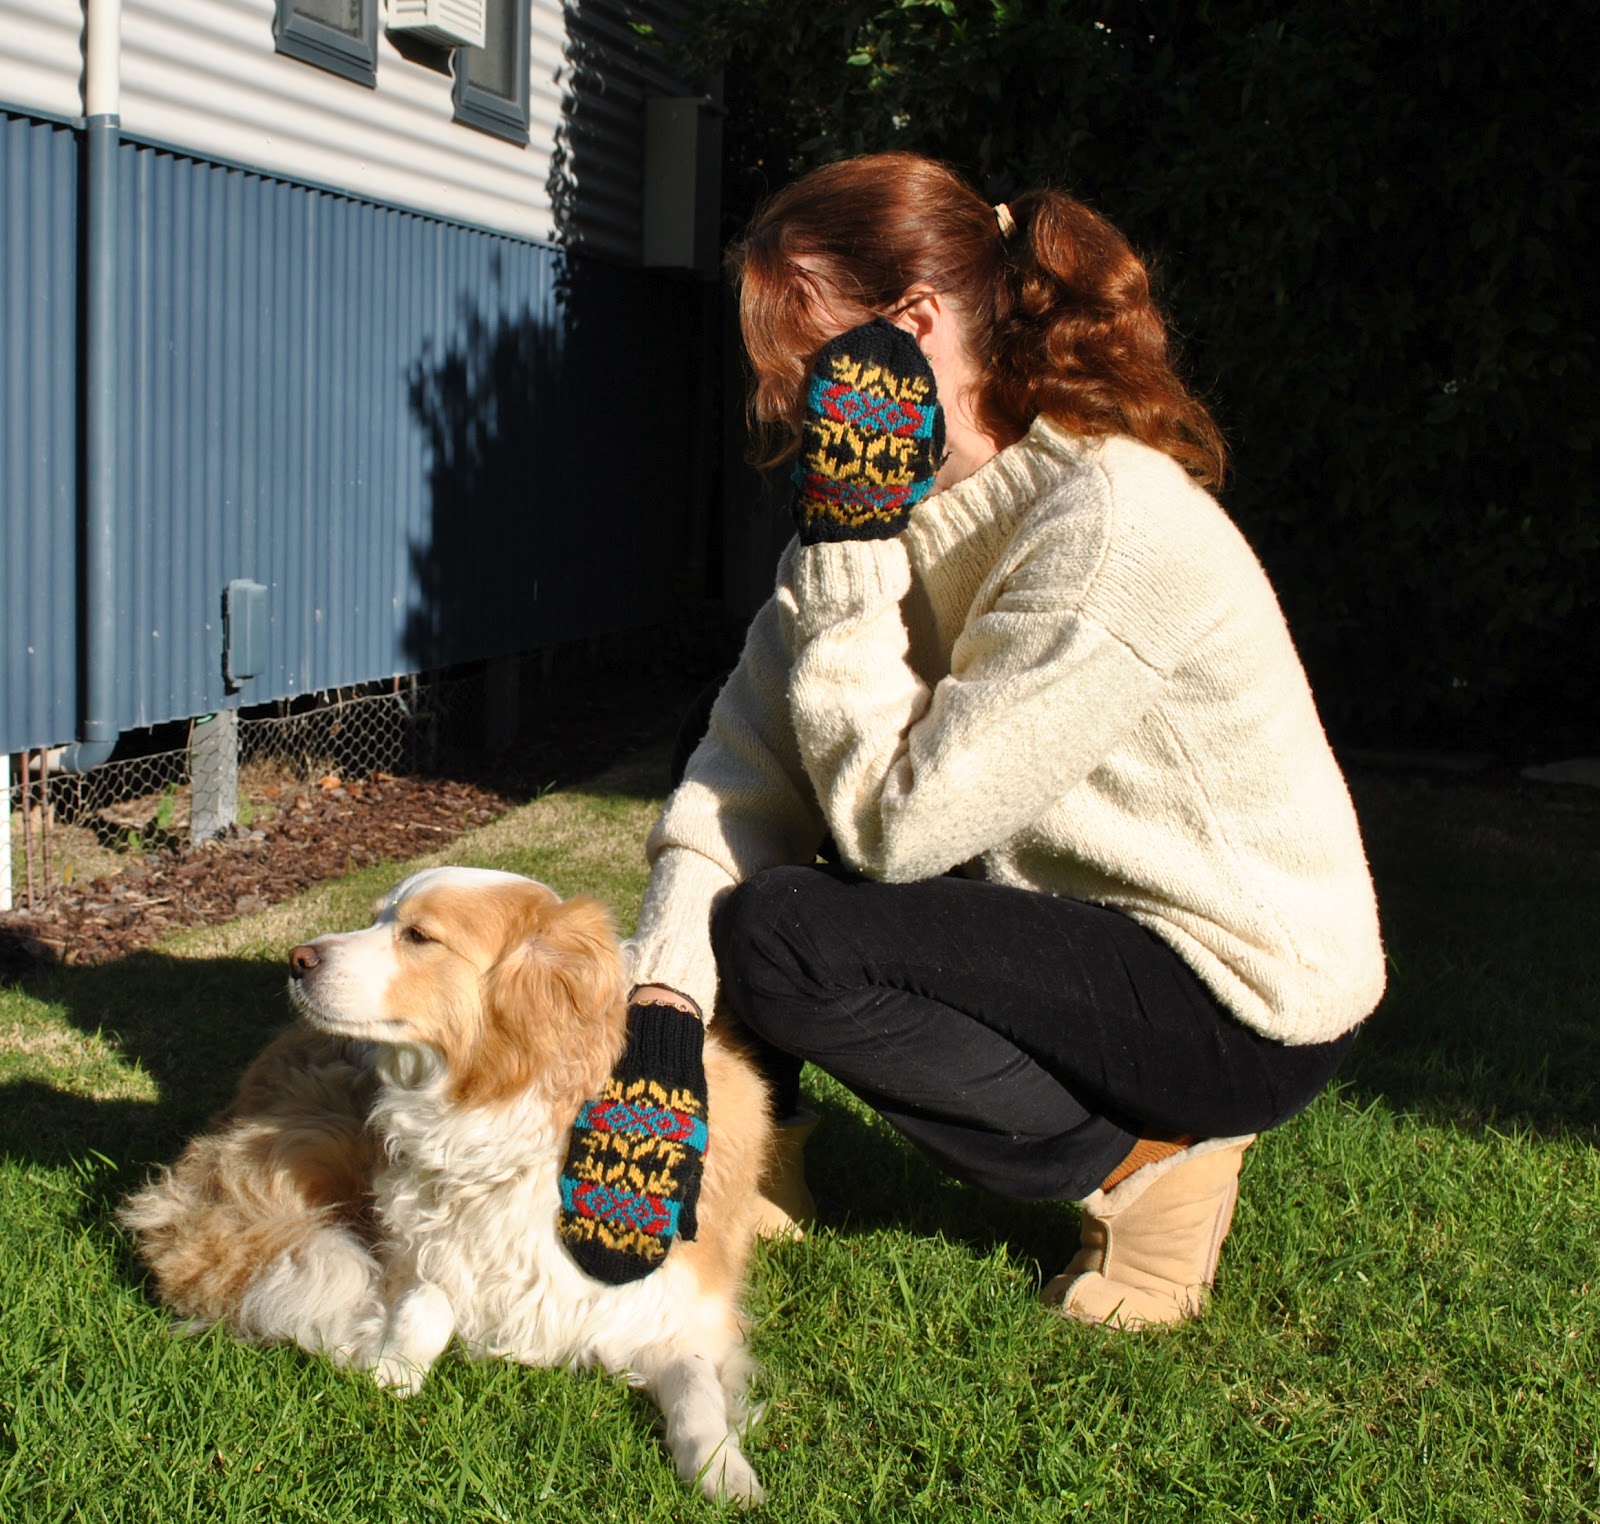
I still love to wear them on really frosty mornings, that is; as long as the finer motor skills are not required   πŸ™‚
Each row has two strands of yarn, one carried behind the other, to form the colourful fair isle pattern.  The backs of the hands are still looking quite presentable, but unfortunately the palms are a bit fluffy now through wear.  But I think they still have a good many years left in them!  I think I will try to make for myself a new adapted pattern based on these, because just now I have noticed that the area around the base of the thumb is just a tad too tight across my hand.  I think the tightness is a minor detail that never bothered me before.  When I was a wee young strapping thing I was very accepting of minor discomforts in my handmade clothing and it is only as I have got more, er, mature (haha) that I have become more picky and fussy about The Perfect Fit.
Will keep you posted on the progress of that pattern…
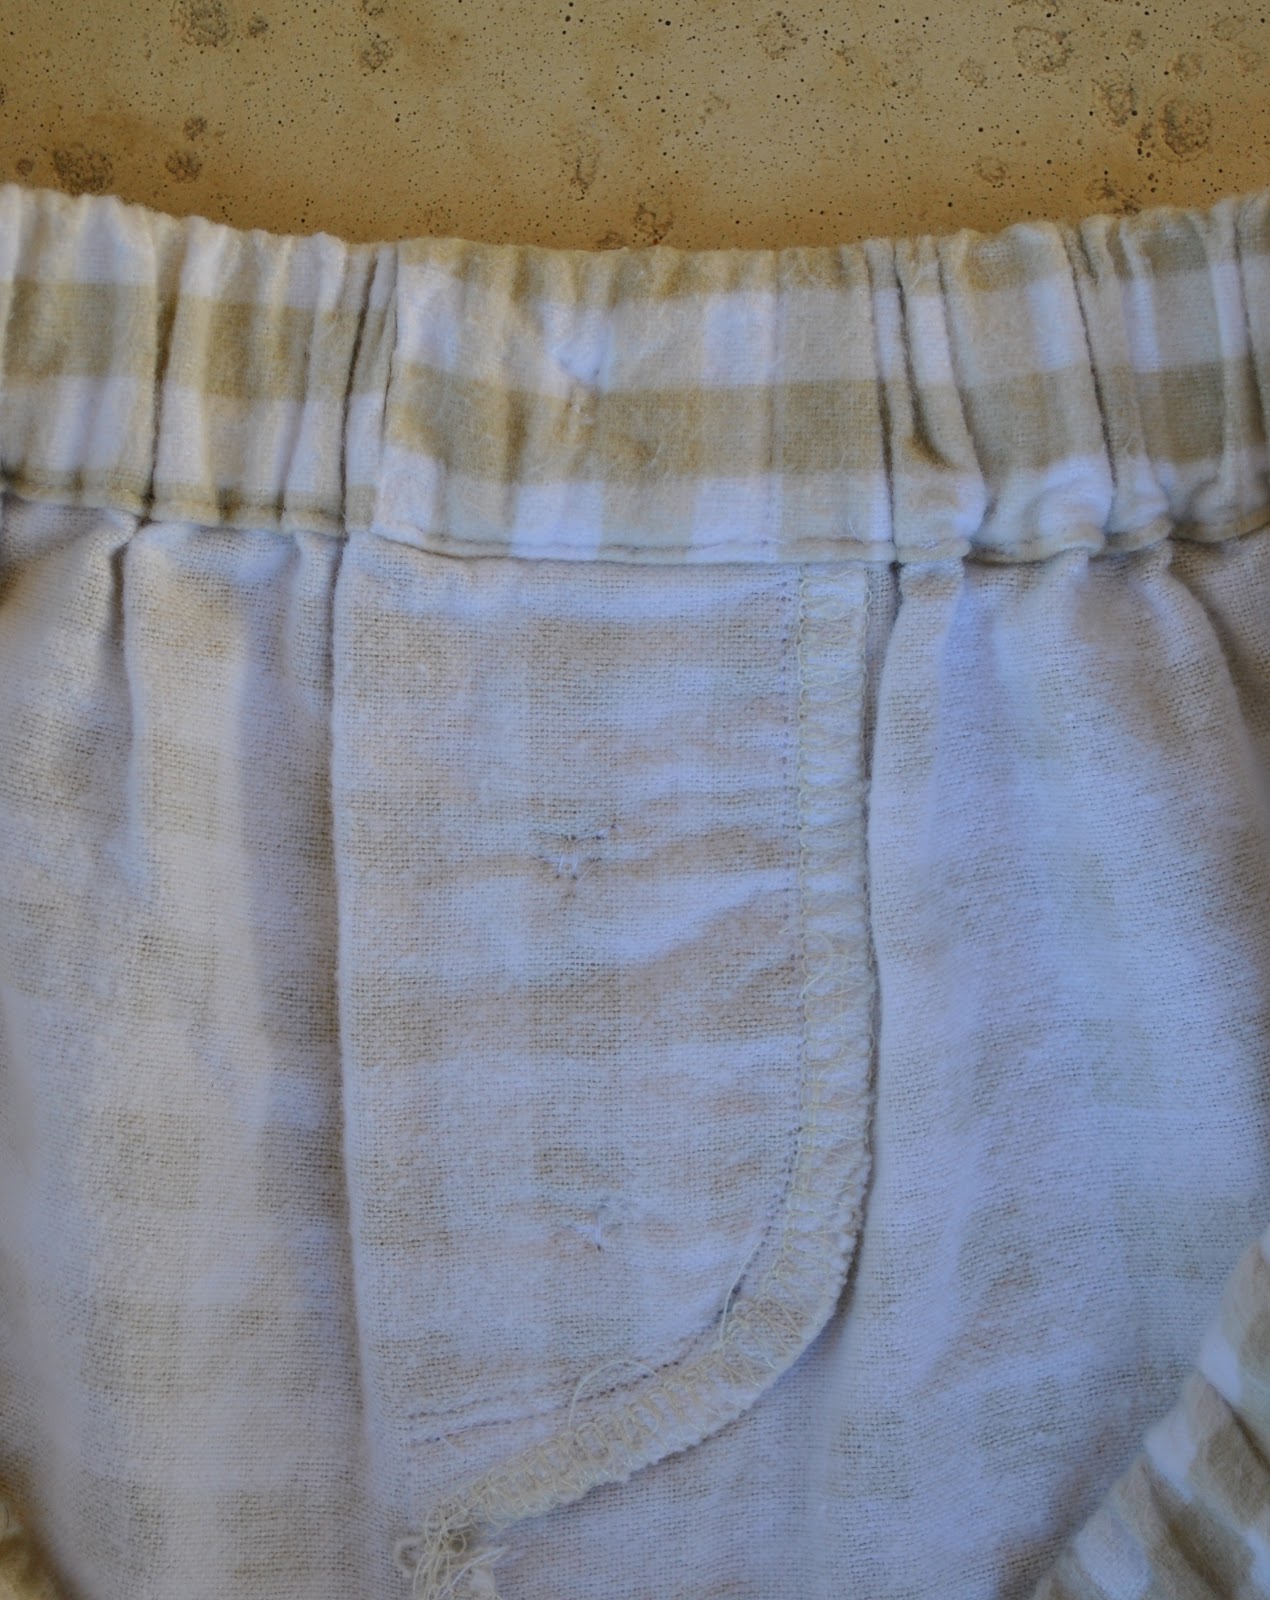
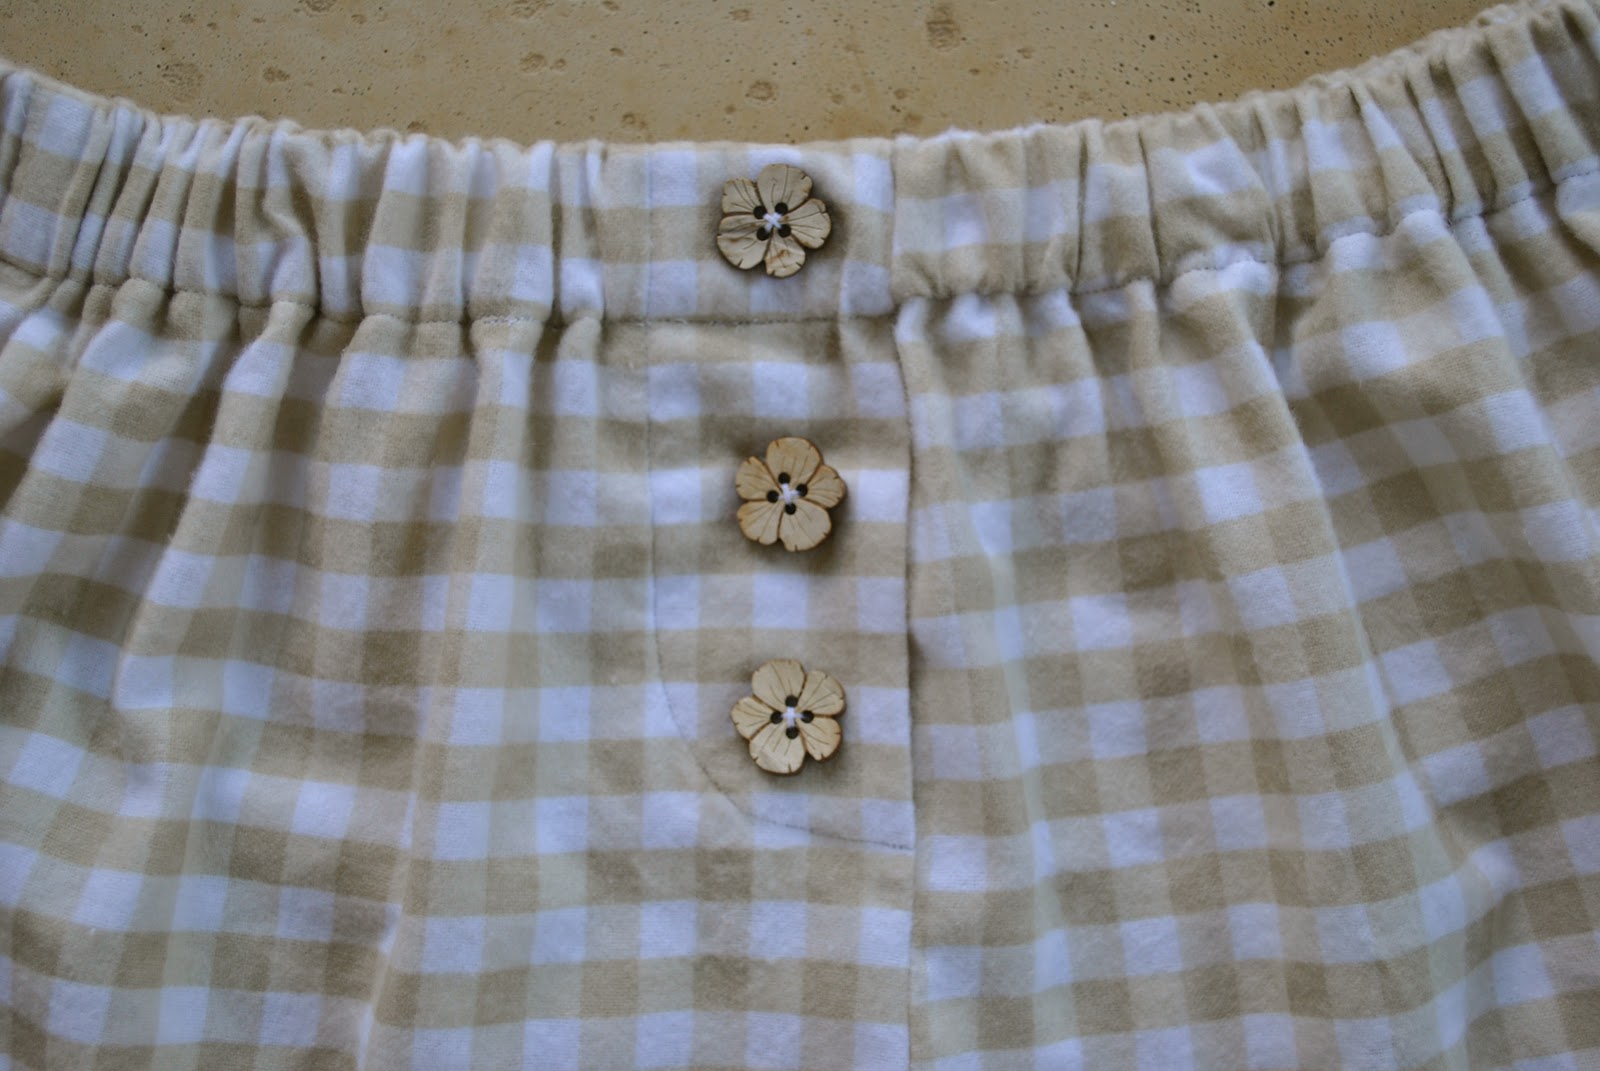
Details:
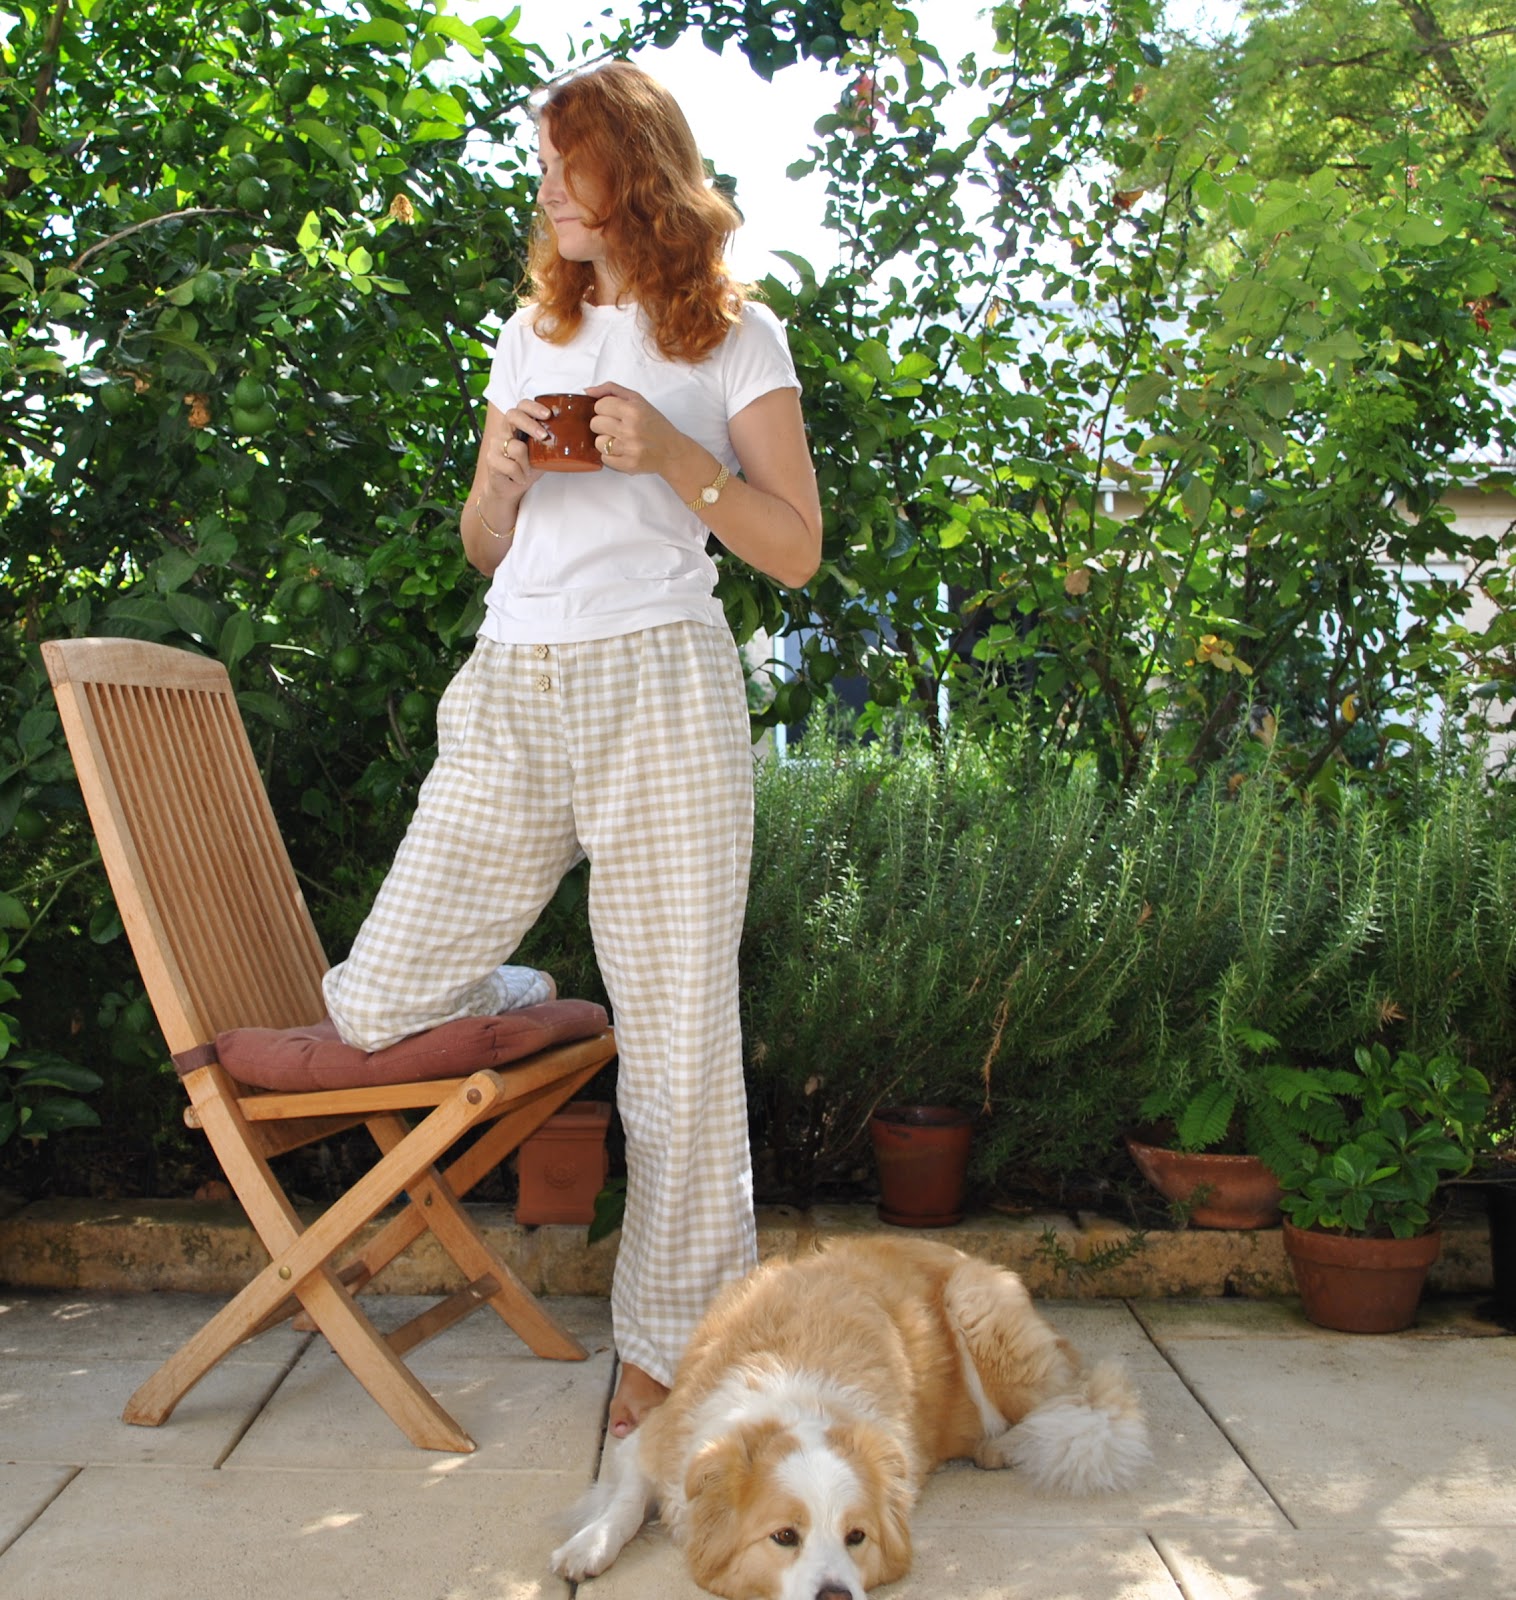
Mittens; knitted by me, using Patons 8ply merino
Jumper; knitted by me to my own design, using Jo Sharp’s Aran Tweed, details here
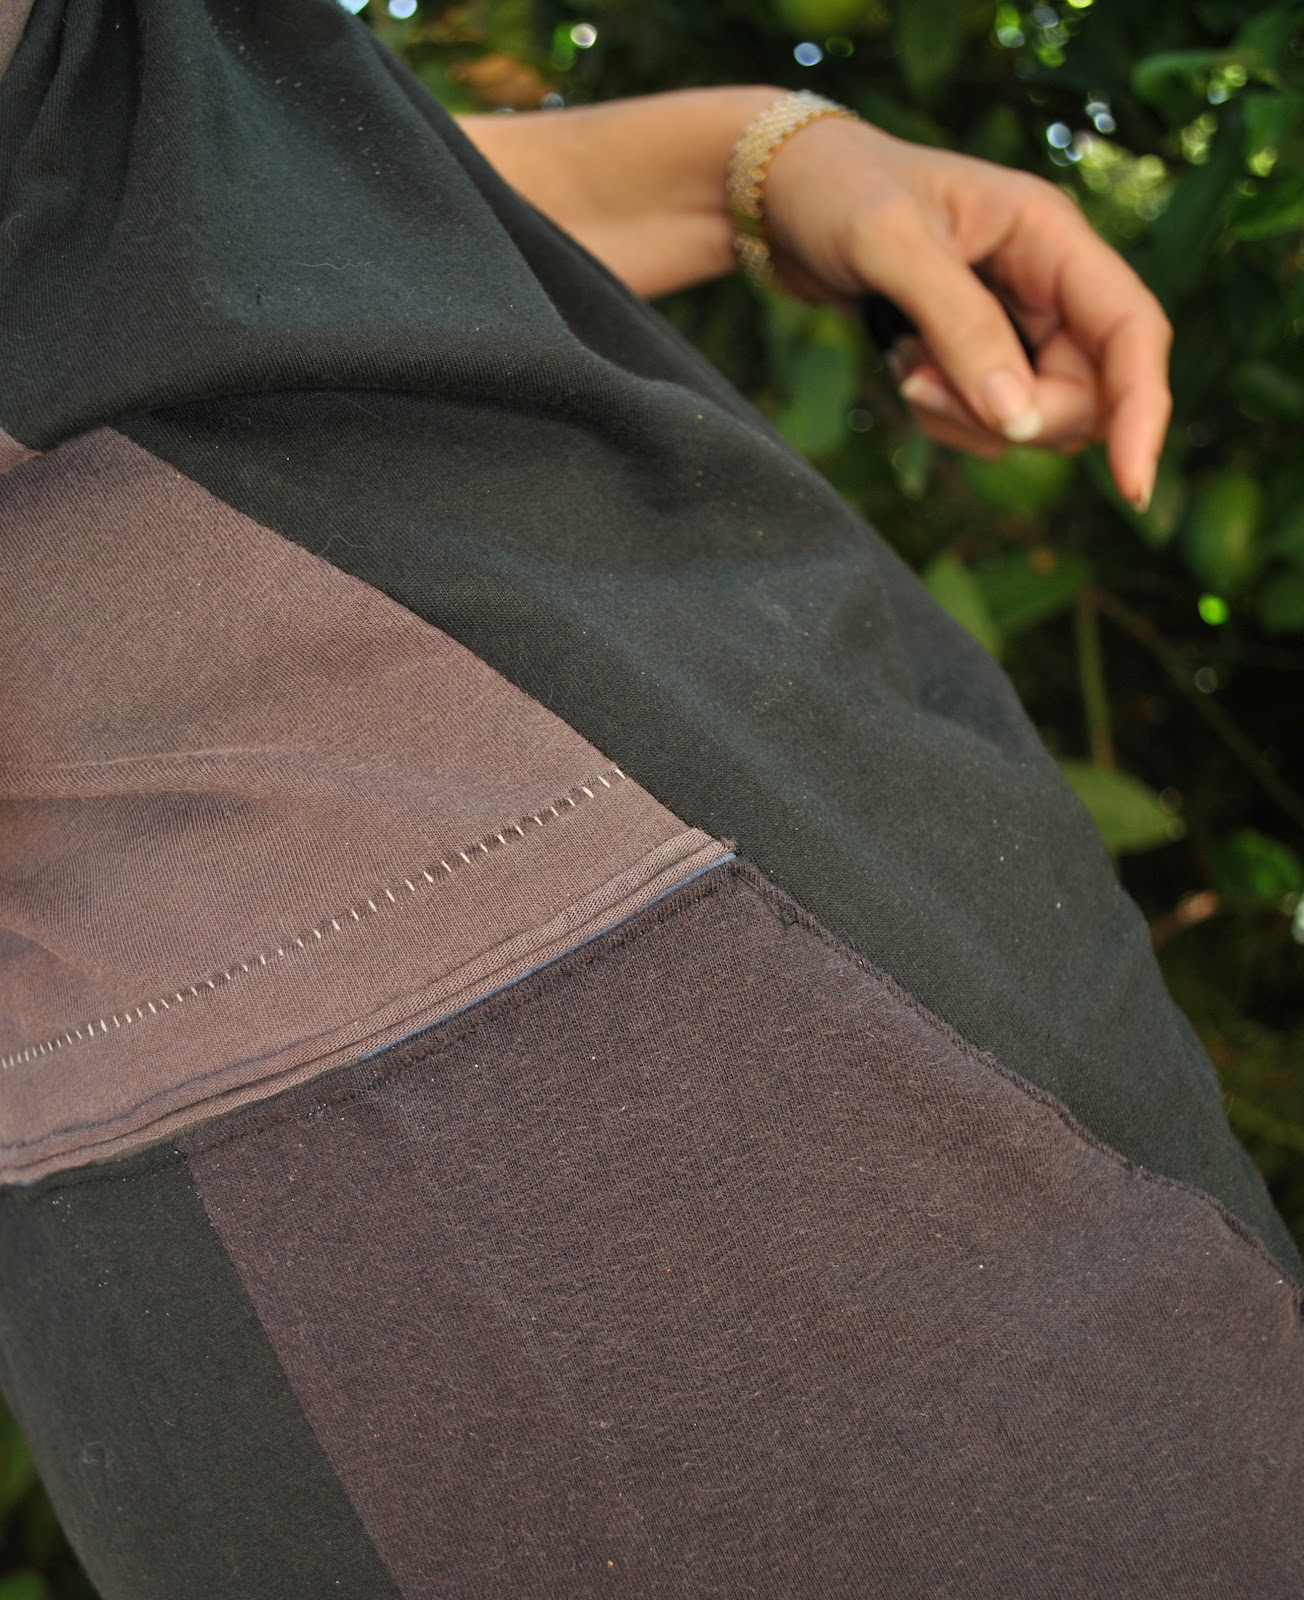
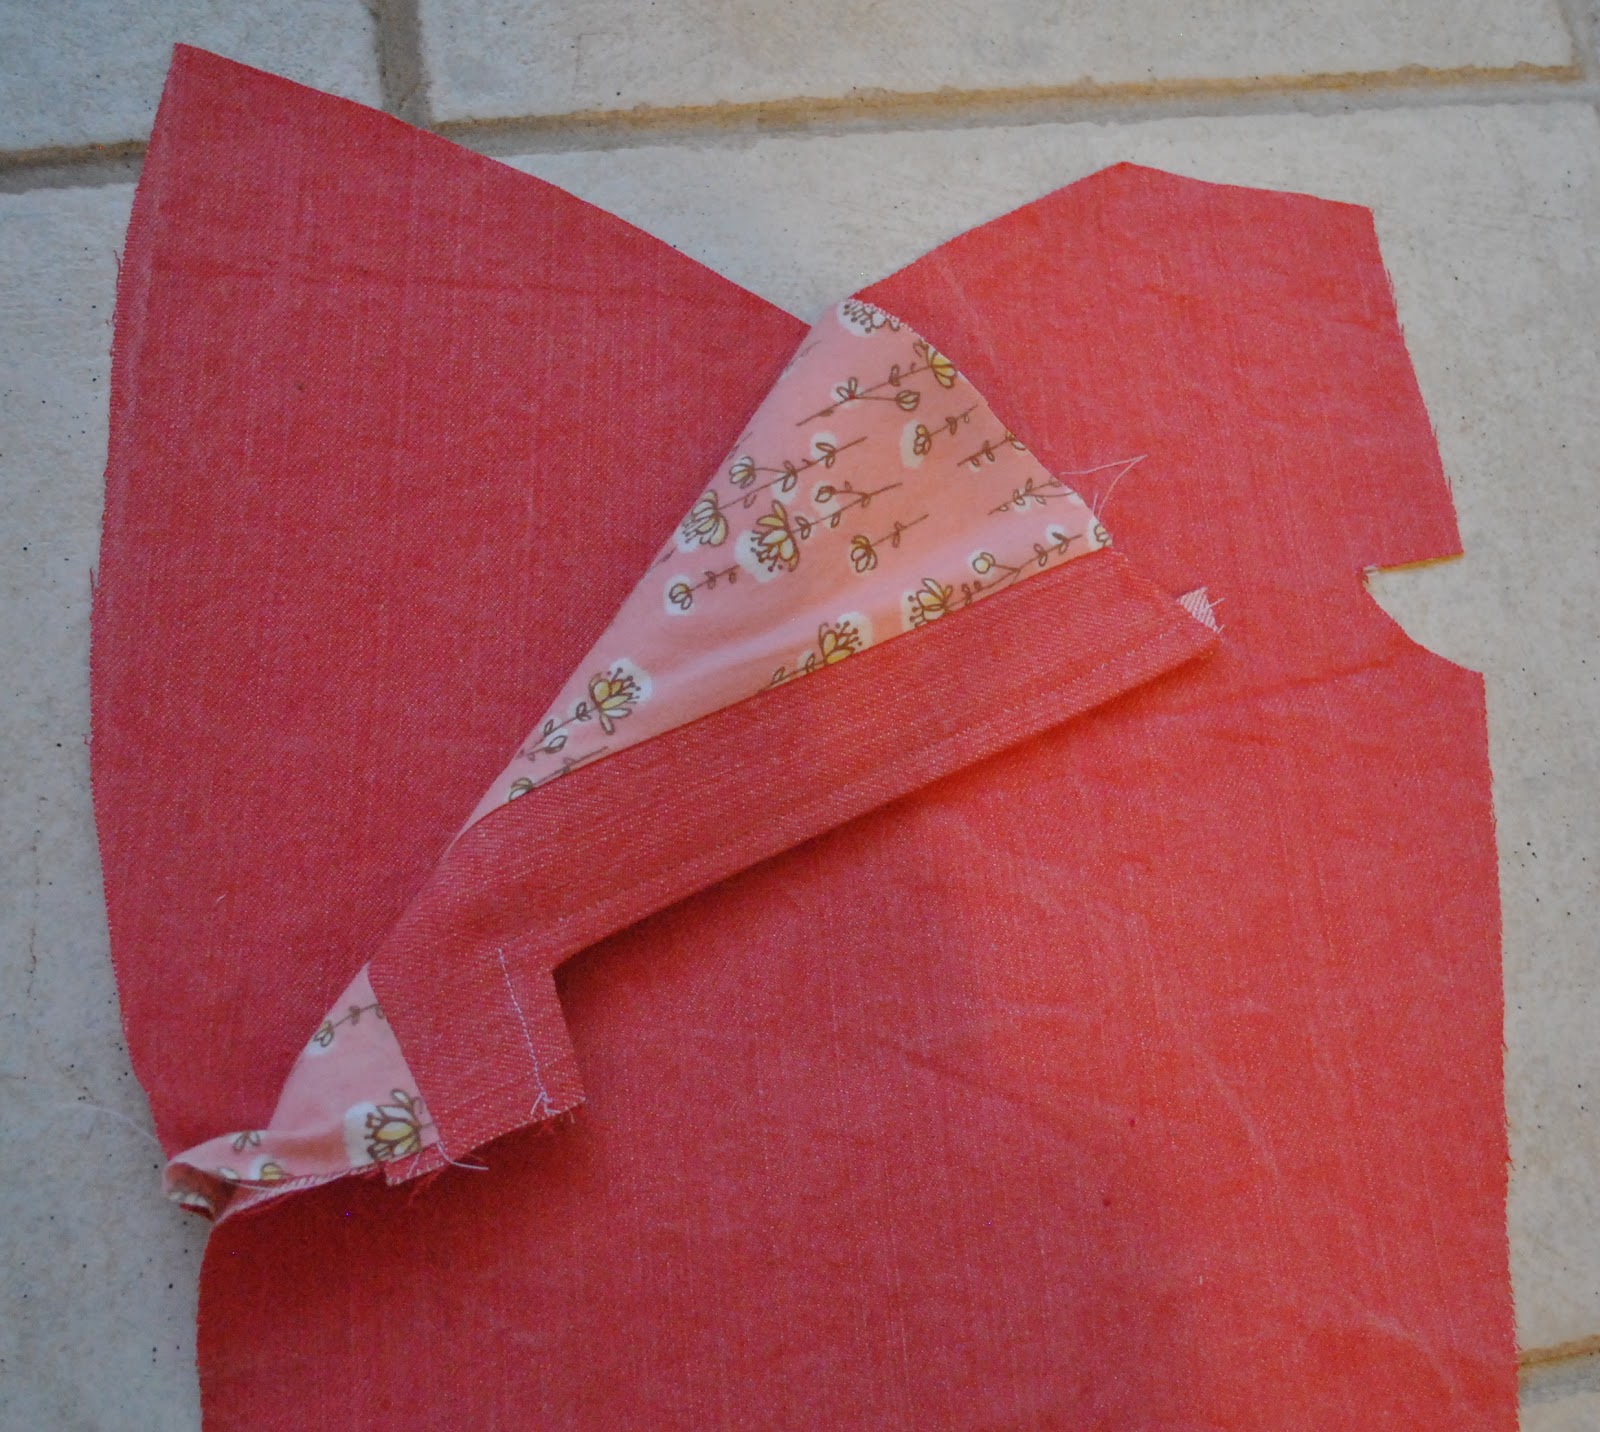
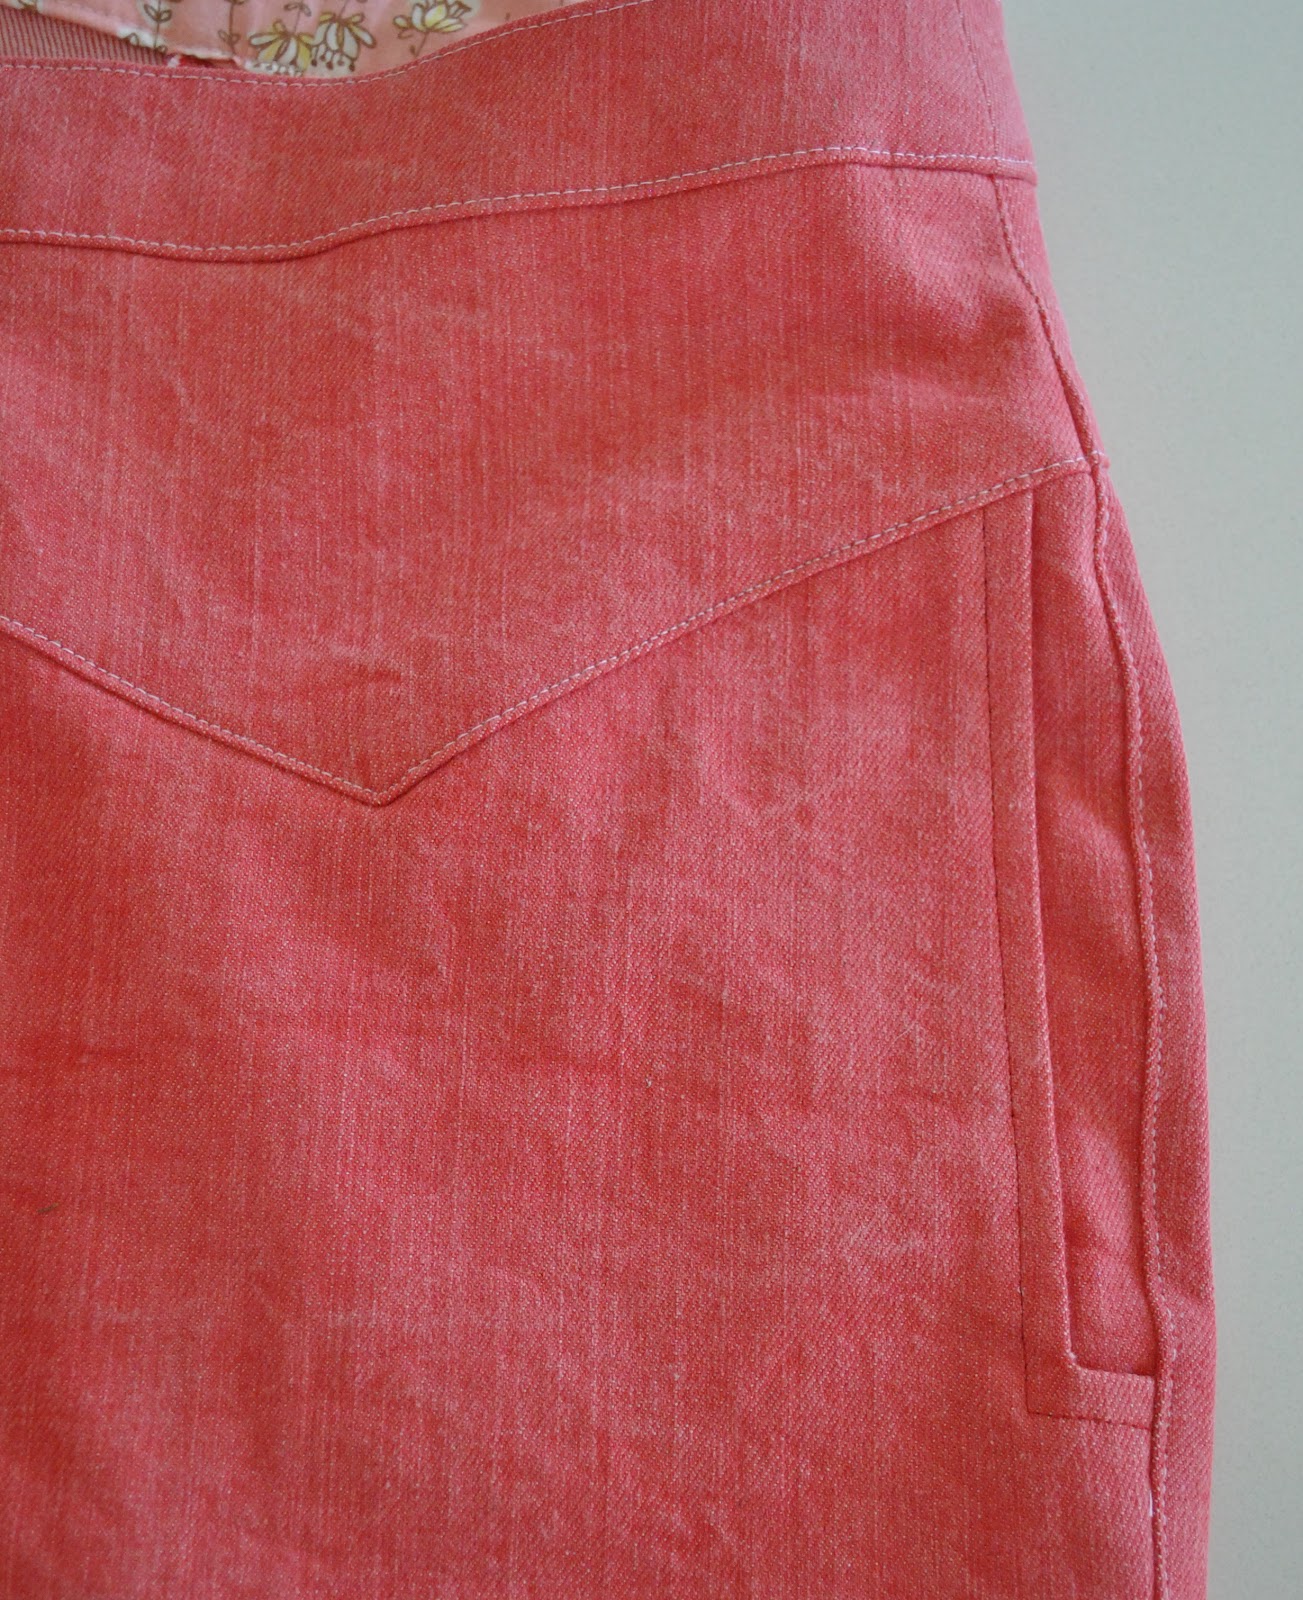
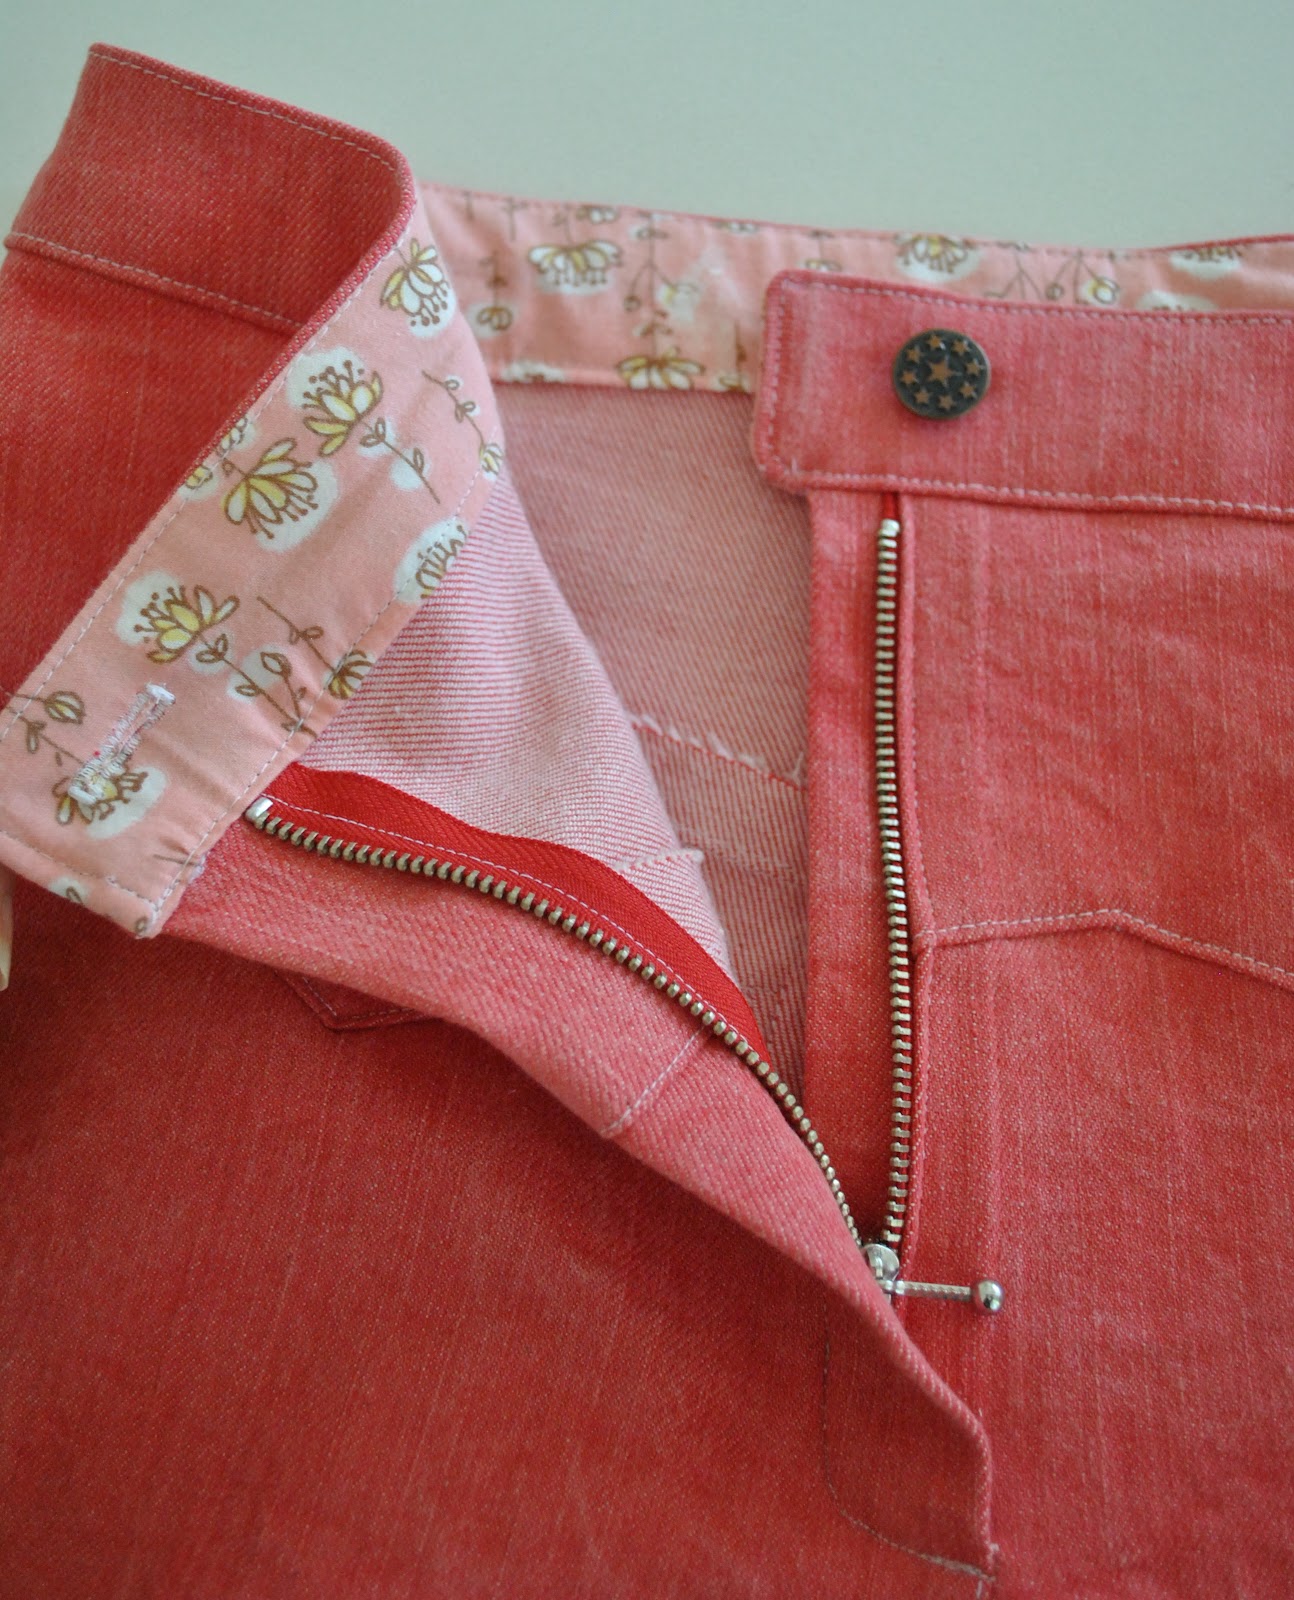
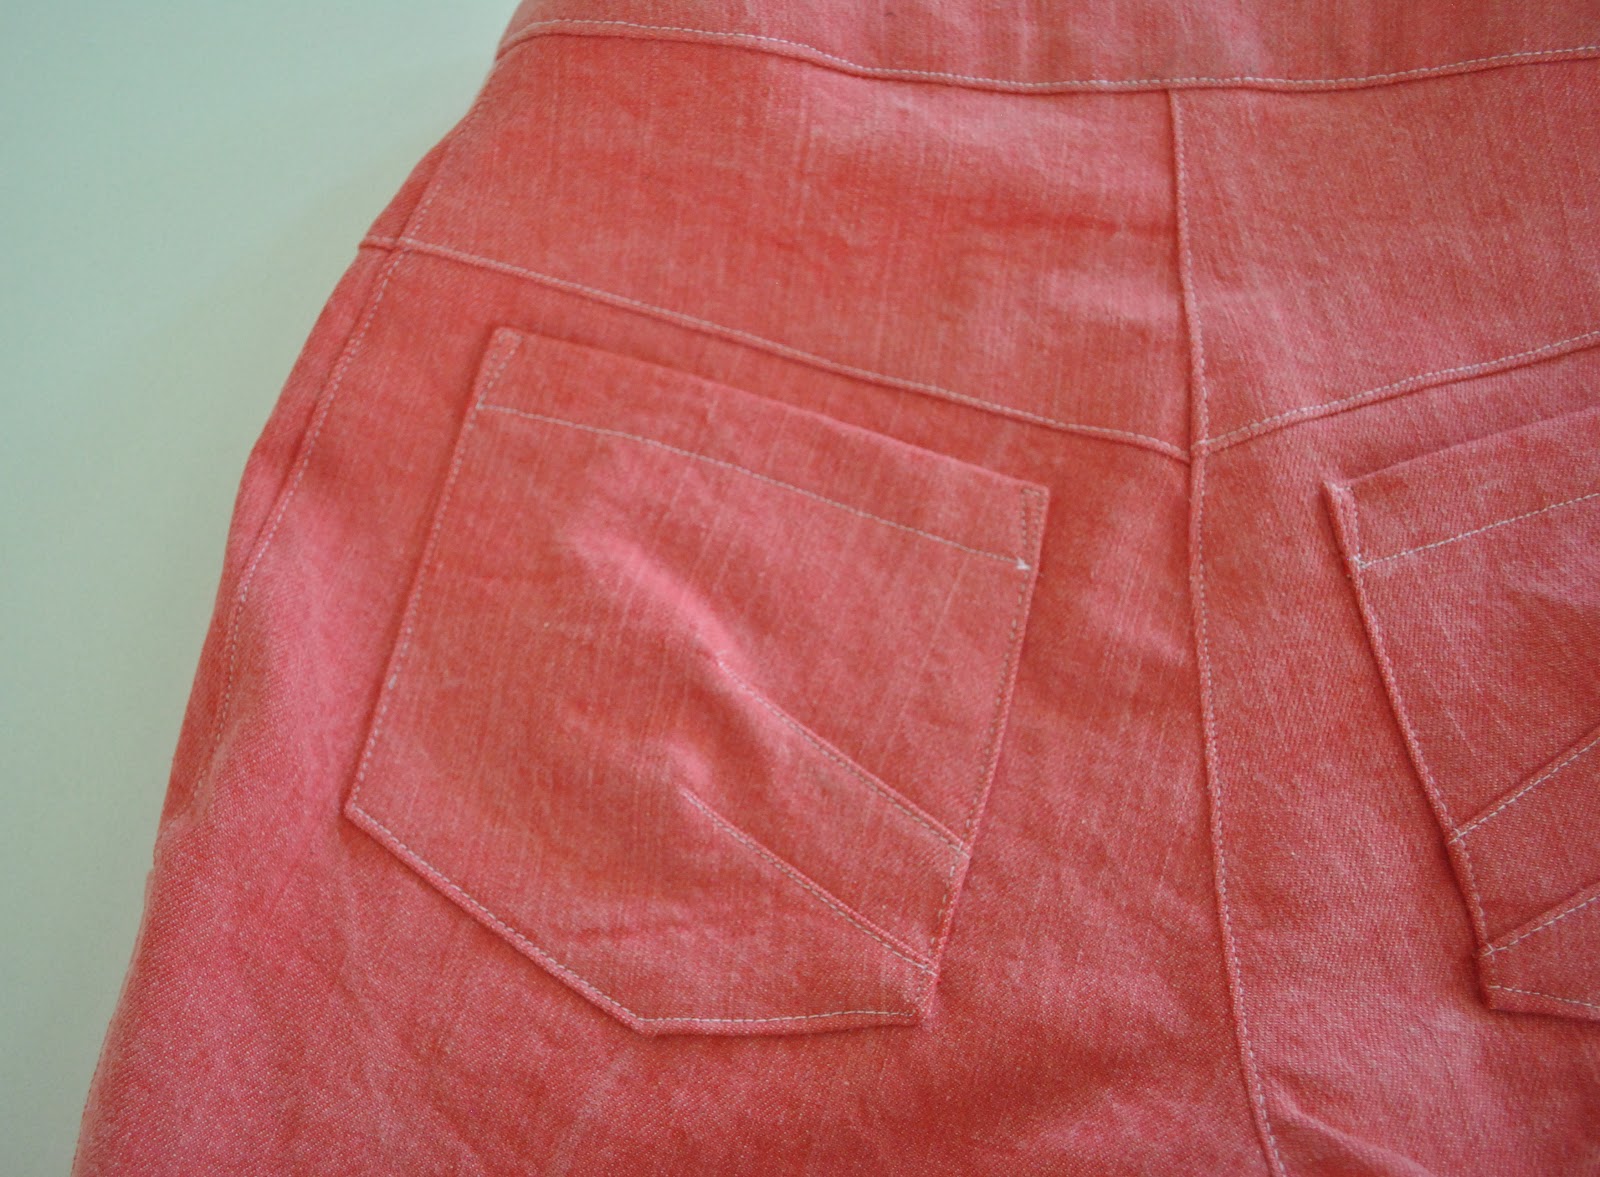
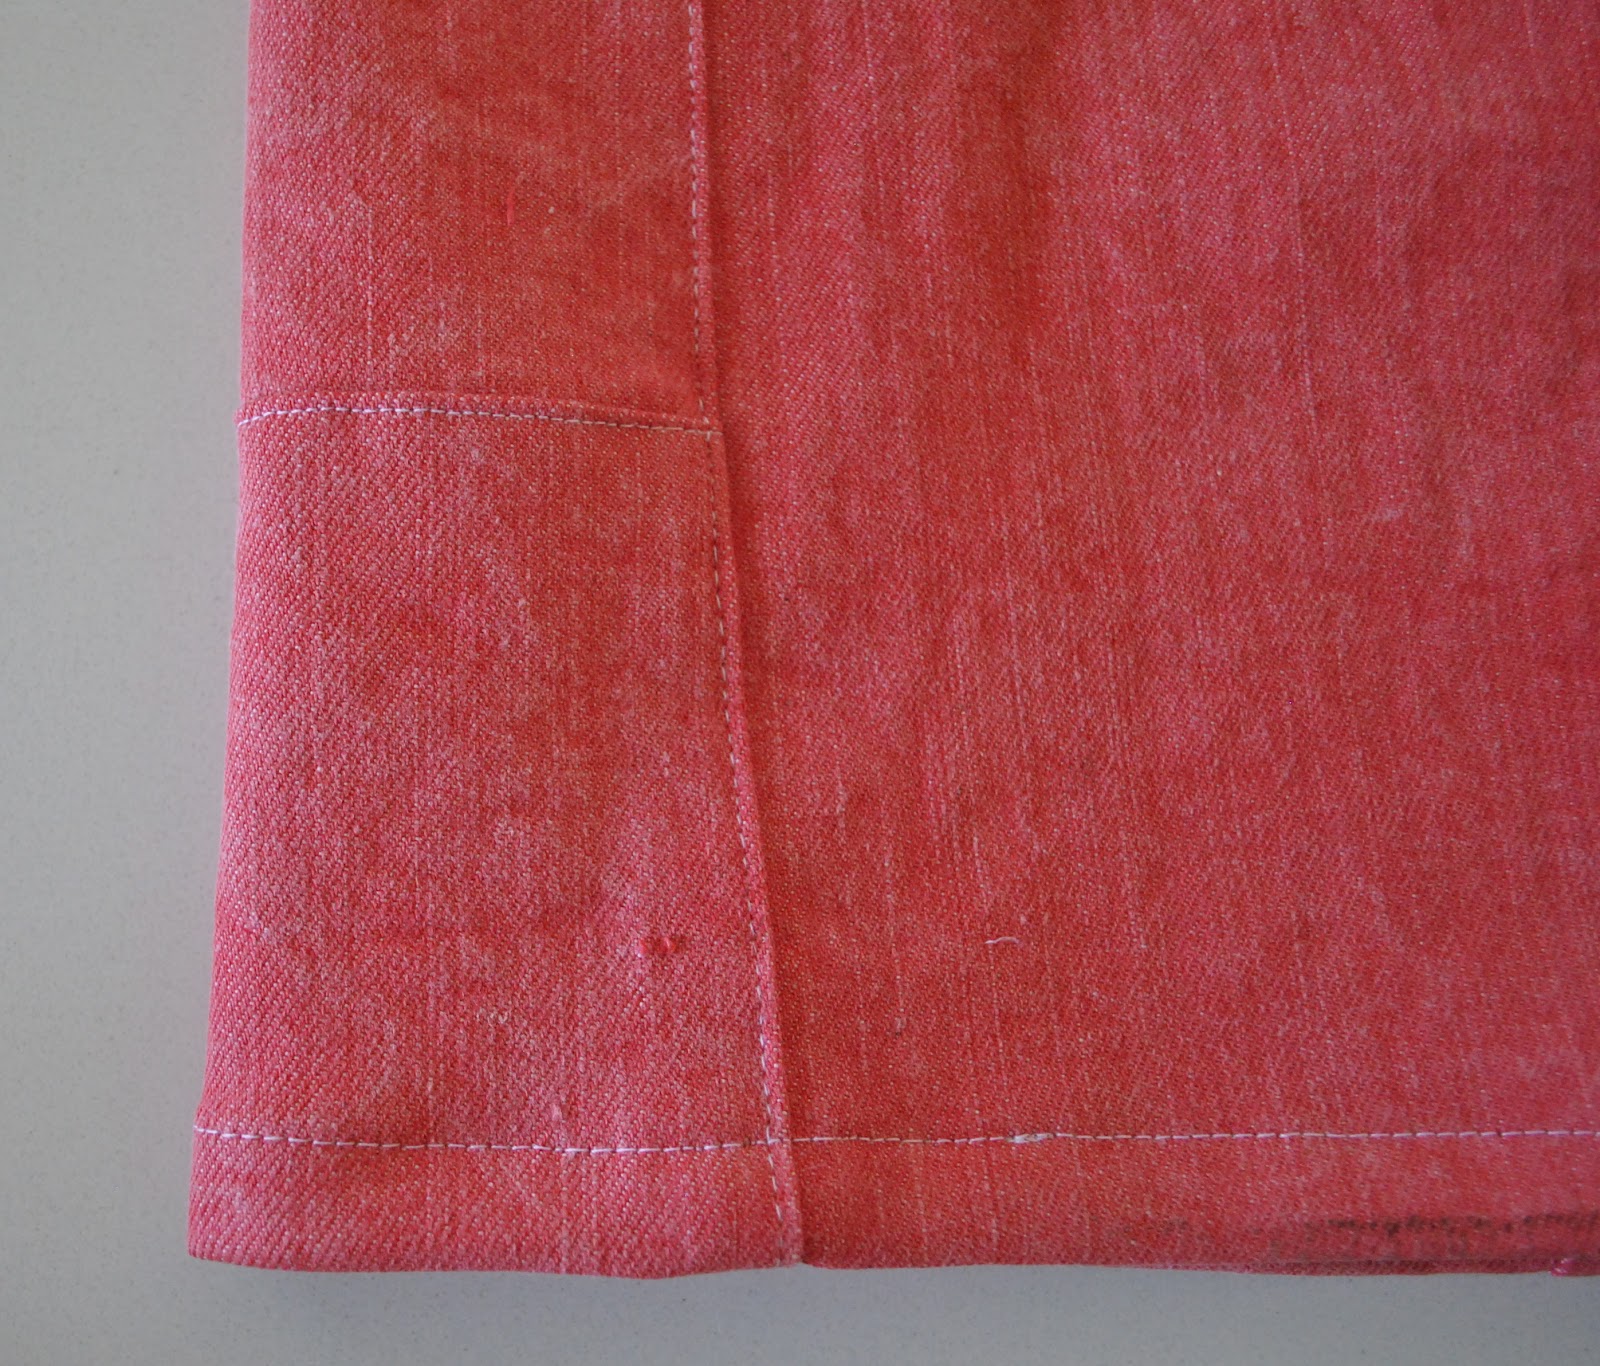
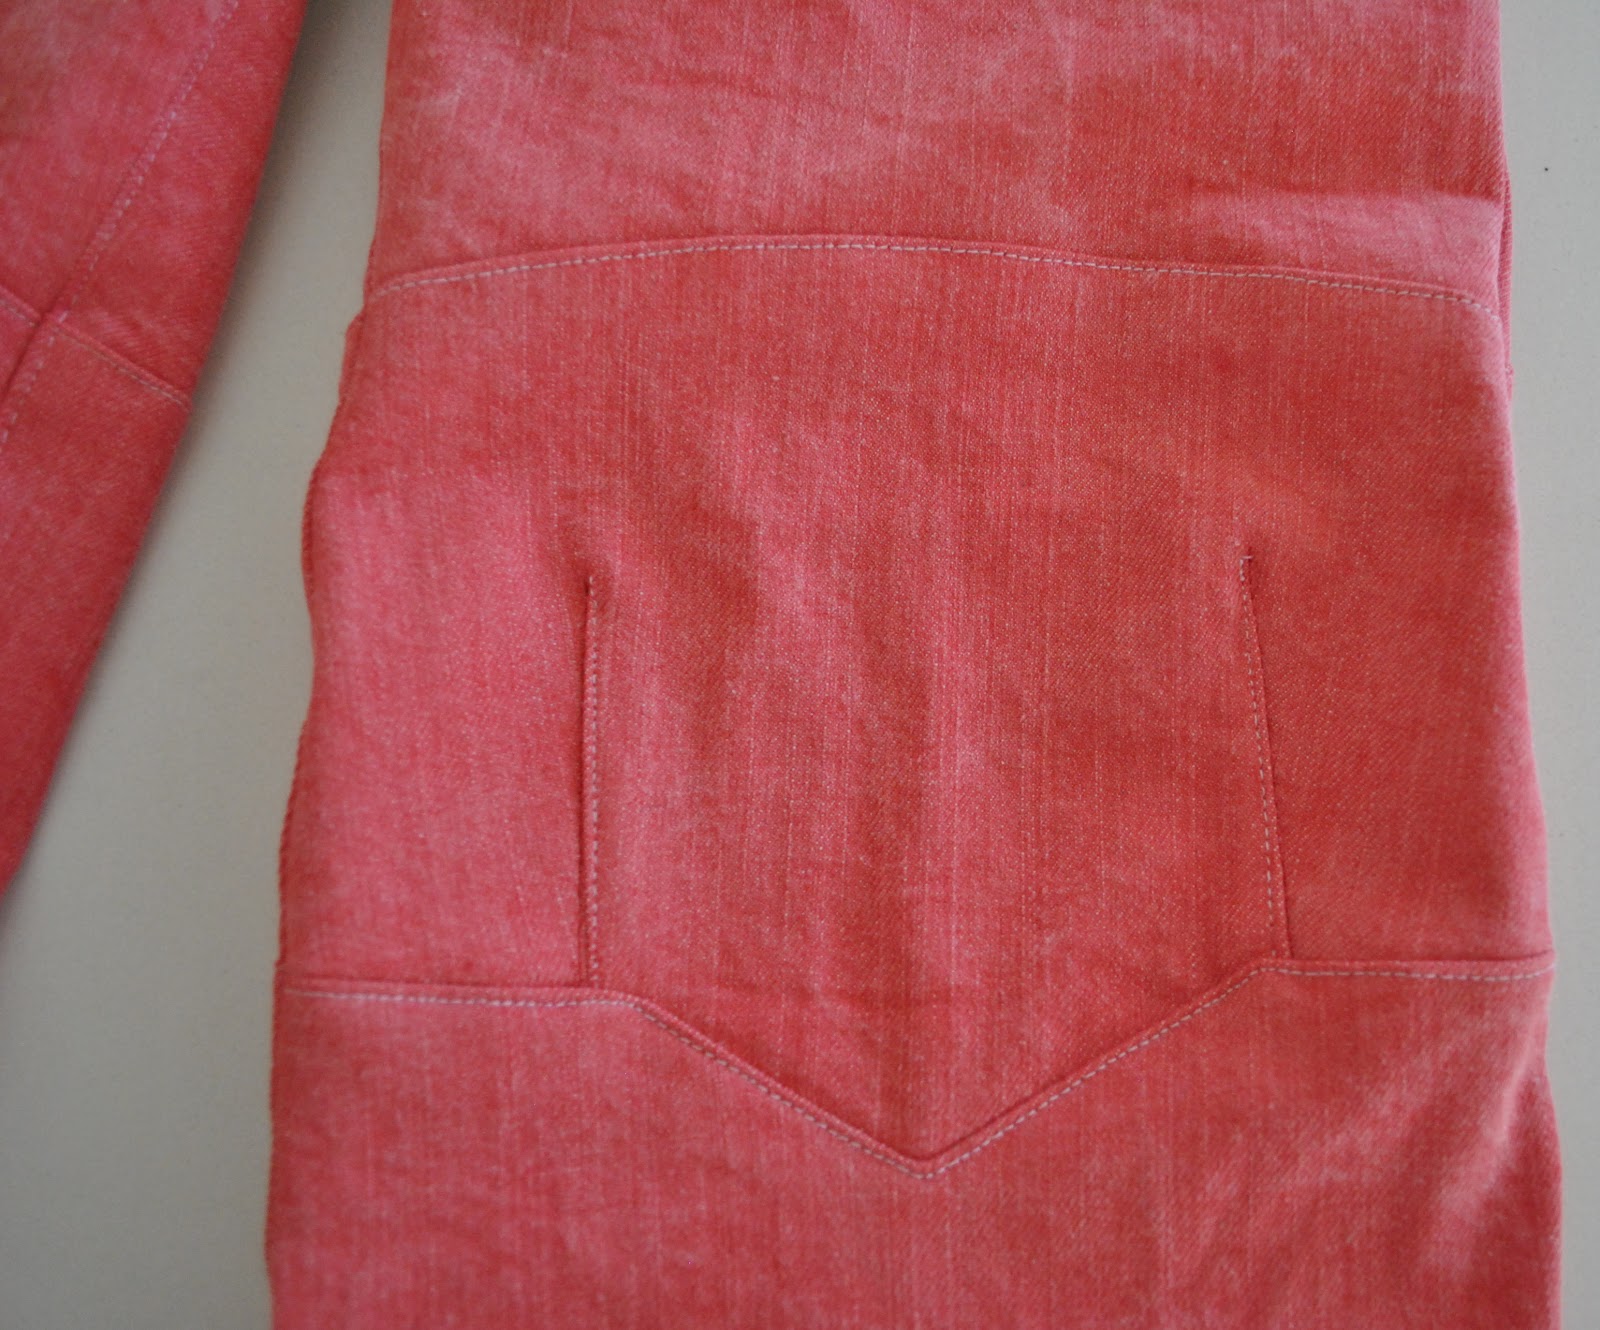
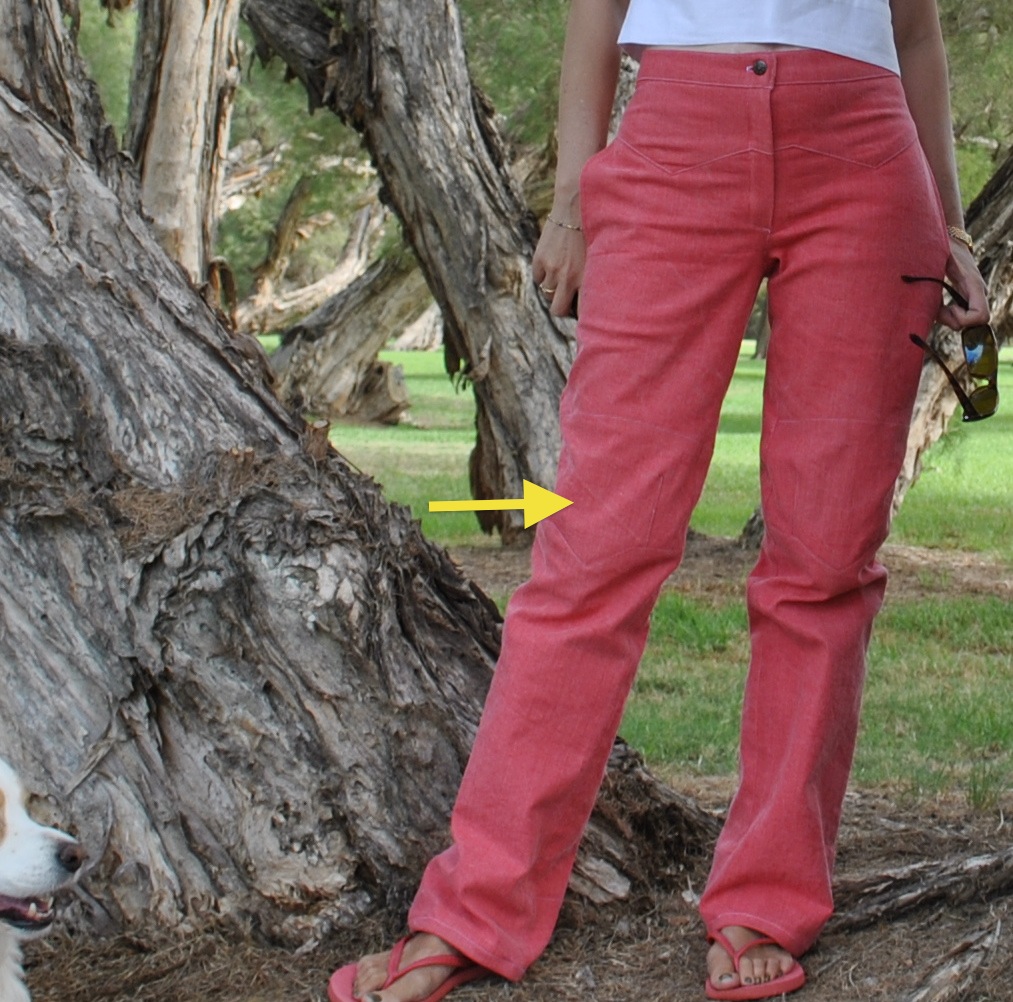
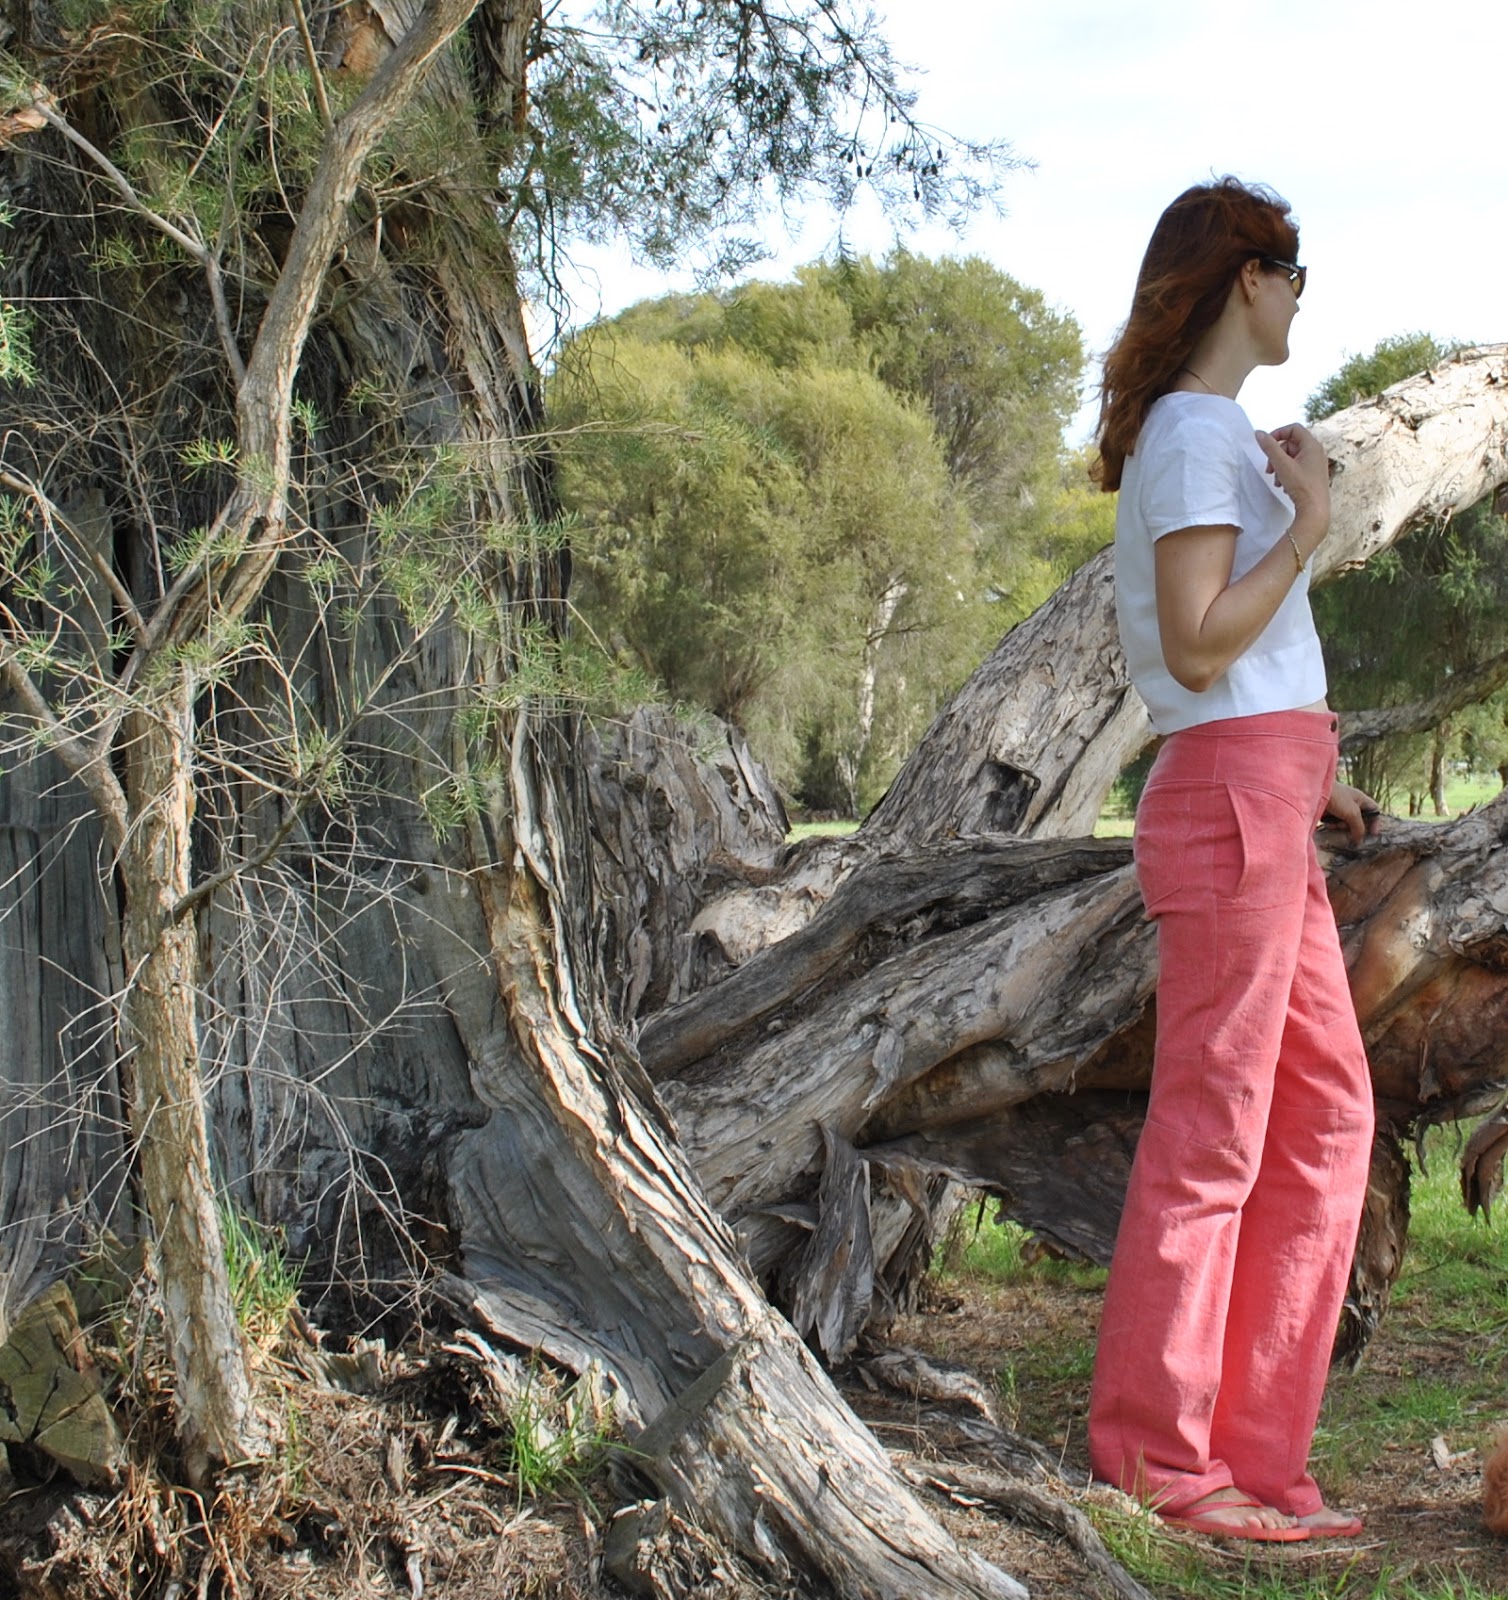
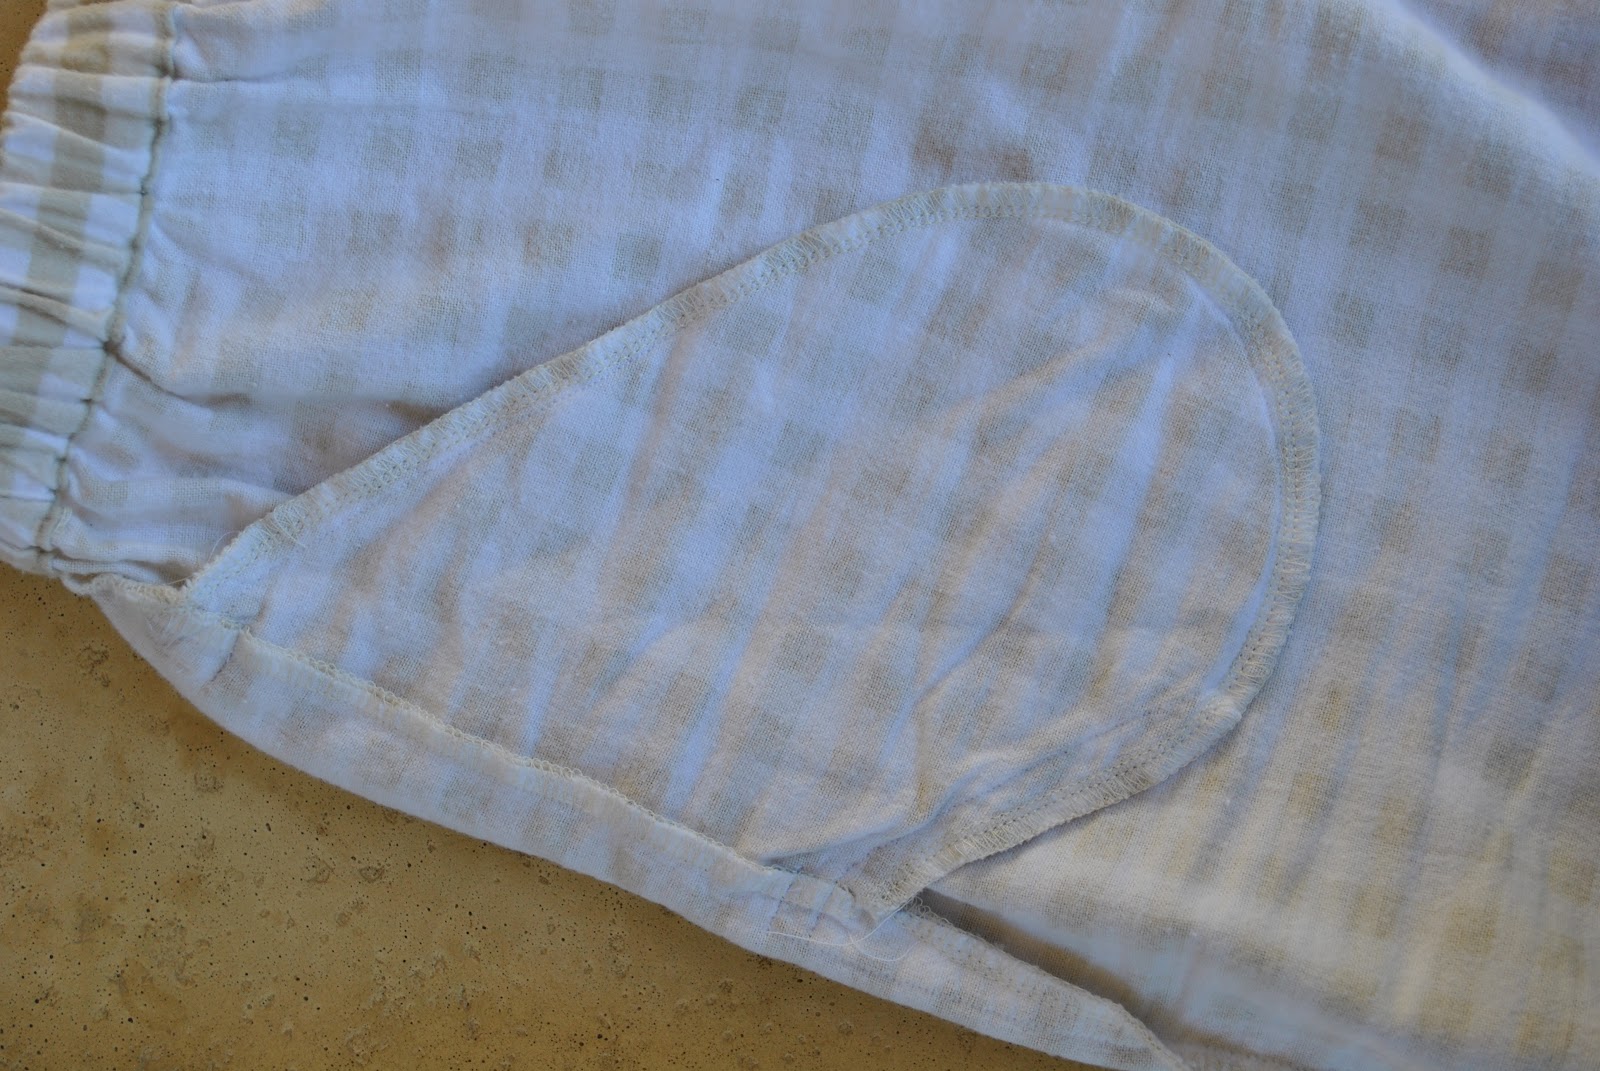
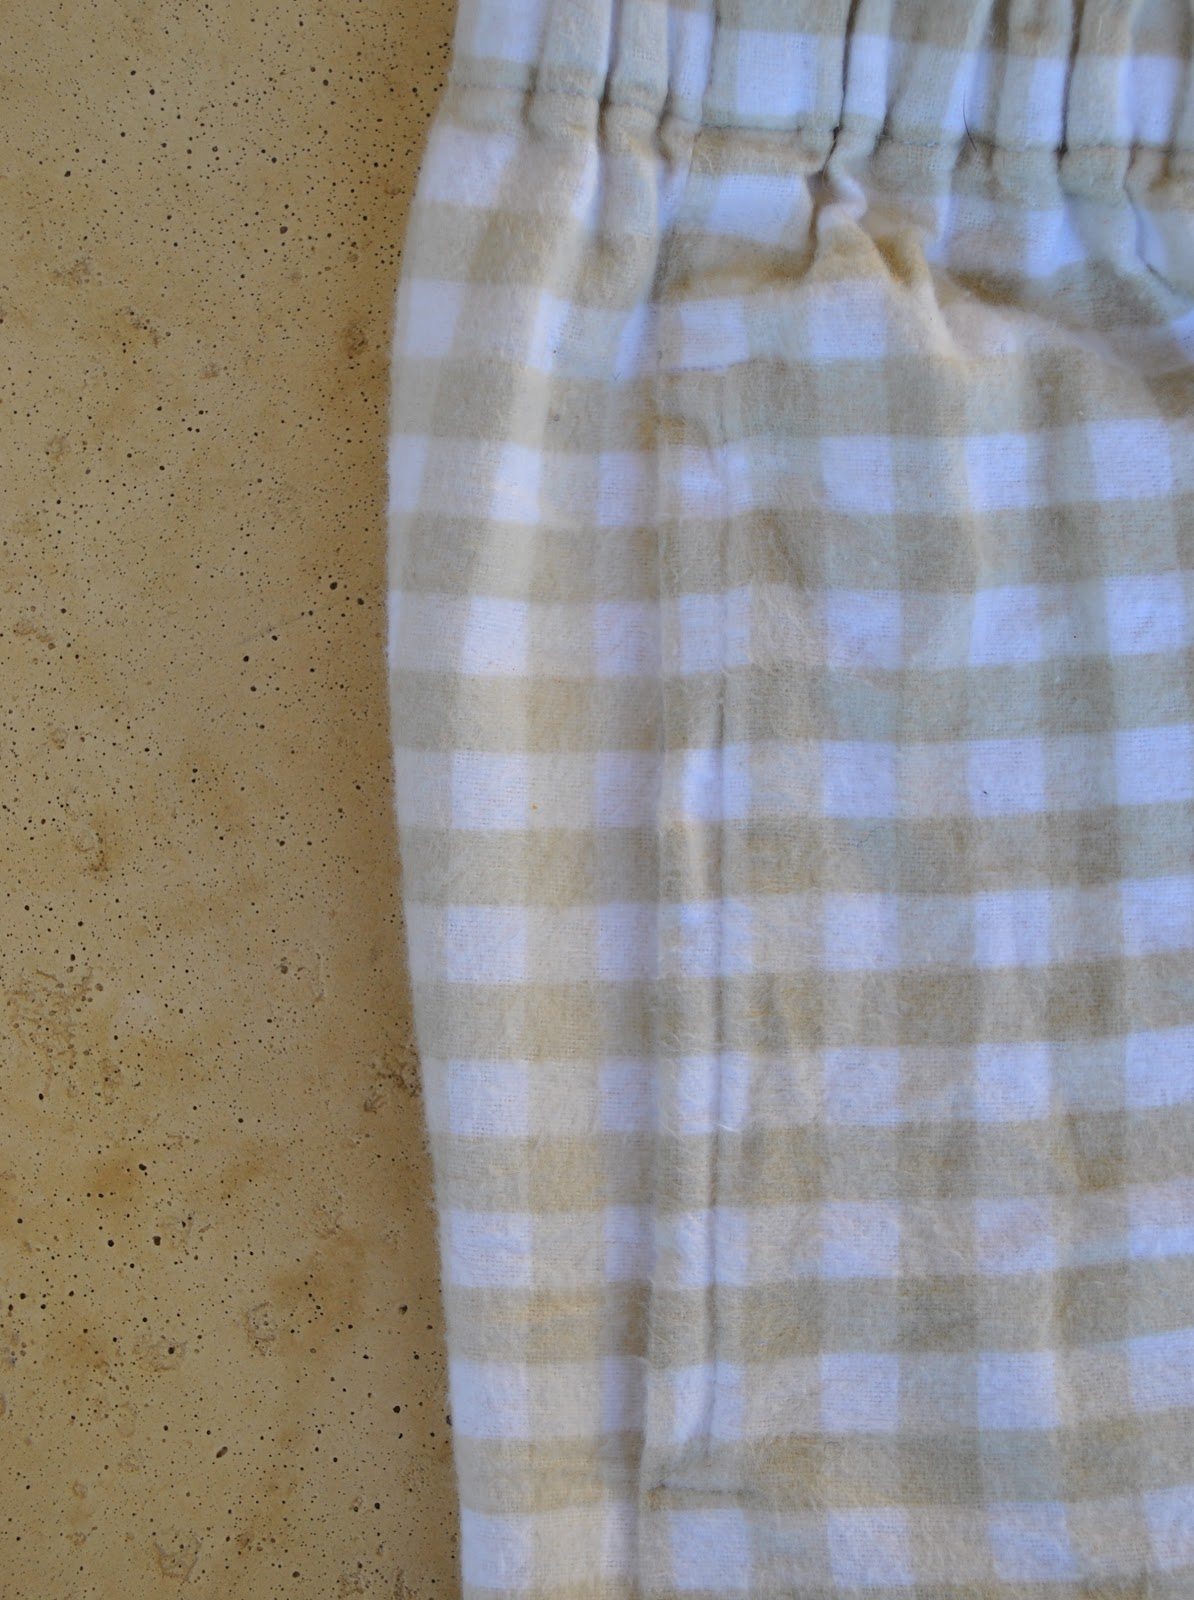
Jeans; Burda 7863 modified, black stretch corduroy, details here
Socks; handknit by me, details here 
Ugg boots

I was highly flattered when Carole and Gilly both asked how I manage my sewing time, and even what was my schedule for weekly sewing…  thank you so much for the interest ladies!  
My “schedule” is a very NON-scheduled kind of a schedule, really.  A Clayton’s schedule.  The schedule you have when you’re not having a schedule, y’know  πŸ˜€    That’s another antipodean-ism there btw…
Lately I am trying a new tack; to limit myself to just one project a week, and no more.  I figure; forcing myself to slow down means naturally paying plenty of attention to the finer details and finishing things off properly.  I’m not doing toooo bad about sticking to that one  πŸ™‚  but (blush) I do still have three more finished things to show here, just awaiting me taking some photographs and sitting down to write something coherent about them.  Often this bit takes me longer than the sewing bit  πŸ™‚
I don’t sew every day, but often if I am idly passing my laundry door I’m suddenly possessed and propelled by some mad demonic force beyond my control, over to the sewing machine, picking up whatever is on the go and doing a little bit.  Sometimes that little bit turns into a lot, as the sewing demon evilly tempts me to put off whatever it is I should be doing, just to do a little bit more sewing.  Oh, I’ll just put in this zip, or oh, I’ll just finish off this pocket, or whatever.  Oh, I really should walk away right now and NOT apply that iron-on interfacing to the collar… oh woops, look I just did.  Now I really just have to sew it together now, darnit…
Other times I might have just put on a load of washing and suddenly woosh!  I awake from a trance to find myself sitting at my sewing machine, doing just some little thing more.   The sewing demon is powerful, I tell you.  Cunning too.
It gets particularly malevolent  when I am all enthused and excited about a new project.  I will be super-restless about getting on with it, and obsessively think about it every moment I am not right there with it, working on it.  My raincoat was one of those projects; I worked on it solidly for several days. feverishly plotting over the minutiae of the construction details and the best possible order it should all go together.  
Until it was finished.  Then I am at peace and the demon is appeased.  
This house is clean.
well, momentarily anyway…. mwahahaha πŸ˜‰

pinterestmail

The Dingo Flour Mill

Thank you so much for the positive comments, and I’m so glad my featured Perth landmarks are giving some extra interest and enjoyment to the usual rather repetitive “outfit shots” that I admit I am getting just a tad tired of myself…. :S  I know, barely halfway through and already: sad, huh?
My location today takes in the Dingo Flour Mill, a working flour mill that has been on this site since the 20’s.  The big red dingo painted on the side is an iconic image here in Perth.  These heritage listed buildings are right across the road from the dog beach where I walk my own dog with a frequency that this blog can attest to  πŸ™‚  It was a tough call! but I forwent my usual favourite ocean backdrop and pointed the camera in the opposite direction this time.

Sienna was very patient, watching and waiting for me, tied to a nearby tree.

She was a very happy and satisfied doggie, given that just minutes earlier …

So; a very appropriate me-made May photo given my actual daily activities with my very own, real-life, red dog, no?

My outfit is nothing new and has been seen here before, but is still a firm favourite, one I wear with monotonous regularity during the colder months. So much so that I don’t know what I will do when it is no more.
There is just something about it I love to bits… and I always receive compliments whenever I wear it.  (The former no doubt influenced by the latter  πŸ˜€  )

Picture taken around 12.30m;  Temperature at the time 21C.
Overnight low: 8C; Today’s high: 21C
Some sun, some cloud; fine all day

Details:
Top; the twist top from the Japanese pattern book Pattern Magic, by Tomoko Nakamichi, charcoal jersey knit, details here
Skirt; self-drafted, made from the same fabric.
Shoes; Enrico Antinori, from Zomp shoes

btw, my husband thought the uncropped photo to be far more interesting, so here it is for comparison…

pinterestmail

An unusual dress

Wacky warning alert… this is it!!  
I’ve liked how Caroline is making good use of old Tshirts lately.  And Tim did a clean-out of his wardrobe recently, and part of the toss-out pile was a few old surfie Tshirts, in shades of blue, navy, grey and black… there were cool prints and interesting stitching details… and my brain started ticking over.  I saw artistic possibilities.
Also I have just bought a few new patterns recently, and Vogue 1281 was mysteriously part of my haul, a very pretty, extremely flatteringly shaped, draped cocktail dress.
This is the thing, you see; when it comes to sewing I like to be challenged and so I prefer the more interesting, difficult and intricate styles and it so happens that these patterns are also usually the most formal and prettiest of little cocktail numbers, totally unsuited to my actual lifestyle.  Most of my days are very casual; I walk my dog, I go to the beach and climb over rocks and walk through the bush, I work at home and I do the housework; so what is a girl to do?  Well I’ll tell you what this girl does; she still stubbornly ploughs ahead and sews up the challenging and intricate patterns she loves, but by using the most casual and grungiest fabrics I think this rather formal style has happily become a very cool dress with a deconstructed urban style that fits in very well with my tastes as well as my actual lifestyle.  I am thrilled with how it turned out, and could not be happier with my new dress!  This is now a perfect everyday dress…
WIN!
I used four Tshirts for the main pieces of the dress, and another one for the lining pieces.  I cut them and sewed them together, arranging the different colours to be evenly spaced around the finished dress, and to have the prints and areas with the interesting stitching details that I liked to be prominently featured.  One of the Tshirts was plain black with no interesting stitching or detailing but was of a very lightweight and beautifully soft knit compared to the other three; so this one I used specifically for the potentially bulky part of the dress; the pleated, draped and knotted areas all coming together on the centre front of the bodice.

Picture taken around 11am;  Temperature at the time 22C.
Overnight low: 14C; Today’s high: 29C 
Gloriously sunny and warm!  Maybe the last really warm day of the season.

Details:
Dress; Vogue 1281 modified slightly, using 5 of Tim’s old surfie Tshirts
Thongs; Mountain Designs

please excuse the sandy bottom…!
Pattern
Description:
Dress has no side seams, very close-fitting, lined bodice, single layer, pleated shoulder strap looped through front pleated drape, front wrap skirt cut-in-one with back, raised waist and invisible back zip.  Strap and bodice: Narrow hem.  Bodice lining: Elasticised upper edge.
Pattern
Sizing:
6-14.  I made a size 10.
Did
it look like the photo/drawing on the pattern envelope once you had finished
sewing it?
in essence, yes
Were
the instructions easy to follow?
Pretty easy.  Step 8 and 9 takes a little bit of concentration to get it right.  I had to redo this when it didn’t work out the first time.
What
did you particularly like or dislike about the pattern?
I loved the style of the dress, the draping, the interesting bodice and neckline!  The pieces fitted together perfectly well.
I personally didn’t like the instructions to hem the upper edge of the bodice before attaching to the pre-elasticated lining pieces.  Instead I constructed mine to sew the bodice and bodice lining pieces right side together, so there is no visible stitching on the outside.   I really think that visible stitching would take away from the dress, particularly if one was sewing this as a dressy cocktail dress which is I suspect the purpose for which pattern is intended.  Not that it really makes much of a difference in my particular dress, which is a very casual style using very casual fabrics, but that is just my personal preference in any case.
I thought the stitching line along the bodice lower edge left it with a weirdly wide seam allowance, and for no discernible reason…  I left it wide but I still don’t seen why it is like that.
Fabric
Used:
Cotton knits
Pattern
alterations or any design changes you made:
I made my dress using slightly stretchy knits, so I eliminated the invisible zip and sewed up the back centre seam.
I extended the right skirt edge by enough so that I could sew the skirt edge down on the inside to a joining seam inside the left side of the skirt.  This was only possible because I had made a pieced skirt piece, but in any case I think it would be essential to extend that right skirt edge to wrap around more fully underneath anyway.  Unless one plans on wearing a slip underneath the dress, or lining it; since there is absolutely nothing to stop that skirt from flying open in a breeze!
I found the strap piece to be pretty long and needed to shorten it considerably… by 10cm!
Would
you sew it again? Would you recommend it to others?
I might sew it again.
Conclusion:
It is a gorgeous style, very flattering to a woman’s curves.  I liked that shoulder strap, how it frames the decolletage and the face in a very lovely way, that chic front draping, and how it joins in at the back asymmetrically.  Interesting!
You could eat to your heart’s content at a cocktail party or dinner, and this dress would allow you to do so very comfortably!
I love this dress and plan to wear it a lot!
pinterestmail

Tiny thoughts…

Me-made May, Day 9:
Isn’t it dreadful when someone with nothing worthwhile to say insists on saying something?  So I will refrain from sharing the tedium of my mundane little non-thoughts today.
You’re welcome.  πŸ™‚
Except to say: my best wishes to everyone for a wonderful day!!
And also; No, my new ombre-dyed skirt from yesterday is not the wacky thing I’ve been working on.  The wacky thing will be obvious when it appears.  I’m waiting for a warmer day to show it off.  πŸ™‚

Picture taken around 10.30am;  Temperature at the time 19C.
Overnight low: 12C; Today’s high: 22C 
Some breezes, some sun, some rain.  Y’know.

Details:
Cardigan; my own design, leopard print wool jersey, part of a twinset, details here, and see the twinset styled in 6 different ways here
Top; drafted from Pattern Magic 3 by Tomoko Nakamichi, blue knit jersey, details here, and see this top styled in 6 different ways here
Skirt; Vogue 1170 lengthened and lined, blue corduroy, details here and my review of this pattern here
Shoes; Enrico Antinori, from Zomp shoes

In other handmade sightings today, my husband is wearing again the same blue linen shirt from yesterday (it’s OK, he works in an operating theatre where they wear scrubs during the entire working day, so it wasn’t really dirty from yesterday.  Really  πŸ™‚  )

And Cassie is wearing the combined beanie/scarf that I knitted for her a few years ago.

Craig’s shirt; Burda 7767 modified, blue linen, details here
Cassie’s combined beanie scarf; my own design, various wools, details here

pinterestmail

Looking deceptively dressy…

… for chucking a ball for the dog in the park, no?
But actually, nothing I am wearing is dressy in my book, so I’m good.  This is another example of comfort dressing, like yesterday.  
This dress is stretchy-knit so it is muchos easy-wear, but I always feel a tad self-conscious when I wear it because it is real figure-hugging.  Sorta on the va va voom side, y’know  πŸ˜‰
So, I do feel a tonne more comfortable and less self-conscious wearing this dress when I have a big coat over the top, like my good ol’ trench coat here.  And can I say, this trench coat has been such a goodie??  I love it utterly.  It was my good coat when I first made it, but when I made another one, I started to treat this one as some old throw-on thing, to be worn whenever without thought to consequences, didn’t care what happened to it.  When it gets dirty, I toss it in the washing machine on an ordinary cycle.  Well, I figure, the materials are all 100% cotton, so how awful could that be?  Still, the first time I tried this I held my breath, anxious about its fate.  Anticipating a brow-beating, “what have I doooone??!” moment.  Which did not come.  My trench coat emerged from the washing machine in perfect nick, which earned it double gold stars and a place in my “have-forever” pieces.  
The shoes probably make my outfit look dressy; but these clogs have a stacked heel all the way along so they don’t feel quite as high as they look when you are wearing them.  And they are an excellent choice for when walking through wet grass and you don’t want your tootsies to get wet.
Honest disclosure; for most of the day I was slouching about with my feet cosily ensconced in uggies, so yeah  πŸ™‚

Details:
Dress; Burda 8071 modified, stretch knit skirt and linen bodice, details here
Trench coat; Burda 7786 modified to be double breasted, beige cotton, plaid cotton lining, details here
Shoes; Perrini, had for donkey’s years

Picture taken around 11am;  Temperature at the time 20C.
Overnight low: 15C; Today’s high: 21C 
Mostly fine and cloudy, patches of sun.

pinterestmail

The Daughter of Woman

I am paying homage to “The Son of Man” the 1964 painting by Rene Magritte.
Today’s mini-challenge within the me-made May group is to be pictured with food, or to be eating or drinking something.  So I took inspiration from that famous work of art, hehe.
Incidentally, this is also my morning tea.  
The artist later ate her subject.
πŸ™ for the orange

The Son of Man, Rene Magritte, 1964

Picture taken around 9.30am;  Temperature at the time 20C.
Overnight low: 16C; Today’s high: 23C 

It is very humid and the promised rain eventuated… we are getting plenty of it today!
And going by the forecast we are in for a lot more.  You may be interested to know that in Perth rain is a very very welcome occurrence, we really do not get enough.  Makes for a lovely lifestyle I agree, but the farmers will be happy today!
Details:
Top; Vogue 1247, lightweight orange cotton, details and my review of this pattern here
Skirt; Vogue 1247 lengthened and lined, curtaining fabric, satin lining, details here, and my review of this pattern here
Shoes; Enrico Antinori, from Zomp shoes
Brolly; Charlie Brown, from David Jones
And today is another joyful day of me-made synergy within my household; I was happy this morning to see Sam wearing his shirt I made for him, for Christmas last year.  A me-made bonus day!
Sams’ shirt; Burda 7767 modified, white and navy check polycotton, details here
pinterestmail

Strawberry pink jeans

I have made some new jeans!  Au Bonheur des Petites Mains PLH08002: Pantalon droit avec decoupes.  (my less than perfect translation: trousers right with slices?, hehe)
Now; to say I am grateful to shams for helping me to obtain this awesomely cool jeans pattern is an understatement; I will be forever.  Eternally.  Grateful!  This is a reeeally good pattern, and is destined to become my go-to pattern for non-stretchy denim jeans.
THANK YOU SO MUCH SHAMS!!  YOU’RE A GODDESS!
The pattern has a few quirky and unusual styling details, which I love, and which add a very unique flavour to the jeans, but the long-term value of this pattern for me is that the jeans fit beee-autifully!  If I tried these on in a store I would be slapping down the plastic due purely to the classic perfection of the fit alone.  In a pair of jeans this is a massive massive plus; I cannot stress this sincerely enough.  What is more; even though the styling is quite unique and eye-catching the pattern can also be easily adapted to make a more conventional pair if jeans if one desires just one quirky pair in one’s collection.
I used non-stretchy thick-ish cotton denim from Spotlight in a cheerful shade of strawberry pink, which has white undertones in the drill weave.  Thus my selection of white thread for all the top-stitching details.  I elected to have just a single row of top-stitching throughout, and I left off some of the top-stitching details suggested in the pattern.  I highly recommend you also check out and admire shams‘ awesome variations on this pattern; here and here and here.
For the waistband facing and the pocket facing I used a pink print cotton, that was formerly a pair of old pj bottoms.  I cut a separate pocket facing, rather than have the pocket bag stitched directly onto the jeans front, because I had decided I wanted the front of my jeans “bare-r” with less top-stitching detailing, but obviously I was not going to forgo having those awesome pockets!

Shams elected in her second and third pairs of these jeans to put in a slanted high hip pocket because of “pooching” of the pocket opening; I decided to go ahead and make the pocket as per the pattern in this my first go at it, and see how it went.  Y’know what? it does bulge out a bit, but not enough to worry me so I’m OK with it.  The best thing about the location of the pocket is that they are perfectly situated to make slouching around with one’s hands shoved deep in one’s pockets very very easy.  I am pretty partial to mooching about with my hands in my pockets, so yeah  πŸ™‚  The slanted high-hip pocket location that one sees in regular jeans is not hands-in-pocket friendly, imo.  A feature that is fairly high on my personal list of criteria for garment satisfaction.

hands-in-pockets, for the win

I added a zip placket, and used a red jeans zip from Spotlight.  Functionally, this was a fairly hideous zip that required copious anointing with household oil to make it zip up and down smoothly!  Inserting the jeans zip with that zig-zag front seam to look acceptably centred and evenly spaced across the front fly and with the top-stitching on each side lining up was interesting.  I spent quite a bit of time on this, and re-inserted that zip twice before I was satisfied.

I left off the pocket flaps on the rear patch pockets, and after eyeballing the placement of those cute darted patch pockets decided to situate them on opposite butt cheeks than how they had been illustrated in the pattern.  I don’t know if this is visually more slimming or not, methinks this could be merely a self-delusion  πŸ™‚

I did not taper the lower leg pieces, but cut the side edges straight to get more of a cargo/bootleg silhouette, which I think suits my figure.  Also, The back lower leg pieces were cut, pieced and top-stitched near the lower hem.  No, that was not because I did not have enough length, I did this on purpose.  I liked it this way  πŸ™‚ 

da knees…

I added quite a bit of length to the lower leg piece, a standard precaution for me when cutting out.  I’m wearing them with flatties here but I like the option of wearing heels if I want…. also, I am on the tall side.  However, this is where I came a bit of a cropper, and I cannot believe I did not foresee a now  blindingly obvious beginner’s trap: of course I should have added some length to that upper leg piece, as well as to the lower leg piece!  Doh!  The upper leg piece turned out to be on the short side and so the knee piece is situated rather weirdly high on my leg…  I’m pretty cross with myself about this, I’ve become so blase about adding length I stupidly did not think it through and break it down into the individual pattern components, like I darn well should have.  Lesson learned.  One is never incapable of making a fundamental boo-boo with a new design.

(but check out those mad arrow-adding skillz … howzat, huh?!  πŸ™‚ )

But I am not going to beat myself up over it, and certainly this little detail is not going to stop me from wearing the heck out of my fab new jeans.  Look at that yummy colour!  Plus, I decided after looking at these pics that the high-ish knee patch is not hugely obvious nor detrimental to the overall appearance.

Details:
Jeans; Au Bonheur des Petites Mains PLH08002, strawberry pink non-stretch cotton denim
Top; drafted from the Japanese pattern book Pattern Magic by Tomoko Nakamichi, white linen, details here
Thongs; KMart

Pattern Description:
Jeans, with funky unique seaming, topstitching and styling details
Pattern Sizing:
38
Did it look like the photo/drawing on the pattern envelope once you had finished sewing it?
Pretty much. I made a few minor modifications
Were the instructions easy to follow?
They were in French. After applying google translate, which substitutes interesting English alternatives to what are probably commonly used sewing terms in France; much hilarity ensued!
Seriously though, the instructions assume the seamster has made jeans before and has a pretty good general knowledge of sewing already, so do not go into details… they are really pretty scant. So I ended up not using them; just piecing together in the same order of construction I have always made jeans.
What did you particularly like or dislike about the pattern? 
The fit is perfection. I love love love the funky styling and the interesting seaming. If I did want to make up an “ordinary” pair of jeans it will be easy to adapt this pattern, with its great fit, to a more conventional style.
The side pockets on the hip are my favourite in jeans so far, since they enable one to mooch about with the hands shoved down deep in the pockets. Aah, sheer heaven.
There is nothing I do not like about this pattern.
Fabric Used:
thickish cotton denim
Pattern alterations or any design changes you made:
Cut the lower legs straight down rather than tapered to get more of a cargo silhouette, since I think this suits my figure better.
Sewed the pockets as a bag with a lightweight cotton facing, so it is not attached to the jeans front with topstitching as per the pattern.
Left off the rear pocket flaps, and some of the top-stitching details, although I will definitely use the suggested top-stitching as a feature in a future pair.
Cut the lower legs longer, but next time I will add length to the upper legs as well, since the legs are of three pieces. The knee piece ended up a little high on my leg :S
Would you sew it again? Would you recommend it to others?
I definitely will be using this pattern again; it is destined to become my go-to pattern for non-stretch denim jeans.
Conclusion:
I adore these jeans! and will be wearing them to the ground. 

A very big thank you to shams! for her help, and for her never-ending inspiration!
pinterestmail

Gingham PJs

I do apologise for the complete and utter lack of chicness and elegance today, and this is not an ensemble one would ever see gracing the pages of Vogue magazine…  but I’m sure every woman secretly harbours an undying love for flannelette PJ bottoms in her heart… yes?  I know I know, we are supposed to spend our days swanning about in some elegant little number complete with gorgeous heels, and then at home slip into some sort of lace-y, slinky, satiny little thing for our down time…  
But seriously.  Let’s get real here.  Our secretly favourite part of the day is really when we get to throw off the elegance and put on our extremely unsexy and unflattering but warm and cuddly and oh-so-comfy ginormously huge elastic waist pants; and curl up on the couch with a book and a cup of tea.
Or is that just me….?   πŸ™‚
I am taking part in two pyjama parties here!  (ooh, it’s been yonks since I went to a pyjama party!) firstly Terri‘s Pyjama Party today, over in her secret room.  And also Karen’s Pyjama Party; only that party was planning to make their pj’s over a period of a few weeks.  As it was, my old pj bottoms ripped a bit when I sat on a splinter recently… it’s OK, I’m not sad; they were old and getting pretty thin about the bottoomba *, but I did need some newies, fast!
(* bottoomba; old family word, pronounced with the emphasis on the second syllable)

So I ran out to Spotlight, the fabric was bought and I made these up in about half an hour, that same afternoon, to wear that same night.  Yah, I know; I am not known for my patience.  But well, these are just pj’s for goodness sakes!  the easiest make in the world…
My pattern is kinda self-drafted… when my very last pair of store-bought pj pants wore out I cut them up for a pattern, added a few little modifications of my own and have been using that ever since.
They have an elastic waist, two inseam side pockets and a false fly.  Normally I loathe false anything on a garment, but paradoxically I really do like a false fly on pj’s.  Just a random excuse to sport a few cute and really fun buttons, for no reason other than frivolously whimsical decoration.  You know, the sort of button you secretly fall in love with but could never use on a real garment  πŸ™‚  These buttons were leftovers from these shorts here, when I had to buy a card of 4 buttons but only needed 1.

Details:
PJ bottoms; my own design, gingham printed cotton flannelette
Tshirt; Country Road, old enough now that it has been delegated to sleepwear

Pocket:

False fly:
pinterestmail
Switch to mobile version
↓