Tag Archives: Skirt

Grey wool coat for Spring

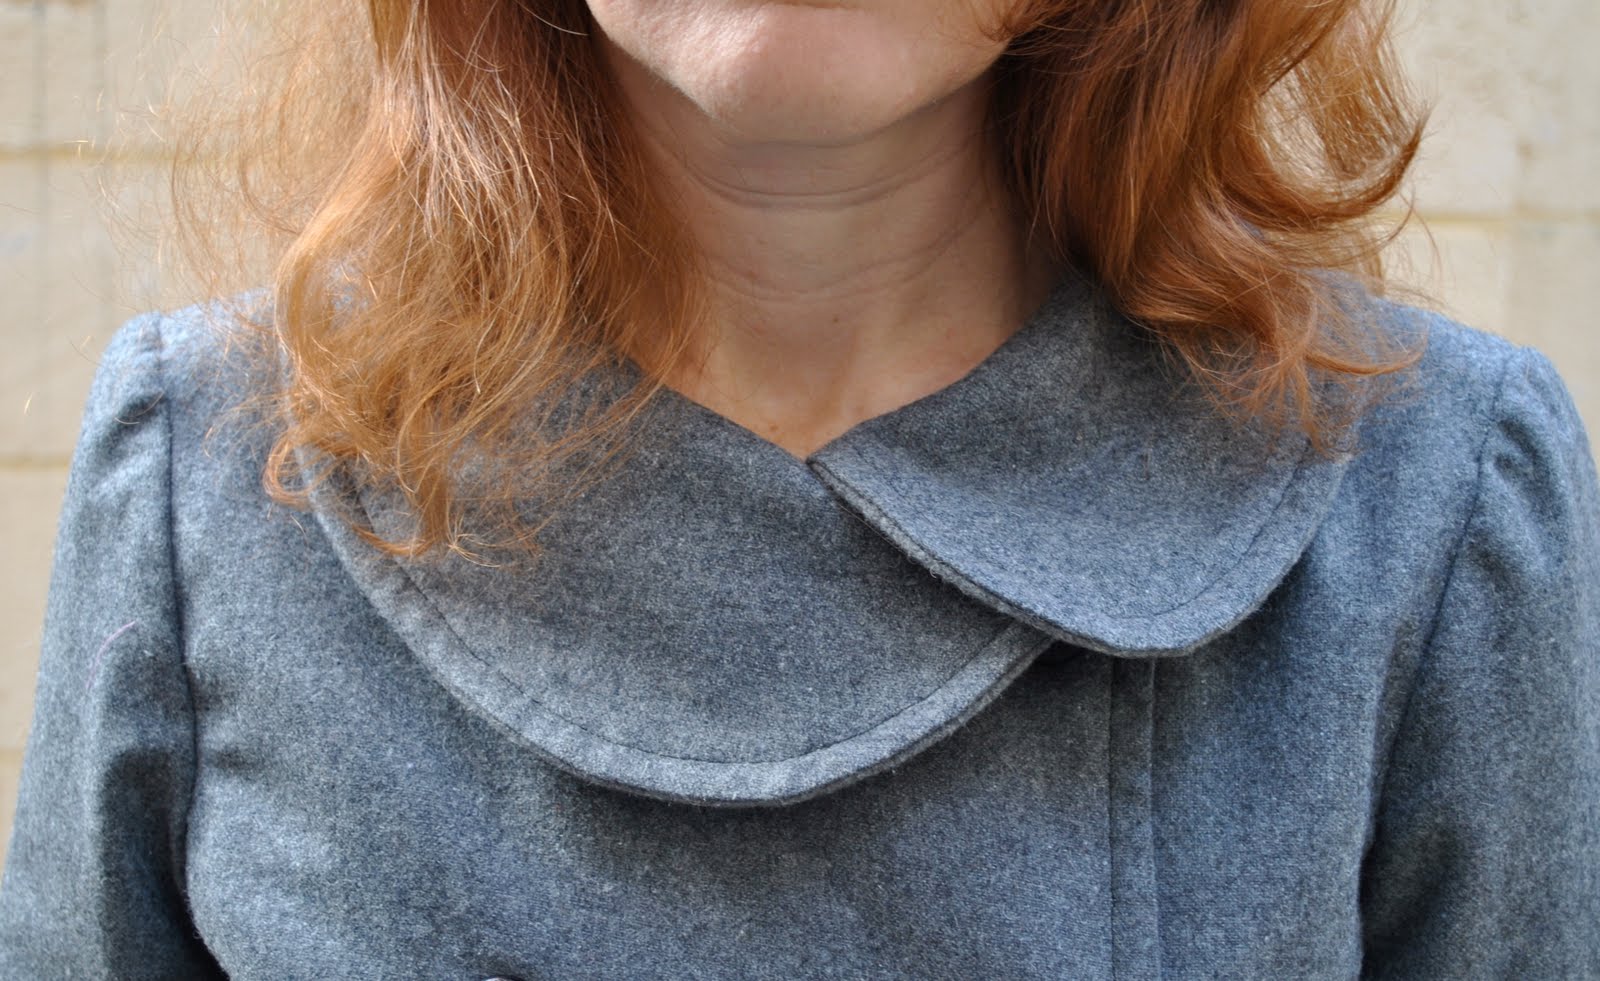
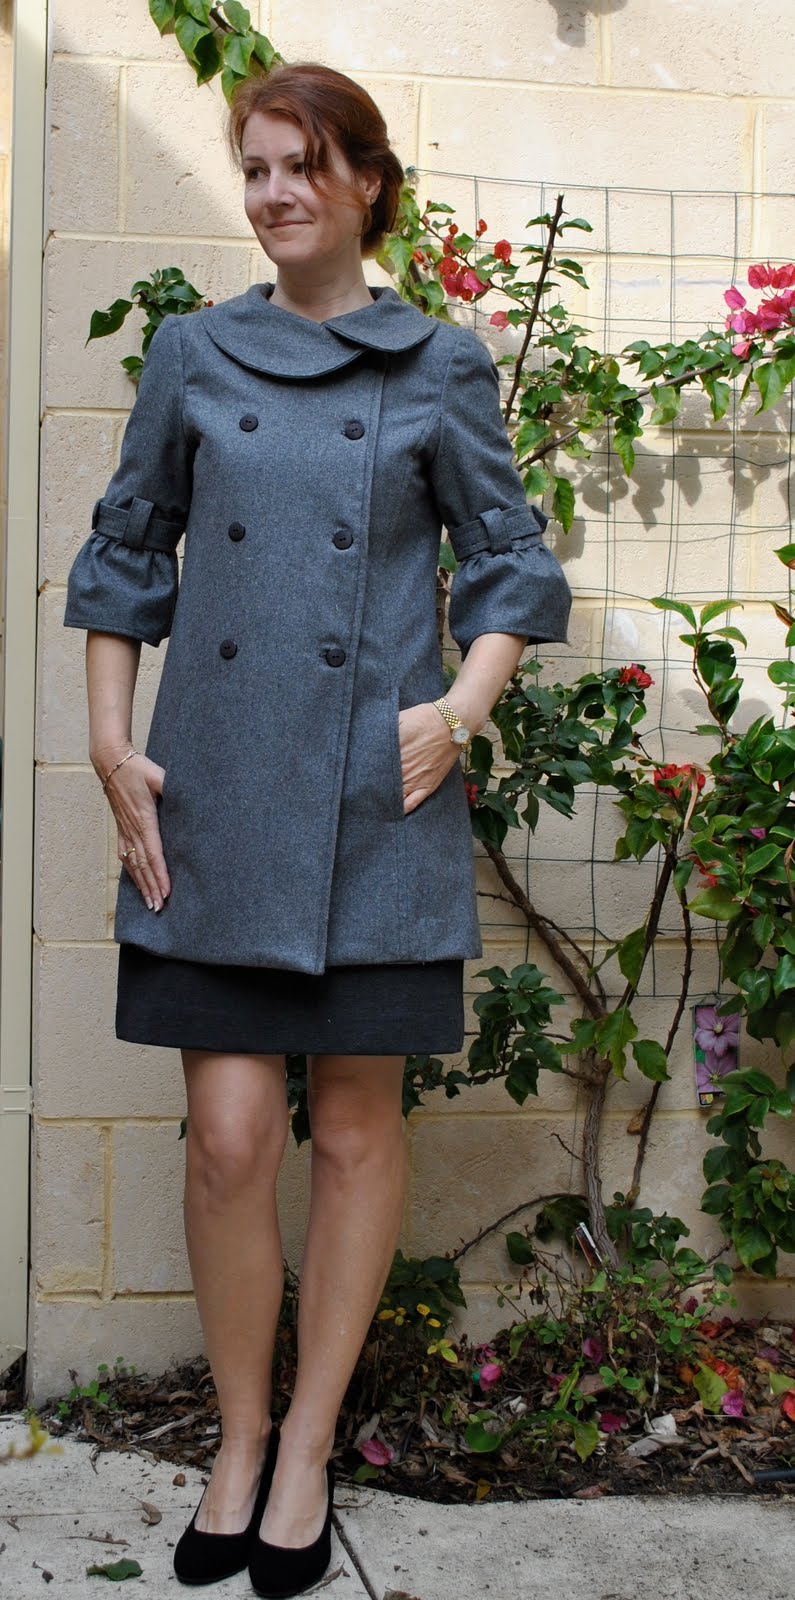
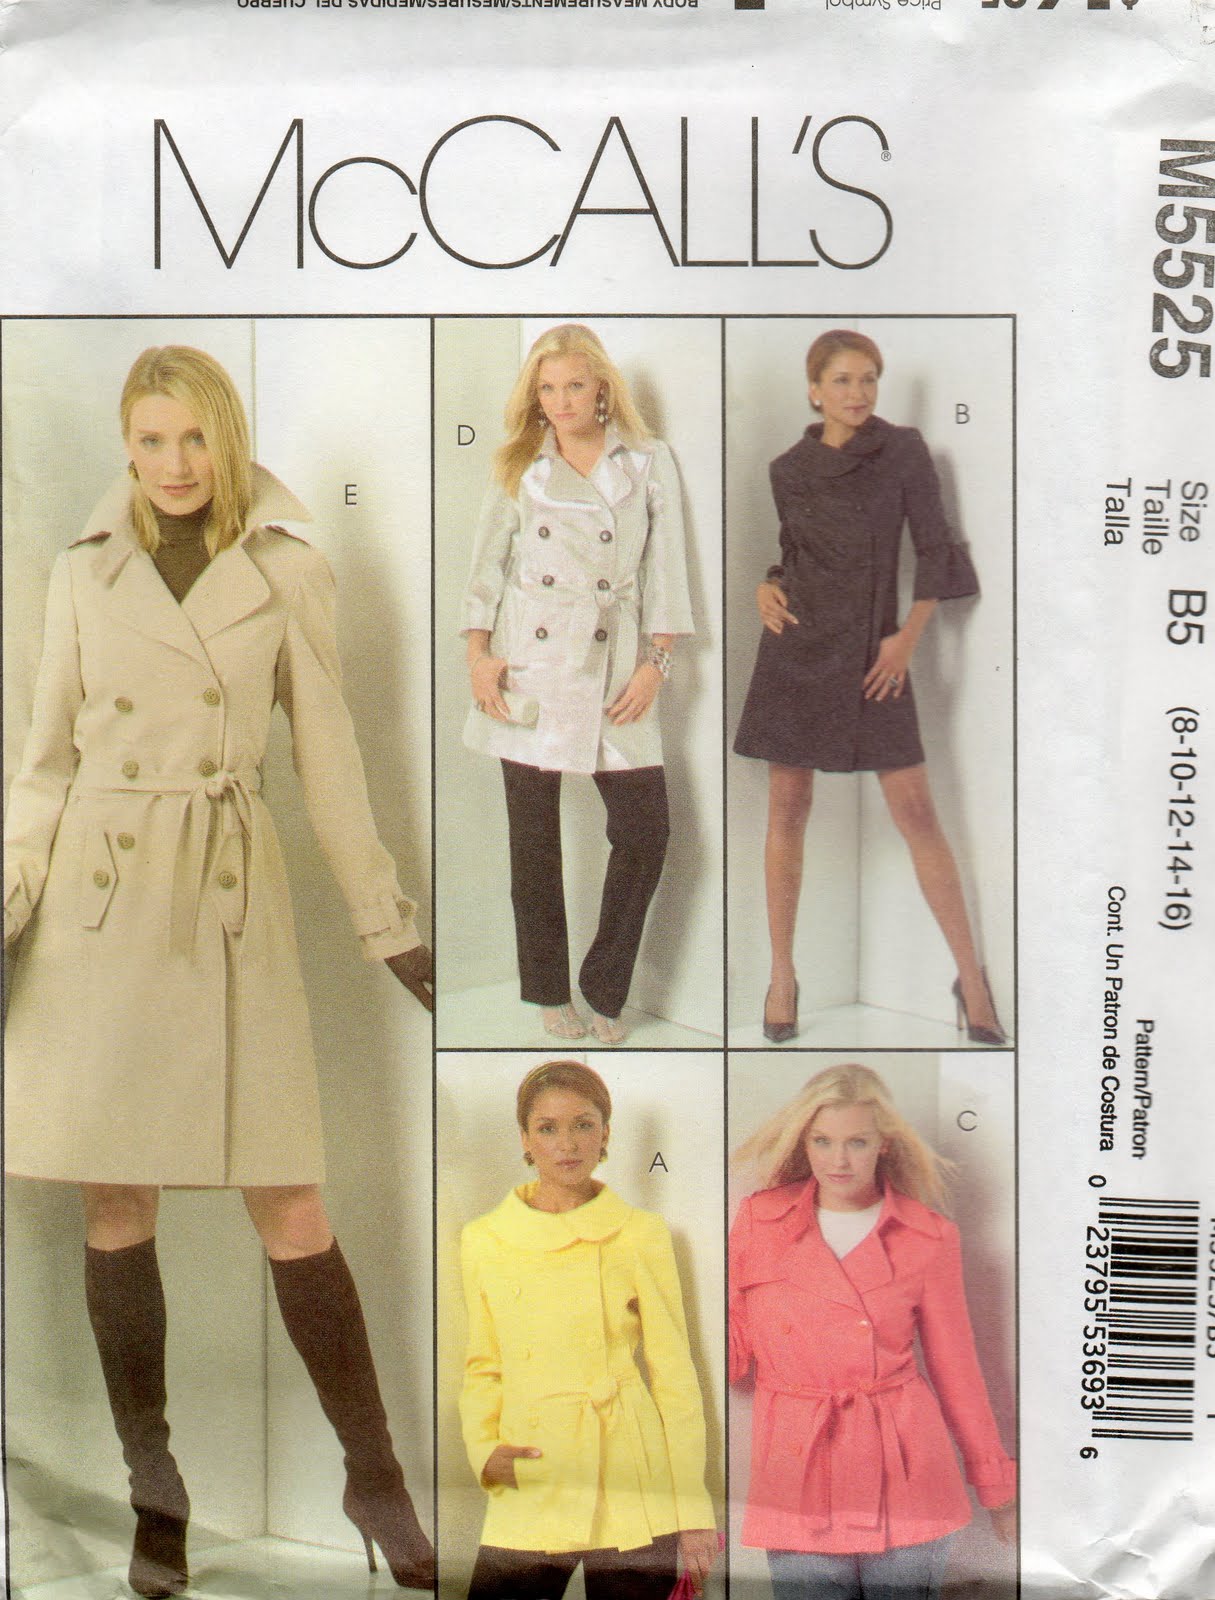
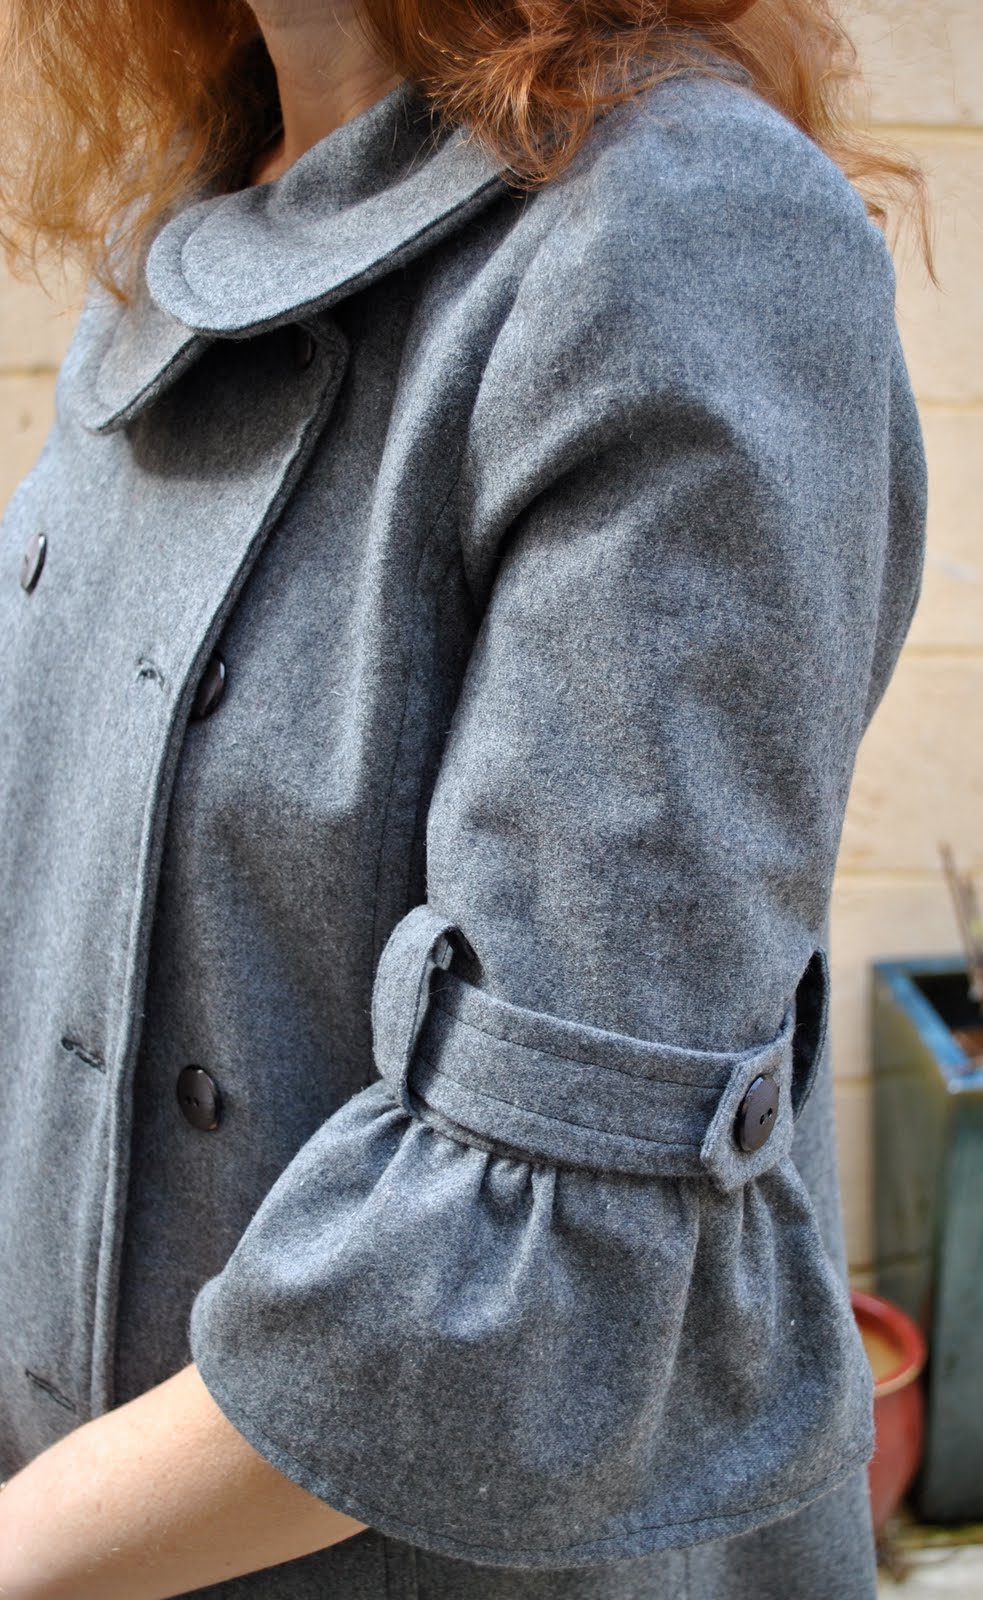
I made myself a coat for spring, using McCalls 5525, view B and grey wool fabric, bought back in March on a whim.  So, it took some cutting magic to get this coat out of the small amount of wool I had bought because there really wasn’t enough for this pattern!  When I realised this and went back to the store to get some more it had all been sold and I needed to buy a small amount of a different grey wool fabric which I used for the under collar and front facings, you can probably see on the close-up pictures the different fabric on the under/in-side of the coat but I think it’s not so different as to stand out in an ugly way.  Actually I think it worked out to be a blessing in disguise, because the second fabric is a much stiffer and thicker felted wool than the outer woven wool fabric, so I decided there was no need to interface, and I think it was the right decision not to do so.  The weight of the two wool layers together feels quite thick and stiff enough…
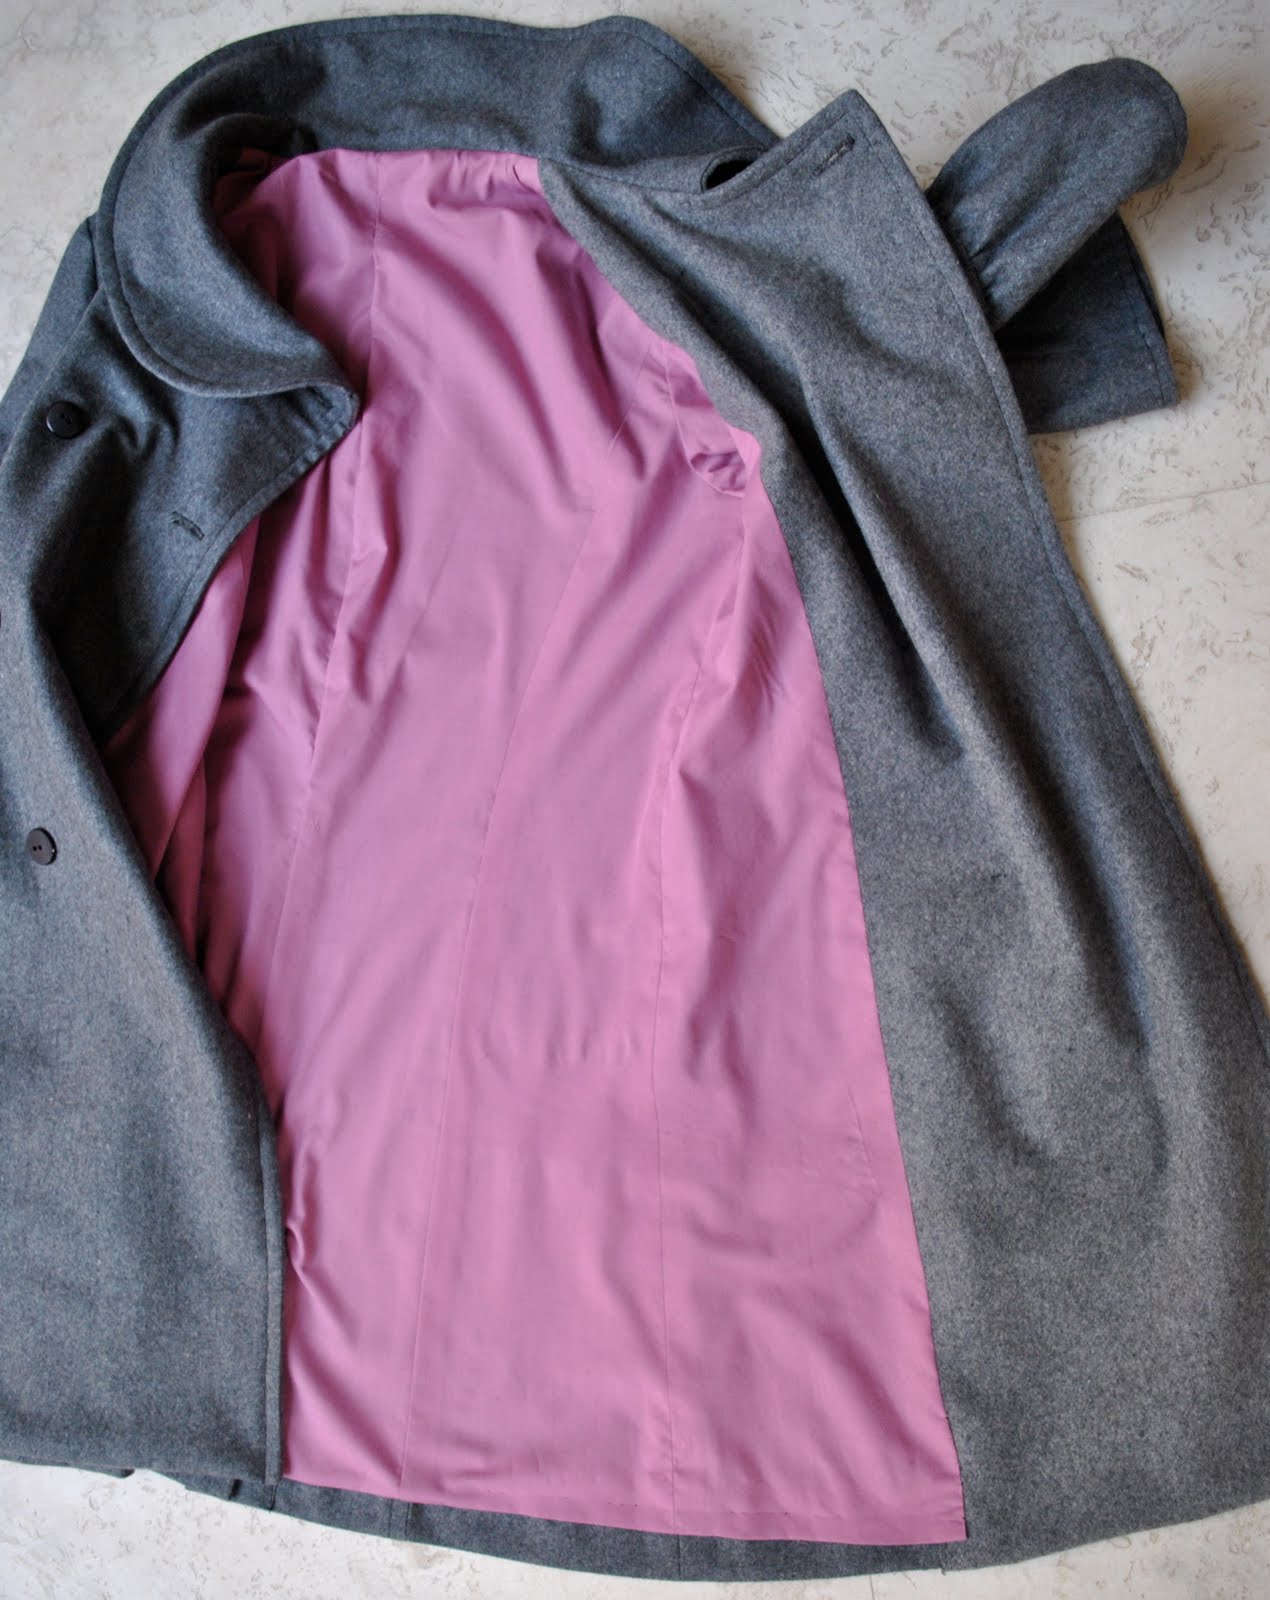
I lined it with a purply-pink cotton poplin, which makes the weight of the coat perfect for Perth’s sometimes chilly but sometimes warm spring weather.  I’m looking forward to wearing it more!

Details:
Coat; McCalls 5525 view B, grey wool flannel
Skirt; my own design, charcoal stretch jersey knit
Shoes; Misano, from Labels

Pattern description
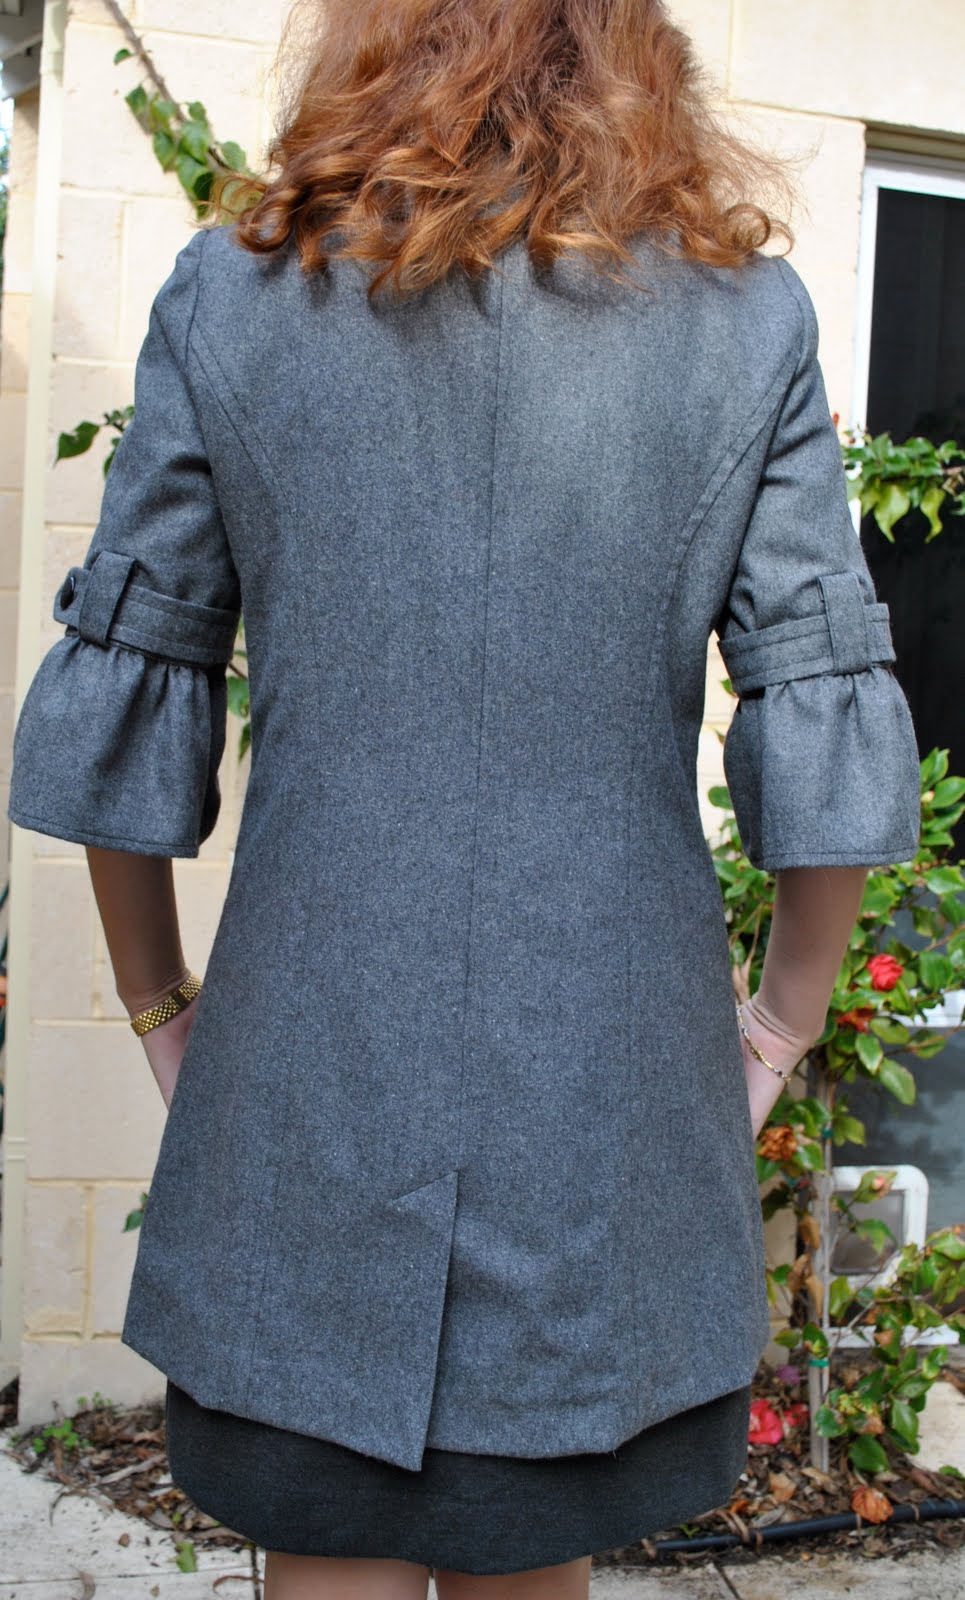
Semi-fitted, lined, double-breasted jacket and coat have collar, lengths and sleeve variations, princess seams and side front pockets.  Here I made view B with back vent, sleeves with button bands, topstitch trim and button closure
Pattern sizing
8-16, I made size 10
Did it look like the photo/drawing on the pattern envelope once you had finished sewing it?
yes
Were the instructions easy to follow?
very easy
What did you particularly like or dislike about this pattern?
I loved everything about this pattern!  I like that it is fully lined, not half lined as some coat patterns are; the inset pockets are in a good position on the front, and the one-piece sleeves are an easy feature
Fabric used:
Woven grey wool for the outer, purple/pink cotton poplin for the lining.  Thicker felted wool fabric for the under collar and facings (because I didn’t have enough of the outer fabric)
Pattern alterations or any design changes you made:
I made the pockets slightly larger as I thought the ones in the pattern looked too small for comfort
Would you sew it again?  Would you recommend it to others?
I highly recommend this pattern, the variations mean you can achieve so many looks from this one pattern and I do plan to try some of the others
Conclusion:
This is such a stylish and versatile coat pattern.  The pattern is well designed; it went together very easily, all the pieces fitting together as they should with no difficulty.  The one piece sleeves make this a breeze to sew.  I made view B, and I particularly love the flattering asymmetrical collar, very “designer” and slightly retro.  I think this view would work beautifully in heavy satin for an evening coat.  I also particularly like the button bands on the sleeves of this view.  I hand-tacked these bands to the sleeve seams to lessen the risk of them “rotating” around the sleeve during wear.
pinterestmail

Noro baggy beanie

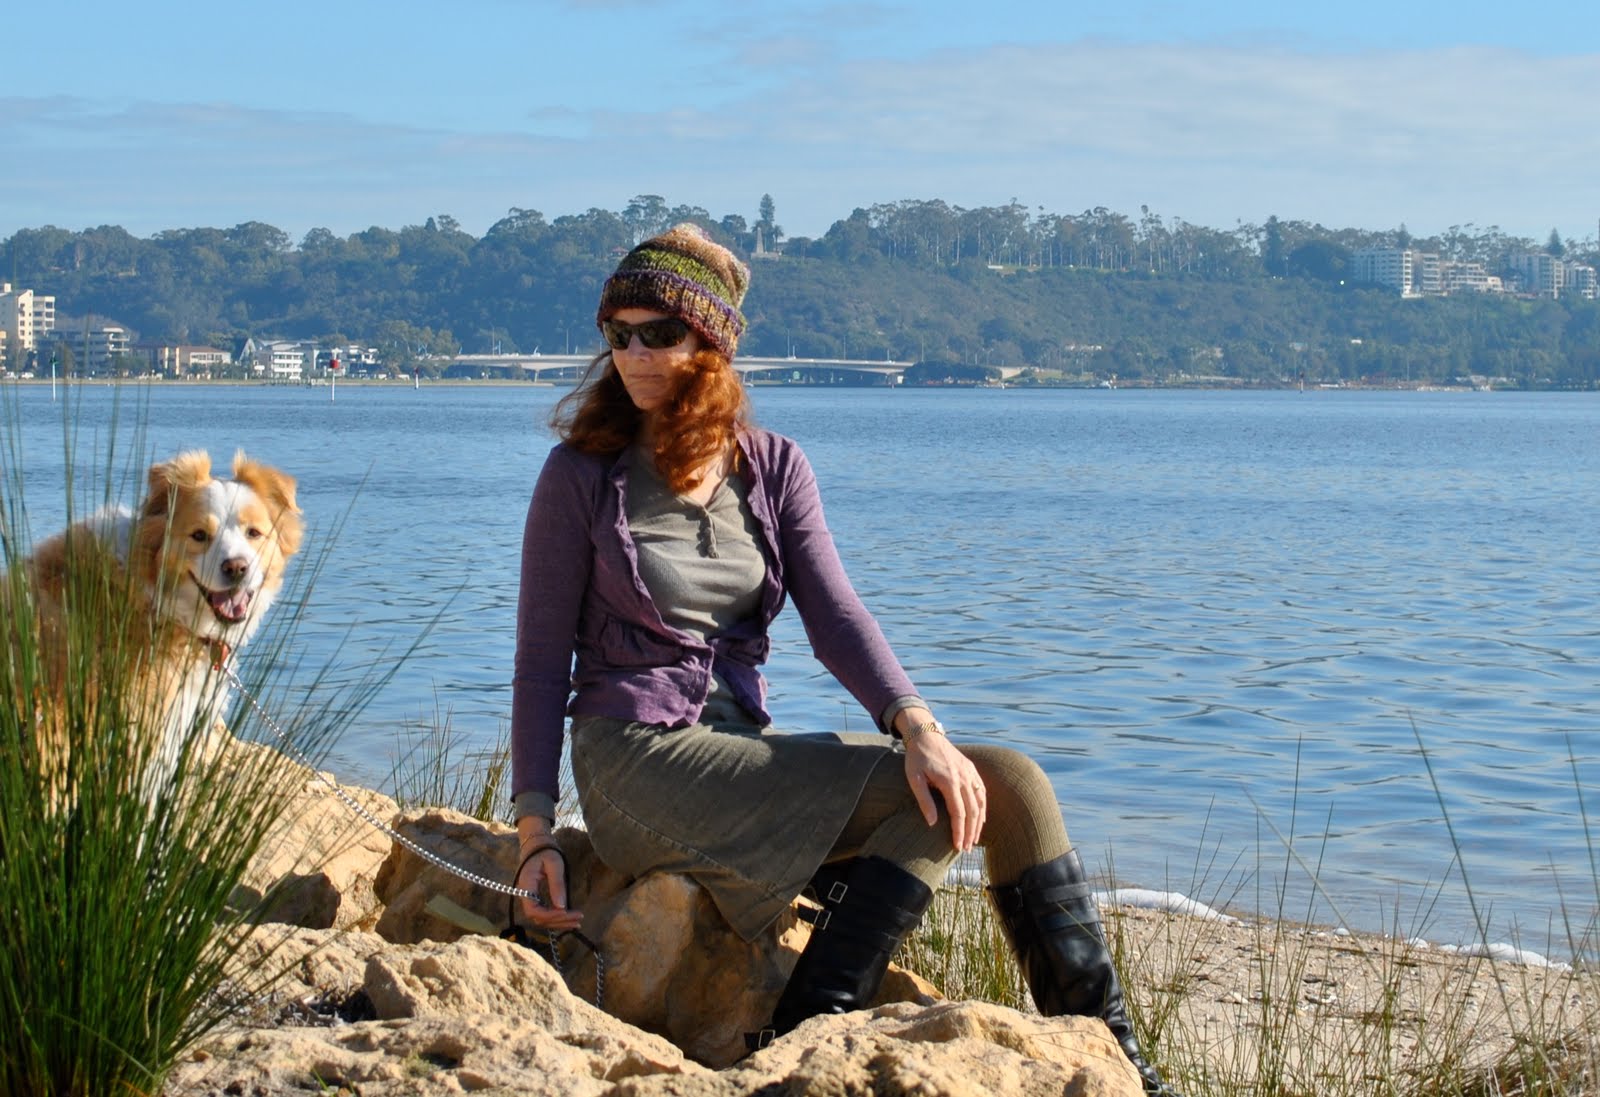
So, here is the other baggy beanie I’ve made for this winter.  This is made using one ball of Noro Kuryon? I think?  I bought it a few months ago, and have lost the tag so colourway is unknown, sorry!…  It’s my own design, but obviously there’s nothing tricky or difficult about making a beanie.  The beauty in this beanie is in the lovely knobbly wool, and it’s woods-y shades of moss green, heather-y purple, a touch of fungal yellow, all shades of brown and deepest charcoal.
Tension: 12 sts and 20 rows to 1ocm square

Cast on 60 stitches.
k2, P2 rib to end
repeat for another 11 rows (12 rows rib in total)
Continue in stocking stitch (K 1 row, P 1 row) for another 24cm length, Decrease for crown as follows:
K4 K2 together, repeat to end of row (50 stitches)
P 1 row
K3, K2 together, repeat to end of row (40 stitches)
P 1 row
K2, K2 together, repeat until end of row (30 stitches)
P 1 row
K1, K 2 together, repeat until end of row (20 stitches)
P 2 together until end of row (10 stitches)

Cut thread leaving tail of 15cm, thread through wool needle, pass through stitches left on knitting needle, pull tight and tie off.  Sew up seam of beanie… done!

Can be worn long and baggy, or the ribbing rolled up to make it a little shorter  🙂


Details:
Beanie; made by me to my own design, Noro Kureyon
Skirt; made by me, Vogue 7303, olive green corduroy
Top, tights and cardigan; all Metalicus
Boots; Andrea and Joen, from Uggies

pinterestmail

Little charcoal skirt

Today is the most miserable of days Perth has to offer; we’ve had tons of rain in the last 24 hours and it’s windy and stormy to boot.  Good news for the farmers, though, this rain has finally broken another very long dry spell that has my friend J worrying over their crops…
On the plus side, today I am having my hair cut; one of my favourite self-indulgences where I get coiffured and pampered and swan out of the salon looking smart, sleek and suitable for public viewing once more… and tomorrow my sister-in-law is taking me to my first Burdastyle Club meeting!  I’m a bit excited, but also nervous about meeting new people and don’t really know what to take…  Maybe it would be safe to just take some fabric and a pattern for cutting out for this time.
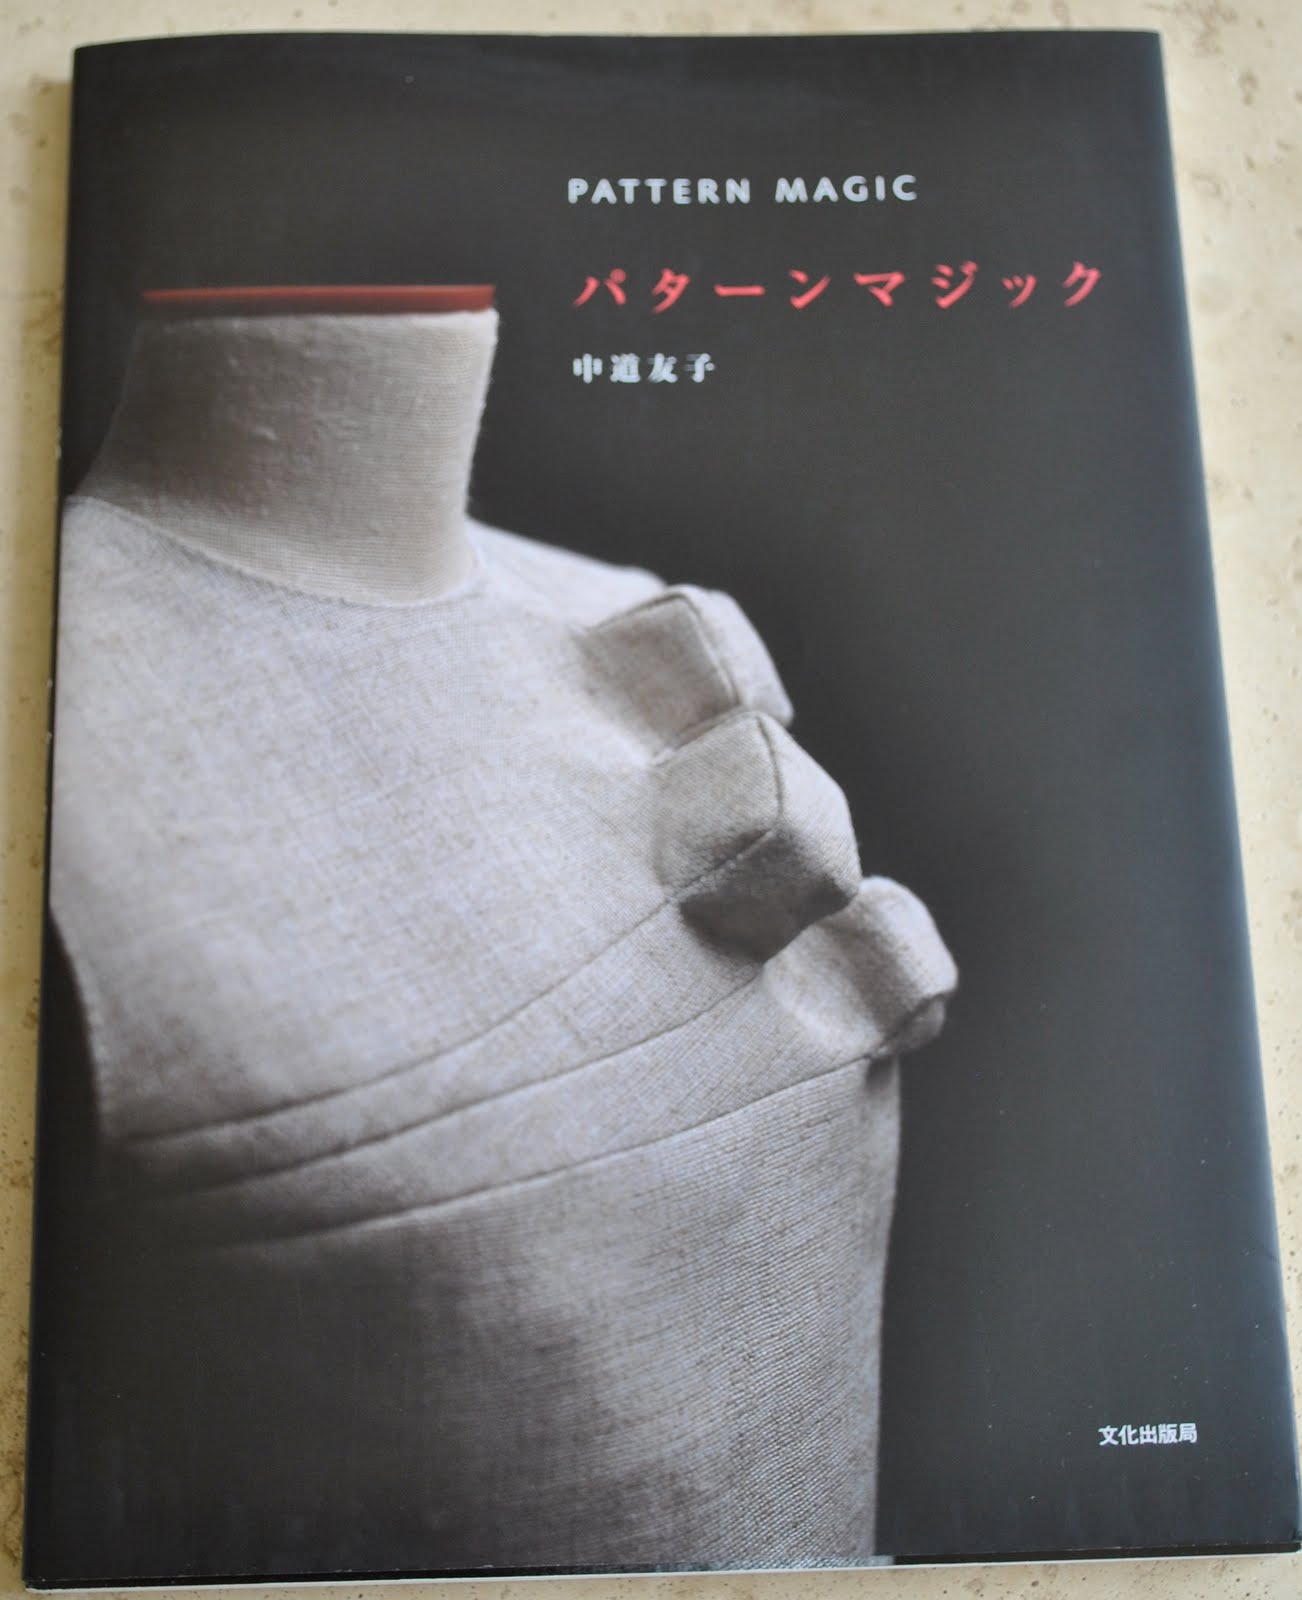
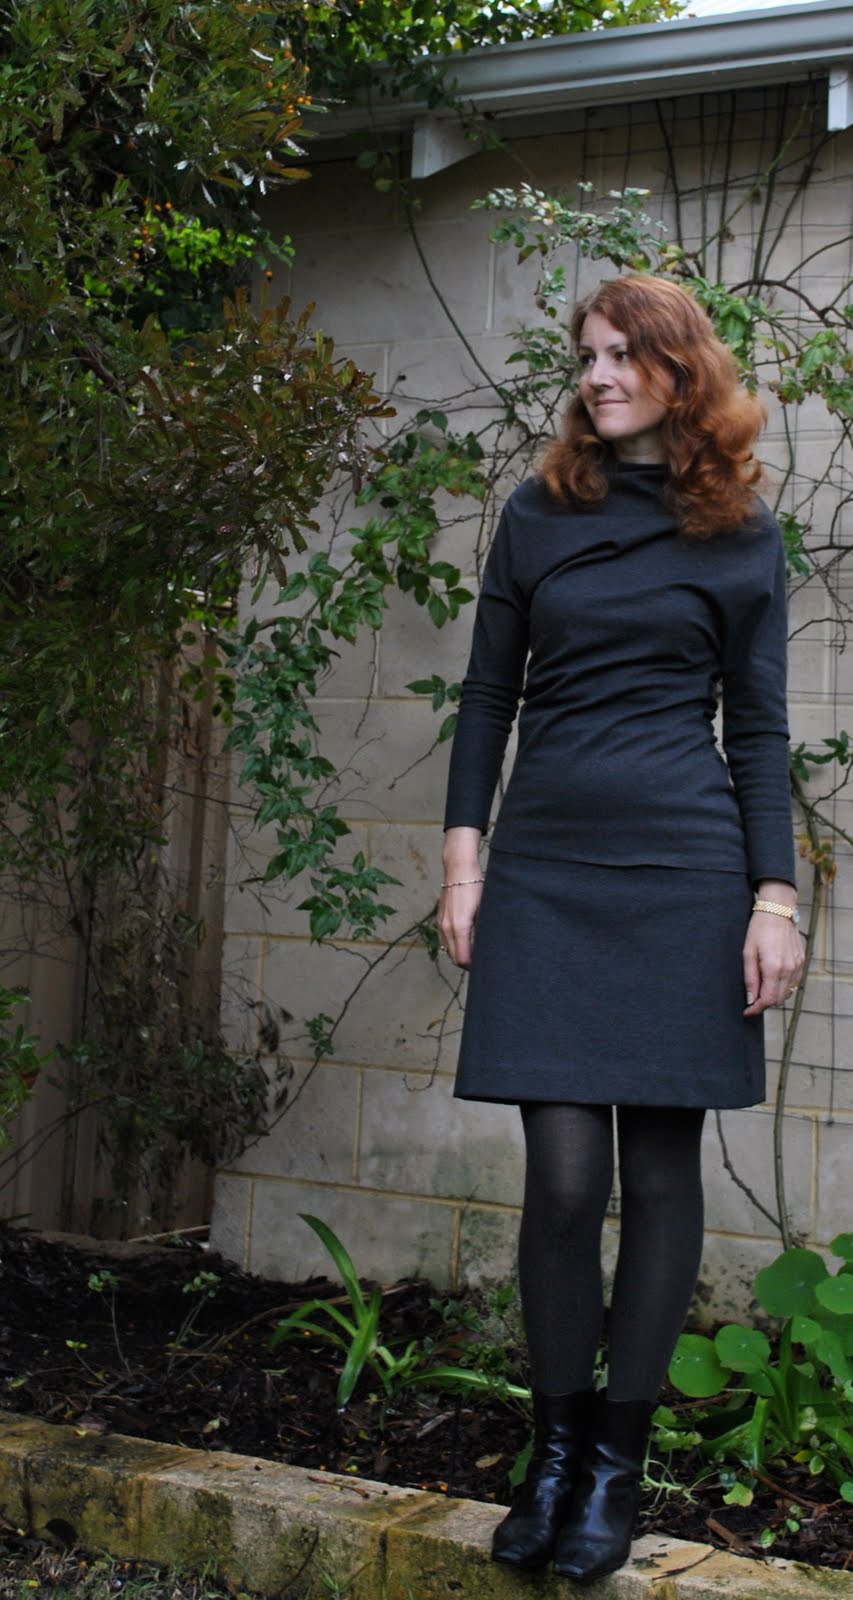
Oh, what am I wearing, well after finishing this top from Pattern Magic I had a bit more of the charcoal stretch jersey left over and made this very simple basic little skirt to go with it.  It is the simplest of skirts; no darts or zips and a waistband of 3cm wide black elastic sewn around the top to hold it up, then hand-hemmed.  I think probably too simple to even bother putting up on Burdastyle…
In this outfit and with these lovely textured charcoal tights I feel appropriately sombre, rumply and skewiff, much like the stormy swirling storm clouds up above me in the sky… 

Details:
Top; made by me, drafted from Pattern Magic by Nakamichi Tomoko, charcoal stretch jersey knit
Skirt; my own design, charcoal stretch jersey knit
Tights; Spencer Lacy
Boots; Mina Martini, from Marie Claire

pinterestmail

Evening outfit, inspired by Christian Lacroix

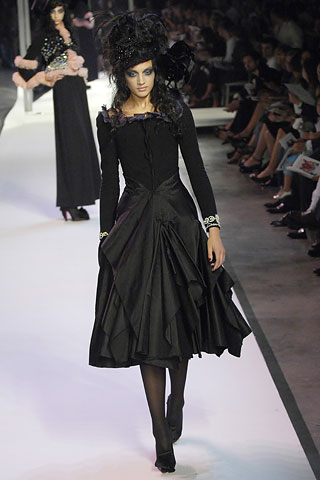
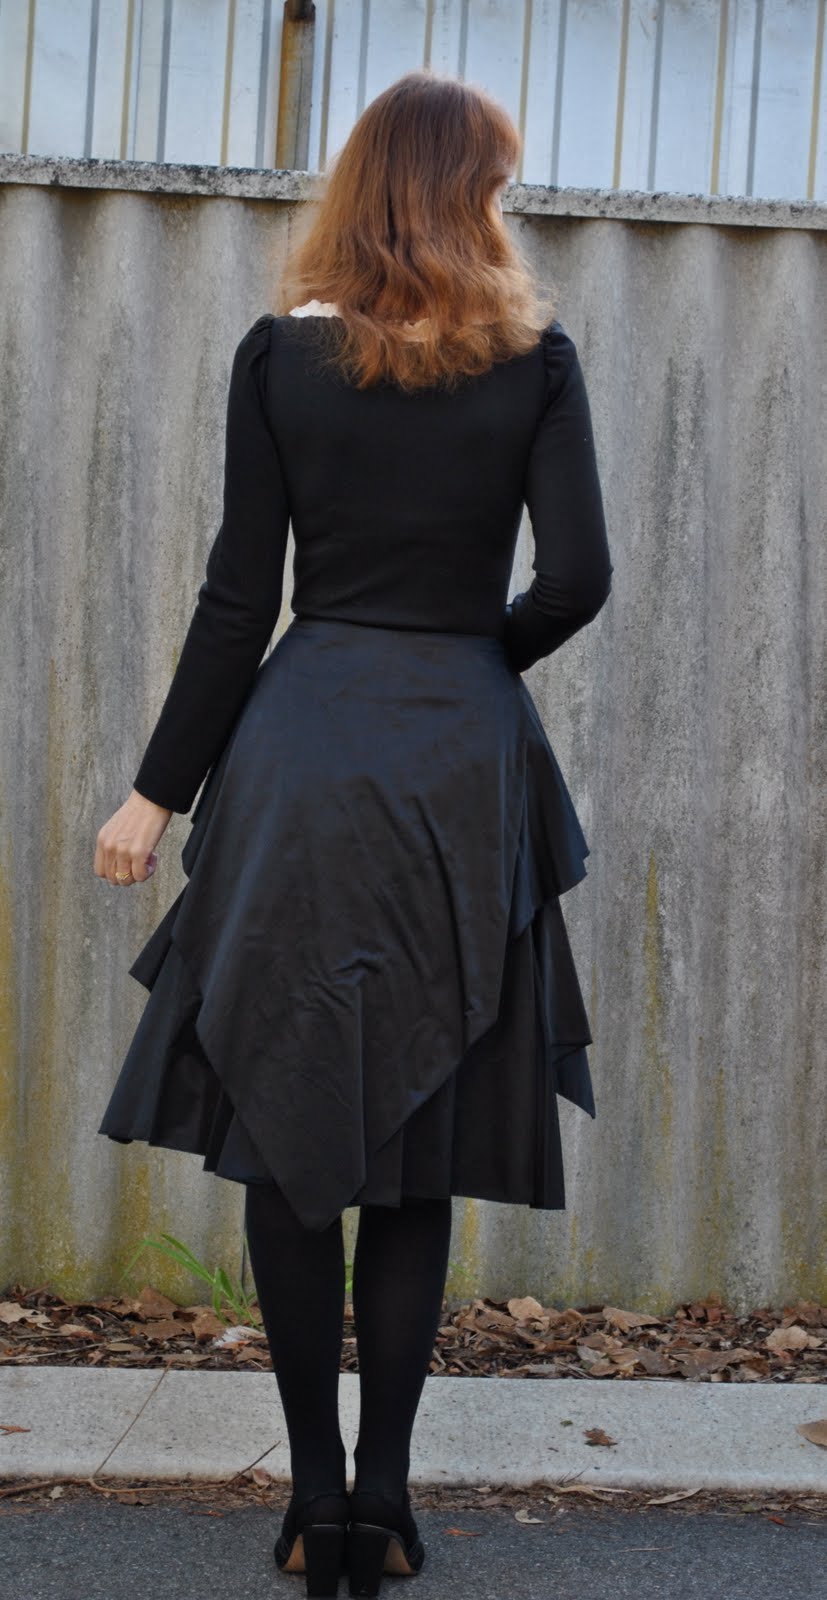
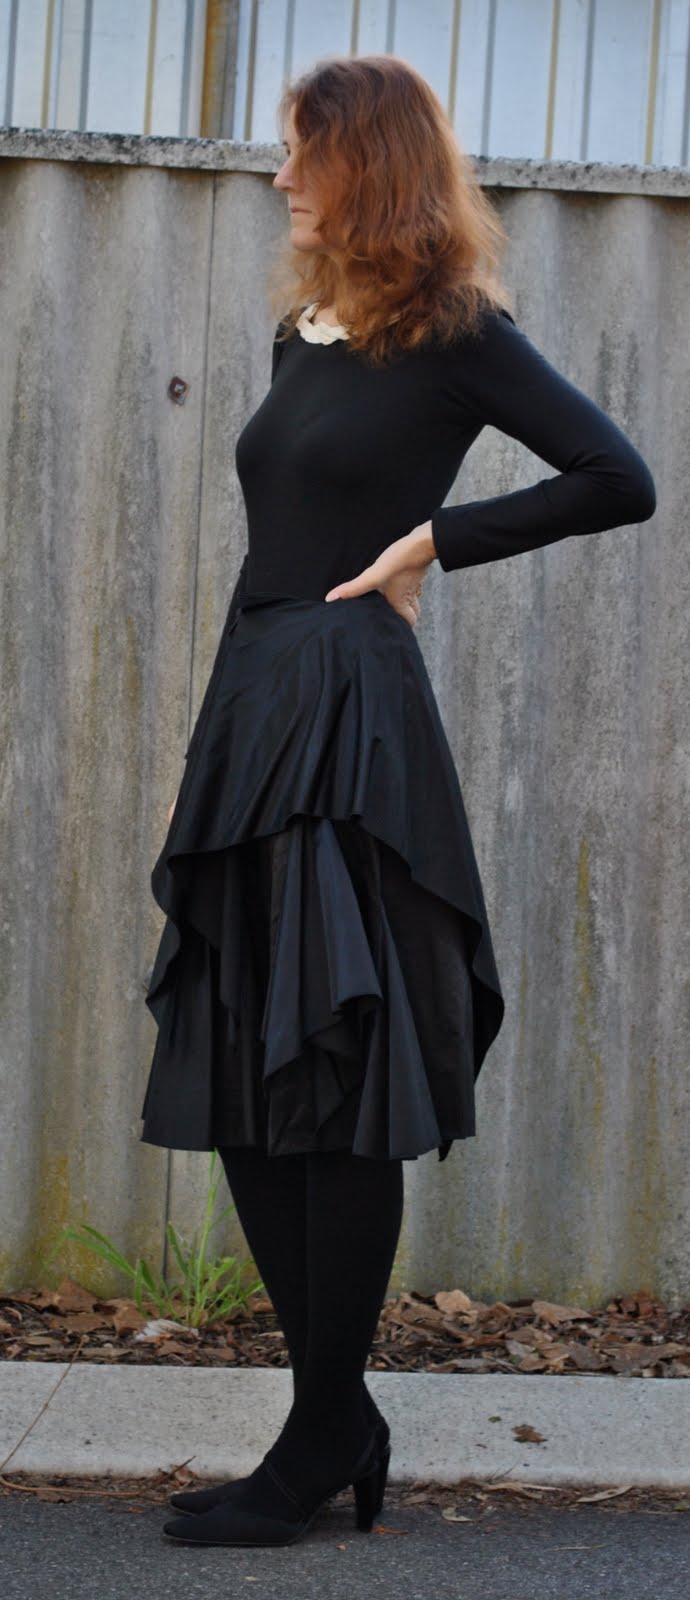
This is an outfit I made for evening wear a couple of years ago.  It’s been a wonderful one for when we have some winter function and the weather is really cold as I can pop on a thermal underneath if necessary, and my shoulders are covered.  I was completely inspired by the outfit at right from the Christian Lacroix Fall 2007 Couture collection.
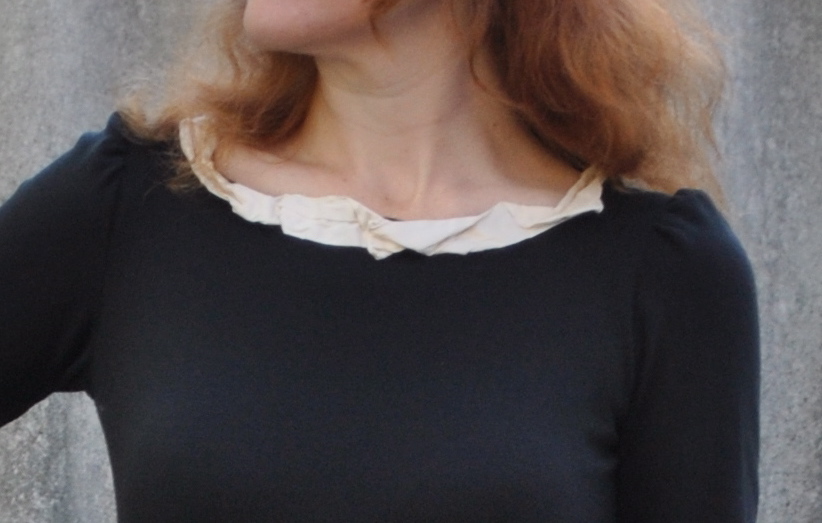
The top is a bodysuit made out of thick stretch black jersey, and for a tiny dressy touch the shoulders were cut high and gathered tightly at the top for a little puff.  The decoration around the neckline is a tube of heavy ivory/cream raw silk that I folded randomly and artistically and hand-stitched down (see detail picture below).
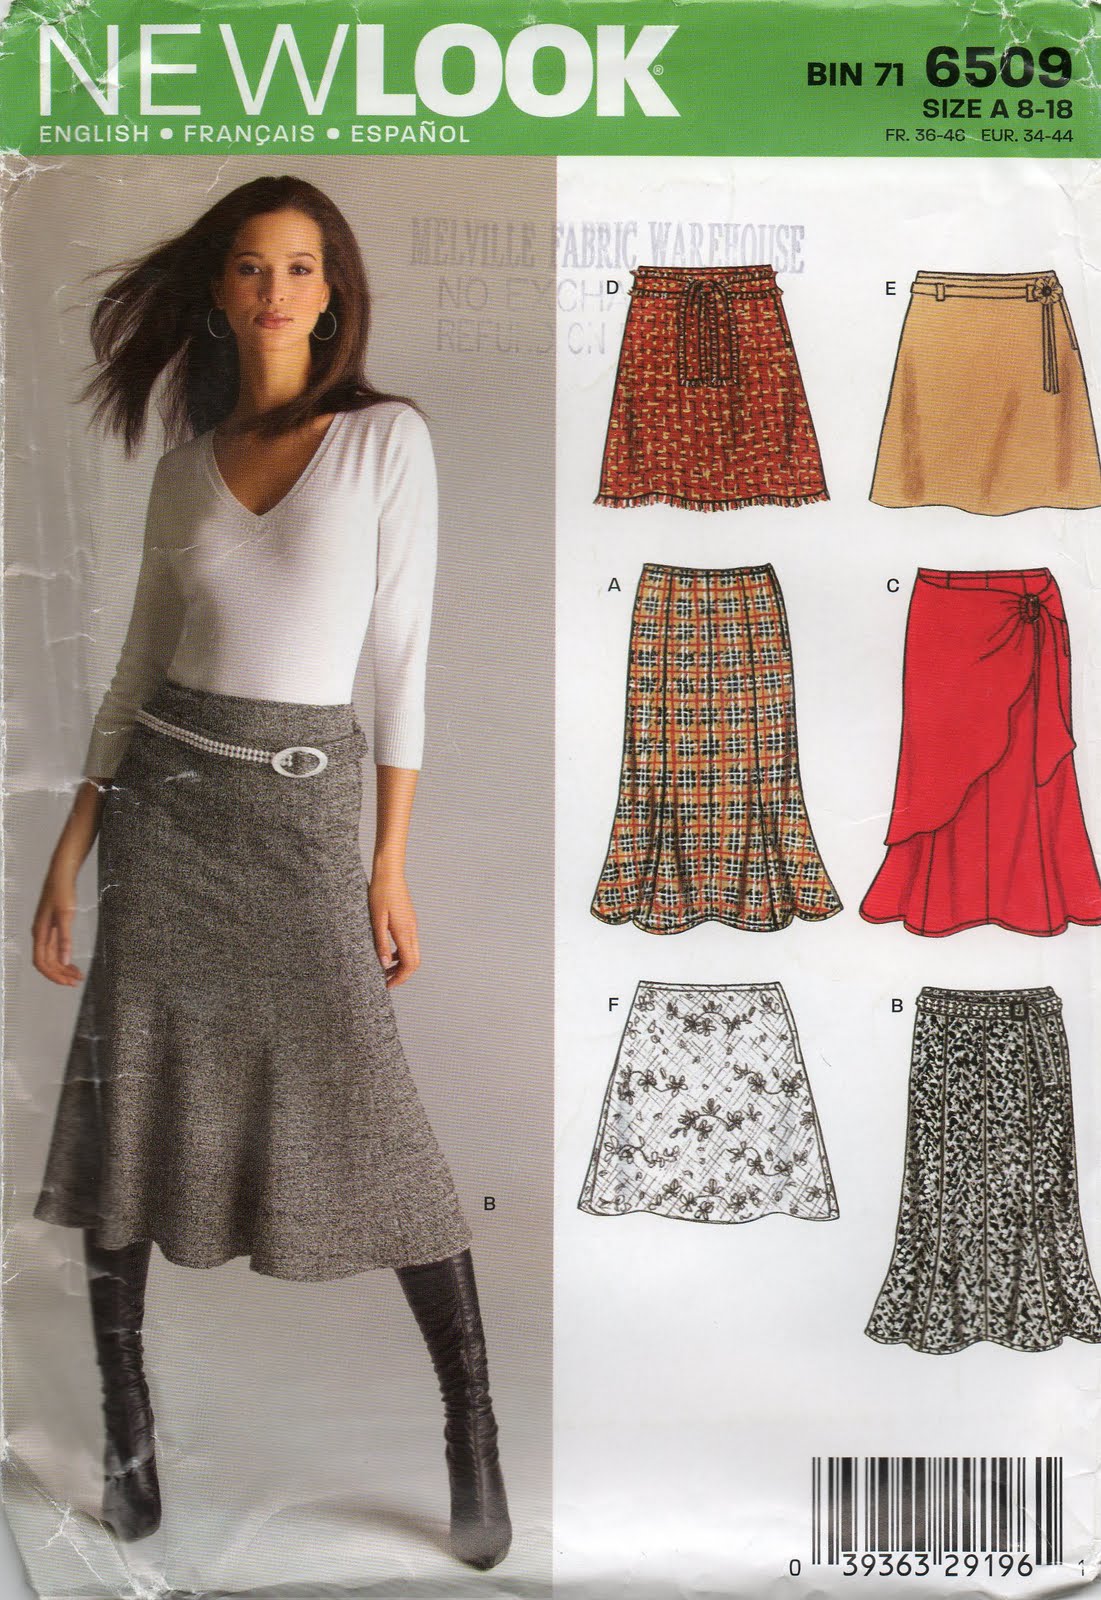
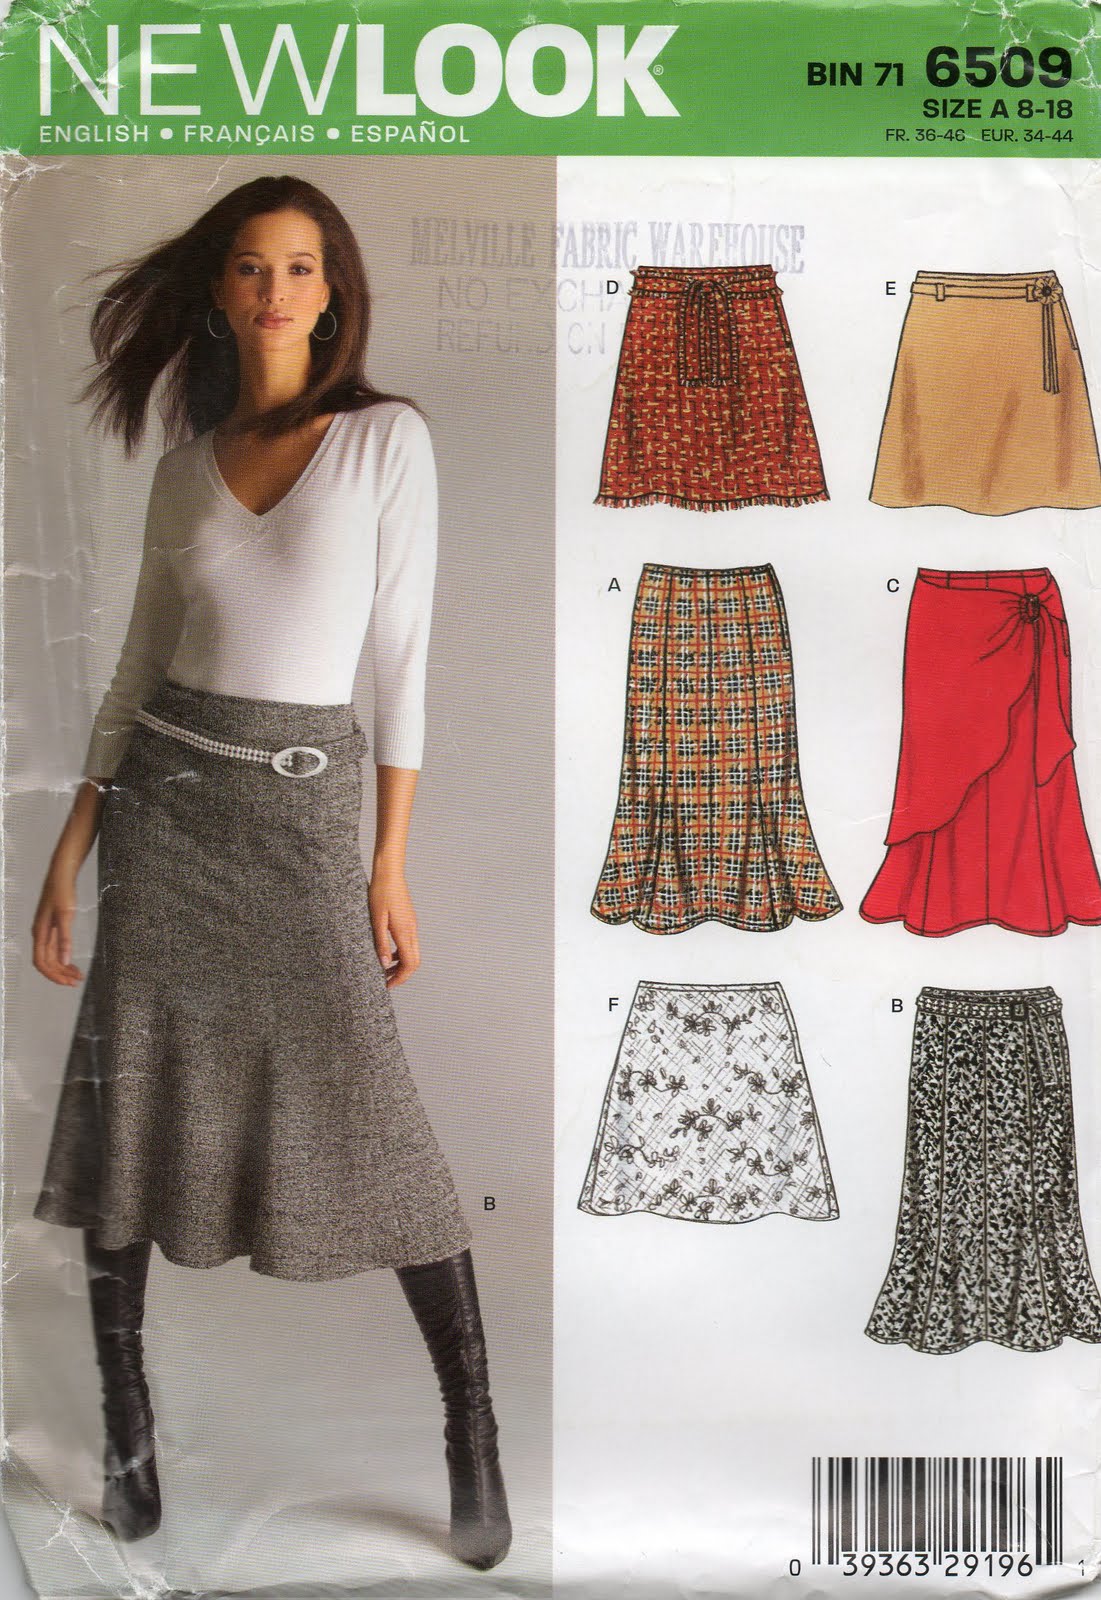
While for the top I was aiming for slimline and body-hugging, I wanted for the skirt to be dramatically flared and with lots of “bits”, like the Lacroix design.  I eventually achieved this by making two skirts.  For the underskirt I started off with New Look 6509 as a basic 8-gore skirt but altered by tapering the gores to be much wider at the hemline.  I also added wide triangular inserts in between some of the gores for added volume.  The overskirt is pretty much a circle skirt, plus some extra at the front opening.  The inserts and the overskirt I hemmed in straight lines, forming points, for a gothicky, witchy look.
Oh, (afterthought!) I’m not sure what the composition of the skirt fabric actually is, but it is like a heavy and very stiff satin; with a slight sheen on one side and matte on the other.  Perfect for the look I wanted.

Details:
Bodysuit; drafted my own design, black stretch jersey knit with ivory silk decoration
Skirt; drafted my own design, starting with New Look 6509, black stiff fabric
Tights; Kolotex
Shoes; Nina, from David Jones

pinterestmail

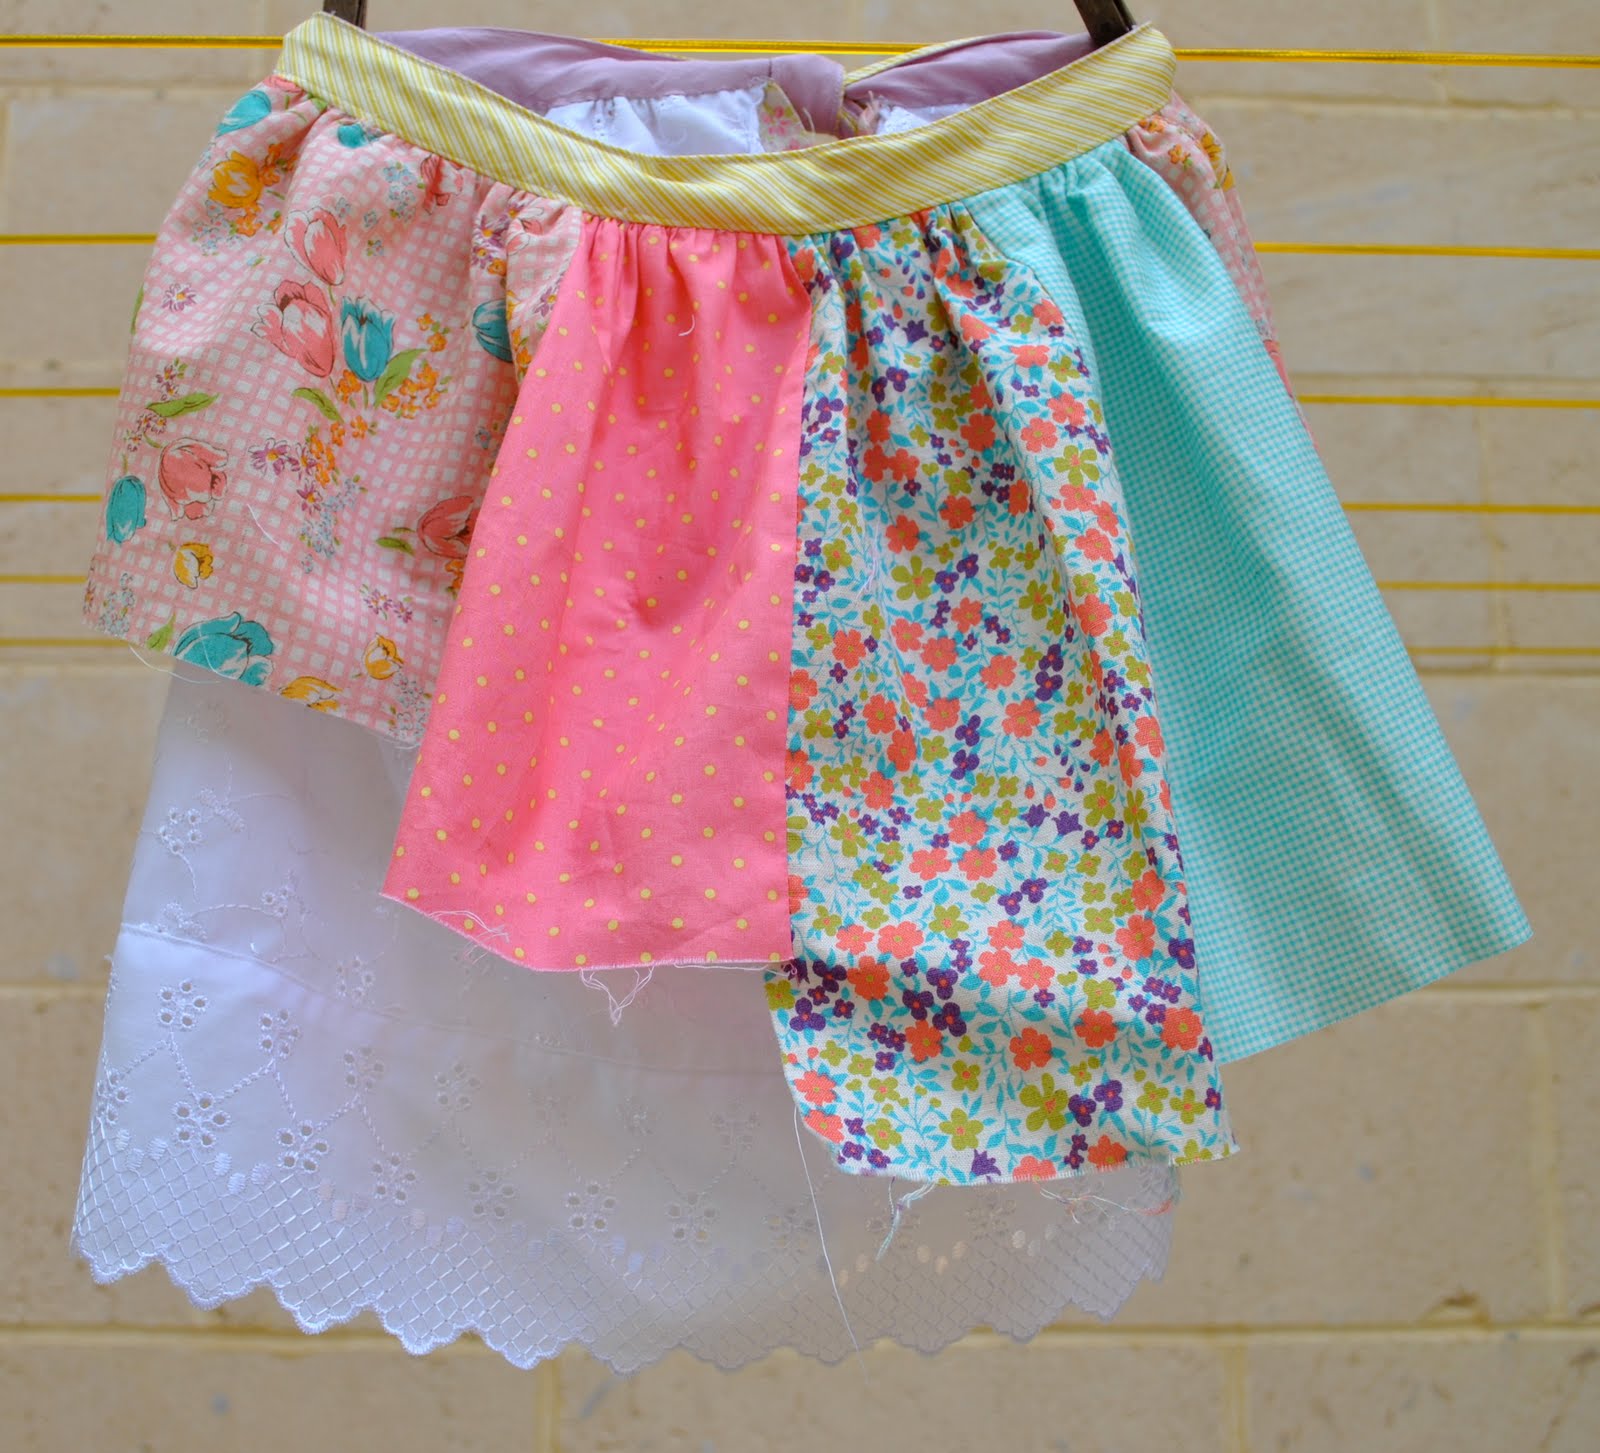
Cute patchwork skirt for a little girl

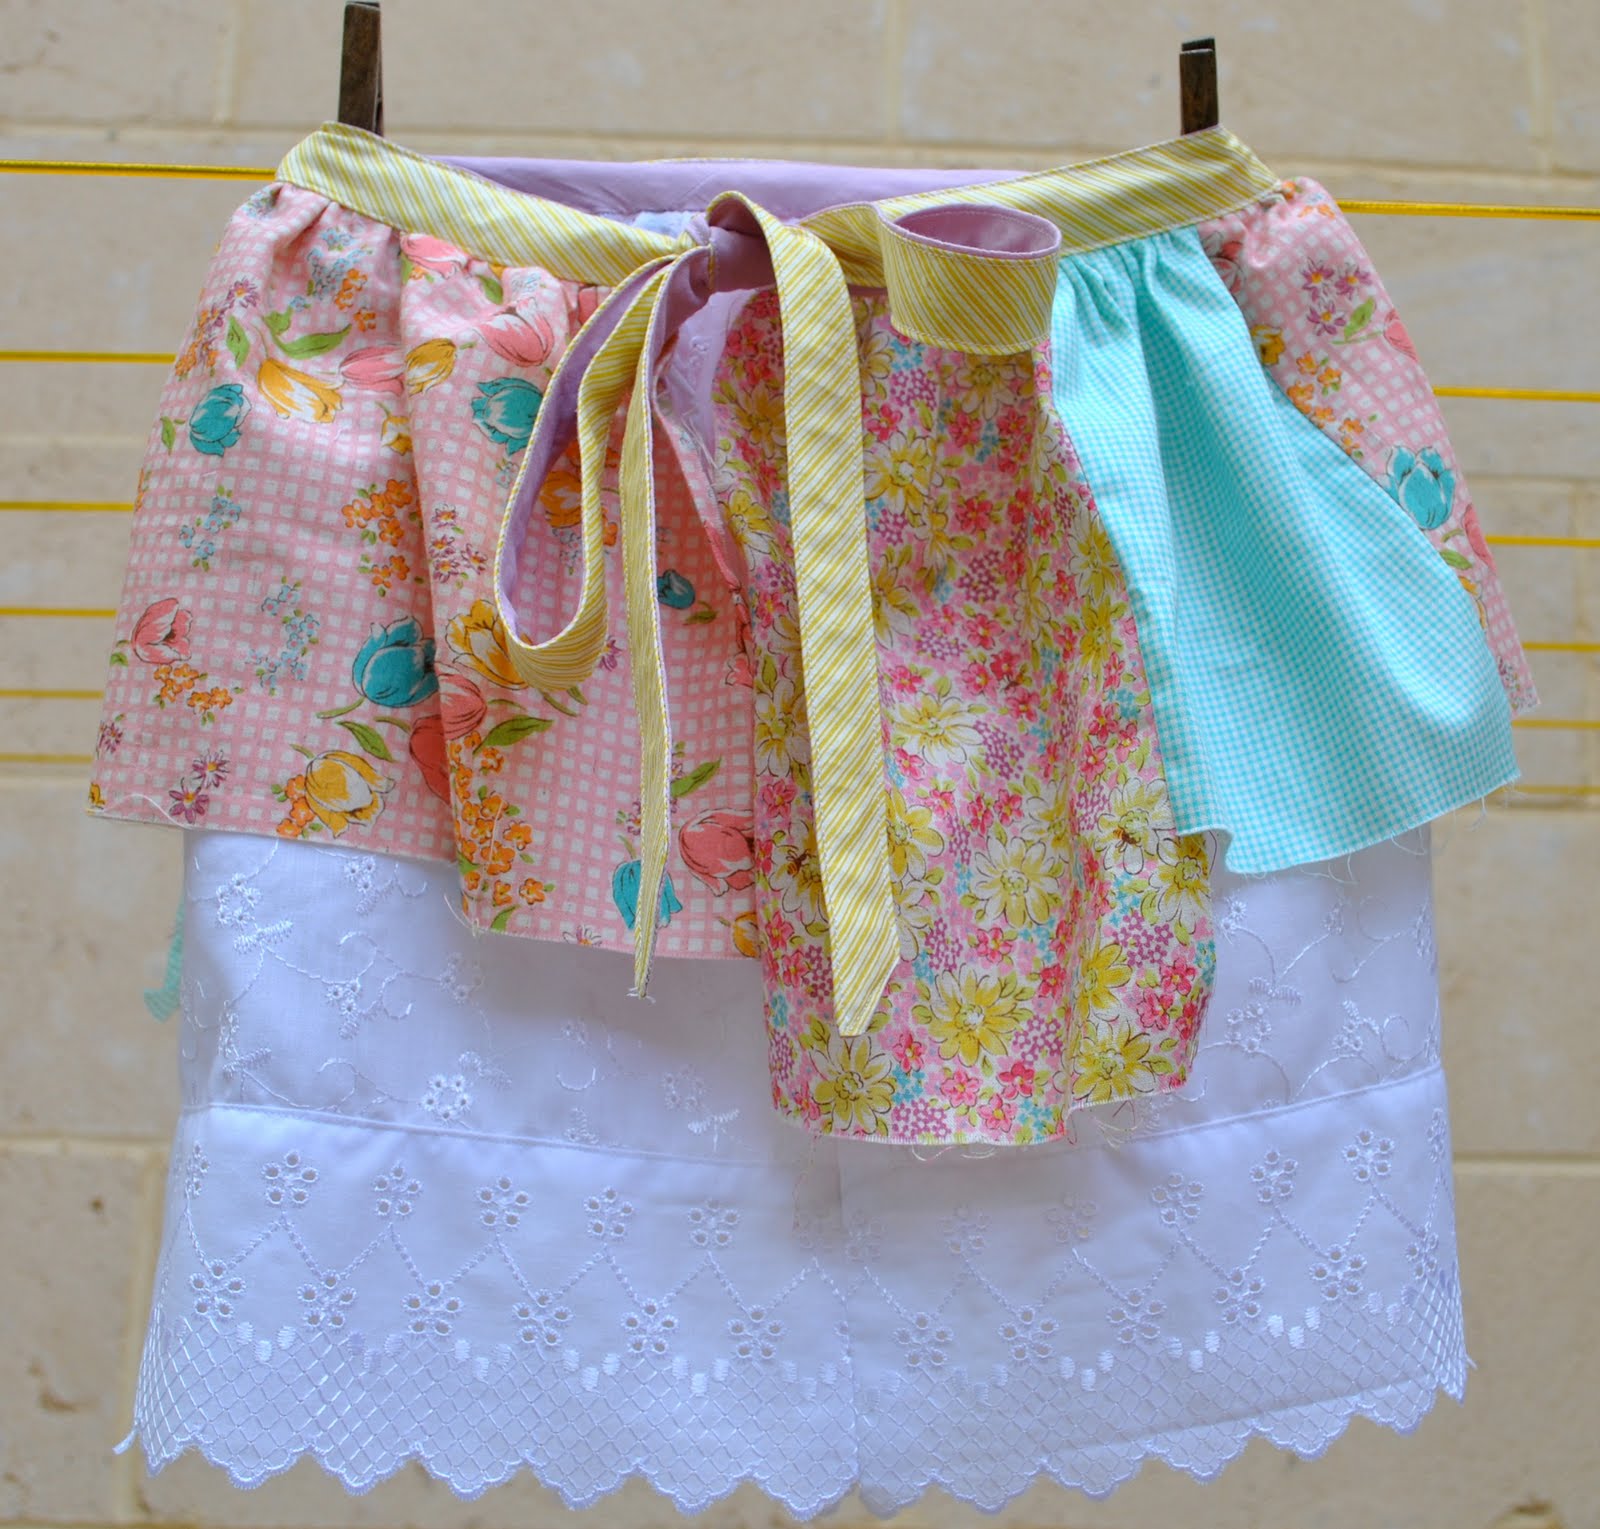
It is my youngest niece’s birthday tomorrow and I wanted to make her a frivolous and girly little skirt because she is luckily still little enough to love pretty dress-up clothes.  A dress I had made her for a previous birthday could well be the most appreciated present I’ve ever made anyone, as she wore it lots and lots.  It was a hot pink satin princess dress, with a sweetheart neckline, puffy glitter sleeves and a glittery tulle bustle and I was thrilled she was so happy with it.
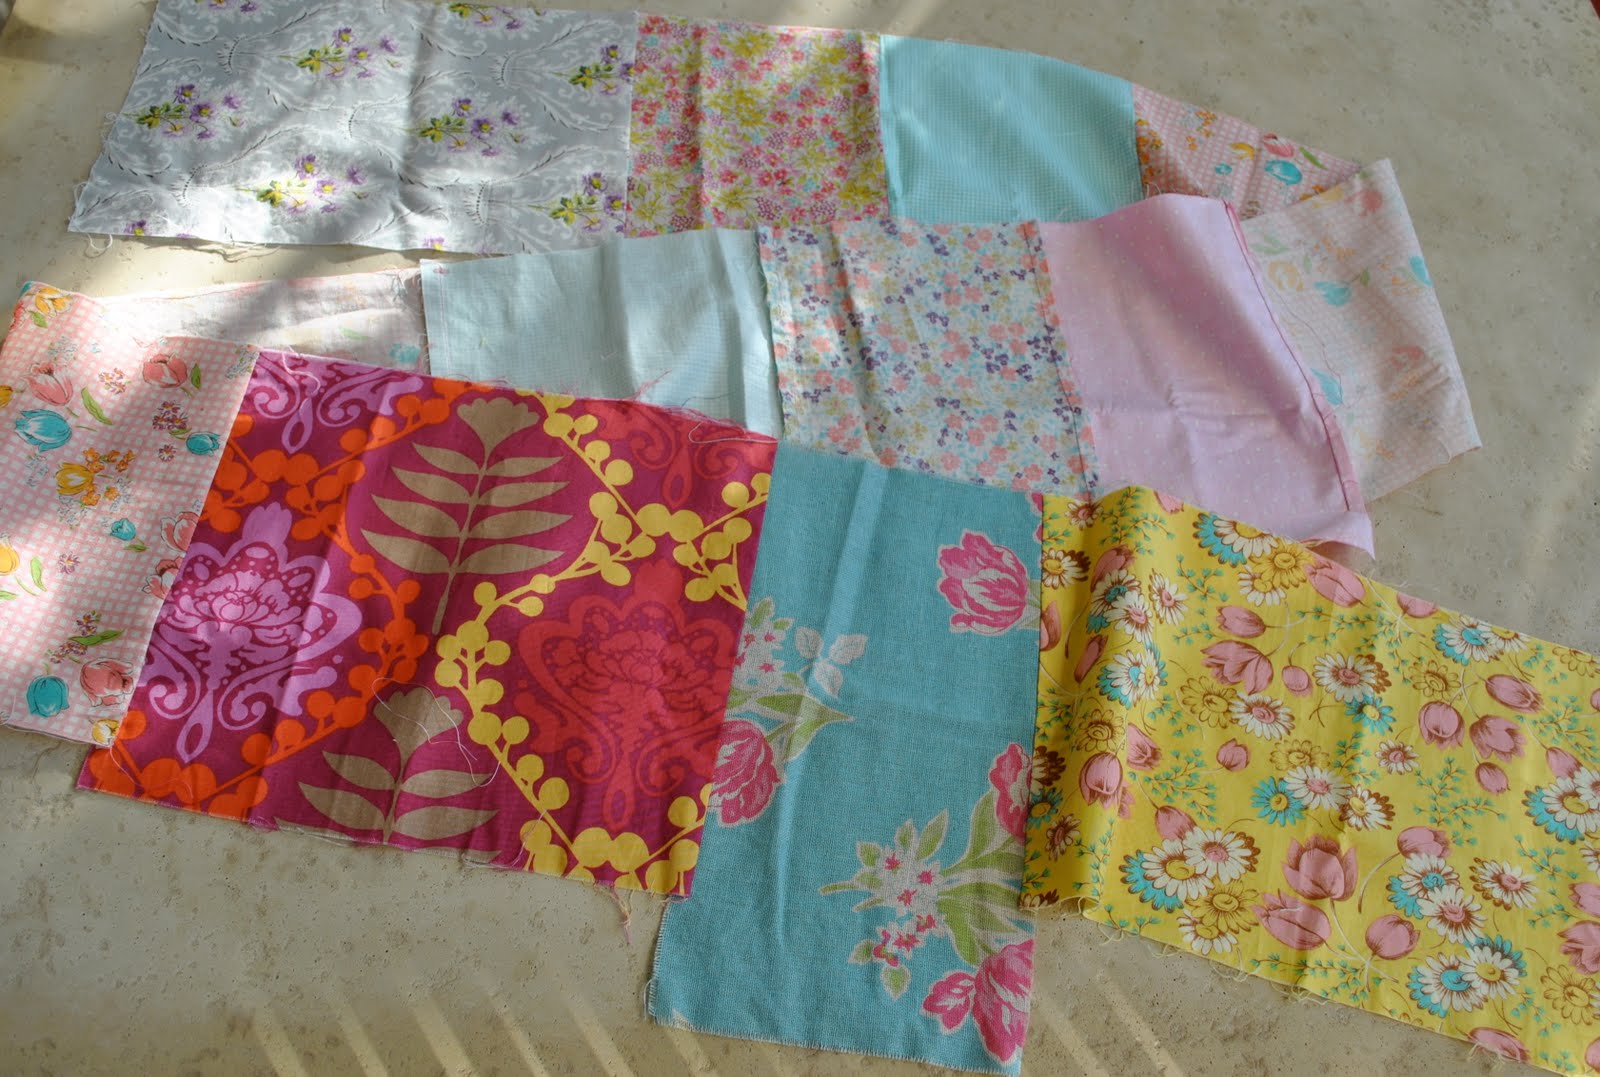
For this skirt I bought this row of pretty patches joined together.  The idea for this skirt came from the very creative Sophie who owns and operates Materialize.  She had made some adorable patchwork tutus for very little girls and had joined this strip together like this when I bought it.

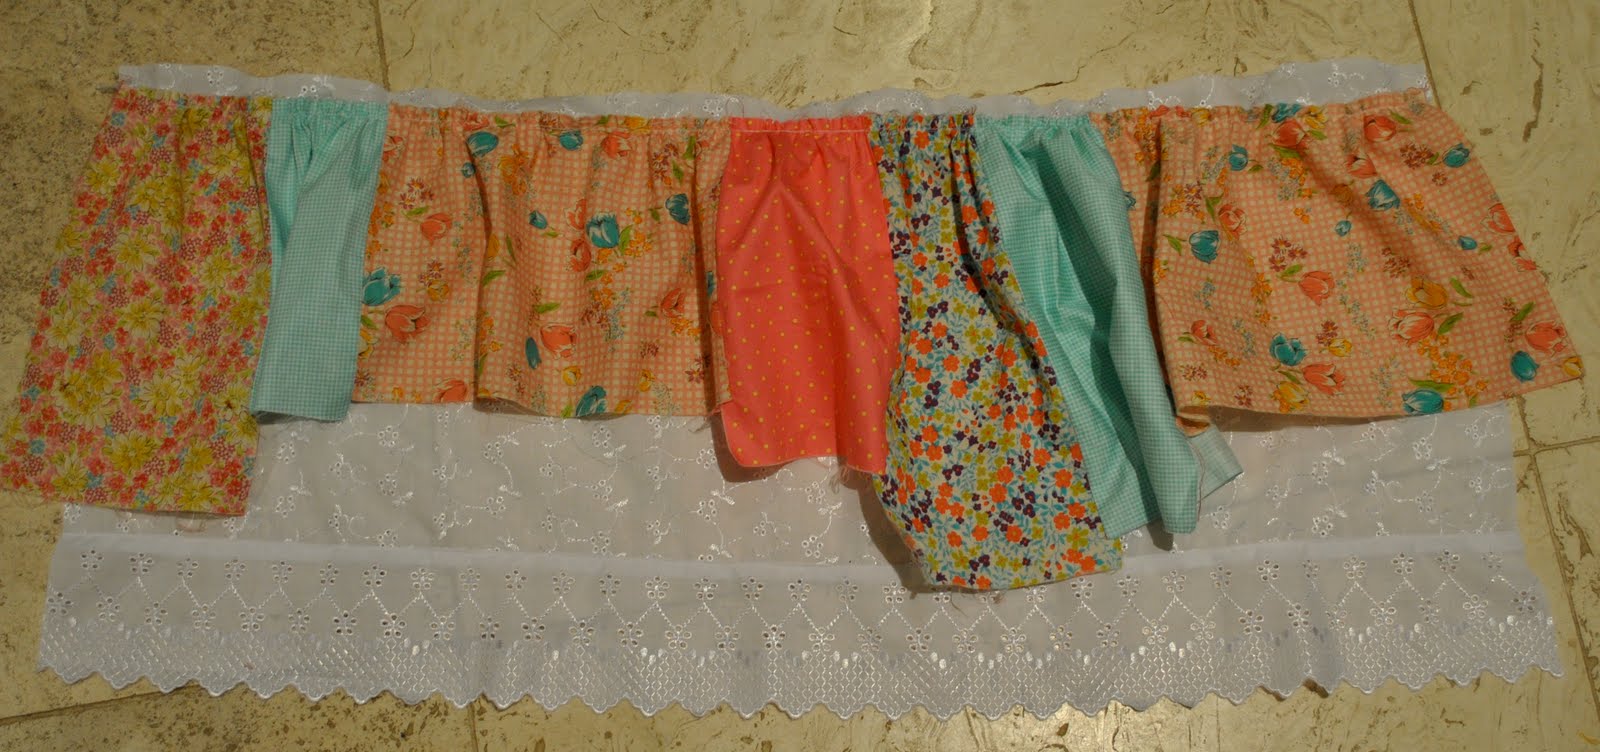
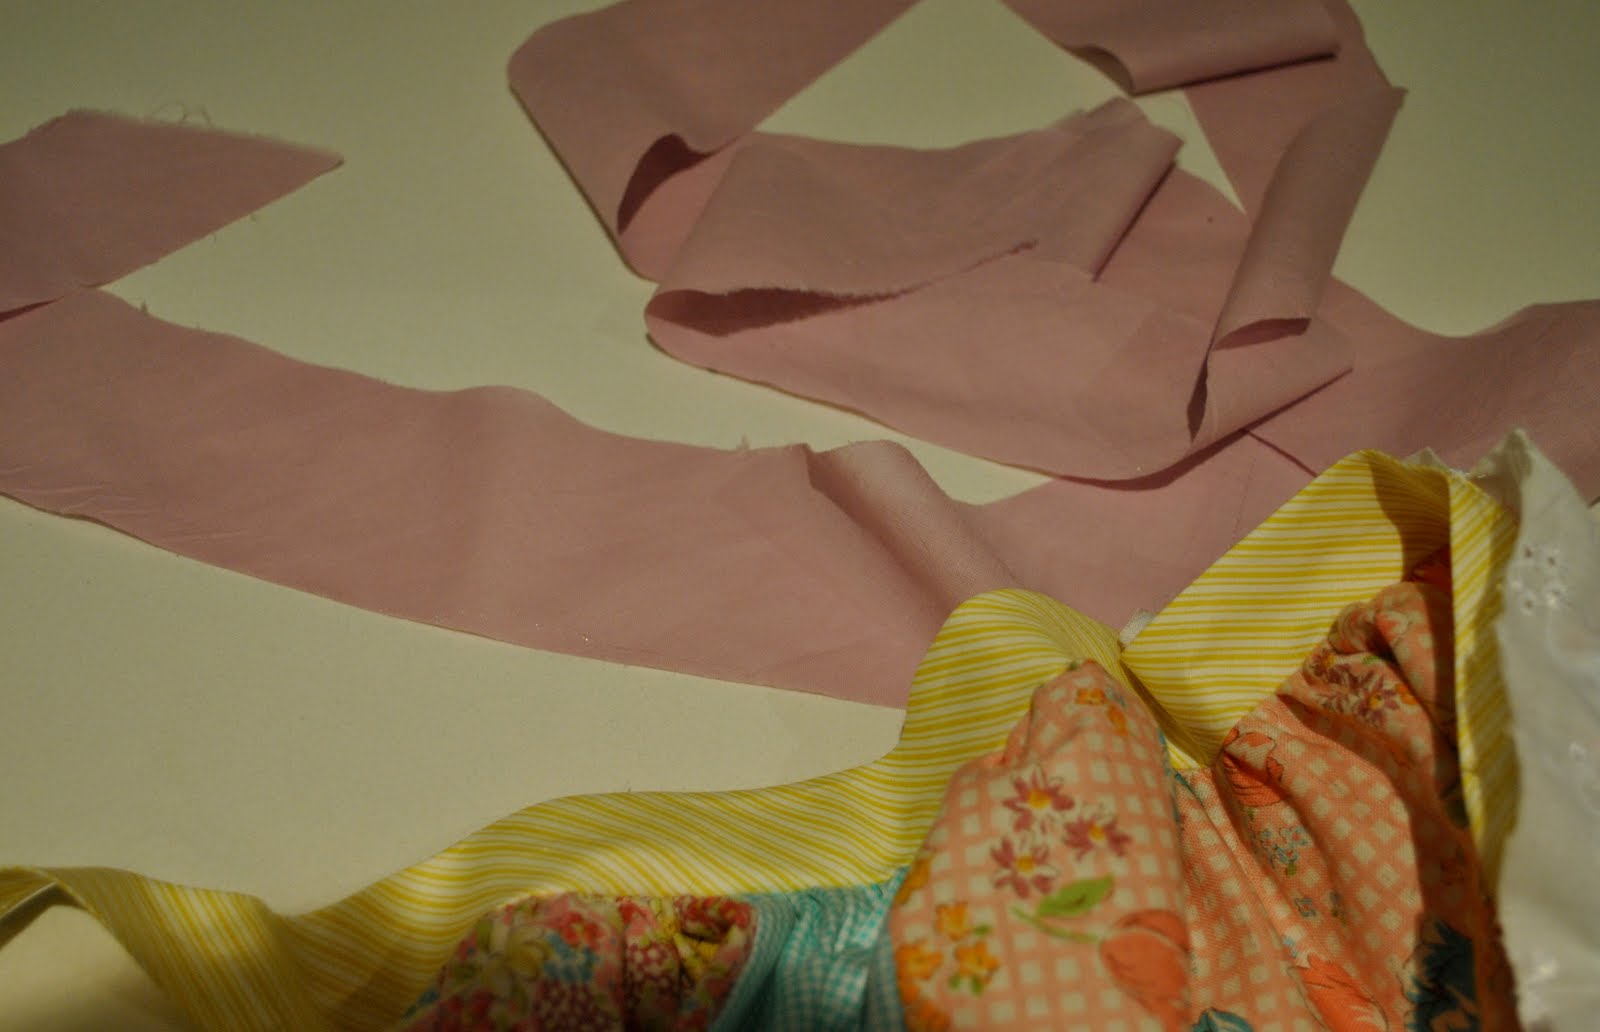
Now I’m making a skirt here not a tutu, and obviously the skirt was going to be way too short with just these pieces so what was necessary here? of course a petticoat!  So I bought some broderie anglaise and a little bit of broderie edging and cut to the suitable length; gathered the patched strip to fit on top.  I did it this way because I wanted the overskirt to be gathered in an apron-like fashion over a straighter petticoat…  At this point I had also removed some of the patches, partly  because I realised the strip was going to be too long and partly because I didn’t like some of the fabrics so much.  Then I attached the broderie anglaise edging strip to the bottom edge…
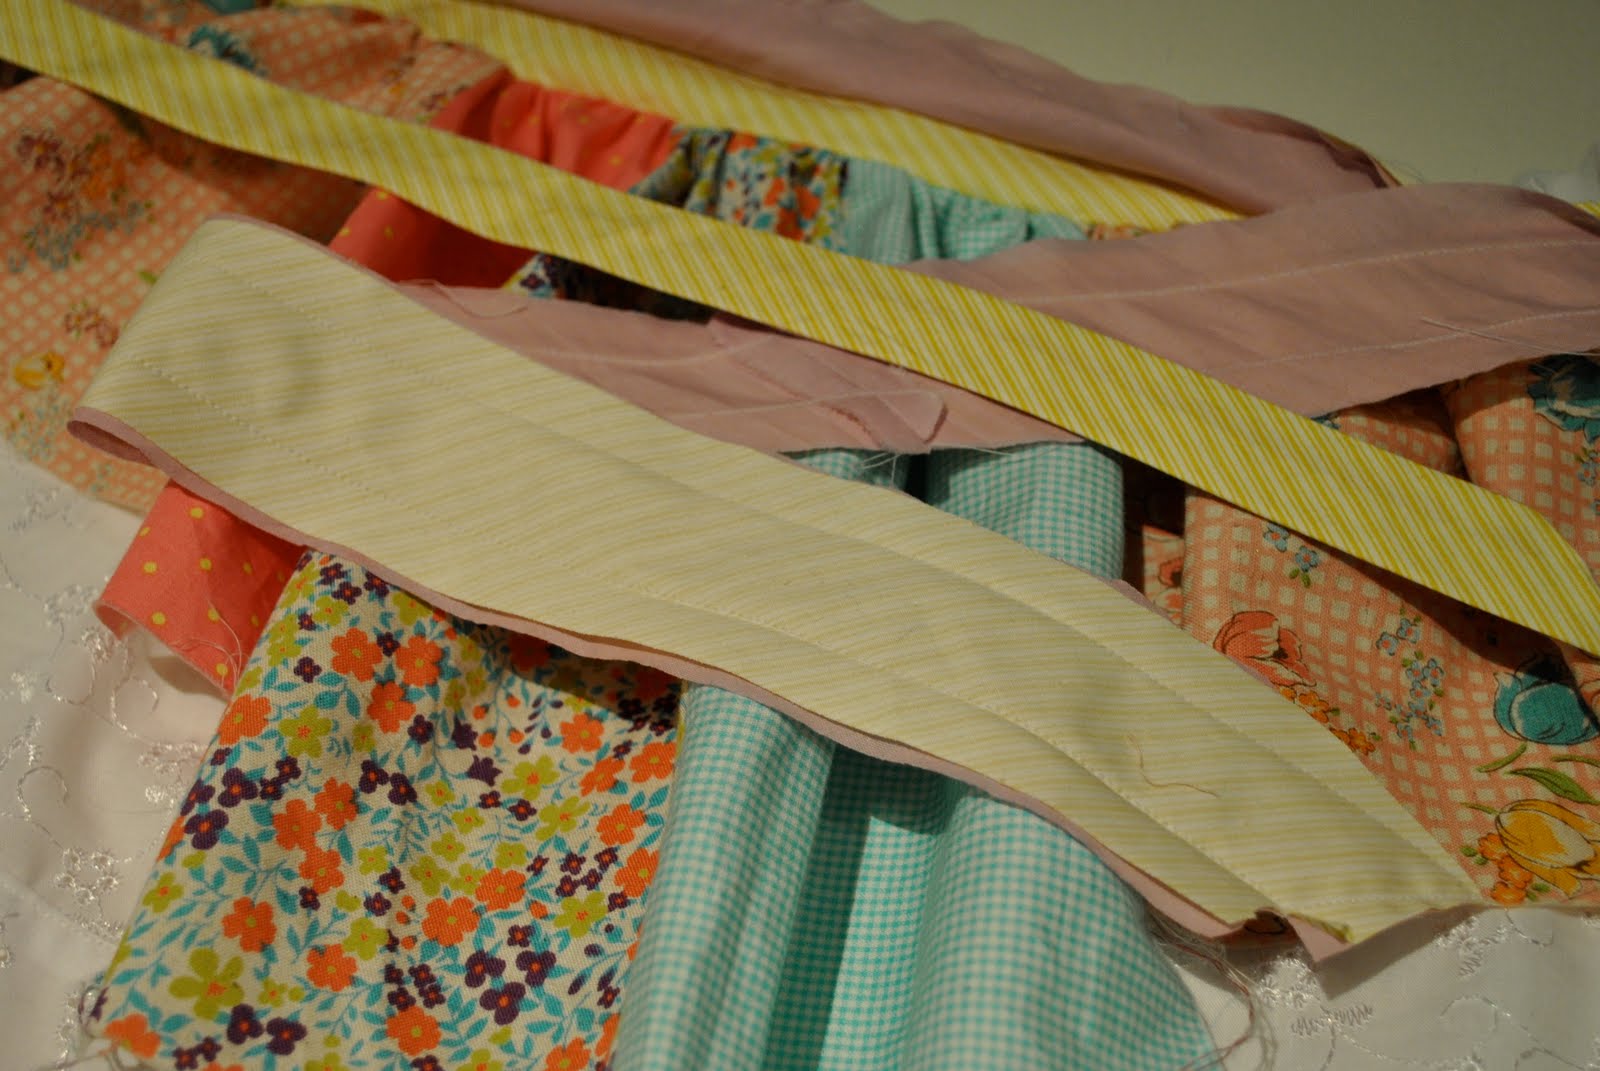
I also got some of this adorable lime striped bias binding to use for the tie waistband, and attached it to the top edge.  The petticoat, being a rectangle, required only a little gathering to fit my niece’s waist measurement.  Using some leftover lilac cotton I made some more bias binding to line the waistband.
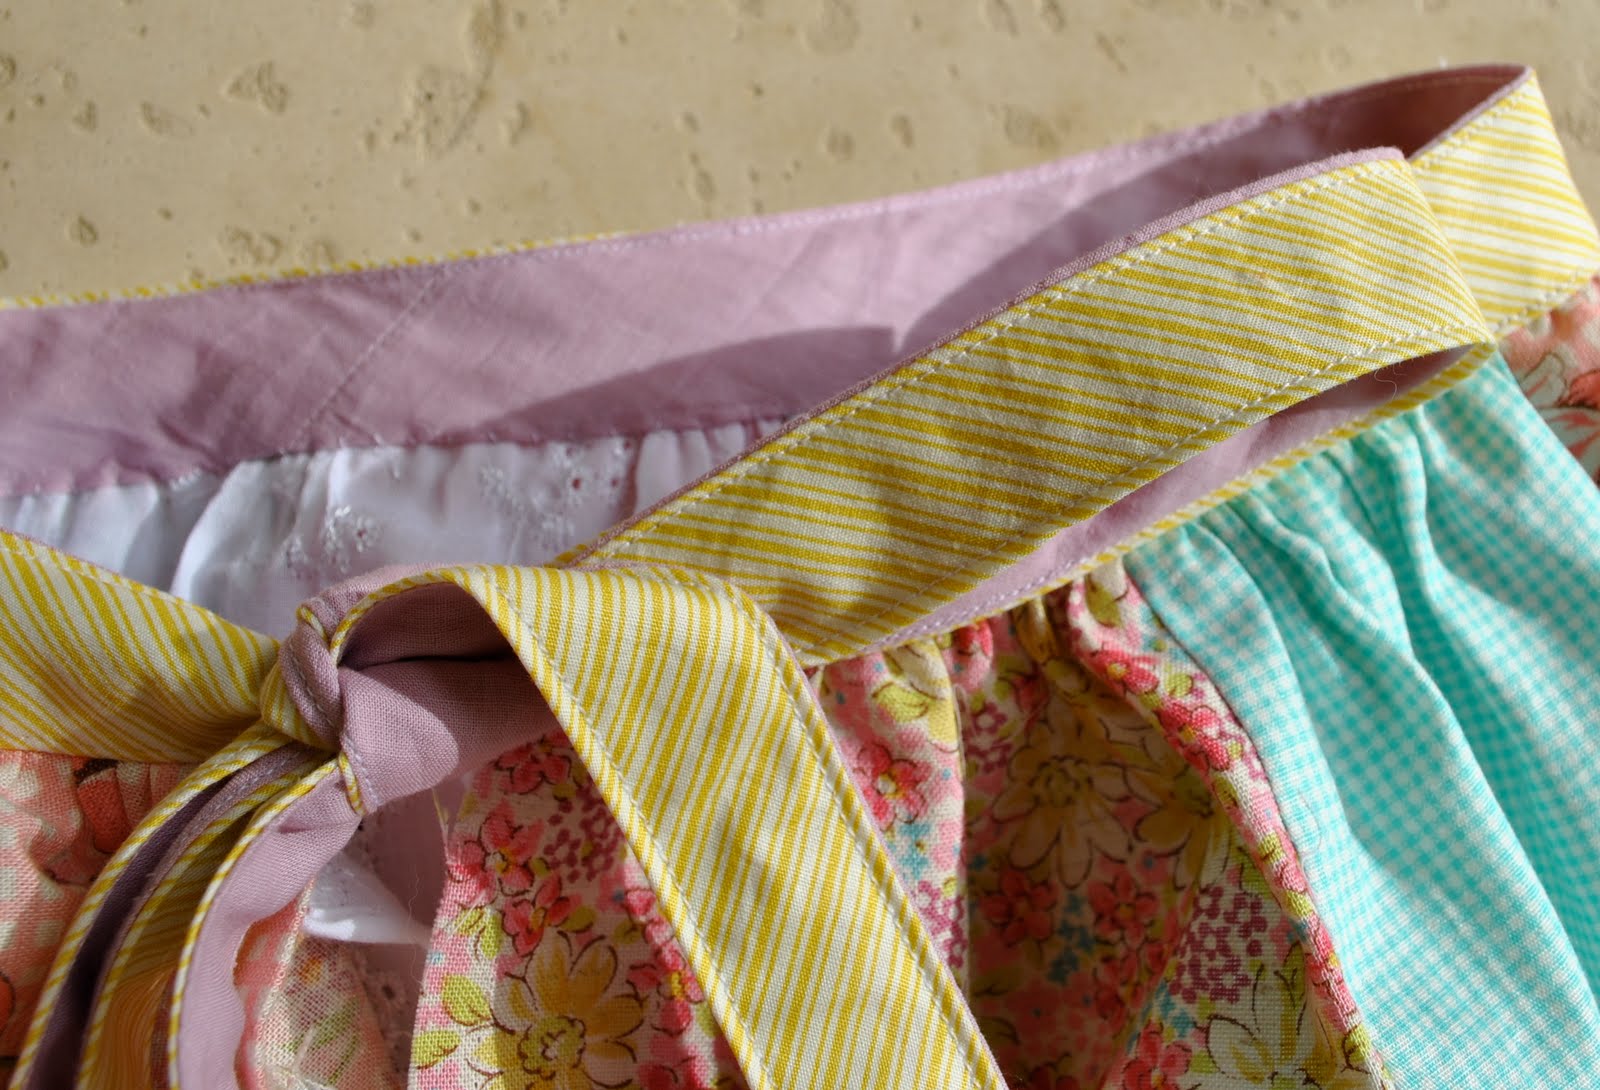
The lilac bias binding was sewn to the lime stripe bias binding, leaving the skirt top open to enable turning right sides out.  Here in this photo  the waistband has been sewn together and one tie end has been turned out and pressed.
The waistband opening was slipstitched closed on the inside, and the waist ties topstitched on the right side out.  Finally the centre back of the skirt was sewn closed, leaving enough of an opening for my niece to step into the skirt.  I finished the open edges of the centre back with narrow hems.

Et voila!  This skirt would be a good way to use up scraps of leftover fabric that’s too pretty to throw out, or if you’ve ever been lured into buying a set of gorgeously co-ordinated fat quarters. 

pinterestmail

Adding a lining to a finished skirt

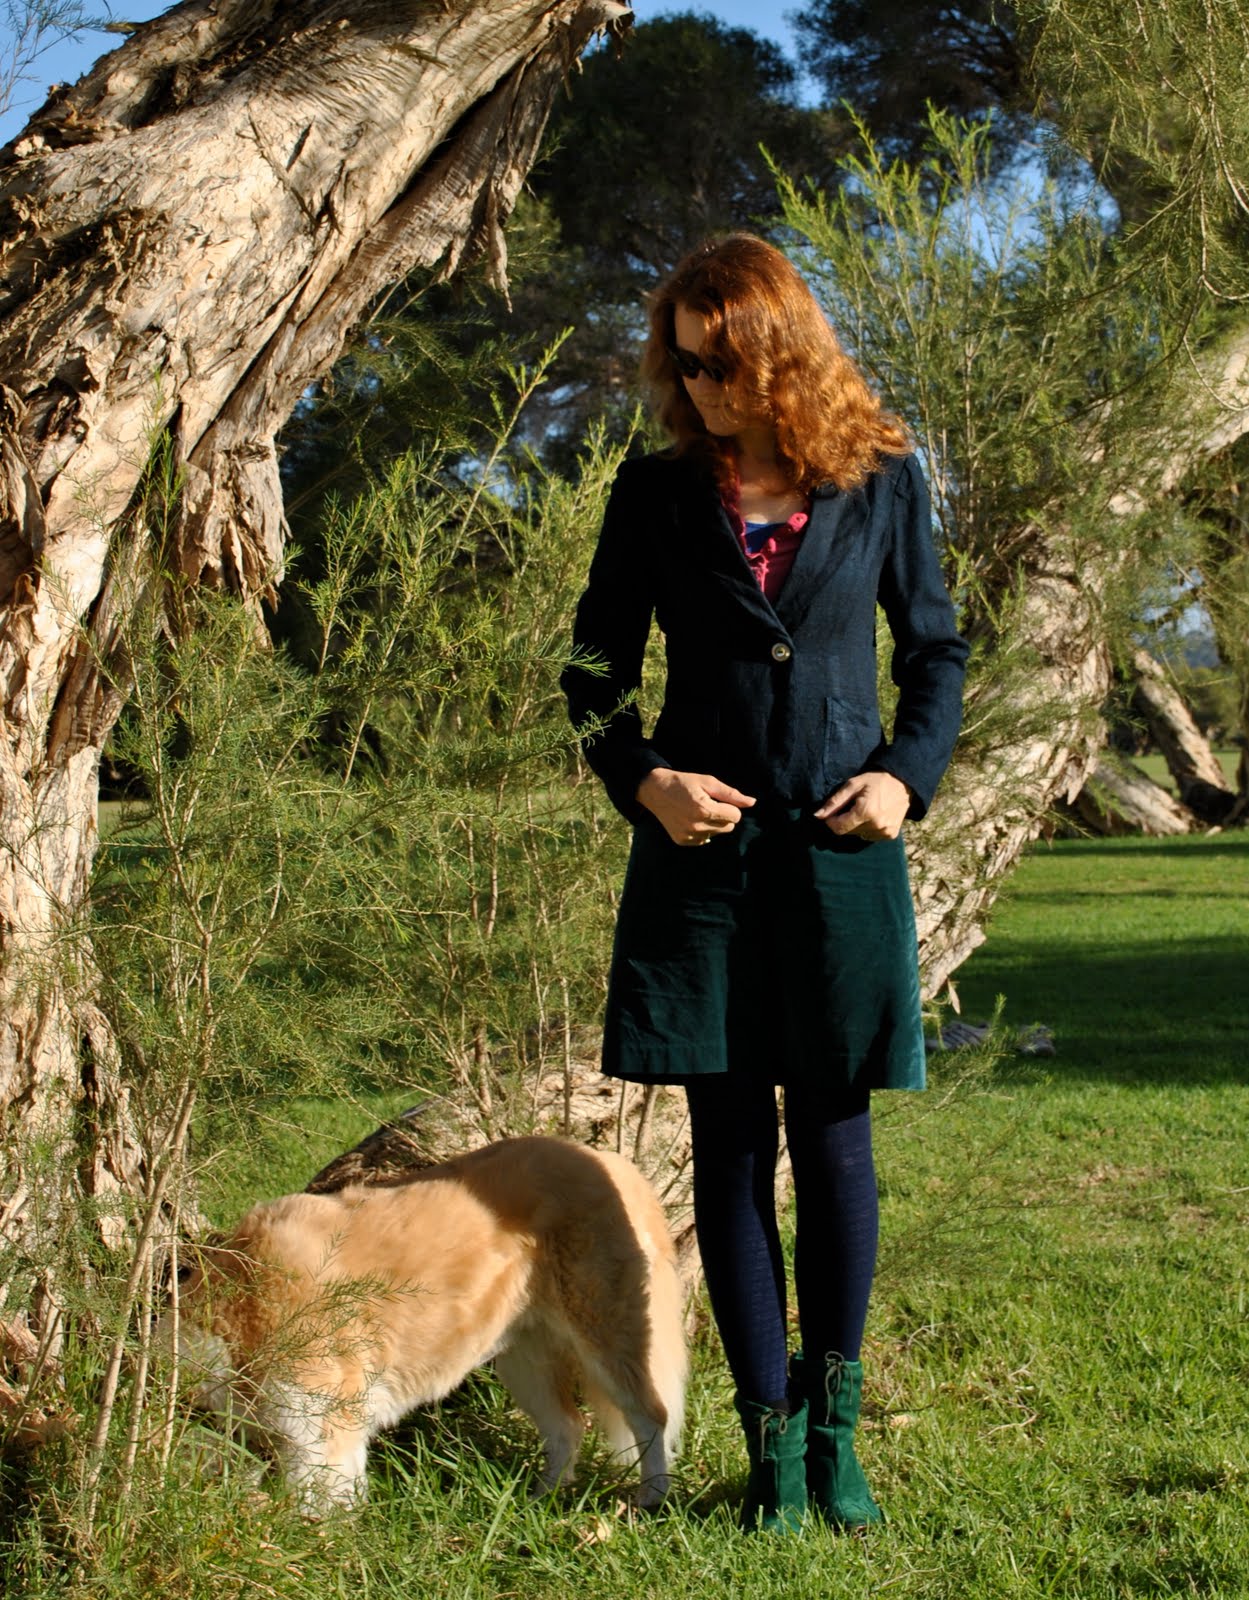
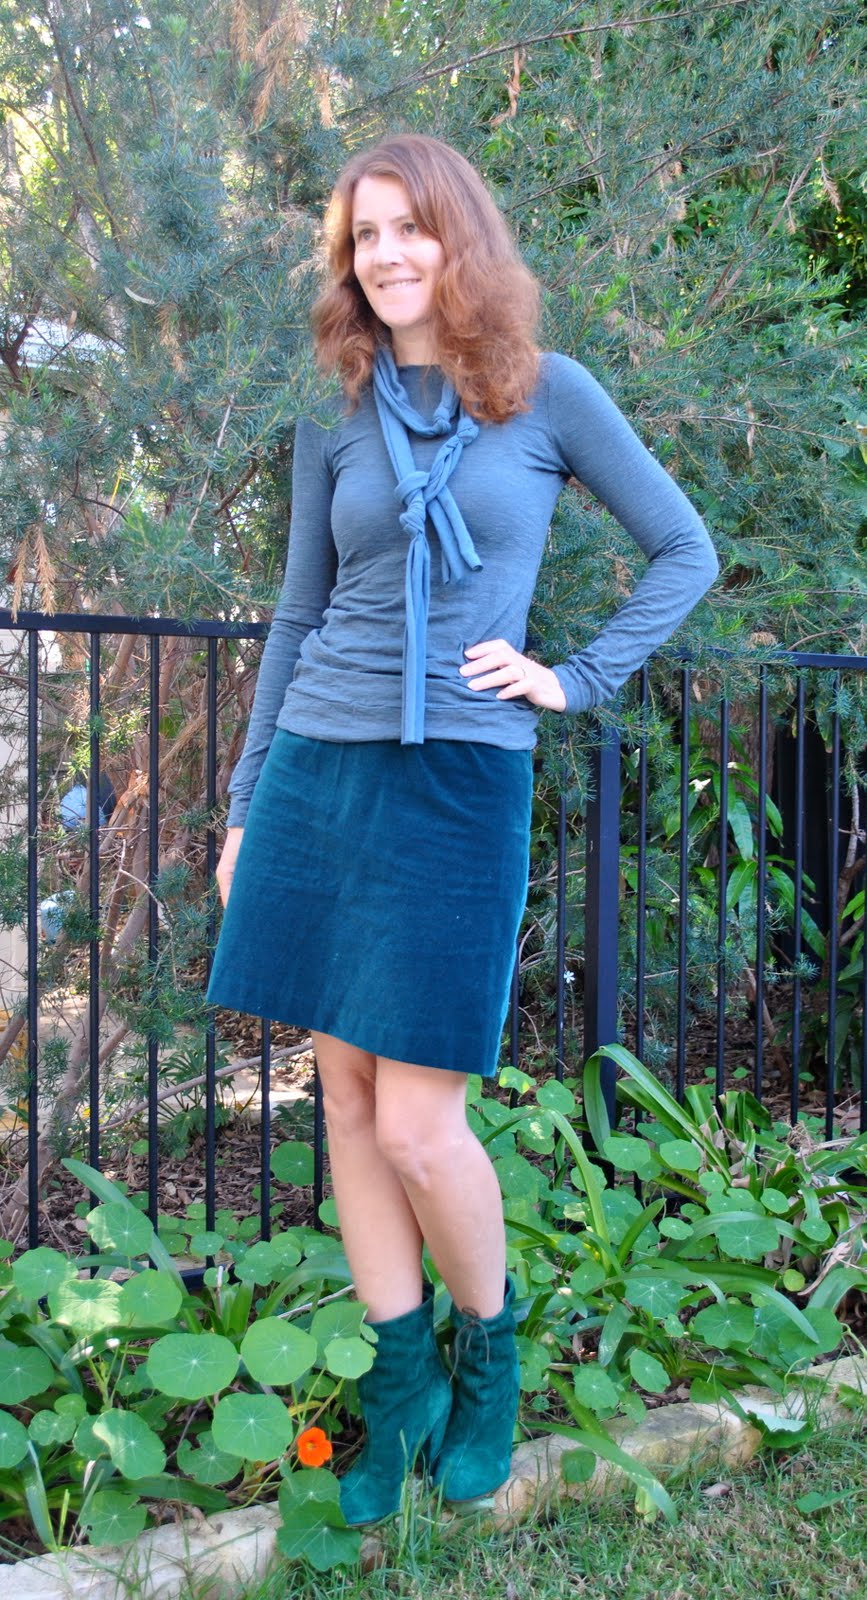
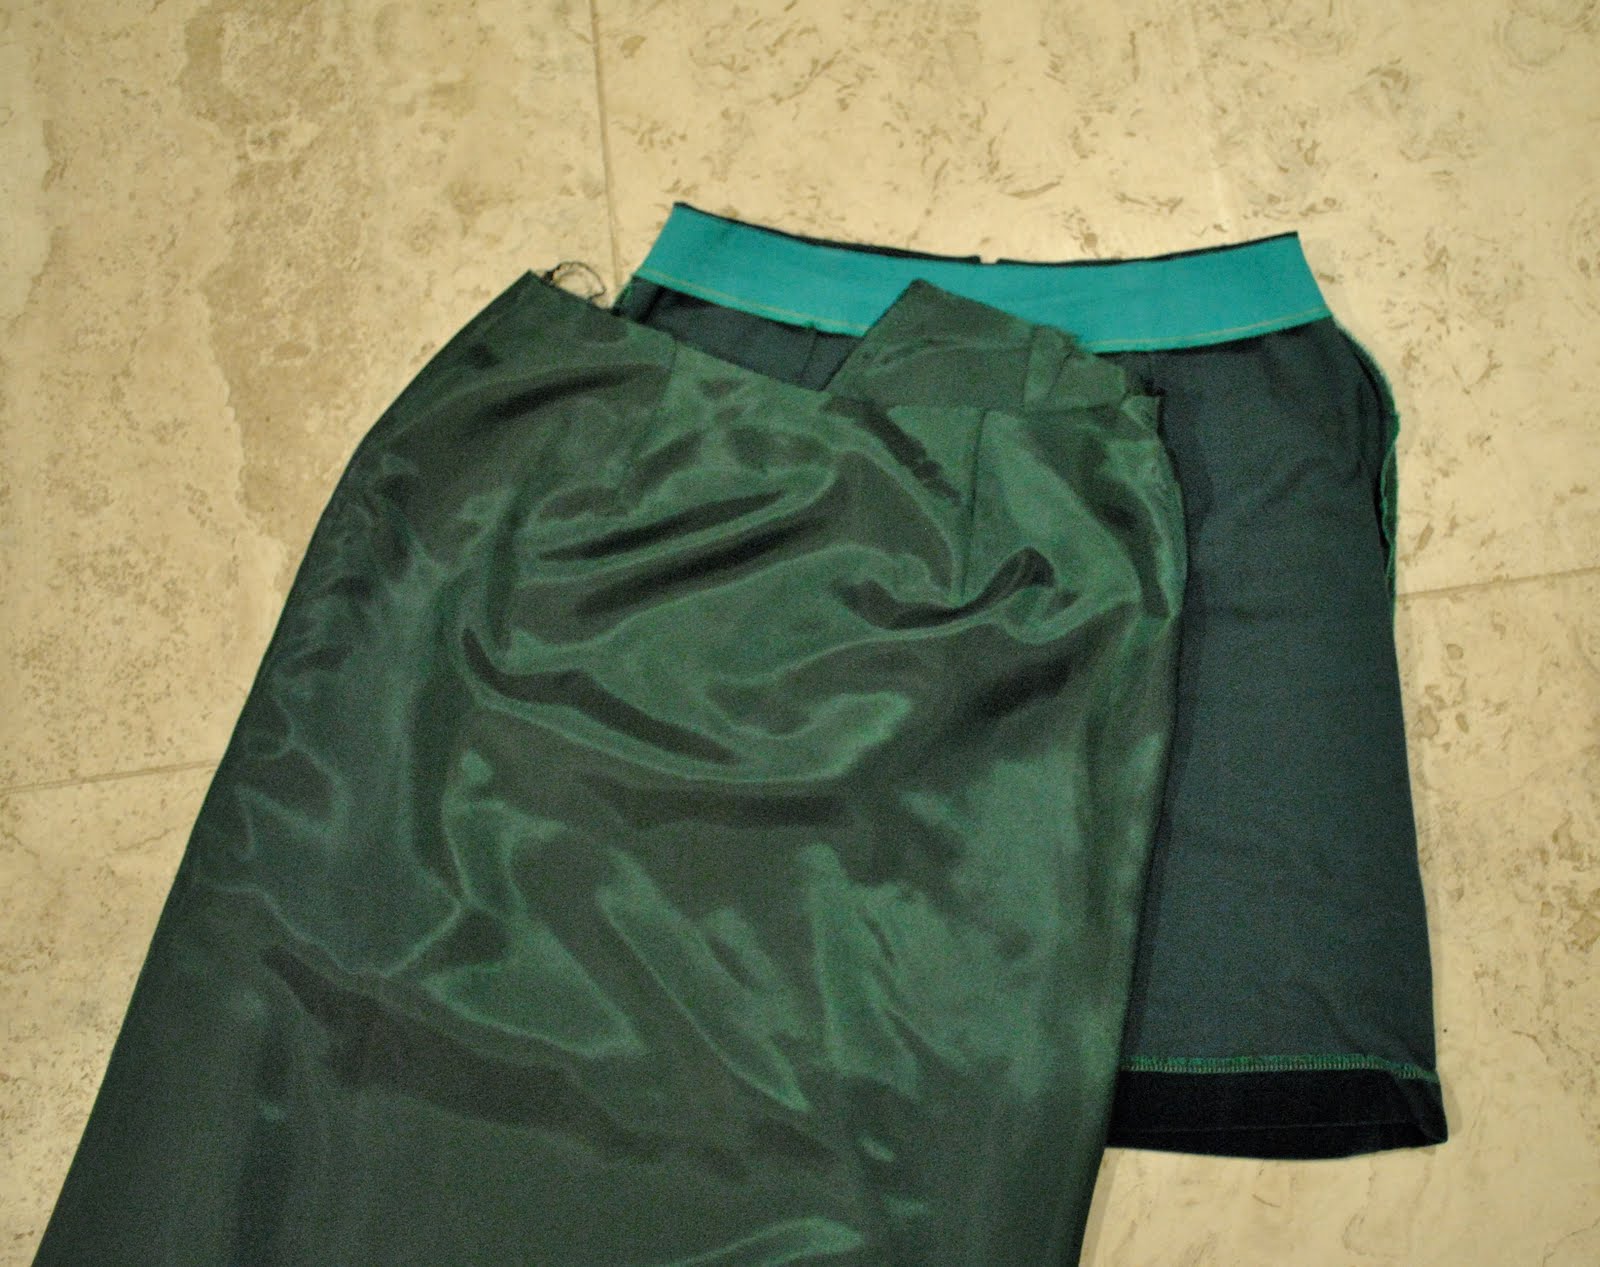
My bottle green basic skirt has had an update!  Well, not one you’d see, but one that will make it tons more wearable in my winter repertoire; I’ve added a lining.
The first few times I wore this in autumn I wore it on its own (see left) and all was hunky-dory.  Then as the weather turned brisker I started donning tights to keep the pegs warm and an immediate problem reared its ugly head… barely half a day had gone by before the skirt sticking to my textured tights as I walked and riding up in a most unladylike fashion became an issue… something had to be done and fast before I could decently wear this thing out in public again!!  So the next time I visited my favourite fabric shop I bought 70cm bemsilk lining in emerald green.
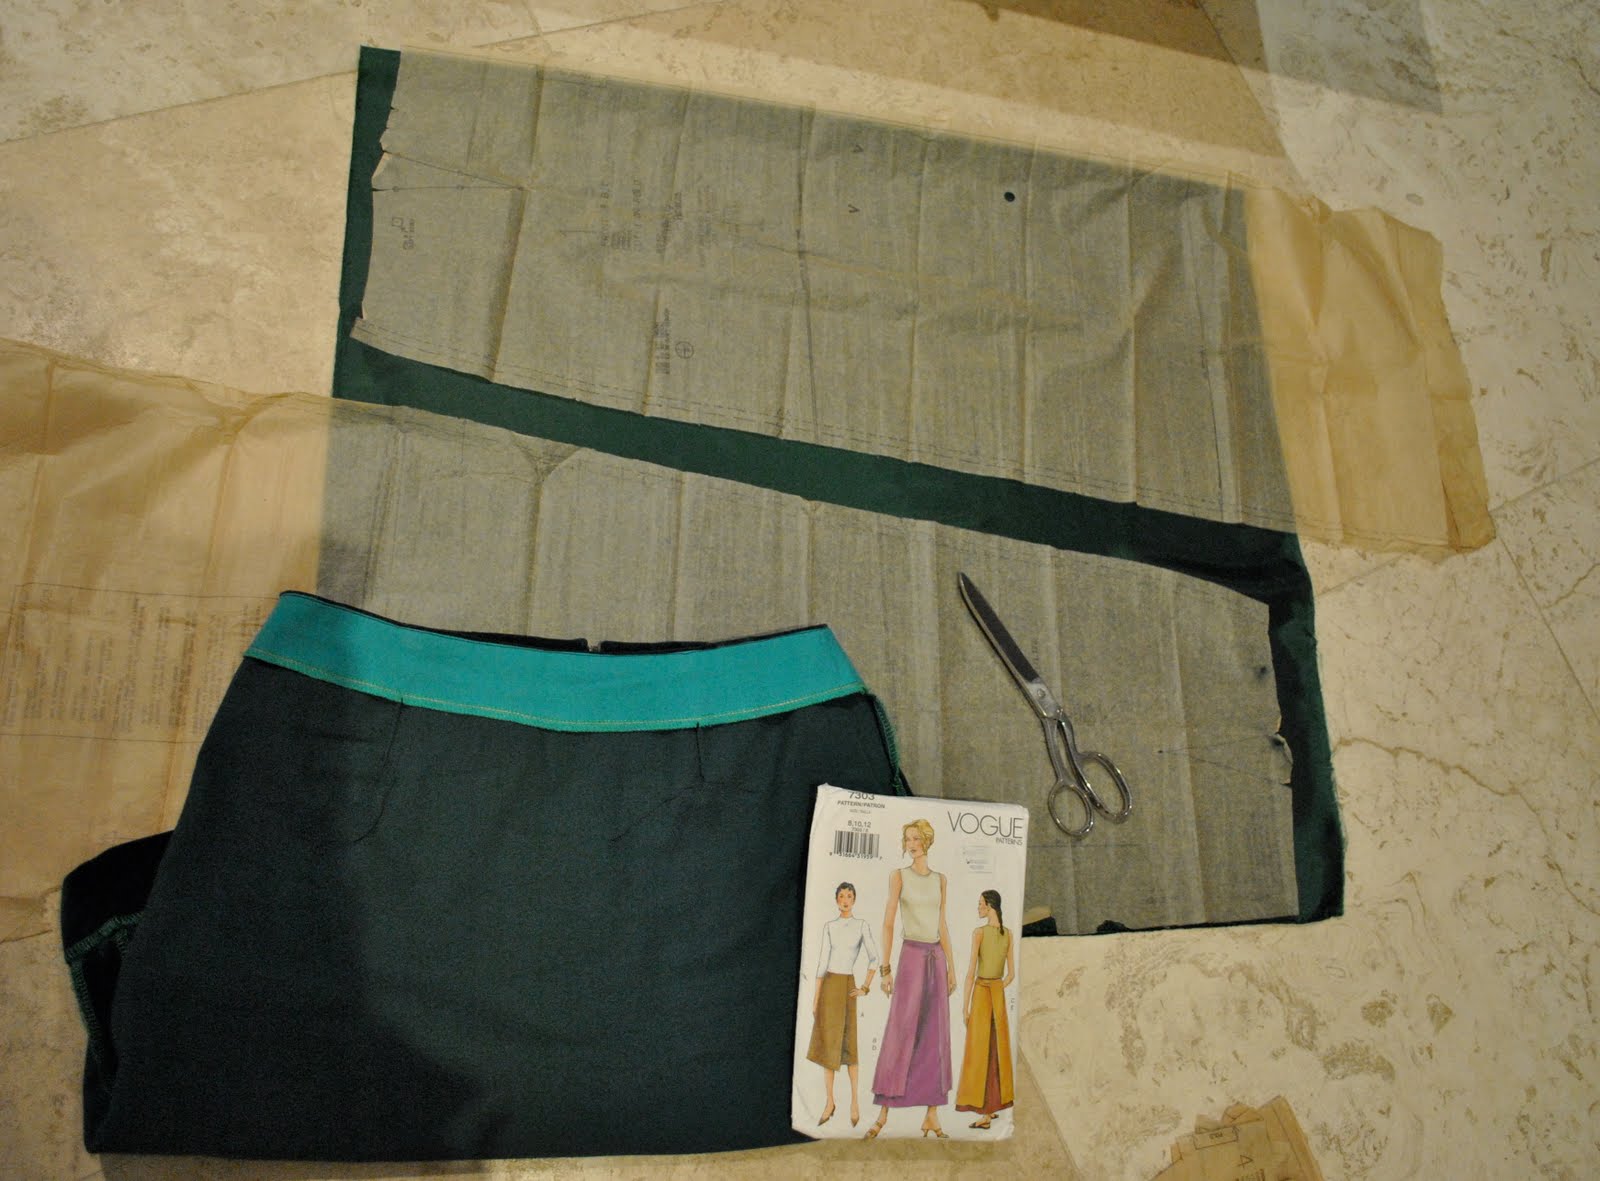
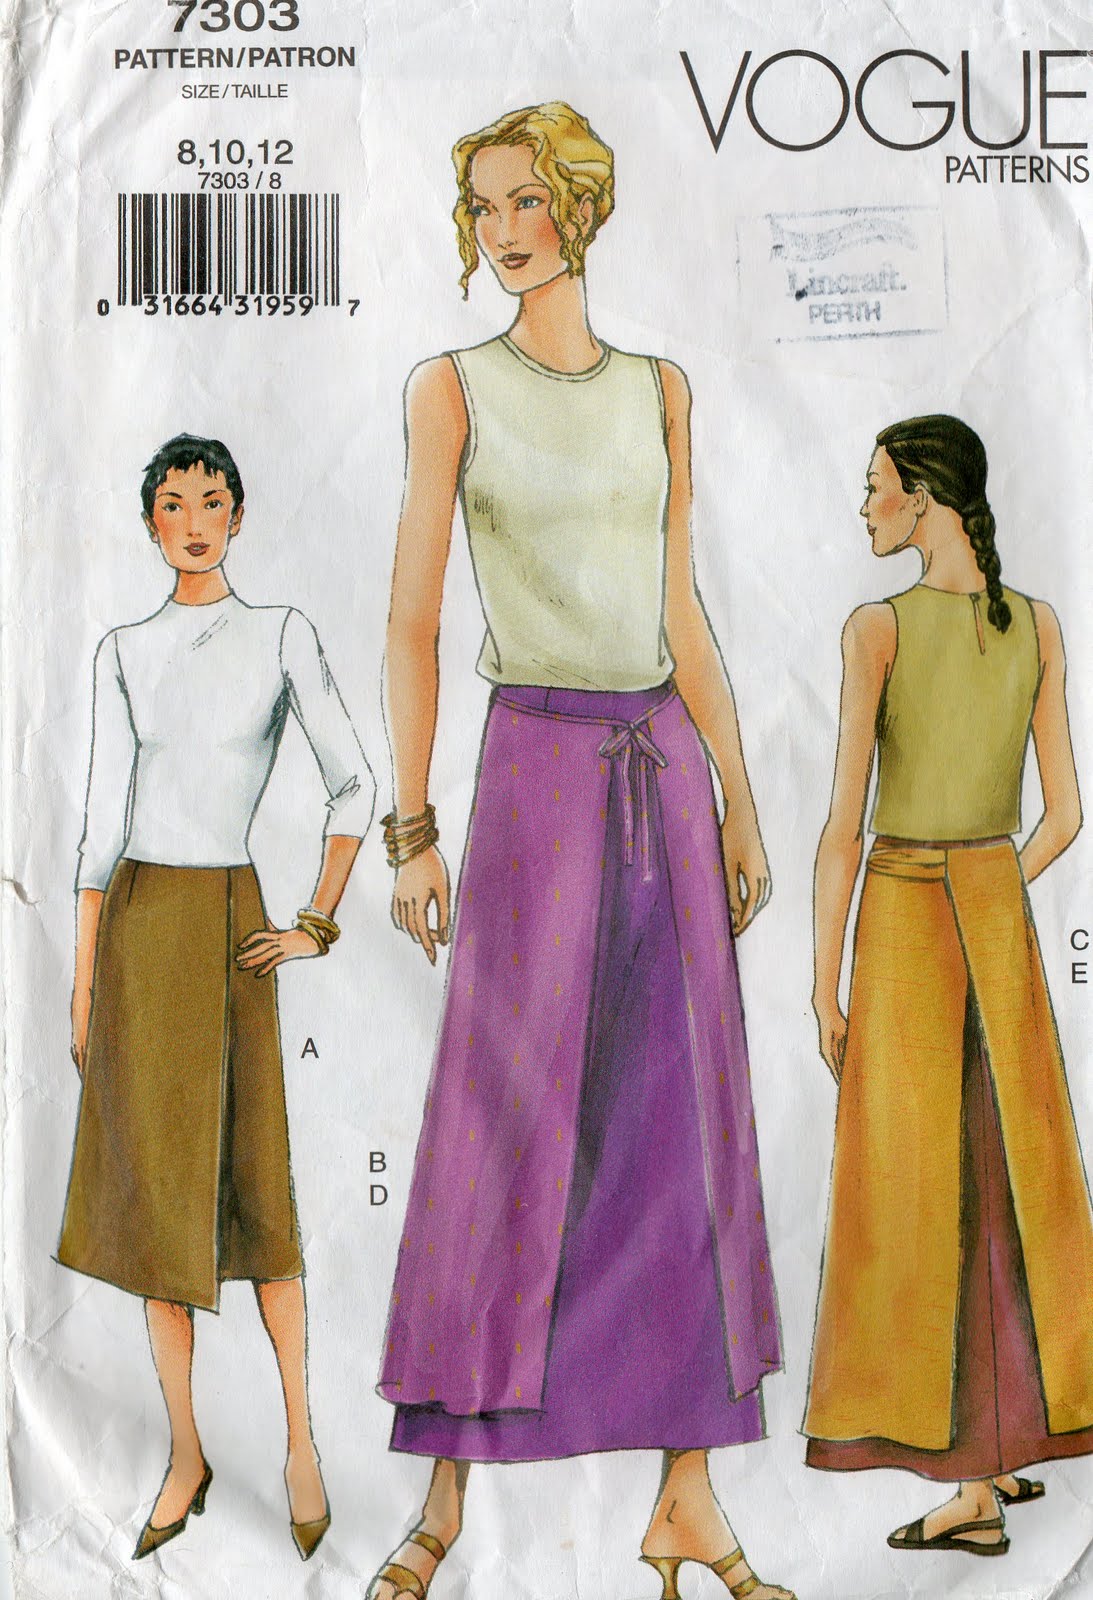
The pattern I used for this skirt Vogue 7303 is ordinarily an unlined skirt with an internal waistline facing and a centre back zip, which is how I made it up for this skirt (this pattern has been used a multitude of ways as followers may have noticed!).
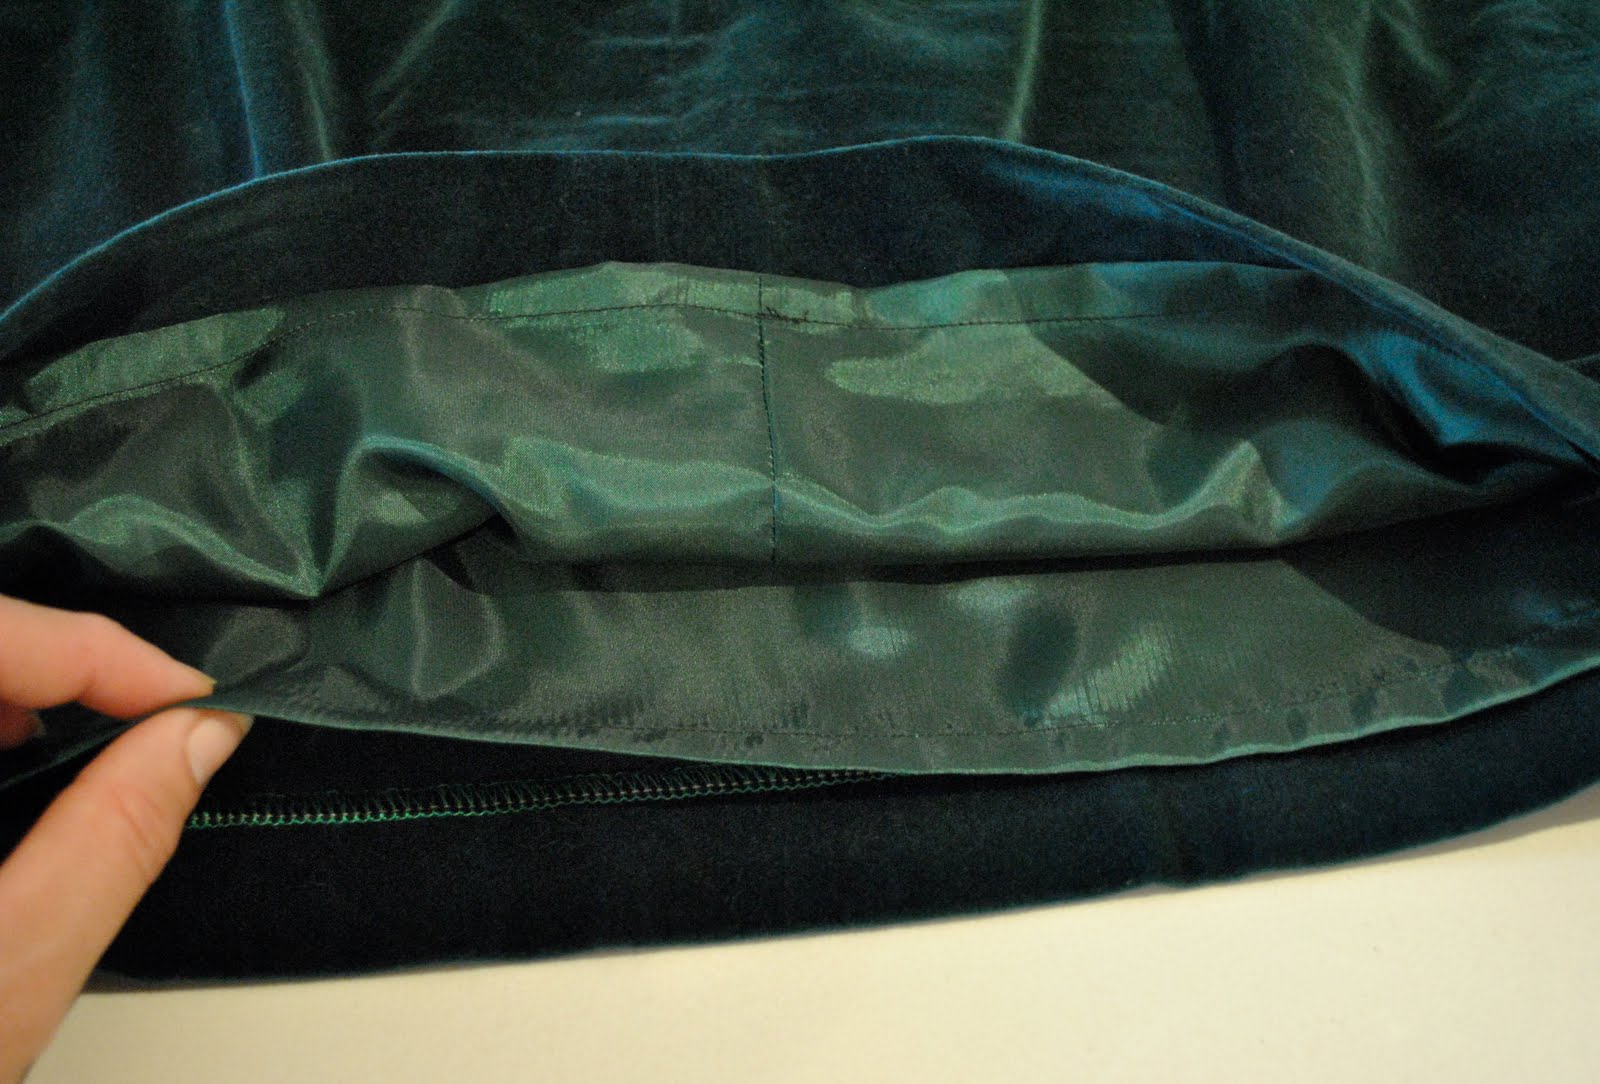
So to line it, this is what I did…    I cut out a front (on the fold) and two backs (laid on the selvedge to get a ready-made finished edge for those centre back edges) from the lining fabric (here the skirt is inside out to show the turquoise facing band, this is invisible when the skirt is right way out);

I made up the lining skirt identical to the pattern, leaving the centre back seam un-sewn, and serged the side seams to finish;

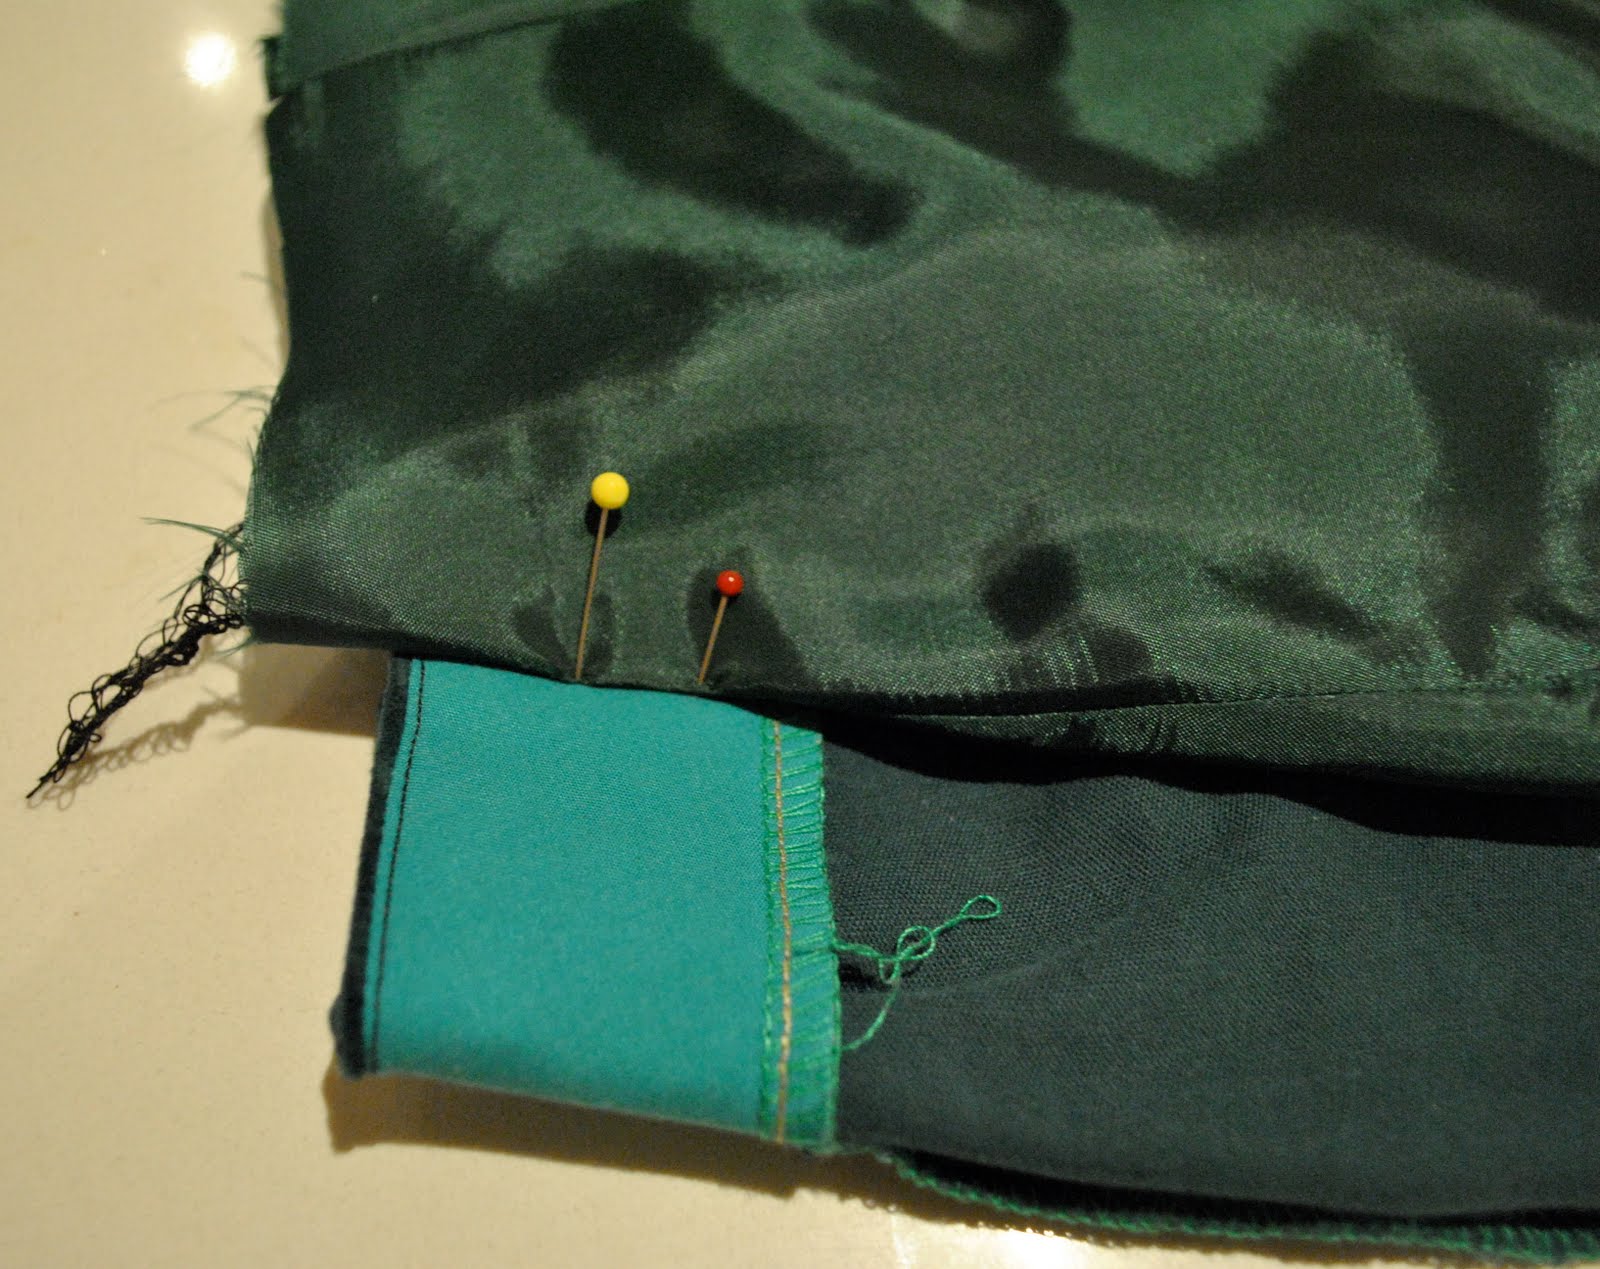
Then the precision measuring bit (not being facetious here, it is pretty important to get these measurements as spot on as possible for a good fit).  I laid the lining skirt onto the finished skirt, so the seam allowance (1.5cm) is overhanging the top of the skirt.  In the picture the red pin is marking a point 1.5cm (5/8″) above the bottom edge of the facing, this will be the stitching line where your lining will be joined onto the facing of the skirt.  The yellow pin is marking a spot 1.5cm (5/8″) above this point; this will be the cutting line for where you can cut away the top of the lining skirt.  Mark both of these lines on your lining skirt all the way around with pins or tailors chalk.  Carefully cut along the cutting line (yellow pin line) around the top of the lining skirt.  

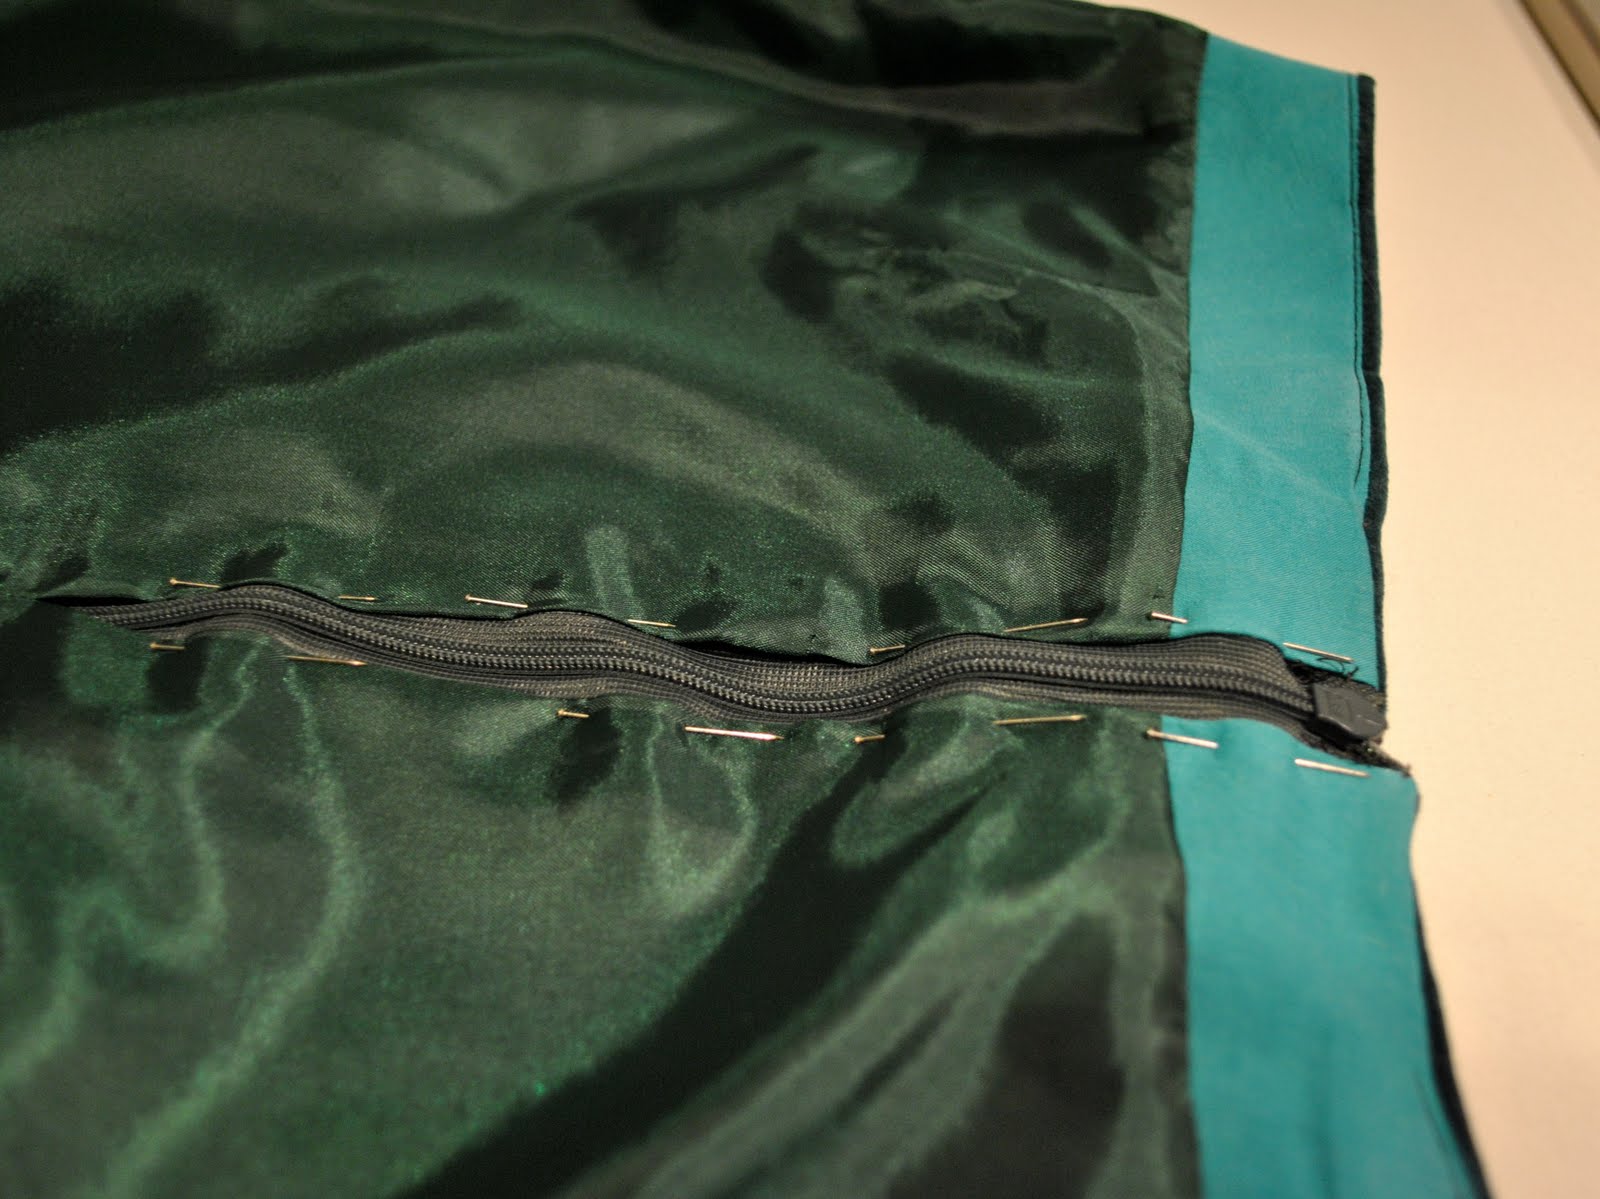
Unpick where you’ve previously joined the facing to the zip tape, and with right sides together and using a seam allowance of 1.5cm (5/8″), sew the lining skirt at the stitching line (red pin line) to the facing.  Serge to finish and press down.  Now sew the centre back seam of the lining skirt to finish at the base of your zip, iron down the seam allowances of the lining and pin to the zip tape.  Hand stitch lining to your zip tape…

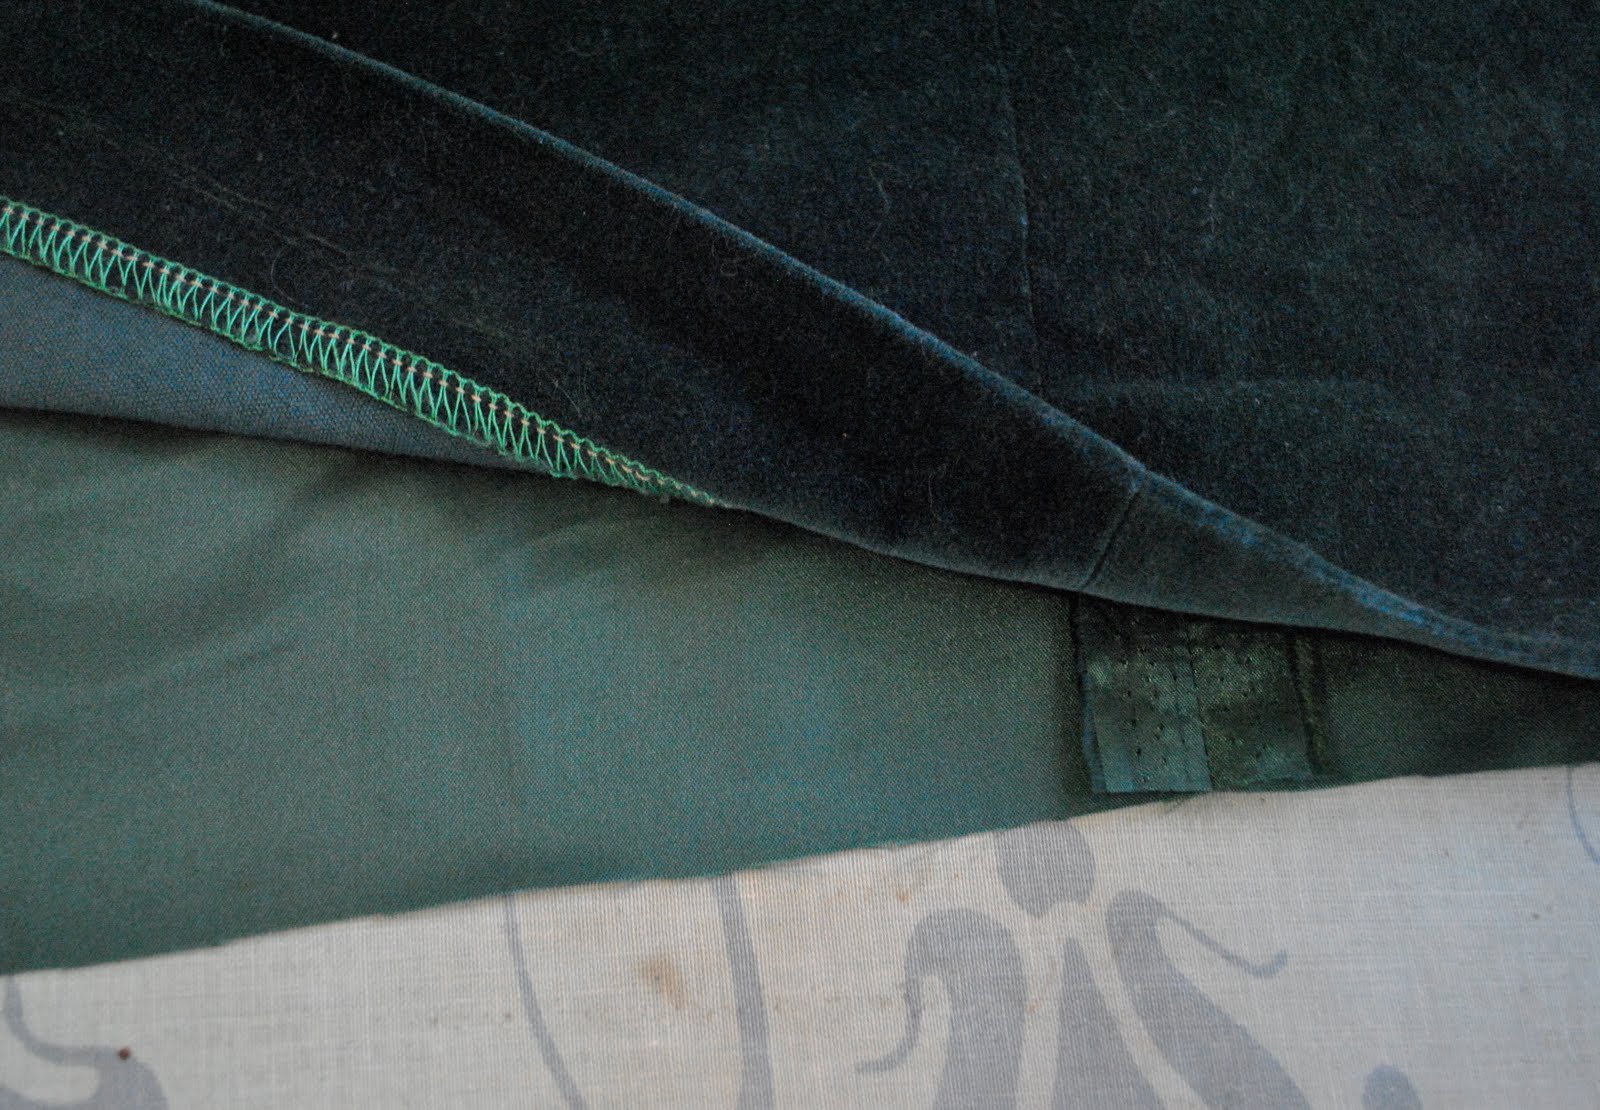
Cut away the lining level with the base of the skirt…

Fold up 1cm, then 1cm again, press, pin and stitch as normal for a lining.

Finished!  Now I can wear my skirt with tights and no more constant re-arranging of the skirt to hang properly.

pinterestmail

Splitting up a suit

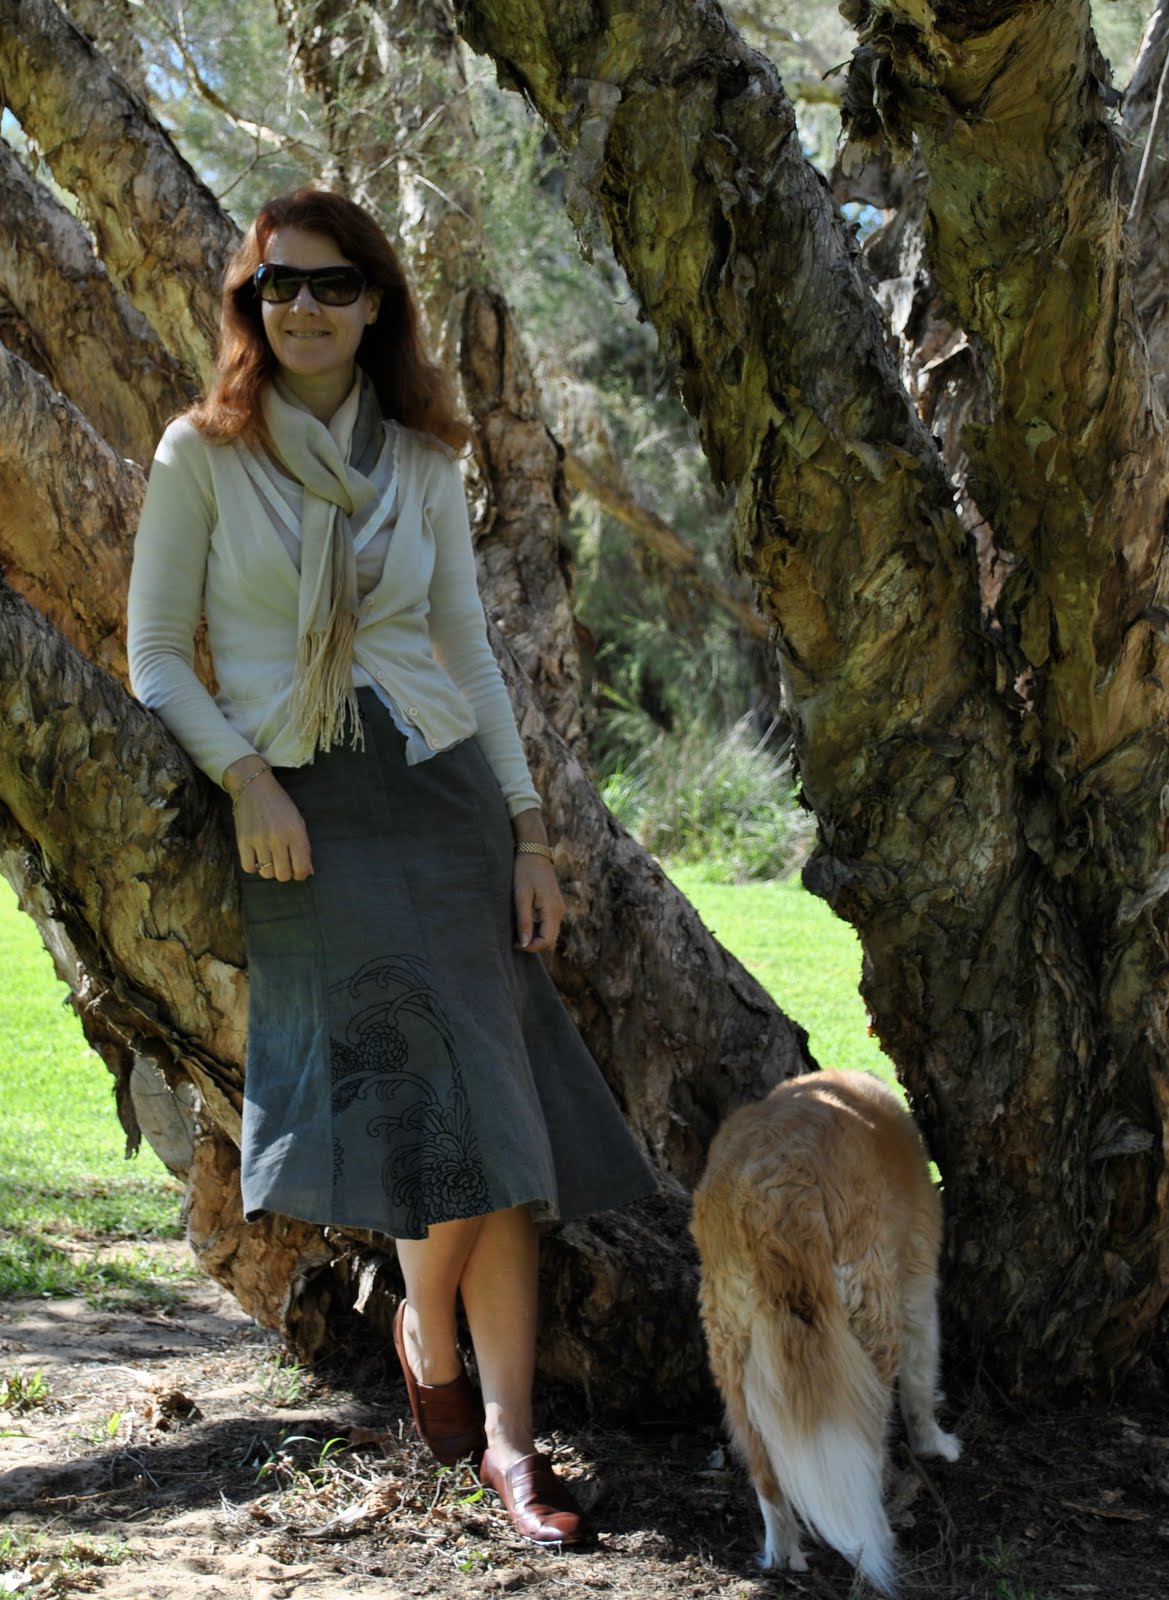
Challenging myself to wear everything in my wardrobe: I’m still coming across old winter skirts that have seen more fashionable days, but are still perfectly good.  Today’s is another one.  Do you remember this skirt?  I had got a lot of this grey cotton fabric for free from a local designer; free because the large-scale black floral screenprint on it was pretty scrappy in parts.  I just went over the scrappy bits with a felt tip pen (Sharpie) which fixed it up fine…  I had challenged myself to make a suit; thinking every woman needs a suit in her wardrobe “just in case”.  So I made a suit of a jacket with two matching skirts.  Of course in the three or four years since I made these I have had zero occasions for a suit.  Even my most corporate of office moments are still too casual for a suit.  Well, (shrug) it’s there if I need it.  I haven’t shown you the jacket yet, but I will…
This is natch the second skirt belonging to the suit.  I really struggled to find a way to wear this skirt this morning.  I’ve fallen out of the habit of wearing it.  And it’s that awkward length again.  Naturally I’ve fallen back on my beloved neutrals to try to coax it back into my heart…  I quite like the gentle neutrality of beige oyster and charcoal together; with the rich brown leather of the shoes.
Today’s random picture below; seen on my walk this morning

Details:
Skirt; New Look 6509, view A
Top; Metalicus
Cardigan (under); my own design, coffee and white net
Cardigan (over); MNG, found in a secondhand shop
Scarf; bought in Venice
Shoes; Betts & Betts Brazilian Collection, had these for about 20 years


pinterestmail

Last day of autumn

Today is the last day of autumn 🙁
So I thought I’d mark it by wearing my favourite autumn made garment; my trench coat.  I’ve got it on over a Tshirt and skirt here, but I like how trenches can actually pass for dresses on a warm day, which it is today, sort of.  I was quite toasty here in this photo and wishing I could take something off…  well, I always feel warm during our dog walk in the morning and only start to slowly freeze when I get into the office.  Australian weather being like it is we don’t have central heating here like northern hemisphere dwellers have.  I’ve got the little gas heater warming up my toes right now…!
I left off the belt I made for the coat and instead donned an old black leather belt I’ve had since teenage years; and I like how the accents of black set off the sandy beigeness of the coat.  The black buttons, black legs, black booties, black belt… the colour of winter is creeping insidiously into my wardrobe and before you know it Perth will be clad all in black and grey, yeah it’s hard to believe on a bright sunny day like today! but it will happen!  One thing is for sure, I will be wearing this coat all through winter too, it’s so comfy and feels so nice to throw it on; instant outfit!  I’m so glad I’ve got it!

Details:
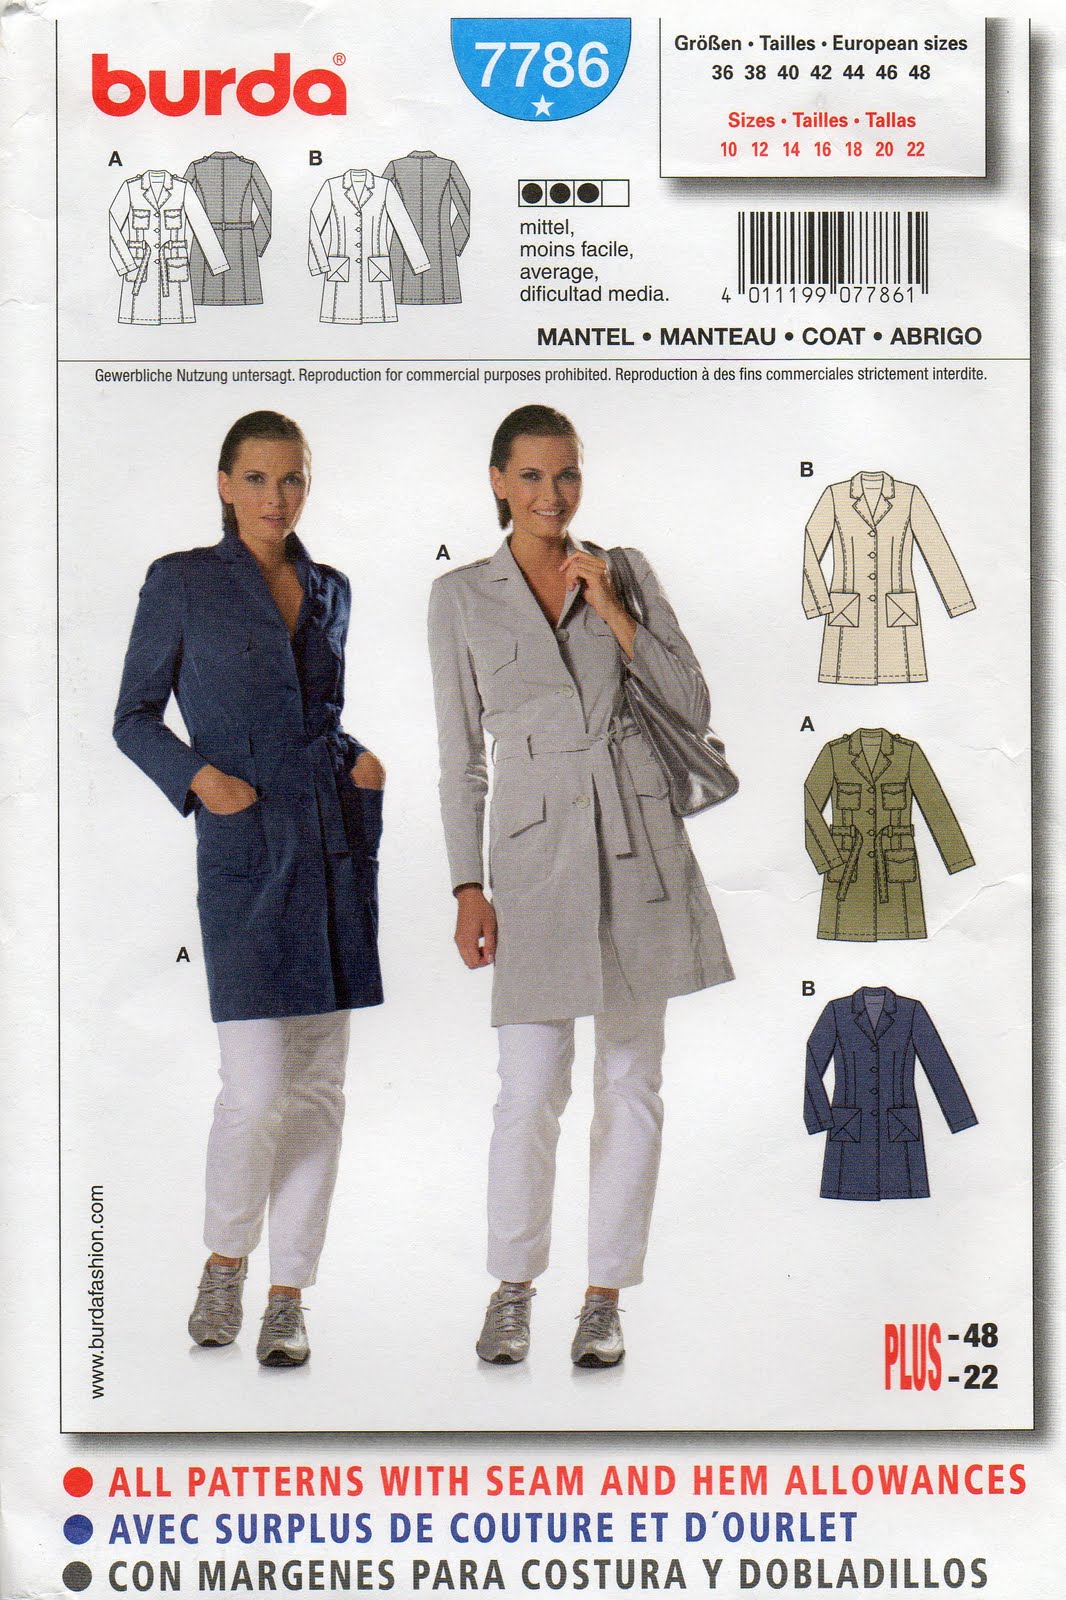
Coat; Burda 7786, modified by me to be double breasted and with added wrist tabs, beige cotton
Belt; had for donkey’s years
Tshirt; Country Road
Skirt; Vogue 7303, olive green corduroy
Tights; Kolotex, David Jones
Booties; Django and Juliette, from Zomp shoes
Bag; Gucci


pinterestmail
Switch to mobile version
↓