Monthly Archives: October 2011

You are browsing the site archives by month.

Versatility; or Photography is your friend

During September, I was give the Versatile blogger award by Adithi’s Amma Sews; and also from SewingCafe with Lynne thank you so much to both Adithi’s Amma and Lynne!
Now the rules are as follows, you have to write seven things about yourself… well, I’ve done a few of those before (in the sidebar at right) and truthfully I have nothing further of any interest about myself to add.  Yup, I am a pretty boring person… and what is more this is not supposed to be about me, although if I do feel like sharing any little titbits of what is going on in my life I will blurt it out at there and then, but pretty much this blog is all about my sewing, knitting or general fashion-related stuff as it inspires me.
So.
The last time I did one of these I wrote 7 things about couture sewing I had picked up from reading the excellent and highly enlightening instructions in Vogue 8333, and I decided that was a far more fun and interesting thing for people to read about than boring old me, so I decided to go down that path again… this is supposed to be a versatile blogger award, right?
So to be a bit versatile; today I shall touch on a completely different subject of interest to me and probably all bloggers like me documenting their handmade creations… photography.  People have left me lovely comments saying nice things about my photography, so while I am no expert and what I know about the actual technical side of photography could be written on a pinhead with room to spare, and a real photographer might read this and laugh at my naivety; I do still like dabbling in fashion photography in my own silly small-scale way and take some pride in my photos.  So thought I would just jot down a few little things about taking photos of myself and my work that I have learnt along the way.
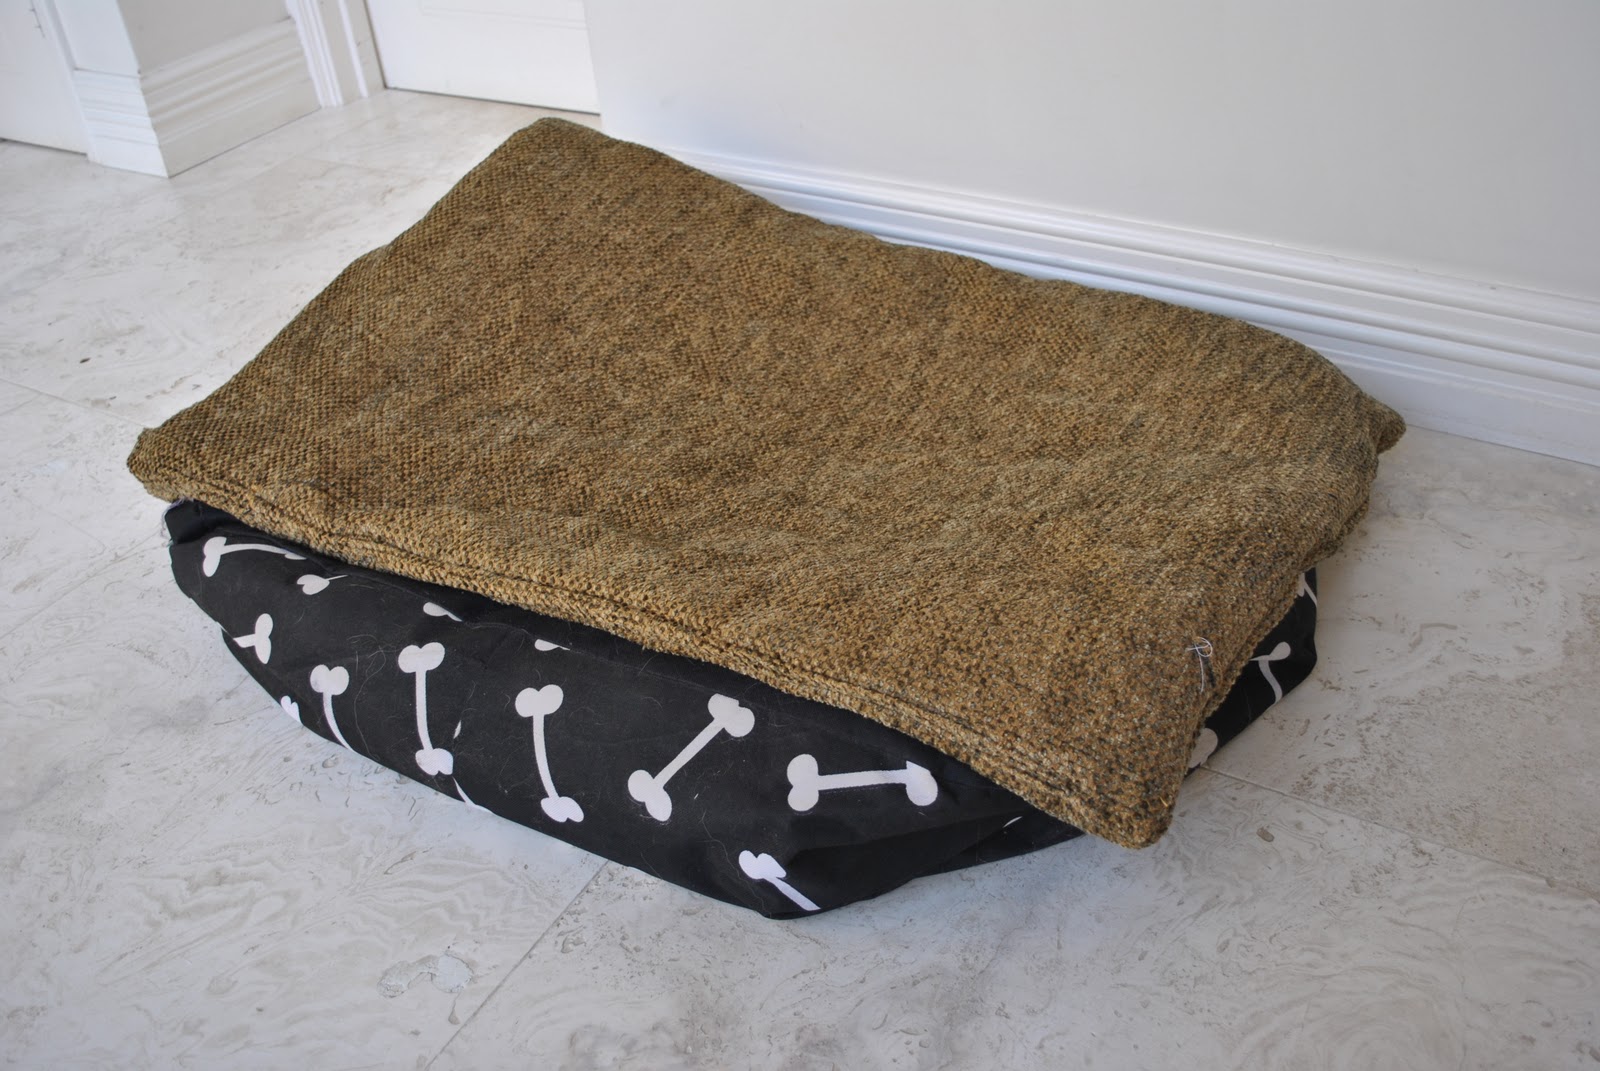
1. Background
It might seem obvious and therefore not worth mentioning, but this is a biggie.  The background of your photographs is really important and there is a big difference between a background that will highlight your creations to advantage, or alternatively swamp them into insignificance.
Aaaand; not particularly vital and not something I obsess about, but I do find myself semi-consciously seeking out photo spots that will enhance my creations.  I certainly don’t let it get in the way of my life, but if I see a good spot around about I will often tuck it away mentally for future reference.  Also, there are suitable spots, and there are unsuitable spots.  Let’s just say, if I have made some new bathers then I will pick a day I am going to the beach to bring along my camera.  And if I am photographing say, a beige dress, then it’s probably best not to sabotage my creation by standing in front of a beige background.
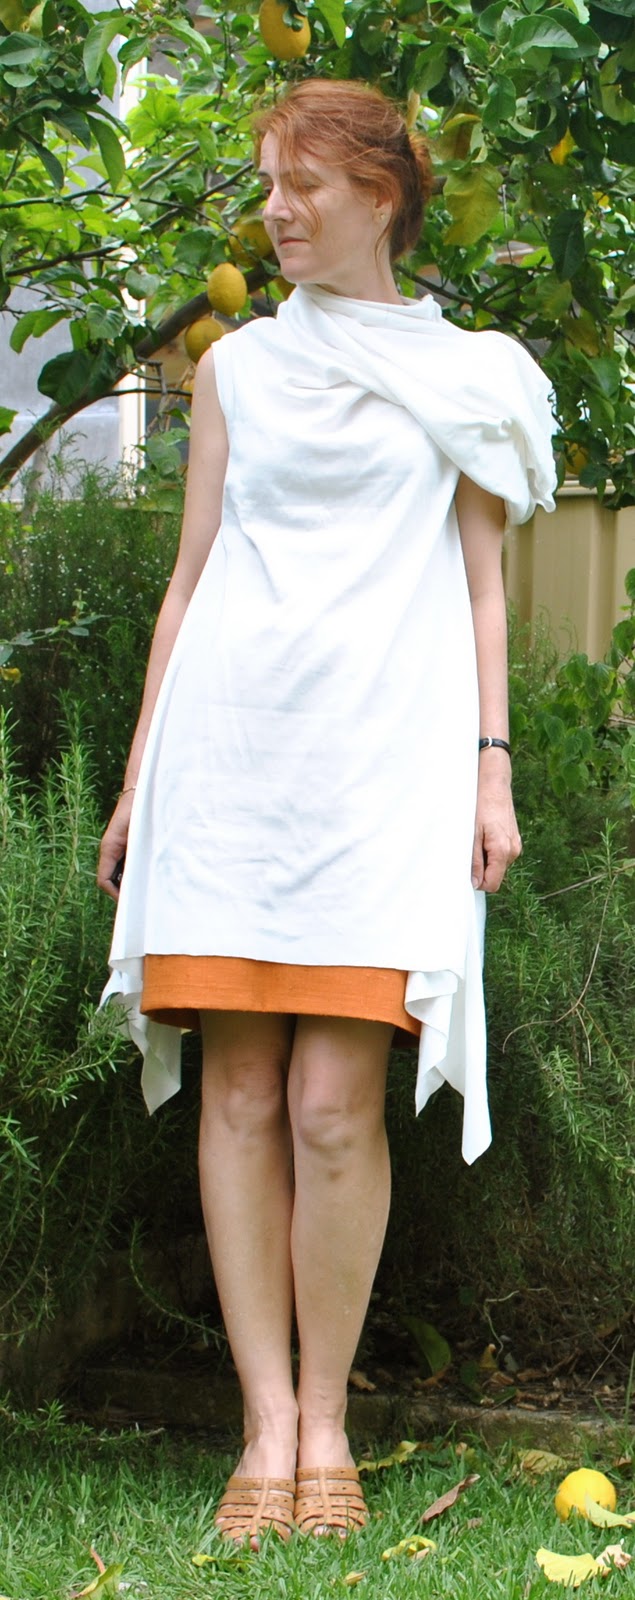
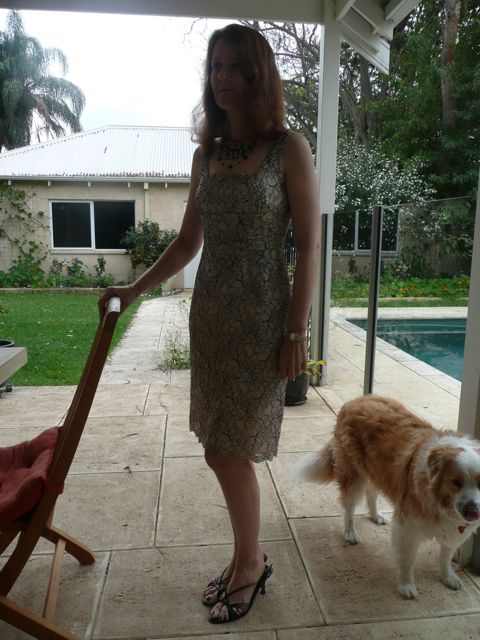
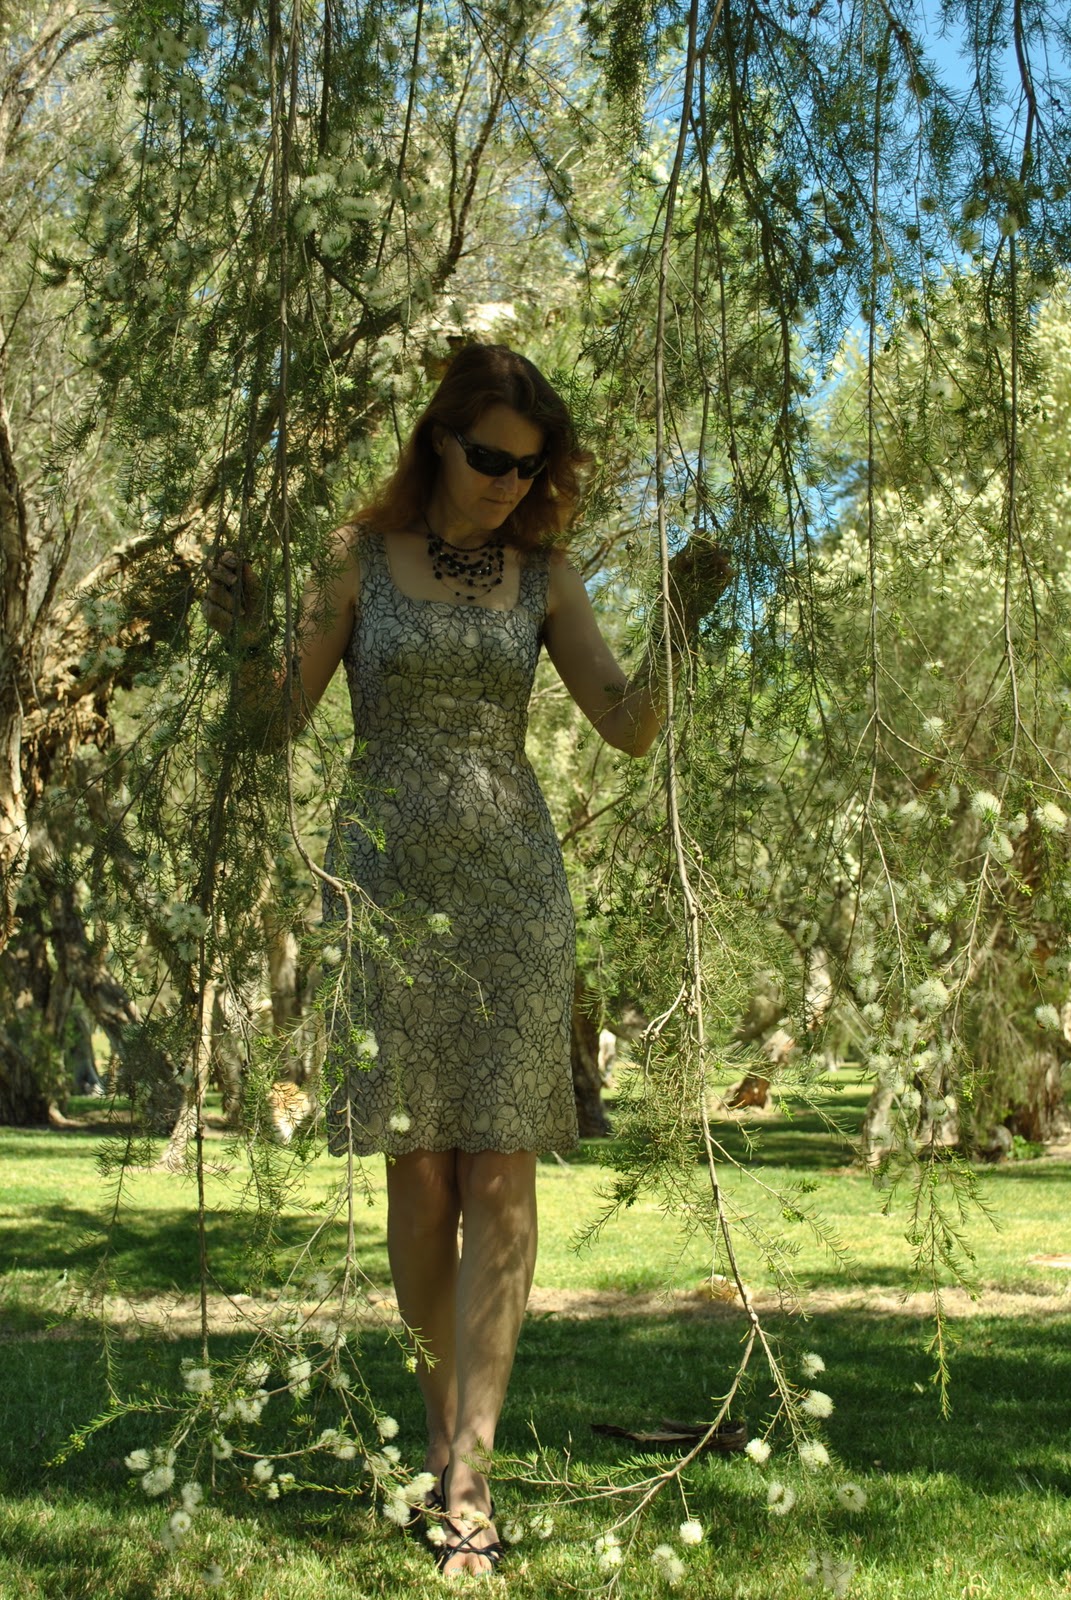
Take these two examples, two pictures of the same dress.  Below is one taken before I had grasped that a contrasting background would show up my dress better.  Below that, I had started to twig that an attractive setting might make a difference.  Which do you think is the better picture?

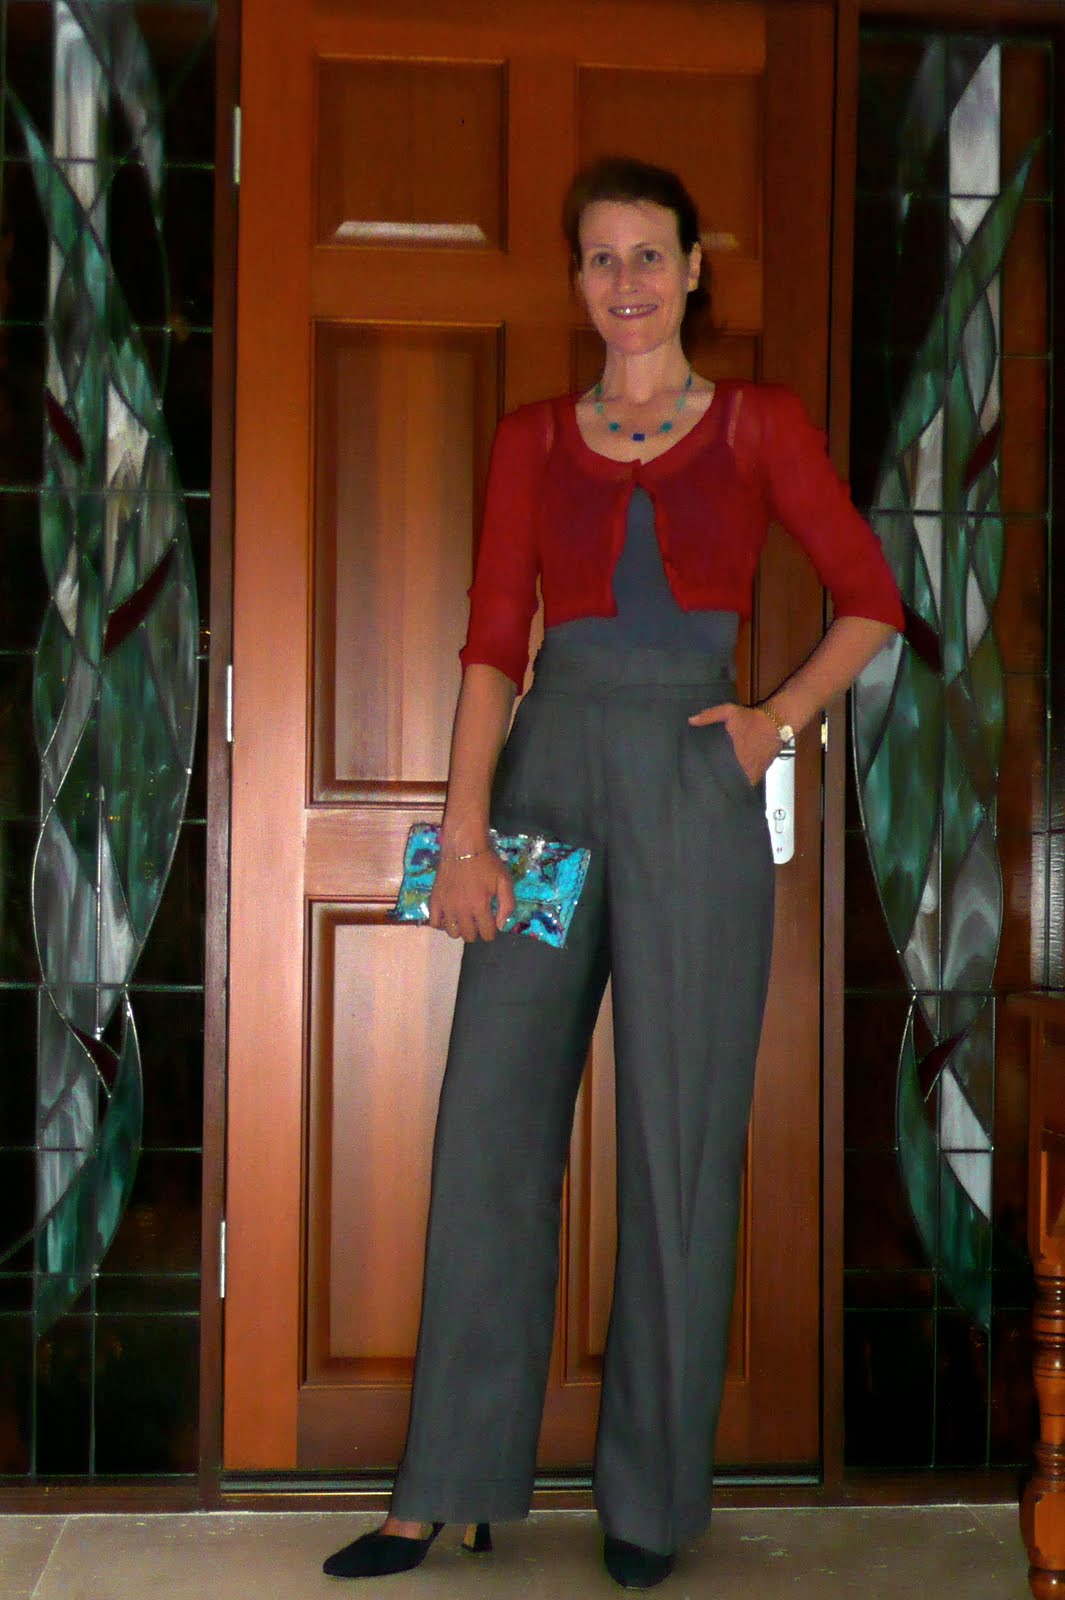
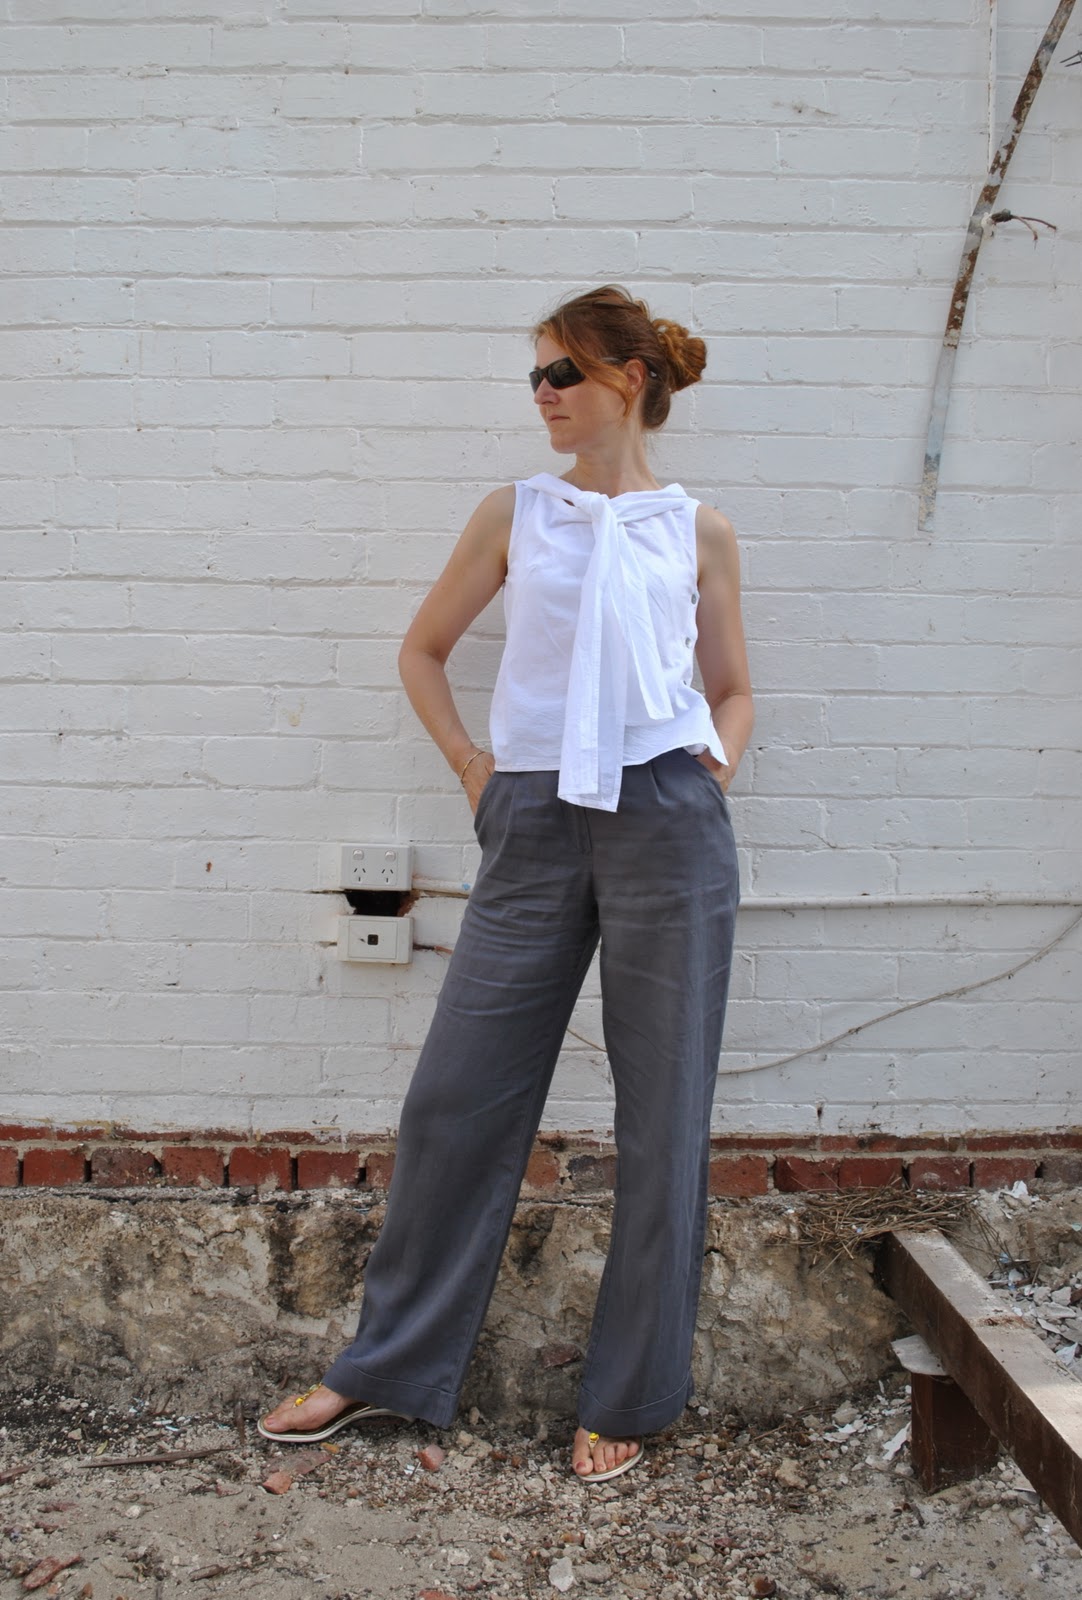
2. Natural light vs. Flash
A tricky one.  I reckon natural light is far superior if you can get it.  I haven’t yet taken a photo of myself with a flash in which I didn’t look terribly ill; on death’s door even.  Or at least ten years older than I am… so I nearly always “force flash off”.  But I’ve heard that professional photographers can do wonderful things with a flash, and I really should take the time to work out what those things are….
In the meantime, take these two examples, below is a photo taken at nighttime, with a flash.  Horrible, no?  Below that, the same trousers in the daylight and sans flash.  Which do you think is the better picture?

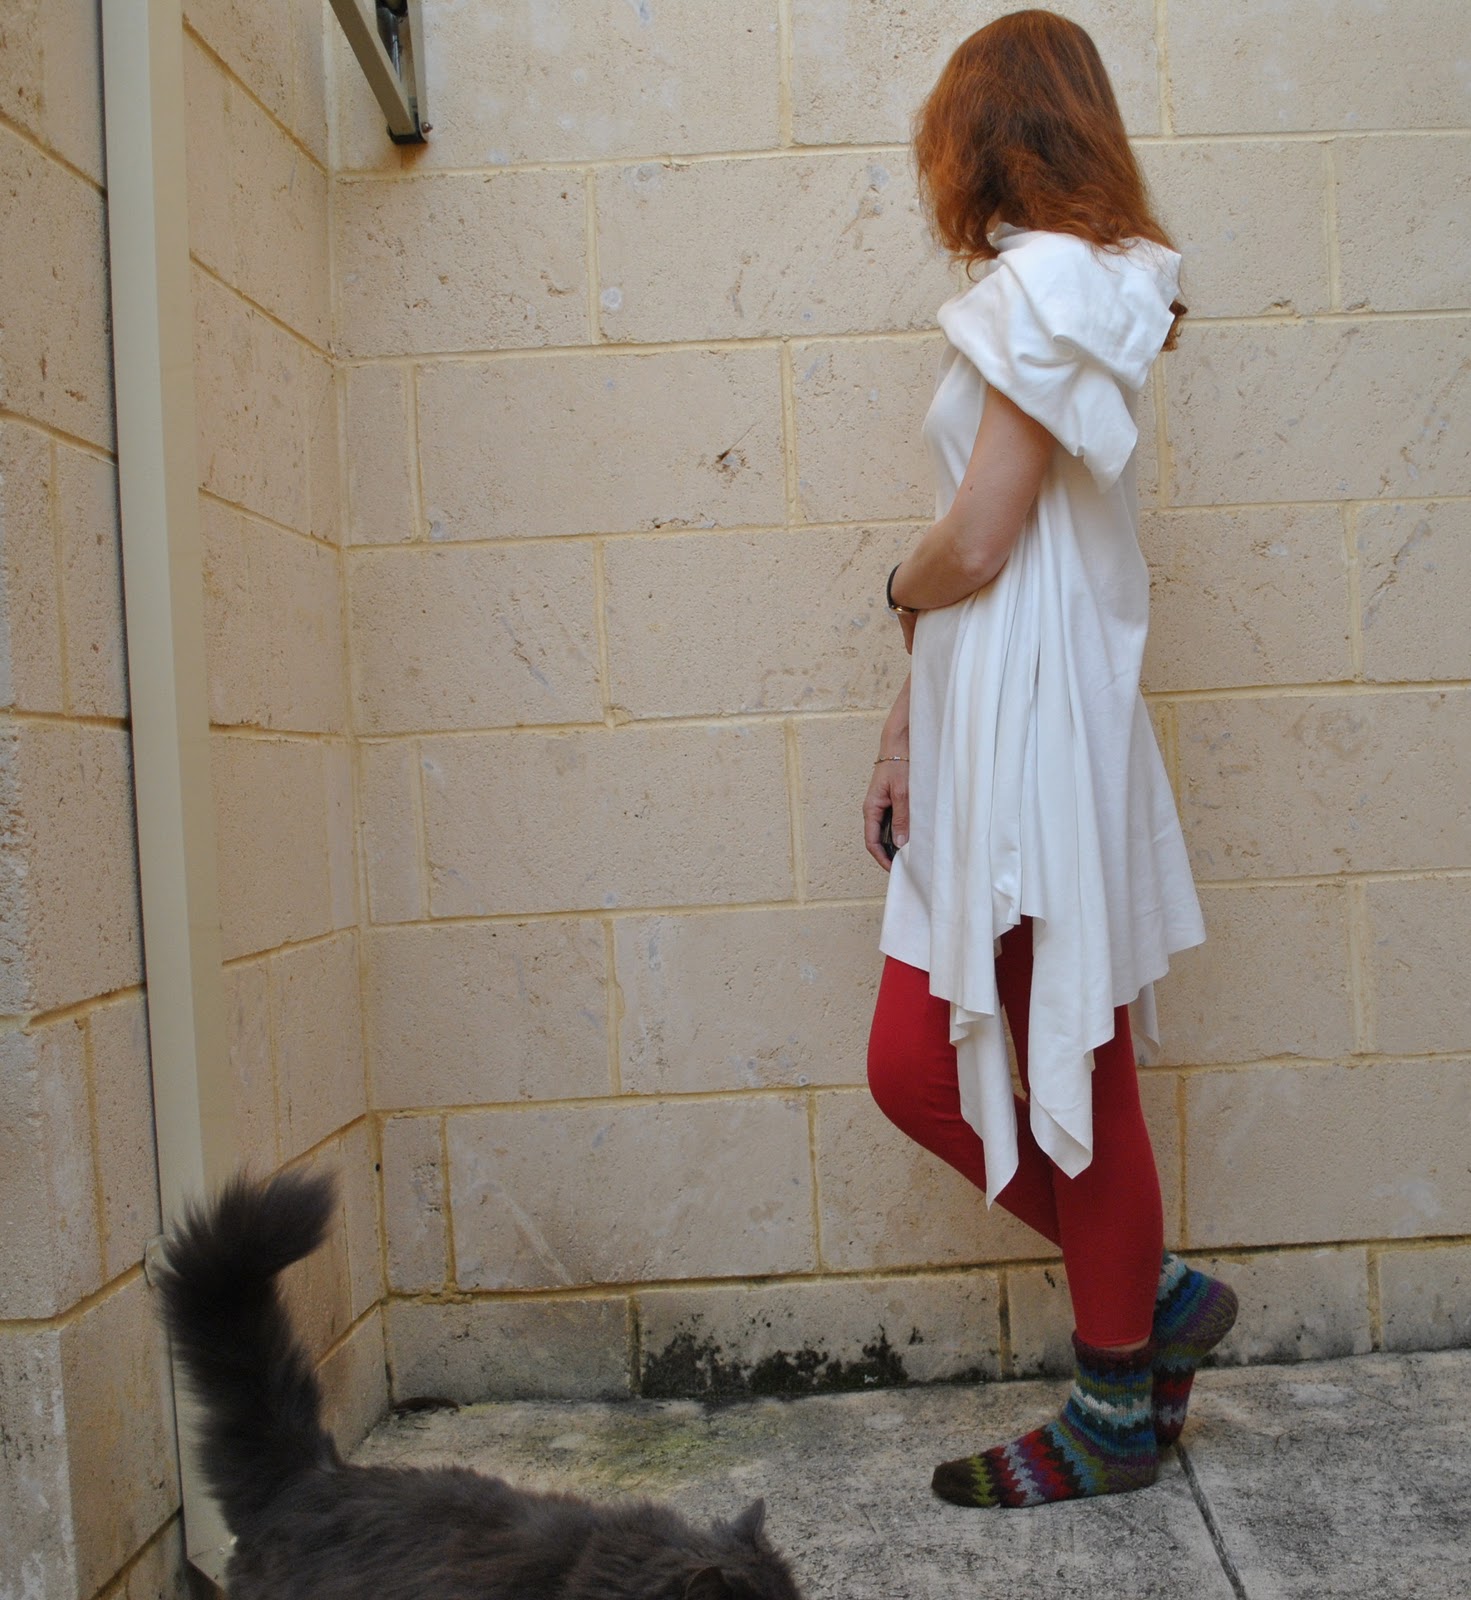
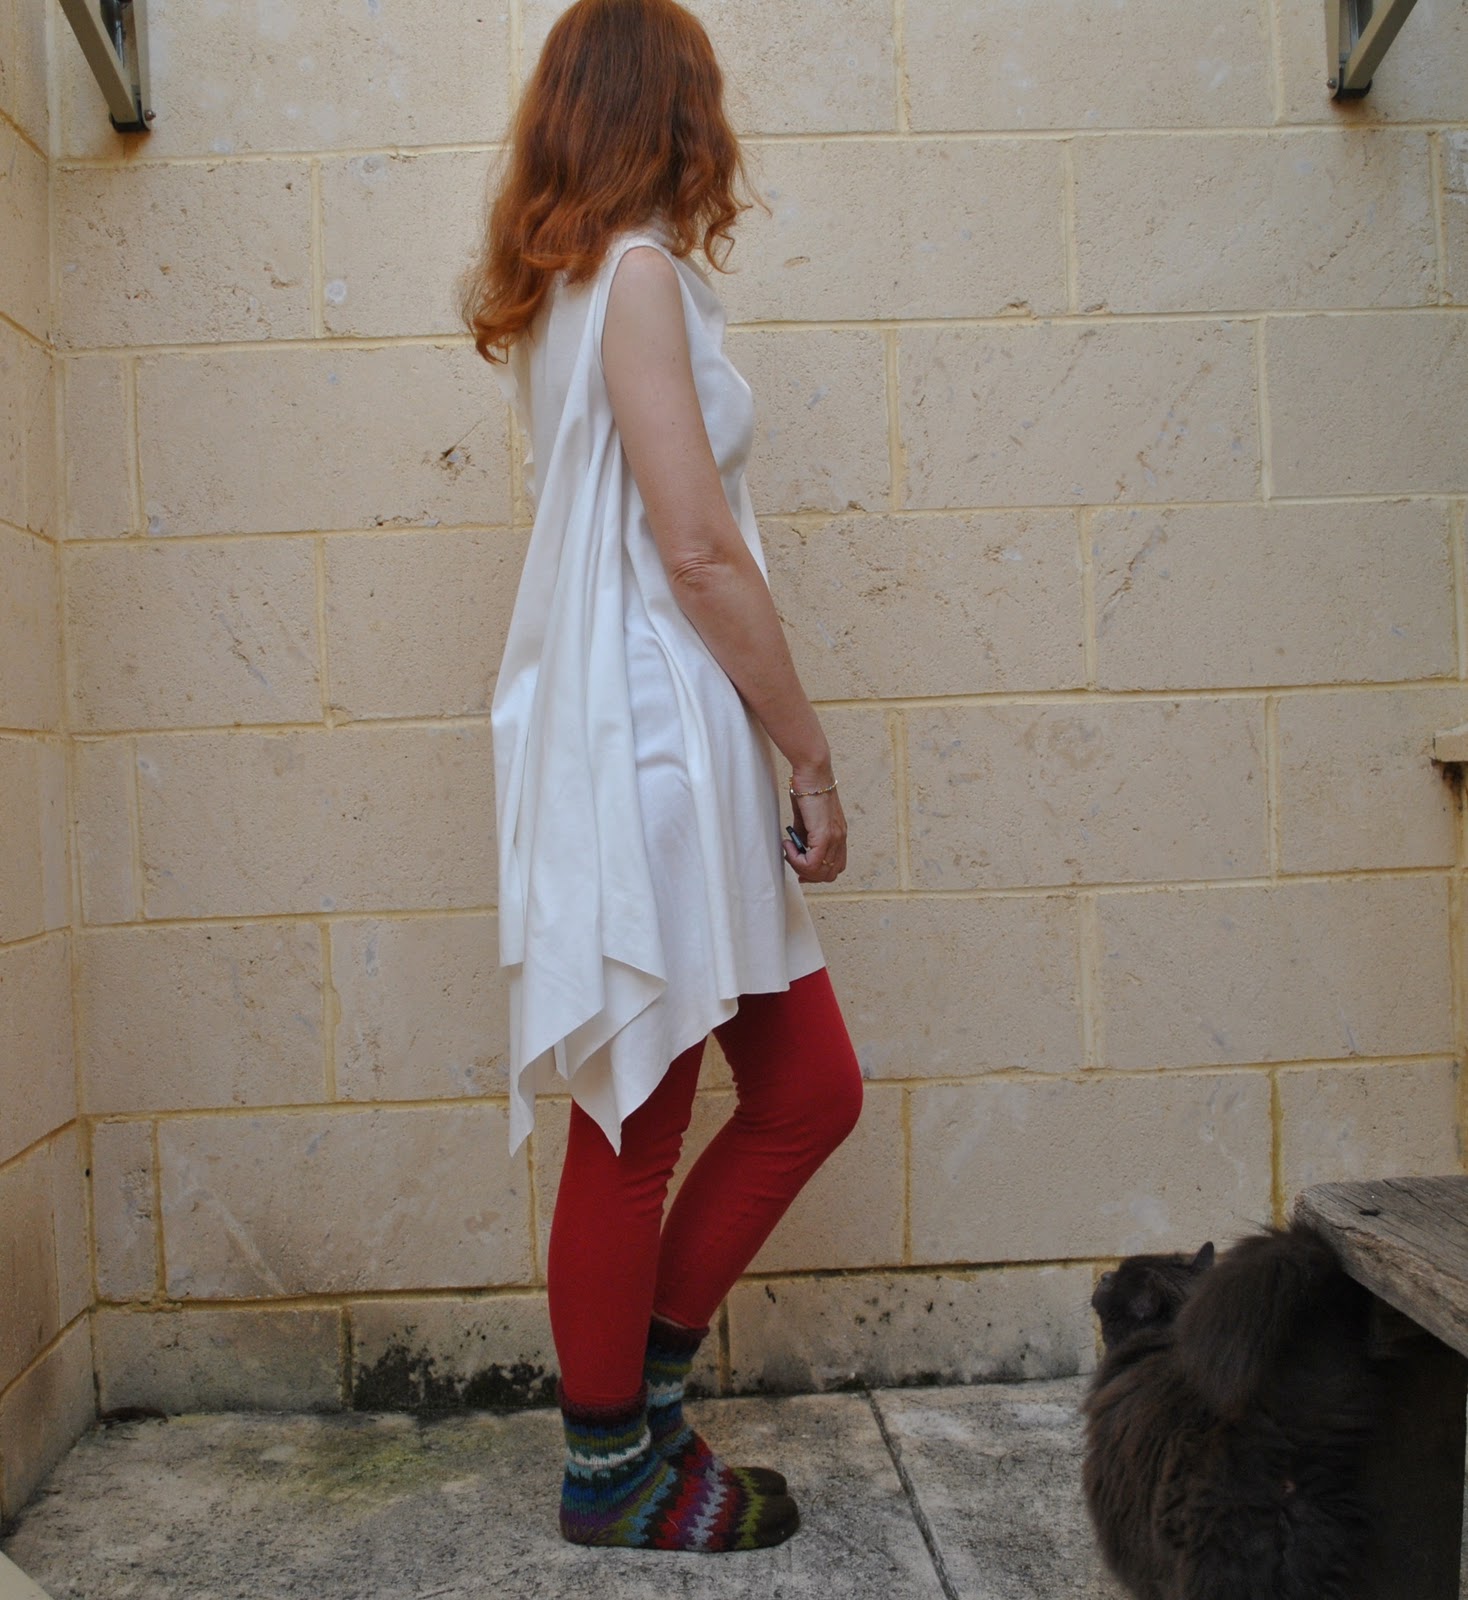
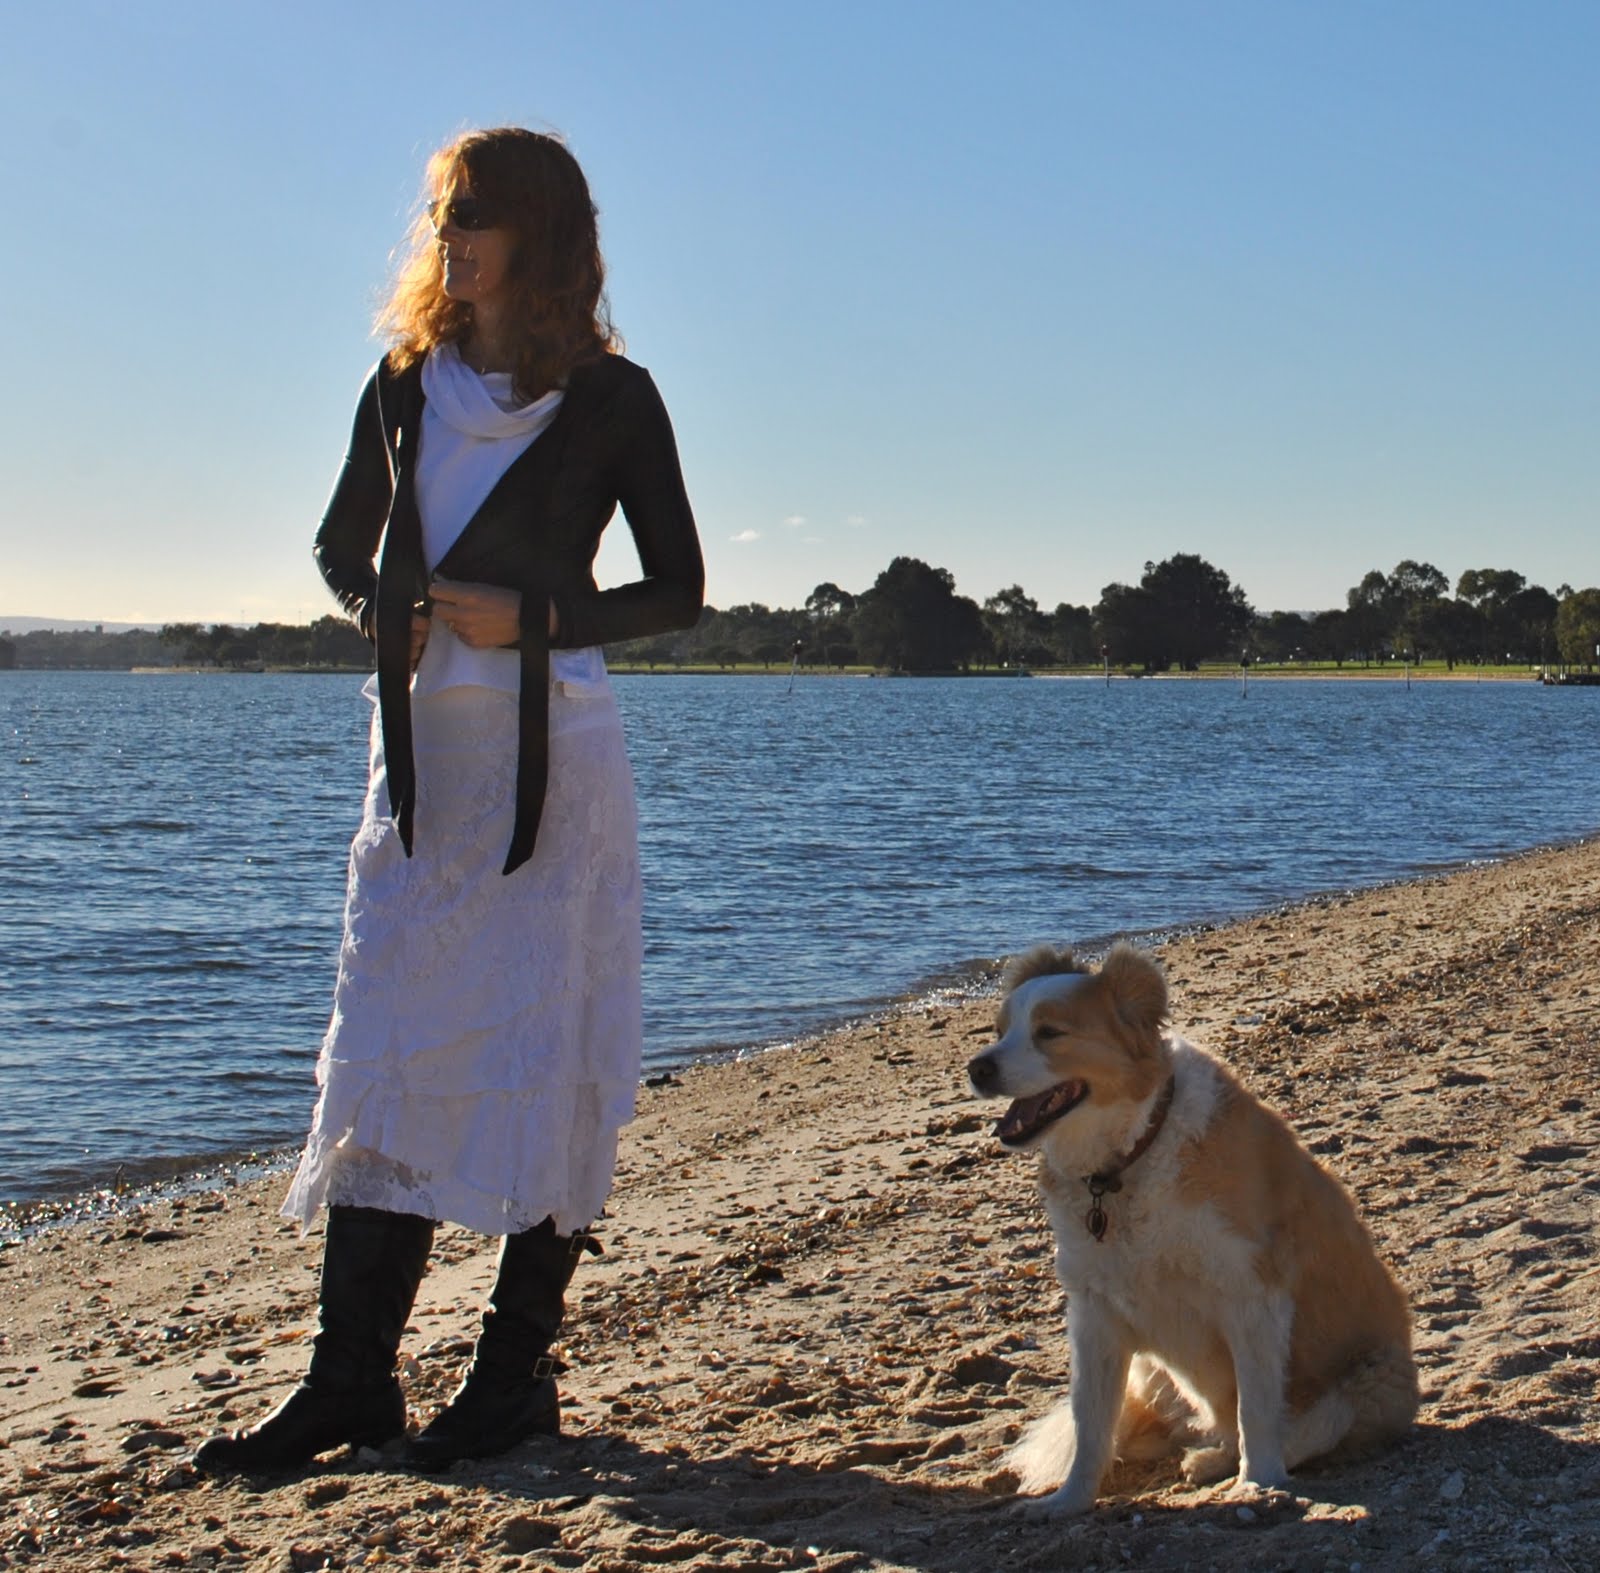
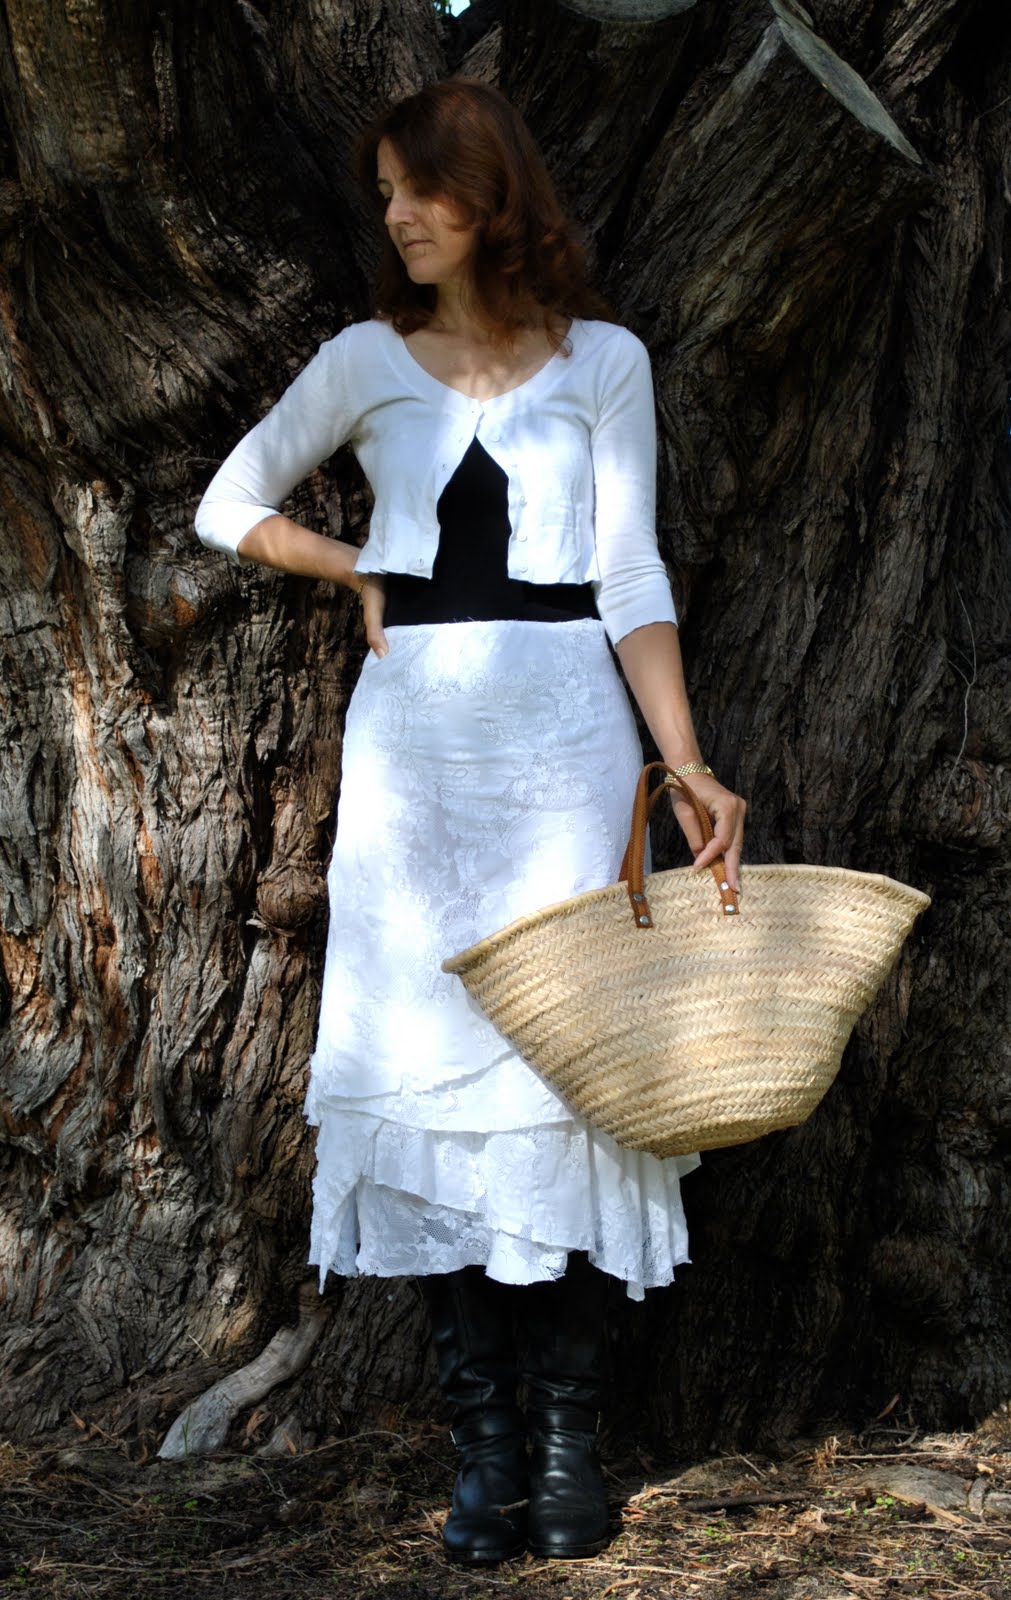
3. the Direction of your light
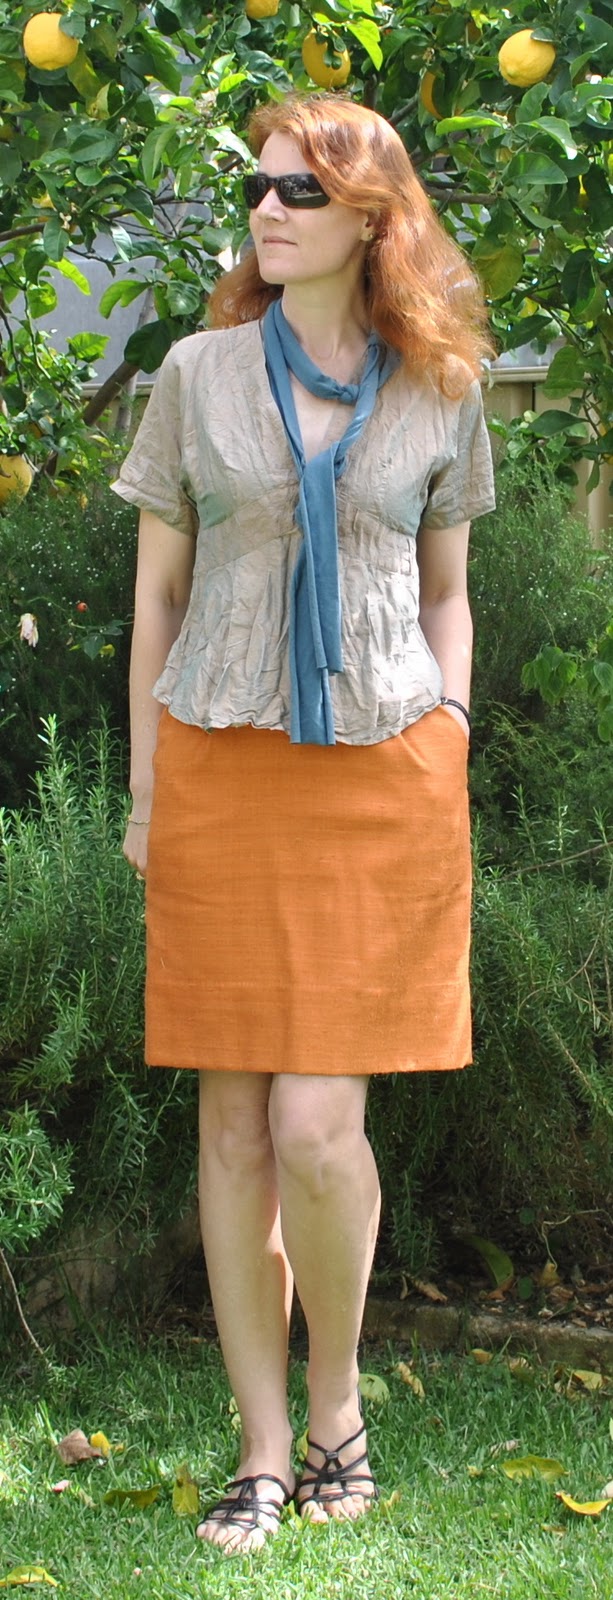
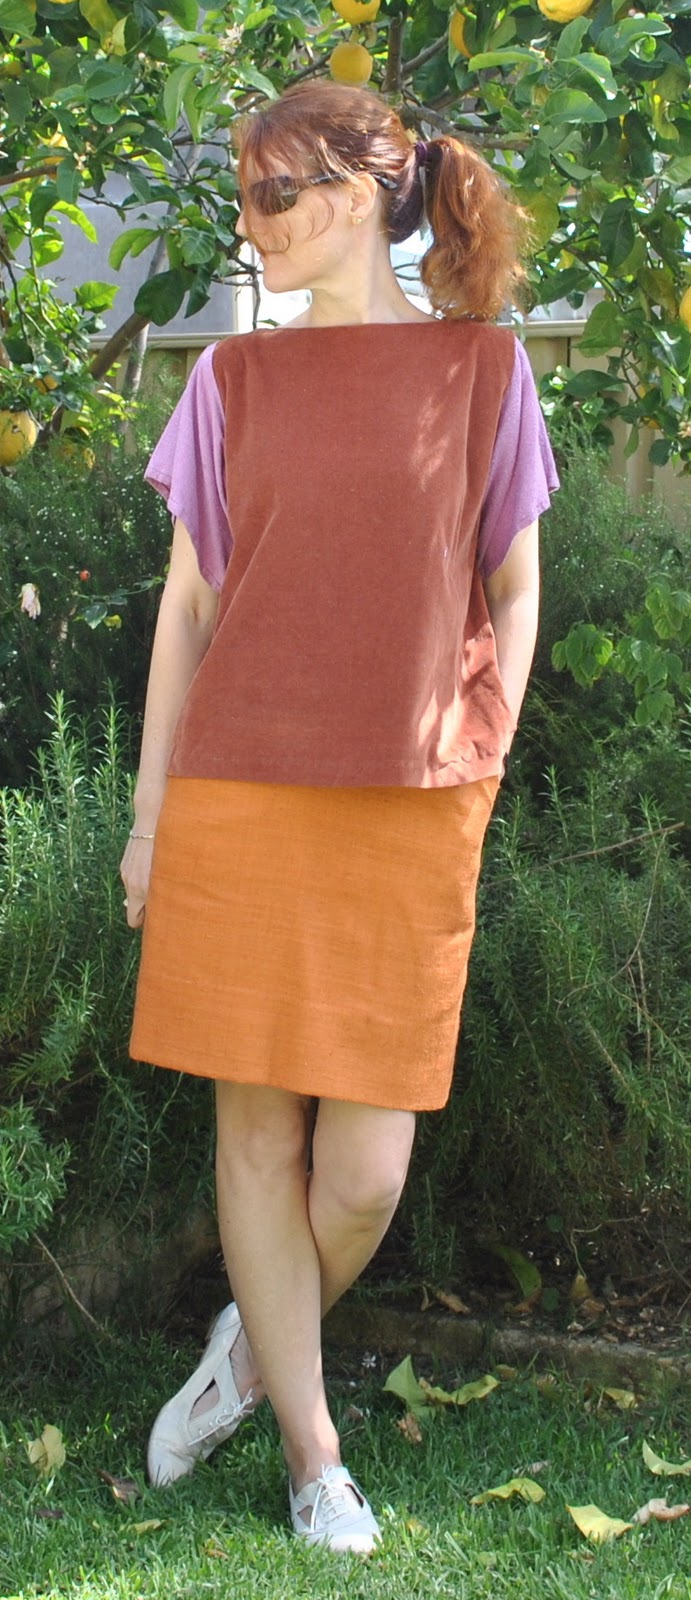
In general, shaded outdoor light is the best for giving naturalness to your clothes, and providing a true indication of colours, textures and details.  And if the light source is behind you, you will just be a featureless silhouette in front of a bright beautiful background, and no one will be able to see any details of your creation at all.  Take these two examples… below I took this photo without thinking enough about direction of the light.  Below that is a similar outfit, taken in the shade.  In which can you see the details of the outfit better?
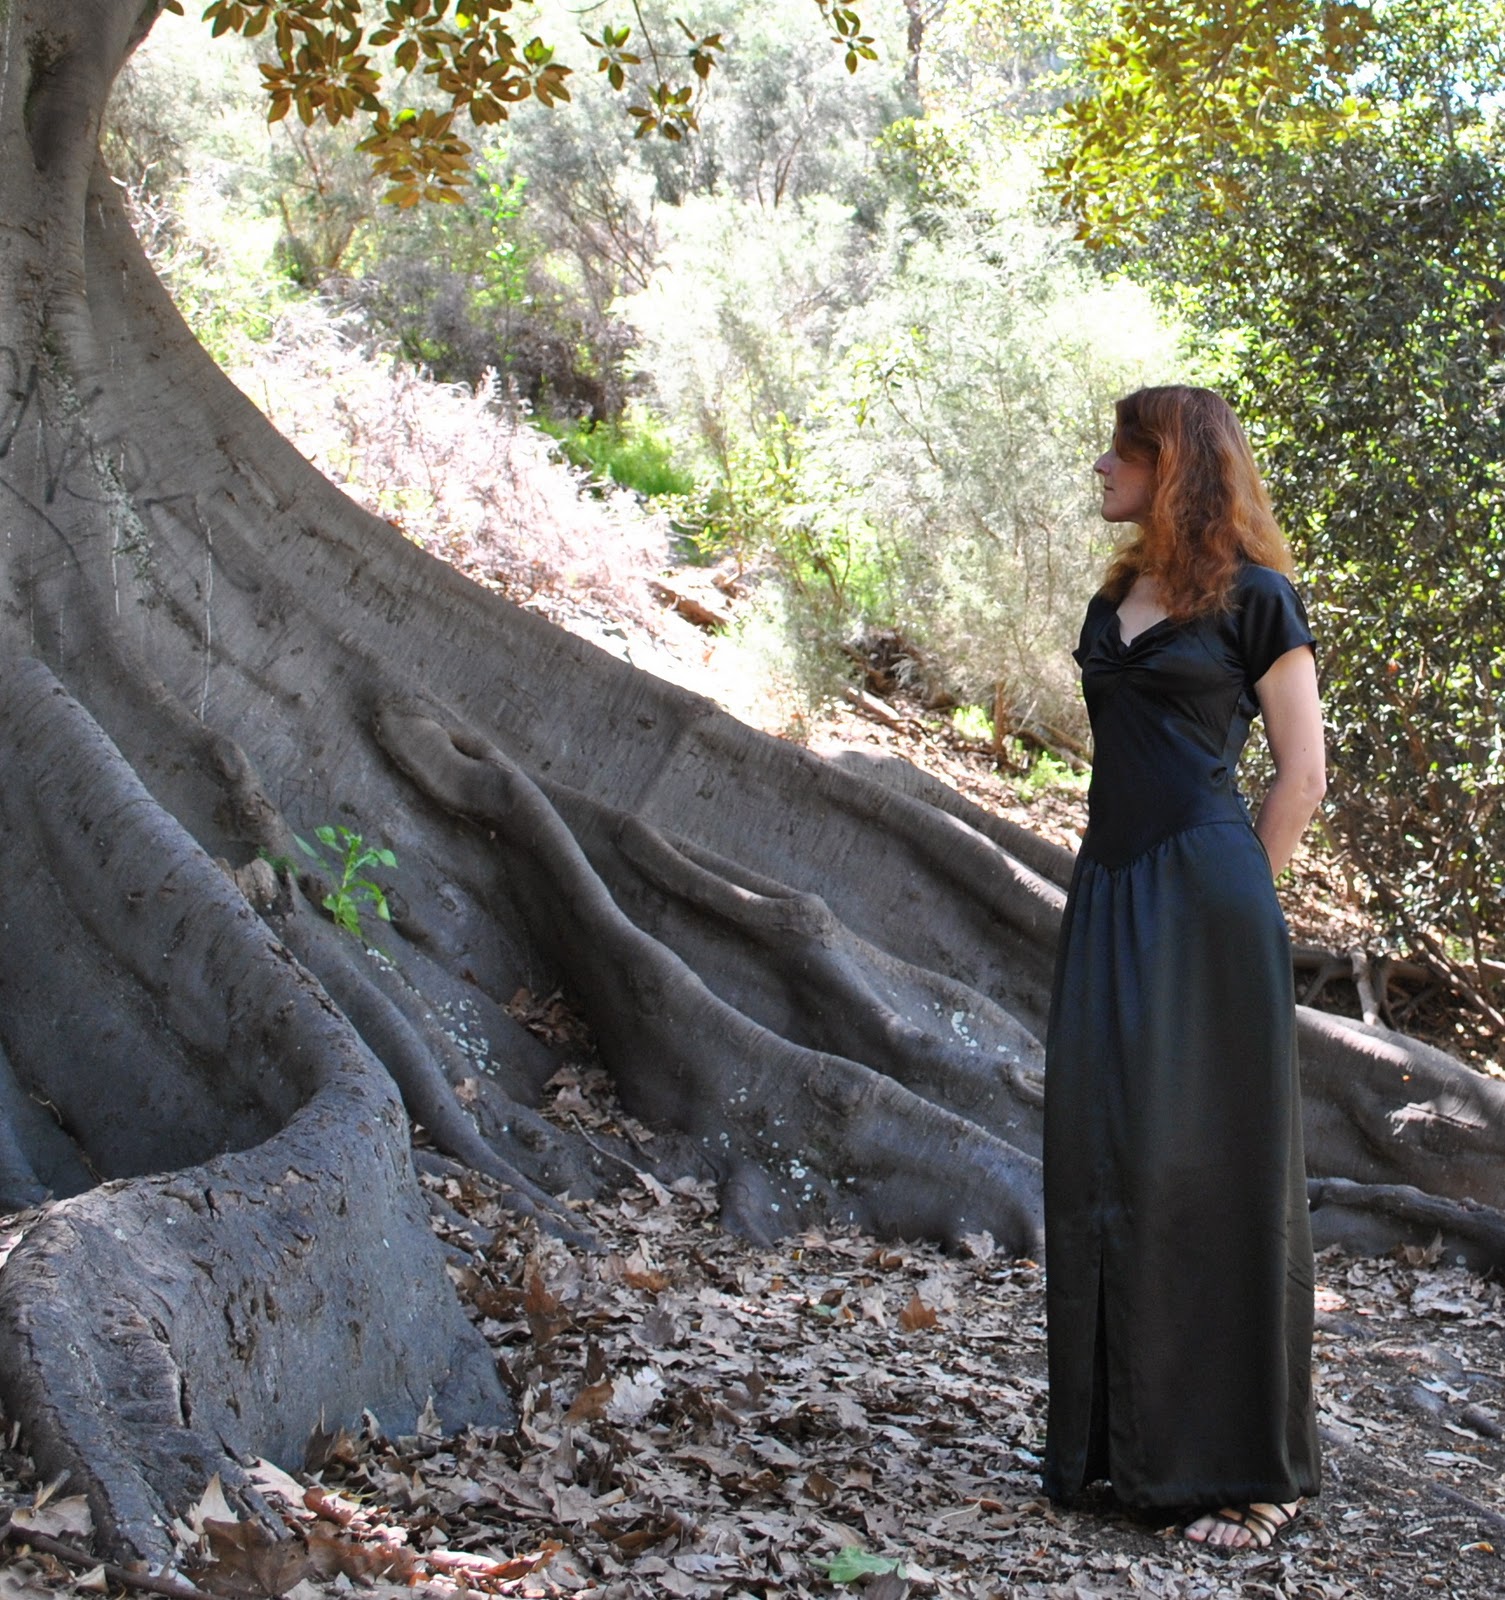
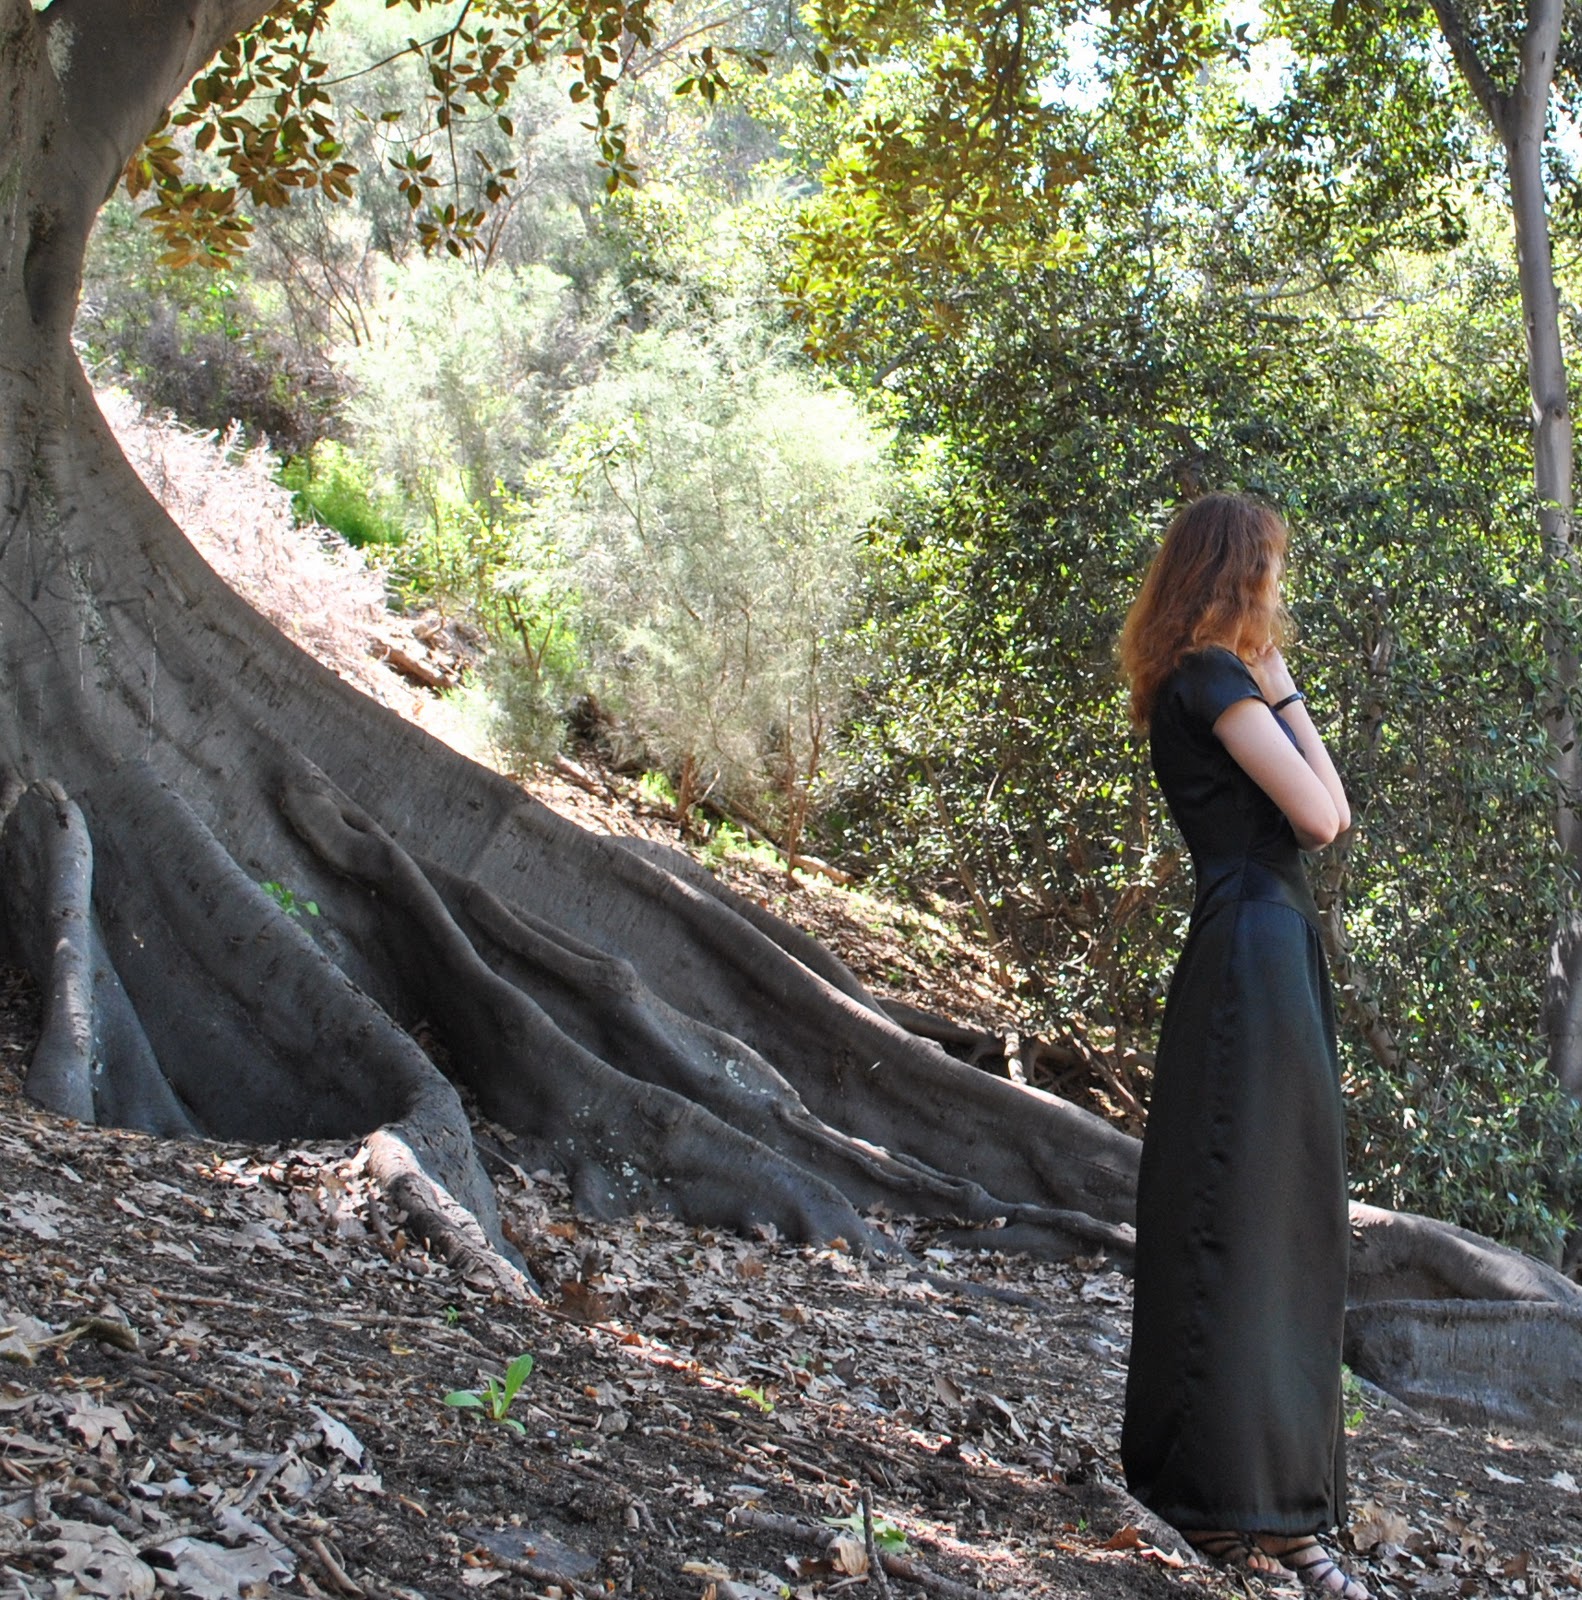
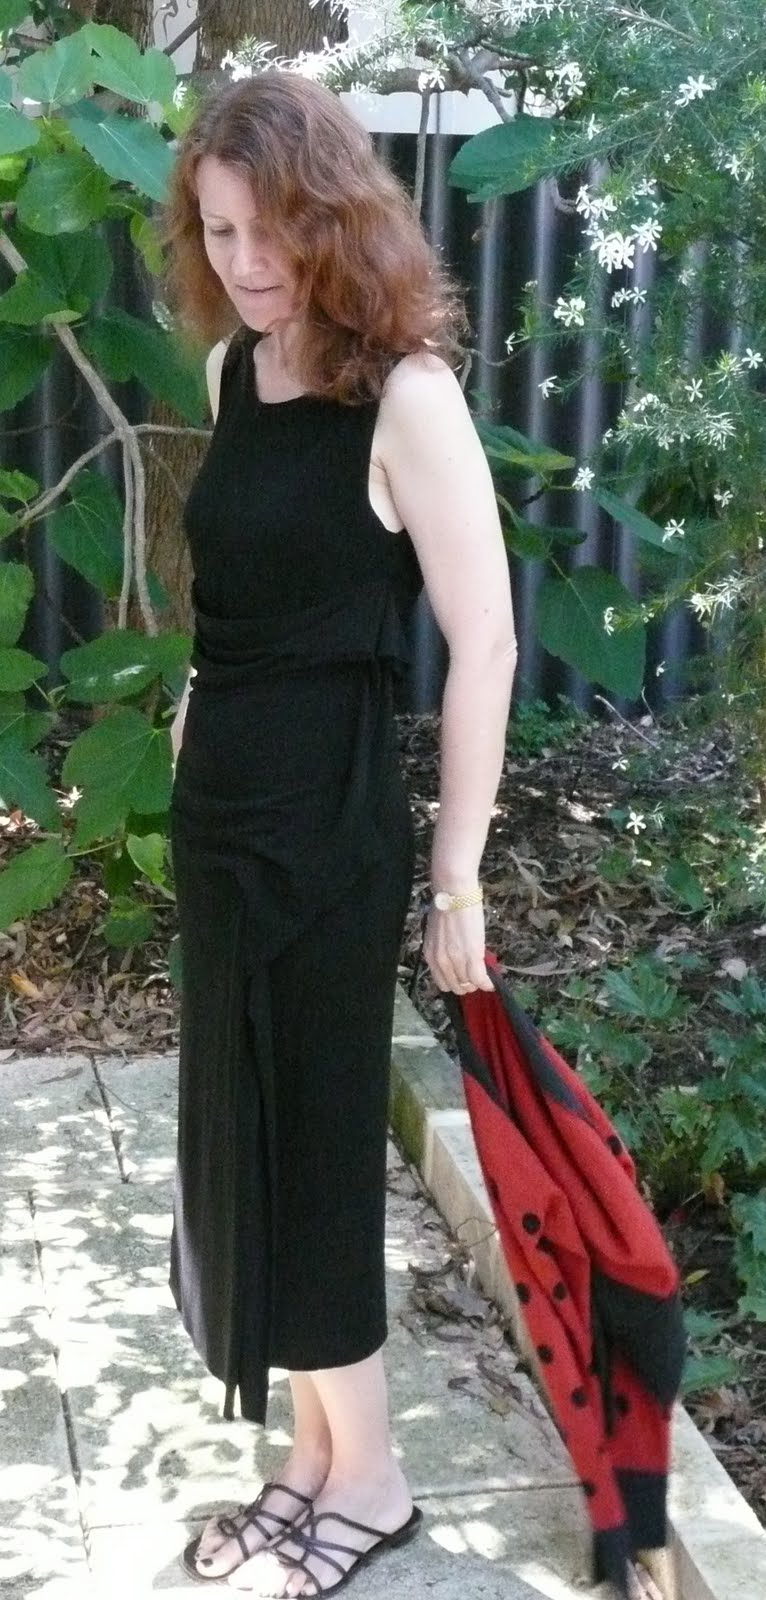
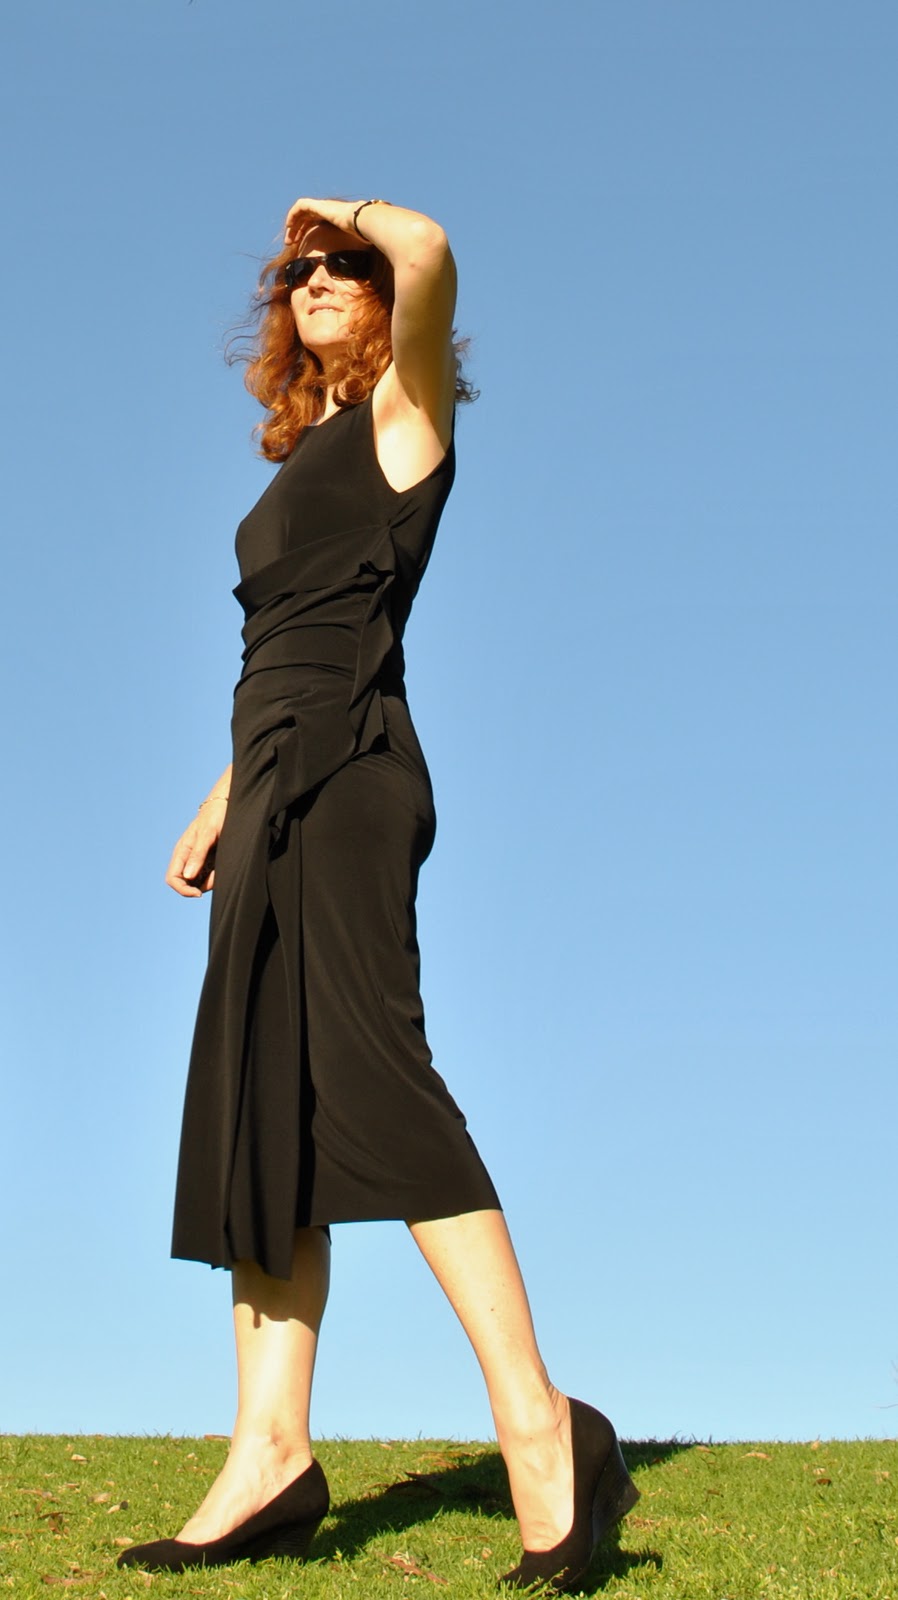
4. Black 
Black is “special”.  Generally speaking (without access to a studio set-up), bright or strong light is necessary to show any details at all of a black ensemble…  Take these two examples, two pictures of the same dress.  On the left is one taken when I thought that shaded natural light was the best option for all my photographs regardless of the colour of my garments, on the right is one taken when I had realised that black might be an exception to this rule.  In which picture do the details of the dress stand out better?
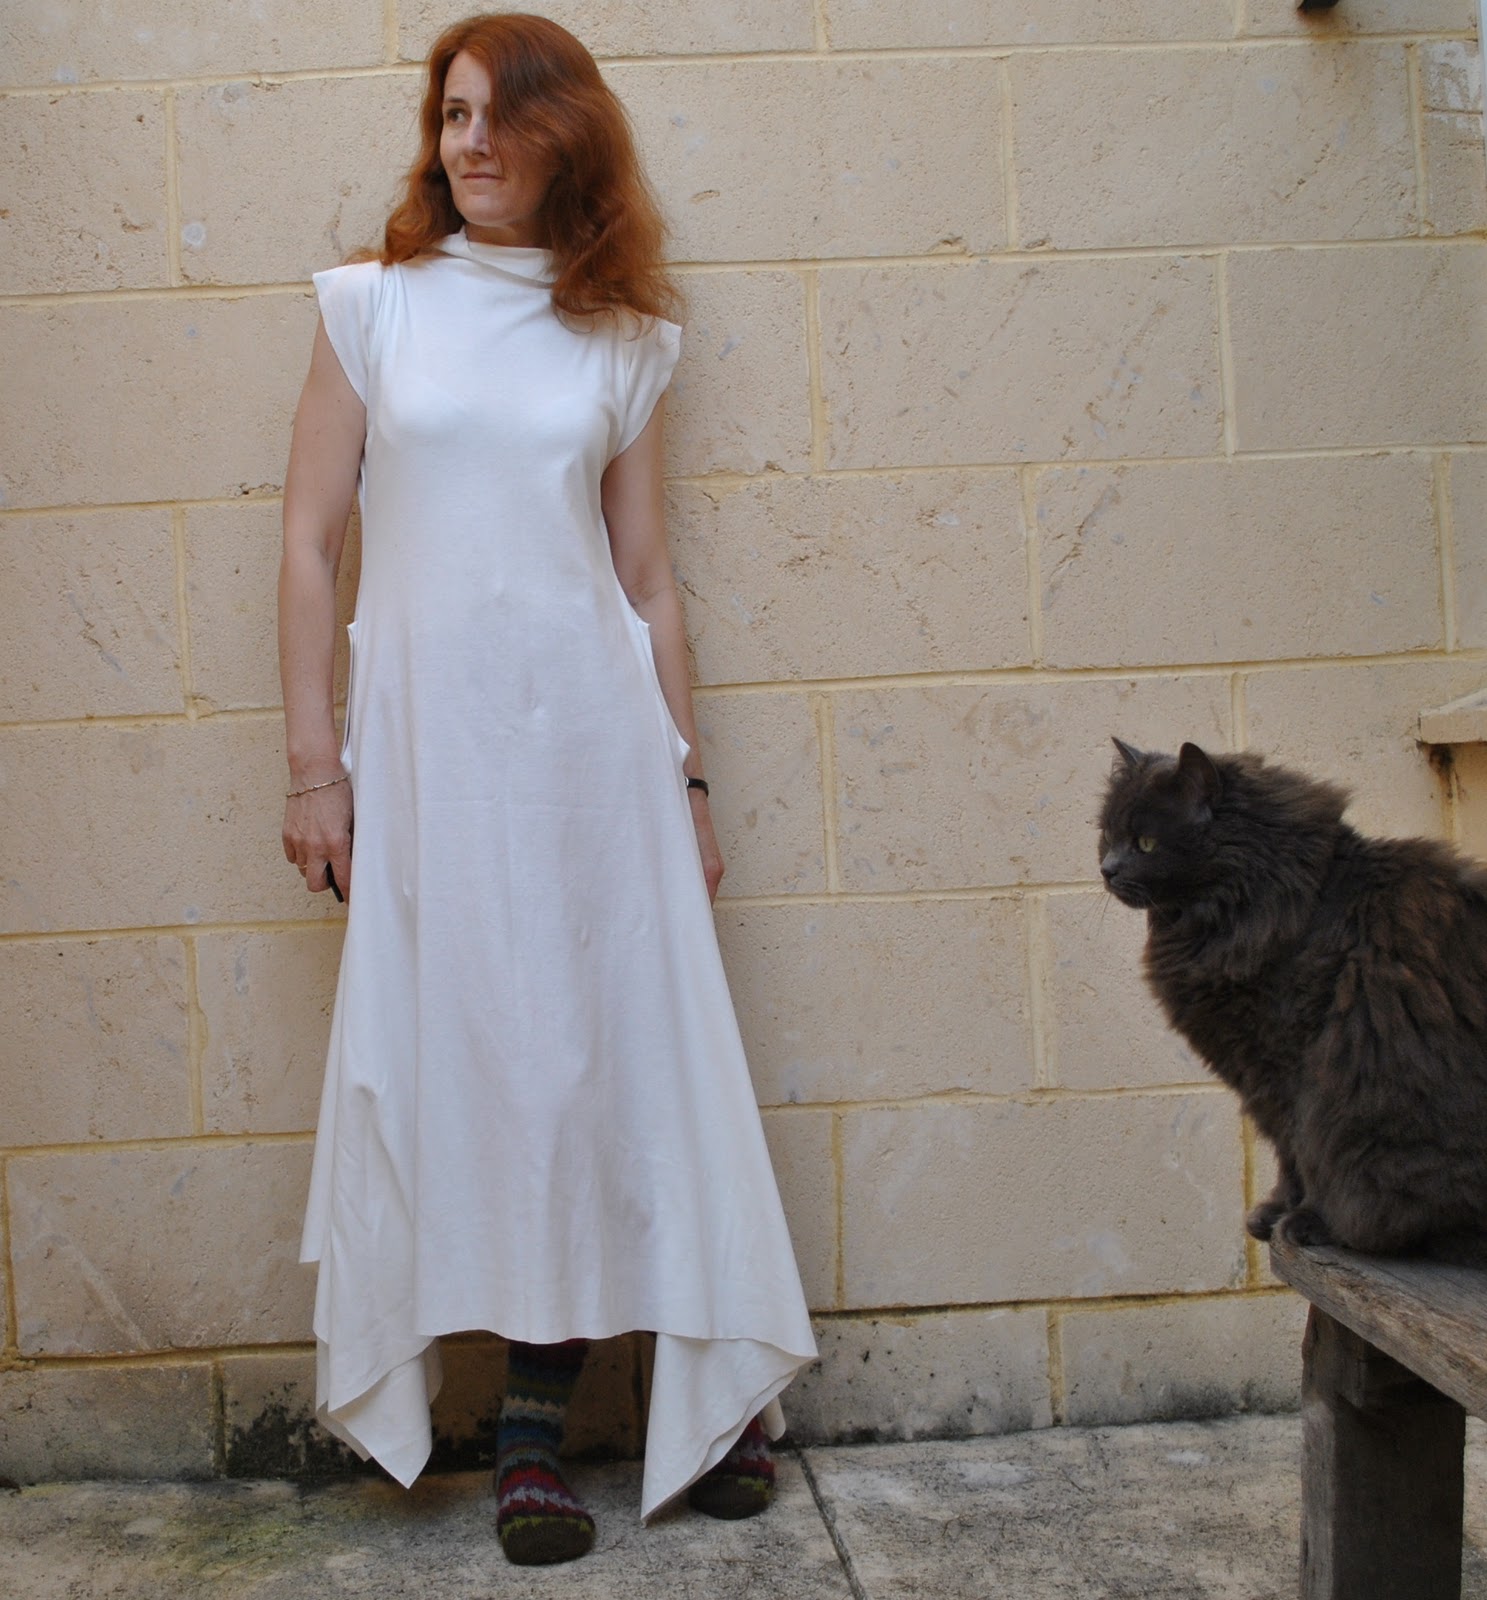
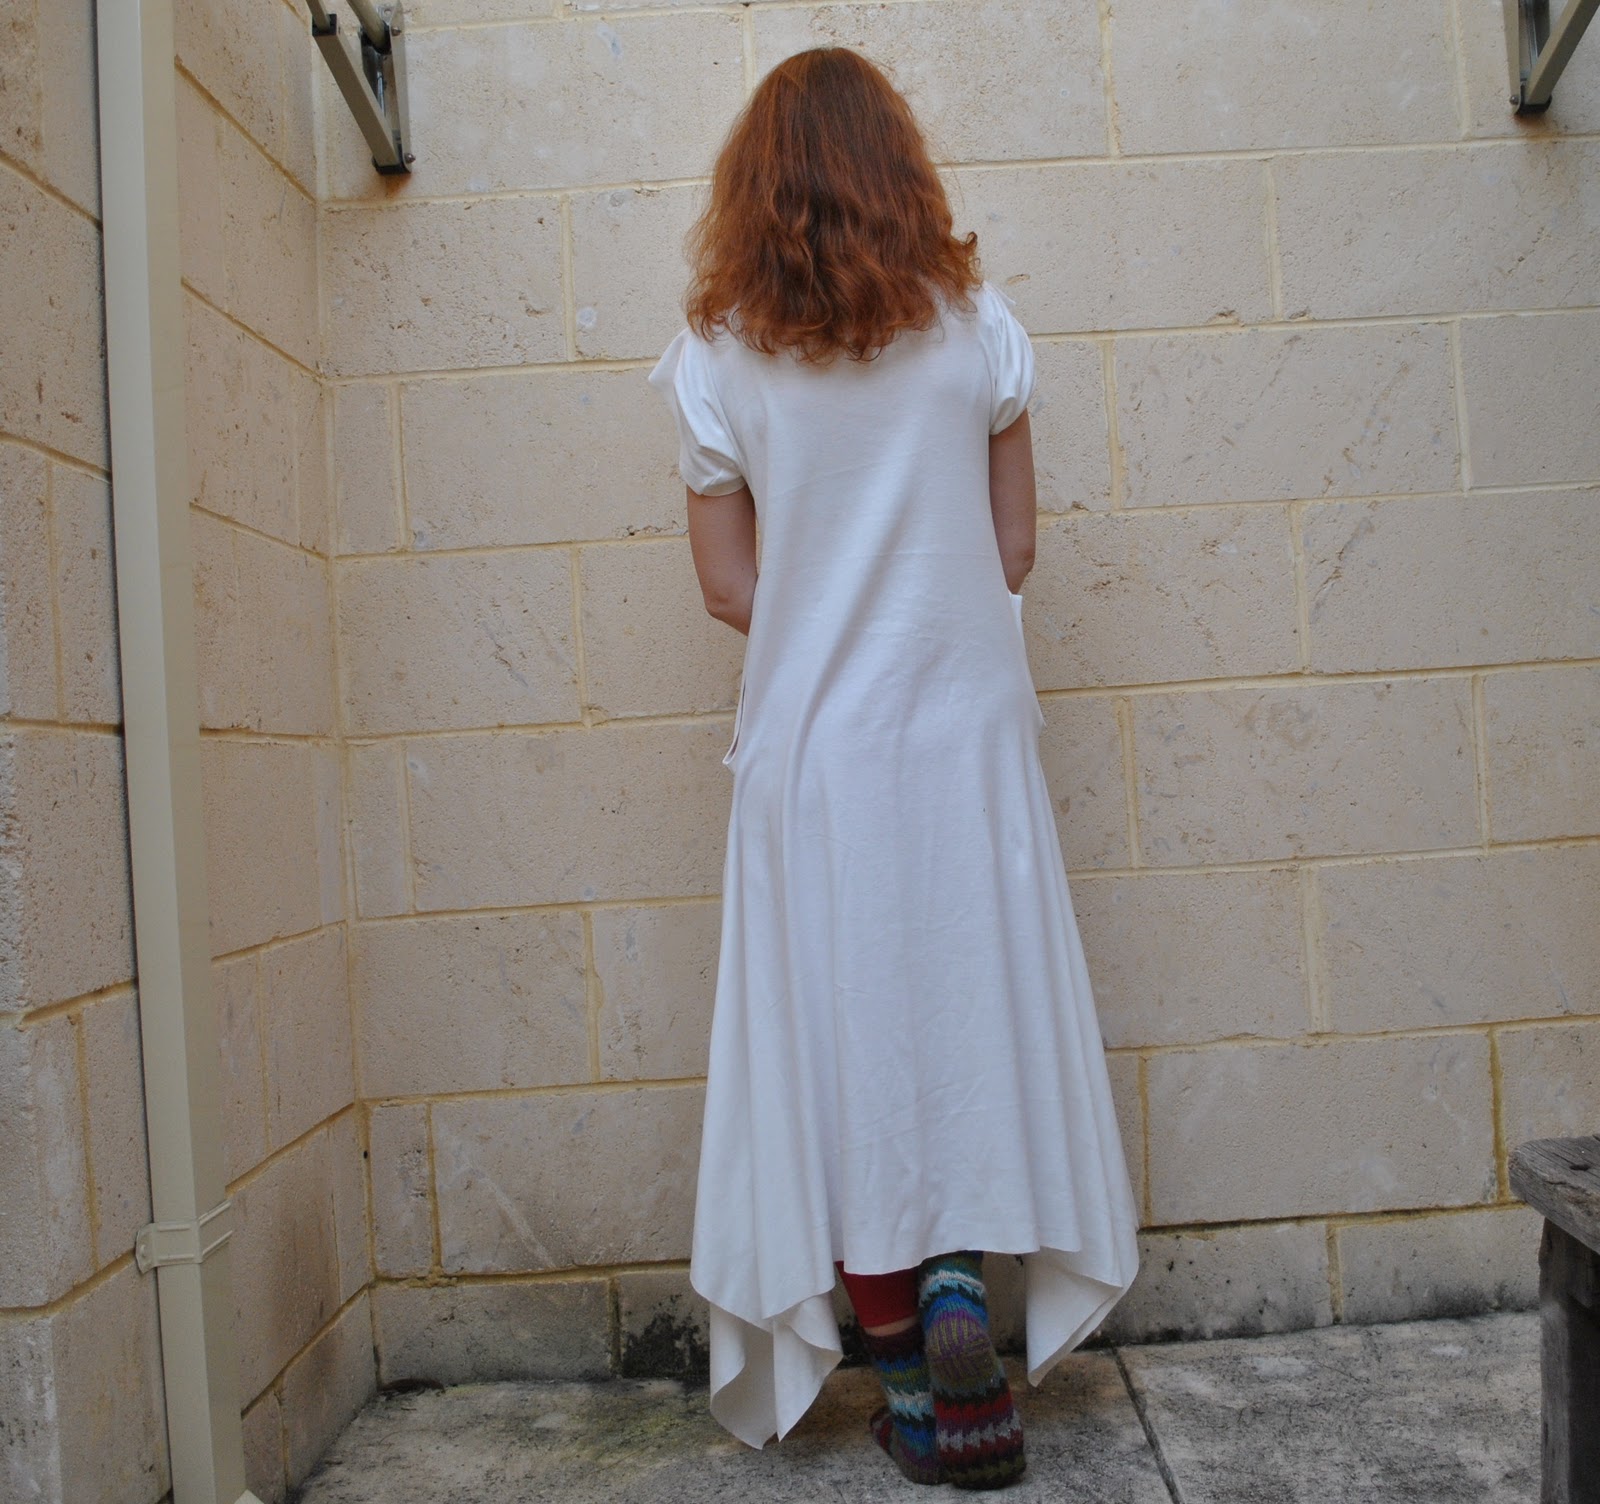
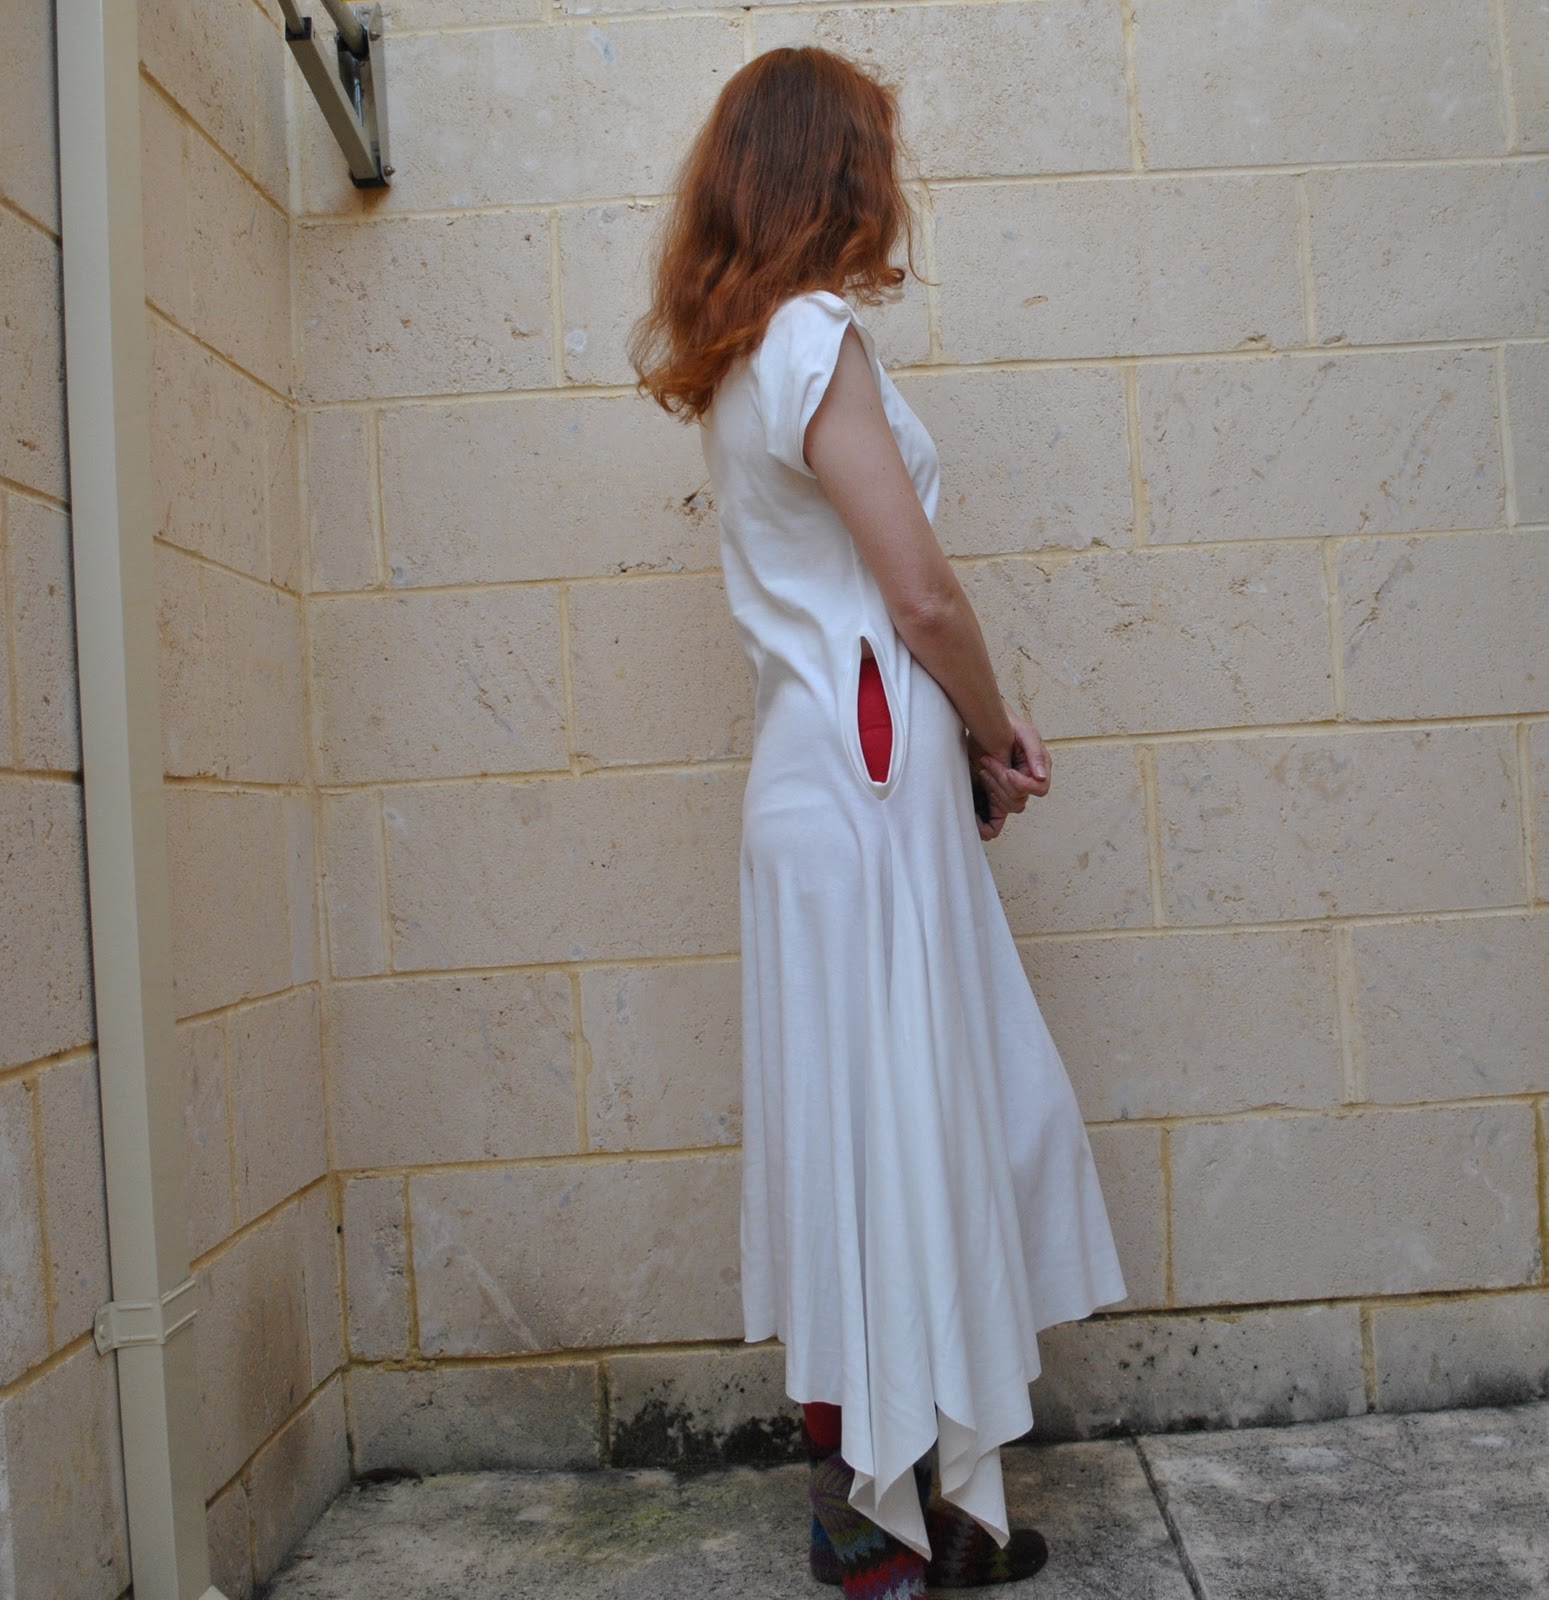
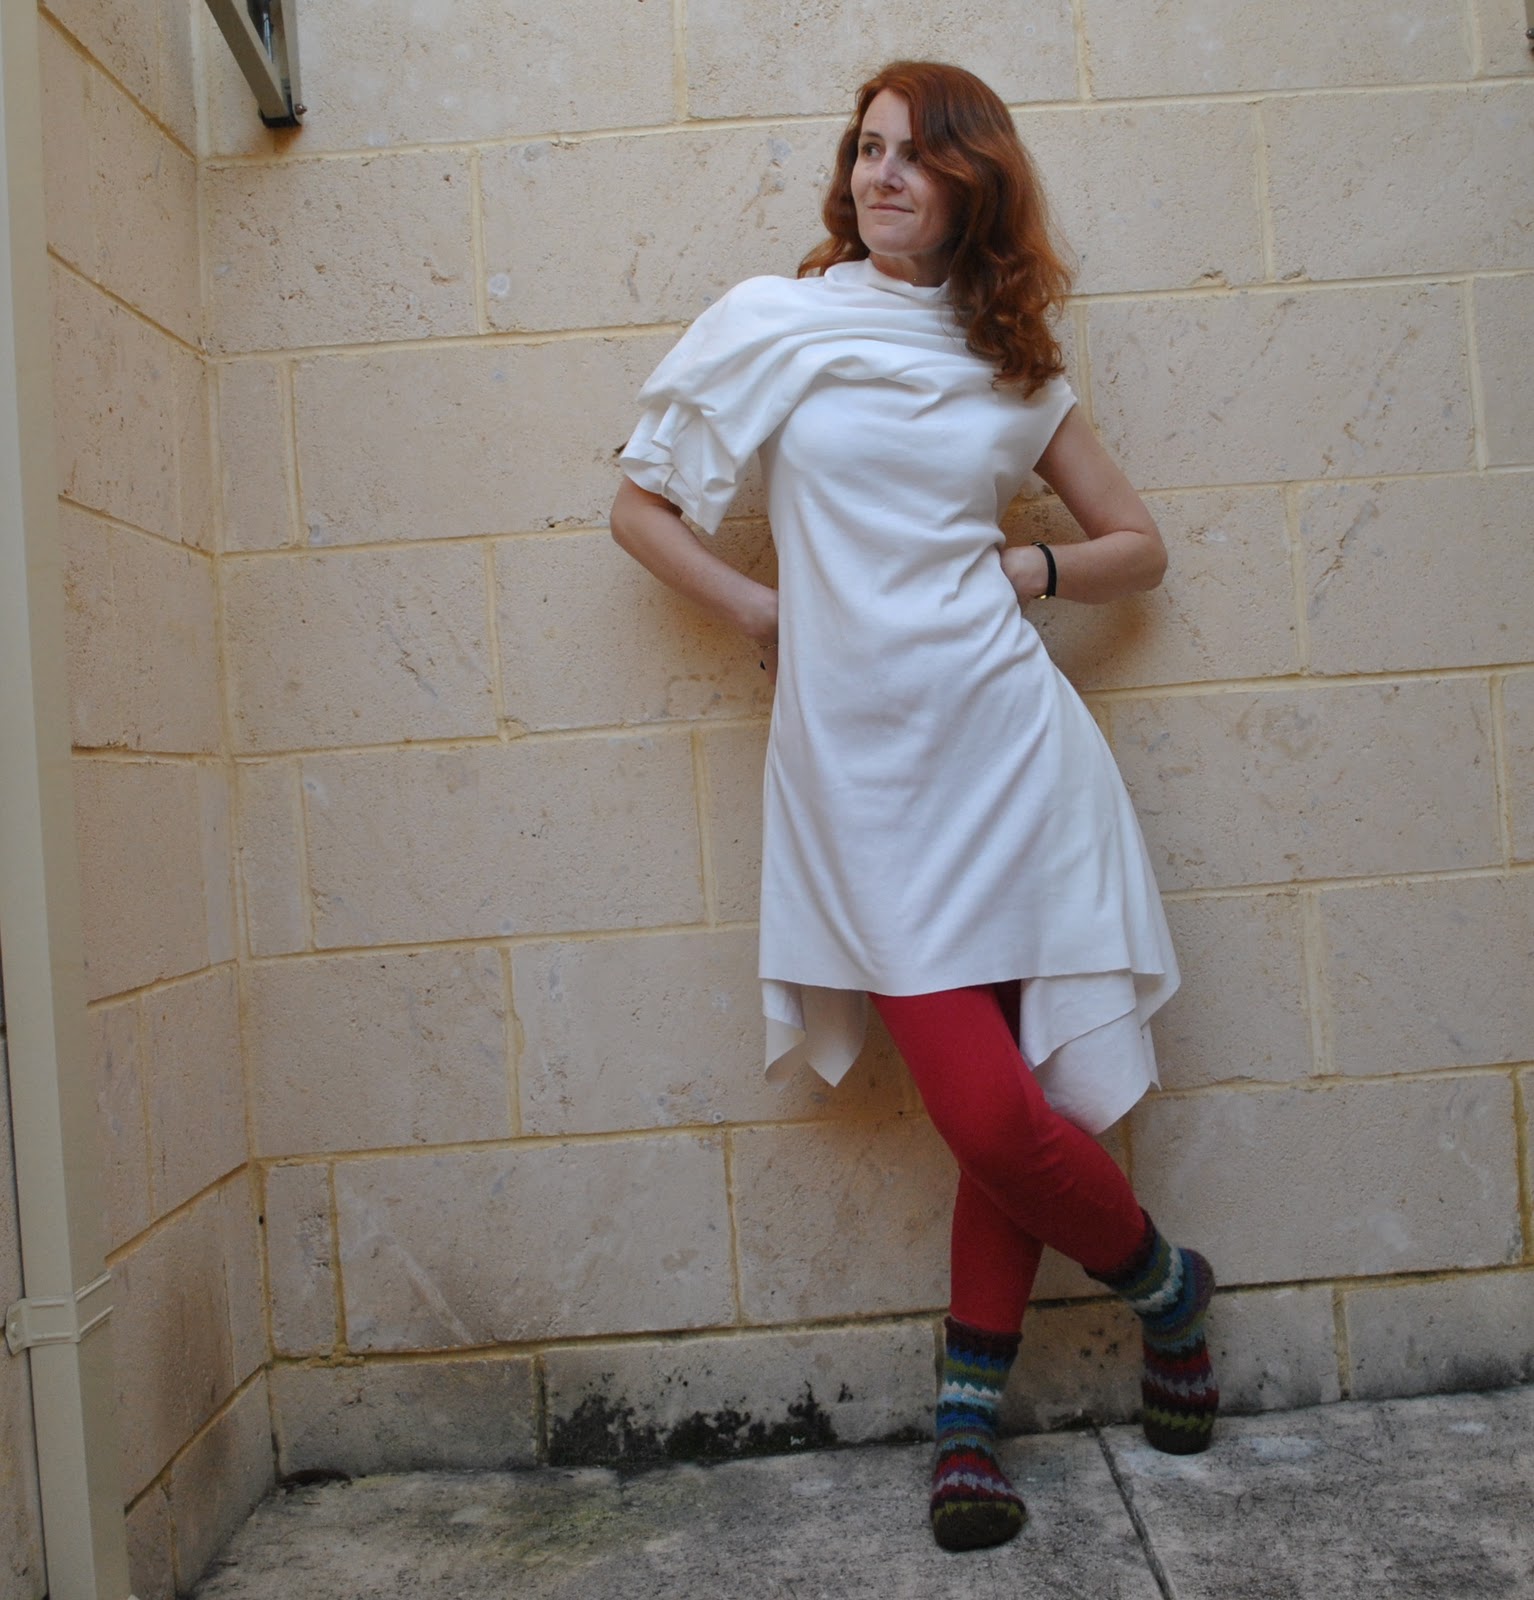
5. Posing
I believe that a natural stance suits my personality.  For me personally, the typical blogger’s stance with one hand on the hip and smiling straight into the lens, is not very natural and sorta too aggressive for my own style.  I did this a few times in my early days of blogging and now those photos make me cringe, because in real life I am quite shy and that sort of stance is not me at all.  Now I just aim to be as relaxed and hopefully the least dorky that I can.  A big cheesy grin is just not very me, although I try to smile at least a little bit in some of my photos since my husband told me I am always looking too serious.  Incidentally, my posture has improved outasight since I started taking photos of myself.  I am not super tall, but I am certainly taller than most of my friends, and I think that was making me slouch.  I could see that in my earlier photos and I’ve stamped that out.  That is one area I can definitely say where blogging has really improved my life!
Take these two photos; below is early blogging days.  A dreadful and cheesy pose, right?  Below that, a similar outfit but I think my posing and my posture has improved enormously and is a lot more natural.
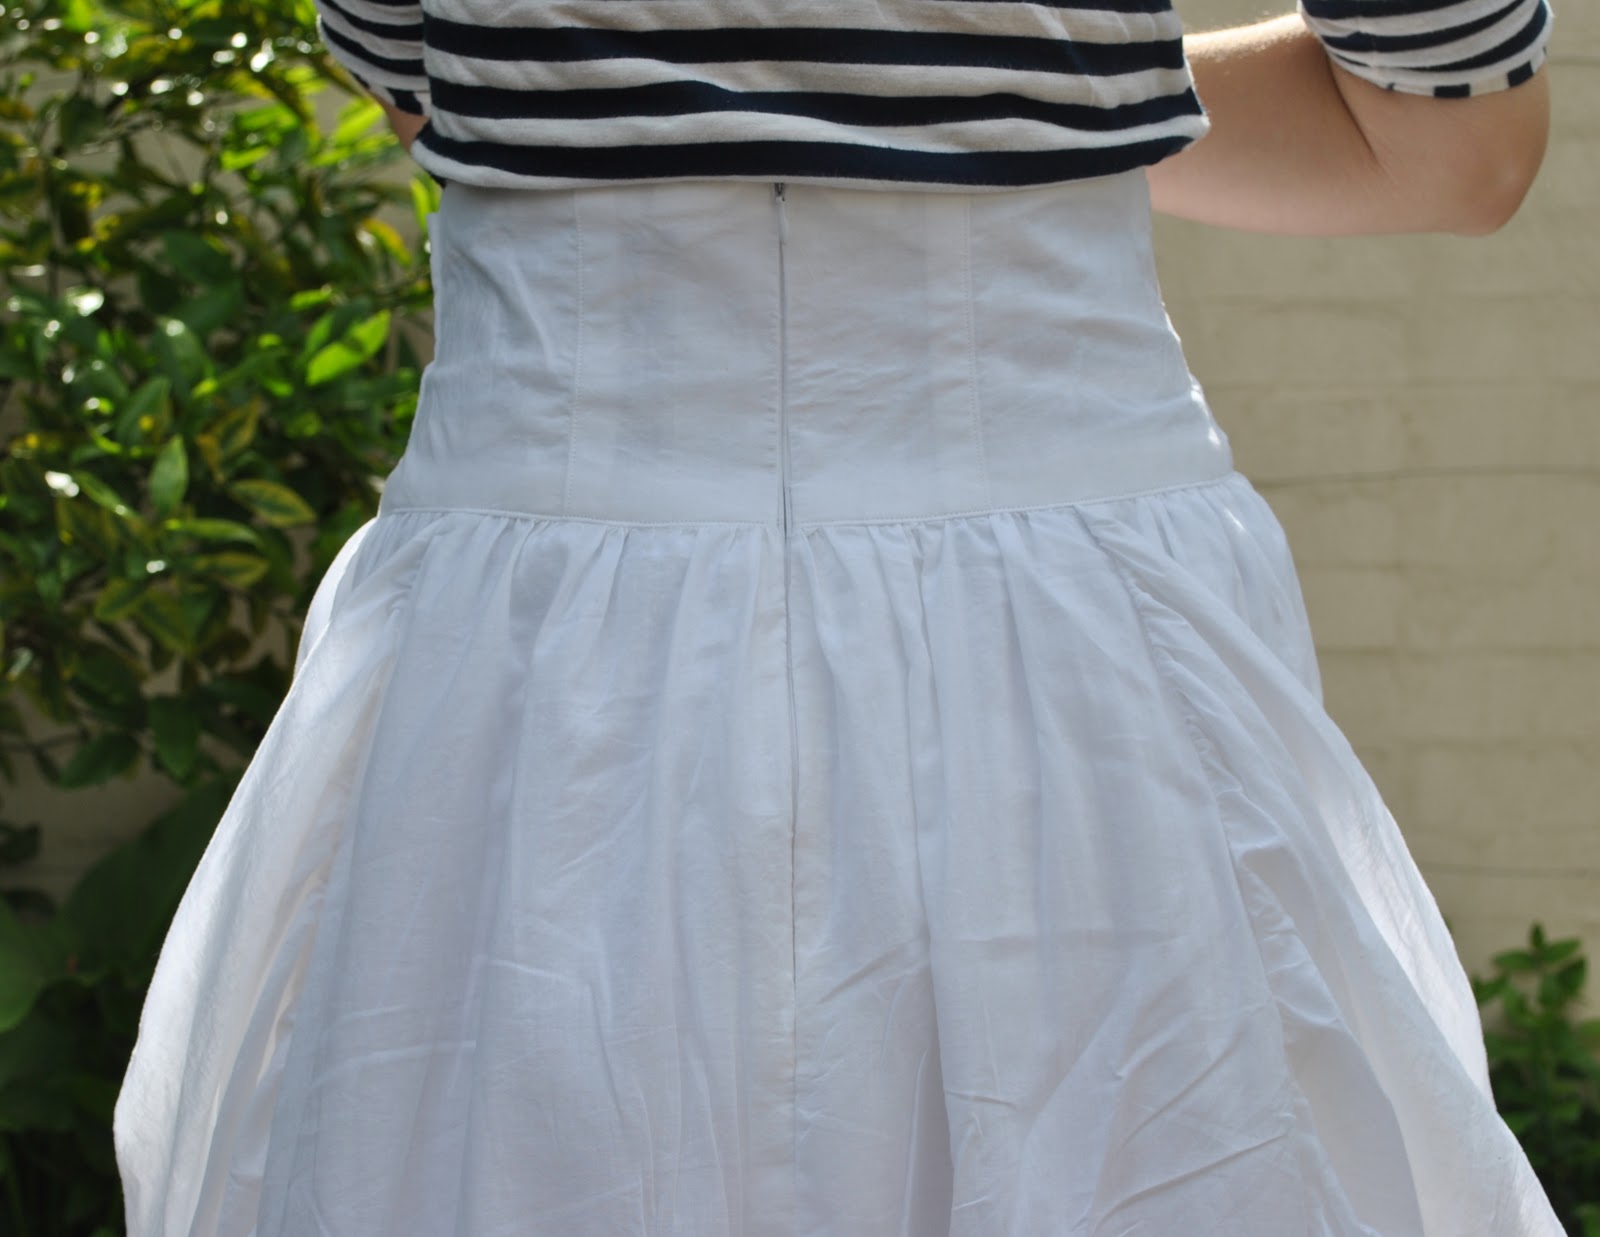
6. Perspective
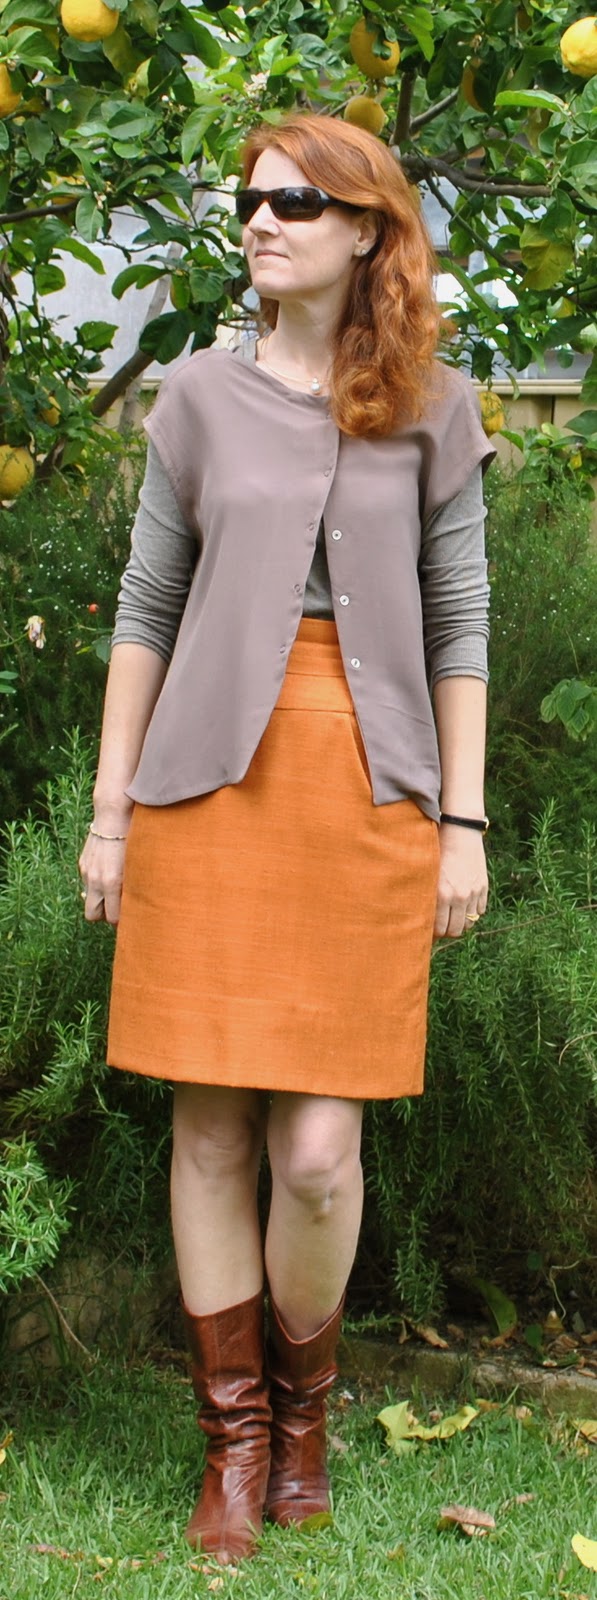
well, again a biggie.  I’ve found that the most flattering angle for a photo is when the camera is situated quite low, say at low hip height, and certainly no higher than waist height.  The worst angle is if somebody taller than you is taking your photo, from their full height, and one ends up looking munchkin-like up into the camera… with a big head and tiny weeny little feet down below.  This isn’t because you actually have a big head and teensie weensy little feet, but is just how it looks from the perspective of the camera.  Do yourself a favour (as Molly would say), and if a tall person is taking your photo get them to crouch down to squatting height.  Or get yourself a tripod and open for yourself a whole new world no longer to subject to the whims of your family’s photo-taking willingness nor availability…
Take these two examples, two pictures of the same dress.  On the left is a picture taken by my son at his full height in the days before I had worked out how to take my own photos, on the right is one I took myself with my camera on a tripod at hip height.  Which has the better perspective? (the two photos of my black dress above have exactly the same issue!)
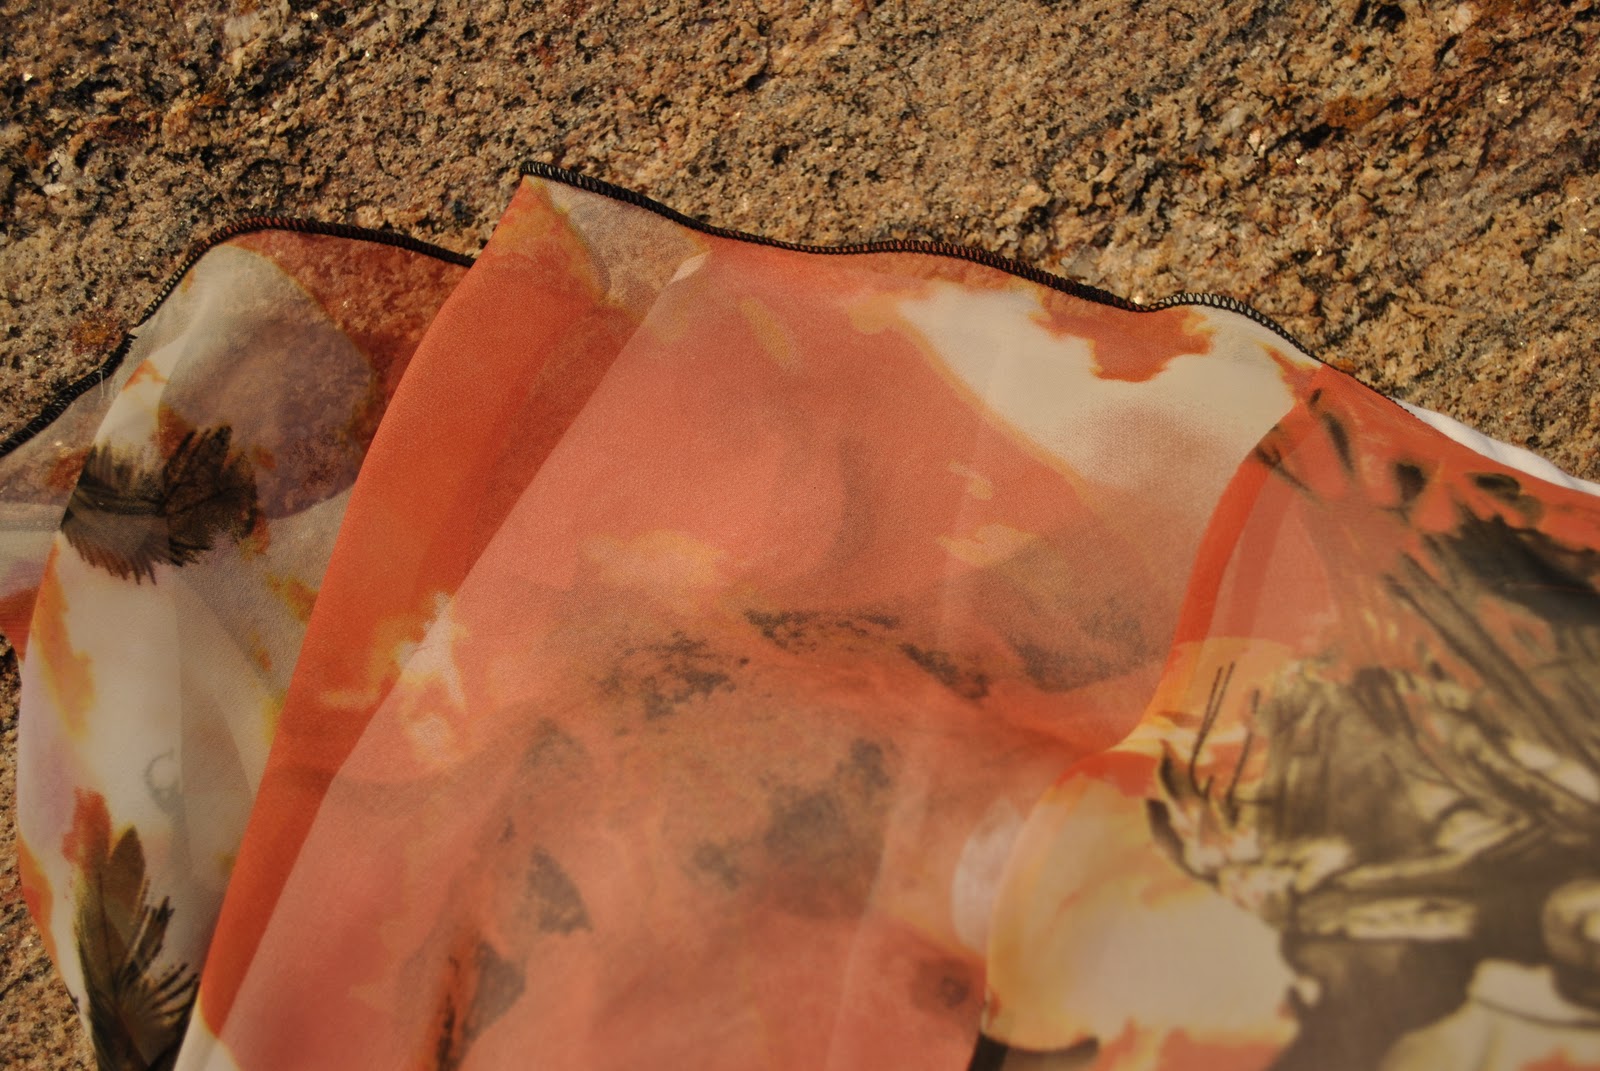
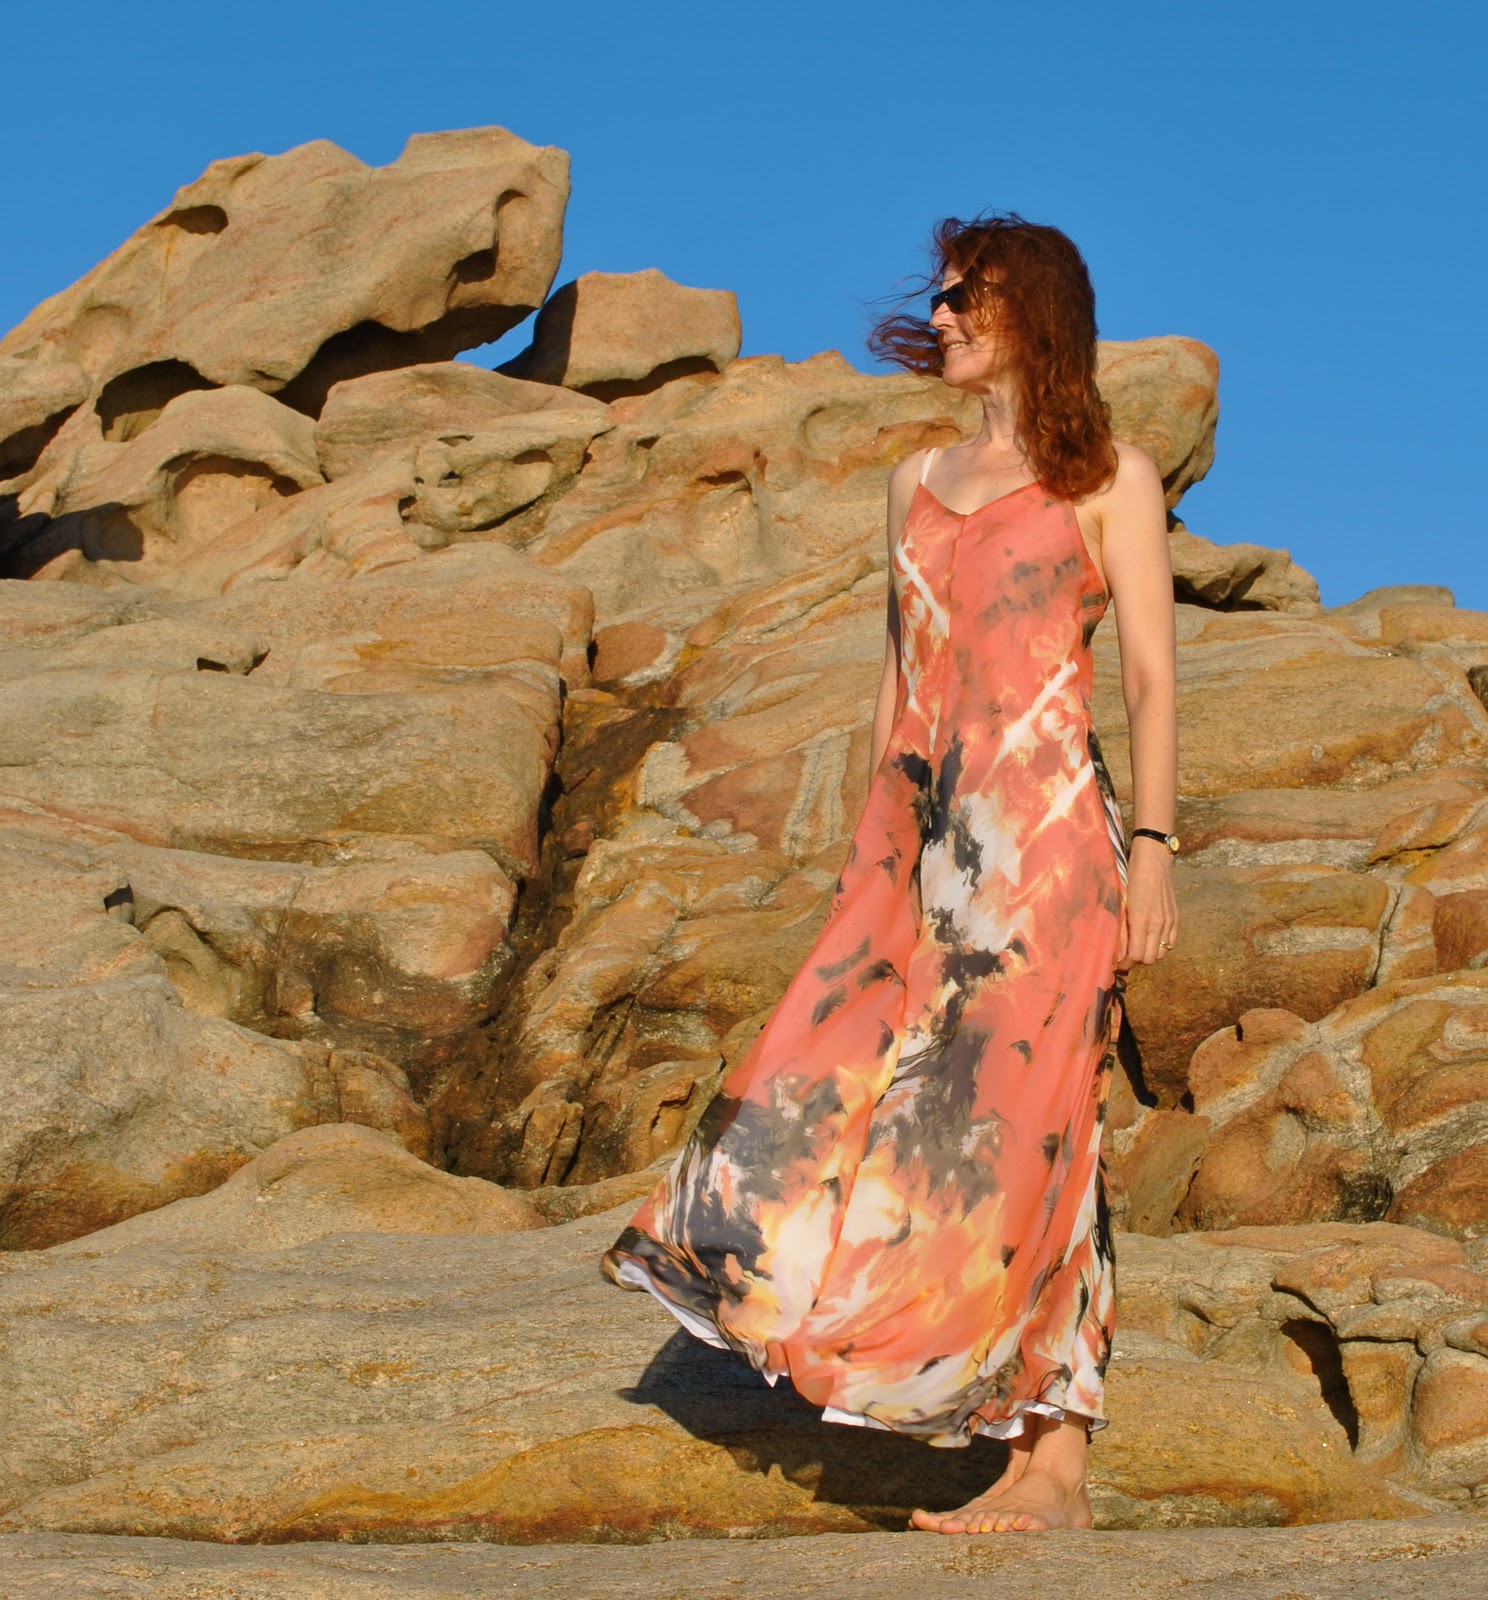
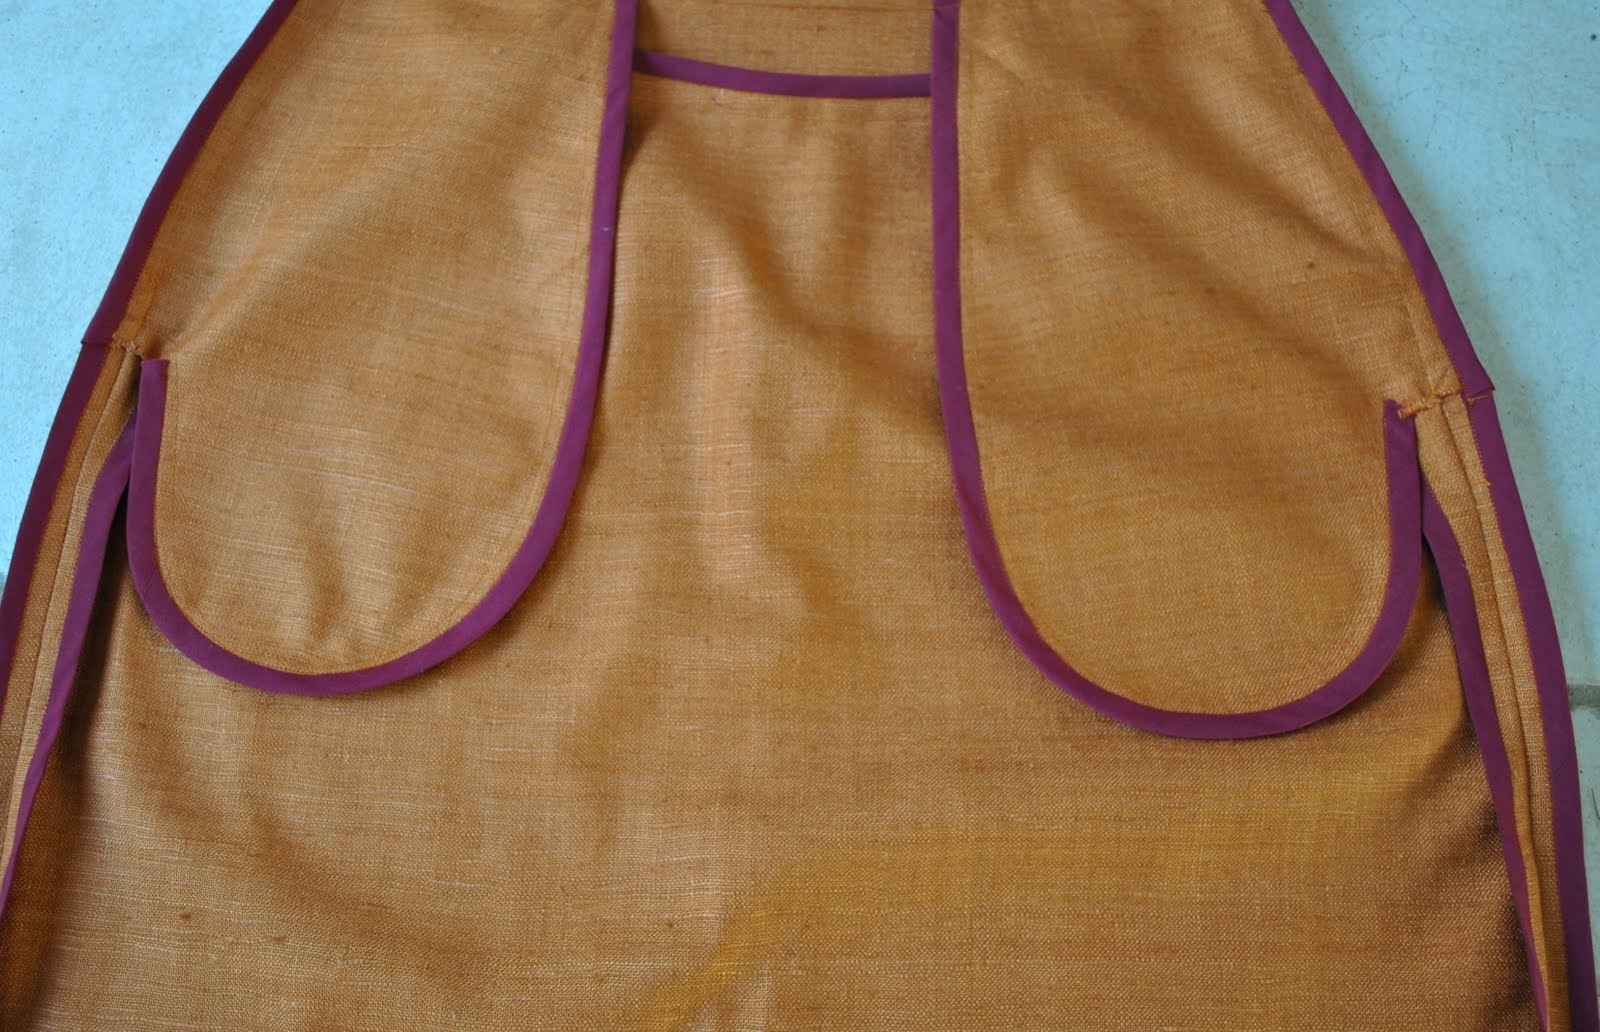
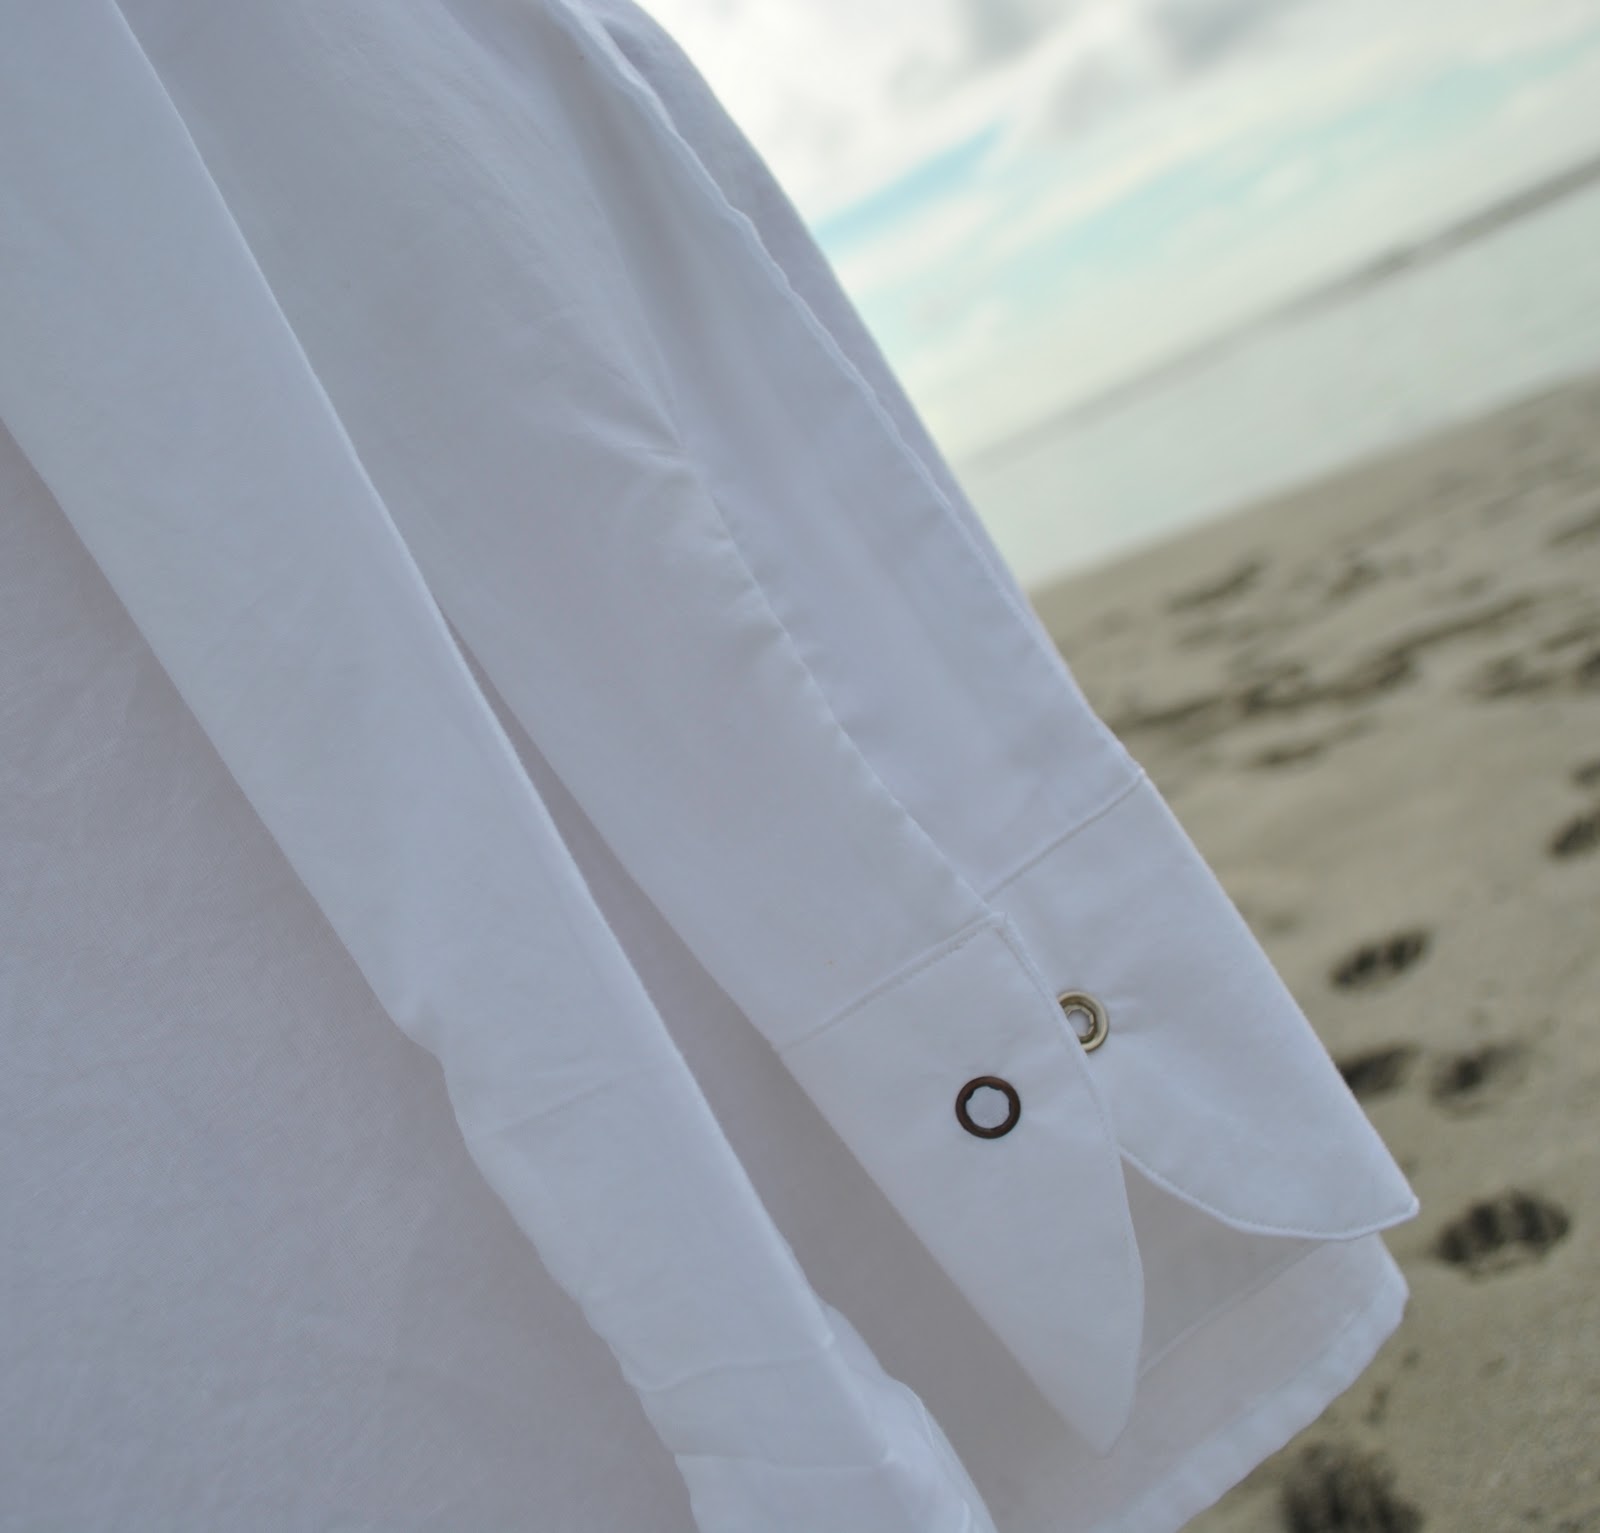
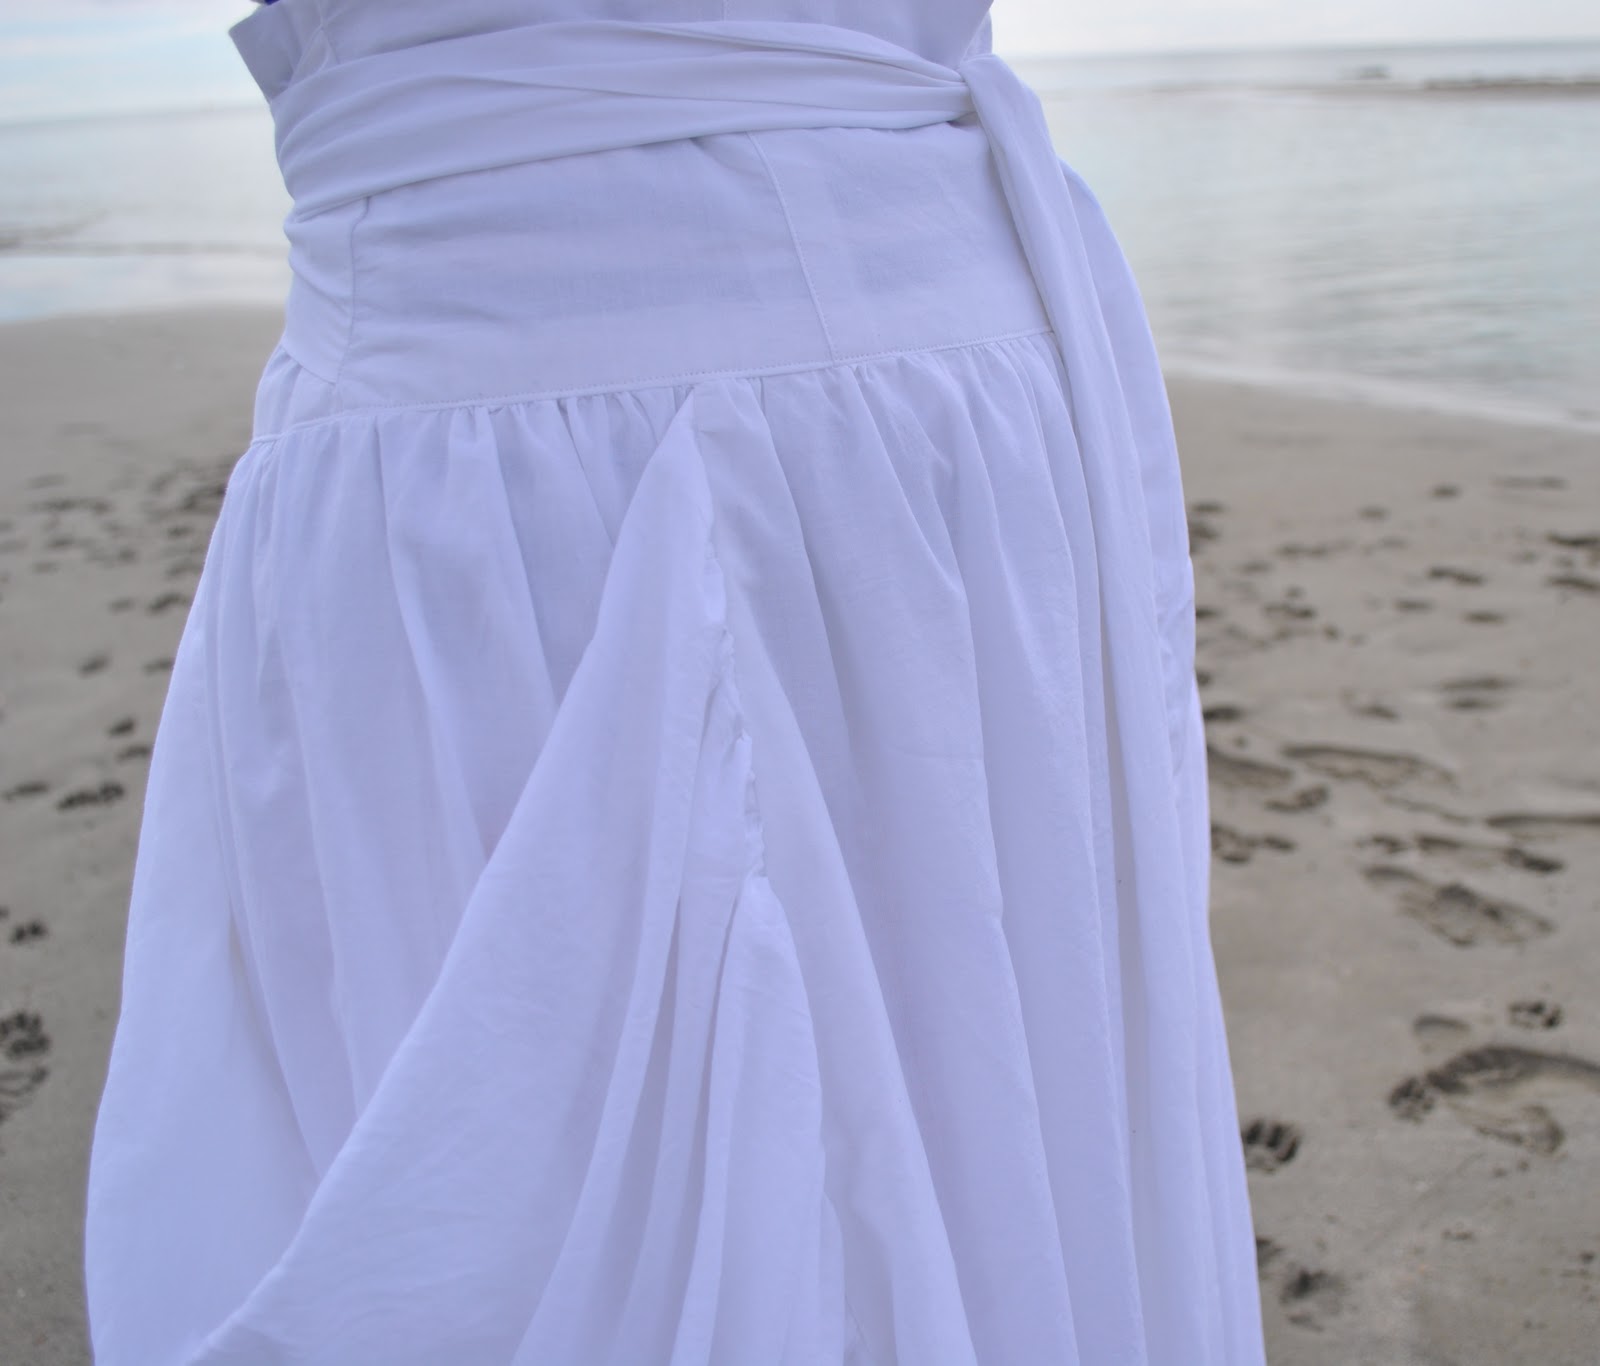
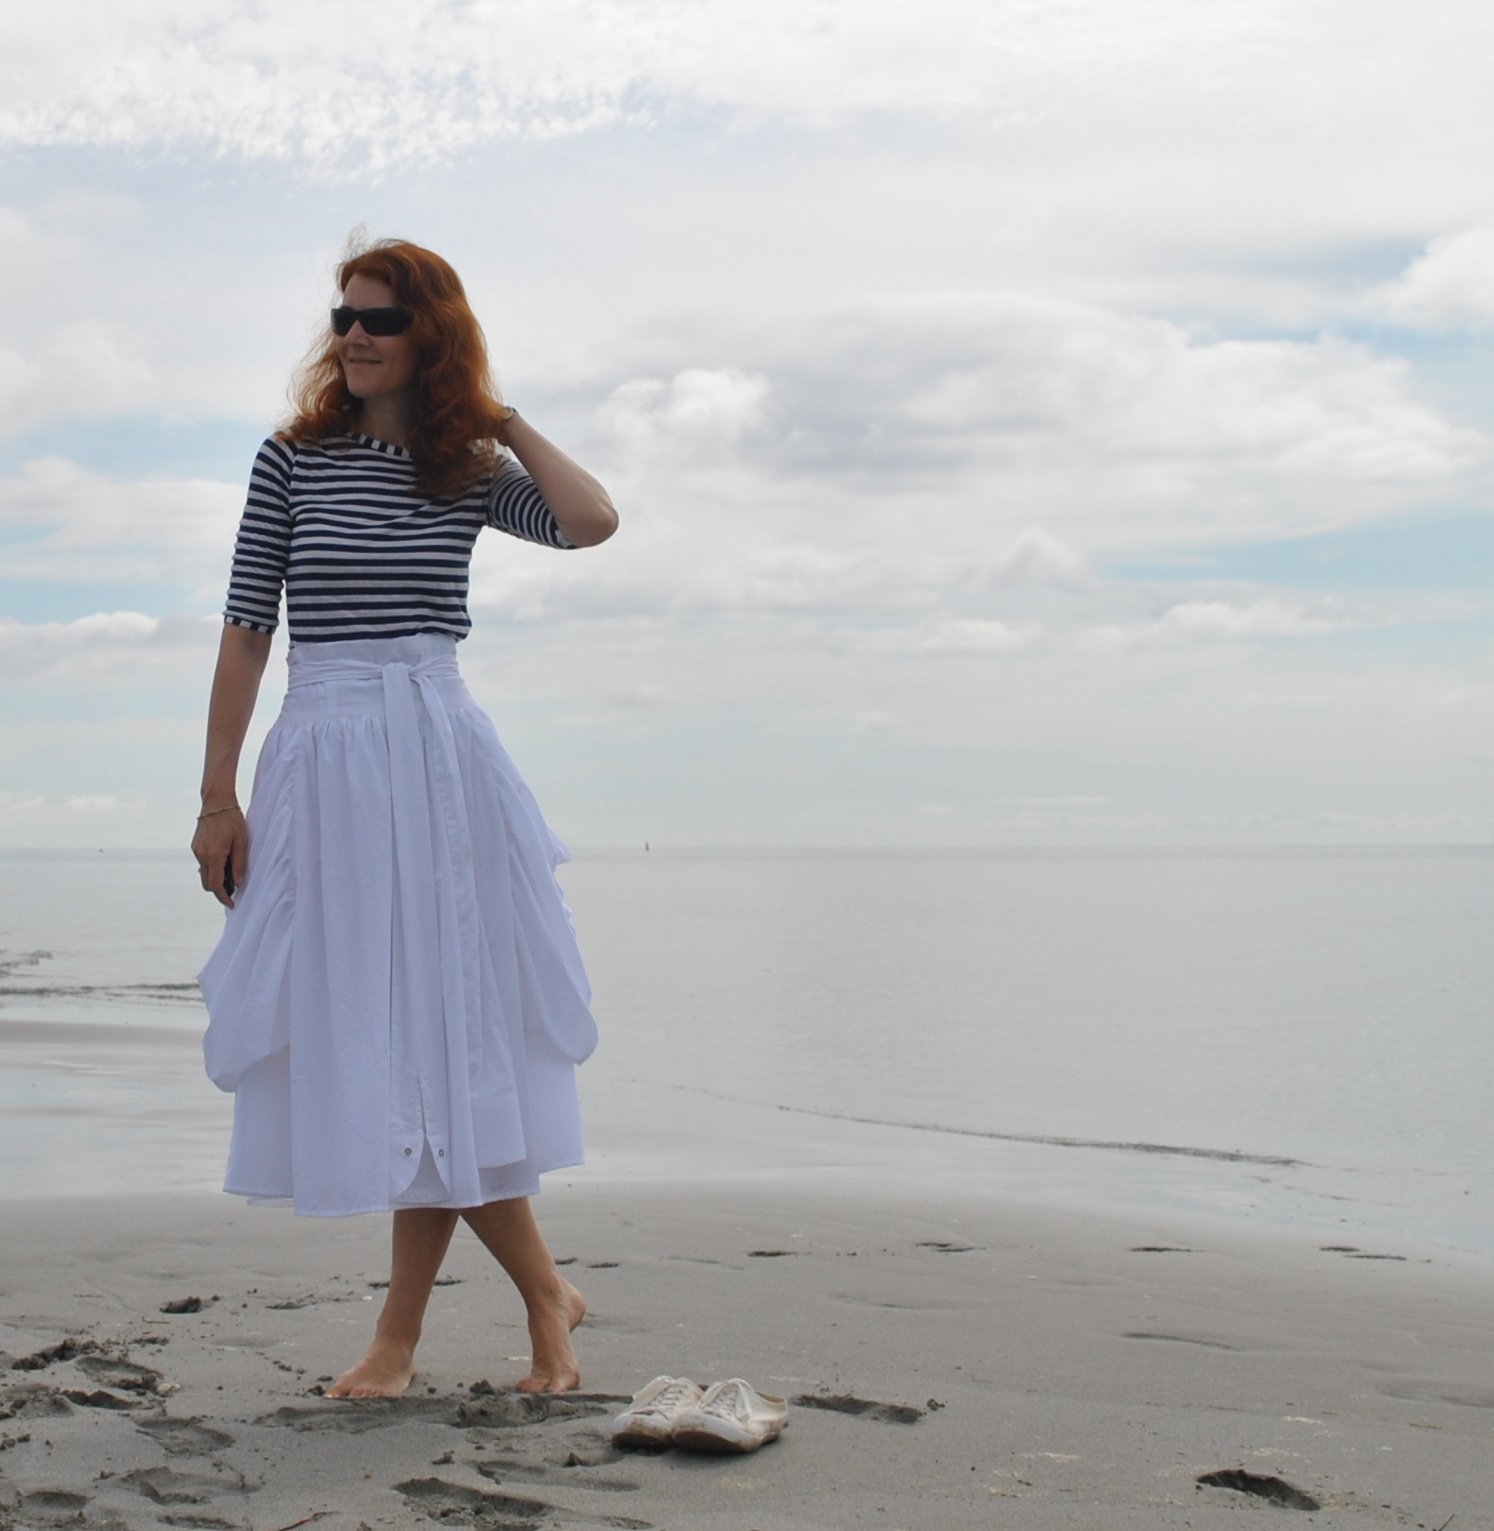
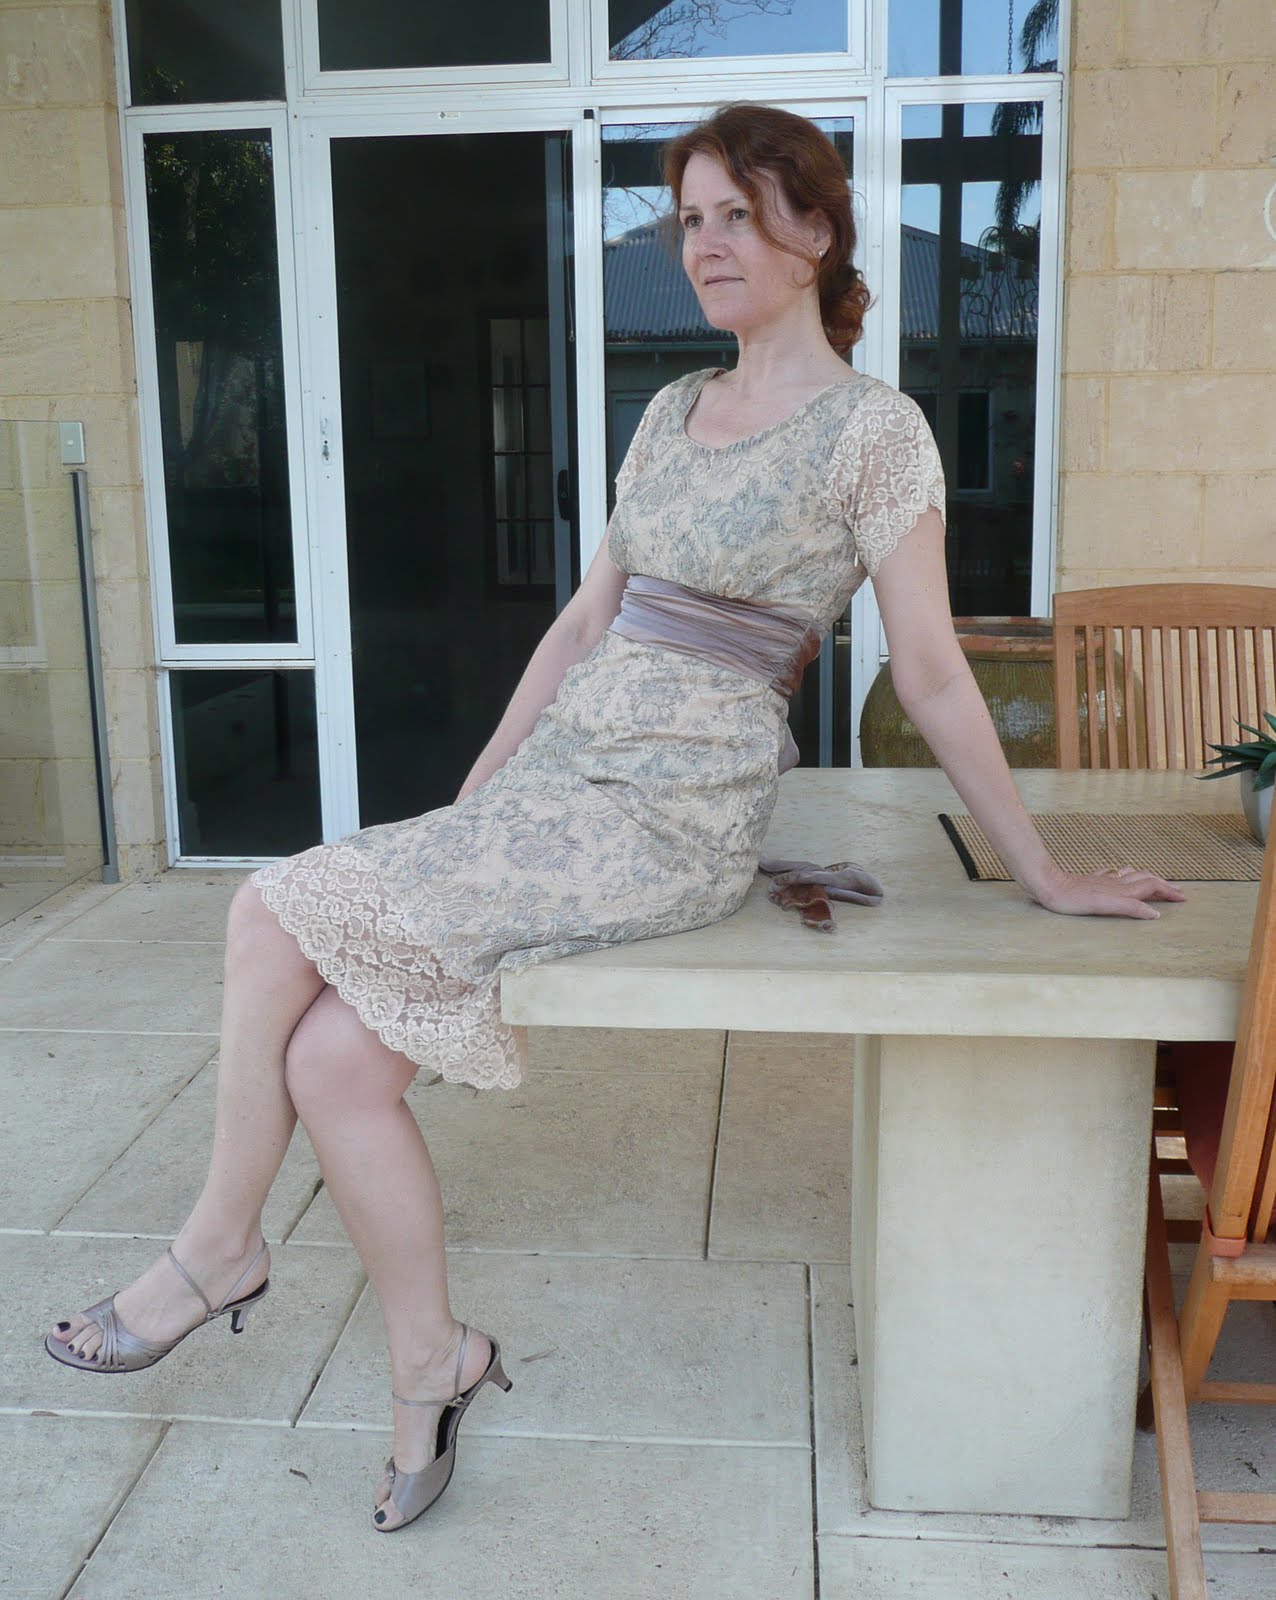
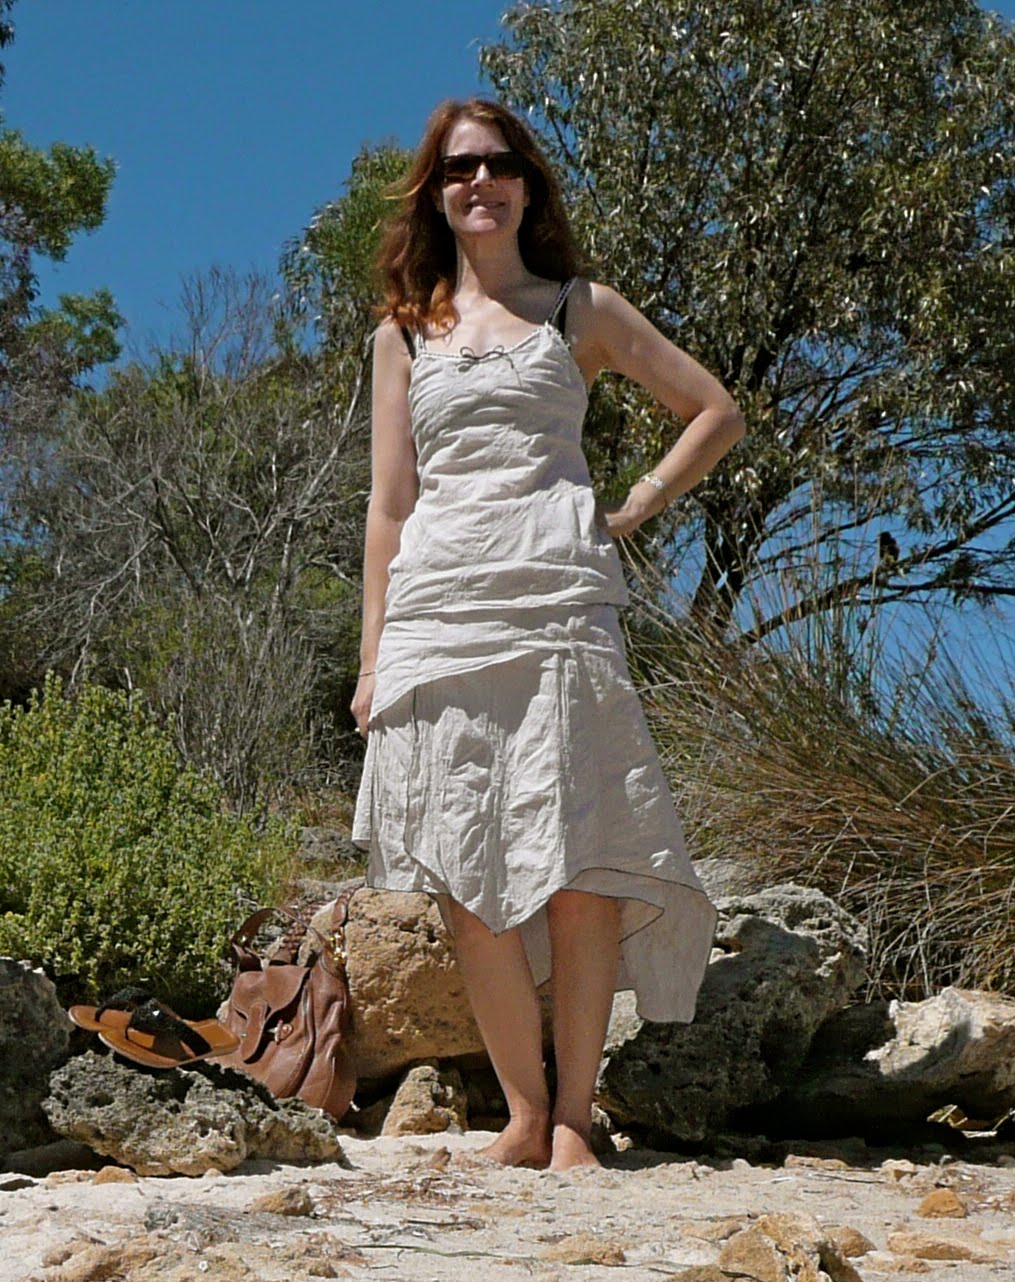
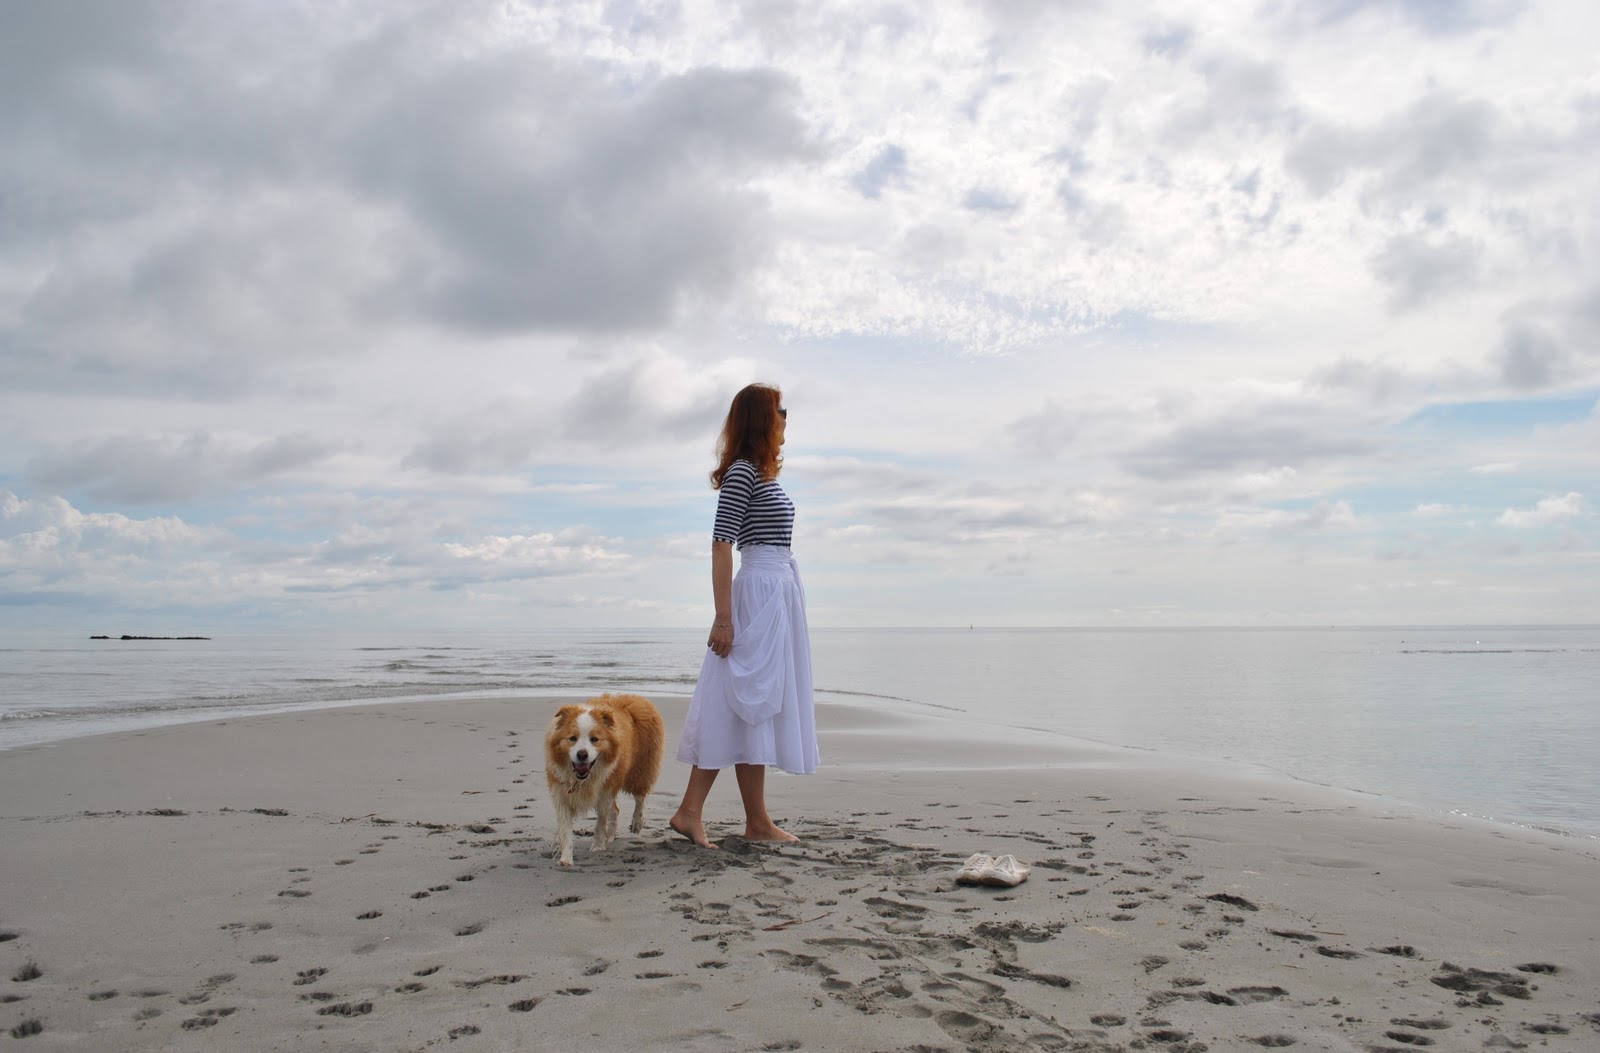
7. Crop
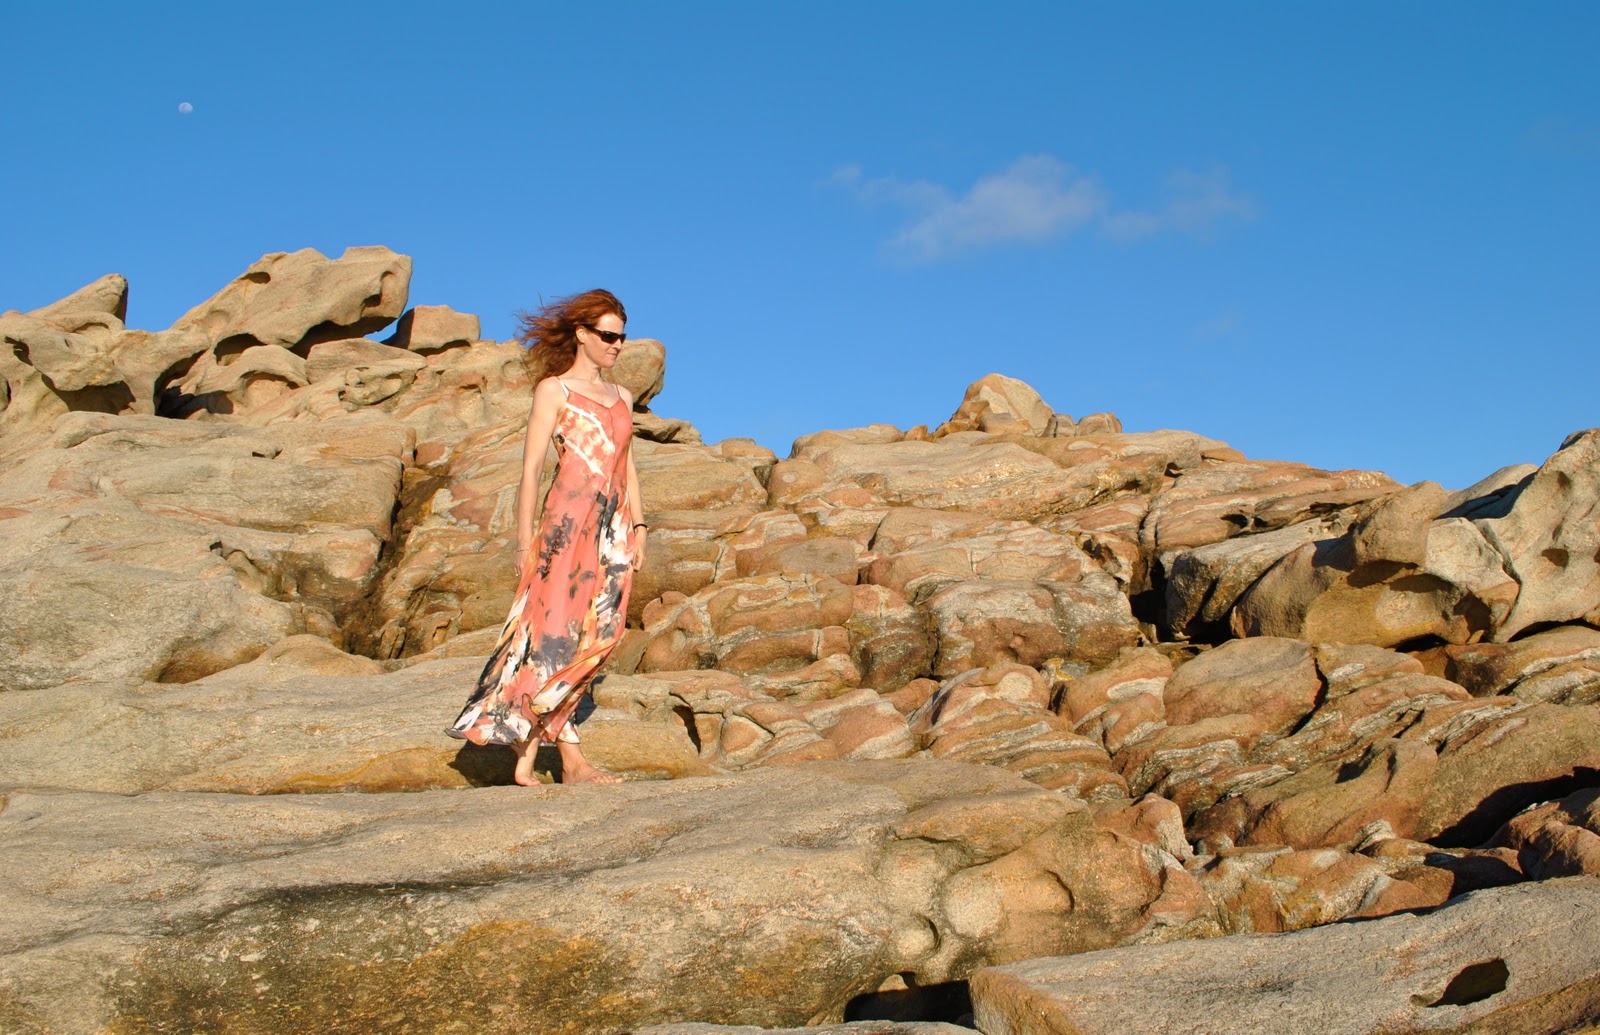
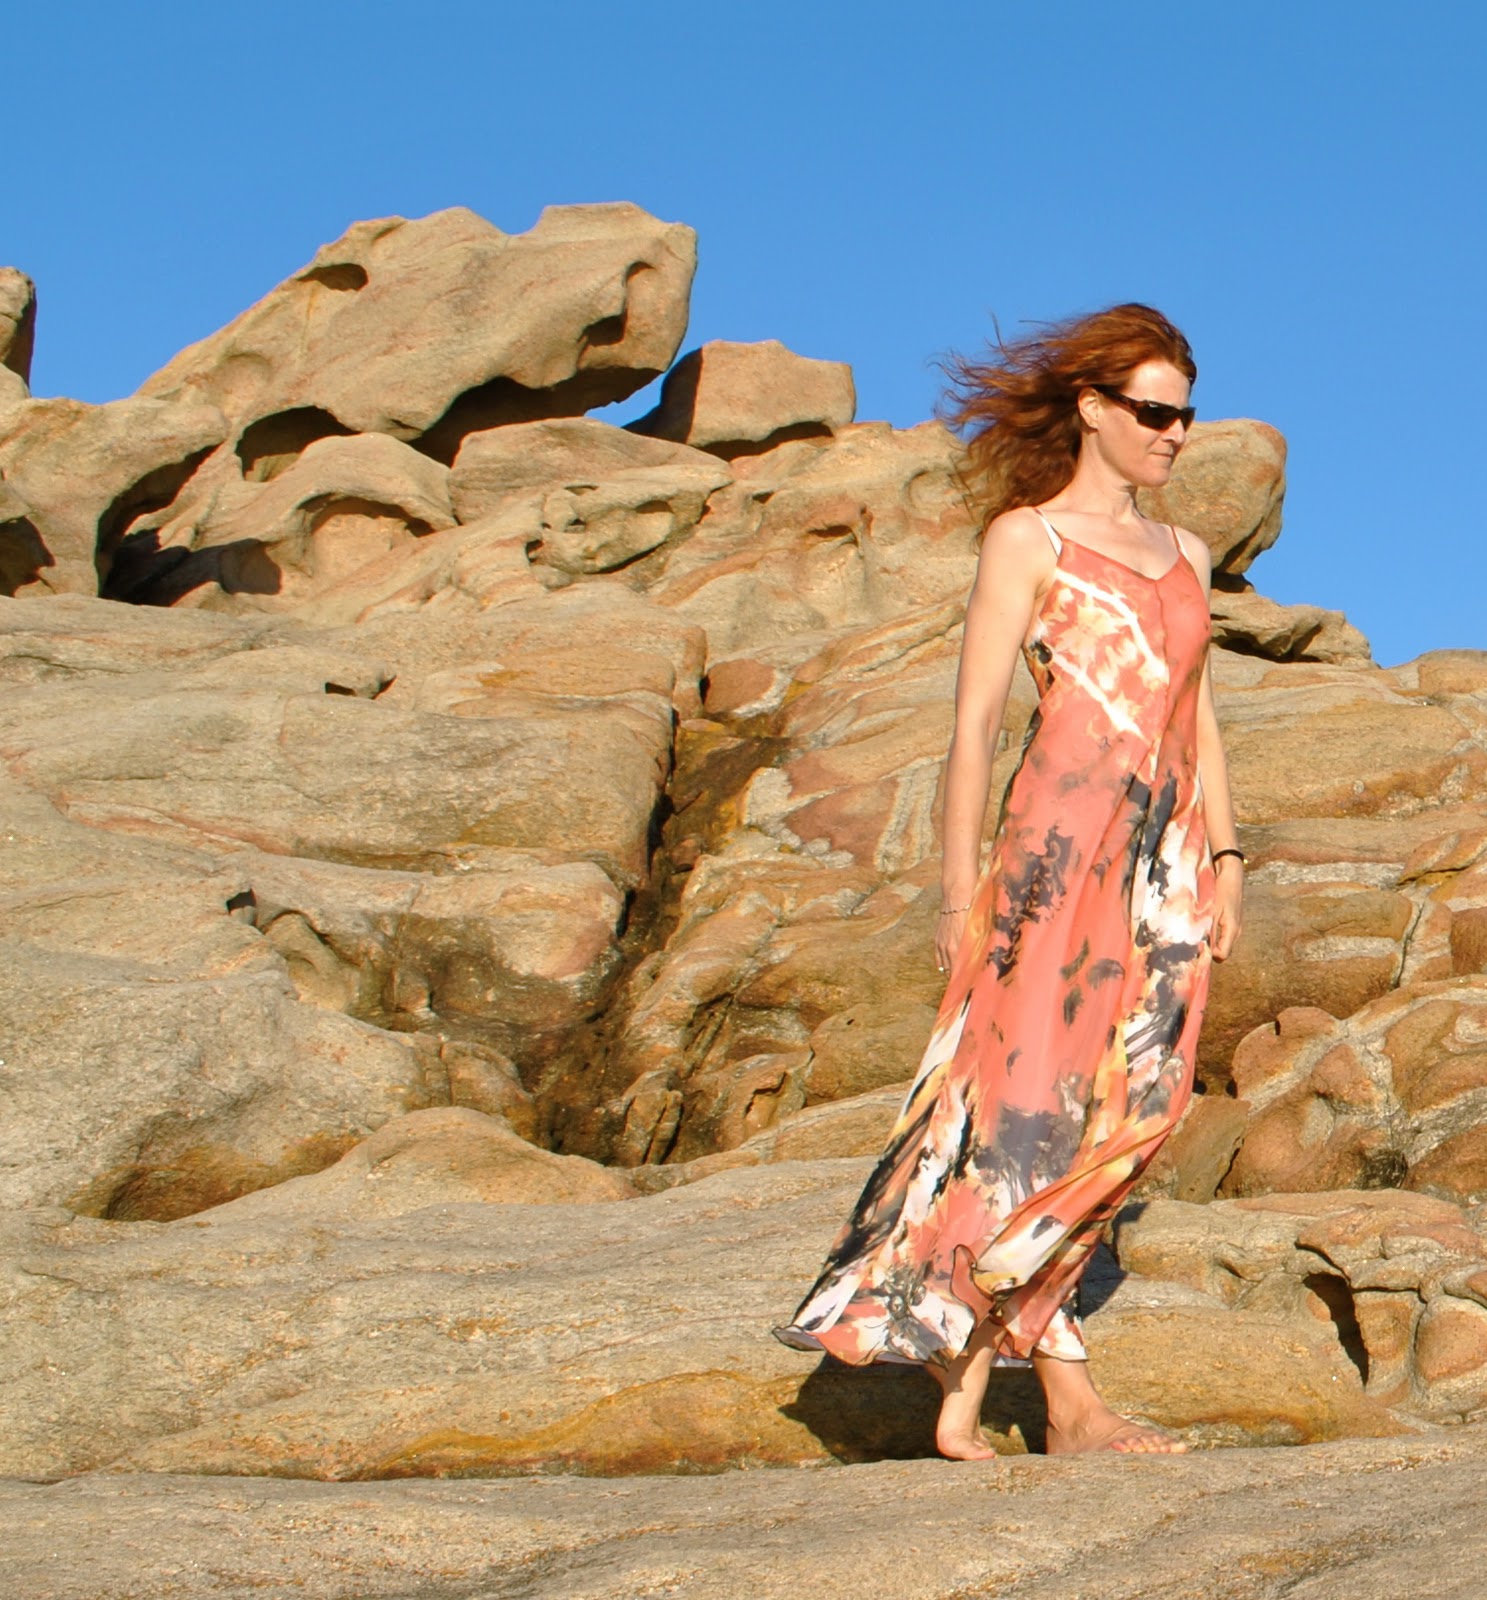
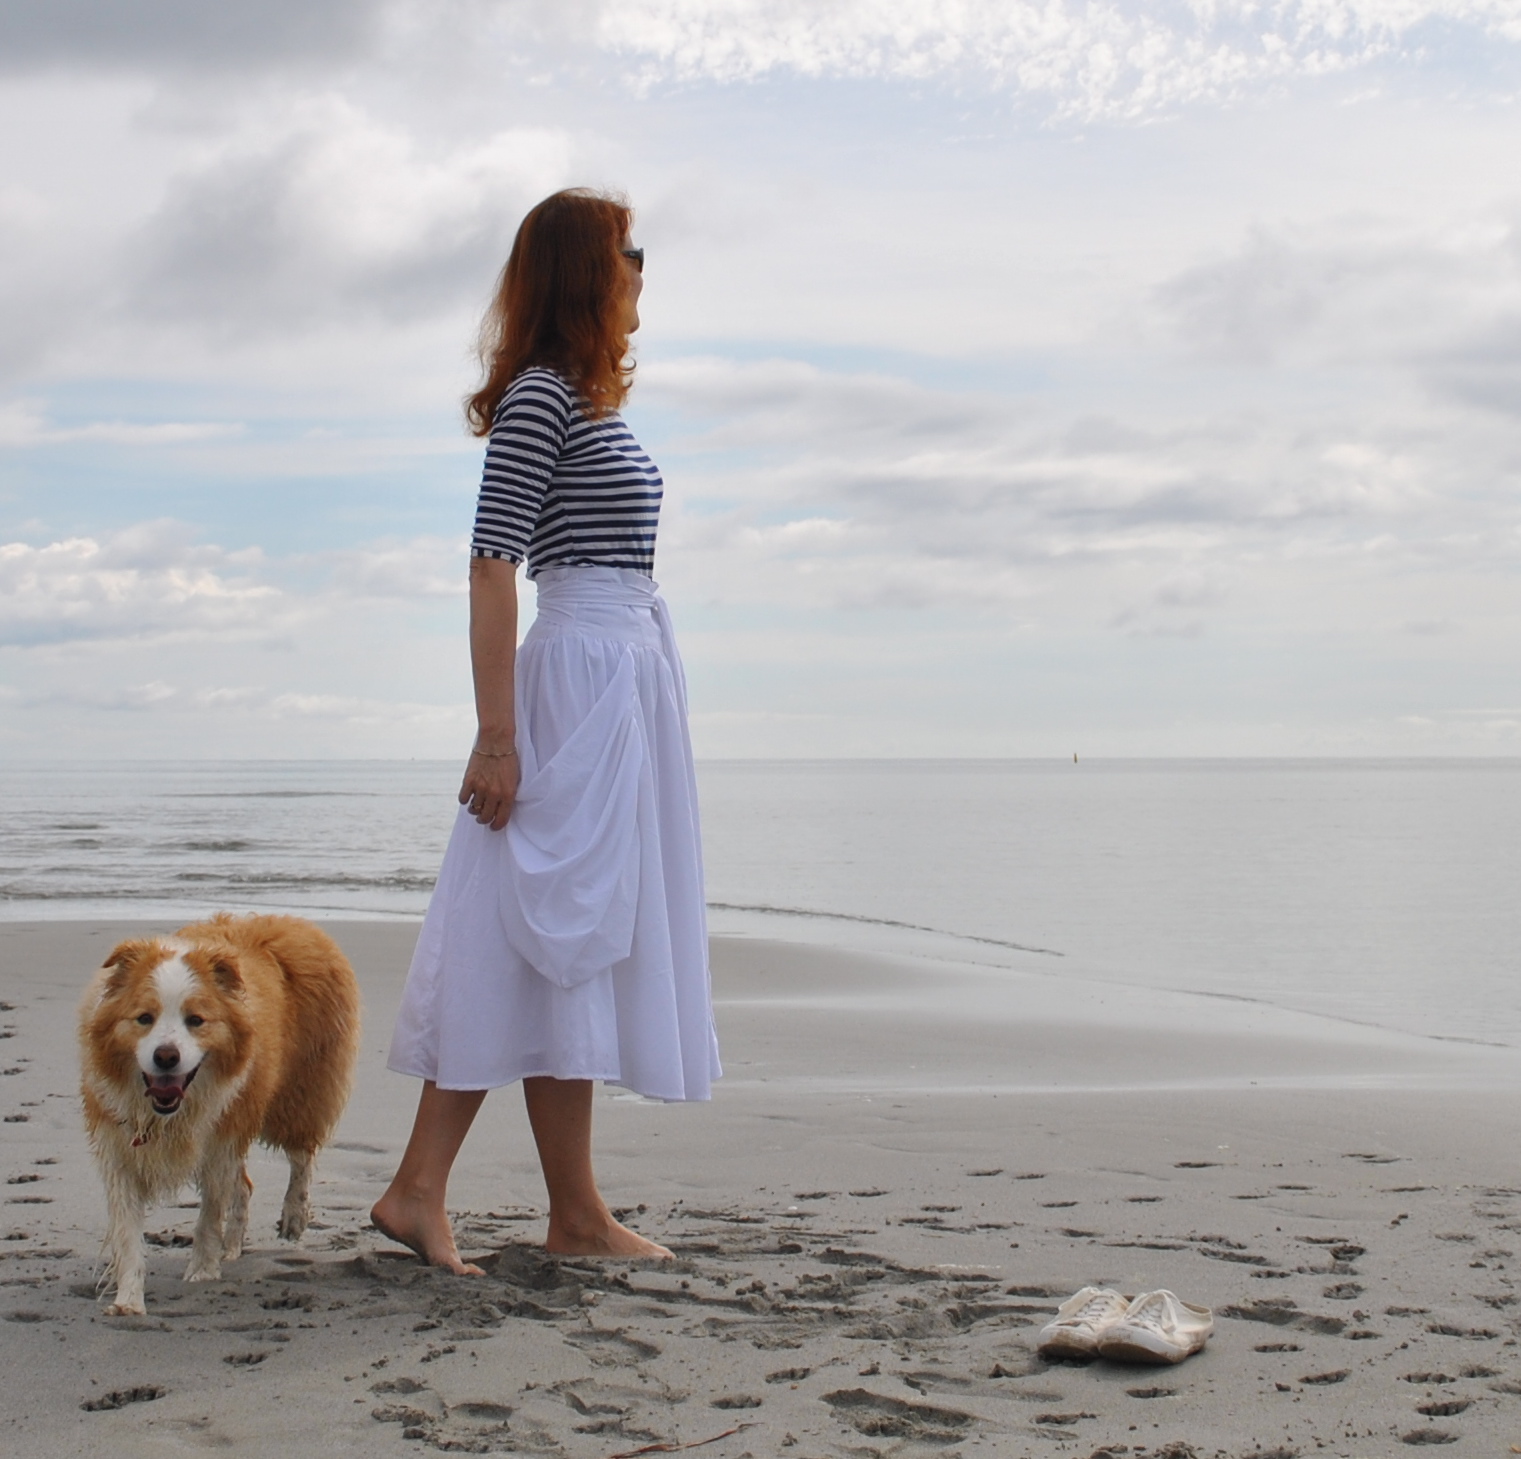
I usually zoom out as far as possible when taking my pictures, reasoning that I can always crop later if necessary.  This is a better option to the alternative, ie taking a few pictures only to later see that your head has been chopped off.  Take these two pictures, below is the unadulterated photo.  Of course you can see only rock and sky (I agree, this might be preferable…), but the dress is a tiny no-detailed speck in the midst of rocks.  Below that is the one I used in this blog.  It is exactly the same photo but cropped to show off the details of the dress.

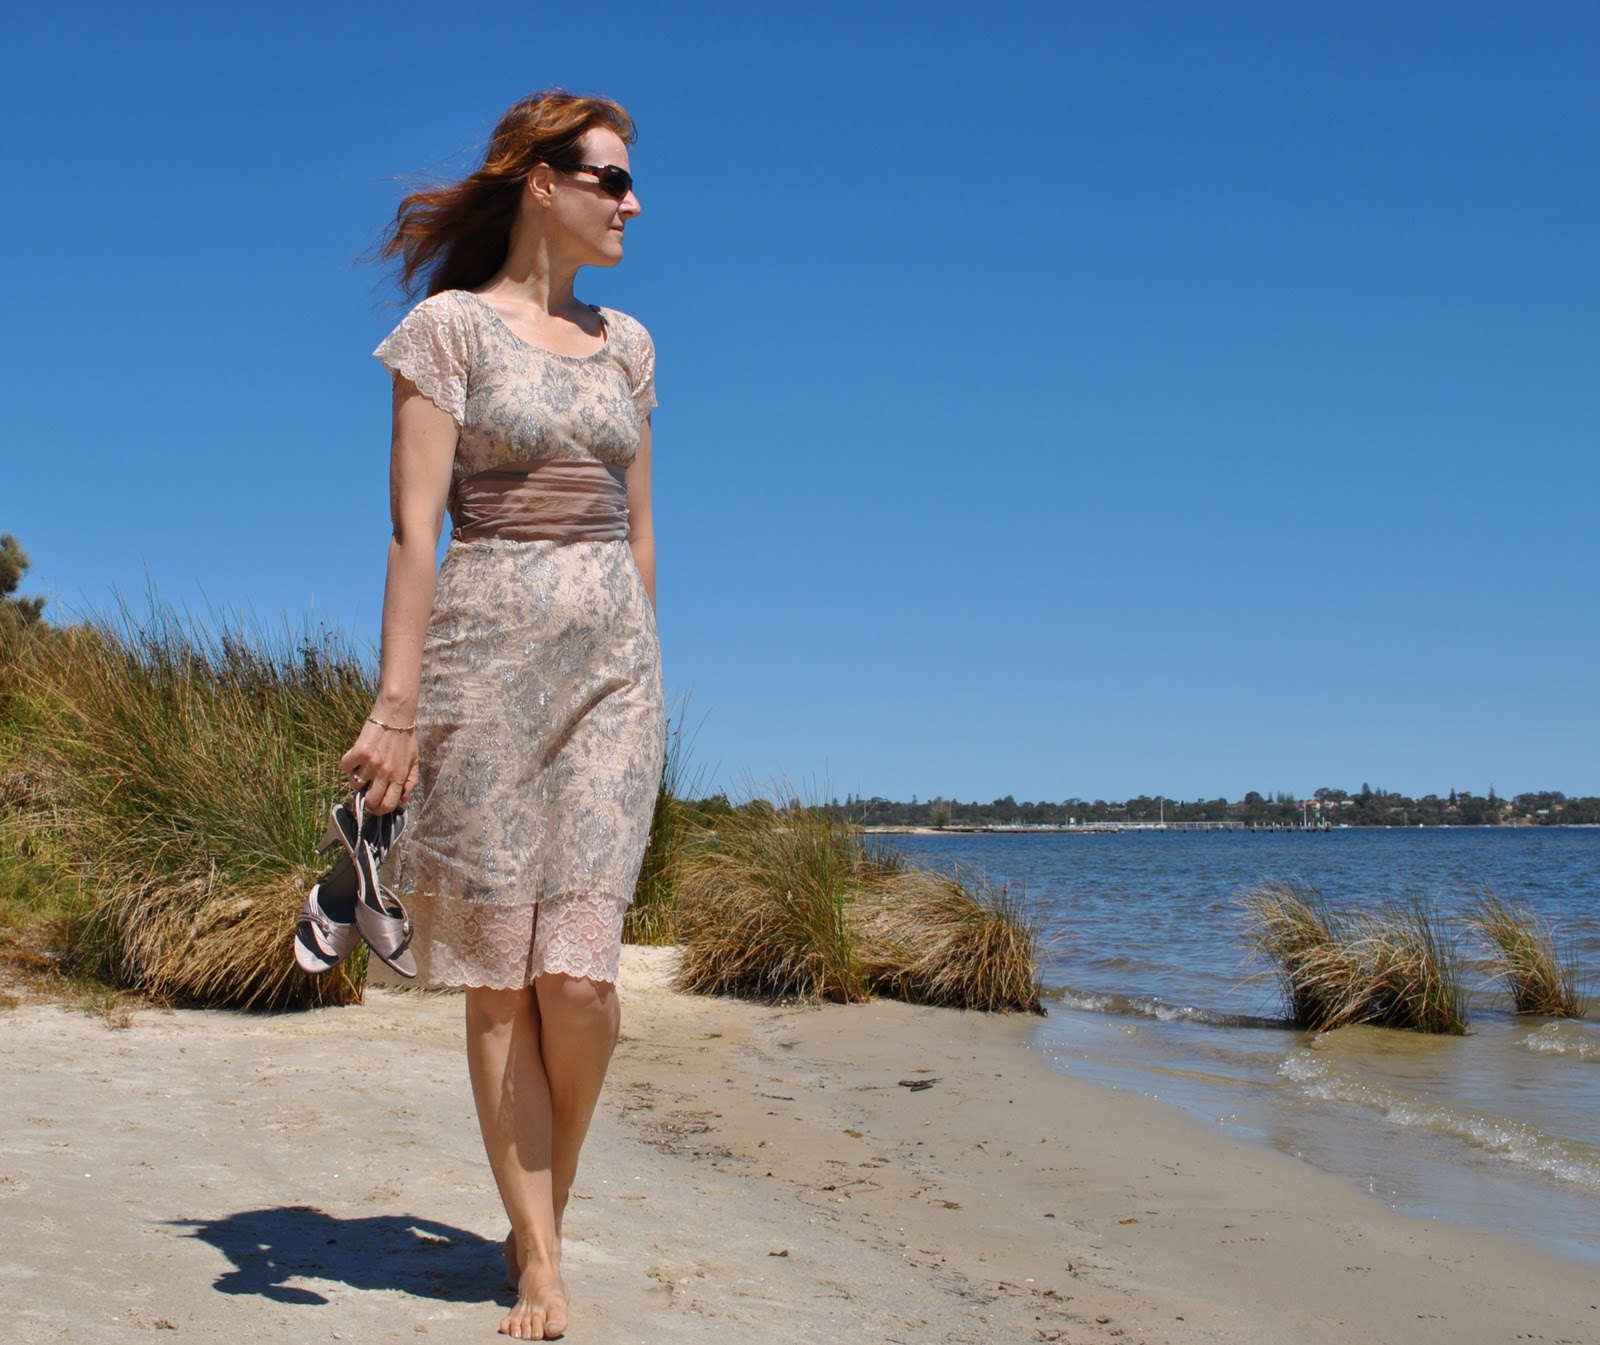
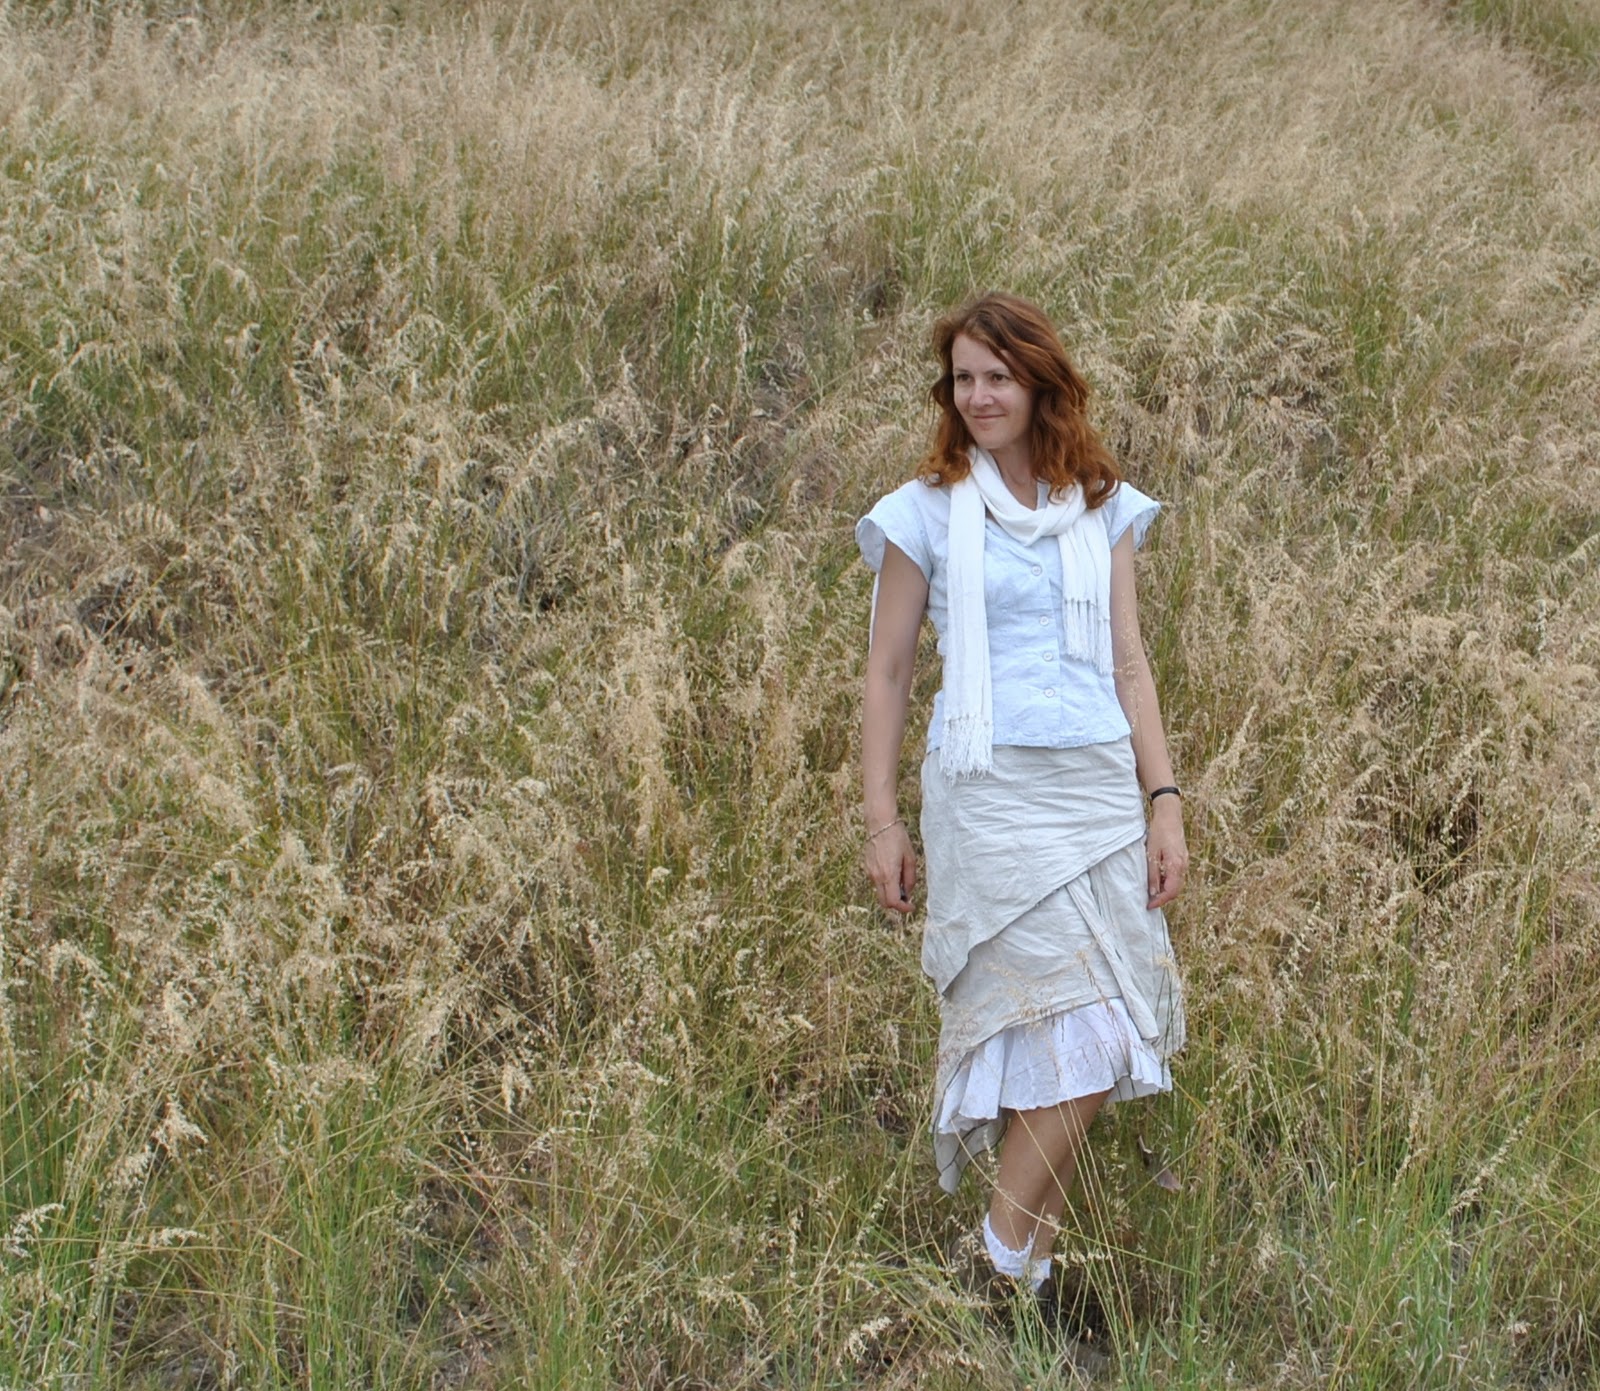
Don’t let the beauty of your background overwhelm you!
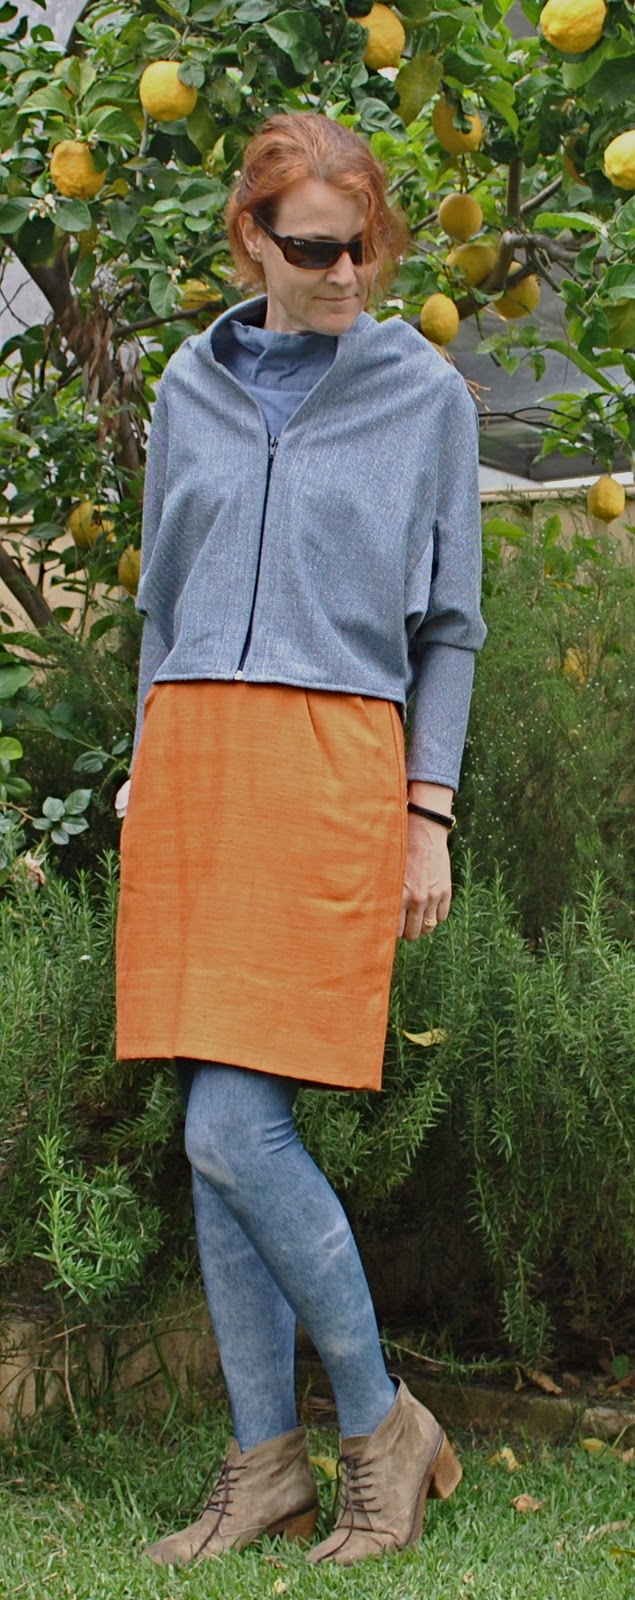
This is the biggest for me.  Often I am so smitten by the beautiful locations I take my photos in I don’t want to crop anything out.  But it is better to be ruthless since I am trying to show off the details of my creations and not just a lovely location… below is the uncropped photo.  Then the cropped version; well, now you can actually see some details of the skirt!

(On a side-note, I’ve noticed lately that I usually crop the picture to place myself off-centre, often in the third portion.  I’m not sure why, except that it seems to be visually more pleasing than if I’m right in the centre… what do you think?)

Now, I am passing this award on to some other blogs that I like reading… your mission should you choose to accept it:
Ana, of Stepalica
Andrea, of Fabric Epiphanies
Caroline, of Church Sexy
Shannon, of Mushywear
Tanit-Isis, of Tanit-Isis Sews

pinterestmail

Sunset maxi-dress

I have been seeing stacks of floaty-to-the-max, hippy-dippy maxi-dresses in totally gloriously over-the-top colours and patterns in catalogues and magazines as a staple for yet another summer.  So decided I just had to make myself one.   It was a bit of a business, but I am super happy with how it turned out!  It flows and ripples beautifully around my ankles, and I feel delightfully bohemian in it.  Just hand me my poolside cocktail, will you?  I’m so ready for summer now!
I have to say in the end this is inspired by or based upon, but certainly not true to Vogue 1355, an old, possibly 90’s??  pattern that I bought on ebay… a pattern with a midi dress of lovely simplicity pictured on the cover.  My dress turned out kinda like how I thought that one looked but not really how it is
I chose a beautifully coloured and patterned polyester chiffon with a lovely design that is almost post-apocalyptic in its colours and images; fiery swirls of ivory, gold and orange, and with wispy furls of black smoke and black downy feathers floating randomly across.  Surprisingly a cheapie from Spotlight. 
This is a delightfully simple pattern, on first glance.  Nothing to it.  Just three pattern pieces, a front, a back and a shoulder strap piece.  No closure; the pieces are to be cut on the bias so the dress simply slips over your head.  Couldn’t be simpler, hmm?  Well, the truth is; this dress is that deceptive brand of simplicity.  But maybe that was mostly due to the difficulty factor inherent in working with chiffon.  The instructions with this pattern are fabulous, like gold, for working with bias cut delicates.
Hilarious random fact for the day; did you know the word “chiffon” comes from an old French word for “rag”?  Lol!

Dress; based on Vogue 1355, printed polyester chiffon, with a lining of white cotton voile

Making the dress; skip this saga if you want.
For a start, the pattern pieces come with a 3.8cm seam allowance, to allow for bias “drops” after hanging… I hadn’t seen this before but I shrugged and went with it.  Later on this turned out to be a wonderful thing…  More on this later… but first things first.
 Have you ever cut out polyester chiffon on the bias?  Yah, it’s a %$^#, right?  Moves and slides about with but the slightest breath of wind… truthfully even breathing on the fabric as you are cutting out and it will ripple slightly off the true bias so so so easily.  I’m a bit of a perfectionist when it comes to cutting out so this stage was leeeengthy.  And in hindsight I probably spent way too much unnecessary time getting this bit perfect since my final dress is unrelated to those seamlines anyway.  But I eventually got it cut out… now on to those seams.  Firstly, one has to pin it along the seam lines and hang it up for a while to allow the fabric to drop through the bias.  To be absolutely sure I left mine hanging for a week.  Then basted and tried it on.  Wait wait, I’m getting ahead of myself!  First I cut miles and miles of tissue paper strips and basted over these, then to rip the paper strips away; the ideal method for sewing delicates on the bias… then tried it on.  Straight away saw that the shape of the dress wasn’t particularly flattering.  The pattern as it is has the skirt very slightly tulip-shaped, which just serves to emphasise the figure flaws of a narrow torso-ed but slightly hippy person such as myself imo…. So, no.  Thanked the heavens for that 3.8cm seam allowance, which allowed me to alter the bodice to be smaller, and to taper the skirt out lots lots more, from a narrower waist in a straight line to the ankles, ending in the teensy weensiest seam allowance at the ankles… a far more flattering silhouette.  Re-did the seams; hung for a few more days.  Ditto for the lining.  Oh, yeah, I made a bias-cut lining dress too, identical to the dress in every way except of white cotton voile.  There is no lining stipulated in the pattern but I deemed it necessary.  Hey, that polyester chiffon is completely see-through, people!!  This was also pinned, hung, basted, tried on, re-sewn, hung for a second time; also.  Finally, when I decided all was perfect, I sewed the seams in French seams (again, with the strips of tissue paper twice, for the double lot of sewing that is the French seam), attached the shoulder straps, and joined the dress and lining dress together at the top.  Hung up for just a bit longer, just to gather mental strength for the next scary bit… the hem.  By this time, the dress just had to work out perfect or I would have been inconsolable… my overlocker is temperamental and sometimes spiteful when it comes to rolled hemming.  On this occasion I was grateful that it behaved itself.  Hemmed with a rolled hem in black on my overlocker, and a narrow double folded hem on my sewing machine for the lining.  Tried it on and was immensely relieved to see it hung at just the perfect length, and what’s more has a perfectly even hem.  Yay!!  Breathed easily for the first time.
And can now appreciate why the pattern was rated Average, in spite of just three very basic pattern pieces.  Pared back simplicity can be quite tough to get just right!

pinterestmail

Some haute couture…

… hehe, just kidding.  Just proving that I actually followed through on my promise.  Sienna now has cast-off old sofa fabric no, wait; brand new (to her), freshly washed and fluffy, specially custom fit covers on her two beds.
Lucky girl!!!
the inside bed…

the outside bed…

details….  whoa, blowing your mind much?  Precision high fashion sewing on show here today… NOT!
Sorry.  Well, sewing for practicality and not for fabulousness is sometimes required of me too.  You might be able to see that at least I used pink and purple overlocker thread.  Sienna appreciated that little girly touch.  Really.

pinterestmail

Burnt-orange skirt; 6 different ways

I’ve been playing with my recently finished burnt-orange skirt, styling it up for a variety of seasons and the different degrees of formality that my lifestyle requires.  When I bought this silk hessian I knew its autumnal shades would go with a lot in my wardrobe.  But I had such fun putting together outfits based on this skirt…  OK, sure I always have a lot of fun playing in my wardrobe, but this time was an easy breezy spoilt-for-choice kind of a fun; because this skirt really goes with just about everything I own!  I could have had twice as many outfits as I have pictured here… either a sign that I have far too many clothes (a distinct possibility), or that I am getting a lot better at colour matching my fabric purchases to each other, and to myself and my own colouring.  The latter can only be a good thing; the former… hmmm, well we won’t go there…
I made this little skirt during the tail end of winter and styled it then with charcoal grey and black here, and I thought the colour of the skirt added a nicely rich yet still citrus-y zing to those sombre winter-y shades.  Naturally the orange will also look fresh and tangy with a pure white top during the warmer months, so I avoided that obvious choice here, with just one exception which I’m guessing will be a much harder item to mix-and-match in my wardrobe…
namely this avant garde white dress, at left.  It’s quite short on its own so really needs at least a little skirt underneath.  To be  honest, I’m already re-thinking this white dress (it’s pretty ….er, voluminous) and have a few new plans… watch this space.  But in the meantime, wouldn’t this be a good choice for a half-way glamorous, semi-formal summer do?  Just imagine the champagne glass in my hand… yes?
At right; for a more casual kind of a summer’s day, well my top here is of shot silk, with an orange warp and a blue weft, so its resultant drab pink colour is actually a mixture of the other two colours in the skirt and scarf of this outfit… how’s that for painterly colour analysis of an outfit?  Sorta impressive…huh?

For days of middling temperature: 
At left; Casual required?  I would wear this outfit, and thus serendipitously be sorta colour-blocked.  The current fashion buzz-word.
At right; going somewhere nice?  Mixing the burnt orange with milk chocolate brown, khaki and rich brown leather; and getting into those toasty autumnal sorts of shades here.

Going winter-y:
At left; I wore these denim-y blue garments with my rusty red skirt during SSS11, and I really like them with the burnt orange skirt too.  Will definitely wear this on a cold and casual day next year… hopefully these tights will hold out that long, fingers crossed  :S
And lastly at right; for a semi-smart winter’s occasion, the burnt orange colour works beautifully with the rich jewel shades of ruby red, purple-y red and with the chocolate brown in my tights, boots and bag…  well rugged up, and these colours are psychologically half warming me up already!

What am I wearing today? well I met with a friend for her birthday lunch, and I wore the “brown” outfit with my slouchy boots.  It was perfect for visiting a cafe, and for these pleasantly warm but not hot days that we are getting now.  
Which outfit here do you like the best?

pinterestmail

LBD, and a giveaway

It’s my blog-iversary!  It has been two years since I started up this funny lil ol’ blog, and I’m marking the (sorta) occasion with a giveaway.
About six months ago, the lovely Gail sent me this pattern and I don’t mind admitting it has been something of my “prize”.  A pattern that I have taken out to look lovingly at every now and again before tucking it back safely into my pattern box.  One of those patterns with the totally lovely pen-and-watercolour illustrations on the cover of willow-y, supremely elegant, immaculately coiffured ladies of yesteryear gazing world-wearily off into the middle distance.  Probably on their way to some impossibly glamorous soiree, or about to hop into the limo to meet up with Clark Gable, or some such.  One can but aspire, right?  But procrastination does not elegance bring…
so ta da!
Finally…  I made a LBD.  Hehe, obviously not the Little Black Dress kind of a LBD… let me explain…. there is a very very silly show on TV here called Beauty and the Geek, which of course I never watch being of a far more serious bent  😉  Anyway one week a geek had to answer a pop-quiz on fashion.  And one of the questions was “what is a LBD?”  And the geek answered “Long Black Dress”  And they marked him wrong, whereas for me his answer was like a stroke of idiot savant genius and he should have been given a big “yeees!” for fashion insight, because Long Black Dress is as pretty darn good answer I reckon, and it is a rare lady who goes through her life without the need for the simple elegance of a long black dress at some point.  And I have now filled that (hypothetical) need.  With vintage-ly panache too, hehe.
And now I am passing on the love, and offering this pattern to another seamstress/seamster.  It is Vogue 2858, an Original 1944 Design (or Dessin Original de 1944, if you want to get really chic about it :))
It has some rather unusual-for-an-evening-gown seaming techniques that I am assuming were normal for 1944…. I made a few “modern” changes to mine, although in a pathetically small nod to authenticity the raw edges of the seam allowances have been pinked  :).
For a start, well the superior invisible zip has been invented, people!  I made use of one.
I also left off the shoulder pads.  I did start out making them, but left them off the final version.  I’m afraid shoulder pads are just Too Dreadful on me…   

This pattern is a size 12-16, and all the sizes still there marked out.  If you’re wondering; I traced it off so I could grade to my own size… yup, it is still a bit of a wrench to be parting with the original, but I can do it knowing I still have my own traced out version should the need arise for a LWD (long white dress).  Or a LRD (long red dress)  Etc etc etc…

If you would like this pattern for your very own piece of 1944 elegance, just leave a comment on this post.  Of course, if you would still like to say something nice about my new dress but don’t want to be entered into the draw, then please feel free to do so…  🙂  I do love nice comments too!
This offer is open to anyone and for two weeks, so on 26 October I will put everyone’s names into a hat, those who say they want to enter, and draw one out.
No, I agree that is a very questionably low-tech method and doesn’t have quite the panache of that random number generator thingy, but frankly my dear I just don’t give a damn.  *

Details:
Dress; Vogue 2858, black crepe
Sandals; Micam by Joanne Mercer, from Hobbs shoes   

*  the obligatory Rhett-ism… couldn’t resist, hehe

pinterestmail

HongKong seaming

(OK, so I wrote this post a while back, during self-stitched September, and then just got caught up in the whole outfit-documenting side of things and forgot about it… ! so it may seem a bit out of date since I made this skirt about a month ago, hehe.  But HongKong seaming is still something that is always relevant, never out of style right?  So, here goes…)

It may sound silly but I often like for the insides of my wardrobe to look as well constructed and as well finished as the outsides, like those of the upper end designer clothes that inspire me.  Beautiful finishes give me a lot of pleasure whenever I lay eyes upon them.  And it makes good common sense to give both your fabric as well as your own time invested in your handiwork the respect they deserve by finishing off as well as possible.  Why?  Because your time is valuable, and you’re worth it!
HongKong seaming is a finish I sometimes like to add to the internal raw edges of unlined coats and jackets, and to those of my better skirts.  It is an especially good finish for high-fraying fabrics that are kinda special; such as silks, wools and blends of these; ie, fabrics that are worth it.  You know what I mean, right?
HongKong seaming may seem like too much hard work, but it is not really that much effort, honestly!  Big pluses; it only requires a very little fabric, looks pretty, and is the best way, bar none, to finish off the raw edges of thickish fabrics that fray easily. 
To finish off the seams of an ordinary little skirt plus enough for a wider bias binding strip to finish the hem, you only need about 40cm of a light or medium-weight woven fabric, ideally cotton or a polycotton.  Actually I only needed this much because I was cutting the pocket linings from the same fabric, you could easily get away with a lot less.  You can just use scraps if need be, no probs.  You can go with a matching fabric or a contrasting fabric for fun.  In the case of this burnt orange skirt I chose a contrasting burgundy for both the seaming and lining fabric.  (Yup, I know that no one but me will ever see the yumminess of these rich autumnal shades together, but this hidden colour punch still pleases me nonetheless!)  Wash a coupla times to remove the sizing and deal with all that pesky shrinkage.  Then cut a few strips on the bias; approximately 3.5cm (1 3/8 inch) in width.  I also measure the length of the lower skirt/jacket edge and cut a wider bias strip (approx width of 5cm, or 2 inch) for the hem binding.

Join together end on end like so, to get a continuous strip of bias binding…

Press the seam allowances open.

Lay against the raw edge of your fabric, and sew together in a narrow 6mm (1/4 inch) seam.

Fold the bias strip back over the seam and press the seam binding back over itself…  
Now fold the fabric back over underneath the seam allowances to enclose the raw edges within the bias strip.  I don’t press at this stage, but just stitch in the ditch of the first stitching. holding the bias strip in place and smoothing it down as I sew.  Being bias cut; it should settle into place well, moulding itself smoothly around curves with the need for any ease stitching. (this is the inside pocket edge, and the pocket lining of the same fabric can be seen underneath)

For the hem binding, the raw edges are sewn in a narrow 6mm seam allowance the same way.  Probably the most difficult bit out of this whole procedure here is joining the two ends together in a perfect bias seam to meet up exactly at the stop/start sewing point.

The bias strip is pressed up, and a narrow 6mm seam allowance pressed down on the upper edge.  This pressed edge is simply slipstitched down invisibly in place.

Voila!  Now how easy was that?  No real biggie, right… once you’ve tried HongKong seaming I promise it is something you will want to incorporate into special projects again and again.

pinterestmail

Do you like big pockets…?

… if so then this is the skirt for you!  I have never seen pockets to rival these, ever.  I knew (intellectually) the pockets were big by the picture on the pattern envelope, but the (realistic) first sight of the pocket pattern piece was still a bit of a shock.  Seriously about as big as the skirt pieces, and the skirt pieces are big.  Lol!!
But of course, the pockets are not mere pockets at all, but a clever design feature to enhance the pouffiness, the floatiness, and the gathered, over-the-top loveliness that is the hallmark of this beautifully feminine skirt pattern.  Side note; my husband commented spontaneously that he loved me in big floaty skirts like this; double WIN! since I love it too.
Funny little anecdote about the pattern… I first saw this on shams’s blog and knew I just had to have it.  Those shirt sleeve cuffs on the ends of the sashes; so adorable!!  (salivating) must have… 
I immediately visited Fabulous Fabrics and asked for the pattern… no, they didn’t have it.  I was actually hoping against hope that it was miraculously hidden in the back of the pattern drawer since I had already looked through the Vogue catalogue and noticed it wasn’t there (eek!)  I assumed its time had come and gone.  I then started trawling ebay, looking for somebody getting rid of their old copy… no dice, although I did fall victim to must-have-itis for a maxi-dress pattern… the product of which has also recently exited my sewing room and been welcomed into the wardrobe… But I digress…   
So, in a masterstroke of going to every extreme to get that pattern by hook or by crook, I did some more detective work and eventually discovered and joined BMV where I was amazed to see I could get it for a price that was an incredibly delightful surprise; $3.99.  This is about a fifth of the usual price of Vogue patterns in Australia… no, I am not kidding nor exaggerating!!)  The cheap price just reinforced my belief that it must be an old pattern and I was lucky to have found it…  My pattern arrived and I was supremely happy.  Then, get this, the last time I was in Fabulous Fabrics (er, yesterday, hehe… yup I am a regular, on a first name basis with staff) I had a quick flick through the new spring Vogue catalogue, and you guessed it, there was the pattern.  It is actually new season, like this season!  To us southern hemispheries, that is…  thus all finally became clear to this very behind-the-times seamstress why I hadn’t been able to get it before… doh!
I used a very light cotton voile, which I sometimes use as a lining fabric, and the same fabric for both the skirt main and for the lining.  I completely love the long long sashes with shirt cuffs on the end, a fun and quirky touch that drew me to the pattern in the first place.  Because of this little feature, to my mind the skirt just had to made of white cotton.  Nothing else would do…  Those shirt cuffs just wouldn’t have the same witty flair unless the style directly referenced the Classic White Shirt.  Plus I just adore big white floaty skirts for summer.
And those pockets…? well, they are graaaand, in every sense of the word.  I don’t think I could actually really put anything in those pockets, really.  Stuff could get lost forever in there…
I have some more fabric to make up the little top as well, but for now, below is my review of the skirt pattern…

Details:
Skirt; Vogue 1248, white cotton voile
Shirt; self-drafted, navy and white stripe cotton jersey, details here
Shoes; Country Road

Pattern Description:
Skirt, gathered, flared and lined, with fitted contoured waistband, centre back zip closure and long attached side sashes with shirt cuff features.  HUGE gathered pockets.
Pattern sizing; 
I bought the AA 8-12, and cut a size 10.
Did it look like the photo/drawing on the pattern envelope once you had finished sewing it?
Just about exactly, since I used white fabric too!
Were the instructions easy to follow?
yes
What did you particularly like or dislike about the pattern?
The pattern is great.  Vogue patterns are always accompanied by clear instructions and detailed illustrations. The pattern pieces went together beautifully.
There is one small thing I would change… the instructions stipulate to gather each skirt piece individually, before joining them together along the side seams.  I find I get a much better and smoother gathering result when the whole skirt is gathered as a whole; that is, you join up the skirt pieces at the side seams, THEN run the gathering stitch around the skirt top in one long go.  This is because I find that the first and last few centimetres of gathering do not gather as evenly or as ideally as if they were part of one long continuous line of stitching and if the skirt is broken up into several sections you have several of these gathering stitch stop/starts.  I would recommend to gather the skirt as a whole.  And also to gather the lining skirt as a whole, too.
Fabric Used:
very lightweight cotton voile
Pattern alterations or any design changes you made:
I took about 5cm (2″) overall off the waist band pieces.  Also I gathered the skirt as a whole, as discussed above.
Would you sew it again? Would you recommend it to others?
Yes, I think I might sew this again, I love it!  I highly recommend this skirt pattern to others.  Just bear in mind it needs very lightweight drapey fabric, because of all that gathering.  I have some fabric to sew the little top, so I will review that separately.
Conclusion:
I just love this skirt!  Firstly, the silhouette is delightfully feminine, and the floatiness and frothiness of all those light gathered swathes of fabric floating about you is highly satisfying.  I feel just so darn feminine in a skirt like this!!
Secondly, the shirt cuffs on the ends of those sashes are completely adorable and what drew me to this pattern in the first place.  Such a witty and unique little detail, that really makes the skirt stand head and shoulders above your average everyday gathered skirt.  Not to mention those pockets, which must be the biggest in known history!  Another fun and interesting feature…
I’m going to love wearing this skirt over this summer!

pinterestmail

Pattern Magic 3; dress with 4 sleeves

… aka; the design on page 18.  I’m sorry I don’t know the correct English translation of its name; but it is the design I picked as my favourite from the very first flick through of this marvellous book.   I apologise for the photo overload, like seriously!  Sooo many photos sorry, and particularly after my oft-repeated rant about the vanity of zillions of photos of the same blinking outfit, in one post…. yikes.  But this dress has several unusual little features, creating lots of different views that all needed picturing to appreciate them.  I tried to keep the numbers down, honestly.   The thing is; innovative fashion sometimes needs to be seen from lots of angles in order to appreciate all the little extras.  So that makes it all OK now, yah?  Still friends…?
And now guess what… this is the same dress….!

No, I’m not kidding… the back views…
still the same dress…

It is very easy to draft and make up, and I used a medium-weight cotton jersey.  I fiddled about a bit with the shaping to get a more shapely middle section, because the dress as it is is rather sacklike.  Oh, OK then, it is still pretty sacklike.  My husband commented I looked “choir-y”.  Thanks, sweetie.  Actually, I’m very happy to add another costume-y thing into my wardrobe.  Terri commented on my Futuristic Nun dress that she like the idea of me as a nun, and I have to secretly admit that I like the idea of myself as a nun too.. and a choirboy sounds like a pretty good sartorial aspiration too, methinks.
I also added length, which eventually got shaved off again, piecemeal.  It was a toss-up between having an extremely loooong dress when worn one way, and a pretty short dress when worn the other way.  I strived for the best compromise I could… and I think I can still wear this decently the short way, sans tights.

So, it has three openings at the top, which could be either sleeves or a neck-hole, whichever you prefer.  These are funnel shaped.. and I decided to leave the edges raw here.  Partially because my fabric was a little thicker than ideal, and to hem would have added some bulk and made the edges more defined.  I decided this was not what I wanted here.  When these sleeves/neckholes are acting as a scarf, you really want the whole area to be quite floppy and soft, and if I had hemmed or faced these areas they would have lost this quality…  The lower edge is similarly left raw.
There are two additional holes at mid hip height.  When you are wearing the dress at full length, they appear as sort of pocketholes, but without the actual pockets.  So, you will need to wear either tights underneath the dress, as I have here, or a long camisole.  That is unless you like for your undies to be on display…  but hey, nobody’s judging …  much.

When you use these holes as armholes, this is when the whole top bit becomes a kind of scarf.  Pretty cool, huh?  These lower holes needed proper edging, so I finished them with a narrow band overlocked in a ring, folded right sides together along the long midline, and then simply overlocked in place.

more side views…

And kbenco requested a view of the heel of Mum’s socks; so here it is.  The stripes join in a kind of star design; yup, they are pretty clever, yes?

Details:
Dress; the design on p18, drafted from the Japanese pattern book Pattern Magic 3, by Tomoko Nakamichi; ivory cotton jersey
Tights; my own design; red cotton jersey here, my tutorial for drafting your own custom fit tights here
Socks; handknit by my mother, here

pinterestmail
Switch to mobile version
↓