Tag Archives: Home Wares

lux trousers and some more random cushions

hello! I’ve made some more things lately…

Firstly, some new trousers.  I used a new pattern, the Fibremood Lux trousers.  Lately I’m more interested in trousers/jeans etc with a flat front and no pleats… and so the pattern piqued my interest immediately.  I also liked the sleek, menswear vibe that the top part gave, even if the patch pockets at the back and the flared legs didn’t quite fit that vibe.  Easily sorted!

I cut mine with straighter legs… partly to fit the pattern better on my fabric too! and decided to put single welt pockets on the back in place of the big patch pockets.  There are nice slanted front hip pockets as well, and I cut mine a good inch bigger all the way around, to better accomodate my own big flippers…

There’s not really much more to say about the pattern, it’s a kinda basic pattern really; classic and a bit plain but we all need patterns like this in our lives too, hmmm?  The belt loops at the centre are stitched in an “M” arrangement, a subtle detail that is different enough to draw the eye without being too much.

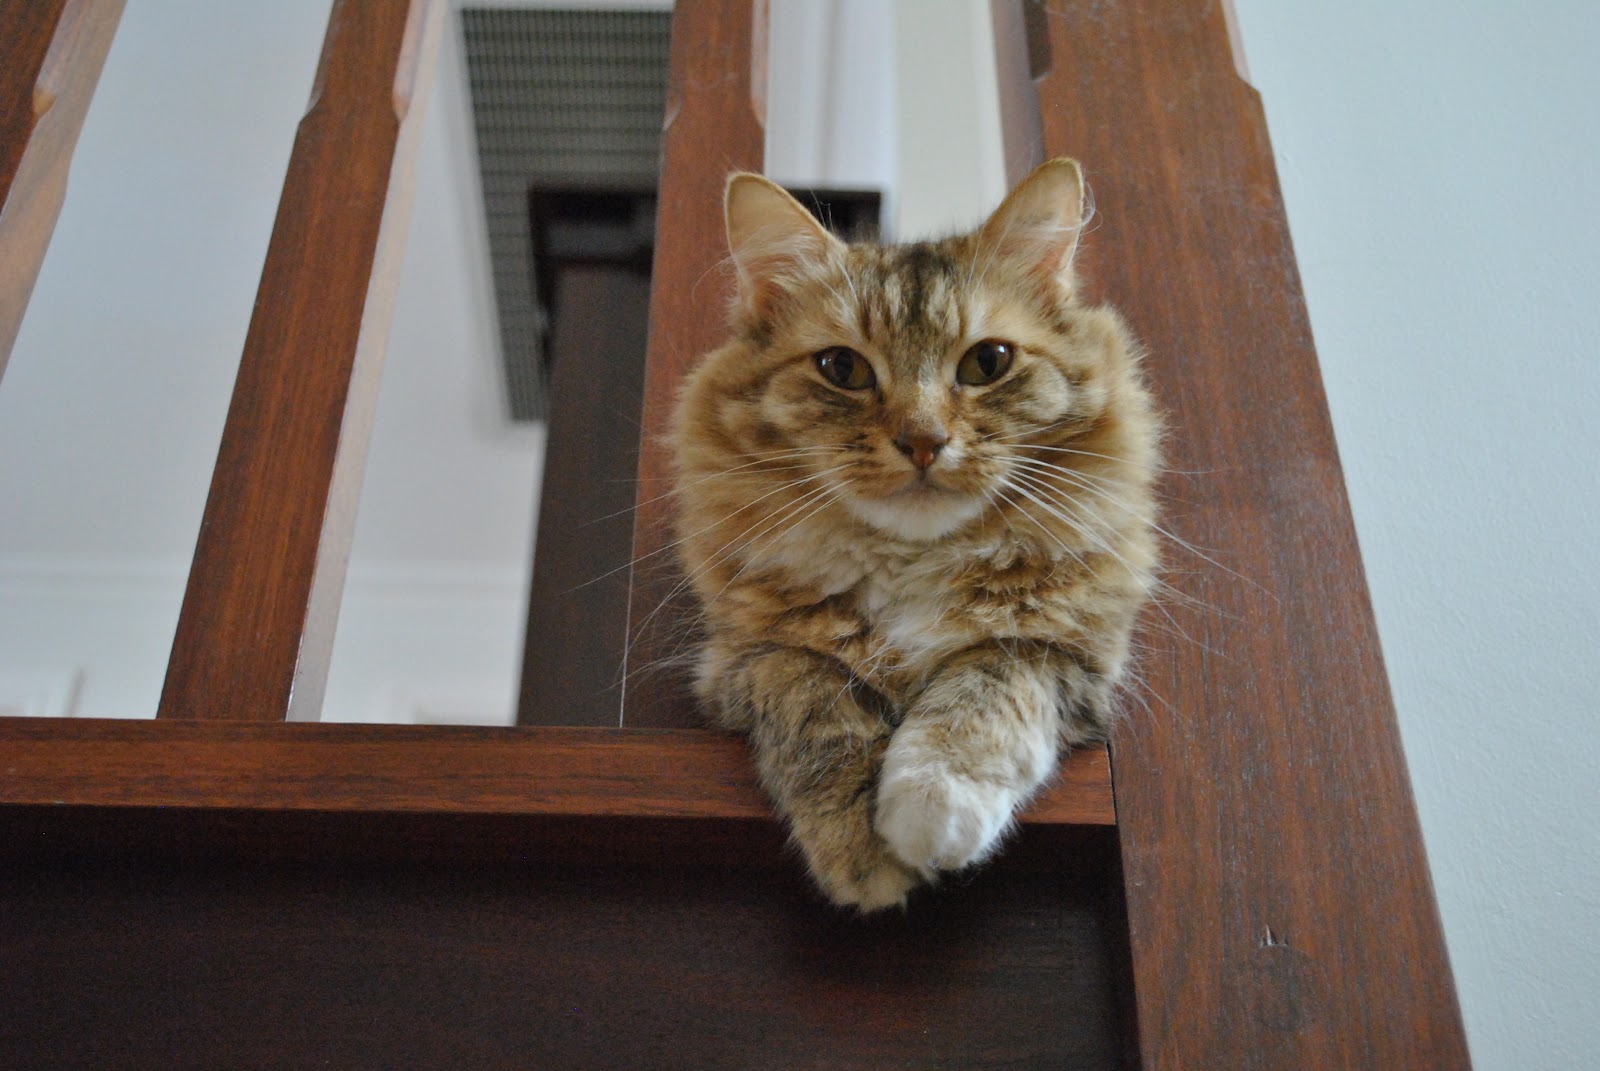
my cute little photobomber!

The fabric is a deep chocolate; cottony-sort of stuff; I’ve had it in my stash for so long I cannot even remember how or where I got it from, let alone the content of it.  It has a very crisp “snappy” hand to it and literally crackles while you walk.  It does crush a little, but irons beautifully, and putting in those welt pockets was a dream!  It is just slightly water resistant, and dries very quickly, so I think it might be a technical fabric of some kind.  Meaning I can wear them hiking if need be …  and that need will probably come up next year, at least once!

worn here with my Fibremood Georgie top and above with my yellow clogs, made using a kit from Leather Needle Thread.  Yes, a 100% memade outfit!

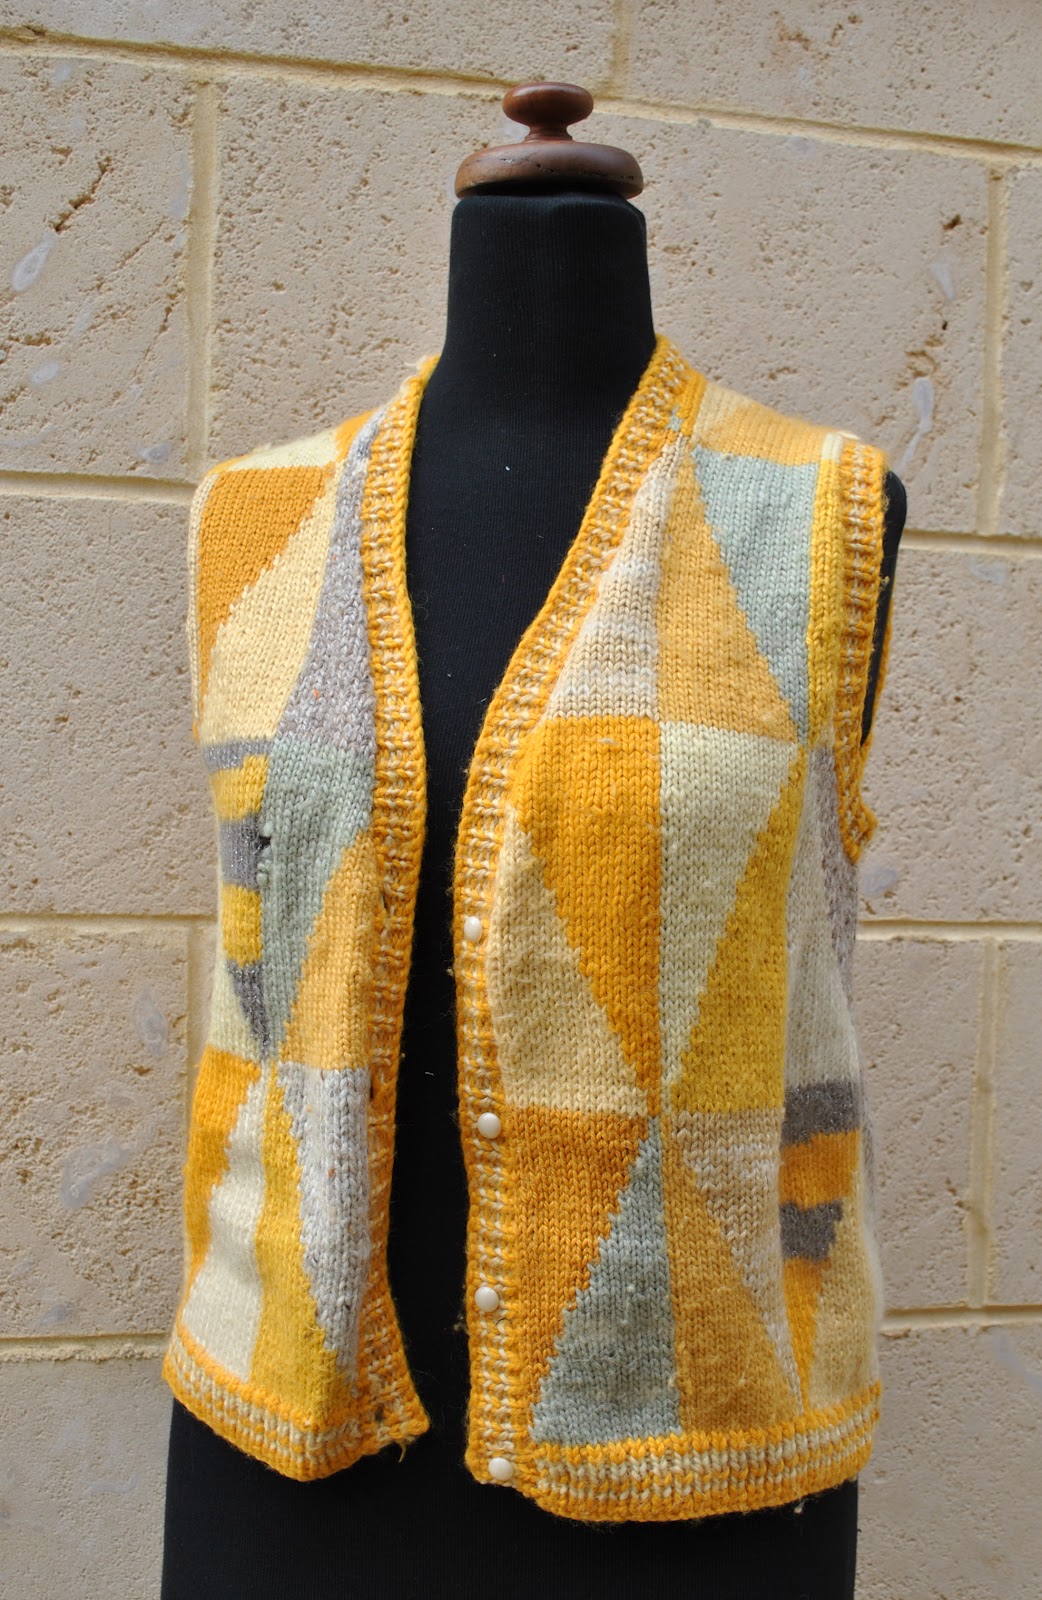
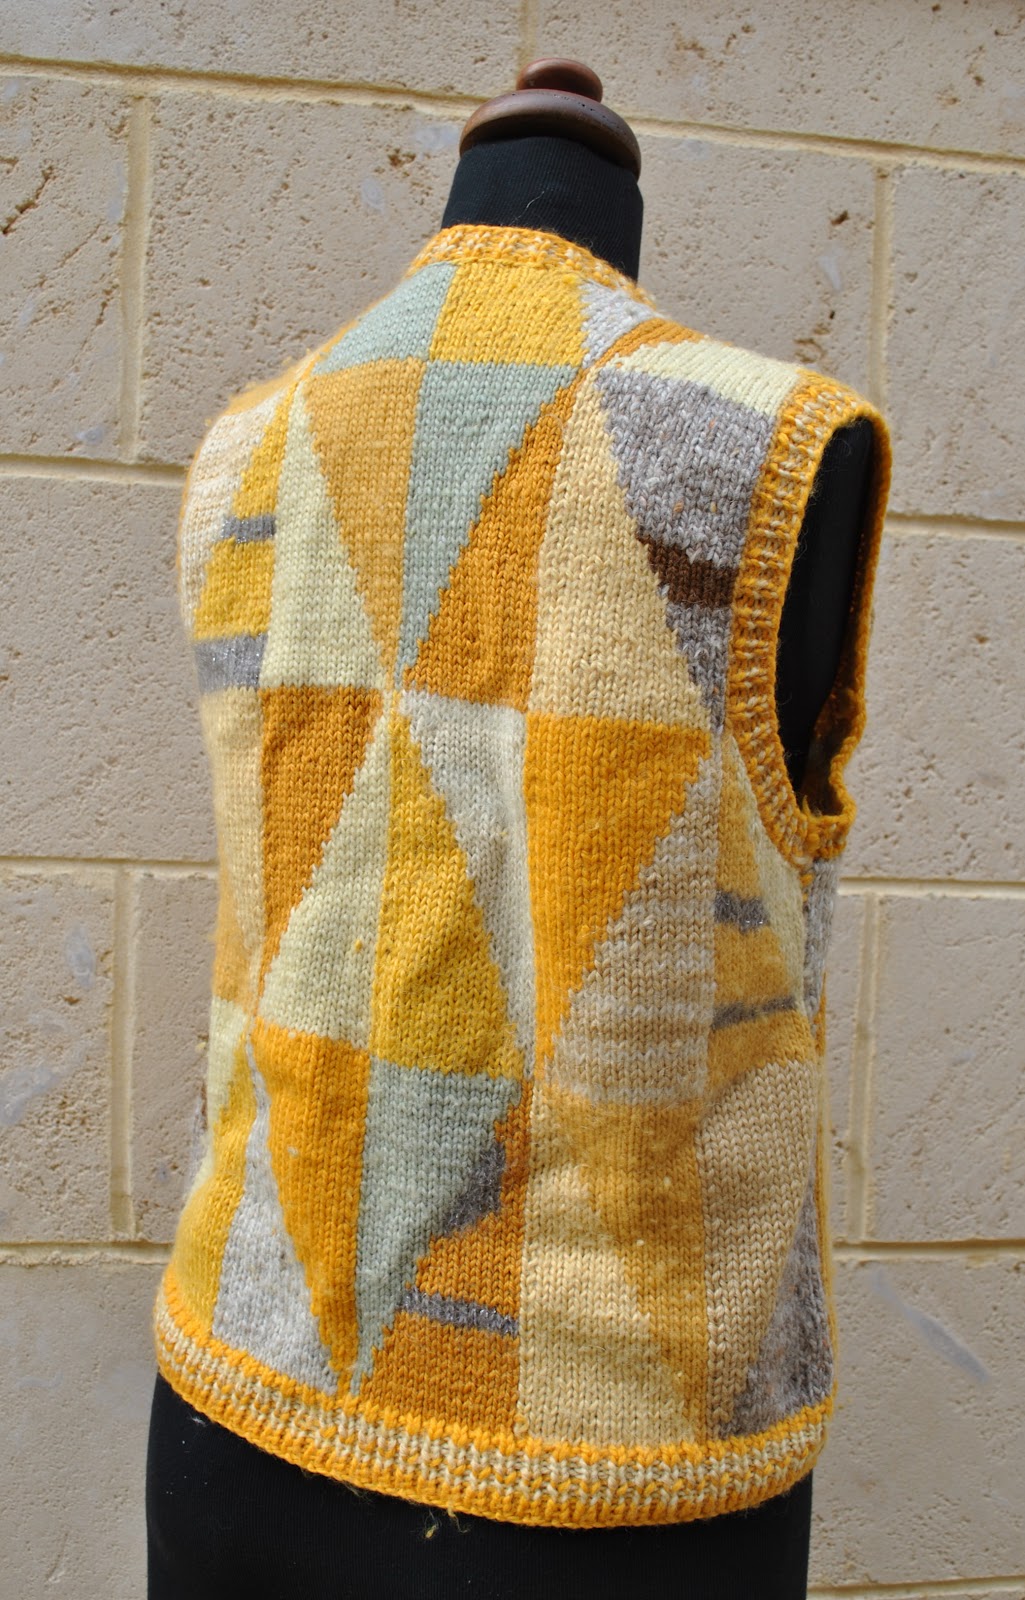
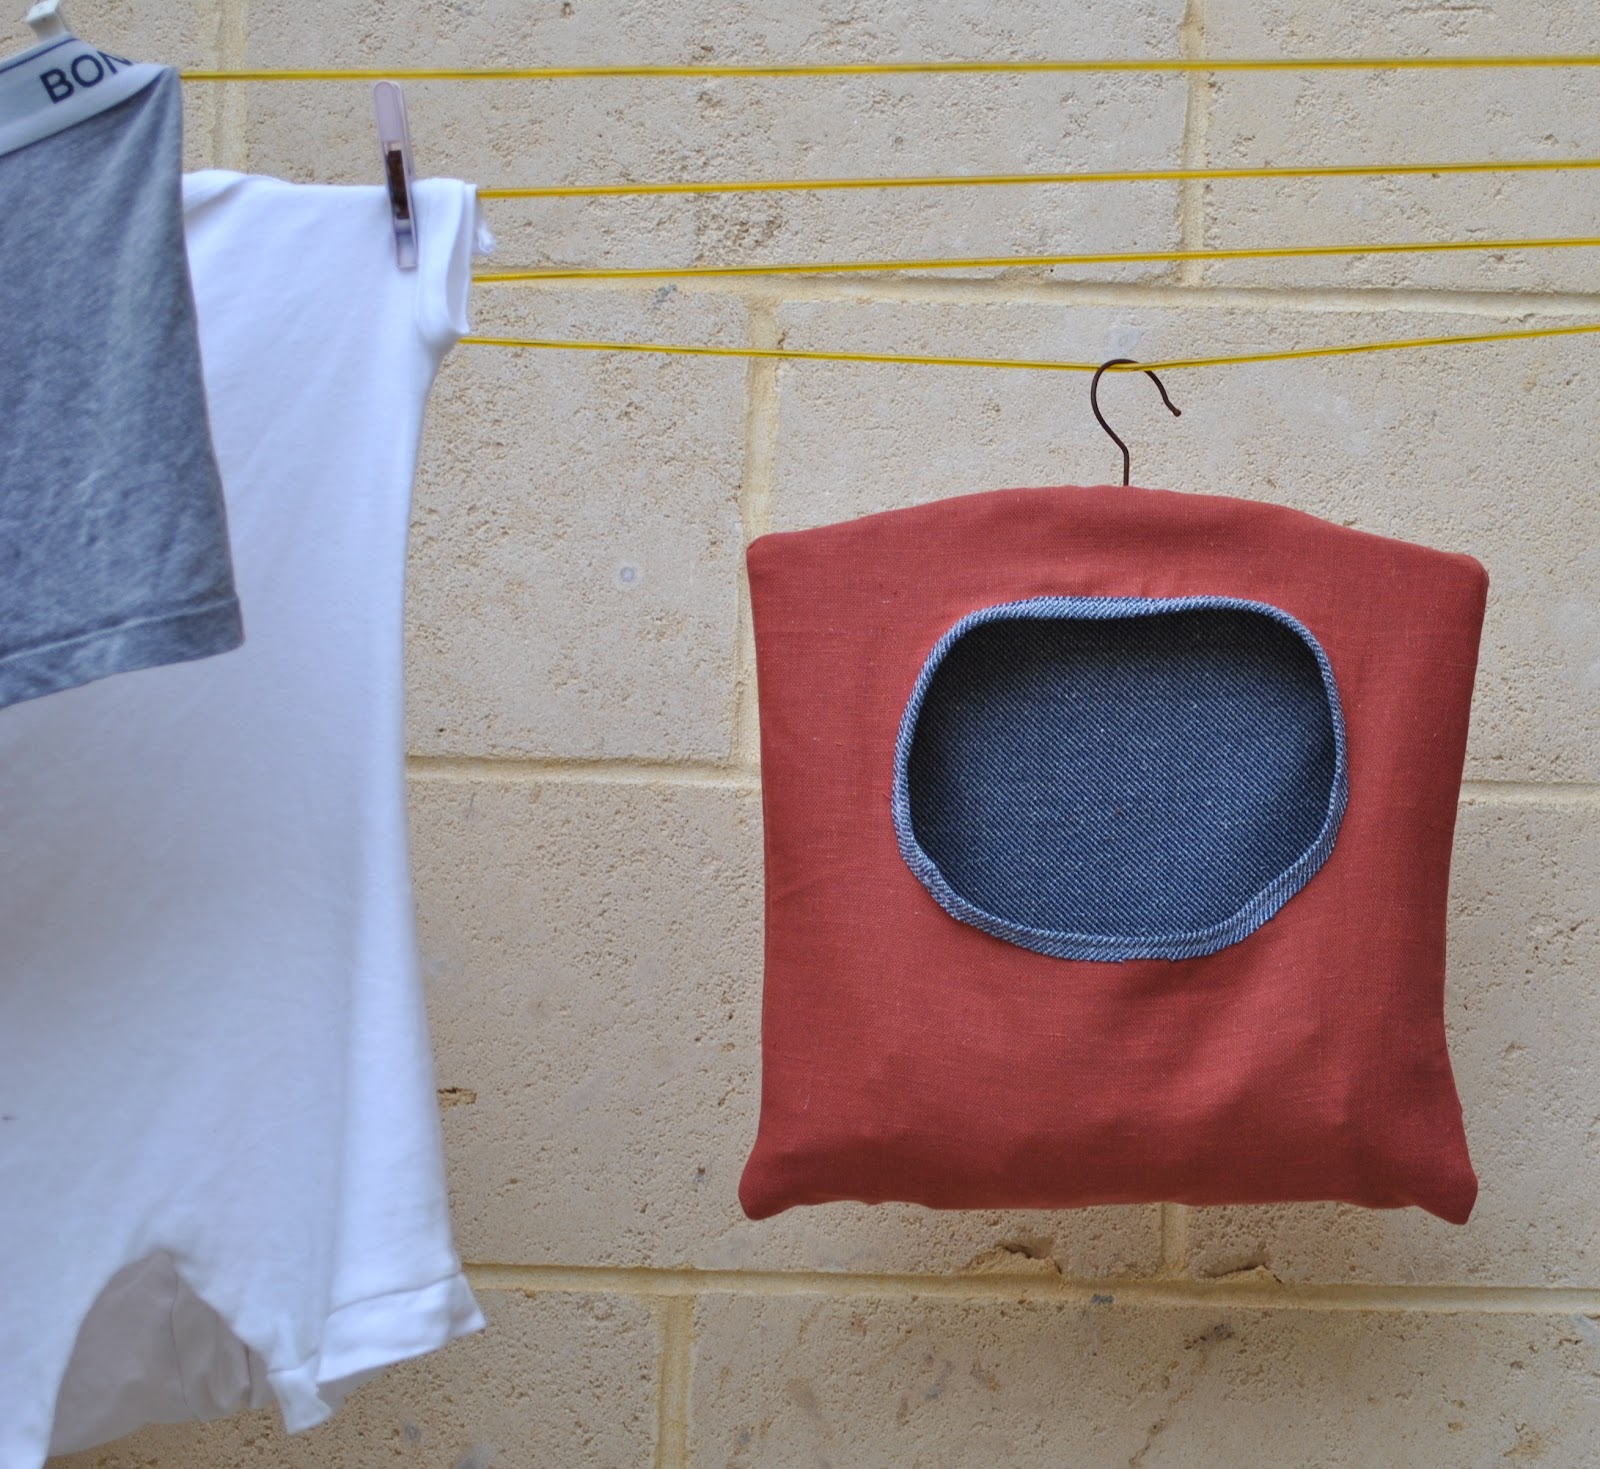
I also have my knitting project for the month to show… I made a couple more cushions.  I know, sorta boring? and a bit crazy too, if that makes sense.  But since I’m using otherwise discarded materials and spending nothing, making stuff like this makes me feel virtuous and thrifty and therefore very happy, so it’s all a good thing!  I needed a smaller project this month after a couple of months of knitting full jumpers/cardigans.  I’m hoping to go back a more substantial project for next month!

Both the bobbly yarns were given to me by my daughter-in-law Lainey, and the yellow yarn was leftover from some socks that I knitted a few years ago.  I also made cushion inserts to fit, using yellow satin and toy filling from my stash.  I remember buying the satin years ago as a lining for a coat, and ended up using a different fabric.  The yellow cushion inserts look really nice in my opinion, since you can see through the bobbly knit; and white would have looked too stark.

pinterestmail

little black dress

I’m so behind on blogging! so this is part one in what I hope is a serious attempt to catch up… so I made this little black dress a little while ago… it’s light and floaty and breezy so really it’s a summer dress.  And I’m wearing it here on basically the coldest day of the year… ha!  But I do like it styled like this for winter! so I guess… good?

The fabric: which I appreciate you can’t see at all in any of my pictures, because of its matte-ness and it’s blackness, sorry! anyway; it is a lightweight crisp fabric that has a very slightly bumpy, seersucker-y quality to it… I’m not sure if it’s silk or cotton or linen but I’ve a feeling it is a combination of two of those components.  I bought it in Fabulous Fabrics quite a long time ago for another project, that I’ve completely forgotten what it was so I decided the fabric was fair game, eventually!  I’m seriously trying to use up my stash this year… yes I’ve probably said that million times before but I’m really serious this time.  I think I’m doing quite well! because I’ve bought just one piece of new fabric all year.  I really want to buy some more lovely fabric that I am really really keen on… but am trying so hard to be good about this!

Anyway, the lightness and crispness of this black fabric was perfect for this design, so I’m very happy I had it and it was pretty much the perfect size piece too… so it worked out really well.  Oh, the design!  Well, it’s the Fibremood Dolly pattern, which is big and floaty and has huge, gathered sleeves, so it’s very trendy, I think.  I do like it though!  I really like the neckline with a little tie to pull in a gathered V neck.  It was so cold on this day I actually wore it for real with my mustard cowl, and also my shearling coat as well as the usual underpinnings pictured, brrr.  I’m excited for when I can wear it all summer long!

Oh ok, so I’m just going to slip another extra thing in here…. did I mention our wonderful youngest son Sam has become engaged to his beautiful lady, Lainey?  We’re so happy and excited to welcome this lovely lady into our lives, she’s the most gorgeous girl and has willingly and happily acted as a model for our little pattern company a few times, so her face has definitely been seen around here before!  Anyway, they recently moved into their own house and asked if I would mind hemming their lounge room curtains.   Of course I hate hemming curtains, but it was absolutely lovely to go and hang out with them while I did it.  It took an entire morning basically and we chatted away and it was a really nice morning in the end.  So I didn’t hate it at all in the end.

pinterestmail

of dots and bats…

I made a swishy new skirt…

this beautiful rayon challis fabric was generously given to me by Minerva in the UK in return for a blog post for their site, which can be read here.. however because of course I am in the habit of documenting my makes here on my own personal blog too, then here we are!

For sometime I’ve been wanting to make a maxi skirt, and just thought what the heck, no time like the present!  It’s very nearly zero waste, which I am quite proud of.  This is the very simple design:

I measured my waist and hips, and gave myself a bit of extra in the hips, and divided by six to get a rough dimensions for a six-gore skirt design, and the width at the bottom hem decided by subtracting my waist measurement from the total fabric width and then dividing by two, and the length of the skirt was determined by the length of fabric I had, divided by two obviously.  So first step was to draw up the one skirt piece.  Yes, I used the same pattern piece for all six gores!…  I planned to fit three of the gores onto each half of the fabric length I had, laid alternately up and down to make the most of the area.  This was possible because the print is non directional.  Actually, side note, but print-matching as a concept is actually the biggest fabric waster OF THEM ALL, I know, pretty controversial thing to say, huh?  Or not, it’s actually quite obvious of course, although no one wants to admit it!  🙂

Initially I thought I’d try to be clever and cut a waistband and pockets from that bit of scrap off the sides, but I quickly realised that pockets and/or a waistband were going to be, respectively; ugly and/or unnecessary.  So this skirt has neither in the end.

some progress shots…

when making a skirt of a delicate fabric and bias side seams, I’ve found it a good idea to hang the pieces up for a day or so to let some of that bias drop out before seaming.  Otherwise I’ve sometimes noticed that over time, the fabric can grow a slightly “gathered” look either side of that stable side seam stitching.

After under stitching the waist seam I didn’t feel like it was sitting very smooth and neat, so I topstitched around the top edge.  Hangs much nicer now I think!

I used a black invisible zip because that’s what I had!


Hemline before and after trimming…


I hemmed using the triple stitched skinny hem, as described here

I gave it a half lining, because swishy skirts have a tendency to be clingy skirts if they do not have a lining, to disastrous effect. Fortunately I had some yellow lining fabric leftover from when I made my yellow Mundaring raincoat.  A lining doesn’t need to be super long to be effective for a main skirt, but now it’s done and I’ve worn it I’ve retrospectively decided I would prefer a big swishy lining too.  I may or may not add a doughnut shape to the bottom some time, to get one.

Anyway, it’s still gorgeously swishy!  I’m wearing it here with my little hand stitched Alabama Chanin tank top, which is my favourite tank top.  I really should make myself another, because I could literally wear this two hundred times a year, easily!  I mean, I don’t, but I could, I love it that much… Hmmm  *wanders off to the fabric room in search of white cotton jersey…*

this is how I wore it to bookclub…

In non sewing news; we are nicely settled into our house at last.  I still have a lot of cleaning out and sorting out to do to get our “family of five”possessions whittled down to be better suited to “empty nesters” state of things *sob* but you know… Work in progress, always!

Oh, one other, this time sewing related thing… Cassie needed a feeding cushion for baby Theo, so I made one using some batman themed cotton drill from spotlight and a European pillow insert.  It has a big border so as to use up the entire width of fabric #wastenotwantnot and I put snaps along the bottom to take the insert out for cleaning.  Look how cute he is on his cushion!  Yes, I made the “Tshirt” here which is actually a onesie, and the pants were a gift from another doting relative that happened to match perfectly  🙂

Until next time!

pinterestmail

Vegetable placemats

Occasionally I still come across old things, handmade by me, but still not shown yet on this blog (blush)
I found this set of eight linen placemats tucked into the back of my linen cupboard.  These were entirely hand constructed and embroidered by me…  I hadn’t forgotten them precisely, but they were one of those things that I kept thinking; I must dig those out and take photographs of those things one of these days…  which has now finally been done!
I made these yonks ago; not even sure exactly when now.  But it was when we had all three kids, and they were very little.  I was heavily into cross-stitch for a coupla years.  Note: was.  It’s a good thing I have these, yes? even just to show that I once did have the patience, if nothing else  😉
I bought natural linen, and measured off the placemats and finished the pulled thread-work and hand-hemming on all eight mats before I allowed myself to do any of the fun stuff; the actual embroidery.  
For the pulled thread-work: I pulled two threads from along just inside each edge, which were then each woven invisibly into the border.  I then hand-stitched along each edge, pulling the loose threads into pairs to form a long skinny “ladder” inside each border.  I’m calling it pulled thread-work, but I’m not absolutely certain that this proper name for this kind of embroidery?

The hems were then folded under twice and hand-stitched, and each of the four corners on each placemat is mitred at the back.
Then I did the cross-stitch embroidery.  The designs are from a Prairie Schooler pamphlet that I bought from Aherns.

I’ve always been taught that the back of the embroidery MUST always look at least as neat as the front…

They all got used, but there were favourites; so there was often swapping and switching before the dinner came out so that a particular veggie was set in front of the appropriate person!  

pinterestmail

Handwoven “rag-rug” placemats

Another set of hand-woven and -stitched items from my teenage years…
and I cannot believe I have so far overlooked these very frequently used items in my documentation process!  :O
To the best of my memory, this is probably my very first handwoven project on the big floor loom…  I expect Mum suggested these as a good beginner’s project before moving onto a more complex project; like the serviettes* I featured in the previous post, with an in-woven pattern.

A set of six placemats in the rag-rug style.  Each measures 40cm x 24cm. 
They are woven in a plain weave, with a blue cotton warp.  The weft was made of three different blue cotton fabrics; two plain cottons and one fine-wale corduroy.  These fabrics were cut into thin strips, the ends spliced and lightly hand-tacked together to make a continuous strip.

The tops and bottoms were finished off by hand-stitching a loop around each and every warp thread and into the weaving, the warp trimmed and then the ends folded under twice and stitched into hems.

These have been in solid rotation for twenty-five odd years although we haven’t really used them as much in the past coupla years.  This is not because they are fragile, oh no! the rag-rug is a super long-lifed type of fabric; super tough and hard-wearing and able to withstand a pretty heavy-duty lifestyle!  More just our laziness, not going and getting them out of the linen cupboard as often as we used to, I guess 🙂

*btw, I decided to eliminate rants from my blog a while back, but just quickly: anyone who wishes to anonymously “correct” my Australian English and lecture me on the “proper” words to use when describing my handmade items, how about this:  instead of trolling, maybe you could appreciate that other countries and cultures might sometimes use different words from your own.  As well as broadening your mind, you might just learn something new every once in a while  🙂
Phew! Rant is over and good nature has now been restored!

pinterestmail

Hand-woven

Every now and again I come across another handmade item in my house that I have not yet documented on my blog here…
This is a set of serviettes, handwoven by me!  Yes, I have dabbled in weaving, in a very very minor way, hehe.
I made these when I was about nineteen, before I was married and when I was still living at home with my family.  My mother had, and still has today actually, a big floor loom on which she made many beautiful things.  I made a few things on it too.  
These serviettes are woven in a plain weave in blue cotton, with decorative rows in white cotton.  These were based on a traditional Scandinavian design, and required some rather complicated setting up, threading and manipulation of the heddles.
I think the reverse is almost as nice as the right side…  I remember dithering for a while on which side I should designate the “right” side  🙂

I remember I made calculations for a set of six, but I must have allowed plenty of room for error since I ended up with a long enough warp to squeeze in one extra, giving me a set of seven.  Each of the seven serviettes was woven to size and then a spacer was inserted before starting the next one.  Once I had taken the woven cloth off the loom, I hand-finished the top and bottom of each serviette by stitching loops around each and every thread of the warp and into the weft, one by one…
Can I just pause for a mo’ and say here…  I have to admit that even I am kinda super impressed at how dedicated and meticulous my teenage self was.  I don’t know if I am even capable of the patience required for this sort of immaculate finishing nowadays….  :S
Finally I cut them apart, then turned under the top and bottom twice and hand-hemmed.  The selvedges at the side I left just as is with no further finishing, since I had gone to so much care to have them looking perfect, ahem.
Each measures 32x30cm.

These were used on a semi-regular basis early in our marriage and even when the kiddies were little but now I keep them for special occasions only  🙂

pinterestmail

You are all so brilliant!!

Woa, you are all so fabulously switched on and fashion-icon-savvy!!  hehe, might I just add; far more so than my husband, who had no idea  …   😉
Yes, of course, everyone was correct, I was Annie Hall.  My husband went Hawaii 5-O; in a loud Hawaiian shirt, his bright red jeans, boaters and a straw hat.  And thank you, we had an absolute ball!  we stayed alive; celebrating raining men, proclaiming our will to survive and asking to be taken to FunkyTown until the wee small hours….   
Naturally one of the fun-nest parts of any dress-up party is checking out and discussing everyone’s costumes… there was a Bianca Jagger, and some Abba’s and more afros, bellbottoms, safari suits, psychedelic minis and gogo boots than I’ve ever seen in one spot.  Giving me an illogical desire to hunt down a pair of glossy plastic gogo boots, ahem…. must resist…  
There is one guy in the group who, for every single fancy dress party, no matter what the theme; wears a fat-Santa suit…  He adds some accessory that is a token nod to the theme, this time it was a peace sign necklace … 😀

For those who wanted to enter into the draw… ElleC, I will be contacting you to send you the pattern.

Now, while I was digging through my stuff trying to settle on a costume, I found and initially thought I might wear this old thing… and you’d think surely I must have shown all my “old things” by now, hopefully this is the very last!
I’m pretty embarrassed to show it here, it is a rather hideous waistcoat, that I knitted during my teenage years.  I was pretty into Kaffe Fasset knits back then, and this was one of my earliest attempts at his style of colour mixing and matching.   The triangles design is his but I made up the knitting pattern myself…  it has no side seams, but was knitted in one piece in the round, and just joined at the shoulder seams; then I picked up stitches around the armholes and the front to knit up the ribbed bands.   It was knitted in the intarsia method, and sadly has a few moth holes now  🙁  but that’s OK since it’s not as though I was actually going to start wearing it again, except if we got invited to a bad taste party, maybe  😀

I have made a “new thing” though, a gloriously fashion-forward piece of haute couture…
kidding...!  
My old peg bag finally had the richard and I made another one.  It is all leftover fabrics; a small piece of rust-red upholstery fabric (from my friend C) for the outer shell, and lined with some of the blue-grey knit leftovers from this little jacket; so it is double layer for extra durability, and exactly the same shape and style as my old one (which I also made).  I re-used the same old clothes hanger for the top.  Both my grandmothers and my mother always made their peg bags just like this one, and I have inherited a preference for the style.  Mum goes the extra step of hand embroidering “PEGS” onto hers in beautiful script; if I had half her talent and patience then maybe my peg bag would be a bit more visually stimulating!  Mine has more of a slapped together rustic-chic look about it… hehe

(and I know the accounting is boring and I kinda half-wish I had not started, but I said I would so I will see the year out!  :S) 
…so, some judicious jottings for July

Nylon Rip-stop; $22.50
Polyester net lining; $4.99
2 dress zips for pockets; $1.98
Open-ended zip; $2.99
Thread; $2.68
Seam Grip; $17.95
Eyelets; from stash
Cord; $1.49
Cord Stops; $1.19
Velcro; $4.00
Pattern; self-drafted
Total cost: $59.77
Fabric; $13.90
Bra cups; $8.99
Patterns; panties were a free download, and the bra was self-drafted
Hook and eye closure; $2.49
Underwire; $2.49
Total cost: $27.87
Nylon Rip-stop; $12.60
Polyester net lining; $9.98  
(yup, being white = “bridal” = twice the price of the black net I used in mine…!)
Thread; $2.68
Open ended zip; $3.49
2x Dress zips for pockets; $1.98
Seam Grip; $17.95
Cord; $1.49
Cord Stops; $1.19
Eyelets; from stash
Velcro; from stash
Pattern; self-drafted
Total cost: $51.36
(y’know what though? I’m not going to include this one in my year’s total since it is not part of my wardrobe  🙂  )
Fabric; $27.00
Pattern; self-drafted
Total cost: $27.00
Yarn; $108.70
Pattern; a free download
Buttons; a gift from Mum
Total cost: $108.70
Fabric; made from all old clothes
Pattern; my own design
Thread; had the right colours already
Buttons; from my stash
Total cost: free
Peg Bag
all leftover free fabric and a re-cycled hanger
Miscellaneous
This month I also
purchased:
Seam Un-picker;
$3.95
Sewing machine light bulb; $7.95
Total cost: $11.90

o hai there…
pinterestmail

Curtains…

I have been sewing curtains!
This is our central hallway, an area that has been curtain-less since… well, since ever.  It has a very big and long window, which is fabulous for getting plenty of natural light inside.  But it did need something insulative for these really hot hot days of summer.  And we have no carpets in the house, which is perfect for keeping the place cool, but also means that soft furnishings are even more essential to soak up noise and add softness visually to the architecture.
Luckily our taste in home furnishings runs to very unfussy, plain and minimalist.  Even so, I have been steadily and craftily procrastinating for yonks, devising lame reasons as to why I could not get on with it.  High up on my list of excuses was the lack of a curtain rail.  Then about a year ago, my husband put up a curtain rail.  A quietly guilty period followed.  Occasional pleas for curtains were deftly fended off.  I had to be imaginative in this respect, you understand; had to think on my feet.  A lack of fabric was not the problem, since in a whimsically optimistic moment during a Spotlight sale ages ago I had actually purchased enough curtaining fabric for the entire house.  It has been sitting in a big roll underneath the stairs, taunting and mocking me with its whole still-unmade-into-curtains state.
Sewing home wares is not a joy to me, and particularly curtains.  Mostly because they are unwieldy and I have to commandeer the dining room, kick everybody else off and out and carry my machines over and set up on the dining room table since my little bench in the laundry where I usually sew could not possibly cope with the massive swathes of fabric.  Also, curtains are boring.  But while sewing together massively big rectangles in straight seams might seem easy and without any challenges doesn’t mean one should get blase about it… I had a wake-up call when I was distractedly overlocking the fluffy selvedge edge off a vertical joining seam, not paying enough attention, and on checking it later noticed to my horror that, underneath, I had overlocked a massive tuck of curtain into the seam…..  noooo!  But I was incredibly lucky…  The tuck was a narrow one and the fabric in it had avoided being sliced by the overlocker’s knife by a scant millimetre…. seriously!!  I unpicked the tuck and all was well….. phew!  That was a warning… and I sat up and took much better care from then on….!
The curtains are not super fabulous.  They are OK.  I think you can tell by looking at them they were not made with much love…  The best thing about them??? they are finished.

Oh, technical details; each side has two and a half drops of fabric, hems are 10cm and the top is triple pleated…. and no, I did not pose the pussycat.  She happened come over at the right time and I took advantage of the fact that she matched the decor….
pinterestmail
Switch to mobile version
↓