Monthly Archives: January 2013

You are browsing the site archives by month.

paper-dolls…

10-15 January

I’m kinda excited about the paper-dolls; the nerdiness and and childishness of it really appeals to me.  And the stats… monitoring my handmade wardrobe, what I am wearing, how I’m wearing it and with what frequency…  omg; the latent geek emerges.  Of course there are so many more important things in life to be monitored.  But this blog has never pretended to be particularly d and m.  Just the trivia, my friends, just the trivia.  The fun stuff  đŸ™‚
Thank you for the compliments on my drawing, but seriously, y’know I really wasn’t kidding when I said my drawing skills are not all that crash-hot.  My paper dolls only look good because of the Fashionary …. you see, the figures on each page are already drawn in for you, naked, in very faint red dots.  All you have to do is draw in your clothes.  The line drawings on pattern envelopes can be quite helpful for that bit.  Then you just dot-to-dot draw in the rest.   And then colour in.  Yeah.  Everyone’s opinion of my drawing skills is dropping dramatically, right?
I bought my Fashionary, and also one for Cassie here.  And btw, this is not an endorsement; I received no freebies and I paid full price for both  đŸ™‚
It’s been super humid and muggy here lately, a by-product of tropical cyclone Narelle off the coast.  The weather girl informed us that we reached our minimum of 27C in the middle of last night and then the temperature started rising and was over 30C by 2am!  Sooo hot!  The rest of today was hideous, as you can imagine!
It’s been a while since I wore these sandals and I love the brightness of the turquoise and aqua set off against the sludginess of my eggplant purply brown dress.  This photo is re-visiting how I sometimes used to try to take somewhat arty outfit photos; looking down from high at my toes, trying to get all the colours and textures and the gist of the thing in one shot.

Hmmm.  đŸ˜€
pinterestmail

Sweet nothings

Recently I received the Very Inspiring Blog award from pdiddly, janessewandtell and also from EmSewCrazy, thank you so much Pauline, Jane and Emily!

But I just had to laugh a little bit…  my 2012 round-up post attracted a comment, Anonymous of course, that read something like this…

Congratulations.  I think your blog is the most up your own ass (sic) blog I’ve ever come across.

My typical knee jerk reaction is to spam those mean-spirited comments, only now I wish I hadn’t because in retrospect it’s kind of hilarious, isn’t it?  Maybe I should make up a button and all.  Except I have absolutely zero skills in the button-making department.  Would anyone like to receive that blog award?  đŸ˜€

Anyways; inspiration, inspiration… now I do know you’re supposed to write stuff about yourself here, but: well since I am taking part in the cloth habit Bra-sewalong masterminded by Amy at the mo’ my brain is stuffed full to overflowing with thoughts of lingerie! and I thought I would share with you some of my current favourite inspirations instead… some colourful and funky, some cute, some eclectic, some ethereally beautiful, all have something to give one some great ideas, yes?

Orange – custom tailored lingerie; source
Mimi Holliday, source
VPL source
Stella McCartney, source
source not found
Marni source
source not found
anthropologie, source
Roseanna, source not found
If you haven’t yet; do these lovelies inspire you to attempt your own lingerie??
I am passing the Very Inspiring blogger award onto:
I have been making some weird looking things… not very inspiring stuff I’m afraid.
This is my meagre progress in the sew-along so far  đŸ˜‰ 3 tester bras.  At least I think I have correctly identified my size at last.  
Because of one rather weird result I got in one online bra-size calculator, which I didn’t want to just dismiss summarily without giving it the smallest benefit of the doubt; I also made up a 32C tester, the top bra pictured above.  Well, it was utterly ridiculous on me.  I quietly left that one out of the Flickr group!!  The other two are 34A (what I thought I was) and 32A (what I am).
And I have made my two pairs of matching undies already… they are now sitting on my sewing bench just awaiting their bra!
pinterestmail

Yellow pleats. please!


Yes, my title is swiped
shamelessly from Issey Miyake’s famous 1993 collection, but I reckon that is OK
since this is an Issey Miyake
design  😉

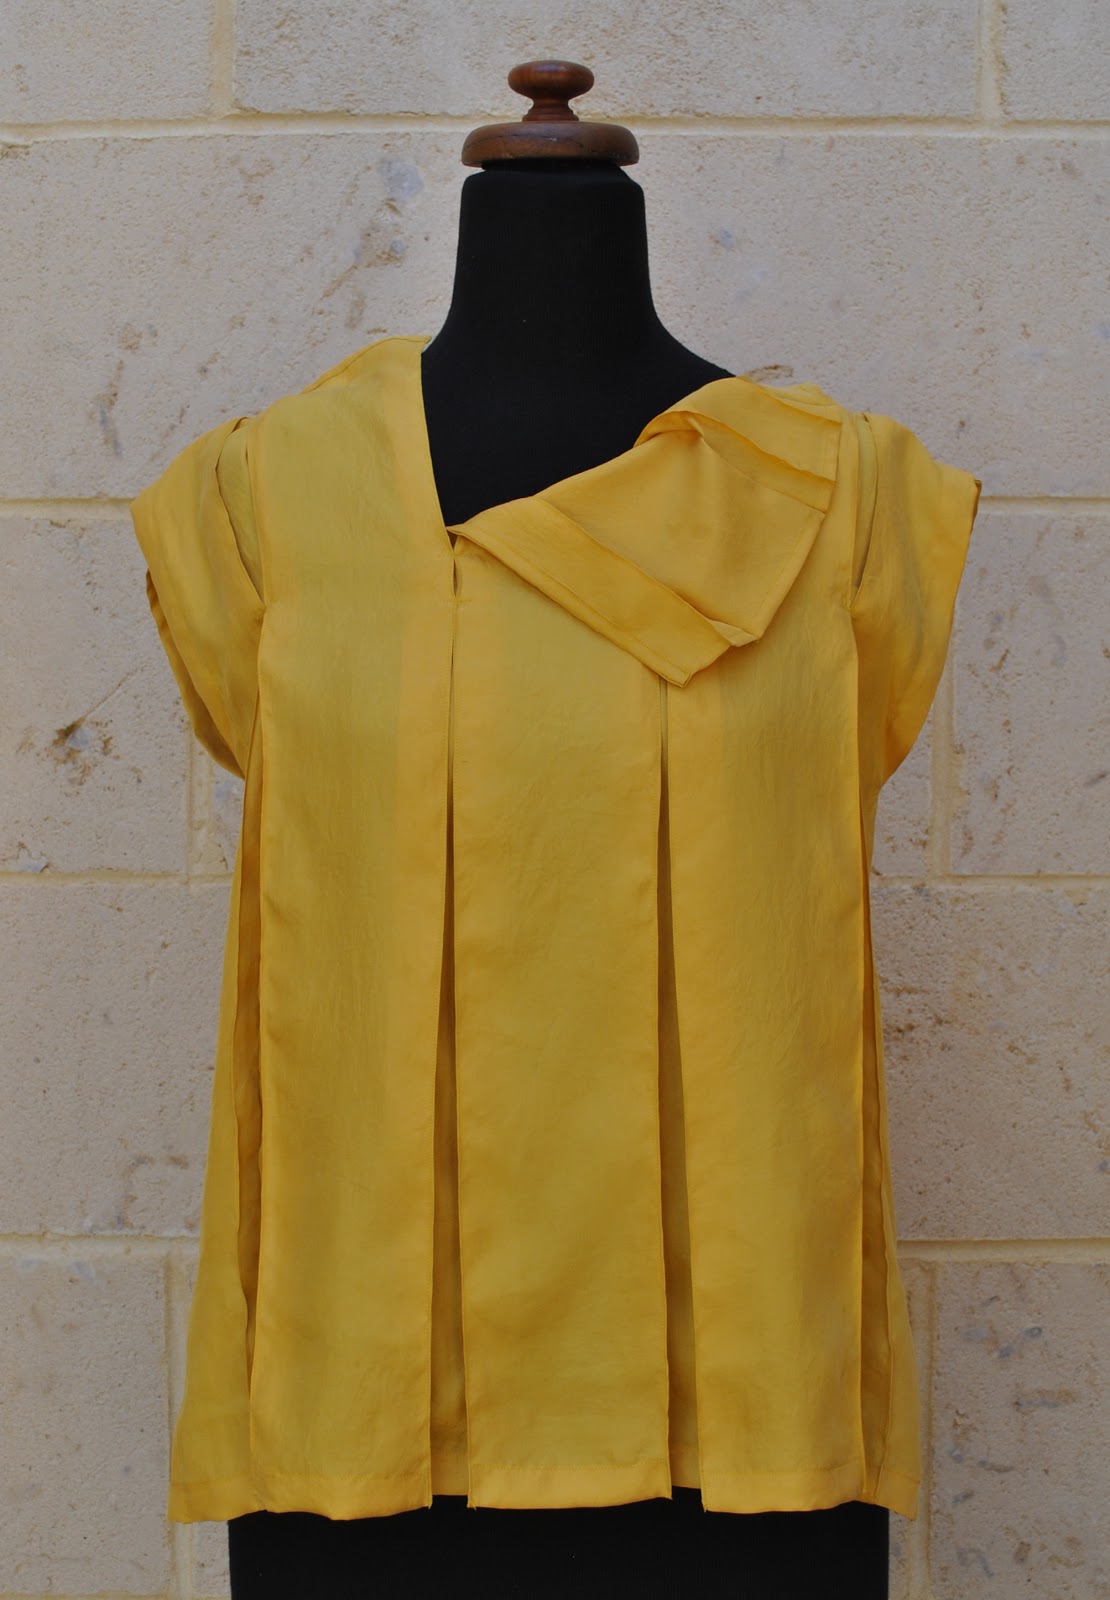
And you’ve probably noticed that it is yellow.  A yellow top.  Very yellow.  Quaite
quaite yellow.  As yellow as.
I’ve just been feeling very yellow-philic lately.  Don’t bother to look that word up, I
just made it up just then.
“Philic”, meaning “attracted to” of course.
Oh, you’re welcome.
Don’t ever say this blog is not ed-you-cational!
I’ve been hunting for yellow fabric for ages
. and it just
doesn’t ever seem to be “in”.  And
I don’t mean pastel primrose yellow, which is inexplicably always represented but which is too dreadful on me: I wanted intense!  Saffron
yellow!  Fierce yellow!  Bold yellow!
Finally I spotted this satisfyingly ferocious, yellow silk
in the Fabric Store, in Melbourne, during our trip away last September, and
snapped it up!  Then came the decision
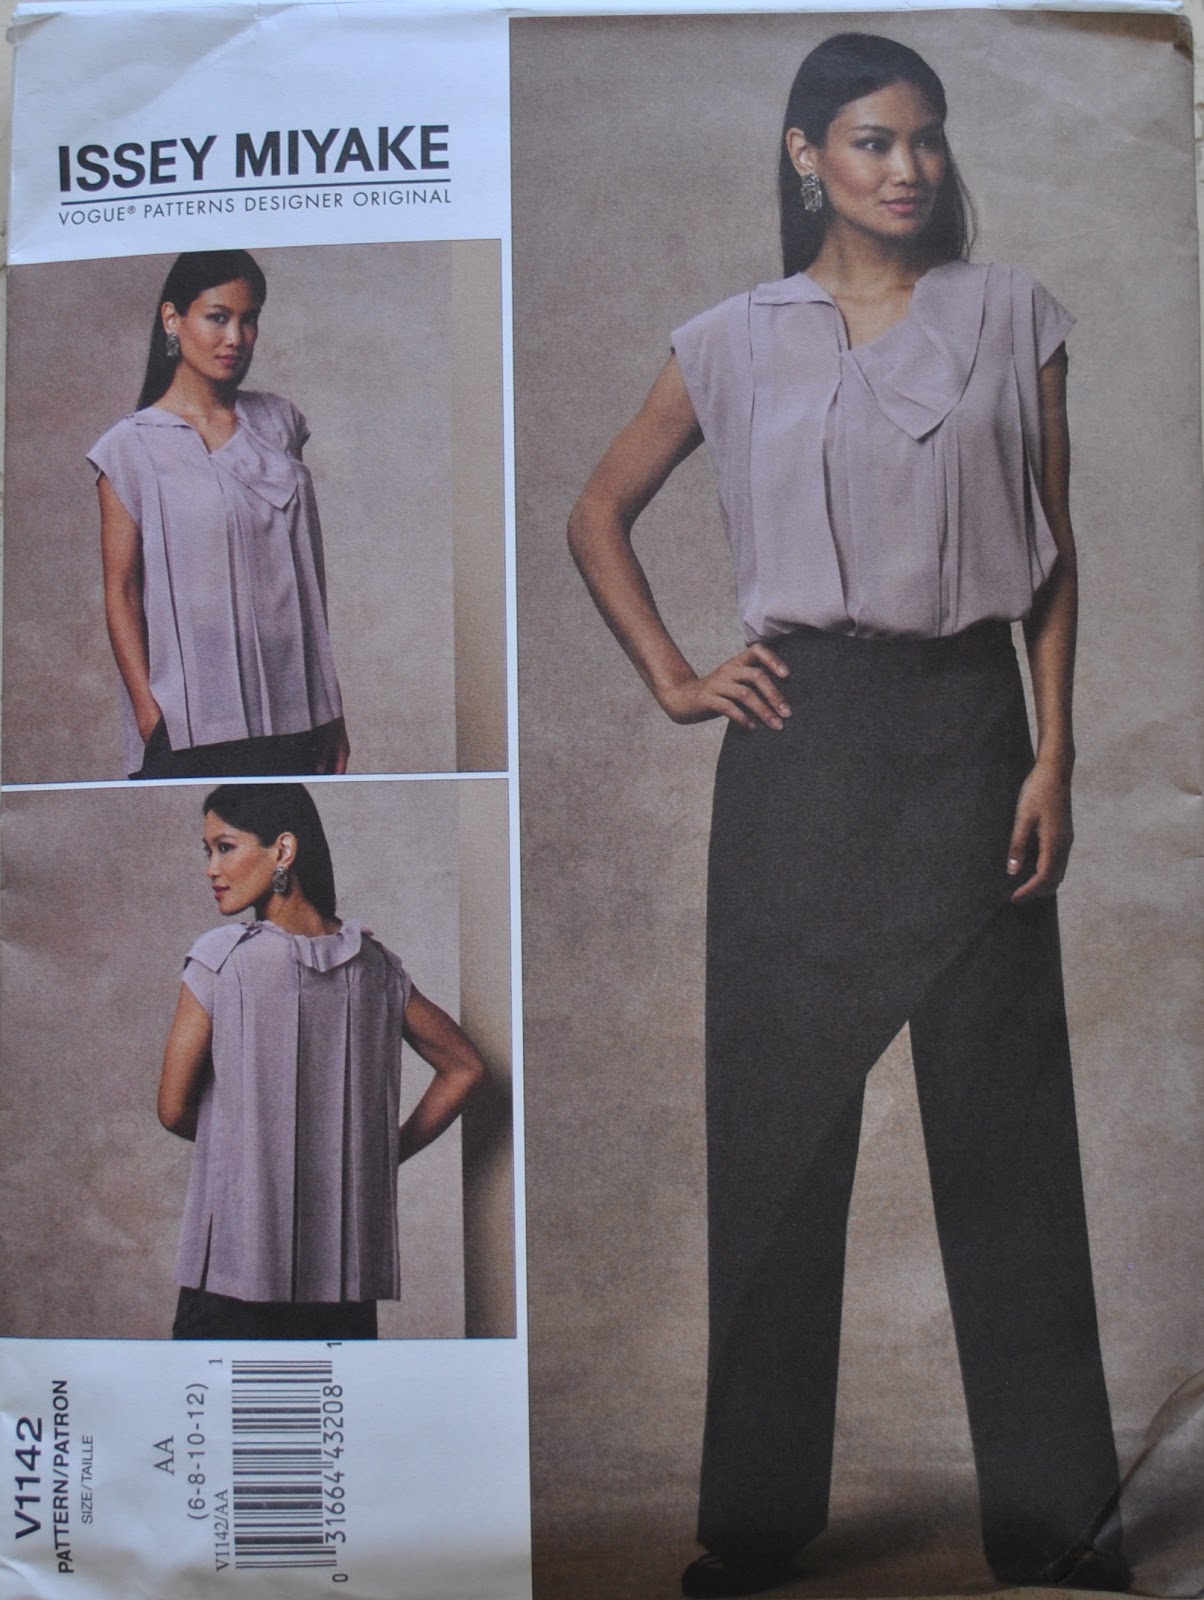
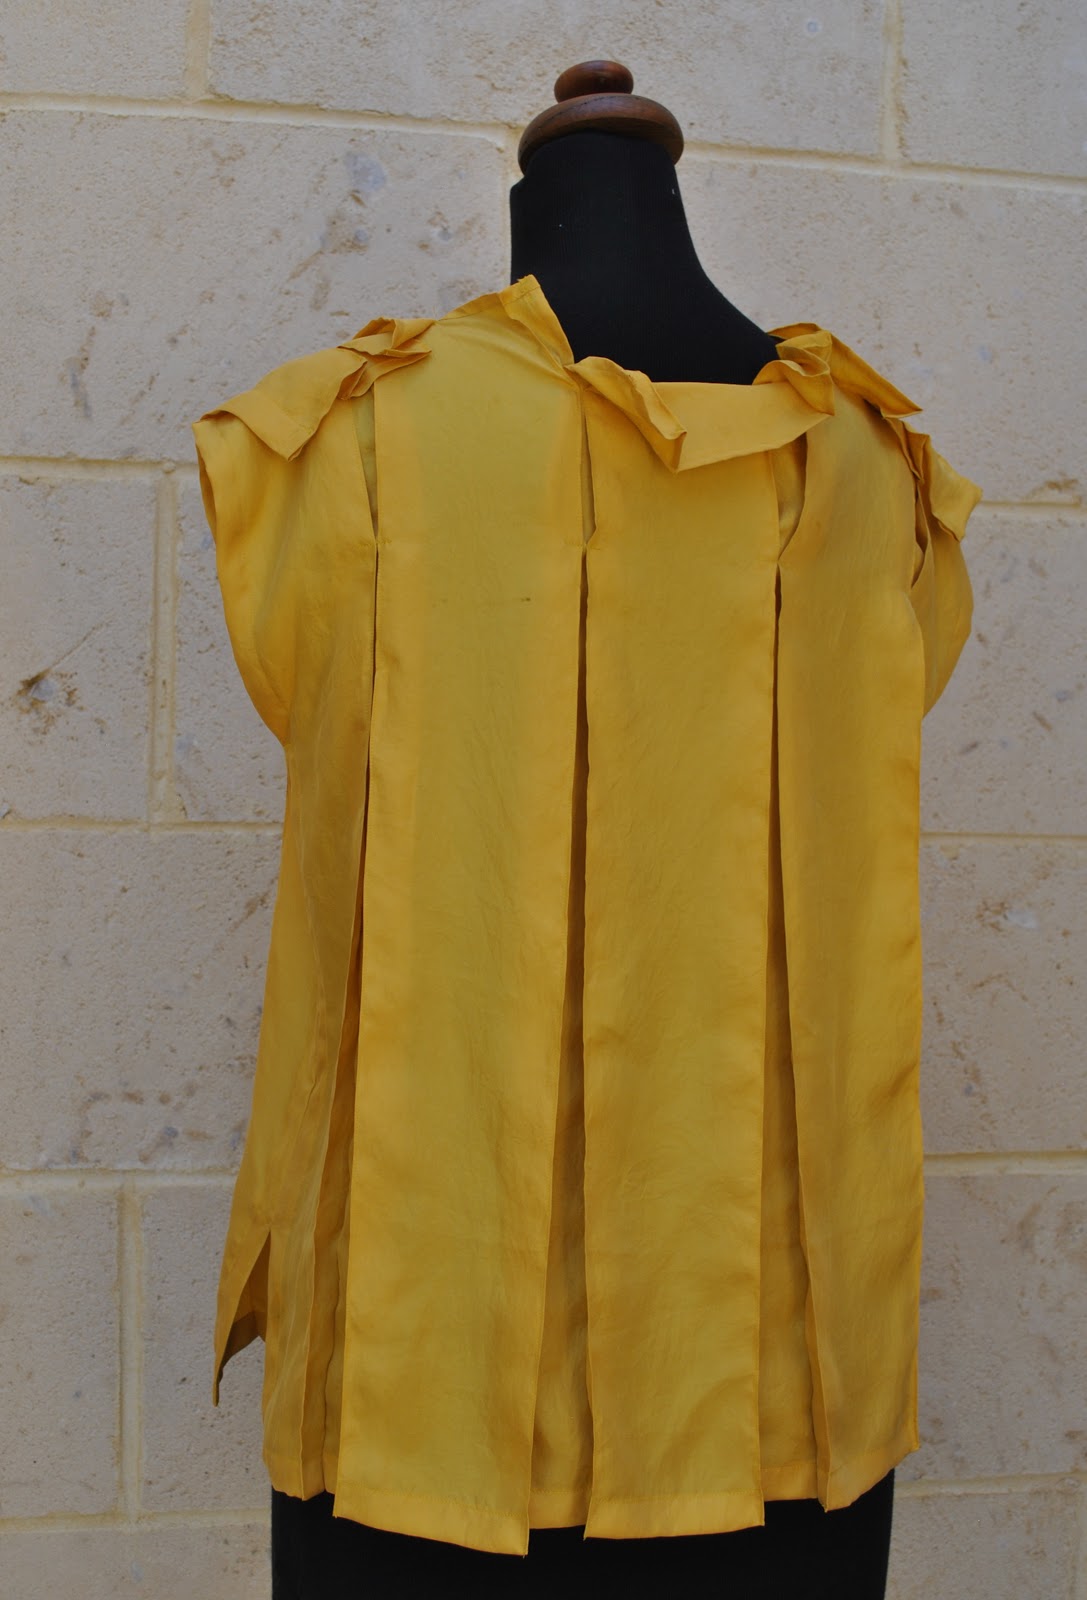
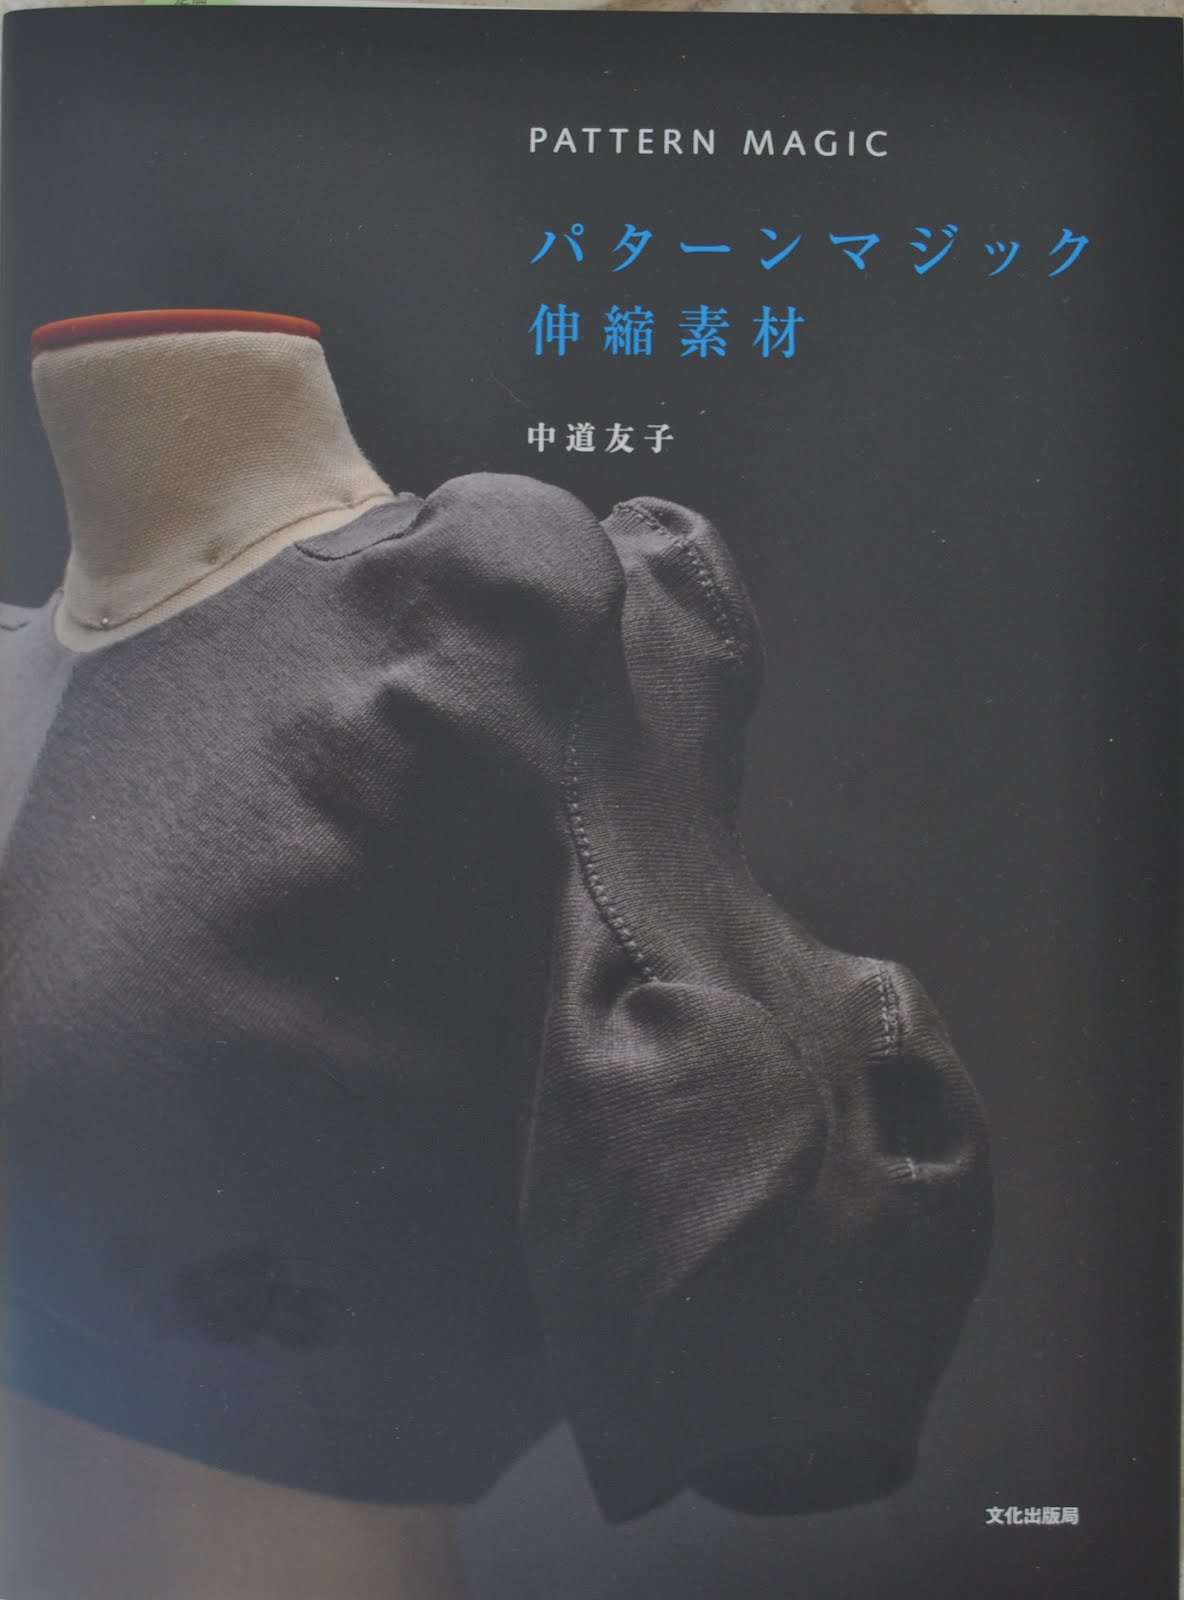
of what to make it in
 a decision swiftly and easily made when I laid eyes upon this Issey
Miyake pattern, Vogue 1142.  My
yellow silk is that very flimsy and flighty stuff, the sort that slithers
across the table with the slightest breathe, so I knew it would be a good
choice; not too bulky when tripled up with this pleat-tastic design.
Oh, another
made-up word.  Honestly
.
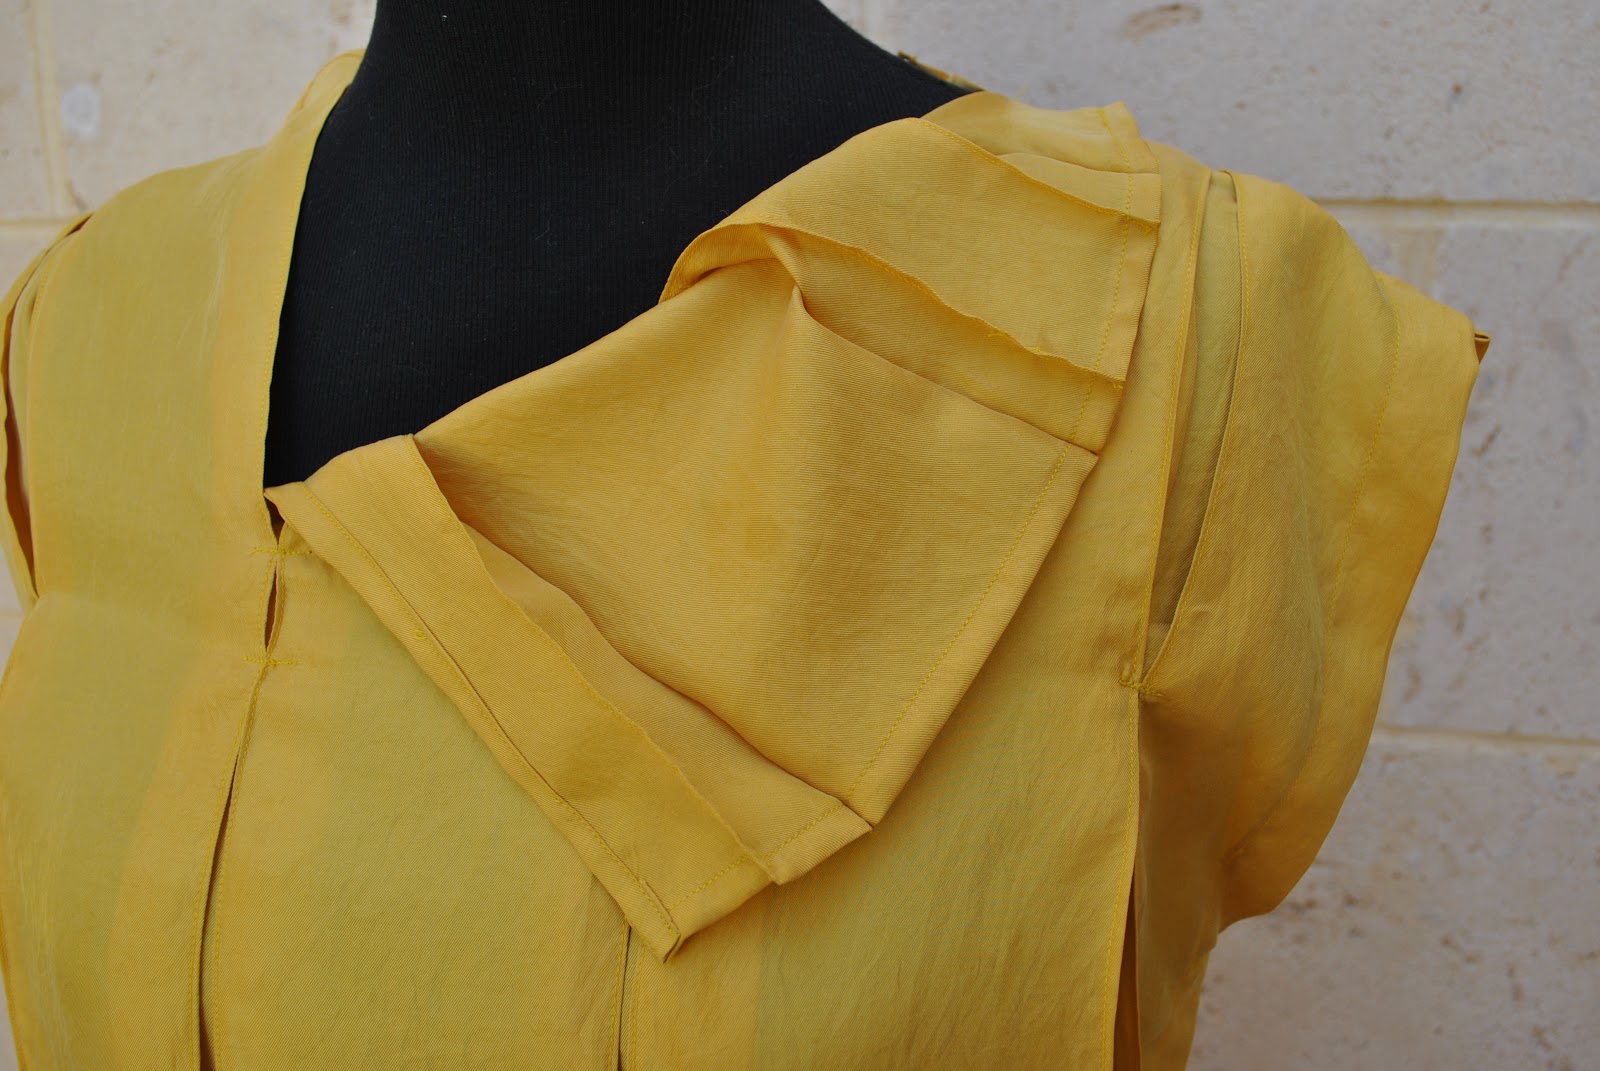
I wrote a pattern review, below, but there is a kinda major issue with
making up this pattern that I thought it worth mentioning separately
 the
pattern instruction just says “fold pleats in place, and press” and then those pleats are not even mentioned again, like bob’s your
uncle and that is all that is needed.
Hello? The sharpness and evenness of those perfectly spaced
pleats is only, like absolutely integral
to the visual success of the design imo.
Wouldn’t those merely pressed-down pleats simply wash out with the very
first wash??? Or, even just fall out on their own, with wear?   And then your top will just be a
formless flowy thing; which admittedly could still probably look quite pretty, but
will not be the tiniest bit sculptural and would have lost all the character of the
original.  I really like the sharp sculptural
lines of the one on the cover.
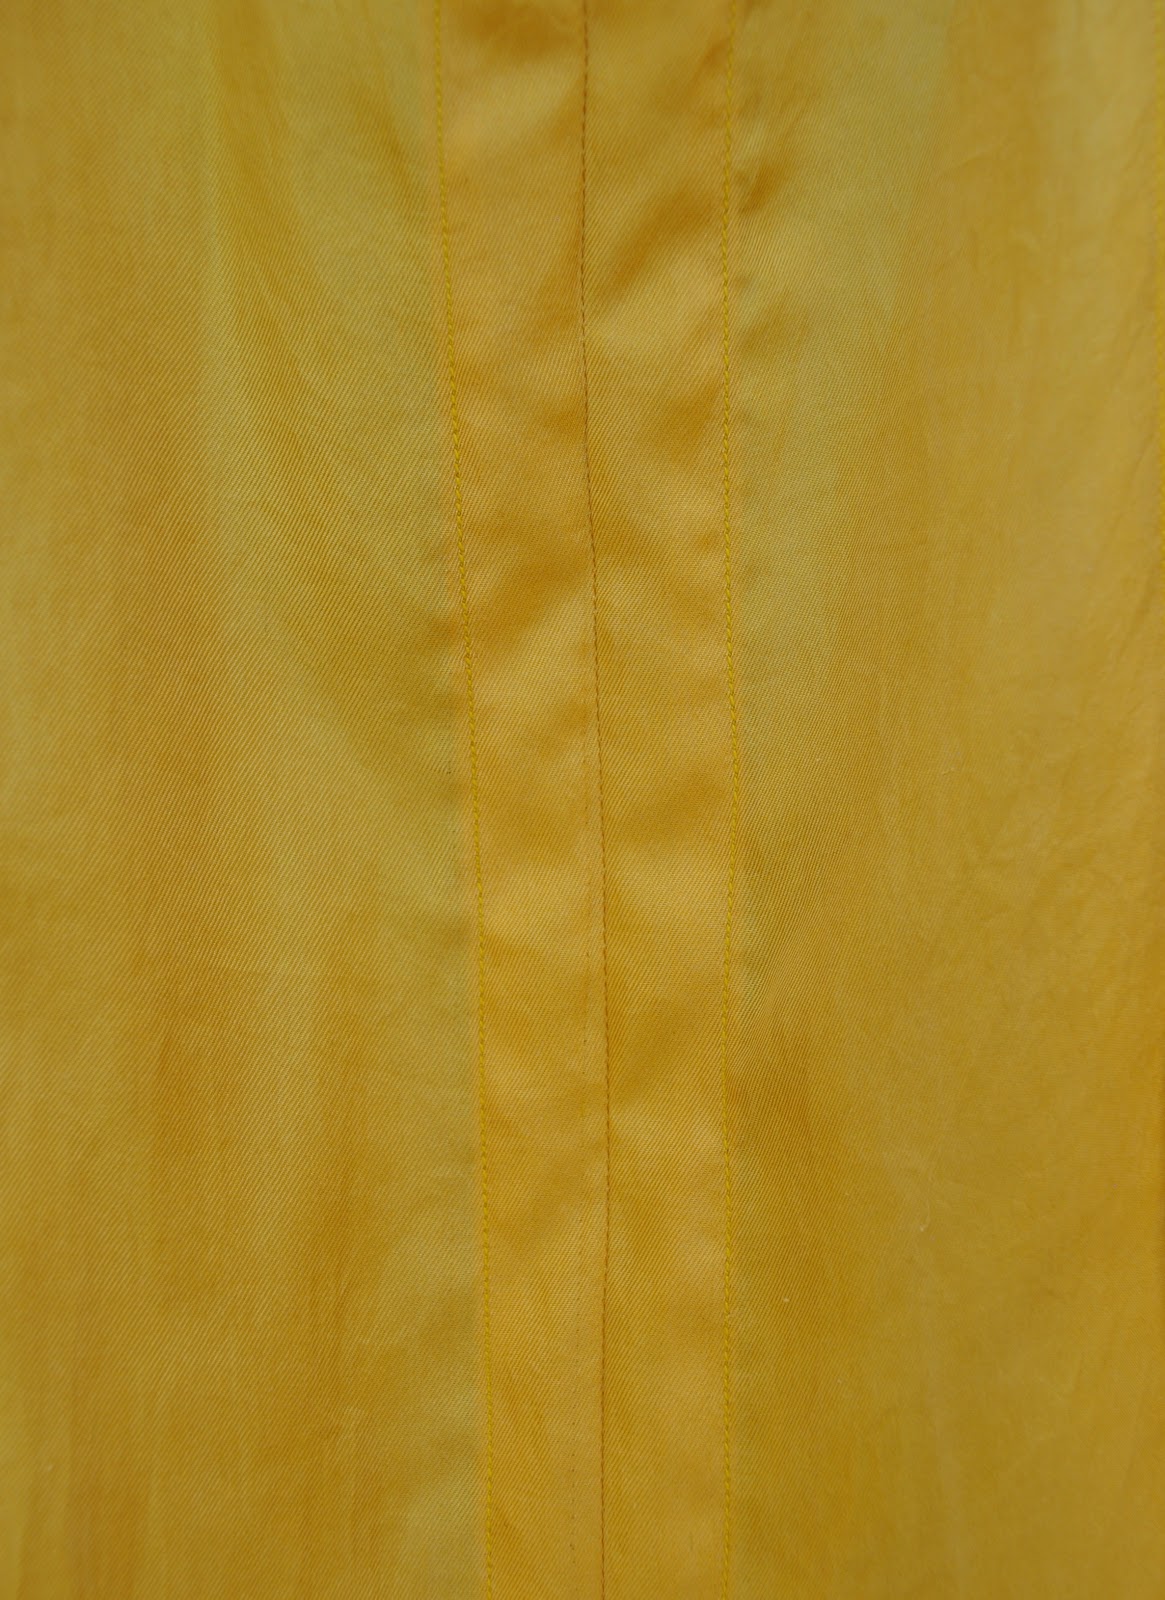
Accordingly I took the precaution of edge-stitching each and
every pleat down immediately after pressing.  This step was fiddly, and accounted for the bulk of my time
to make the top; but I think it is essential to keep those pleats nice and
crisp for forever: so therefore it is worth it.  In fact I just hopped over to Pattern review to check out
the other reviews and noticed that no one else mentioned how they
tackled the permanency or lack thereof, of their pleating; and I am curious as
to how their pleats fared in the wash??


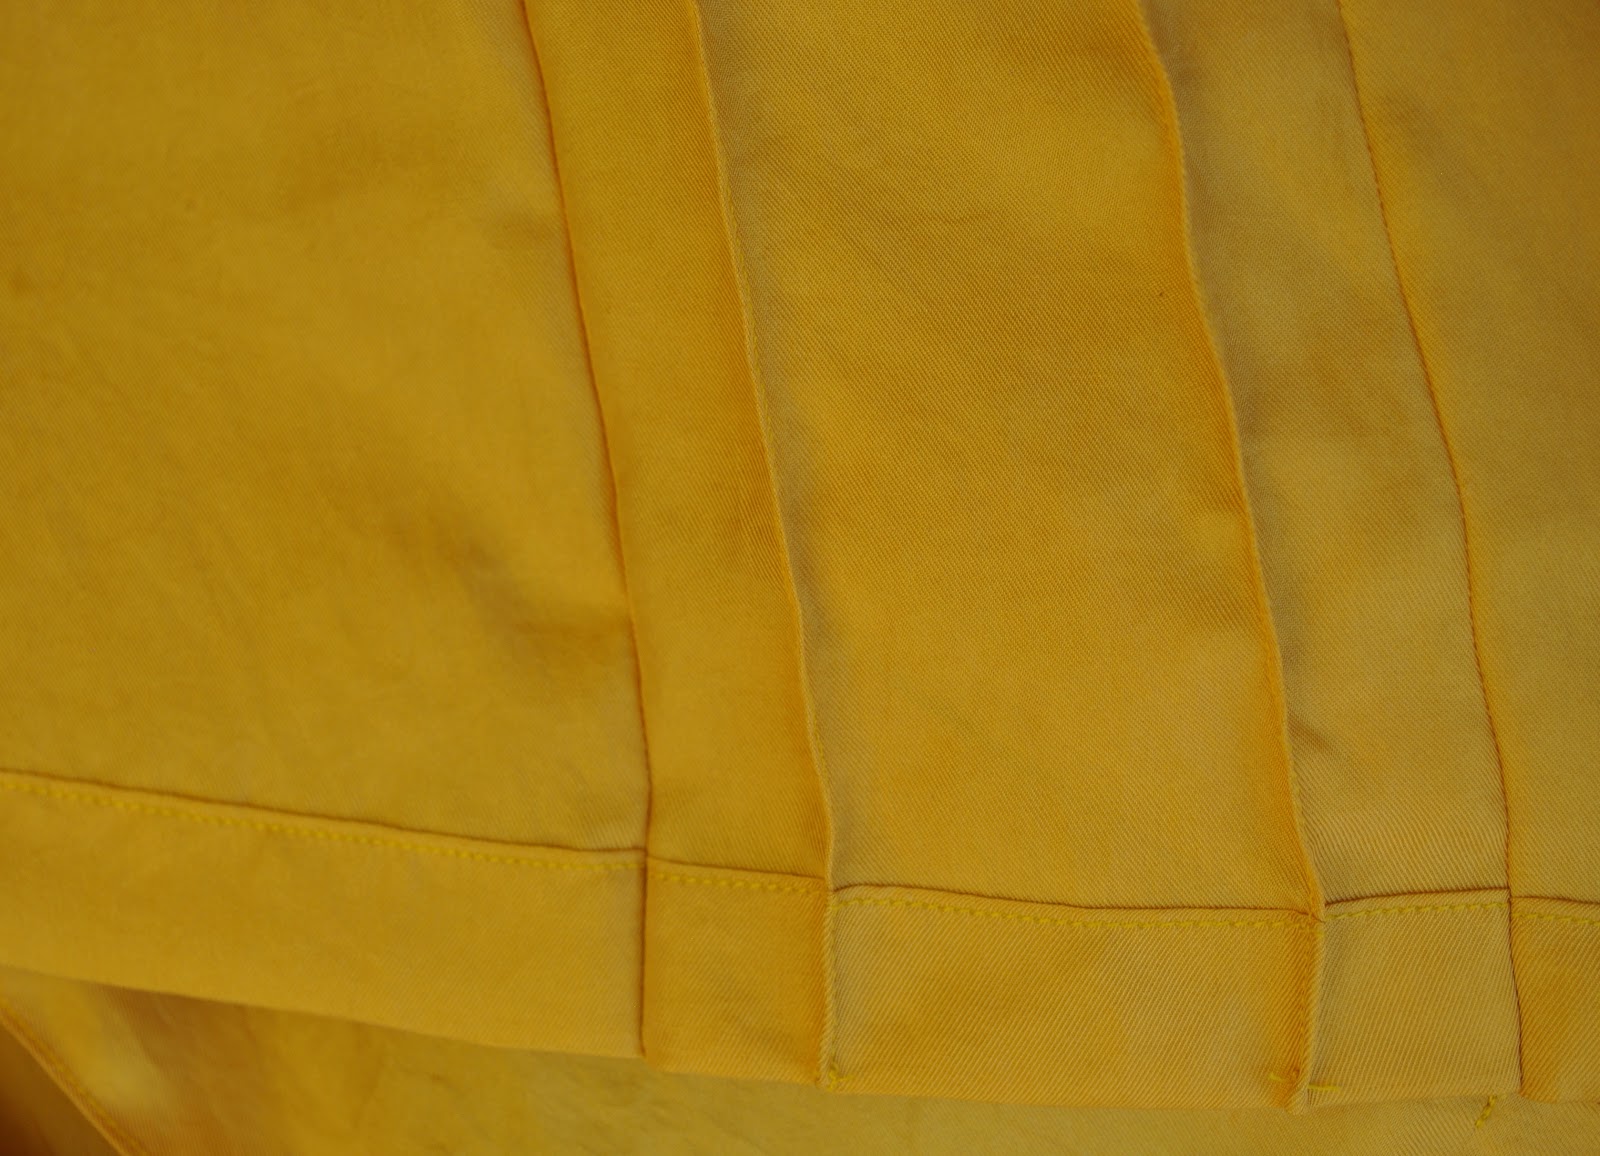
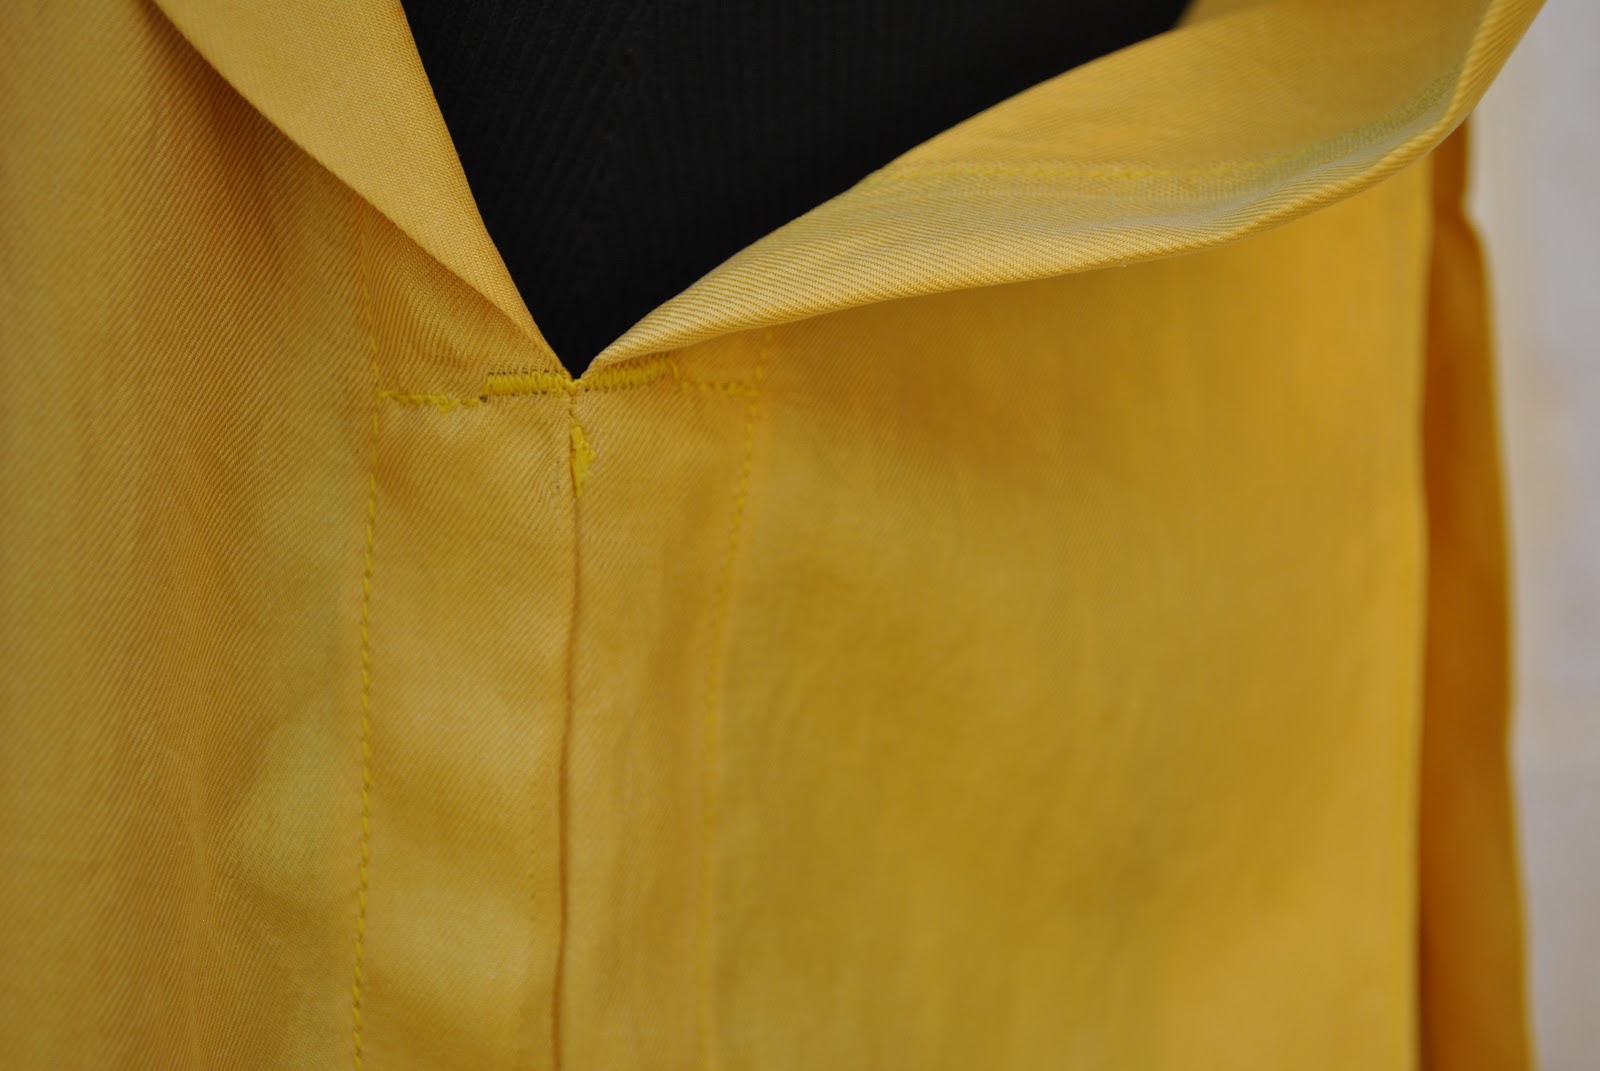
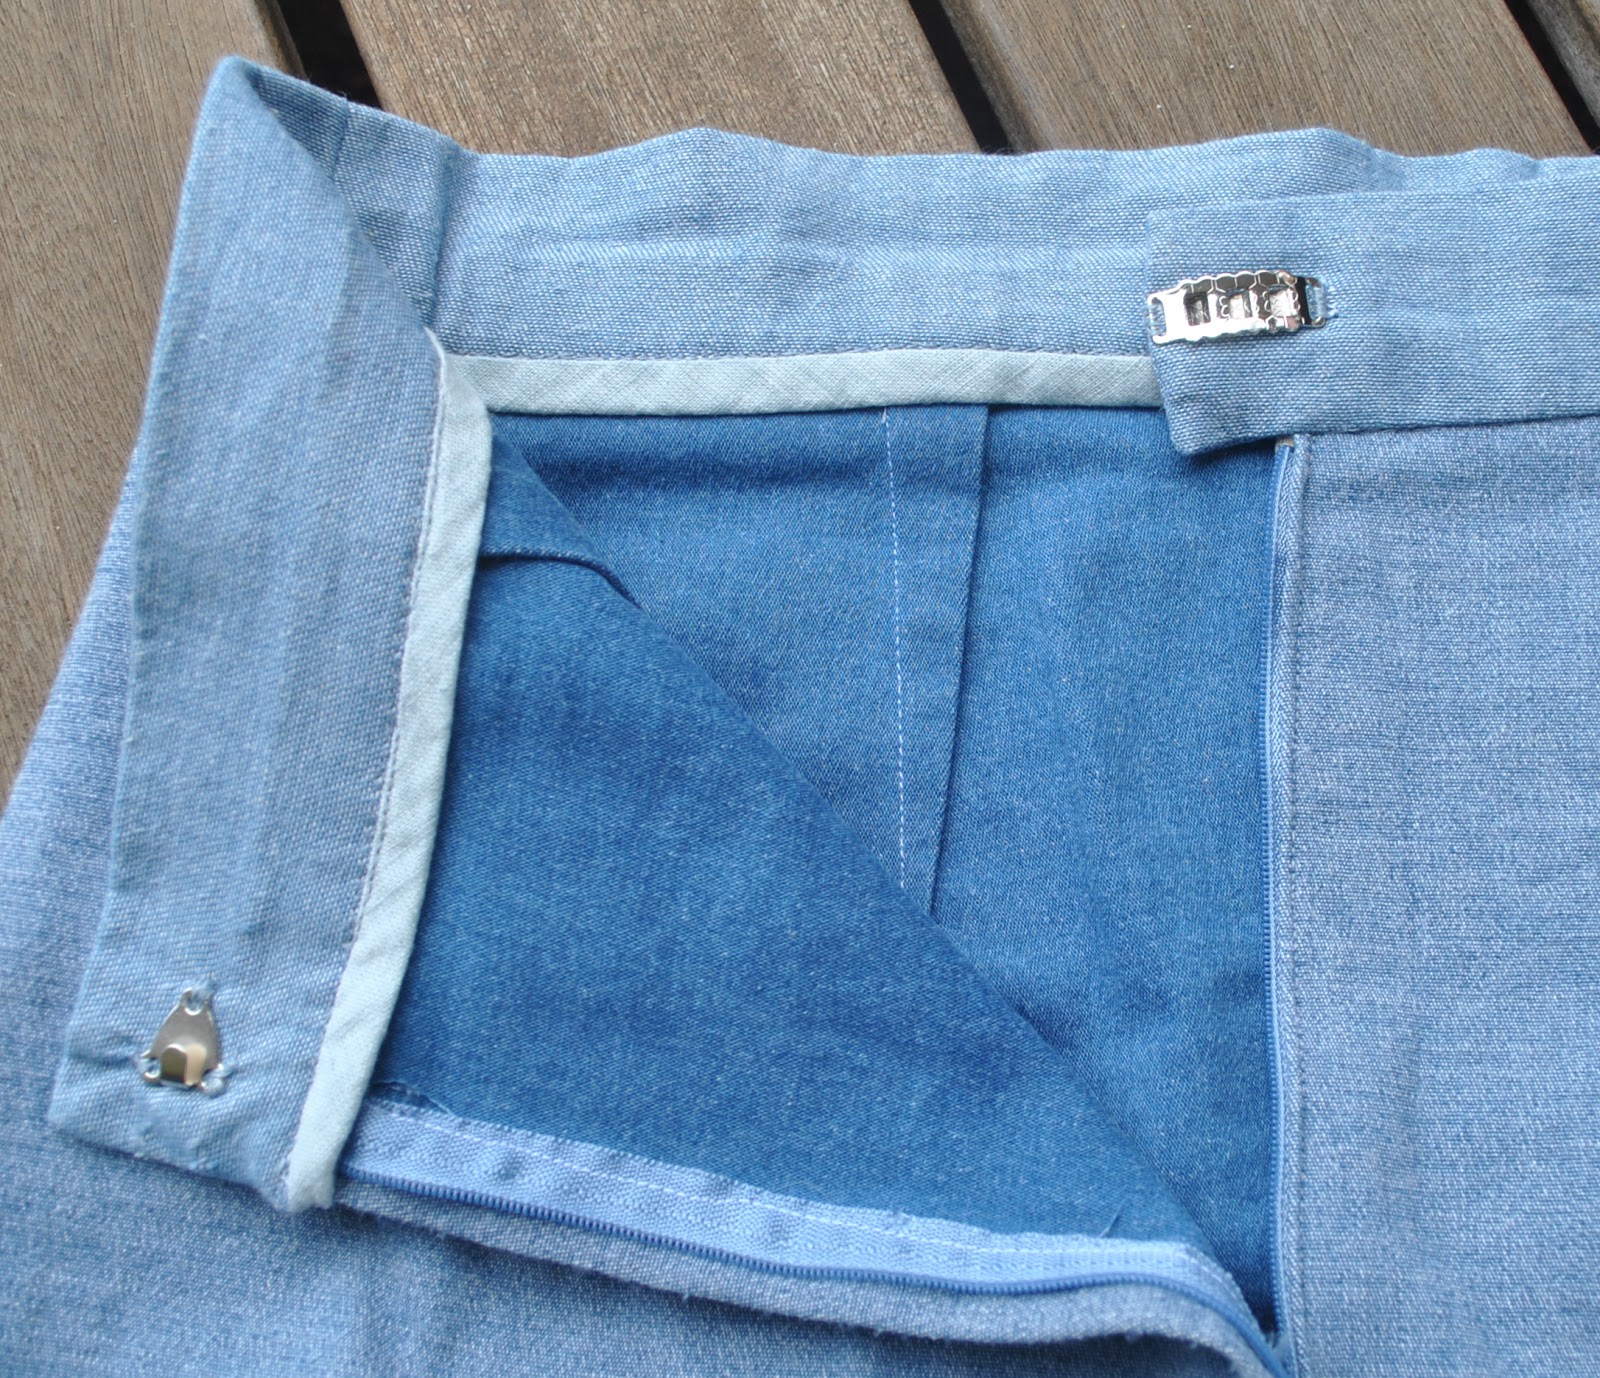
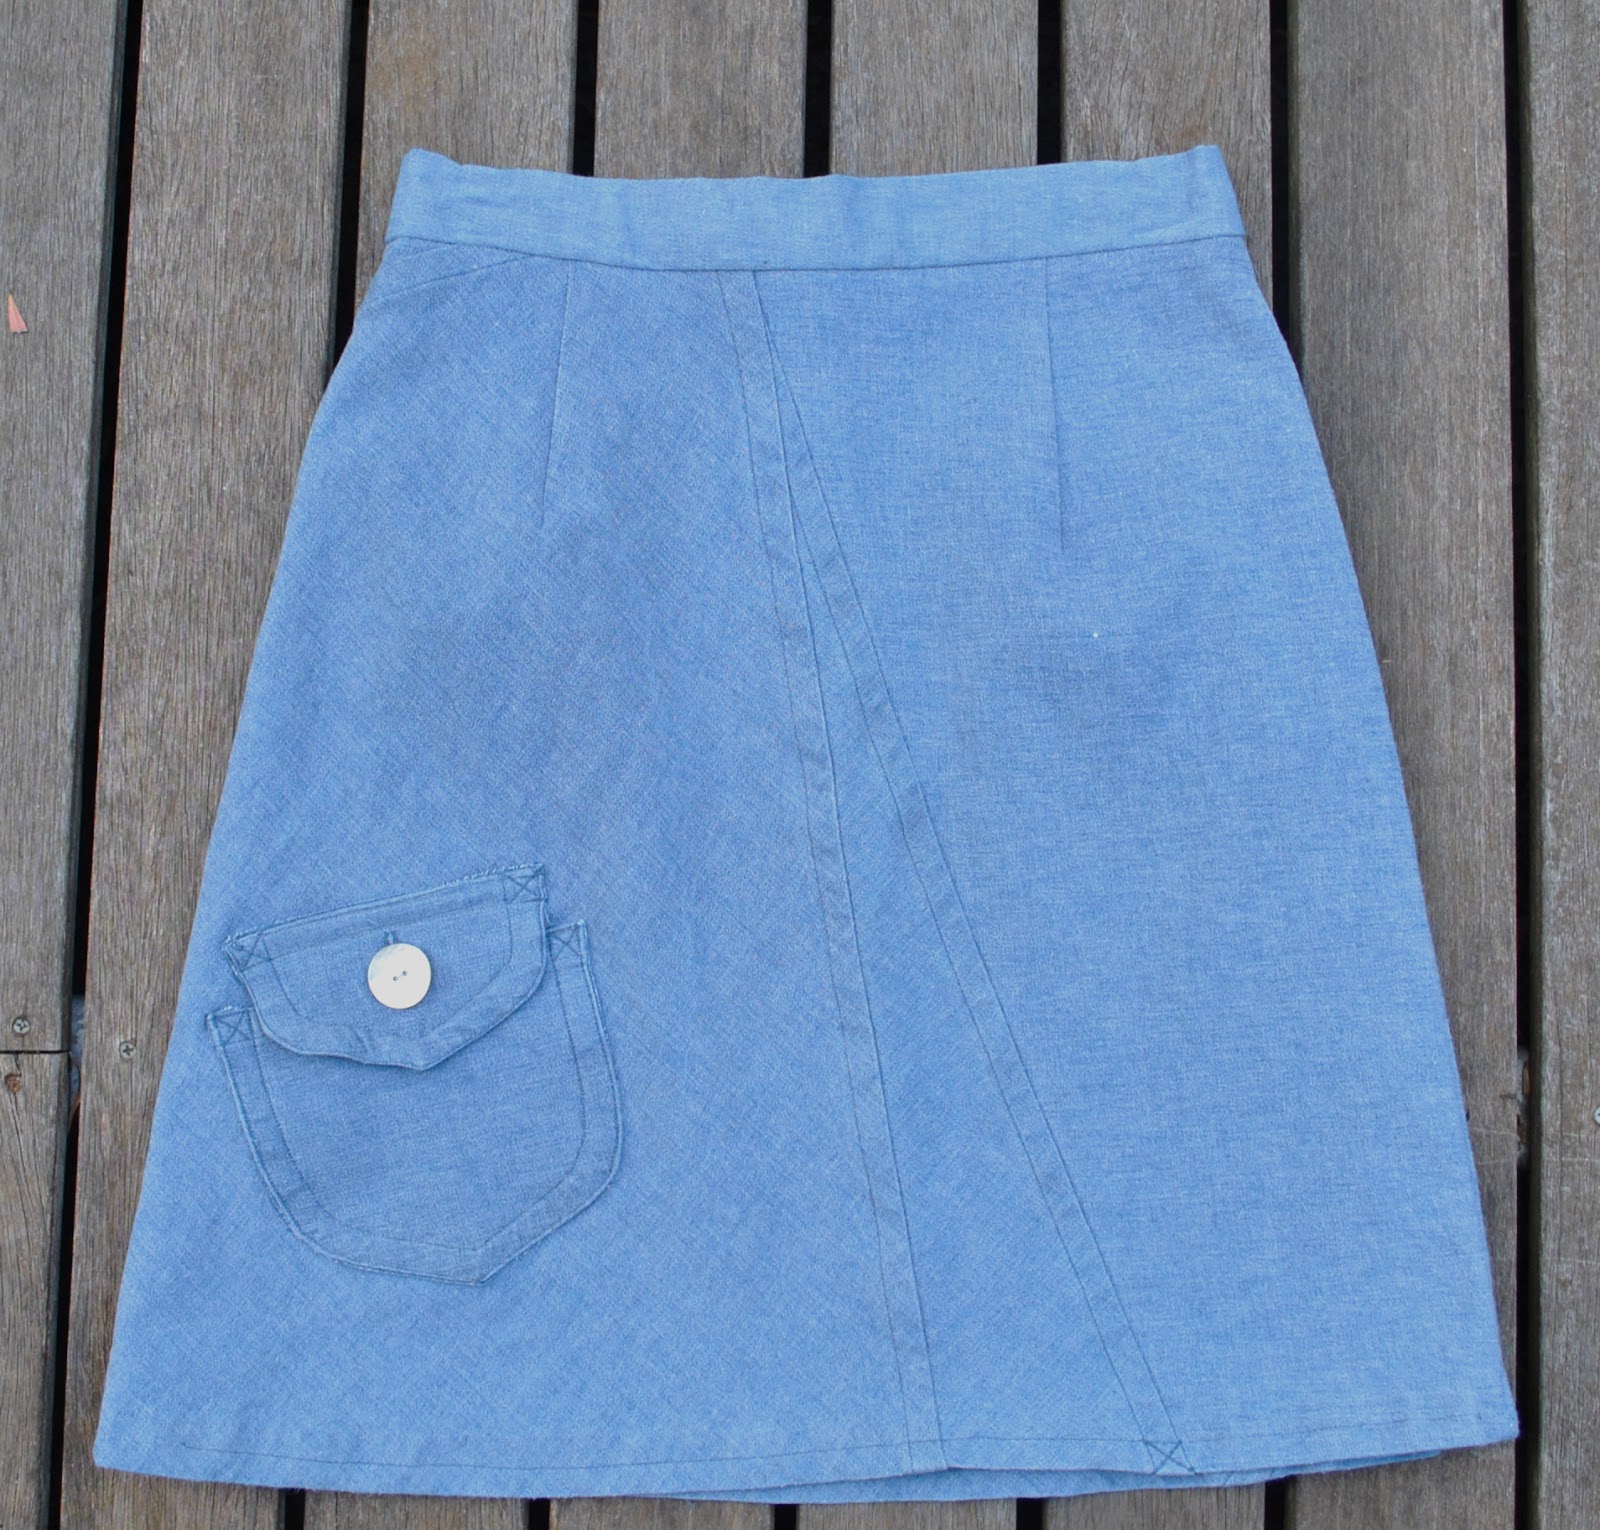
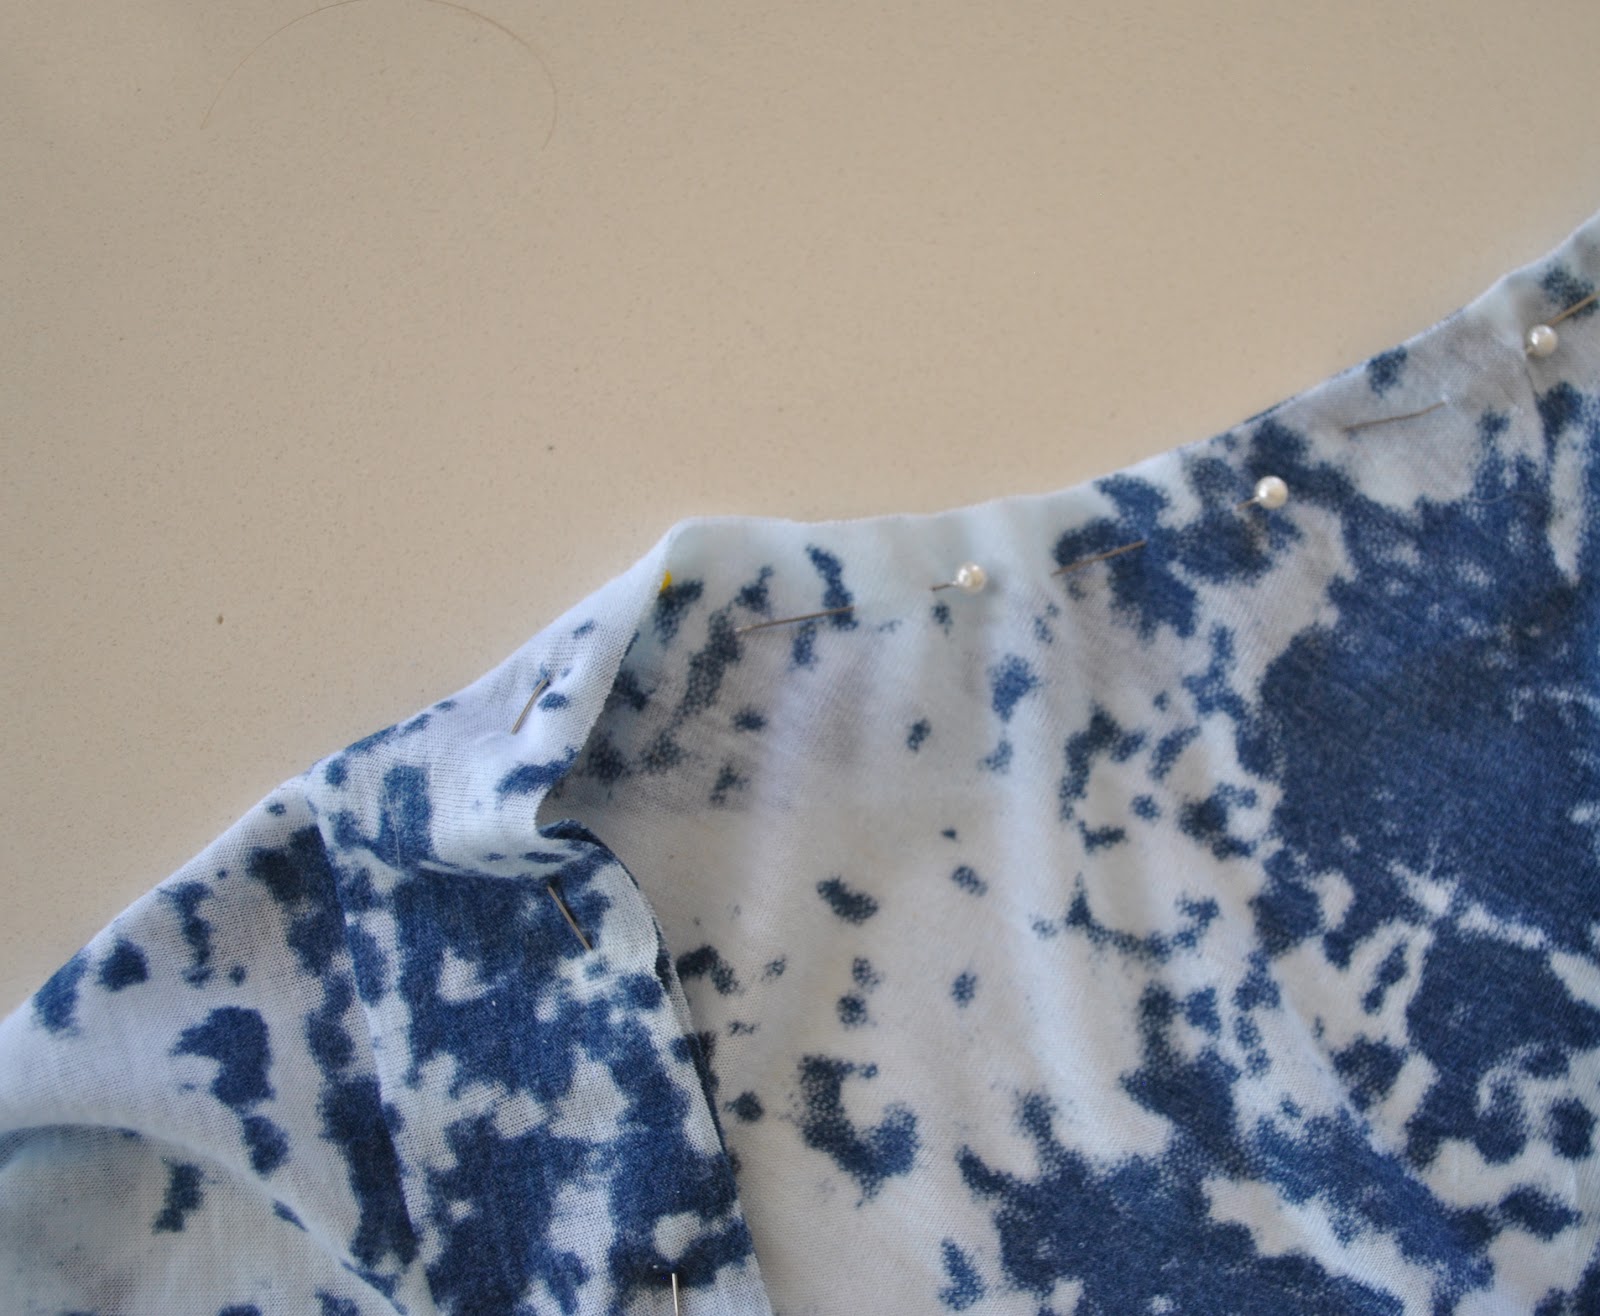
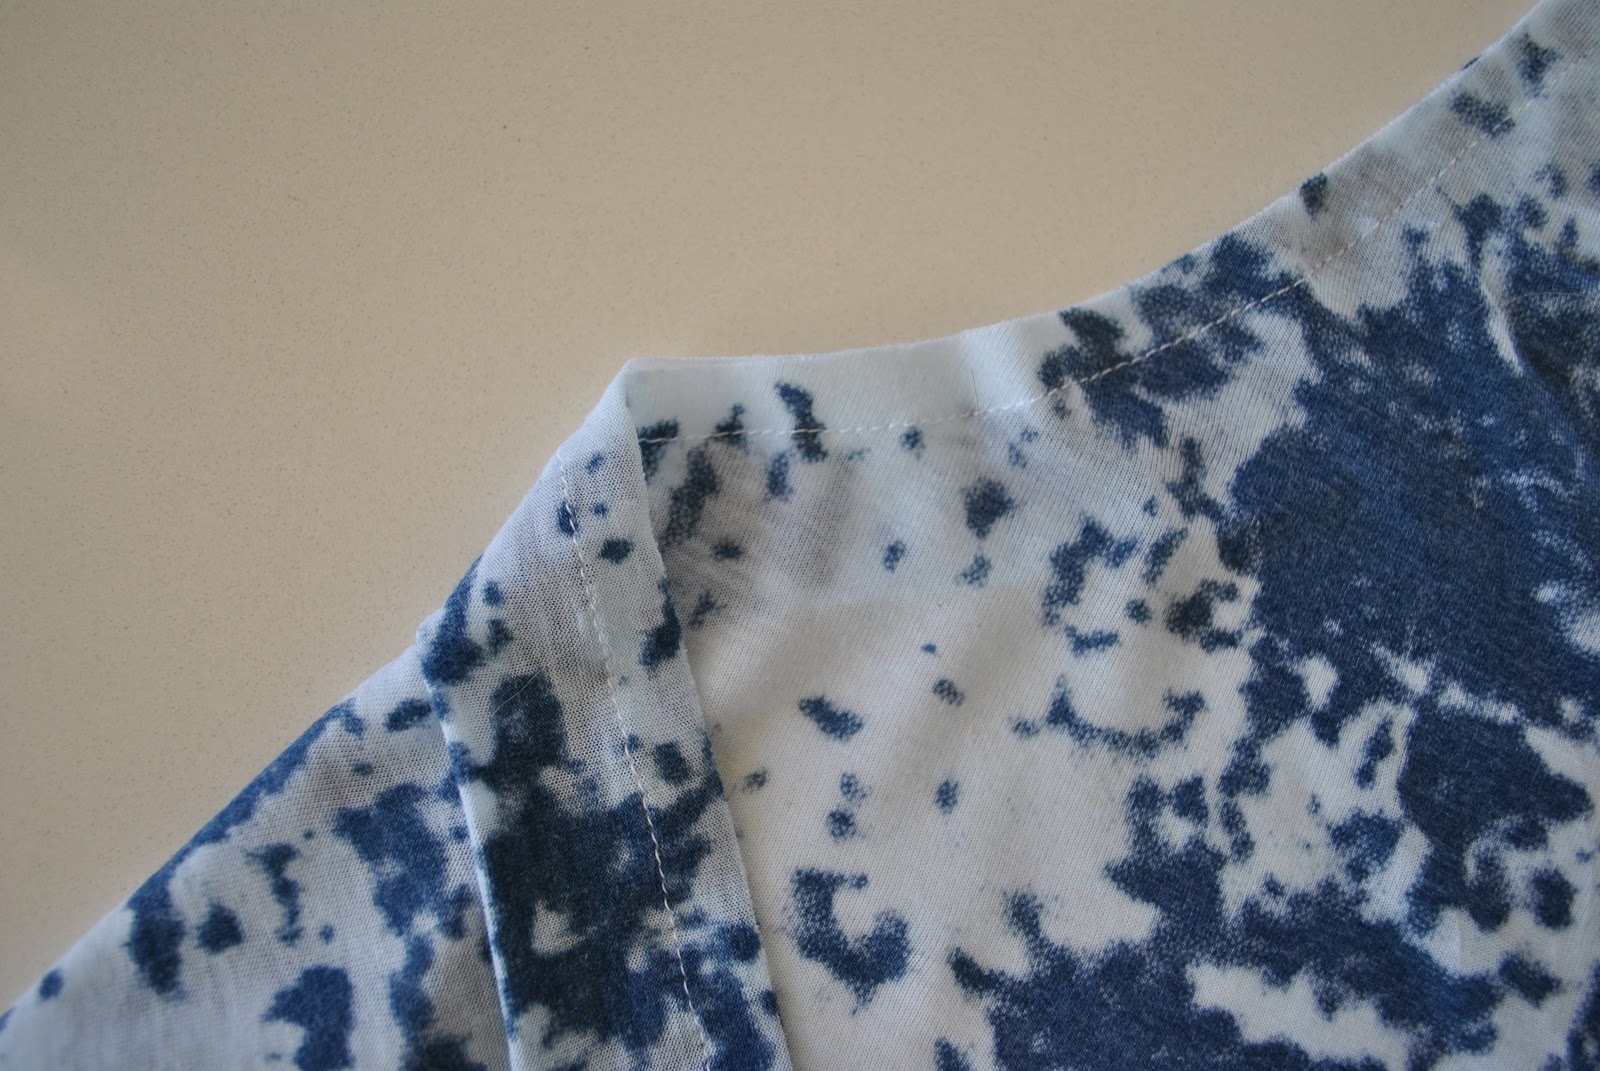
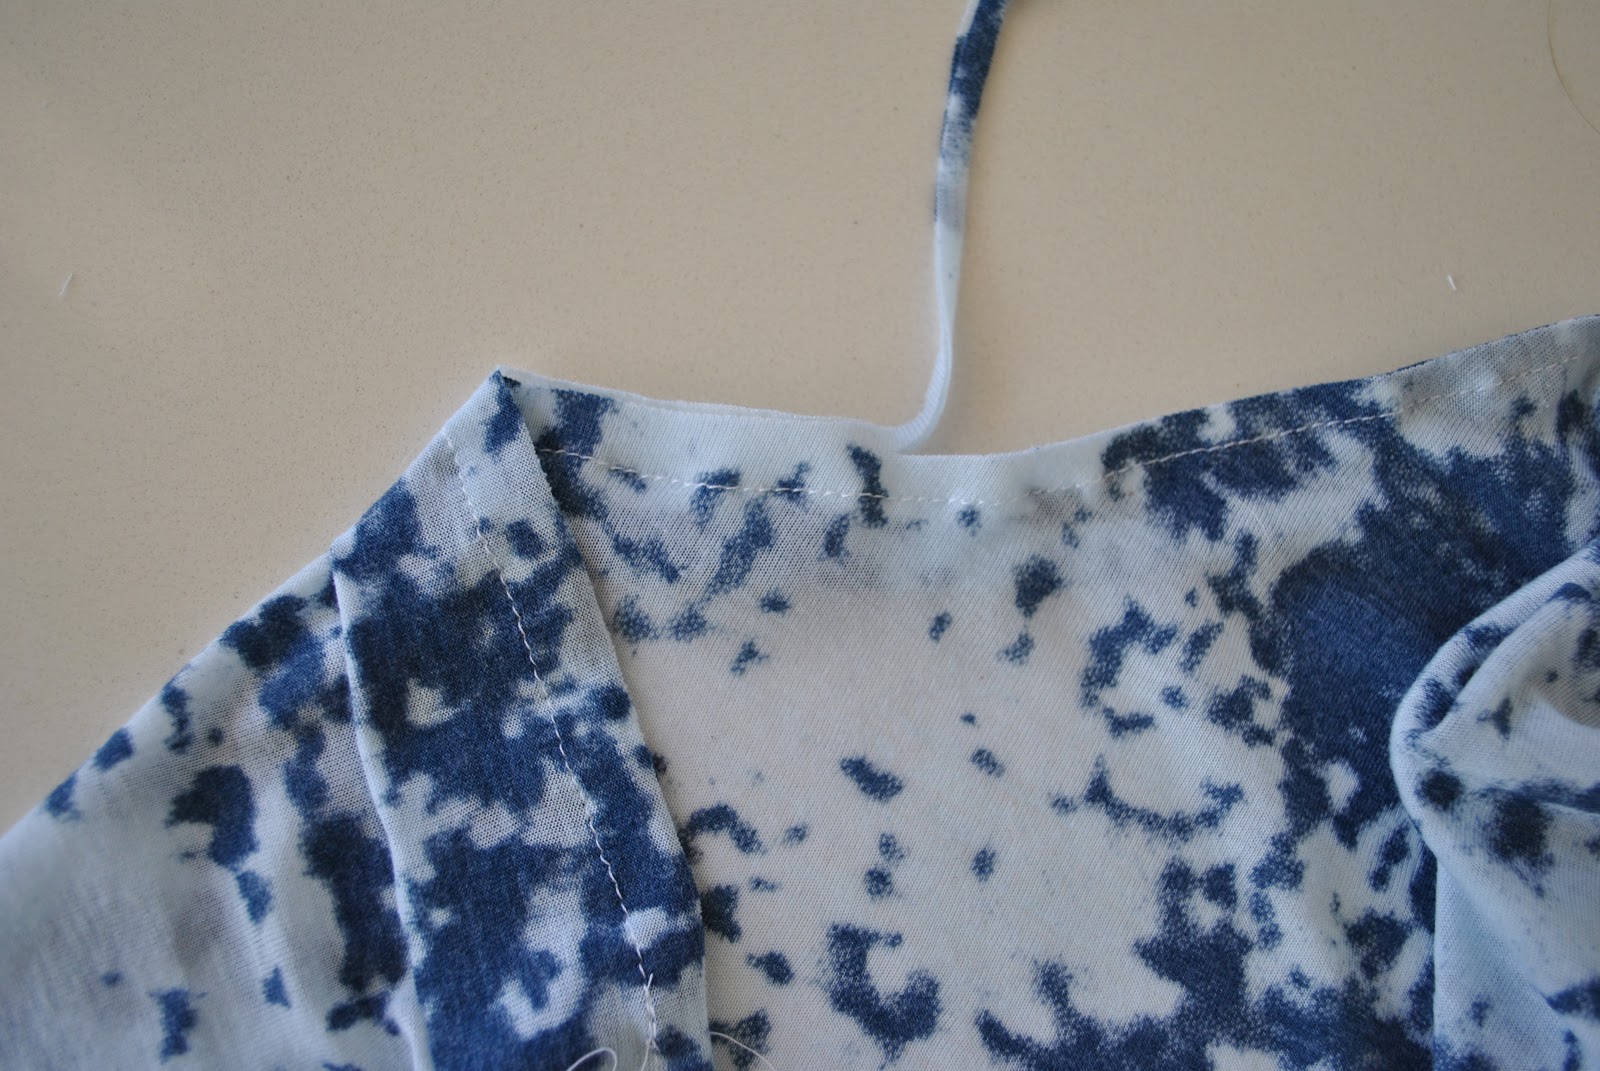
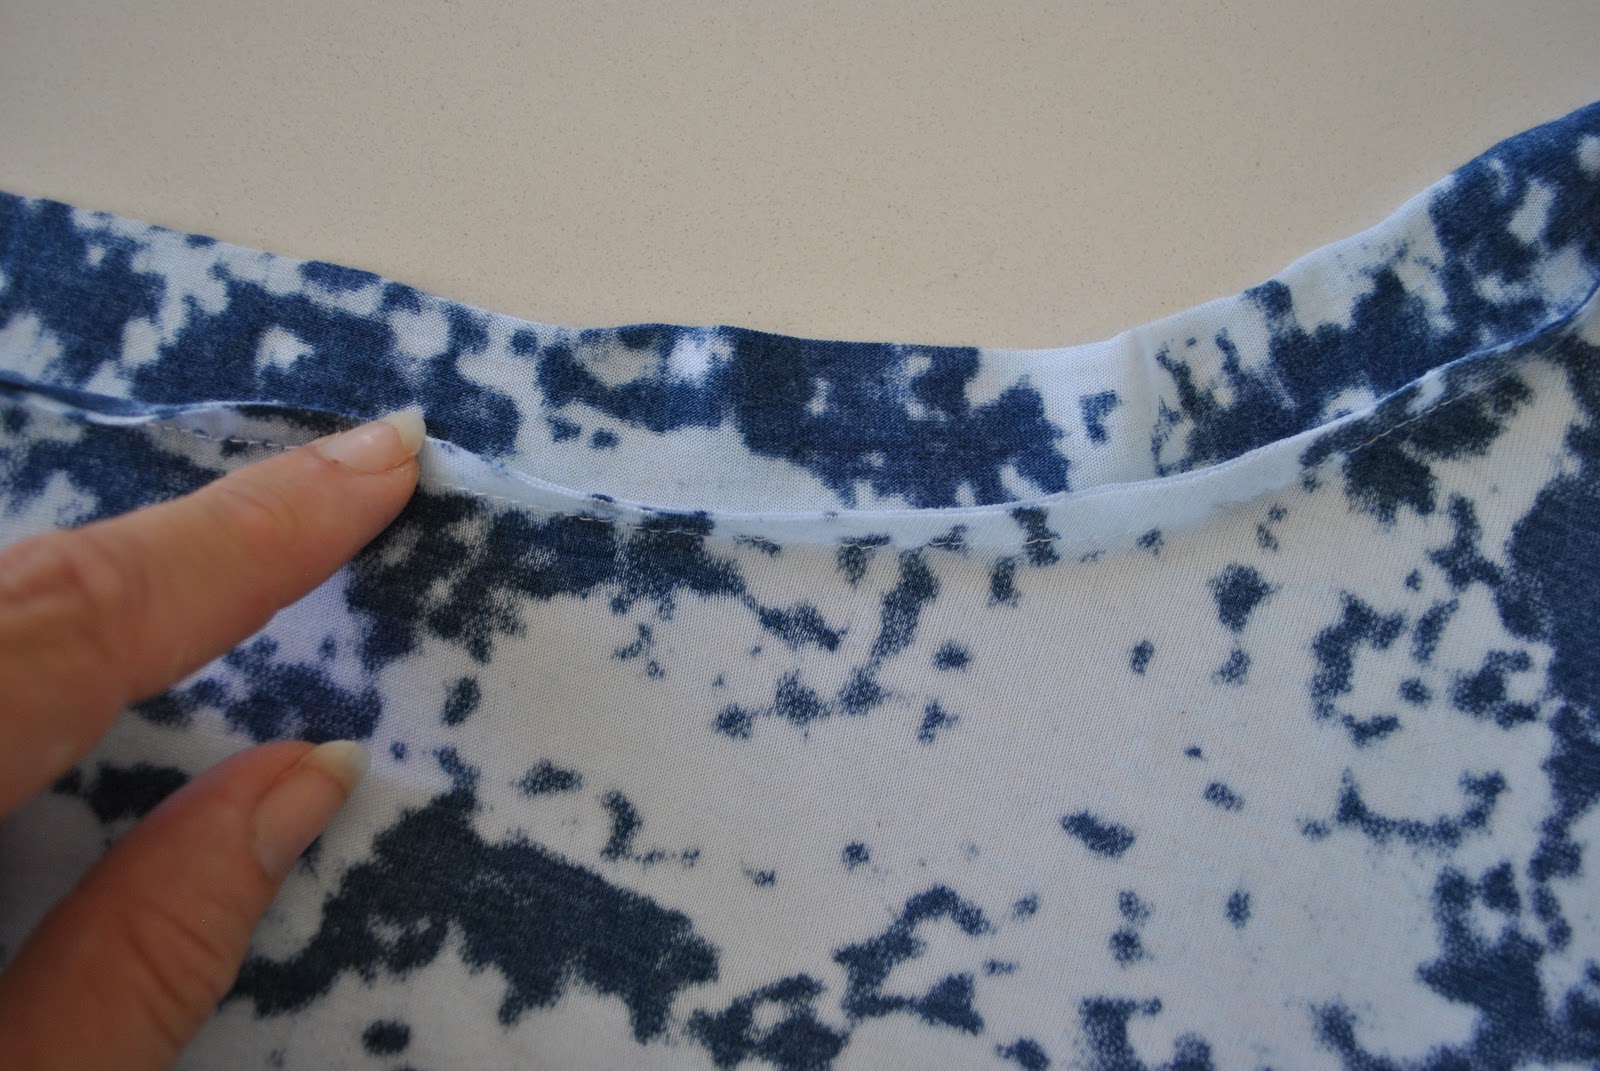
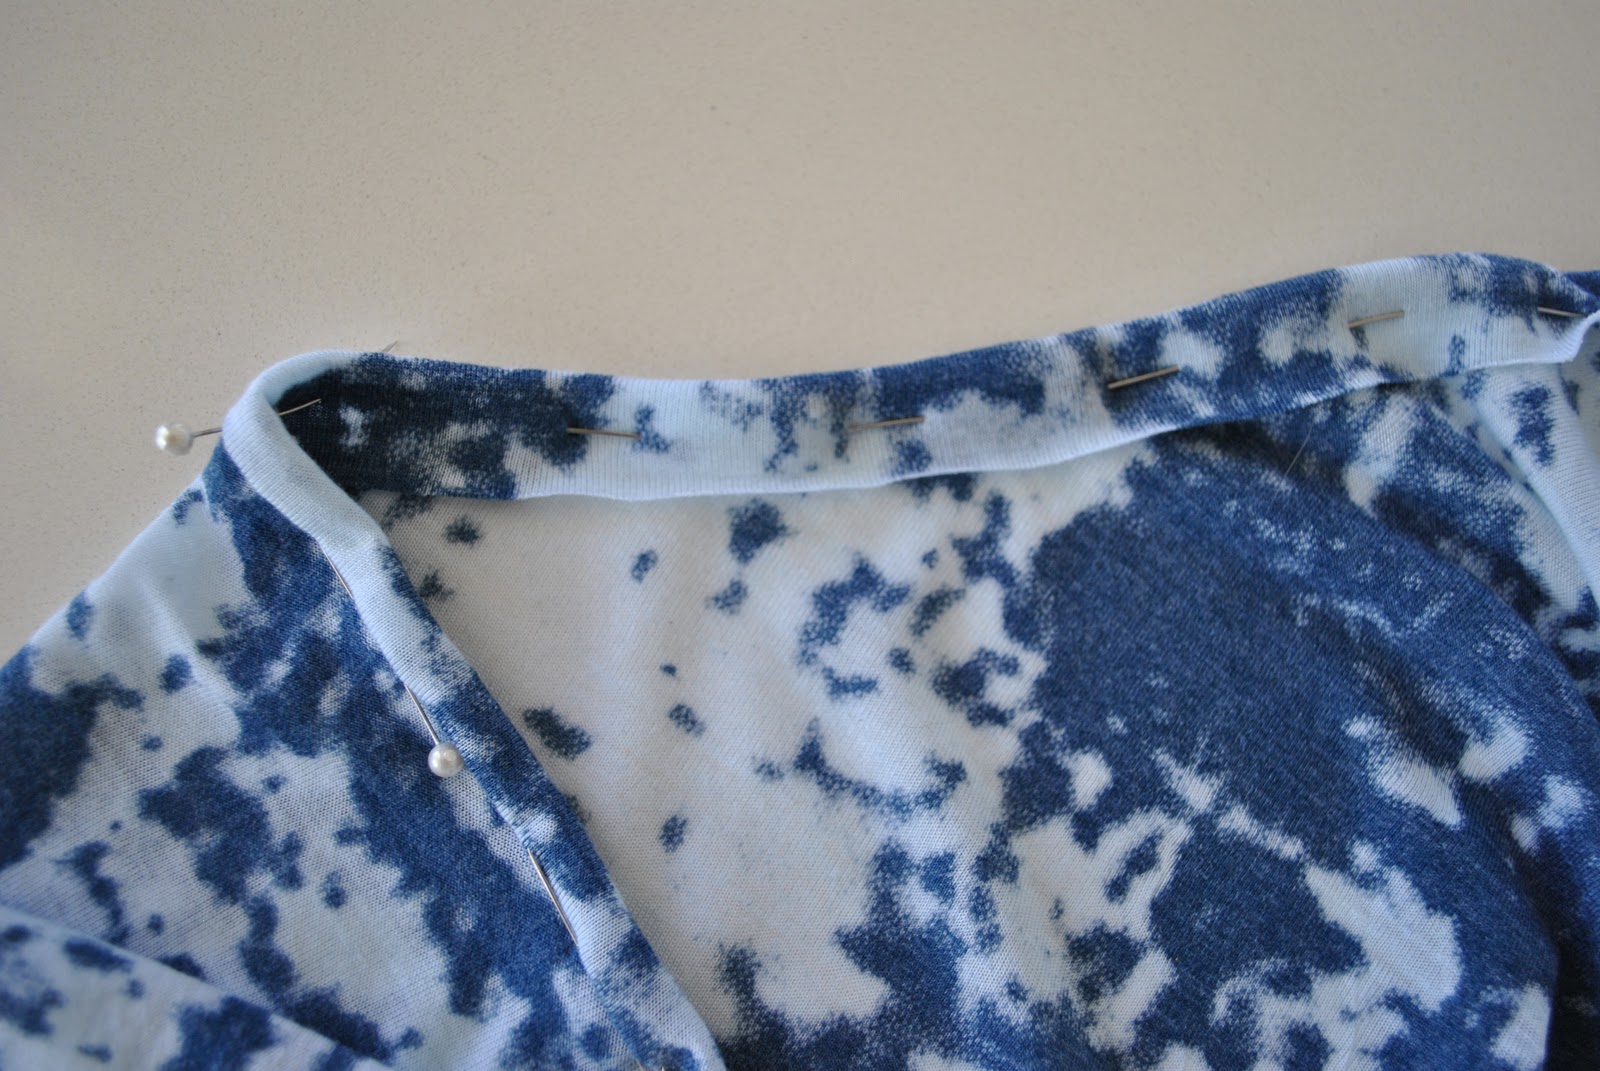
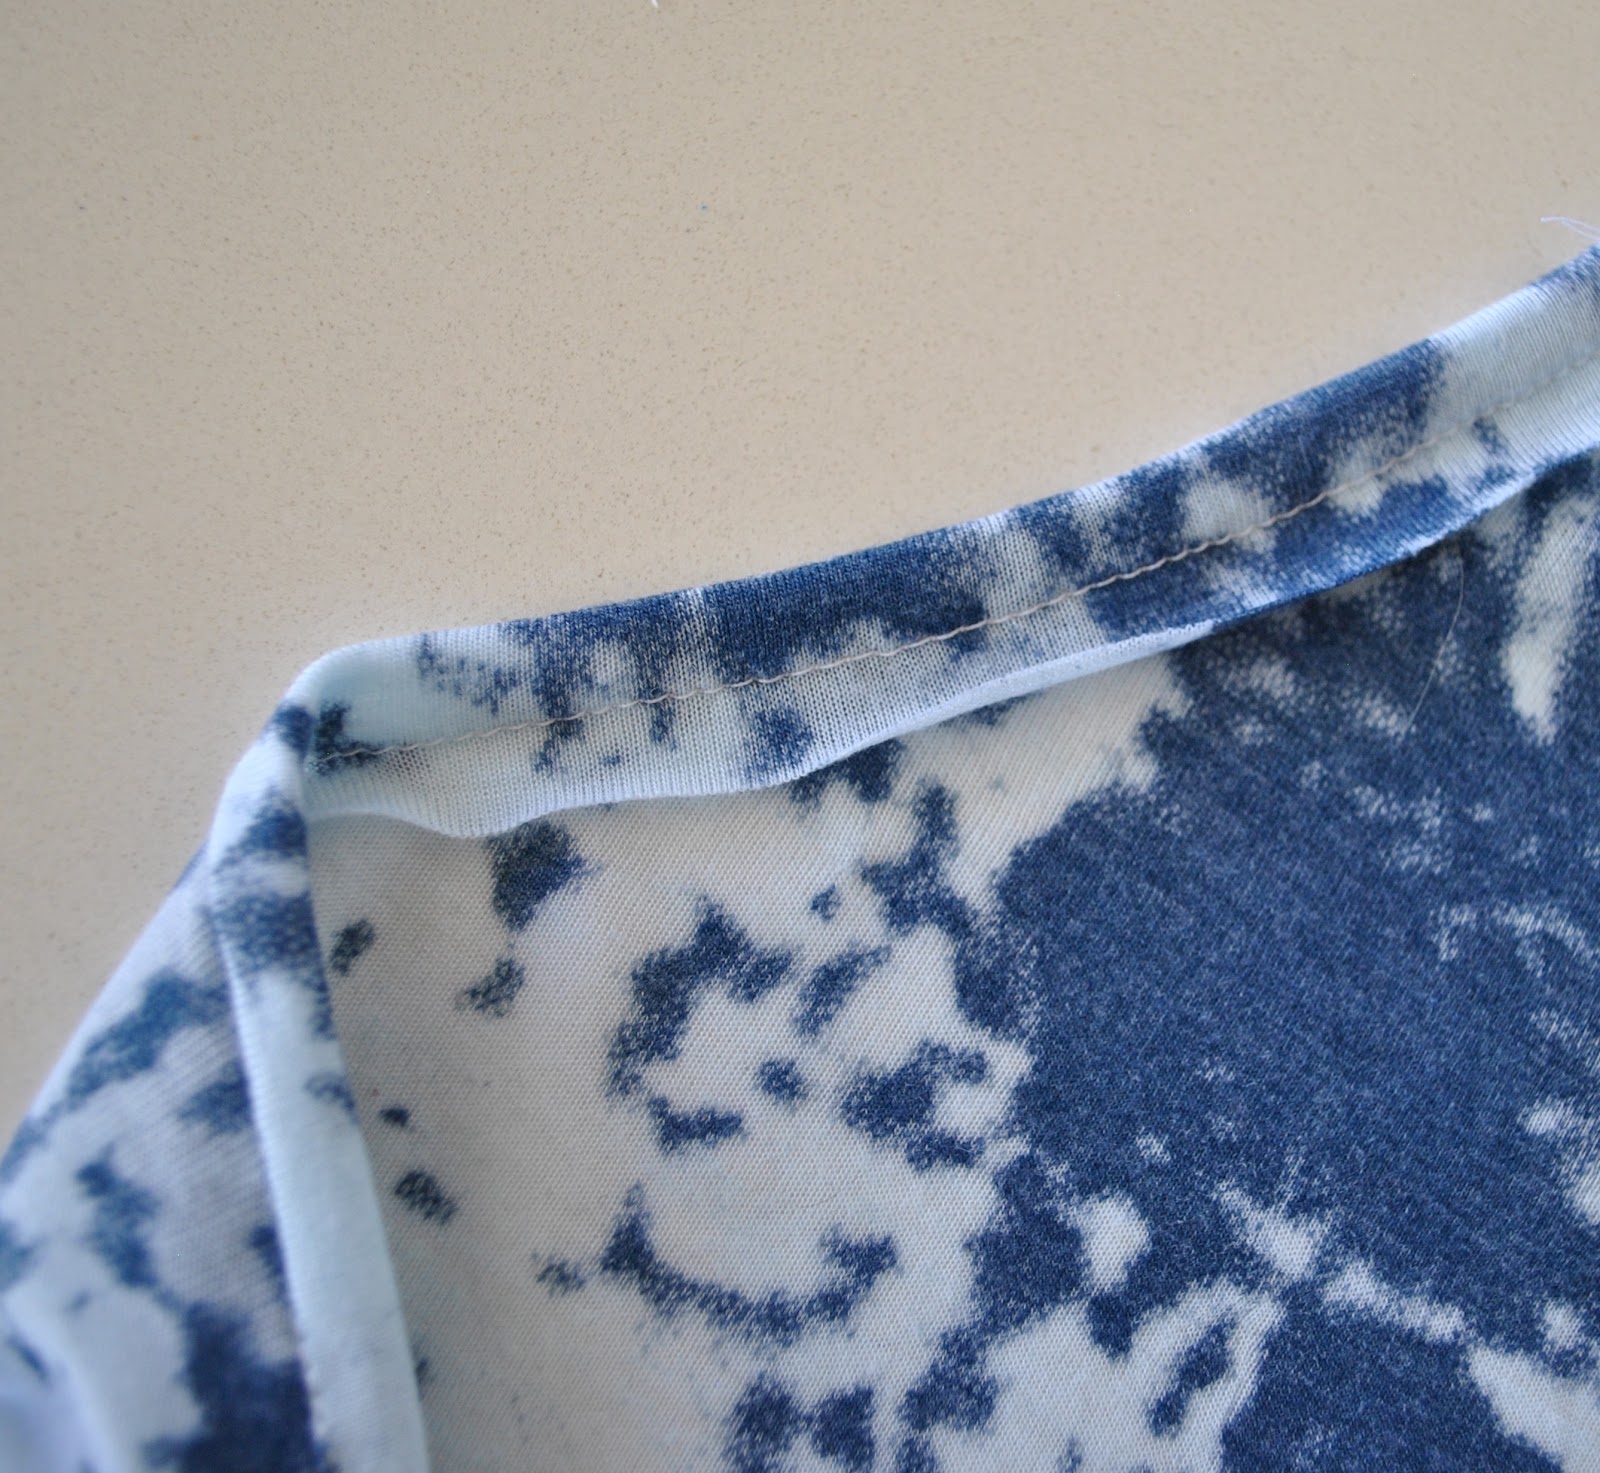
Some deet shots; there is a heck of a lot of topstitching in this top;

edge-stitching on the outer folds of each pleat and the inner edges too,

the side seams are flat-felled in wide seam allowances

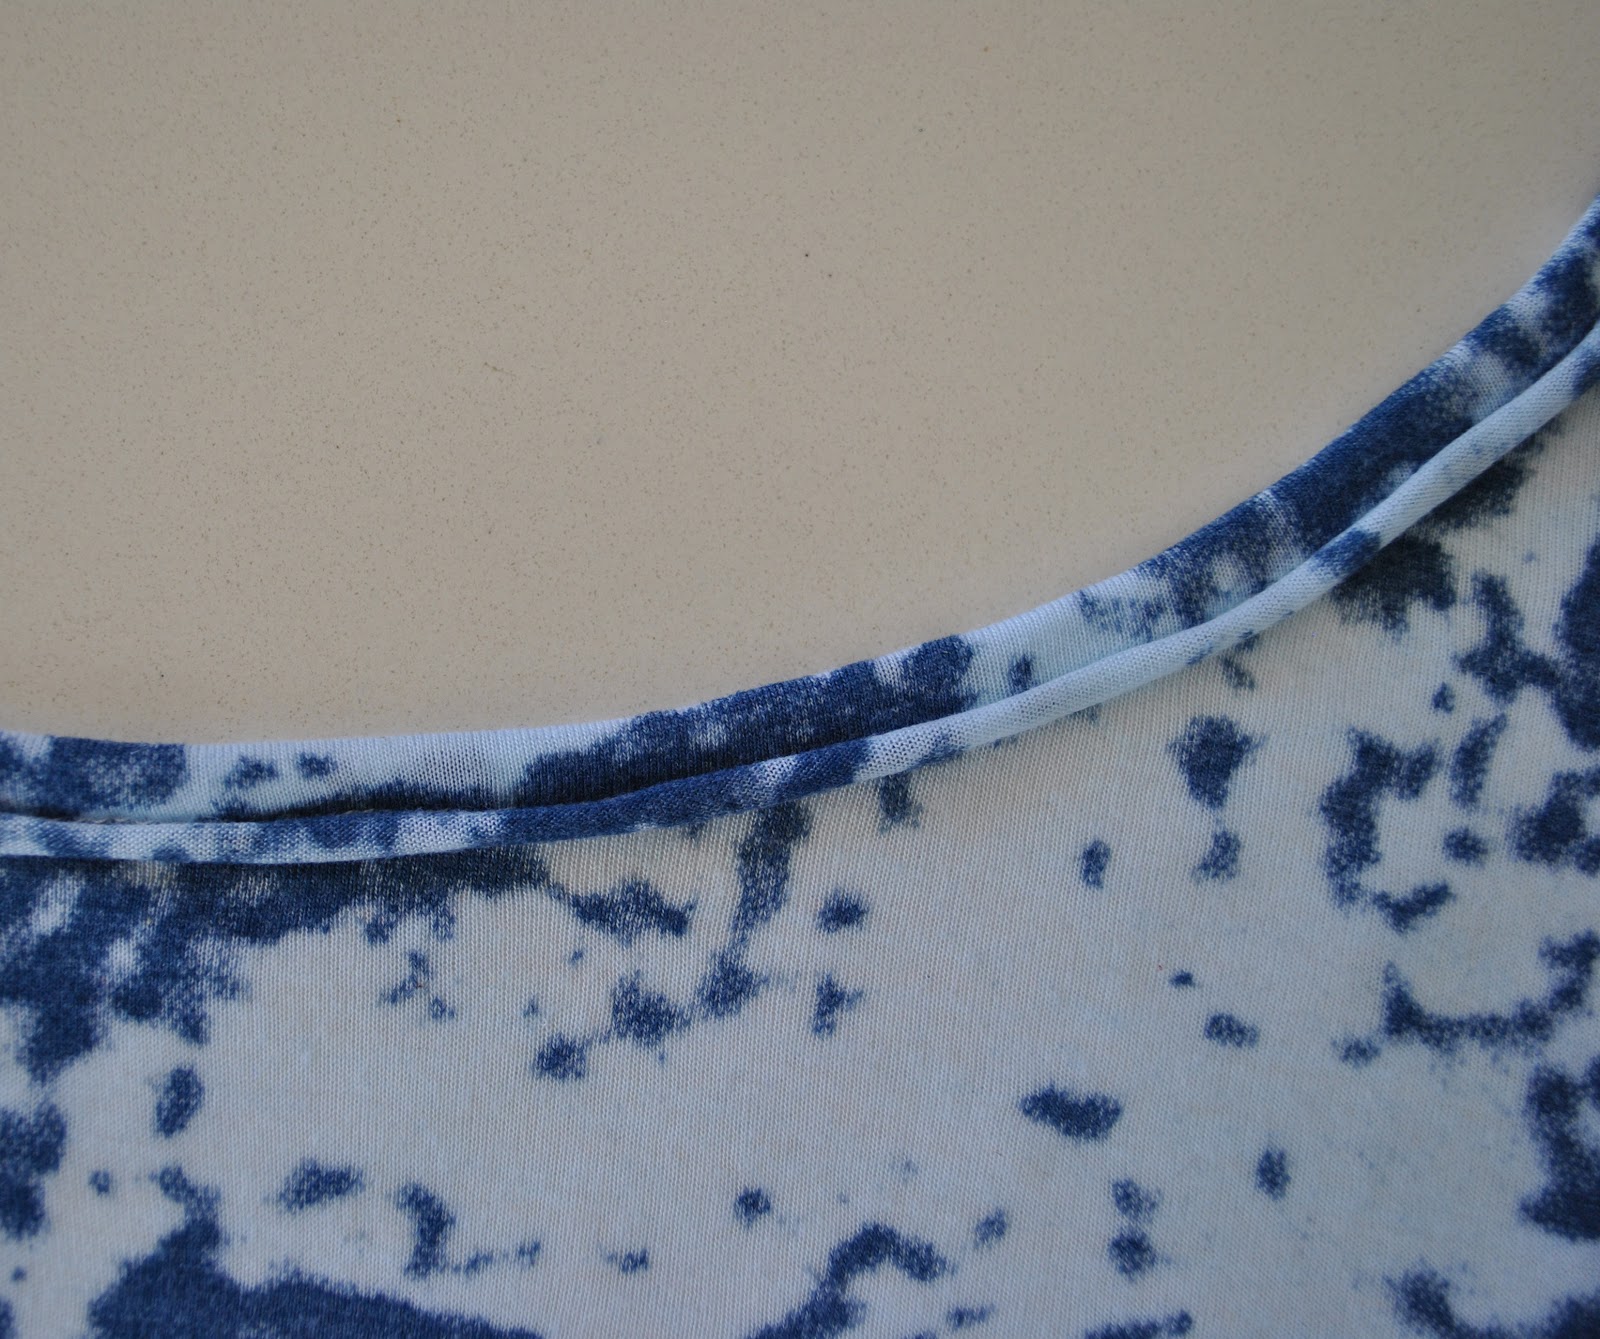
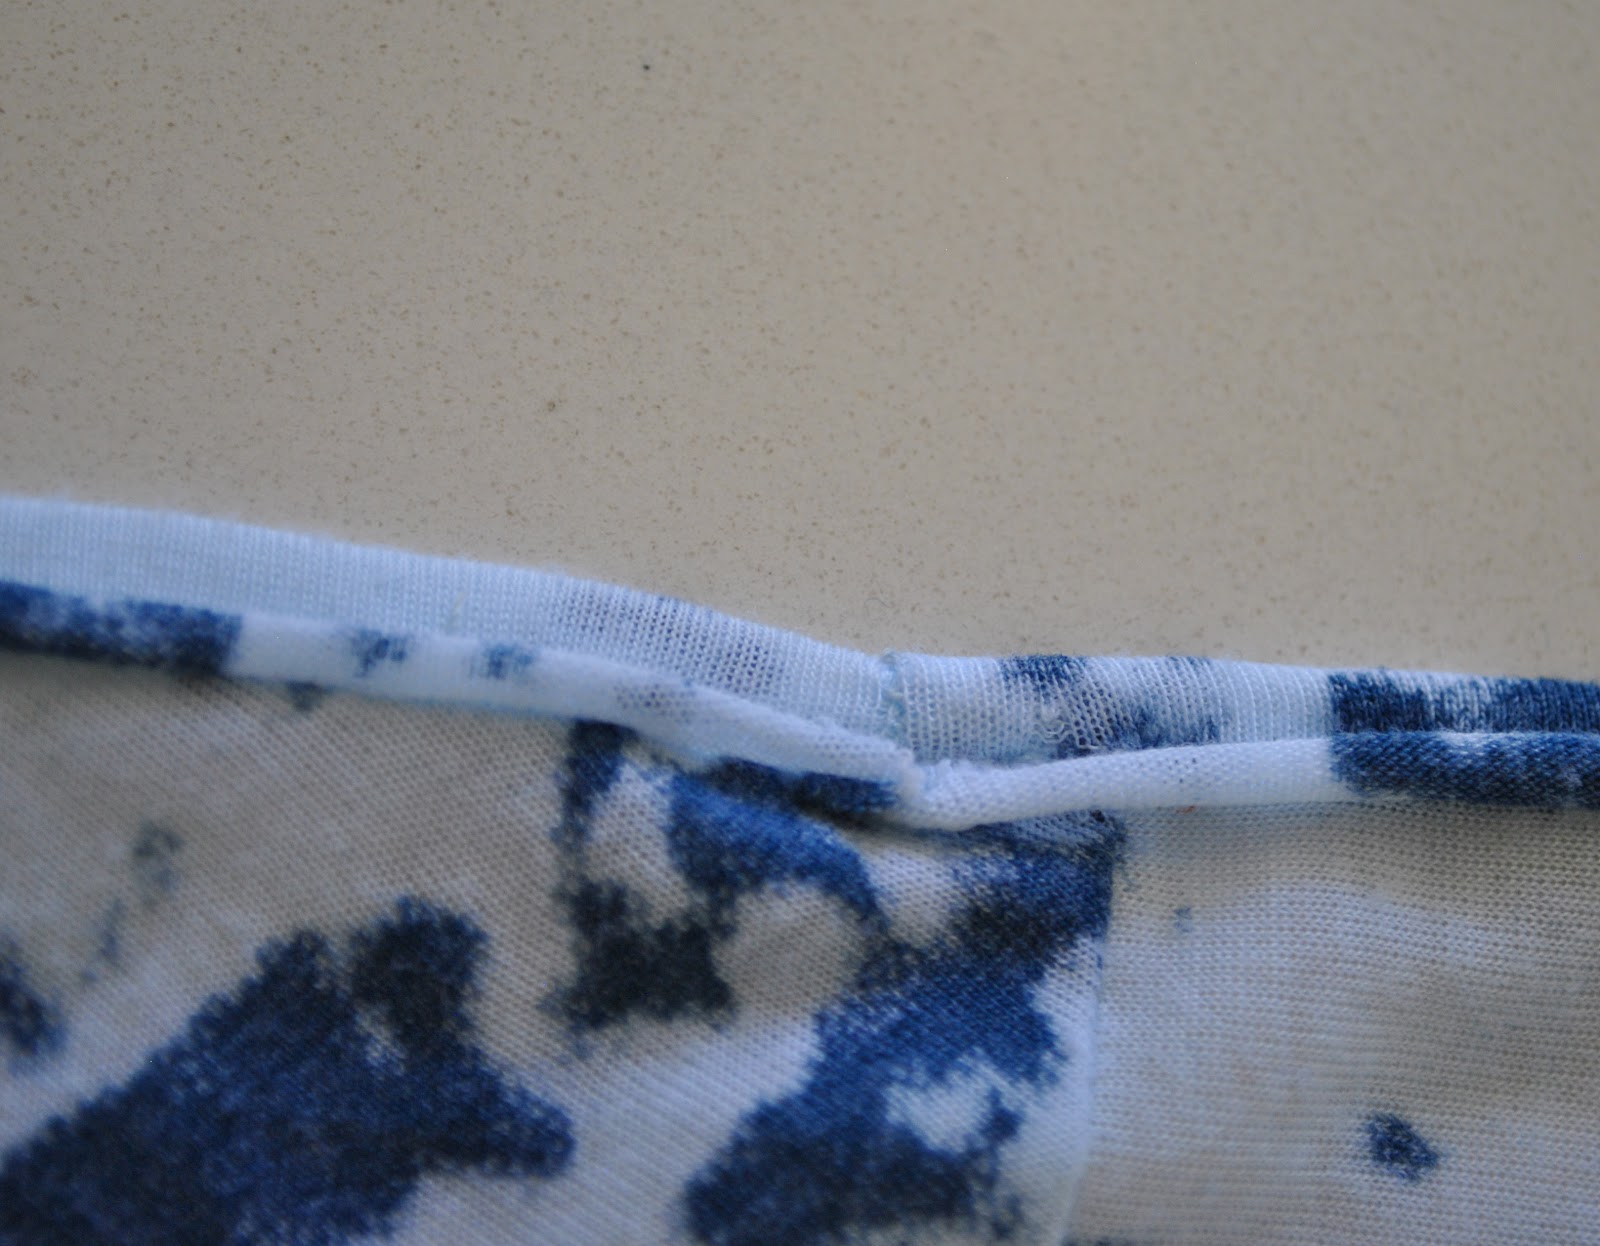
there is strategic stitching, artfully placed on the outside
of the pleats, to fuse them together

and also bar-tacks at the vulnerable side-seam/armhole
point as well as the upper edge of the side seam split, to add strength to spots that are subject to strain during wear.
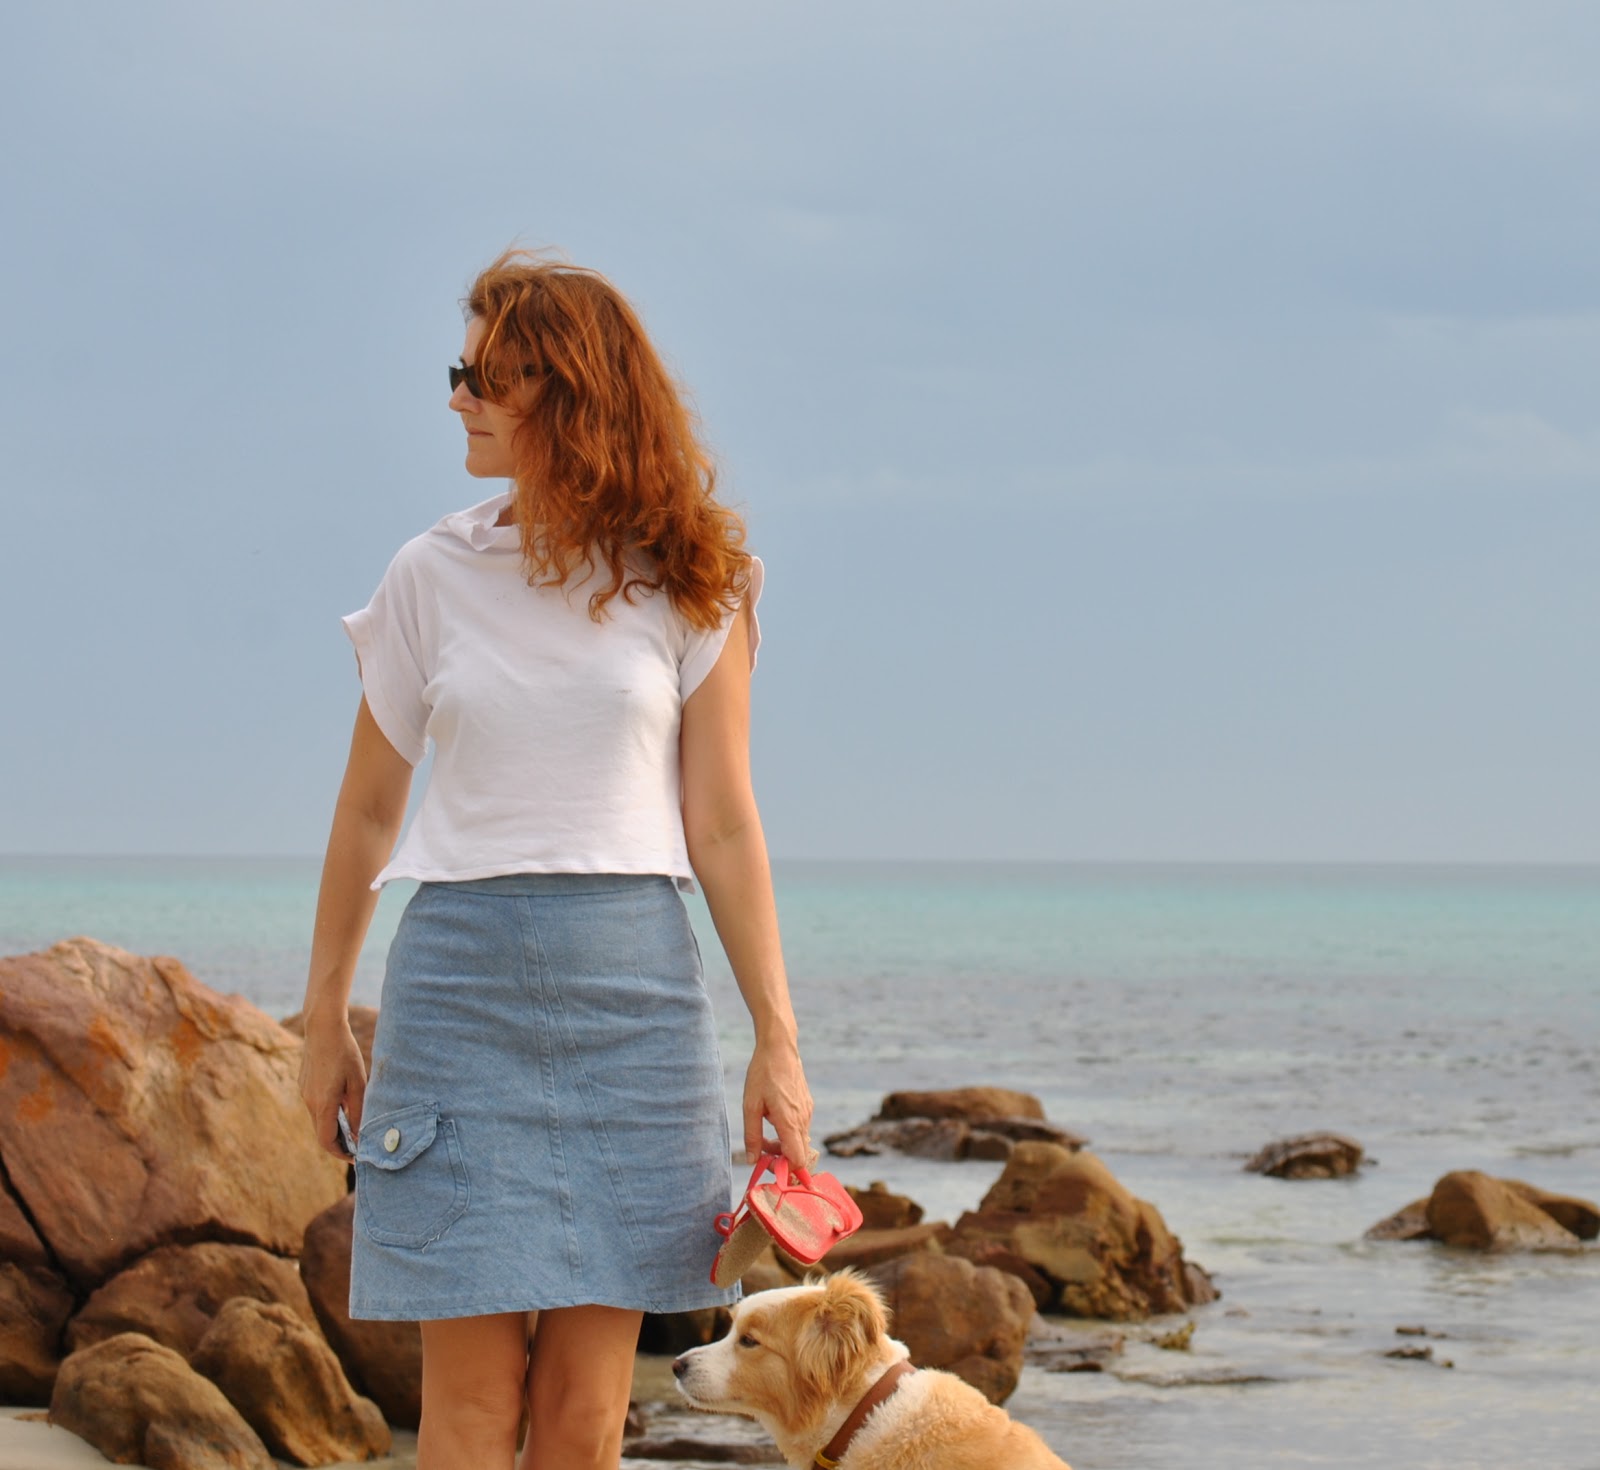
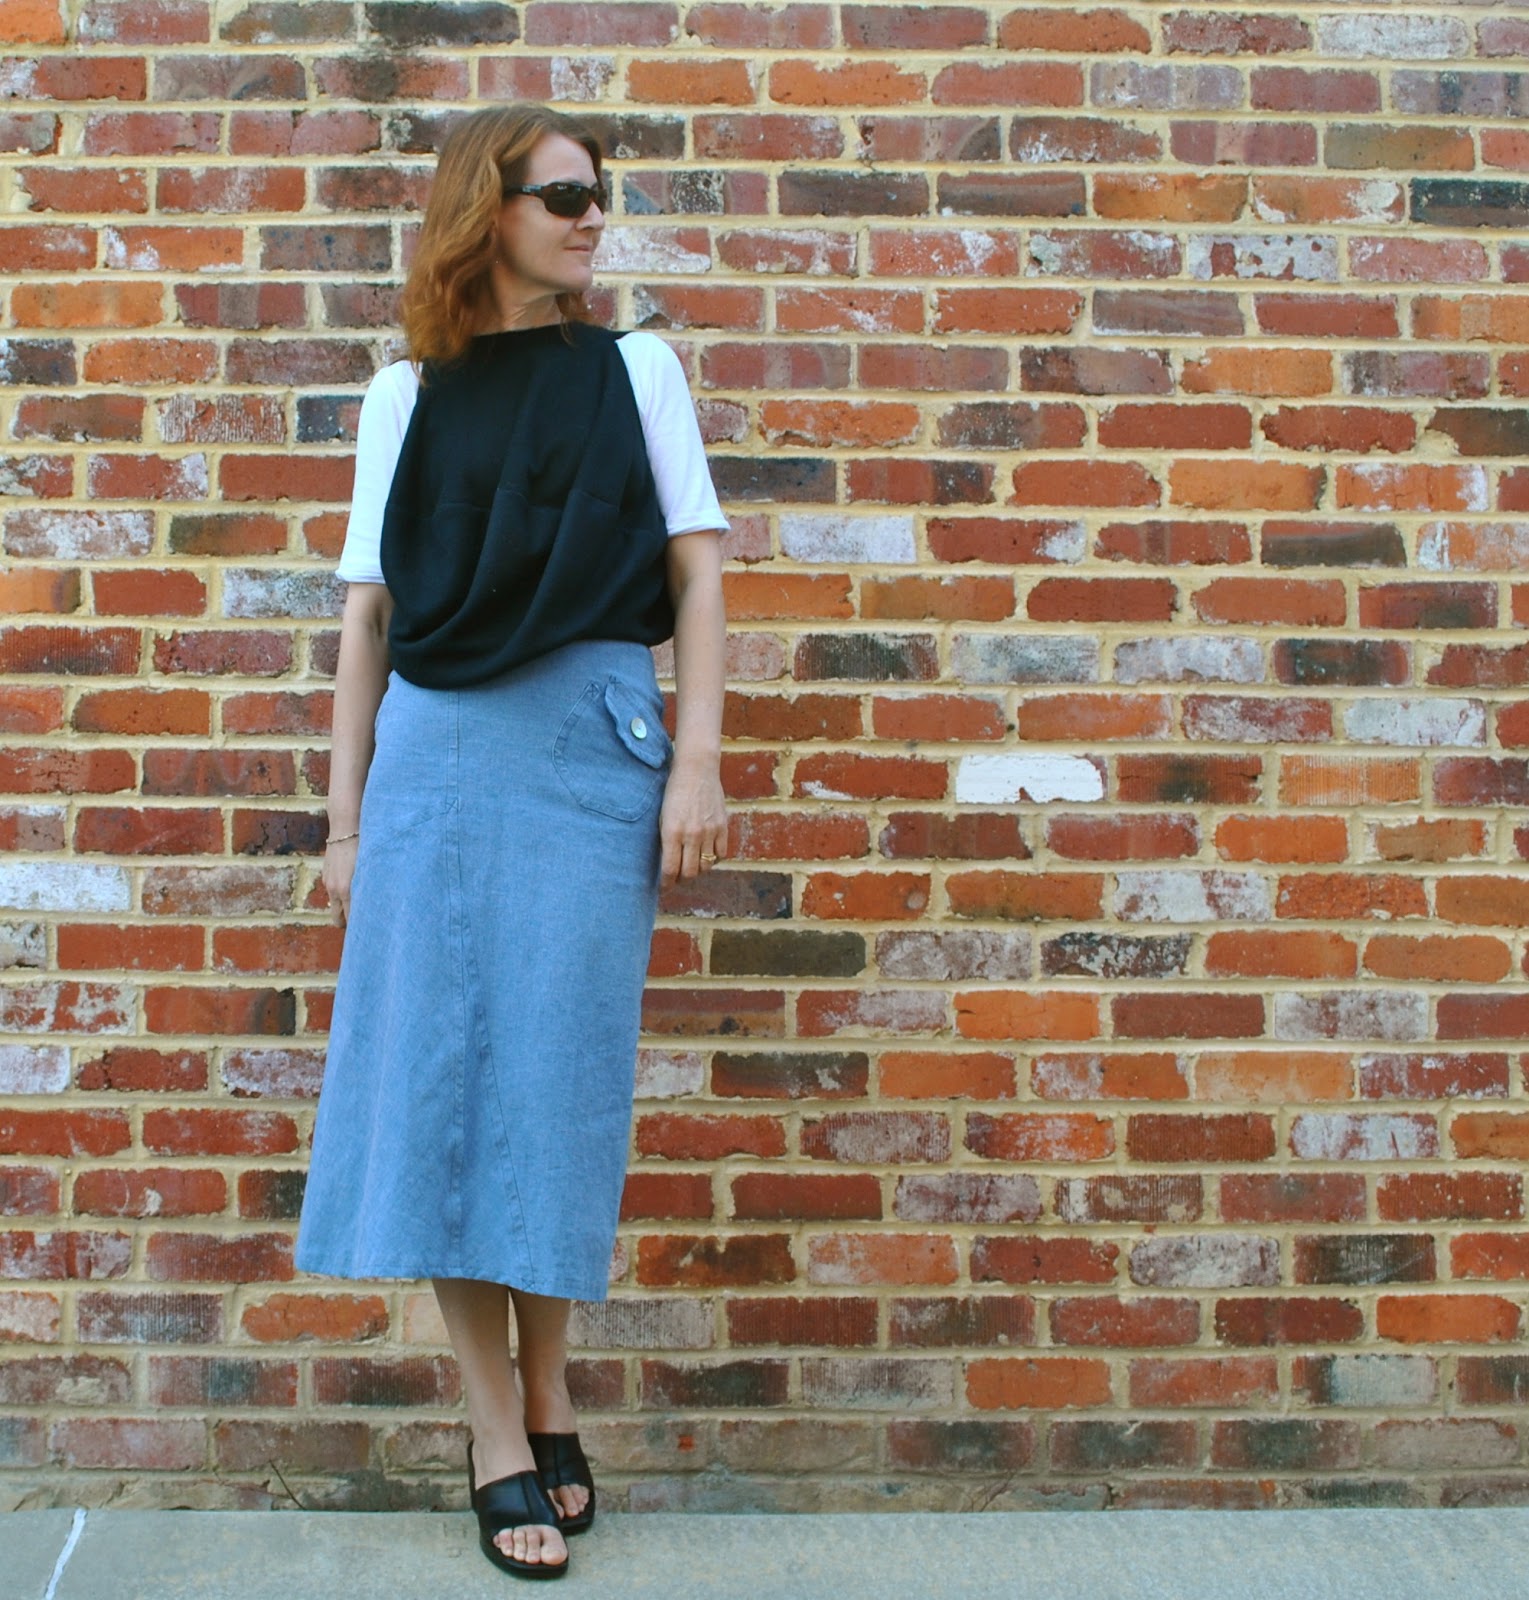
Details:
Top; Vogue 1142, yellow silk
Shorts; Burda 7723, white linen, details and my review of this pattern here
Sandals; Misano


Pattern
Description:

Loose-fitting
pull-over top has pleats and stitched hems. Wrong side of fabric shows.
Pattern
Sizing:

American
sizes 6-14; I cut the size 10
Did
it look like the photo/drawing on the pattern envelope once you had finished
sewing it?

Yes.
Were
the instructions easy to follow?

Ohh,
the instructions are very easy to follow…
In my opinion a lot of extra top-stitching is essential in order to prepare
this garment to stand up to normal washing and wearing.
What
did you particularly like or dislike about the pattern?

I
absolutely love the design concept; the way a
couple of almost-rectangles can be tweaked here and there before being
 well
to put it frankly; pretty much slapped roughly together, and magically become transformed
into a rather romantic, artistic and very unusual blouse.
Fabric
Used:

Very
thin and slippery silk
Pattern
alterations or any design changes you made:

After
pressing each pleat in place, I edge-stitched each and every fold of each pleat,
to make it a permanent fold.
Yup.  Each, and.  Every.  Fold.  To not do this would be to lose all those pleats with the very first
wash.  And since I spent about five
minutes carefully measuring each fold
before pressing; losing them was not an option I wanted to consider!
In
fact I cannot understand why the permanency of the pleats is not considered and
addressed in the instructions

Would
you sew it again? Would you recommend it to others?
Yes, I
probably will want another one of this summery and airy little top sometime.  I recommend this top pattern to the meticulous seamster who craves romance and drama in her wardrobe, but still likes to be comfy.
Conclusion:
It is super comfortable
and very forgiving to wear, and nicely easy breezy for summer.  On top of that, it is a delightfully unusual, undeniably cool and
very funky garment.  I feel rather
artistique in this top   🙂


pinterestmail

the paper-doll project

I’ve been thinking about things for the year ahead.  Apart from continuing to make all my own clothes, I mean… that’s a given  đŸ˜‰
It’s fun to set little goals to think about and complete.  I like list-making and box-ticking, if that explains anything.

So, this year I am going to wear only my own self-made clothes, and sketch the outfit I am wearing each day in my Fashionary.  I’ve written before how much I enjoyed and was thoroughly inspired by Natalie Purschwitz’s journey, and this is kind of a homage to her Makeshift project.  Although Natalie made her own shoes as well as her clothes; which blows my tiny mind!!   So needless to say, making my own shoes is way beyond me.  Actually it’s probably impossible in Perth.  
However I can do the clothes! and document them.
I’m calling this the paper-doll project.

1-9 January
The outfit on the right was drawn on white paper separately and then stuck on with stickytape afterwards… this is because my first attempt at drawing that skirt underneath looked horrendously weird.  Awful.  Since I completely suck at drawing.  I’m hoping this project will change that.
However, I did like the way the white paper stuck on top made my outfit look just like it is; an all-white outfit, and not just like I had forgotten to colour it in.  So I started drawing all the other white garments on white paper, and sticking them in for other days.  
So practice makes perfect and hopefully my drawing skills will improve and…  oh, who am I kidding; I just like fiddling about with paper and scissors and coloured pencils and sticky-tape, doodling fashion-y type stuff.   Playing fashion designer!  I loooooved paper dolls as a child.  This is fun!

The hairstyle on each paper-doll is the hairstyle I had for that day too.  Since I basically rotate between three hairstyles; ponytail, “out” and messy bun (day 8) then this shouldn’t be too challenging to draw  đŸ™‚
The other reason I am doing this:  well, apart from fun, and does there need to be any other reason, really?? of course no.  But I started out using my Fashionary as a brain-storming and planning tool for my future creations.  But it didn’t take long for me to notice something of a downer; only about half the things I’d drawn as a firm “yes” for a future project, actually end up looking like I initially planned.  I’ve found that by the time I finally get the fabric and the patterns out and get going I’ve often mentally moved on and incorporate a whole host of little changes!!  There is no point in showing examples here, suffice to say they are many!

It’s cheering to see the creations that did get made but the drawings of things that might have been but are not and never will be; are a bit sad, like wasted space and wasted effort.  This year my Fashionary is going to reflect the clothes I actually am making, and choosing to wear.  đŸ™‚
(I didn’t put in any links to the construction posts with photos, but I can do that if it is useful to anyone 🙂  )
pinterestmail

Bra sew-along….

… woops, better late than never!
With all my crazy pre-Christmas sewing, followed by the stiflingly hot post-Christmas coma period, I totes forgot to post that I am taking part in Amy’s Bra Sew-along, over at cloth habit….
Join us!
Now, I have made a few bras for myself already but I’m ashamed to say that the most perfunctory of measuring sessions was employed before I decided on same size I’ve been buying for years and years and years and years (“and years”, recurring) since I’ve always felt perfectly comfortable in them…. yes, I know, lame excuse and how lazy, right?  So I have a selection of nice and comfy 12A’s (34A) in my drawer….   Well, in the spirit of “gettin’ serious” about mastering the perfect bra I did three separate measuring sessions in each of the following 85b International bra size calculator, the Berlei bra size calculator, and the Victoria’s Secret How to Measure page… that’s nine measuring sessions; and in each case came up with 10A (32A).  Hmmm.  No wonder my bras were lovely and comfy if they’re all a tad too big!
So for the sew-along, I am going to be brave, and try out the smaller size…
I will be using KwikSew 3300

pinterestmail

Denimen. Ineminem.


First garment for the year!

The credit for the cute pocket and the funky piecing and top-stitching goes to Mum of course  😉  Yes, remember this Vogue 8561 skirt that she made, and
passed on to me because she didn’t like it?  Unfortunately that particular combo of pattern and fabric was kinda unforgivably frumpy.  I think the older you get, the far less
you can get away with anything remotely frumpy.  When she saw it on me even Mum said “oh just toss it out Carolyn,
it does nothing for you either”
But it was of lovely, new fabric; slightly stretchy denim from
KnitWit? I think? and waaaaay too nice to ditch so hastily; and I liked the idea
of a little blue denim skirt in my wardrobe.  Key word there: “little”.  And blue denim; always a favourite!
So the unfrumpy Vogue 1247 came to the rescue
 I
spliced the upper and lower skirt pattern pieces together and managed to cut a
front and back from the very lowest portion of the skirt, keeping most of the
original hemline intact.  
Interesting, huh? that the hemline circumference of that long long original is almost exactly the same as it is in this much much shorter skirt.  Explains a lot, in retrospect it was pretty constrictive and difficult to stride briskly along in….  and I’m a strider.
I cut out
that adorable little pocket from the top and re-attached it to the skirt;
because imo it was the hands-down highlight of the original skirt and I just had to keep it!  The original dress zip was unpicked and
re-used in the CB seam, and I found a piece of non-stretchy denim in my stash
with a wrong side having an excellent colour match, leftover from a skirt
Cassie had made for herself.  From this, I cut
a new waistband, and to reduce bulk and avoid that quintuple layer of fabric
you get in the joining seam of a traditional waistband, I edged the inside raw facing
edge with pale blue bias binding (leftovers from this shirt) and stitched them
together in-the-ditch.  I re-used
the same heavy-duty hook and eye closure.
Voila!  I think
this is a far more flattering and usable skirt in our climate, and there is no
doubt it is going to get a heck of a lot more wear now!
Details:
Skirt; a refashion of a Vogue 8561 denim skirt, using a
modified version of Vogue 1247, my review of this pattern here
Top; the top portion of a dress from Pattern Magic 3 by
Tomoko Nakamichi, of white cotton jersey, details here
Thongs; Havaiana
pinterestmail

A self-rolling edge finish for knits

This is a sweet and pretty finish to apply to the edges of casual knit garments… and a more neatly-finished-on-the-inside edging, if slightly more involved, than a similar one I wrote previously.  This is the edging technique used for this dress.
Firstly; the fabric has to be that sort that when left alone; rolls up at the edges all by itself.  Generally, this will only be a reasonably lightweight, single knitted jersey.

Cut a cross-grain strip (that is, with the stretch running along the long edge of the strip) that is as long as the aperture being edged, minus 10% and rounded to the nearest full or half centimetre, for ease of working.  
So, for example, if your neckline is 32cm, cut a strip that is 32cm – 3.2cm = 30cm.  Or if your armhole is 125cm, cut a strip to be 125cm – 12.5cm = 113cm
The width of my strip here is 4cm (or 1 1/2″)

Stitch together the short sides of the strip right sides together, in a 1cm seam.  Then pin the right side of the strip to the wrong side of the garment.  Your strip is now a bit more than 10% shorter than the armhole/neckline; apply the most stretch when attaching it to the most curved sections of the garment edge, such as the sharpest points of the underarm curve, and the centre front of the neckline.

Stitch in a 1cm (3/8″) seam.  If the area is not expected to cope with any stretch during wear then a straight stitch is fine; otherwise use a shallow zig-zag, a stretch stitch, or double-stitch with a twin needle.

Trim the seam allowances just a bit, by about 3mm.  
Why do we do this, and not just stitch the seam with a narrower seam allowance in the first place? because stitching a narrow seam allowance on a fine flimsy knit is not easy even on the best of sewing machines.  Most domestic sewing machines will tend to chew up the edges of a lightweight fabric if you try sewing very close to the edge, meaning you’ll end up with an uneven ugly line of stitching.  Stitching in a wider seam allowance just means the fabric glides through machine more easily, and stitches up far more smoothly, and then you can trim away the excess width afterwards.

Turn the strip up, and press up…

… then flip the strip over and onto the right side of the garment, encasing the seam allowances and press it in place.  Don’t worry if you are pressing some of the curl out of the fabric at this point, it will come back!
From the wrong side, pin the strip in place.

With the wrong side of the garment facing up, stitch in the ditch of the seamline between garment and strip.  Again, if you are stitching a garment in which has to cope with a bit of stretching then it is probably wise to use a stretch stitch, or a double stitch with a twin needle here….

Give your garment a dunk in a bucket of water and if necessary, if it isn’t curling up on its own; ease that curl back into place… it will stay there as it dries, and forever after that.  Just don’t iron it down!

Voila! cute curly seam, that looks a bit like piping  đŸ™‚

Oh, and that strip joint…? (hehe, strip joint, (smirk)) …. be sure to situate that in an unobtrusive place, like the underarm seam, or just behind the underarm seam if bulk is an issue.  (sorry; I forgot to take a picture of this “during”)  Here the strip seam is about 1cm to the left of the side seam, with the strip seam allowances both pressed to the left and trimmed on the diagonal close to the stitching just prior to the final stitching-in-the-ditch step.

pinterestmail
Switch to mobile version
↓