Monthly Archives: October 2015

You are browsing the site archives by month.

short and rose-y

…some new summer shorts  đŸ™‚

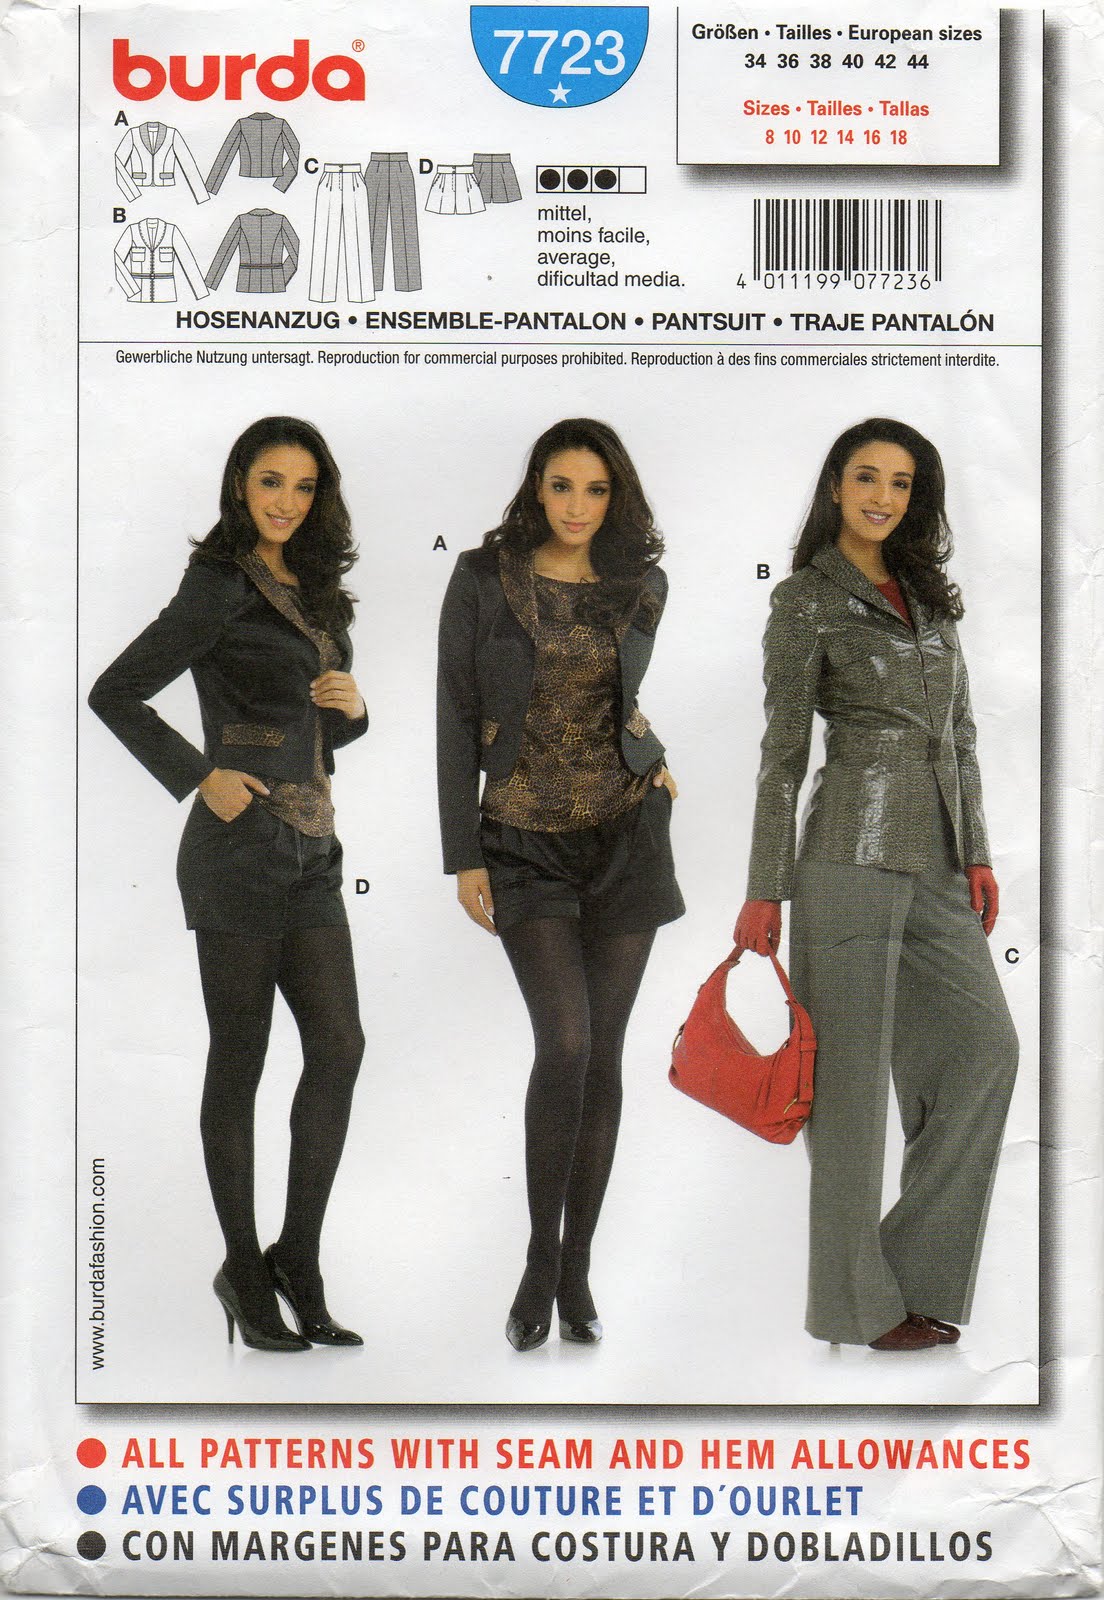
Pattern;  ye olde faithful Burda
7723.  Someone alerted me to the fact
that this pattern has been discontinued
. boooo!  This is fair dinkum one of my favourite
patterns
 goodness knows why Burda would let go such a nice flattering design
as this  đŸ™  However, last time I was in
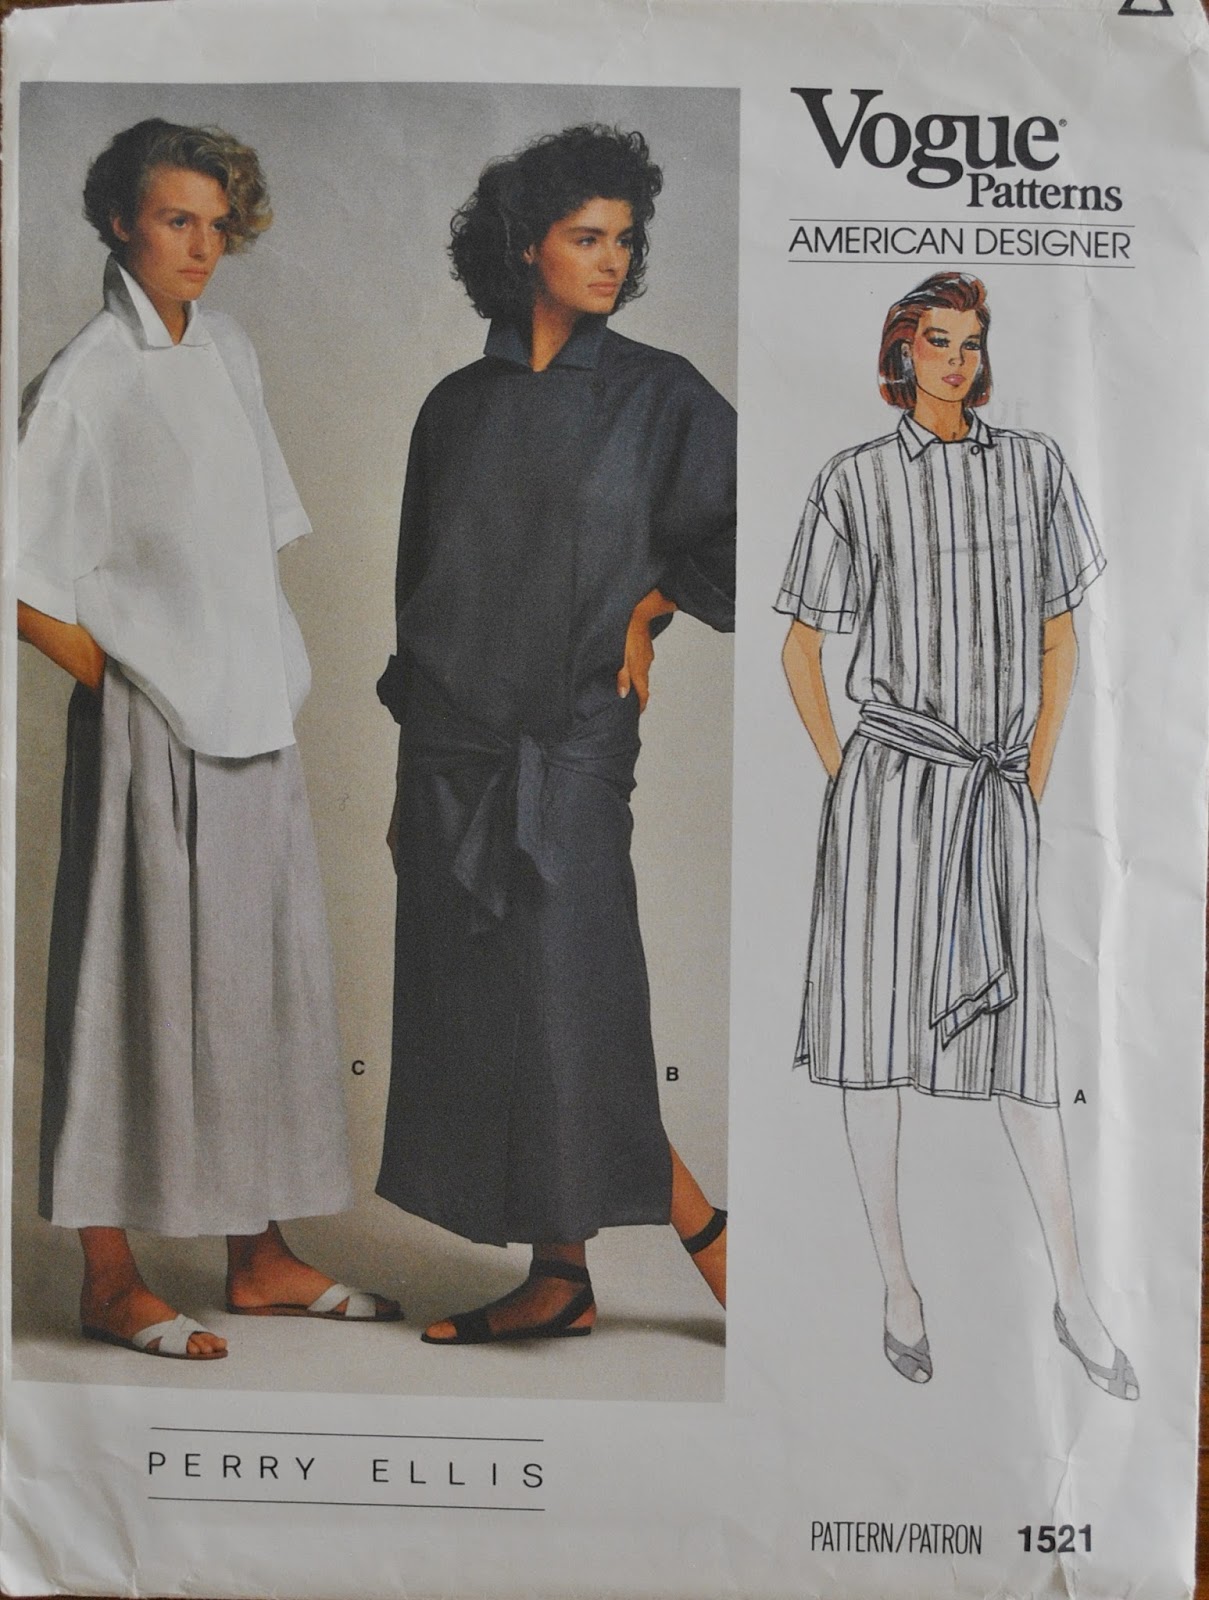
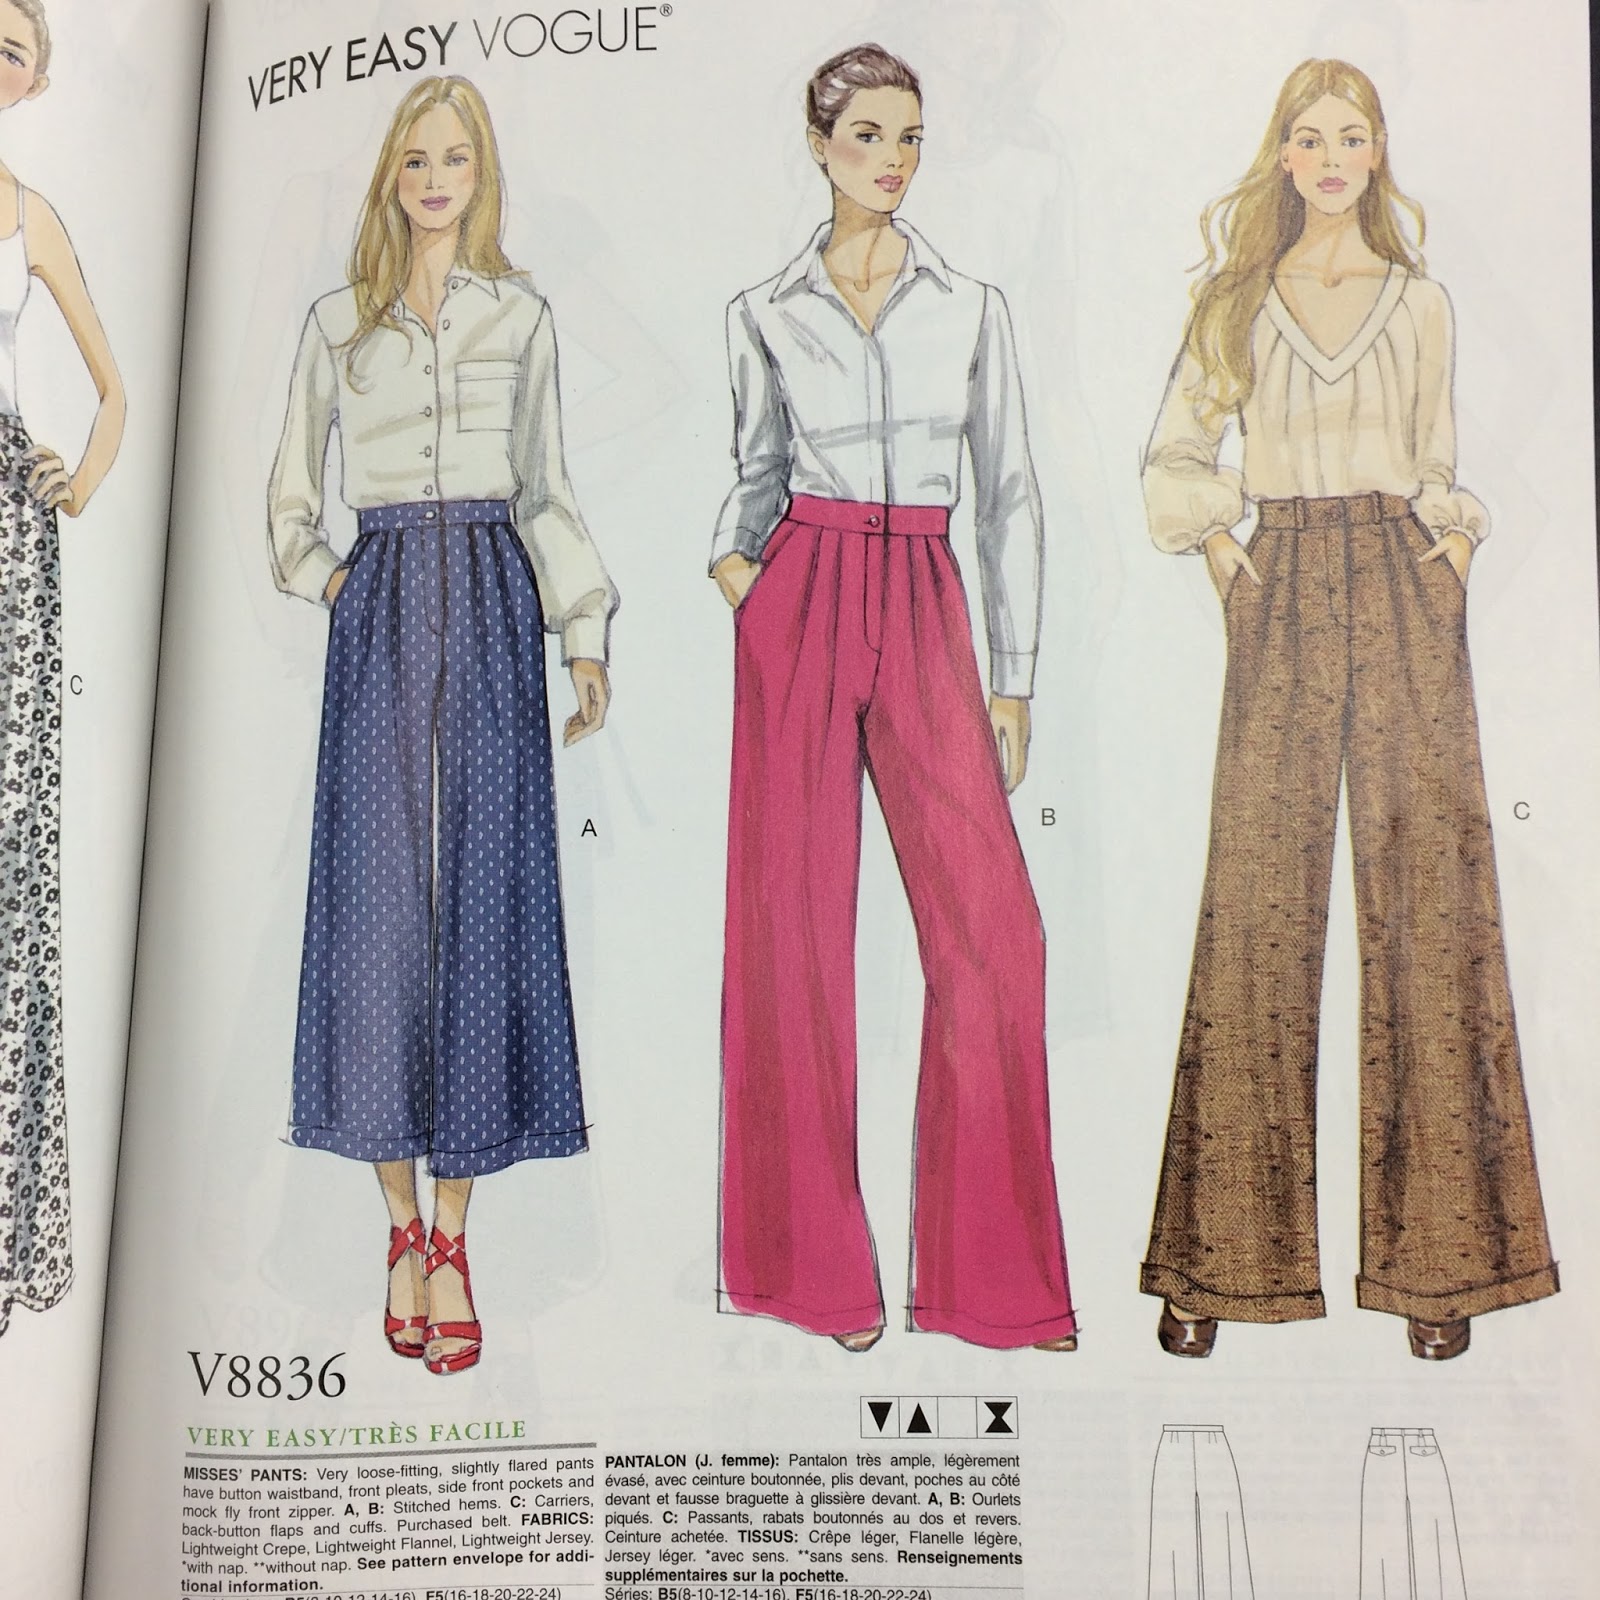
the fabric store I had a good squizz at the pattern catalogues, and while there are no Burdas like this any more, I noticed Vogue 8836 cut to shorts length might just be a pretty good substitute?  It has the same high rise with deep/wide waistband,
the same slightly flared leg, the same slanted front pockets, the same double
pleats at top to enable decent hand-shoving access to said pockets.
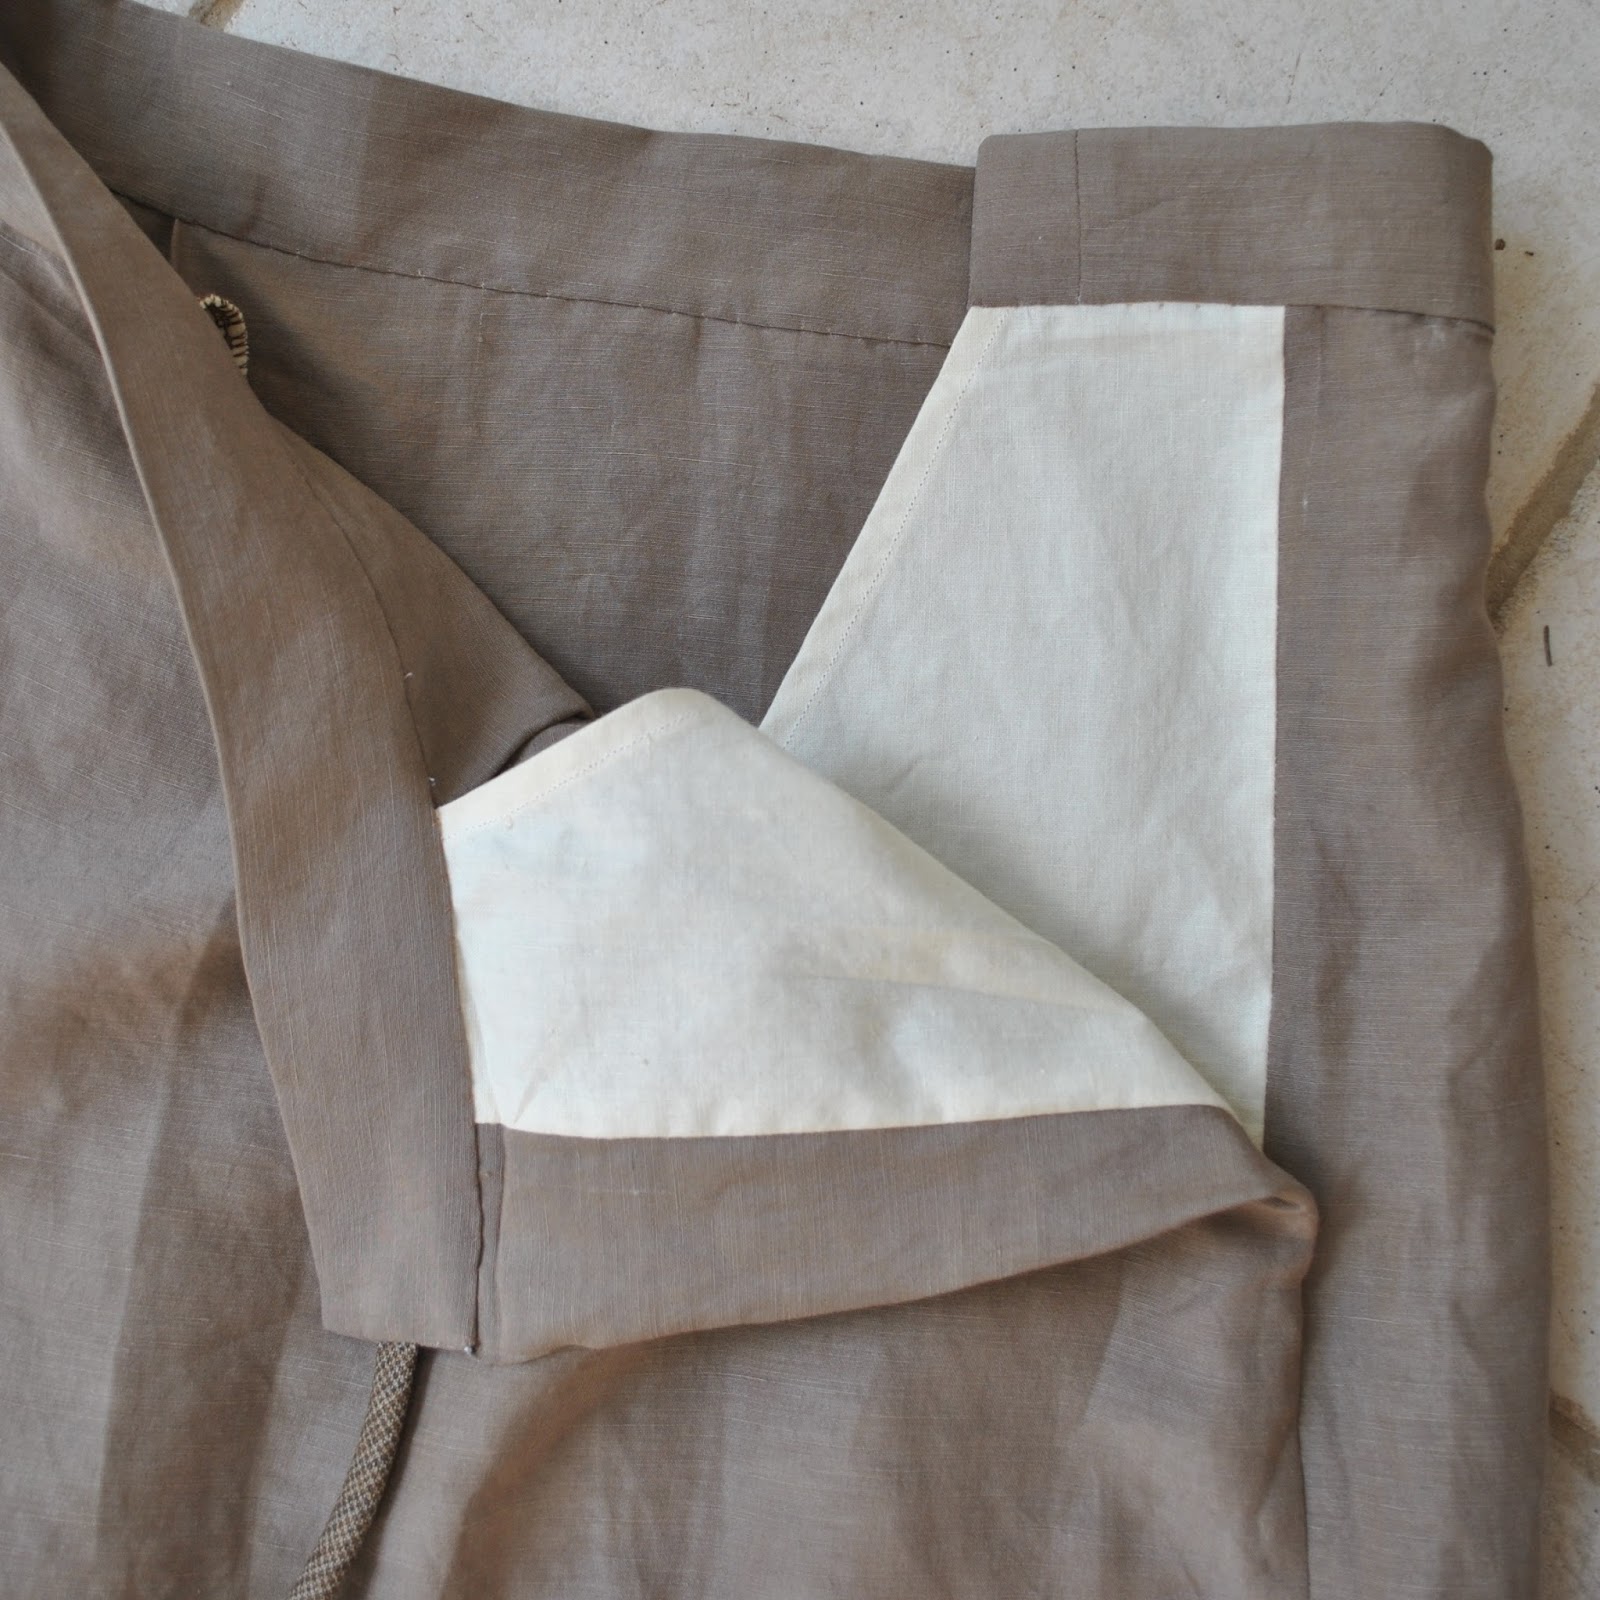
One thing I really loooove
about the Burda pattern is the way the pocket piece extends right into the fly;
which gives you a kind of inbuilt tummy control panel right across the front.  I don’t know if the Vogue has this feature but if not that would be sad, since this is a GIANT WIN!
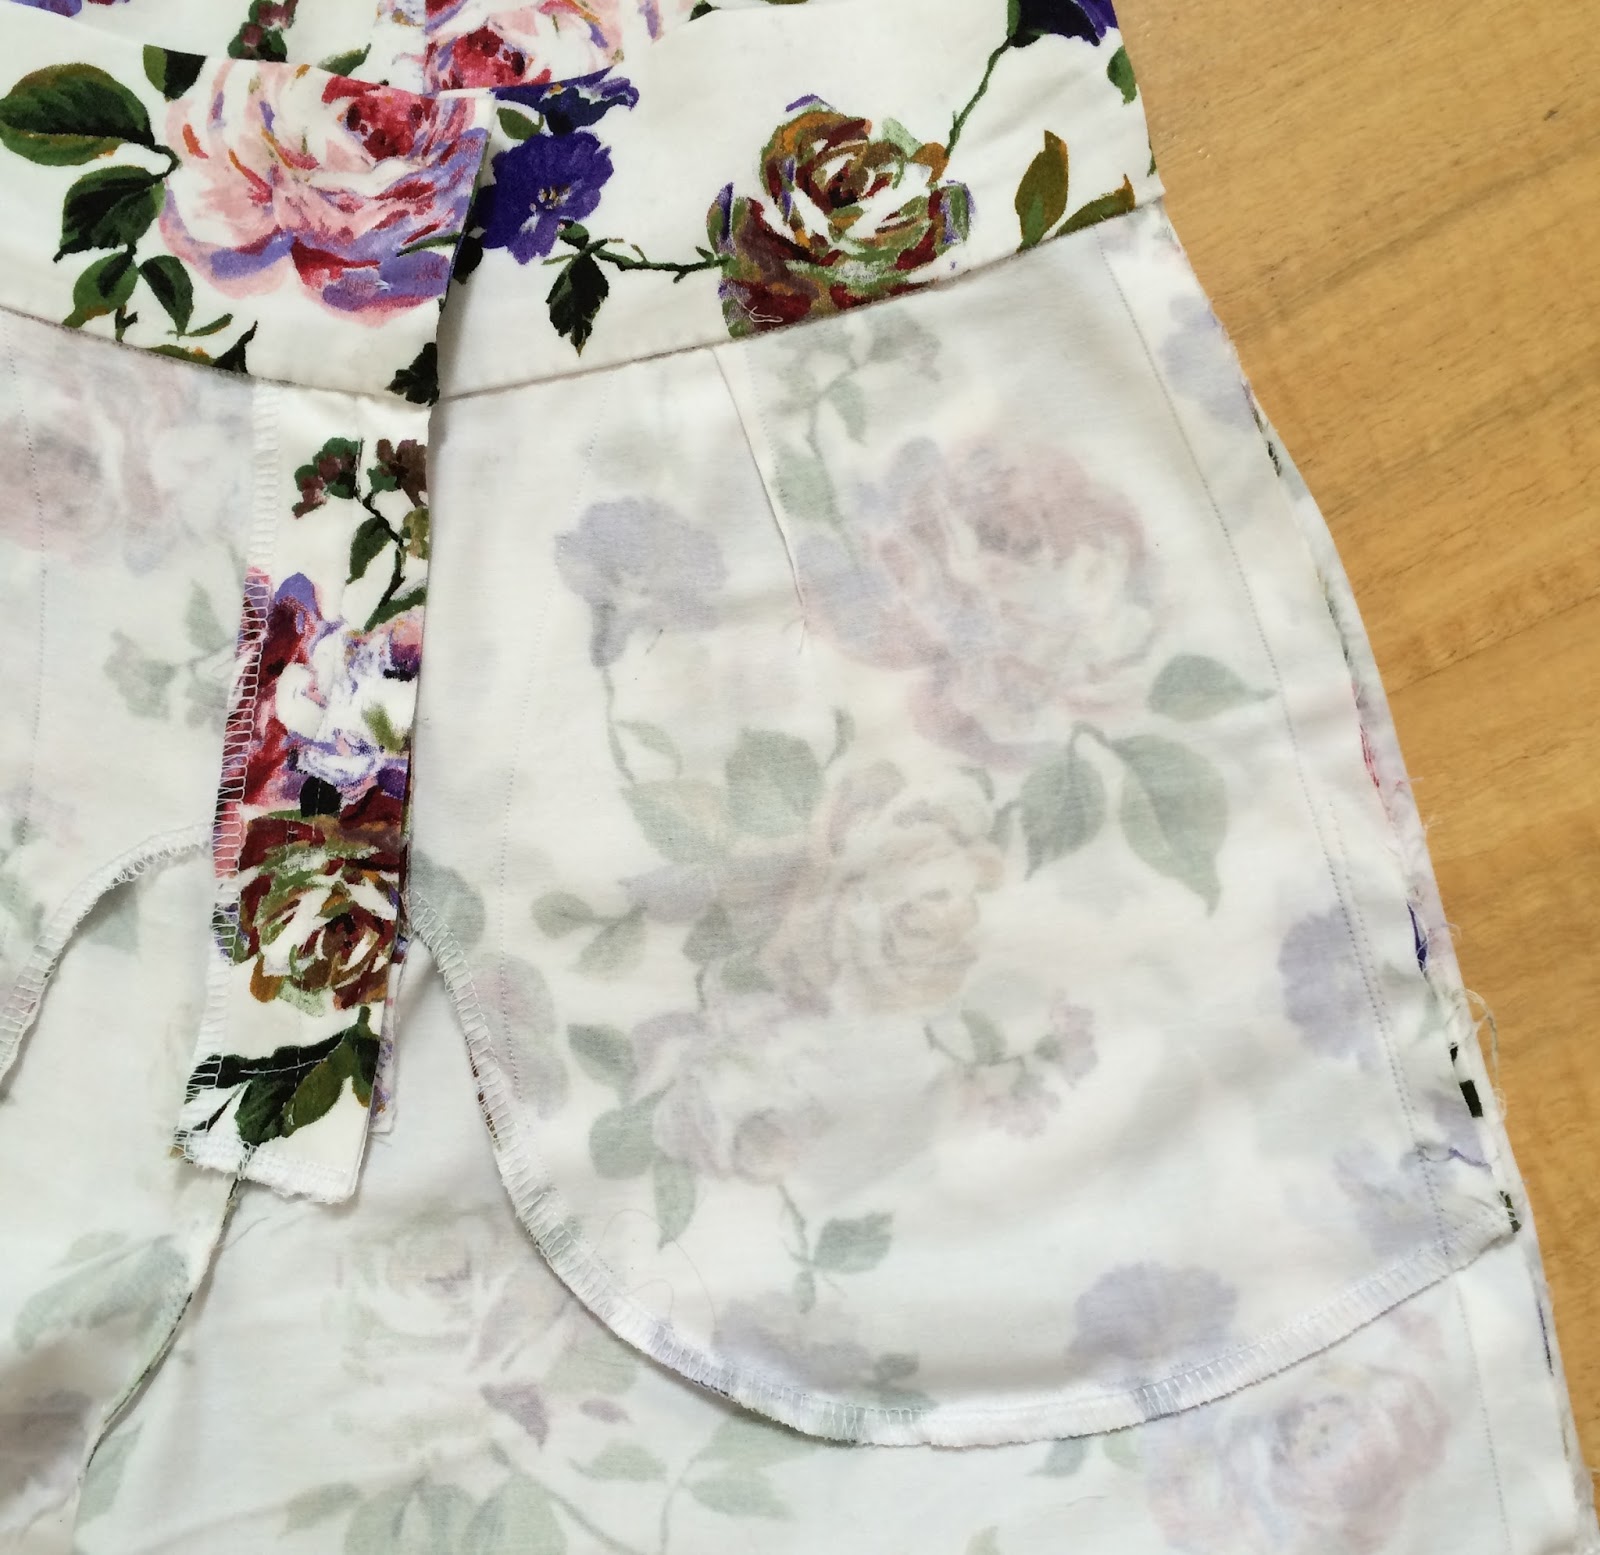
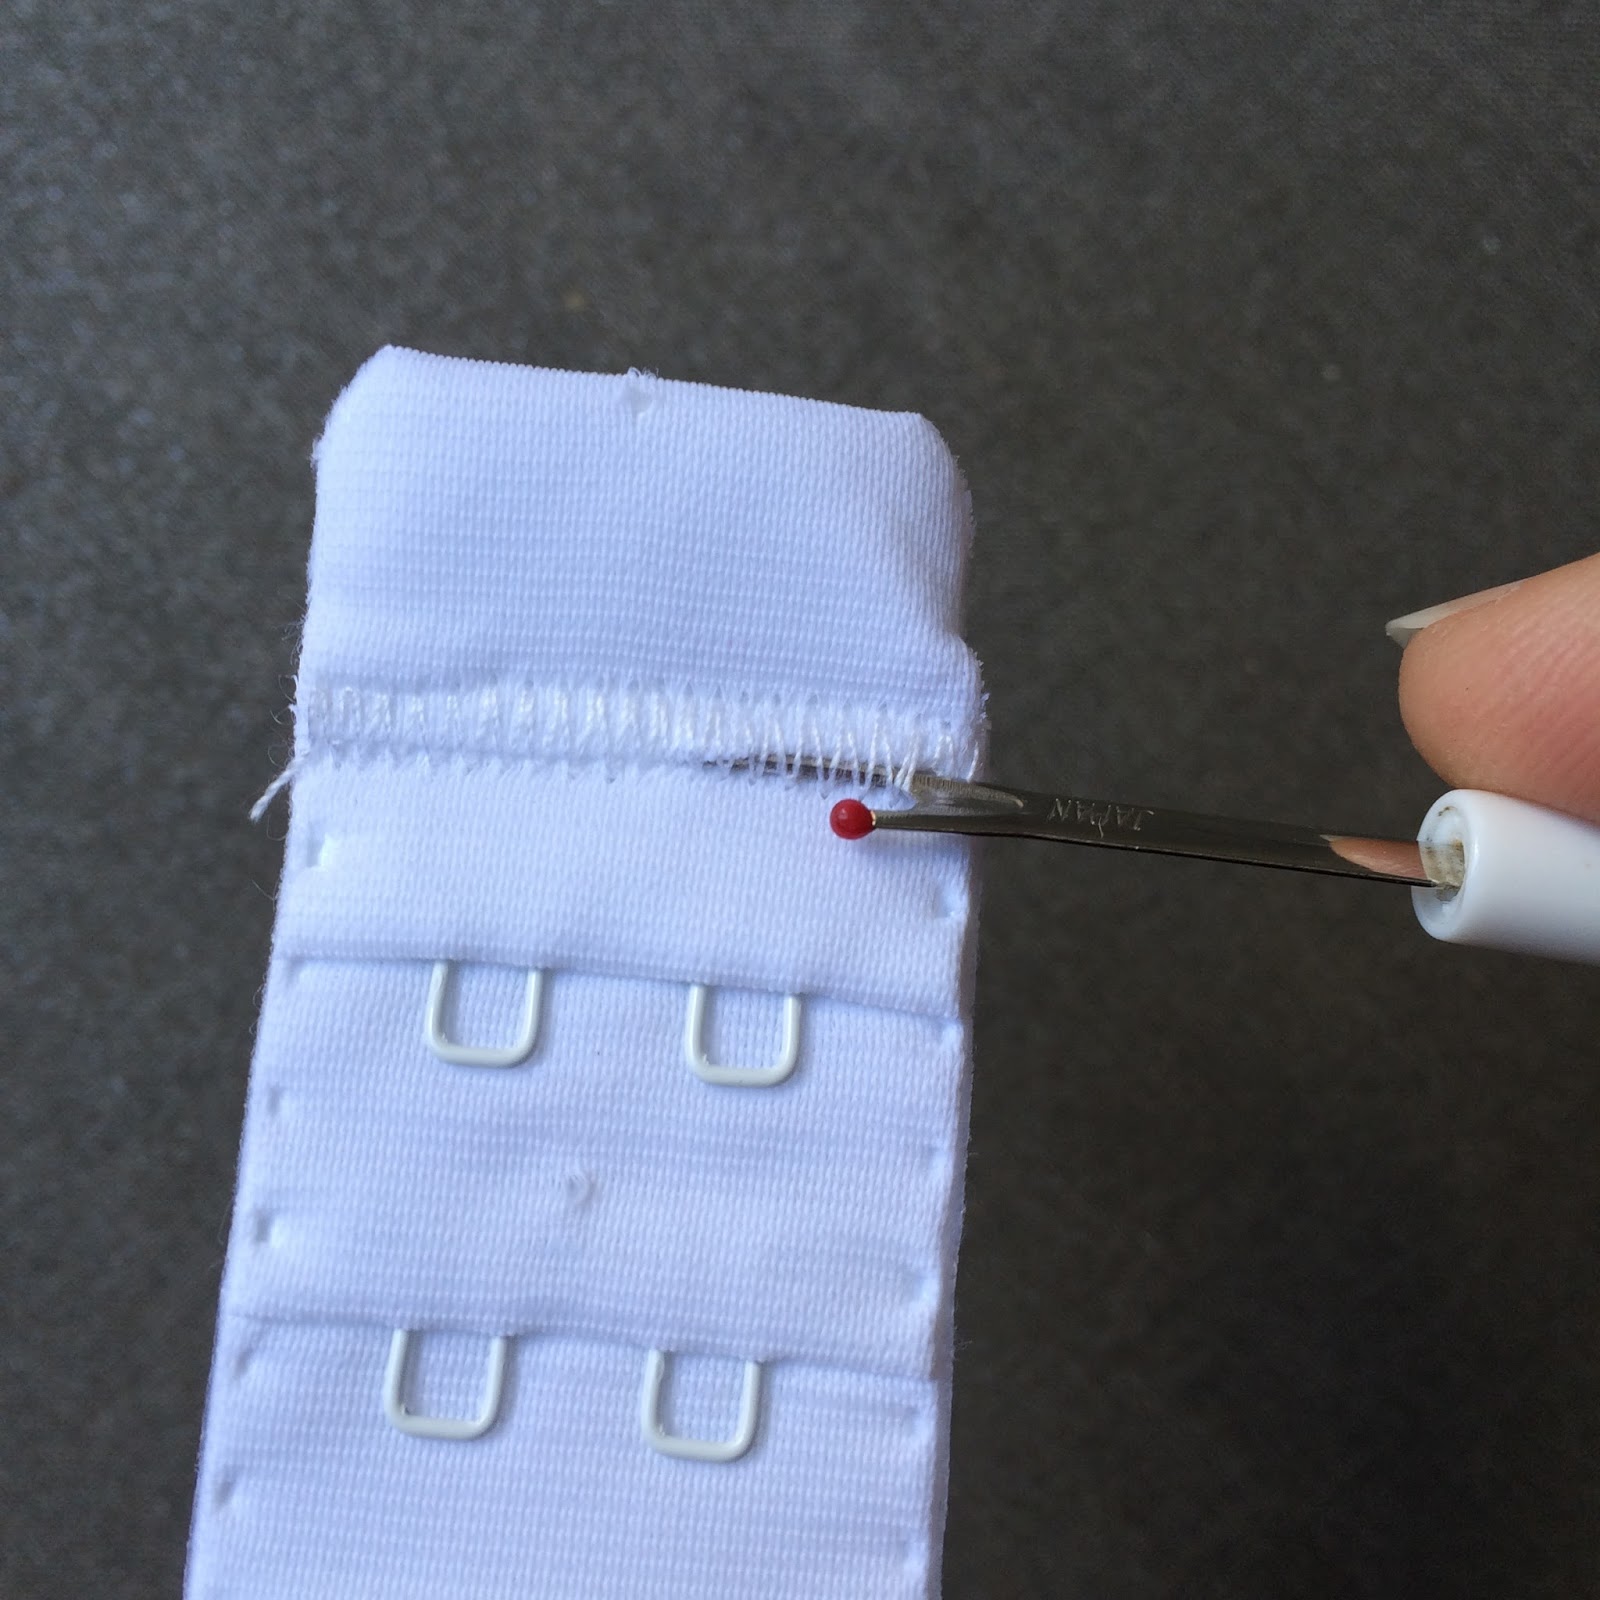
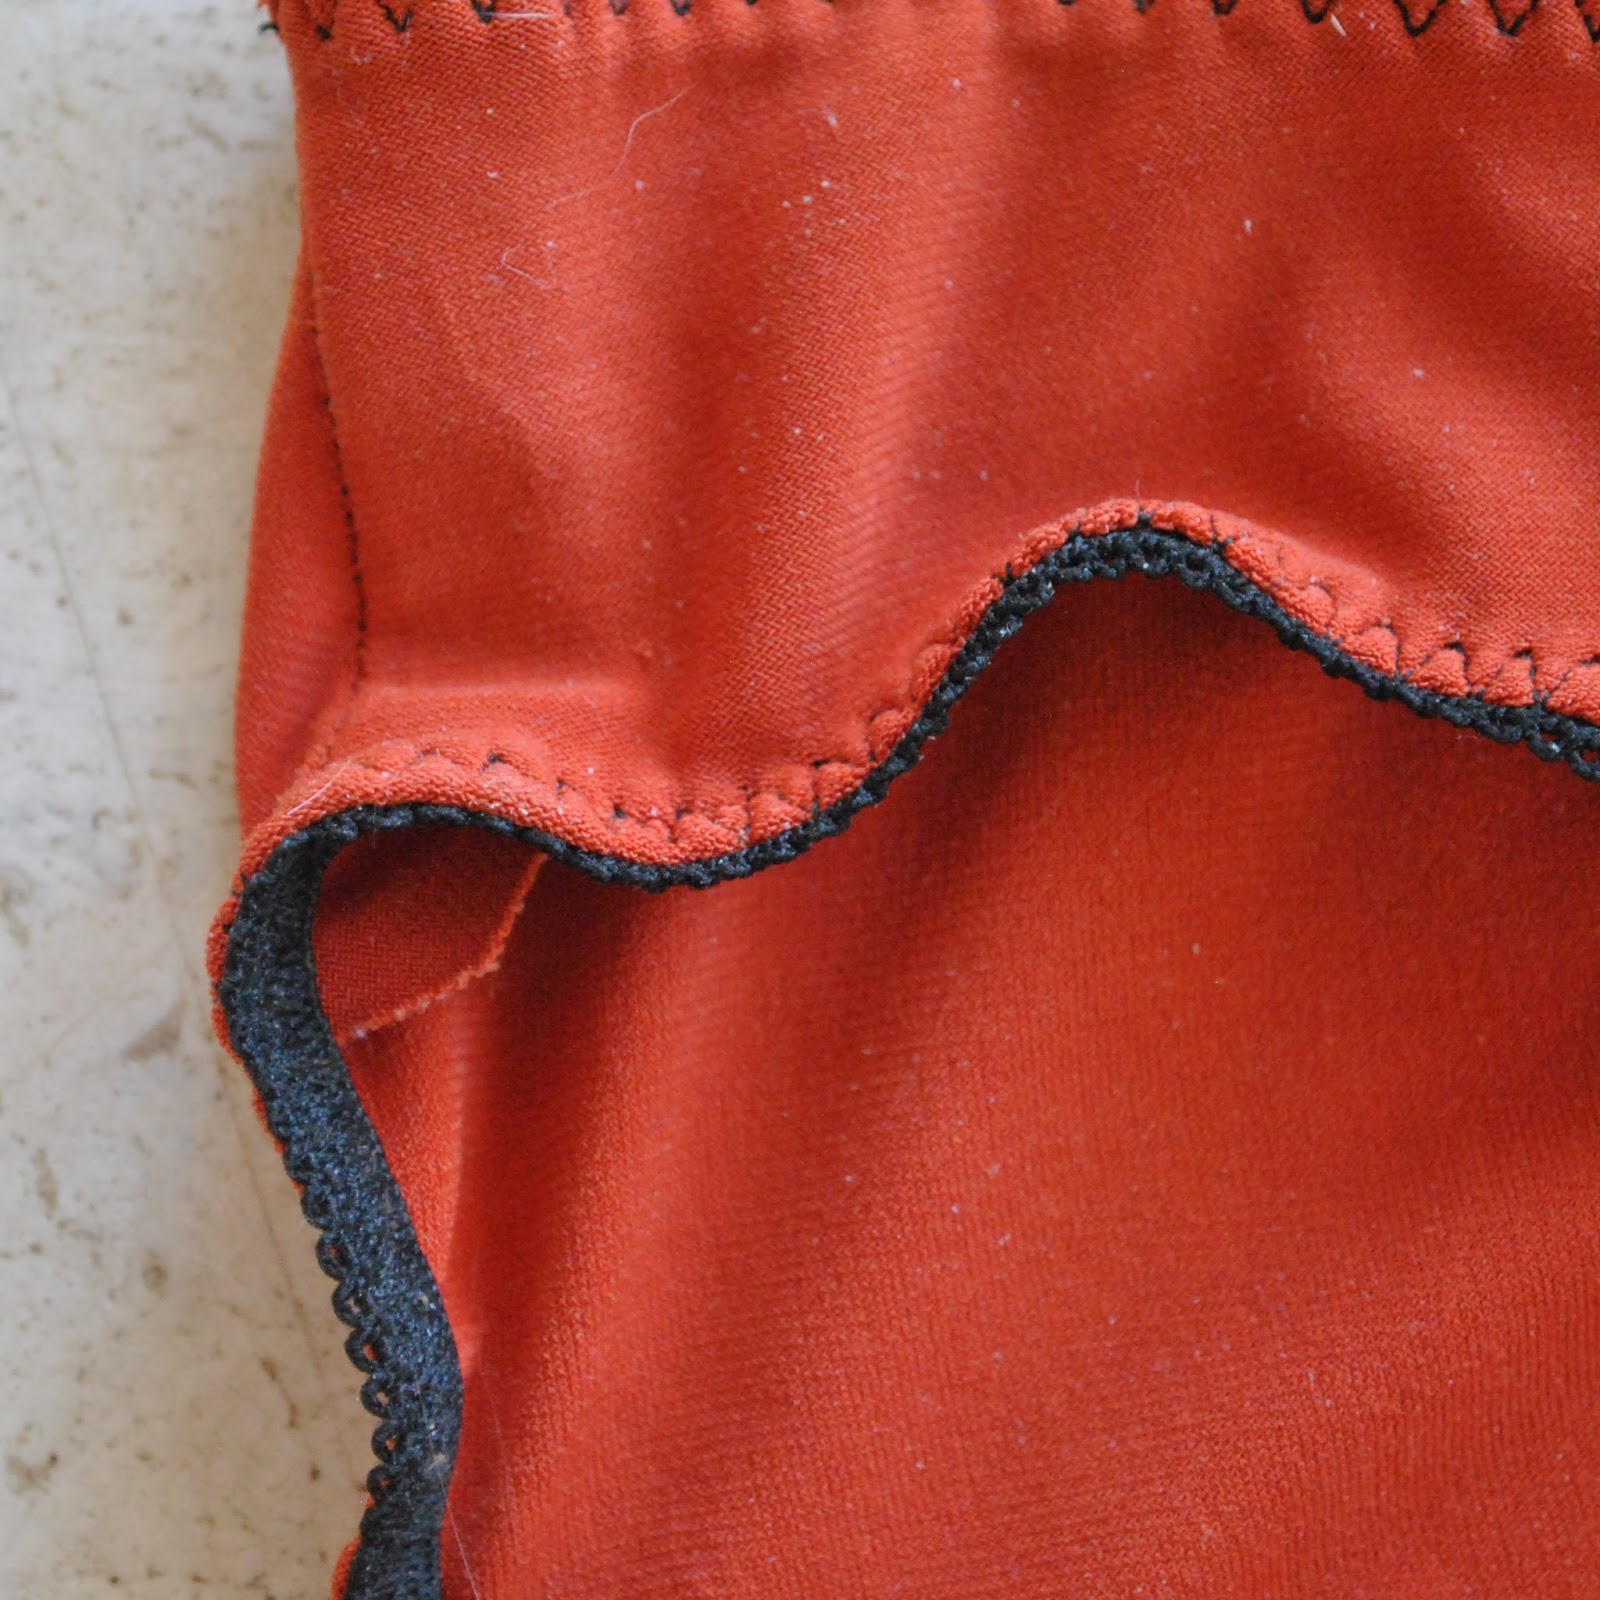
Alterations; just the usual, the pattern doesn’t instruct to put a protective placket behind the fly but I always put
one in. It’s an easy add-on and always a nice finishing touch to any fly front.
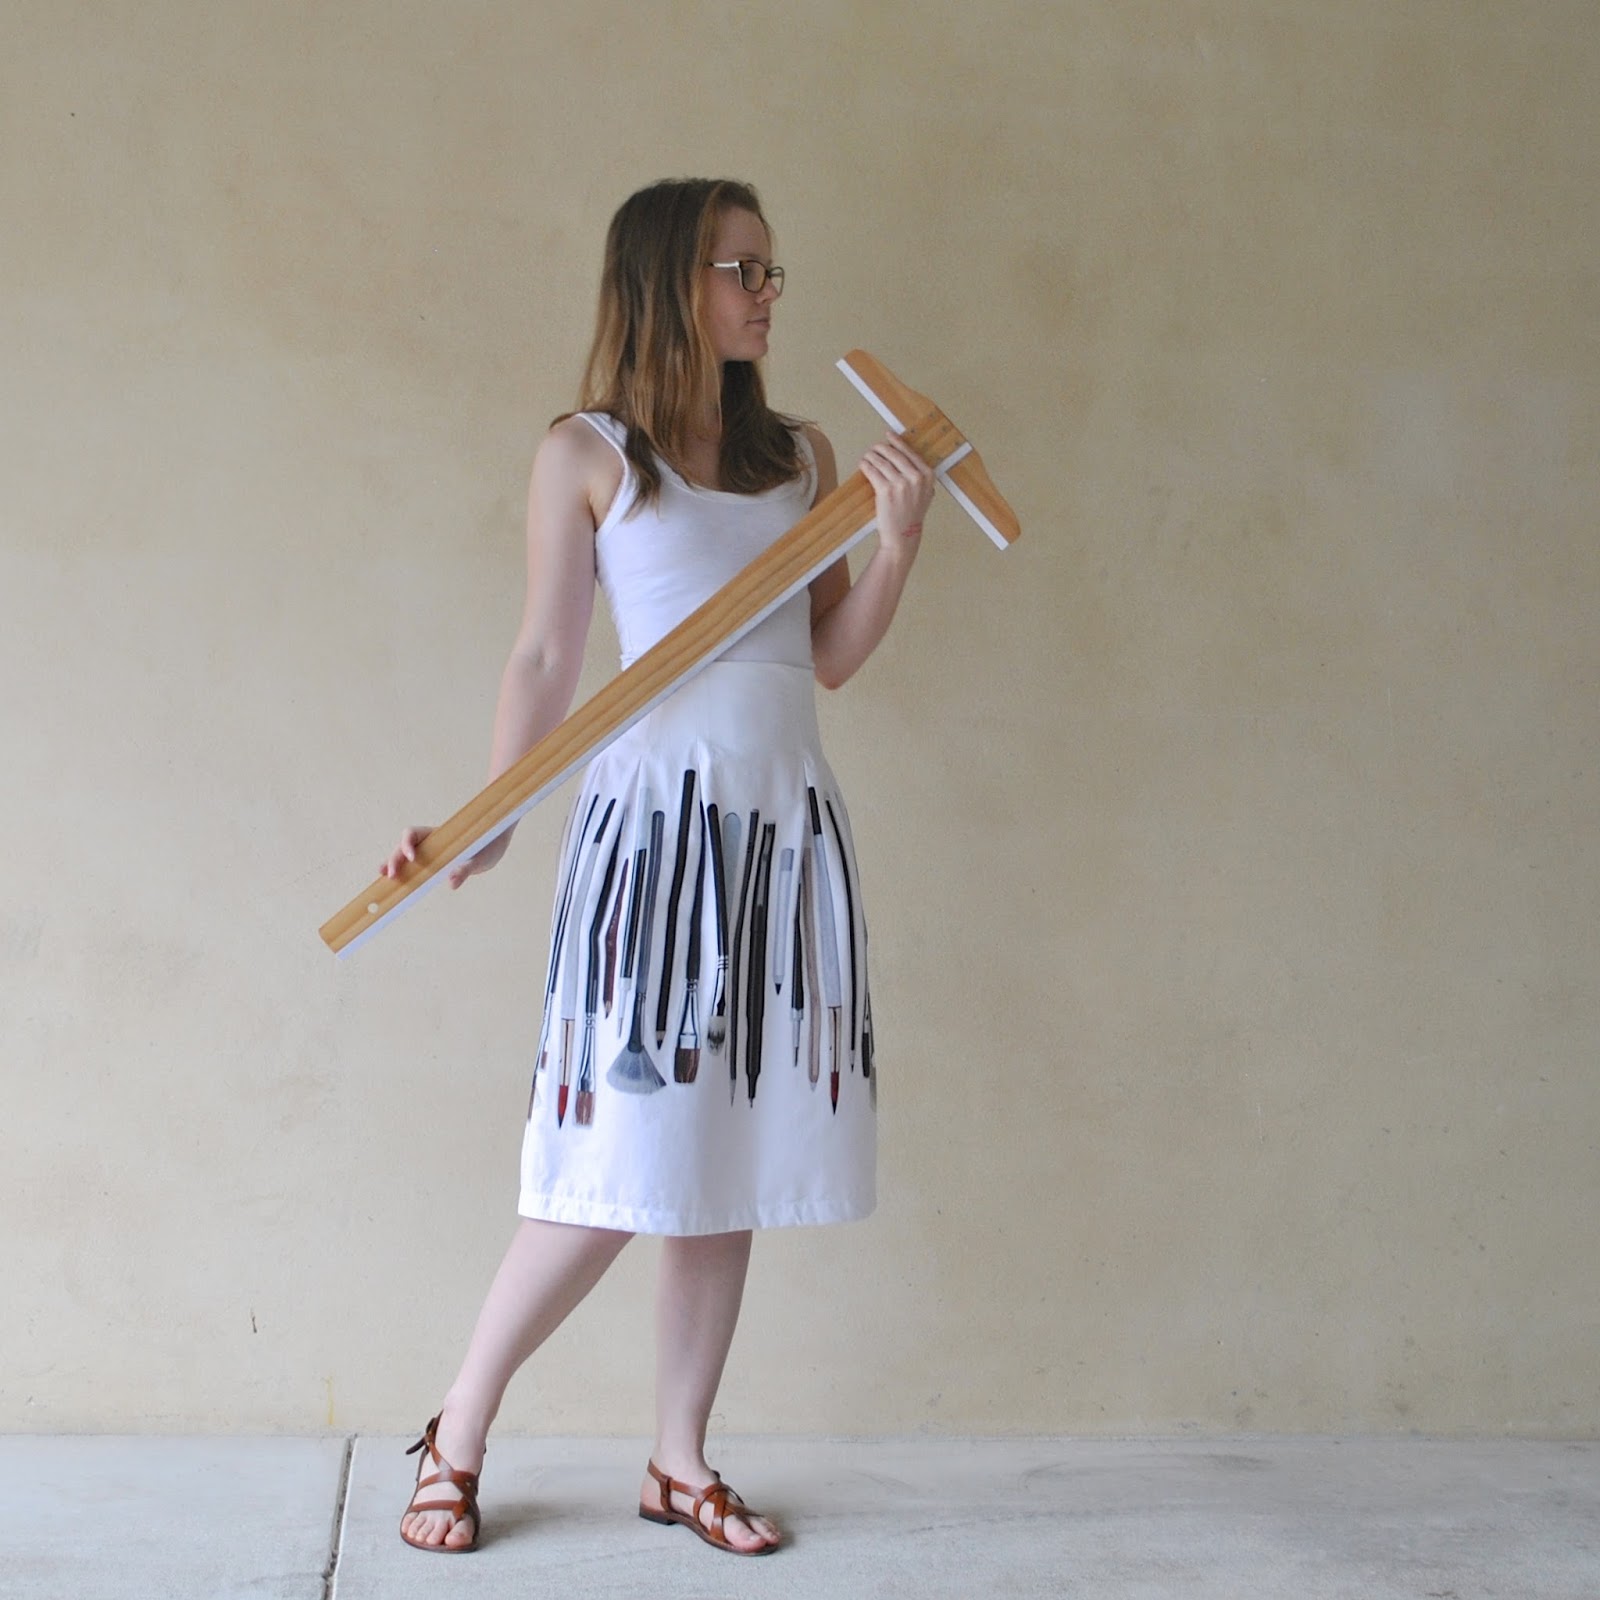
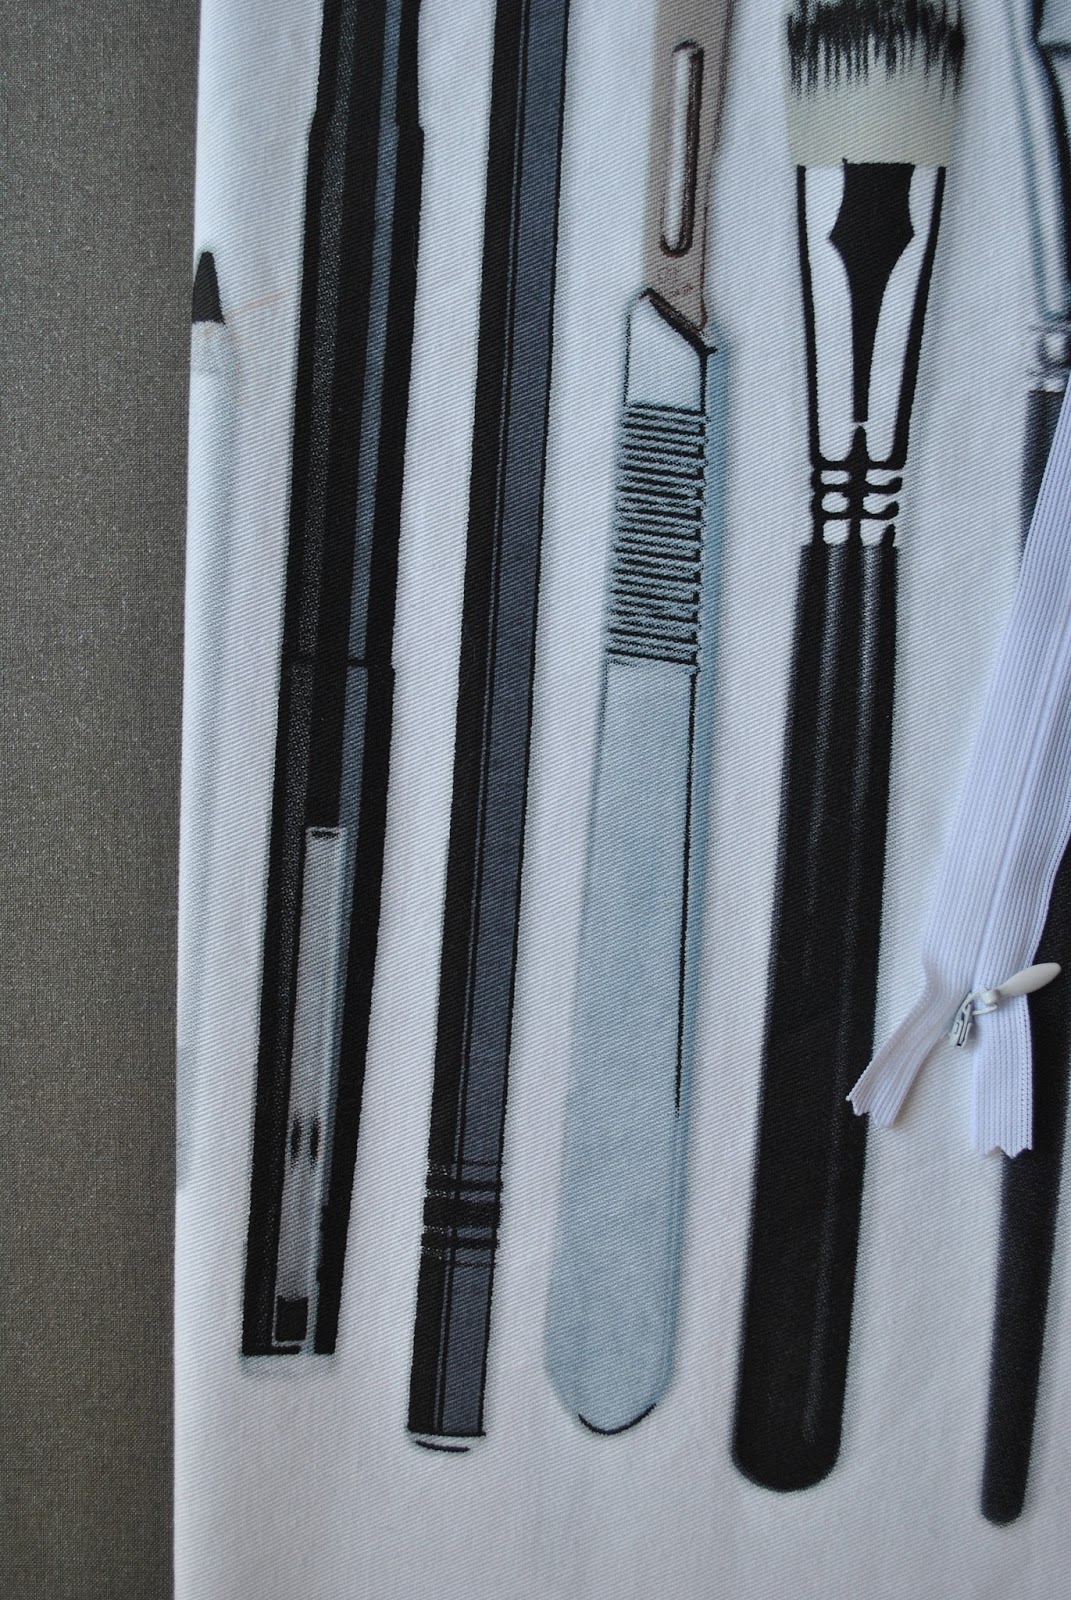
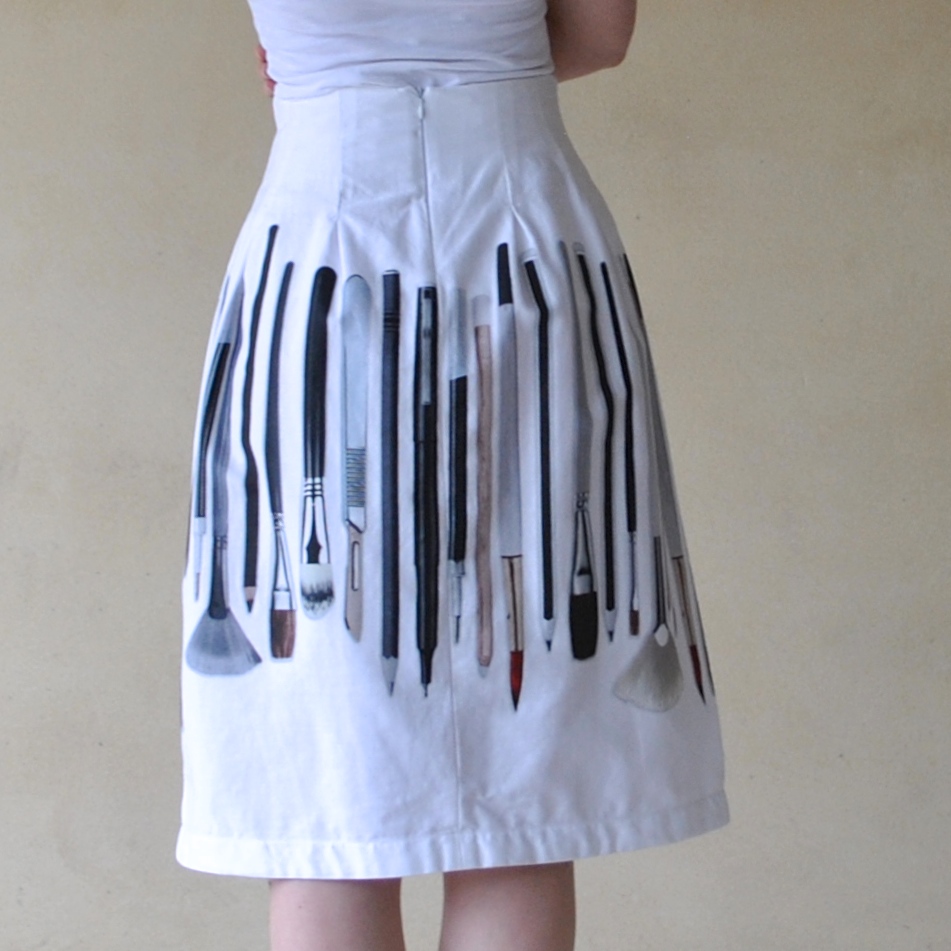
Fabric; some lovely stretch sateen from Fabulous Fabrics; soft, sturdy without being very thick, and the print has a sharp, painterly appearance, like old-fashioned ceramics.  Mum bought it for
me for my birthday.  Actually, the fabric is very lovely and totally deserves to be something far more dressy.  Just that I’m a funny bun when I get an idea
in my head, sorry; and I really fancied some luxe-ish shorts.  I’m excited about the thought of wearing them
both pretty pretty style, with my ultra feminine broderie anglaise top; and also
more contrast-y like, with my more masculine, utilitiarian khaki linen shirt
too. 
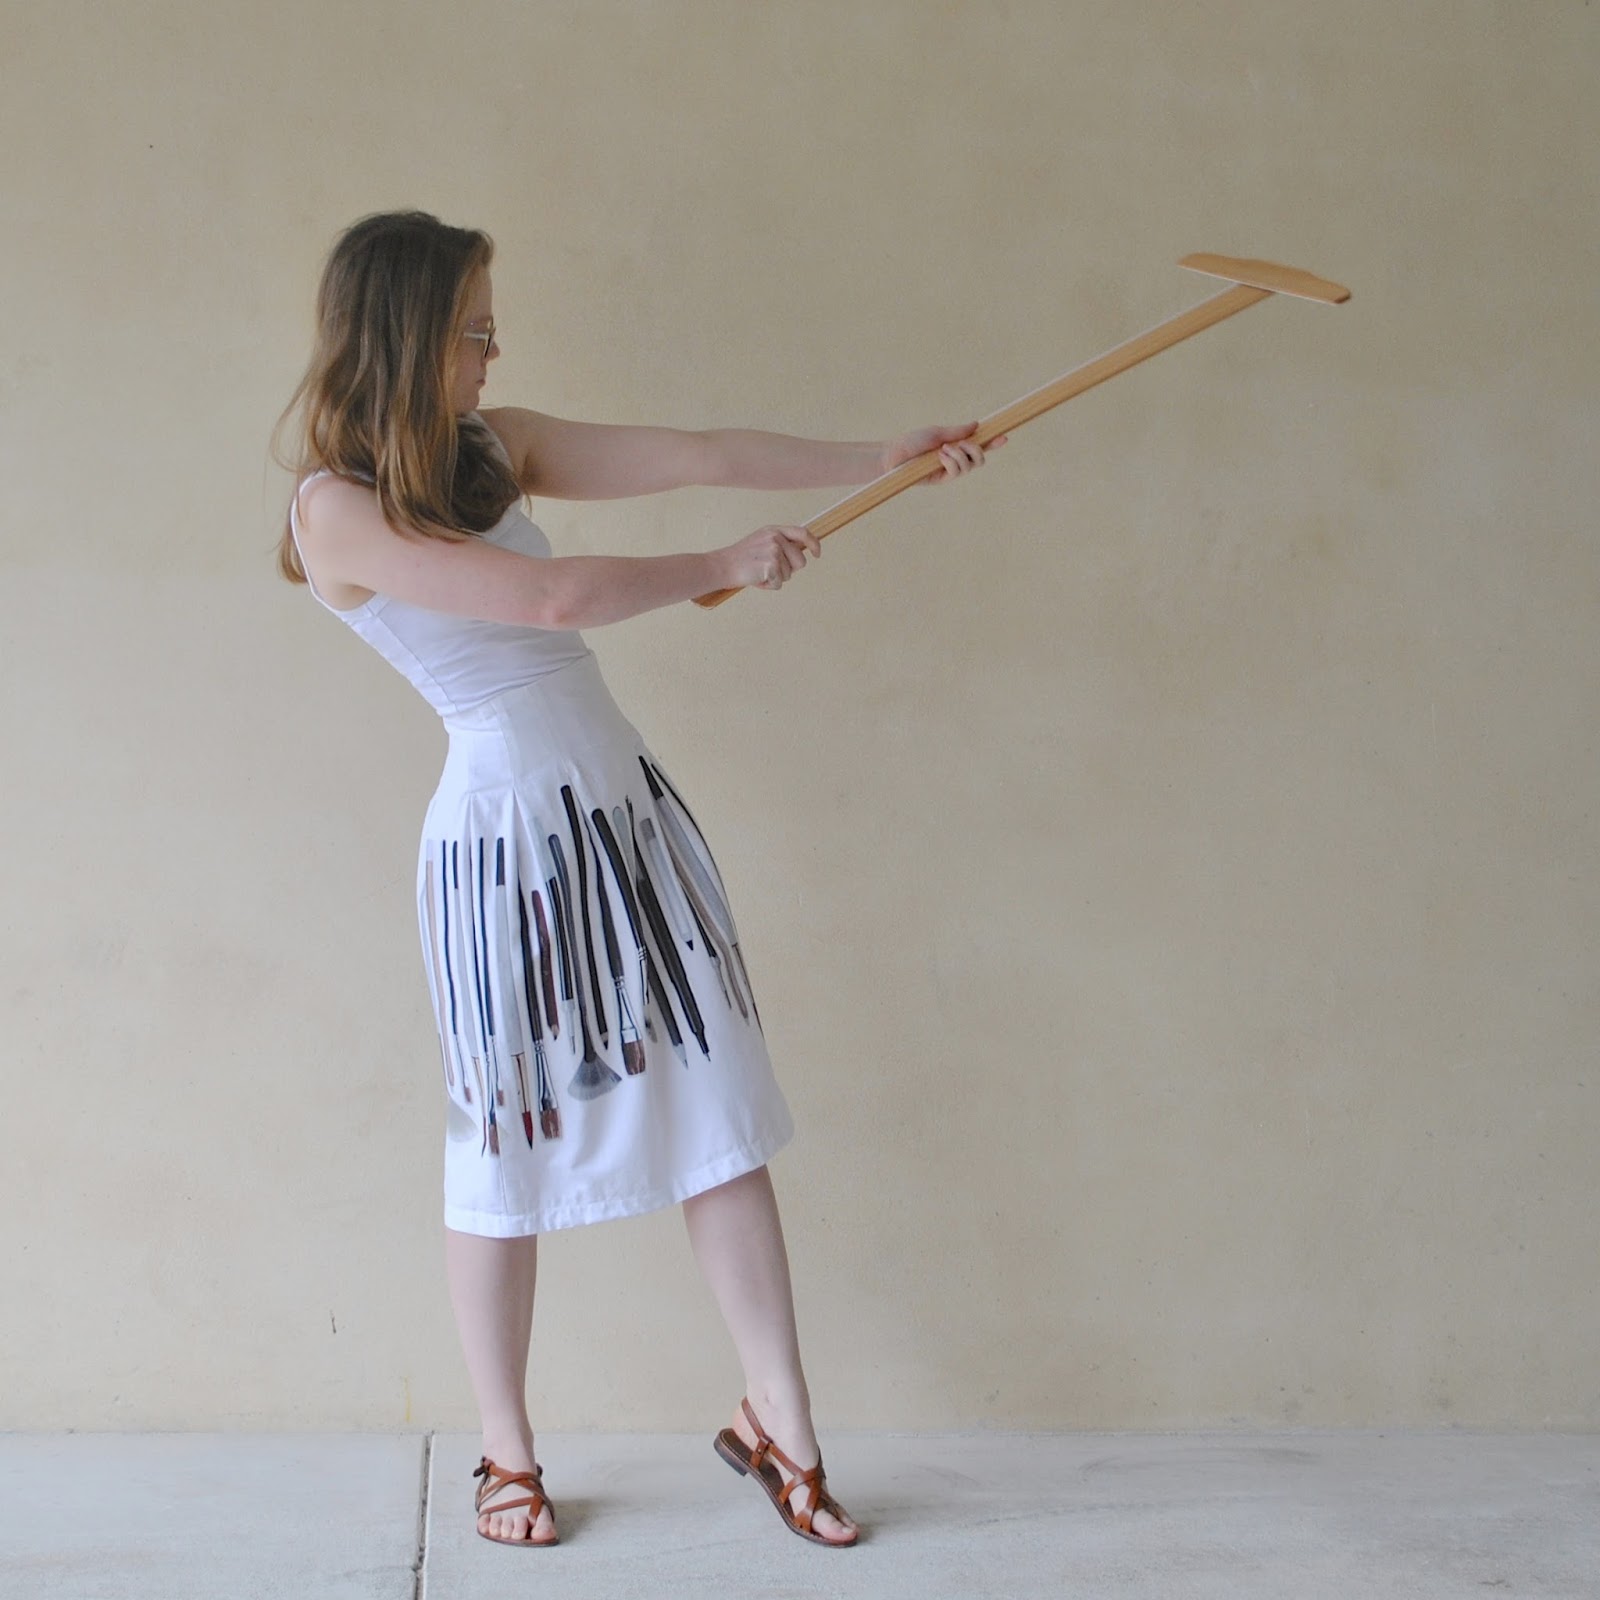
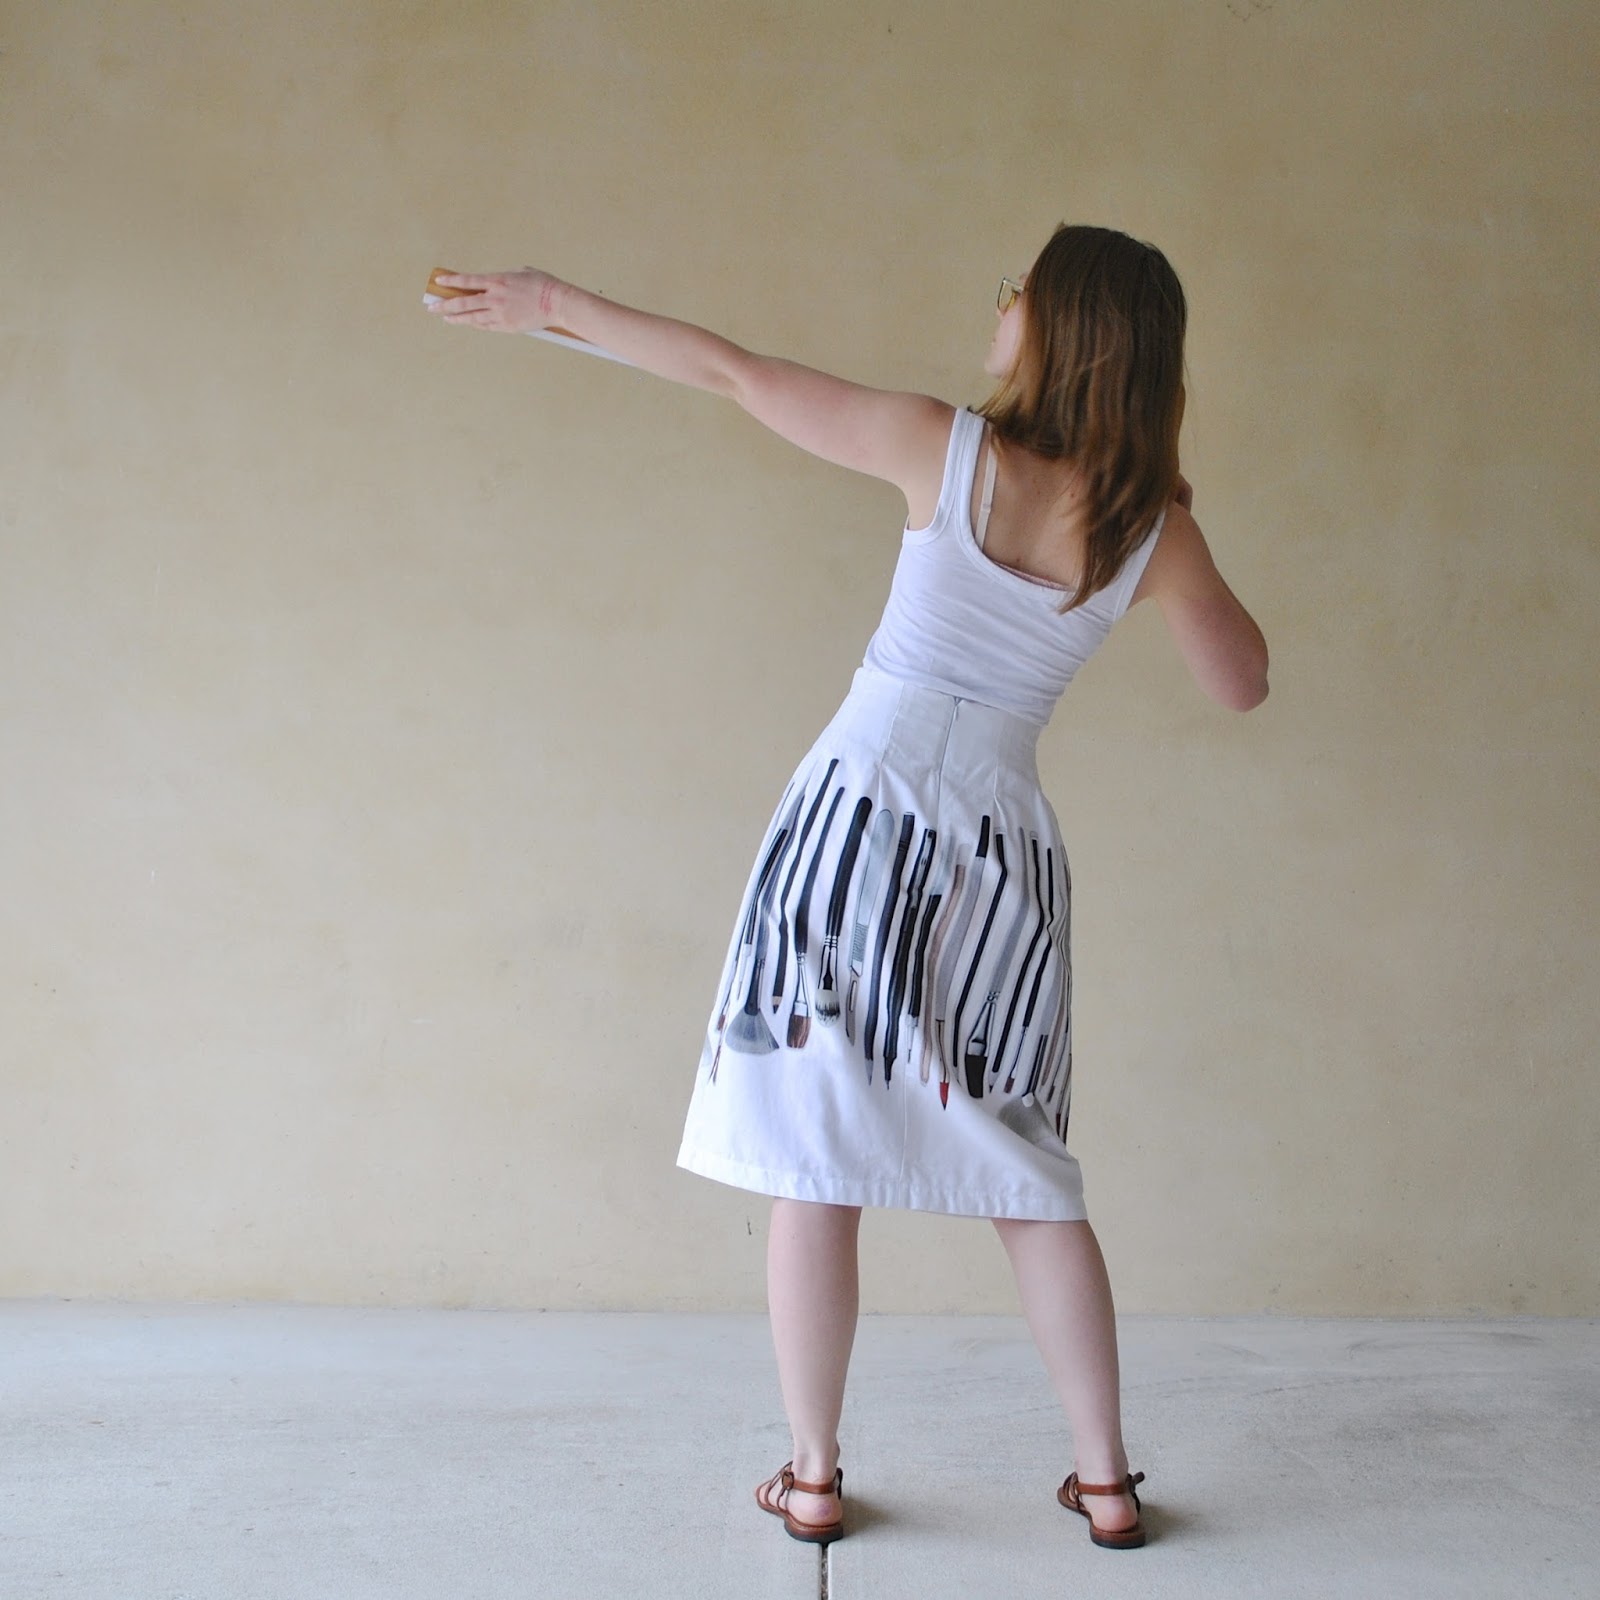
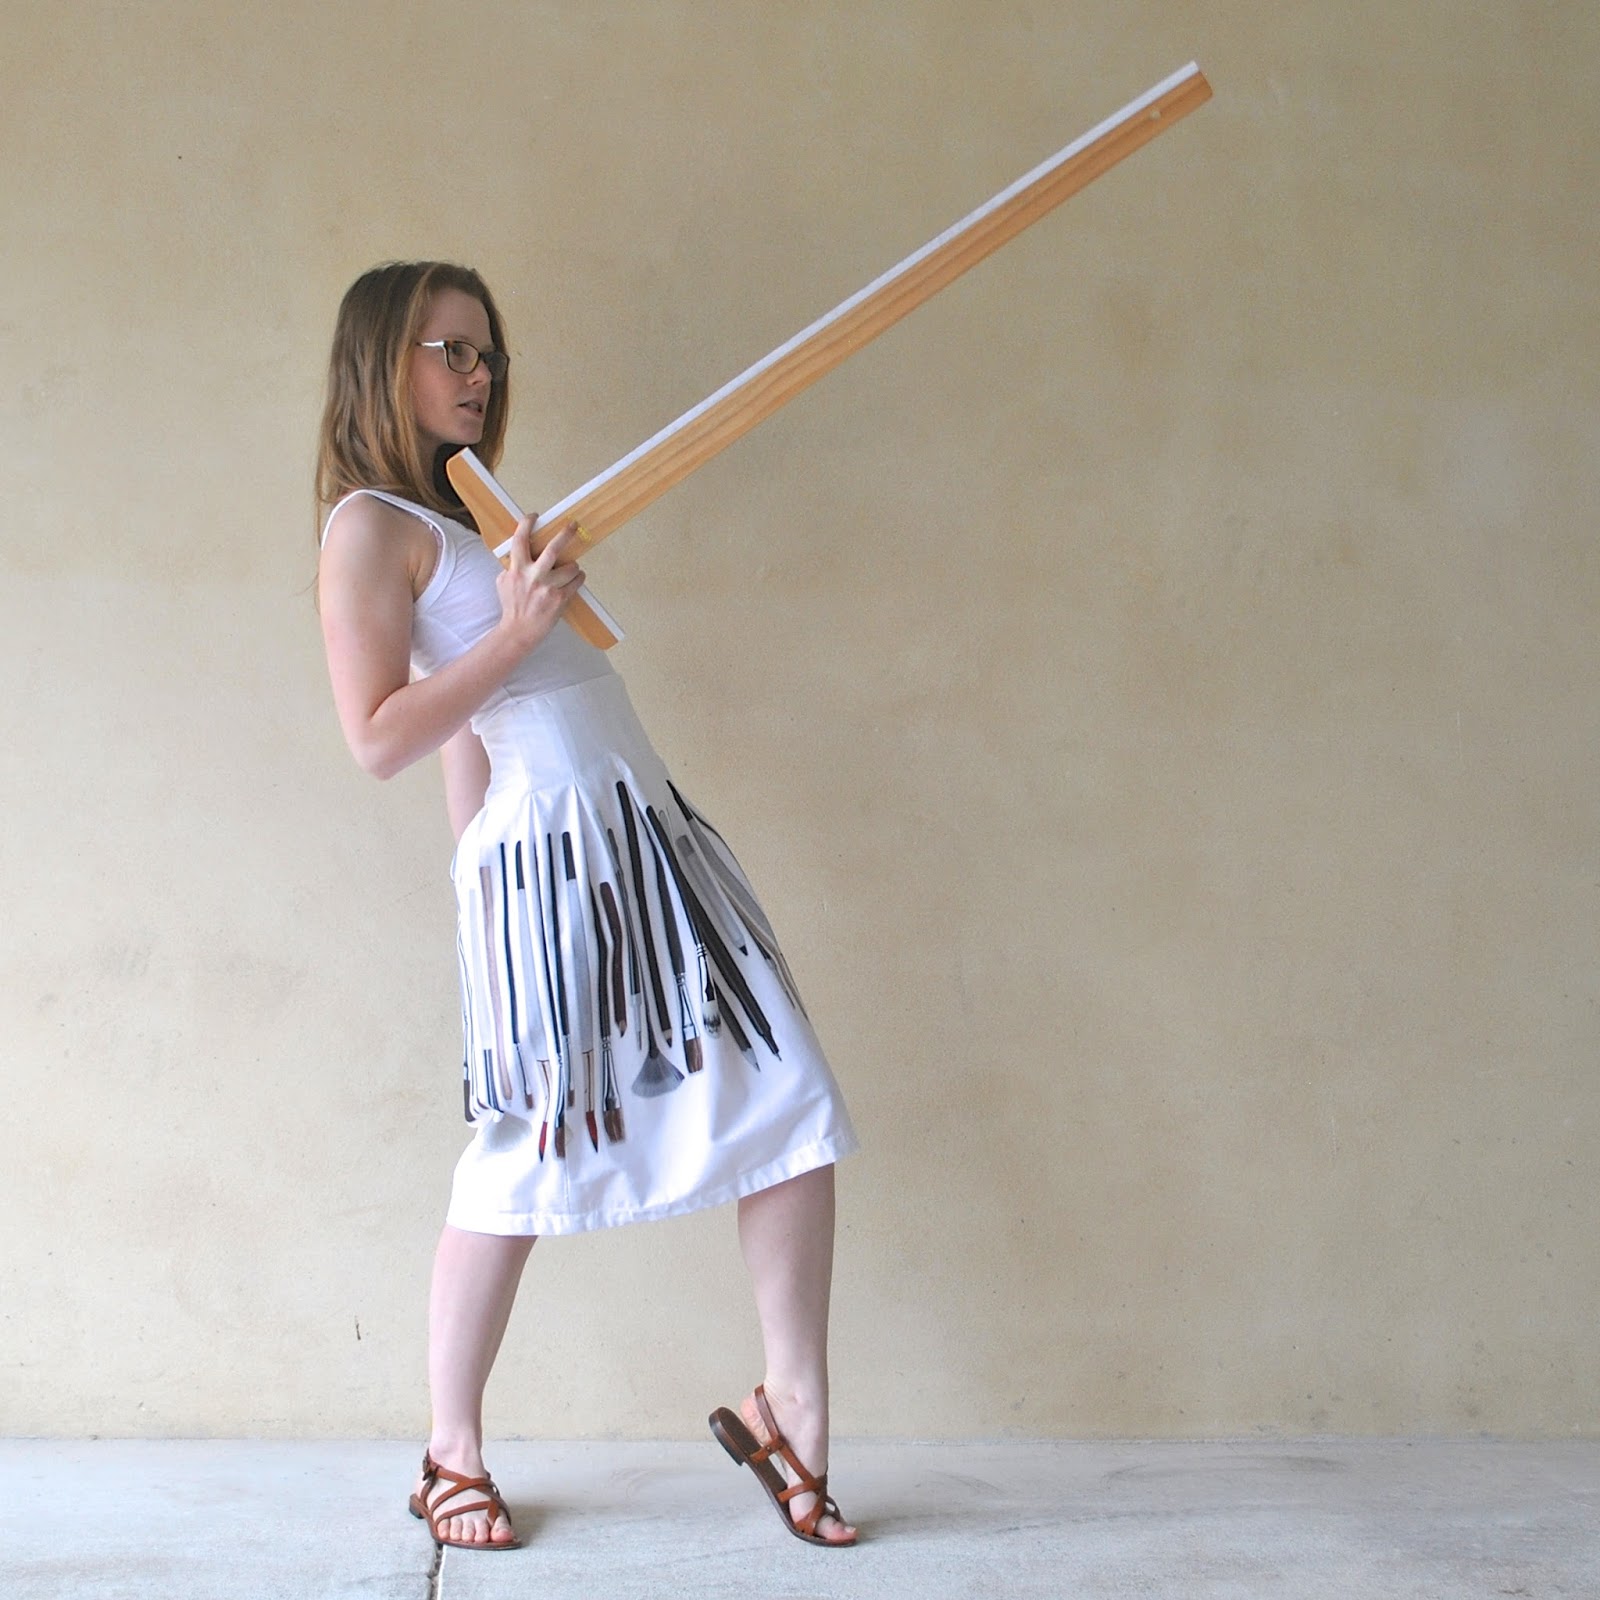
The lovely Margo recently posted about showing your sewing creations in action, with an action shot… which inspired the following display of gawky awkwardness.  What was I thinking, I don’t know.
Thought bubble emanating from Sienna; what the flippin’ heck is she doing NOW!????
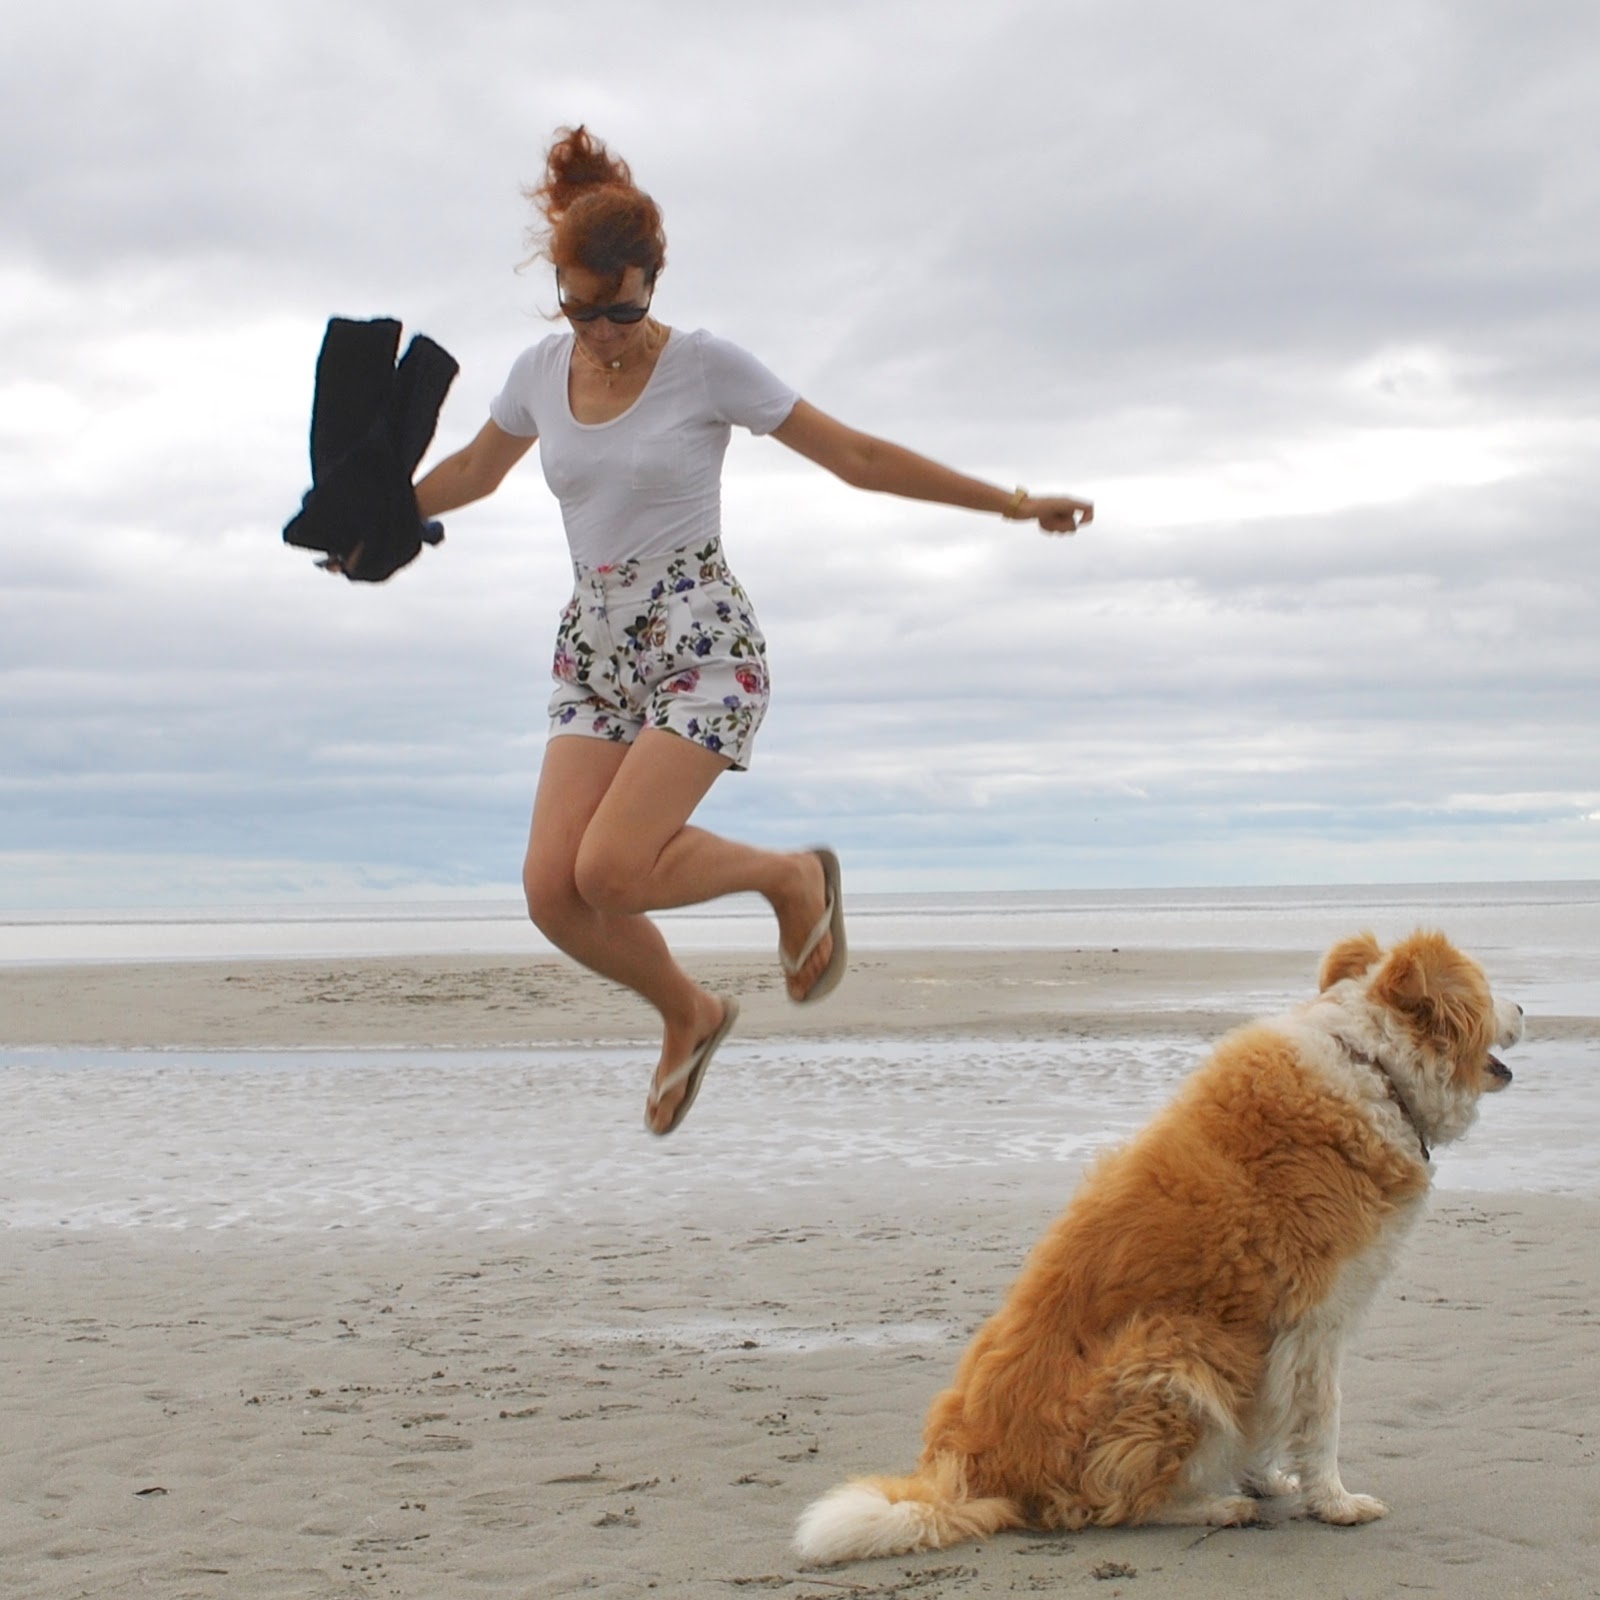
Action shot!  Sienna knows, you see, that in real life this particular action is pretty much non-existent from my daily repertoire of actions, haha.   Pegging clothes on the line or taking out the rubbish would be a more realistic action shot, if slightly less riveting for a picture!
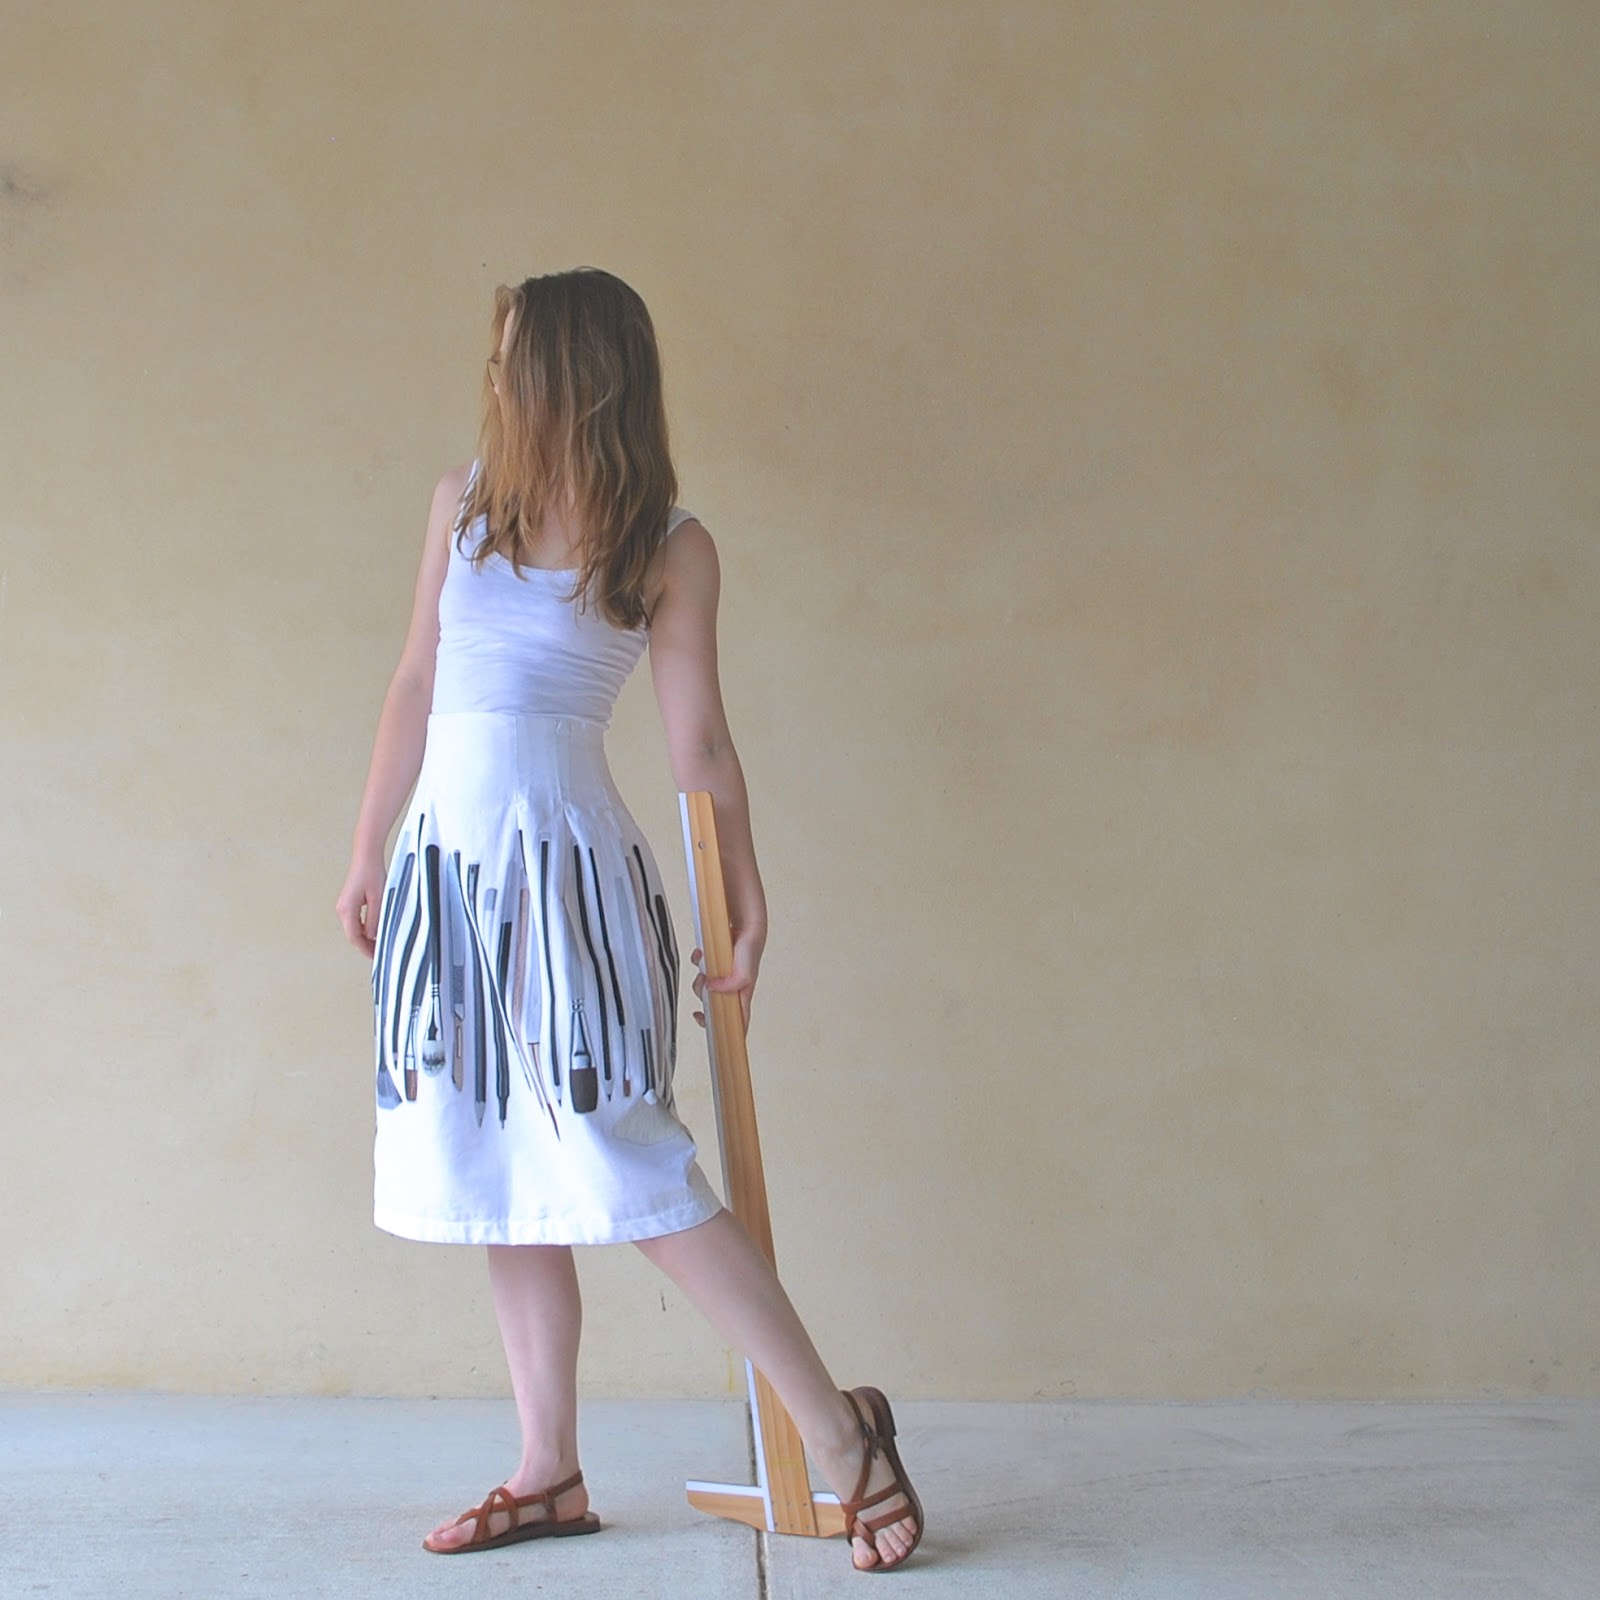
Oh dear.  Well, it seemed like a good idea at the time, ahem…!
Okay! wrapping it up…
Happiness factor; well, a favourite pattern and totally lovely fabric, all going together as smooth as silk.  I’m giving
this project 10/10  đŸ™‚
Details:
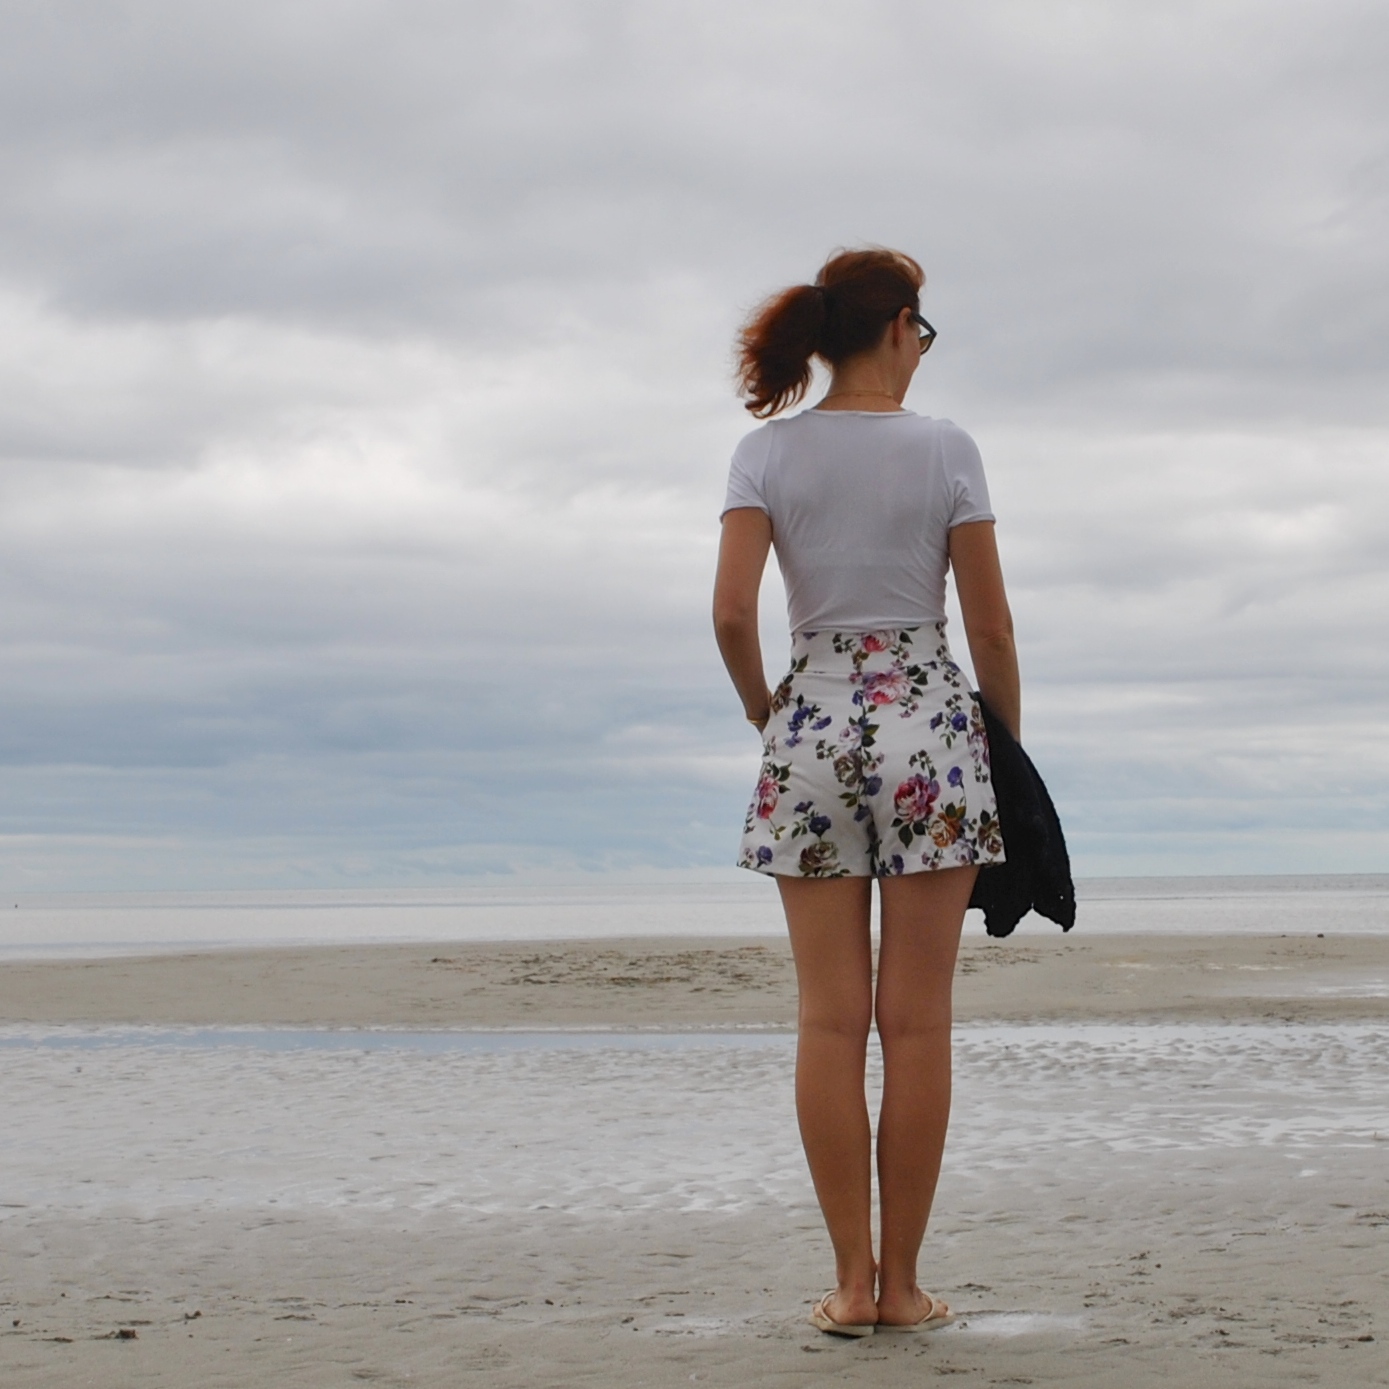
Shorts; Burda 7723, floral sateen
Tshirt; the Nettie, Closet Case patterns, white bamboo jersey. details here
Cardigan; midnight blue Miette, details here
Thongs; Havaianas
pinterestmail

Perry Ellis skirt, sort of

New skirt.
The above picture is showing what I actually wore out and about today…  please note the far less glamorous shoes than featured in the remainder of this post!
Pattern; Vogue 1521, a Perry Ellis design from 1985.
Fabric; taupe and white silk/linen mix from Fabulous Fabrics, with a crisp and rather dry and paper-y texture to it.  The taupe was purchased as a remnant, and I added the panel of ivory onto the bottom edge.  I added it underneath the hem, leaving a little overhang of the brown, so it looks more like an underskirt than a pieced addition.  Pockets are cut from some nondescript cream-coloured cottony stuff, from a bundle of scraps Mum gave to me.

So; this is another thing to fit in with my vintage pattern pledge; only my version is terribly unfaithful to the original design.   It is supposed to have an absolute truckload of pleats up the top there.  I got halfway through making it, pinned the pleats and all and I and suddenly just hated it, and veered whimsically off and away for a random new look.
But, I’m still counting this as part of my vintage pattern pledge 🙂 … not because it’s almost the end of the year and I’m running out of time to fulfil it …  đŸ˜‰ well, okaaaay, there is totally that!  đŸ˜‰  Anyway technically these are all the pattern pieces cut out right and they’re all joined up in the ordinary way and all; just that instead of multiple pleats there is just one giant pleat both front and back.   I wrapped the extra width back upon itself, folding the same way on both the front and the back.  And bought it into my waist more with some discreet darts along the top, both front and back, and overlapped the R side pocket with the front pleat a little bit too.  This worked out quite well, I think.
Moral of the story; if you’re hating where something is going but you really do want it to work, because you really love the fabric and don’t want to waste it, or can see some potential in there somewhere … DON’T GIVE UP!   There will ALWAYS be a way to make it work out!
Being that it is so unfaithful to the original look, is this a cheat on my vintage pattern pledge? Meh, I’m not angsting over whether I’m sticking to the letter of the law all that much.  Generally speaking I prefer an avant garde skirt over a safe one.

I maintained the L side pocket closure, which I’ve always though was a brilliant closure/pocket combination deal.  I should do these more often!  And instead of button/buttonhole I sewed on some long tweed straps, made from sewing up a scrap of bias cut piping tweed that was wrapped around a bundle of fabric I bought at the Morrison remnants sale a few years ago.  It’s very nice tobacco-brown tweed and I always knew I’d like to use it featured somewhere in a thing.  I really like how it its rough matte texture looks against the smooth dull sheen of the silk.

Wanna see something funny?  here is my 20 year old self wearing the top I made for myself using this same pattern, thirty years ago.  I know I made both the top and skirt when the pattern was first released, but strangely I can’t remember any of the details of that first skirt!  A bit sad too; I know there are loads of things from my younger years that I’ve forgotten, simply because I have no photos of them..   Here, I’m visiting a rose garden in Pinjarra with my mother and grandmother.  I totally would not remember that outing without the photo.  It’s sad how much of our memories are only cemented in later years by the existence of a picture, to jog them.  

Project happiness factor; given my rising hate for it halfway through (bad) followed by serendipitous ad-libbing and eventual satisfaction (good)  I’m awarding this one 8/10.

Details:
Skirt; Vogue 1521, a Perry Ellis design from 1985, taupe and ivory silk/linen
Top; my own design; blue jersey dyed black, details here
Shoes; low sandals are 2 baia vista from Zomp shoes… high black are Diavolina from Zomp shoes

pinterestmail

some random tips for sewing lingerie

There are a bajillion great posts out there with good tips for sewing lingerie; hopefully this one is adding one or two new pieces of info into the pot…

Pattern pieces: If your pattern pieces are half ones it’s well worth doubling them to make full pattern pieces, that do not need to be placed on a fold.  This is useful for many reasons; one is pattern placement when it comes to lining up lace motifs, another is getting the most economical layout on a small piece of possibly expensive lace.  Also if your pieces are to be cut on the bias… some knickers patterns are suitable for fine wovens like Liberty, and need to be cut on the bias and it’s only about 1000 times easier with a full pattern piece than folding the fabric accurately for a “cut on the fold”.  Mark the bias line on all new pattern pieces too.

I also prefer to splice together the knickers front piece and crotch piece of my Watson brief pattern (see above) so as to make them one piece and eliminate that horizontal front seam.  The crotch lining is sandwiched between the (new) knickers front and back pieces along the curved joining seam, and is stitched down with the leg elastic at the sides, but otherwise sits loose at the front.  I prefer this to having a front seam!

Usually I save paper by taping together scrap pieces or even newspaper to make the other half pieces; for frequently used patterns, or if the original is a fragile tissue paper pattern, the pieces can be traced as whole new ones on thin, sheer plastic which is more durable (above).  For this I use plastic table-clothing, sold in 30m rolls from the party section of Spotlight.

Also, I jot on the actual pattern pieces the lengths of elastic needed, to save re-measuring for each new project.

When sewing the ends of the rings and sliders; cut, pin and sew the pairs together and at the same time.  It’s hand down the best way to guarantee the two sides will be identical, if such things as symmetry are important to you.  Actually the same goes for anything there will be a “pair” of in the project.

Satin ribbon trim; I always “heat seal” the cut ends of ribbon bows so they don’t fray during wear.  Just hold the cut end of the ribbon close to a candle flame and carefully watch it as you sloooowly move it closer; it gets to a point where it starts to melt away in the heat.  This happens pretty quickly so you need to keep a close eye on it and pull it away the very second you see it happening.

Hook and eye tape: I prefer to buy separate hook and eye tape if it’s available but my closest store sells only “bra extenders”.  I’ve found these to be an adequate substitute if I can’t find the proper arrangement;  the pieces can just be picked apart quite easily.  If the “hook” piece is too long the extra length can be cut away and the edge zig-zagged.  It’s not as neatly finished or as professional looking, but it’s perfectly fine in a pinch.

Sewing edging elastic onto lightweight and super-stretchy fabrics
Super stretchy fabrics are obviously perfect for underthingies but also obviously come with their own little challenges… and one of them is the dreaded “lettuce leaf” edge happening.

yes, this is my own work *hangs head in shame*

I’ve found it very helpful to sew a long basting or stay stitching 6mm (1/4″) from all edges before attaching any elastic.  I know, straight stitch on knits, *horrified gasp*   it’s a huge no-no and I could get blasted for this! but meh, it works out pretty good for me 🙂

I mean, everyone has their own, slightly unique way of attaching elastic, I’m of the school of thought that whatever works, works; and lots of different ways are going to work.
The lettuce leaf occurs when the elastic is overstretched while sewing it to the edge of the fabric, and it’s pretty easy to do this when sewing with a particularly stretchy fabric.  It’s better for the elastic to be sewn to the edge of the fabric “flat” that is, for the elastic to be stretched to the minimal amount and for the fabric to be stretched not at all, while sewing them together.   A stay stitching helps to prevent this, and after the elastic is attached and before the final zig-zag you can pull out those initial basting/stay-stitching threads, if you like; to keep things looking nice and neat and tidy.

pinterestmail

mocha set

…  for me!
Fabric; slithery, slinky-malinki poly knit from Fabulous Fabrics in a divinely luxuriously glossy mocha shade; all elastic and other findings from Homecraft Textiles.  I wanted to make a Sierra bra for myself too; and while I love lace-y underthingies, this time I went for smooth, sleek and sophisticated, with a grownup vibe more befitting to an ancient old crone such as myself.
Haha, no really, I do have a nice selection of frillies already and just wanted a change of pace  đŸ™‚
Features; none.  Letting the fabric glow on its own with absolutely nil embellishment.
LOVE this unadorned look, I mean I adore pretty bits and bobs too but sometimes the simplest and plainest of styles in a sophisticated colour and liquid-y fabric like this feels just as gorgeous!

Technical blahdy-blah: I cut two backs, clean finished the seams within the layers, and also lined the front/cups with self fabric to about centre front.  I just left the lining CF straight edge floating unfinished on the inside; it’s not going to fray or anything and doesn’t show up at all.  The remainder of the fronts/straps are single layered.  The lower edge is finished with elastic, folded under and zig-zagged on the right side, just the same finish as the top edges and all edges of the knickers (as pictured below).  I cut the elastic 7% shorter than the edge it was to be attached to, measuring the paper pattern pieces.
That black hook and eye tape at the back is bothering me, but well, colour options here are pretty limited.  I’ve found Homecraft Textiles to have the absolute best array of lingerie elastics to be found in Perth.  Well worth hitting up.
2x pairs of undies, both super plain Watson briefs.  Boring and barely worth a photo… close-up for elastic-attachment detail purposes only.

Full set: so normally I love my things to be photographed looking artfully arranged to best show them off but couldn’t resist going the full Merchant and Mills here.

artistic dishevelment and not a randomly chucked down pile of clothes at all 

What is that aesthetic anyway? just kind of throw it down in a messed up crumpled heap on the floor, y’know? just like when your teenagers kick their grotty clothes aside as they step into the shower or something, and leave them there.  For days, if you don’t nag gently point it out.
*deep breath*
Embrace the crumple.  
Feel the crumple.  
BE.  The crumple.

Hehe, not to diss Merchant and Mills! I actually have the workbook myself… a recent birthday pressie, and heavy hints had nothing to do with it at all! *cough cough* and I love a lot of the stuff in it!  Just that the screwed-up-and abandoned-on-the-floor thing cracks me up.  The new cool… OK!
Actually, my clothing is more usually kept like below…  
Aaaah, that’s better!  *sigh of contended happiness*  ooo, did someone say neat freak?  Order and method, my friends.  Order and method:)

Happiness factor; plain, but supremely happy with that plainness, and I love the wraparound bra style; it’s nice to have something a bit different.  Construction, smooth sailing all the way.  For visual purposes I’m deducting one point for the black hook and eyes at the back.  9/10  đŸ™‚

Details:
Bra; the Sierra by Madalynne, free to download here
Knickers; the Watson briefs by Cloth Habit.

pinterestmail

pink lace Sierra + Watsons

OK, so I couldn’t resist downloading Madalynne’s free bralette pattern the Sierra and giving it a go!  Plus I made the usual two pairs of matching knickers to go with it.  These are both the Watson knickers, by Cloth Habit.
Fabrics; pink bamboo knit and pink, slightly glittery, lace from Fabulous Fabrics, all elastics and other findings from Homecraft Textiles
I made this set for Cassie.  I bought materials to make a Sierra and Watson set for me too, but mine is quite different in style.

 The Sierra bra is a really cute and interesting design for smaller chested ladies, and is something a bit different in a bra design, which I like.  Well, we all love a bit of variety, yes?  It looks kinda complex on, but it’s really a fairly straightforward, wraparound bra; and for a simple soft bra with no shaping or obvious support, does feel nicely secure and snug when worn.  And did I mention; it’s freeeeeeeeee!

Cassie chose the fabrics, including that pink lace.  That lace!  Looks so pretty and girlishly innocent and totes adorbs, right?!
Well, so did that kid in the Exorcist, just saying… and unpicking fine-grade slinky stretchy bamboo knit away from delicate lace; tendril by freaking tendril is NOT the joyous meditative pastime to sake and soothe your soul like you want your hobbies to be.
Initially I intended to have the two fabrics entirely overlaid for the whole set, like the bra, and the bra went together really well.  Then I made a pair of knickers with the two overlaid like that.   The lace then showed itself to be completely wrong for knickers.  It was such an ordeal and they looked so hideous that I was just too depressed to even bother salvaging any of it…  that got emotionally binned, and I had to walk out to eat chocolate and sulk in front of the TV for an evening.  
Went back to it the next morning with renewed vigour.  Did think about not having any lace on the knickers at all.   But she wanted it to be a nice cohesive set, so some lace had appear somewhere, and it’s all worked out, I think.  I like the knickers to match the bra but still be different to it, like this.

There’s nowhere to put a little decorative bow on the bra, part from just below the shoulder straps like this, and I actually love it! my favourite bit of the bra.  It’s also a nice way to hide the stitching of bra cup-to-ring.  I sewed the bra shoulder straps as two regular ones rather than halter; but she’s thinking about that.  If she decides she wants the halter I’m gonna change it, because I think the halter is a lot easier to put on in this design. Update; yep, changed it to halter…

I think the set did eventually turn out very nice and the bra looks really cute on.  Cassie is happy so I’m happy.  Well, I’m happy now it’s finished.
Happiness factor; well the memory of those failed knickers hasn’t faded away completely, so I’m awarding this project 5/10 overall.  It’s gone up since yesterday, believe me!

Bra; the Sierra by Madalynne, free to download here
Knickers; the Watson by Cloth Habit

pinterestmail

do you Art?

Imagine that said in an vehhy posh accent along the lines of “are you being served modom?”…  
Little anecdote; many years ago I took part in a group craft project, and another lady in the group had clear and firm ideas about what we were to produce, and how.  At our first meeting she approached one lady and as a first spoken utterance to her, enquired “do you appliquĂ©?”  

Hehe, that’s neither here nor there obviously, but it’s stuck with me for years and years and still gives me a laugh.  
Man I need to get out more…
Anyway…
skirt!

We bought this novelty print cotton drill from Spotlight a few years ago, and Cassie was supposed to make the skirt herself, but you know.. time goes on, you get busy, life takes over, whatevs, and it eventually falls to your mother who is sick to blinking death of looking at this blasted fabric hanging around, gathering dust and generally taking up precious stash space that could be given over to her own fabrics … gathering dust ahem…
Anyway! time for some interventive action.
I used no pattern but just made it up to fit what she wanted.  She wanted high-waisted, close-fitting at the waist and this length, and for the paintbrushes to be situated exactly so high and for not a single skerrick of print to be hidden or broken up in any darts or shaping.  I cut two rectangles with no shaping, to maintain the print, put in an invisible zip at centre back, and pinned tapered box pleats to fit her waist, each one going straight at first then tapering narrower for the last third to accommodate her hips.  There are four such pleats both front and back.

Pretty easy, once I got going on it!  I added a shaped, interfaced facing, and hand-hemmed.
Done!
The one difficulty; inserting the zip centre back was a teeny bit angsty, because I discovered that the paintbrushes are printed just slightly slanty and off-grain… OF COURSE THEY ARE.

I chose that shortest pencil on the fold to be the “sacrificial” pencil through which to cut the centre back seam, and sewed the seam with as narrow seam allowances as practically possible and as close to the pencil/brush on either side as I could get.  It passes right on each one, touching the very tippy top of the one at left and scraping the very bottom of the one at right.  Phew!

Answer? Yaaas dahhling, we do most certainly Art.

pinterestmail
Switch to mobile version
↓