Remember recently I made a little paprika cardigan? and I wasn’t super happy with my construction technique of the fronts and could visualise a far better method of getting that front edge nice and neat … well, of course I could not rest until I had seen it through.
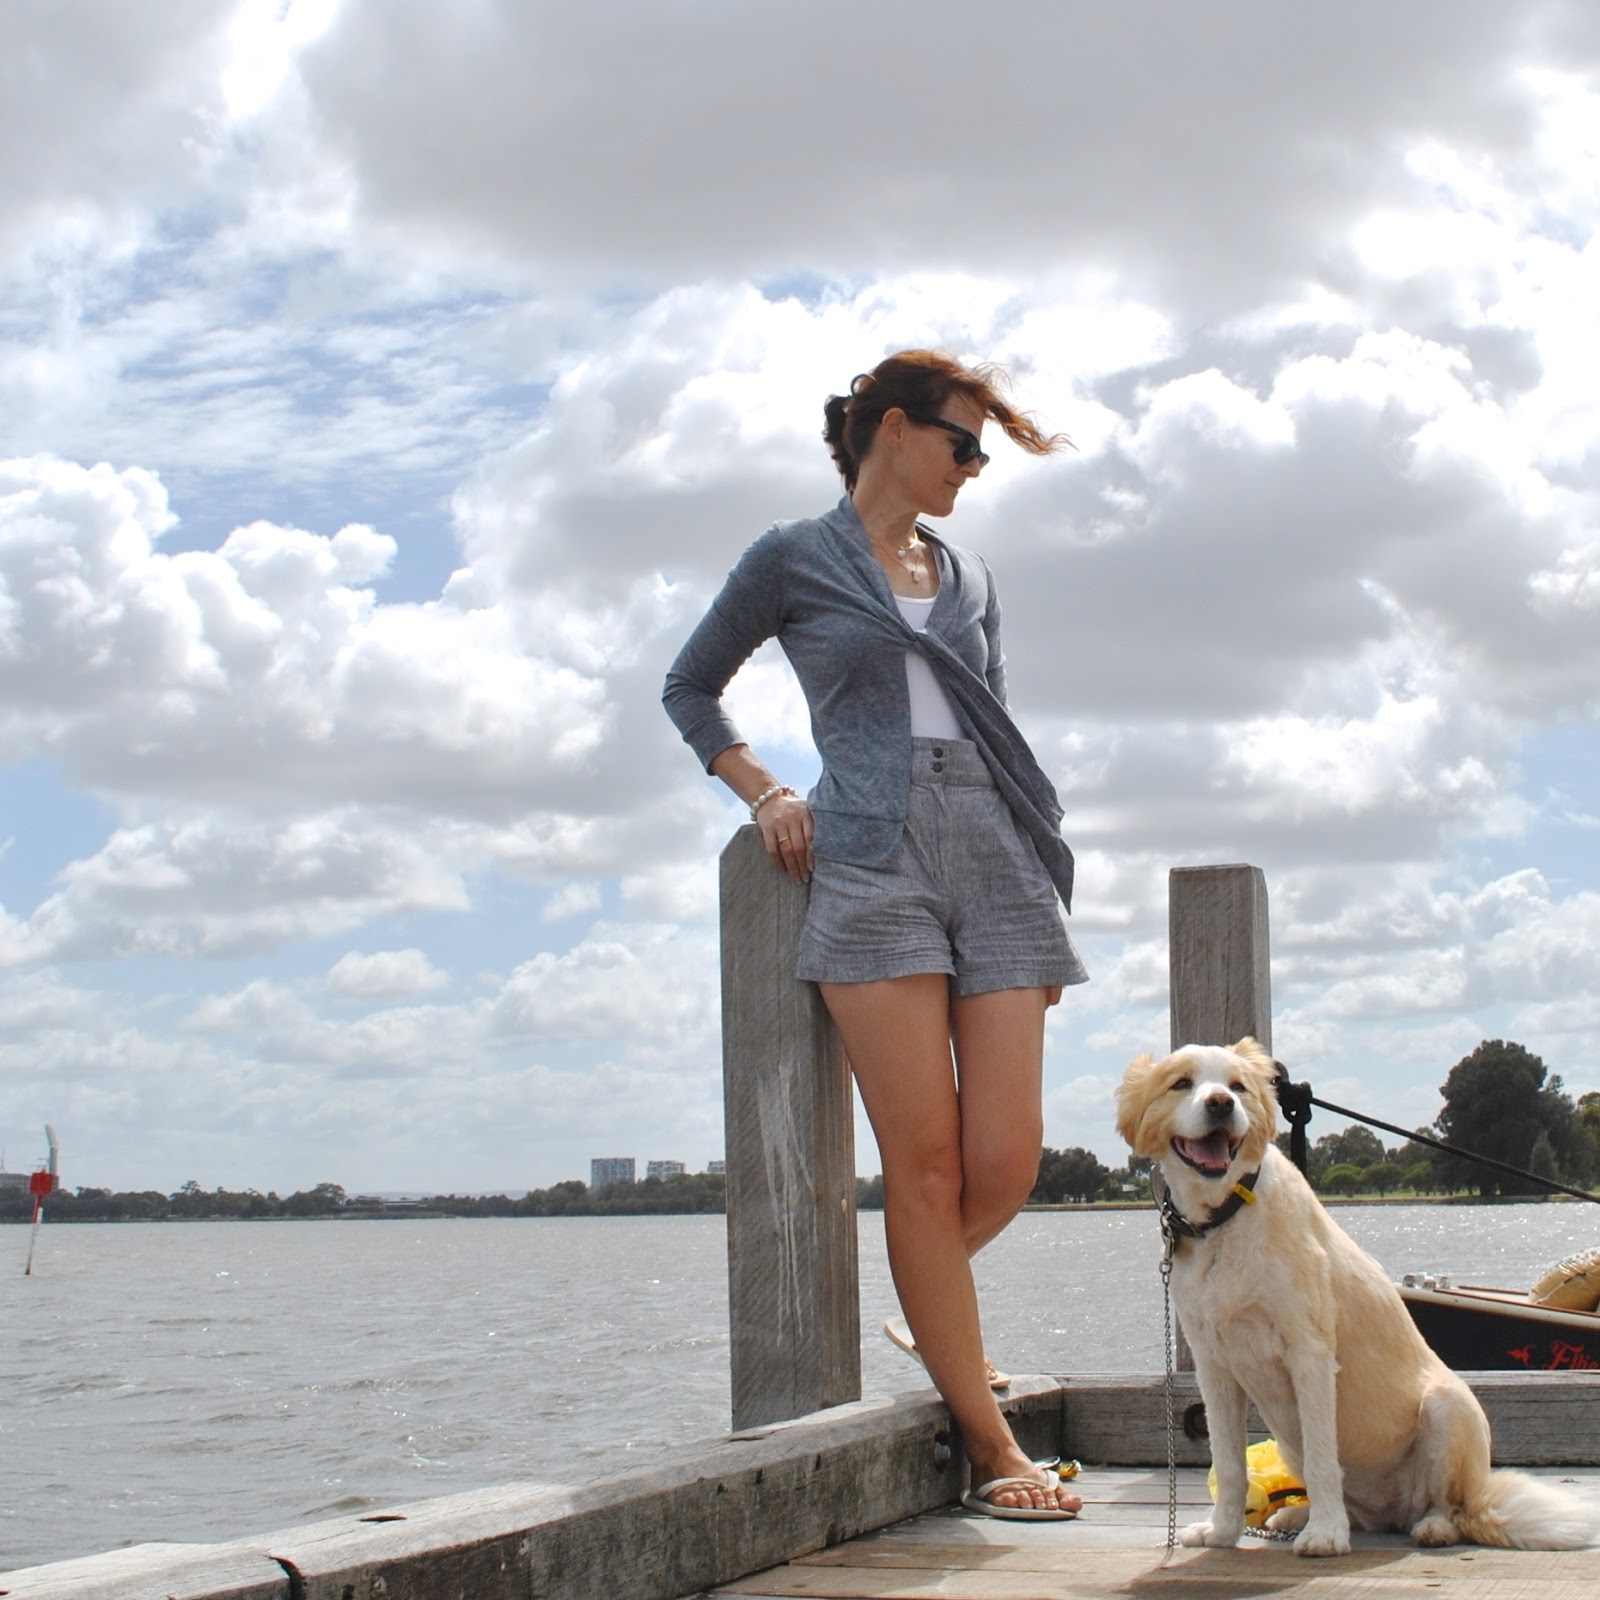
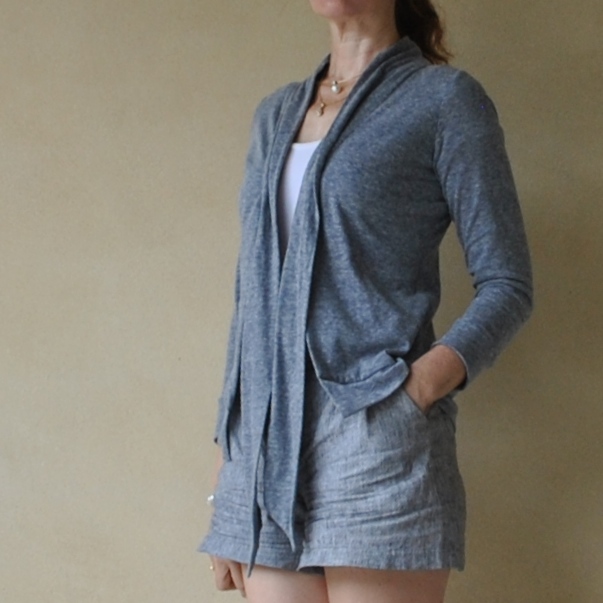
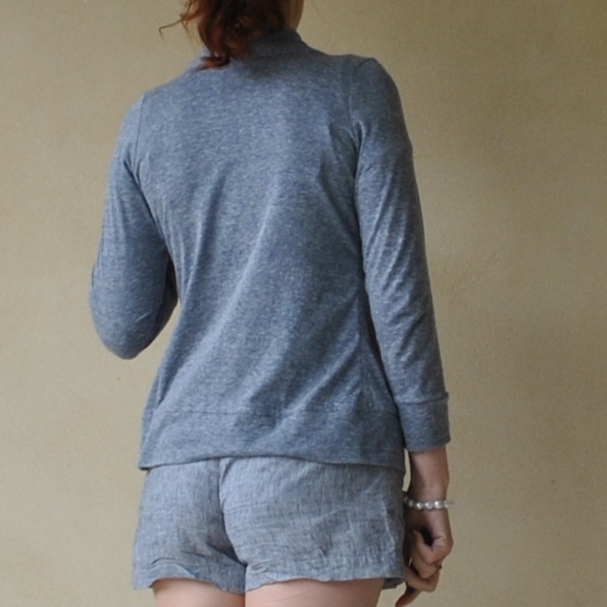
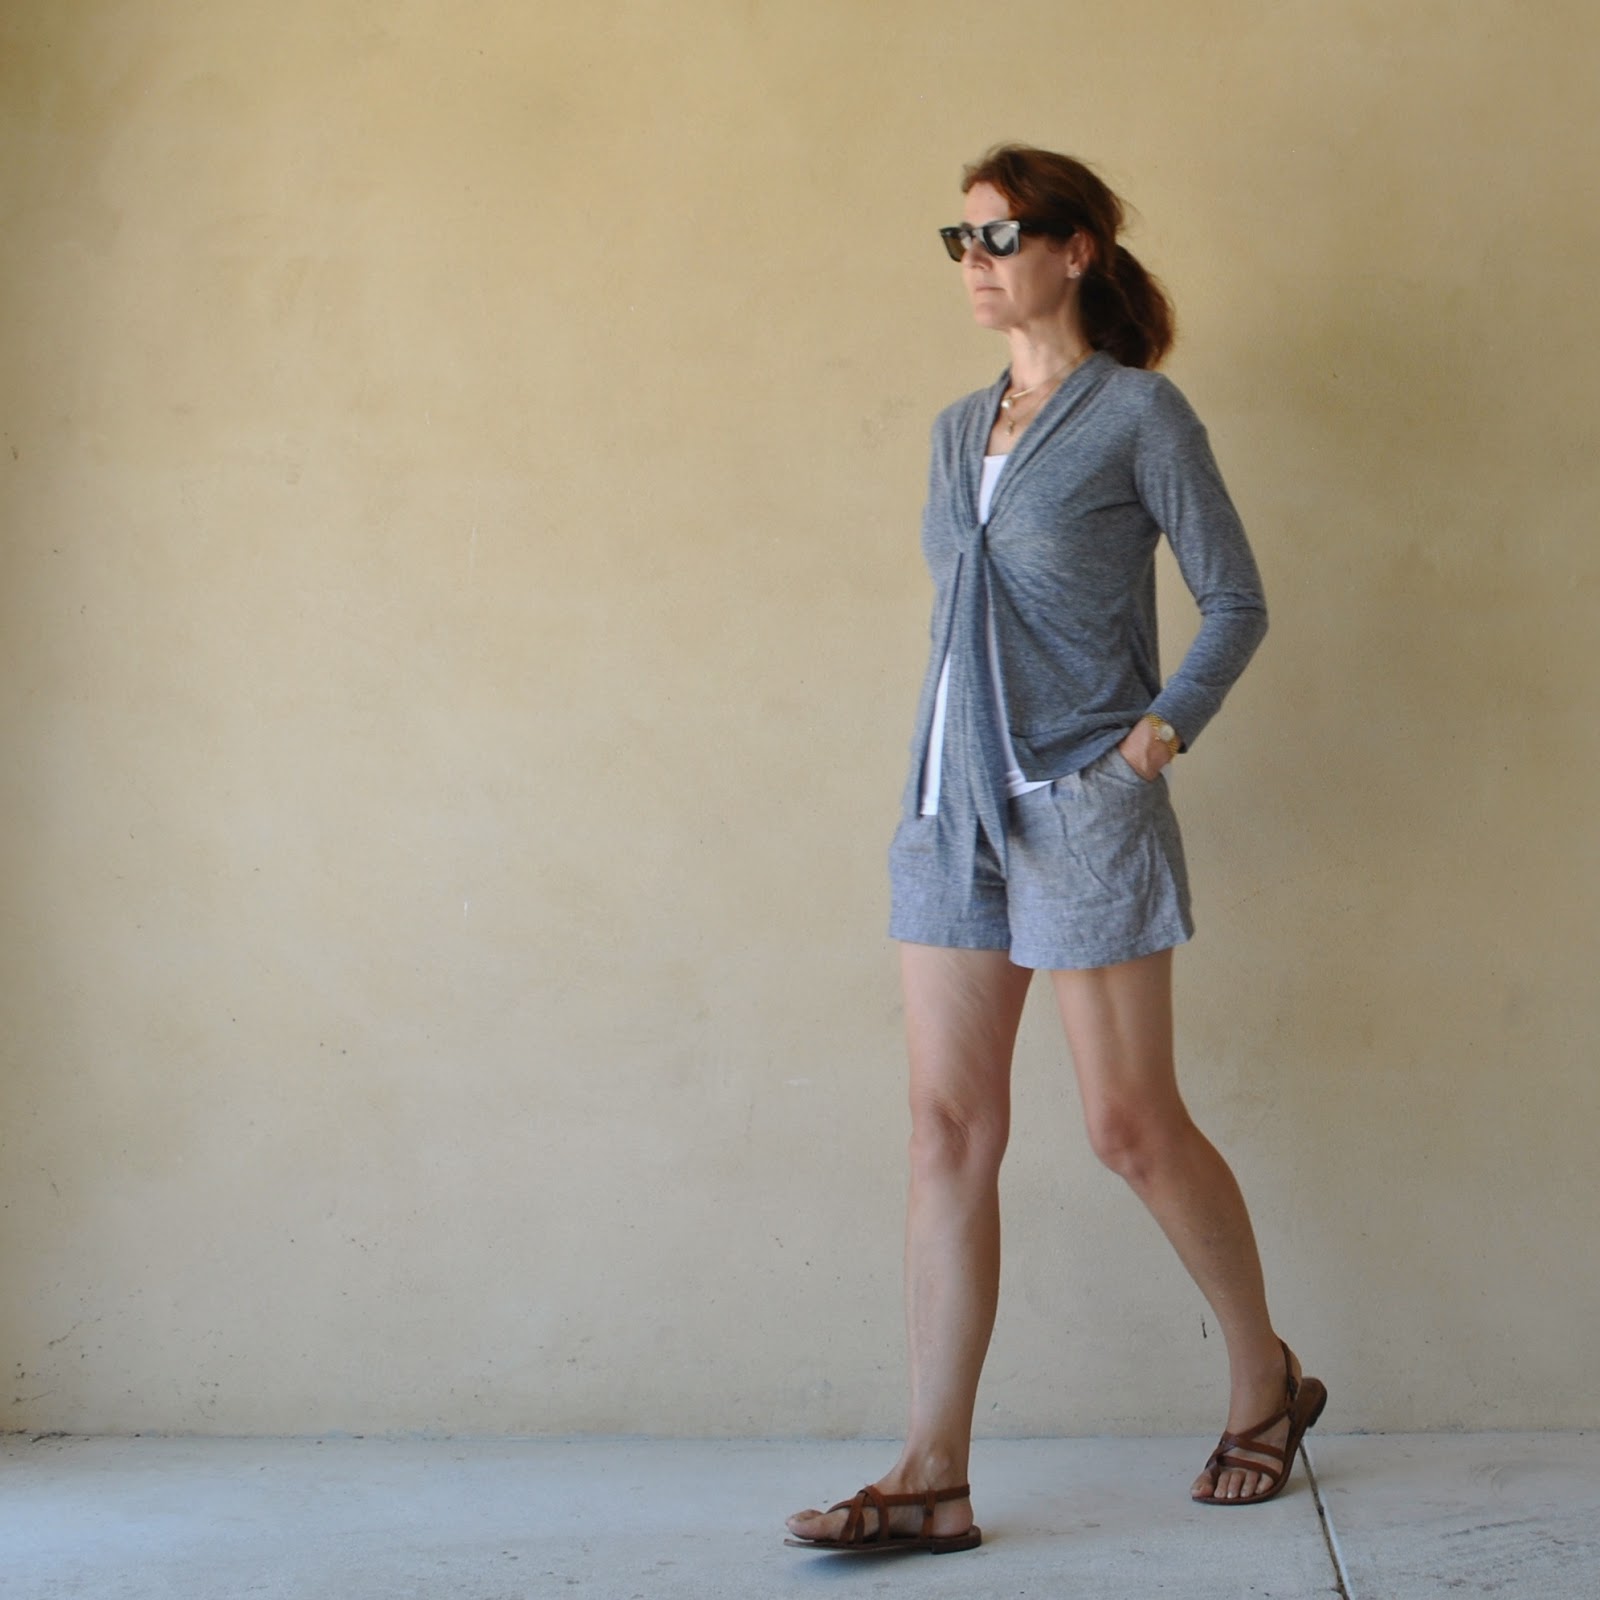
Voila; new, stormy-grey-blue cardigan
Essentially, the gist is to cut each front piece on the fold through the centre front; meaning the fronts are double thickness, with one half acting as a facing. The fold at centre front is its own neat finish with no further need to do anything at all to it. Also, the front plus facing enclose the lower band between their two layers. For this reason, this technique works very well with very thin knits.
Fabric; thin blue/grey marl cotton jersey, leftover from Sam’s hoodie and originally a remnant bought from the Morrison sale, although when I say remnant there was at least 5m of it! Morrison is tres generous with their “remnants”, to say the least! I still have quite a lot left.
Pattern; I used the Nettie from Closet Case patterns, which is my go-to basic now for form-fitting Tshirts/bodysuits, however any tried and true Tshirt pattern could be used for this same modification.

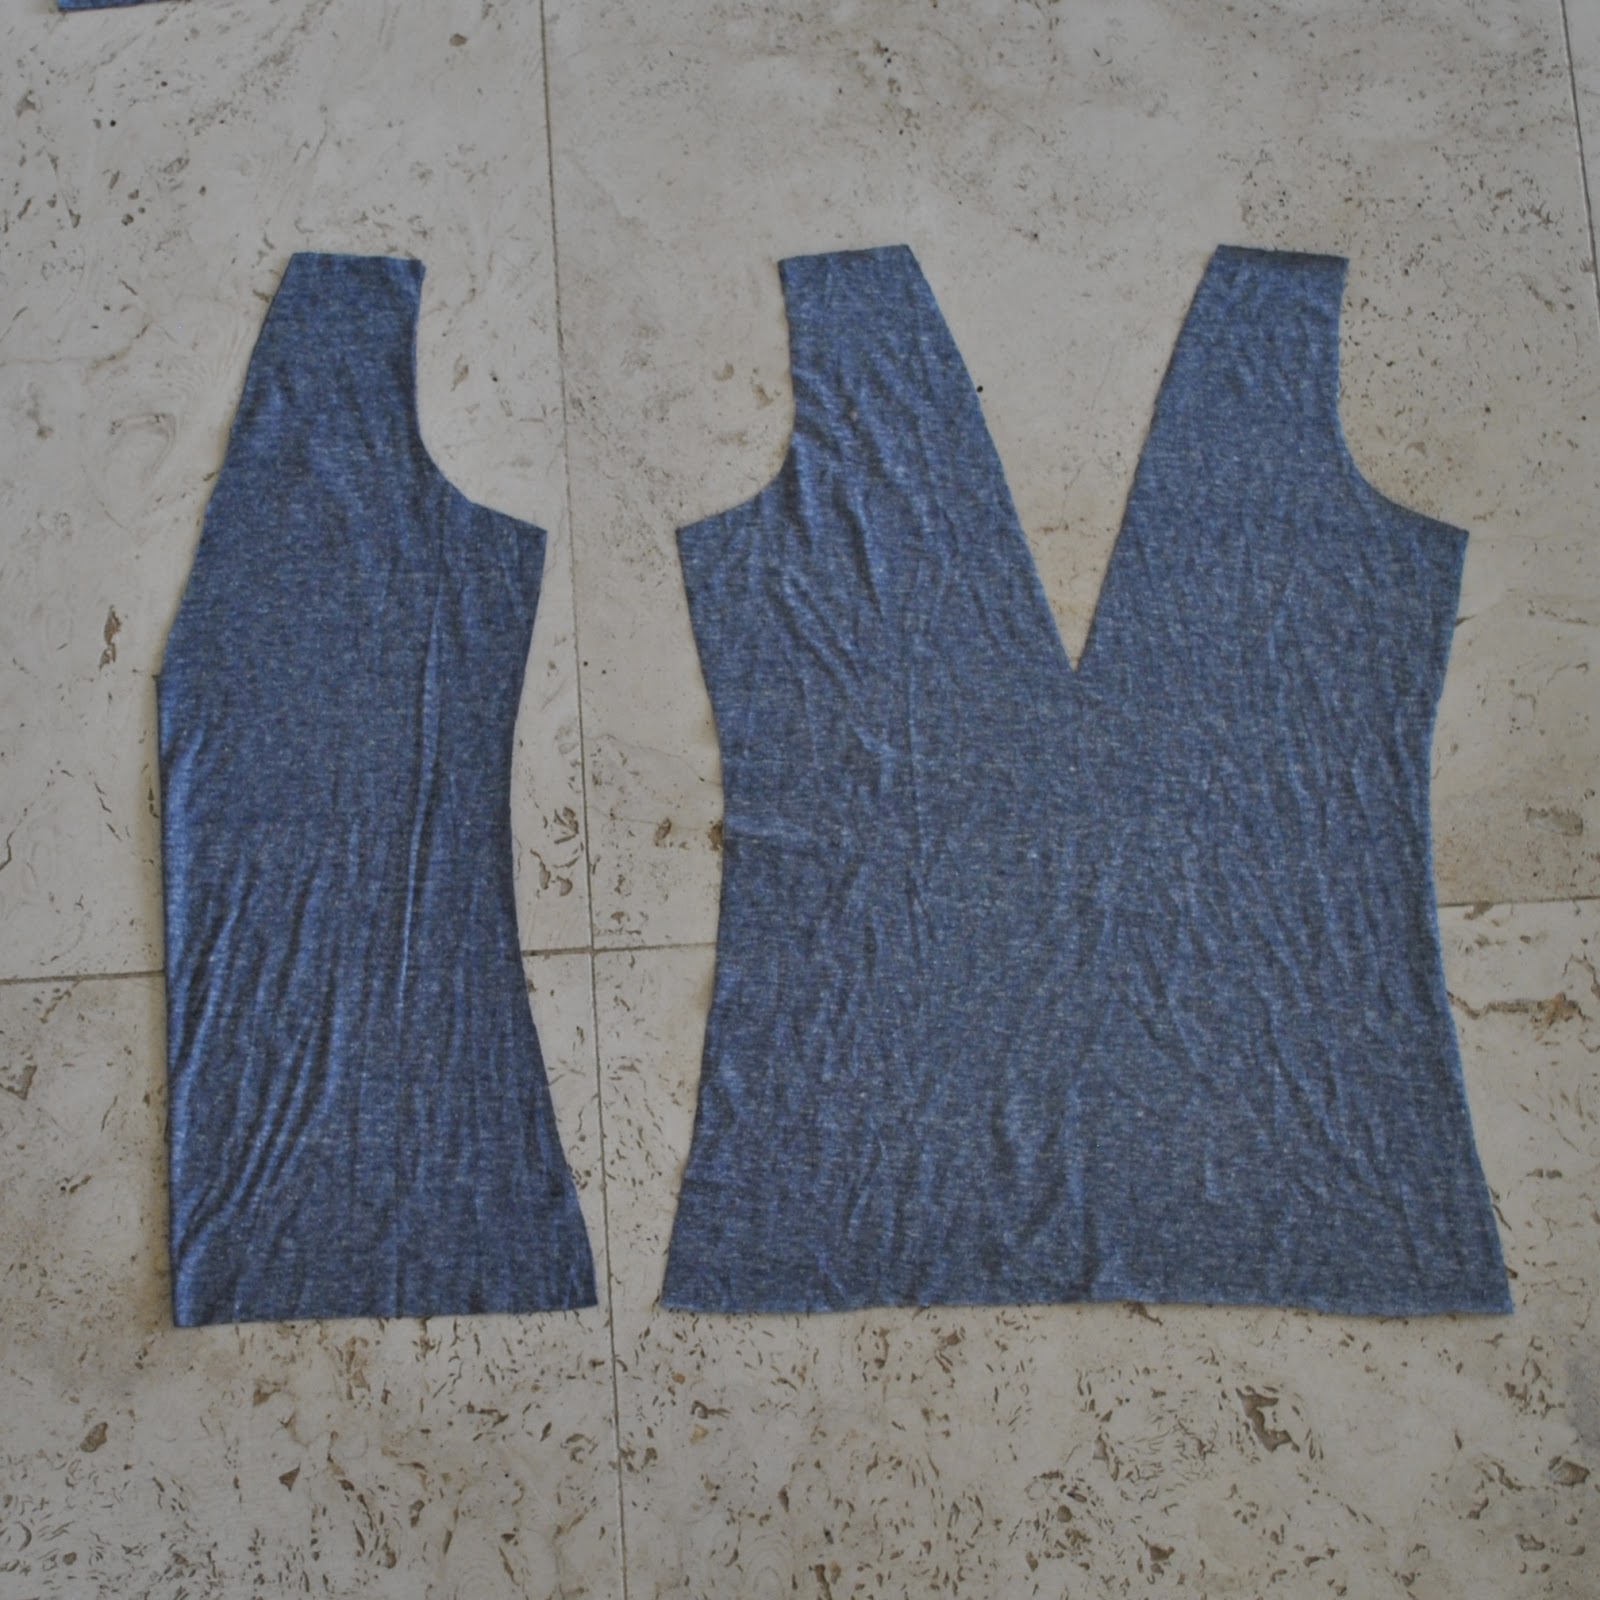
I cut my pieces like so: top parts; fabric folded along the right hand side; with the top two horizontal bands being the “rough cut” lower edge band and the sleeve cuff bands respectively; underneath are the back cut on the fold, the sleeves and at the left is the long neckband. This last is joined right sides together along one short edge to make a double length band on the grain.
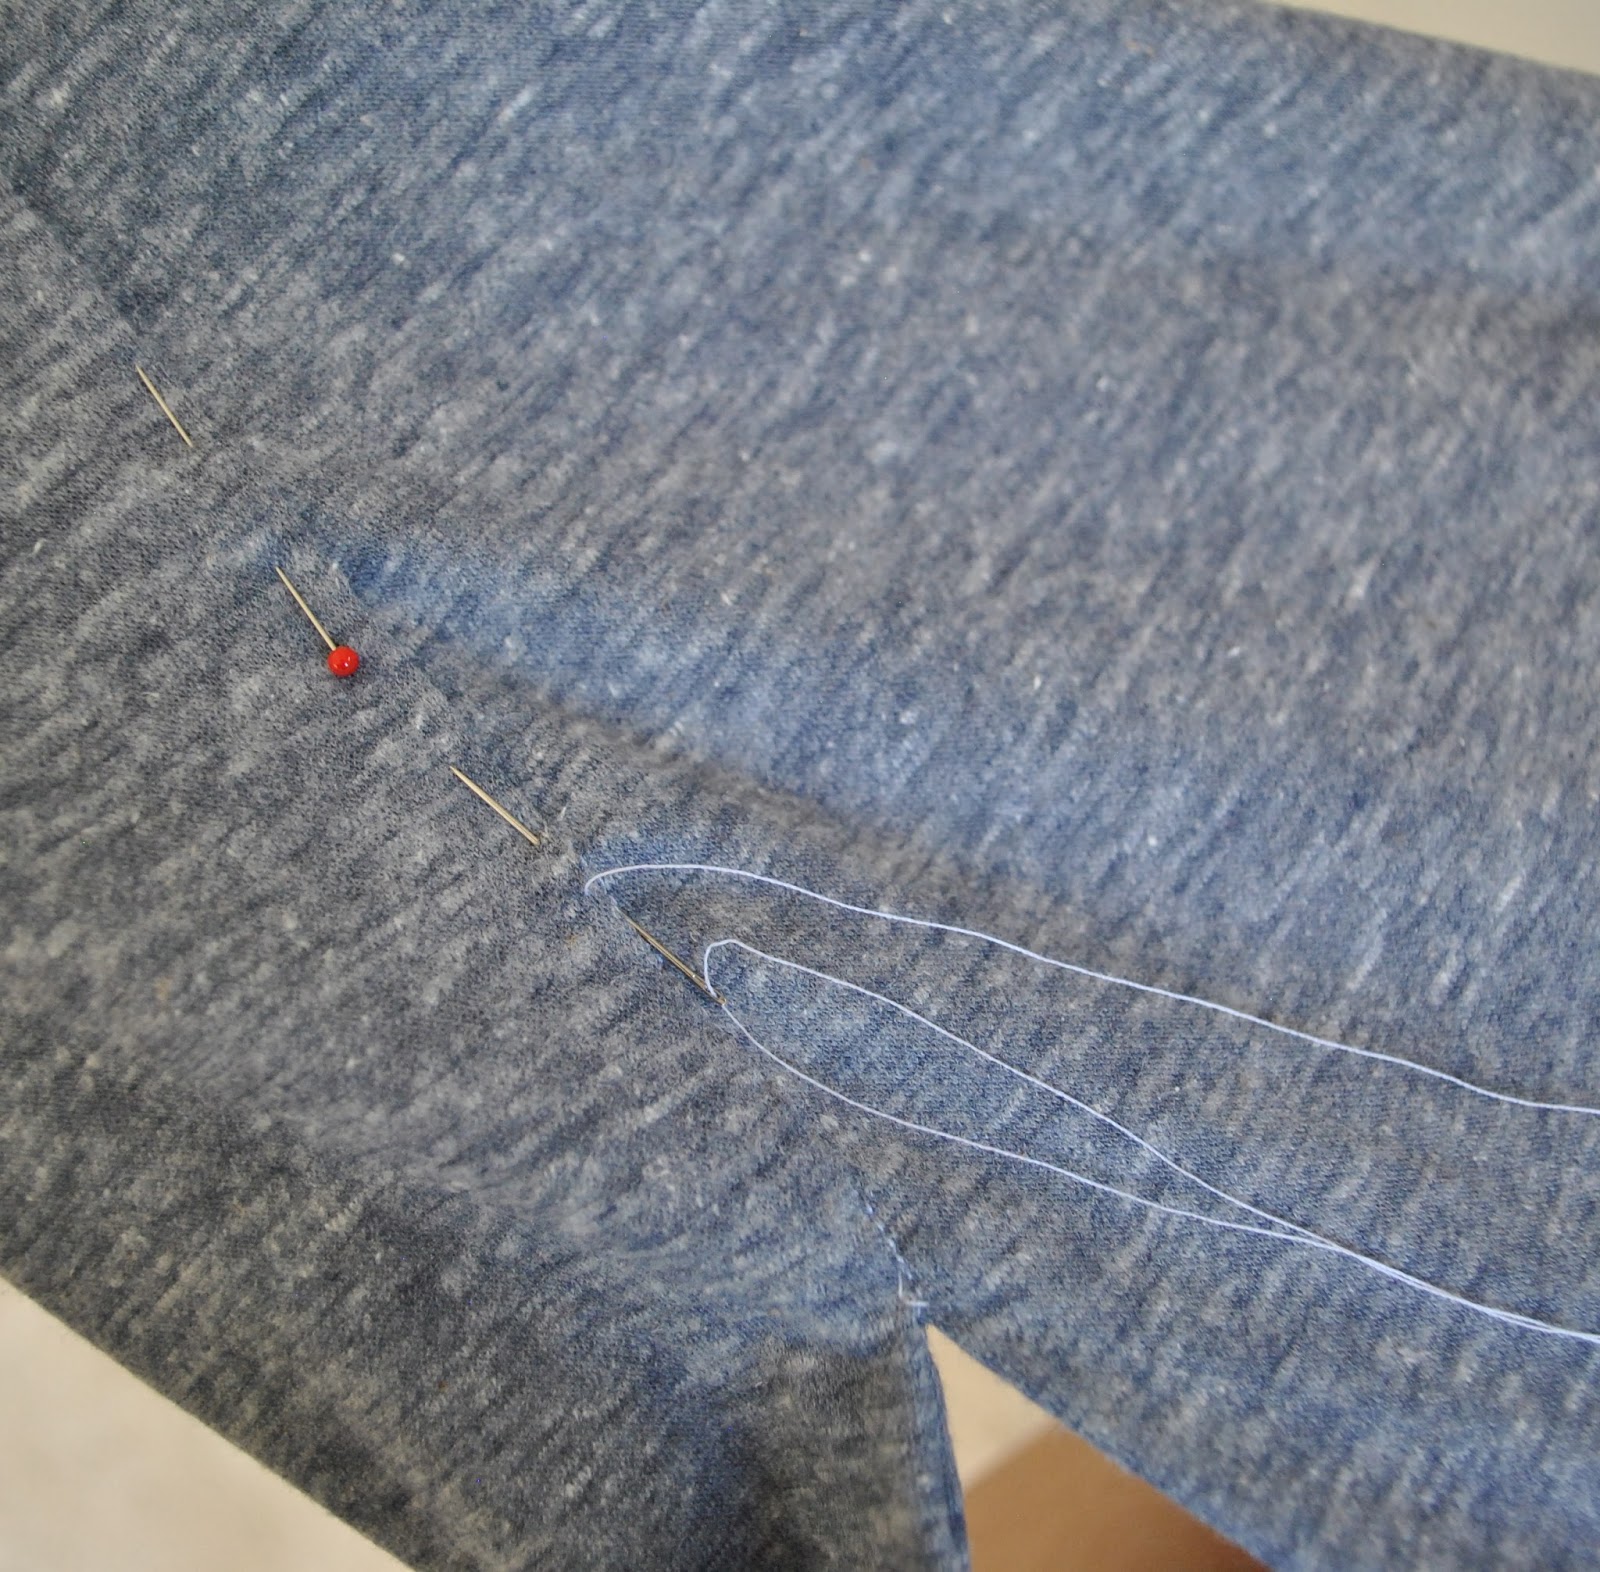
After cutting these: the fabric is then re-folded in from each edge so as to cut those two fronts (below) on a fold, with the centre front laid on each fold. Cut from the inside shoulder edge out to the CF fold at bustline level on a straight diagonal line, to create the V-neck opening edge.
Construction details:
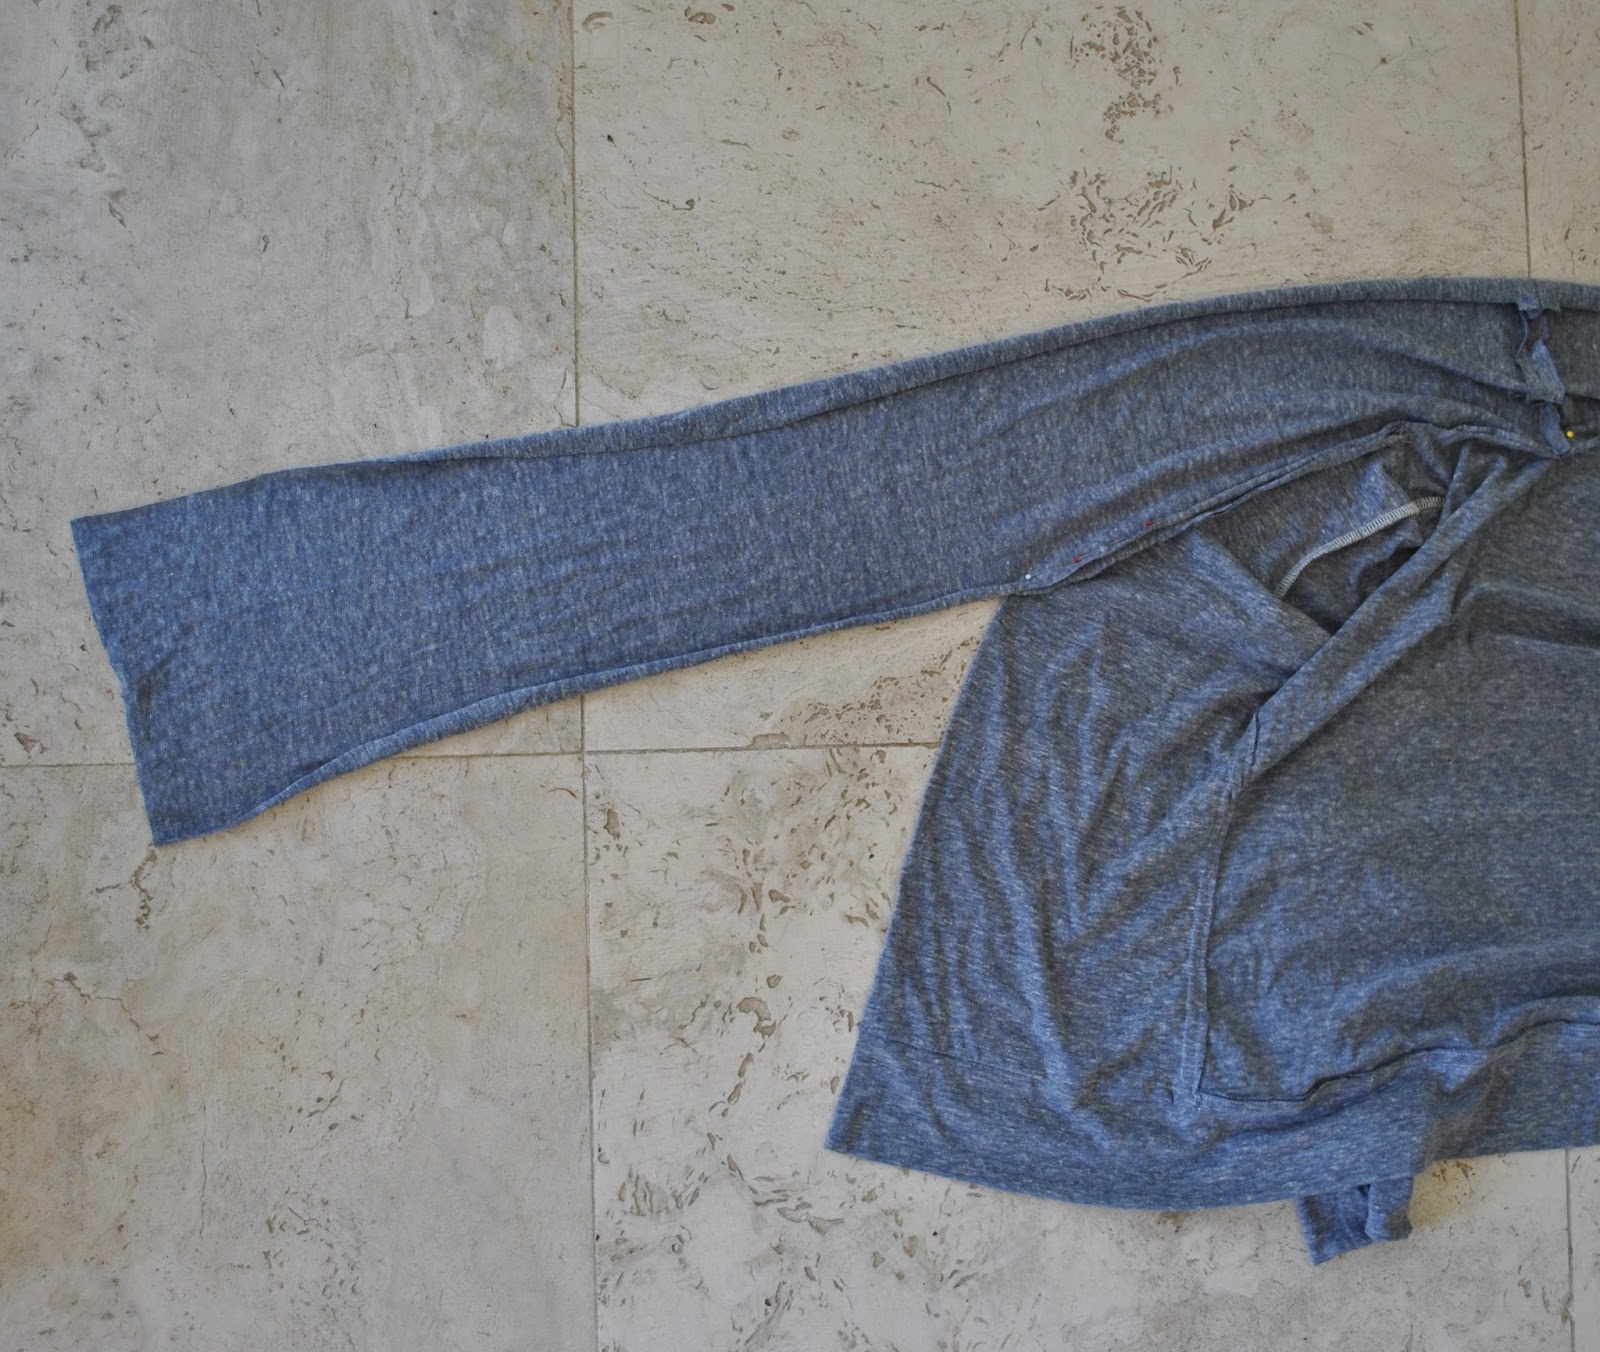
first, stitch fronts to back at shoulders. Sandwich the back between the two fronts so that the seam allowances get tucked away between the layers. You have to twist it around it in a weird funny-looking way but it does work out.
Stitch front to back at side seams, keeping the front facing free.
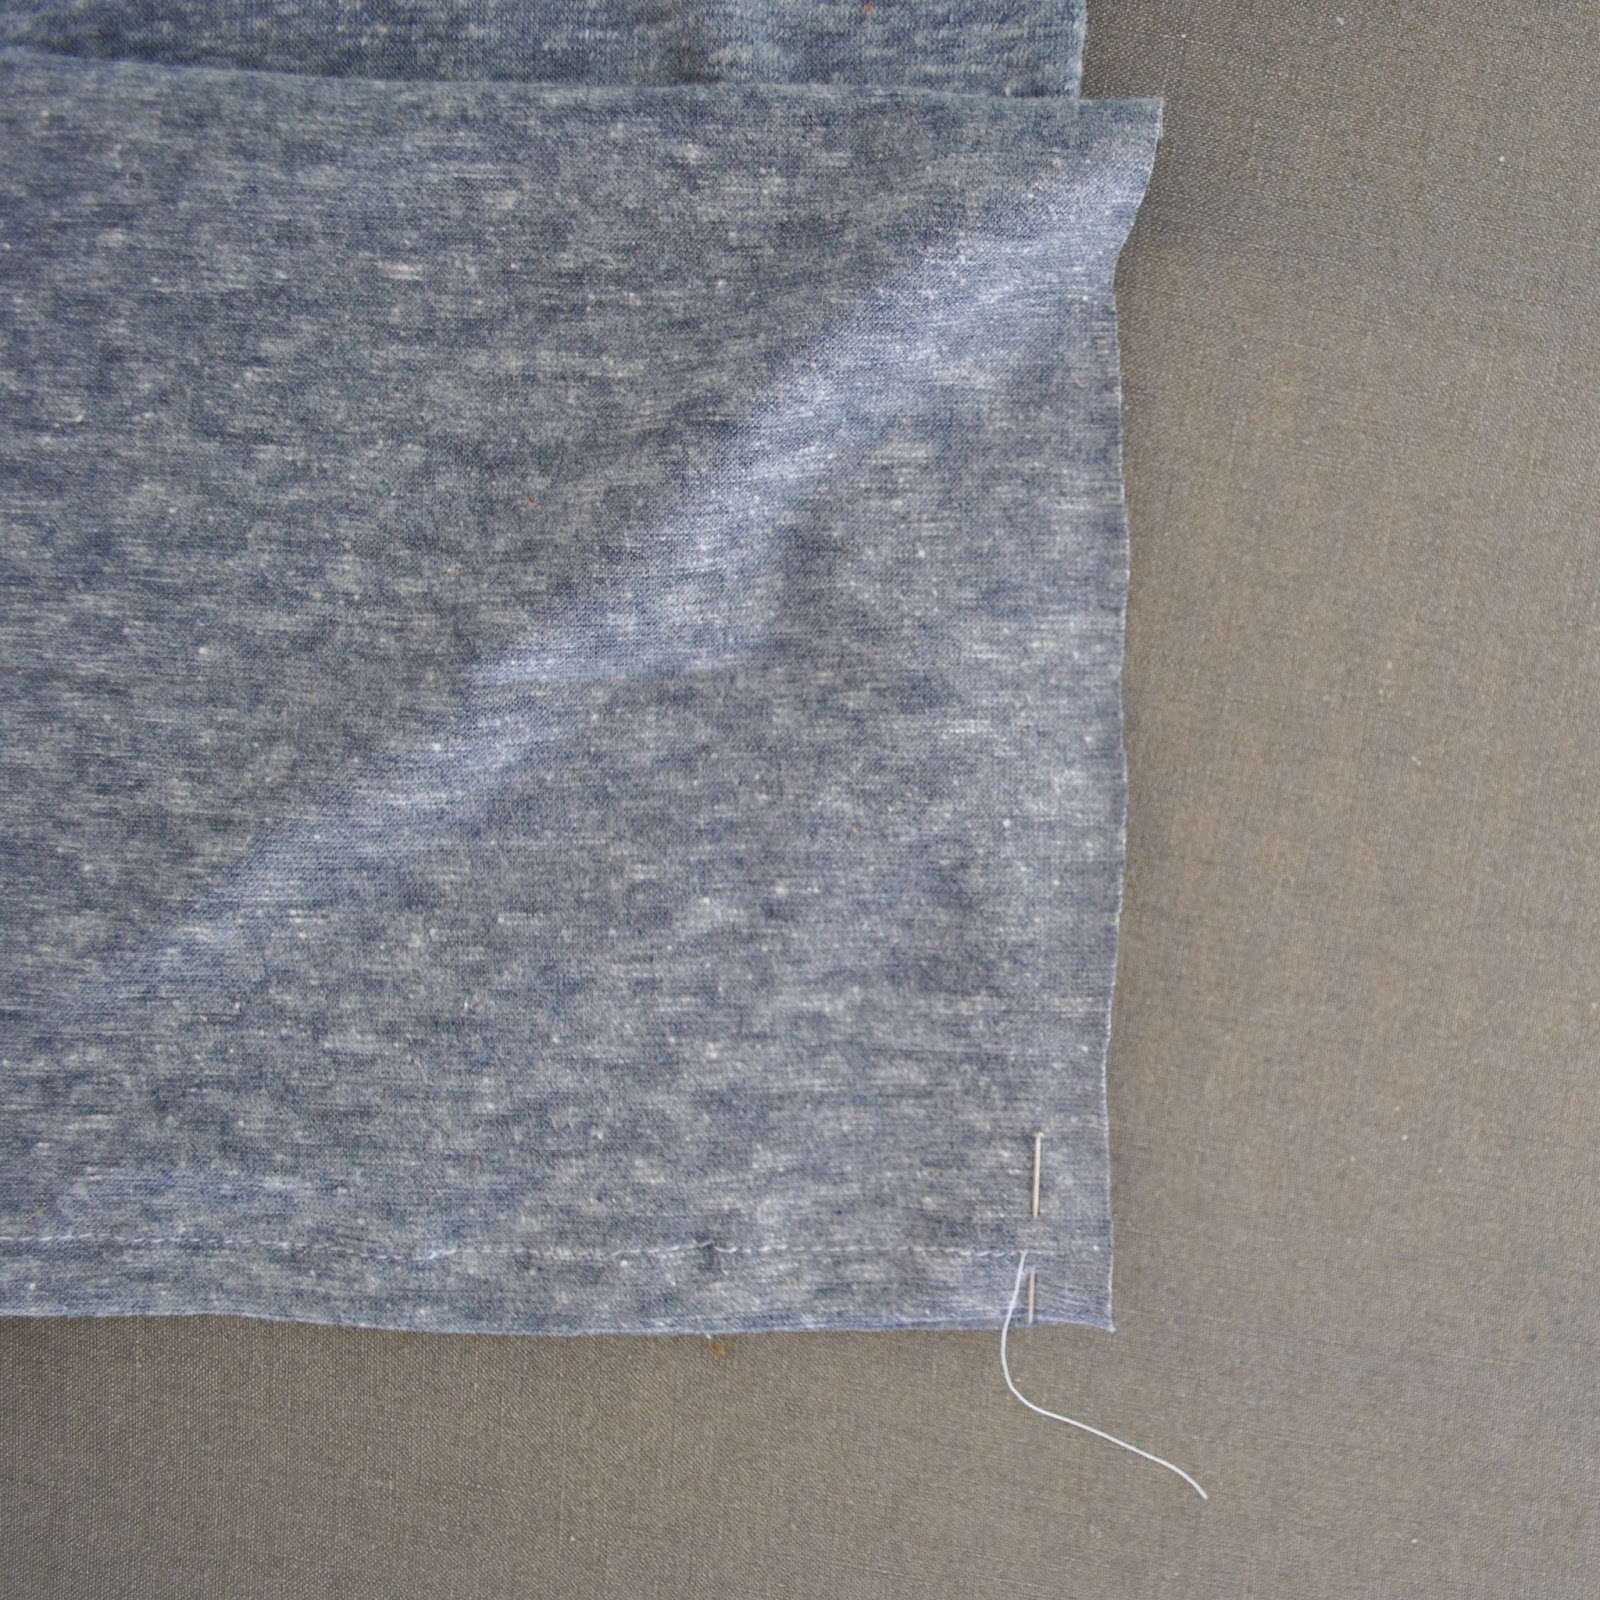
Then trim the cardigan to the length you want it to be, taking into account the width of the lower band. Measure the around the lower edge to determine the length of the lower band and cut it to fit; allowing for a 1cm seam allowance at each end.
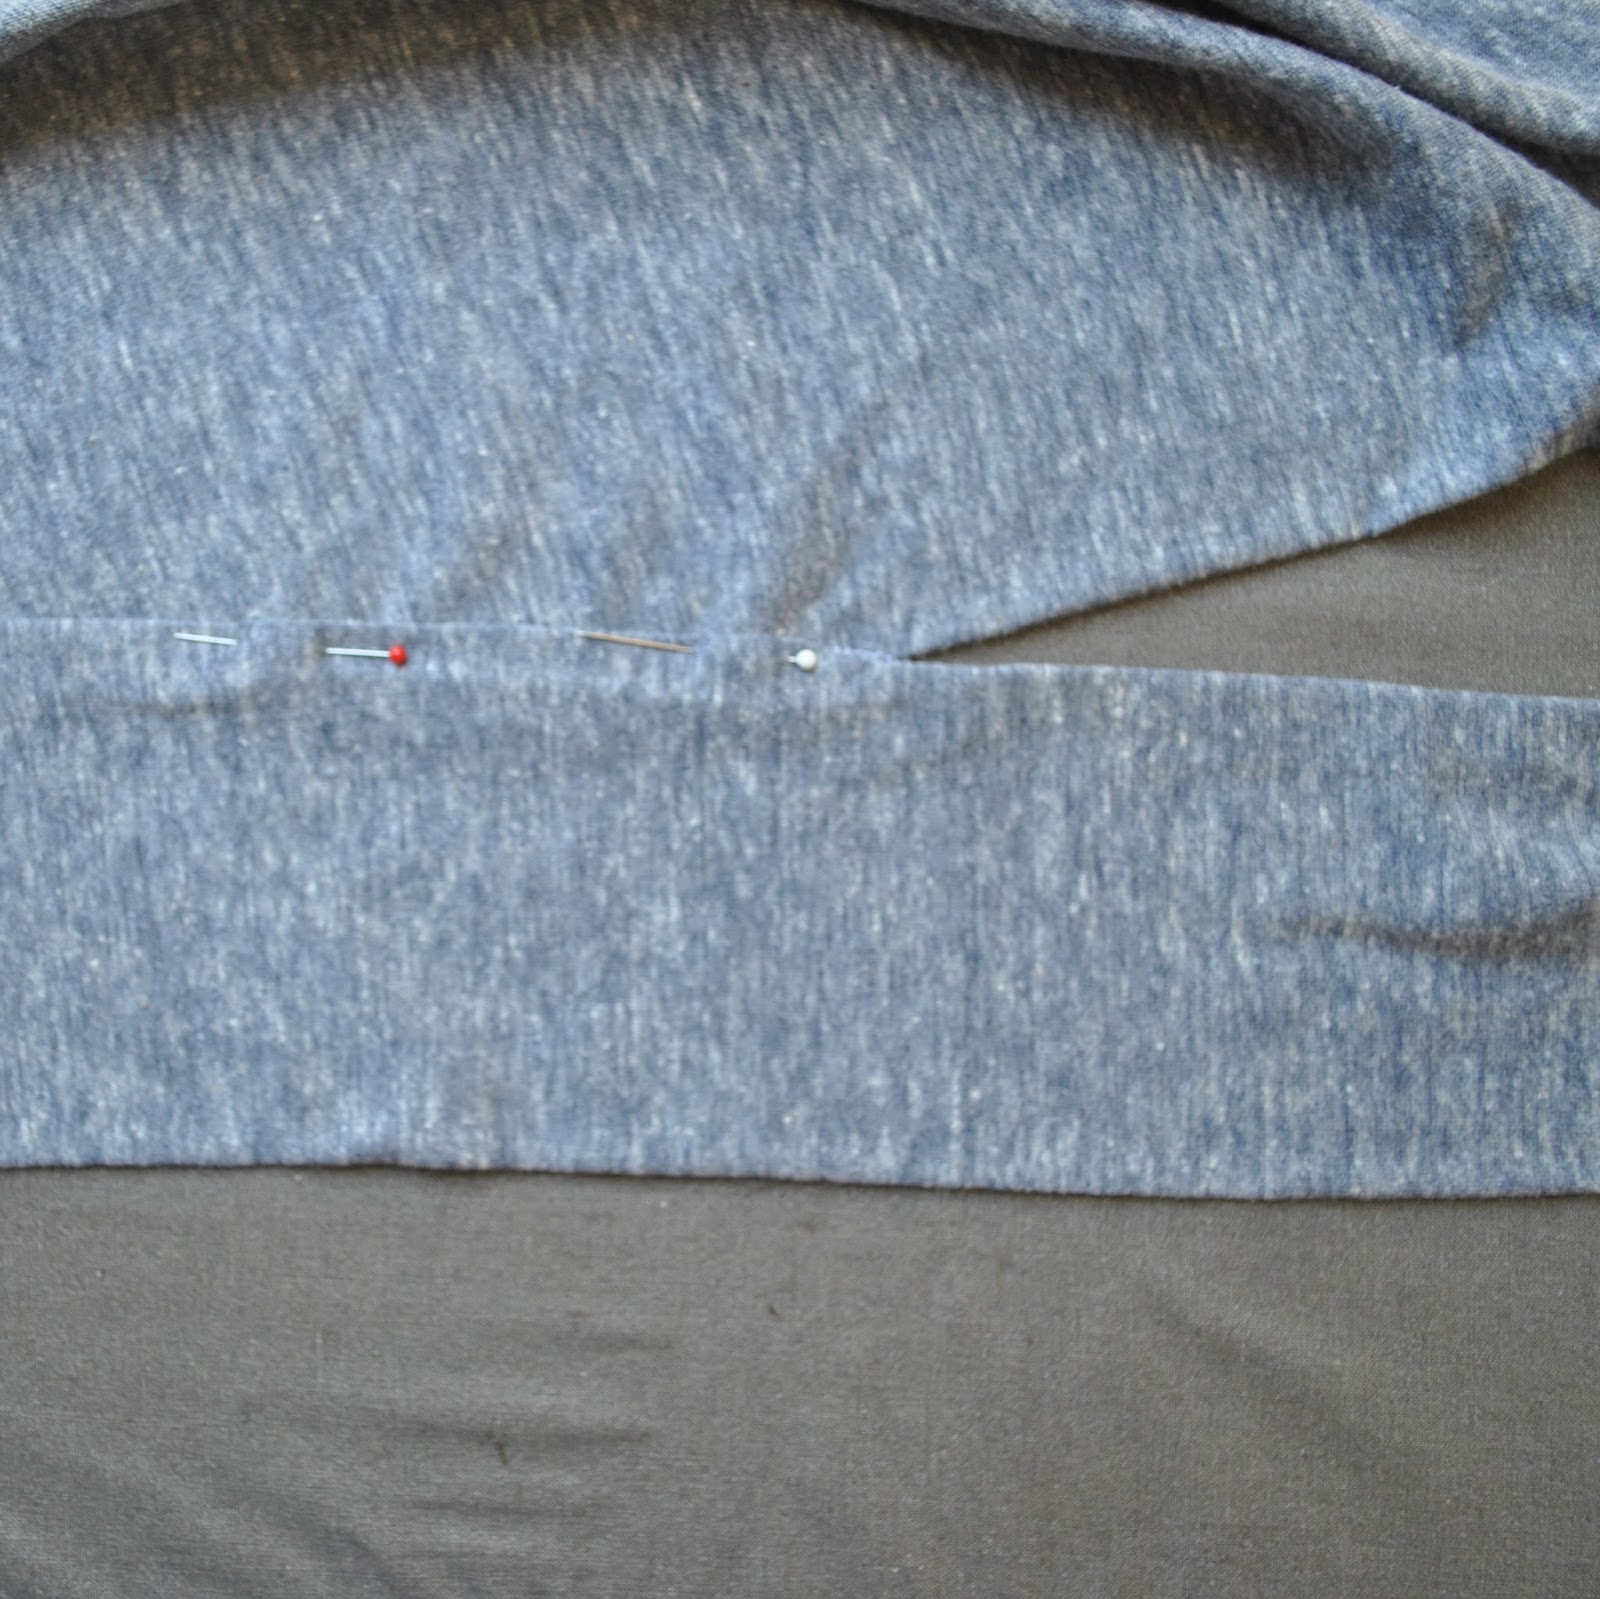
Pin the band to the lower edge of the cardigan, again keeping the front facings free. Stitch, between the seam allowances, right sides together.
Turn the band up in half, lengthwise, right sides together, and stitch the short edges closed, ceasing stitching at the end of the previous stitching. Turn bands right side out and press.
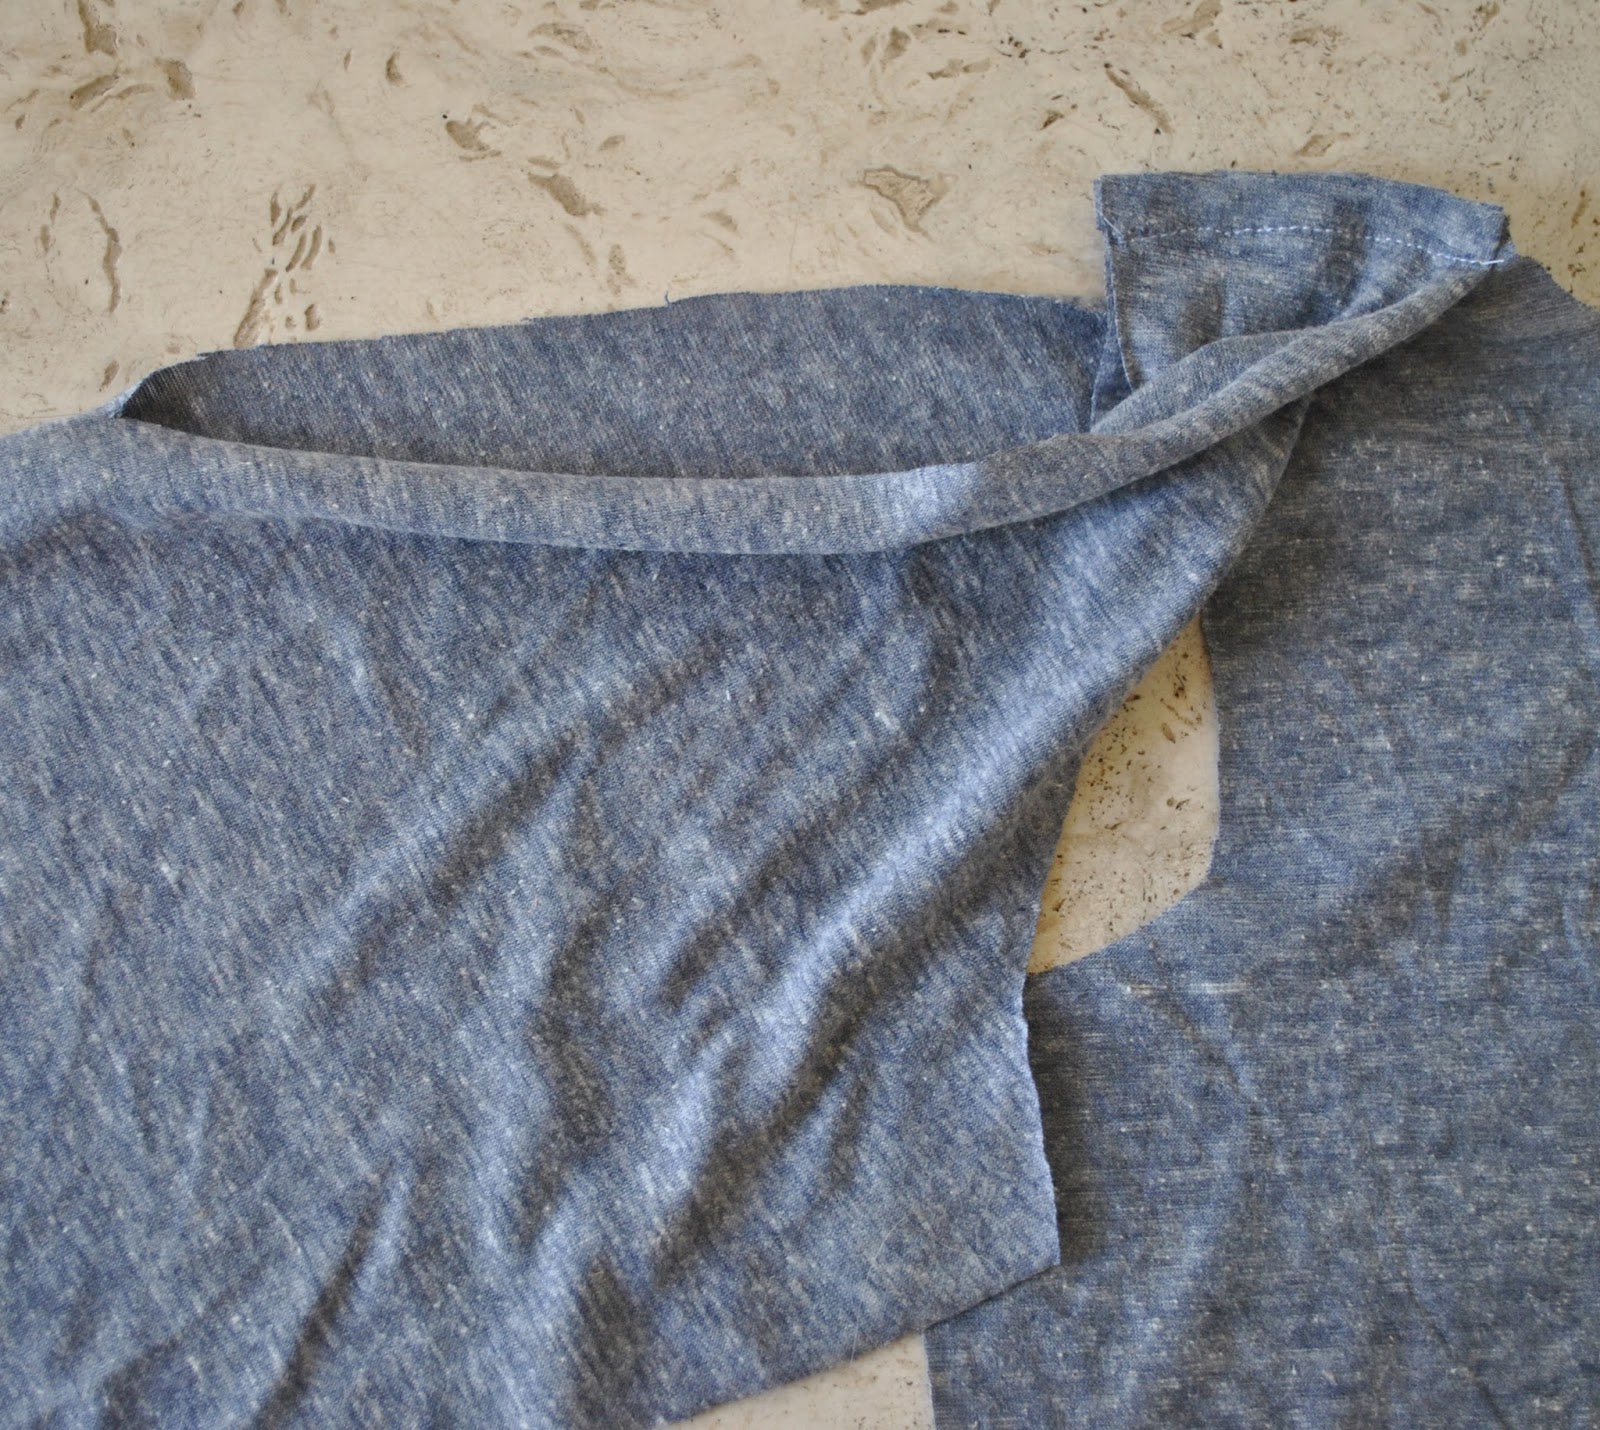
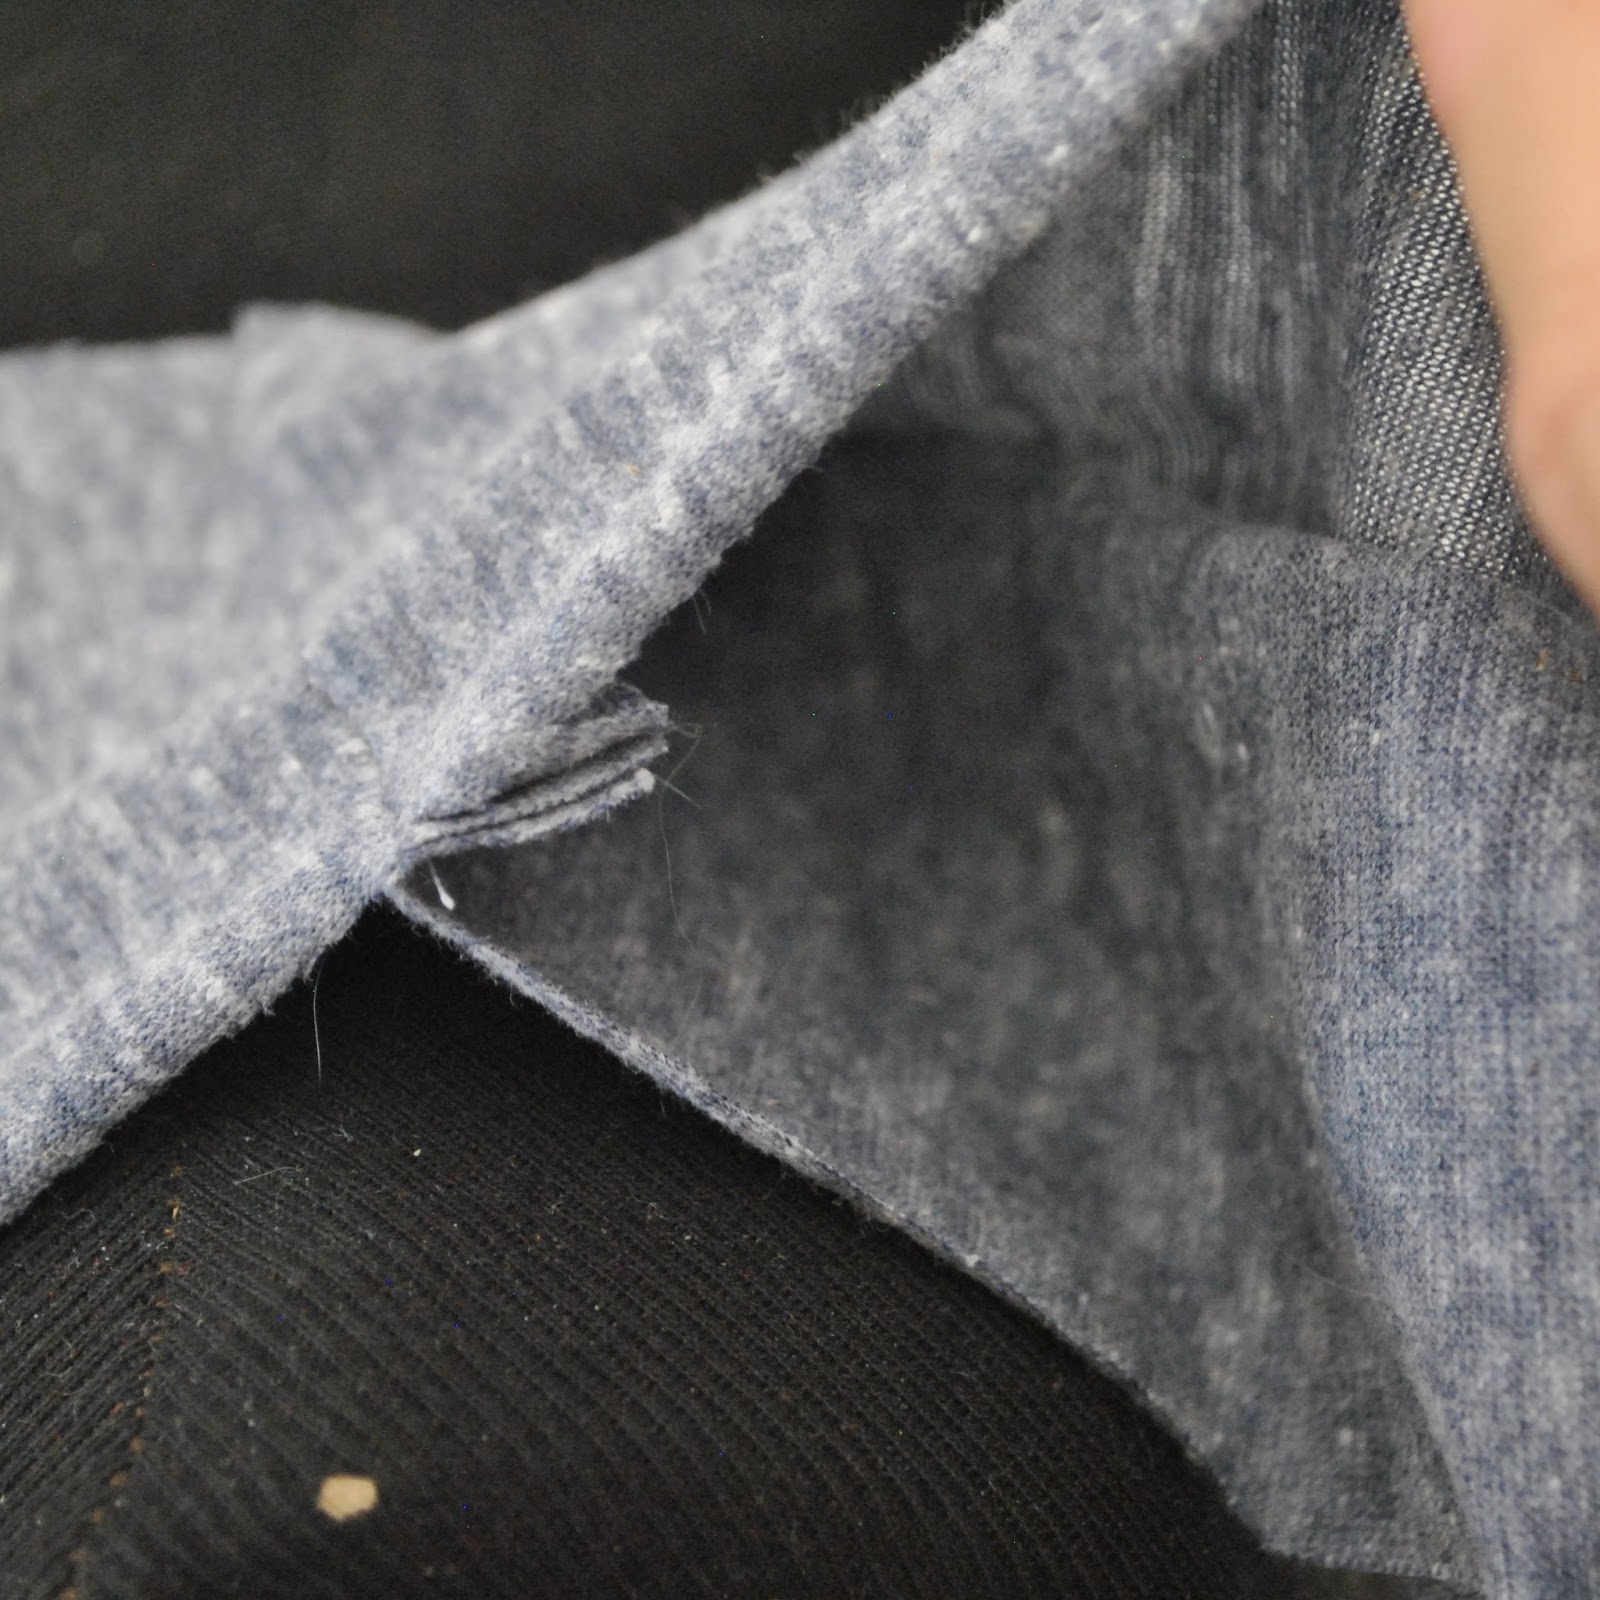
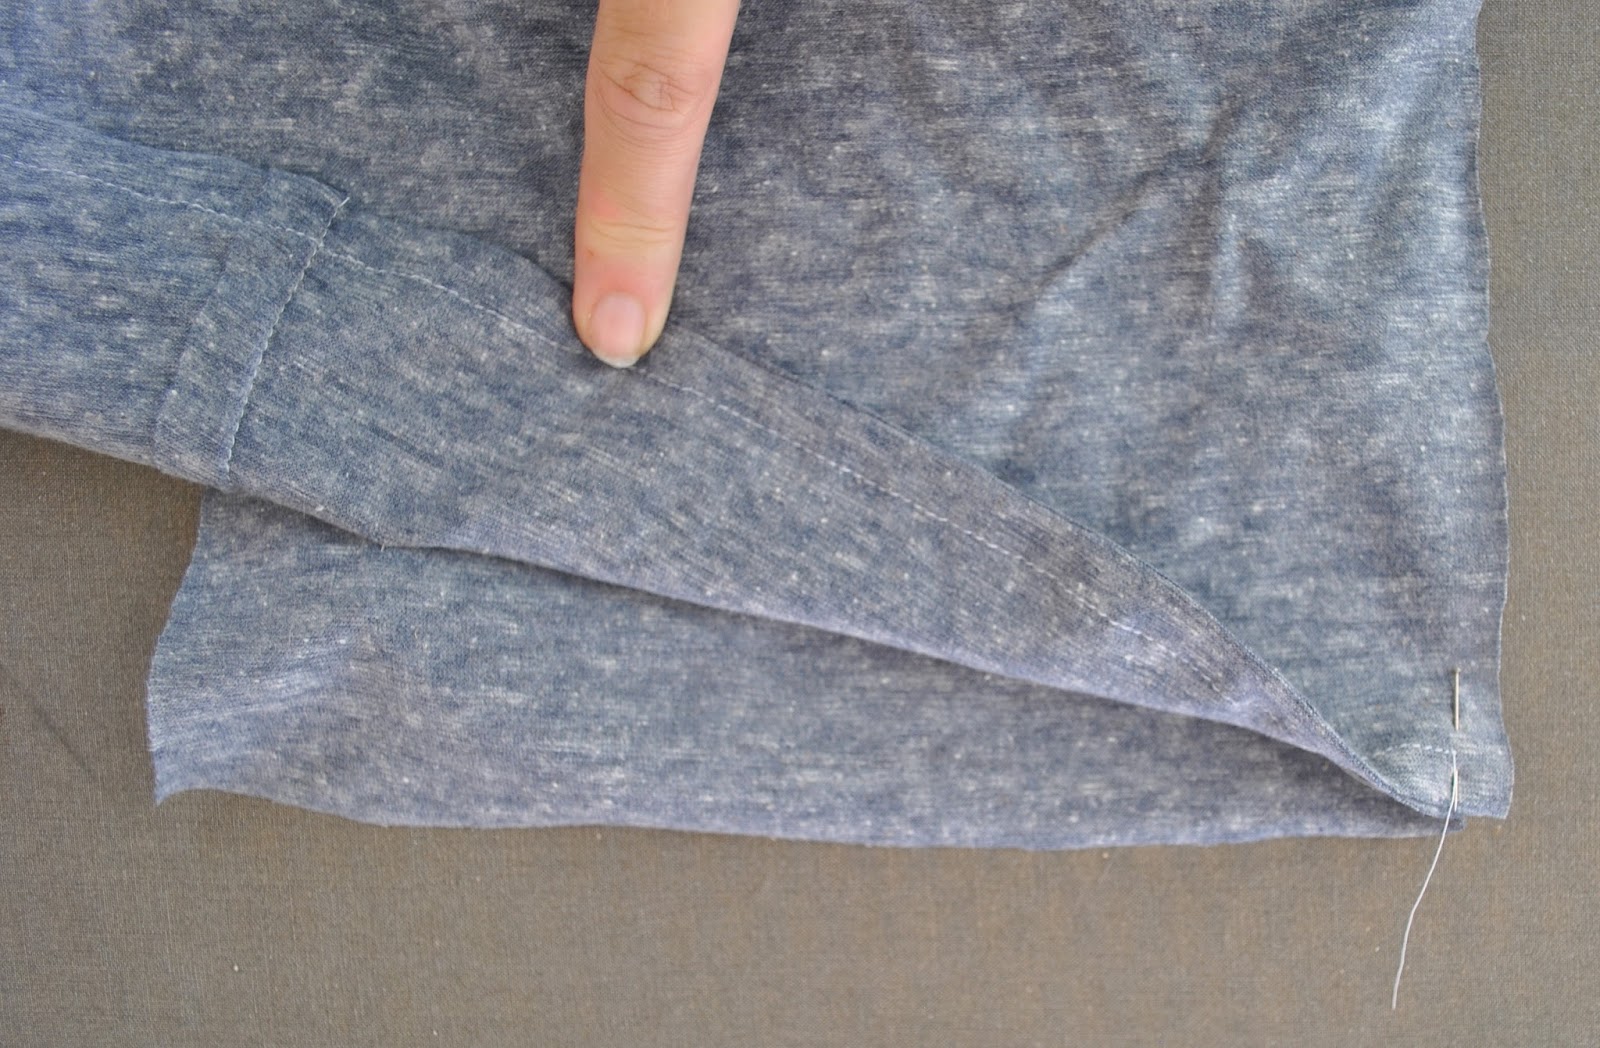
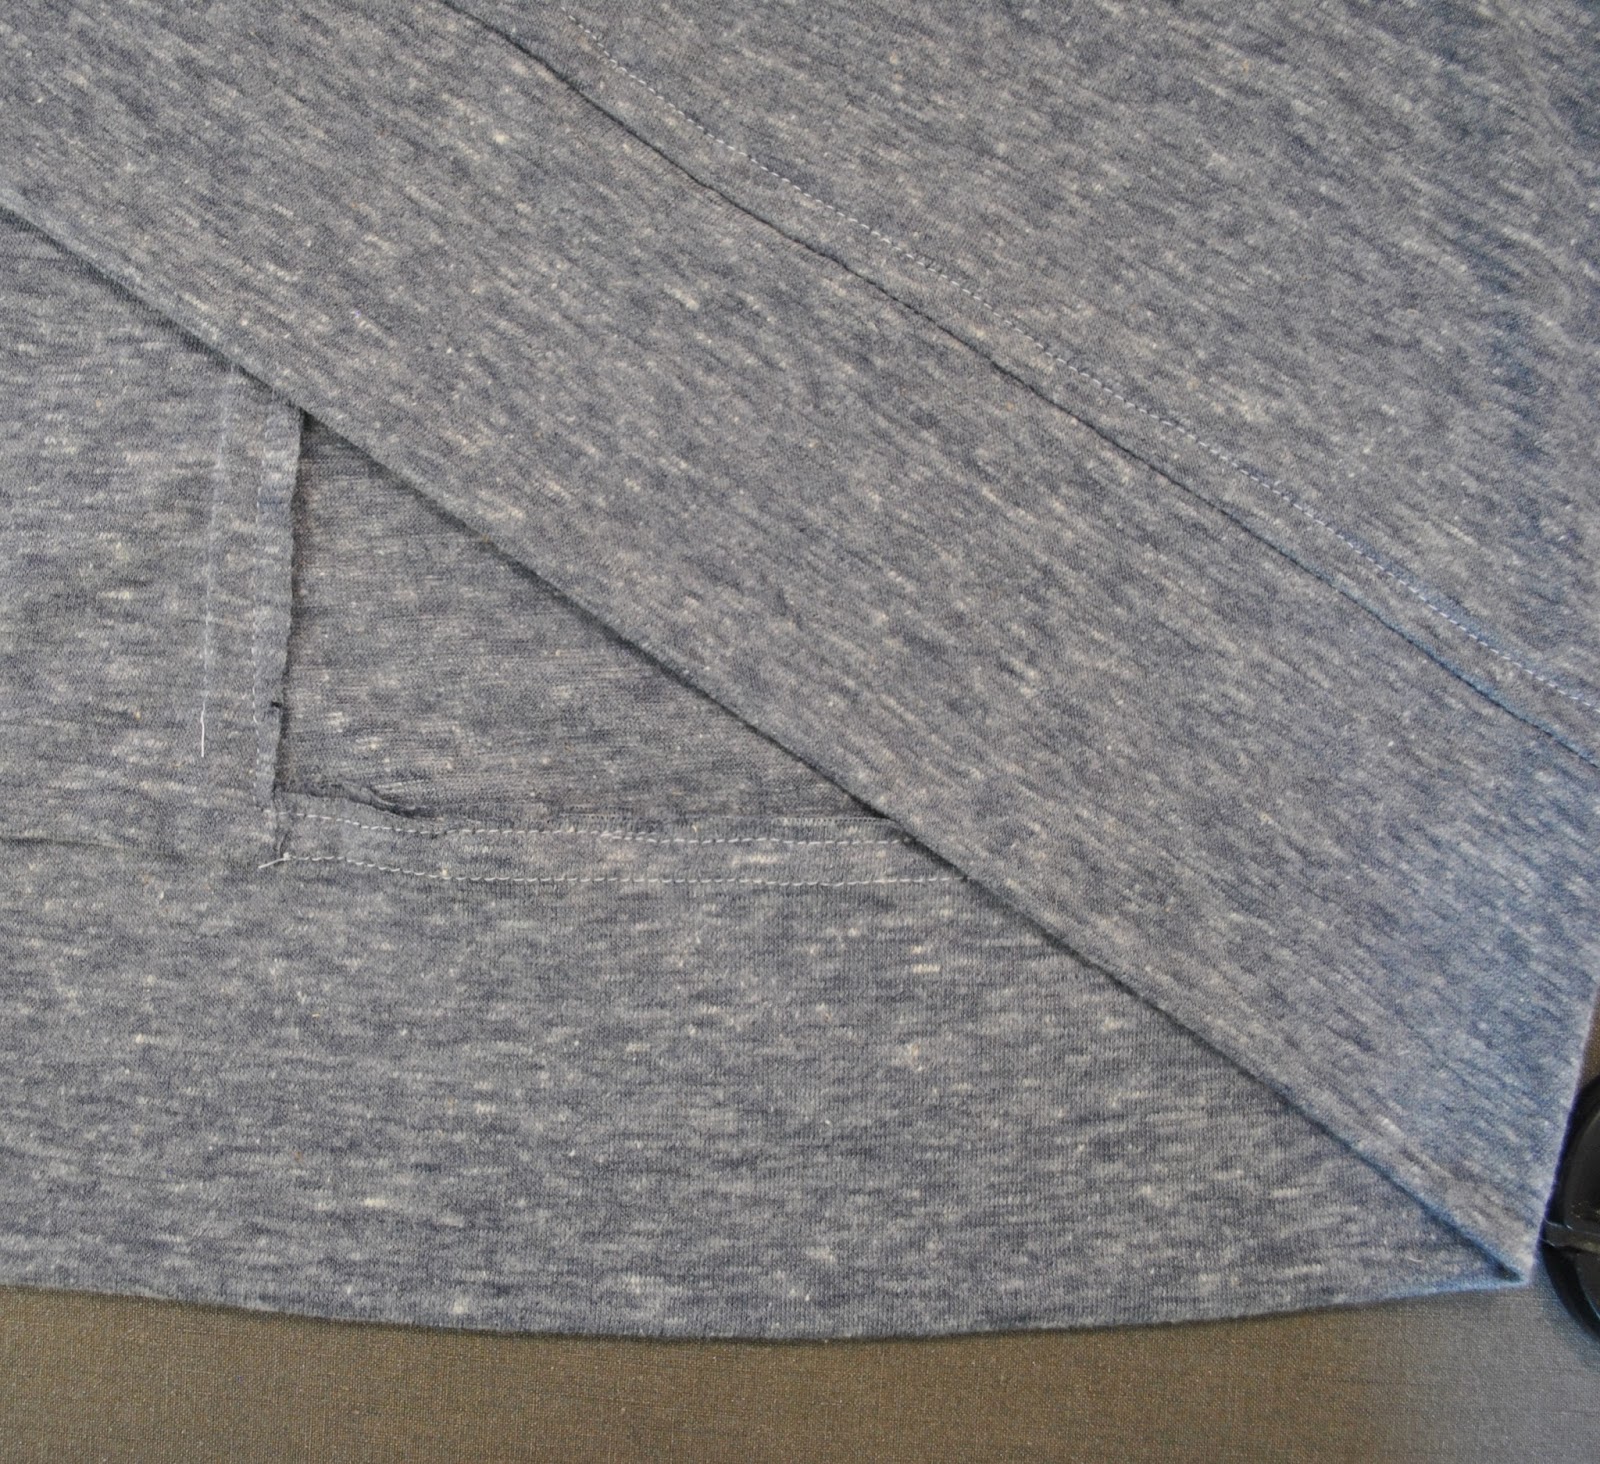
Now fold the facing to the outside, laying it over the lower bands and keeping raw edges even, and stitch lower edge seam through all layers, keeping the stitching just a whiskers’ width outside the previous stitching. The reason for keeping it just outside is so that the previous stitching does not show through on the right side of the band.
Now when you pull the band out and turn it all back right side out, the seam allowances are nice and neatly hidden away out of sight. Yay!
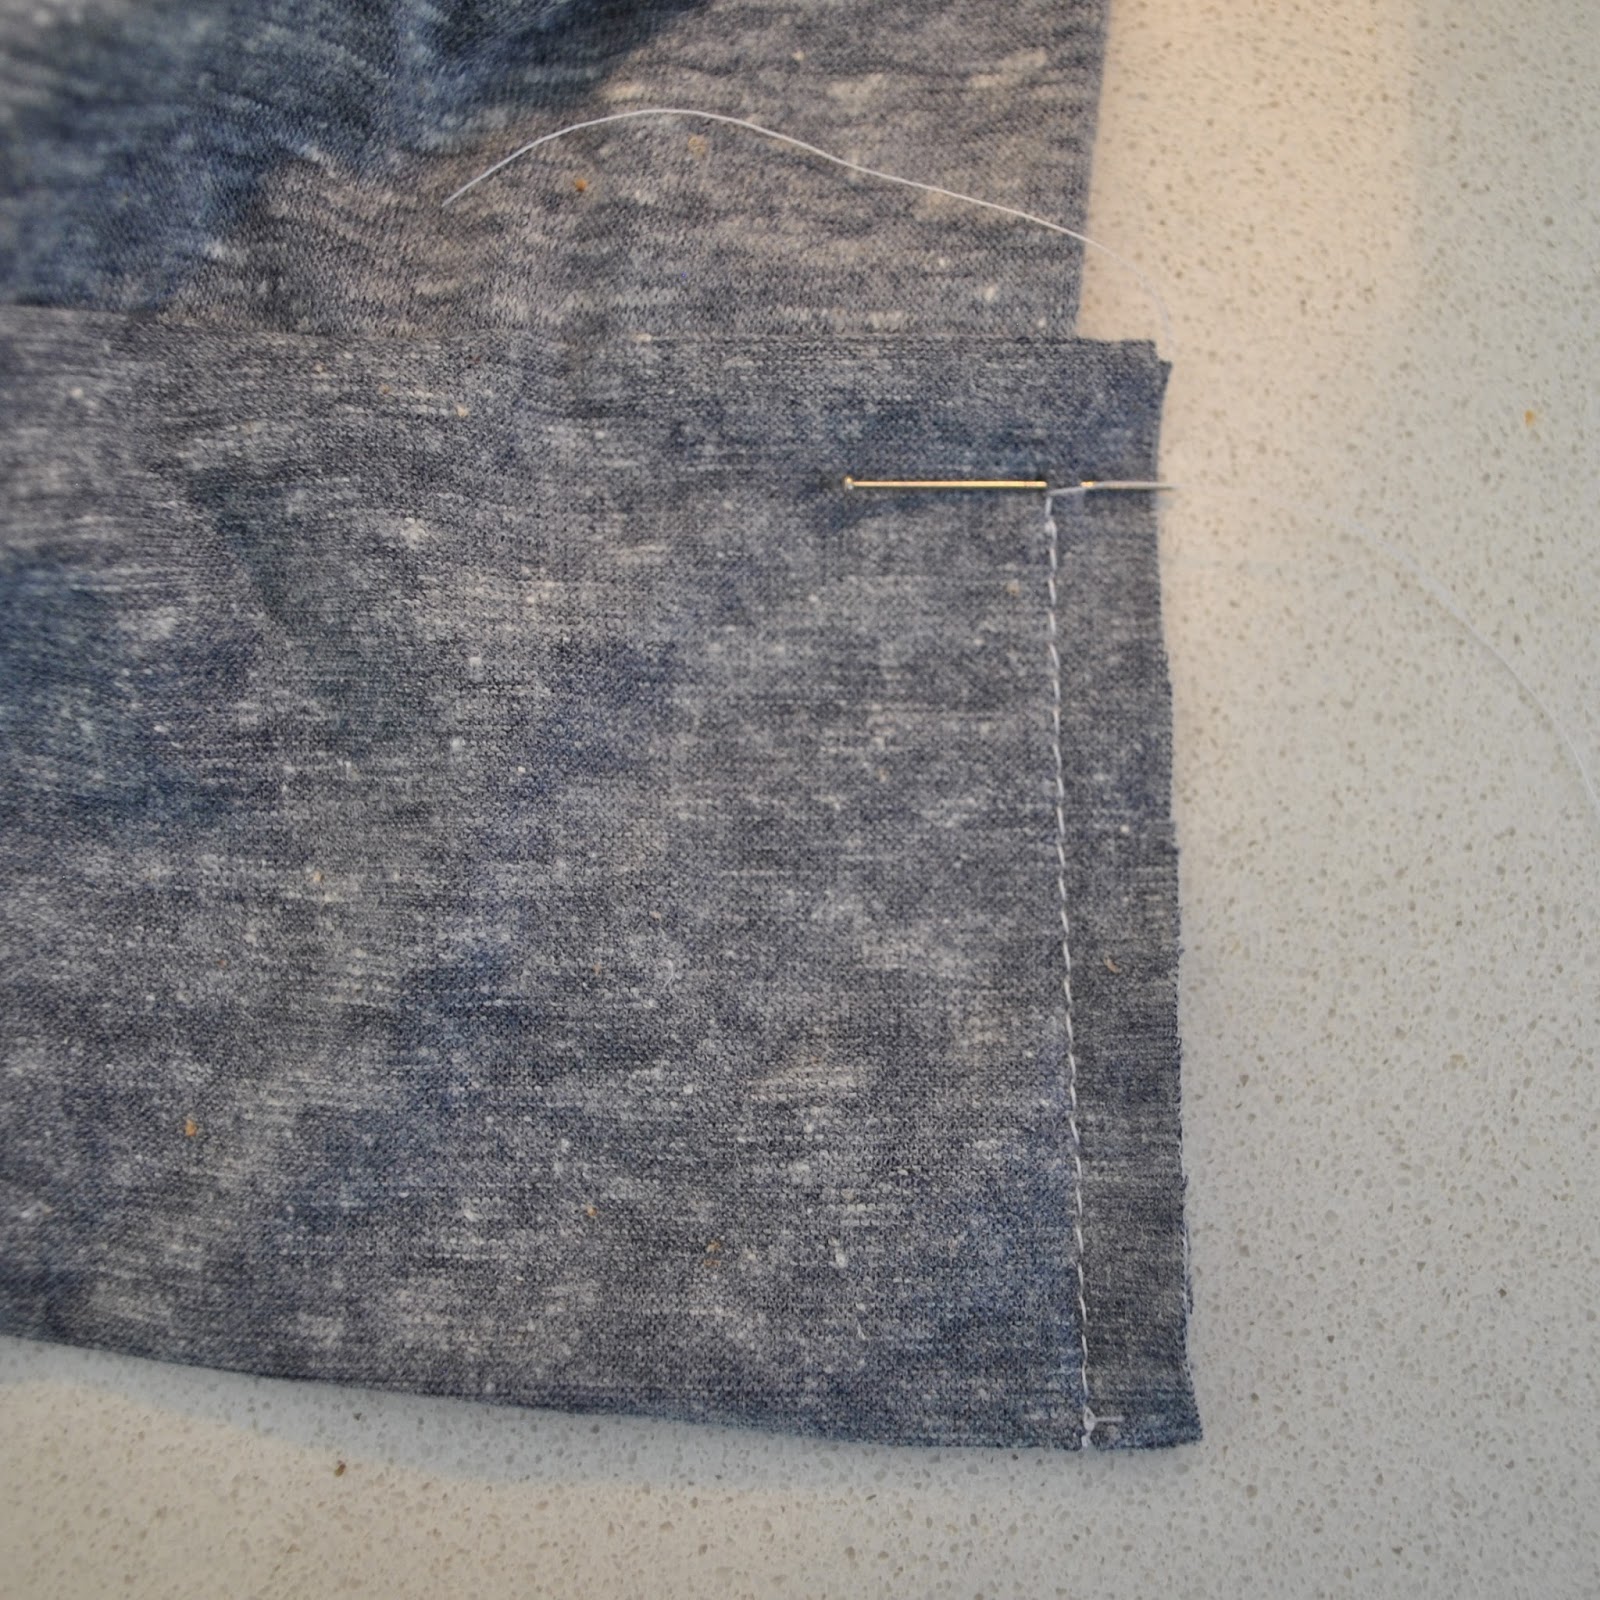
To anchor the front facing to the side seams, I opted to simply lay the front facing down to the side seam allowances, aligning raw edges, and top-stitch from the right side, 6mm away from the seam. The raw edge won’t fray, and it looks reasonably neat stitched down, also the top-stitching also accomplishes a sort of faux-felling of the seam allowances too. However this is definitely not ideal and I have to admit I have since thought of a different and better way of doing this bit too! so there may well have to be yet another little cardi in my near future… to see that thought through too… eeek! am I getting a bit obsessive or what? hmmm could be could be… 😉
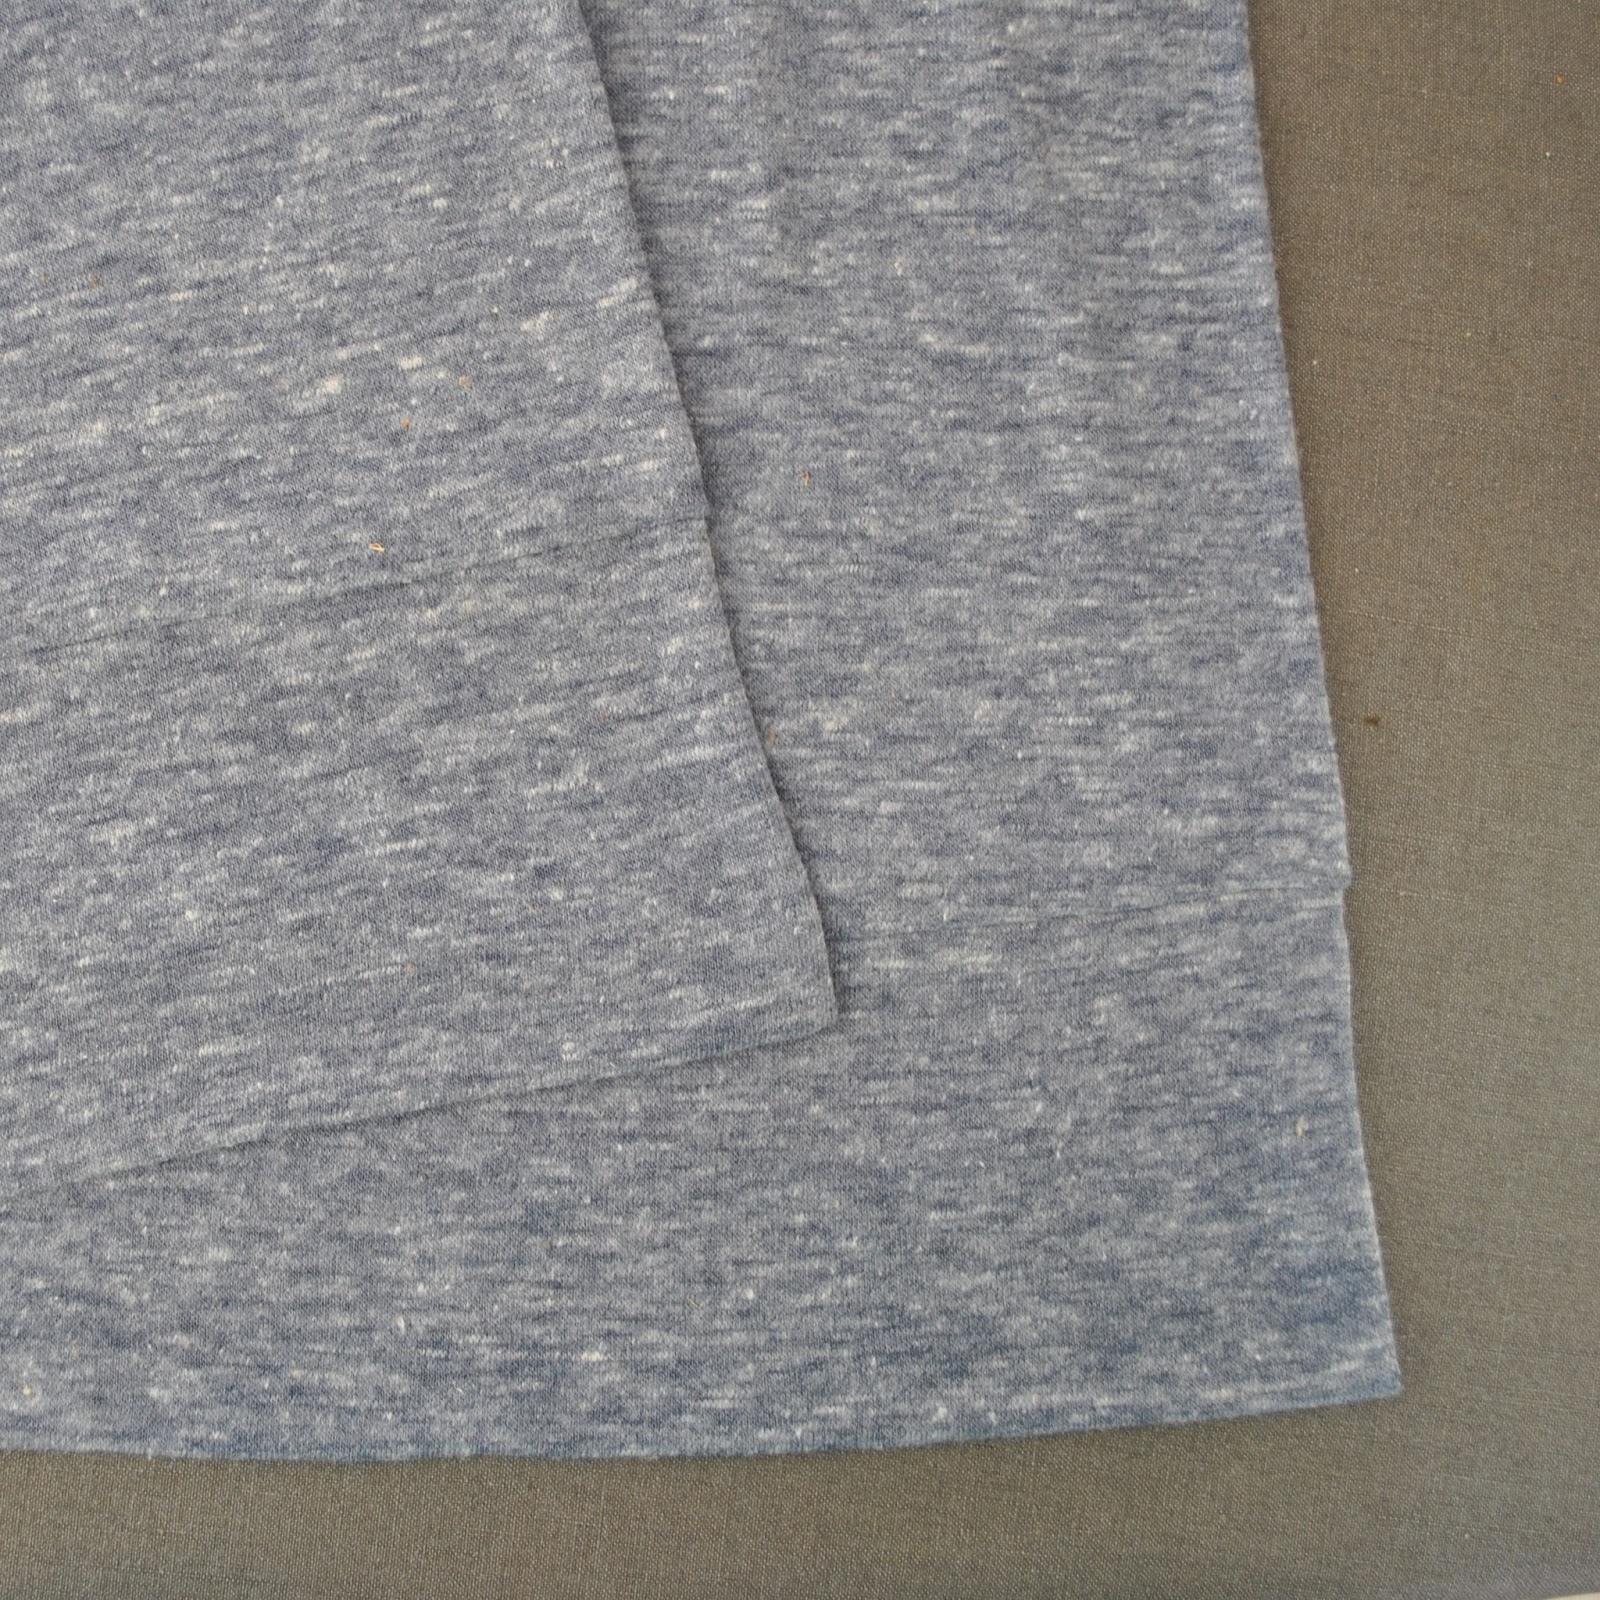
Sleeves; same technique as for every other Tshirt/cardigan ever invented. Namely, stitch the sleeve seams, set sleeves in the armhole and stitch. The raw edges can be finished with overlocking if desired.
Attach sleeve cuffs, for this I nearly always employ this method, which gives a nice neat finish I think.
Last step; the neckband: pin the long neckband to the raw edges of the neck edge, including the facing, keeping raw edges even, right sides together and stitch.
Fold the ties in half along the length, right sides together and stitch the long tie ends together, starting at the endpoints of the previous stitching. Stitch the short ends in a diagonal point, if desired.
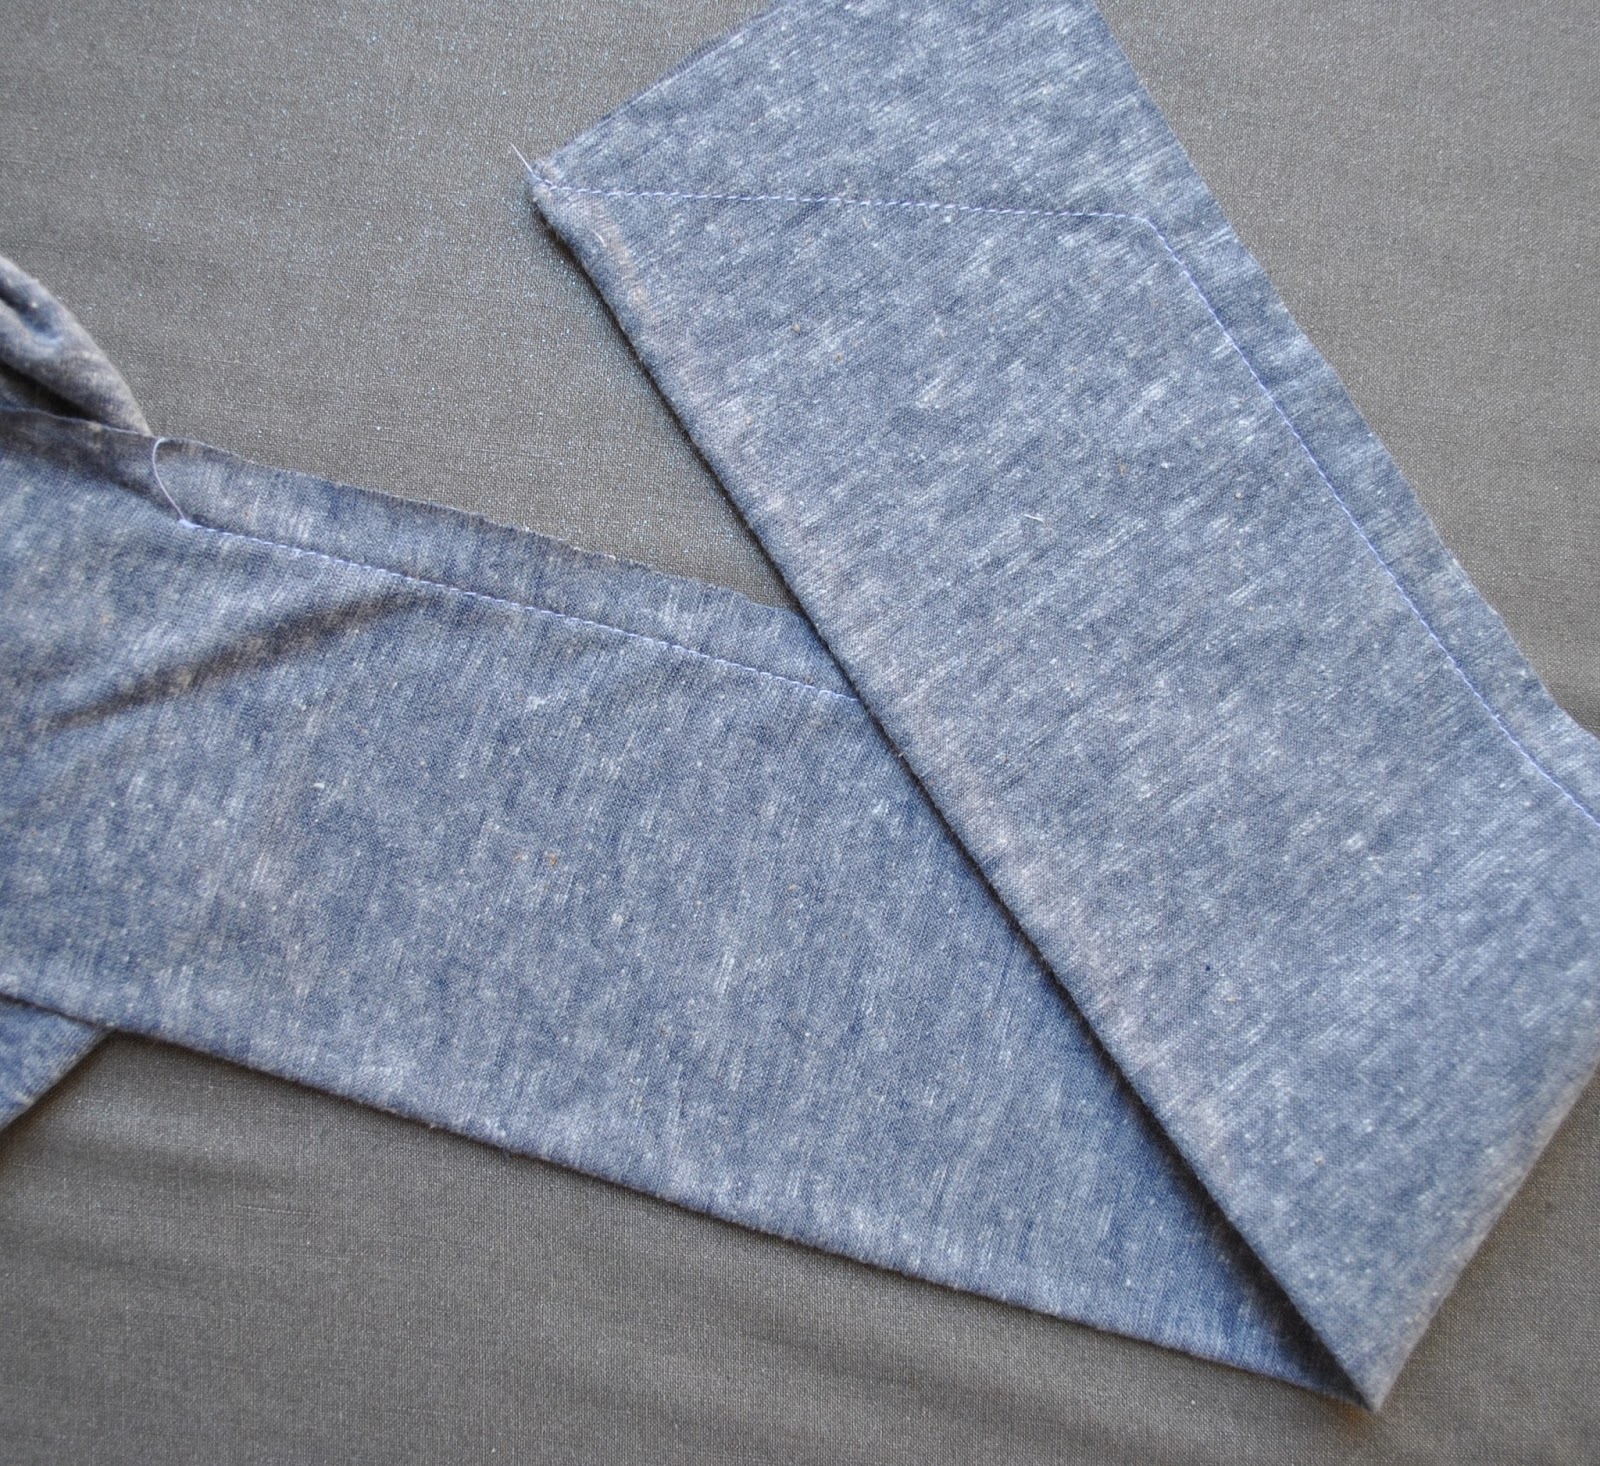
Trim, turn the ties right sides out and press.
Turn under the seam allowances of the remaining raw edge of the neckband, press, pin and slip-stitch closed by hand.
Finito!


Details:
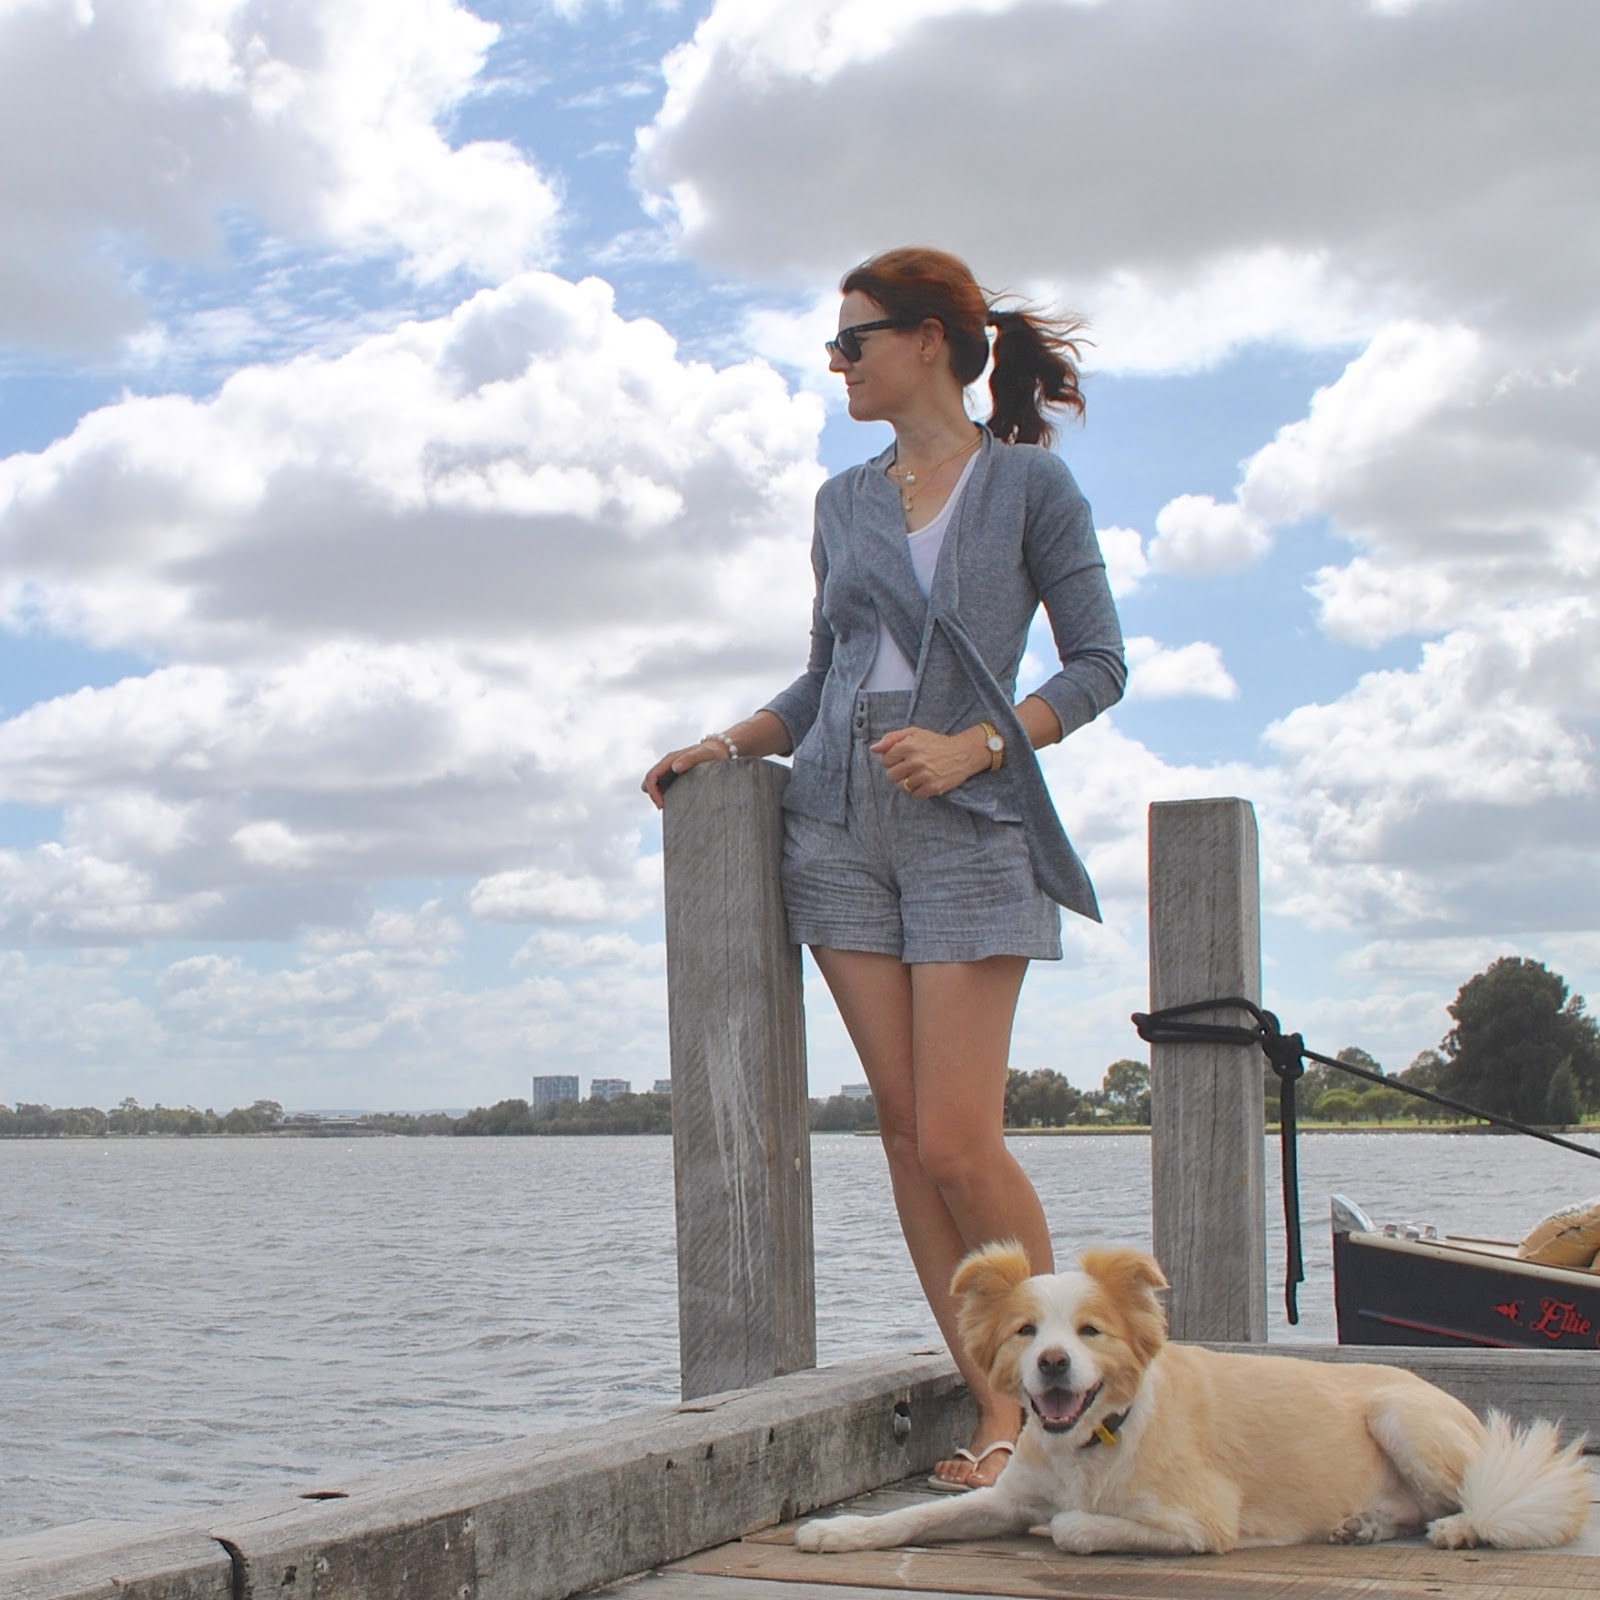
Cardigan, the Nettie, by Closet Case patterns with my own design modifications
Tshirt (under); another Nettie, white jersey, details here
Shorts; Burda 7723, pinstripe linen, details here
Thongs: Havaianas
Location; Coode St jetty, South Perth


Wonderful, as always. But what about the dog? New puppy?
thank you! and this is our dear old dog Sienna! she just looks younger thanks to her summer trim 🙂
And again another lovely cardigan with instructions! You're great! Thank you!
The new dog looks lovely too 🙂
love your twist on simple tee pattern! and how neat the finished garments looks..
You've nailed it this time. An excellent solution to the previous dilemma.
fantastic! I love your design!
Thank yu so much for this! I need to make one too…
The cardigan looks great! You come up with so many amazing Ideas! I'm adding this one to my sewing list.
That's a great cardigan and thanks so much for the tutorial. I am just getting started with sewing with knits so this is very helpful. I love that fabric too and you were lucky to get such a big remnant! What more will you make using it, I wonder?
LOL, I LOVE LOVE Sienna, and she does look younger with her haircut. Still the same happy smile though, she is just wonderful.
Sewing wise…. ah, girl crush here. Again, you have taken a basic article of clothing and taught us some very useful skills – with beautiful work! Thank you for the detailed pictures and explanations, they are much appreciated. 🙂
aww, thank you so very much Angela! 🙂
I've loved every Nettie you have made. One day I'll have to try this pattern!
I love it ! it may be dressed with everything. A must have for me.
I really appreciate you wanting to try out your ideas with this cardigan as it looks so good. Love the colour and Sienna does look cheeky with her summer trim, for once I am thinking it might be the thing to do for Roscoe.
thank you Sharon! It does really get very hot here over summer so a trim is the kindest thing for a thick-coated dog like Sienna 🙂
Thanks for sharing how you made this lovely cardigan – but I am afraid it is Sienna who steals the show :).
she always does 🙂
Lovely cardigan. Thanks for sharing.
Another garment I want to steal. I will pick it up when I dognap Sienna who looks very smart with her new haircut.
works brilliantly and I love your modification!
Another lovely cardigan! I loved your paprika one very much, too! These are Cardigans one needs all the time. Thank you so much for your tutorial. I am in hope that I will make me one, too! 🙂
Clever clever girl! Thanks for sharing how you did this!!
Well, that's a very interesting use of a TNT T-shirt pattern. Thanks for posting this!
What a beautiful top – I love it! It's one of those tops that can go with just about anything. Oh and I always love seeing your furry friend in the photos as well – adorable.
Thank you for the great tutorial! I will certainly try this version. Your cardigan looks effortlessly elegant and the finishing is brilliant.
I love you posts and I have to say I LOVE your dog It positively beams with happiness and pride at his association with such a clever lady !!!
aww, thank you so much Mem! 🙂
Wow, neat and clever construction!
Thank you, i will try this…
Pingback: tie-dye cardigan | Handmade by Carolyn