Tag Archives: Closet Case Files

3 merino netties

To be perfectly honest I don’t know why I keep calling this a Nettie because I’ve rejigged it so much it literally has zero of the original seam lines left…

… anyway!  above is my new sweater/ tee in the Fabric Store merino knit, colour Vanilla; I made it using (sort of) the Closet Core Nettie pattern and added a short wide turtle-neck collar… I love this tee so much! even though honestly I don’t really need to make another white or even white-is top as long as I live.  I don’t care I still love it!

Worn with my Closet Core patterns Pietra shorts in BamBam cotton drill from Spotlight, and ye olde self-drafted tights

二 … another new sweater/tee; same pattern, same fabric in colour Marsala.  Worn with my outback wife V 1247 skirt, self-drafted tights

三 … below; same pattern, this time with a bound neckline, and the same fabric in colour Forest.  Worn with this little wool tartan skirt, fabric bought in Tokyo during a holiday there… boy that feels like decades ago now!  I wish I could go back some day!

below, closer to actual colour

So; I had bought all of these beautiful thin merino stretch knits from the Fabric Store online during one of their sales… I had this idea once upon a time of making a tee in every colour in their range but just to do it bit by bit, buy maybe two new colours per year.  I don’t know now if I’d still do a tee in every colour…   since we moved and I had to finally own up to the fact that my stash is GINORMUOUSLY HUGE,  so I’m kind of on a mission to use up my stash before buying anything else at all.  And now with the completion of these three new tees, I’ve successfully used up nearly all the merino in my stash, which is kind of amazing! Yes, I said “nearly’ I still have about another sweater’s worth of the ivory leftover, and small leftover amounts of marsala and mustard left too, oh and also the forest, but the forest is thankfully already cut out and well on its way to be completely, and gainfully, used up which is totally awesome news.

oops, almost forgot! the last, forest, (sort of) nettie is the next in my use-12 fabrics challenge that I set up for myself at the beginning of the year… yes, I got a bit behind with this for a few months but I hadn’t forgotten it!

pinterestmail

a blanca flight suit with a difference

I really loved the industrial-chic vibe of the Closet Core patterns Blanca flight suit pattern as soon as it came out… loved the zippered breast pockets, the front opening zip, the front hip pockets, the er.. bottom? pockets; sorry have momentarily forgotten the technical term for those things.  Anyway…  such a plethora of fabulous topstitching possibilities!  I actually love top-stitching, it’s one of those calming zen activities that pleases my inner love for well-ordered neatness…  and just the pure and simple visual joy of looking at that evenly dotty line marching its way across cloth.  *happy sigh*

I think though, that I’ve long come to terms with the fact that I want only a limited number of trousers/pants in my wardrobe.  I have some nice ones that I enjoy wearing but the thing is that I really really love dresses and skirts the most.  And jumpsuits, I’m even more happy to have none!  But of course, how easy is it to make the Blanca pattern as a dress?  Super easy!  I didn’t take any pictures, but you just simply cut the pants pieces in a skirt shape instead.  I think I added a squidge more width to the hip area too… just in case, with a view to removing it if I needed to.  I didnt  #pearfromwayback

I also added a walking vent to the skirt back in the centre seam… It’s not really necessary for walking, I put it in mostly for visual purposes because I thought the back skirt would look a tad bland without something there.  I’m really glad I did think of it, because I think it does add a touch of interest.

Want to see something funny/annoying?  I originally cut the vent to a certain length which I thought would look visually nice.  Then I hemmed the skirt and of course the vent became too short!  So I had to carefully unpick it, and splice in a little wedge of fabric neatly to fill the gap, and redo it.  Was this easy?  NO!  Ha!  I think it looks neat enough, and since it’s hidden inside the vent away from view you can’t really see it at all.  I’m pretty happy with how almost-invisible it turned out though, even if you’re looking!

Note to self though; if you’re putting in a walking vent ad hoc, cut it way way too long to start with.  You can always cut the top down if it’s too long, and if it’s not?  This simple precaution will save you a heck of a struggle later on.
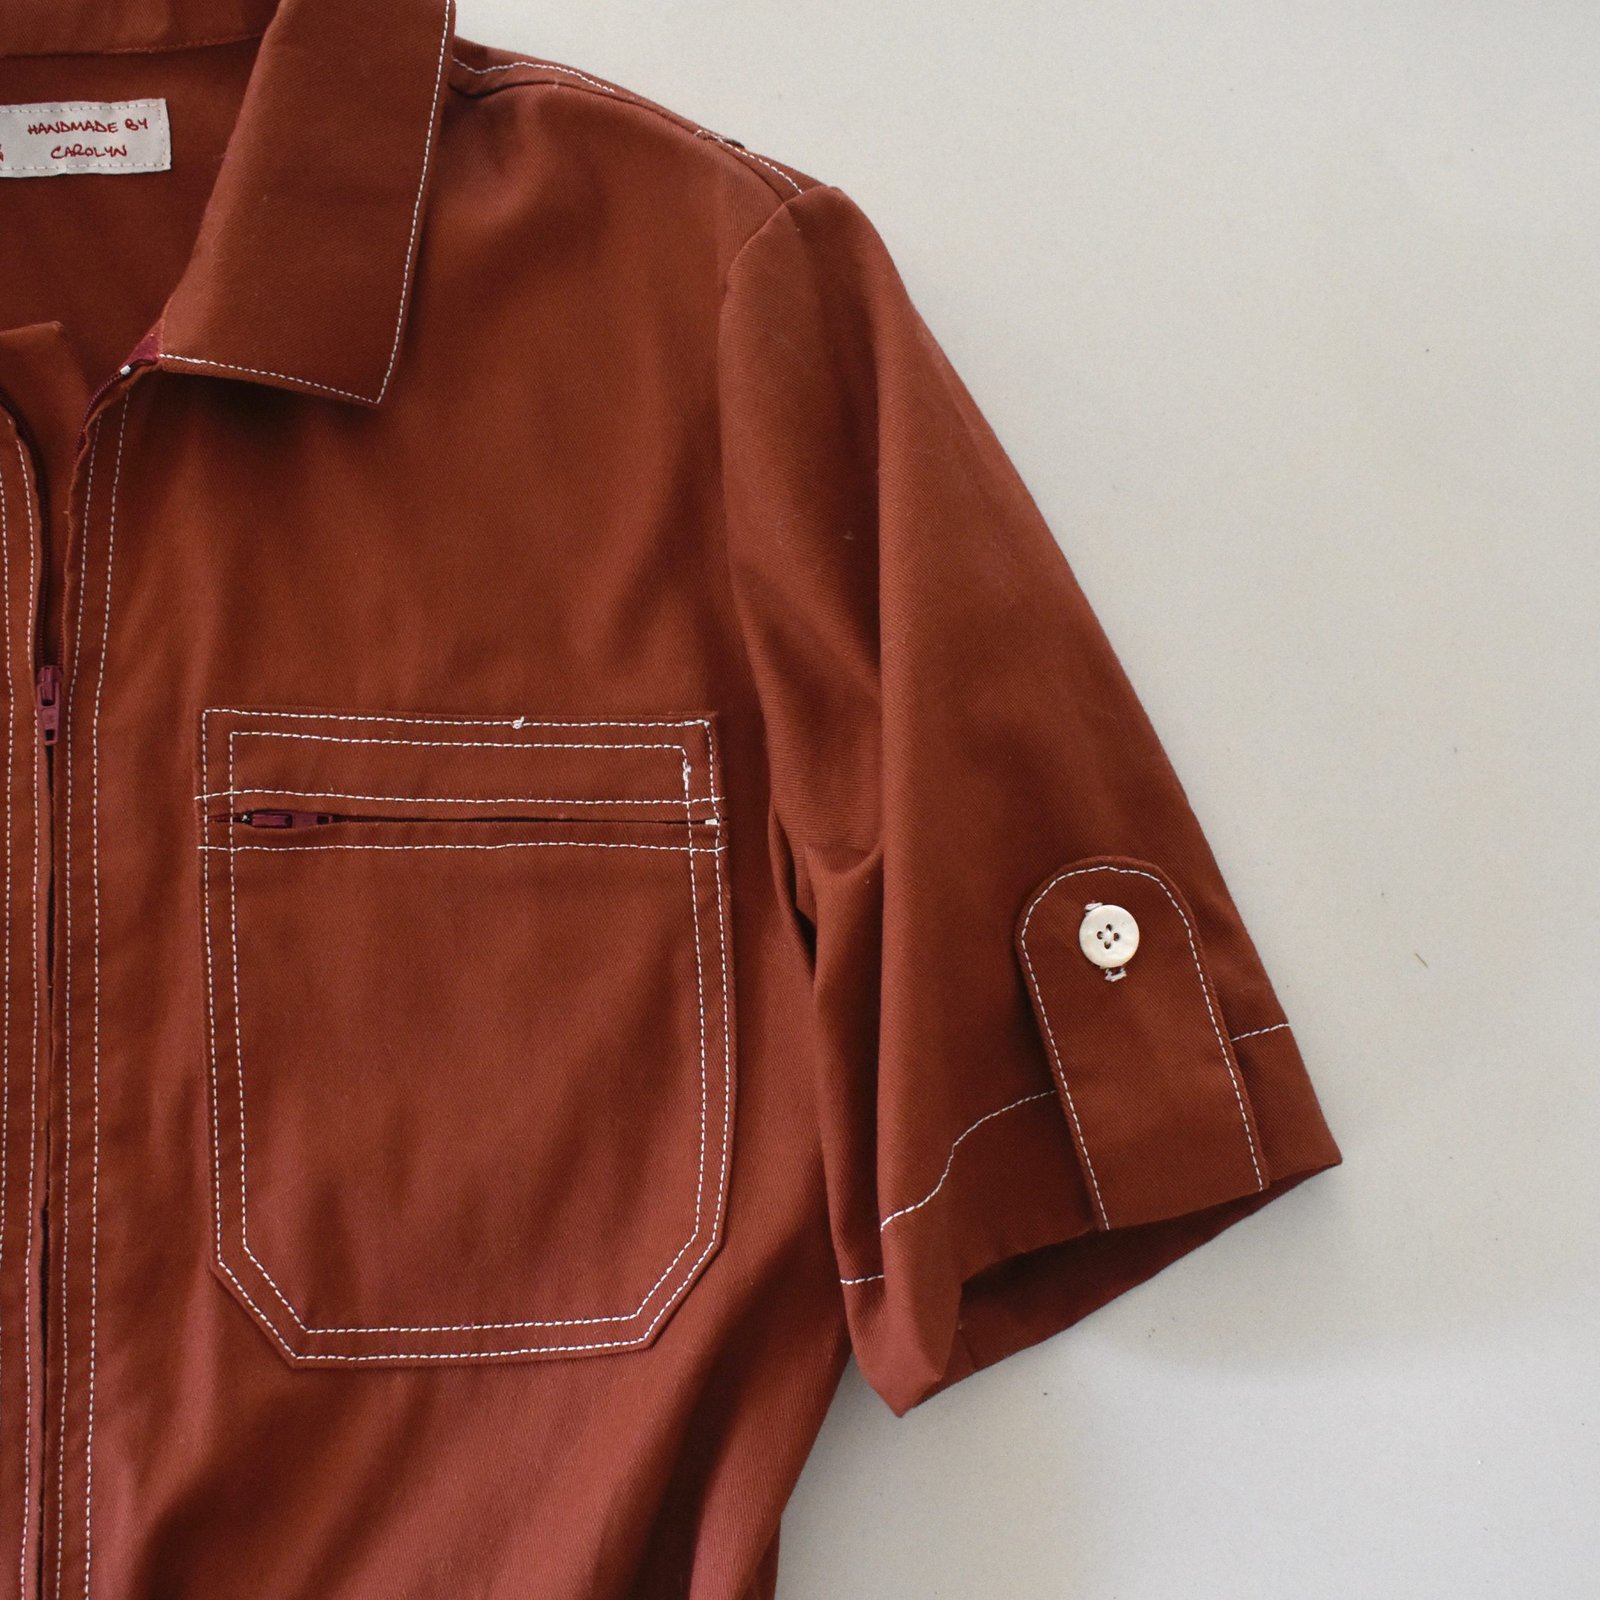
Those tabs are supposed to be down near the trouser hems in the original pattern, I put mine on the sleeves instead.  The buttons are pretty marbled ones from my stash.  Oh, fabric… I bought this rusty coloured cotton twill from Spotlight stores, fun fact: this is actually the very last piece of fabric I bought before lockdown commenced.  I bought the wine coloured zips at the same time, and I already had the ivory topstitching thread in my stash.

Look at this perfect belt buckle!!  I bought this from Closet Core patterns too… it’s the absolute perfect finishing touch.  I had to wait a whole month for it to show up, but I’m so thrilled with it!

I had a small scrap of striped linen, leftover from this Perth top I made for my sister-in-law S, which I managed to cut the lining for the front pockets.  I love this little Beetlejuice touch peeping out!

Back belt loops, back pockets.  Any excuse to indulge in a bit more top-stitching…

Who says you can’t fly in a dress?  Up up and away!!

pinterestmail

an exciting need for maternity gear!

so, I have some very exciting news!  I’m going to be a granny again!  Well of course I’m already a granny to darling little Arthur, but I am going to be granny to TWO.  That’s cause for celebration, I think!  Especially if by celebration, I mean celebratory sewing … which is specifically the kind of celebration this blog recognises, hehe.

Cassie is quite early on in her pregnancy but is already uncomfortable and in need of maternity clothes. Kelly passed on to her one or two of the things I made for her last year, but they are different sizes and so Cassie needed some things of her own, too.

Exhibit A!

I printed out another Closet Core patterns Ebony pattern to cut out Cassie’s size… now I know it’s not technically maternity, but in my opinion this makes a really good maternity option!  And there are so few! Honestly, you  go and check out the maternity range around at the moment and it’s quite shocking how few there are on offer.  Quite disgraceful, to be honest!  There used to be lots of options back when I was sewing for my own pregnancies, but those options seem to have sadly dwindled…  today’s pregnant ladies who sew for themselves have to be resourceful because there is practically nothing at all being designed specifically for the expectant figure.  And even less that’s very interesting.

Anyway.

The first thing I made is the above cotton jersey floral dress for Cassie… she absolutely loves it, which is great because I was initially not a fan of the fabric she chose!  However, once I’d made it and she put it on I could see she looks lovely in these fresh, bright, pretty springy colours.  She wanted something that could work for just about everything, casual and comfortable for both at home and out, she can wear it to work, and even to a formal event if she wants with the appropriate shoes.  Specifically, she has a friend’s wedding coming up, to which she is planning to wear this; and with her high heeled black booties I think it’s going to be lovely.  Plus, it’s stretchy fabric, so it’s very comfortable too, she can curl up on the couch in it just fine.  Pretty? and comfortable too?!!  win win!

I used the aforementioned Ebony pattern, of course, with the set-in sleeve.  The swing of the skirt is a little less than the pattern, because the fabric I had wasn’t as wide as needed.

Exhibits B! and C!

This top is another Ebony, naturally, in the tunic length and with the raglan sleeves.  This spotty cotton jersey is absolutely lovely! such a pretty print.  Oh, both of these fabrics, the spots, and the green, plus the previous blue/pink floral, were all from Spotlight.

please excuse the lumpy look, there’s a cushion doing baby stand-in duties in there and it’s not doing a very good job…

The skirt is Burda 7023, one I made several times previously for Kelly, so we know it’s a fantastic little pattern.  Thanks again to my lovely reader Graca, who very kindly sent this to me!  xx

I did the same thing I did before for Kelly’s skirts, with a self-drawstring in the front band coming out through little eyelets on the inside, so she can tie the front up tighter during these earlier days before she’s very big.

Exhibit D! and sorta E? though I’ve shown this little top here before so it shouldn’t really count actually.  Cassie made the skirt herself, using the Megan Nielsen Axel skirt pattern, and a pretty embroidered and pleated organza that she bought from Megan Nielsen store too actually.  It has a stretch jersey waistband, and is lined with lightweight cotton jersey too.  The little top is one I made for Kelly, and is a streamlined Closet Core patterns Ebony, first blogged here.  I made it using the same oatmeal-coloured, lightweight cotton jersey Cassie used for the waistband and lining of her skirt…  I originally bought this gorgeous stuff at Homecraft Textiles.


I just wanted to add pictures here of two other me-made clothes that Cassie is finding very useful in her pregnancy, a sort of pregnancy-appropriate, pattern round-up, if you like.  Both these dresses are getting worn a LOT.

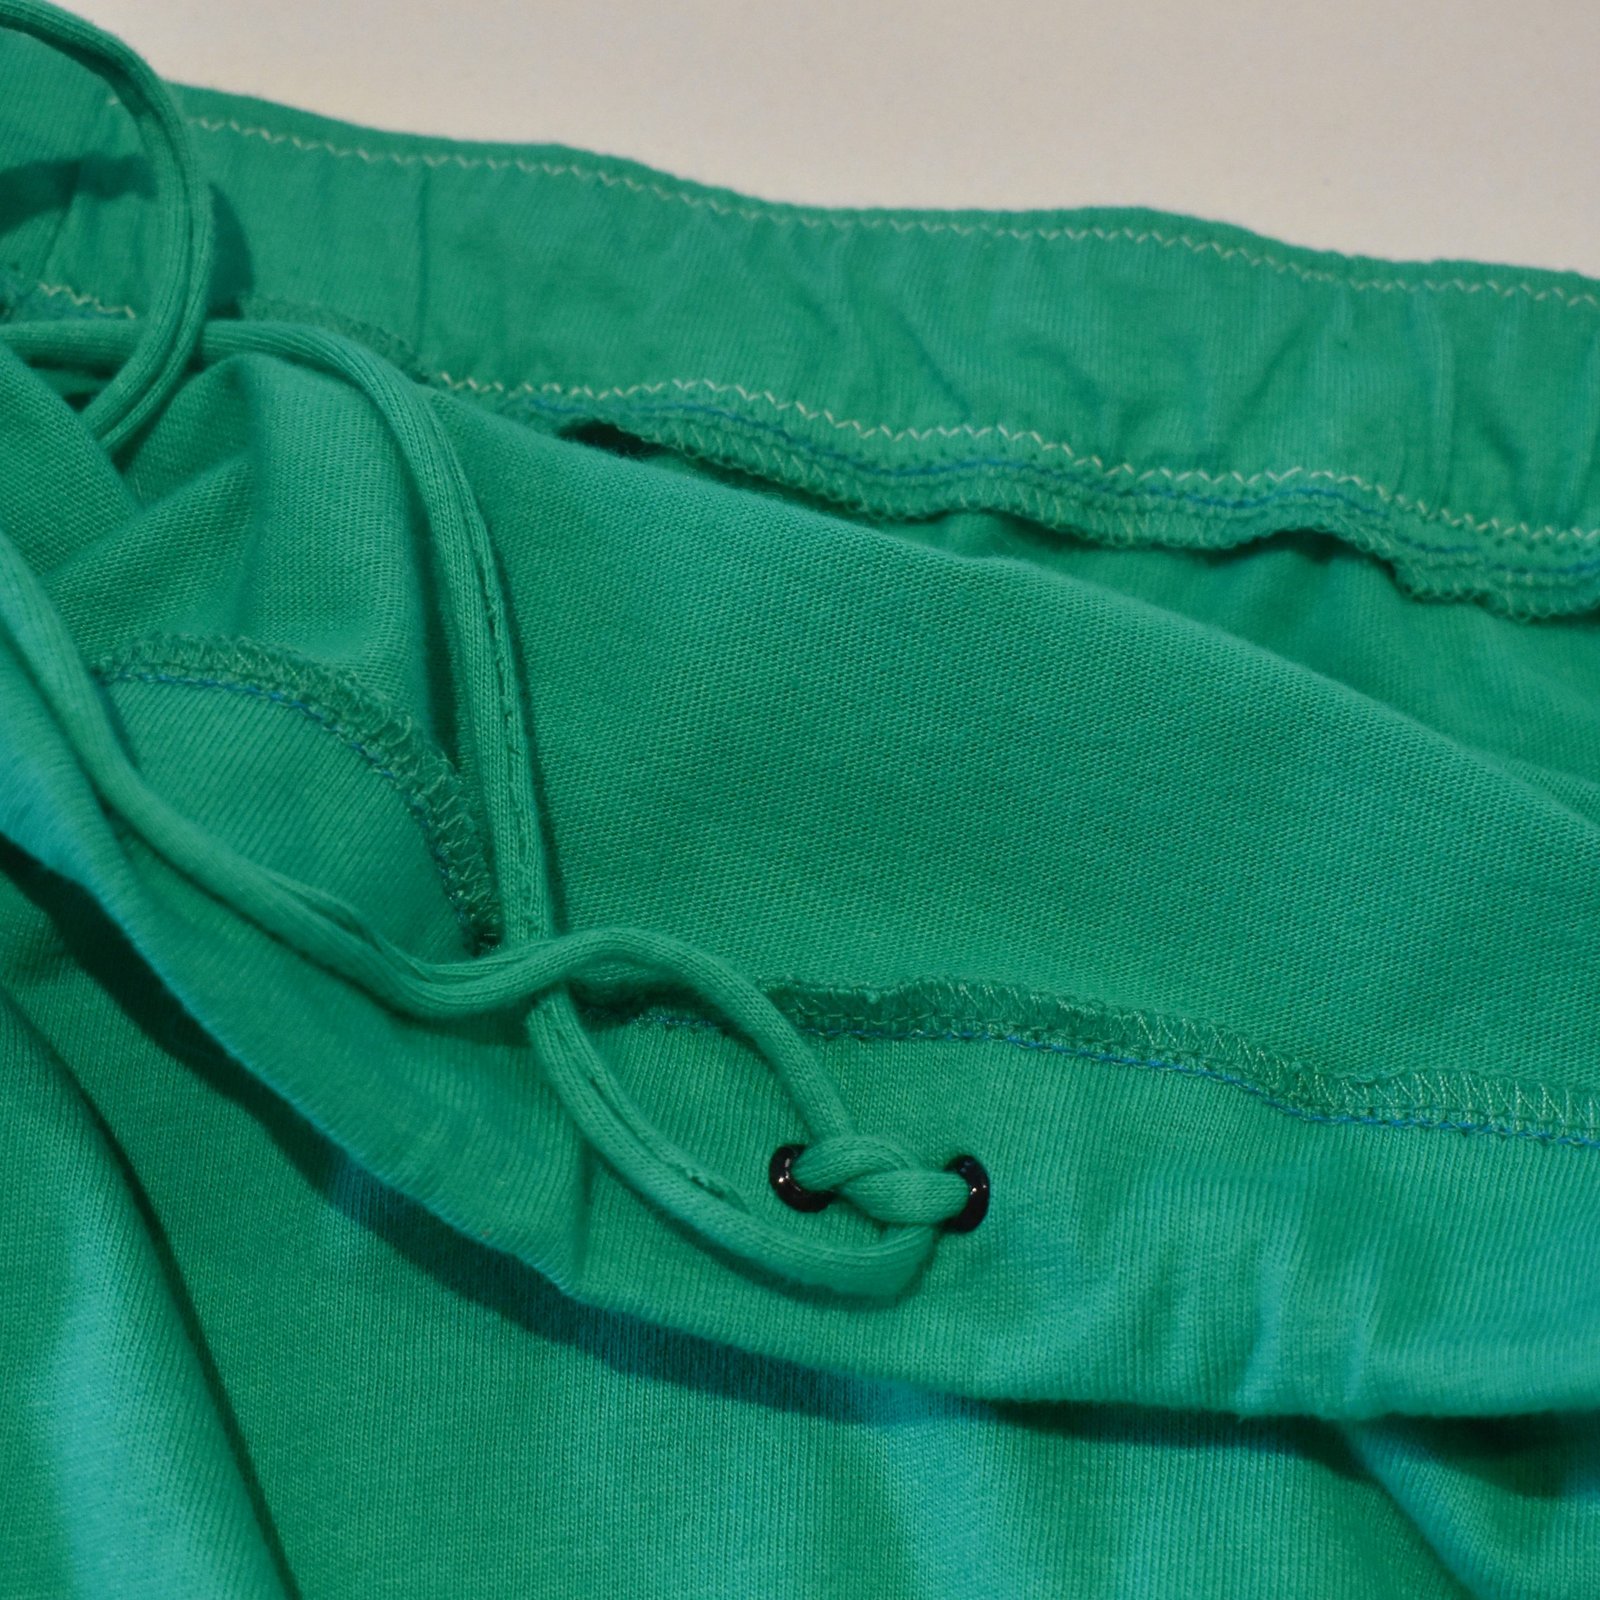
Exhibit F: this Megan Nielsen patterns Sudley dress that I made for her in 2017, in a gorgeous spotty rayon from Spotlight, originally blogged here.

and also Exhibit G: this Burda dress also from a few years ago, made using a really beautiful, Amalfi coast printed crepe from Fabulous Fabrics, and Burda 02/2015/107, and originally blogged here.  This was my Christmas present to her from 2015, so I’m thrilled she’s got so many years of great wear out of it!

pinterestmail

a pretty outfit (cielo and sixtine)

So I made an oh-so pretty, fluttery, flower-strewn outfit of the most perfectly spring-worthy persuasion! but wait…  am I not currently still on the downwards slope to the dark dank pit of winter?  well yes, so we are just barely into July, and I am OVER winter already.  *sigh*

Really I expect I’ll be making winter-y things soon but I just don’t feel like it right now, and I just want to think about fun summery things still.  Terrible, isn’t it?  Anyway, I bought this lovely rose-y rayon-linen in Spotlight, back when Perth was sort of half in isolation.  I’d been feeling very down, gone shopping for some essentials and just spontaneously decided buy something pretty and non-essential at the same time, to cheer myself up.  As it turned out, we had hardly any cases of the covid-19 virus in Perth, which is of course wonderful; but we were all as terribly worried at the time as if there were and buying something lovely lifted my spirits quite a lot at the time.

I cut out the ruffle-tastic new Sixtine skirt by Coralie Bijasson patterns and then had just enough left for a plain little top, which is the best counterpoint for all that ruffle anyway.  I’d recently had success making the Closet Case patterns Cielo top for Cassie so traced out the  next size up for me.  And I really love how they go together!  The Sixtine pattern is a simple, completely symmetric, true wrap skirt, with the most amazing ruffle and a half action going on.  Actually when I say ruffle and a half, that is quite literally what it is; there’s a ruffle, and then another half of that same ruffle on top.  Ruffle and a half! And my fabric worked out so nice! it is quite fluid and soft, which was just right for the ruffles; they have just exactly the right amount of body and zero limpness.The Cielo top is a great little basic, I can already tell I’m going to make stacks more.  Simple, but perfectly so.

I don’t really have much else to add, both these patterns are unambiguously straightforward designs with no tricks to speak of.  With the Sixtine skirt, I think you were supposed to place the buttonholes and buttons so the buttons popped out on the outside of the waistband when buttoned up, but I used very plain sheer flat ones from my stash, both ancient and inherited and not very pretty, so I positioned them so they button up on the inside of the skirt.

Oh, I also finished the lower hemline of both ruffles using the triple-stitched narrow hemline, explained in this post here.

I have one more sort of interesting thing I can say about sewing this; normally when you’re cutting things out from a print you carefully make sure all your pattern pieces are aligned with the “up” side in the same direction, yes?  Well I would definitely do that for fabric with a nap, but for a fabric with a print I’ve often preferred the look when I do not adhere strictly to this rule, but lay pieces so as to alternate up and down placement.  That way you avoid that “double-ing up” up of an identical motif that can look absolutely terrible and obvious when it occurs in a pieced garment.  Obviously this really only works if the print doesn’t have an obvious “right way up” design, but while it’s only a little thing it can make a noticeable difference.  As soon as I looked at my pictures here I could see a couple of instances where an upside-down motif is not too far away from a right-way-up motif, and if they’d been both oriented the same it would have looked strange.  So I’m glad!  I hope I explained that OK!

Anyway, I love this new ensemble and honestly can’t wait til the weather is hot again so I can actually wear it.  In the meantime perhaps I should start finally turning some attention towards more wintery projects  (sigh)


Details:

Top; the Cielo top by Closet Case patterns
Skirt; the Sixtine skirt by Coralie Bijasson patterns
Shoes; both super old now but still much loved

Later edit; so I added some pockets to this skirt! They’re patch pockets, with a slightly gathered top, drawn in by a little olive ribbon, which I happened to have in my stash.  They’re simple but of course useful.  Who doesn’t like a little bit pf practicality along with their floomph?!

Here’s a brief overview…

the pockets are cut to fit my mobile phone in, and are about 3cm wider at the top…

I snipped a little hole in the outer layer of the upper hem/casing..

the gathering ribbon emerges from this hole

align the raw ends of the ribbon inside with the raw edges of the upper pocket hem/casing

ensure the ribbon ends are stitched down firmly along with the pocket… gently pull up the excess pocket width at the top and tie off the ribbon…

camouflaged but not totally, and I think it looks kind of pretty when you do notice it   🙂

pinterestmail

I sewed selflessly

So, I sewed some stuff!

Item A; a dress for Mum to wear to Cassie’s wedding…

I started out with Burda style 09/2019; 109 because I thought the sleeve cuff really lovely; however I ran up a muslin – actually 2 –  and we decided the cut-on sleeve just wasn’t that nice and that a set-in sleeve would be much better.  So I ended up re-tracing and -fitting the Esme pattern from Lotta Jansdotter’s Everyday Style book again since Mum had really like the one I made for her previously.  I just adapted the sleeve to have the Burda cuff on the sleeve end.

The fabric is a really beautiful, green polka-dotted ivory crepe from Fabulous Fabrics; Mum and I went in together and chose it one morning.  Fun!  I didn’t use the neckline facing pieces, opting in stead to fully line the dress with an ivory lining that I already had in my stash, the lining negated any need for a facing…  Mum kindly hemmed the dress herself since I was seriously running out of time by the end of it!  The dress shell has french seams throughout, though I used the overlocker for the lining.

At the same time that we bought the fabric, Mum bought a length of emerald green chiffon and finished it with a hand-rolled hem to make herself a lovely matching scarf.

I thought she looked absolutely lovely!

Item B; a shirt for part of Cassie’s birthday pressie…

For her birthday, we went out together and bought a few lengths of fabric which I was to make into some simple work outfits for her.  Of course now she’s working from home but that’s ok; at least she’s still working!

This is pattern 02/2015; 113, adapted to be much slimmer in the body due to the fact that I didn’t buy enough fabric, ahem… that’s fine since the style is so super wide I think Cassie would have requested it be slimmed down anyway!  This thing is BOXY!!  I also had to leave off the sleeve cuffs, but Cassie absolutely loves it just as it is  :)..

The gorgeous polka-dot fabric is a linen from Fabulous Fabrics.  The buttons are leftovers from Kelly’s wedding dress!

I did manage to snap one photo of her wearing the top! kinda a miracle given how crazy busy we were before the wedding, and then I’ve barely been able to see her after the wedding during these virus social-isolation times… this is her on the eve of her wedding, when she was preparing to practice her father/daughter dance with Craig… yes, she’s wearing her wedding shoes of course  🙂

I actually made a little video on the making of this blouse, which was fun.  I’m hoping to make more of these for my YouTube channel  🙂

Item C; some shorts for Cassie’s birthday.  For these I started with the Closet Case patterns Pietra shorts and did the same elastic-waist elimination that I did for my own shorts… shown here.

The fabric is a cotton twill from Spotlight, in Cassie’s favourite duck-egg/mint green colour.

Item D; another little top for Cassie… this is the Closet Case patterns Cielo top, lengthened slightly. This is a lovely little pattern and I will definitely be using this one again!  No other adjustments.

The pretty rose-print is a linen from Fabulous Fabrics.  I should say, that while these pieces are all a gift from me to Cassie, she did choose the fabrics herself.  We had a lovely fun morning checking out fabrics and chatting about work-wardrobe possibilities!

Items E & F; I made two different masks for myself.  I haven’t used them very much but am really trying to get more used to the idea!  When we’ve visited Japan I’ve seen lots of people wearing masks all the time of course, and while I think they’re a great idea, especially in our current virus-centric lives, we’re just completely unaccustomed to wearing them here in Australia and it’s really hard to get used to it.  I find them very claustrophobic and a little difficult to breath in them!

The first one, above; I used this pattern/tutorial on the Makers Habitat YouTube channel, it has a lining with an opening so you can insert a filter inside.  It’s a nice straightforward pattern, very quick and easy to make.  I added a skinny channel to the top, and cut a short length of wrapped florist’s wire to insert in there for a nose support; this can be removed for washing.

This second one I used the Trend patterns free mask pattern, here.  This is also a nice pattern, very “designed” and I really like it, but I did find I had to fold a quite wide dart in the under-chin piece to get a good fit.  Also it is a more complex and involved thing to make than the previous pattern,  For both masks I used a leftover piece of cotton from my stash, the most tightly woven and with the densest thread count I could find!   They are both lined with cotton voile.  The ties are just thin strips of cotton jersey, cut with my rotary cutter, left unhemmed, threaded through the side channels and simply knotted.

pinterestmail

jungle baby mobile

Yesterday we attended a very special event, and I made a very special gift for the occasion! … Kelly’s bridesmaid and Tim’s groomsman, now a newly-wed couple themselves, hosted a baby shower for who else but our newest little not-quite-here-yet bub…  The new nursery is to be jungle-themed, so I thought I’d make an animal mobile.

I bought acrylic felt sheets, wooden beads and a bamboo hoop from the craft section at Spotlight, and everything else from my stash… embroidery thread for the embroidery, upholstery thread for stringing everything all together, and all-purpose glue… the blue/green wool that I used to wrap the hoop was from a large bag full of wool that a neighbour put out on their verge as rubbish.  When I spotted it I was like… whaaa??? well yes please and thank you! #wastenotwantnot

The designs are all my own:

toucan;

sort of a generic monkey… I kinda wish now I’d made him a specific type but oh well…

gorilla.  btw, most of them have a definite front and back so I’ve pictured both of his here…  He was one of my early favourites so I can’t believe I forgot to take his special close-up photo!  we’ll have to make do with a couple of zoom-ins …

tiger.   I’m pretty pleased with my tiger, it was easily the most labour intensive and fiddly of them all!  This is actually version three; I was dissatisfied with two earlier versions but kept going until I had one I was happy with.  He also has a definite back and front.

panther

blue and red macaw

blue and gold macaw.  Until I was making this mobile and made a point of looking it up, I wouldn’t have noticed that these macaws have black beaks while the red and blue ones have white beaks!

python.  this was a last minute inclusion and I really love him!  My python has a lovely diamond pattern along his length, and it should be noted btw that this is not a very common marking for this particular colouring but I’m claiming artistic license!

There are three different leaf sizes, and I went to a careful effort to balance everything out; the ground dwellers are at the bottom, then there’s the mid-range dwellers, with the birds flying up in the canopy.  Except for the toucan, he’s not flying but I imagined him perched on a branch.

I like the way the blue/green yarn I used to wrap the hoop is sort of “planet earth” colouring, as well as sky/leaf canopy colouring.  Seems sort of fitting.  And the dark wooden beans that are really there to weigh down the motifs, also sorta represent nuts in the trees and on the ground,  and the wooden trunks of the trees.

Lastly, here it is in motion.. thanks Cassie! for holding it up for me to film it!

Kelly sent me a picture this morning showing it hanging up already, which is so cool! and I sure hope baby enjoys watching it from his cot!

Before anyone points it out; yes I know these animals do not necessarily live in the same jungles as each other, but hey; at least they’re all actual bonafide jungle animals and I didn’t pop a cheetah or a zebra in there!

Now before I forget… I said I only had two more things to blog about before the end of the year, but I was forgetting the following!  for Kelly’s birthday she mentioned how she needed maternity clothes, so I offered to take her shopping for fabric and I’d run up a few things…  I’ve shown some of them here but not all of them for some reason, anyway, here are the rest…


a Closet Case patterns Ebony dress with set-in sleeves; in cotton jersey bought from Spotlight for this project

A raglan-sleeved Ebony tee, and a skirt made using Burda 7023.  Apart from the navy blue merino for the sleeves which is leftover from my Nettie tee, these fabrics are all long term residents from my stash, some give to me by Mum.  It’s not a glamorous outfit, but one I thought she could wearing hanging around the house or on the weekend for housework or something… hey, we all need those clothes too!

another raglan-sleeved Ebony tee, and Burda 7023 skirt combo… striped jersey a long term resident from my stash, originally leftovers from this dress; and black jersey from Spotlight, not a leftover but bought specifically for this project.  For my previous notes on adaptions to this skirt pattern, see here.


So; NOW I’m pretty sure I have only one thing left in this year to blog and it’s a lovely one if I say so myself …. stay tuned!

pinterestmail

Sienna maker jacket

Ok, hopping straight to the crux of things; I absolutely J’FREAKINADORE this jacket!!  This is the new Sienna maker jacket pattern from Closet Case patterns, and I was lucky enough to be chosen to test the pattern.  This is view B, made using a deep bottle green cotton twill bought at Potters Textiles.  I actually found this in the remnant bin, believe it or not… yeah, Potters often does really BIG remnants.


We’re not supposed to reveal our tester versions of a pattern until it has been released, but I simply just could not resist sneakily wearing it! and have been (im)patiently waiting until I could chat openly about it… in fact, I took it on holiday with me recently when I visited the USA with Yoshimi on our sort of sewing-tour, because I really really wanted to include it in my travel wardrobe.  Also, I knew that Heather, with a bit of luck, was actually going to release it right about the timing of our trip.  And she did! yay!  so I was able to indulge my love of it in full.

photo taken in San Francisco by Yoshimi

And I wore it, literally Every Single Day.  This thing could most probably walk itself around San Francisco and New York by now!

The design is fabulously comfy; loose and stylishly slouchy, just slightly oversized in a good way, with two piece sleeves, notched collar, and a veritable tonne of pocket real estate.  A small but nice detail is a handy hanging loop included in the pattern pieces and instructions.

The belt from views A and B is pretty cool, snaking through a neatly faced slit opening, before wrapping around your waist and attaching itself to a little tab on the side.

Above can be seen the paler olive green poplin I used to finish the raw edges inside in a bias bound finish.  I kinda wish I’d hunted out  deeper bottle green that would match more closely the colour of the jacket, but both Yoshimi and Cassie reckoned the paler colour looked really good, so I guess it’s ok then.  I bow down to better, more stylish opinions than my own.

I flat-felled the side seams, centre back seams and both sleeve seams; I chose to do both sleeve seams because I knew I’d be wearing the sleeves rolled up most of the time, and wanted it all to look nice on the outside.

In fact, the only spot where I used the overlocker was the armscye; I figured these would remain pretty much totally hidden, most of the time, so meh…

I love how neat and almost … ?military? the jacket appears when firmly belted…

… and I enjoy wearing it open too, with the belt tucked into a side pocket.


OR, you can wrap the belt around your back only, just to pull in the back pouffiness a little, and tie it to the tab.  I often find with a jacket that I develop a strong preference for either open or closed, however with this one I tried wearing it all different ways on different days, and really liked it equally worn any which way.

As mentioned, the pocket situation is pretty fabulous.  There are enough pockets in this thing to satisfy the most fanatical and ardent of pocket-lovers, honestly.  View B has two ginormous patch pockets on the hips, a small breast pocket pictured above, and a large inner breast pocket picture below too, nicely big enough for your passport, phone, bus/train pass; well just lots and lots of stuff really.

But wait! there’s more!!  The jacket also has two quirky little pockets on your sleeves!!   ok, so you’re probably not going to use these ones super frequently, but they are there!  I guess you could store an electronic pass in there, for one thing, so you only have to brush your arm up against the detector without getting it out.  And they look pretty cute!

For my buttons, well, I was on a use-up-the-stash mission in the lead-up to my holiday, since I knew I was going to blow that one right out of the water during our holiday! anyway, I had some old wool-covered buttons in my stash, long ago cut off an old cardigan, and I coloured them in with a felt-tip pen to blend in nicely with my green drill.

To be honest, I had actually wanted to make the long version of the jacket, however my piece only allowed me to cut this shorter version.  I was initially a little sad about that, however I’m so in love with the finished version I couldn’t possibly remain sad for long.  And I am still keen to make the longer version!  I don’t very often want make the two views of things straight away like that, so if that’s not true love, I don’t know what is!

Interesting factoid, well to me anyway; my Stylebook app tells me I’ve worn it 17 times already and I’ve only just blogged about it.  Unbelievable!!!

    Details:

in holiday photos, I am wearing my cockatoo top and skirt, details here
White sandshoes by Trenery,
Black booties by nylon, bought at Zomp boutique
Prada gold hand bag

other photos:

Mustard tee; the Nettie pattern by Closet Case patterns, mustard merino, details here
Skirt; Vogue 1247, in outback wife barkcloth, details here
Tights; self drafted from my custom-fit pattern details on how to make your own here
Boots; Roberto del Carlo, bought at Zomp boutique

photo taken in New York by Yoshimi

pinterestmail

mustard pietra shorts

Hack attack!

Despite initial appearances, my new shorts are actually based upon the Pietra shorts/pants pattern by Closet Case patterns… I loved this pattern immediately, loved the high waisted flat front with no waistband, and those cool side panels with pockets.  However, I was not quite so much in love with the elasticated back … or perhaps I should specify I was not quite so much in love with my own rear view in the aforementioned elastic waist version of the pattern?!

Yes, I did make up a test version with the elastic waist first … for version number one, I cut up an old linen dress given to me by Mum.  Unfortunately I decided I’m tragically allergic to elastic waistbands, with the one and only exception of pyjama bottoms.  Although looking at these pictures now my rear view is not as offensive to me as it was when I first looked at them!  at the same time, I am still much happier with the rear view of my second, non-elasticated and more streamlined version.

side view…

I was pretty sure I would be able to alter, modify, wrangle a de-elasticised waist with a bit of finagling… putting an invisible zip in the centre back seam and removing a whole lot of real estate from the back waist area, retaining that lovely flat front and pockets completely.

the front view looks exactly the same as the original, unsurprisingly since this is basically unaltered…

I shall now proceed to explain my butchery… and please note that these measurements laid out here are tailored to my own personal waist measurements and will obviously be different for other people.  Specific measurements for each of these modifications can best be determined from your own waist and hip measurements.

I removed 6cm from the waist of the back piece; and actually swung the side edge out towards the hem edge at the same time, adding a bit of flare to the back view of the shorts…

I also removed 2cm from the top/back edge of the side pieces, tapering off to nothing at the top edge of the pocket.  This wedge was also removed “mirror-image” from the front facing, shown already stitched on at the left…

I put a dart in the back piece… while my picture illustrates it to be 10.5cm, I actually stitched it a bit longer, closer to 11.5cm at its end point

… the dart is situated 10cm in from the centre back raw edge and is 3cm in width at its top edge

… I used the existing back waistband piece to cut my two new back waistbands to fit the new size…

… inserted an invisible zip into the centre back seam.  Note, the centre back seam is essentially unaltered, except that the back waistband now has a vertical centre back seam too.

Because I whimsically fancied something a bit different for the back of my waistband, specifically a V-shaped cut-out effect at the centre back … I put in the zip a bit lower and stitched the top edge in an angle like so…  Yes, I’m very much oversimplifying here, because making my two sides exactly identical actually took aaaaages and some super precise measuring.  I even unpicked one side completely and re-did it because it’s amazing how even 1 or 2mm difference will show up as a glaring inconsistency.  Hint; making a little paper template made it a lot easier to get everything perfectly mirror image; which yes, seems super obvious in retrospect!

corners trimmed and turned out…

I hand stitched the waistband self-facing down with tiny fell-stitches…

To finish; the side seams were pinned, and the already-understitched front facing was wrapped around over the top and over the back waistband piece.

Side seams were then stitched, corners trimmed and seam allowances finished etc. before pulling the whole thing right sides out.  And that’s it!


Oh! of course, the ever important fabric notes… this is actually just a super cheap cotton drill from Spotlight… I LOVE the orange-y mustard colour of course, SO MEEEEE! and the random vertical dashes.  The pattern sorta reminds me a lot of this felted wall hanging I made, many moons ago; my vision was of a sort of poem carved by an artistic cave man, in a language or alphabet wrought in colours and strokes of differing lengths and groupings.  This is still hanging up in our front room! and you can read more about it here

Details:

Shorts; both the Pietra shorts/pants pattern by Closet Case patterns
Drapey white top; based on the loose drape top no.1 in the Japanese pattern book “drape drape”, by Hisako Sato
Hat; Vogue 8844, in khaki drill
Plain white tee; Nettie tee by Closet Case patterns, white jersey

pinterestmail
Switch to mobile version
↓