Monthly Archives: July 2018

You are browsing the site archives by month.

a mustard raincoat, oh and a skirt too

Hello!  I’ve made a new raincoat!

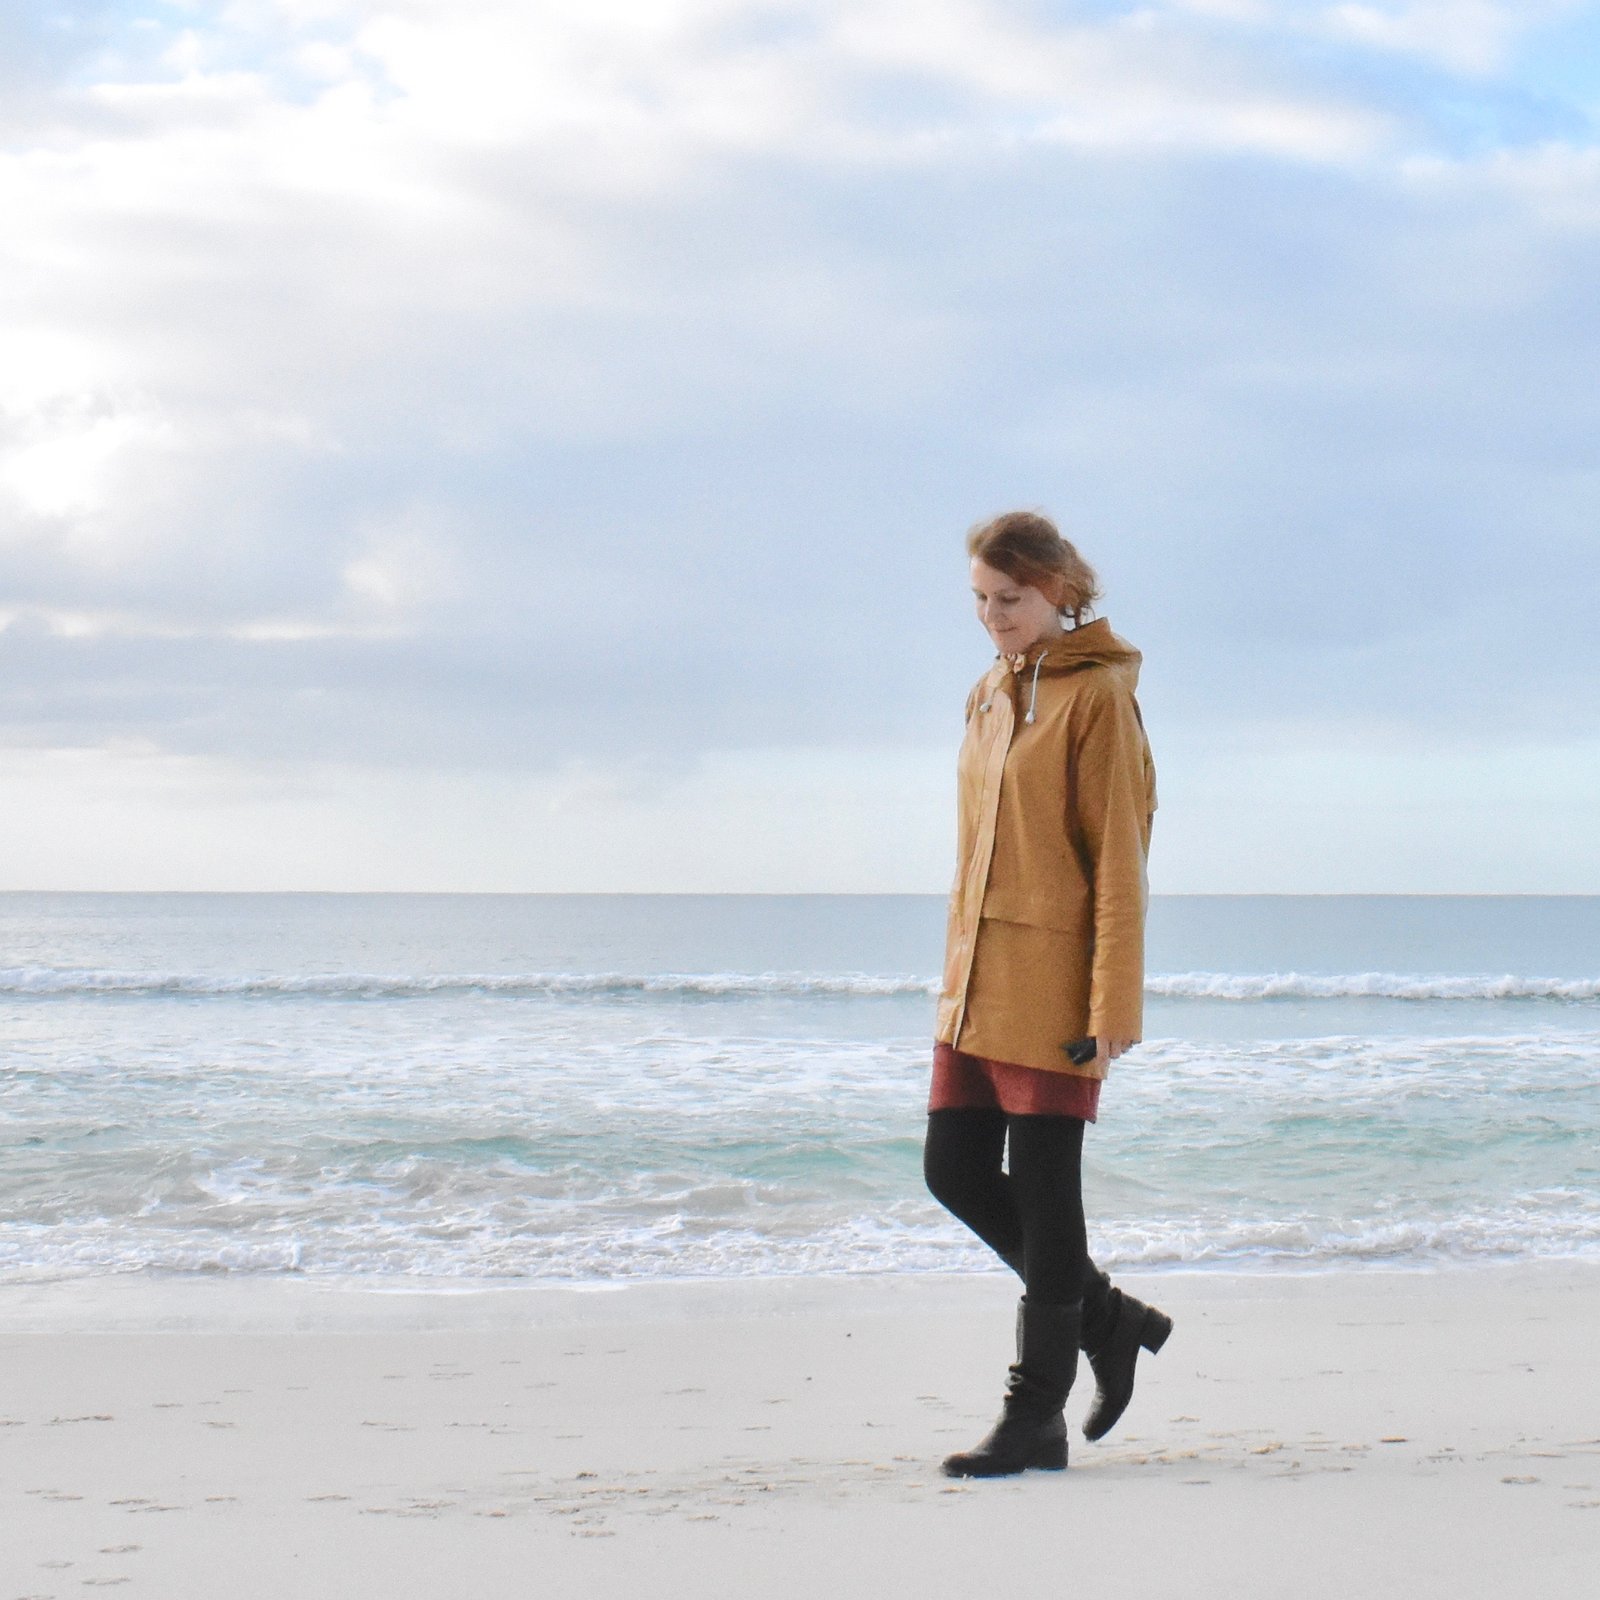
So, I’ve been wearing my pale pink Kelly anorak raincoat, made from a shower curtain, for several years now, it was undoubtedly my most worn garment of last year by a fair dinkum mile!  and it’s been such a trooper.  I love it so much, still!  However it is looking a wee bit shabby now… so I’ve been toying with the idea of a new raincoat for little while.  Getting nice waterproof fabric is quite a challenge in Perth, you come across it so rarely and I was wondering if I’d have to brave the scary gamble that is Buying Off the Internet.  Then I happened to be browsing in Homecraft Textiles during their yearly 50% off sale, and unearthed this gorgeously mustard-coloured waterproof fabric.  The colour was particularly exciting.  Something that actually suits me? that’s not black, or navy?!!!   Take my money!!!

Having said that… it’s not the most wonderful raincoat fabric in the world and I had struggles APLENTY  but more on that later.

Patterns!!  I loved the Kelly anorak pattern, and it did work really well for me as a raincoat, however I have this maybe erroneous belief that a raglan sleeve is better suited in a raincoat… I think that a rounded armscye seam could lend itself to a higher chance of leakage.  I could be totally wrong there though, but I just think it anyway.  I’ve been looking out for a good, raglan sleeved jacket pattern that would lend itself to being a good raincoat, but to no avail.  So I made my own pattern.  My previous, blue, raincoat was a pattern I’d worked out for myself; inspired by a cheapie old RTW one that I’d bought for Tim when he was a young ‘un, and which I’d inherited down the track as he grew out of it.  I devised some rather unusual pockets for it, and actually totally loved how they worked out.  I dug out the pattern, made the modifications to bring it into line with the shape I wanted for my new raincoat.  Everyone’s heard of the famous FBA… well I have no use for a full bust adjustment, but in a raincoat I could definitely use a FPA.  What is that? a Full Ponytail Adjustment, of course!!  I have pretty much never had a raincoat, rtw or me-made, with a hood that accommodated a ponytail comfortably.  The hood is always pulling back off your head and exposing your forehead, which is annoying.  I’m happy report that this hood is so far perfect!

I’d originally bought some soft tulle to line the raincoat.  I’d managed to get some soft netting to line my first, blue raincoat and it worked a treat, and I wanted something similar for this one.  But the tulle was horrible; just not soft enough and too scratchy against my sensitive snowflake skin after all, so I’d ended up ripping it out.  The raincoat is actually fine without a lining, because the inside of the mustard shell is a rather nice, soft woven stuff.

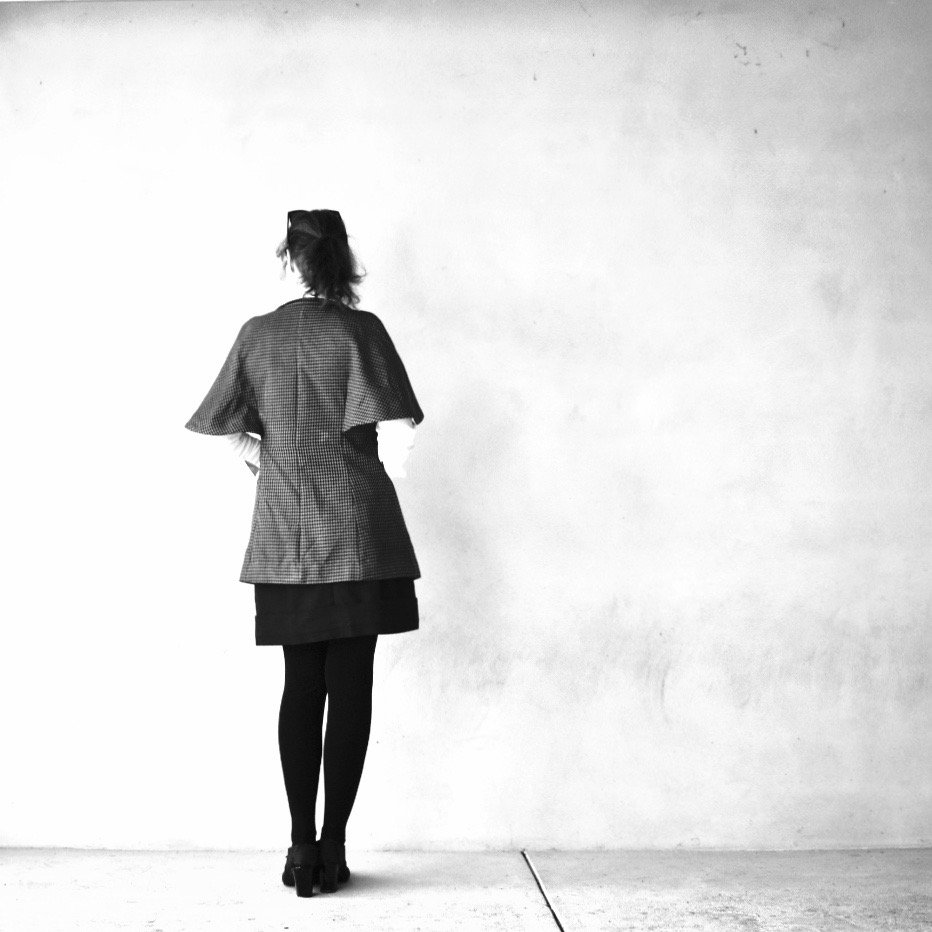
the white sports fabric seen in the pic is a ventilation panel, hidden underneath the upper back flap

The outside is laminated, actually the fabric could best be described as a lightweight, thinly laminated, woven cotton.  The plastic laminate was obviously downright hideous to sew.  For one thing, it had quite a sticky waxy coating on the laminate, which gummed up the needles, and the eye of the needle, making re-threading the needle a freakin’ NIGHTMARE.  I wiped the laminated surface with a lightly soapy solution before sewing, which did help a tiny bit, and occasionally wiped down the needle too, but it was still pretty bad.  When it came to top-stitching, well there was absolutely no way the laminated side up was going to move underneath the foot at all.  I cut strips of tissue paper to stitch over, and tore them away afterwards; fiddly, but not a difficult thing to do (above).

seam sealing, also a view of the fabric’s wrong side

Sealing the seams; I used a no-name seam sealer from BCF, a local boating camping and fishing store.  It’s supposed to be used for tents and sails I think, but it works beautifully for raincoats too!  I used a cheapie old paintbrush to work it into the stitch-holes, and seal everything thoroughly.  Since then, it’s been out in three very heavy downpours, and I’m happy to say has stood up to the task beautifully!  All the traumas, and it’s been worth it!  It’s early days, but I think I’ve found my new favourite wardrobe item!

Want to read all my tips for making a raincoat?  They can all be found in my original raincoat making post, here.

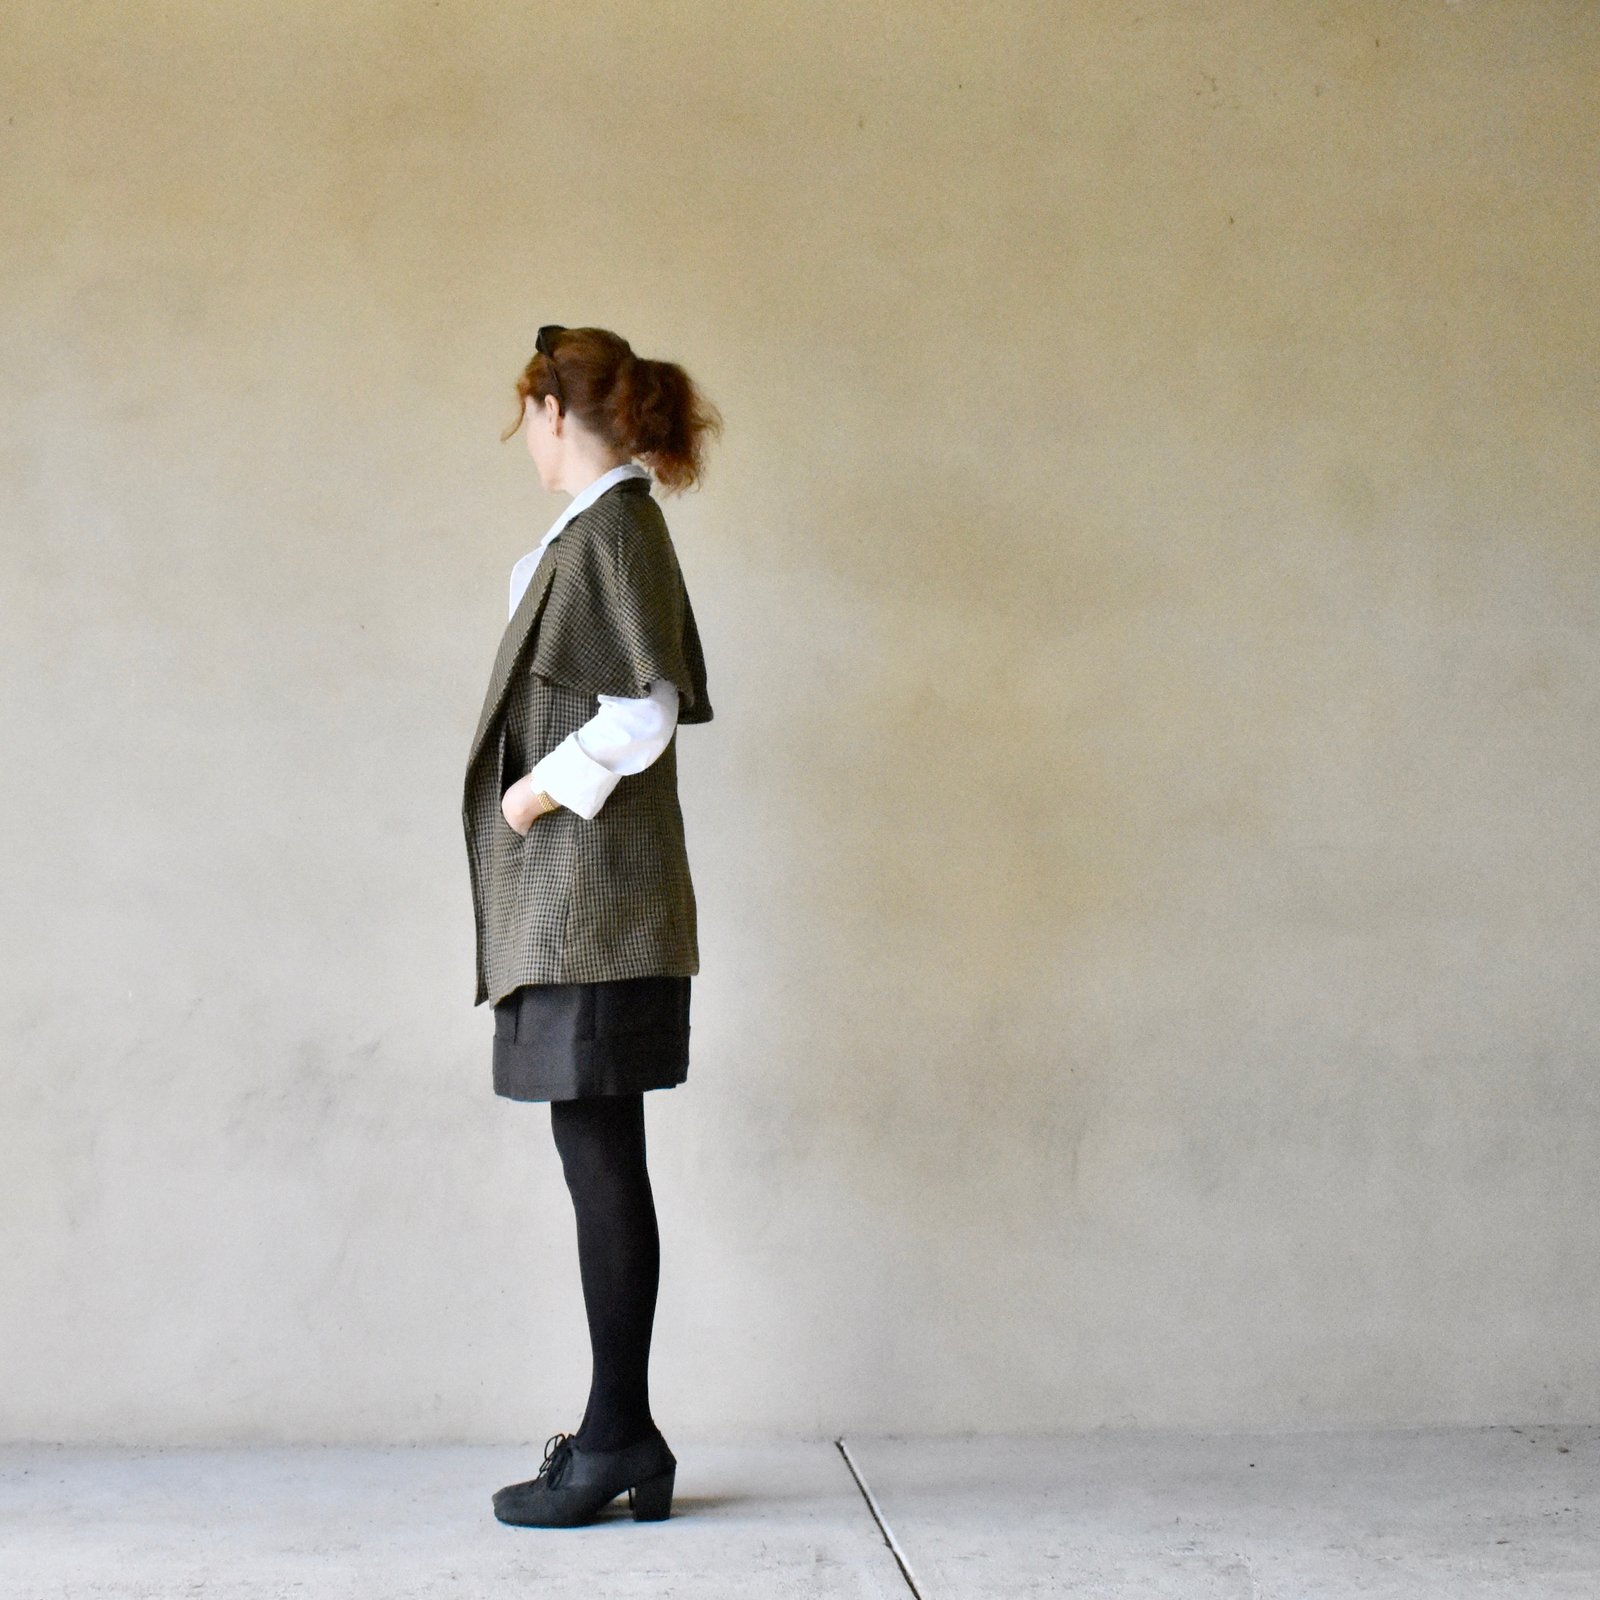
Oh, and I made a new little skirt too,  but it’s not nearly so exciting.   Well, I had a small piece of coffee-coloured, wide-wale cotton corduroy, leftover from when I made this dress, and when I was dyeing the fabric for my Sherlock Holmes jacket I’d also tossed in the coffee-coloured corduroy.  And it came out a nice shade of golden-mustard.  So I managed to squeeze out this little skirt.  It’s not made up to any real pattern really, I basically put an invisible zip at centre back, held the front and back up to myself and pinned the side seams and where I wanted darts.  Pretty lazy genius, huh?  It was a very small piece of fabric, and the resulting skirt was too short for a hem.  I edged the bottom edge with a chocolate linen bias-cut strip to finish, and the skirt is lined with pale golden polyacetate lining fabric, itself also leftover from something else, can’t remember what.

And that’s it… until next time!

Later edit: this skirt now has pockets!

Details:

Raincoat; my own pattern, made from thin, plastic-laminated cotton
Skirt; my own design, dyed cotton corduroy
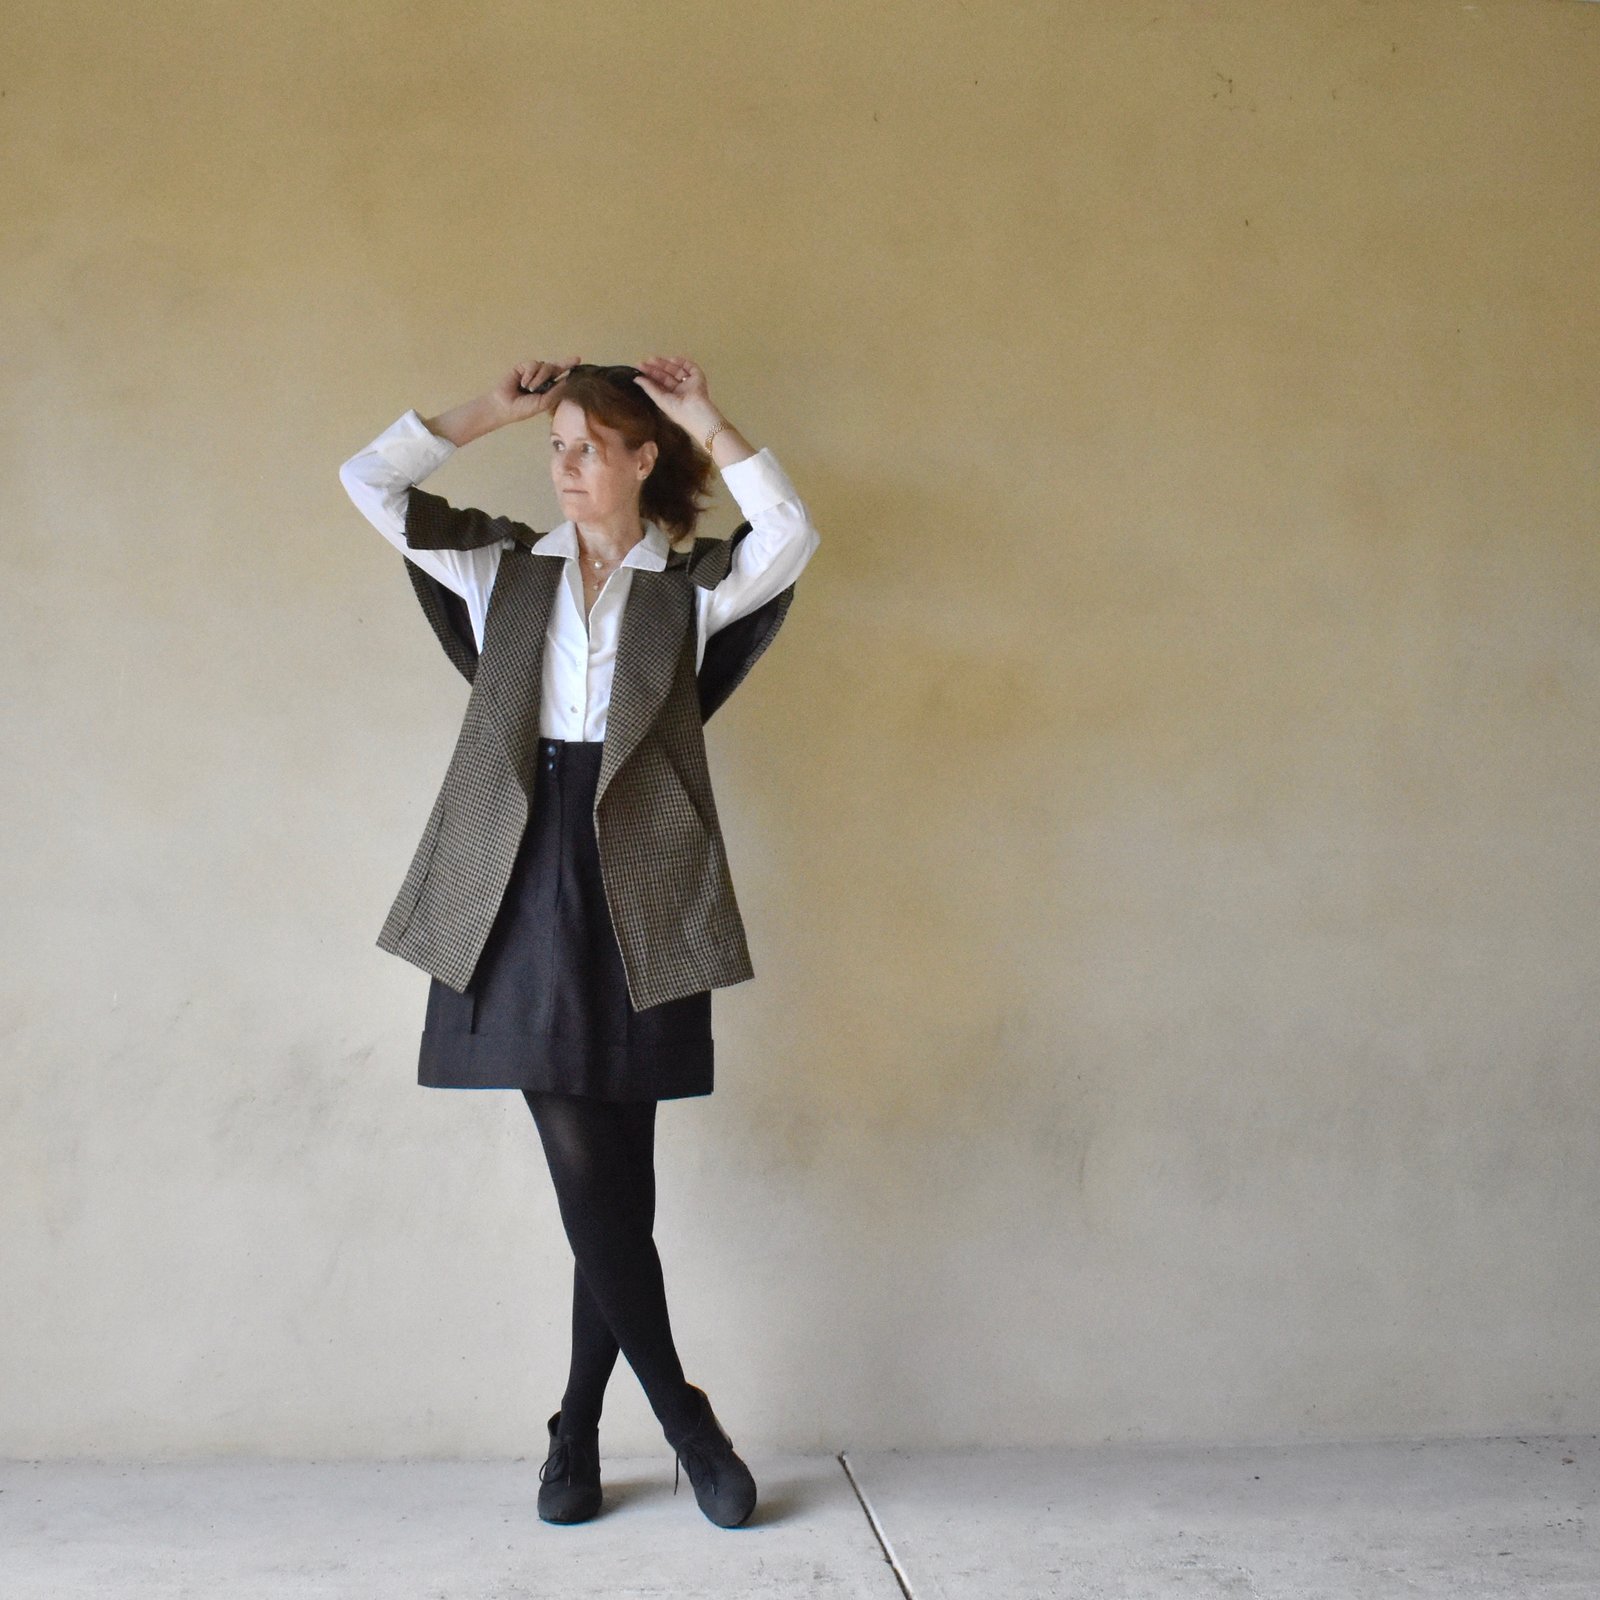
Bobbly top (just above); Burdastyle 04/2014;111, details here
Tights; made by me, details here and my tute for making your own custom-fit tights pattern is here
Boots; Roberto del Carlo, from Zomp boutique

pinterestmail

more soap…

So, I’ve been making some more soap, trying to develop a few new recipes of my own.   Ever since my first go at soap-making, I’ve perused the oil selection at Coles with a lot more interest… and came home with a few new goodies to experiment with.  Specifically; macadamia oil and avocado oil.  Following the good advice a few kind commenters on my previous soap-making post,  this time I used a soap calculator to help formulate my quantities, thank you Becky and Barb! for letting me know there was even such a thing!  My recipes also contain different proportions of the other oils I already had, olive oil and coconut oil.  I’ve been seeking out the paler yellow olive oil now too, because I wanted the natural colours of the new oils to be predominant …


And since I’m providing recipes here that include the highly toxic and corrosive compound sodium hydroxide, here are a few very important safety tips…

WHEN HANDLING NaOH, ALWAYS WEAR RUBBER GLOVES, PROTECTIVE EYEWEAR AND CLOTHING THAT COMPLETELY COVERS YOUR ARMS.

  • Never let it get into contact with your skin.  When mixing into water, work outside as much as possible so as to avoid inhaling the fumes.  Never under any circumstances put your face over or near the container you are mixing it in.
  • Ensure you are not going to be disturbed for the time you are working with it. Keep all pets and children well away.
  • If you must take your lye solution inside, keep all windows open and work underneath a range hood with the fan on full blast.
  • In the case of spills, clean up with copious amounts of water… i.e. a garden hose if outside.  If you do happen to splash some on your skin, IMMEDIATELY put the affected area underneath a tap, and flush with water running fully over the area for several minutes at least.  If you can see a visible burn or the area continues to sting and burn after copious flushing then seek medical attention immediately.  NaOH is not to be trifled with!


Making your lye solution; FOR ALL RECIPES:  When mixing NaOH into water, put the full volume of your cool or cold water into a clean, thick sided, glass container that has no cracks, and can hold at least twice the volume of the water you are working with.  Add the NaOH to the water, a little at a time, stirring with a metal spoon.  You can stir with a wooden spoon, but you may find the solution gets a little  discoloured with tannins from the wood.  NEVER add water to NaOH, ALWAYS ADD NaOH TO WATER.  This is because as NaOH dissolves in water it generates heat and fumes, and is potentially explosive.  If you have trouble remembering which is the correct way to mix the two: when I was at school we learnt this little ditty… and the exact same principle applies to working with a strong alkali like NaOH.

(Picture of a gravestone)

“May her rest be long and placid,
she added water to the acid;
The other girl did as she ought-er,
and added acid to the water”

Substitute alkali for acid, it’s the same situbar.  After the solution mixes clear, it will be quite hot.  Do not seal the container.  Supervise it until it cools before using.


Moving on…. here are my recipes:

Macadamia Soap  (7/10)

I absolutely love the dreamy cafe-au-lait colour I got with this mixture!  whether it’s horrible to use or not I do not know yet, but will definitely update here and write a little review when it’s cured and I use it.

200g coconut oil
500g macadamia oil
300g olive oil
300mL water
137g NaOH

See the above safety note for handling and mixing NaOH. 

Gently heat the coconut oil until it is liquid, then add the other oils.

Outside, carefully add NaOH to the water, a little at a time and stirring.  Let it sit for a few minutes, uncovered and under constant supervision, until jar feels lukewarm and no longer hot, and fumes are no longer visibly emanating from the surface before mixing it into the oil.

Pour NaOH solution all at once into the oil, and commence stirring with a stick mixer not running.  After a few minutes of this, turn the stick mixer on and keep “pulsing” and mixing for about 10 minutes or until the mixture becomes visibly “gelatinous” in appearance.

This mixture took a lot longer to set than my previous batches… at least 48 hours before it was hard enough to remove from the moulds without distorting them at all.  I’m hoping this means it will be a really nice, moisturising soap  🙂

This recipe has larger quantities and so obviously produced a lot more soap than my previous recipes, I had an old Brie container and used this to mould the excess into a nicely oval-shaped bar of soap, but it was still overflowing and these bars are each quite a bit bigger and thicker.  I chopped up some macadamias and sprinkled them on top for both decoration and as an identifier down the track, seemed like a good idea at the time! but then I decided I don’t like how it looks on top of the soap and will think of something different in the future…


Avocado Soap  (5/10)

250mL avocado oil
400mL olive oil
110g coconut oil
200mL water
90g NaOH

See the above safety note for handling and mixing NaOH.

Exact same procedure as for the previous recipe…

This mixture got to the gel stage a lot more rapidly than the macadamia soap.   The avocado oil was quite a strong natural “grass” green in colour, which gives this soap its creamy yellow-y green colour.  This is the entire batch from this recipe:  avocado oil is quite expensive and the bottle a small one, thus the smaller quantities.

I just used my 24x24cm cake pan lined with baking paper, there wasn’t enough mixture for the silicone moulds too.  The bars are quite deep though.

Just a note on how I’m choosing these quantities, it’s pretty easy to let the olive oil just take over your recipe since it’s so cheap compared to other oils, however I wanted to keep the “special” oil up there as a major-ish component and not just a token one!   While for sure, costs are something you always want to consider, I still want to experiment with the more interesting oils, like macadamia and avocado and am quite excited to use both these ones once they cure too!

this is the full quantity of soap produced from this recipe… yes, the avocados are there for pretty, illustrative purposes only and are not required for the recipe!

Update:

I’m rating the Macadamia Soap a good solid 7/10; it’s nice soap to use and I probably will make it again.  The macadamia oil makes it a little more expensive to make than some of the others which I why I’m rating it down just a little.

The Avocado soap is getting a slightly low 5/10… I mostly likely won’t make this again.  The avocado oil was quite expensive, that pretty green colour faded as the soap dried, leaving it a regular old pale yellow colour, and also I just wasn’t keen on the, albeit subtle, fragrance of this soap.  It just smelt a little on the…. “foody” side, is the only way I can think of putting it!

My other soaps, pure Olive soap (4/10), Coconut soap (7/10) and Buttermilk soap (9/10) are blogged here

pinterestmail

Elementary, my dear Sherlock

Yes, I know; a complete mis-quote of an already mis-quote… *braces oneself for outraged Holmes enthusiasts*

But wot is this new thing I’m wearing ‘ere then?!  Is it a jacket…?  no, a cape…?  some tweedy, distinctly Holmes-esque thing, somehow exuding English-ness, an air of briskly strolling in the country, of hounds-at-dawn, roaming in-swathes of fog and mystically swirling mist, stalking the streets of London or out on the Baskerville moors?  Fittingly, I’m accompanied here by my very own hound, who while certainly a fearsome and diabolical creature at times, is however sadly lacking a Baskerville lineage.

So, I was mindlessly browsing Le Internet, checking out new-to-me pattern companies, something I am wont to do, randomly, late at night and way past my bedtime,… and clicked Add to Cart on the Cape-Sleeved Jacket by Trend Patterns.  Followed by… Purchase.  So daring!!

It’s a rather interesting and lovely style, not something I’ve seen anywhere else: a longline open jacket with notched collar and interesting “sleeves” that are more like an intriguing hybrid of sleeves and cape.  I searched my stash for a suitable victim, and unearthed a grey/black houndstooth-y check suiting; given to me yonks ago by ?I think? Mum, though I’m not totally sure.  It had exactly the right weight and style for this design, but the colour was pretty dead and cold and flat and looked absolutely terrible on me… so I squandered more time than I care to admit to, attempting to dye it.  It was a rather large piece, so I’d started out leaving it to soak cold in a large tub of yellow dye.  This had almost no effect, so I added orange for synthetic fabrics.  This had a tiny teeny little effect.  So then I dried the fabric, and cut out the jacket pieces, which made for a smaller bulk of fabric for the dye pot, and boiled it all up with the same dye mix.  Finally; SUCCESS!!!!

helping…

from left; original colour… after soaking… after boiling

The new shade of tobacco was rather warm and pleasing, and deemed acceptable.  Of course the big problem about dying pieces, already cut up; as opposed to one single piece of fabric, is that the pieces frayed a bit, and also got stretched out and distorted somewhat in the boiling/dyeing process, and so I’m not 100% confident that my final jacket is all that perfect or beautiful… but I did my best!  carefully steaming everything back into the shape of the intended pattern piece.


Lining;  fully lined with chocolate polyacetate lining fabric, from my stash, probably originally from Fabulous Fabrics since it’s a really nice quality.

below; see how the front armhole is open right up to practically shoulder level? I think it’s worth pointing this out since I actually had no idea it was like this from the line drawing and remained ignorant right up until it came time to add the cape facing…

That’s not a criticism btw, just an observation.  I really love my new Sherlock Holmes jacket, and I really loved making it too; but I’ve admit; it was not a particularly easy project.  Even given the fact that I complicated things for myself a. dyeing and b. deciding I absolute HAD to have in-seam pockets – which were a big success in the end if I say so myself.  I’m so glad I put them in.  Actually I can’t imagine a jacket without pockets of some kind.

How did I put in my pockets?  so I remembered to take a few pictures but not many, so hopefully my written explanation will suffice…  I cut the front armhole piece (below, at left) and the front panel (below, at right) as pictured; and in addition, a pocket opening facing piece (below, middle) with the same upper edge as the slanted edge of the front panel (at right)  I also cut a pocket lining (not pictured) from the same chocolate polyacetate lining fabric used throughout the jacket…  it’s the same size and shape as the pocket bag extension (at left) and with a slanted top edge equivalent to that of the pocket opening (at right)…

the pocket opening edge is that slanted edge showing out from under the square inner edge of the paper pattern piece, and that little extra piece is the pocket opening facing.  The facing is interfaced (see below), stitched along that slanted edge leaving a 1cm free at either edge of seam, and under stitched.  I cut a pocket lining using the same chocolate lining fabric that lines the whole jacket and stitched this on to the lower edge of the pocket facing.  Then stitched the pocket and pocket linings together around the long curved pocket edge.  The remainder of the jacket construction proceeds as normal, and the pocket is nicely hidden away between the jacket outer and lining

So; what was tricky about making this jacket…?  well, the steps are illustrated with photographs, not drawings; so if you’re the kind of person who often goes on the illustrations then it’s not always clear which pattern pieces or which seam you might be looking at in this photograph or that one….  and there are 27 un-numbered pattern pieces…  Maybe I’m just dumb, or losing it or something, but I’ve been sewing clothes for myself for over forty years and there were bits where I was scratching my head and had to read and re-read over a couple of times to “get” it.

It’s also pretty important to mark the marks, notches and dart lines carefully and securely.  As far as this project goes, this is where my brilliant plan to dye my fabric pieces fell apart a bit since a lot of these little marks were dislodged and lost while dyeing, and notches disappeared in fraying edges, and it was pretty hard to re-instate everything accurately.  To be honest, there were several times I felt like heaving the whole lot in the bin and starting over anew, with fresh new fabric, particular since I hadn’t even liked my fabric all that much in the first place!!

I think numbering the pattern pieces would have been a HUGE help, and then to use those numbers in the instructions.  Another thing, the instructions are…. kinda sparse.  The term “bag out” is used several times …  I’ve always been a little thrown by the term”bag out”.  I mean, I know what it is… basically just another way of saying stitch the outer and lining layers together.  See, I grew up under the tutelage of the long-term pattern companies like Vogue, McCalls and Burda; and “bag out” is not a phrase that ANY of them EVER use, as a rule.   Also, “bag out” is incidentally Australian slang for picking on someone, like rudely giving them a really hard time, so seeing it pop up in sewing instructions is always a moment for pause 😉

After all this; I actually quite happy with how my jacket turned out, and am even little keen to make it up again.  I think my attempts to dye the fabric just made the project a whole bunch harder than it needed to be, and I’d like to give the pattern a second chance, and to do it properly, make a really good and proper tailoring job of it next time.  I would also like to add a few more pockets, to the inside and the lining, like a mens’ suit jacket has.


Details:

Jacket; TPC13, the Cape-sleeve Jacket by Trend Patterns, grey tweed overdyed with orange dye
Shirt; the Closet Case patterns Carolyn pj shirt, white cotton, details here
Skirt; Burdastyle 10-2010; 136 (the Karl Lagerfeld skirt), in black suiting, details here
Tights; my own custom fit pattern, details here
Shoes, designed and made by me, details here

My cape-sleeve jacket feels so very very Sherlock Holmes to me that I couldn’t resist just popping over to London for a more appropriate photoshoot location….

jk, of course.  Hurrah for the wonders of photoshop!

pinterestmail
Switch to mobile version
↓