Tag Archives: Raincoat

water lily dress, a raincoat, and a stripey shirt

hello!

I’ve been making a few more things lately…

first up; a dress!  I bought this screen printed linen a few years ago from the Injalak Arts Centre, the design is Mandem (Water Lily)  by the indigenous artist Eva Nganjmirra.  The pattern I used is an old favourite by now, Vogue 2900.


Something charming about this screenprint, I discovered; was the designer’s “signature” of sorts…of course, I had to carefully cut around this and place it some where semi-prominent.

I decided the pieces had to be highlighted in some way more than just mere seamlines, and utilised a method I have written about previously here… namely this is a bias cut strip that is inlaid over the pieces before joining together.  I had a small length of mustard linen, leftover from this dress, that I used for this purpose.

Unfortunately there wasn’t enough to do every single seam and edge like I have done in previous examples of this method but I just did as many of the more prominent bodice seams before I ran out of it.

I know I’ve used this pattern quite frequently but it really is such a beautiful dress design that I don’t see myself every tiring of it any time soon.  Of course I really should branch out more and I’m resolving to try more new patterns this year and not fall back so often on the old favourites.  In the meantime though, some of my recent as yet unblogged projects have failed this resolution already whoops.

I think my only, somewhat trivial criticism of this design is its lack of shape in the waist area.  I have a pretty high waist to hip ratio that isn’t really suited to this drop-waist design however I still stubbornly persist in wearing it.  Sometimes I think I should try to modify it to look less “boxy” but the bodice pieces are so beautifully proportioned in themselves I’m not really game to fiddle about with it.


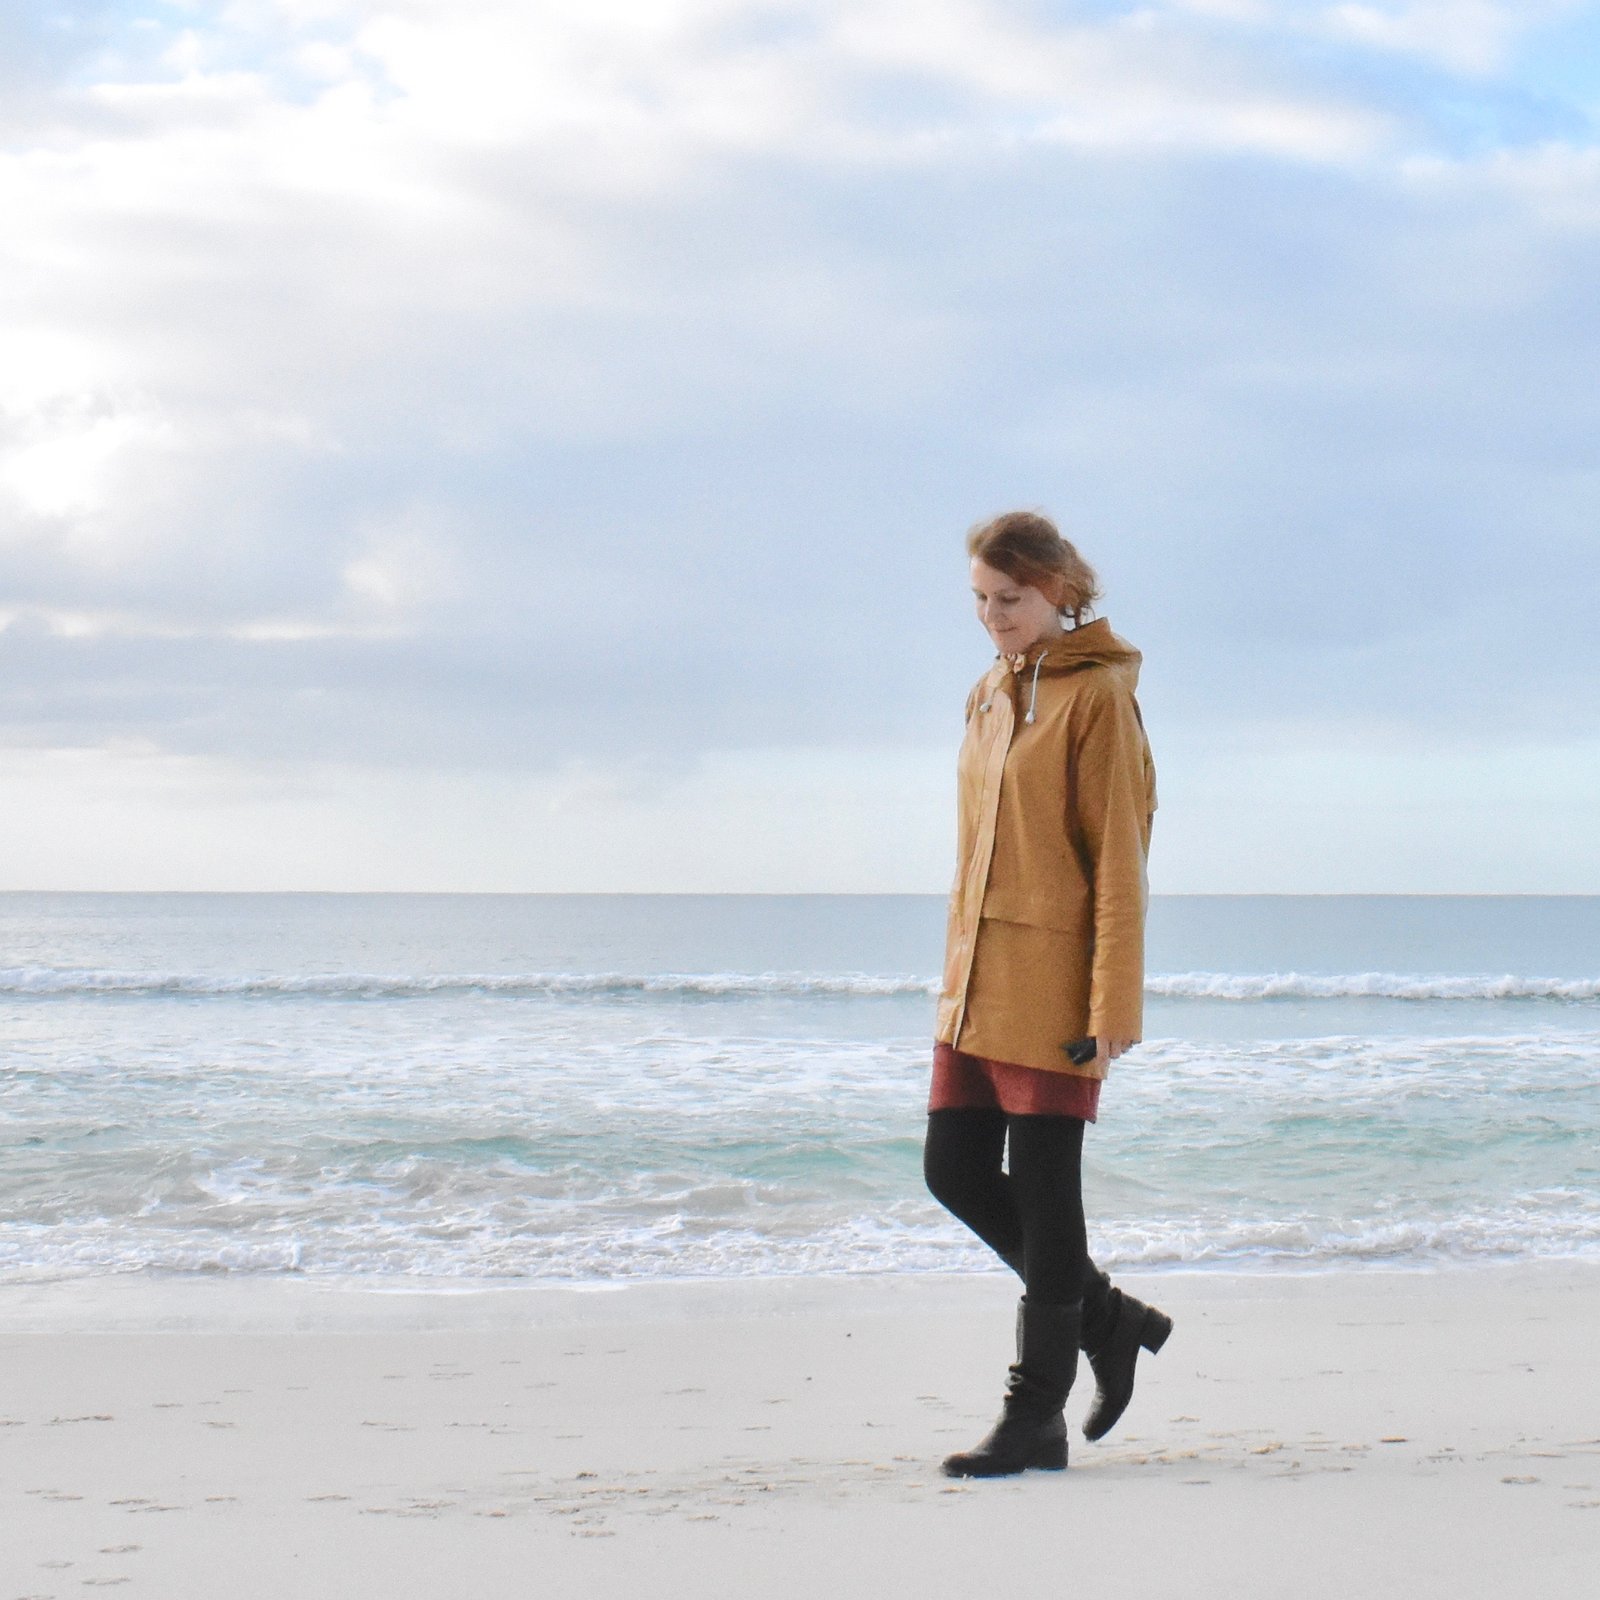
I wore this along with my me-made mustard clogs out to a meeting with friends recently and managed to grab a quick street shot.  I’ve always liked to get a real world photo the things I’ve made if possible, but it’s sometimes difficult.  If the coast is clear, like this time, I can quickly prop my phone up against my bag on the footpath and take a sneaky timed photo!

My little grandson G randomly ran up to join my while I was taking my more staged photos, which was happily fortuitous since he happened to be wearing a little T-shirt I made for him recently using leftovers from another, s yet unblogged, project to appear here soon.  Once I get my act together!

I used Butterick 5510, a great little pattern that I should probably buy in a bigger size now!  The blue and white striped jersey was tossed out by my friend N during her fabric purge recently.  It’s quite nice stuff, if you don’t mind the suffering that comes with matching stripes in cutting and piecing.  Fortunately I don’t mind this toooooo much.  Maybe just a little, but only if it’s just every now and then.

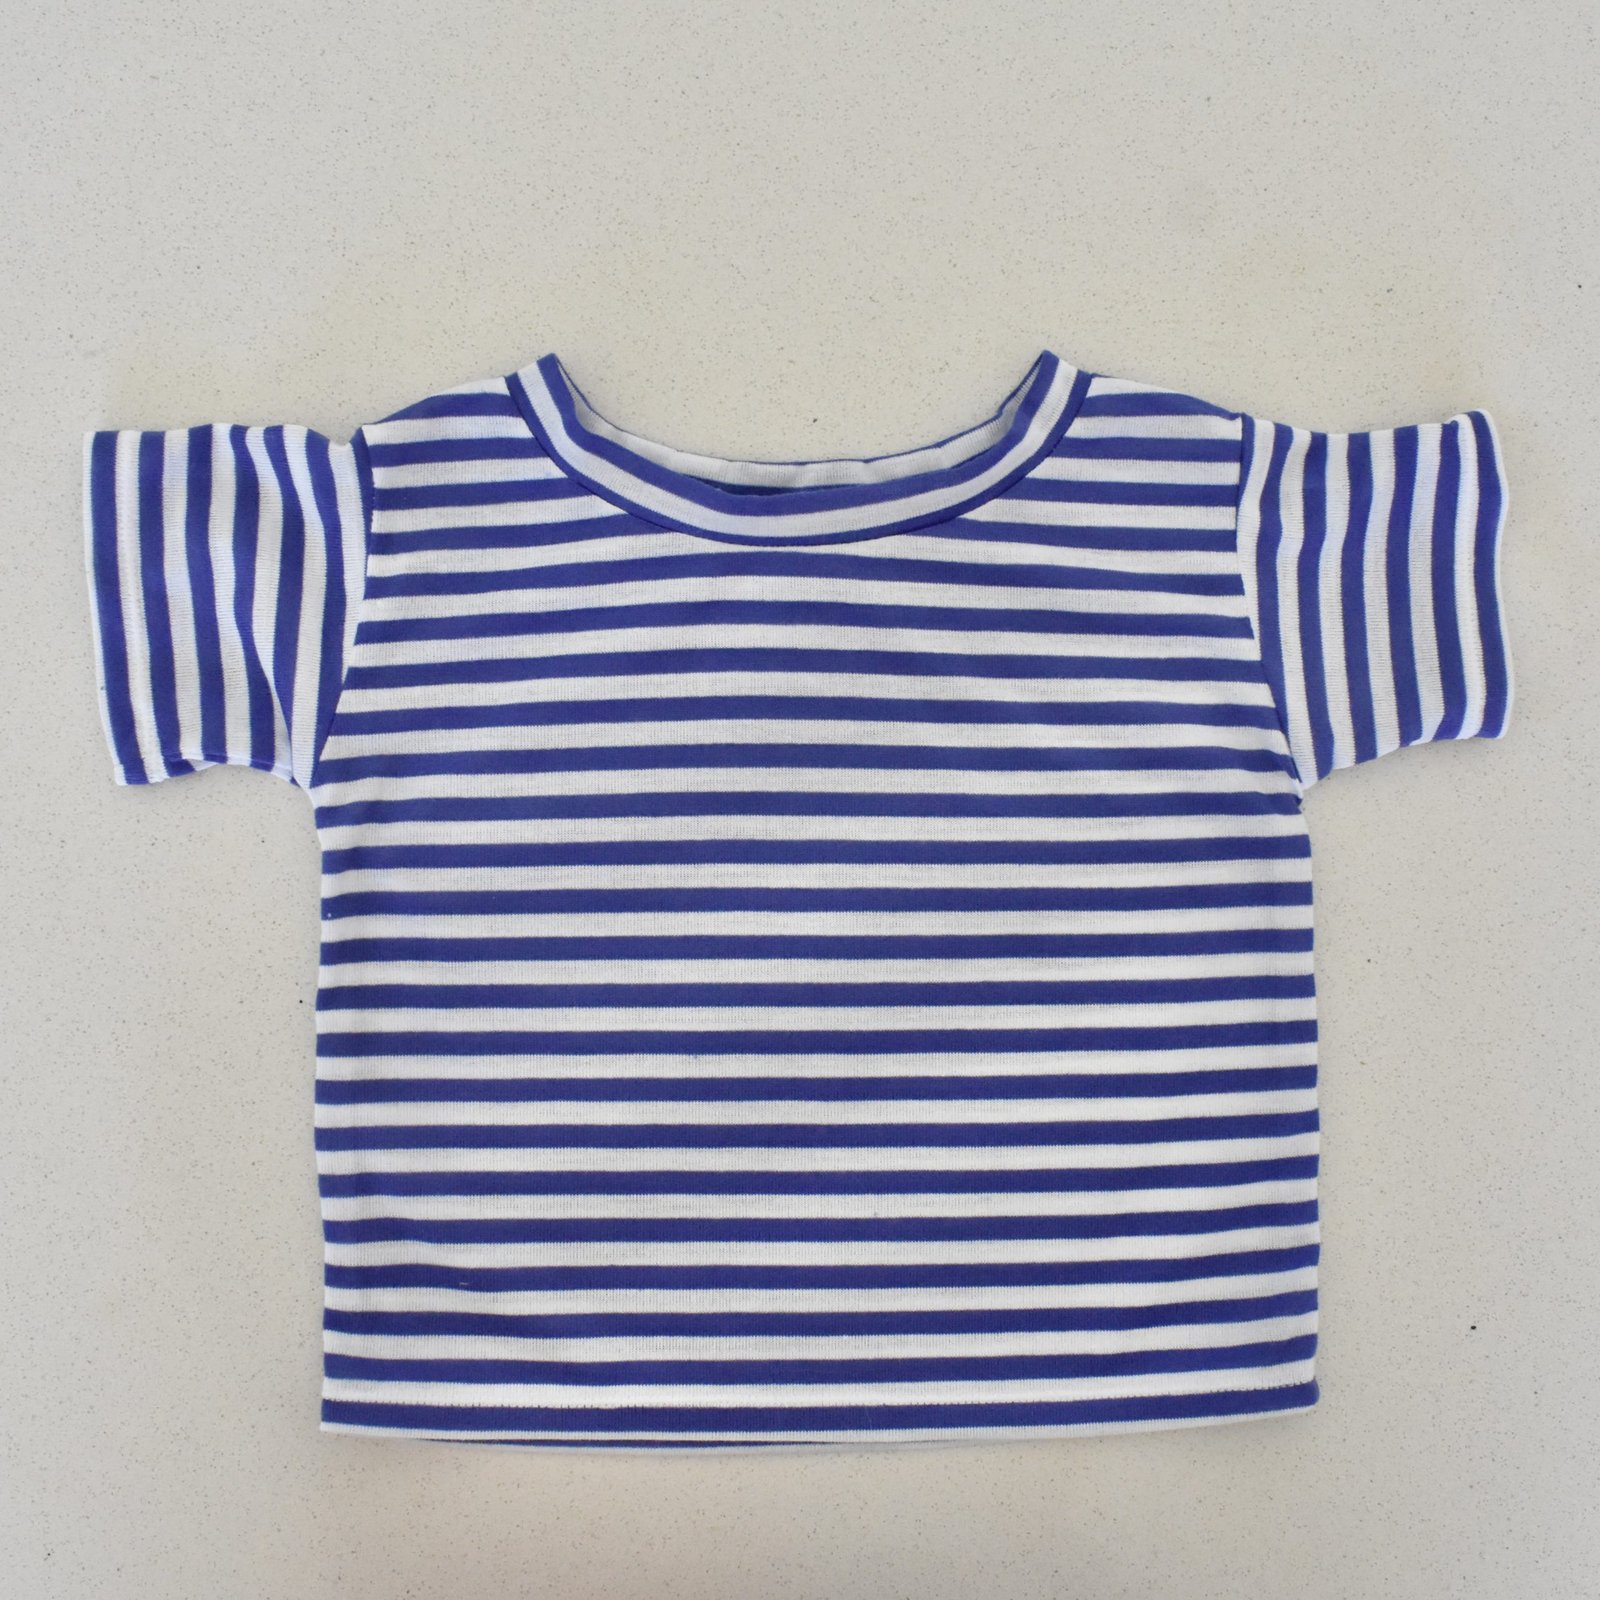
I lenthened the T-shirt considerably because it’s really way too short otherwise. I don’t know if all my kiddies are just super tall or not but I’ve always found commercial patterns to be ridiculously short and wide.

Please note careful stripe matching.  Oh, another problem with this pattern was the rather small neckline.  After cutting it and subsequently realising it was actually pretty tiny, I recut the neckline, cut some extra neckline edging and pieced it.  One join is pretty good, the other less so… I’m pointing the two out here.  Hopefully they’re not too terrible!  I’m pretty sure G doesn’t mind though, and at least it fits over his head!

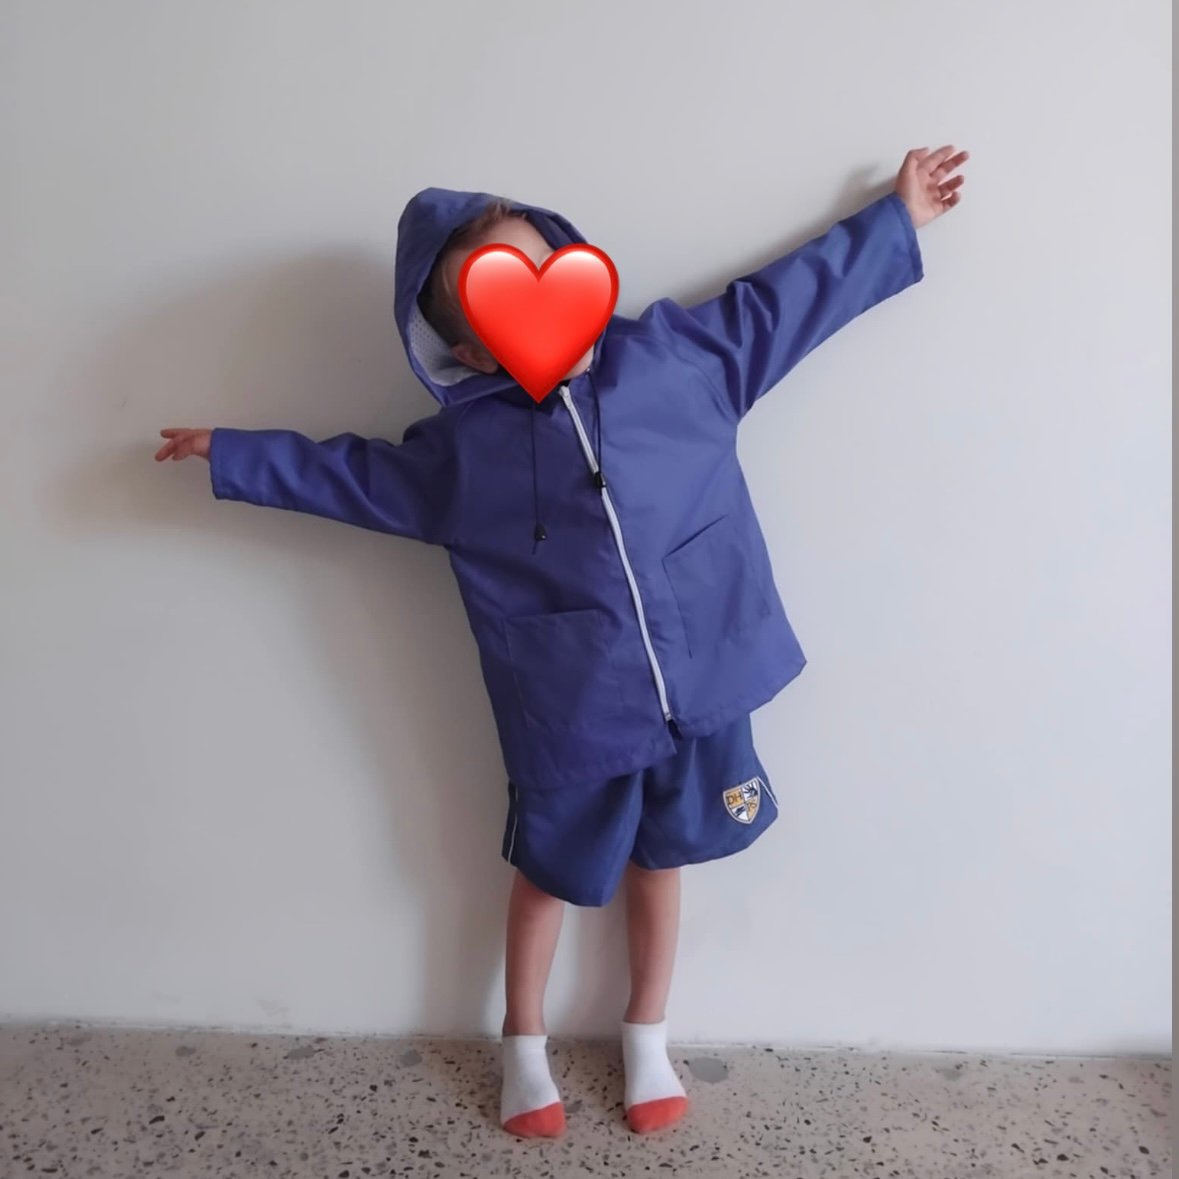
I also some leftover raincoat fabric from when I made my sister in law Sandi’s Mundering raincoat, back here; so I drafted and ran up a new raincoat for T.  He’s grown out of his yellow one, blogged here, which will be passed on to G this year.  I lined it with the breathable sporting fabric, a length of which I bought for raincoat vents years ago.  The zip, cord and eyelets happened to be in my stash already too, hurrah.


The pockets are just patch pockets. All seams are sealed on the underside using seam sealing wax that I bought for this purpose years ago from the camping and outdoor outfitter store, BCF.

I think he likes it!  He looks pretty cute in it anyway, and I think it turned out a pretty good fit considering I drafted it just using one of his T-shirts.  Phew!


pinterestmail

a sweet little raincoat

I made a cute little raincoat for my grandson Theo; and I think he looks so adorable in it!

I used the leftover remnants of Waterproof Oxford from my own Mundaring raincoat, originally bought from the Remnant Warehouse; and borrowed one of his hoodies to gauge the size he would need…

I actually based the design on our Mundaring raincoat pattern too! just a much simplified version with a zip up front, sans plackets; the hood has a self facing rather than a separate one, and I just put simple patch pockets on the front rather than the more complicated, weatherproof zipped ones on our Mundaring pattern.  Also, his has no weather flap on the back, just a straight back.  The length was determined by the length of the zip!

I sealed the seams using a wet-weather gear sealing wax stick, sourced at BCF.

It is fully lined with a soft white cotton jersey, for comfort and warmth, and added a white linen hanging loop.  All the raw edges and seams are hidden neatly away between the shell and lining layers.

It was so cute when he put it on! he toddled off to his toy box and retrieved a little wooden elephant puzzle piece, and we spent the next fifteen minutes putting it into a pocket and taking it out again.  As it turns out, pockets are utterly fascinating!

I estimate it used around 0.5m of the leftover raincoat fabric plus about the same of the white cotton jersey too.  Or 1m in total …   So in my dumb little #use30 challenge; I’ve used 23m of my stash.  Just 7m to go!

pinterestmail

Mundaring raincoat

Hurrah!  Cassie and I have finally finished making our newest pattern!  please give a warm welcome to the Mundaring raincoat pattern, currently for sale in our shop, the linky dink to which is over to the right in my sidebar there… or you can just click on the this pattern picture just to the right here.

So, the Mundaring is a pattern for a loose-fitting, below hip length raincoat with raglan sleeves, large front zippered pockets with inbuilt weather flaps, a back weather flap covering a hidden vent panel, roomy hood that can be tightened with a hood cord.  Closure is by an open ended zip, hidden underneath a front band.  The pattern includes separate pattern pieces for an optional lining with additional inner breast pocket, and an appendix with tips for weatherproofing the seams of your raincoat.

I know it’s taken me a long time to finally finish getting this together, I first made this design for myself back in 2012 when I made my blue raincoat

this is actually a great little raincoat and I love it and still wear it!  Then I made a pink and blue colour blocked version for Cassie, improving on the design a little more.

Then I fine-tuned the design to be just about exactly what I wanted, albeit in unlined form, when I made my mustard one

this is when I got actually got serious about turning it into a proper pattern and studying the grading criteria.  btw the mustard one has been a really great raincoat too, and I still wear this one when the colour of it is what an outfit requires  😉

In testing the design I’ve made multiple Mundarings since that time, several in each of the five sizes each… plus another “proper” one for Cassie in this chic, pale grey pleather.  And finally, the cheerful yellow one for myself, and then a lovely blue one for my sister-in-law S.

Doesn’t she look gorgeous?  I’m so grateful she agreed to be my model again!

Both my latest are made using a fabric called Oxford Waterproof that I bought from Remnant Warehouse.  btw, NO, I am not getting free fabric or recognition or anything for promoting it, and these are not affiliate links even, I bought this fabric and am recommending it because I am genuinely a fan and think it is the perfect fabric for my design!

My raincoat is this colour, the Gold colour-way, and S’s is the Royal colour-way.   I fully lined both these raincoats using matching polyactate lining fabric from Fabulous Fabrics, and both of them have white zips and white cords and cord stops, which I think looks really nice  🙂

I sealed the seams on both raincoats using this stuff…

I selected it because it is an adhesive sealant with high flexibility, and bonus that while comes out of the canister kind of cloudy it then dries to be quite translucent.  In my  opinion it’s absolutely perfect for this purpose!  I’ll update this post with the exact product as soon as I can, and am truthfully kicking myself right now I did not take a picture of the canister before (doh!)

The pattern is for sale in pdf form here… we are working on getting a paper pattern up and running, and will update the shop with a paper pattern once we’ve got all our ducks in a row vis a vis that.  But in the meantime… here is is!!  I’m so happy to finally have it out in the world!

Here are some of the specs!

Pockets?  Why, of course!

Details:

All raincoats; Carolyn & Cassie Mundaring raincoat pattern, in Oxford Waterproof from remnant warehouse
White tank top; my hand stitched Alabama Chanin tank top.. it was the first one I laid hands on in the drawer!
Jeans: Closet Core patterns Morgan boyfriend jeans, blogged here
White shoes; handmade by me, blogged here

pinterestmail

a raincoat for Cassie

Yes, I may be modelling it here, since maybe I stole it for a few days after finishing it, hehe, but this raincoat was always for Cassie and is now safely residing in her wardrobe, where it should be!  I ended up finally giving it to her a coupla weeks ago.  Luckily I had taken photos of me wearing it because it’s just not so easy anymore to take photos of her, now she’s moved out of home… *sob*  She popped over today for some Mum/daughter time and I asked her how it’s been.  She says it’s waterproof, it’s a good size to wear over regular winter clothes which is just what you want from a raincoat, and she loves it, all three of which are always very gratifying to hear!

Materials; So, I’ve had this beige pleather in my stash for aaaaaaaaages, so long that I barely even remember buying it! although I do remember it was from Spotlight.  I’m in a real stash-busting frame of mind lately, so TIME TO GET THIS STUFF MADE UP AND OOOOOUUTTA THERE!  It’s pretty hideous stuff to sew; slightly stretchy and with that “sticky-ness” of pleather so it doesn’t move nicely under the sewing machine foot at all.  I used strips of tissue paper for each and every top-stitching seam…  see here for my tips on sewing leather or pleather

Lining fabric from the deep stash; have no idea now whether I bought it originally or whether it was one of Mum’s throw-outs.  I used a slightly different beige lining fabric, also deep stash; for the sleeves.  All three zips, hood cord, cord stops and eyelets are all from Spotlight.

I couldn’t find the same seam sealer I’ve used for all my other raincoats; BCF is now stocking the above sticks of wax for the job.  I couldn’t help thinking they were basically candles without the wicks and maybe I could use one of the many candles I have already! but bought one anyway.  It proved not very easy to use, since it was quite “firm”, not really soft enough for the job; and  you have to rub it quite vigorously over the seam to get it insinuated into the stitch holes which seemed to stretch the fabric out a little.  Then, I tried melting it a little in a (real) candle flame, before dripping it over the seams, then eventually moved to softening the wax stick in the flame just a little before commencing to rub it in.  The last wasn’t particularly easy either, because the wax only stayed softened for about five seconds away from the flame before it hardened up again, and needed another “soften” in the flame; but in the end I decided this was the best way to get the wax well-worked thoroughly into the seam holes.

But it works! the raincoat is waterproof and that’s the main thing.  Though if I had a choice, I would probably choose the chemical seam sealer over the wax stick… actually I only just had a thought; I have some real beeswax somewhere, and wonder if this would actually work better?  It’s quite soft naturally and so might prove easier to massage into the seams….  something to think about trying next time!

Pattern; is my own.  I’ve made this up three times previously, my first go is here, my second, also for Cassie! is here, my third is here.  I’ve added little improvements and modifications each time I’ve made it up; this one is, dare I say, the nicest yet… although it’s always had the most awesomely practical and deep pockets, if I do say so myself!  I gave this one a big upgrade when I lined it fully with golden beige polyactate lining fabric.  This makes it quite delicious to wear, and makes me wish I’d properly lined my own raincoats with something more traditionally “dressmaker-y” like this.  I lined my first and second raincoats with a soft mesh, which is very nice, but the lining fabric is definitely silkier and far more luxurious against the skin.  Again… next time!

o hey you gorgeous thing!  fluffy photo bombers are always welcome!!


I also gave it an internal pocket, just a simple patch pocket on the left breast; simple but extremely useful.  Yes, ahem; I am realising this raincoat IS most definitely far nicer than my own!  I should have kept it!  jk

.. cheekily wearing it “out” another day!  I wore it to the sewing guild meeting with my dp studio “Eve” dress, my handmade black tights, and the booties Craig bought for my last birthday present…

pinterestmail

a mustard raincoat, oh and a skirt too

Hello!  I’ve made a new raincoat!

So, I’ve been wearing my pale pink Kelly anorak raincoat, made from a shower curtain, for several years now, it was undoubtedly my most worn garment of last year by a fair dinkum mile!  and it’s been such a trooper.  I love it so much, still!  However it is looking a wee bit shabby now… so I’ve been toying with the idea of a new raincoat for little while.  Getting nice waterproof fabric is quite a challenge in Perth, you come across it so rarely and I was wondering if I’d have to brave the scary gamble that is Buying Off the Internet.  Then I happened to be browsing in Homecraft Textiles during their yearly 50% off sale, and unearthed this gorgeously mustard-coloured waterproof fabric.  The colour was particularly exciting.  Something that actually suits me? that’s not black, or navy?!!!   Take my money!!!

Having said that… it’s not the most wonderful raincoat fabric in the world and I had struggles APLENTY  but more on that later.

Patterns!!  I loved the Kelly anorak pattern, and it did work really well for me as a raincoat, however I have this maybe erroneous belief that a raglan sleeve is better suited in a raincoat… I think that a rounded armscye seam could lend itself to a higher chance of leakage.  I could be totally wrong there though, but I just think it anyway.  I’ve been looking out for a good, raglan sleeved jacket pattern that would lend itself to being a good raincoat, but to no avail.  So I made my own pattern.  My previous, blue, raincoat was a pattern I’d worked out for myself; inspired by a cheapie old RTW one that I’d bought for Tim when he was a young ‘un, and which I’d inherited down the track as he grew out of it.  I devised some rather unusual pockets for it, and actually totally loved how they worked out.  I dug out the pattern, made the modifications to bring it into line with the shape I wanted for my new raincoat.  Everyone’s heard of the famous FBA… well I have no use for a full bust adjustment, but in a raincoat I could definitely use a FPA.  What is that? a Full Ponytail Adjustment, of course!!  I have pretty much never had a raincoat, rtw or me-made, with a hood that accommodated a ponytail comfortably.  The hood is always pulling back off your head and exposing your forehead, which is annoying.  I’m happy report that this hood is so far perfect!

I’d originally bought some soft tulle to line the raincoat.  I’d managed to get some soft netting to line my first, blue raincoat and it worked a treat, and I wanted something similar for this one.  But the tulle was horrible; just not soft enough and too scratchy against my sensitive snowflake skin after all, so I’d ended up ripping it out.  The raincoat is actually fine without a lining, because the inside of the mustard shell is a rather nice, soft woven stuff.

the white sports fabric seen in the pic is a ventilation panel, hidden underneath the upper back flap

The outside is laminated, actually the fabric could best be described as a lightweight, thinly laminated, woven cotton.  The plastic laminate was obviously downright hideous to sew.  For one thing, it had quite a sticky waxy coating on the laminate, which gummed up the needles, and the eye of the needle, making re-threading the needle a freakin’ NIGHTMARE.  I wiped the laminated surface with a lightly soapy solution before sewing, which did help a tiny bit, and occasionally wiped down the needle too, but it was still pretty bad.  When it came to top-stitching, well there was absolutely no way the laminated side up was going to move underneath the foot at all.  I cut strips of tissue paper to stitch over, and tore them away afterwards; fiddly, but not a difficult thing to do (above).

seam sealing, also a view of the fabric’s wrong side

Sealing the seams; I used a no-name seam sealer from BCF, a local boating camping and fishing store.  It’s supposed to be used for tents and sails I think, but it works beautifully for raincoats too!  I used a cheapie old paintbrush to work it into the stitch-holes, and seal everything thoroughly.  Since then, it’s been out in three very heavy downpours, and I’m happy to say has stood up to the task beautifully!  All the traumas, and it’s been worth it!  It’s early days, but I think I’ve found my new favourite wardrobe item!

Want to read all my tips for making a raincoat?  They can all be found in my original raincoat making post, here.

Oh, and I made a new little skirt too,  but it’s not nearly so exciting.   Well, I had a small piece of coffee-coloured, wide-wale cotton corduroy, leftover from when I made this dress, and when I was dyeing the fabric for my Sherlock Holmes jacket I’d also tossed in the coffee-coloured corduroy.  And it came out a nice shade of golden-mustard.  So I managed to squeeze out this little skirt.  It’s not made up to any real pattern really, I basically put an invisible zip at centre back, held the front and back up to myself and pinned the side seams and where I wanted darts.  Pretty lazy genius, huh?  It was a very small piece of fabric, and the resulting skirt was too short for a hem.  I edged the bottom edge with a chocolate linen bias-cut strip to finish, and the skirt is lined with pale golden polyacetate lining fabric, itself also leftover from something else, can’t remember what.

And that’s it… until next time!

Later edit: this skirt now has pockets!

Details:

Raincoat; my own pattern, made from thin, plastic-laminated cotton
Skirt; my own design, dyed cotton corduroy
Bobbly top (just above); Burdastyle 04/2014;111, details here
Tights; made by me, details here and my tute for making your own custom-fit tights pattern is here
Boots; Roberto del Carlo, from Zomp boutique

pinterestmail

Kelly anorak as a raincoat

kelly-side

ccf-kelly-anorak
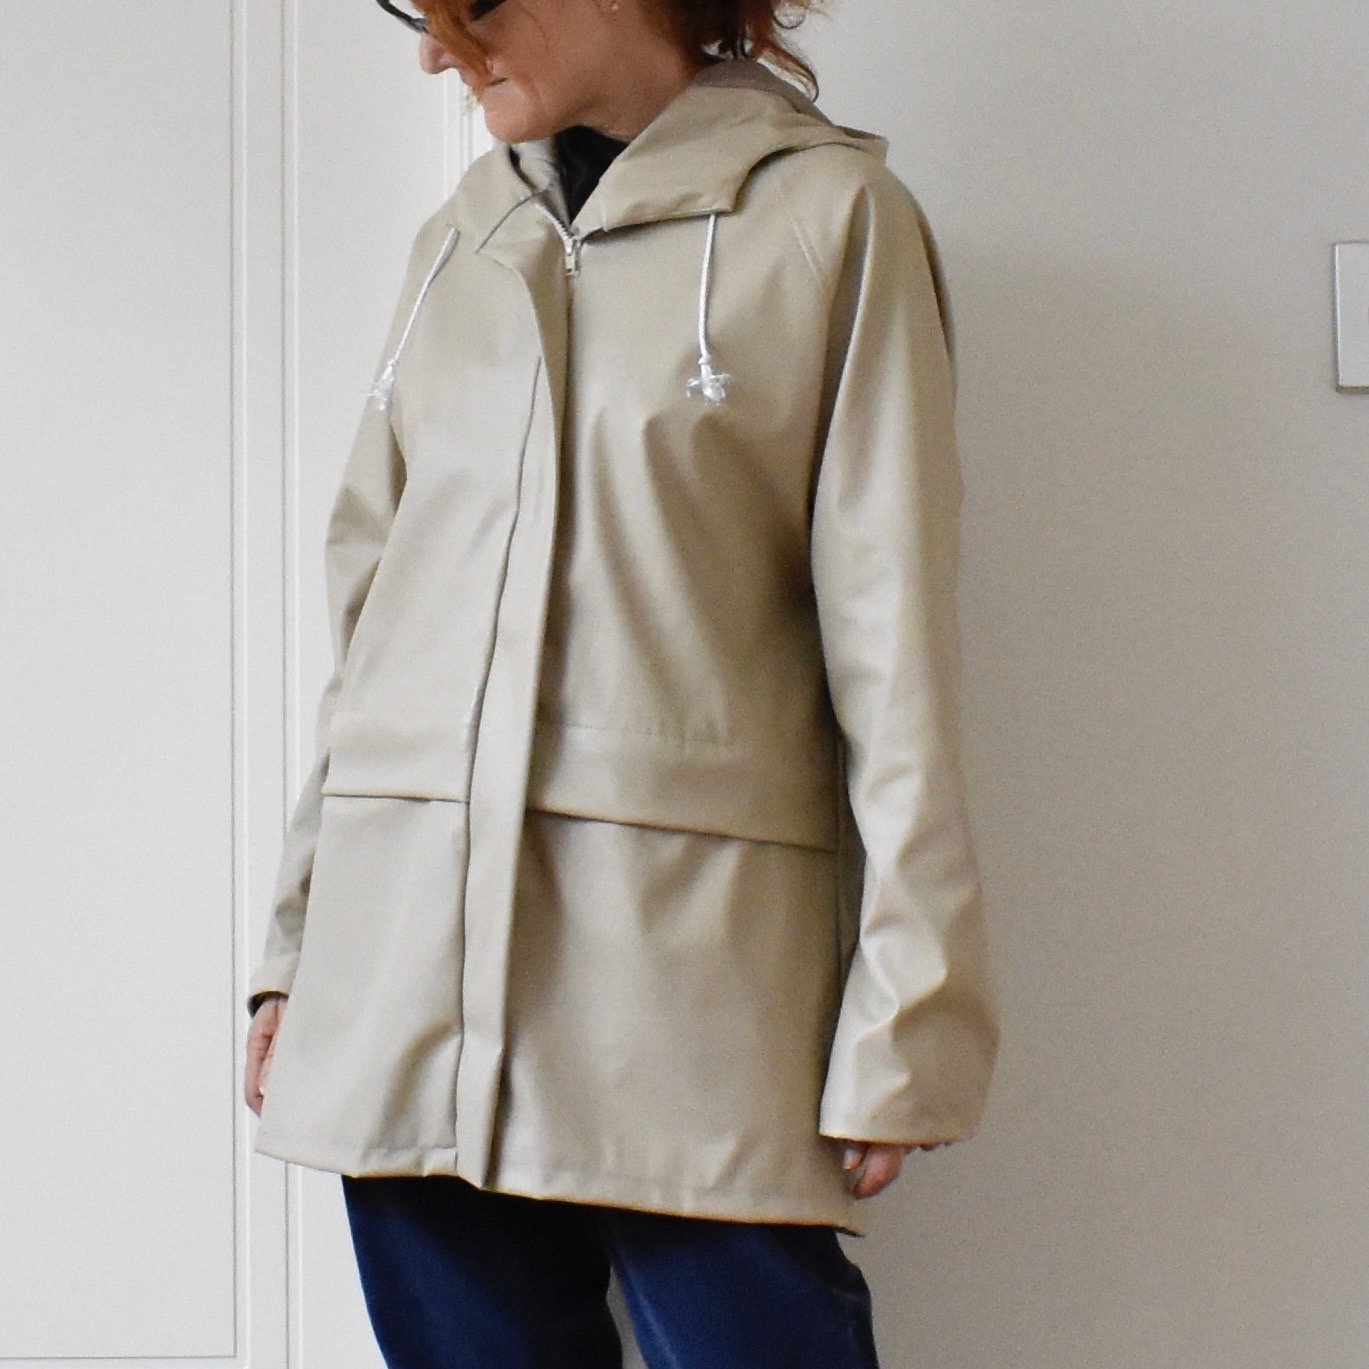
Hello!  I’ve made a new raincoat!  This is the Kelly anorak by Closet Case patterns, and I knew straight away I wanted to make it as a raincoat… why? well we’ve had officially the wettest winter and early spring on record, since they started keeping records, so like ever.  EVER!  It’s been hideous, I tell you!  I’ve been wearing
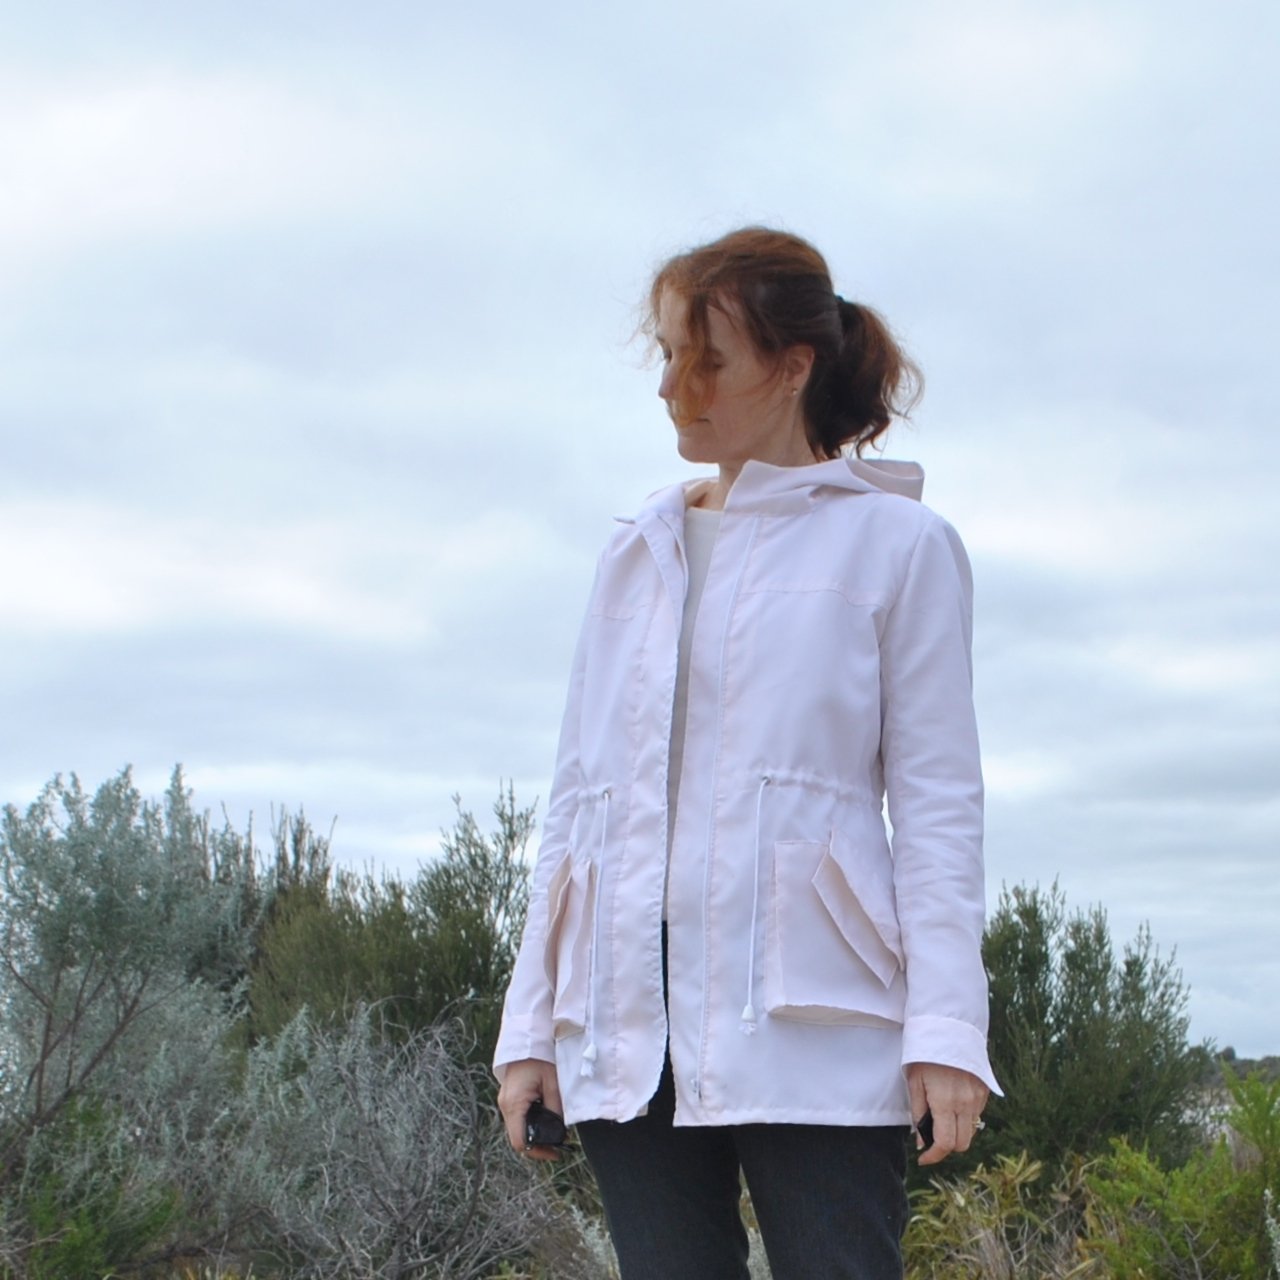
 my old me-made raincoat all winter, but I’ve noticed that it’s not quite as effective as it used to be.  I would classify it as shower-proof now, rather than waterproof  *sob*.  Well, it is a few years old now so possibly the fabric is becoming a little brittle with age, because I’m pretty sure it used to be lovely and watertight!  Now, not so much!  #sadface

So a new raincoat was needed…  I really wanted a white-ish, cream or ivory one. I just love off-white and think ivory looks so chic and really smart in outerwear.  Actually, I think it looks chic in anything!!  #welldocumentedivoryfan  I bought a plain white shower curtain from Spotlight, and gave it a little water test, posted here on my instagram account.  I love how the water droplet looks like a wee little living thing, zipping about on the surface.  Obviously the fabric passed with flying colours.  Pretty cool, huh?

lining

The fabric was quite see-through, and while I don’t mind a little bit of sheerness in a raincoat it really was TOO sheer, so I decided to underline fully with polyacetate lining fabric.   I didn’t want white lining fabric, pure white is quite harsh for my colouring, so I chose this pale golden beige colour.  I had this idea that it would tone down the pure white to a warm, off-white, oyster white, which I think my colouring needs.  SO.  Funny thing!  To my mind, this lining fabric is a definite gold, or even brown, wouldn’t you agree? I would not call this colour “pink”… so I’m pretty surprised that the overall look of my raincoat reads pink!    Don’t get me wrong, I love it! just that I did not expect this!  In retrospect, I can see the colour does have a sorta peach-y look to it…but still!  Golden brown under white; gives… pink?!??  Well alrighty then!!

seam-sealer

In a raincoat, you need to seal the seams, and for my previous raincoat I used some stuff called Seam Grip, which has done a stellar job in that raincoat for years.  So I was pretty sad that I couldn’t find it any more!  BCF sold me some of this stuff… it’s a little different, far more liquid-y than the gel-like Seam Grip.  It dries on the surface of the fabric forming a slightly hard, just slightly stiff, matte finish; similar to what you would expect if you painted clear matte nail polish on the seams.  It does seem to do the trick, though only time will tell.  The good thing about it is that it “disappears” on the fabric and you can hardly tell it’s there… unlike the Seam Grip which was a definite visible, shiny “smear” on the seams inside my old coat.  Not that anyone ever looks on the inside of my raincoat, but you know what I mean! this new stuff is quite invisible which does look really neat and tidy.  So that’s good.

front
Materials:  my shower curtain, zip, eyelets, nylon cord, press studs and  the “stops” for the cord; I bought everything at Spotlight.  Seam sealer from BCF (boating camping and fishing) store.  It’s intended for use on tents and sails!  My shower curtain was just enough fabric for my pieces!!  Just a few scant patches left enough for me to cut a few extra pocket flap pieces and after that? almost nothing leftover.

kelly-pattern

Pattern; the Kelly anorak, by Closet Case patterns, available here.  Heather asked me to be a tester and I gleefully jumped right in.  I really like Heather’s patterns, she has a modern young woman’s aesthetic, with clean lines and unfussy shapes.  Basically, I’ve loved everything she’s designed! I made up the pattern just as is, grading out from a size 8 at the top to a size 10 at the hips, according to my measurements, and I reckon the fit is spot on, with just the right amount of ease.  I believe Heather has shortened the sleeves, lengthened the body and widened the biceps a touch in the final version in response to tester feedback, however I’m happy with the fit I’ve got here!

Alterations: I just made some very minor alterations simply because it’s a raincoat:

pockets

The bellows pockets are designed to have a faux flap, so you can just shove your hands satisfyingly right in those pockets with absolute no impediment… however because mine is a raincoat and I thought functional pocket flaps would be a good idea, you know, to protect whatever is in the pockets from the rain! so I made and added extra pocket flaps on the outside.  I LOVE the little double flap effect this gives! ok, maybe it looks a bit weird but I really like it!

I added press studs to the wrist cuffs but left them off the opening front zip placket; reason being that I think a raincoat doesn’t really need them and might actually be more of a nuisance than useful. You know; it starts raining, you want to just throw on your coat and just zip it up quick! bob’s your uncle.  The drawstring is good enough for pulling it all in, for me.

front-detail

In most cases, I overlocked all raw edges to prevent fraying then flat-felled all seams UP, which you always do in raincoats for waterproofing reasons.  I remember I went into some detail on this in my previous raincoat post…  it’s a little thing but I believe it does make a difference!  The shadow of up-flatfelling can just be made out above on my sleeve seams and this front/front yoke seam, which is slightly curved to give some subtle bust shaping.

I hammered in two eyelets tucked up high under each arm to allow body heat to escape; this is an essential in a non-breathable, waterproof garment…

underarm-eyelets
I also added eyelets and pull-cord to the hood opening because, well obviously.  A raincoat hood is never merely decorative!

kellyanorak

You know what?  I’ve worn the raincoat several times, and it’s brilliant.  I love it!  And so far so good; it’s stood up to a a pretty heavy downpour and I’ve remained happily dry inside  It is actually very warm too, which I guess is what you’d expect from a completely waterproof fabric.  I’m happy!

front-openDetails:

Raincoat; the Kelly anorak, Closet Case patterns, made using a shower curtain with polyaceteate underlining.
Jeans; Morgan boyfriend jeans, Closet Case patterns, details here
Top; modified Nettie, ivory knit details here… hehe, I’ve just realised I’m wearing all Closet Case patterns, this was not planned, honest!
Shoes, designed and made by me, details here

front-hood-up

pinterestmail
Switch to mobile version
↓