Category Archives: Crafty Stuff

more soap…

So, I’ve been making some more soap, trying to develop a few new recipes of my own.   Ever since my first go at soap-making, I’ve perused the oil selection at Coles with a lot more interest… and came home with a few new goodies to experiment with.  Specifically; macadamia oil and avocado oil.  Following the good advice a few kind commenters on my previous soap-making post,  this time I used a soap calculator to help formulate my quantities, thank you Becky and Barb! for letting me know there was even such a thing!  My recipes also contain different proportions of the other oils I already had, olive oil and coconut oil.  I’ve been seeking out the paler yellow olive oil now too, because I wanted the natural colours of the new oils to be predominant …


And since I’m providing recipes here that include the highly toxic and corrosive compound sodium hydroxide, here are a few very important safety tips…

WHEN HANDLING NaOH, ALWAYS WEAR RUBBER GLOVES, PROTECTIVE EYEWEAR AND CLOTHING THAT COMPLETELY COVERS YOUR ARMS.

  • Never let it get into contact with your skin.  When mixing into water, work outside as much as possible so as to avoid inhaling the fumes.  Never under any circumstances put your face over or near the container you are mixing it in.
  • Ensure you are not going to be disturbed for the time you are working with it. Keep all pets and children well away.
  • If you must take your lye solution inside, keep all windows open and work underneath a range hood with the fan on full blast.
  • In the case of spills, clean up with copious amounts of water… i.e. a garden hose if outside.  If you do happen to splash some on your skin, IMMEDIATELY put the affected area underneath a tap, and flush with water running fully over the area for several minutes at least.  If you can see a visible burn or the area continues to sting and burn after copious flushing then seek medical attention immediately.  NaOH is not to be trifled with!


Making your lye solution; FOR ALL RECIPES:  When mixing NaOH into water, put the full volume of your cool or cold water into a clean, thick sided, glass container that has no cracks, and can hold at least twice the volume of the water you are working with.  Add the NaOH to the water, a little at a time, stirring with a metal spoon.  You can stir with a wooden spoon, but you may find the solution gets a little  discoloured with tannins from the wood.  NEVER add water to NaOH, ALWAYS ADD NaOH TO WATER.  This is because as NaOH dissolves in water it generates heat and fumes, and is potentially explosive.  If you have trouble remembering which is the correct way to mix the two: when I was at school we learnt this little ditty… and the exact same principle applies to working with a strong alkali like NaOH.

(Picture of a gravestone)

“May her rest be long and placid,
she added water to the acid;
The other girl did as she ought-er,
and added acid to the water”

Substitute alkali for acid, it’s the same situbar.  After the solution mixes clear, it will be quite hot.  Do not seal the container.  Supervise it until it cools before using.


Moving on…. here are my recipes:

Macadamia Soap  (7/10)

I absolutely love the dreamy cafe-au-lait colour I got with this mixture!  whether it’s horrible to use or not I do not know yet, but will definitely update here and write a little review when it’s cured and I use it.

200g coconut oil
500g macadamia oil
300g olive oil
300mL water
137g NaOH

See the above safety note for handling and mixing NaOH. 

Gently heat the coconut oil until it is liquid, then add the other oils.

Outside, carefully add NaOH to the water, a little at a time and stirring.  Let it sit for a few minutes, uncovered and under constant supervision, until jar feels lukewarm and no longer hot, and fumes are no longer visibly emanating from the surface before mixing it into the oil.

Pour NaOH solution all at once into the oil, and commence stirring with a stick mixer not running.  After a few minutes of this, turn the stick mixer on and keep “pulsing” and mixing for about 10 minutes or until the mixture becomes visibly “gelatinous” in appearance.

This mixture took a lot longer to set than my previous batches… at least 48 hours before it was hard enough to remove from the moulds without distorting them at all.  I’m hoping this means it will be a really nice, moisturising soap  🙂

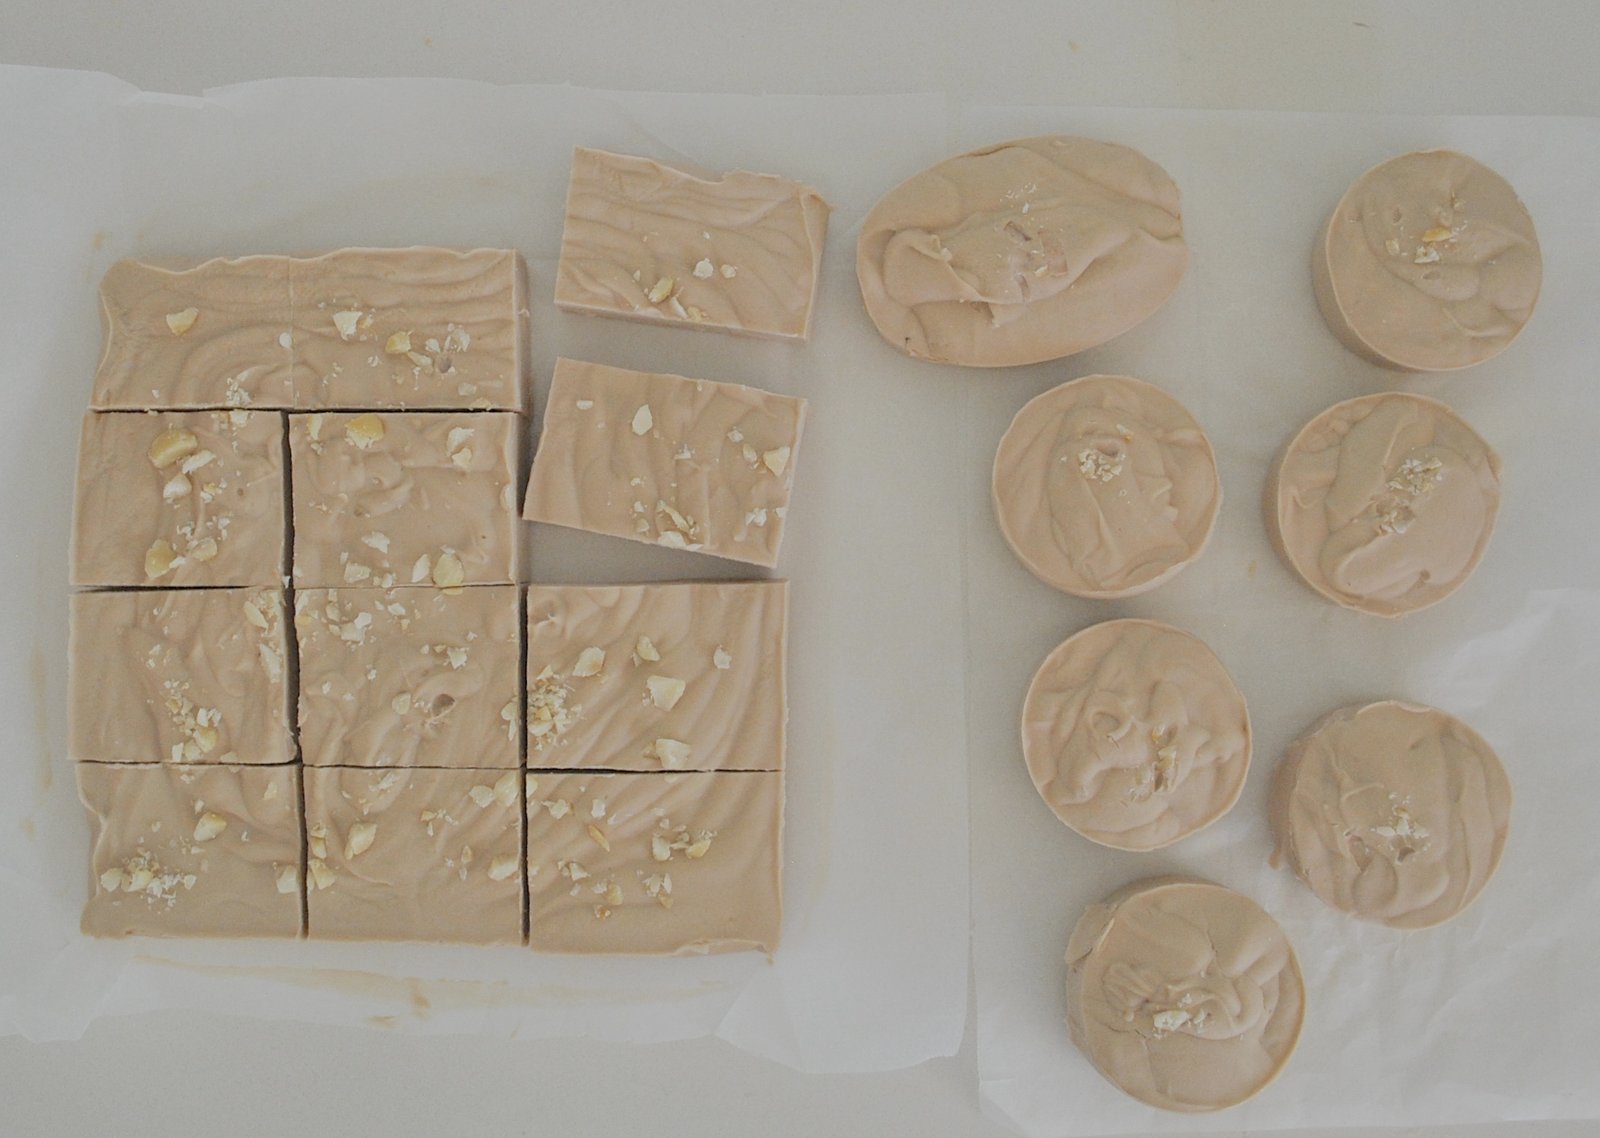
This recipe has larger quantities and so obviously produced a lot more soap than my previous recipes, I had an old Brie container and used this to mould the excess into a nicely oval-shaped bar of soap, but it was still overflowing and these bars are each quite a bit bigger and thicker.  I chopped up some macadamias and sprinkled them on top for both decoration and as an identifier down the track, seemed like a good idea at the time! but then I decided I don’t like how it looks on top of the soap and will think of something different in the future…


Avocado Soap  (5/10)

250mL avocado oil
400mL olive oil
110g coconut oil
200mL water
90g NaOH

See the above safety note for handling and mixing NaOH.

Exact same procedure as for the previous recipe…

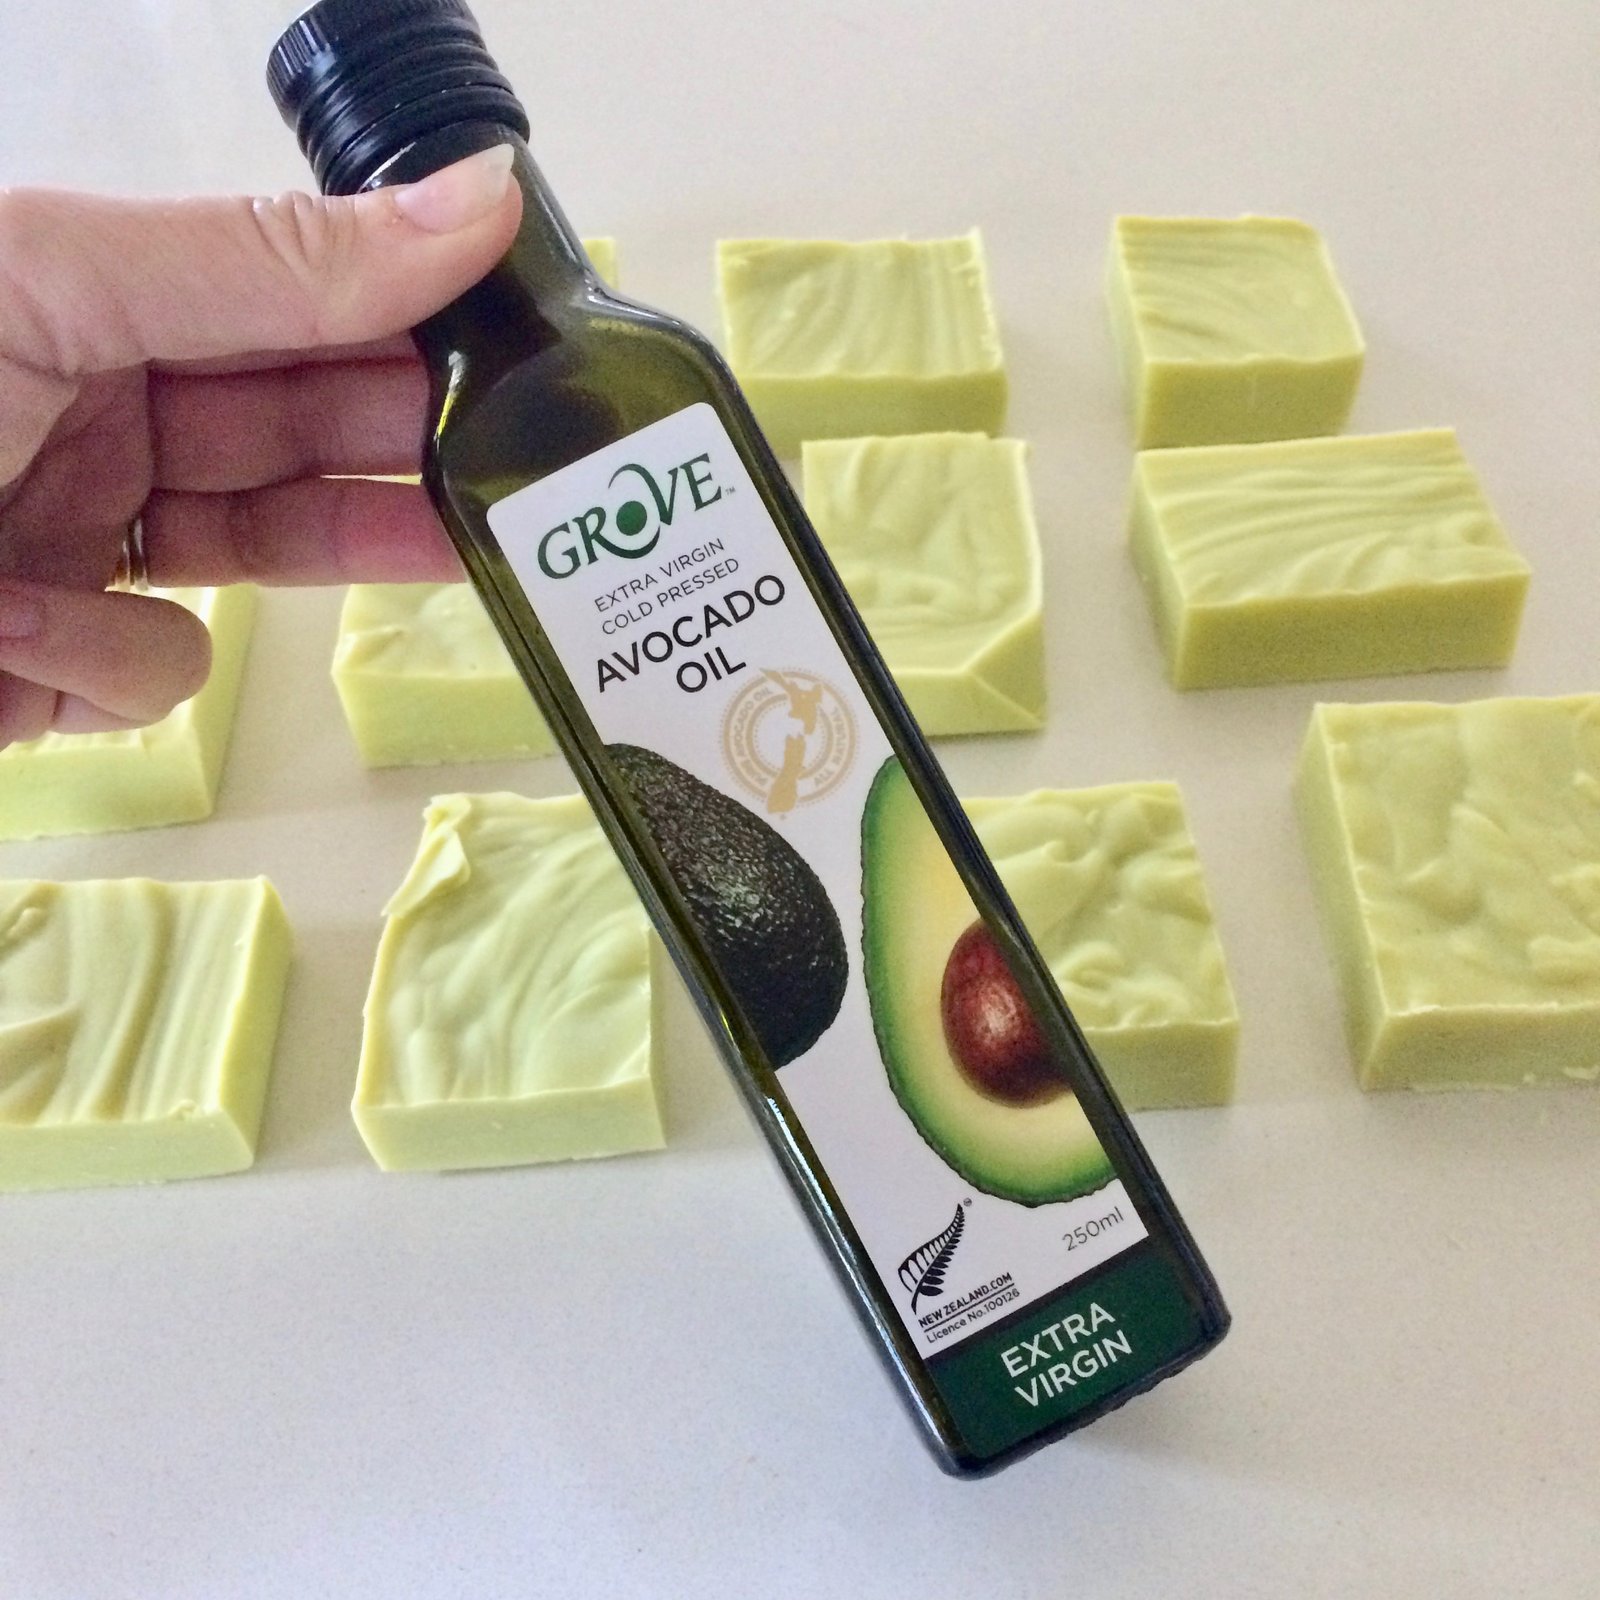
This mixture got to the gel stage a lot more rapidly than the macadamia soap.   The avocado oil was quite a strong natural “grass” green in colour, which gives this soap its creamy yellow-y green colour.  This is the entire batch from this recipe:  avocado oil is quite expensive and the bottle a small one, thus the smaller quantities.

I just used my 24x24cm cake pan lined with baking paper, there wasn’t enough mixture for the silicone moulds too.  The bars are quite deep though.

Just a note on how I’m choosing these quantities, it’s pretty easy to let the olive oil just take over your recipe since it’s so cheap compared to other oils, however I wanted to keep the “special” oil up there as a major-ish component and not just a token one!   While for sure, costs are something you always want to consider, I still want to experiment with the more interesting oils, like macadamia and avocado and am quite excited to use both these ones once they cure too!

this is the full quantity of soap produced from this recipe… yes, the avocados are there for pretty, illustrative purposes only and are not required for the recipe!

Update:

I’m rating the Macadamia Soap a good solid 7/10; it’s nice soap to use and I probably will make it again.  The macadamia oil makes it a little more expensive to make than some of the others which I why I’m rating it down just a little.

The Avocado soap is getting a slightly low 5/10… I mostly likely won’t make this again.  The avocado oil was quite expensive, that pretty green colour faded as the soap dried, leaving it a regular old pale yellow colour, and also I just wasn’t keen on the, albeit subtle, fragrance of this soap.  It just smelt a little on the…. “foody” side, is the only way I can think of putting it!

My other soaps, pure Olive soap (4/10), Coconut soap (7/10) and Buttermilk soap (9/10) are blogged here

pinterestmail

soap!!

So, I actually bought a book called how to make your own soap about a year ago, took it home all full of enthusiasm, only to fizzle out once I realised that a lot of the recipes were full of rather hard-to-locate ingredients *sad trombone*  I did enjoy looking at the pretty pictures though and dreaming a bit, not much else, kept on buying soap from the supermarket, blah blah blah…  Fast forward to a few days ago, and I saw on ig a simply beautiful picture of castile soap Marilla had just made, and she mentioned how simple it was, only olive oil, water and sodium hydroxide!  well that, I could manage!!  I was inspired!  Enthusiasm reignited!  Immediately dove straight in; googled the youtube video she recommended, picked up the NaOH next time I went out.  NaOH, aka caustic soda, aka lye, can be found in Bunnings in the heavy duty cleaner section.

Watching that youtube video, of course there were links to about a million other, soap-making videos, so I watched another, and another, fell down a bit of a rabbit-hole… who knew there were so many soap-making you-tubers???  Several of them prone to snarking on each other in the comments section, haha… but that’s another story!  I did a bit of googling, and found some more simple recipes that also called for ingredients I could easily buy.  By the way, I’m linking to the videos and recipes that gave me the proportions but I’m writing my own recipes here too… why? Several reasons: it’s a little annoying to have to sit through a whole video just to catch that moment when they mention the ingredients and quantities they’re using; secondly because I had to convert everything to metric, which is actually a pain in the neck and I don’t want to have to do it again the next time I want to make soap; and thirdly; I’ve altered some of the quantities to better fit in with a. the quantities of things I can buy here and b. for next time what I think is going to make a decent and manageable quantity of soap.

I made three types of soaps, pictured above from left:  Castile, or pure olive oil soap, pure coconut soap, and buttermilk soap.  I bought all the ingredients from the supermarket apart from the NaOH, which I got from Bunnings.  It was lots of fun making soap… and far easier than I thought!  🙂

Since I’m writing recipes here :  a few very important safety notes on working with NaOH, or caustic soda… long term readers may know that I’m an analytical chemist, and I spent years working with chemicals day in day out, and when you do that you can get a little lackadaisical with the handling of very dangerous chemicals.  But never ever with stuff like NaOH! it is a very strong alkali; highly corrosive and potentially explosive if not handled correctly around, say, water, which you are doing when you’re making soap.  So!

WHEN HANDLING NaOH, ALWAYS WEAR RUBBER GLOVES, PROTECTIVE EYEWEAR AND CLOTHING THAT COMPLETELY COVERS YOUR ARMS.

  • Never let it get into contact with your skin.  When mixing into water, work outside as much as possible so as to avoid inhaling the fumes.  Never under any circumstances put your face over or near the container you are mixing it in.
  • Ensure you are not going to be disturbed for the time you are working with it. Keep all pets and children well away.
  • If you must take your lye solution inside, keep all windows open and work underneath a range hood with the fan on full blast.
  • In the case of spills, clean up with copious amounts of water… i.e. a garden hose if outside.  If you do happen to splash some on your skin, IMMEDIATELY put the affected area underneath a tap, and flush with water running fully over the area for several minutes at least.  If you can see a visible burn or the area continues to sting and burn after copious flushing then seek medical attention immediately.  NaOH is not to be trifled with!


Making your lye solution; FOR ALL RECIPES:  When mixing NaOH into water, put the full volume of your cool or cold water into a clean, thick sided, glass container that has no cracks, and can hold at least twice the volume of the water you are working with.  Add the NaOH to the water, a little at a time, stirring with a metal spoon.  You can stir with a wooden spoon, but you may find the solution gets a little  discoloured with tannins from the wood.  NEVER add water to NaOH, ALWAYS ADD NaOH TO WATER.  This is because as NaOH dissolves in water it generates heat and fumes, and is potentially explosive.  If you have trouble remembering which is the correct way to mix the two: when I was at school we learnt this little ditty… and the exact same principle applies to working with a strong alkali like NaOH.

(Picture of a gravestone)

“May her rest be long and placid,
she added water to the acid;
The other girl did as she ought-er,
and added acid to the water”

Substitute alkali for acid, it’s the same situbar.  After the solution mixes clear, it will be quite hot.  Do not seal the container.  Supervise it until it cools before using.

Having said all that, I hope I haven’t unnecessarily scared anyone off! as long as one is careful, knows what is going on with it and has a healthy respect for the dangers, and follows all the above simple and common sense safety rules, you should be fine.  On with the soap-making!

Each recipe should make 18 bars of soap approximately the size pictured, give or take a little


Castile, or pure olive oil soap… (rating 4/10)

Based on this recipe

1kg olive oil… I used an extra virgin olive oil… do not know if this makes any difference
280mL water
130g NaOH

See the above safety note for handling and mixing lye.  Outside, carefully add NaOH to the water, a little at a time and stirring.  Let it sit for a few minutes, uncovered and under constant supervision, until jar feels lukewarm and no longer hot, and fumes are no longer visibly emanating from the surface before mixing it into the oil.

Pour NaOH solution all at once into the oil, and commence mixing with the stick mixer not running.  After a few minutes of this, turn the stick mixer on and keep mixing for about 10 minutes or until the mixture becomes visibly “gelatinous” in appearance.

this was my first effort, and got me hooked, it was so easy and quick!  My olive oil was quite a strong green colour, and the mixture looked pretty swampy while I was mixing it, so I was pleasantly surprised at how the colour mellowed and softened into this beautifully soft and creamy, greeny-yellow.  MUCH nicer!!  We have an olive tree, so I snipped a few leaves to decorate my soap bars.


My second effort was this rather dreamy Coconut Soap ( 7/10)

based on this recipe

900mL coconut oil
340mL water
125g NaOH

See the above safety note for handling and mixing NaOH.  Leave the solid coconut oil out in the sun, or even sitting in your car or something until it’s completely liquified.  Procedure is otherwise exactly the same as for the castile soap, above.

So, I’ve had a large jar of coconut oil sitting in my pantry for the last ten years or so; we’d bought it for Cassie to make a “beachy waves” hair product that required about 1 tablespoon of the stuff.  The hair product was horrible, made your hair revoltingly greasy, and so the jar has sat untouched in our pantry ever since.  Well guess what?!  *throws a party* finally found a use for it!!!!

Note: I found this mixture gelled more quickly by comparison to the previous mixture, and was a noticeably more solid gel too.   LOVE the heavenly pure white colour… like meringue! and I sprinkled some shredded coconut flakes over the top, just for decoration.  Afterwards I thought I should have stirred some coconut through the mixture before pouring into moulds, it might make a nice exfoliant in the soap.  Next time maybe!

Buttermilk soap  (9/10!)

based on this recipe, though I didn’t watch the video… I’d watched enough videos by this time that I was like… got it!!

240mL buttermilk
800mL regular olive oil.. this one was a much paler yellow in colour, not as green as the variety I used for my castile soap
145g coconut oil
125g NaOH

Pour the buttermilk into ice-cube moulds and freeze.  Once frozen, tip into a glass jar with a capacity of at least 500mL.  Add the NaOH –see the above safety notes – and stir until dissolved.  As the two mix, the heat given off will cause the buttermilk to melt quite quickly.  I guess this is why you freeze it in the first place, so the heat of this reaction doesn’t burn the milk, or cause it to curdle.

In a large separate bowl, mix the oils, and add the buttermilk/NaOH mixture, and proceed just as previously described.

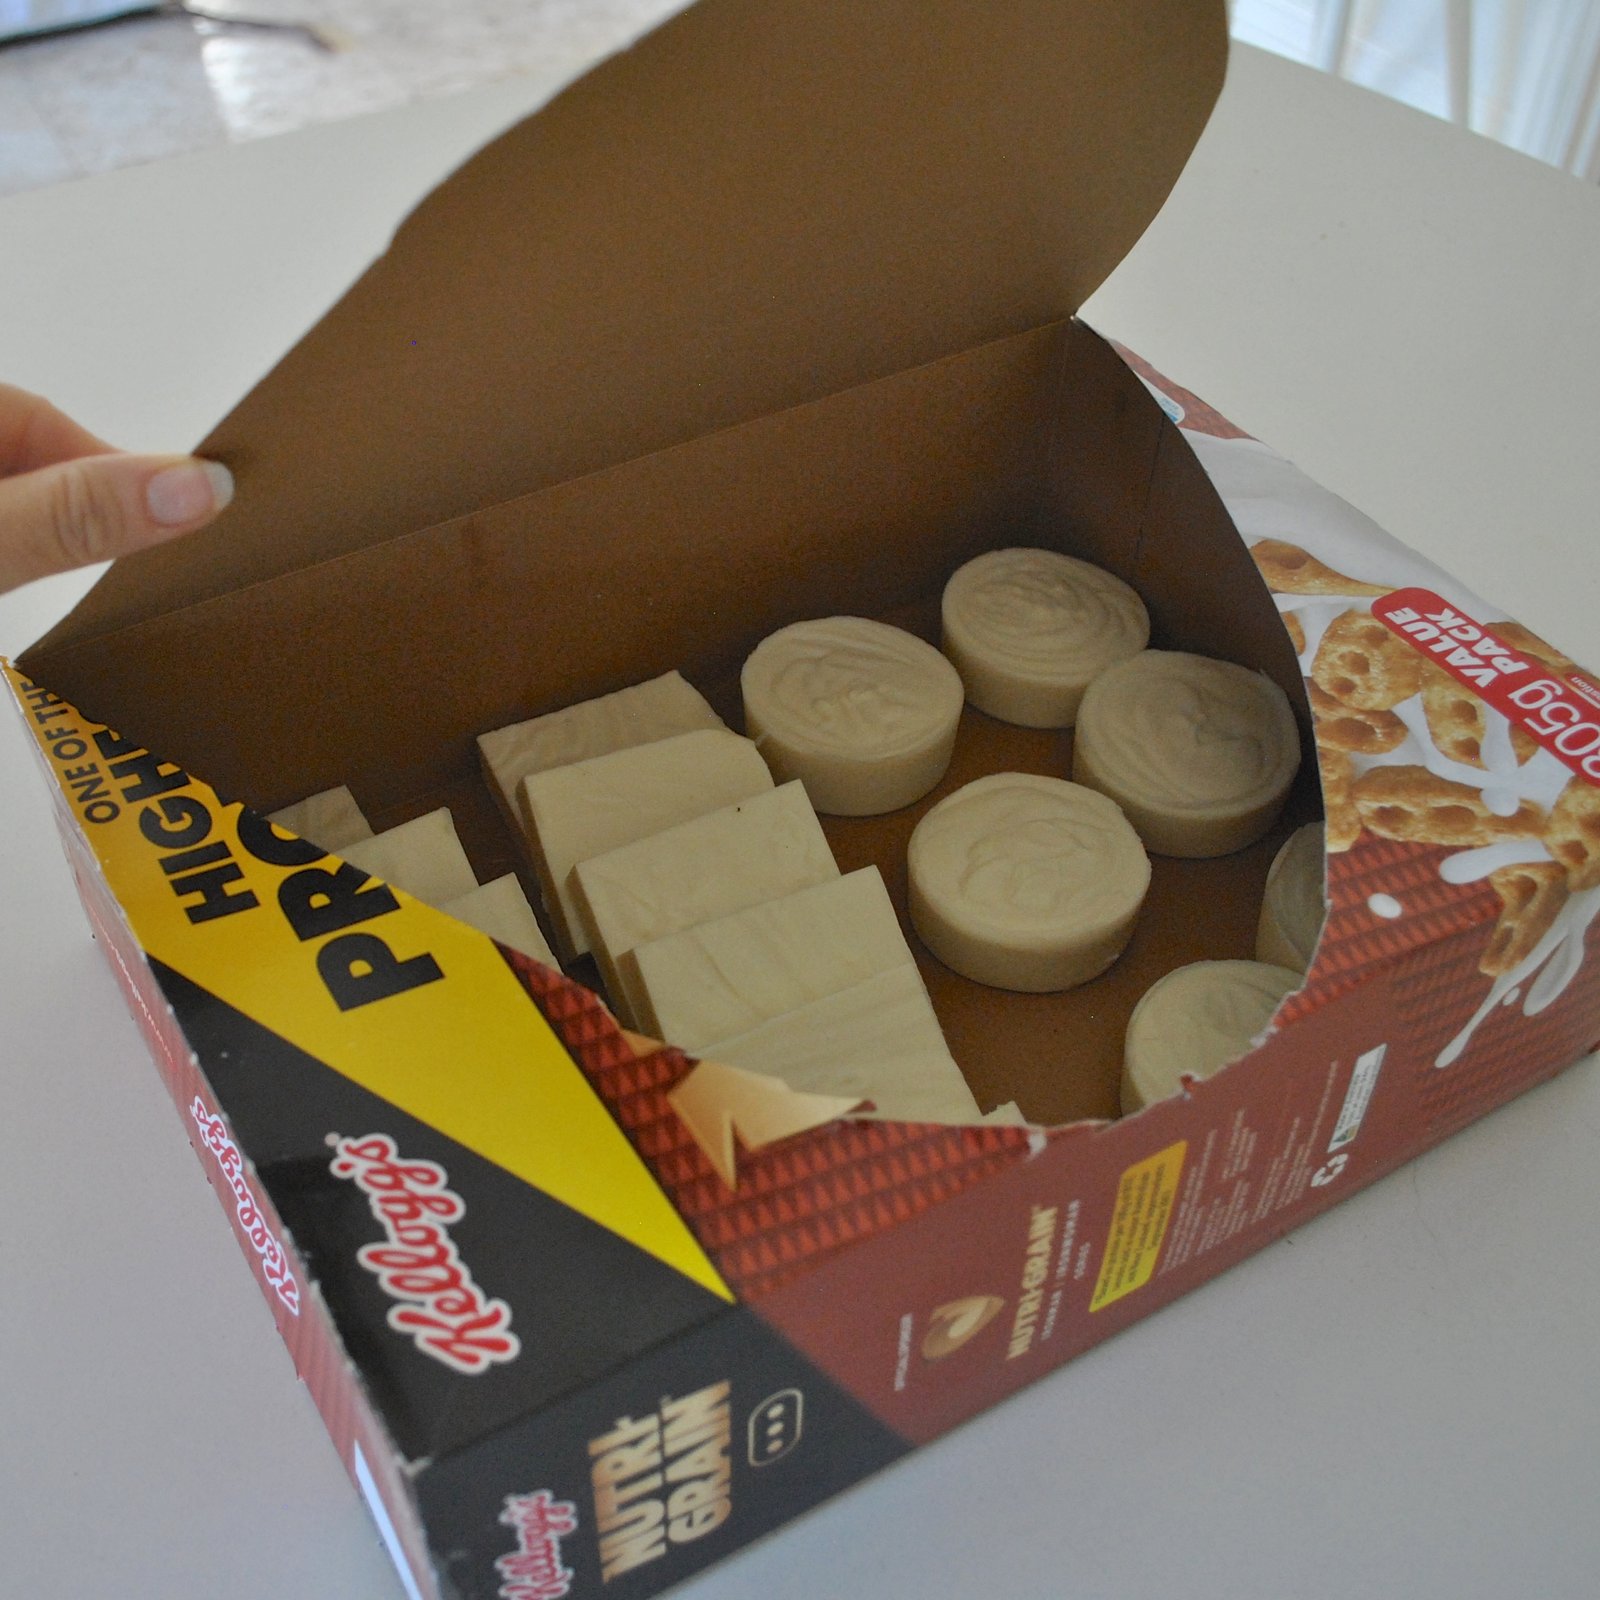
Compare the mixture’s rather strong yellow colour above with the much paler colour it takes on as it sets and dries, below.

Note: I found this mixture took quite a lot longer to reach the “jelly” stage than the previous two recipes.

So that’s it!  For moulding the soaps, I used a silicon, 6 capacity muffin tin and a 20cm x 20cm metal cake tin lined fully with baking paper, and let them sit for 24 hours before removing from moulds and cutting.

the buttermilk mix…

The muffin “tins” were great because the soaps just popped out ready formed and don’t need any further shaping… but I like the more conventionally shaped bars I cut from the slabs of soap too. The soaps need to cure for at least 6 weeks in a non-airtight container before using; I used old cardboard cereal boxes and have stored them up high on my overhead kitchen cabinets so they’re out of the way.

buttermilk soaps

I can hardly wait until they’re ready!  My pouring skills drastically improved with each batch, so my castile soap bars started out a bit messy with blobs of soap slopped up on the sides, a little rough and ready, the coconut soap is still kinda choppy but more attractively so, and my buttermilk soap bars are smooth and silky things of beauty to my eyes!  I’m reeeeally looking forward to when they’ve all finished curing so we can try them out.  According to my reading, if you start using them too early before they’re fully cured, homemade soaps will wash away faster and be used up too quickly, which would be a waste… we don’t want that!

the whole lot…I’m roughly estimating that this might be… maybe, a year’s? supply?  though I’ve never really kept tabs on “how much” soap we use so that’s a pretty wild guess and I’ll have to wait and see.,.

I read that olive oil soaps apparently don’t give as much lather as other oil soaps, again we shall wait and see!

When I’ve tested them all out I’ll come back here and write an update!  Stay tuned!

Update:  so I’ve rated the soaps up there…. clearly my favourite is the Buttermilk soap, with a rating of 9/10… I love this soap! silky smooth and beautiful to use, and a lovely very soft, unobnoxious fragrance.

The Coconut soap I’m giving a good solid 7/10; although it  has quite a hard texture I don’t mind this too much in a soap, but I am deducting a few points just for that. It has a nice, very subtle fragrance, and coconut is one of my favourite fragrances.

The Castile, or pure Olive Soap is sadly my least favourite of the bunch, it turned sloppy in the soap dish quite quickly and actually dissolved very quickly too.  I’m not ruling out that I made some boo-boo while making it, it was my first go at soap-making after all! but all the same, I think I just prefer the others…   4/10

The other soaps I’ve made, Macadamia  (7/10) and Avocado (5/10) are blogged here.

SaveSave

SaveSave

SaveSave

SaveSave

SaveSave

SaveSave

SaveSave

pinterestmail

Easter eggs

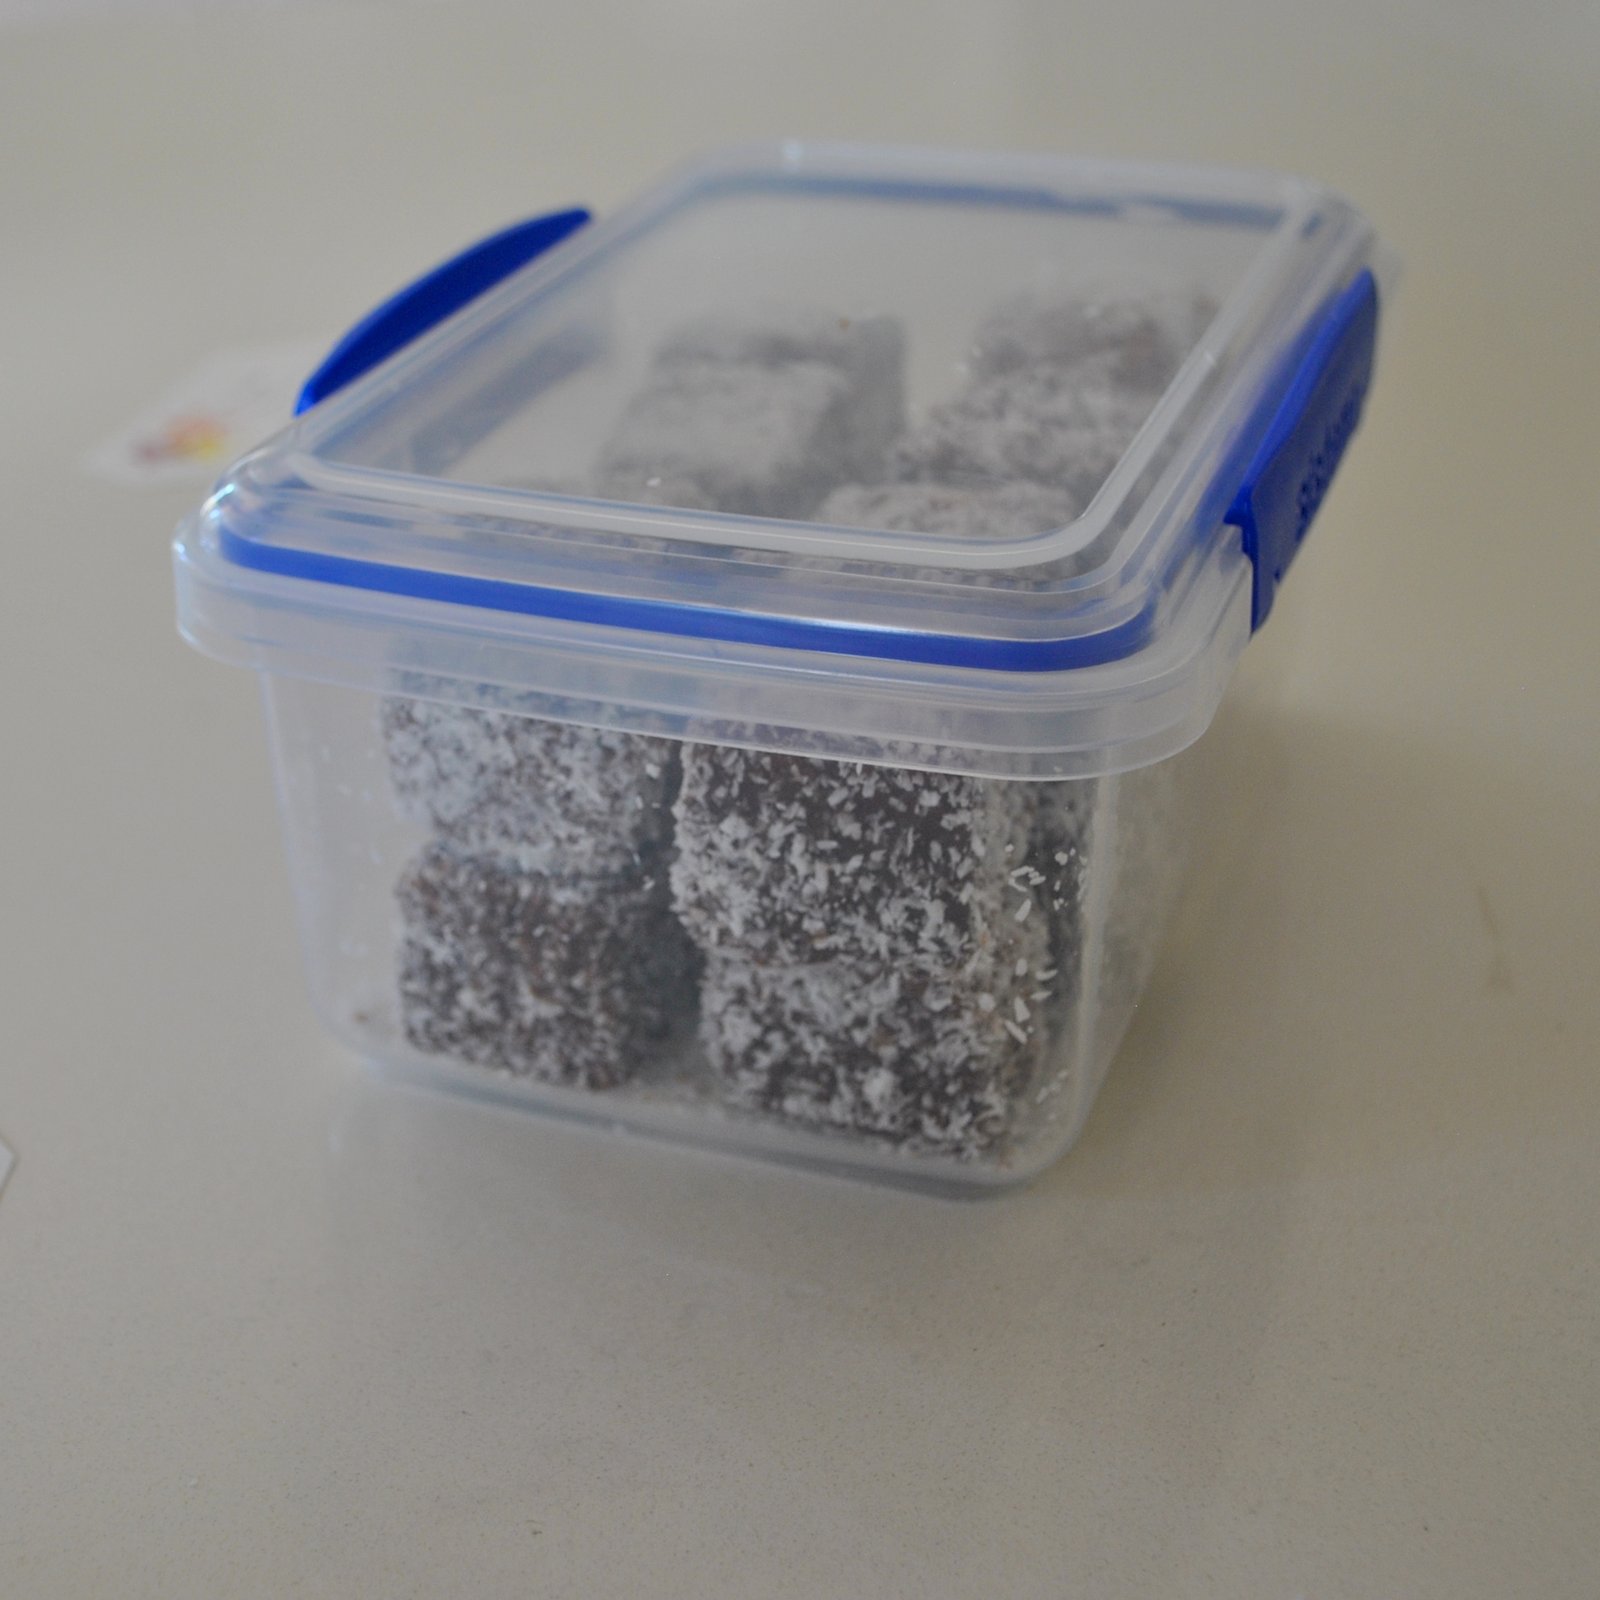
I made a batch of these yummy things a few years ago, following a recipe on The Londoner, and they were such a hit with my family and friends that I made them again for this year! except this time I adapted the recipe so as to:

a. neatly dovetail in with the quantities of ingredients that you can buy here in Aus,

b. up the citrus tang, to better suit our palate, and

c. give the ginormous quantities that my family can put away in a sitting… these are super yummy and a wee bit addictive!

Cheesecake Easter Eggs

3 x 250g cartons of hollow chocolate eggs, the ones that have 15 eggs in each carton

for the lemon-y “egg white” filling:

500g cream cheese
1 cup icing sugar
juice of 2 small lemons + 1 lime
300mL whipping cream

Beat the cream cheese and icing sugar together until soft and fluffy, add juice.  Whip cream separately until stiff, and fold into the cream cheese mixture.  Gently chip a little bit off the top of each chocolate easter egg and use a skinny teaspoon to spoon the filling into each egg,pushing it down so as to fill completely.  This quantity of filling should fill all 45 eggs nicely.  As you fill, sit each egg into an empty egg carton and put in the fridge to set.

for the passionfruit “egg yolk” filling:

170g can passionfruit pulp, or 5 passionfruit
1 tsp butter
1 tsp gelatine

Strain the passionfruit pulp into a ceramic bowl, put the dab of butter on top and sprinkle the gelatine over in a layer.  Heat in a microwave, 20 seconds at a time, stirring thoroughly after each zap, until the mixture is almost hot, and blended well.  Leave to cool slightly.

Take the chocolate eggs and scoop out a depression, dribble a little bit of passionfruit filling into each egg.  Put back into the fridge until set.

Eat!

Happy Easter everyone!

SaveSave

SaveSave

SaveSave

pinterestmail

mini Lamington petit fours, and baby birds

scaling Mt Lamington…

Before the onslaught of sewn Christmas gifts, and, I’m sorry, but there’s a LOT to share… here is a rare appearance of some baked Christmas gifts!  We kind of have a no-gift policy  within our extended families for Christmas nowadays, but I still always like to still give just a little something.  There have been years in the past when I used to make little Christmas ornaments and tree decorations but lately I’ve stuck to edible treats.  I dunno, but food seems less of an intrusive gift? if that makes sense? it can be kept for personal consumption if the recipient so desires, or else passed around at the ubiquitous seasonal parties at a pinch…  and, unlike ornaments which can sorta impose upon people an expectation that they’re hauled out for display every year; they’re consumed, i.e. they GO!  No random stuff to add to the household clutter, yay!

A few weeks ago, our friends R and J became Australian citizens after a looooooooooooooooong and extreeeeeeeeeemely drawn-out process, and celebrated with an “Australian” party; we all were to take a plate and I took a plate of petit fours, specifically that all-Australian classic: Lamingtons.  But not the big honkous ones, oh no, little elegant bite-sized ones.  They disappeared from the dessert table in quite a satisfactorily quick manner, so I decided to make them again for this years’ Christmas gift.

By the way, want to know what I wore??  I wore this ensemble!! haha, well if I’m going to wear it anywhere, it should be to an Australian party!  Some people at the party were even very kindly interested to know the whole story!

Your classic Lamington is usually quite big, like 5-6cm (2+”)  square, but I prefer them made in this bite-sized form a LOT more.  They look sweet and more appetising, and just more fun … well anything in miniature is more fun, no?

My recipe… adapted from various sources.  This makes a generous, party-sized batch; for gifts I made several batches to get enough.

Lamingtons

Sponge cake; if you’re short on time you can buy a ready-made sponge cake which makes this a super quick and easy treat!  however it’s not that hard to make your own.  If you do make your own, it’s best to make it a few days earlier and leave it to harden up and get just a little bit stale.  Stale cake? yes sounds horrible, but trust me, the Lamingtons really are the better for it.

5 eggs
3/4c castor sugar
1 c SR flour
90g melted butter

Beat the eggs until thick and creamy and pale; while still beating add the sugar very gradually, and continue beating continuously until dissolved.  Fold in butter, then sifted flour.  Spread into a 25x30cm Swiss roll pan lined with baking paper, make sure the mixture is only, like 2-2.5cm deep, at most! and bake at 200C for about 10 minutes, or until a light golden brown.  Turn out immediately and allow to cool completely.  Once cool put in an airtight container and let it sit in the fridge for a few days until a little hardened and slightly stale before assembling the petit fours.

A few days later: take out the sponge and cut it into neat and even squares BEFORE you prepare your icing.  Mine are about 2.5cm (1″) square in size, but obviously you can go whatever size you wish… square, however, is traditional!

Also before preparing the icing, have the desiccated coconut ready in a shallow bowl for the coating step.  Only then, continue!

Icing:

3 1/2 c icing sugar
1/4 c cocoa powder
1 Tblsp melted butter
1/2 c boiling water

Large quantity of desiccated coconut for coating… around 300g should be plenty

mix all ingredients except coconut! together thoroughly.  To save time and an extra pan; (remember the first rule of baking; minimise washing up at all costs!!) I just put the unmelted butter on top of the dry ingredients, and just slowly pour the boiling water on top of it; it quickly melts the butter into the mixture, saving you the extra step of having to melt it first.

To assemble the lamingtons; dump sponge cake squares into the chocolate icing and fully coat them, take out and let excess icing drip off for a second then quickly roll them in desiccated coconut.  Messy, but just do it fast!   It’s far better to do this step while the icing is still pretty warm, as it stiffens up pretty quickly as it cools… you can add tiny bits of boiling water to make it runny again but it’s not as good.

Set the freshly finished Lamingtons onto a wire rack and into the fridge to set completely.  They can be frozen, and in fact are DECLICIOUS eaten frozen during the summer.  Personally, I prefer them frozen… in any case it’s best to at least keep them in the fridge.

Real talk; this rather prosaic and un-pretty packaging below is how my family actually receives them….  when it comes to serving them up to guests I like to arrange them either in a militarily, strict grid on a square plate… OR even looking all dishevelledly pretty in a jumbled mini-mountain of lamington-boulders, like in the picture at top; but to give them away I buy these airtight, snap-lock boxes from the supermarket to pack ’em in.   Not super glamorous but they are super practical… so people can pop the boxes straight into the freezer, and keep the containers afterwards to store other food in them, if they wish.

Also I just wanted to show here our gift tags for this year… made using the leftover bits of card from when I made my iceberg advent calendar recently.  There was this little pile of randomly shaped card leftover and I couldn’t bring myself to throw them out with a need for Christmas gift tags just around the corner!  I once again wielded my trusty old star stamp … oh, and can I just say, if I could say something to my younger, newly adult self, it would be GOOD ON YOU! for buying a small selection of stamps and high quality ink pads during that early, brief card-making phase, because for decades now I have continued to use these every year to make Christmas gift tags for practically nothing since they’ve paid for themselves a gazillion times over now.

waste not want not!

Merry Christmas, all!!!

Oh! and a random note about life here lately… I just have to share this… we’ve had a little family growing up in our garden over the past few weeks! a couple of willy wagtails built a beautiful and perfect little nest up in the upper boughs of one of our potted ficus by the pool… we watched with great interest as the two birds took turns sitting on the nest, until one day…

and then the next day…

and the next:

last Sunday:

Monday;

Tuesday:

Wednesday:

Thursday:

on Thursday arvo, one of them popped out of the nest!! it sat on the bough for a few hours but later on hopped back into the nest for the night.  Every night a parent would sit on them all night…

on Friday, the parents started teaching them how to fly!

obviously I kept Clara inside all of this day and the next… I didn’t want them stressed out about her presence.  It was too cute watching the babies in their wobbly attempts to fly, flopping onto our outdoor table and weaving a little drunkenly through the patio.

Two ended up in the lemon tree where they spent the night, the third one, which seemed a little less developed than the others, stayed in the nest another night.  The parents were still catching insects for all three of them, and caring for them constantly…

Saturday:

all three end up in the lemon tree where they stay huddled up together most of the time.  The parents are still spending all their time catching insects for them and looking out for them, encouraging them to fly.

Sunday: empty nest syndrome….  🙁

they’re still spending most of their time huddled together, although they’re moving about from tree to tree, and while they seem to be catching a few insects here and there the parents are still feeding them a bit.

Well.  That’s where we stand.  It’s totally amazing how fast they’ve grown up!  there were a few days there where I felt they were changing almost by the hour!  I can’t even express what a gorgeous pleasure it’s been to witness this little family growing up and such a privilege that the parent birds trusted us just enough to build their nest here in our garden.  I just hope the nest will be used again next year!

SaveSaveSaveSave

SaveSave

SaveSave

pinterestmail

an armada of icebergs…

Sooo… what tasteful works of homemade Christmas art has Carolyn proudly displayed in the entrance hall to assault the eyes of unsuspecting visitors to our house, hmmm?    Oh, a whole bunch of little cardboard icebergs… hmmmm, ok, yeah.  “Interesting” decor choice…  #kindergartenchic #sohotrightnow

It’s an advent calendar!!

Also; I’ve just looked up what is a group of icebergs called, and it’s an armada.   Cool, eh!

So, I saw this cute advent calendar on Burdastyle and couldn’t resist… because I freaking LOVE Christmas! and particularly Christmas crafts and all those fiddly decorative bits and bobs that you get to strew about your house….  maybe I even don’t mind a bit of baking too?!  Just a teensy bit…?  Maaaaybe  #notreally  😉

On the site it’s called an Origami advent calendar, which is perhaps a little bit of a misnomer… because my understanding of “origami” is that there must be no cutting nor any sticking/pasting too, and these cute little contraptions involve both.  If not origami though I don’t know what you’d rightly call this kind of construction, actually.  Just … making boxes?  cutting and pasting little receptacles together?  Well, whatever.  It’s a free pattern.

I used some card stock that Mum and Dad gave me when they cleaned out their shed…. it was perfectly clean and in very good nick! traced the template and cut out 24 identical shapes.  So my icebergs are all the same size.  In retrospect, if I was going to do this again (unlikely) or even if I re-use them for next year I would mix it up size-wise by printing out the template in two or more different scales, say 75%, and maybe even also as small as 60% to get a little range of sizes.  I think they’d look pretty cool with more of a variety of sizes, but I’m ok with how the arrangement looks for now.


Anyway, let’s be real… it’s the contents that you get excited about, really!

Instead of sealing the boxes completely closed with double-sided tape as recommended, I put tiny strips of velcro on it, so you can open the boxes to get to the sweeties inside without potentially destroying them.  See, it took quite a while to make 24 little boxes, like hours! and so I’ll probably re-use them, at least one more year.  Hopefully more!

For the numbers, I used my old alphabet/number stamps that I bought many years ago… during my cardmaking phase.  I found the boxes can fit up to four Lindt balls, with a bit of manipulation and shoving.  Probably Craig and I will be the only ones excited about popping open the daily “iceberg” and counting down until Christmas.  Or maybe, just me!

speaking of icebergs… I took these pictures in the vicinity f Le Conte glacier, Alaska, during our trip there this year.  So so beautiful!!!


I don’t know if I’ve ever shown here my other, far less trendy, advent calendar, that I made yeeeeeeears ago when the children were little… I seem to recall it was a free pattern too, maybe from the Woman’s Weekly or Better Homes and Gardens something like that.

I still put sweeties into the heart pockets every year and have this year too, although who knows when my children will drop by and eat them?!  This one’s a bit “country” but in my own defence that was the hippest of hip decor styles at the time!  I know, it’s a bit dated now, but that can’t be helped…  if there’s one set-in-stone rule about style, and this goes for decor and fashion; and that’s that what is HOT one year will definitely be NOT in a few years!!

one of the fabrics was designed by a Carolyn somebody, whose name was printed on the selvedge… and I had the brilliant idea of snipping off a “Carolyn” and attaching it to the back, seemed fortuitous at the time.  Now I’m mentally apologising to the de-surname-d Carolyn who actually designed the fabric… whoops!

Now, if you’ll excuse me I still have a small avalanche of fabrics awaiting transformation into Christmas gifts and my summer wardrobe, and it’s already the first day of summer so I’d better get cracking…. au revoir!!

SaveSave

SaveSave

SaveSave

pinterestmail

I made a little blue book

So the title explains it all really, hehe…

I’ve been reading the blog Lil’ Blue Boo by Ashley Hackshaw… partly for chicken stuff since Tim and Kelly got chickens recently and the whole family has been invested in their care and involved in the Building of The Chicken Coop, and can I just say… wot a saga… but also because I’ve found Ashley to be the most inspiring and creative lady!   And I especially loved a little book she’d made recently, and it got me thinking again how I would like to make a book.  Just yet another of those things that I’ve wanted to have a go at for years… I have a huge list, btw.

Anyway, her adorable little notebook got me revved up to actually take scissors to paper… I googled for how-to’s and found Lee (Crafty Loops)’s amazing tutorials on YouTube.  I pretty much followed her method, with the exception that my own book is made entirely from scraps, rubbish, and leftover bits and bobs.

We have a whole lot of scrap paper in our house… old, partially filled notebooks, scrapbooks, graph paper and lecture pads from the children’s days at school etc; that I’ve kept just in case I ever need scrap paper.   I semi-roughly cut stacks of various sorts… I went for sort-of neat but not perfectly neat, because I really like the imperfectly, imprecise handmade look in a book.  Like Lee did in her demonstration book, I cut eight signatures with five pieces of paper each… which gives you eight little booklets of ten pages.  Since you’re glueing the frontmost and backmost pages to the cover, this means I ended up with a little book of 78 pages in all…

For punching the stitching holes… I don’t have an awl and was too impatient to run out and buy one.  However necessity is the mother of invention, as they say; and I found a dried up ballpoint pen actually works as a pretty good substitute… for backing I used a dried-up old foam squeegee block #whenhoardingpaysoff

For binding; I used a small scrap of bias-cut white linen, and for stitching I used a leather needle and cream-coloured Gutermann’s upholstery thread.

spine all glued up and drying… I used regular ol’ PVA glue

My cover is cut from a discarded cardboard box that I rescued from our recycling bin… I covered it with white paper first… this too was scrap actually!  an un-needed page of a new pdf clothing pattern I recently printed.  And made.  And have not yet blogged, oops, I’m so lazy…

The final cover for my book is linen; this was a piece of indigo-dyed linen leftover from a natural dyeing workshop, run by Trudy Pollard.  I attended the workshop with Nicki, Sue and Megan a few years ago.  Long term readers of my blog may remember that I made this dress from the linen.  I’ve kept the leftovers all this time! well, natural indigo is kinda precious and nigh on unavailable here, and I thought the scraps might come in handy one day.  And they did!

Et voila!!

I’m so ridiculously pleased with my little blue book!  And it was so much fun to make too… like being in kindergarten again!  have no idea what I’m going to write in it yet.. maybe poetry? artsy doodles? a journal? or maybe a little sewing book, to keep track of fabrics and haberdashery requirements?  So many options… I need more books, obviously  😉

Later edit: Also, completely beyond the level of an amateur … but if you’re interested, check out the amazingly beautiful work of artisan bookbinder Glenn Malkin

SaveSaveSaveSave

SaveSave

pinterestmail
Switch to mobile version
↓