Tag Archives: Christmas

Christmas prep

Hello, Christmas makes!!  To be honest though my output is quite modest this year, I haven’t gone overboard with the making of Christmas gifts unlike previous years.   Just a few little things…

I’d mostly made this black felt bunny a few years ago, using the Luna Lapin pattern book.  He was kinda my first test of the pattern before making a camel brown bunny for Arthur, blogged here, but I didn’t do too bad a job if I say so myself.  So this year I decided to complete him as a present for Gilbert.

I made his outfit using various bits and pieces as usual; the shirt and buttons were an old shirt of Tim’s… and I used the same buttons for his eyes, the chinos are a nice piece of cotton twill that I plan to use for a pair for myself sometime… hopefully I didn’t cut too large a chunk for that to happen! and his little waistcoat was from a small scrap of fabric that I discovered in a bag of leftovers given to me by my mother-in-law.

I also made Arthur’s bunny a new outfit.  I didn’t have his here to model it so Gilbert’s bunny has been roped in for the job.  It’s a summer outfit; comprising a Hawaiian shirt and board shorts.

I had to include this picture of the shirt-making burrito!  the instructions don’t have this but I figured why not make it as neat as possible.  I used sew-in press studs for the shirt in lieu of buttons; they’re just easier and you don’t have to worry about ruining your tiny little shirt with a bad buttonhole.  The fabric is leftover from my first Myosotis dress.  The board shorts are white linen and blue linen that I dyed myself using a natural indigo  dye bath.  Actually, the leftovers from my recently made Mestre shirt.


Every year my family always exchanges some sort of homemade food treat too… my effort this year is gingerbread star biscuits to be dunked into tea or coffee.  I made a little more that 160ish gingerbread stars and pondered how to decorate them, finally deciding upon an easy option of polka dots.  Yes, I’m super into polka dots at the moment for some reason.  Oh, and did I say “easy”? haha. For some reason this very simple concept took an entire afternoon and I’ve still got a numb spot on my finger from the pressure of operating the icing contraption thingie.  I’m low key disappointed that so much work resulted in actually quite ordinary results,  hmff.  They are sadly not at all spectacular, but are definitely very yummy and I hope everyone likes them!

In other making news, not related to Christmas pressies; remember this dress?  I made it using our own Karijini pattern and a doona cover.  yes I still love it in principal, but had tired a little of its soft inoffensive colourway and last month subjected it to the unforgiving depths of the dye pot.  It now looks a bit more eye-catching, ahem.  I actually love it, and it feels like a new dress in my wardrobe, which is nice.


pinterestmail

a knitting advent-ure

I’ve knitted a magical, rainbow, unicorn of a jumper/sweater!

But, what is this, Carolyn??  I didn’t know you were into magical rainbow unicorns?!  Well, of course there is indeed a story behind this…

my little “troll” progress keeper was my constant companion and cheerleader… 😉

So, in the past few months, idly hanging around on youtube I randomly got into the world of knitting youtubers, and watched a few videos… I think it was Katie of Inside Number 23 who introduced me to these wonderful things called knitting advent calendars …  I thought they sounded like such a fun idea! at roughly the same time I’d been to Calico and Ivy checking out all the wool and other yummy eye candy they always have in there and seen and admired some gorgeous wool hand-dyed by a local lady going by the name of Dingo Dyeworks, and I mentally tucked the name away.  Later on, in search of an advent calendar, I found that the same Dingo Dyeworks had produced one for this year.  SO naturally… I bought one!

day 1; and I’m ready to party!!!

The advent calendar came in the form of 24 cute little boxes, each with a mini skein of wool inside; the colours of which were a complete mystery.  There is also a 25th box, which is much larger and contains a full-sized skein of the same sock yarn, but I decided to base my “advent”-ure project on the 24 mini-skeins.  The only thing you knew about them was that they were all on the Dingo Dyeworks “ridgey-didge” base; a fingering-weight 85% fine merino 15% nylon superwash, which I’d checked out in Calico and Ivy and liked.  SO I laid my plans… to make a jumper, or sweater.  I bought from C + I a skein of similar gauge yarn in an undyed cream colour and did a few swatching experiments, made a few calculations and a plan, decided I could indeed make a whole jumper from sock yarn.   I knew knitting just a little bit every day would be perfectly manageable, and fairly painless.  In fact, I always find the lead up to Christmas so full of stress and madness that I welcomed the thought of carving out a little bit of time in each day, to just devote myself to a quiet, happy and mindless project just for me.

If you follow me on instagram, you might have seen my daily “unboxing”, a single example of which is above… I had so much fun just opening the yarns and seeing that day’s colour!  Honestly, even without the daily calming and meditative knitting session, and notwithstanding that I now am the proud owner of a divine new jumper – the texture of which is so baby-soft and so squishy, and basically too too heavenly to even describe…  just opening the days’ little box each morning was also such an enormous joy for me.  I also posted a picture in my stories each day of the day’s progress.  If you want to see them all, I’ve saved the whole process in my permanent stories, called “advent”-ure, at the top of my page  🙂

day 3… 🙂

I started from the bottom, and knitted the same number of rows on each sleeve and the body section each day, and then when I got to the appropriate place to start the yoke, joined them all together and continued in the same way, decreasing raglan style up to the neckline.

day 14…

Before opening the first skein I wasn’t 100% sure there would be enough yarn in each little skein to do the width of stripe I wanted, in this case my plan was to “fill in” between the stripes with a few rows of the undyed yarn I’d bought for the cast-on… but after day one I’d happily determined there was plenty! in fact I estimate I only used roughly a half of each skein, even for the widest sections.

day 17…

I’d decided to just knit each colour as it appeared and not second guess anything at all! so the delicious Unknown of it all was exciting and fun; but I have to admit there were one or two days I was like “whaaa??”   However I’d checked out the Dingo Dyeworks advent calendar from 2017, which was so so beautiful, and I just had to put my trust in this years’ being beautiful too.

day 20…

It is a little different, to be sure! and while not all the colours were what I might have chosen and there was even a coupla days where I truly wondered where this was all going!  Would this advent-ure be irredeemably unicorn-ly?!  However I’m very happy to admit that my fears were unfounded and I feel like my finished sweater is now one of my loveliest and, dare I say, the prettiest that I have?! and the colour-story worked out quite beautifully in the end.  I’m still about 99% convinced days 16 and 17 were mixed up! but that’s neither here not there really, since you can’t really tell that in the end result.

aaaaand, day 24!

Knitting on this every day was, as I’d hoped, a calming and peaceful, meditative and fun! interlude in the lead-up to Christmas for me, so I am so glad I decided to do this … yes, it resulted in a smaller pile of me-made things I could give my loved ones; I bought a few presents for my family this year and I refuse to feel guilty about that! and I still did manage to make a few things.  And I have a beautiful and unique new jumper!

back, indistinguishable from the front actually, but you know…

Details:

Jumper; my own design, made from the Dingo Dyeworks 2018 advent calendar
Skirt; Vogue 1247, made from curtaining fabric, details here
Thongs; fipper, bought on our holiday in Bali

pinterestmail

the bumper Christmas edition

So, every Christmas I like to make a small mountain of stuff for my loved ones; this year was a smaller mountain than previously, mostly because I embarked upon a sorta epic making-adventure of a more selfish variety, ahem … but more about that particular project in a future post!  But I did still manage to make some bits and pieces for others!  btw, I was too busy to take any photos on the day, woops!  but I’m hoping to get some modelled shots here sometime soon  🙂

Items 1-5; it’s always difficult to think of something for the boys, something “useful”, because boys are never just about the pretty things like girls are. Also, because I actually prefer practical and useful myself too, always.  I recently discovered elbe sewing patterns through instagram, and noticed that she had very kindly made a free pattern available; the Sorrento bucket hat.  Freeeee!  So generous! and I thought it would be fabulous for my guys who do wear hats all the time. Craig, for one, who has been wearing the same sad shabby hat for about a decade now, ahem. Yes, since I make stuff it has indeed been a point of embarrassment, hehe  ;D  A hat also seemed like the perfect gift for Cassie’s man D, notoriously difficult to buy/make for.  He loves fishing with a passion and was apparently in need of a new fishing hat, according to Cassie.  Great timing!

Tim’s hat

I had to measure everyone’s heads… awkward! but well, I guess everyone’s used to my strange stealth-measuring attacks by now!  Cassie helped me out by stealth-measuring D’s head… she said she did it while he was sleeping which made me laugh to imagine that!  Fortunately he says it fits him perfectly!

D’s hat…

The boys’ hats are all made from Spotlight’s cotton drill, it’s hard to find fabrics that are both masculine and interesting, but luckily Spotlight currently has these camouflage prints in a wide range of colours. SO AMAZINGLY LUCKY!!!

Craig’s hat…

I opted to interface the brims with medium weight fusible interfacing, and they are all fully lined; Cassie’s with a stiff white cotton, the drills I used for Craig’s and Tim’s both have an olive-ish cast to them so I used an olive poplin from my stash for them, and Sam’s and D’s are both more blue-ish so for them I cut up the trouser legs off an old pair of Sam’s navy blue work trousers.  It was exactly the right shade of navy blue, and also a really nice weight for lining a hat.

Sam’s hat…

And I found this old label in my notions basket! the very last one! leftover from when I used to sew their names in their school uniforms! I had a little giggle putting this in, and Sam too when he saw it in there on Christmas morning.

Cassie’s hat…

I also made one for Cassie using some of the leftover fabric from her Christmas dress for this year…  more on that later!  Cassie’s floral linen is very lightweight compared to the cotton drill that I used for the boys’ hats, so I fully interfaced all the pieces in this one, including the lining, with medium weight fusible interfacing.

This is a free pattern so obviously you can’t complain, and I’m not! because this is a fantastic little pattern! However one thing I want to note for if I ever use this the future… the pattern specifies 30cm for fabric and 30cm for lining. Yes, this is technically correct; but personally I prefer for the brim lining of a hat to be of the same fabric as the shell, because you can see it while you’re wearing it. So if you’re cutting out all 4 brim pieces from the outer fabric, 30cm is enough, but just barely! and only if you throw all grainline specs out the window and are super vigilant about miserly pattern placement! I did make sure to cut the band pieces on grain though, I think you have to for the hat to look nice.  If you want to cut the brim plus brim lining pieces all on grain then you’d need at least 40cm, or 50cm to be safe

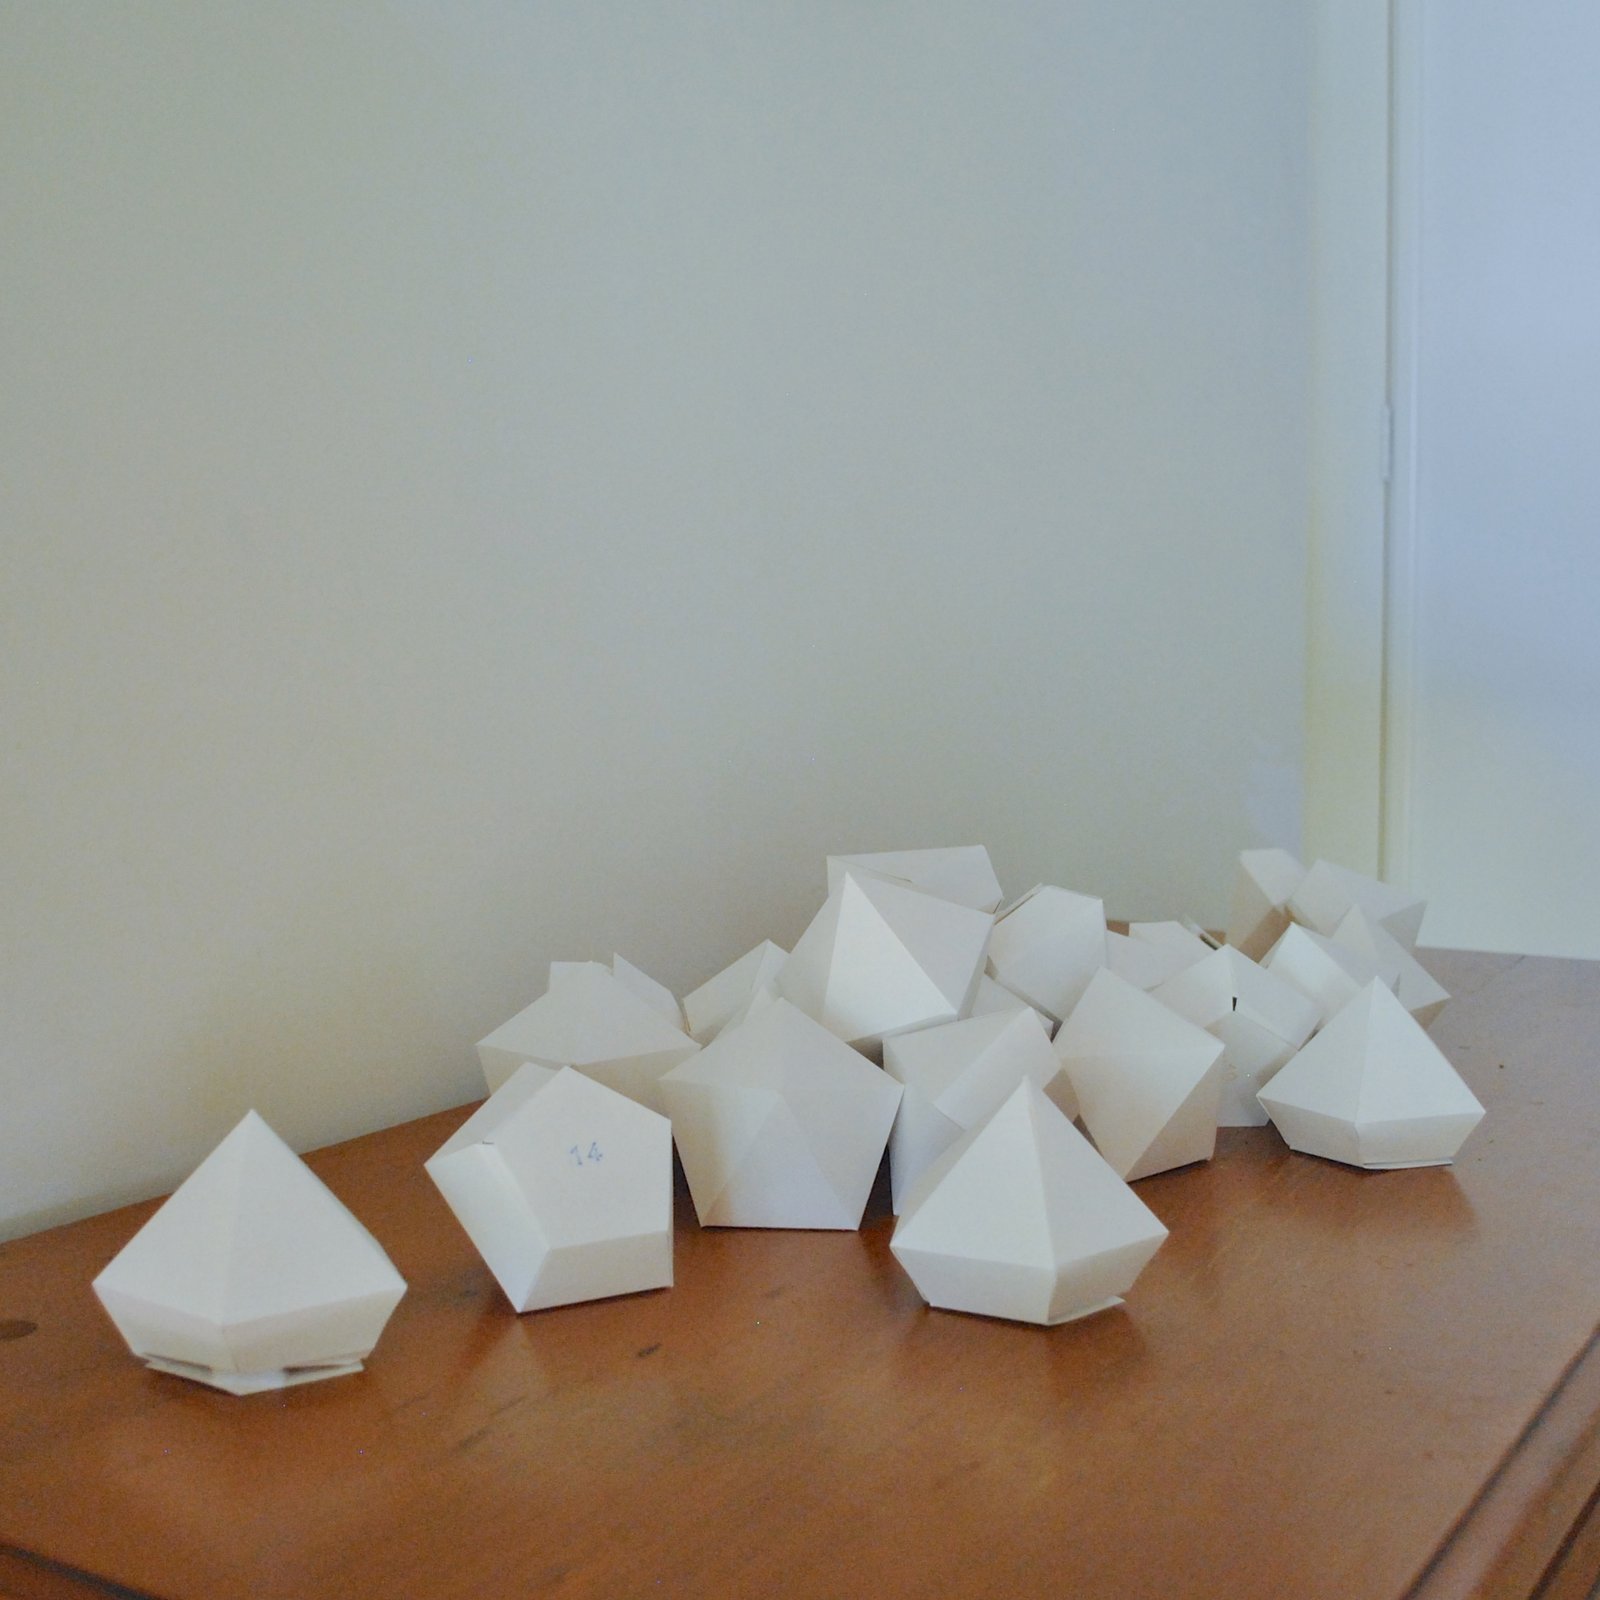
I made all my paper pattern pieces full size, which I HIGHLY recommend; because when you are cutting out fiddly little pieces like these on the fold, and in multiples; then they rarely come out identical to each other.

Best thing; everyone seemed to love their hats! I might even get around to making one for myself one day 🙂

Items; 6-7; I was going to make hats for Tim’s fiance Kelly and for Sam’s lady L too, but when it came time for choosing prints for them, well I chickened out!  There were loads of gorgeous prints in Spotlight, pretty, feminine and cute and probably lots that they’d love, but well, you know, choosing a print for another girl is quite a personal thing, and I was nervous they wouldn’t like my choice. Eventually I hit on the idea of making a reusable shopping bag for them.  Yes, these are in a print too, that I chose, but a bag is definitely “safer”!

During the last year, it became illegal for supermarkets here to give out single-use shopping bags, and now everyone has to remember to take their own shopping bags for their groceries… of course there are lots of branded reusable shopping bags you can get but everyone likes a cute one to hang up in their kitchen, yes? Kelly and Tim have recently done up their kitchen and btw, it looks AMAZING!!! it’s all dramatically jarrah, black/white, stainless steel, and grey blue; and they also have a lot of indoor plants there. So I chose the above fabric for Kelly’s.

For L; well she loves baking, and she loves cute stuff, so when I saw this bright and fun doughnut print I knew instantly it was perfect for her!  

I made my own pattern, based upon the measurements of the little bag holders in Coles checkout stations. My own experience is that the stitched-on-strap style of handle is a weak point in shopping bags, the first thing to go; so I designed the bags to have cut on handles, and to be reinforced with a facing.  It is a bit of a fabric hog to cut it out like this, but I’m thinking it will prove to be a much stronger and robust design than separately cut and stitched on straps. 

  I found some pieces of stiff plastic film to line the bottoms of the bags, and for the groceries to sit on.

Item 8; Cassie specifically requested that I make a dress for her this year, and we went to Fabulous Fabrics together to look at fabrics. They had this divine pink hydrangea print in a cotton sateen, and Cassie wistfully fingered it and mentioned she would love this if it was in linen. We looked at a few other prints and she pointed out a few others, which I tucked away in my head for the future, mwahaha. But just imagine my joy when I went back in to actually buy something for her, and saw they had actually JUST got the hydrangea print in, IN LINEN! PERFECTO!

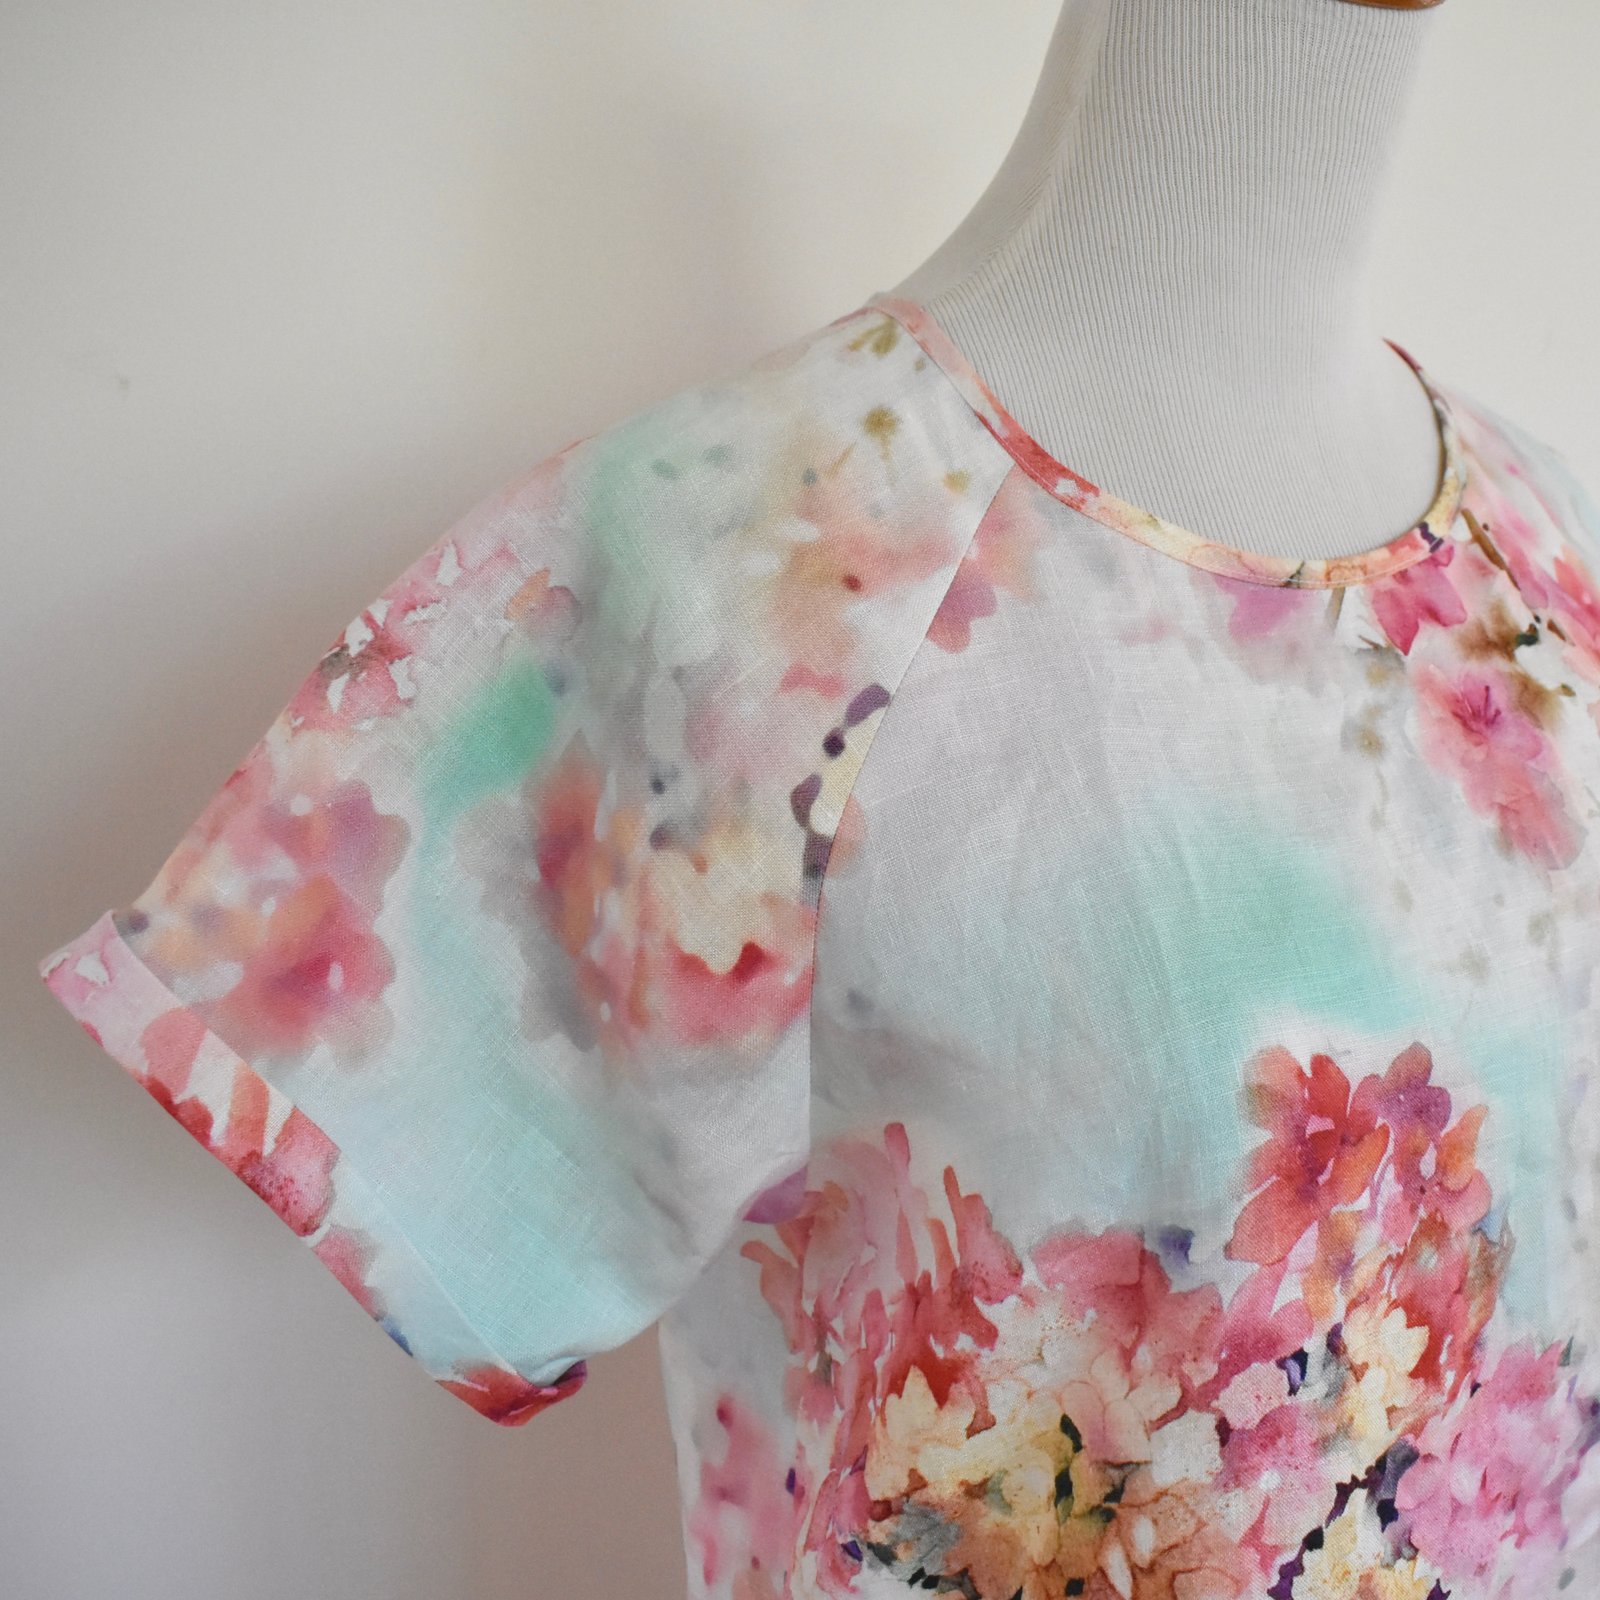
For the patten, I cut up an old favourite little tunic dress, that she had discarded a long time ago; it is a simple but very pretty little T-shirt style, with a high rounded neckline finished with bias binding, raglan sleeves folded up at the hem, and a centre back zip, and I always thought she looked gorgeous in it. The new dress did seem a tad short when I’d finished it, but otherwise I was very pleased with it. Then she tried it on on Christmas morning, and it was Super Short!  Turns out 26yr old Cassie likes to wear her dresses a little longer than 18 yr old Cassie did, haha. who knew?!  😉  Anyway, fortunately I had extra fabric, even after making her matching bucket hat, so I extended it with an extra piece attached underneath the hemline. This is a technique I’ve used on several of my own dresses in the past, I do think it makes for an interesting hemline detail, even if you don’t need to add length.  To make it look more like “intentional design detail” rather than “whoops, need to add length because it’s scandalously SHORT” I folded and stitched a series of tucks, and love how this looks!  A hidden bonus is that this adds some weight to the hemline… and I think linen dresses can often benefit from a little extra weightiness at the bottom.

Items 9-2000, might be overshooting the mark but just roughly guess-timating there; so I also like to make something both useful and fun for my extended family members, and this usually ends up being an edible something … this year it was gingerbread pussycats! So of course we have our own three darling little fluffykins, and I hit on the bright idea of icing the gingerbread puddycats to symbolise The Girls.

I’d made huge batches so this took quite a long time, but turned out pretty cute I think! The kids were tickled pink!

My recipe is adapted from a free recipe from Taste.com, and my own lemon icing is a sort of hybrid royal icing/ regular icing. Sophie has green eyes, so I painstakingly picked out the green cachous from a multicoloured jar. I couldn’t get black food colouring! so settled for dark purple-y/blue for Sophie, and sky blue for Zoe, who is a greyish blue point with blue eyes. Zoe was by far the fiddliest pussy cat to recreate!

Mischka is a mischievous fuzzy wuzzy ginger striped pussy with amber eyes, so I tried to capture her cute and perky nature with a riotous striped icing.

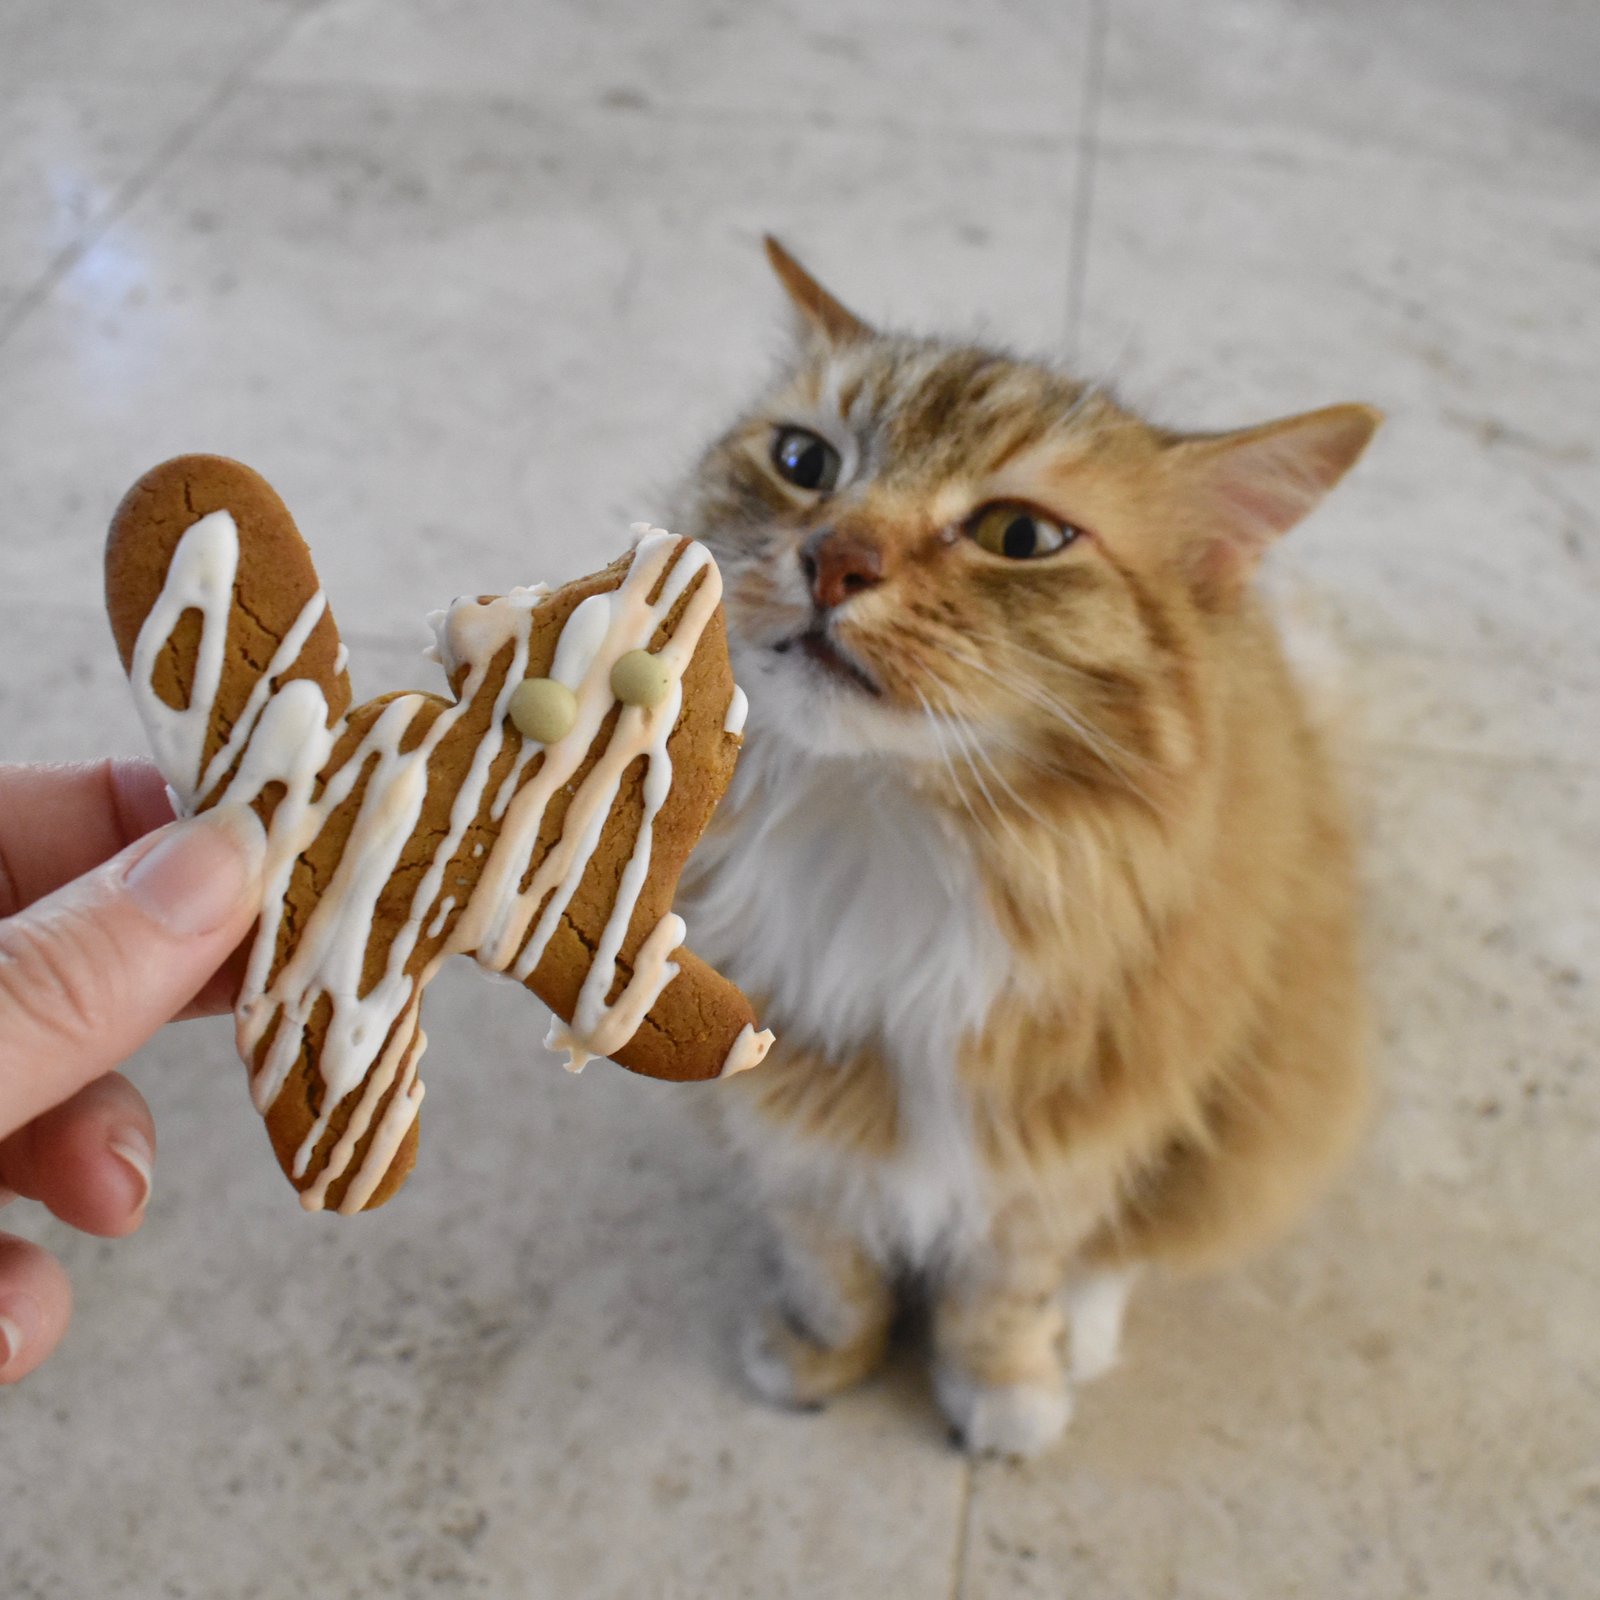
It’s funny; everyone immediately said, “but what about Clara?” and there were lots of jokes as to why she was excluded from the fun but of course the real answer is perfectly simple… I don’t have a dog-shaped cookie cutter! Maybe next time, haha.

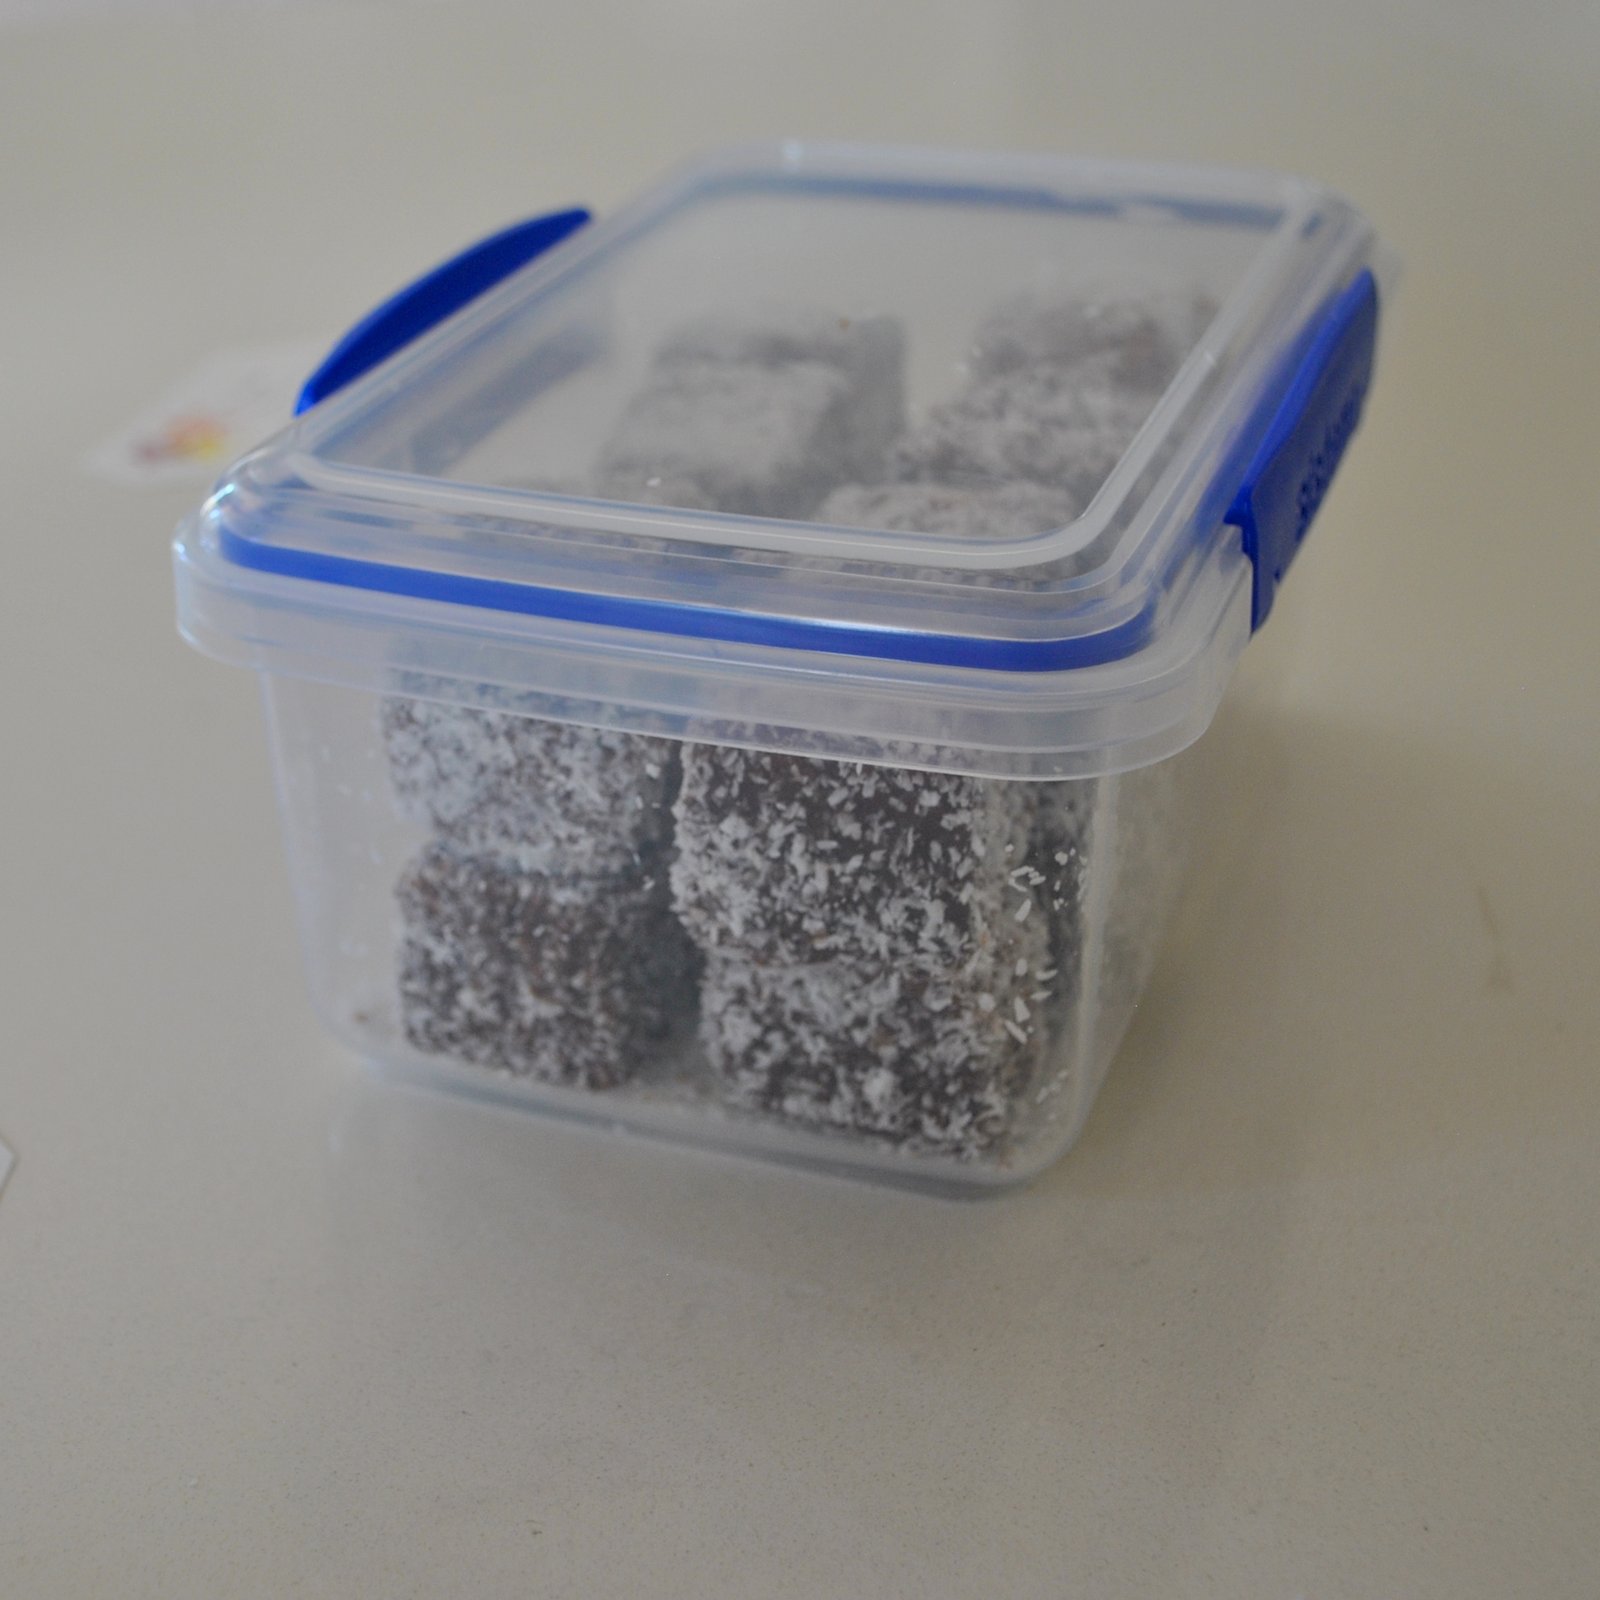
I buy these airtight thingies to give them away in,  see, practical and useful are my middle names!  Each one perfectly fitted 16 gingerpussies.

So, I blog very very rarely about the meals I make; but this year Craig and I decided to cater for the entire extended family lunch, which is a BIG undertaking. We ambitiously planned for a rather (for us) long and involved menu and I’m so proud of us for pulling it off that I thought I’d share … we made all the various dressings and everything!

the makings of maple carrots…

pumpkin and couscous salad…

German-style potato salad…

BBQ asparagus, zucchini and snow pea salad…

veggie rosti with smoked trout; we doubled this recipe and made one with the smoked trout and the second one with smoked salmon

peach and raspberry trifle…

and cherry and nougat semifreddo

the recipes are all from the free Coles cooking magazine that they put out every month. Fair dinkum, this is hands down my favourite source of recipes at the moment… I love it!  We also had a ham that I forgot to take a picture of, and Vintage Cellars had high-end champagne going for half price so I bought a dozen of these… honesty, it all felt very special and went so well, we had such fun, and we were so chuffed everybody at our party had such a gorgeously happy day too!

So that was Christmas this year!! it felt rather epic and stressful all month leading up to it, but now it’s the morning after, and I’m feeling peaceful and relaxed with a happy post-party glow, the house is clean and back to normal; and most of all I am SO GLAD that I did go to the effort of making as lovely a day as I could for all my amazing family. It’s always SO worth it 🙂  Until next time!

pinterestmail

mini Lamington petit fours, and baby birds

scaling Mt Lamington…

Before the onslaught of sewn Christmas gifts, and, I’m sorry, but there’s a LOT to share… here is a rare appearance of some baked Christmas gifts!  We kind of have a no-gift policy  within our extended families for Christmas nowadays, but I still always like to still give just a little something.  There have been years in the past when I used to make little Christmas ornaments and tree decorations but lately I’ve stuck to edible treats.  I dunno, but food seems less of an intrusive gift? if that makes sense? it can be kept for personal consumption if the recipient so desires, or else passed around at the ubiquitous seasonal parties at a pinch…  and, unlike ornaments which can sorta impose upon people an expectation that they’re hauled out for display every year; they’re consumed, i.e. they GO!  No random stuff to add to the household clutter, yay!

A few weeks ago, our friends R and J became Australian citizens after a looooooooooooooooong and extreeeeeeeeeemely drawn-out process, and celebrated with an “Australian” party; we all were to take a plate and I took a plate of petit fours, specifically that all-Australian classic: Lamingtons.  But not the big honkous ones, oh no, little elegant bite-sized ones.  They disappeared from the dessert table in quite a satisfactorily quick manner, so I decided to make them again for this years’ Christmas gift.

By the way, want to know what I wore??  I wore this ensemble!! haha, well if I’m going to wear it anywhere, it should be to an Australian party!  Some people at the party were even very kindly interested to know the whole story!

Your classic Lamington is usually quite big, like 5-6cm (2+”)  square, but I prefer them made in this bite-sized form a LOT more.  They look sweet and more appetising, and just more fun … well anything in miniature is more fun, no?

My recipe… adapted from various sources.  This makes a generous, party-sized batch; for gifts I made several batches to get enough.

Lamingtons

Sponge cake; if you’re short on time you can buy a ready-made sponge cake which makes this a super quick and easy treat!  however it’s not that hard to make your own.  If you do make your own, it’s best to make it a few days earlier and leave it to harden up and get just a little bit stale.  Stale cake? yes sounds horrible, but trust me, the Lamingtons really are the better for it.

5 eggs
3/4c castor sugar
1 c SR flour
90g melted butter

Beat the eggs until thick and creamy and pale; while still beating add the sugar very gradually, and continue beating continuously until dissolved.  Fold in butter, then sifted flour.  Spread into a 25x30cm Swiss roll pan lined with baking paper, make sure the mixture is only, like 2-2.5cm deep, at most! and bake at 200C for about 10 minutes, or until a light golden brown.  Turn out immediately and allow to cool completely.  Once cool put in an airtight container and let it sit in the fridge for a few days until a little hardened and slightly stale before assembling the petit fours.

A few days later: take out the sponge and cut it into neat and even squares BEFORE you prepare your icing.  Mine are about 2.5cm (1″) square in size, but obviously you can go whatever size you wish… square, however, is traditional!

Also before preparing the icing, have the desiccated coconut ready in a shallow bowl for the coating step.  Only then, continue!

Icing:

3 1/2 c icing sugar
1/4 c cocoa powder
1 Tblsp melted butter
1/2 c boiling water

Large quantity of desiccated coconut for coating… around 300g should be plenty

mix all ingredients except coconut! together thoroughly.  To save time and an extra pan; (remember the first rule of baking; minimise washing up at all costs!!) I just put the unmelted butter on top of the dry ingredients, and just slowly pour the boiling water on top of it; it quickly melts the butter into the mixture, saving you the extra step of having to melt it first.

To assemble the lamingtons; dump sponge cake squares into the chocolate icing and fully coat them, take out and let excess icing drip off for a second then quickly roll them in desiccated coconut.  Messy, but just do it fast!   It’s far better to do this step while the icing is still pretty warm, as it stiffens up pretty quickly as it cools… you can add tiny bits of boiling water to make it runny again but it’s not as good.

Set the freshly finished Lamingtons onto a wire rack and into the fridge to set completely.  They can be frozen, and in fact are DECLICIOUS eaten frozen during the summer.  Personally, I prefer them frozen… in any case it’s best to at least keep them in the fridge.

Real talk; this rather prosaic and un-pretty packaging below is how my family actually receives them….  when it comes to serving them up to guests I like to arrange them either in a militarily, strict grid on a square plate… OR even looking all dishevelledly pretty in a jumbled mini-mountain of lamington-boulders, like in the picture at top; but to give them away I buy these airtight, snap-lock boxes from the supermarket to pack ’em in.   Not super glamorous but they are super practical… so people can pop the boxes straight into the freezer, and keep the containers afterwards to store other food in them, if they wish.

Also I just wanted to show here our gift tags for this year… made using the leftover bits of card from when I made my iceberg advent calendar recently.  There was this little pile of randomly shaped card leftover and I couldn’t bring myself to throw them out with a need for Christmas gift tags just around the corner!  I once again wielded my trusty old star stamp … oh, and can I just say, if I could say something to my younger, newly adult self, it would be GOOD ON YOU! for buying a small selection of stamps and high quality ink pads during that early, brief card-making phase, because for decades now I have continued to use these every year to make Christmas gift tags for practically nothing since they’ve paid for themselves a gazillion times over now.

waste not want not!

Merry Christmas, all!!!

Oh! and a random note about life here lately… I just have to share this… we’ve had a little family growing up in our garden over the past few weeks! a couple of willy wagtails built a beautiful and perfect little nest up in the upper boughs of one of our potted ficus by the pool… we watched with great interest as the two birds took turns sitting on the nest, until one day…

and then the next day…

and the next:

last Sunday:

Monday;

Tuesday:

Wednesday:

Thursday:

on Thursday arvo, one of them popped out of the nest!! it sat on the bough for a few hours but later on hopped back into the nest for the night.  Every night a parent would sit on them all night…

on Friday, the parents started teaching them how to fly!

obviously I kept Clara inside all of this day and the next… I didn’t want them stressed out about her presence.  It was too cute watching the babies in their wobbly attempts to fly, flopping onto our outdoor table and weaving a little drunkenly through the patio.

Two ended up in the lemon tree where they spent the night, the third one, which seemed a little less developed than the others, stayed in the nest another night.  The parents were still catching insects for all three of them, and caring for them constantly…

Saturday:

all three end up in the lemon tree where they stay huddled up together most of the time.  The parents are still spending all their time catching insects for them and looking out for them, encouraging them to fly.

Sunday: empty nest syndrome….  🙁

they’re still spending most of their time huddled together, although they’re moving about from tree to tree, and while they seem to be catching a few insects here and there the parents are still feeding them a bit.

Well.  That’s where we stand.  It’s totally amazing how fast they’ve grown up!  there were a few days there where I felt they were changing almost by the hour!  I can’t even express what a gorgeous pleasure it’s been to witness this little family growing up and such a privilege that the parent birds trusted us just enough to build their nest here in our garden.  I just hope the nest will be used again next year!

SaveSaveSaveSave

SaveSave

SaveSavepinterestmail

an armada of icebergs…

Sooo… what tasteful works of homemade Christmas art has Carolyn proudly displayed in the entrance hall to assault the eyes of unsuspecting visitors to our house, hmmm?    Oh, a whole bunch of little cardboard icebergs… hmmmm, ok, yeah.  “Interesting” decor choice…  #kindergartenchic #sohotrightnow

It’s an advent calendar!!

Also; I’ve just looked up what is a group of icebergs called, and it’s an armada.   Cool, eh!

So, I saw this cute advent calendar on Burdastyle and couldn’t resist… because I freaking LOVE Christmas! and particularly Christmas crafts and all those fiddly decorative bits and bobs that you get to strew about your house….  maybe I even don’t mind a bit of baking too?!  Just a teensy bit…?  Maaaaybe  #notreally  😉

On the site it’s called an Origami advent calendar, which is perhaps a little bit of a misnomer… because my understanding of “origami” is that there must be no cutting nor any sticking/pasting too, and these cute little contraptions involve both.  If not origami though I don’t know what you’d rightly call this kind of construction, actually.  Just … making boxes?  cutting and pasting little receptacles together?  Well, whatever.  It’s a free pattern.

I used some card stock that Mum and Dad gave me when they cleaned out their shed…. it was perfectly clean and in very good nick! traced the template and cut out 24 identical shapes.  So my icebergs are all the same size.  In retrospect, if I was going to do this again (unlikely) or even if I re-use them for next year I would mix it up size-wise by printing out the template in two or more different scales, say 75%, and maybe even also as small as 60% to get a little range of sizes.  I think they’d look pretty cool with more of a variety of sizes, but I’m ok with how the arrangement looks for now.


Anyway, let’s be real… it’s the contents that you get excited about, really!

Instead of sealing the boxes completely closed with double-sided tape as recommended, I put tiny strips of velcro on it, so you can open the boxes to get to the sweeties inside without potentially destroying them.  See, it took quite a while to make 24 little boxes, like hours! and so I’ll probably re-use them, at least one more year.  Hopefully more!

For the numbers, I used my old alphabet/number stamps that I bought many years ago… during my cardmaking phase.  I found the boxes can fit up to four Lindt balls, with a bit of manipulation and shoving.  Probably Craig and I will be the only ones excited about popping open the daily “iceberg” and counting down until Christmas.  Or maybe, just me!

speaking of icebergs… I took these pictures in the vicinity f Le Conte glacier, Alaska, during our trip there this year.  So so beautiful!!!


I don’t know if I’ve ever shown here my other, far less trendy, advent calendar, that I made yeeeeeeears ago when the children were little… I seem to recall it was a free pattern too, maybe from the Woman’s Weekly or Better Homes and Gardens something like that.

I still put sweeties into the heart pockets every year and have this year too, although who knows when my children will drop by and eat them?!  This one’s a bit “country” but in my own defence that was the hippest of hip decor styles at the time!  I know, it’s a bit dated now, but that can’t be helped…  if there’s one set-in-stone rule about style, and this goes for decor and fashion; and that’s that what is HOT one year will definitely be NOT in a few years!!

one of the fabrics was designed by a Carolyn somebody, whose name was printed on the selvedge… and I had the brilliant idea of snipping off a “Carolyn” and attaching it to the back, seemed fortuitous at the time.  Now I’m mentally apologising to the de-surname-d Carolyn who actually designed the fabric… whoops!

Now, if you’ll excuse me I still have a small avalanche of fabrics awaiting transformation into Christmas gifts and my summer wardrobe, and it’s already the first day of summer so I’d better get cracking…. au revoir!!

SaveSave

SaveSave

SaveSavepinterestmail

Christmas mignardises


IMG_7565

So, every year I make something small to give to close friends and family for Christmas, sometimes a Christmas ornament, sometimes a sweet treat to eat.   This year, I decided on eatables; mini Christmas-pudding mignardises.  Cute, non?

The idea and the details are probably not new but I did adapt from several sources, so I thought I’d compile here my method for making them…

First up, the Christmas cake

My standard fruit cake recipe,  given to me by my old friend V yonks ago, I’ve been using it ever since.  It’s a nice boiled fruitcake, very moist, so a good choice for making the cake-balls.  I doubled up the ingredients to make two fruit cakes, and this plus one quantity of rum buttercream icing should make approximately 140 bite-sized balls, if you don’t eat any in the meantime  😉

IMG_7525

Pineapple boiled fruit cake:  (these quantities are for one cake, double this quantity is required for the remainder of the method)

Tip the following ingredients into a saucepan:

450g can crushed pineapple, drained but reserving a little of its juice just in case
125g butter
375g mixed fruit
1 cup sugar
1 tsp mixed spice
1 tsp bicarb f soda
pinch salt (optional)

Boil, stirring, for 10 min, if it starts to stick stir in just a splash of reserved juice.  Allow to cool, then add:

1 cup self-raising four
1 cup plain flour
2 eggs

Mix in well.  Again, if it seems too thick, add a dash of reserved juice.
21cm square cake tin, 160C for about 40 min or until cooked, leave for 5min in tin, remove to cool completely

As mentioned, this quantity makes just one cake, for this method double up to make two.  Once the cakes are cooled completely it’s time to make the balls…

Now; you’re forming the cake into balls using buttercream icing as the binding agent… I found my basic recipe on taste.com but to impart a festive Christmas-sy flavoured air to them I substituted a large dollop of rum in lieu of some of the milk.  If you don’t want the alcohol just use all milk and no rum, or just a dash of rum essence, for the flavour.  I found this quantity to be enough for the two cakes, so halve this quantity if you’ve only made one cake.

IMG_7526

Rum buttercream icing:

125g butter
500g icing sugar
4 tblsp rum + 2 tblsp milk

Cream butter until smooth.  Stir in about 1 cup of sifted icing sugar.  Add rum + milk and mix.  Stir in the remainder of the sifted icing sugar, beating well until smooth.

It starts to dry out straightaway, so use immediately!

IMG_7529
I rolled the balls, half a cake at a time,because it’s kinda messy work and this was all I can handle, but whatever works for the individual of course.  Anyway, break off a sizeable piece of cake that you can handle and crumble into a large pan.  The pieces should be fairly small and crumb-y, but obviously there are going to be some chunky fruity bits, don’t worry too much about a very superfine consistency.  To half a cake worth of cake crumbs, add a quarter of the rum buttercream icing and knead and mix it in thoroughly with your hands, then take about a tablespoon at a time, or bite-sized pieces, roll the mixture into balls.  No doubt about it, this is messy work, best not pick a day you’ve just had a manicure; although I will say that the butter etc all over your hands impart beautifully soft skin afterwards!  When rolled, push them into the bench ever so gently so they have a little flat base, so they can stand upright without toppling over.

IMG_7530

Decorating:
I found this quantity of cake to require:

650g white chocolate
400g glace cherries

Melt chocolate in three of four batches for ease of handling, and either dip the balls or drizzle over the cakes, so as to look like custard or brandy sauce as it’s poured over Christmas pudding.  Push half a glace cherry on the top or use other glace fruit, if preferred.

Done!  Keep them in the fridge until required.  They can go individually in mini-patty pans to give away, or not, because I think they look pretty cute all by themselves!

IMG_7576

Festive and delicious! good for an after-dinner treat and they go very nicely with a morning cuppa too, ahem.  I hope the family enjoys them!  🙂

IMG_7570pinterestmail

fun with gingerbread

*sings* Have yourself a very gingerbread-y Christmas…

Gingerbread!  Gingerbread madness  🙂
I love the stuff but I pretty much never make it.  Until I do and then it seems like I become temporarily obsessed and will make a lot, maybe to compensate for not having made it in, like, ten years or so.  Madness.  
See, I decided I would make gingerbread men to give for Christmas gifts this year, and so made a big batch.  See above.
Then I thought it would also be nice to make a gingerbread house for Christmas Day too.  So drew plans and made a few more batches of gingerbread.  Can I just say; designing gingerbread houses is a lot of fun!  A lot more fun than actually putting them together, haha.
Mine is a pretty wonky little house but hey! shrug.  My family politely admired it!  And I’ve learnt a few tricks, from my mistakes.

For example; if, like me,  you’re a gingerbread house newbie, don’t try to make it symmetrical and perfect.  There lies inevitable failure and grief at your own ineptitude.  Just aim for charming wonkiness and asymmetry right from the get-go! and then you may happily bask in the success of your ploy, mwahaha.
Also, roll and cut out the house pieces straight on the baking sheet.  Picking up and tranferring the pieces can skew them a tiny bit.  Ergo, wonkiness.
Make the walls thicker than the roof pieces, to stably hold that thing up.
Also, pipe any fiddly decorative curlicues on the flat, before construction.  Seriously, that bizz is freaking difficult enough already, no need to make it more so.
 Then at some point I looked my first set of gingerbread men and judged them to be a bit big and not very cute at all; really a totally unacceptable gift!  I decided that only cute, mini gingerbread men would do.  Went out and bought a new, mini gingerbread man cutter, and made stacks of baby ones.  Was satisfied with these.

 I’ve kept the rejected big ones with green buttons for my family, and the silver- and pink-buttoned ones are the good ones, that I gave away.  Yes, my poor family have no choice but to eat big, non-cute gingerbread men, awwww!  I’m such a bad mum  🙂

I used a recipe from my mother’s Scandinavian cookbook, that she has had since the 70’s.  I doubt it is in print anymore so I’ve reproduced the ingredients here:
Gingerbread

100g butter
225g dark brown soft sugar
1tblsp each of ground ginger and cinnamon
265g treacle
900g flour
1tblsp bicarb of soda
approx 235mL milk
Melt and mix the butter, sugar and treacle, then add the dry ingredients all at once and mix in thoroughly.  Stir in the milk, then knead to a consistent dough-y texture.
Roll out to desired shapes.  These quantities make quite a lot of dough, enough for a small house.
Bake at 175C, for approx 12-15 minutes, depending upon the size and thickness of the pieces.
Join the house pieces with toffee, made by dissolving and gently boiling plain white sugar until it reaches the hard crack stage.
Icing: beat 1 egg white until stiff, mix in 500g icing sugar.  Note; not “icing mix” which will not set properly.  Add in a coupla squeezes of lemon juice to get a good piping consistency.
Merry Christmas everyone!

pinterestmail

the Wolery

After my brothers and I had all moved out of home and started our own families; I started a rather non-rigid, and not annual, tradition of making a Christmas ornament for each of us… just something silly and small, not anything of great worth or anything but something that could be a commonality to us in our separate homes.  This year I was happy to find the time for it again  🙂
so please say tu-whit, tu-whoo!  (trans.  Hello) to…
the Black parliament above
the Green parliament 

the White parliament

and the Brown parliament.

I used this pattern developed by Moonstitches, and I used old corduroy jeans, some scraps of cotton and embroidery thread; and the little buttons I had to buy new, from Spotlight.  Each owl has a circular cardboard base, covered with cotton and stitched in place.  I slipped a glass bead inside just before stitching the base on, to make the owls bottom-heavy and to help them stay upright and not blow over.
I just love how the tiniest variations in height and width, and the placement of the beak and the eyes, results in very distinct and individual personalities in each owl!

Merry Christmas all!pinterestmail

Switch to mobile version
↓