Spicey Rose chenille scarf

Here I’m in soccer Mum mode again… we lost…
Not to worry, my scrummy scarf is to be talked about here today.  I’ve possibly worn this before on the blog but not mentioned anything about its province, so today it gets a post of its own.  I wish I could remember the name of the Colinette yarn I used; I bought and knitted it up about four years ago and it’s since been discontinued and I can’t find any old tags or any info on the net to enlighten me.  The best I can do is to tell you it’s a chenille in a beautiful array of toasty, spicy, berry-preserves colours guaranteed to start warming you up before you’ve even wrapped it around your neck…
I bought 3 balls, cast on 80 stitches and just knitted in garter stitch until all three balls had gone.  Now usually I prefer not to use garter stitch in a scarf as it has a sort of “first scarf” look about it, but it this yarn’s case I think it works all right.
Sorry about the slightly blurry close-up.  I didn’t notice how bad this photo was when I looked in my camera’s viewfinder (I think I might need spectacles!), but no matter as you can still get a feel for these lovely colours and generous dimensions of this scarf which have made it such a “nice” component of my winter wardrobe.  Inverted commas on the rather lame usage of “nice” there, because I couldn’t think of a suitably rave-y-type adjective that perfectly encompasses the versatility of a scarf that works just as well as a casual scarf, as here, and yet capably transforms into an evening stole when I want it to… if I wasn’t so lazy I would get dressed up to show it in evening mode, but that will have to wait for another post.

Details:
Jeans; Soon
Top; Ezibuy
Scarf; made by me, Colinette yarn
Boots; Mina Martini, from Marie Claire shoes

pinterestmail

Winterblue shirt

You’ve heard of “wintergreen”?  Well I’ve decided this is “winterblue”!  You know, a sort of arctic colour scheme and with the snowflake-like print ‘n all…?
Today is my son Tim’s birthday, so of course I had to make him a shirt like his brother’s, see here…  Tim really feels the cold so I made his out of warm-as-toast plaid cotton flannel, a fabric that caused a few queries about the “pyjamas” I was making but in keeping with my surfwear research of the other week!, and using Burda 7767 (yes, again…)  Again I used press studs in lieu of buttons throughout, and added a tab inside the sleeves so he can roll his sleeves up; the preferred mode of wear.  Although the cuffs and sleeve plackets are there and finished to perfection (if I say so myself!) they will probably never be seen!
Please note that the checks match up perfectly, and that the pockets are mini symmetrical works of art; patched and with the outer half placed on the diagonal, pocket flaps also on the diagonal and stripes going in the opposite direction on each side.  I’m kind of obsessive with my patterns like that!  Do you like the little message I put inside the yoke?  I ran out of the flannel (it came in a much narrower width than I realised when buying it) and so used some of the leftover cotton from Sam’s shirt to face the pocket flaps and for the inside yoke.  
He says he loves it, and is wearing it now.  Happy birthday, Tim!
Today’s random picture below, an inadvertent experiment by Tim; what happens when you leave a felt-tip pen uncapped and resting overnight against a roll of absorbent toilet paper?  Scroll down to find out…

pinterestmail

Moody Blues socks

This is another pair of socks made from leftover wool (the stripe) and the plain blue Patonyle sock wool I bought to help eke out the leftovers… these socks have shrunk to the extent that only my daughter can wear them.  I’m just relieved she likes them; she says they’re nice and warm.  It’s hard to believe they once fitted my feet!!  
It’s obvious in this picture that the blue stripe sock wool (Italian) has laundered and worn far better than the Patonyles (Australian) wool; which has shrunk and pilled and felted somewhat… a lesson in sock wool purchasing for the future…  it probably just means the acrylic content in the Italian wool is higher, normally I would plump for the pure wool product every time but an acrylic component is a desirable evil in a sock wool.  Particularly in my household with its high teenage population, where tossing the socks in the washing machine is always going to win out over handwashing…
This morning I was telling my friend E about my self-imposed 6 month shopping ban and she reacted with the same incredulity that all my friends have (what a funny thing to do! why on earth are you doing that? the general response)  It’s funny that my 6 months is almost at an end (end of June! not that I’m counting!) and it’s only just now I’m telling my friends about it.  Why is this?  I shouldn’t be ashamed, but proud.  Maybe I was afraid of failing?  However there it is, I’ve been too embarrassed to tell my closest friends until now…  E wondered if I was going to rush out and spend up three times as much as I would have, but I truly think my shopping habits may be permanently changed by the exercise.  Not that I’ve ever been a big shopper by any means as I’ve habitually made such a lot of my wardrobe.  And my shopping habits have always been to buy high quality, infrequently, and that won’t change.
But high up on the shopping agenda will be some new sunglasses (I’ve lost mine and am borrowing Cassie’s lately!) and some underthings (I know some clever people make their own, but I prefer to spend my sewing time making other garments and just buy the undies!)
Today’s random picture below; taken by Sam

pinterestmail

Tobacco wool sheath

I made this tobacco wool-mix dress using Burda 8511, with fitting modifications about two years ago.  The modifications were namely creating two long and deep front darts, deepening and lengthening the back darts, and bringing in the side seams.
I think this is a great sheath pattern, obviously as I’ve used it four times already (to see the other versions I’ve made click on the Burda 8511 in the labels below), but it does suffer from being a bit shapeless.  Every time I’ve made it I’ve modified it quite a lot, just to get some shape into the thing.  I guess though this is why we buy these paper patterns or attend workshops to make up our own slopers or whatever; so we can get a basic workable shape to start us off, with which we can then play with from thereon.  Add our own exciting details as the whim strikes us.  The joys of dressmaking, no?
I made this for a winter dress, so the top half of the bodice is self-lined, with bemsilk lining the rest of the dress; super warm…  This way I’m wearing it today is the way I was customarily wearing it two years ago and I think maybe it’s time to dress it up a little differently?  Yeah well, we were all into pinafore dresses back then but perhaps it’s time for a new interpretation?  I’m not sure if I look “hot”, or just “not”.  Thus the long shot above, as I have a sneaking suspicion this tree is a much nicer aesthetic prospect than me in this outfit…
To be honest, lately in the dressing department I’m feeling very mojo-less and need something to boost me out of this flatness.  Any styling suggestions, anyone?
This morning my husband and I went out to breakfast together, which was real nice.  We don’t do this sort of thing very often…  It was quite cold then, but now I’m roasting as I’m looking out at bright blue skies again, and had to smear on the old sunblock before I went out for my walk later.  btw, how do you like my random picture for the day?  Pelicans are usually such somnolent birds, so I was lucky to catch this one wheeling away from the shore on his ungainly take-off; his huge wings flap flap flapping ponderously to get his big heavy body off over the water…  He was a beautiful sight.

Details:
Dress; Burda 8511, with some modifications, brown wool mix
Skivvy;  Metalicus
Tights; Kolotex, David Jones
Boots; Sempre di, from Zomp shoes
Belt; Emu leather
Bag; Gucci

pinterestmail

Adding a lining to a finished skirt

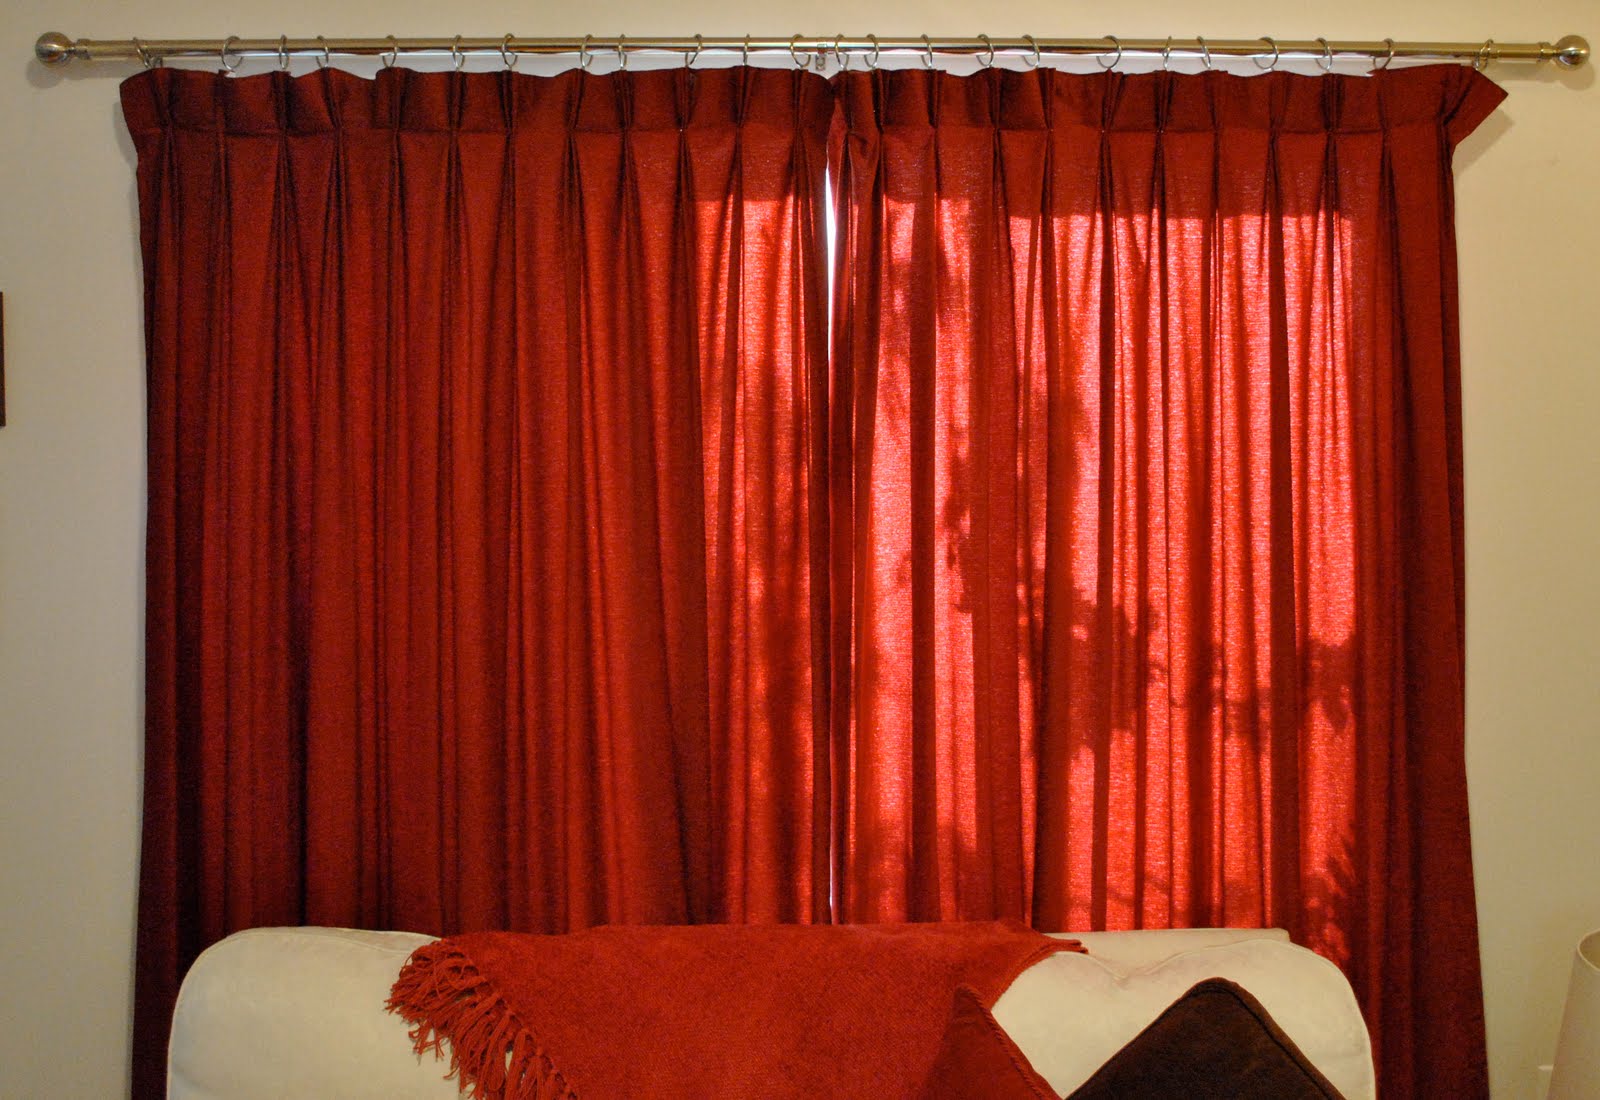
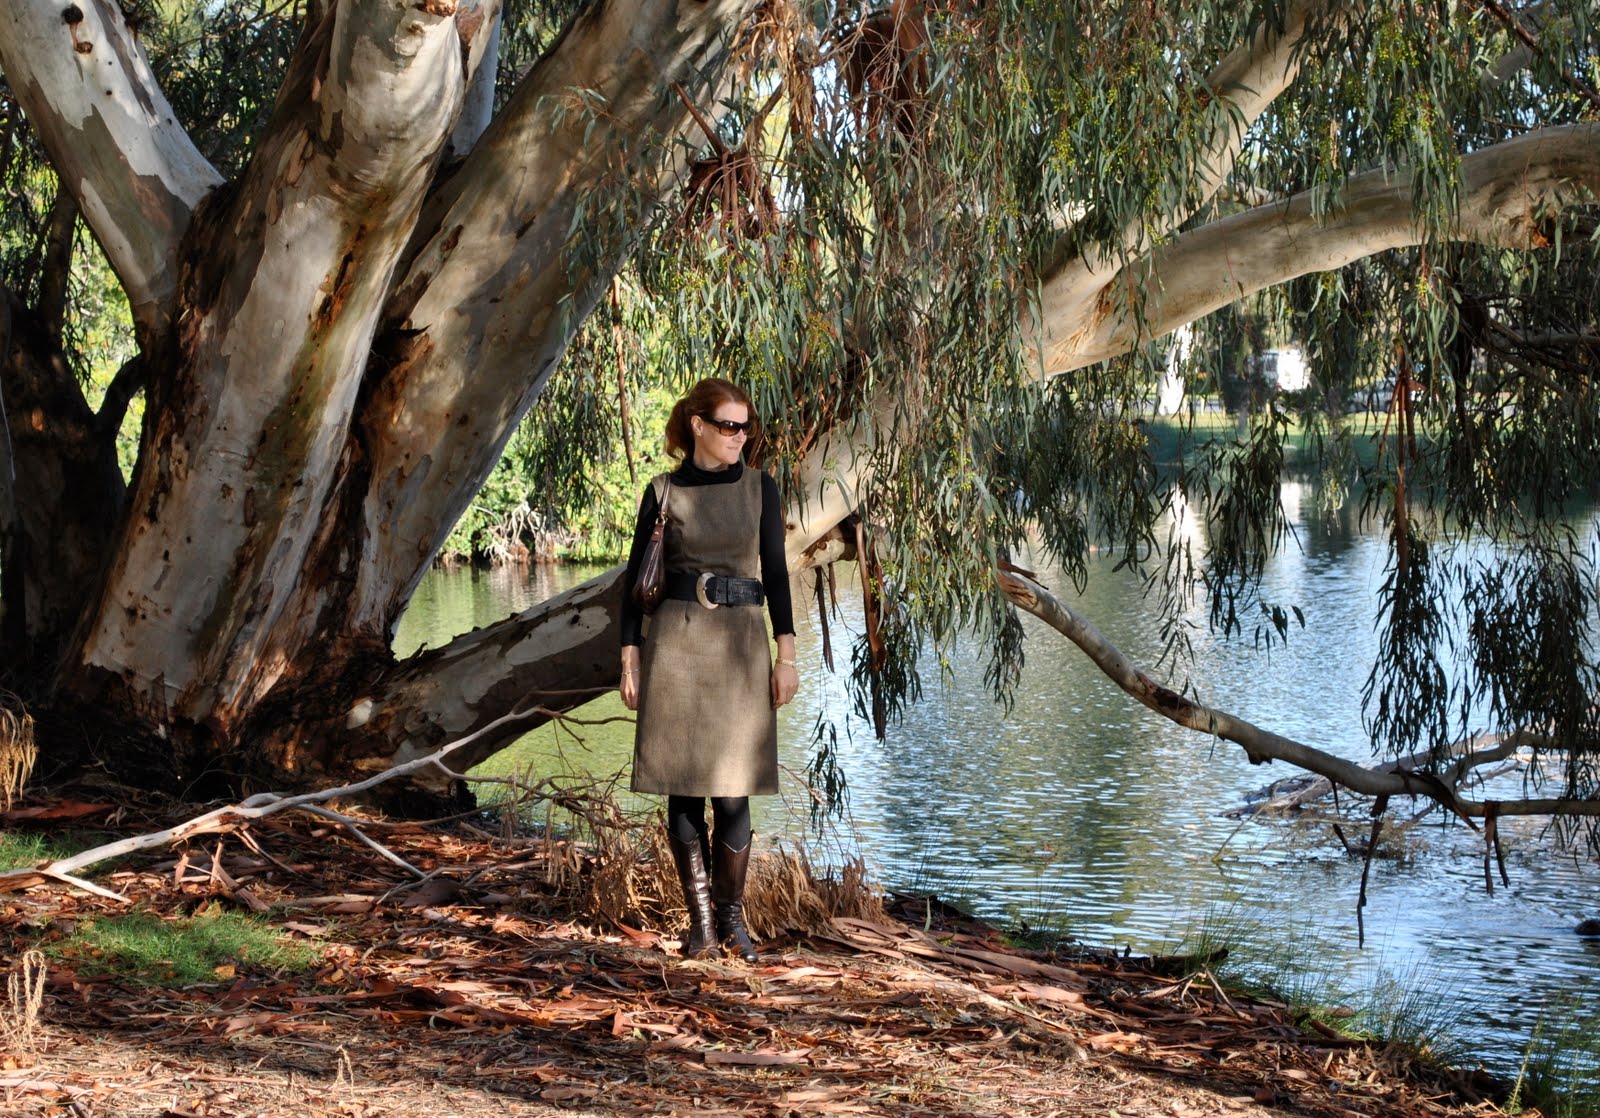
My bottle green basic skirt has had an update!  Well, not one you’d see, but one that will make it tons more wearable in my winter repertoire; I’ve added a lining.
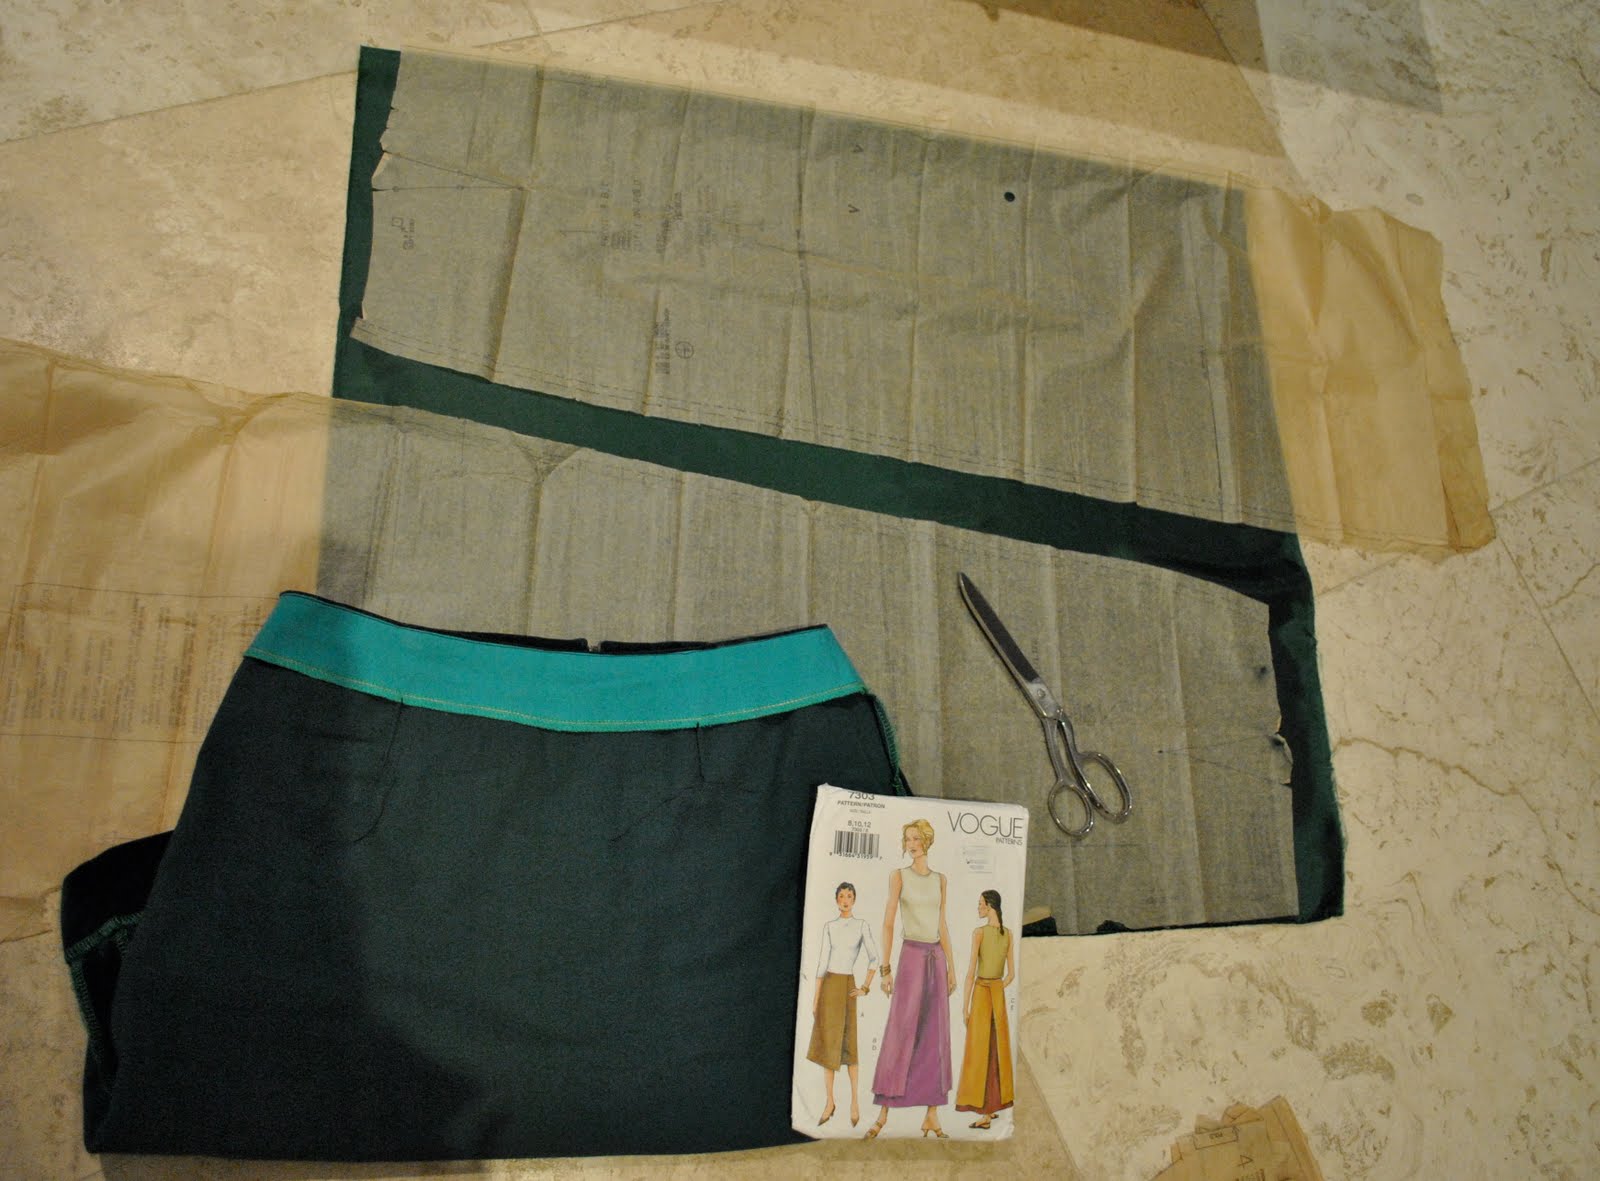
The first few times I wore this in autumn I wore it on its own (see left) and all was hunky-dory.  Then as the weather turned brisker I started donning tights to keep the pegs warm and an immediate problem reared its ugly head… barely half a day had gone by before the skirt sticking to my textured tights as I walked and riding up in a most unladylike fashion became an issue… something had to be done and fast before I could decently wear this thing out in public again!!  So the next time I visited my favourite fabric shop I bought 70cm bemsilk lining in emerald green.
The pattern I used for this skirt Vogue 7303 is ordinarily an unlined skirt with an internal waistline facing and a centre back zip, which is how I made it up for this skirt (this pattern has been used a multitude of ways as followers may have noticed!).
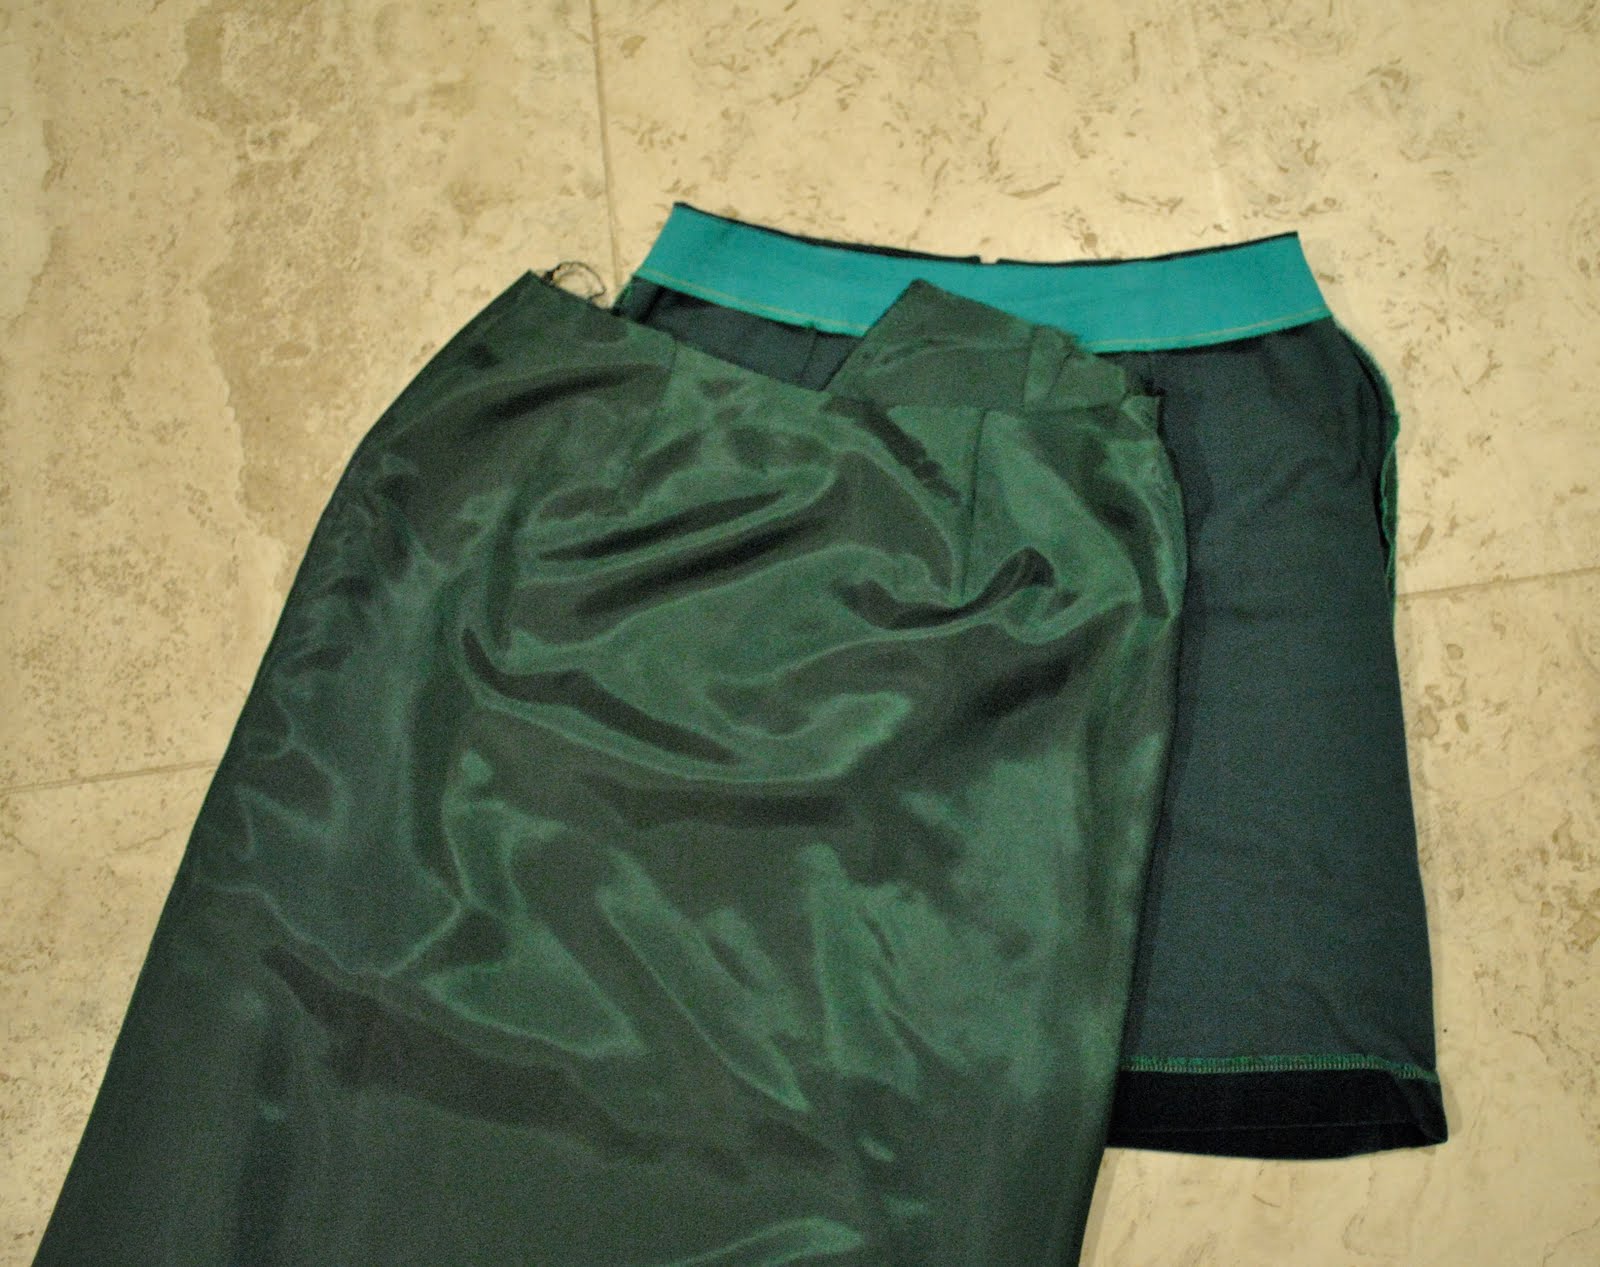
So to line it, this is what I did…    I cut out a front (on the fold) and two backs (laid on the selvedge to get a ready-made finished edge for those centre back edges) from the lining fabric (here the skirt is inside out to show the turquoise facing band, this is invisible when the skirt is right way out);

I made up the lining skirt identical to the pattern, leaving the centre back seam un-sewn, and serged the side seams to finish;

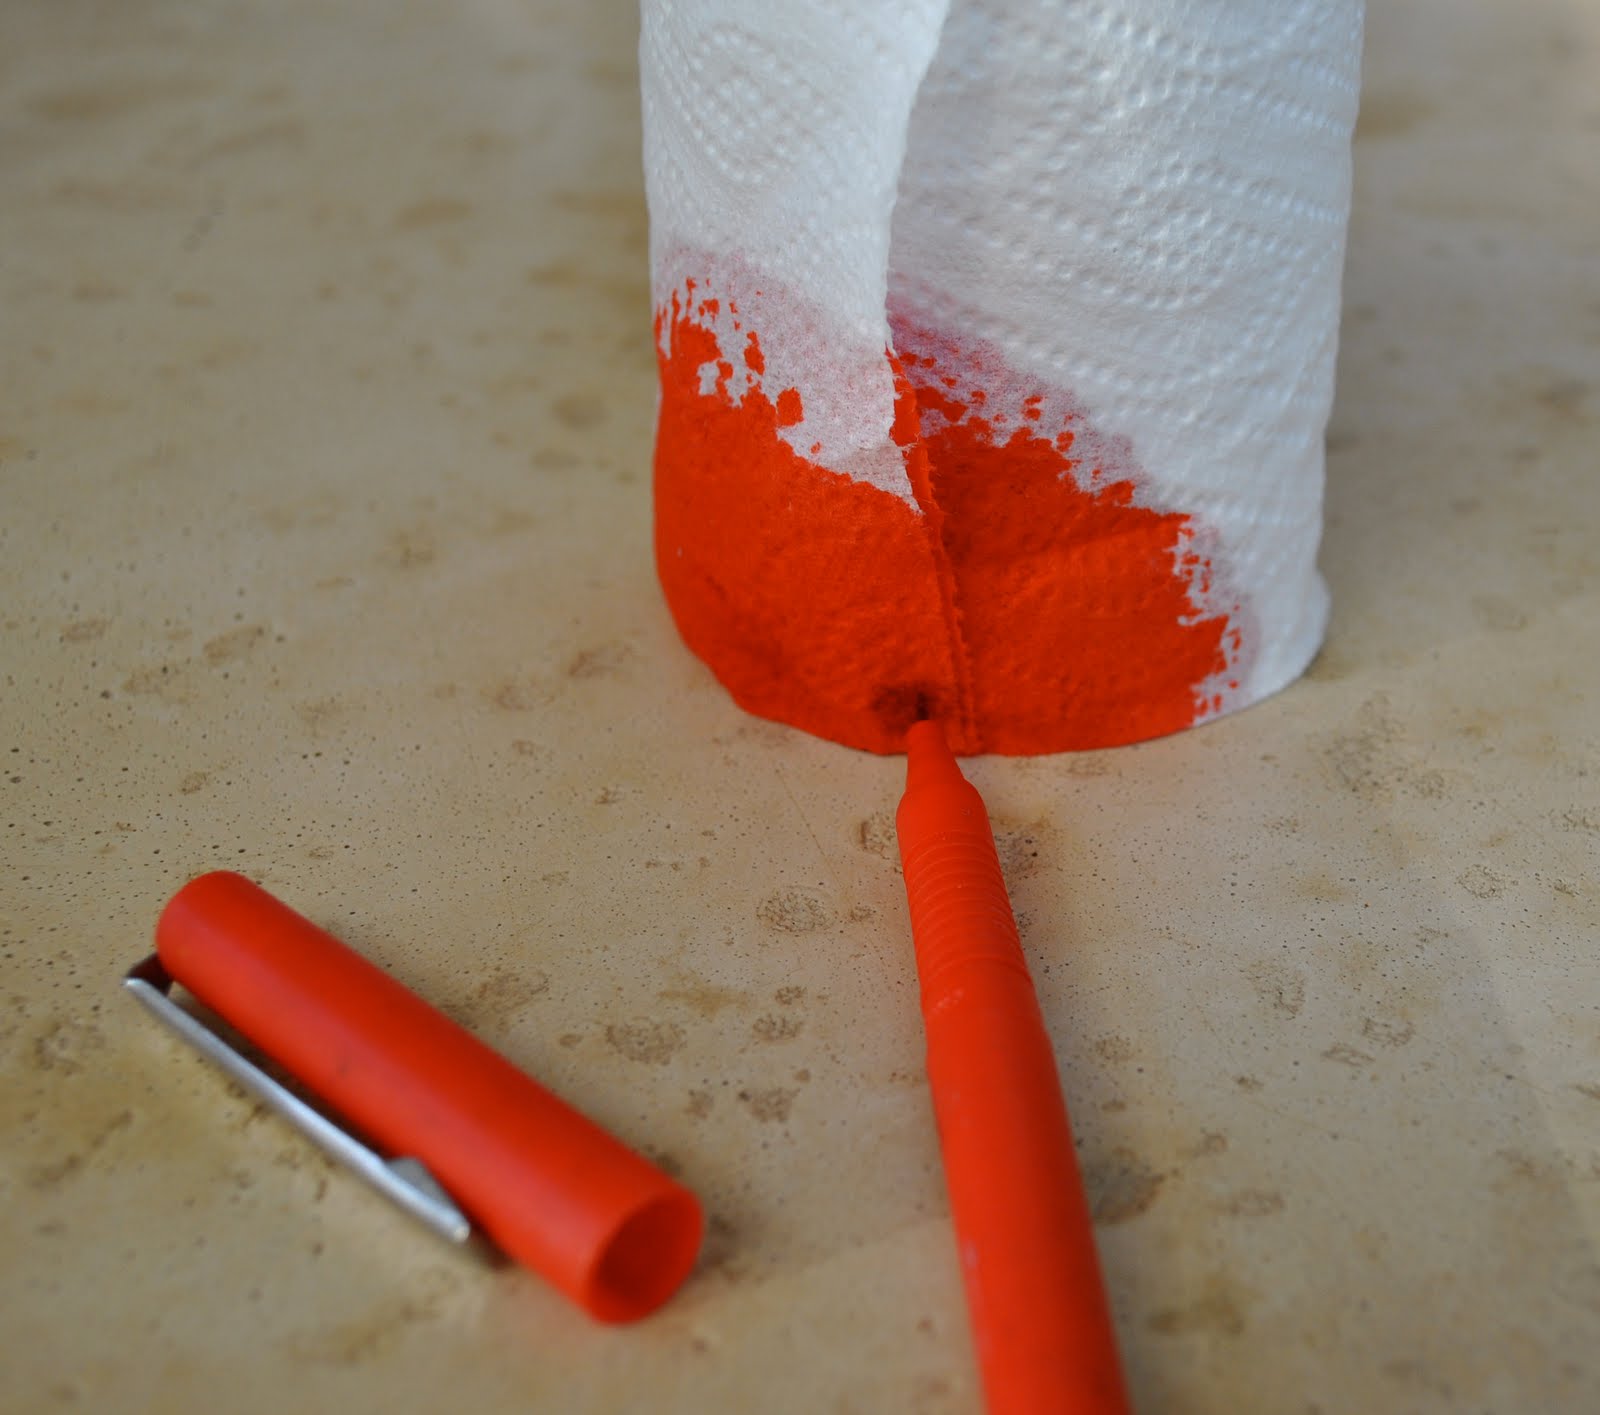
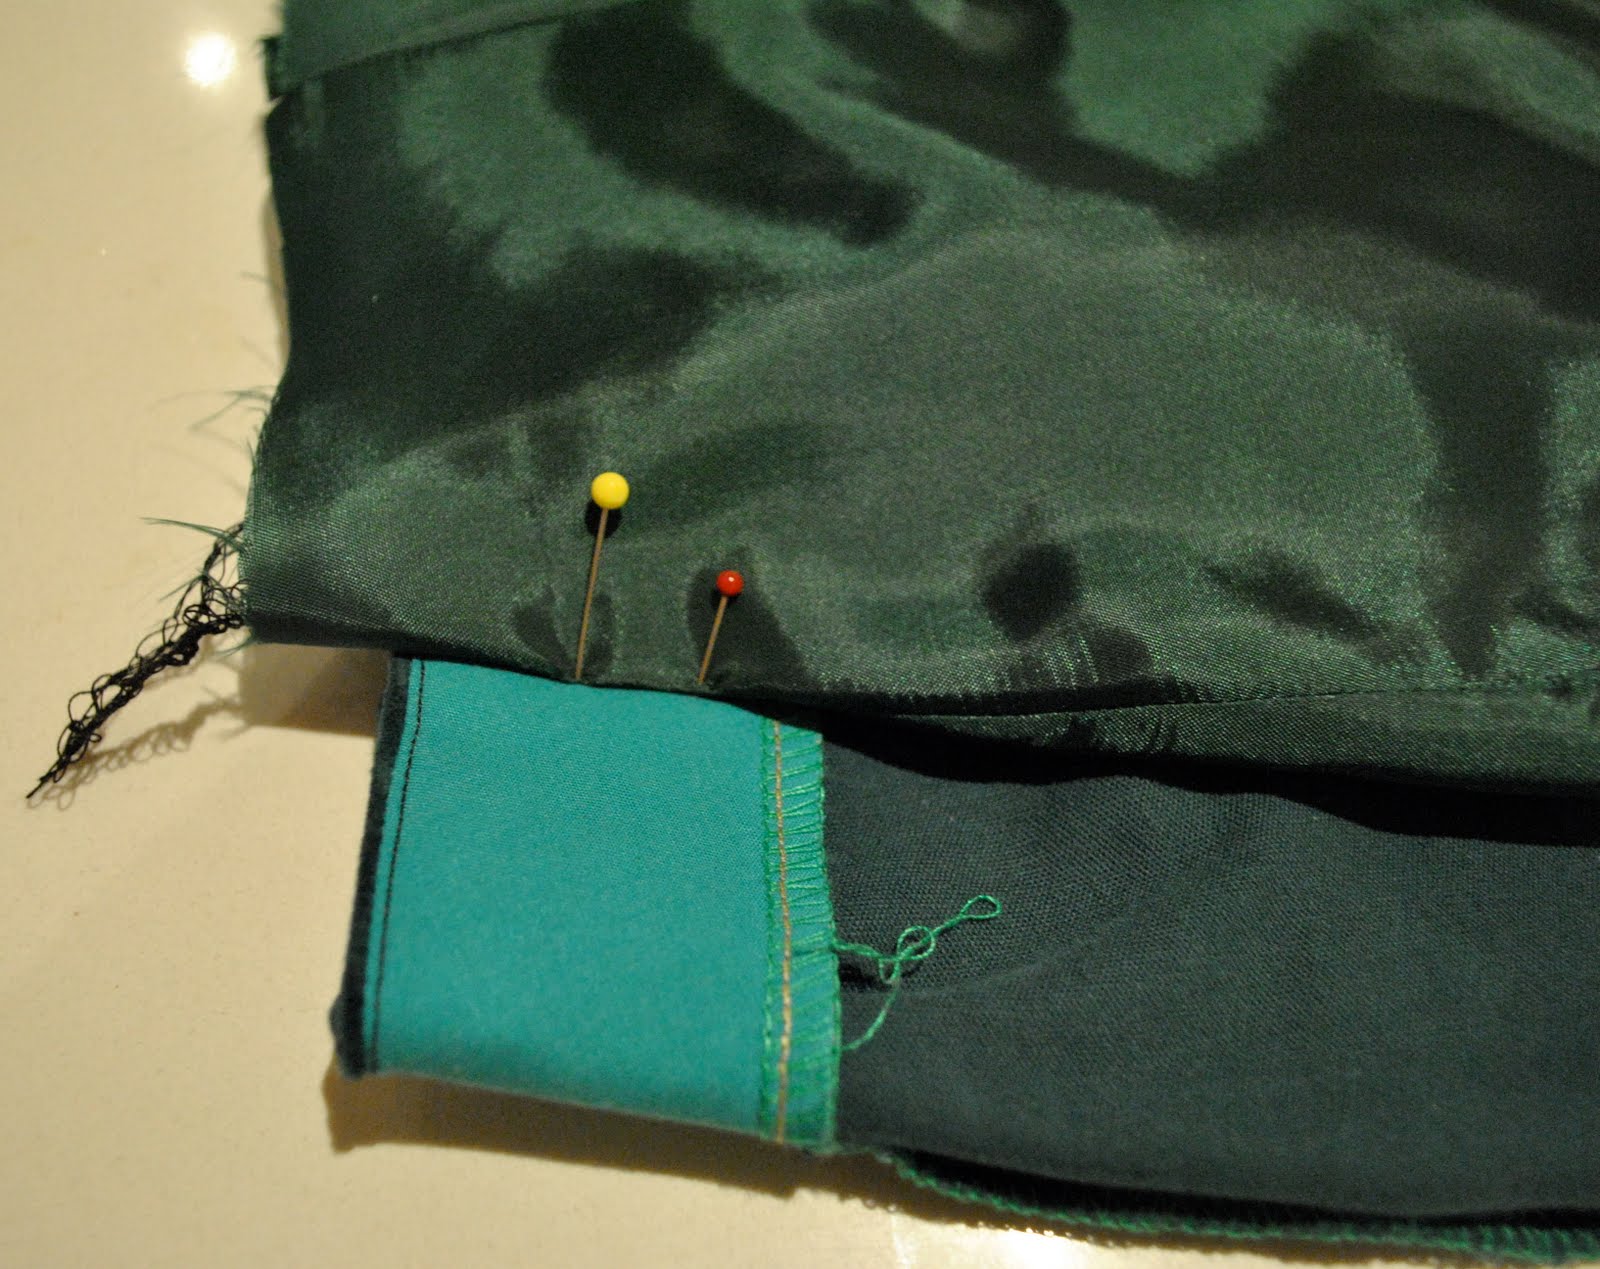
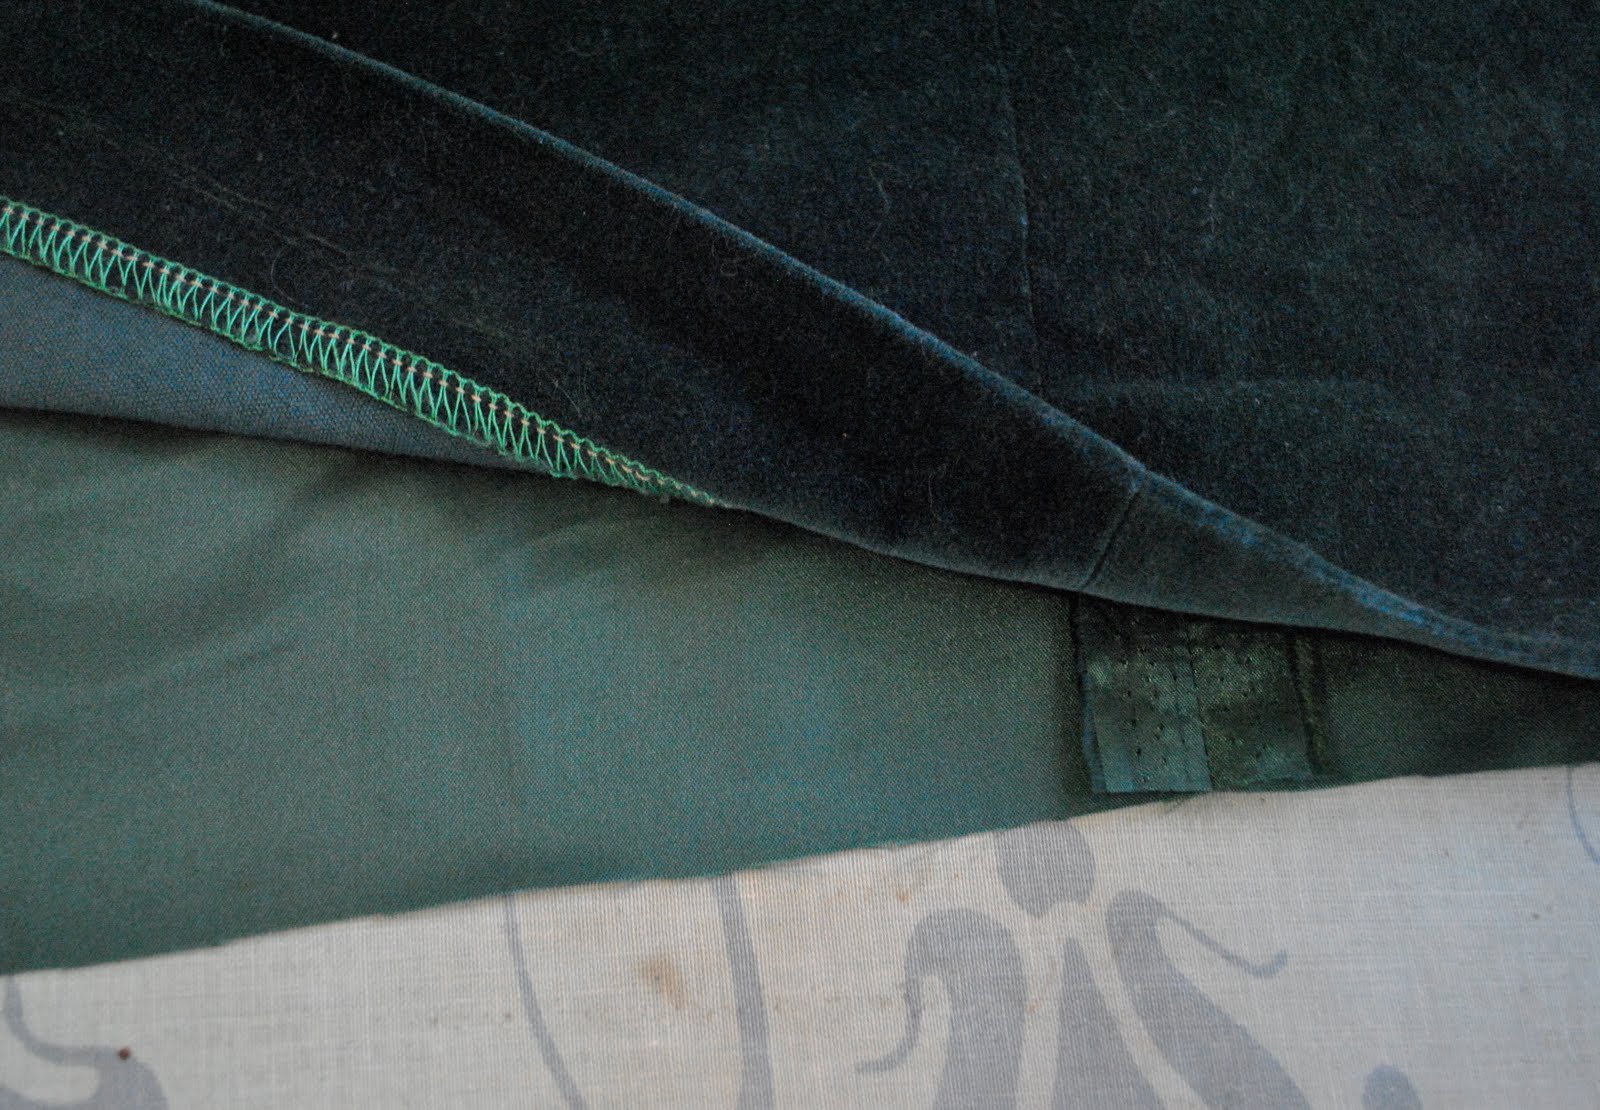
Then the precision measuring bit (not being facetious here, it is pretty important to get these measurements as spot on as possible for a good fit).  I laid the lining skirt onto the finished skirt, so the seam allowance (1.5cm) is overhanging the top of the skirt.  In the picture the red pin is marking a point 1.5cm (5/8″) above the bottom edge of the facing, this will be the stitching line where your lining will be joined onto the facing of the skirt.  The yellow pin is marking a spot 1.5cm (5/8″) above this point; this will be the cutting line for where you can cut away the top of the lining skirt.  Mark both of these lines on your lining skirt all the way around with pins or tailors chalk.  Carefully cut along the cutting line (yellow pin line) around the top of the lining skirt.  

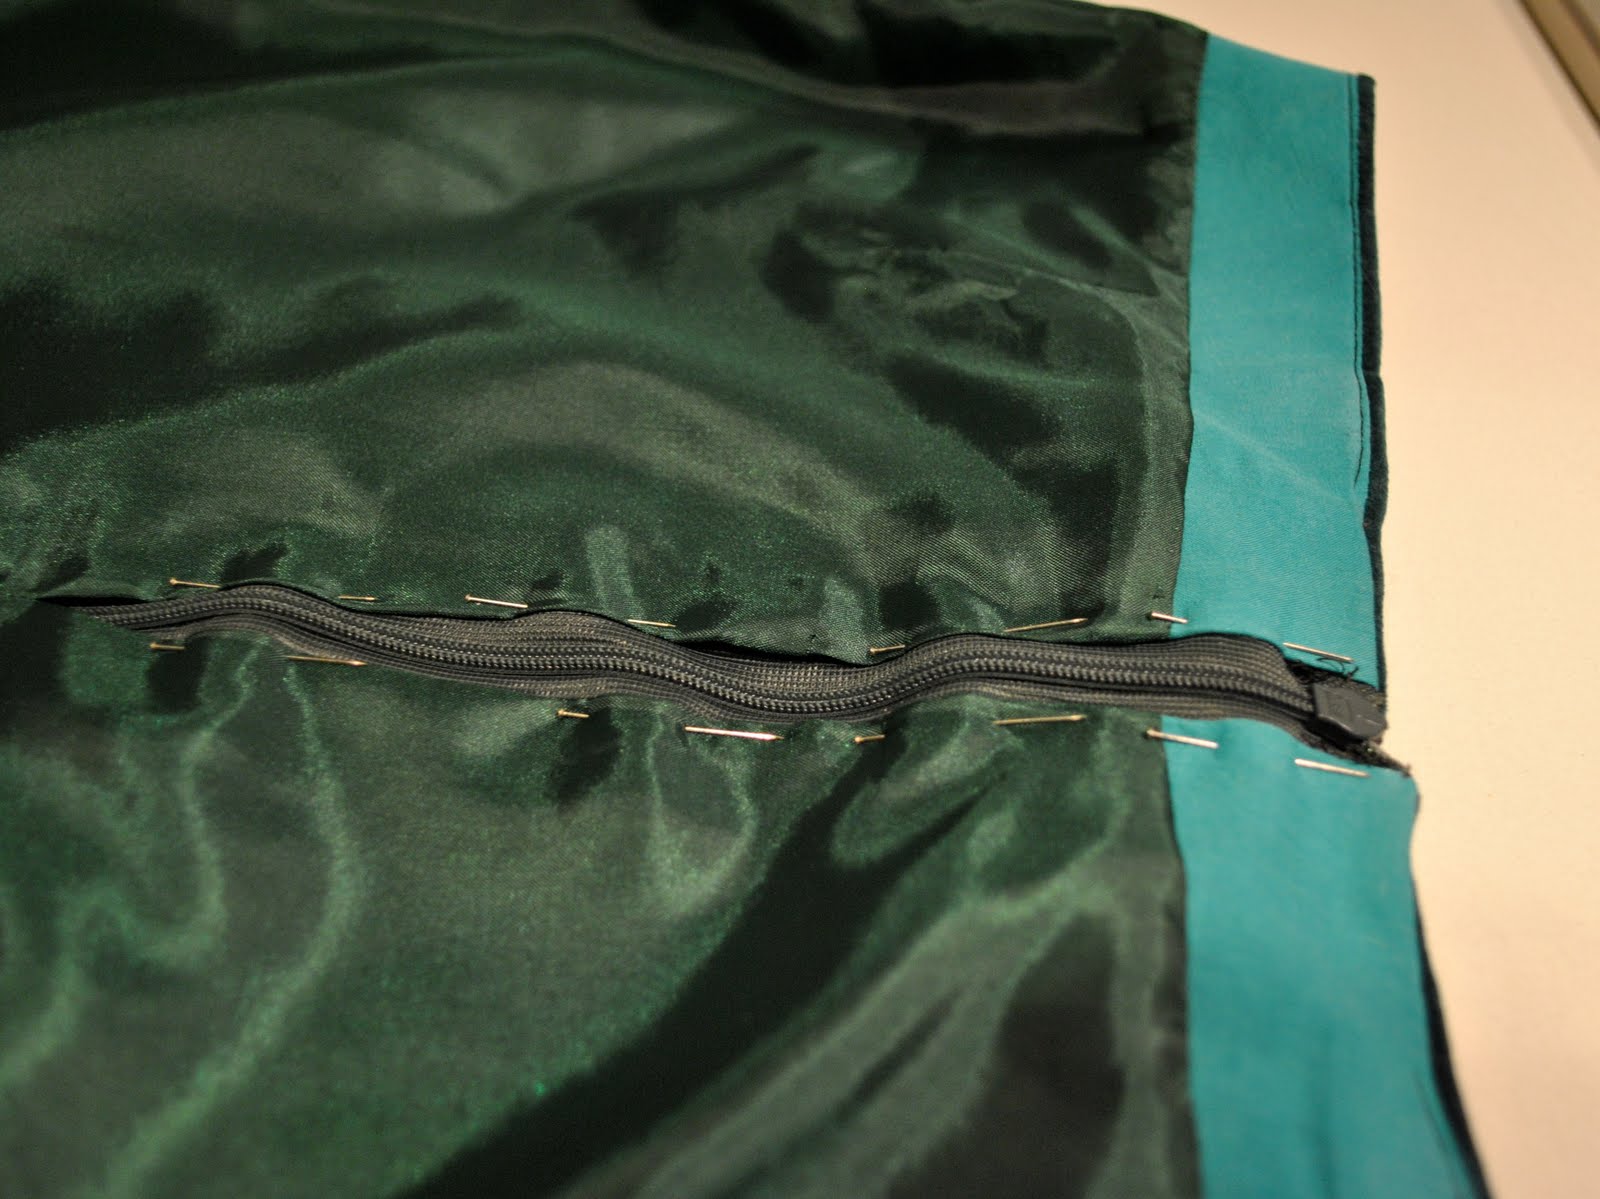
Unpick where you’ve previously joined the facing to the zip tape, and with right sides together and using a seam allowance of 1.5cm (5/8″), sew the lining skirt at the stitching line (red pin line) to the facing.  Serge to finish and press down.  Now sew the centre back seam of the lining skirt to finish at the base of your zip, iron down the seam allowances of the lining and pin to the zip tape.  Hand stitch lining to your zip tape…

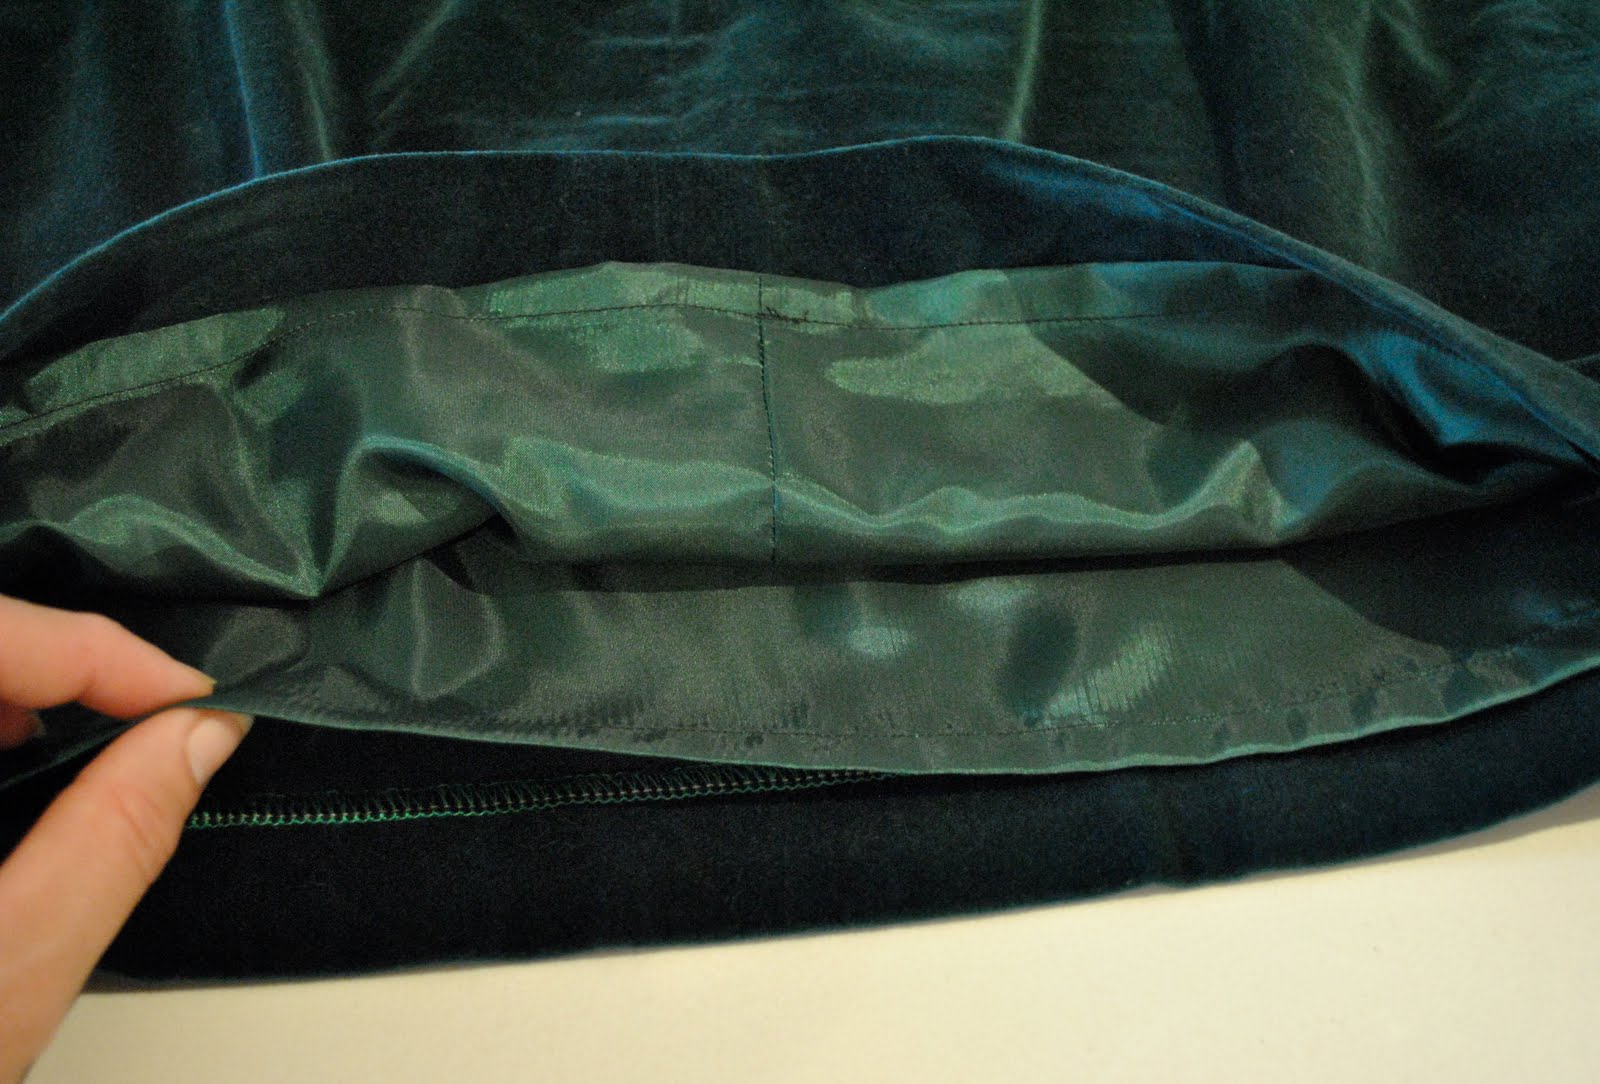
Cut away the lining level with the base of the skirt…

Fold up 1cm, then 1cm again, press, pin and stitch as normal for a lining.

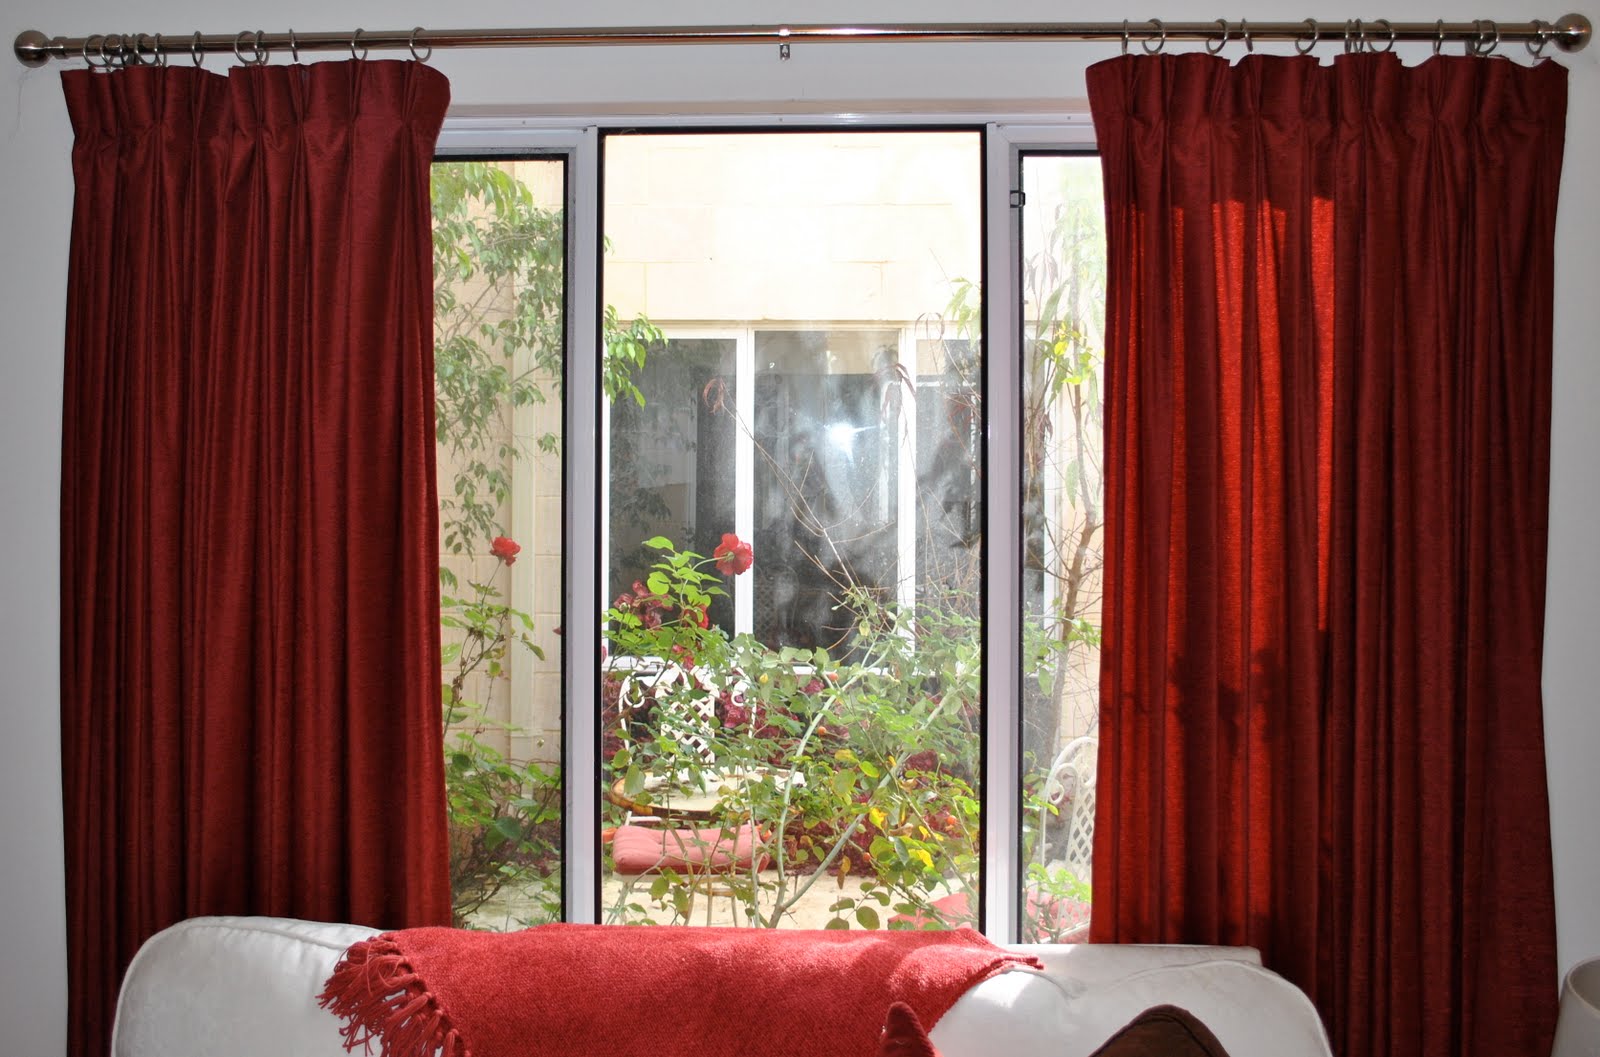
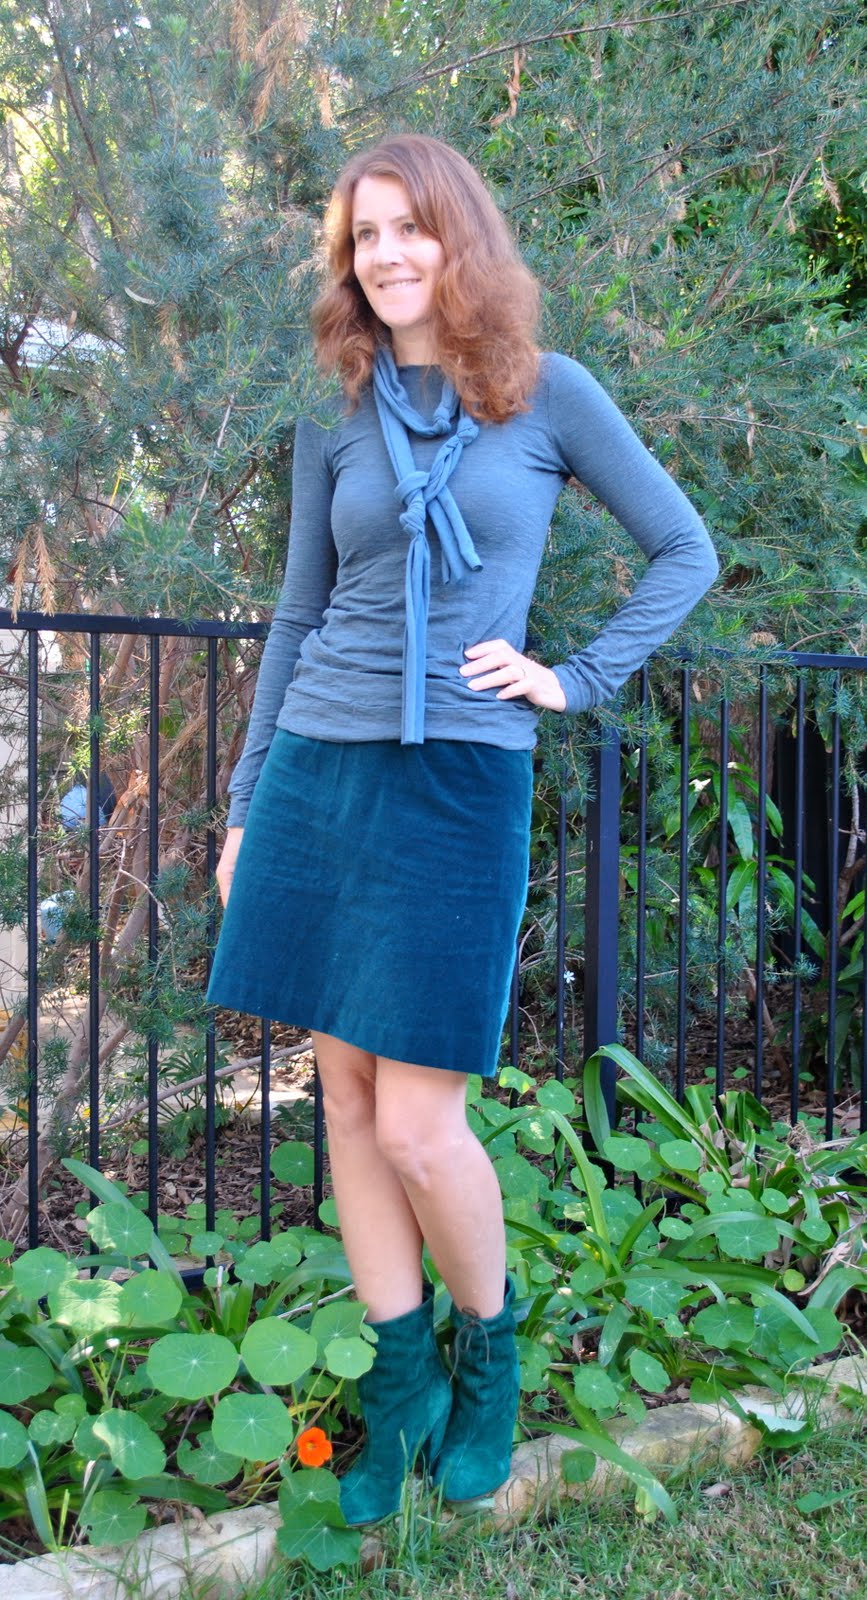
Finished!  Now I can wear my skirt with tights and no more constant re-arranging of the skirt to hang properly.

pinterestmail

Splitting up a suit, 2

Here finally is the jacket from the suit I made a few years ago (see here and here)… made from free fabric and using Simplicity 4698 … again.  Yes, I do re-use patterns a lot, glad you noticed!
We had some very welcome rain last night.  Welcome because it’s been so dry lately, and whilst I rejoice in endlessly sunny days with open arms and no complaints we do need the rain so much too…  No doubt by the end of winter I will be complaining nonstop about wet weather but for now we are happy.  Looking back over my blog I can see it last rained on 21st May… and it is supposed to be winter!  Actually it’s been quite handy having this little daily snapshot here to remind me of each day’s doings and yes, the weather too.  My gosh, I can hardly believe I’m stooping to talking about the weather, so stiff, but in a fashion blog it is an immediate and relevant factor in one’s apparel choices for that day, so consideration of the weather is quite appropriate so here we go; rain this morning, but fine the rest of the day and not too cold.  I’m as warm as toast in this get-up here and happy to have found a way to put on this white elephant of a suit jacket, so all is well…  My friend A paid me a compliment on the jacket this morning (without knowing I’d made it, bonus points!) so perhaps it deserves more airings?
Today’s random picture below; seen on my walk this morning

Details:
Jacket; Simplicity 4698, grey and black cotton
Jeans; Burda 7863, khaki stretch gabardine
Jumper; Cue
Boots; Andrea and Joen, from Uggy’s in Dunsborough

pinterestmail

Family room curtains

Boring curtain alert: As previously warned I do have a preference for the simple and uncluttered look in my house, so my curtains are not going to win any awards for innovation here… that being said I feel these curtains are perfect for our family room.  It’s not so much the curtains themselves that are interesting (they are not) but the ability they have through their translucency to transform the feel of the room and provide another ever-changing moody ambience to the room; if I could work out how to put a gif on this blog then I would, because this static first picture cannot adequately convey the shifting shadow play of leaves that is cast into the room, nor the liquid rippling of the pool reflected onto the curtains like a colourless abstract moving work of art; its a spectacle that I can never tire of.

When we wish to have sunlight in the room we can open the curtains to look out on our pool and on the backyard trees with the never-ending avian aerial display that exists therein…

pinterestmail

Retroswirly tights

So I made myself some tights!  What do you think?!  Pretty chuffed myself actually; self-drafted, and I did make up a paper pattern for next time although of course not all stretch fabrics are created equal and I think each fabric would have to be judged on its own stretch factor for this purpose before using a pattern…
I didn’t get enough fabric to go the whole length from toe to hip and initially was kicking myself for this frugality, but then realised that, of course! no one is going to see above hip height anyway! so not necessary to have an unbroken length of fabric all that way anyway… so made the above hip part of the tights separate to the leg part of the tights and joined them together after.  So all turned out beautifully as this meant I used the whole width of fabric and had no leftovers, yay!  As all seamstresses will agree; leftovers can be handy occasionally, but can also be a fiddly nuisance filling up one’s available fabric storage space…
The leg seam goes from little toe around the front of the toes and up the inside leg, there is a centre front and centre back seam on the above-hip portion (no side seams at all!)   Then the round-the-hipbone seam joins top to bottom, and finally the top is folded over to form a casing and 2cm wide elastic inserted.
(OK, so I’m wearing them here to show them as full length as possible, but in reality I will probably wear these with boots and longer skirts…!)
Today’s random picture below; witch’s hat with a view, seen this morning

Dress; Body & Soul, it’s so long since I bought this (approx 12 yrs ago) the label is washed white and unreadable
Tights; own design, stretch print jersey
Shoes; Nina, from David Jones

pinterestmail
Switch to mobile version
↓