Watson lingerie set in sand cotton jersey

I just could not resist buying Watson, the new lingerie pattern designed by Amy of Cloth Habit.  Yes, I have a few lingerie patterns now, but a few points of difference with this one allowed me to talk myself into buying a new one.  Quite easily, as a matter of fact!  I’ve always admired Amy’s beautiful creations and so adding her new pattern to my collection was always going to happen  🙂
I used a sand-coloured cotton jersey, (the Morrison remnant sale), lining the bra cups and cradle with soft, sand-coloured rayon stretch (Fabulous Fabrics), pretty scalloped-edge lingerie elastic (Fabulous Fabrics) and plush elastic for the bra straps (Homecraft Textiles).
The pattern is for a simple, soft cup bra, in either longline or regular length, with no provision for underwires, and a bikini brief.  Obviously I had to make both! and made my usual two pairs of matching knickers to go with my bra.
So, I have several thoughts about the Watson pattern…
Firstly and most importantly, I really love my new bra! I very much like the clean and modern line, the simplicity of the cut.  It looks really cute on and for my size the fitting and drafting is spot on.  I chose to make the longer line option, and am very pleased with it.  Usually I go for a padded, underwire bra, but it’s nice to have different options in the undies drawer.
I chose to line both my bra band and cups for two reasons; firstly because I prefer the cups to be a slightly thick and padded anyway; and secondly; because the way the bra is constructed inevitably means all the seam allowances on the inside are exposed.  That’s unavoidable in having a pieced cup in a single layer of fabric.  However I usually like for my insides to be just as pretty as the outsides, and so I cut cup linings and worked out a way to construct it so that all the seam allowances are tucked neatly out of sight between the outer and lining layers.

1. Do not baste the lining to cradle as the first step; instead sew the side seam so that the back band is sandwiched between the cradle and its lining.
2. Sew all pairs of outer and upper cup pieces together, also for cup linings.  Baste the cups to their corresponding lining cups all around, wrong sides together.
3.  Turn the cradle inside out, so you can sew the cups to the cradle, sandwiching the cups, right sides together, between the cradle and its lining piece.  This means that all seam allowances will be inside the cradle.
4.  Sew the lingerie elastic to the top and lower edges as normal.
5. hey presto! all the seam allowances are nicely tucked away!

The white scalloped lingerie elastic from Fabulous Fabrics is very pretty and makes a really lovely edging; however, I thought it a little flimsy to use along the lower edge of the bra, which is a more “demanding” edge and requires a slightly thicker, heavier duty elastic.  So I used my regular Birch’s lingerie elastic just for the lower edge of the bra.

A small complaint about the pattern: I had to do a bit of detective work to determine the lengths of elastic required because unfortunately they do not seem to be included in the pattern.  I searched and searched and could find absolutely no clue in the instructions as to how long I was to cut my elastic pieces!  Nor the straps!  Strange.  So I dug out my KwikSew 3300 bra pattern to measure the strap piece, and also checked out the tables in it for a guide as to how long I should cut the lingerie elastic for the Watson bra edges.  Luckily, the KwikSew pattern has terrifically helpful tables outlining exactly how long you should cut your elastic, for each size.  Thank goodness for that!
Same story for the undies; I had to get out my McCalls 2772 bikini pattern and measured the waist and leg elastic guide pieces and used these same lengths for these knickers too.
I’ve now jotted down on my Watson instructions all these elastic lengths I need so I don’t have to go looking for them again.  Because I’m sure there will be more Watsons in my life.  🙂
Ok I only have one more complaint, and that is that metric measurements are missing from the instructions.  Yes, I can convert them myself, and I have, for future reference, and noted them down directly onto my copy.  But it would have been helpful to have them included in the pattern.  Along with those elastic lengths.

The bikini brief undies are plain and simple little things, definitely my style.  I only realised upon viewing the pattern pieces that there is a horizontal joining seam right across the front of the crotch, with open seam allowances on the inside.   I wanted mine without a seam, so I spliced my front and crotch pattern pieces together and cut the front as one piece, and then cut one separate crotch lining piece from white cotton jersey.  This is sandwiched between the back and front pieces when joining together, so that all seams allowances are nicely tucked away inside.  This is the same method I learnt from my regular McCalls 2772 bikini pattern, and so I know it gives a nice comfortable result.  And no unsightly seam!

I’m very happy with the new set!  It is so comfortable, also the colour alone means I’m guaranteed to wear these a tonne.  I was actually pretty desperate for this set… yes, sounds needlessly dramatic, but I have tonnes of white dresses and shirts.  Which I favour.  Meaning my white/colourless lingerie gets more wear and tear than the colourful stuff and as the lingerie drawer gets weeded out it’s looking a bit too colourful in there lately.  Clearly I have been extremely bad at planning and keeping up with lingerie requirements.
But now, I’m on it!  Stay tuned for another exciting episode of Watson, coming soon to this station.  Featuring some luvverly lace, mmmmm  🙂

pinterestmail

Oriental Bird

I was tempted to call this my other Swedish dress, since I bought this fabric in Stockholm as one of my wearable souvenirs from our Scandinavian holiday, but actually the fabric is English!  I bought it in Svenkst Tenn but “Oriental Bird” is a linen upholstery fabric by GP&J Baker, printed in England.
Yes, upholstery.  I am wearing a couch.  *womp womp*
😉
Y’know those upholstery adverts in magazines that showcase upholstery fabrics and even carpets by making “garments” from them and photographing them on a model, like a fashion spread?  Well, I love that kind of thing.  Fabric is fabric and honestly, I cannot see any reason why upholstery fabric cannot be worn just like any other fabric.  I reckon if you like it then just go for it.
And the print is just beautiful.  Just look at these colours!  There are twenty three colours.  Twenty flipping three…  Meaning, twenty three separate screens were required to make the design.  Having done some printing myself, I find that number of colours to be, quite simply, staggering.  Think of the placement!  Honestly, I cannot even comprehend.  Consider my mind officially blown.

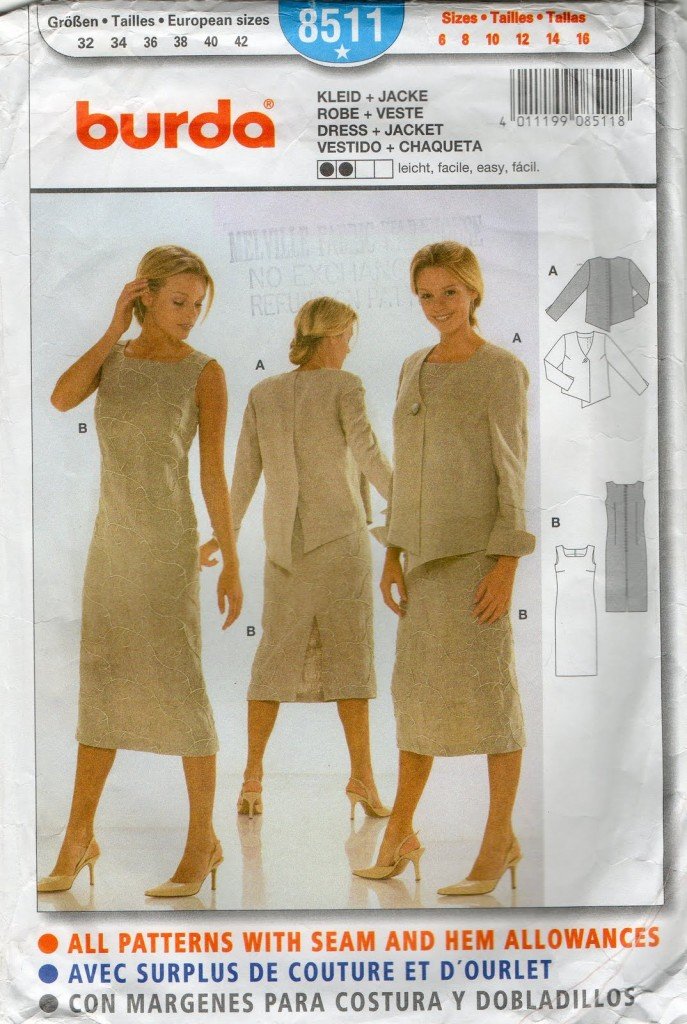
I used Burda 8511.  I wanted a dress with minimum joins, seams and darts or any other fussy shaping details that would visually interfere with the large-scale print; and this fulfils all criteria.  It’s a terrific little basic shift dress pattern.  I’ve had mine for years and it is still in print and available today.
Speaking of the pattern…  I’m gunning for Burda’s envelope pose here.  

powning it

I shortened it slightly and, because I wanted a nice fit, went to the effort of a minor sway back adjustment.  I also did my semi-regular FHA.  Haven’t heard of the Full Hip Adjustment? well that’s probably because I just made it up, hehe.  The FHA is enormously complicated, requiring one to grade out from the waist to a larger size at the hips.

Inner workings: my fabric has three main characteristics; A. it is quite thick and stiff, B. it frays  and C. it was very expensive.  Taking these into consideration, I decided to HongKong finish all the raw edges inside.  This can be a time consuming finish, only visible to and appreciated by one person; you, the wearer.   However imo it is a really beautiful inner finish, and I’m always secretly thrilled with the sight of it, even thought it’s only for my own private benefit.  I used pale yellow cotton voile for the HongKong bias strips and raw silk for the neckline/armhole facings.

Details:
Dress; Burda 8511, upholstery linen
Sandals; Zomp, from Zomp shoes

pinterestmail

floral bathers

Bathers!
Pattern; old fave McCalls 2772, with the halter neck bikini top modified to be a tankini.
Fabric; one-way stretch from Fabulous Fabrics.  I just randomly fancied floral this year. 
I was immediately attracted to the clarity of the print, the realistically drawn, intricately detailed flowers and foliage.  However, despite its obvious gorgeousness and I was pretty sure it would look great as a pair of bathers, I agonised somewhat over the fabric in the store for ages.  Why? well, there is actually something extremely annoying about it.  
See how I have oriented the floral bit so that the flowers stand upright? which to my mind is the only logical orientation for the print…  well, the stretch in the fabric is actually going up and down, parallel with that print; and not across, or perpendicular to it, like you would rightly expect it to. 
I know, right?  Annoying!

You want the direction of most stretch to be going around your body, obviously! and well, who would want the flowers positioned that way??  There is a leeetle bit of stretch the other way, but not very much, so to my mind the way the print was done is just all kinds of wrong.
So I umm-ed and aah-ed for like forever over whether or not to take a chance on it. 
Well, clearly I did in the end.  And put the flowers in going up and down, exactly the way I wanted them.  Sheer pig-headed stubbornness determination told me I could make it work.  
And I did, by putting an invisible zip in the left side seam.  Problem solved!  Swimsuit purists will no doubt be horrified at the zip but look at me, not caring like a boss.  At least it can be put on and taken off with the greatest of ease, which it would absolutely NOT do without that zip.  Don’t ask me how I know that.  I may or may not have sewn up that seam first, just to see, and may or may not have then spent a good five minutes struggling to get it on and then another five struggling to get it off again.  Picture Houdini furiously battling with a straitjacket.  Not exactly the epitome of effortless chic, haha.
Some quality time with my seam ripper, whack in a zip, done!  Effortless chic is once again within my grasp, mwahaha.

The bikini bottoms; well, I obeyed the rules here and meekly cut them with the stretch going around my body, like you are supposed to.  Choosing my battles wisely, here.  Since the pieces are all cut from the plainer, all-green outer edges of the print then you can’t tell that the print goes the other way.

And I’m now totally ready for summer!  Bring it!

Details:
Bathers; McCalls 2772 bikini modified to be a tankini
Hat; Country Road
Location; Bunkers Bay

pinterestmail

nani IRO blouse

I’ve made a new top.  It is a plain little top, but to my eyes the lovely thing about it is the fabric; a beautifully soft cotton gauze, and the charming hand-painted look to its print.
A short story…
About
a month ago I was meeting with some friends, and one friend was a little late.  When she arrived, she explained that on the
way she had spotted a cute top in the window of a shop, and just had to screech to a stop and check it
out.  She tried it on and then bought it,
totally on the spur of the moment.  We
all duly admired the top and chatted about the pros and cons of spontaneous vs
carefully planned purchases.  Important, life
altering stuff, I know!
Anyway,
after our get-together, which happened to be in Glyde Street where Calico and
Ivy is situated, I popped in to check out the offerings.  Saw the range of nani IRO double gauze, fell hopelessly
in love all over again, as I always do when I go in and see it there.  It occurred to me that maybe I could buy
myself a little top too.  Except of
course that my version of buying a little top is buying a piece of fabric.  Inspired by my friend I just decided to
spontaneously go for it. 
And bammo, new top!   Woot!
I wanted the print to be the star so wanted for a very plain, simple and relaxed silhouette.  I used New Look 6483, one of my really old old old tried and trues that I’ve had for many years.  Not exciting, but a real goodie nonetheless.  There are probably tonnes of patterns identical to this one.
This
print is called Painting Check.  My very favourite
thing of all about it is the way the print fades away towards the selvedge and
I wanted to use this feature as a sort of “border print”,
although obviously it isn’t actually a border print but the complete opposite.  It’s a reverse border print!
But
I like ideas that are turned on their head so it’s definitely my kind of border
print.  To keep this feature firmly in
focus I left the selvedges unhemmed.  It’s an uncommon choice but I think it works really well for this particular fabric, and I really like how it looks!
The
two body pieces are cut from one selvedge edge and the two sleeves were cut
from the other.  The sleeves still have
the fabric ID on them, which I find quite charming.
There was only 1m left on the roll, which wasn’t quite enough for the hip width required for my pattern pieces.  So I cut them as wide as possible and just left the side seams open in a slit from the lower waist down.  
Side,
sleeve and shoulder seams are flat-felled, the armscye seam is overlocked and
the neckline is finished with a narrow strip of bias cut cotton voile,
stitched, understitched and then topstitched.
Details:
Top;
New Look 6483, nani IRO double gauze “painting check”
Shorts;
Burda 7723, white linen, details and my review of this pattern here
Thongs;
Havaianas
pinterestmail

a natty little nightie

This was a need.  
A very desperate need.
My lovely, fluffy, cosy, snuggly warm winter PJ’s are rapidly becoming unbearably so, meaning…
IT’S SUMMER NIGHTIE TIME!!!!  
I wanted the “IT’S CLOBBERING TIME!!” font for that bit there, but Blogger’s font selection is lacking in such niceties so all caps will have to do.  We’ll just have to imagine it, ok?
Pattern; McCalls 4454, lengthened from a pretty little camisole to nightie length.  With in seam side pockets added, just because.
Fabric; I managed to eke the pieces to the very last scrap from the leftovers of my sew bossy dress, a pretty cotton floral sent to me by reana louise.  Thanks, Reana!  It’s such a nice quality fabric.  I didn’t have quite enough blue floral for straps, but I found a little piece of pink and white poly gingham that I cut into bias strips to make the straps and to finish the top edge, and also made a short, super skinny spaghetti tube for the little decorative bow on the front.  I originally bought this gingham to make little pinked-edge caps for jars of lemon butter, the year I enthusiastically made jars and jars and jars recurring of the stuff to give away to friends.  Note to self: I MUST do that again next year.  Was hopelessly overrun with lemons this year. Lazy me.

Anyway, now that scrappy little leftover bit of pink gingham has proven itself useful I can smugly pat myself on the back for keeping it all this time.  Ha! that’s all I need, more justification for hoarding those awful little bitty scraps!  Merely aiding and abetting the beast, that’s what.

pinterestmail

patchwork Sandpoint top

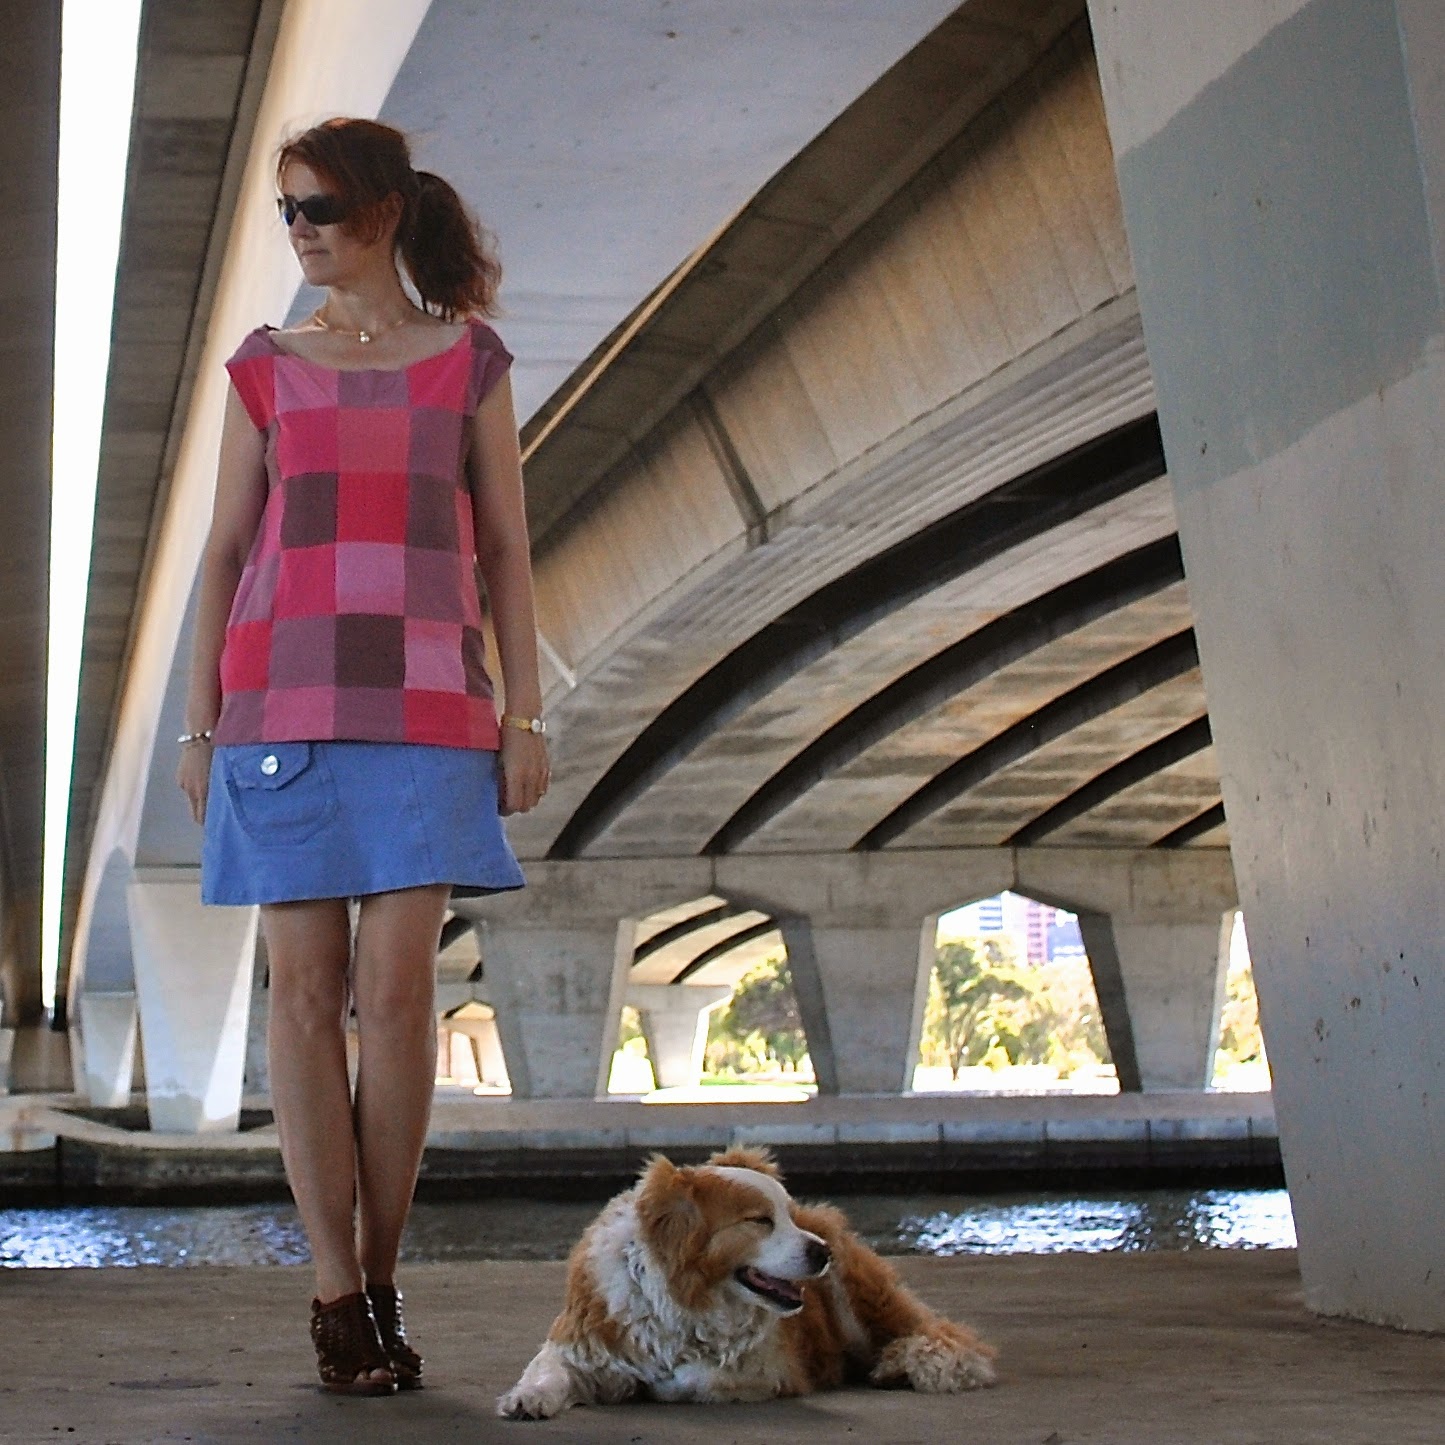
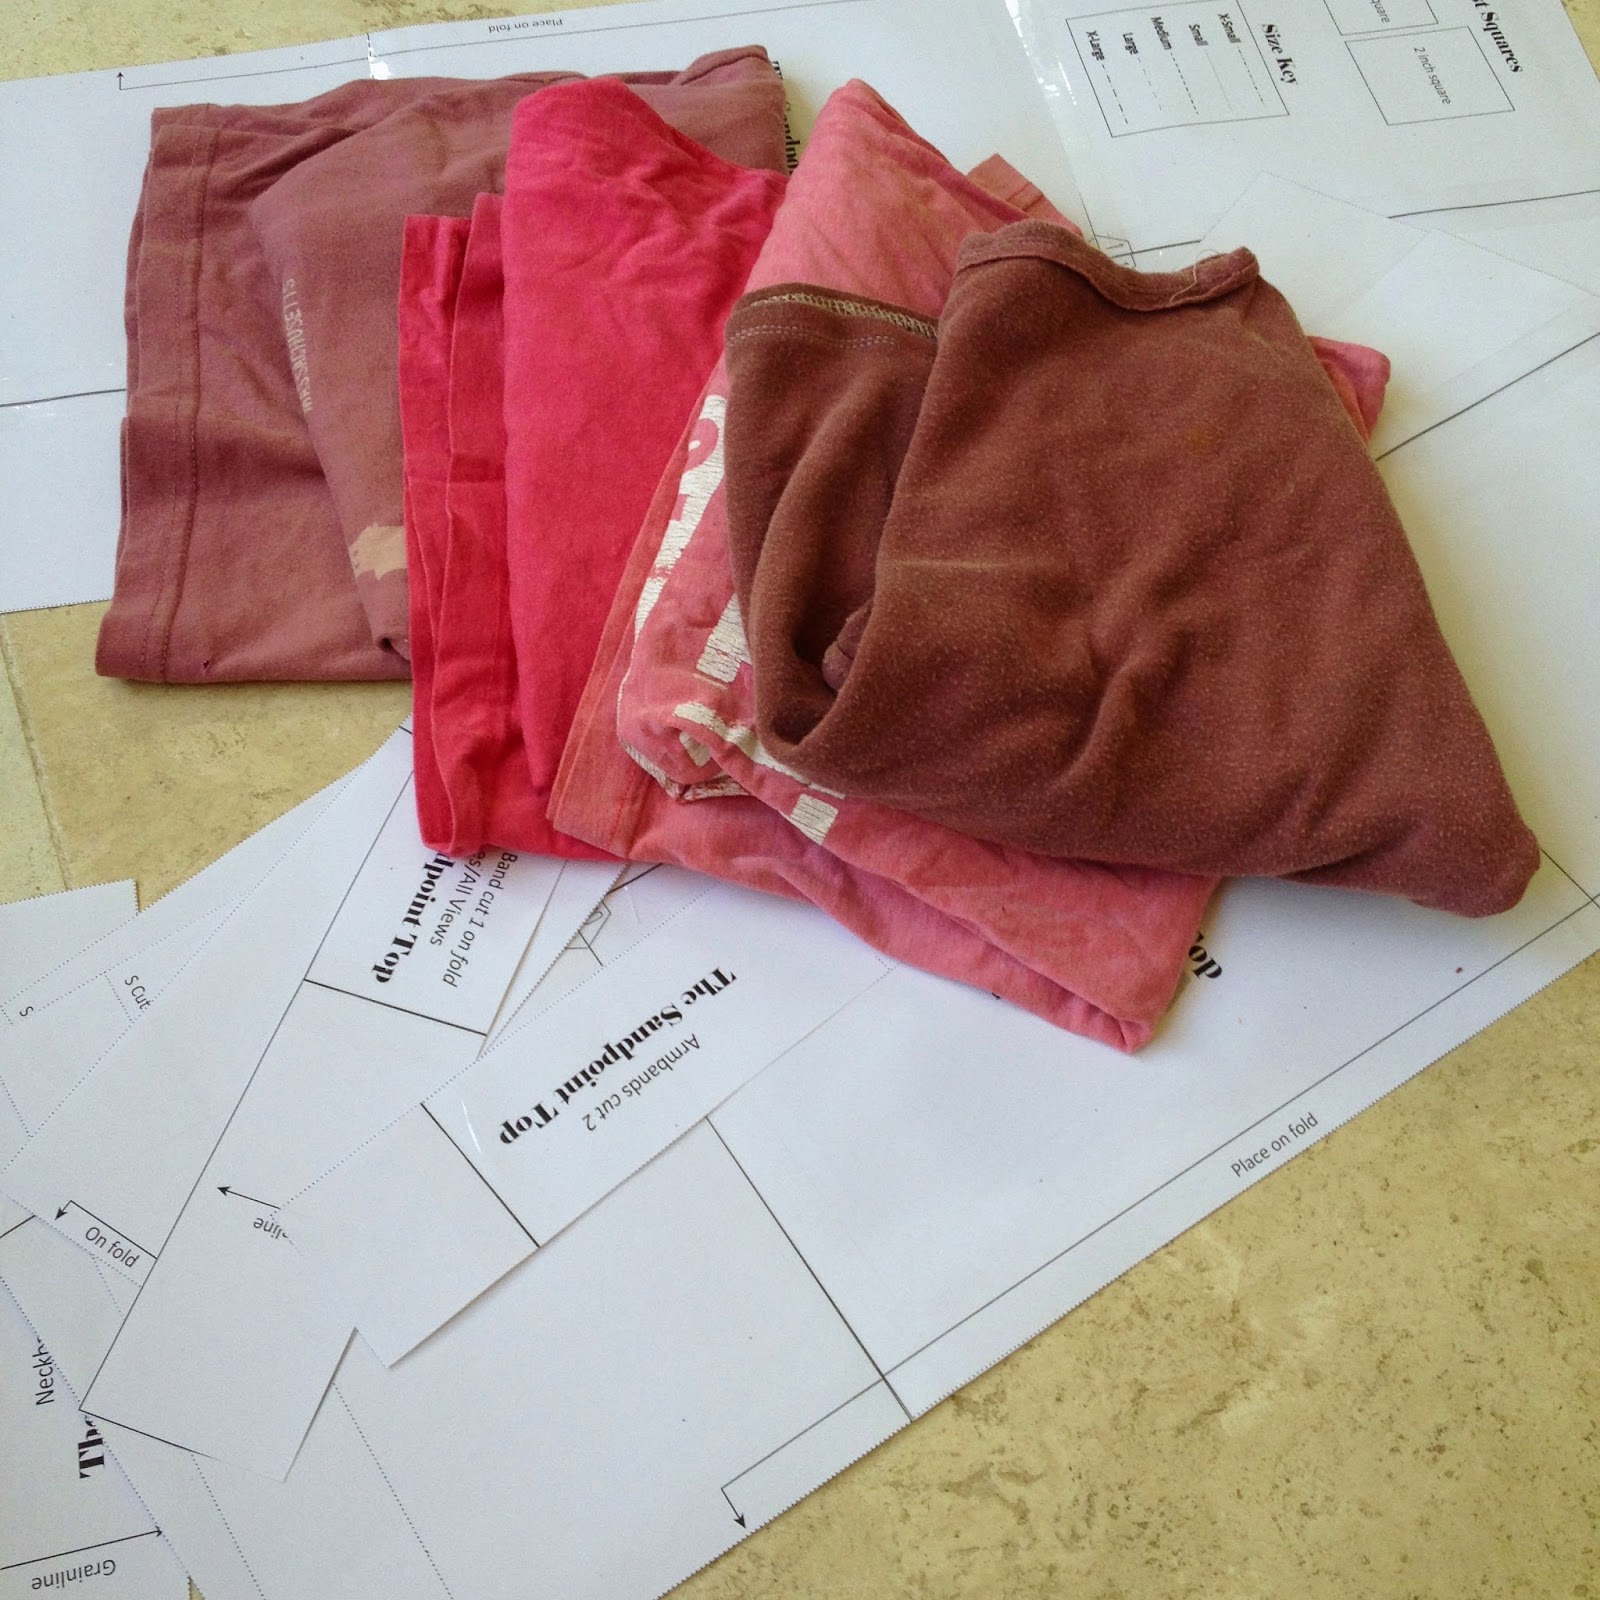
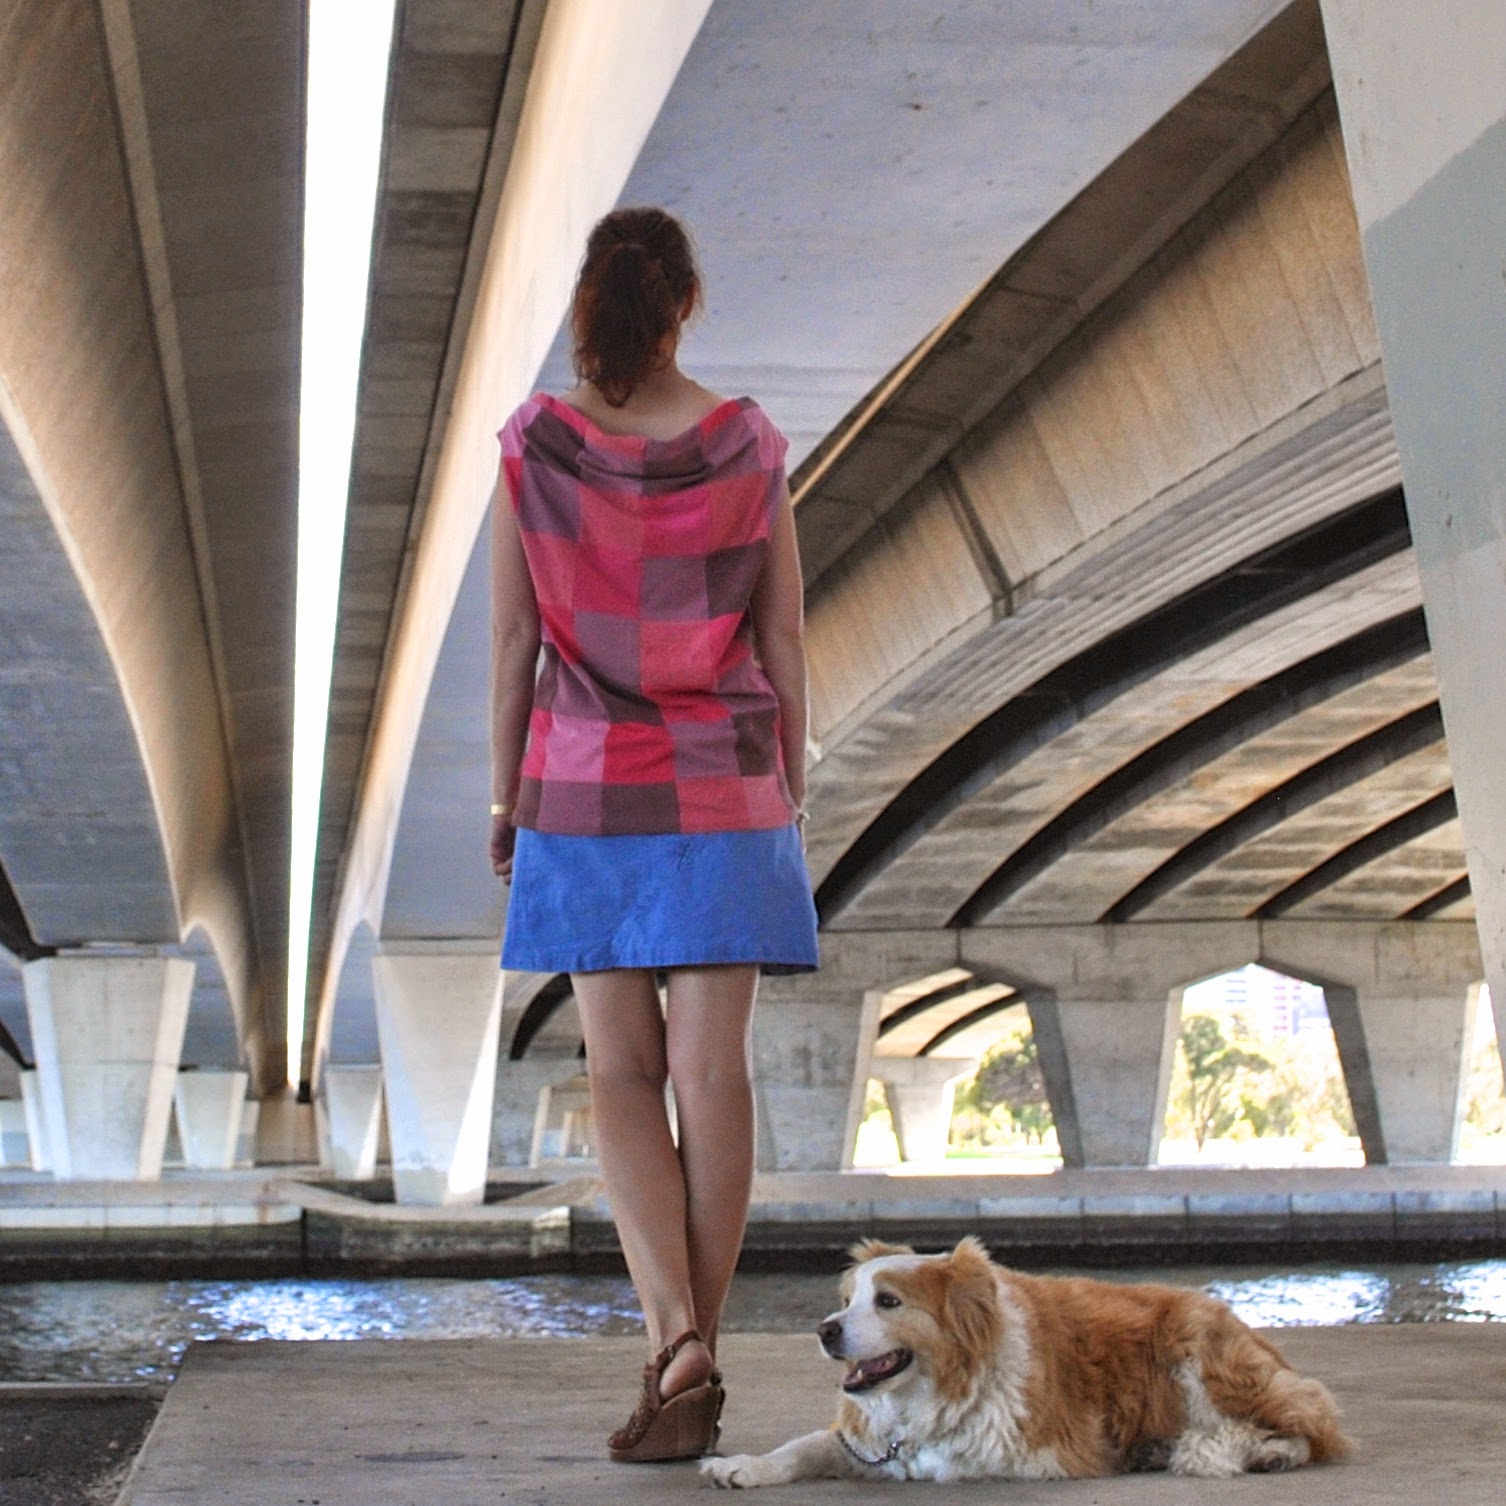
I’ve made a new top.  Well, kinda new from old actually, since it’s made from 4 old Tshirts cut up and patched together.  My refashioning bag yielded; a light purply-brown from Craig, two pinks from Tim, and a chocolate-y one which is one of my old self-made Tshirts.  They were all old and a tad tatty here and there but still had some good bits left in them.  And I liked these yummy Cherry Ripe colours together.   mm-mmmmm  🙂

The pattern is the Sandpoint top designed by Helena of GreyDay patterns.  Mel of the curious kiwi contacted me to ask me to make up the pattern and review it and well, I love trying out new patterns; so ta da!

The Sandpoint is described as “a loose fitting T-shirt
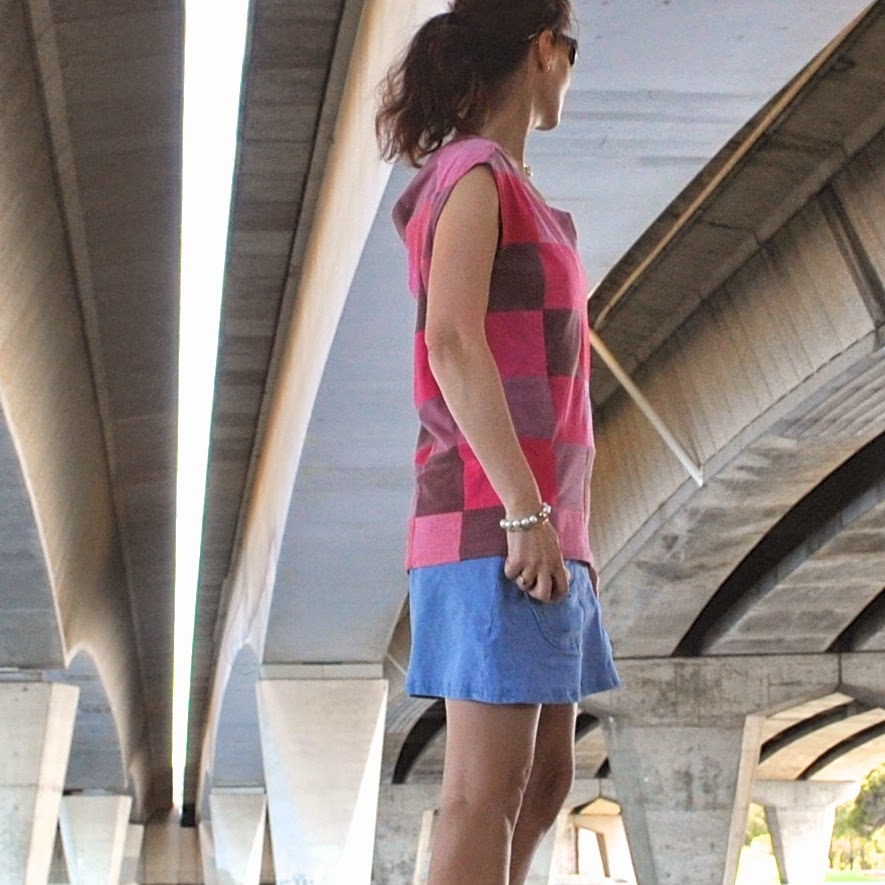
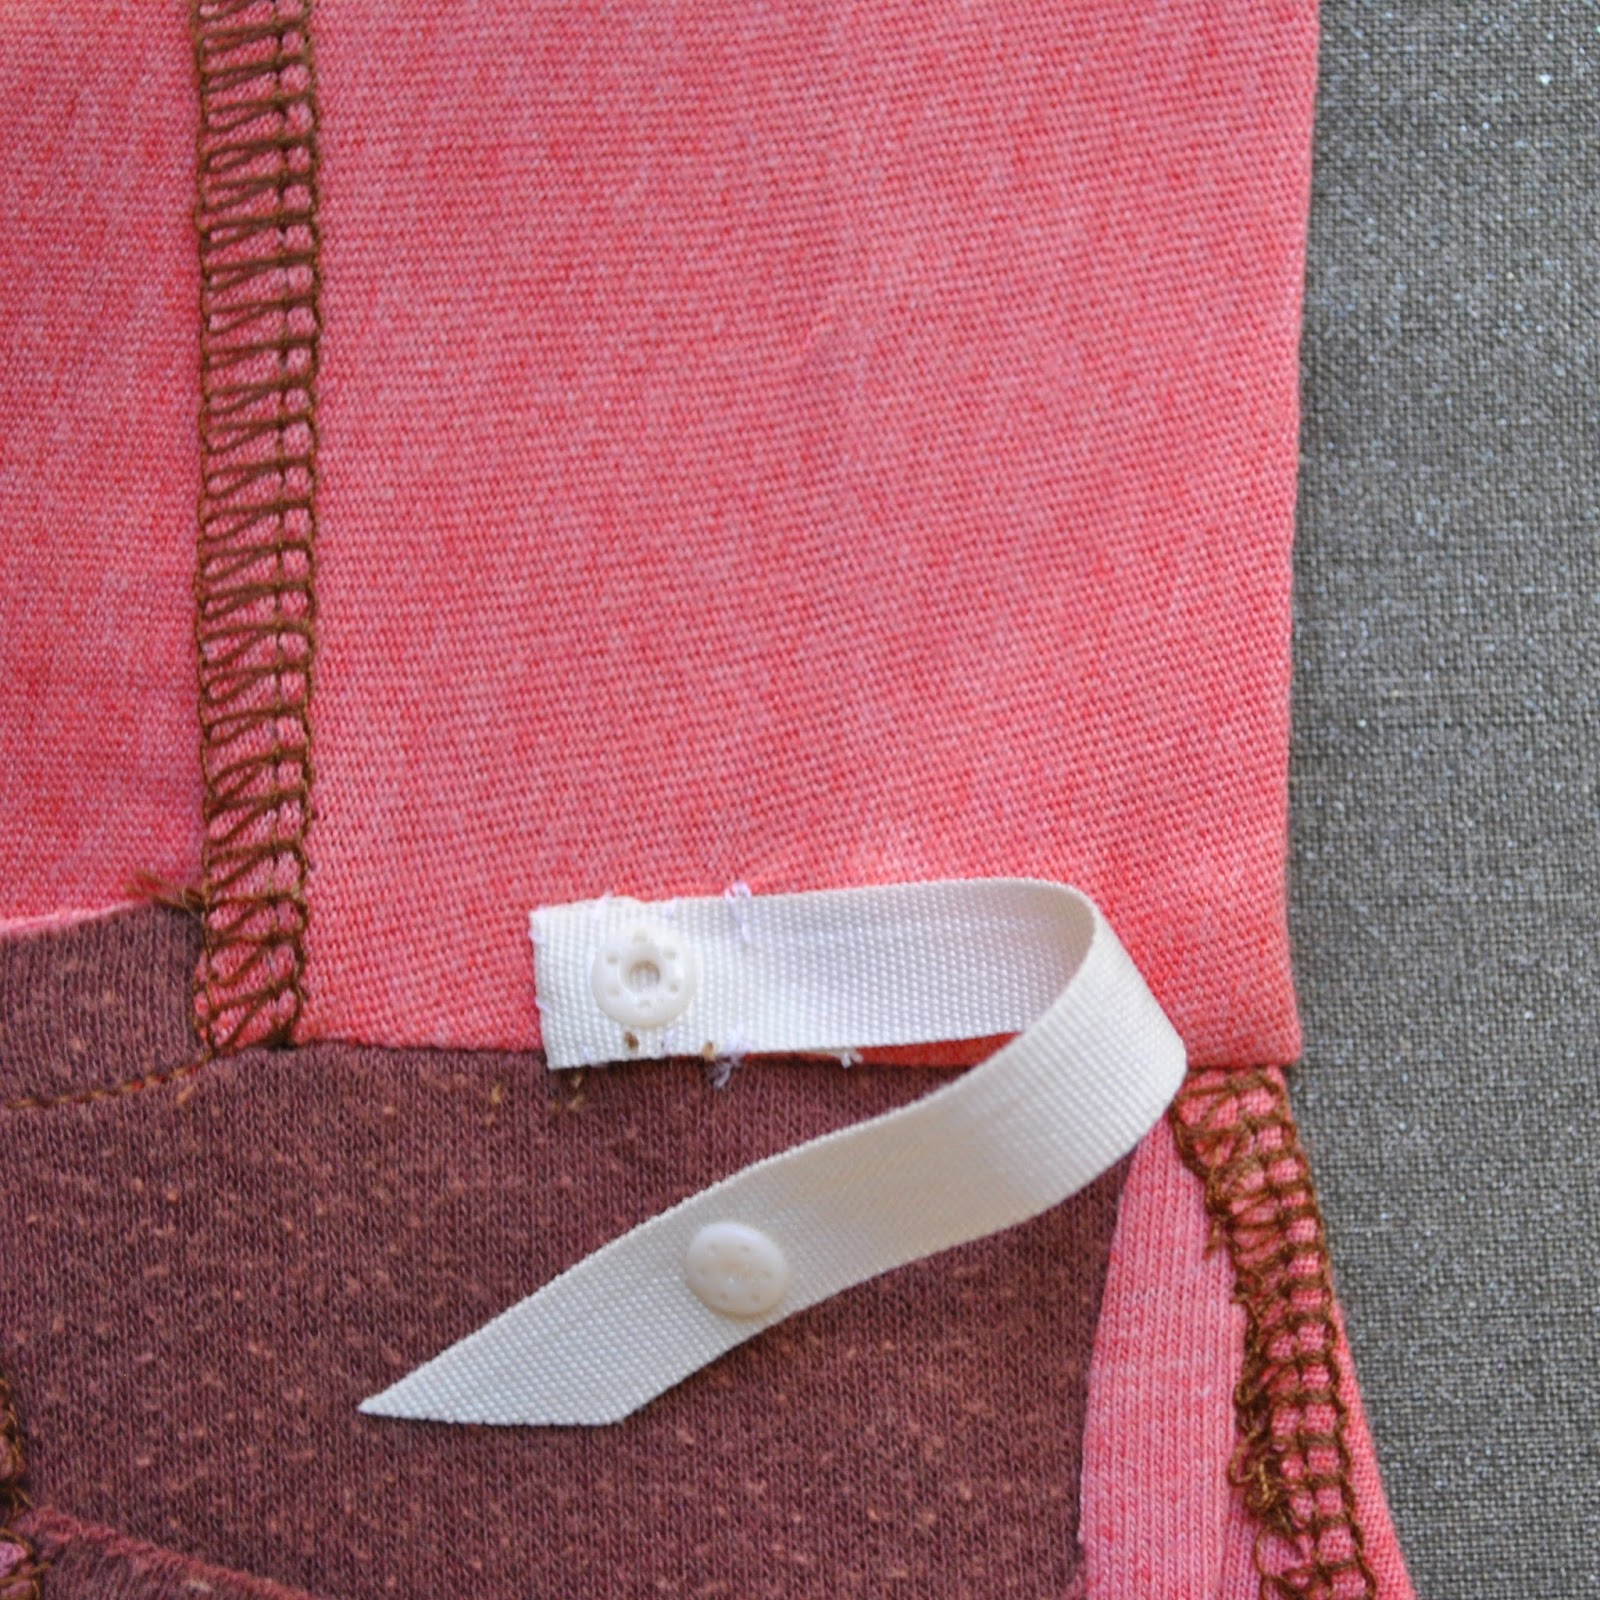
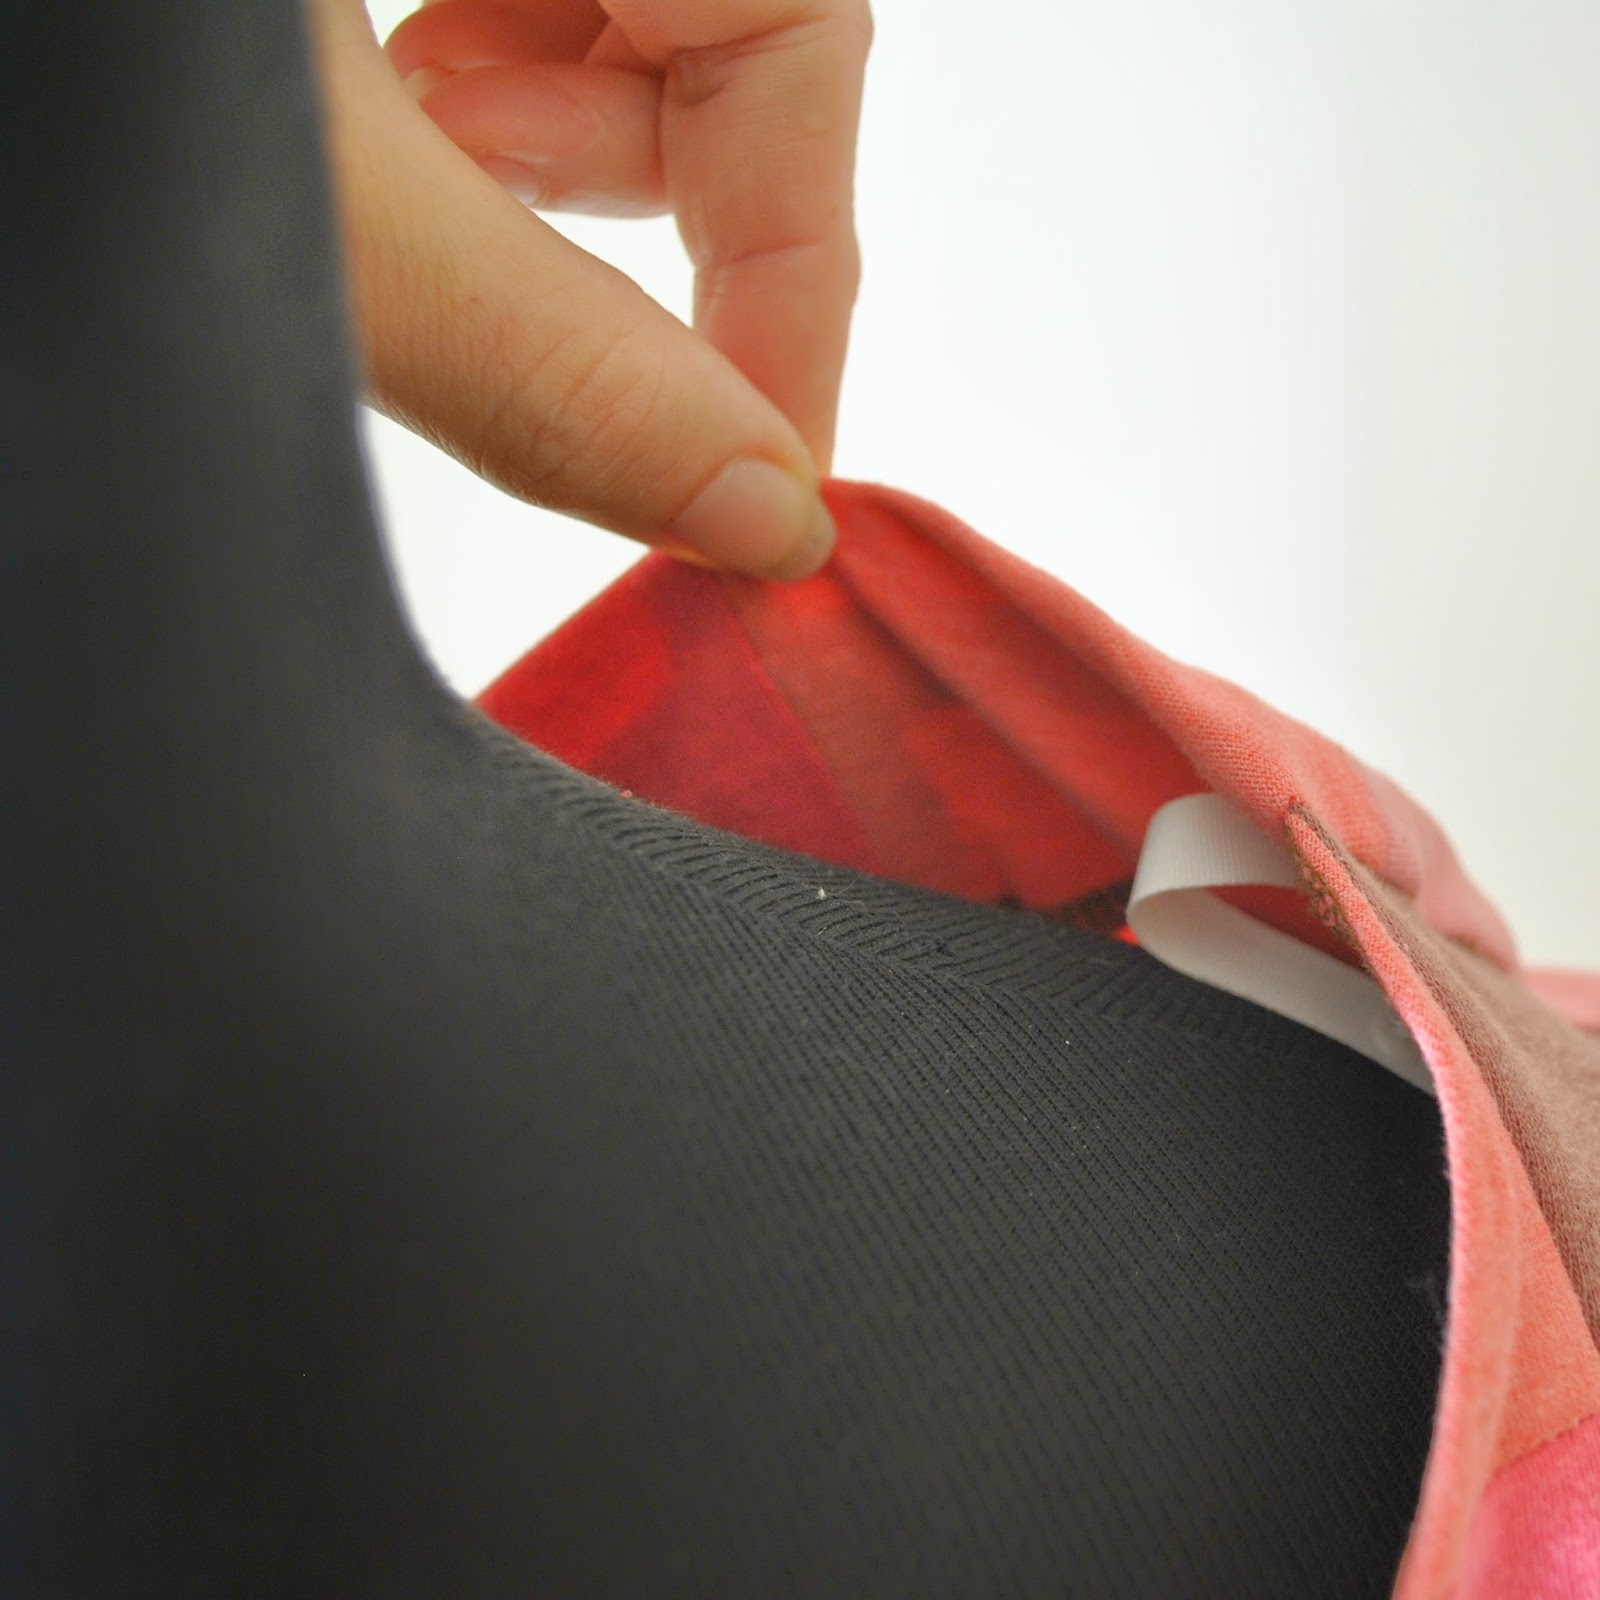
with a surprise cowl in the back”.  It is a nice little top pattern suitable for a beginner, having separate front pattern pieces for the two neckline options, V-neck and round neck.  I think it’s biggest point of difference from other similar designs is a “shoulder band”, essentially a strip which is supposed to be worn behind the neck.  I think its purpose is probably to keep the top actually up on your shoulders and not fall off, which is pretty much a given with these necklines.  However I wasn’t keen on the shoulder band and decided to leave it off, and sewed lingerie holders inside on the shoulder seams.  I have previously used lingerie holders to keep up the shoulders of my other oversized cowl, drape-y tops, here and here, and have found them to work just fine for the job.  Fortunately they do for this one too  🙂

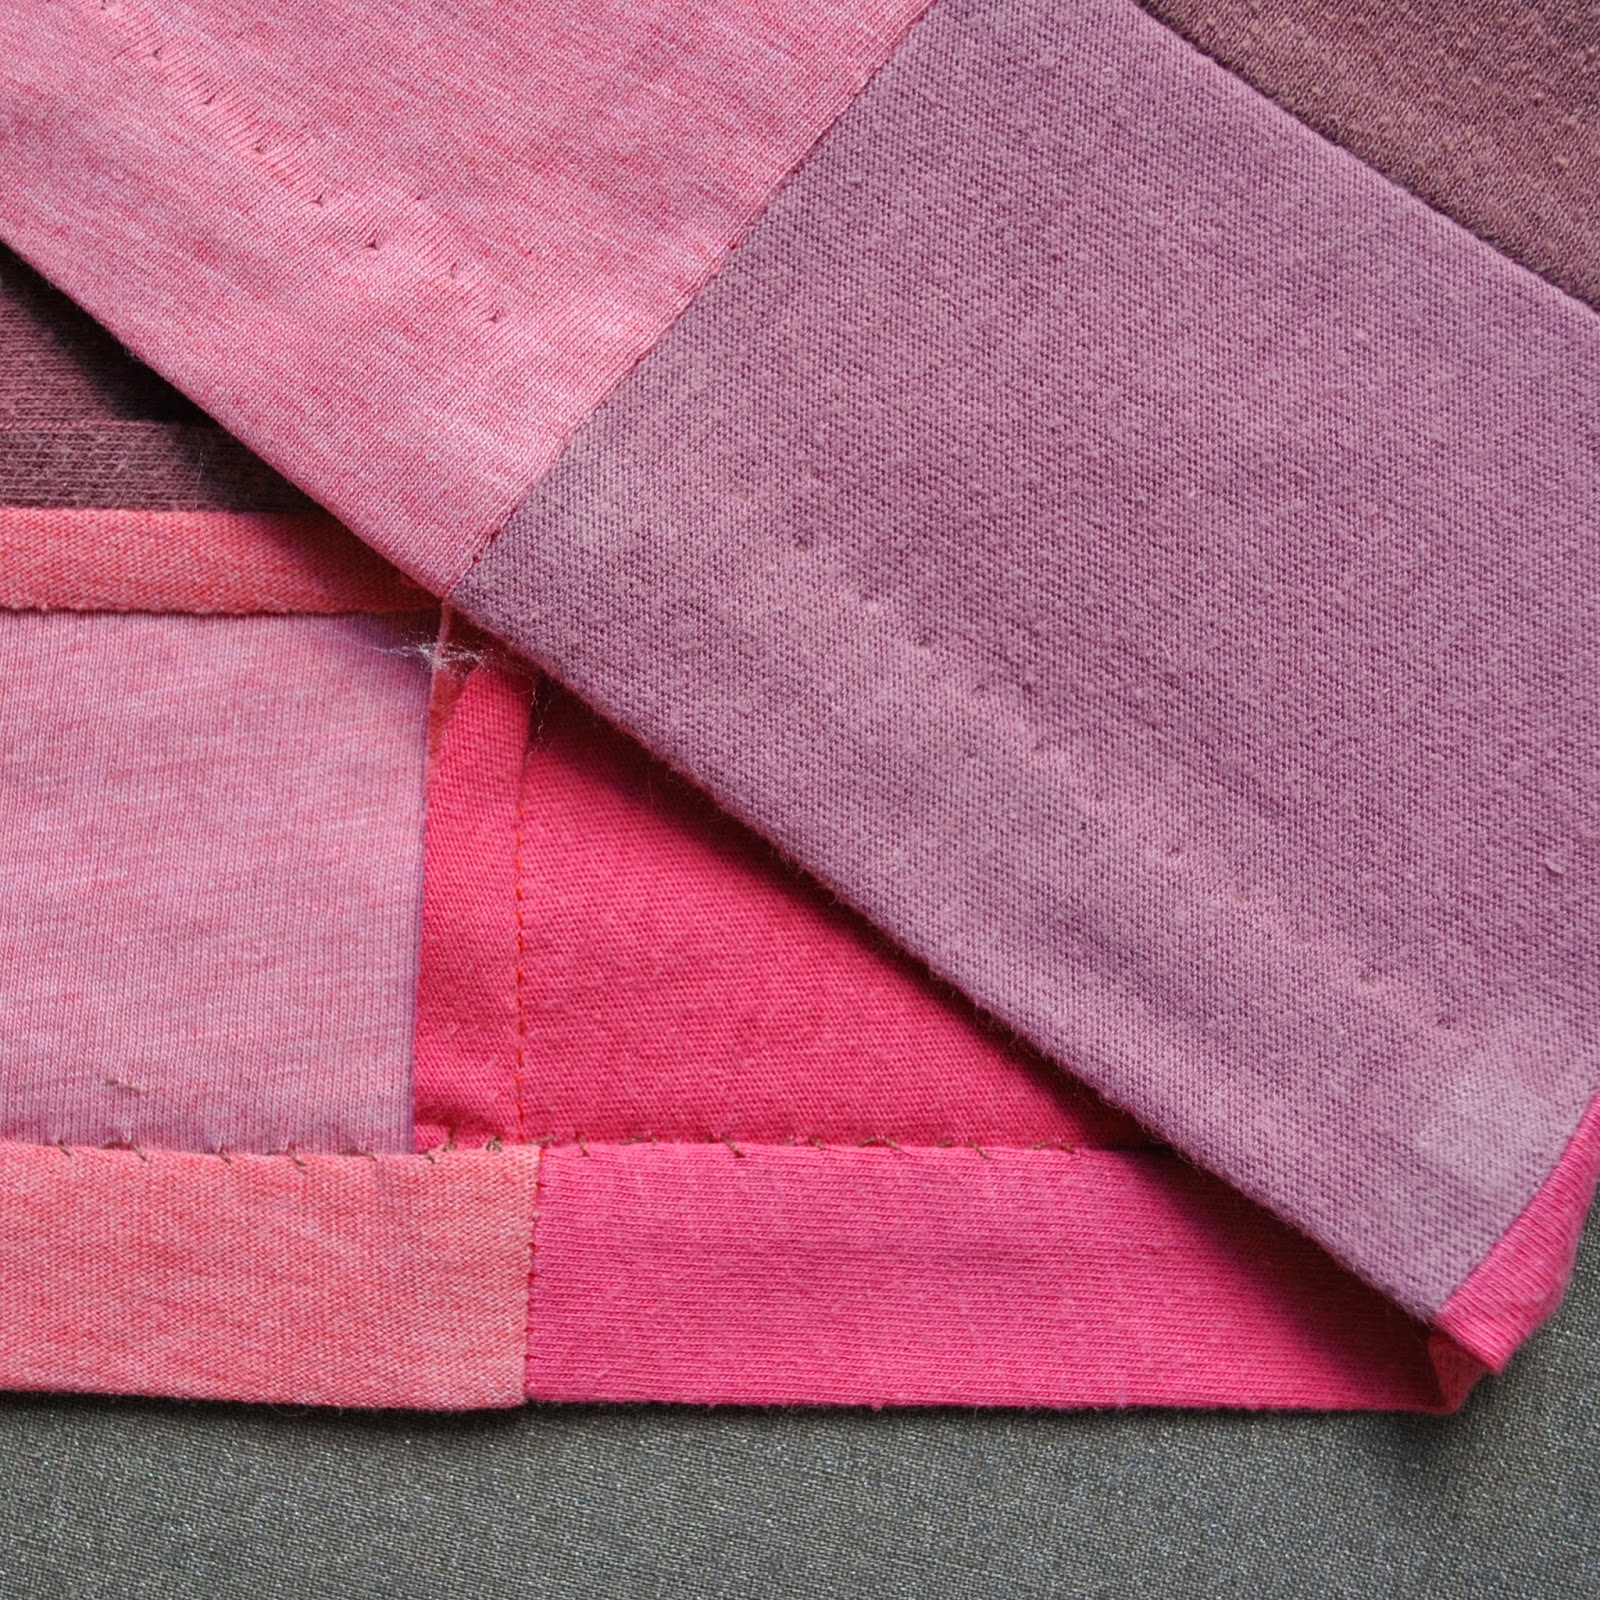
Because I wanted my rather bold patchworked fabric to speak for itself I decided that arm and neckline bands would be a visually distraction, fighting for attention.  So I left these off also and finished these edges by simply overlocking, turning under once and hand slip-stitching a hem in place.  My lower hem is likewise, invisibly hand stitched, and actually my top is 6.5cm longer than the pattern… for no real reason other than my patched-together fabric had the extra length, and who was I to ruthlessly cut it off? after all that careful cutting and patching it together!?  Plus, I just happen to like tops to be a little bit long.

Because I was leaving off the shoulder band, I put my top together quite differently from the instructions… namely: the instructions say to fold the back cowl allowance inside and then stitch the front and back together at the shoulders.  However this would result in a visible end-of-seam at the neck, which in the design is to be covered up by that shoulder band.  So, instead I pinned the front and the back together at the shoulders right sides together, then folded the back cowl facing allowance out to wrap around the front; then stitched the shoulder seam.  This way, when the shoulder seam is turned right side out the shoulder seam is nicely encased and hidden away within the facing, which gives a neat, more polished finish.

Details:
Top; Sandpoint by GreyDay patterns, made using 4 old cotton jersey Tshirts
Skirt; an adaption of Vogue 1247 and Vogue 8561, blue, slightly stretch denim, details here
Shoes; c/o Misano

pinterestmail

simple buttoned cuff

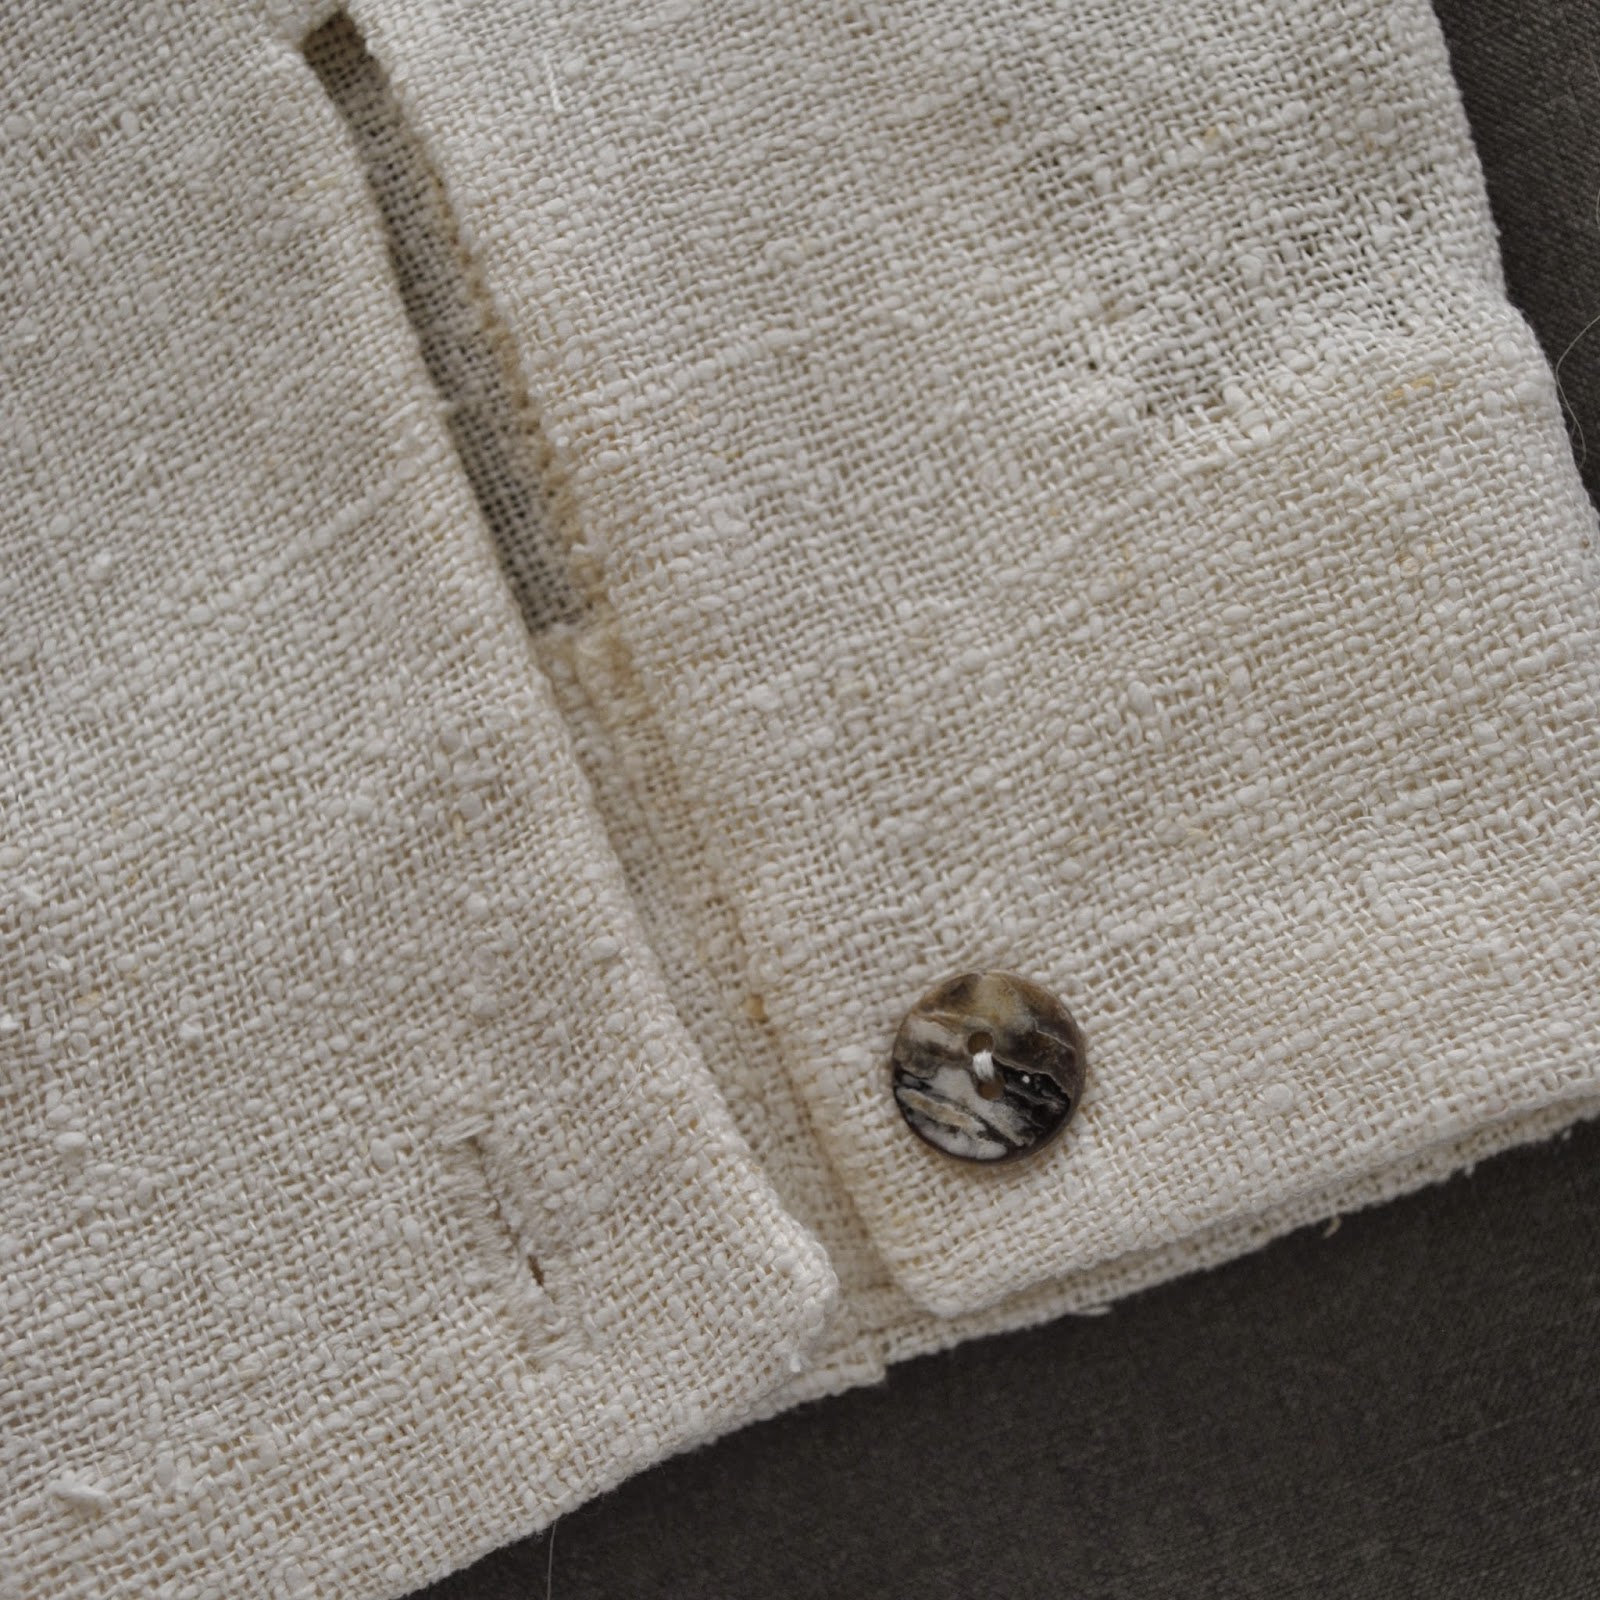
This is an understated little feature to jazz up the end of a plain sleeve.  It’s mainly decorative rather than useful, but I think it does look kinda cute  🙂
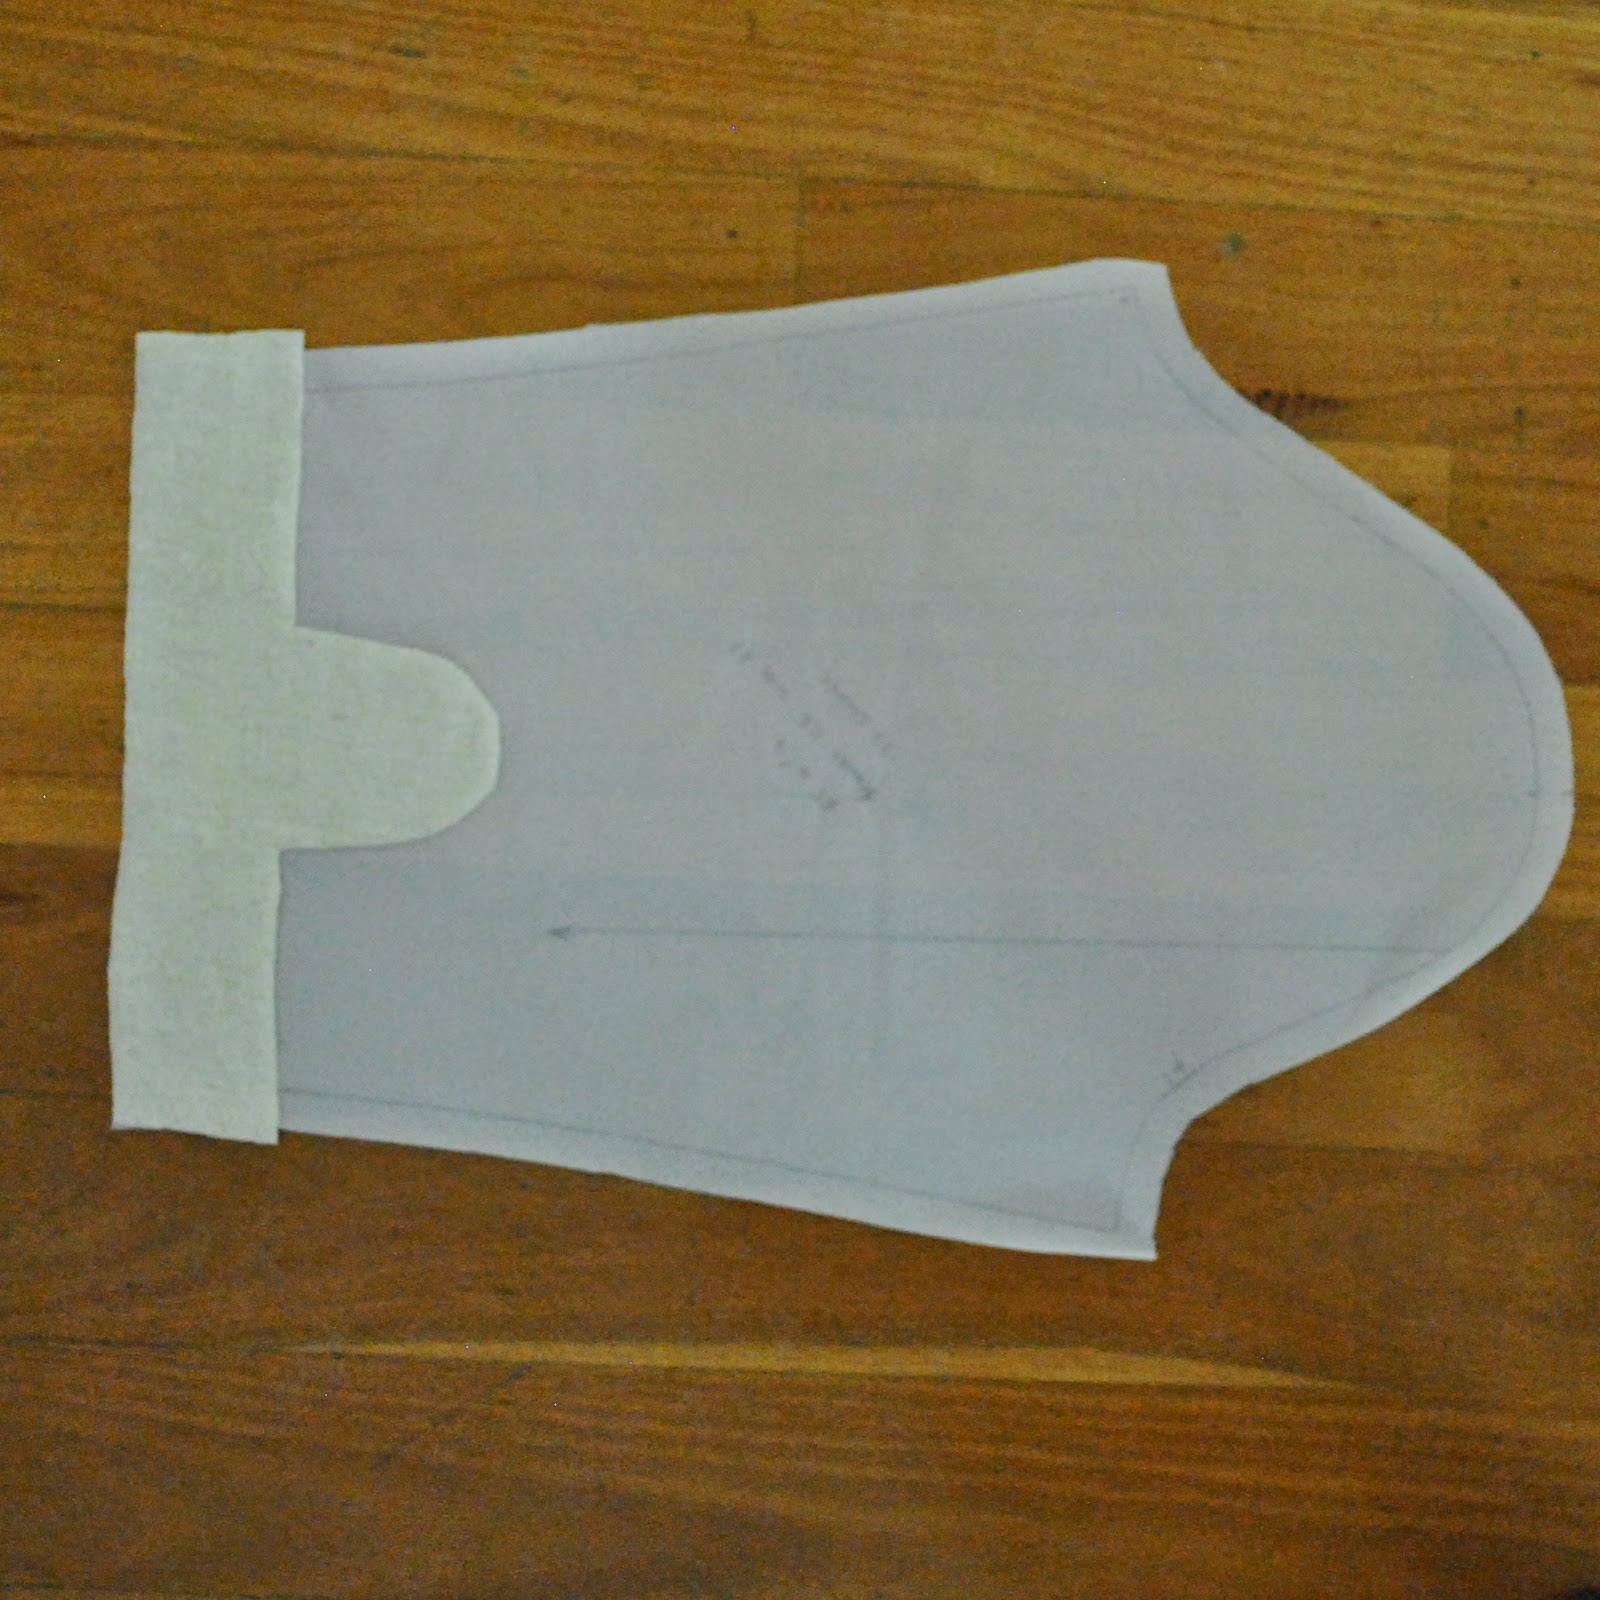
To add this, you will need to cut your sleeves tapered out a little wider at the  lower hem end to allow for the overlap.  Doesn’t need to be much, about 1.5cm (5/8″) at each side should be sufficient.
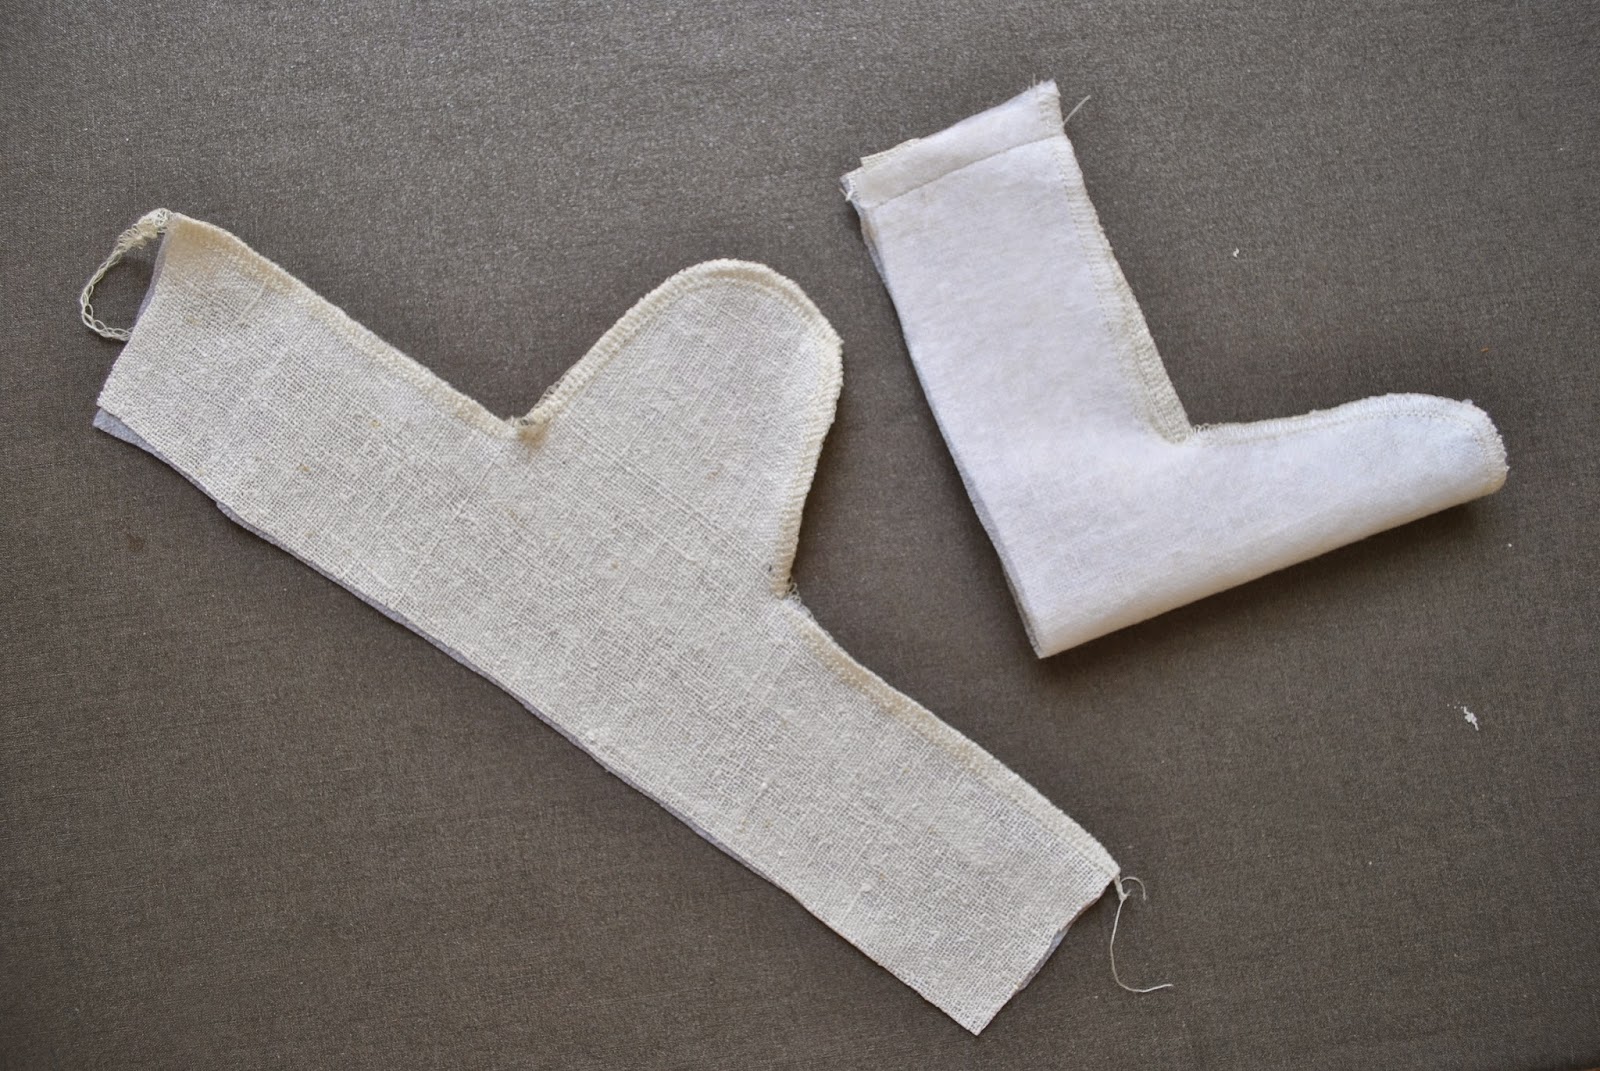
Cut a matching facing for each sleeve, with an allowance for the slit facing situated in the centre.  Mine is 6cm (2 3/8″) deep for a finished depth of 5cm (2″) , and the slit facing is 7cm (2 3/4″) wide and 13cm  (5″) long for a finished slit length of 9cm (3 1/2″).

Interface, finish the outer edge, stitch the short sleeve seam together.

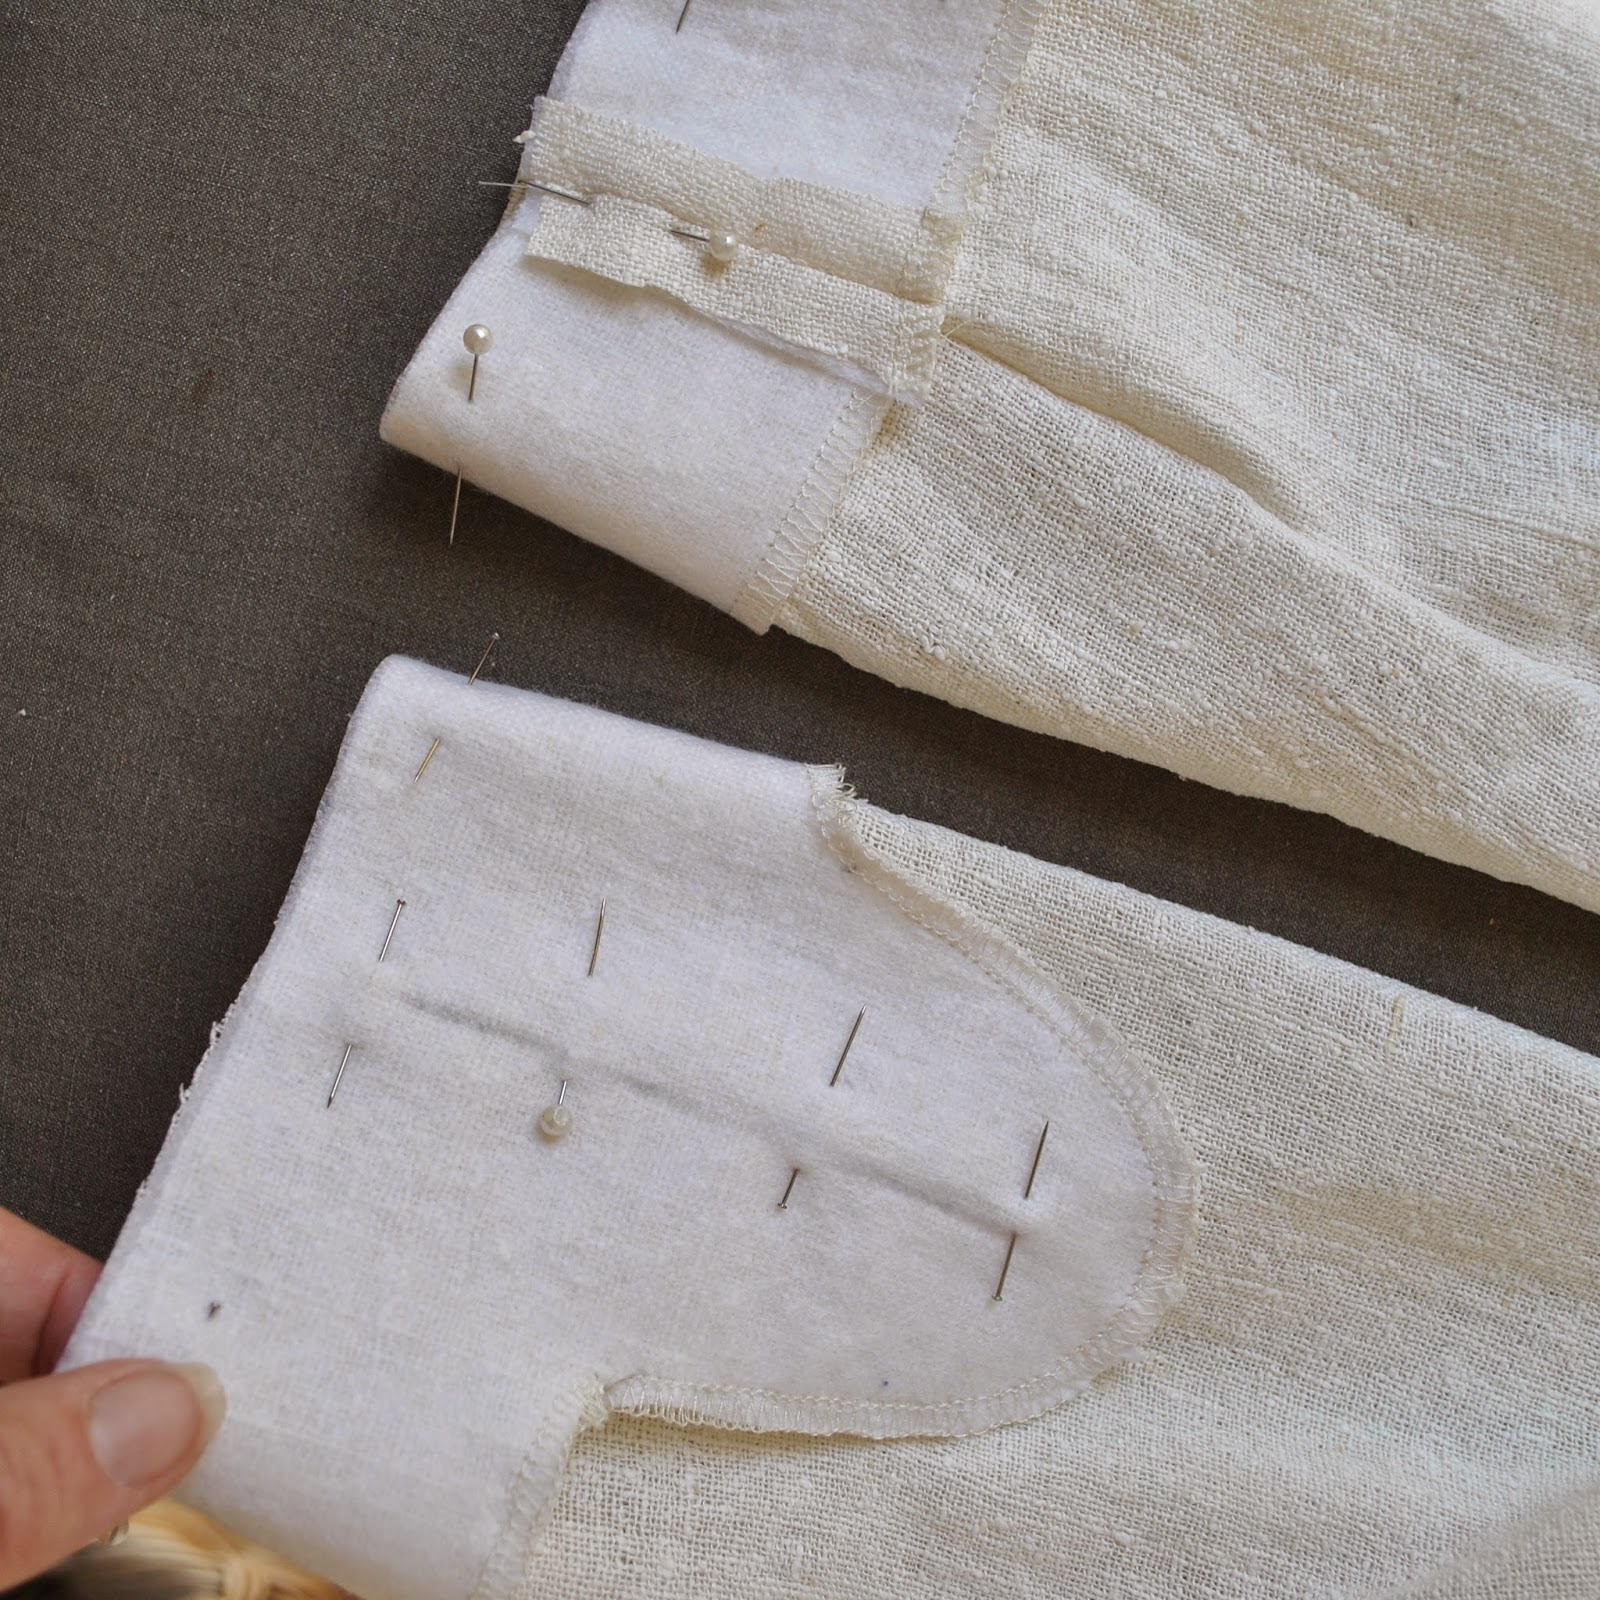
Pin to sleeve edge, right sides together, aligning the seams.
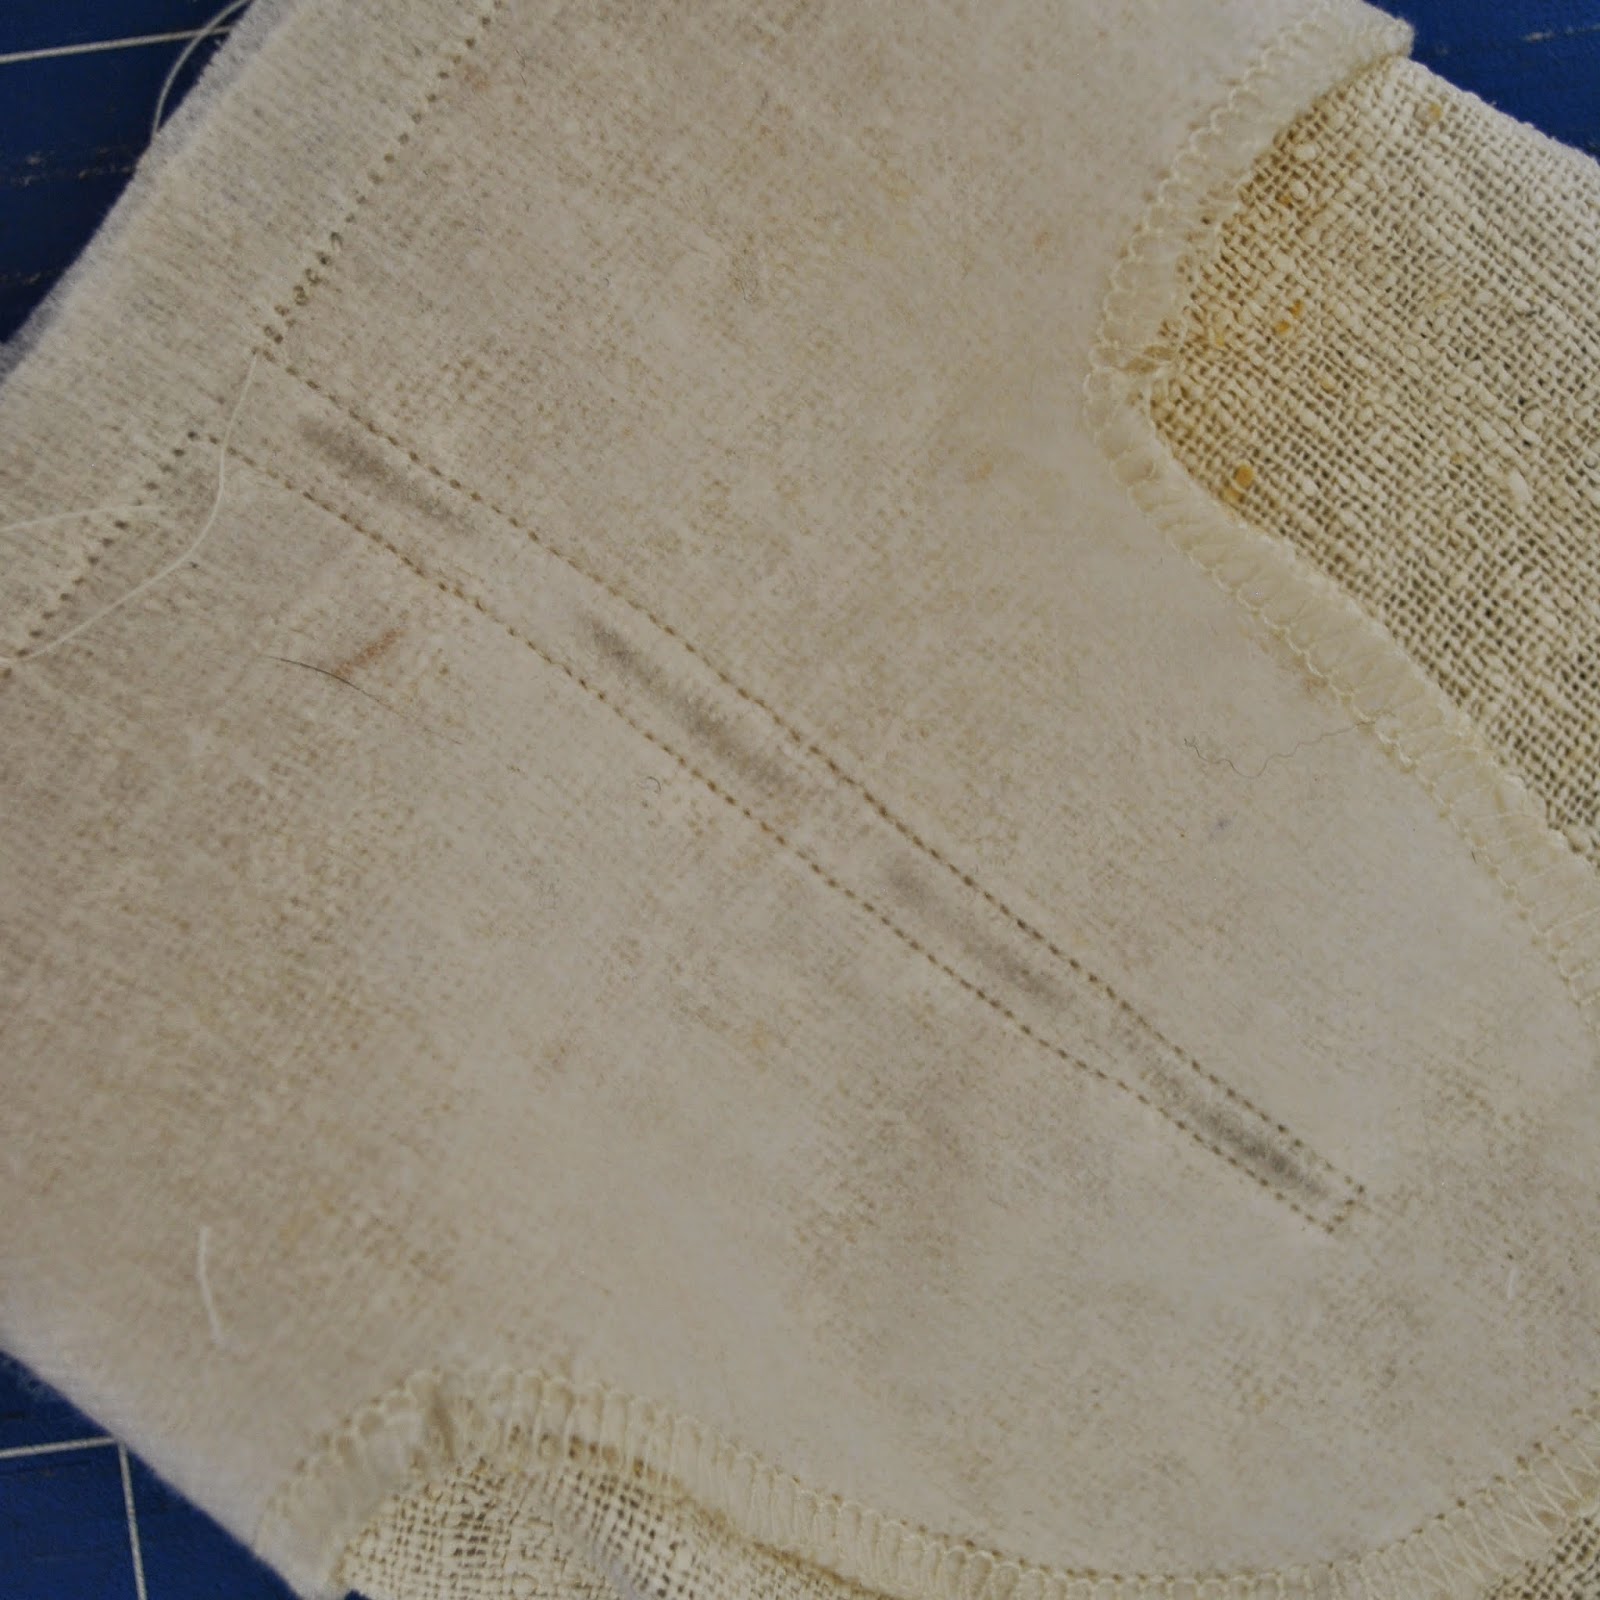
Mark the line of the slit on the wrong side of the facing and pin along its length.

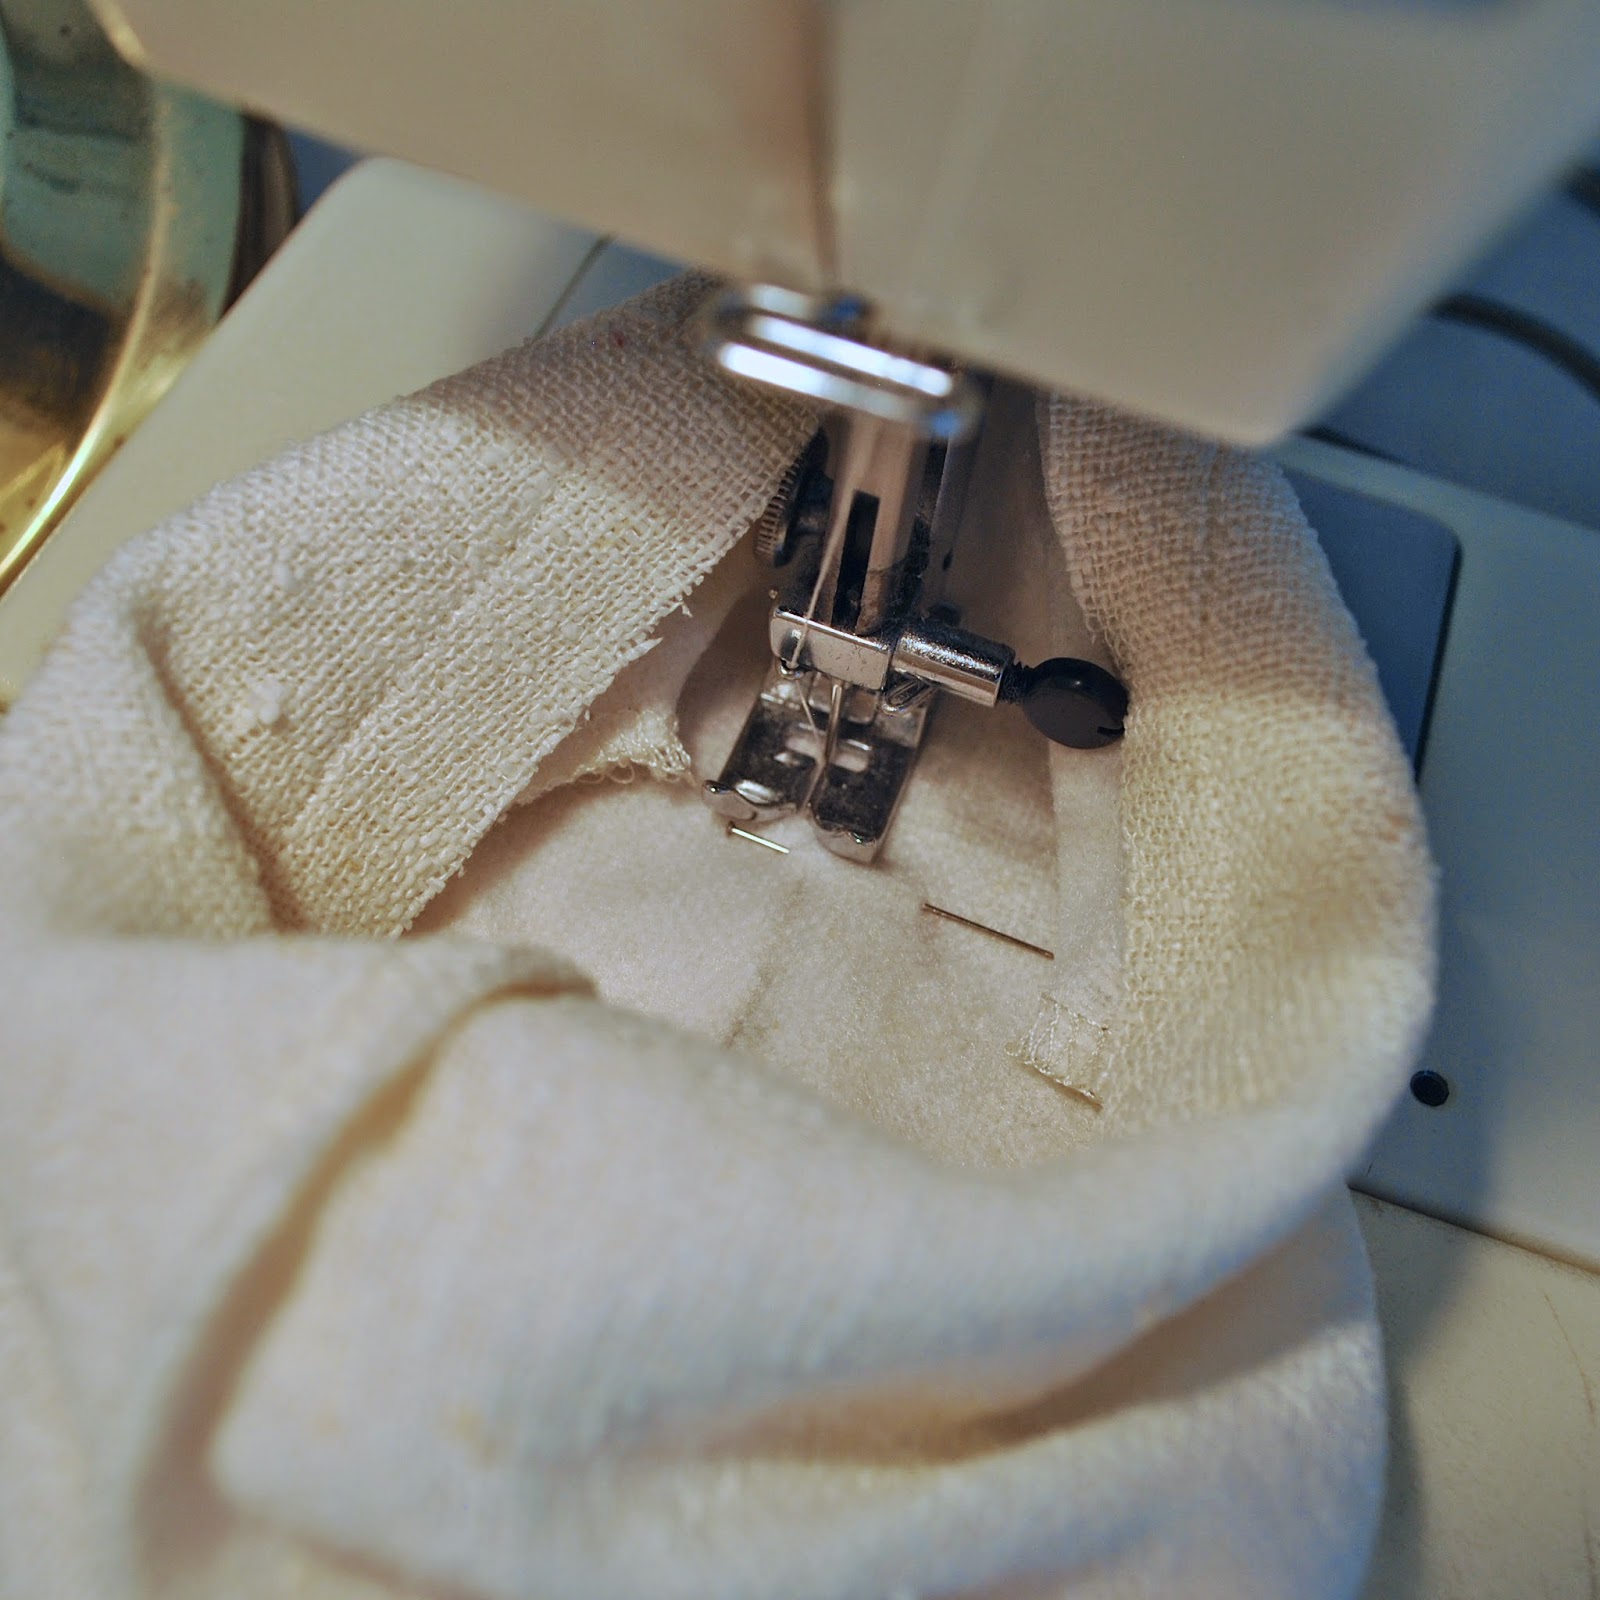
Turn the sleeve so the facing is inside the tube of the sleeve and stitch.  btw, always, but always! stitch in the inside of a tube or closed “circle” of any kind, sleeve, leg, armscye, whatever…  otherwise you are bound to soon be spending quality time with your unpicker when you find you’ve inadvertently caught the opposite side in there somewhere.   Yeah, we’ve all been there, right?!

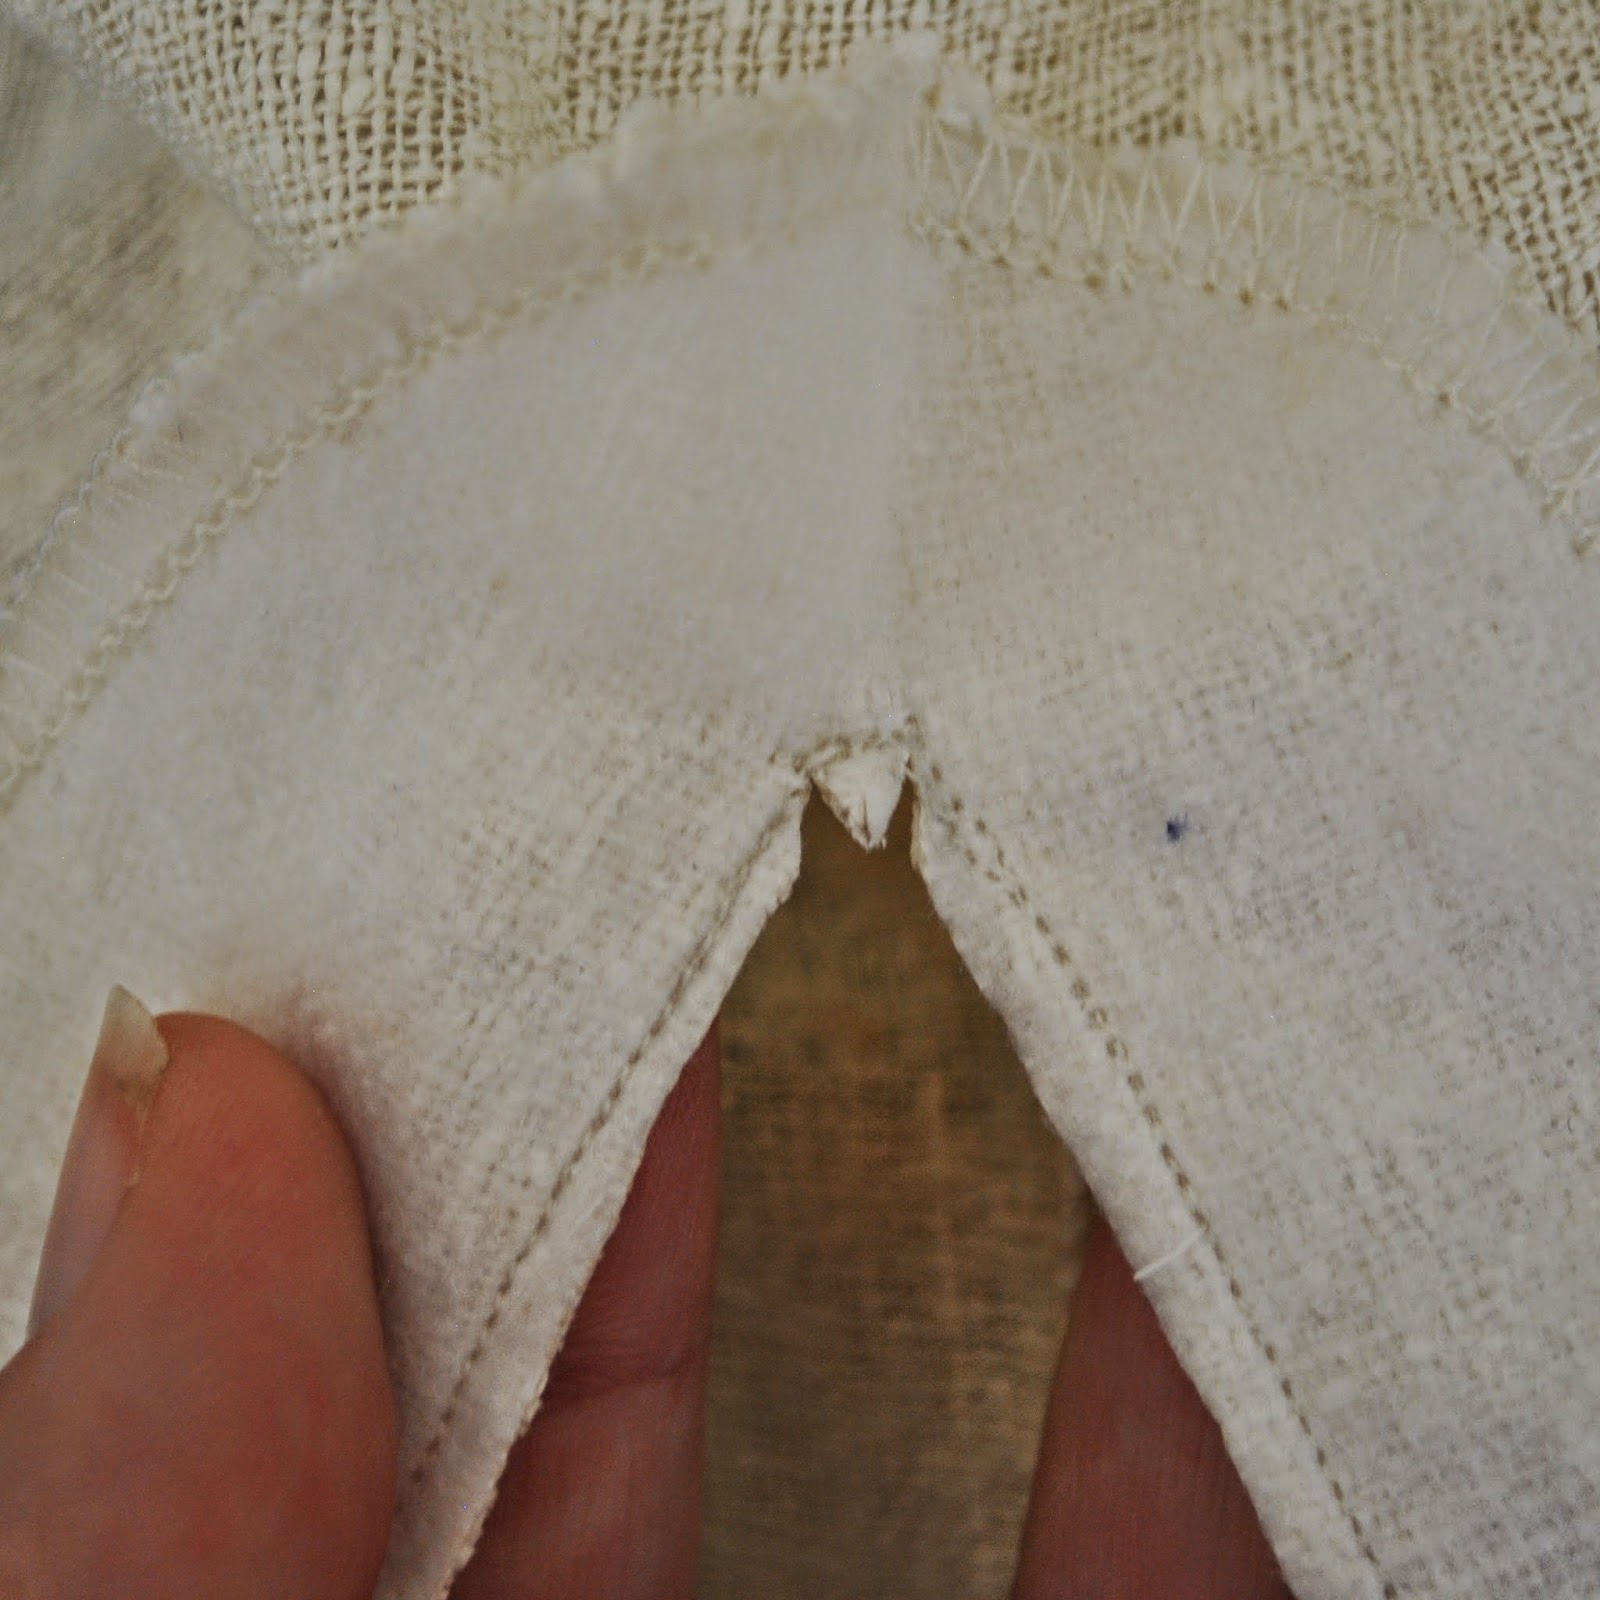
Cut up the middle of the slit stitching, snipping into the corners at the top in a little V shaped snip.

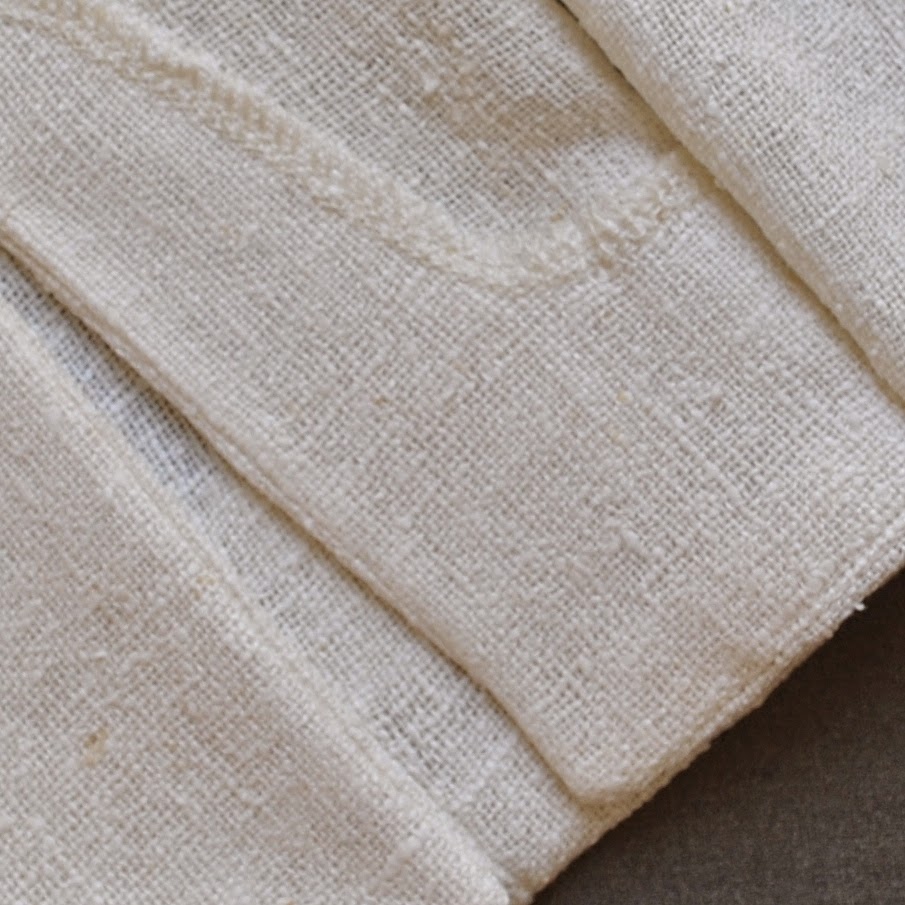
Turn out and understitch the sides of the slip and the sleeve hem as far as possible.  
To help keep the facing tucked up inside the sleeve and not fall out, invisibly slip stitch the outer edge of the facing to the sleeve.  Only scant, widely spaced stitches are really necessary here.

And; buttonhole, button and done!

pinterestmail

a creamy little double-fronted top

My new top will come as a very un-surprise to anyone who has been following me in the Sewvember instagram challenge, haha!…
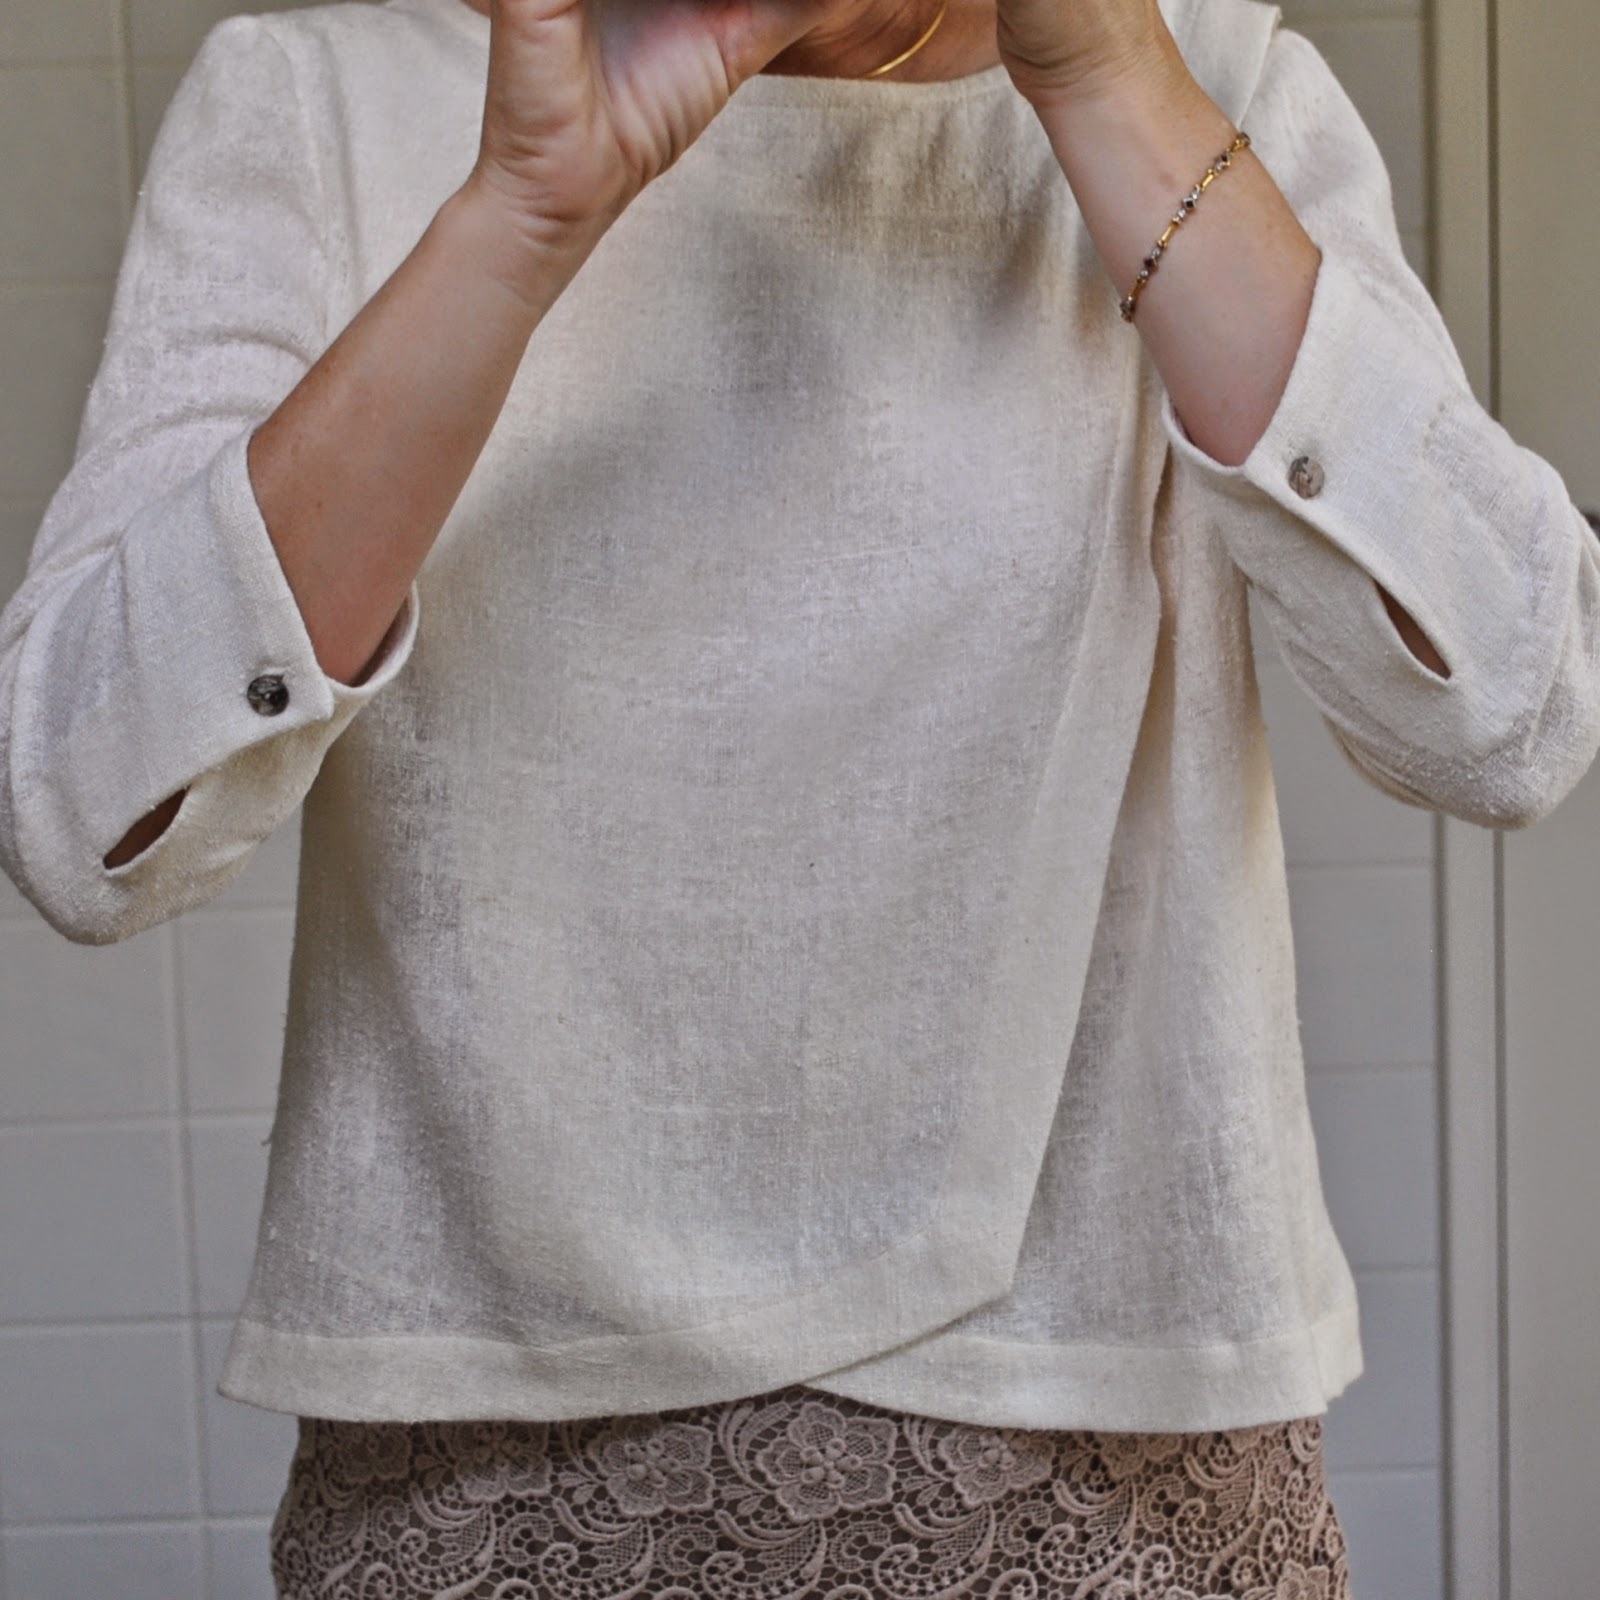
This pattern is Burdastyle 04/2014-115, with modified sleeves  and my fabric is a silk hessian from Spotlight.  It has a very loose weave, a rather pleasing slightly rough and rustic texture.  The rich, almost buttery cream colour apparently suits me.
Now, I have received a handful of patterns of my choice from Burda… however this is NOT one of them.   I had bought this magazine myself already!  and I’ve already made the asymmetrical turtleneck top from the same collection in the mag.  Ok, honesty here; I actually totally love just about this entire collection.  It’s embarrassing to admit how easily I am swayed by colour choices.  Those peacefully harmonious shades of soothing cool non-colours; *sigh* heavenly!
So style-wise, this is a plain design.  And my choice of fabric; quite plain.  But that’s ok, a bit of plain is a good thing to have in the wardrobe to set off the more eye-catching elements within.  But as I was doing the sleeves, which are likewise as plain a style as could be, I worried that they were going to tip my blouse over into the territory of Irretrievably Bland.  So I added a little feature; a faced split that has a little button closure on the corners.  I’m very pleased with how this looks; quite primitive, like a vague sort of a nod towards a tailored shirtsleeve button placket.

Construction-wise, this is a nice, quick and simple little pattern and utterly foolproof… . oh, I put the wrong front lapping over.   Haha.  We’ll just pretend that I did that on purpose, ok?  Ahem.

Insider biz; the side and shoulder seams are flat-felled, the sleeve seams overlocked.  The neckline is faced with a bias-cut strip of pale yellow/cream cotton voile.

Finally, my usual criteria; if I saw this in a shop would I be tempted to buy?  Heck, yeah!  Plain is my middle name.  Along with all the other middle names I adopt when the mood strikes.  This is going to be worn a tonne  🙂


Details:
Top; Burdastyle 04/2014-115 with modified sleeves, cream silk hessian
Skirt; adaption of Vogue 1247, coffee lace with silk charmeuse lining, details here
Thongs; Mountain Designs
Sienna wears her own custom-fit coat

Later edit: 4 yrs later, and I gave this little top a rejuvenating dye-bath!  it’s now a pretty shade of cherry-blossom pink…
Other outfit details:
and then again, to an exciting new shade of hot pink!  I love it like this!
pinterestmail
Switch to mobile version
↓