Tag Archives: Fibre Mood

limoncello

I originally bought this fabric simply because it reminded me of limoncello; specifically limoncello partaken after a long day hiking thr0ugh the delightfully bucolic Italian countryside… yes of course it is indeed that most wonderful variety of fabric; souvenir fabric!  I bought it in Rome, in the famous Fratelli Basetti Tessuti back in 2012, after our hiking holiday… it is a most gorgeously crisp linen in a sharp, warm, citrusy yellow with the skinniest white pinstripes.  I have used a small piece of it previously to make one of my Perth dresses, and so I have learnt that this gorgeous colour unfortunately runs like the the wind!  My Perth dress started out yellow and ended up basically beige eventually.  Sad, but true.  It’s ok though because I’m perfectly fine with giving it a refreshing new dye-bath when the time comes.

The pattern is the FibreMood Feliz.  I have to admit I was a little suspicious of how very long the skirt is! and was initially dead set on shortening it just about immediately, but actually? I kind of like it like this.  The Feliz has some nice features, specifically I like the curved back yoke and the flat, narrow collar; and I love how the workman-like vibe of those rolled up sleeves clashes stylistically with an almost impractically long skirt.  Not that the skirt is really “impractical” in a real life sense but you know what I mean.  I’m going to give it a good fair go before thinking about shortening it anyway.

Changes; just a few very minor tiny things.. Because the sleeves are worn rolled up most of the time, I decided to do a flat-felled seam finish on the sleeve seams,  The seam allowances are only 1cm so this was a tiny bit tricky! but definitely worth it.

So, here’s a slightly funny thing…. see how the back bodice of my dress pictured below curves down to the side seams? well the pattern piece, below right, is most definitely shaped just to do just this, however, the line drawings of the dress do not show this downward curve.  Mmmm…

I made the back yoke double layered and utilised the burrito method to get a perfectly neat finish on the inside.  This meant I could also add one of my labels without visible stitching showing on the outside, which is nice  🙂

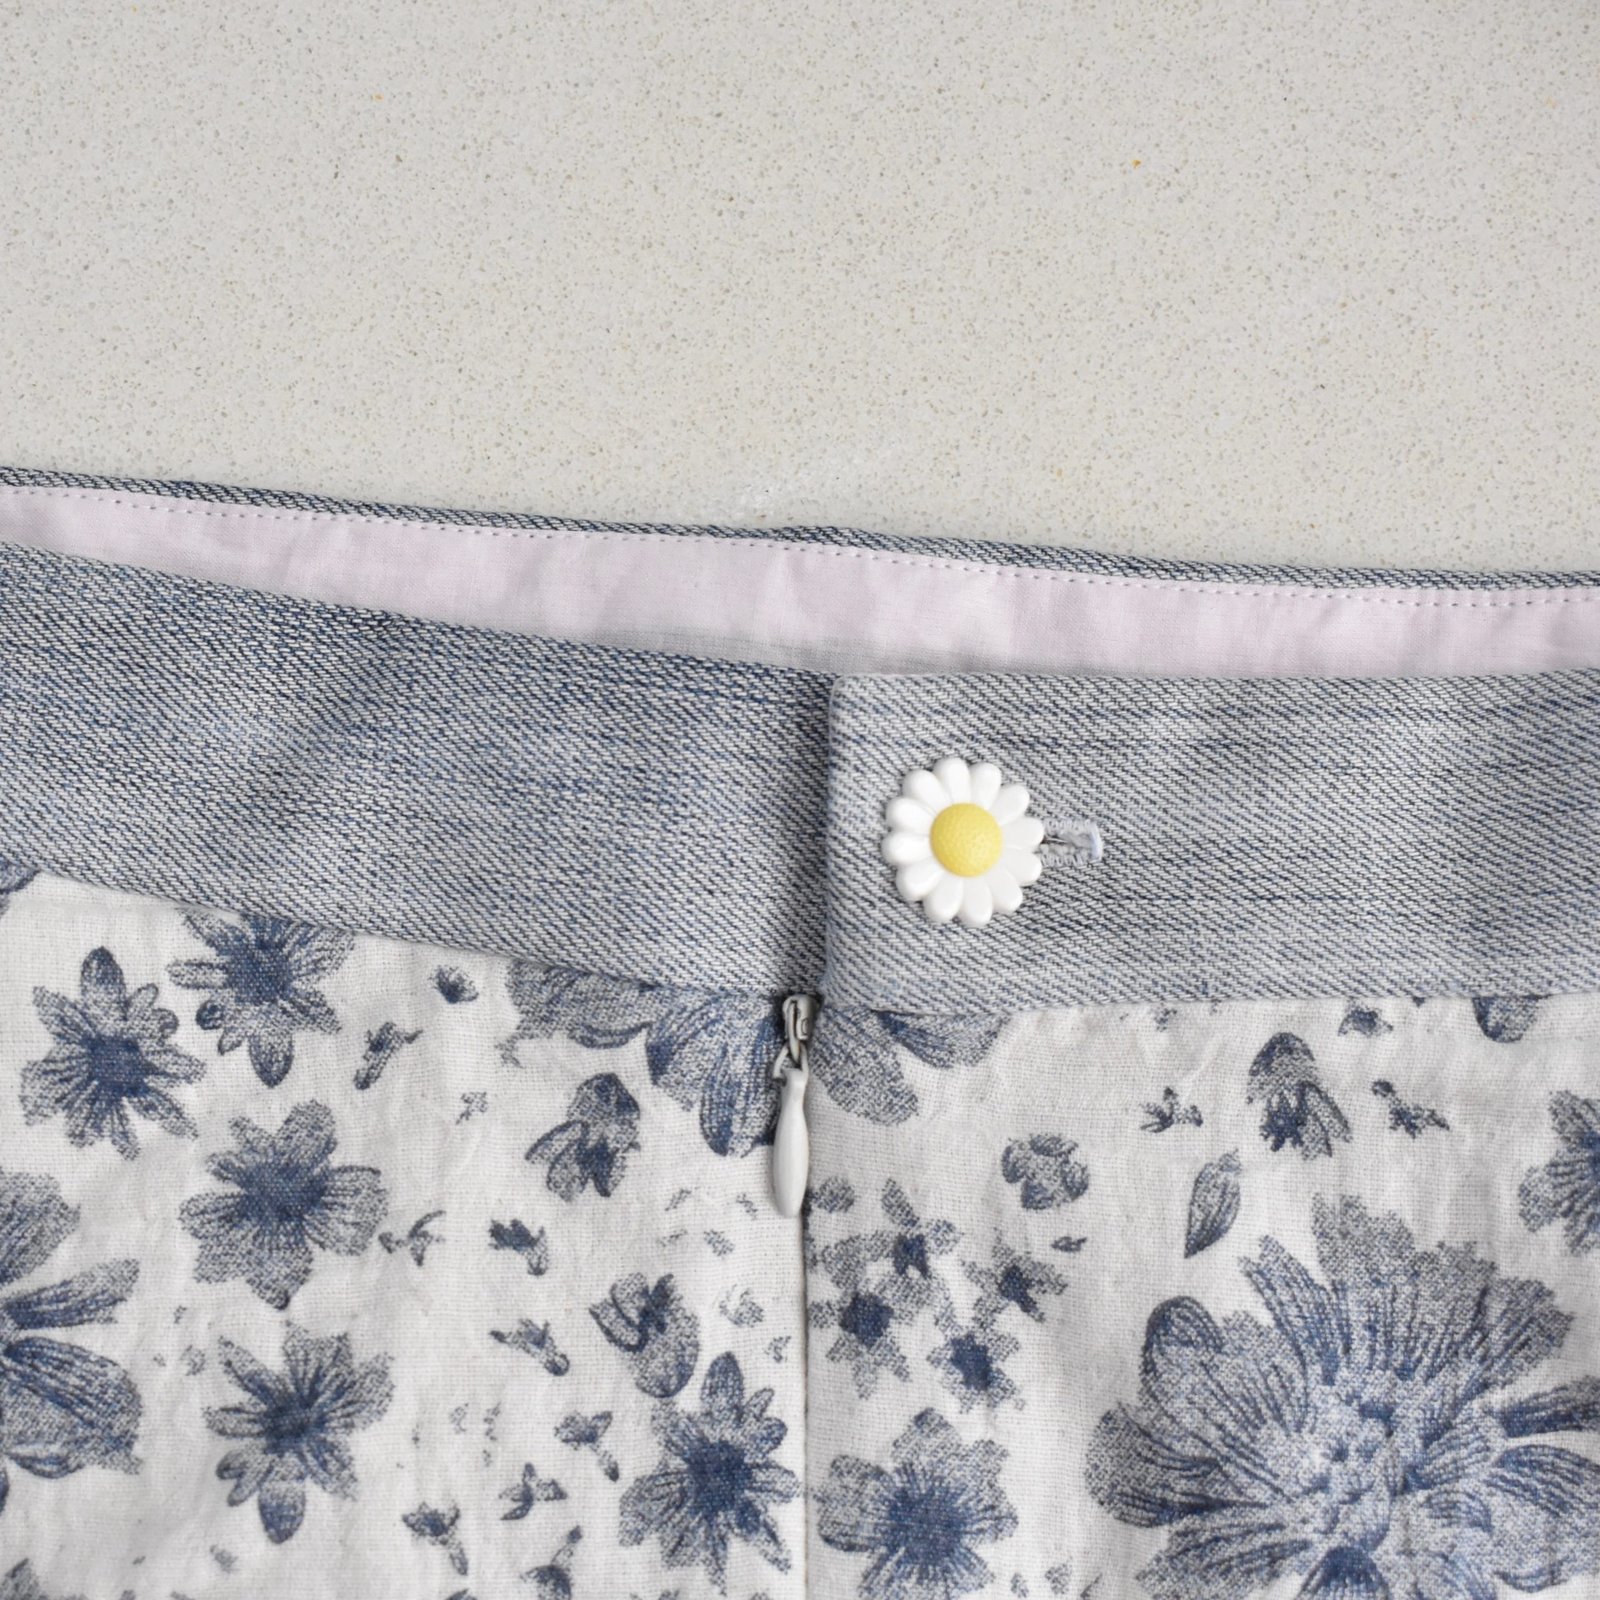
The slimline, stamped brass buttons are so lovely, I got these from Fabulous Fabrics.  I’ve actually used these twice before, for this olive shirt, and this blue shirtdress, now a shirt too.  I know I shouldn’t ever be using the same buttons, you should find different ones.  But you know when you’re perusing the button selection and you see they still have that super cute button you’ve used before… and you know you’re being predictable and unadventurous but basically one knows a good thing when one sees it and in the end why fight it.

Details:

Dress, Fibre Mood Feliz, in lemon-yellow pinstriped linen from Italy
Tights, made by me here
Booties;  nylon from Zomp shoes

pinterestmail

heaven…

Heaven by name, heavenly by nature?  Well, I think it’s a pretty nice dress, at least!

🍓
this is the new Heaven dress pattern by @fibremood; an unusual design with a chic, wide trapezoidal neckline and an interesting combined sleeve/yoke arrangement that I’ve only ever seen in a few Japanese patterns before now.

I’ve learned to overlook the awfully unflatteringly “puffy” line drawings featured in all the fibre mood patterns, because the finished products are invariably not at all like that! anyway I was quite intrigued by the lines of this design…  initially, while perusing the promotional photos… see below! I did worry that the sleeve/bodice corner junction at the neckline looked like it might be a little on the tight side… however when you’re wearing it, it’s more like nicely “firm” rather than tight and I think that structure is necessary to keep the neckline in place and also from gaping open.  The dress is actually very comfortable and I really enjoyed wearing it!  I even got down on the floor and had a play with Arthur in it, and was perfectly fine!

🍓 I also feel like it turned out to be pretty cute too  🙂  I bought the lovely cotton/linen mix fabric from the upholstery section in @spotlightstores … I just fell in love with the gorgeous deeply, dusky-raspberry pink colour and HAD to have it!

🍓This dress really was a fun thing to make, very quick and easy… I like the way the elegant and unique sleeves are set off against a sleek, just slightly fitted body section.  I like the sleeves pushed up, but they do look very elegant let down to the wrists as well, I think.

sleeves down

🍓 closure is by invisible zip in the L side seam.

🍓I didn’t line it but to be honest I think it would be better lined, particularly for an “autumn” dress, which it is definitely designed to be. I might even have a go and add a lining somehow, when I get a bit more time… I will update here when I do!

another bonus; all that ugly overlocking will be covered up if I line it!

It has to be lined, a petticoat will not do.  I did try it with a few of my petticoats and they all show at that wide wide neckline.  Yes, my bra strap shows at the neckline in a few of the pictures here, which I know is such a no-no.  However I felt a bit better about this when I noticed that even the model’s bra strap shows too.  I’m in good company!

🍓 btw, I did NOT shorten mine, this the length of the pattern.  I honestly think they must have added length to the above one modelled for the magazine!  Actually, I prefer it as that little bit shorter than knee length… it feels more like an autumn-al length, if that makes sense.

Details:

Dress; the FibreMood Heaven pattern, upholstery linen mix from Spotlight
Shoes; asics, from the Foot Locker

pinterestmail

paper-bag waist

I’ve just made these ridiculously comfy trousers!  perfect for lounging around while you do your work-from-home thing in these newly strange and scary times.  I adore them unreservedly.  Well, it’s the paper-bag waist, have had a soft spot for them since the 80’s… incidentally, you know how they say that if you remember a trend the first time around then you should scrupulously avoid it the second time around?  Well, what a load of tosh!  There’d be no trends left for us if we followed that crazy advice!

Because yes indeedy, this is actually a familiar little style that pops its head up pretty frequently to the joy of us who do love for our trousers to be comfortable but at the same time have an abiding aversion to an elastic waist.  Personally, I reckon the paper-bag waist isn’t so much of a “trend” any more but can rightfully claim the classic tag.

I made them using this really gorgeous, quite thin, bottle green cotton corduroy from Minerva Crafts… it’s absolutely beautiful stuff. Then again I’ve always been a huge corduroy fan, it’s one of my favourite fabrics of all time actually, for winter things I mean.  It’s like velvet, but better; easier to sew and wear, and to care for too.  I ordered quite a lot of this colour way and I have enough leftover for a simple little dress or a tunic or something.  Hmmm. brain clogs a whirling!!

The pattern is the Jasmin trousers, by Fibremood.  Fibremood releases a great little range of patterns each season for women and children, I really look forward to their releases and love checking them out.  Each issue caters to a range of sewing levels, usually featuring some easy-wearing basics and styles that are both chic and comfortable, and a nice scattering of surprises with every issue.  I thought this style was one of the surprises, but I just found myself homing in on it straight away!  🙂

These ones have very up-to-the-minute, turned-up cuffs on cropped legs, a good amount of room in the seat without being excessively baggy – remember these?  although I ended up adoring those too, once I’d taken them in a bit!!  The Jasmin trousers are easy and straightforward to make and I thought the fly front very well explained.  I often find it helpful to draw and cut out a stitching guide for the topstitching of the fly front curve if a pattern does not provide it, and this one doesn’t; however it’s a simple matter to draw one up.

The pockets are nice and and roomy enough.  I hand stitched the top edge of mine to the waistband facing edge.

I love how the paper bag waist is cinched in with a big wide self-belt to define the waist.  Acting on instinct I cut my belt out for the biggest size with a plan to shorten it later if it proved too long.  It may or may not be ok, partly because I don’t have the required D-rings of the right width to finish it, and I didn’t really want to head out to Spotlight during these isolation times, just for D-rings; so I’ve had to resort to just tying the belt in a knot.  I might shorten it still but just going to see how it goes for a little while.

I happened to have a perfectly matching zip in my stash! which is super lucky because I meant I didn’t need to go out for that either.  🙂  This is one I inherited from Mum yonks ago, and it had a real vintage tag.  Sometimes I worry about truly vintage zips, that they’re going to break straight away, from being rusty, or brittle.  It seems fine so far, and it doesn’t have to take any strain so I’ve got my fingers crossed!

wow… I can assure you that all that random fluff is actually quite invisible to the naked eye!

I just couldn’t resist the Paper Bag Shot!  It’s a pretty rare thing where I have ever had to stand or walk with a covering over my head like this and actually I found it quite difficult to keep my balance!  Was very disorienting, and made me wonder about learning to balance without the visual cues of your surroundings…

Anyway; I LOVE my new trousers, and they’re wonderful for comfortable working from home on the couch.  My own work has dropped off a little lately, but I have taken up learning a language to fill in some of my extra time.  I’m using the Duolingo app on my phone, a free one; it’s a great little system, sending me daily reminders so I have to keep up the pace.  What language, do I hear you ask… I’ll give you one guess…

🇯🇵

Well, of course, Japanese!  It’s super difficult.  I think the only thing I’m going to learn to say with any real competency is “Professor Maria can speak Japanese and English”  This should stand me in good stead for the future, a future in which I hope I can go over there for fabric shopping again!  Let’s think positively!


Details:

Trousers; the Jasmin trousers by Fibremood, in green corduroy from Minerva Crafts
White top; the nettie, but Closet Case patterns, details here
Beige shoes; designed and made by me! details here
old favourite mustard top; the Sudley blouse, by Megan Nielsen patterns, in a silk crepe from Tessuti, details here
Sandals; from an oppy, many yonks ago

Note; was even harder to paper-bag balance in heels!

out in ze wilde….

pinterestmail

mother of the bride

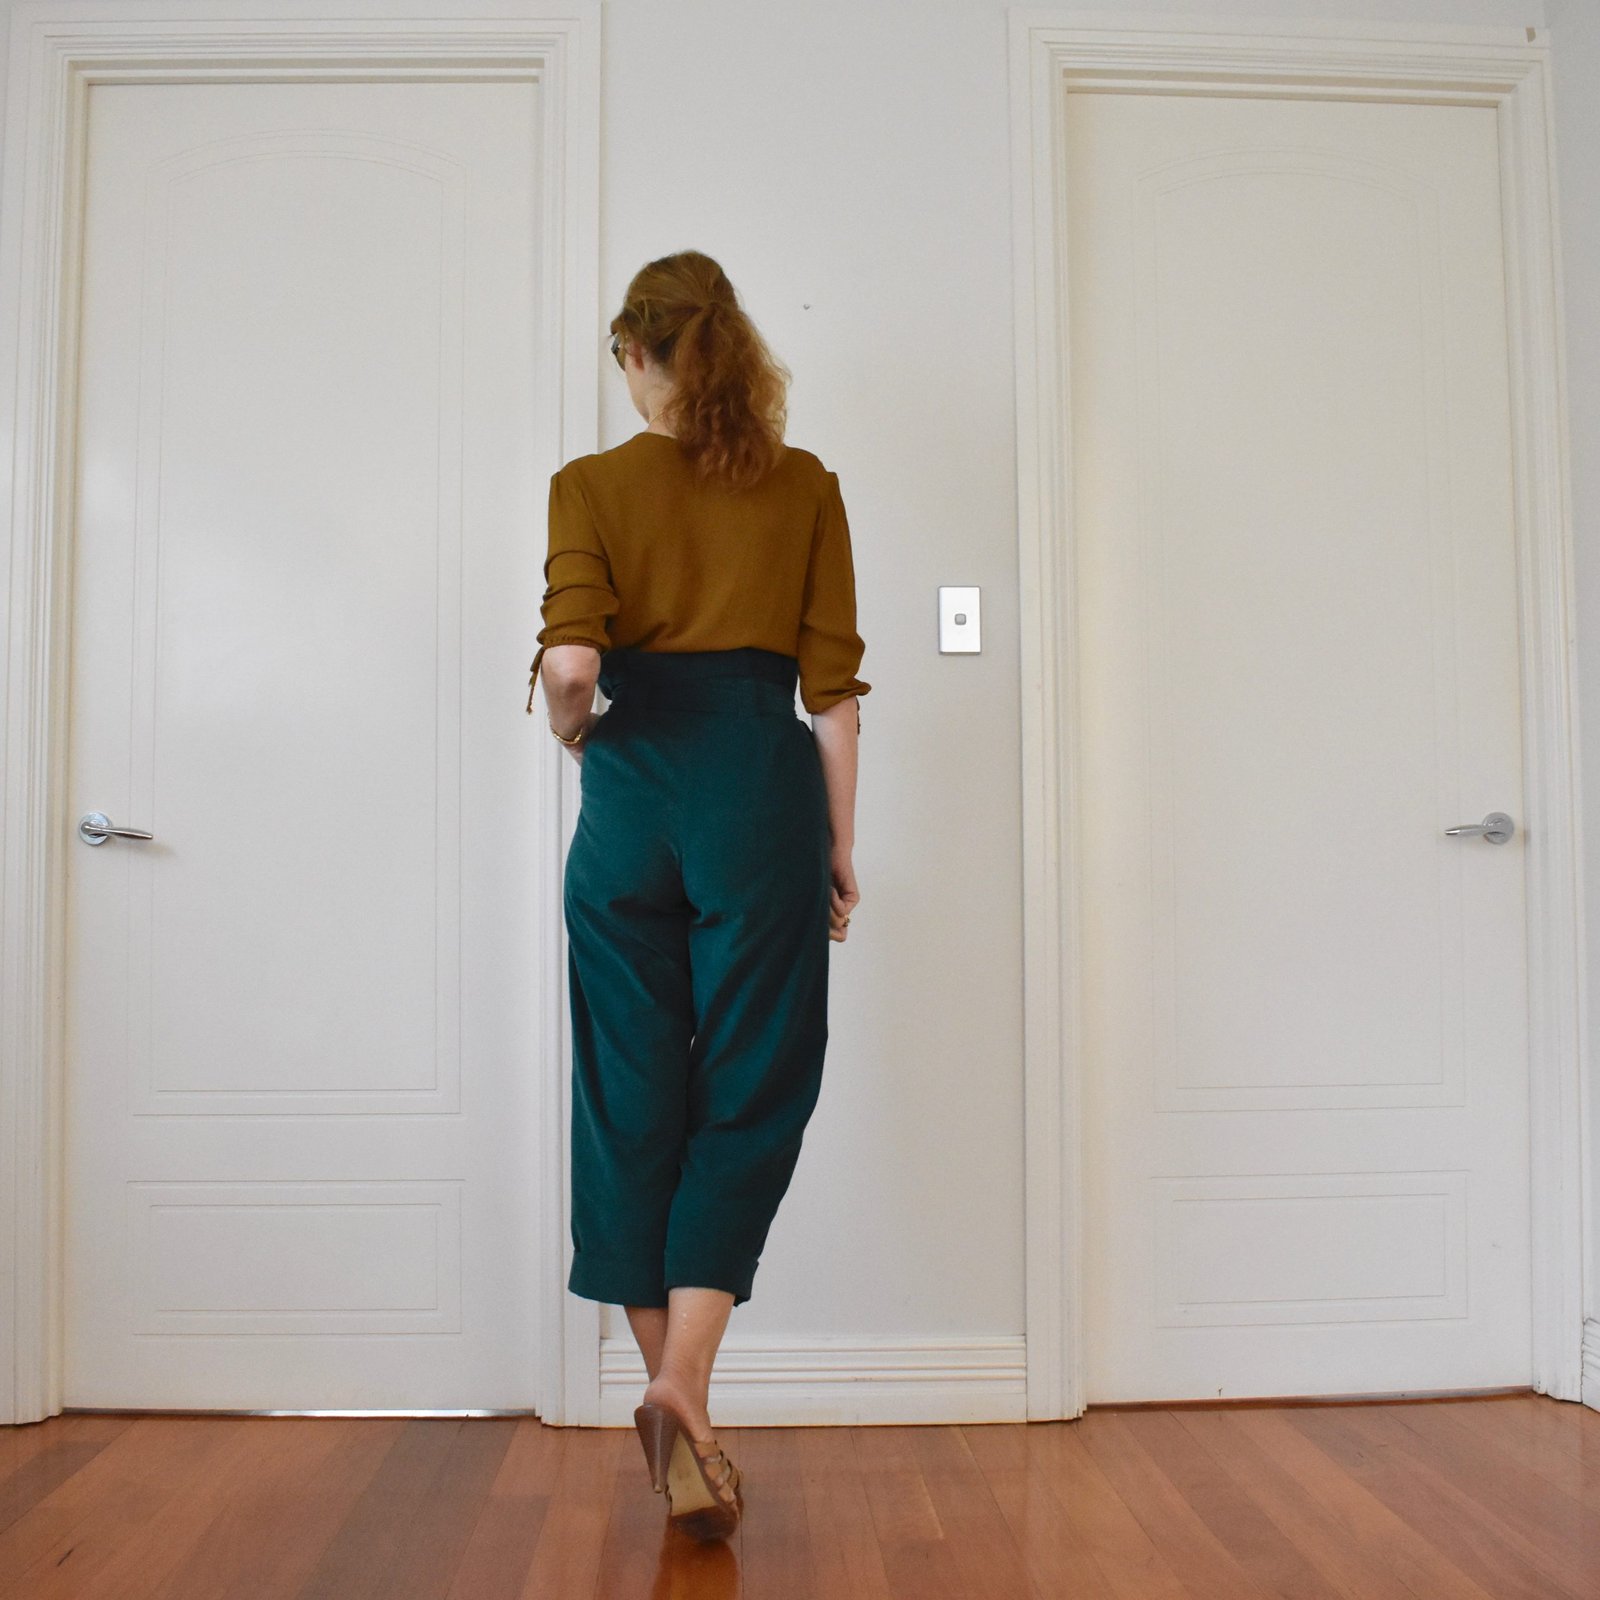
So, I made this beautiful (I think) dress for Cassie’s wedding.

I had early settled upon the beautiful bohemian Carole dress by Fibre Mood … for several reasons.  Firstly;  I already have the pattern printed out AND had made it up previously too and so knew I didn’t need to do any more special fittings of the pattern to myself.  Time-saver!  And secondly, I thought it was a gorgeous style too, of course!

I found the beautiful floral print in Fabulous Fabrics.  It is a silk/cotton and the most divinely luxurious stuff to sew and to wear.  It is also just about completely see-through, so my dress is underlined fully with soft ivory lining fabric.

I basted underlining and outer shell pieces together along the seamlines first, then overlocked the raw edges together before stitching the seams

The underlining is cut 4cm shorter than the dress with a machine-finished hem, but the outer shell hem is stitched in a narrow hem with tiny fell-stitches.  I hand basted the facings to the underlining with tiny invisible stitches at both the front fold and the overlocked edge to the inside too.

My label!

Side view… I absolutely adore the gentle high-low nature of this beautifully twirly hem!

So I actually made this dress back in January, when I had a bit of spare time in between bridesmaids and bridesmaid fittings, and I’m so glad I did.  The last little bit leading into the wedding was SUPER stressful…

this counts as my make-nine-but-actually-twelve thing for March…

and OH! I almost forgot! just like I did for Tim’s wedding outfit, I quickly whipped up a matching bra and undies for this outfit too…

Well… it sorta? matches?!  I think it’s close enough, anyway.  It was actually damn difficult to find fabric even vaguely matching in either colour or design!

I used my favourite pattern the Watson by cloth habit, and cotton jersey from Spotlight.  The red ribbons were saved from an old, also me-made, lingerie set, and I made my usual two pairs of matching knickers…


Details:

Dress; the Carole pattern by FibreMood, silk/cotton from Fabulous Fabrics
Lingerie; the Cloth Habit Watson
Shoes; Zomp, from the Zomp boutique

I took these pictures back in mid-January, so this is the happy face of a woman who has not even heard of the novel corona virus… so hard to remember those innocent times now!

I’m a bit torn here; I’ve either finished saying everything I need to say about the dress, OR I can address the obvious elephant in the room.

As mentioned, I actually made the dress way back in January, when I hadn’t fully got revved up with the more … maybe important? shall we say? wedding sewing, and decided to just run mine up in a quiet week, in between bride and bridesmaids’ fittings, and before things got more hectic.  And, oh my gosh, but did they get more hectic.  I was making Cassies’, very involved, wedding dress, and her three bridesmaids’ dresses, this dress here, and I also ended up making my Mum’s dress too, when she was getting overwhelmed at the thought of it.  It’s been … a lot… emotionally as well as workload-wise.  As well of course as we all know; approaching like an invisible tsunami from the other side of the globe was Covid-19; and none of us had any concept just how much the world was going to change in the following few months.  I really really appreciate that we are so extremely lucky here in Perth to be so isolated, that the situation here is far far less severe than in other countries, and that our government is right on top of things and has shut down the country in, hopefully, good time.

So yes, Cassie’s wedding did indeed go ahead; with good fortune the date was set for the very last weekend before restrictions started to really ramp up here in Perth, Western Australia.  When I say ramped up, well the number of people allowed at a gathering have been reduced, and reduced and reduced!  specifically, first it was 500, which went quite rapidly down to 100, then to 10, then 5, then 2!  At the time of the wedding, the number was 100.  Let me say; I’m not complaining, and I am most definitely very pro-lockdown to control the spread of the virus, but at the same time I have to admit to being so very retrospectively glad that the timing of our wedding meant we were able to go ahead as planned.  We were worrying right up until the night before, when we got the legal go ahead with very few adjustments needed.  We were fortunate that our numbers were already small, we had no guests that were coming in from out of the country or even the state, our venues were big enough to comply with the (at the time) 4 square metres per person rule, and we had already made preparations to protect our elderly relatives, like face masks and hand sanitiser – purchased at great expense! was available at each venue.  We also pro-actively made a no contact rule; absolutely no hand-shaking, hugging or kissing.  It is so so strange to lay out these guidelines for a wedding, but these are very strange and scary times and such rules helped put everyone’s mind at peace.  Everything went off as planned, and a couple of weeks later everyone is still healthy and well, for which we are so enormously relieved that I can hardly find the words for it.

It’s almost impossible for me to reconcile this time when we were fully allowed to gather together to celebrate our darling daughter’s wedding as a family; with now, a few weeks later, when we are not seeing anyone in our family AT ALL.

Anyway, that’s the story.  Small things to worry about really, at a terrible and terrifying time like this.  I sincerely hope everyone who reads this is safe and healthy, and continues to be so, and that you and your loved ones are able to access good health care if you should need it.

pinterestmail

floral frikka with matching skirt

… so here are a few things I made earlier! like; along with everything else that’s been going on I can barely remember when I made them.  Honestly, I’m really missing writing for my blog lately, and “engaging” with other sewing folks on instagram – please note correct use of appropriate buzzword – with all the wedding sewing I’m doing it’s all I can do to keep up with just my daily outfit blog … and keep the pantry stocked … and some sort of food on the table each night… wait.  Actually that is rarely happening nowadays, whoops…

Also, a pre-warning, after the wedding there’s going to be a veritable avalanche of sewn items popping up here.  An avalanche I tell you!!

Anyway!! I’m just gonna go with stream of consciousness blogging again and see how we go.

This is the new Frikka hoodie pattern by Fibremood… funny thing; when the catalogue came out I immediately homed in on the Becky dress and was like, YES!  that’s the one for me!! at that point noticed that it was for child’s size 2-14 … womp womp.  So I chose the adult sized Frikka hoodie obviously.  As it turned out, I had just enough fabric to cut out a little matching skirt, and so I’m pretty chuffed I ended up with a sort- Becky look after all.  Win!

pseudo-Becky

My fabric is a surprisingly cosy cotton double gauze from Minerva.  Suprising, because you wouldn’t ordinarily think cotton gauze would be warm.  In my experience, it’s a lot warmer than you think!  And so soft and cuddly, mmm.

note to self; wearing the hoodie up with a pony tail looks, um weird….

Some sewing notes; I added a kangaroo pocket on the front…  #pocketho

I stitched the sleeve hem quite deep hem on the sleeves, a. because I really love a three quarter length sleeve, and b. so when cuffed/rolled up the right side of the fabric shows.

I didn’t have a matching cord on hand for a drawstring in the lower casing, and may not even bother actually.  I think it’s fine just the way it is.

I really like the hood construction on this thing.  It’s fully self-lined, in a very innovative (to me) yet intuitive and simple to construct way; with the two sides being cut on a fold, opening edge on the fold.  Very clean and easy.

With the matching skirt; I didn’t have enough fabric for the waistband as well, so cut one from an old pair of jeans.  The colour is a perfect match, and also denim is probably a better fabric for a waistband anyway.

I stitched on a, in retrospect rather insane daisy button, because it seemed appropriately fun and random at the time, but I may switch it out at some point.  The petals are really knobbly so it’s kinda tricky pushing it through the buttonhole…


I also fully lined the skirt with ivory/grey polyacetate lining fabric, because the gauze is naturally quite “sticky” and I do plan on wearing it in winter, with tights.


Note to self; 40 minutes for a blog post.. not too bad!  Now to get back to the wedding sewing!!


Details:

Hoodie; the Fibremood Frikka hoodie, made in this cotton double gauze
Skirt; kinda based upon Vogue 1247, except with no pockets or horizontal seams, same fabric, and lined
Poppy dress (only the skirt seen); Vogue 1351, poppy print silk chiffon, details here
Pink twist top; the Pattern Magic 1 twist top, thin pink stretch stuff, details here
Shoes; made by me and my own design, detail here

pinterestmail

Carole in blue velvet

Should that be “Carolyn” in blue velvet??  well I think it should!  Because this thing is so very very me!  LOOOOOOVE!

Actually, this is the Carole pattern, from the new issue of Fibre Mood magazine, available for purchase here.

The fabric is a totally GORGEOUS deep blue velvet that I bought at the Morrison fabric sale from.. ooh, maybe a few years ago?  I forget.  This also happens to be the only piece of fabric I had big enough for this pattern.  Lol!  Same as for the Faye dress, this pattern is a HUGE fabric hog!  It doesn’t show up too much, but there is a centre back seam on every back piece; the bodice, the middle piece, and the skirt piece.  This is not ideal, but was completely unavoidable.  The skirt piece alone is ginormous!  Even trickier; the pattern is designed for fabric 150cm wide, which my fabric was NOT ahem; it’s important to comply with this simply because the skirt piece is too big to cut out with fabric any narrower.  I only managed it by flipping the skirt pattern piece by 90 degrees and having a centre back seam.

Even one of the front middle pieces is also pieced down the centre, but I sneakily arranged for it to be the left front, the one that is covered up once the dress is all wrapped up closed.  You could never tell! except that I’ve now told the whole internet, right here, woops…

Technical deets:  I omitted applying iron on interfacing to the skirt opening edges.  Well, I did actually apply it, but thought it looked too stiff and did not allow the skirt to flow and undulate elegantly in the way I desired it too… so I peeled it off.  I think the skirt turned out so much better without it!

I had precisely zero velvet left after cutting out the main dress pieces, so cut the bodice and neckline facing from an old pair of Sam’s work trousers, which was the perfect shade of inky navy blue.  I’ve previously used these same trousers for the piping and buttons on this dress here.  Waste not want not!

For the ribbon tie closure, I bought a length of navy blue cotton twill tape, and zig-zagged the raw ends so it won’t fray.  The hem is hand-slip-stitched in place.

I absolutely LOVE this dress!  I almost, almost wish the weather was colder, so I could start wearing it in earnest… but well, I could never truly wish for colder weather, really.  Not with a straight face.  However, I shall very much look forward to wearing it next year.  Truthfully, I actually finished making this quite a while ago… like a few weeks ago #oops but have been completely unable to take a picture of it.  Partly that’s me being lazy.  It’s been so hot!  unseasonably so, and I just didn’t want to put it on.  I did try to take pictures indoors, at my now usual photo spot; but they were terrible.  I LOVE velvet but obviously it’s like a black hole when you photograph it, soaking up all light and basically looks just dark and completely featureless.  This is an example of what I’m talking about…

hehe, only including the picture because it’s got my beautiful Sophie in it, really…

Another thing is .. well, you guessed.  The wedding dress.  As well as the wedding consults and planning.  We helped a lot with advice and as a sounding board for Tim and Kelly when they were planning theirs; and now of course, Cassie being our daughter, and the lion’s share of planning a wedding generally falling to the girl; fair or not that’s just how it is! well of course we’re fully into the details of this one too.  I’m just getting more and more behind on everything! and my sewing/blogging schedule is all over the shop.  I’m not complaining, far from it! but just explaining I suppose.  Life is currently quite FULL, for us.

Hmmm, got carried away and off the subject just a little bit there…  I should just delete all that, but I’m currently in the mood for stream of consciousness blogging, so I guess it should stay.  Ha!  That’ll teach me!

Details:

Dress; the Fibre Mood Carole dress, in deep blue velvet
Tights; made by me, details here
Boots; Sempre di, from Zomp boutique

Also, I’m part of a link party… check out the other creations people have made from the magazine!

pinterestmail

deep golden Faye dress

I’ve just finished making this dress… it’s rather gorgeous, isn’t it?

Just before going away, I was contacted by the lovely Sophie, who asked me if I’d like to make something from the autumn issue of the Fibre Mood magazine… would I?!!  Fibre Mood is a newish Belgian sewing magazine, with a nice variety of designs suitable for different sewing skills, some quite simple, and some more funky and cool with interesting details.  I chose the Faye dress – I have to admit partially influenced by the totally divine sample! printed it out before going away, but got no further until the day I got home again …

and literally as soon as I got home, like the very same day… I got onto it and finished it.  Again, maybe influenced by the sample; I dug out from my stash this silk crepe in just about exactly the same colour.  Copycat?  Moi?  Well, I may have also been influenced by the fact that it was literally the only piece in my stash large enough for the pattern layout too!  I’d originally bought it from Tessuti’s in Melbourne, during one of my girls’ weekends over there with my Mum and Cassie.

It’s so autumnal!!  I’m incredibly into autumnal tones right now, I think probably influenced by all the beautiful fall foliage images we’re getting from the northern hemisphere right now, but also of course because I am an “autumn” myself.  I do think these tones suit me pretty well  🙂

pockets!!”…  in a hoarse drug-dealer-on-the-street-corner voice…

The design is slightly 80’s, in a really good way in my opinion! reminding me of the comfortably loose-fitting midi shirt-dresses with gorgeous wide and swishy pleated skirts from ralph lauren 80’s collections…  the Faye design IS a true shirt dress too actually; with a long concealed button band, and with both the bodice and skirt pleated into the waistline.  And, of course, and at the risk of sounding fanatical; HUGE pockets in the side seams, above  🙂

The bodice has what look like pocket flaps on the front, but which are actually faux flaps, and are more of a design feature.  The back bodice has a matching horizontal seam, and a rather cute hanging loop as a purely visual feature.  I love small interesting details like this!

well, hello gorgeous!  Sophie likes the dress too…  🙂

I didn’t have matching golden buttons in my stash, and am trying to use my stash rather than always buying new – holiday souvenir shopping notwithstanding!! – so I dug out some black buttons from my stash.  It may sound counterproductive to stitch very visible buttons underneath a button band constructed specifically to conceal them! however I actually like this look of them peeping out a a lot.

The sleeves are stitched with a very wide hem, which is then turned up to for a self-cuff.  I really love the almost “safari” shirt vibes of the bodice.  This photo also shows the nice pleats in the bodice and skirt fronts.

The only part of the design I found a little too scantily explained was the hemline… there were basically no instructions as to how to finish the hemline with that concealed button band as well as the button band itself either.  I know from past experience this is something you do have to address a lot earlier than the very last step! this sort of thing requires stitching the corners right sides together and turning out, and at least a little bit of hand-stitching things down.  The instructions for Faye pretty much leave all of that entirely up to you.  I also decided to hand stitch the concealed button band pieces together at the lower edge too, to make it all look a bit neater and seamlessly finished off.


Also, in my  opinion, the nature of the button/buttonhole band construction makes for a very thick area at the front of the waistline… because the button band and concealed buttonhole band are cut-on with the bodice and skirt, and then seamed together at the waistline… when you create all those multiples folds that are inherent in a button band, not to mention that of the concealed buttonhole band, well let’s just say there’s a heck of a lot of layers in there.  If I was going to make this again, I would probably cut the button/buttonhole bands separately and in one long piece, no waistline seam, and attach them to the centre front edges of bodice and skirt after they’re joined together.  The way it’s done in Faye is not actually terribly terrible, because this is the kind of dress you wear a belt with it, and a belt hides the waistline anyway; however I think this approach would make for a less bulky and cleaner waistline.

The hem, I made as a super skinny rolled hem, finished with tiny fell-stitches.  My crepe is the kind of fabric that when you press your very narrow finished hem, thus flattening it out from 3D to 2D, it morphs out to a much wider hem, seemingly by magic.

Summary; I love my autumnal new dress! and may even dare to wear it as a spring-time dress… I think it will work equally well!

Details:

dress; Fibre Mood “Faye” dress in a golden silk crepe from Tessuti’s in Melbourne
Tights; self-drafted using my own custom fit pattern and black polyester stretch from Spotlight
Belt; super old one from Country Road
Boots;  Officine Creative from Zomp boutique, a birthday gift from Craig

the swish is amaaaazing!  I’m so into the swish right now!

pinterestmail
Switch to mobile version
↓