Tag Archives: Handcrafts

blue Blair jacket

Hello!  I made a new thing.  It’s sort of a jacket, sort of a coat.  What’s the difference between those two things anyway, I wonder?  I always thought a jacket was short, like maybe no longer than hip length max, and a coat is longer, like anything past the hip.  This pattern is marketed as a jacket, but also as potentially a shirt-dress, and the two variations are called duster and blazer respectively; so I guess you can take your pick!  A multi-faceted design, to be sure!Whichever, it’s unlined so a very simple and quick thing to make as far as jackets go, and the boxy unfitted shape makes for an undemanding fitting process too.  Oh, maybe I should mention the name of the pattern; this is the new Blair jacket pattern by Homer and Howell, and I made the duster length.

I really enjoyed making this! you normally think of jackets/coats/dusters as being quite involved but this was really easy.  Even considering that I chose to bind all the raw edges inside with HongKong binding, which is a process that when you’re about to embark on it you think; oh this is going to take FOREVER… But since I figured the seam allowances were going to show every single time the coat blew open I wanted everything to look neat and tidy inside.  And whenever I do get going with HongKong seaming I invariably love it, end up thinking, oh this is FAB!! and why don’t I do this for ALL the things I make, hmmm??

My fabric is a wool-blend suiting that I’ve had in my stash for years and years; so long I cannot even remember who gave it to me.  Because, yes; it was donated to me from someone else’s stash once upon a time.  I think maybe my grandmother’s?  It’s beautiful quality, but I’d always shied away from using it because I thought the colour was absolutely terrible for me.

However right now I’m trying to be more resourceful and use le stash, stay in my house and avoid shopping as much as possible.  You know, isolation and all that … so decided what the heck.  That’s why dyes were invented, right?  I knew the fabric wasn’t 100%wool, but it was worth a try.  Sploonch! it went, straight into a navy blue dye-bath.

This actually worked out pretty well… it’s now a lovely shade of …  bruise?? ok maybe I’d describe it as smokey blue, or even light teal.. anyway it’s a richly smudge-y sort of a colour that I really like and a big improvement on the original light sky-blue.  For the HongKong seaming I used an olive green poplin from my stash too.

Buttons! well obviously I had nothing that matched in size or colour AT ALL and normally I’d pop off to the shops to search for something.  But see I’d made up my mind to work from my stash, and giving in on the buttons would be such a fail… so fresh on the heels of making my tea-cup for the bridal shower hat, I thought I’d try to make some from modelling clay.  I think they worked out really well!

I don’t think I’ll be tossing the coat in the washing machine any time soon, just in case, although I’m sure they would probably survive fine.  Maybe just a gentle hand-wash.  But look at them!  I LOVE them!  I especially love how slightly wonky they are.  Of course any and all wonkiness was completely intentional  😉

I’m just going to briefly mention the changes I made to the pattern:

I switched the orientation of the box pleat in the back to be an “innie” rather than an “outie”

I added a hanging loop inside the collar/yoke seam

I put in BIG inseam pockets into the side seams.  Yes, there are now pockets in the Blair pattern, but I was a tester for this pattern and they weren’t in the original design.  I NEED pockets in a coat! so I actually went in with the seam ripper and added some in after I’d finished the coat completely.

Here’s a little video on the making of this coat, now up on my YouTube channel… I’d like to say that the quality of my videos is improving, but I still haven’t worked out how to even add music.  I feel like such a youtube failure!  but it’s such a lot to even get this out.  I’m trying to improve!

Anyway, blogging/vlogging fails aside; the final verdict is that I’m going to love wearing this… coats are not an awfully common sight here in Perth, we’re so ridiculously casual here, to a fault! But I really love coats, both the making and the wearing of them; and I really love looking at pictures of Northern hemisphere bloggers wearing coats regularly that I’m going to just do it anyway.  This is one of those things that is kinda un-Perth, even though I’m deeply Perth in just about every way.  This is weird, but it’s just the way it is  🙂


Details:

Coat; the blair jacket pattern byHomer and Howells, in a wool mix suiting
Dress; the Cissy dress pattern by Homer and Howells in a rust coloured lace, underlined with pink/rust dyed cotton, details here
Tights; my own design, black stretch stuff, details here
Black shoes; my own design and made by me, details here
Floral dress; based upon Simplicity 8658, floral cotton gauze, details here
White shoes; designed and made by me, details here

pinterestmail

jungle baby mobile

Yesterday we attended a very special event, and I made a very special gift for the occasion! … Kelly’s bridesmaid and Tim’s groomsman, now a newly-wed couple themselves, hosted a baby shower for who else but our newest little not-quite-here-yet bub…  The new nursery is to be jungle-themed, so I thought I’d make an animal mobile.

I bought acrylic felt sheets, wooden beads and a bamboo hoop from the craft section at Spotlight, and everything else from my stash… embroidery thread for the embroidery, upholstery thread for stringing everything all together, and all-purpose glue… the blue/green wool that I used to wrap the hoop was from a large bag full of wool that a neighbour put out on their verge as rubbish.  When I spotted it I was like… whaaa??? well yes please and thank you! #wastenotwantnot

The designs are all my own:

toucan;

sort of a generic monkey… I kinda wish now I’d made him a specific type but oh well…

gorilla.  btw, most of them have a definite front and back so I’ve pictured both of his here…  He was one of my early favourites so I can’t believe I forgot to take his special close-up photo!  we’ll have to make do with a couple of zoom-ins …

tiger.   I’m pretty pleased with my tiger, it was easily the most labour intensive and fiddly of them all!  This is actually version three; I was dissatisfied with two earlier versions but kept going until I had one I was happy with.  He also has a definite back and front.

panther

blue and red macaw

blue and gold macaw.  Until I was making this mobile and made a point of looking it up, I wouldn’t have noticed that these macaws have black beaks while the red and blue ones have white beaks!

python.  this was a last minute inclusion and I really love him!  My python has a lovely diamond pattern along his length, and it should be noted btw that this is not a very common marking for this particular colouring but I’m claiming artistic license!

There are three different leaf sizes, and I went to a careful effort to balance everything out; the ground dwellers are at the bottom, then there’s the mid-range dwellers, with the birds flying up in the canopy.  Except for the toucan, he’s not flying but I imagined him perched on a branch.

I like the way the blue/green yarn I used to wrap the hoop is sort of “planet earth” colouring, as well as sky/leaf canopy colouring.  Seems sort of fitting.  And the dark wooden beans that are really there to weigh down the motifs, also sorta represent nuts in the trees and on the ground,  and the wooden trunks of the trees.

Lastly, here it is in motion.. thanks Cassie! for holding it up for me to film it!

Kelly sent me a picture this morning showing it hanging up already, which is so cool! and I sure hope baby enjoys watching it from his cot!

Before anyone points it out; yes I know these animals do not necessarily live in the same jungles as each other, but hey; at least they’re all actual bonafide jungle animals and I didn’t pop a cheetah or a zebra in there!

Now before I forget… I said I only had two more things to blog about before the end of the year, but I was forgetting the following!  for Kelly’s birthday she mentioned how she needed maternity clothes, so I offered to take her shopping for fabric and I’d run up a few things…  I’ve shown some of them here but not all of them for some reason, anyway, here are the rest…


a Closet Case patterns Ebony dress with set-in sleeves; in cotton jersey bought from Spotlight for this project

A raglan-sleeved Ebony tee, and a skirt made using Burda 7023.  Apart from the navy blue merino for the sleeves which is leftover from my Nettie tee, these fabrics are all long term residents from my stash, some give to me by Mum.  It’s not a glamorous outfit, but one I thought she could wearing hanging around the house or on the weekend for housework or something… hey, we all need those clothes too!

another raglan-sleeved Ebony tee, and Burda 7023 skirt combo… striped jersey a long term resident from my stash, originally leftovers from this dress; and black jersey from Spotlight, not a leftover but bought specifically for this project.  For my previous notes on adaptions to this skirt pattern, see here.


So; NOW I’m pretty sure I have only one thing left in this year to blog and it’s a lovely one if I say so myself …. stay tuned!

pinterestmail

Ms Summer

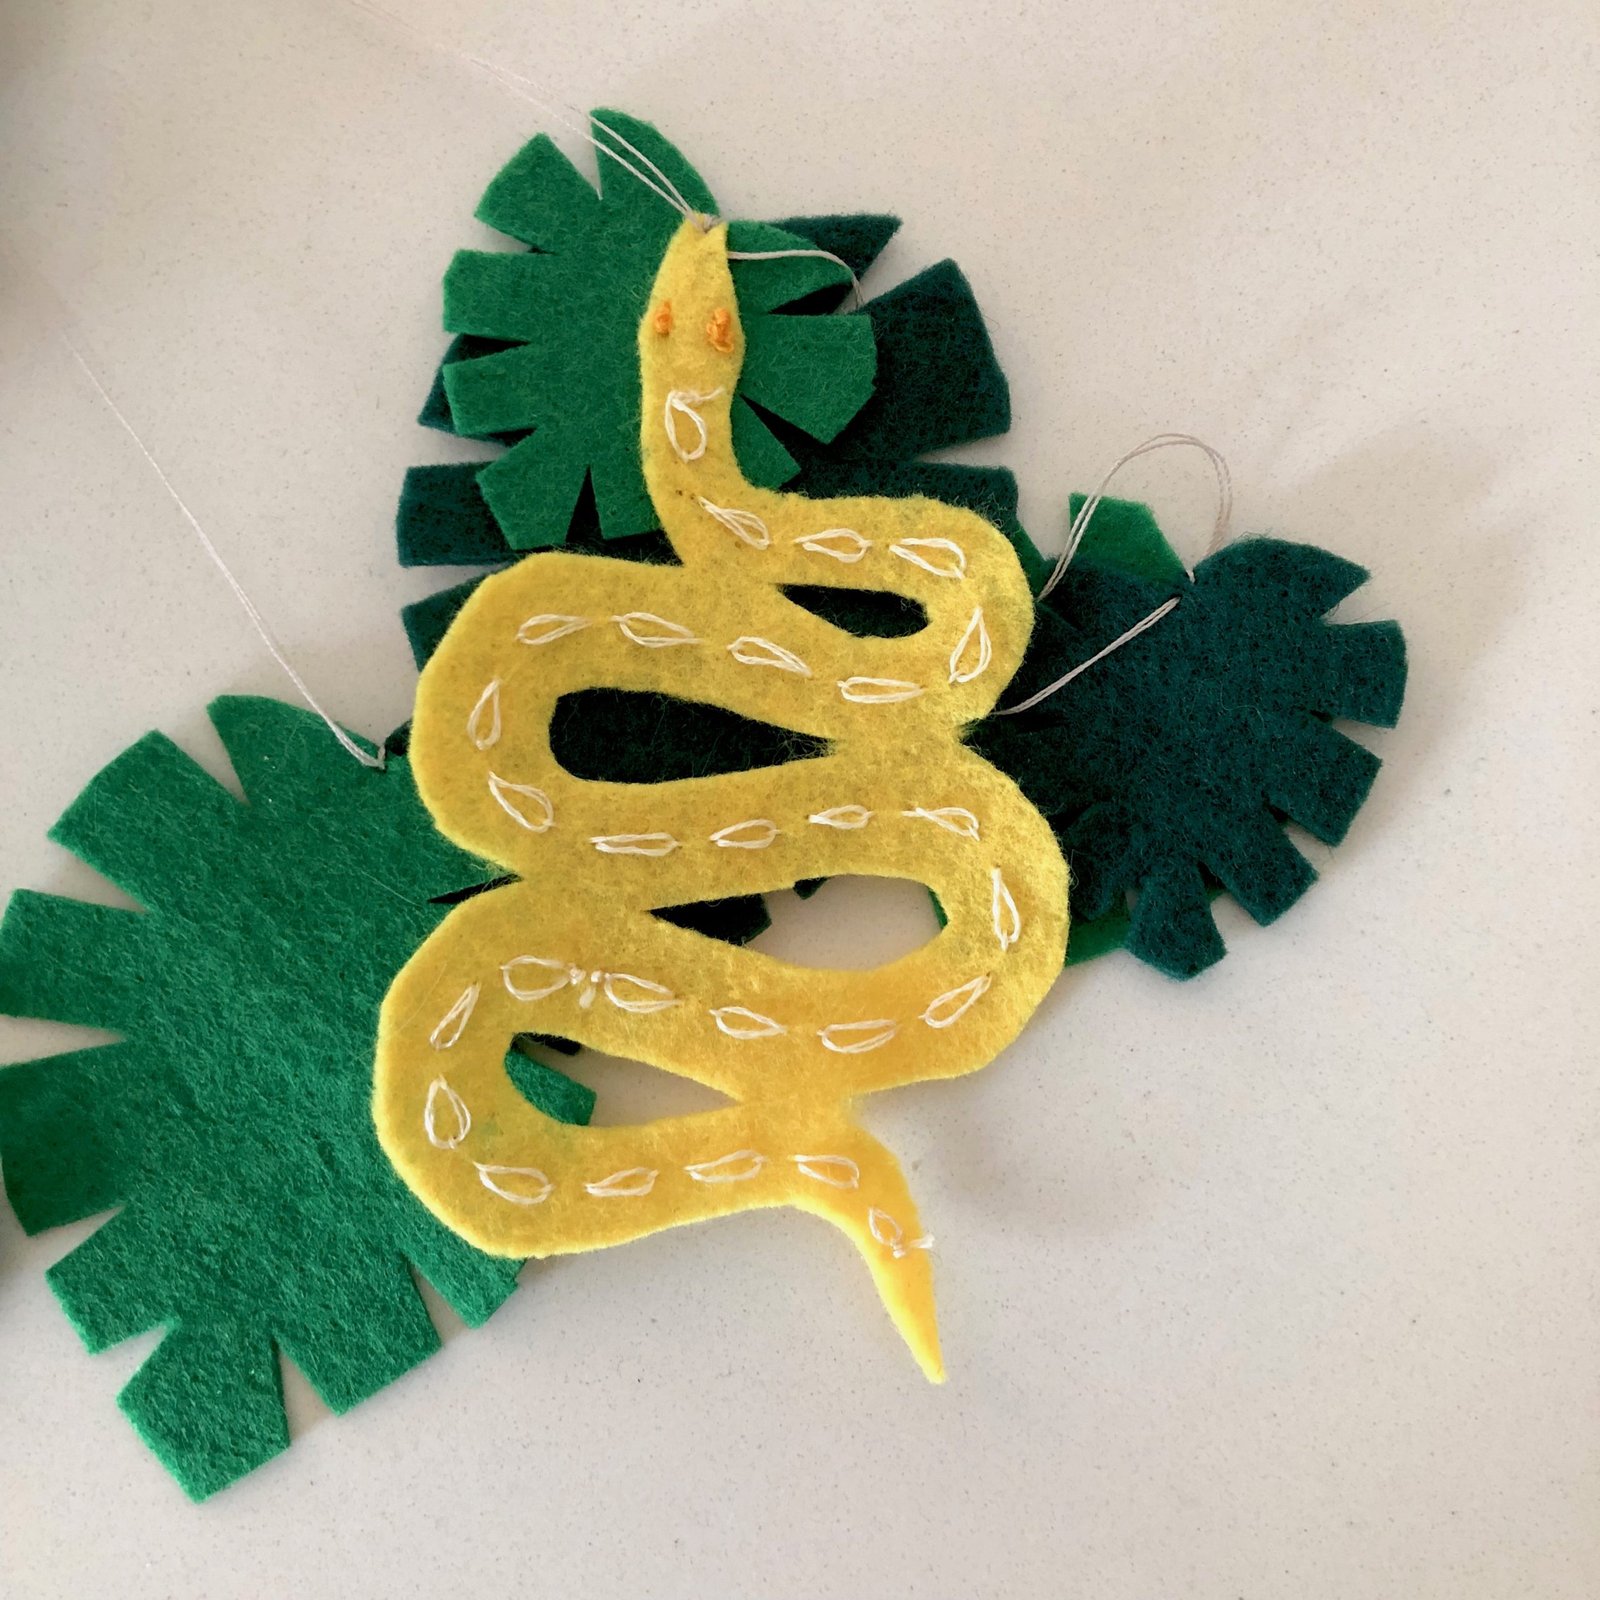
Well, hello there gorgeous!   I’m thrilled to introduce Ms Summer to the world!  the latest in my small set of seasonal girlies…

I hand-dyed natural calico with a small army of different iDyes to get Ms Summer’s lovely cocoa-toned skin tone, however her luxuriant mane of tawny hair came ready-dyed in this wonderful range of browns/charcoal/tan and the occasional touches of chestnut… and can I just say I over-the-top love her hair!! and actually would kill to have a crazy multicoloured mane like this myself…

I have hair envy!!!!

Like her friends, she comes with a whole lot of lovely clothes, to keep her comfortable and suitably attired for all seasons.

For summer, she has this pretty little wrap dress… one can never have too many stripes in one’s wardrobe.. oui? and the blue-and-white sets off her baby blues rather nicely too, I reckon.  Also I rather like the way the stripes lie which way (but loose) all over her dress  🙂

For winter, she has a turtleneck sweater in millennial pink – eeee! sah trendyyyyy! – with an attached denim miniskirt, also a pair of light periwinkle tights, and a hand knitted beanie in shades of slightly variegated lavender/mauve.


I have to say, I’m particularly enamoured of her little denim skirt… probably because when I was a teen I practically lived in little denim skirts myself.  Teenaged me would no doubt have pounced on the pink turtleneck too, to be honest  😉

Of course she has cute little lace knickers too, with an embroidered rosebud on the front…

… and if she wishes to attend a soiree, or even just for strolling on the beach should such a thing take her fancy, she has a sequinned cocktail dress in a shade to perfectly highlight and set off her cornflower blue eyes.

… which she can accessorise with her classic pearl drop necklace…

… AND she has a jaunty emerald green duffle bag.. with pockets!! to carry all her kit  🙂

Ms Summer is currently listed over in our shop… 🙂

Not pictured above, but like all my dollies she also comes with a lavender tote bag that she and all her things can be safely stored in, when she’s not being played with.

pinterestmail

a knitting project bag

It’s sometimes quite difficult to think of gifts for Mum because she will say, without fail; please DON’T GET ME ANYTHING FOR MY BIRTHDAY.  But… I have to think of something!!!  Besides the fact that she’d probably be little bit upset if I actually did give her nothing, haha  😉

Mum is always knitting, and she’s still particularly keen on knitting socks… whenever she comes up to stay she brings her knitting, usually stuffed in some flimsy plastic shopping bag; and works on it pretty solidly, at all hours of the day or night.  And inevitably, she will ask to borrow my scissors and a wool needle… btw, I don’t mind at all hunting these things out for her, but really it would be so much better if she had them with her and at hand already.

Lightbulb moment… Mum was in urgent need of a knitting project bag!!

It’s only recently I even became aware that knitting project bags were a thing, after I discovered a few knitting podcasts on youtube… where knitting project bags are an absolute must have!  I’m a bit embarrassed to admit that my own knitting bag is just a daggy old, small shop tote thing, that shops put your purchases into… it can be seen in this post here.  It’s not very good, and Mum’s isn’t any better.

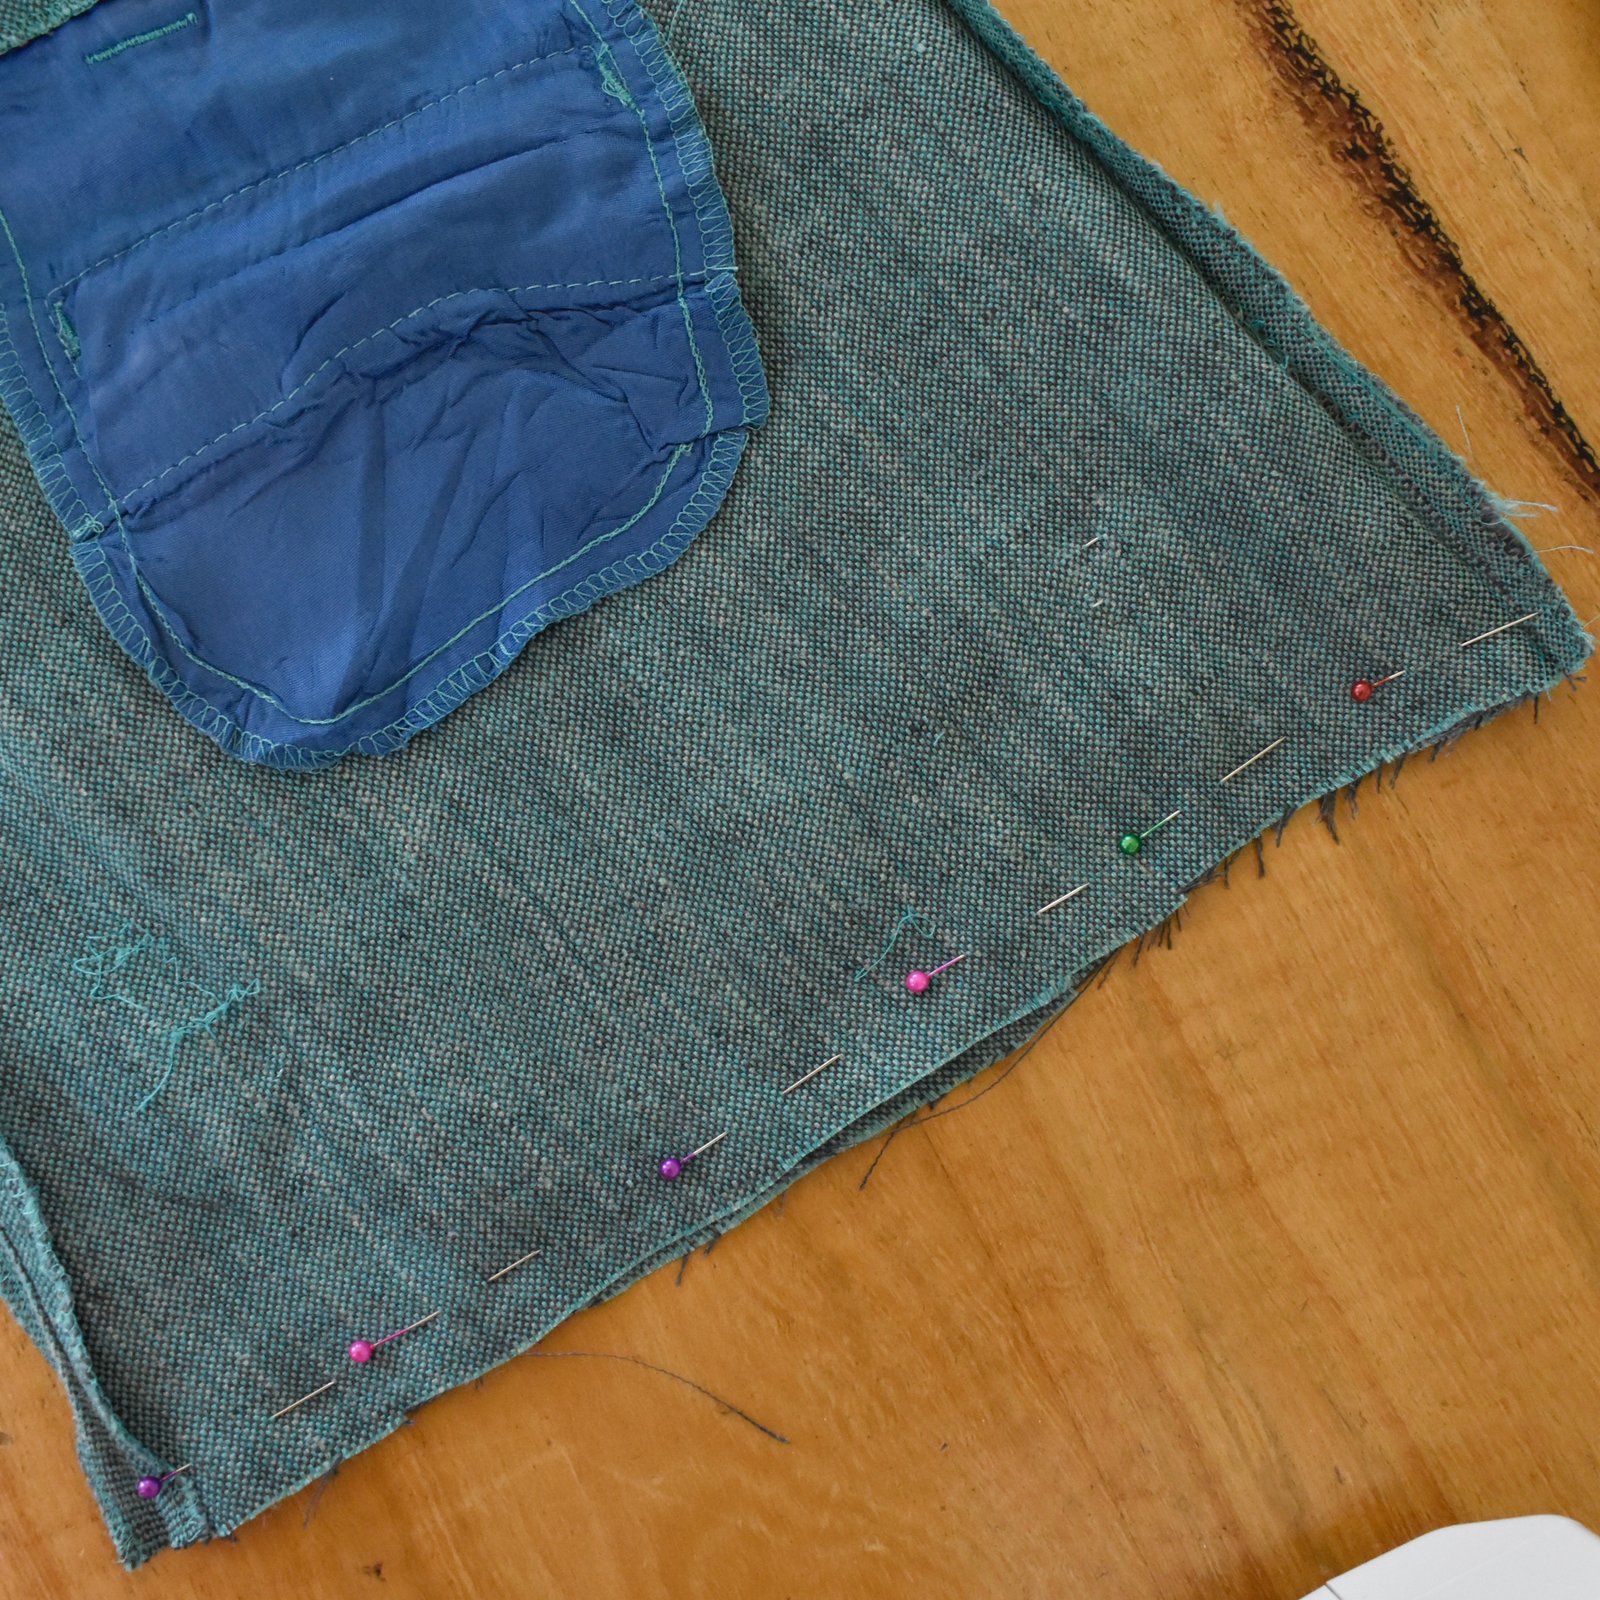
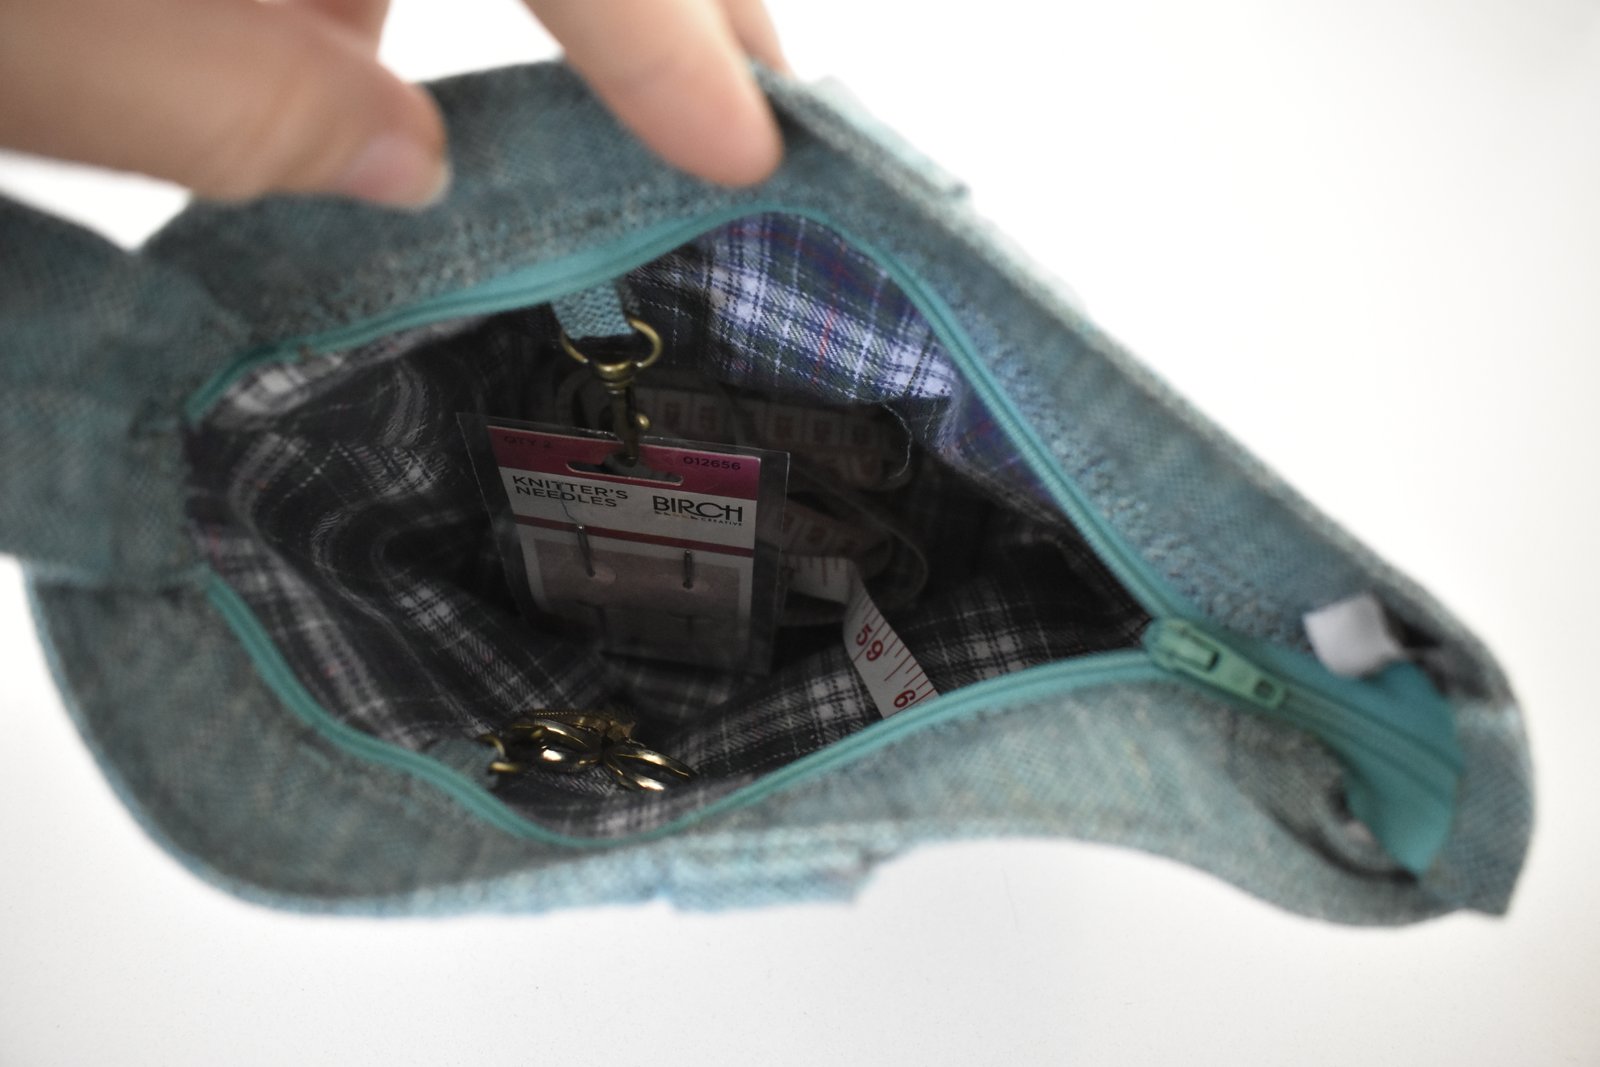
I perused Le Stash, and my hand fell on some lovely garden-green raw silk, mainly because I knew I had a matching zip in my zip stash already too.  The green silk turned out to be a pair of trousers, that Mum herself had originally give to me to use for fabric sometime.  She’d originally bought them in Italy, while on holiday, and got many years of good use out of them.  It occurred to me I could make a really good little project bag, utilising the trousers’ existing welt pockets and waistband…  bonus that this lovely fabric is boomeranging its way back to Mum in a new, and newly useful form.  Full circle! I selected some brushed tartan cotton for the bags’s lining, and inserted a new zip underneath the waistband facing inside, along with a wrist strap, so she can have the bag hanging from her wrist and still knit from it.  I think the really interesting thing about the bag though is the accessories; I added three little tabs inside, two with swivel clips, to which I attached a pair of scissors, and a pack of wool needles, and the third has a D-ring to which I’ve sewn a tape measure.  I left the original back welt pockets intact on the outside (above), so she can tuck small extra things into those pockets, things she might not want to go rattling around the inside of the bag.

I think she will have everything she needs!

I wrote a little tutorial, in case anyone reading this wishes to have a go at a similar refashion for themselves.  It’s a very useful thing for a knitter, whether for yourself or a gift for someone else, it’s easy and kinda fun to make, and I think it turned out quite cute too! In fact I would really like one for myself!

I used:

a pair of trousers with a waistband,
piece of brushed cotton for lining (around 52cm x 25cm),
stiff interfacing (52cm x 25cm)
30cm zip
2x 13mm swivel clips
1x 20mm D-ring

Extra accessories to finish; a tape measure, pair of scissors, pack of wool needles

To start with, unpick the side seams of your trousers, and cut out the seat.  Cut the waistband off at the side seams too, allowing the same seam allowance as the side seams.  Note; I then trimmed down my piece to about 52cm x 25cm (inc waistband) which made a bag with a finished measurement of approximately 20x20cm, and with a base of 20cmx8cm.

If your trousers have welt, or other pockets, that’s a bonus!  Cut a piece of lining fabric the same size and shape, using the trouser piece as a template.  If the fabric is on the floppy side, apply stiff fusible interfacing to the lining, and if your interfacing is anything like as unreliable as mine, it’s a good idea to stitch/quilt the interfacing and lining together to be sure they stay together as one layer.

Unpick and open out the lower edge of the waistband facing, and stitch up the side seams, including the waistband and waistband facing, in one continuous seam.  Stitch the lower bottom seam.  Likewise, stitch the side seam/s and bottom seam of the lining.

Determine the desired width of the bag bottom… this should be at least equivalent to, or even a bit wider than the bag opening.  I made mine 20cm.  Measure this length along the bottom edge of the bag, centred so that the excess on each side is the same.   Bring the side seam and bottom edge seam to meet, right sides together, and pin.  Determine the side edges of the base of the bag, by marking two straight lines at the end points of the bag base, perpendicular to the bottom seam.  (shown on the bag lining, below) Measure each carefully to ensure they are going to be the same length, if there are differences then adjust and re-mark until they  are equivalent.  Mine are 8cm long from pin to pin.

Stitch.  Construct the lining bag to be exactly the same.  Trim off the corners.  Pin the bag and bag lining together along the bottom side edges, wrong sides together, and stitch together along the previous stitching, ie. the short side edges of the base of the bag.

Turn the bag right sides out, so the lining bag sits inside the outer bag, attached at the base but not yet attached at the top.  You can optionally stitch the bag and bag lining together along the long bottom seam as well, however I found this to be quite fiddly…

Make the wrist strap and tabs for the bag’s accessories to hang off…  my
dimensions are:

strip 1: 8cm x 37cm
strip 2: 4cm x 10cm

Construct each as follows: fold strips in half lengthwise and press, open out and fold both raw edges in to meet the pressed centre line, press.  Fold the strip in half along the first fold line and press, topstitch close to each long edge of the strip.

Cut the narrower strip in half, giving two 5cm strips. Thread each through the closed top of a swivel clip, and baste raw edges together.   Cut 5cm off one end of the first, wider strip for the tape measure tab, thread this piece through a D-ring, baste.  Stitch the tape measure onto the D-clip.  The remainder of the wider strip will be used for the wrist strap.

Bag: open up the remainder of the waistband facing away from the waistband.  Pin the ends of the wrist strap to the waist band facing adjacent to either side of one side seam, baste in position close to the raw edge.  Take the zip, and pin each side of the zip to the waistband facing, aligning the top and bottom ends of the zip with the side seams of the bag, and ensuring the opening end of the zip is adjacent to the wrist strap, and with wrist straps folded back against the waistband facing; topstitch zips in place, stitching over the wrist straps.  Leave a gap of 1.5cm each side at the bottom end of the zip to enable the end to sit on the outside.  Trim the zip, leaving a 2-3cm tail.  Cut a small square of fabric and use it to wrap and enclose the trimmed bottom edge of the zip; fold, pin, and stitch it in place.

Open the zip; take the three previously made tabs with swivel clips and D-ring attached and pin them around the top of the lining bag, raw edges even, right sides together, and with the swivel clips/D-ring hanging down inside the lining bag.  Fold down the waistband facing enclosing the raw edge of the lining bag and top edges of the accessories tabs inside the old waistband.  Pin waistband facing back to its old position on the original waistband of the trousers.  Ensure the upper ends of the zip tape are tucked up inside the waistband, also check you are happy with the position of the tabs with swivel clips/D-ring before stitching the old waistband facing back in place.  This can be a little fiddly around the top and lower edge of the zip, but just take care and stitch as far as possible.

The final step is to clip a small packet of wool needles and pair of scissors to the swivel clips.

Aaaand, done!!!  Now, I really really want to make one for myself too!


pinterestmail

a family collaboration

mum

So Mum is up to stay with me, and she popped out the other day wearing this gorgeous, completely handmade ensemble… and it occurred to us that it was a tri-generational effort!  Mum made her skirt, Cassie made the scarf for Mum a few years ago, and I recently made the top for her.  I asked her if she minded if I took a picture to share on ye olde blog and she graciously said yes.

SO!  What have we here?!

skirtPride of place of course goes to Mum’s skirt… alabamachaninstudiobook a fully hand-embroidered and hand stitched Alabama Chanin skirt; with embroidery in the reverse appliqué method, and using the four panelled, mid length skirt pattern from the book Alabama Studio Sewing + Design by Natalie Chanin.    The cotton jersey fabrics were originally white and Mum dyed them herself in two different shades of grey and blue.  Mum traced and cut the stencil design June’s Spring from p116 in the book herself, enlarging by 300% as recommended, (also available as a pre cut stencil on the Alabama Chanin website here)  She printed the design in creamy-coloured textile paint, and hand-embroidered with a running stitch in double strand of cream Gutermann’s upholstery thread.

alabama-chanin-embroideryWhen snipping out the motifs she carefully left a very narrow border of the cream stencil round each one.
ac-embroidery

Exquisite, oui??  I adore everything about this skirt; the colours, the design, the workmanship; and it’s just slightly tempting me to get out the materials and get a-hand-stitching again.  Slightly  😉

scarf1

The scarf… Cassie made the this gorgeous seaside/beach-inspired silk scarf for an art project at school.  She hand-dyed and -painted white silk habotai in blue and yellow blocks and blobs, tying parts of it in the  shibori style, then stitched a wiggly row of blue stitching for the tide, and embellished with clusters of mini yellow glass and gold beads.  The hems are hand-rolled and -stitched.

beading

I can’t believe I’d almost forgotten about this beautiful piece of Cassie’s and feel so lucky and proud that I have two such talented and creative ladies in my life.

scarf2

esme-top

Mum’s top is made by me, and yes it is very plain… !  everyday-styleA month or so ago Mum mentioned how she specifically wanted an unobtrusive, very plain white top to wear with this skirt so I offered to run one up for her… I chose the Esme top pattern from Lotta Jansdotter’s book Everyday Style and a slubby plain white cotton from Fabulous Fabrics.  I measured Mum all over, secretly storing the measurements away for future use, mwahahaha… no one gets away from the handmade in my family!!    and drew the pattern so as to custom fit it or Mum’s measurements.  Instead of the neckline facings I finished the neckline with a bias cut strip, because I think it’s a much nicer and neater finish for a neckline edge.  Mum wants to know how to do this herself so I’ve promised to write a tutorial sometime.
neckline

Anyway.  She looks so chic and beautiful here, and it was so fantastic when we realised she was spontaneously wearing a collection of handmade family pieces… Such a fabulous and sentimental thing for the three of us.  Thank you so much for letting me share, Mum!

pinterestmail

raspberry/navy Alabama Chanin tank top

I’ve finally finished my latest Alabama Chanin project…  
Below is how it appeared on this blog previously…? (shudder) well, that dress has undergone extensive renovation over the past five months and now at last, I am quite satisfied.

I received loads of fantastic suggestions, thank you so very much to everyone who gave me so much helpful and wonderfully thoughtful advice  🙂  I am very grateful  🙂 *mwah*
The pattern is the fitted top from Alabama Studio Sewing + Style, by Natalie Chanin, and I had modified it slightly by giving it a higher rise at the neckline at CB, which will help keep the straps firmly on my shoulders and not slip off, like they occasionally do in my previous, first version of this pattern.  The print is Abbie’s Flower design from the same book, enlarged by hand and printed as described here, and I employed the reverse appliqué method from the book, stitching running stitch around all motifs using crimson Gutermann upholstery thread, and then cutting the printed motifs away to reveal the base layer of fabric underneath.

I really liked Ann’s suggestion to bring some navy into the equation.  I bought some royal blue cotton jersey from KnitWit.  This was but a starting point; the original blue was a nice colour, but flat and not quite as edgy as I would have liked against the warmth and liveliness of the raspberry.  Some dyeing fun was called for.  I made haste for the lair and dragged out ye olde dye-pot, mwahahahaha
A short stint in a half-strength bath of iDye in Brown later and it was darkened and deepened up very nicely; transformed it into a very satisfactory shade of mottled dirty-navy.

Hehe, I just re-read that description and had to laugh at how the exact opposite of attractive that colour sounds!  well, I do love me some ugly colours, hehe.
The seams are all hand stitched in running stitch, with the occasional backstitch to “stop” the seam, something I learnt to do in hand- stitching quilts; and the seams then felled using running stitch, as per the Alabama Chanin way.  

I cut the binding strips for the armholes and neckline from the same dyed navy jersey and hand stitched them down in herringbone stitch using navy blue Gutermann upholstery thread.

A new tip; in my previous Alabama Chanin embroidery forays, I pinned the fabric layers together for the embroidery stage, this time I thought of a better solution.  I pinned and basted around all raw edges, then simply ran rough basting lines of long stitches, about 4-5cm apart, right across the pieces using my sewing machine.  Quick and dirty, nicely stable, and the long stitches are very easy to pull out as the embroidery progressed.  And far better than having to worry if my pins were going to fall out, only to get discovered on the sofa and produced as hard evidence in the Case against Sewing Taking Over the House.  Please, take a moment to consider the danger to one’s beloved husband whose bottom came to rest right beside that tiny little pearl-headed pin! not to mention one’s innocent offspring and cute fluffy pets!  
Hehe, no need to add further fuel to that particular flame  🙂

 My next Alabama Chanin project? already in the works!  Fortunately I made my original dress double layered and so I still have quite a good quantity of the raspberry fabric left after cutting this out; and I also dyed enough of the navy so that now a matching, though not identically patterned, skirt is awaiting in the wings to be made, as we speak.  Type?  Read?  One day, someone is going to come with a satisfactory verb for this kind of interaction  😉
Anyway, I am super pleased with my new Alabama Chanin top, and the good thing about that satisfaction is the renewed enthusiasm it brings for me to get on with that skirt quick sticks, to have something else to wear it with.  Ever onwards!

Details:
Top; the fitted top from the Alabama Studio Sewing + Style book, hand-dyed, -printed, -embroidered and -stitched in two different colour fabrics
Jeans; the Closet Case patterns Ginger jeans, navy stretch cotton denim, details here

pinterestmail

raspberry Alabama Chanin tank dress

I’ve finished a handmade dress.  It’s dyed, printed and stitched together entirely by me.  
This is a fitted tank dress, the pattern is from the book Alabama Studio Sewing + Design, by Natalie Chanin.  I dyed shocking pink linen jersey knit to fortuitously achieve this rather nice, motley, deep raspberry pink, which I love, and the print is the Abbie’s Flower design from the same book, enlarged by hand and screen-printed in deep burgundy textile paint, all described here.
So.  I should be pleased with it, but actually I’m teetering on not.  I’m pleased it’s finished, let’s put it that way!  
Actually I’m borderline depressed with it.  See, I did have grand plans for further handwork and embroidery.  Those plans came to nought.  
I trialled several different embroidery and even beading ideas but everything I tried just looked awfully heavy-handed   The size of my print is quite petite, and it’s also detailed and well defined and more than a bit busy, and so doesn’t really lend itself well to the embellished Alabama Chanin look, I think.  Eventually, frustrated, I ceased diddling about, picked everything off, and just sewed it together.  
Defeated.  
So I was pretty over it even before the poor thing got sewn together.  Probably why I shoved it into the cupboard and all but forgot about it until my recent wardrobe spring clean.  Hey, new dress! Guess I should wear this thing, hmmm.

The seams are all stitched and felled by hand, and the simple armhole and neckline binding applied with herringbone stitch by hand.

Also, I’m undecided that the tank dress silhouette is very flattering to me.  It’s a funny thing really because I totally adore my long AC skirt and matching tank top worn together, a combination which one might argue could pass at a short distance for a tank dress just exactly like this.  Somehow having the break between top and skirt is a huge improvement to my eye.  As a dress, with a continuous unbroken fall of fabric from shoulder to hem; I dunno, I just don’t like it as much.  It’s irrational and I can’t explain it.
This is why I’m probably always going to wear it with a little cardigan, as above.
It’s not out of the question that I’ll refashion this into a separate skirt and top one day.  In the meantime I don’t mind it worn over my Metalicus petticoat like this.  I’ll see how it goes for a while.
Maybe it’ll grow on me.

Details:
Dress; fitted tank dress from the book Alabama Studio Sewing + Design by Natalie Chanin, in linen jersey, hand- dyed, printed and stitched by me
Petticoat; Metalicus
Cardigan; Country Road
Thongs; Havaianas

pinterestmail

Mum’s Alabama Chanin skirt

I am so glad that Mum brought around her finished Alabama Chanin skirt for me to ooh and ah over; and has allowed me to photograph her wearing it and to show it here on my blog too… thank you so much, Mum!

This is the mid-length skirt from the book, Alabama Studio Sewing + Design, by Natalie Chanin.  Mum used a deep blue upper layer over a black lower layer, both cotton jerseys bought in Tessuti’s in Melbourne during our truly fah-bulous Mum/daughter/grand-daughter trip over there together last November.

The upper layer is stencilled with the Anna’s Garden design from the same book, enlarged by 306%, then the two layers are embroidered together using Gutermann’s upholstery thread in a pale grey.  The stencilled areas are then cut away in the “reverse appliqué”  method to reveal the black under-layer.  Mum used a doubled strand of upholstery thread as per the book’s instructions, but found the two strands a pain in the neck to work with; they constantly got twisted up awkwardly together and were subsequently difficult to pull through.  Just for comparison sake, I used only a single strand in embroidering my own two pieces.
The surface embroidery is all done by hand of course, and Mum decided to sew the finished pieces together by machine.  The waistband is pale grey fold over elastic, also from Tessuti’s.
The stencil was applied to the upper layer in watered-down acrylic house paint using a small foam roller as described here.  Since I did the stencilling for Mum I know there is one more piece in the works!  and now I’m roolly excited to see that one too!  🙂

pinterestmail
Switch to mobile version
↓