Tag Archives: Inspiration

The Daughter of Woman

I am paying homage to “The Son of Man” the 1964 painting by Rene Magritte.
Today’s mini-challenge within the me-made May group is to be pictured with food, or to be eating or drinking something.  So I took inspiration from that famous work of art, hehe.
Incidentally, this is also my morning tea.  
The artist later ate her subject.
🙁 for the orange

The Son of Man, Rene Magritte, 1964

Picture taken around 9.30am;  Temperature at the time 20C.
Overnight low: 16C; Today’s high: 23C 

It is very humid and the promised rain eventuated… we are getting plenty of it today!
And going by the forecast we are in for a lot more.  You may be interested to know that in Perth rain is a very very welcome occurrence, we really do not get enough.  Makes for a lovely lifestyle I agree, but the farmers will be happy today!
Details:
Top; Vogue 1247, lightweight orange cotton, details and my review of this pattern here
Skirt; Vogue 1247 lengthened and lined, curtaining fabric, satin lining, details here, and my review of this pattern here
Shoes; Enrico Antinori, from Zomp shoes
Brolly; Charlie Brown, from David Jones
And today is another joyful day of me-made synergy within my household; I was happy this morning to see Sam wearing his shirt I made for him, for Christmas last year.  A me-made bonus day!
Sams’ shirt; Burda 7767 modified, white and navy check polycotton, details here
pinterestmail

Yoshiki Hishinuma top; more details…

…in response to comments, and thank you for your interest!
Barbara wished to see the Yoshiki Hishinuma top on, so here it is.  It doesn’t really go perfectly with this skirt .. back in the day when I used to wear it regularly I had a sorta funky, long-ish, deep-grey patchwork skirt that suited it to a T! but I do not have that skirt any more  🙁  Anyhow, the shirt is now so fragile; even wearing it for the short while in which I took this photo more little flakes of the paint detached themselves and appeared on my skirt and on the floor, so this will have to be its last outing!
Beryl expressed an interest in seeing the inside of the shirt; so here it is.  There’s not much to see on the inside, actually… the outside is the interesting bit  Basically it looks like an un-ironed shirt!

If I ever get around to having a go at reproducing this garment painting technique I will be sure to take a few pics.
A few wondered how the fabric feels to the touch; the chiffon is very slightly on the thick and stiff side.  It is 100% polyester, and the heat treatment applied to obtain pleating has most likely denatured the fibre and taken away some of the natural floatiness usually associated with chiffon.  The painted sections are stiffer, natch.

And in response to some recent comments about my photos:
Jen S wondered who do I get to do my photo shoots; no one!  Unless stated otherwise all the photos on my blog here are taken by me; the ones of me wearing my creations are taken using a tripod and a remote control. 
Andrea commented, “What would the neighbours think (about your blog photos)?” well the answer is that my neighbours do not see that I go around taking my own photo…  I plan to keep it that way!  I am really very shy, and I wouldn’t dream of even taking out my camera if there was somebody around watching.  I generally find a secluded spot or as close to deserted as possible, and set up out of anyone’s sight.  If another person pops into view I sit quietly fiddling with my camera and wait until I’m alone again.  There have been only a couple of occasions during the last two years in which I have been approached; generally older men who are keen on photography and want to check out my camera and talk “shop”.  I am always polite; I pretended to be experimenting with how to use my camera, taking photos of the view or something, but I’m secretly relieved when they walk on and I can get back to my slightly embarrassing hobby of taking photos of myself out in the big wide world…  😉   
I read a really good line on a fashion blog once about what to say if you are challenged taking photos of yourself; “I’m doing an assignment”.  Sadly I think I’m too old to get away with that one!  But “learning how to use my camera” works pretty good.  And happens to be true as well…. I am still learning how to use my camera!

Details:
Top; Yoshiki Hishinuma, polyester chiffon painted with acrylic paint, bought second hand
Skirt; Vogue 1170, PU laminate, details and my review of this pattern here
Sandals; akiel, from an op shop

pinterestmail

Inspirational piece by Yoshiki Hishinuma

Hey peeps!
Today I thought I would hit y’all up with some fabbo inspiration type stuff, like yo.  
I mentioned cleaning out the wardrobe recently… I have a few garments hanging in my wardrobe that have been there for years, that will never be tossed out even though I don’t wear them anymore; for a number of random reasons.  Including stuff that is amazing and/or inspiring to me in some artistic or sartorially interesting way.
This Yoshiki Hishinuma blouse falls into that category.
It is a deep grey/taupe, polyester chiffon blouse; that has been heat set into randomly spaced, slightly wavey, deep permanent pleats, laid flat with the pleated folds in place, and then rollered over with some sort of stiff plastic creamy-yellow paint.  When one wears it, the pleats open, revealing the unpainted grey chiffon sections … It must have been constructed completely right up until sewing on the buttons stage before “painting”, since the buttonholes are painted over also.  The buttons themselves are of nacre, sewn on with the rough side facing out and the polished bit underneath.
I bought it in a second hand shop about 7 years ago, and it was already a wee bit damaged then.  But I loved it so much, so I still wore it carefully for a further year before it deteriorated even more and then I stopped wearing it because I was worried about ruining it completely.  Particularly, the paint in the underarm area was very vulnerable to wear.  
I have kept the blouse because it is utterly unique and beautiful, and I have often thought about reproducing the concept myself.
Somehow…

On the back; one can just see the faint embossed shadow of the front collar points in the paint.

It is made in Japan; of course.. in my opinion arguably the most inspiring sartorial country on the planet, and interested fellow aspiring creative-clothing devotees can read more about the designer here and view some others of his pieces here

pinterestmail

French fly, or waist stay; a tutorial

Thank you for so much enthusiasm regarding my French fly!  I am very pleased with how it feels to wear, as well as how it turned out.  By the way, I googled French fly and came up with zilch, so either it goes by a different name in (real) tailoring circles or there really are no other online tutorials on this feature.  Could I be the first…?  (omigosh moment)
So anyway, here is the lowdown on my own version of fitting a French fly to a pair of shorts with a waistband.
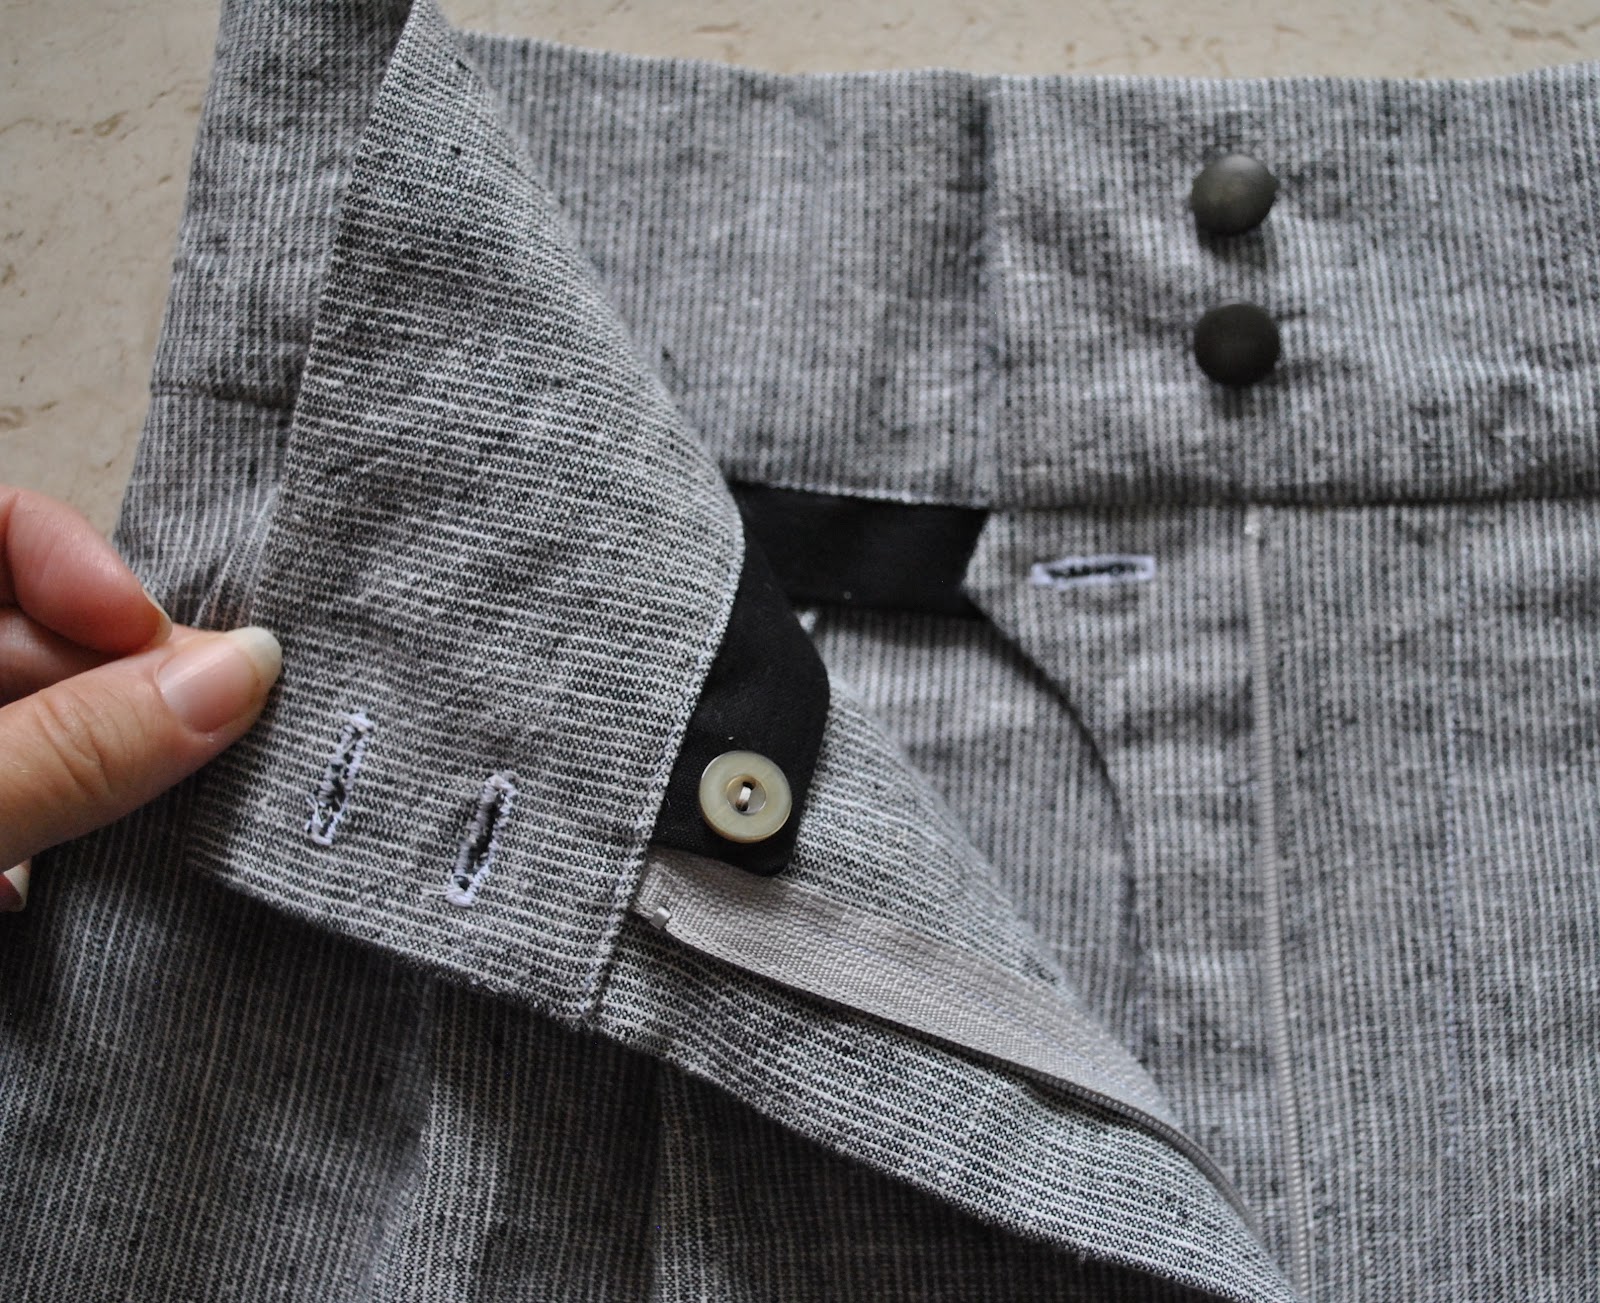
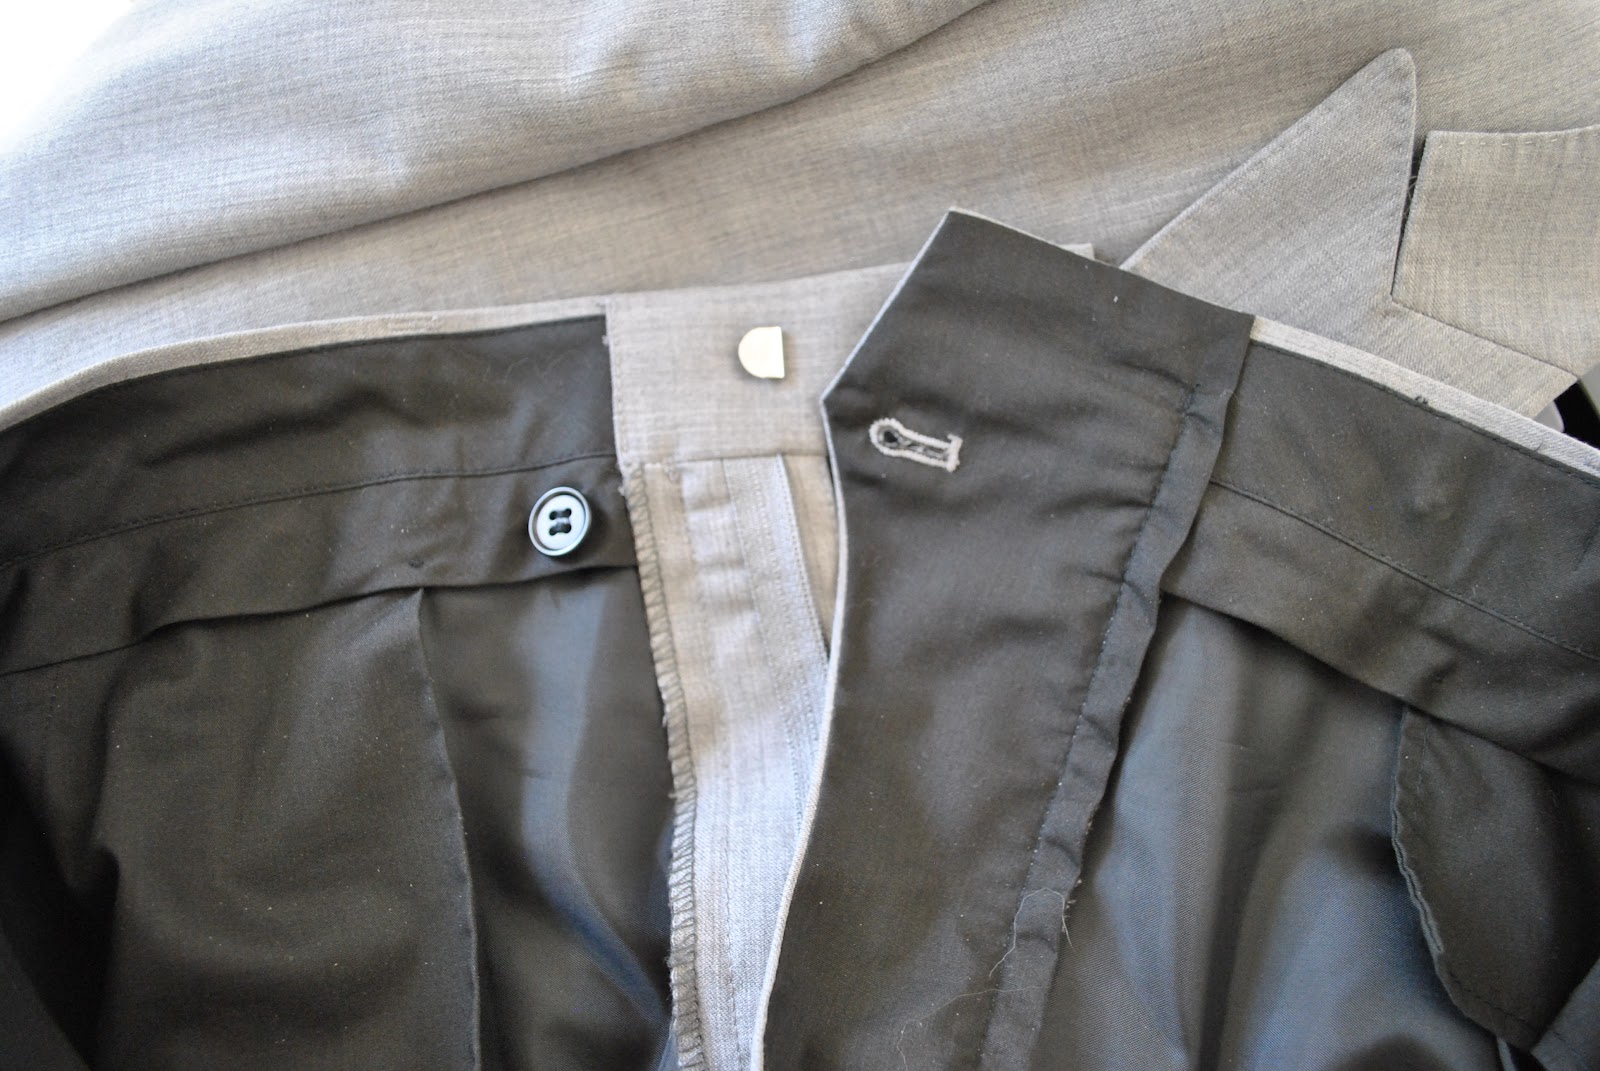
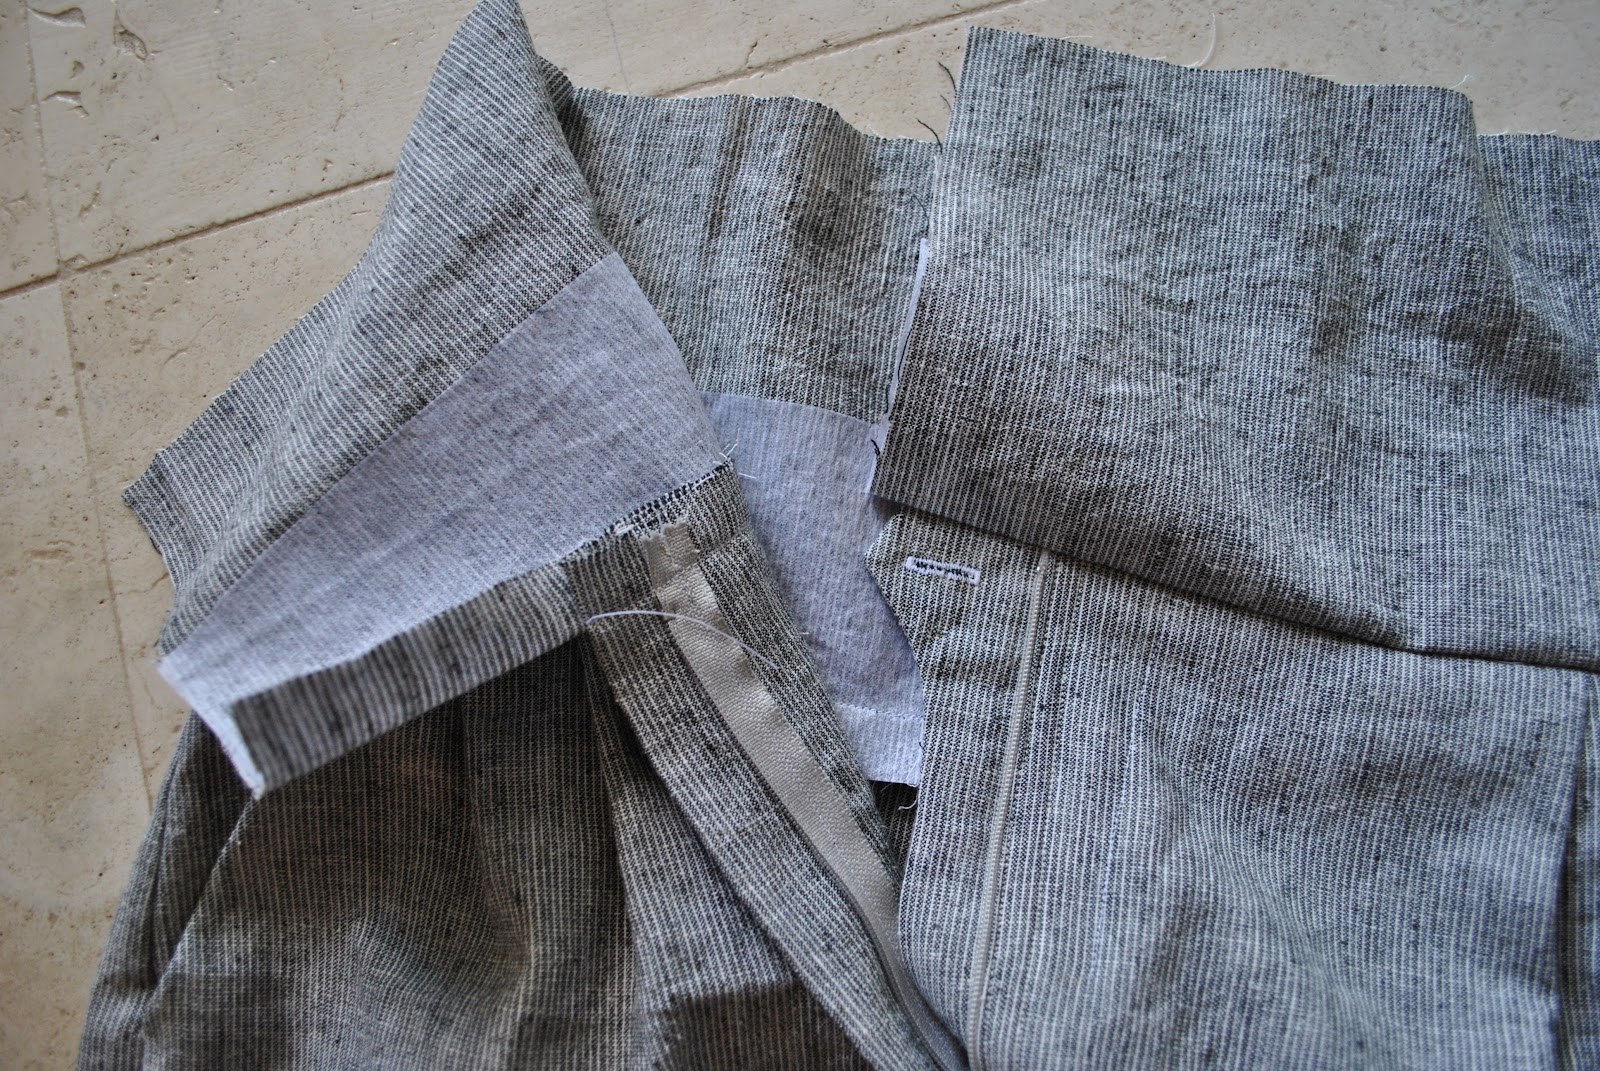
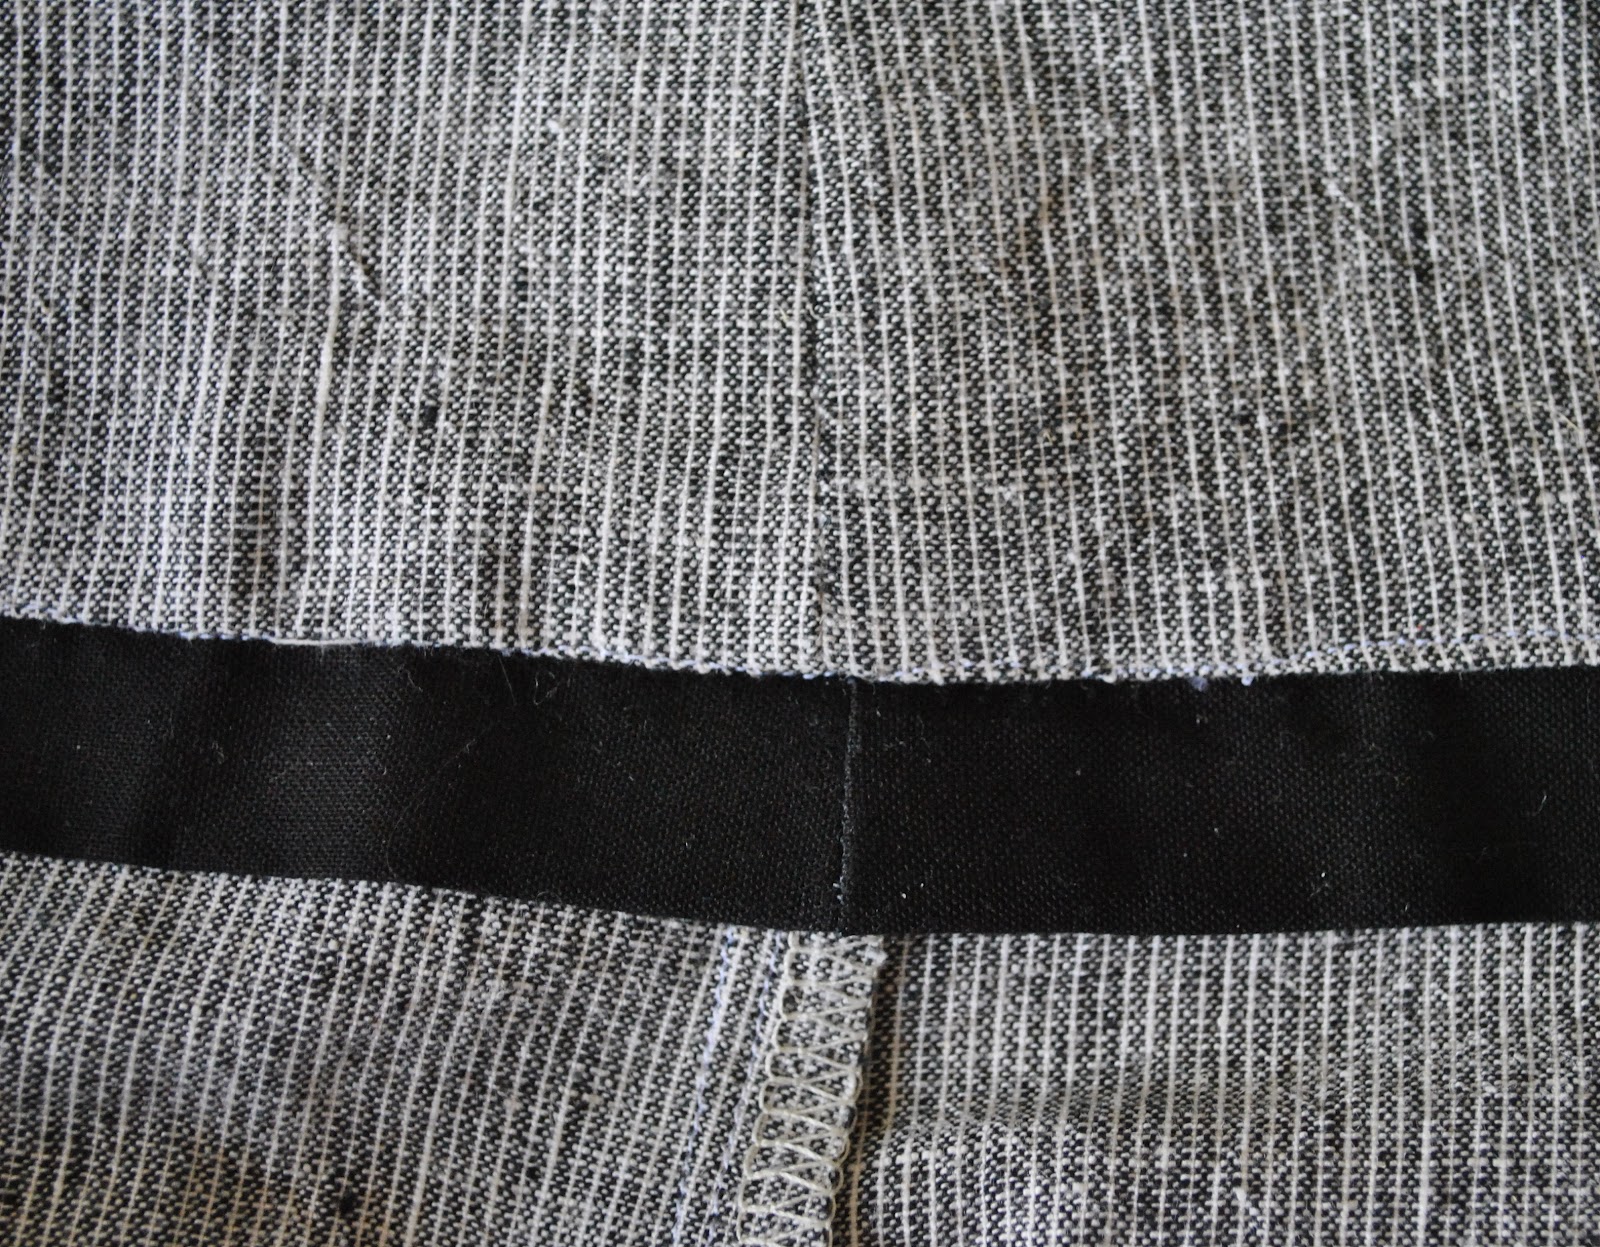
Firstly, I checked out the inner workings of my husband’s beautifully tailored suit trousers, and saw this…
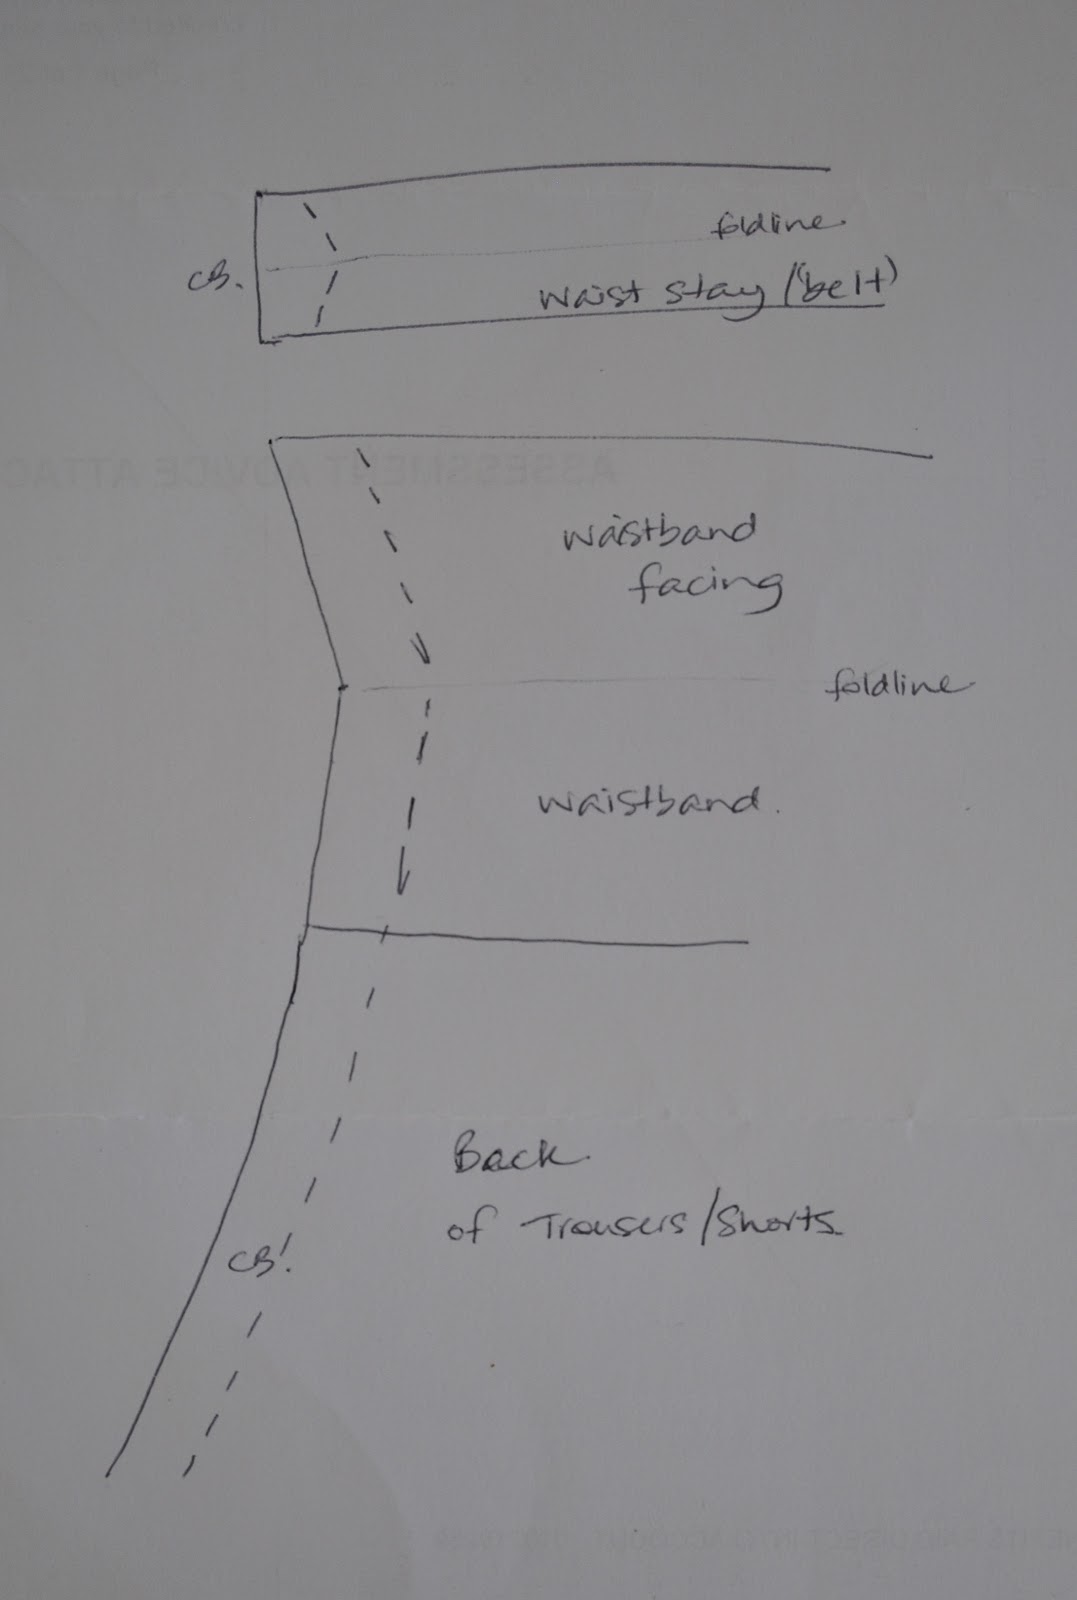
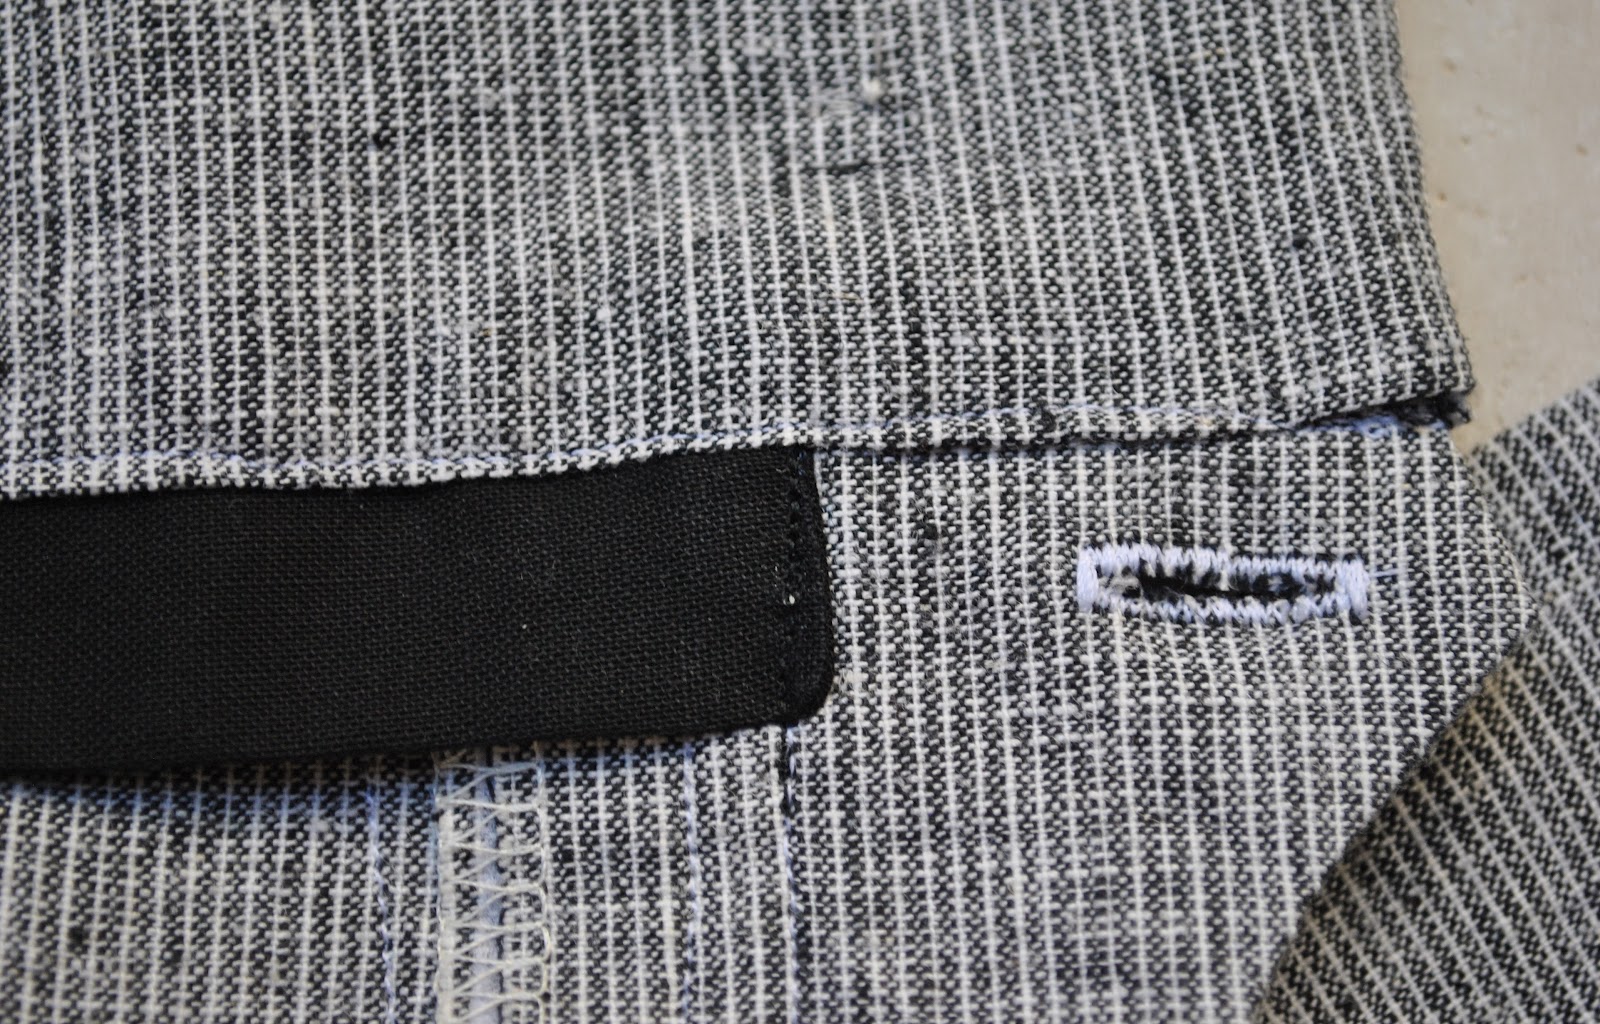
Basically, the inner button and buttonhole are situated on what is like an inside hidden “belt”, something akin to a waist stay that one would find in a strapless dress with a boned foundation.  The belt is secured underneath the waistband and zip plackets, goes all the way around the waist and the button closure is level with where the top of where the zip pull sits.

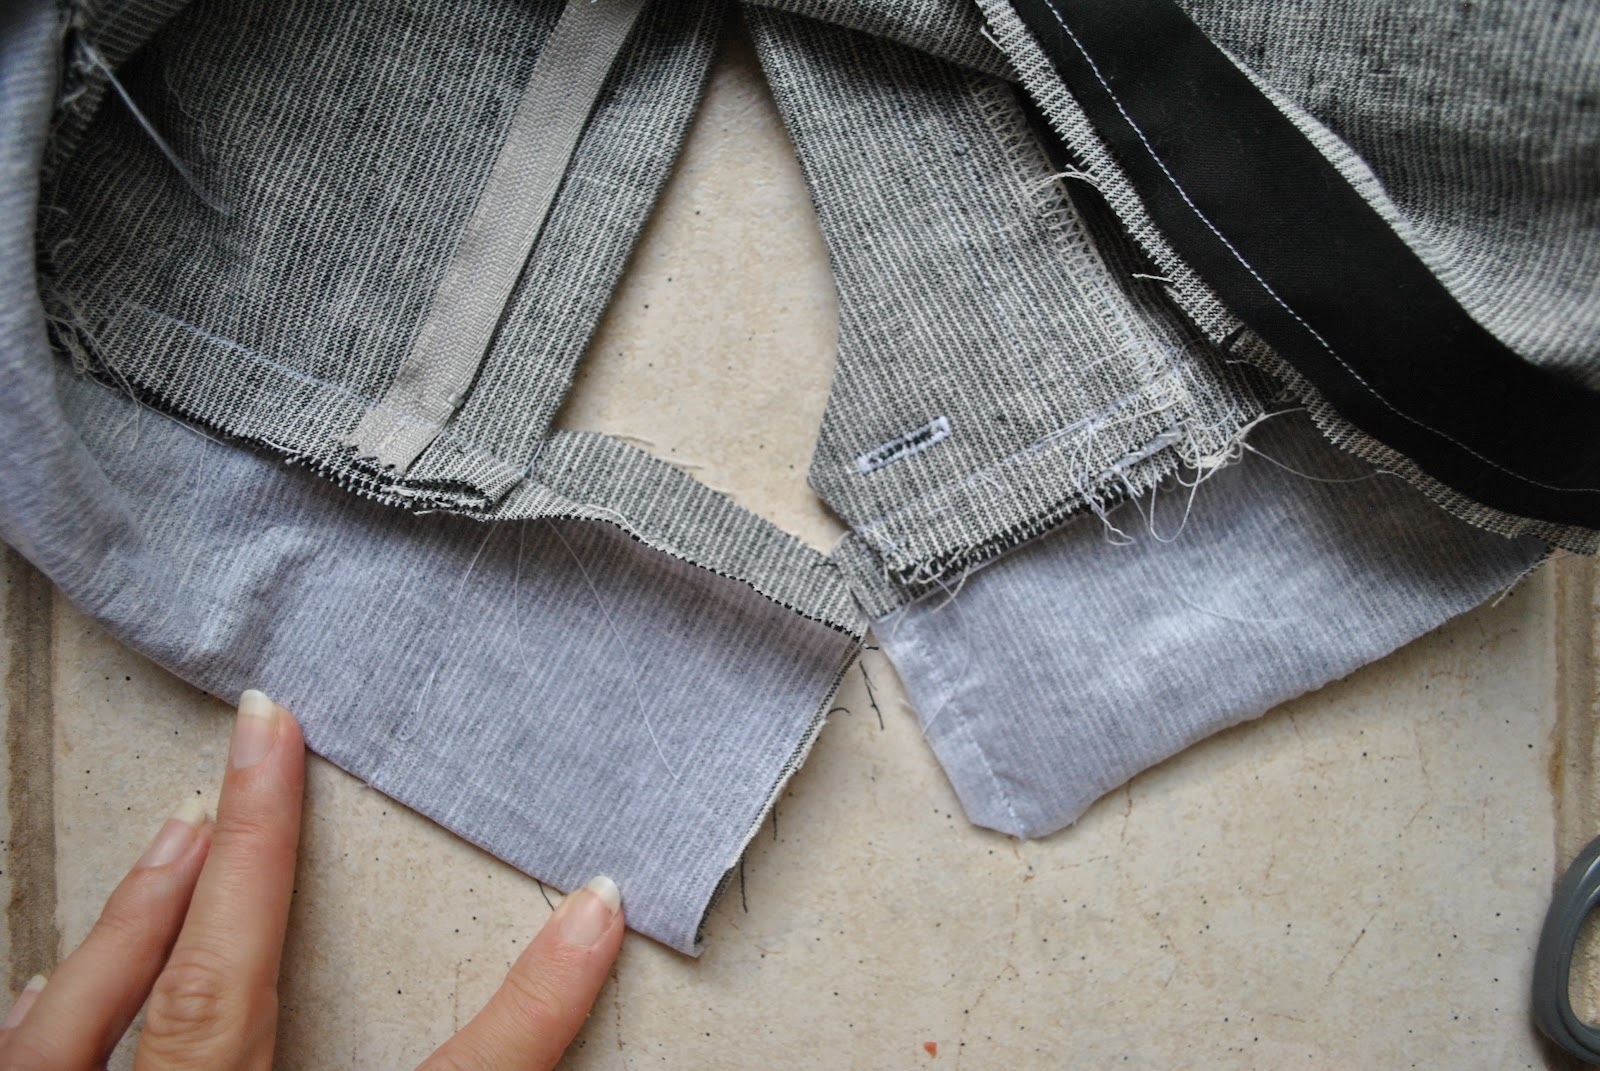
Below is pictured the centre back of the suit trousers, and this is one of my favourite features of mens’ trousers; how the centre back seam is all sewn in just one seam; back pieces, waistband, facings and waist stay, all together in one seam.  This means that any future adjustments for fit are very very easy, requiring just minor unpicking, re-sewing of just the one seam, and then either catch-stitching or stitching-in-the-ditch the waistband facing and waist stay again.  Incidentally, ever since I noticed this I have been using it on my own trouser and jeans waistband (and blogged about it in more details here); mostly because it does make for a massively easier fitting.

But on with my own experiments, French-fly-wise…
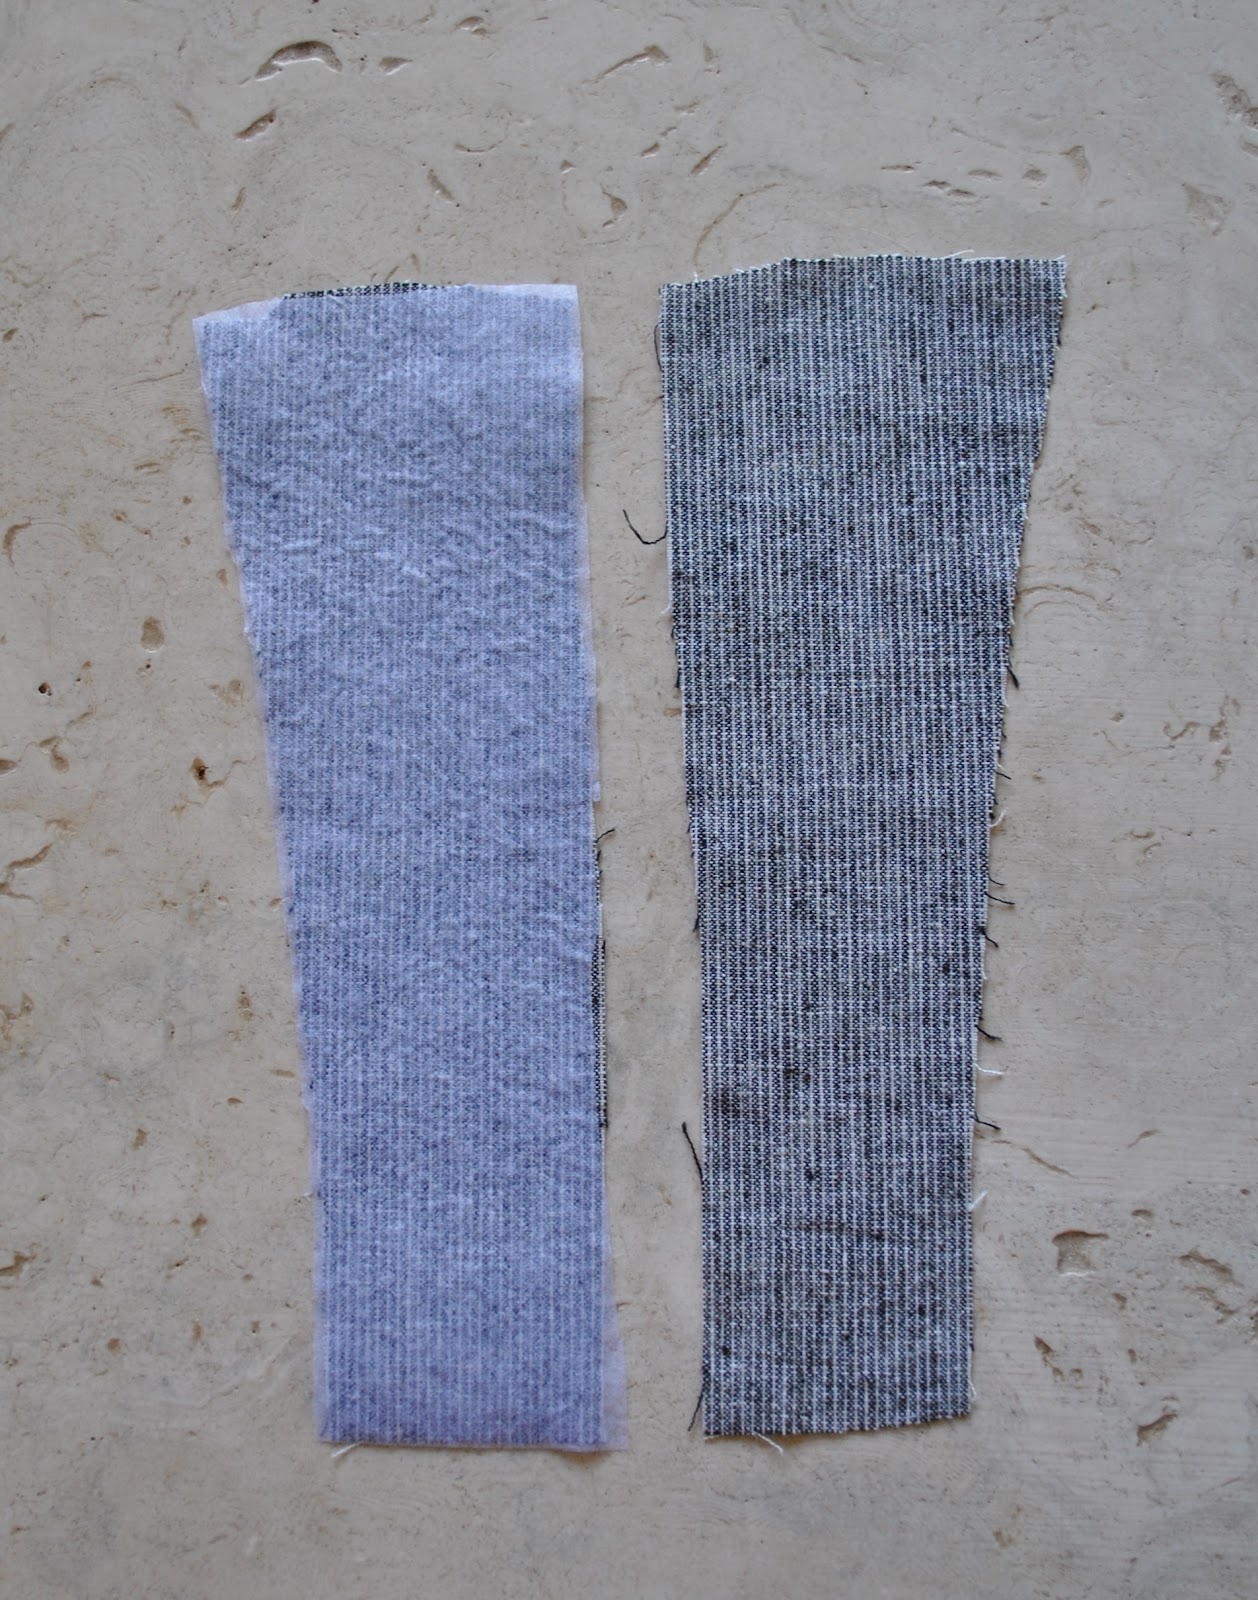
I cut out two pieces for the zip placket, applied iron-on interfacing to one.

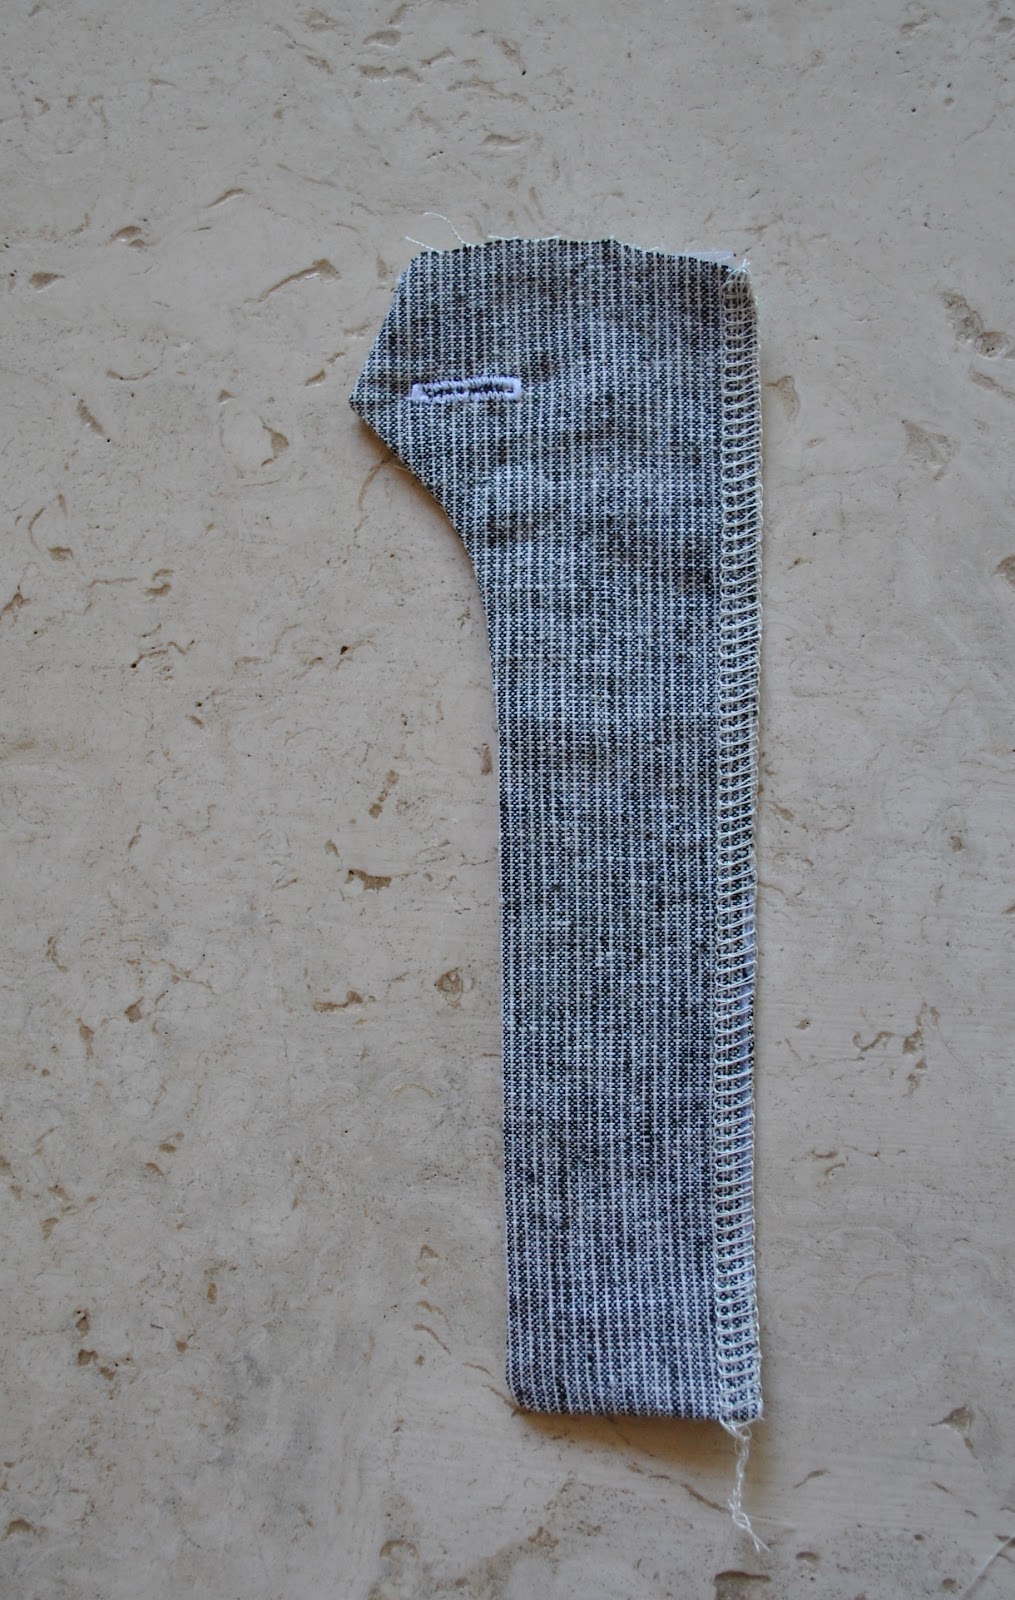
Measure the length of the zip and sewed the placket pieces together to be the correct length to fit my zip, just like a regular zip placket.  The difference is shaping the placket with the “nose”.  The point of the nose has to be at the same level to where the zip pull sits when it is closed.  Turn out the placket, finish the long raw edges together, and put in a buttonhole of a size to suit your chosen button.

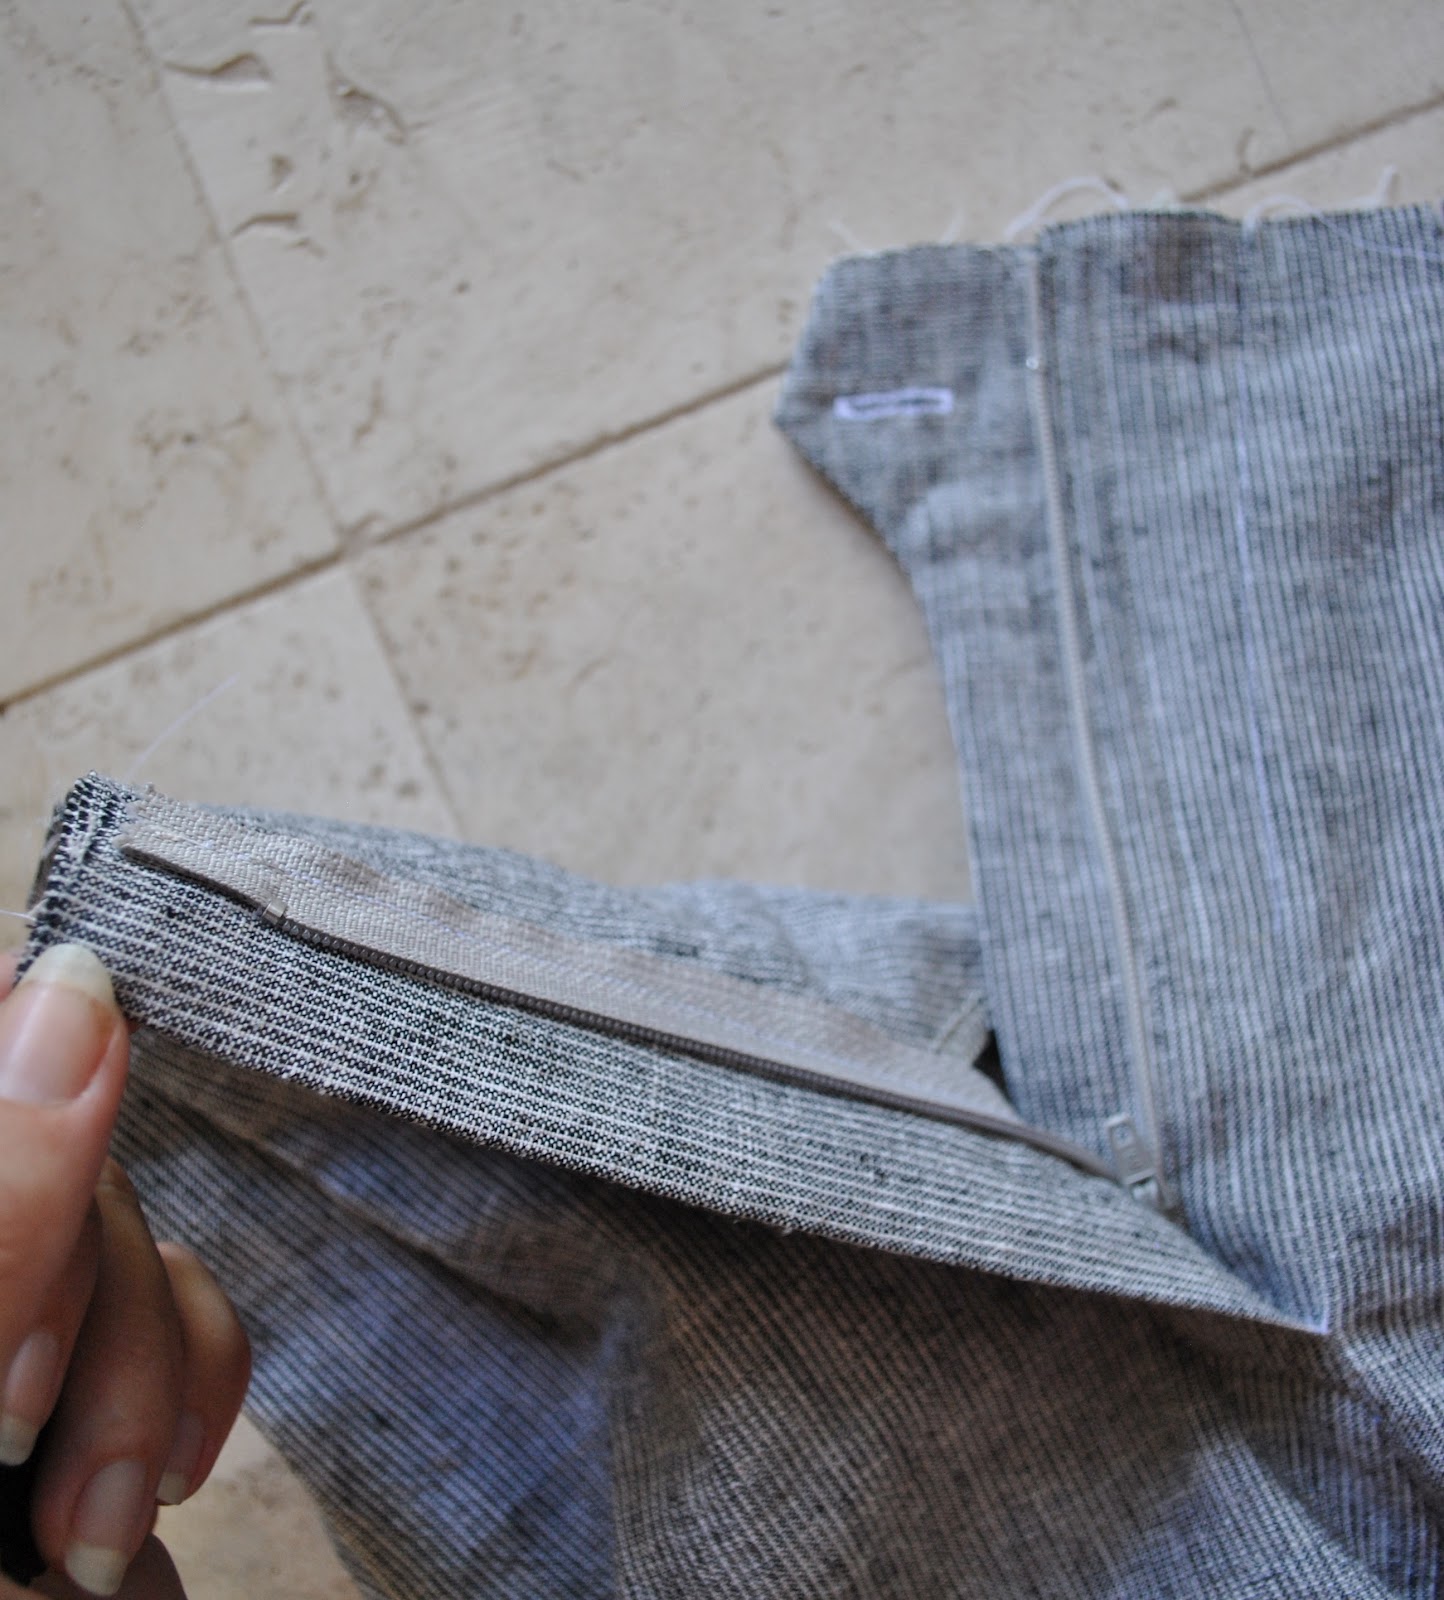
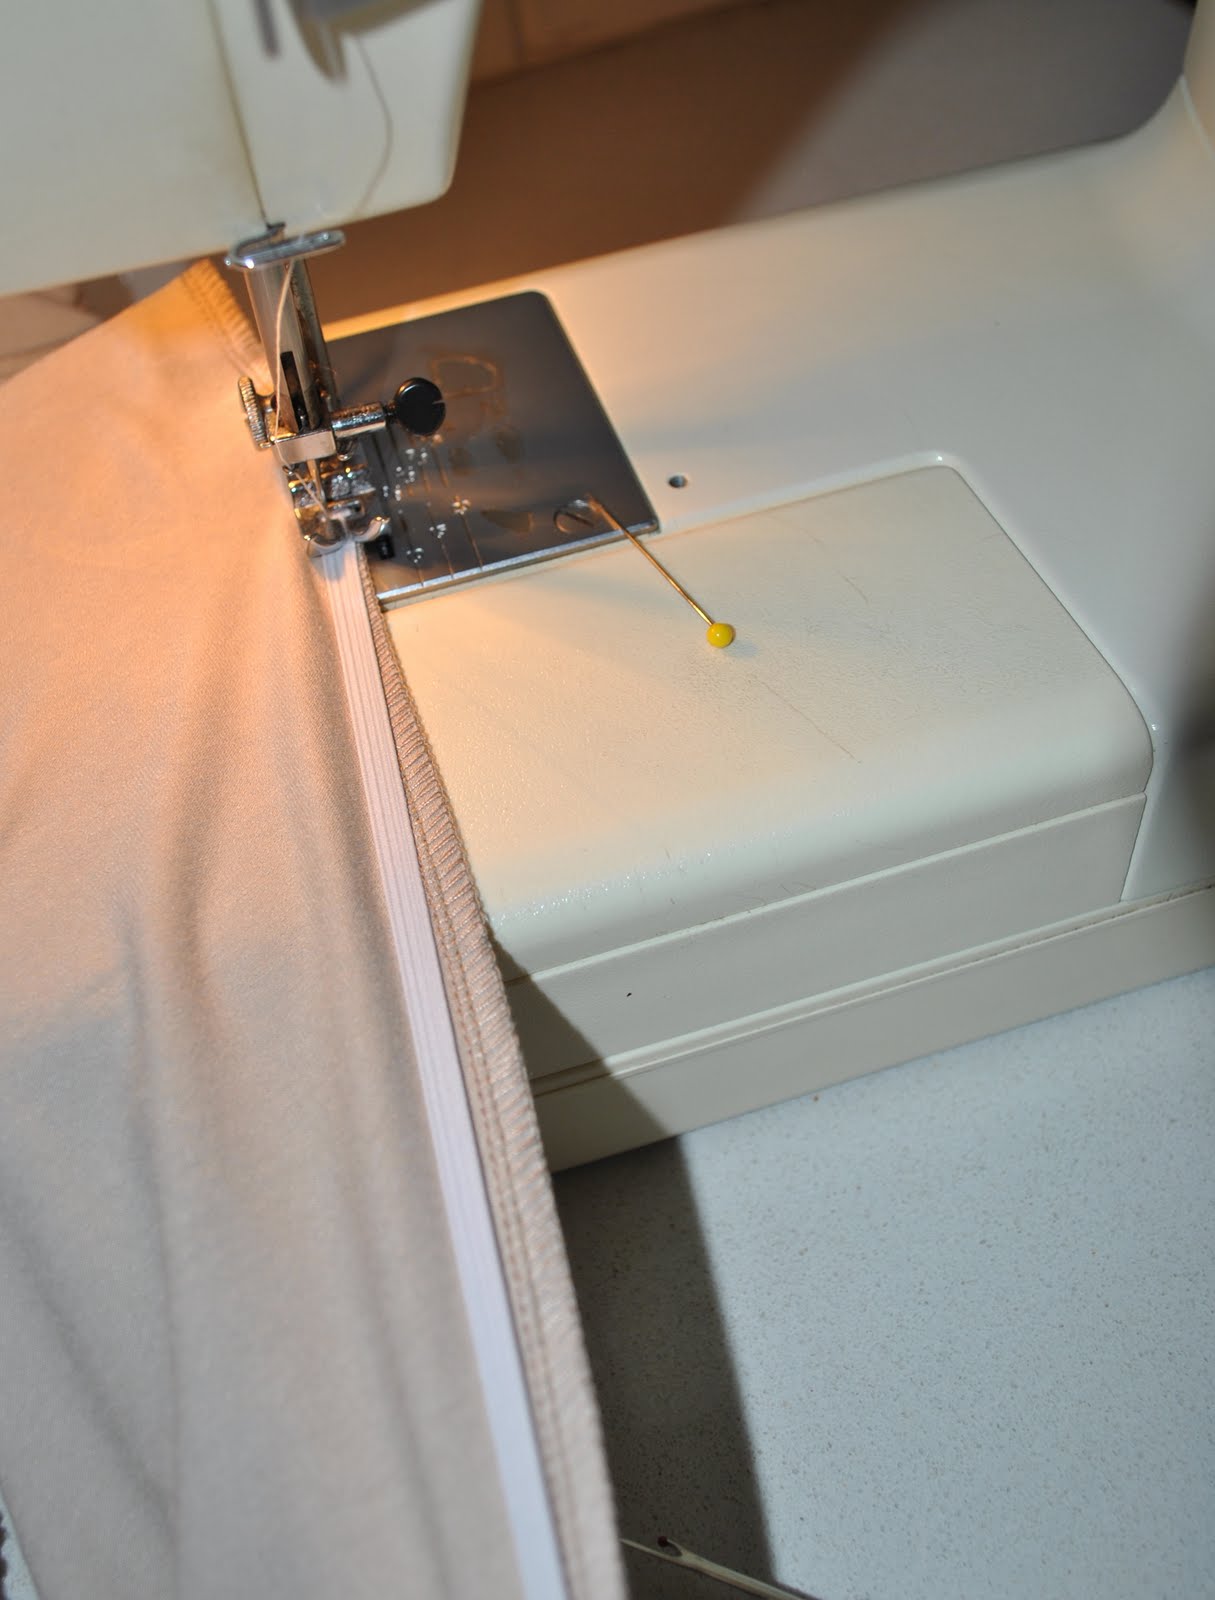
Insert the zip placket and the zip, just like you would for a regular zip placket.

Attach the interfaced half of the waistband to the top edge of the garment, just as usual.

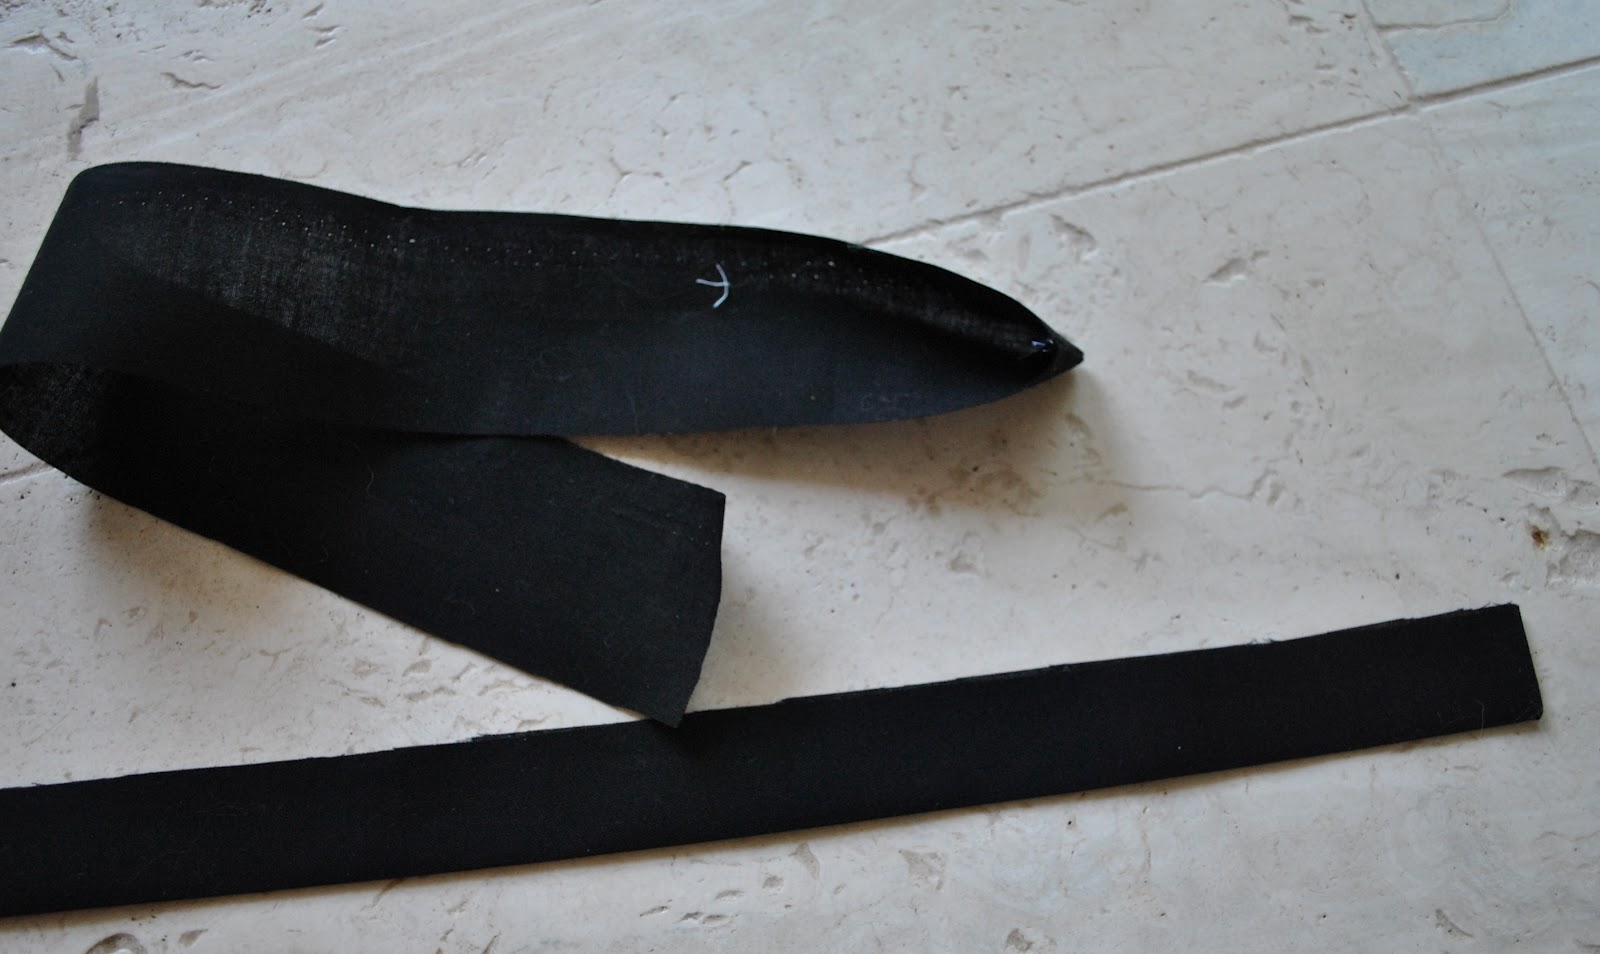
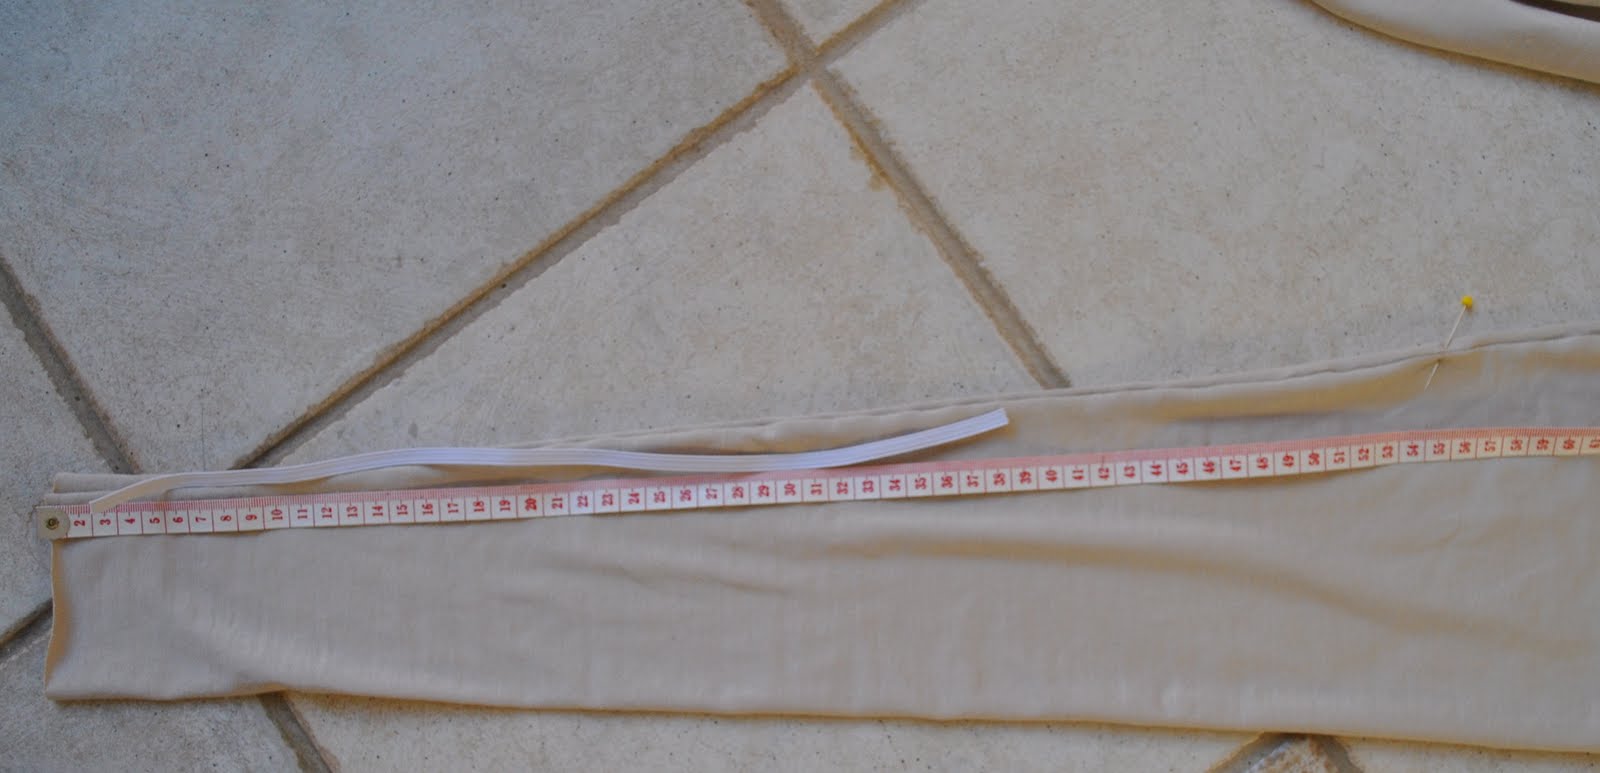
Cut two long pieces of sturdy woven fabric on the grain lengthwise to be the hidden “belt” or waist stay (I’m just going to go with “belt” from now on, OK?)  I used some rather nasty, densely woven, very tough black quilting cotton that I bought from Spotlight yonks ago, unusable for any real garment but that has been wonderful for all sorts of pocket lining, HongKong seaming, waistband facing, and a whole host of other hidden purposes.  I cut my two pieces to be plenty long enough to go around half my waist, plus extra, and the width should be double your desired finished belt width plus double seam allowances.
Fold both pieces in half lengthwise right sides together, sew together one of the short ends, turn right side out and press.  Press the whole length in half lengthwise.

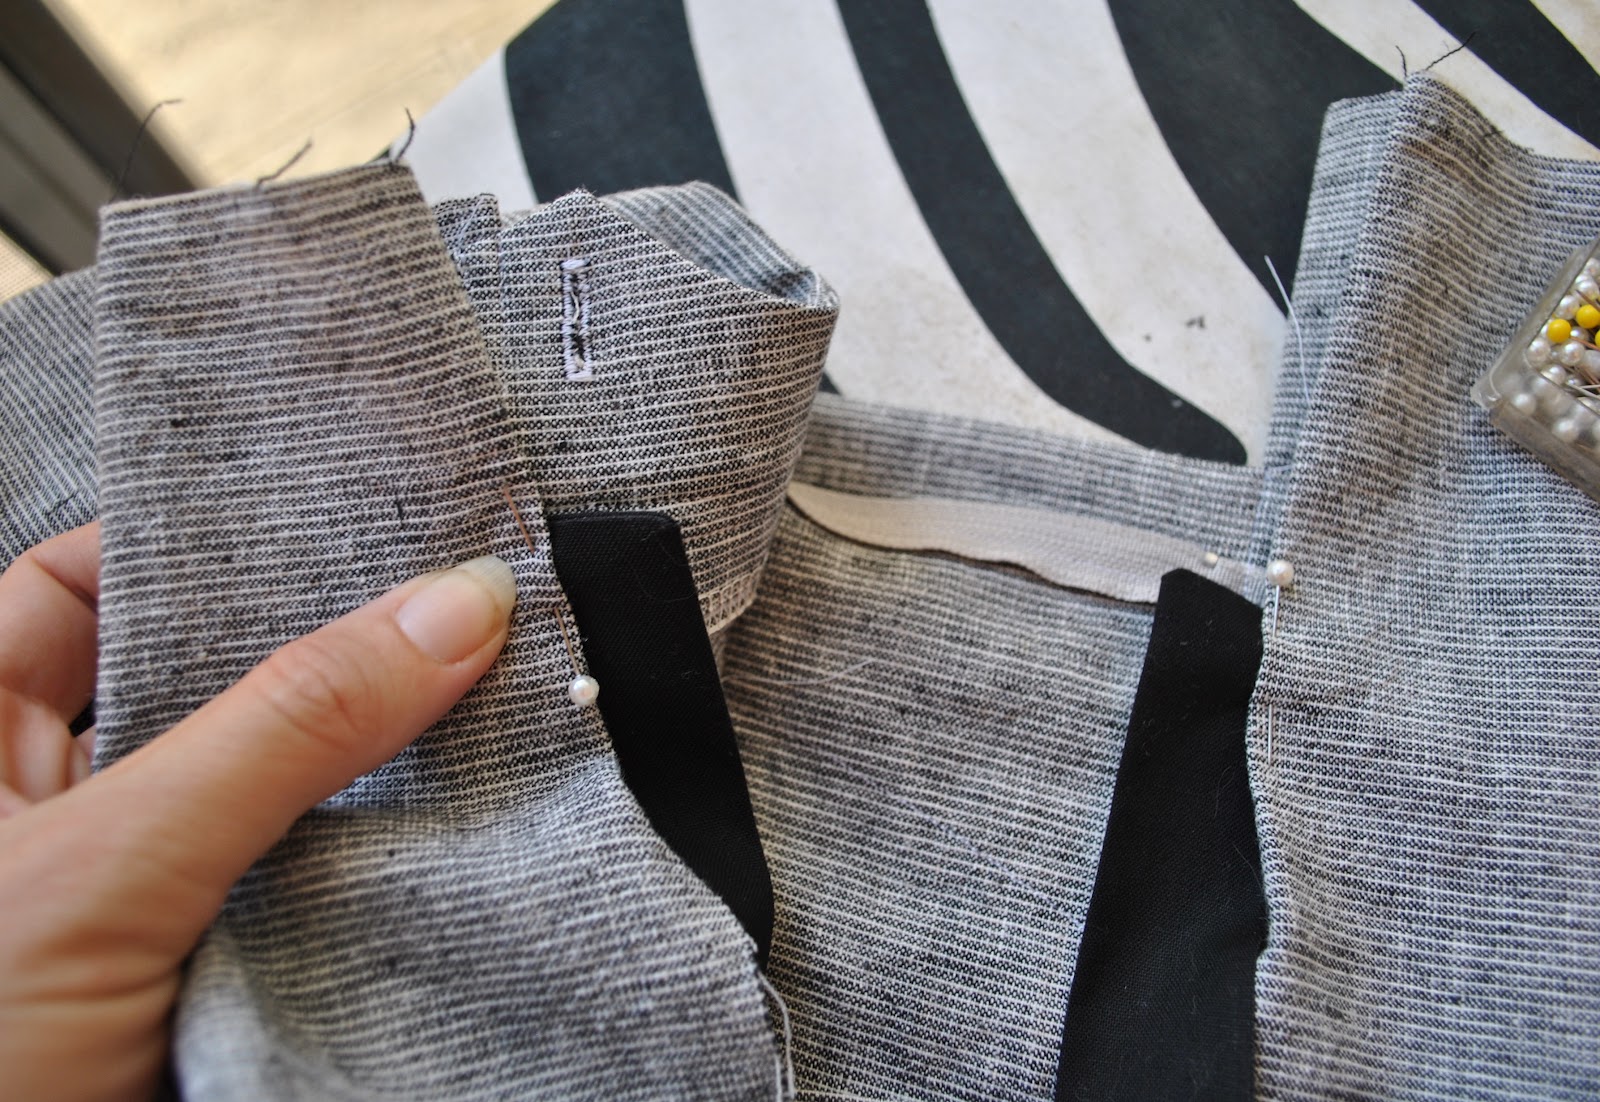
Now turn in the waistband facing and hold in place to situate each belt in its right spot…  each with the stitched closed bit at the front and the long folded edge down.  The left front should be situated just over the stitching line of the placket, and the right front to halfway over the zip tape.  Pin to mark their placement on the facing.

By the way, if you planned ahead, you could have the left front of the waist stay/belt inside the zip placket and stitched down inside it along with the zip placket/zip seam.  Because I was still working it all out and trying to think each step through as I was going along, I did not manage to do this for this one (hey, it’s my first) but I would definitely try it for next time.  It would take a bit more fiddling, but I think it could be done.
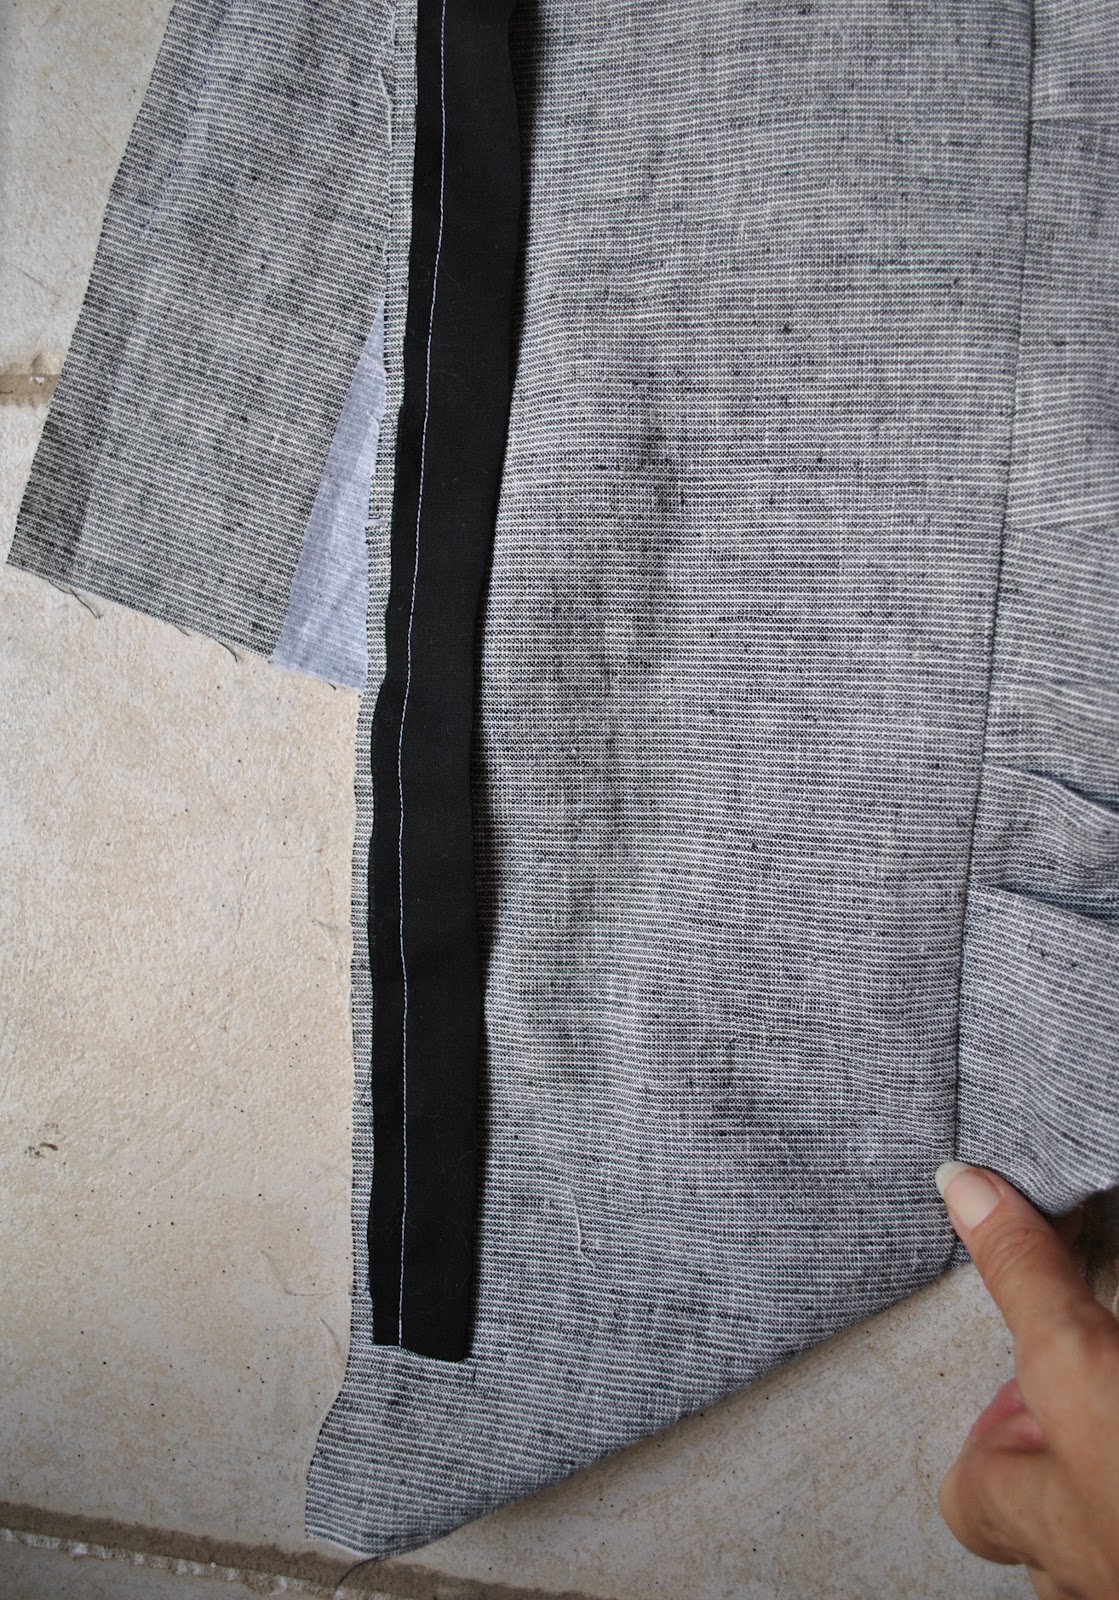
Stitch the belts to the waistband facing, keeping the front edges of the belts in exactly the position you had pinned previously.  Stitch all the way along to about 5cm away from the centre back seam, to allow for final fitting of the waistband.

Do the final waistband fitting and stitch up the waistband centre back.  Once this is done, measure the belt to fit, and sew the two together at the centre back seam.  If you are like me and always stitch a slanted centre back seam to fit a sway back, then you will have to stitch the facings and the belt pieces together on the diagonal to match.  Below is a very rough and somewhat exaggerated diagram to illustrate what I mean (obviously, the angles should all match), that centre back seam is sewn in a symmetrical arrowhead with the point at the central foldline.  I left out the waistband facing and belt seam allowances for ease of drawing, but they should be sewn with their own little opposing diagonals as well….  This is necessary to get them to sit nice and flat when they are all folded and tucked in place.  Once stitched together at the centre back, fold the centre back of the belt in half lengthwise and press, and stitch the remainder into place on the waistband facing.

Fold the waistband facing in right sides together and stitch the front edges, just as you would for a regular waistband.  Trim corners and turn the waistband right sides out.

Fold in and under the waistband facing seam allowance, and the belt seam allowance, and pin in place. Baste and stitch in the ditch all the way around to finish the waistband.

To complete securing the belt; stitch the left front down firmly, stitching along the same stitching as the placket/zip stitching.  Like I mentioned above, if you had inserted and secured this end within the placket this would not be necessary.  But when done like this, this stitching is essential.

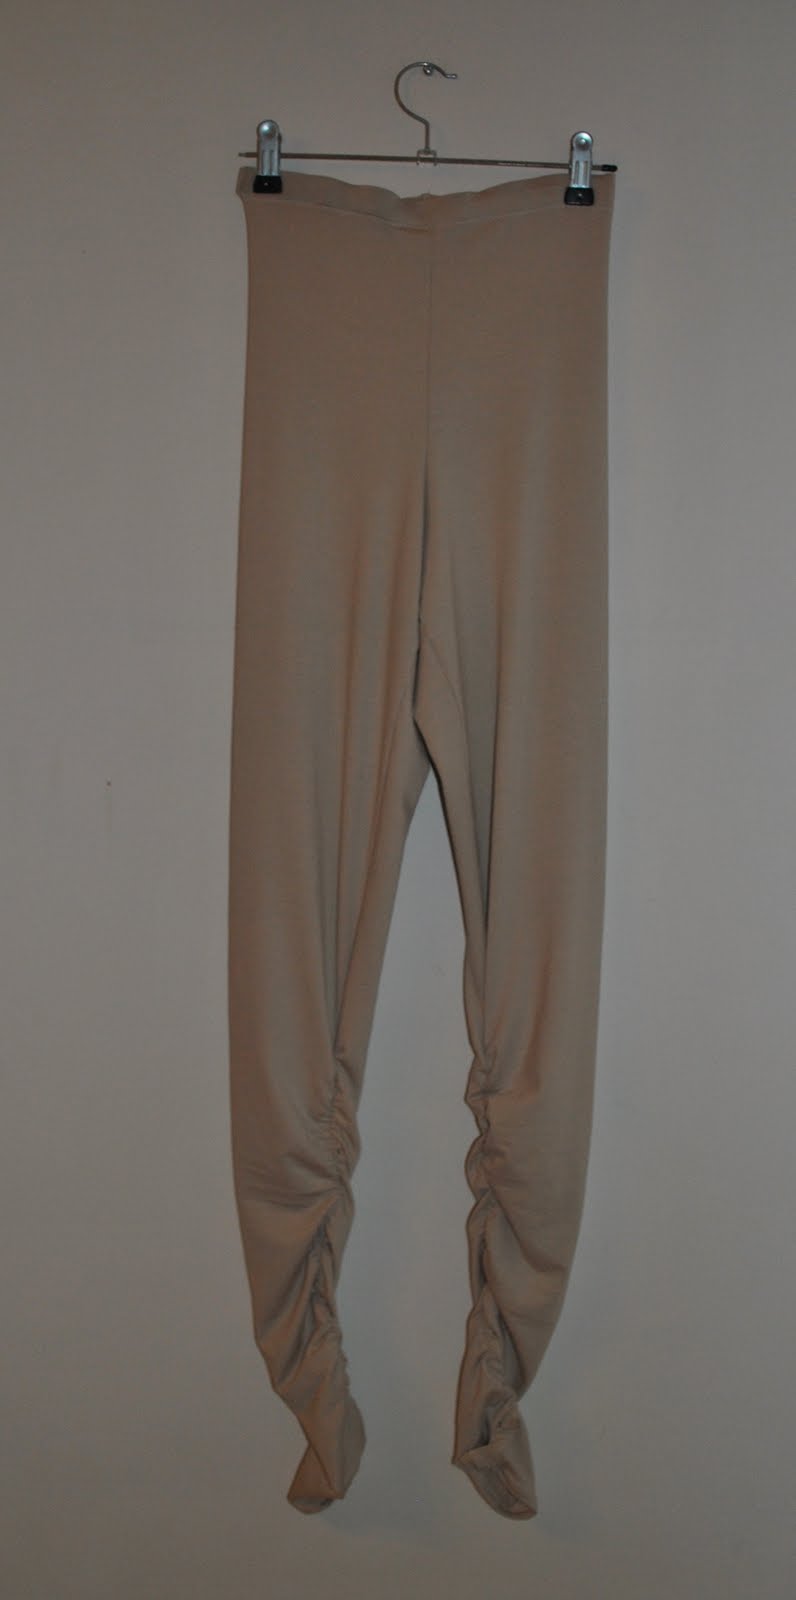
Finally, try on the trousers/shorts to determine the placement of the belt button, and stitch it on securely.  It should be situated so that the front fly flap and zip sit closed and perfectly relaxed.  There should be no strain on the zip (which would mean the belt is too loose)  and no squeezing together at the top of the zip (which would mean the belt is too tight)

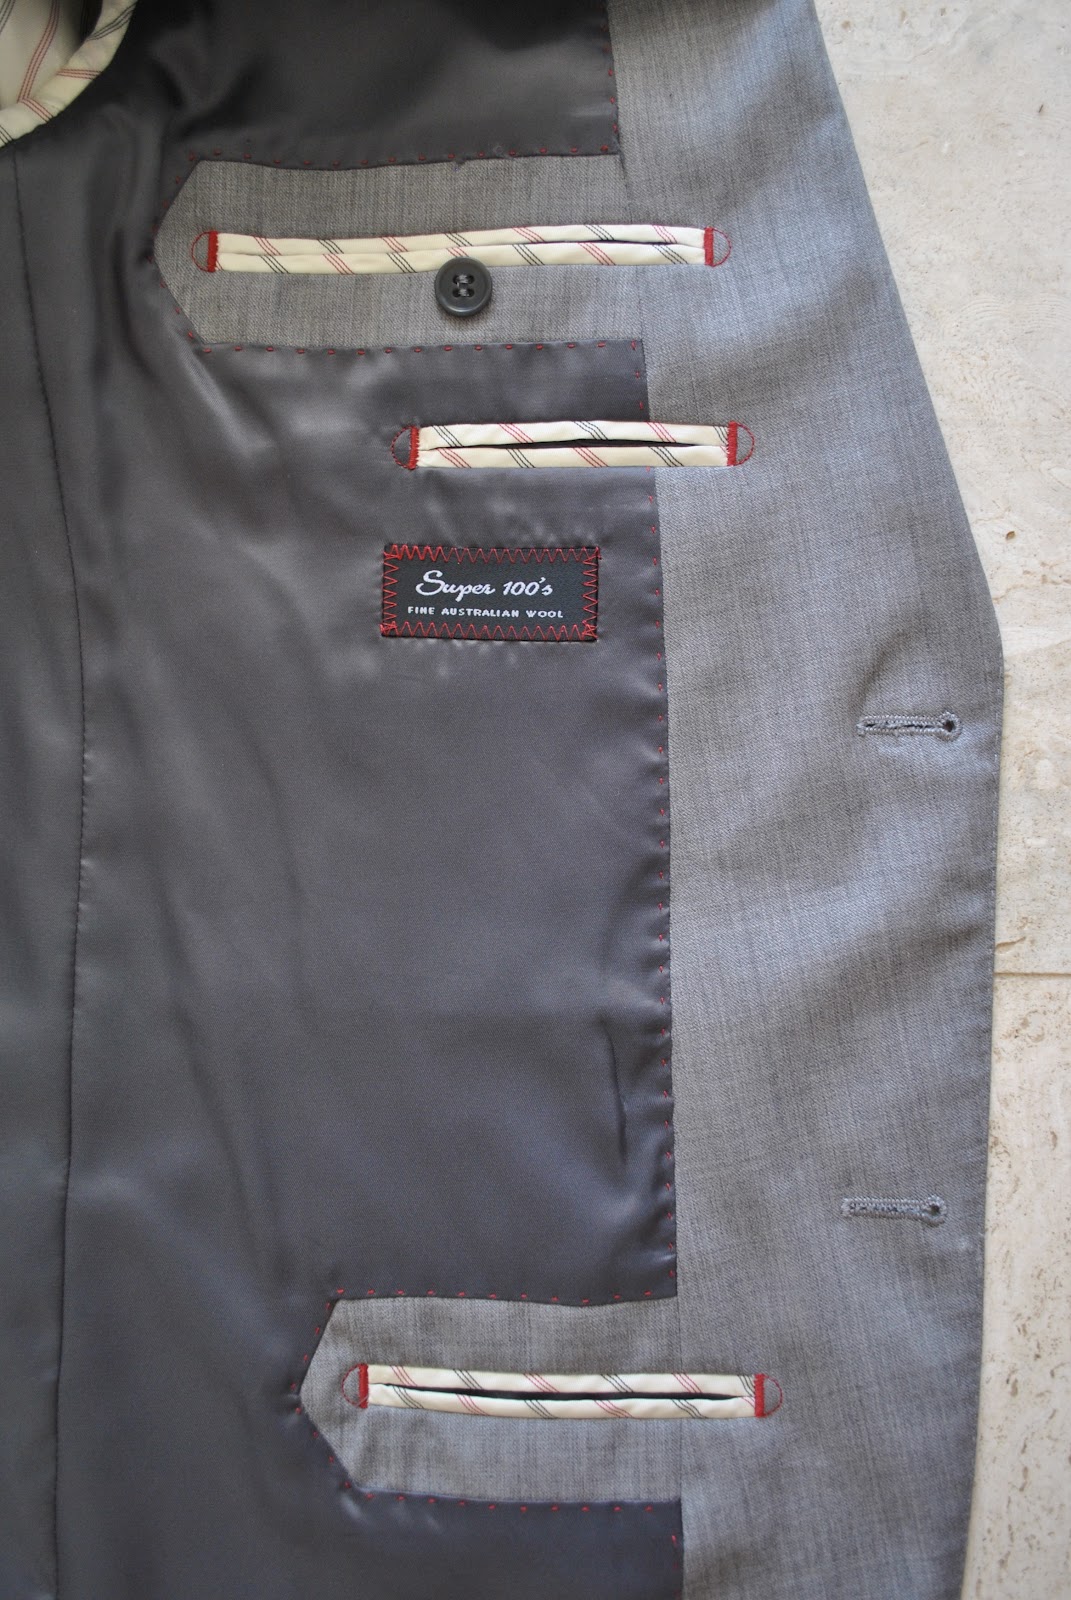
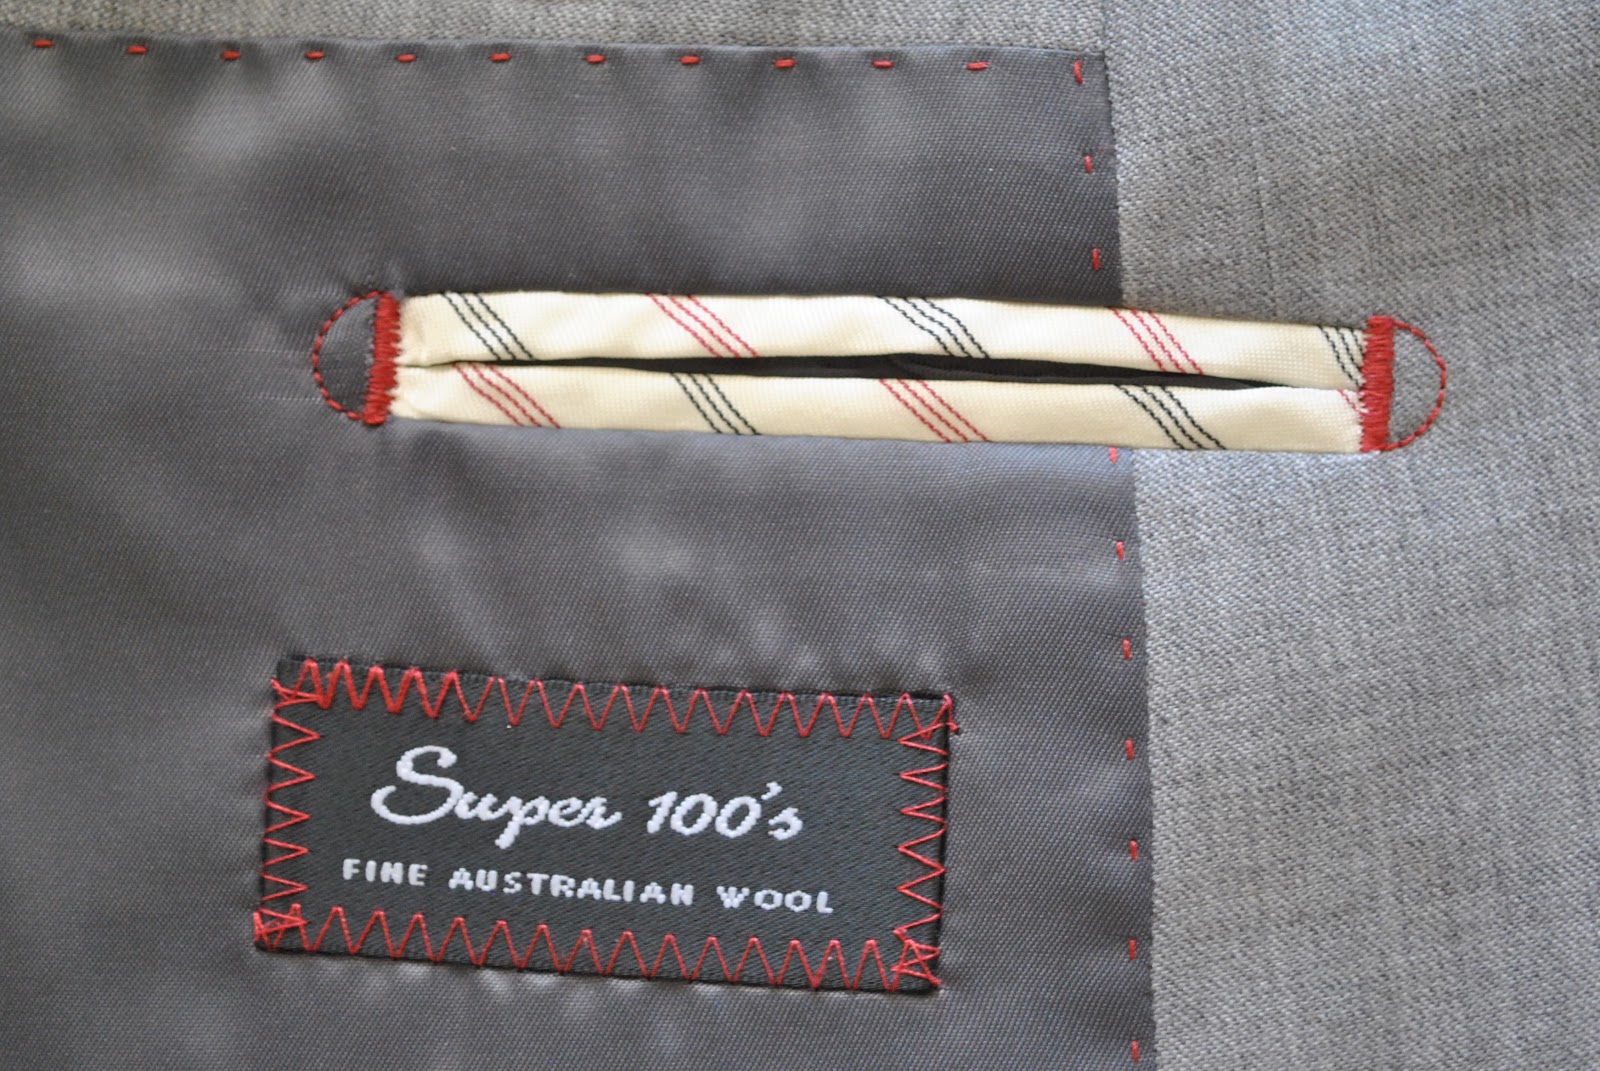
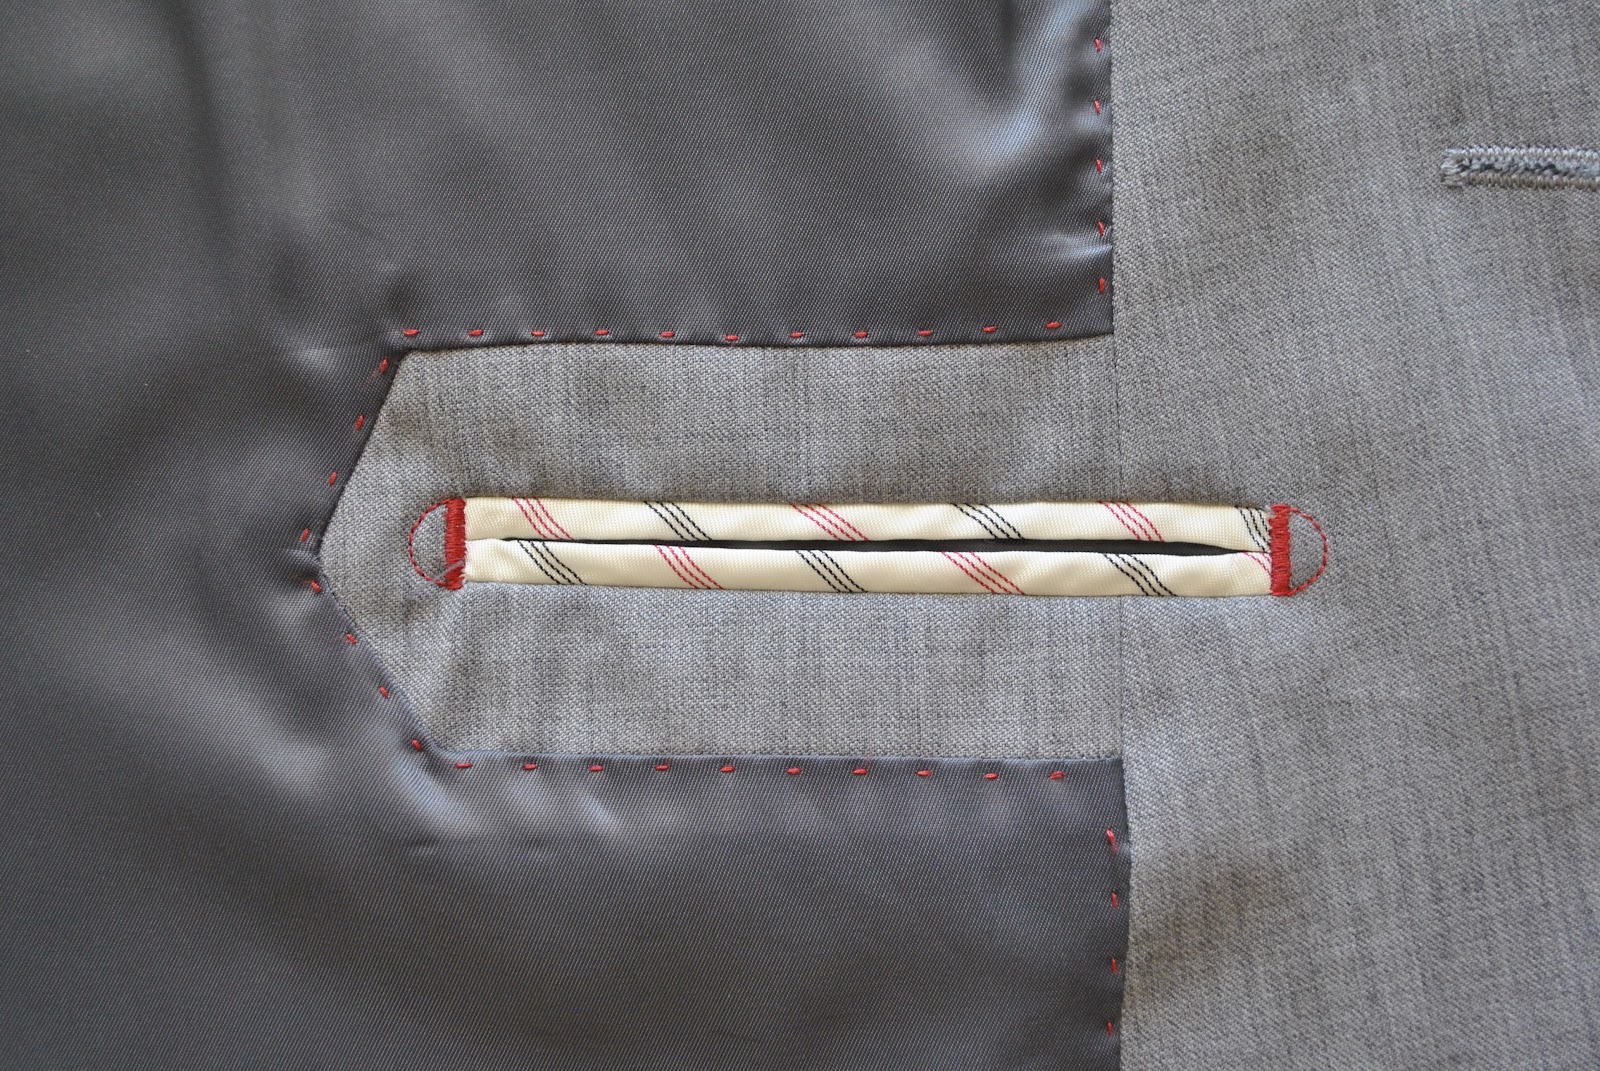
By the way, and on a completely incidental note; d’ya wanna see something utterly beautiful?  The inside of my husband’s suit jacket…
These are three fully functional pockets.  I think I would die a happy woman if I ever managed to produce something even half this precise and immaculately perfect.
pinterestmail

Fashionary

Thank you for those compliments on my sketch in the previous post; but I have to own up right now that I’m not really much of an artist…  I cheated!  🙂
My “artistry” is all thanks to the Fashionary….

I first heard of the Fashionary about two years ago and immediately got one for myself and one for Cassie that Christmas (and posted about here).  I bought them here; and if you click on that link you can see how other truly artistic people are producing absolutely beautiful fashion drawings like mini works of art in their Fashionarys, compared to my very basic sketches depicting my prosaic little sewing plans in a practical manner without frills nor spills.  That is pretty much why I do not usually post my pictures of my own rather ordinary sketches up here….
But I still use it to mock up most of my ideas before they get made, and I looove to play with it!
Why?
well first and foremost, it is fun!  It’s like being in kindergarten all over again, except in a grown-up and (ahem) acceptably adult format….  It caters to that wannabe fashion designer inside of me, yet dispenses with that pesky requirement to have any actual drawing talent…  
Since it is so easy!  Just like doing dot-to-dot drawings when you were a teeny kiddy…
Most of the notebook comprises pages of these templates of figures; 3 to each single page.  You can get a female one or a male one.  They are drawn in with very faint red dots; like so…
and since I realise they are very faintly drawn in and you might not be able to see them very well, I have pencilled one in to show it off better…

When a new sewing plan or outfit or something starts to transpire in my head, or maybe if I am toying with ideas, then it is sketching time, and even better; colouring-in time…
Here’s one I prepared earlier  🙂  (it’s unrecognisable, but the one on the left is supposed to be my Sunset maxi-dress, lol!)

And a hint of autumnal things to come  😉

Cassie, a far more well-organised person than her mother, also keeps samples of the fabrics along with her sketches, and actually remembers to take it shopping with her.  This is an excellent idea that I really must adopt too… would take the guesswork out of thread and button matching…

I find my Fashionary useful to keep me on the straight and narrow, to keep me to my fabric and sewing “promises” to myself if you like.  The act of drawing up my design sort of commits me to it.  Like, there it is all drawn up and coloured in, now I have to make it happen!
Once I’ve completed sewing the garment I put a little tick beside it, thus satisfying my list-keeping-and-ticking-things-off tendencies.
And, did I mention it is fun?

pinterestmail

Taking advantage of one’s surroundings…

I received a comment on my photo yesterday in the Self-Stitched September flickr group that read in part that my ensemble looked perfect “mostly due to the beach background” LOL!  *
Well I’m afraid the beach is going to steal the show again today because when I am fortunate enough to be staying by the beach then I see no reason not to make full use of nature’s beautiful offerings, particularly when one is simply logging a mere outfit.  I’m not vain enough to believe my sewing creations are going to elicit any Wow! factor all by themselves!
So, today; I am using another little ploy for when one’s jeans have shrunk a tad, just roll them up a little bit and voila, the ankle-freezer factor has been happily disguised!  Now they look as if they were meant to be like this…  Another plus is that one can wade, which is as far as I will go in at this time of year.  Shams asked if we swim at this beach, and yup we sure do! but it is still a tad chilly for full immersion.  But the feel of cool salty water lapping about your ankles, and soft and squishy but still slight abrasive sand underfoot is always such a deliciously blissfully healthy feeling for your feet, don’t you think?  I think it beats any foot pampering offered at any beauty spa, any day!
My half-zip-front parka is one I made about five years ago, and so it might be outdated but I still love it.   It is self-drafted, but a completely slavish imitation of a Marni design from their Spring/Summer 2007 collection, so I feel I’m borrowing a bit of designer-style austere chic when I don this… .  I really like how the high bunched up collar turned out.  It’s basically a double layer rectangle cut to fit the neckline, sewn in, then with a lace inserted between the two layers and exiting through some tiny buttonholes to tie it loosely.  It does have some piecing on the front, and all the seams are double topstitched, but it is probably hard to see it in this photo.

Details:
Parka; self drafted, a copy of this one at right, from Marni Spring/Summer 2007, black cotton
Jeans; Burda 7863 with modification, rust coloured stretch corduroy, details here
Sandshoes; Country Road

*Actually I’m sure the comment was intended to be a nice comment but I just couldn’t help but laugh when I read that bit…!

pinterestmail

Scrumpled leggings

Ta da!  Scrumpled leggings!  You like?  I do!
And I think they fit in very nicely with my current seasonal aim of dressing to suit the natural colours and textures of my environment…
I know this is not a new look.  In fact I had a vague sense of deja vu when I first popped on my new scrumpled leggings… and went off to check, sure enough, here are some Comme des Garcons leggings from 2005 that I can remember being quite interested in when I first spied them in a Vogue magazine.  Yup six years ago… back then I wasn’t into making my own leggings, thinking they would be way too hard.  Little did I realise then how easy leggings are to make!  Also this kind of raaather avant garde stuff never ever ever appeared in a store here so I never bought some for myself.  Perth is kinda sleepy, you see.  Fashion-wise we are slowly waking up, but Harajuku we are not…
Speaking of, when Cassie and I had our fun day out with Yoshimi and Novita in Tokyo, as we parted ways Yoshimi pointed us in the direction of the Mitsukoshi department store, where we had a fabulous eye-opening hour or so oohing and aahing over fashion the likes of which are almost unknown around here. Unknown that is apart from some very expensive European clothing in certain boutiques…  Anyhoo Cassie found a pair of scrumpled leggings like these, and we thought they were so fun and different we bought some.  You’re wondering why I didn’t buy any for myself? well the leggings situation in Tokyo is the same as the shoes situation, if you are taller than 5’6 or have larger than a size 38 shoe, then forget about it
But scrumpled leggings had entered my radar once more…
And recently shams posted about a pair of leggings than she described as “pooled” because they ended up so long, and she liked them that way so left them long.  I liked them that way too.. and thus fully re-awakened my latent desire for a pair of scrumpled leggings…
Super easy.
I used my own pattern that I drafted to fit me, but cut the legs pieces to have about an extra 20cm length from the ankle down, and in a less tapered shape than I had drafted for a tight legging, probably by about 1-2cm wider at the ankle point.  Sorry, inexact measurements I know,the truth is I was kinda winging it…
After sewing up the inner leg seams (simply whizzed on the serger in a matter of seconds!) I cut two roughly 27cm lengths of 6mm elastic.  These were zig-zagged to the inside of the inner leg seam from just below my knee level down to 2cm from the bottom.  Then I just hemmed the lower edge as normal by folding up the lower leg edge by 1cm twice to sit over the elastic and zig-zagged the hem.

(Comme des Garcons leggings at right, image from Vogue Australia Sept 2005, photo by Willy Vanderperre)

Details:
Leggings; my own design, beige knit stuff, from my own tutorial of making your own custom fit leggings here
Top; Ezibuy
Dress; drafted from “Pattern Magic” by Tomoko Nakamichi, of charcoal wool mix, details here
Shoes; Francesco Morichetti, from Zomp shoes

pinterestmail

Spring has sprung!

Ok, OK, so I know we aren’t supposed to even mention the S word until the 1st September but look at this floral fabulousness popping up all around!  I took all these photos here on my walkies this morning…
and obviously when those first tender buds of spring start to burst forth into colourful pretty profusion a woman’s thoughts turn inexorably to… her wardrobe.  Well, naturally!  To be honest it doesn’t take much of a push for my thoughts to turn to my wardrobe.
The weather is still a tad cold for flinging off those drab winter-y layers, but I’m getting pretty excited about what to incorporate into my wardrobe for the warmer weather that is creeping in.  I’m thinking my new spring and summer wardrobe will inspired by the colours of an Aussie spring environment, like pictured here.  Thus, a dose of sage greens, ivories and beiges (surprise!), some light dresses in muddy neutrals (surprise!) and I have a few sharp bright colours to throw into the mix as well.  A lot of my plans have been virtuously conceived from doing a thorough recce* of my stash, but I’m not going to completely close my mind to the possibilities of new fabrics and patterns and let’s face it, when have I ever?!  However I will attempt to use just some of the lovely fabrics in my collection that have been too intimidating to cut into.
What about you? Are you making sartorial plans for the changing season; whether it be spring, or autumn for the northern hemispheries?  And where do you take inspiration for your wardrobe plans?
*recce; Aussie slang for reconnaisance, pronounced “reckie”

Details:
Top; Metalicus
Jeans; Burda 7863 modified, purple denim, details here
Scarf; jersey offcut joined with french seam, details here
Sandshoes; Country Road

below; a nesting swan.  She’s been there for a few days, so soon there will be cygnets!
pinterestmail
Switch to mobile version
↓