Category Archives: Uncategorized

Nice little stormcloud cardi

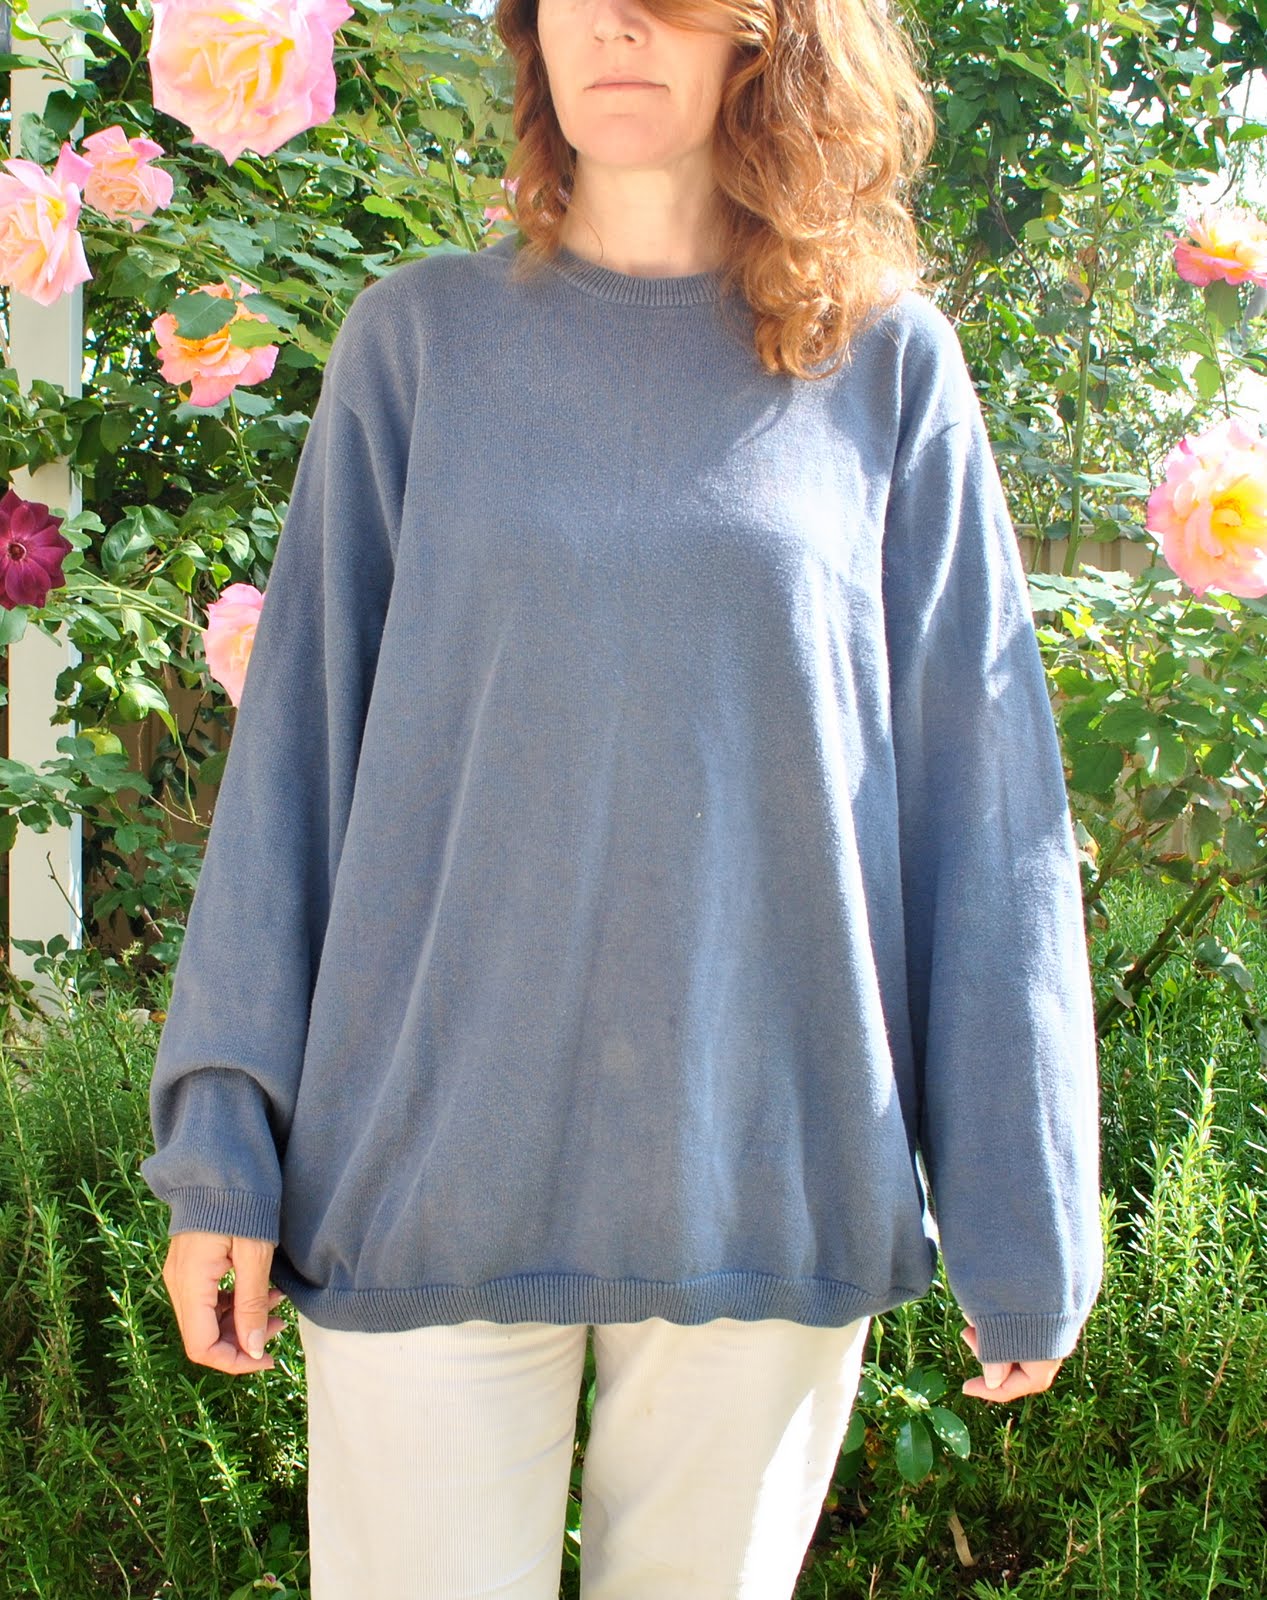
My husband has had this jumper for about ten years and hasn’t worn it at all for the last five years at least.  When I found it in our toss-out bag I knew straight away I couldn’t ever throw it out, because we bought it for him together when we were in Paris… ah, holiday memories.  I’m quite sentimental about stuff like that.  Admittedly it has expanded in size substantially over the years and flatters no one any more.  See the before photo below?  Hoo boy.  Enough said.  It’s also pilled and old, but the cloth is a fine woven cotton knit which is lovely and soft to wear and so worth keeping.  Time to get out the scissors…  Don’t worry, it’s not a designer item or anything…
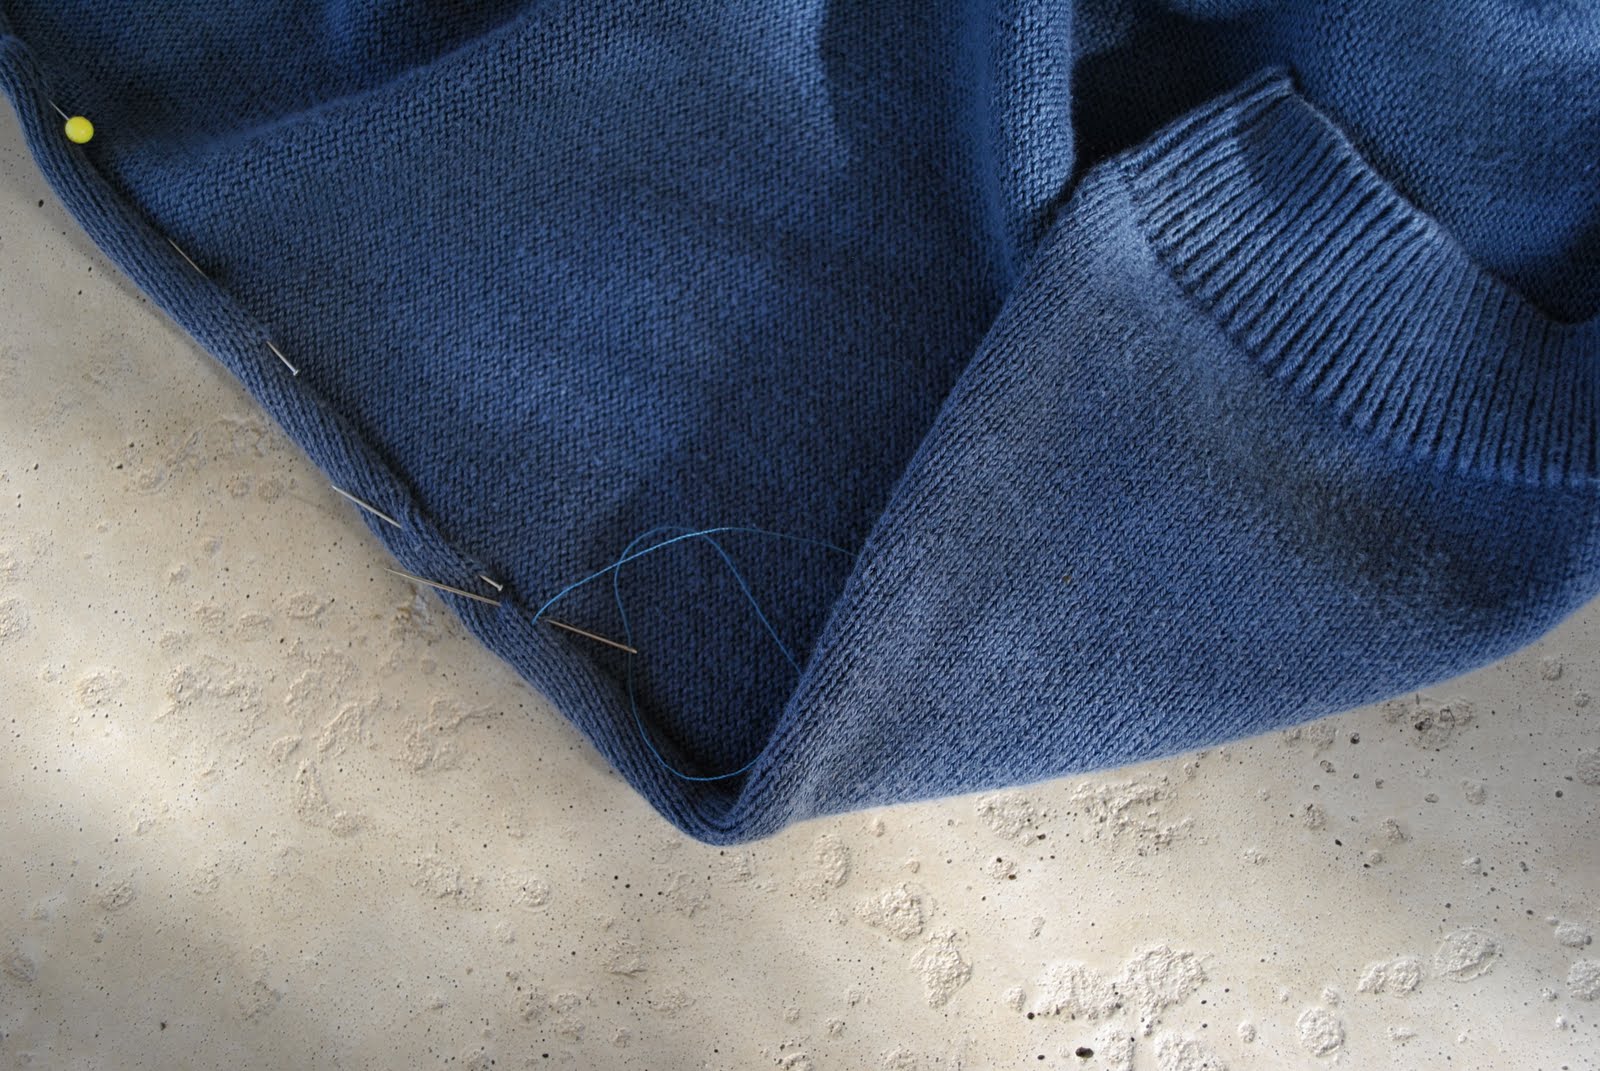
I thought long and hard before embarking on this re-fashion.  I thought about re-sewing the seams so it would fit my husband again, but he was over it…   and I also fantasised about various exciting and asymmetrical avant-garde shapes before decided a nice ordinary little cardi in a classic shape would make me the happiest.  So.  I kept the sleeve and bottom rib edgings (although I’m already wondering whether it would be better with the sleeve ribs turned under and invisibly hemmed on the inside, what do you think?)
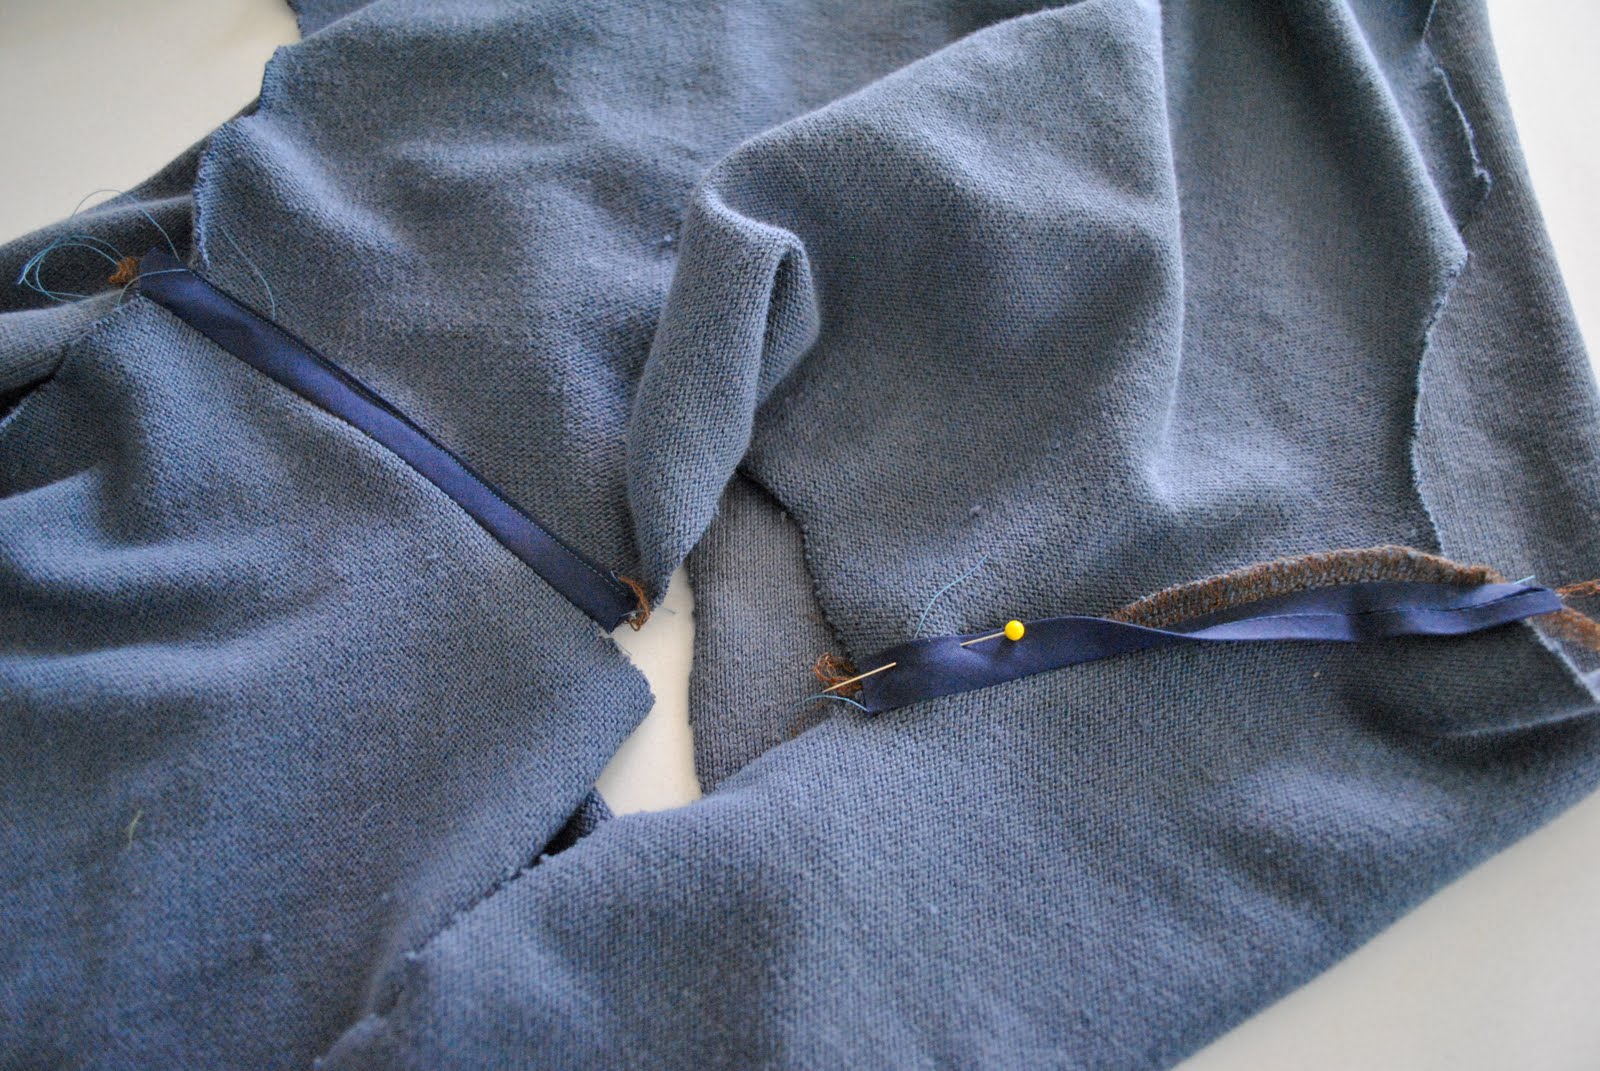
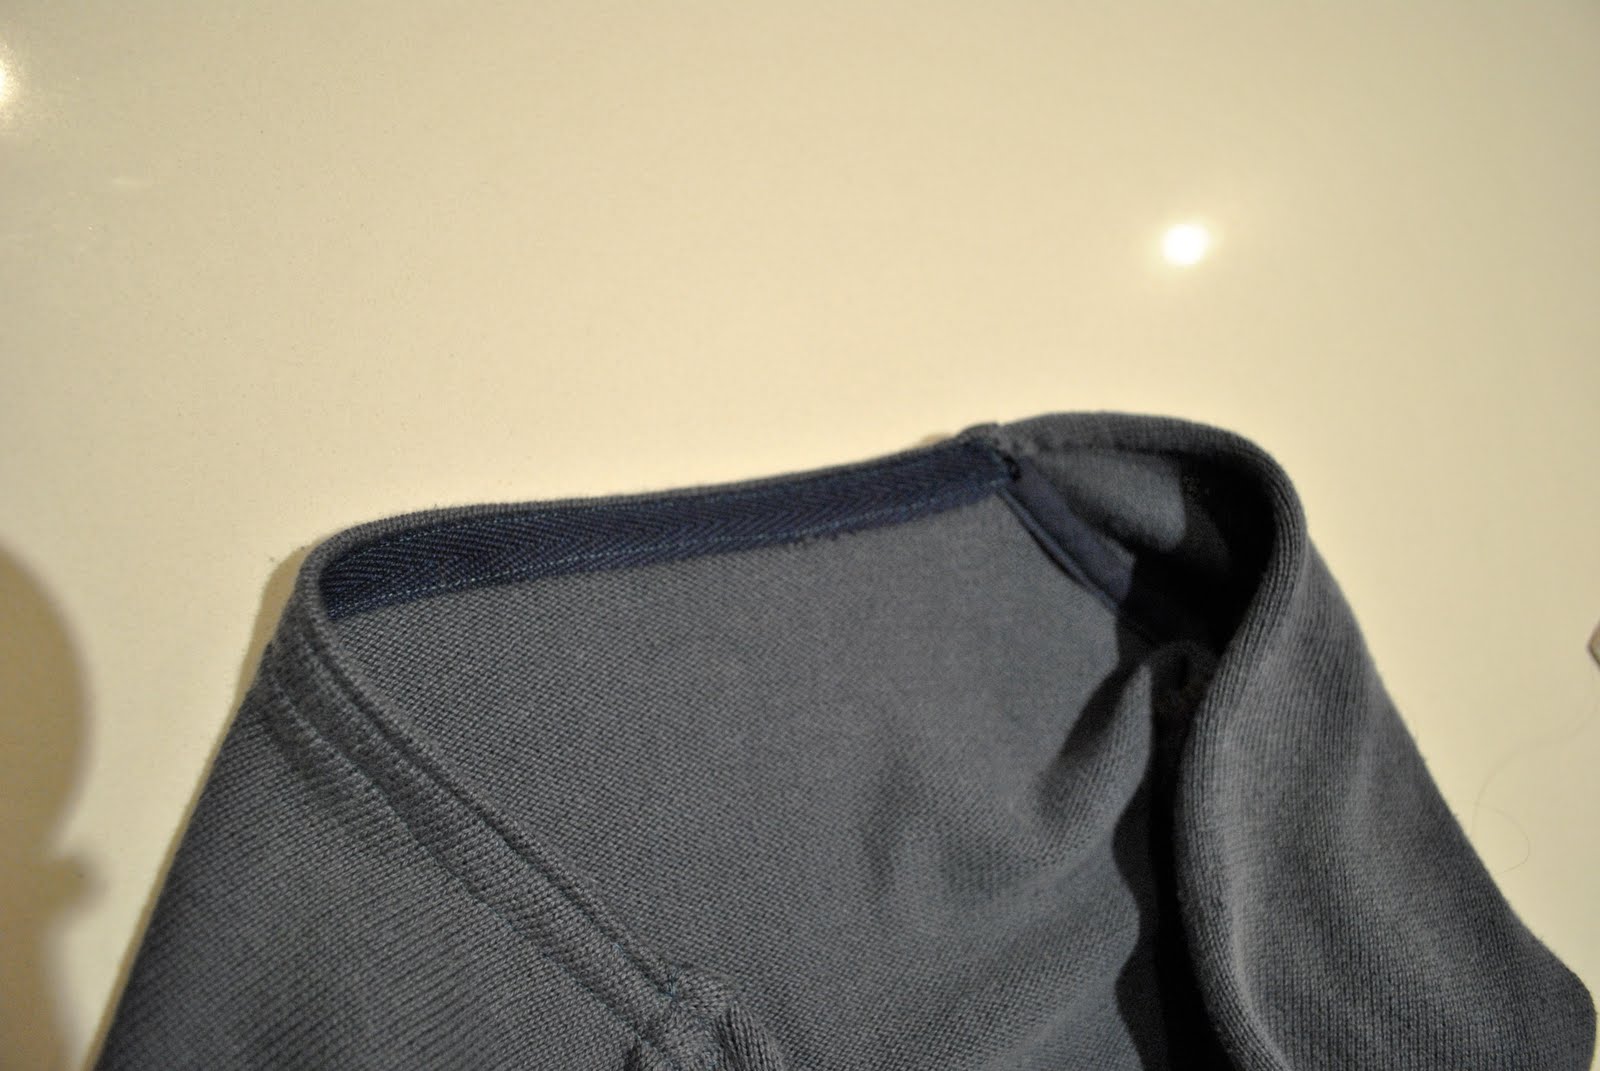
The shoulder seams were encased and reinforced with blue bias binding, and the neck edge with a small scrap of blue tape.  I knew those tiny scraps would come in handy some day…
I hand rolled and sewed the raw front edges and attached a medium sized hook and eye for closure.
What do you think?
Details:
Cardi; my own design, refashioned from my husband’s old cotton knit jumper
Jeans in both before and after photos; old corduroys from Just Jeans
Tops; both Metalicus
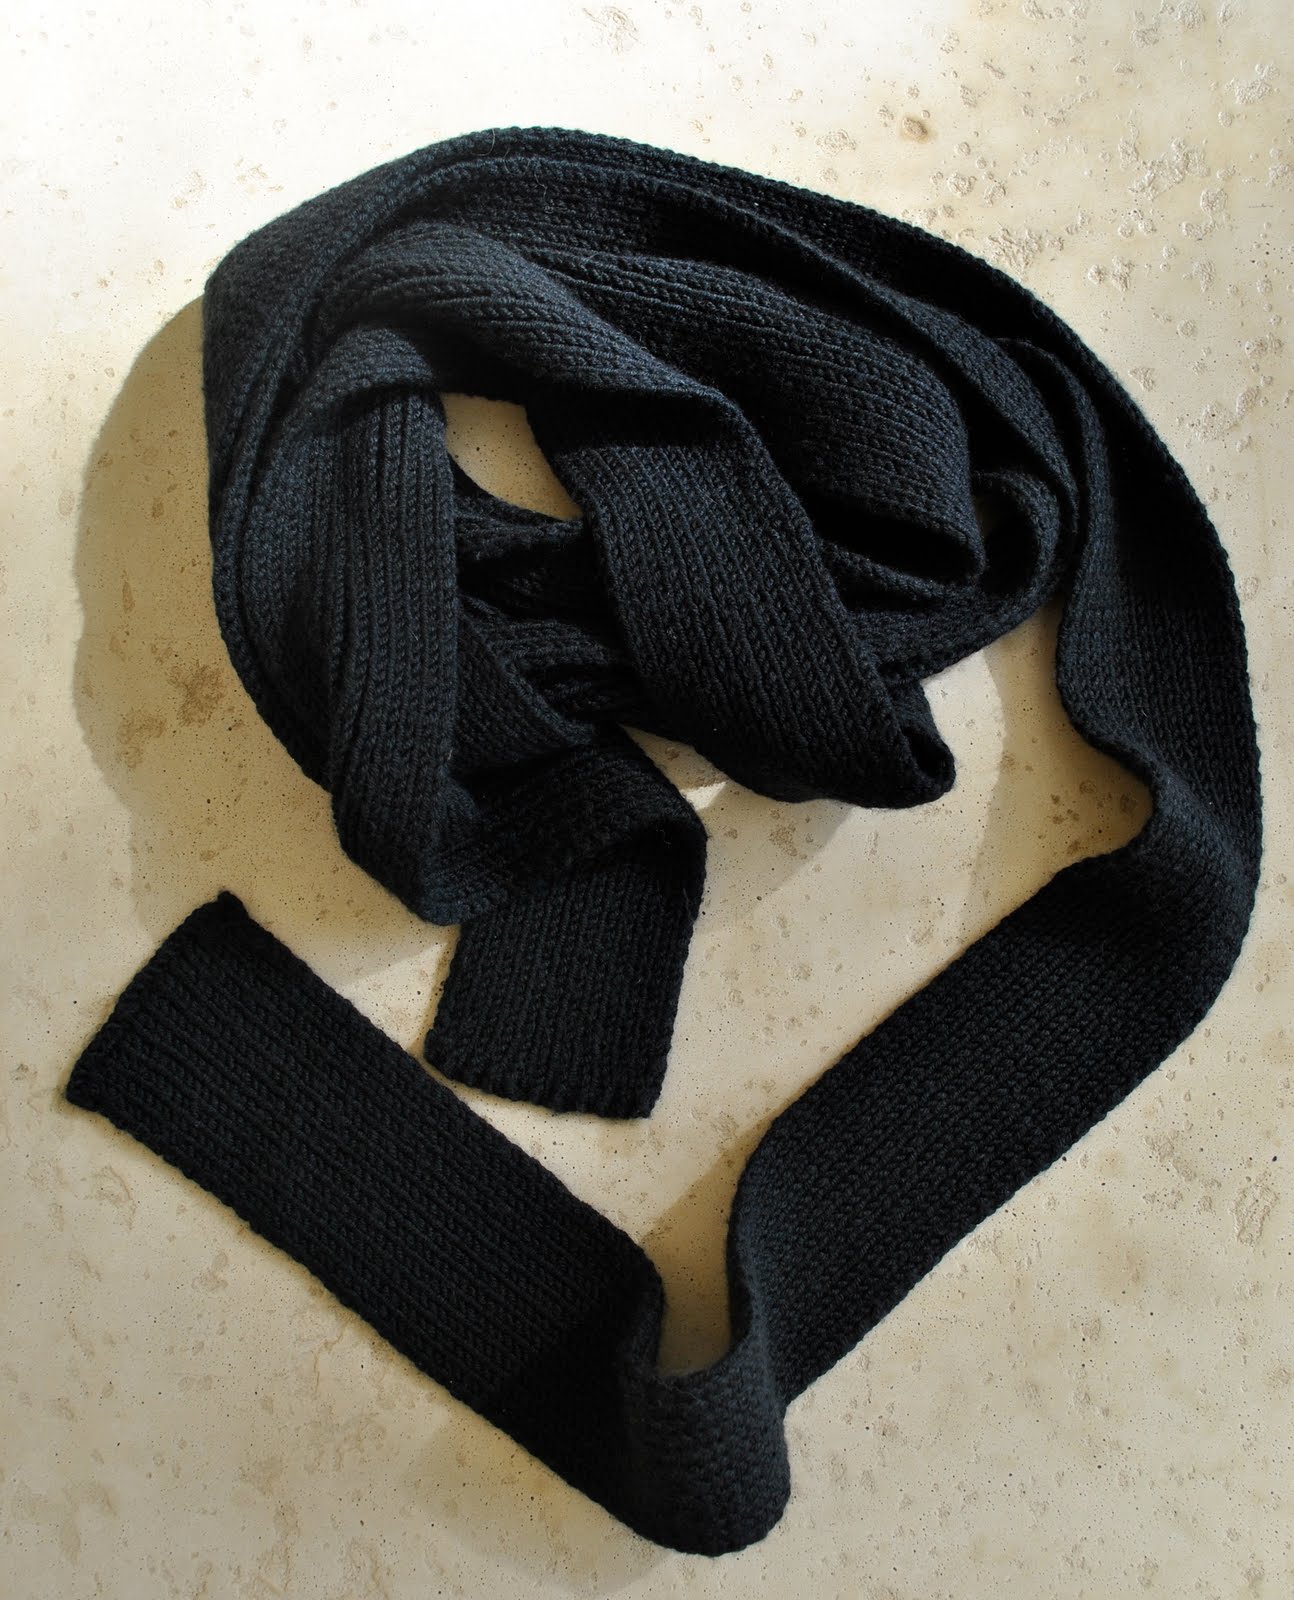
Scarf; Country Road 
pinterestmail

Pattern Magic; project 4

It might seem as though I’ve forgotten about my pledge to work my way through the very excellent book Pattern Magic by Nakamichi Tomoko but I haven’t.  It’s just that other sewing projects (such as ballgowns) have intervened and new wardrobe requirements have surfaced as the weather has got colder.  Lately a few naughty new additions to the fabric stash has meant the door to my laundry cupboard no longer closes without Bessie standing outside, her firm butt and her steel foot preventing an absolute avalanche of fabric…  so it was time for me to self-discipline and get back to the to-do list!  And I had purchased this fabric ages ago from the cheapie table at my favourite fabric store and it was just sitting there, waiting to be made up into something… anything…
Anyhoo, here is my latest effort.  I hadn’t got very far into drafting this particular pattern before I realised I was totally going to wear it.  Not only was the colour of this fabric close enough to the air force blue I am currently craving for my winter wardrobe, but I think the dress design is so delightfully different from your run-of-the-mill shift dress without being so odd as to attract sideways glances in the supermarket.  I think an avant-garde pattern made up with a very plain utilitarian fabric such as this sober blue crepe is a happy partnership that works pretty well, if I say so myself!
I started with the bodice drafted at the first stage of the book.  Next step to take a few body measurements enabling you to extend the bodice to get a simple undarted front and back of a shift dress, you then cut out a circle on the side seam and slash the pattern in a sunburst from this circle and fan out the resulting triangular pieces; this is how you achieve the gathered hole at the side seam… hard to explain, but the excellent diagrams in “Pattern Magic” illustrate how to draft the pattern very clearly. 
And here is the dress…  Different, no?  I think my husband was anticipating a bit of flesh exposure happening with this dress, but nooo! … 😉  Plus it’s now definitely too chilly in Perth even for teens to be in their midriff tops!… (Chilly being a relative term here in Perth!)
I just love Japanese sewing books for this reason, their illustrations are so excellent as to make understanding the language not so necessary that you can’t follow the instructions.  I’ve recently acquired through a loan from a friend another superb Japanese pattern book that I plan to work through straight after this one.  Being totally and completely in Japanese though, including the title and cover page, I am unable to supply the name of my borrowed book until further internet research has been carried out…
Details:
Dress; from Pattern Magic, by Nakamichi Tomoko
Top underneath; Metalicus
Boots; Mina Martini, from Marie Claire
pinterestmail

Toasty warm layers

So you can probably tell by my windswept hair in this photo that the weather today is a blustery foretaste of winter to come here in Perth!
On a whim this morning while trying to decide what to wear, I put this op shop skirt on under the purple heather dress and it felt so warm and cosy I kept it on.  And I really like how the three striped layers of colour looks from top to bottom of this outfit.  Previously I wouldn’t have thought of wearing a skirt under a dress but I think it works in this case when both are straight and plain and in lovely toning colours.  They look a little off-parallel here, but trust me, that is the wind effect and the hems actually line up quite well indoors!
And remember when I announced I would be replacing the lining of this skirt because of its annoying tendency to cling to my legs?  Well today being so brisk and all, the lining-clinging-to-the-legs feature of this skirt turned out to be a plus.  Toasty warm legs!  The lining’s going to stay after all!

Details:
Dress; Burda 8511 with minor adjustments, purple hessian silk
Skirt; Salvation Army op shop ($2!)
Cardigan; Country Road
Boots; Enrico Antinori
Bag; Gucci

pinterestmail

Lounge suite re-cover, version 1

My post last week entitled “Lounge suite re-cover” should really have been given the addendum “version 3”, as it is the third re-cover this suite has endured…  
After searching high and low for a photo of the first re-cover this is unfortunately the best I can come up with.  Rats.  I’ve not been particularly good in the past with photographing the stuff I’ve made, but I’m trying to do better in this respect… after all I set up this blog as a kind of record of all my sewing efforts both past and present and it’s been so frustrating that some of my favourite projects have gone and I have no pictorial record of them anymore…
This first cover (made in 2000) was made in light blue/grey corduroy that was on super special from Textile Traders.  Naively reassuring myself I was “of course!, capable of whipping up a new cover for our lounge suite…!”  I blithely bought twenty metres and faced my first struggle when I had to somehow get this huge bolt of fabric into my car to get it home…  Eventually worked out how to put down a few seats (my husband had always done that for me), opened the flap into the boot that I didn’t know was there before and discovered it with some relief in the carpark that day…  Finally manhandled the roll of fabric in the car and drove home with it half in the boot, half poking between the front car seats and resting on the dash beside me, my youngest son wedged firmly between the fabric and the car door in the back seat.  A Laurel and Hardy moment in our lives…
This was a huge project for me, being the first time I had tackled something as big as this.  I spent days struggling with large swathes of corduroy, pinning and measuring, refusing to admit defeat.  I was one immensely proud seamstress when it all came together at the end.  I was like, sure I can make clothes for myself, but now upholstery…! Now I’m gettin’ somewhere!, achieving a whole new level of competence here.  So this project marked a minor watershed in my sewing life…so to speak.
It was a tough and hardy cover but in retrospect the colour was deeply impractical…. when you have three children that will eat their Vegemite-on-toast on the couch in front of the TV whilst your back is turned; when chocolate treats are passed around in front of a late night movie… yeah, you get the picture.  The pay-off is a couch that is a sheer embarrassment if friends come around to visit; not to mention the mother-in-law…  (only joking, my mother-in-law is very understanding about furniture that suffers the onslaught of children and animals on a daily basis, lucky for me!)
(sheepish explanation for the huge mess in photo 2, my excuse is that it was Christmas Day, post present opening…)

pinterestmail

Khaki jeggings

I’ve submitted my first Pattern Review … er, review. This is for Burda 7863, the slimline pants I’ve just finished for winter. I wanted slimline pants this season so I could wear them tucked into my biker boots, and I’m definitely planning to wear these mostly in this way. However only half the legs are visible when boots are on, so for my review photo I thought I’d better show them in their full length as here. Without further ado, here is my review…

Pattern Description: 
Ladies slimline pants in either three quarter or ankle length with fly front, button up waistband, curved inset side pockets, patch back pockets with flap. Waistband sits at natural waistline. For two way stretch fabrics only
Pattern Sizing:
European 36 (US10) to 48 (US22)
Did it look like the photo/drawing on the pattern envelope once you were done sewing with it?
I made up the ankle length only but, yes
Were the instructions easy to follow?
very easy
What did you particularly like or dislike about the pattern?
It was a very simple pattern to use. The envelope rates it as average difficulty, I’d say a beginner could easily make these pants successfully. The instructions are clear and easy to follow. What I didn’t like; according to the Burda sizing I have size (US)12 hips and size (US) 10 waist. So I laid the pattern pieces down on some well-fitting jeans I already have and was suspicious the (US)12 hip would be too big, consequently I cut my leg pieces to accommodate size 12 hips but basted them together along the size 10 sewing lines. As it turned out the size 10 fit perfectly and I finished the seams to size 10 and removed the extra allowance.
Fabric Used:
Khaki/grey stretch gabardine for the pants and the back pocket flaps were made in a contrasting beige cotton. Topstitching in contrasting light tan thread, pewter shaded metallic buttons. To reduce chance of “pocket shadow” on the front of the pants I used a scraps of a very lightweight brown synthetic I had for the pocket piece.
Pattern alterations or any design changes you made:
No pattern alterations. Instead of double rows of topstitching as recommended in the pattern instructions I used single long stitch topstitching in a lighter coloured contrasting thread, as I like the more simple look this gives.
Would you sew it again? Would you recommend it to others?
I would definitely sew this again! I already have some black stretch denim waiting with this pattern’s name on it…!
Conclusion:
I chose this pattern because I wanted slimline pants for winter and all my other pants patterns are widelegged because I had it stuck in my head slimline wouldn’t suit me. I am thrilled I took a chance with this new pattern type and felt very trendy and hip the first time I wore them! With the waistband sitting high at the natural waistline the pants are a big improvement on the low-rise skinny jeans of the last few years; the higher waist removes the risk of muffin-top happening and using a firm stretch fabric results in a figure hugging, body sculpting silhouette that I couldn’t be happier with…! This are definitely not “mummy jeans” but stylish and smart.
I would class them as “jeggings” the new name for pants that are too thin for the name “jeans” but too tailored and smart to be labelled “leggings”

Details:
Pants; Burda 7863, khaki stretch gabardine
Top; Cue
Ivory scarf; Country Road
Blue scarf; My DIY version, from a refashioned tank-top
Belt; from Salvos op shop
Booties; Django and Juliette

pinterestmail

Long n’ skinny scarf

Today is the first time I have showcased this scarf on the bloggeroonie.
I made this about two years ago when big woollen loopy scarves made a small splash on the fashion scene.  I bought three balls of lovely soft black wool, cast on 23 stitches and simply K1 P1 rib stitch until all three balls had been finished.  Sorry, can’t remember the brand of wool.  I think it could have been Debbie Bliss.  The result is a marvellously long affair that wraps easily three times around my neck, with plenty to spare for artistic looping and draping and for the ends to be left hanging loose (as here) or to make a loose knot if desired.
I’m also wearing in my new winter shoes.  They actually only “sort of” new; I bought them last October in the post-winter sales, always the best time to buy good quality winter shoes.  Since I’ve got very big feet I’m often lucky enough to find my size in the after season sales… well there’s got to be one advantage to having gigantic feet…   This morning is the second time I’ve worn them this season, and my poor feet are now a little tender; ouch!  Hate wearing-in new shoes; well I did fall in love with the witchy vibe of these little booties and plan to wear them a lot so this painful early stage has to be borne…
Has anyone got any tips for a non-painful wearing-in of new shoes?

Details:
Skirt; my own variations on Vogue 7303, lined, python print satin
Top; Morrison
Cardi; own design, snakeskin printed rubber coated jersey
Scarf; knitted by me, no pattern
Shoes; Django and Juliette, from Zomp shoes

pinterestmail

Mother’s Day

I know Mother’s Day is celebrated on different days in all the different countries of the world, but here in Australia we celebrate it on the second Sunday in May: which is today!  
My parents kindly had sent me a few photos of some of the items I’ve made for them over the years so I thought it a good day to put up a photo of the Goddess bag.  I made this for Mum ooh, probably about six years ago? I think?  Not sure…  (I’m getting shocking with remembering stuff like that…  I also think this could have been a birthday gift, not a Mother’s Day gift; again, memory not what it used to be and I’ve lost track in my own head of fine distinctions such as these… sad, no?)
This is a knitted bag with a sewn in lining and was made in a class at Ivy and Maude, now part of Calico and Ivy.
Mum looks gorgeous in colours such as these.  All of the jewel and green-y blue colours.  These are “her” colours.  This bag is composed of a mix of eclectic yarns; including some lurex, some mohair, some feathery type yarn, some chenille, some wool.  My favourite section has always been the shredded ribbon yarn around the bottom of the bag, in divinely smudgy and faded hues of putty, indigo, lavender and aqua, reminiscent of a watery undersea vista of a meadow of seaweedy tendrils…
I sincerely wish all the mothers reading this a perfectly looovely day, and I hope your offspring think to remind you of the wonderful person you are in their lives.  If they are teenagers, good luck with that one… (;D) however if they are little you are sure to be presented with lukewarm tea and toast on a tray in bed, and a beautiful handmade card.  I have all my children’s handmade cards safely tucked away and they always make me smile at their cute little designs, hand-drawn decorations and funny salutations.  My youngest son, even up until quite recently, always signed his cards to me with his full name, including his surname, ie.  Dear Mum, Happy Mothers Day to the best mother in the world, lots of love Samuel Smith.  So sweet, as if I would confuse him with another Samuel!
So, Happy Mother’s Day to all of you yummy Mummys out there!!

pinterestmail

Bottle green Basic

I made a new skirt!
This latest is the result of wanting a little quick and easy skirt that I could just throw on for any occasion, something like my olive green corduroy skirt that is such a staple in my wardrobe.  Plus my desire to incorporate a little more green in my wardrobe.  I used to have a lot of this colour once upon a time, but my green options have dwindled somewhat over recent years, suffering from my obsession with neutrals.  Plus I had seen this skirt at right in the Celine parade and thought how great the bottle green looked with all the other creams, whites, beiges, caramels and other light neutrals in the collection, and as I have such an overabundance of aforementioned neutrals in my wardrobe I thought it was high time for a return to an old favourite.  Thus, green.
Having said all that here I am wearing my new skirt with no such light neutrals as displayed so gorgeously by Celine but with the wintery shades of teal and my new air force blue scarf…. ah, paradoxical, no?  But I like the look of the green so much with these “dirty” blues just as well, so this is how I am wearing it for today… no doubt when spring starts to sprung (spring?) then I’ll be pairing this little skirt with my beloved neutrals as planned…
Sorry for the old chestnut Vogue 7303 rearing its head once more on this blog.  I only bought 70cm of fabric and needed a pattern that could cope with such a small amount.  This trusty old pattern is getting kinda fragile and is patched together with sticky tape in places, and its envelope is dog-eared and tattered, but still I keep turning to it.  Besides its economy with fabric, another plus is its sheer simplicity; it took less than an hour to run this number up.
I am constantly vacillating between wanting to source new and exciting patterns for my wardrobe, and then when the time comes reaching for the same old basic tried and true patterns…  I like to do both and don’t have a set formula when it comes to choosing my next project but just work on whim and fancy…  What do you do?  Do you use a pattern once and then move on to the next exciting challenge, or do you keep returning to the favourites in your pattern collection, or is it a bit-of-both?

Photo above from Celine Spring/Summer 2010

Details:
Skirt; Vogue 7303, bottle green cotton velveteen
Top; Metalicus
Scarf; refashioned from an old tank-top, here
Boots; Fornarina, from David Jones

pinterestmail
Switch to mobile version
↓