Category Archives: Uncategorized

Tips for sewing with PU laminate (leatherette)

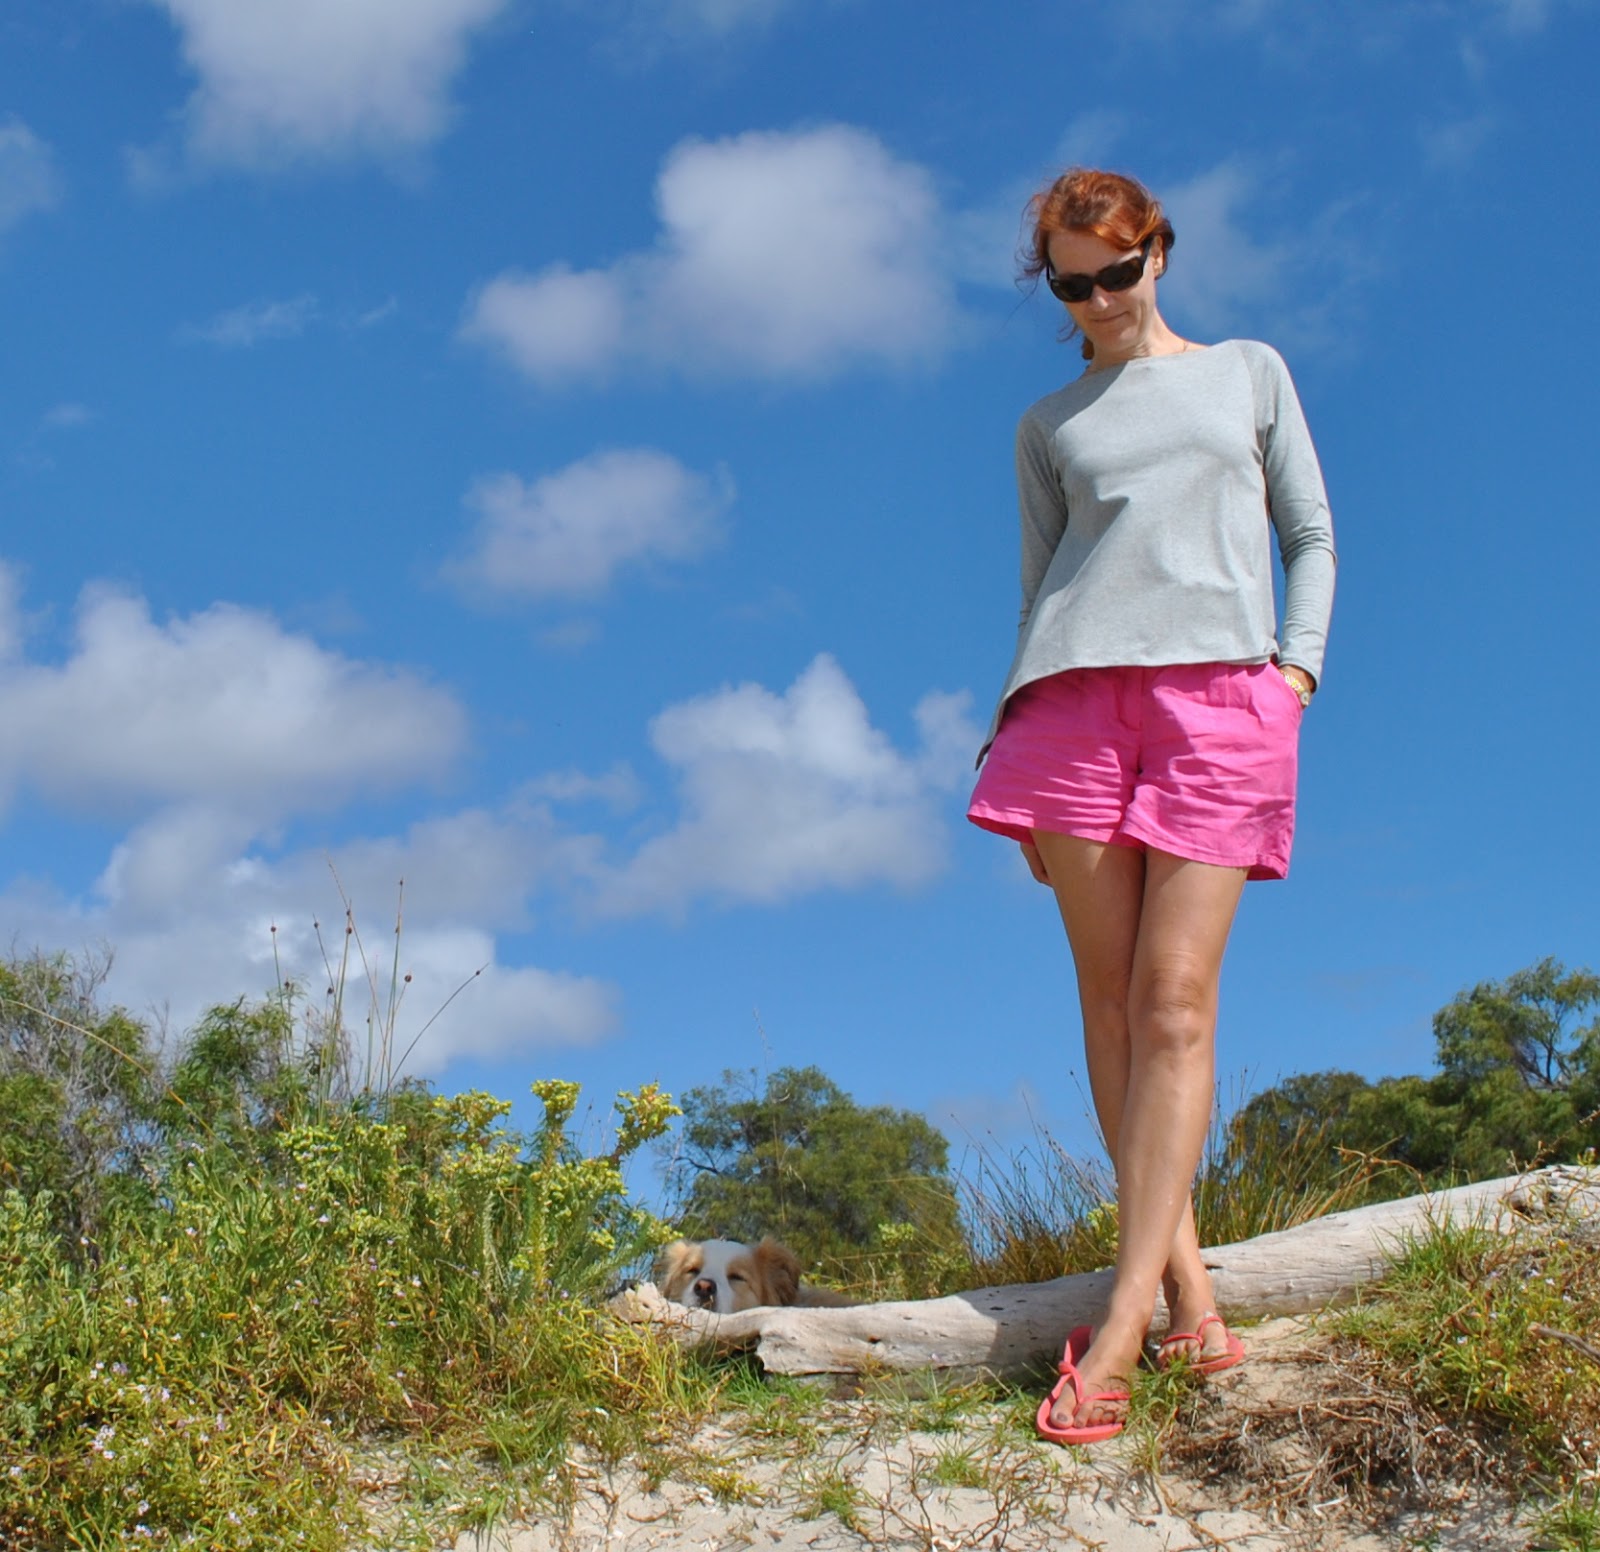
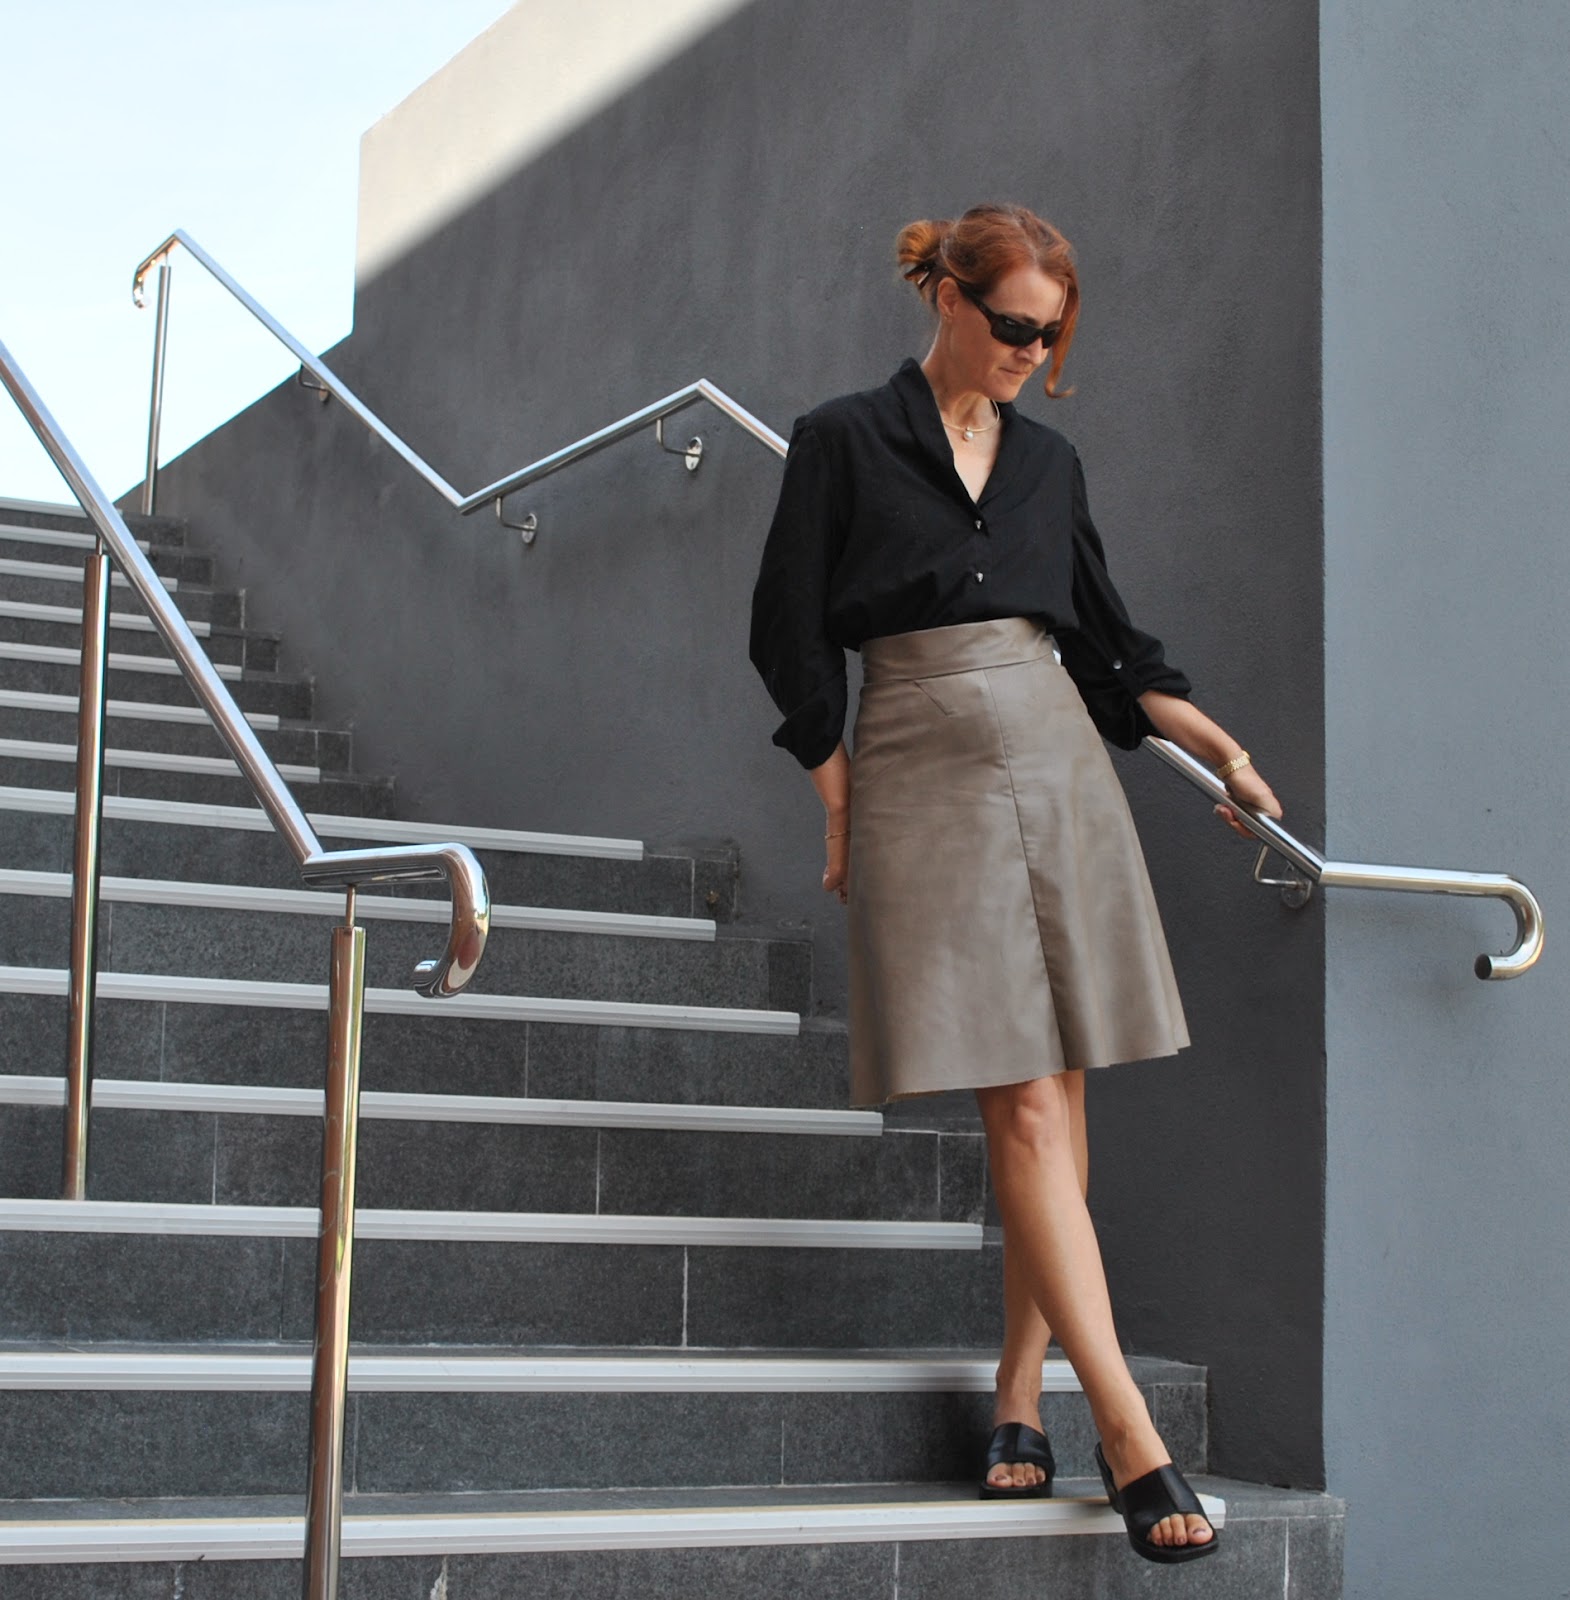
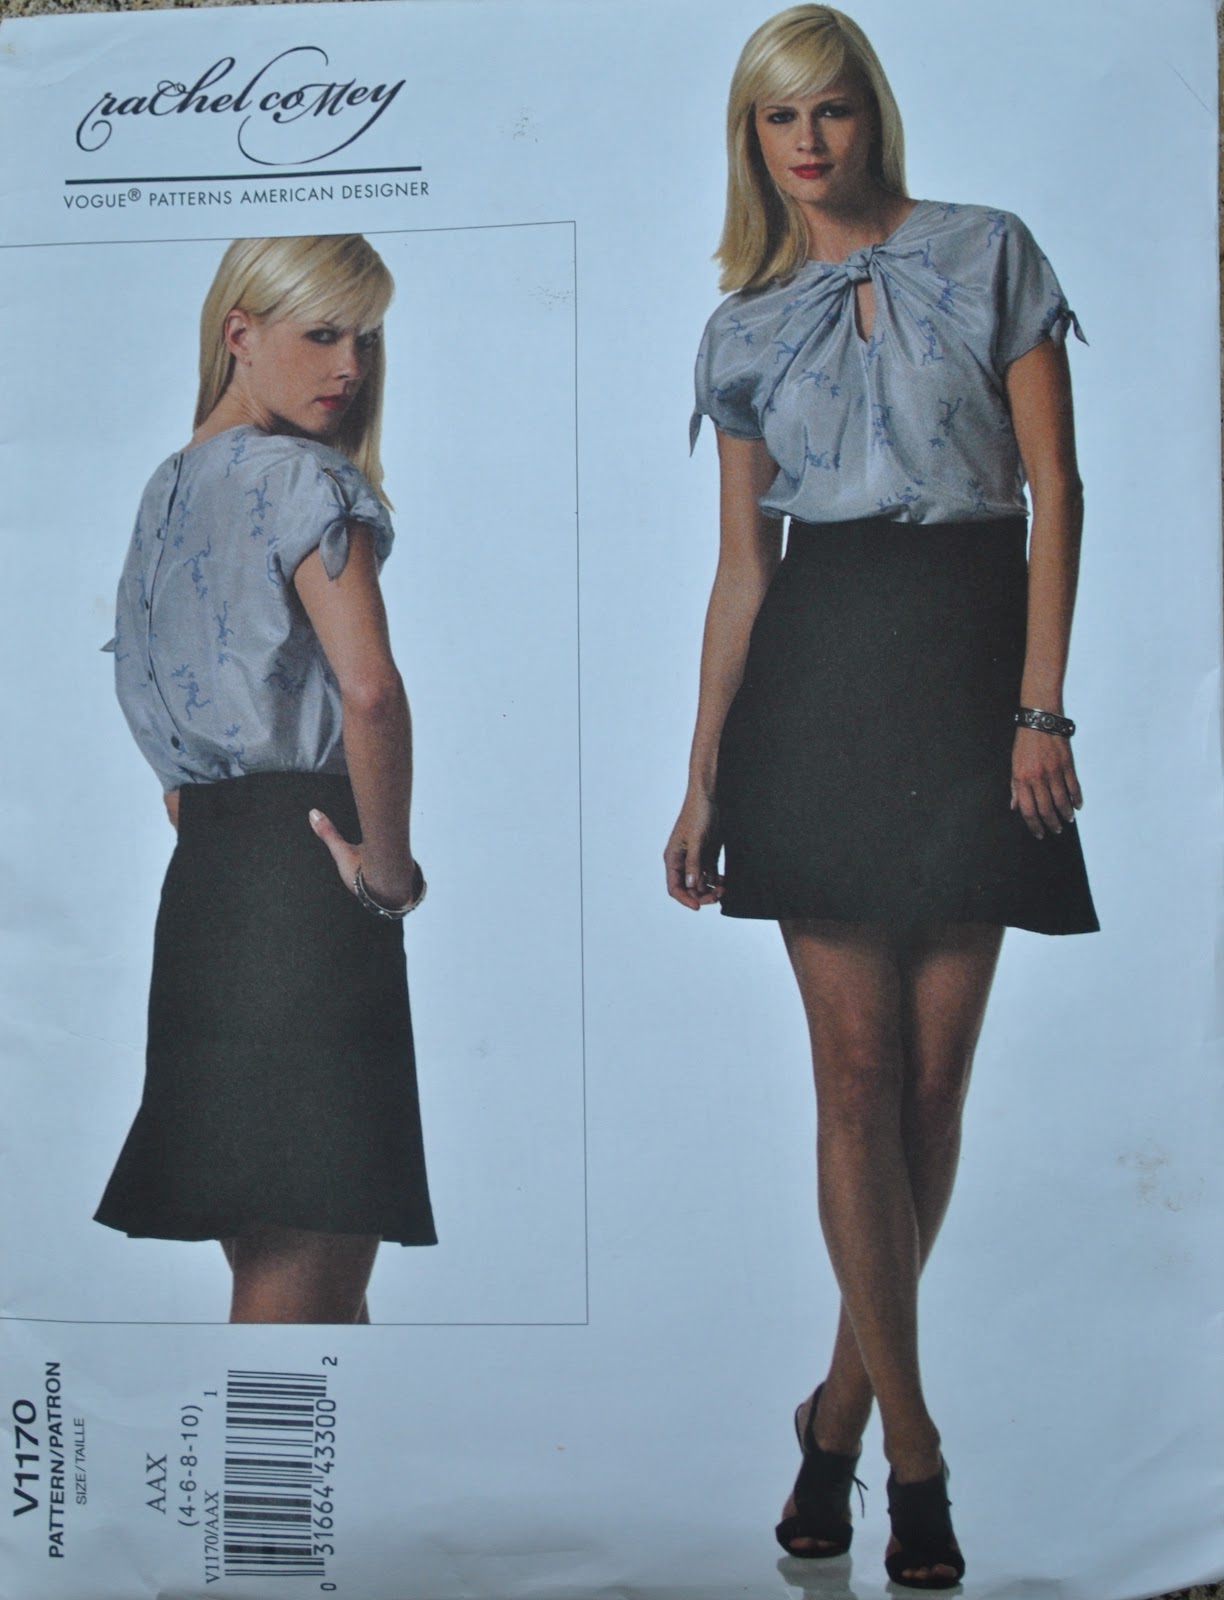
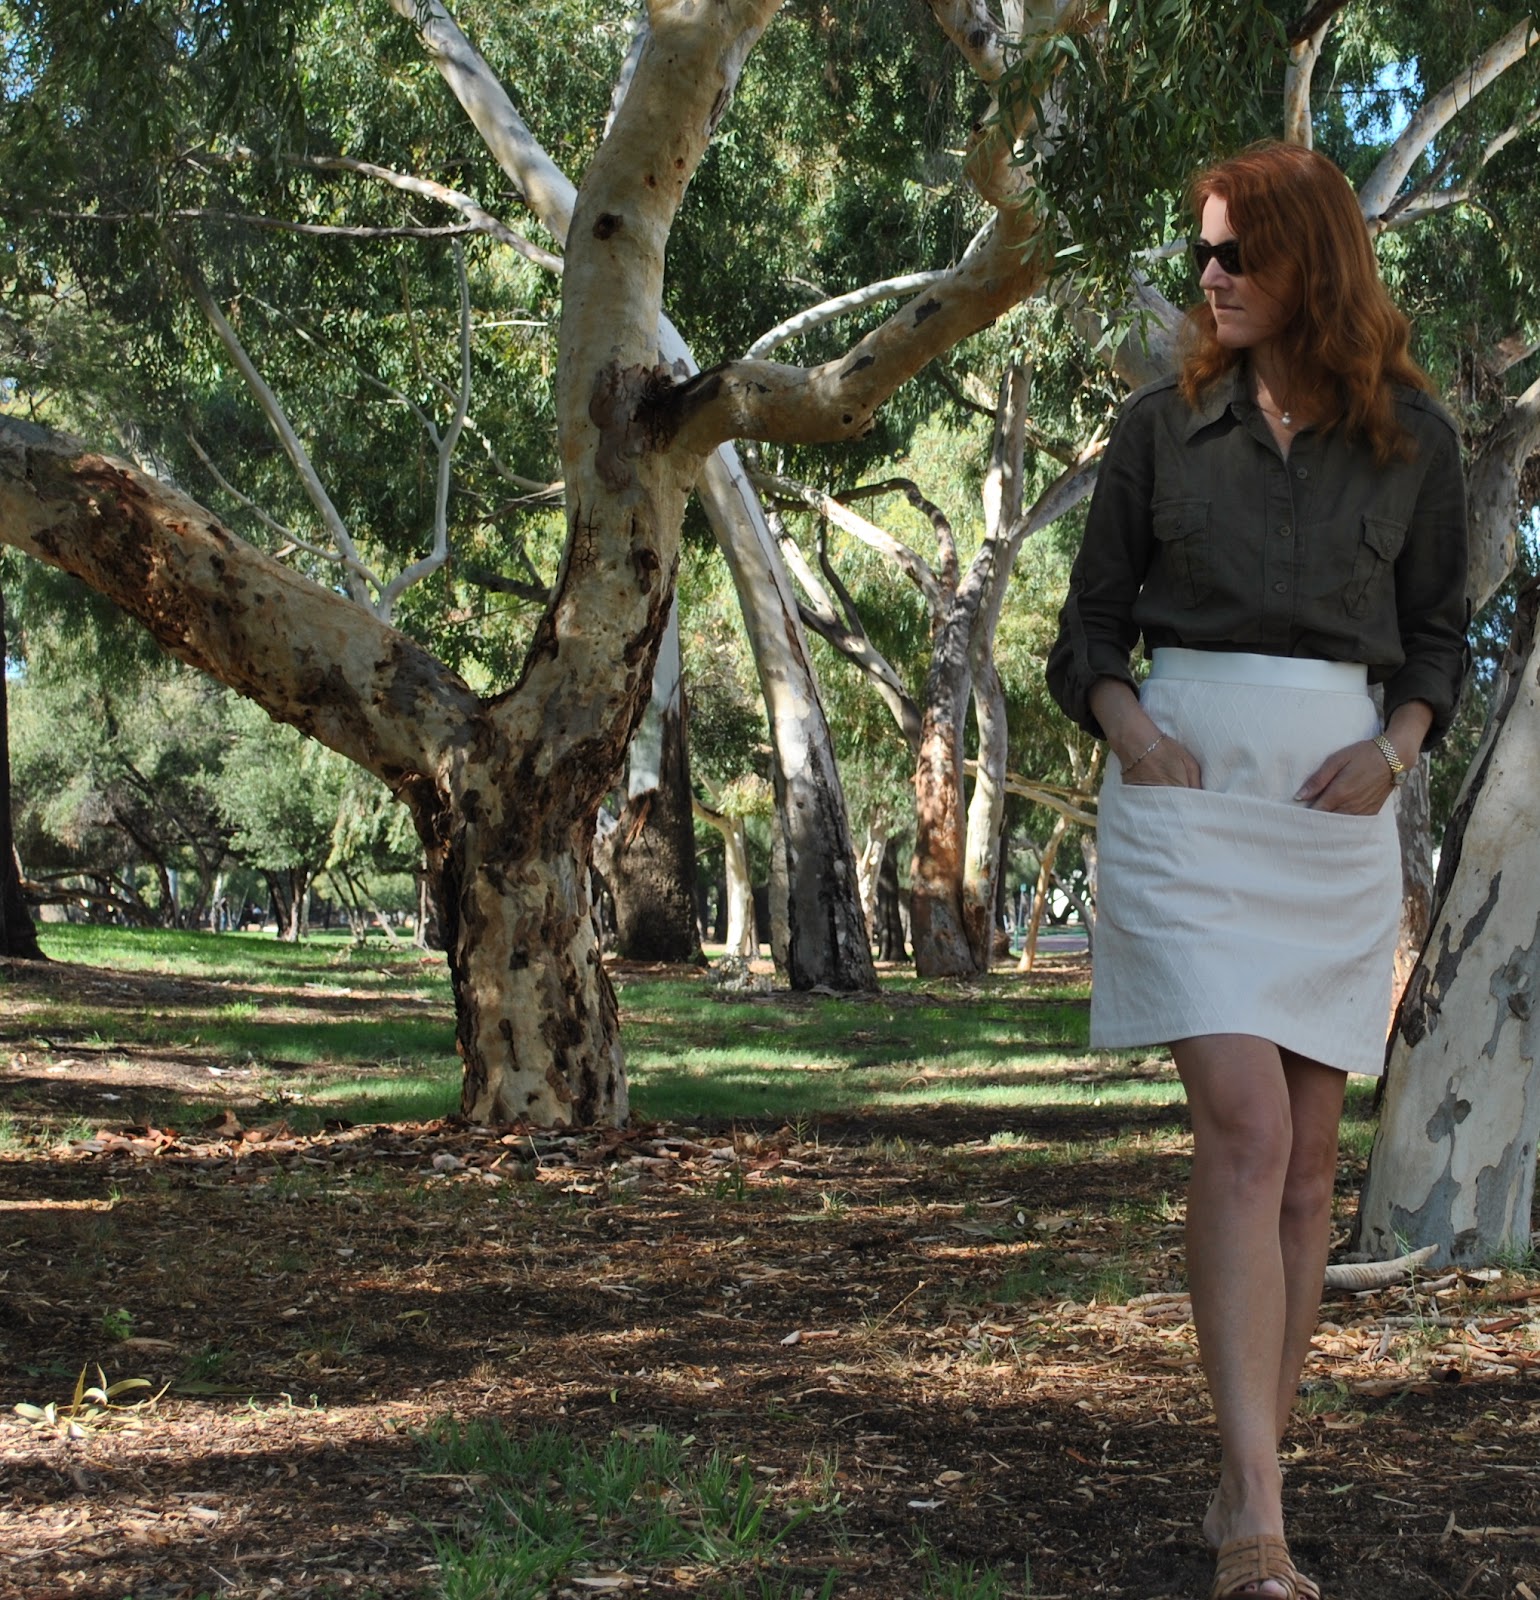
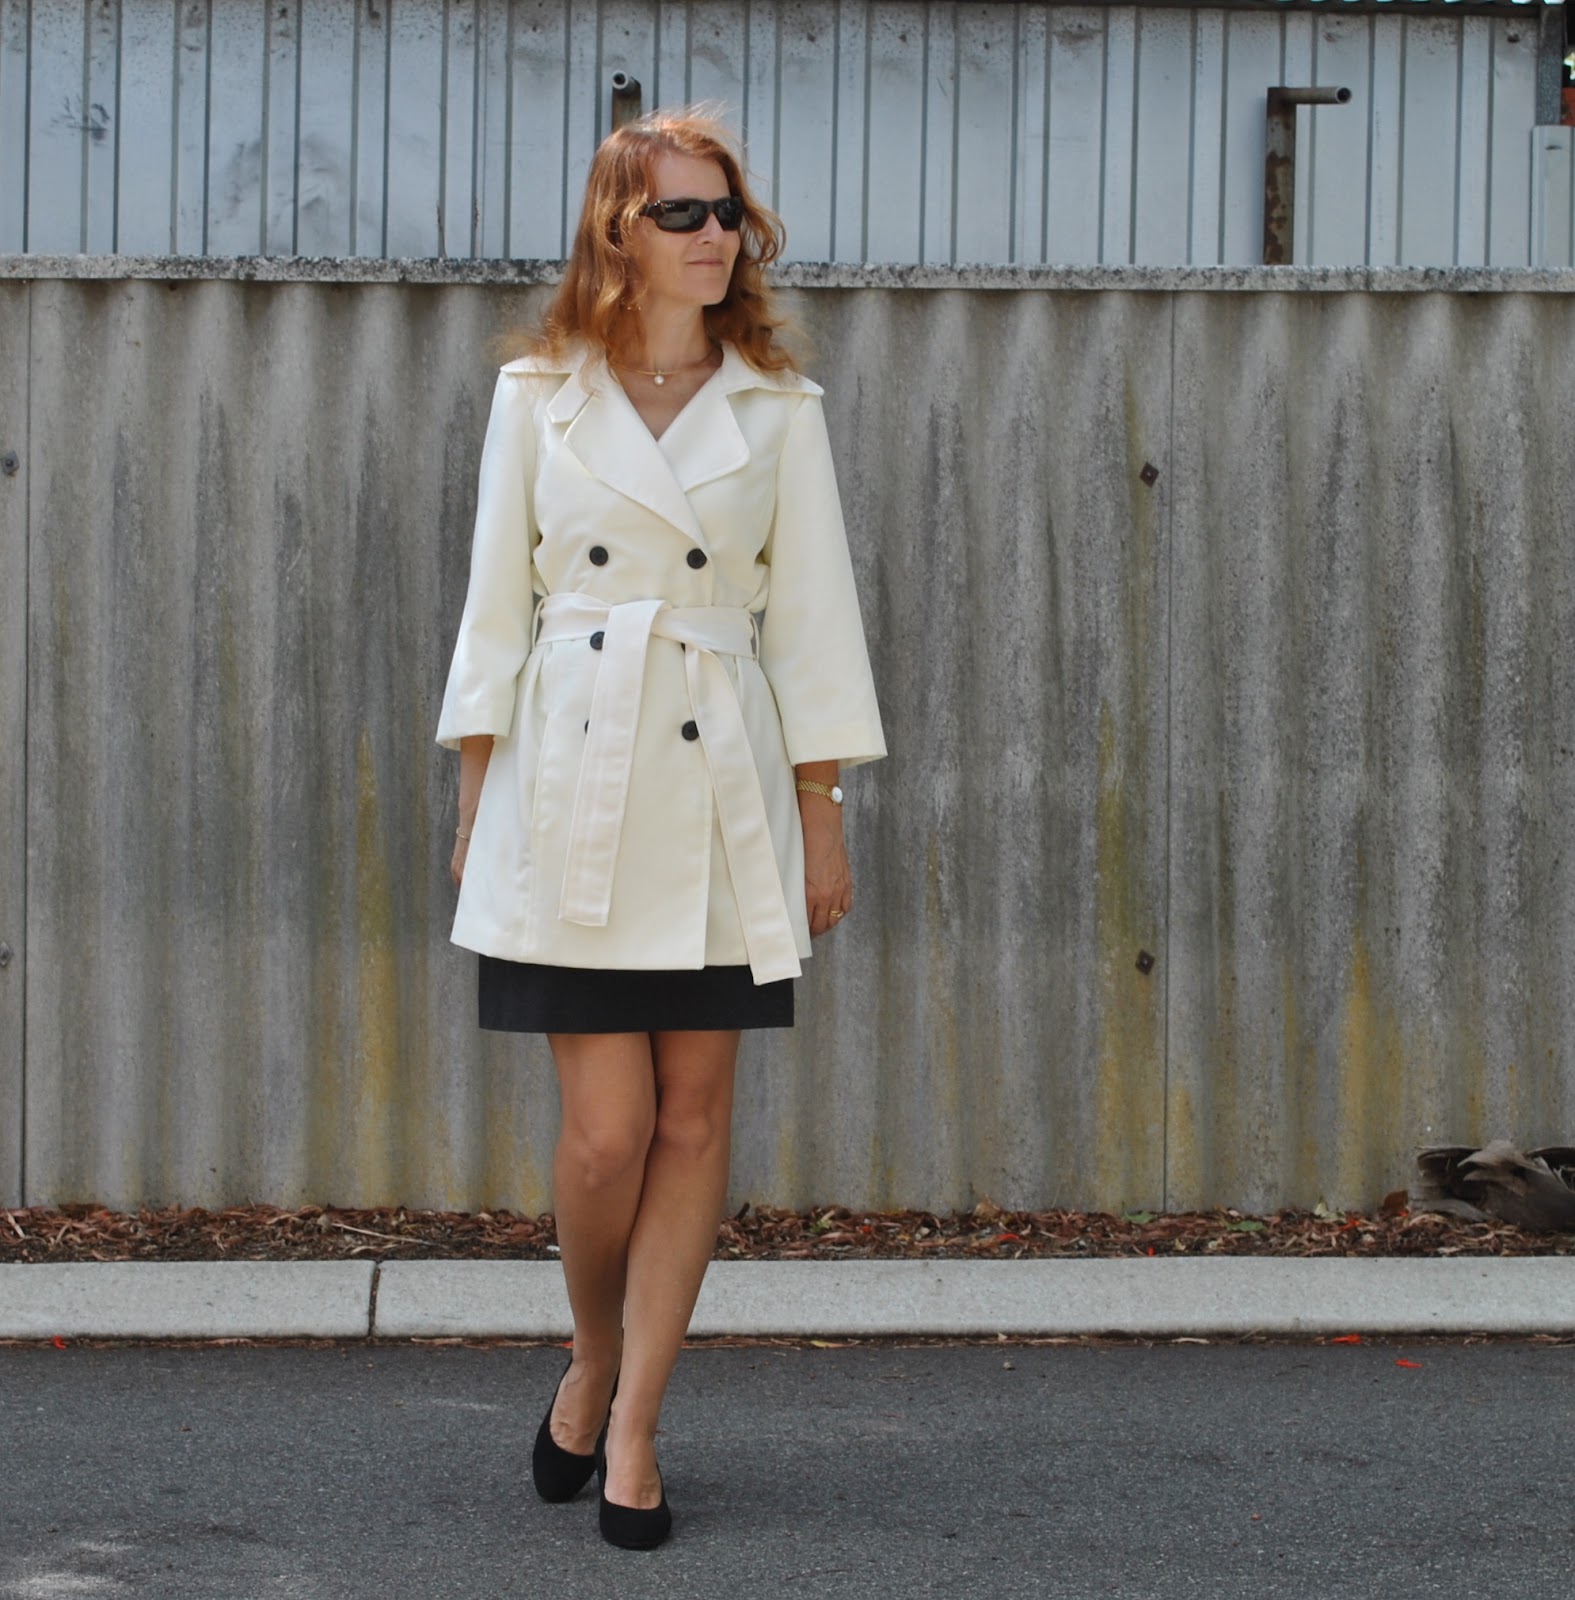
(I should have posted this straight after posting my PU skirt, but I forgot… oops!)

I’m not really an expert on this “fabric” but I thought I would just jot down a few little techniques I used when making my skirt, in the hope that they will help others…
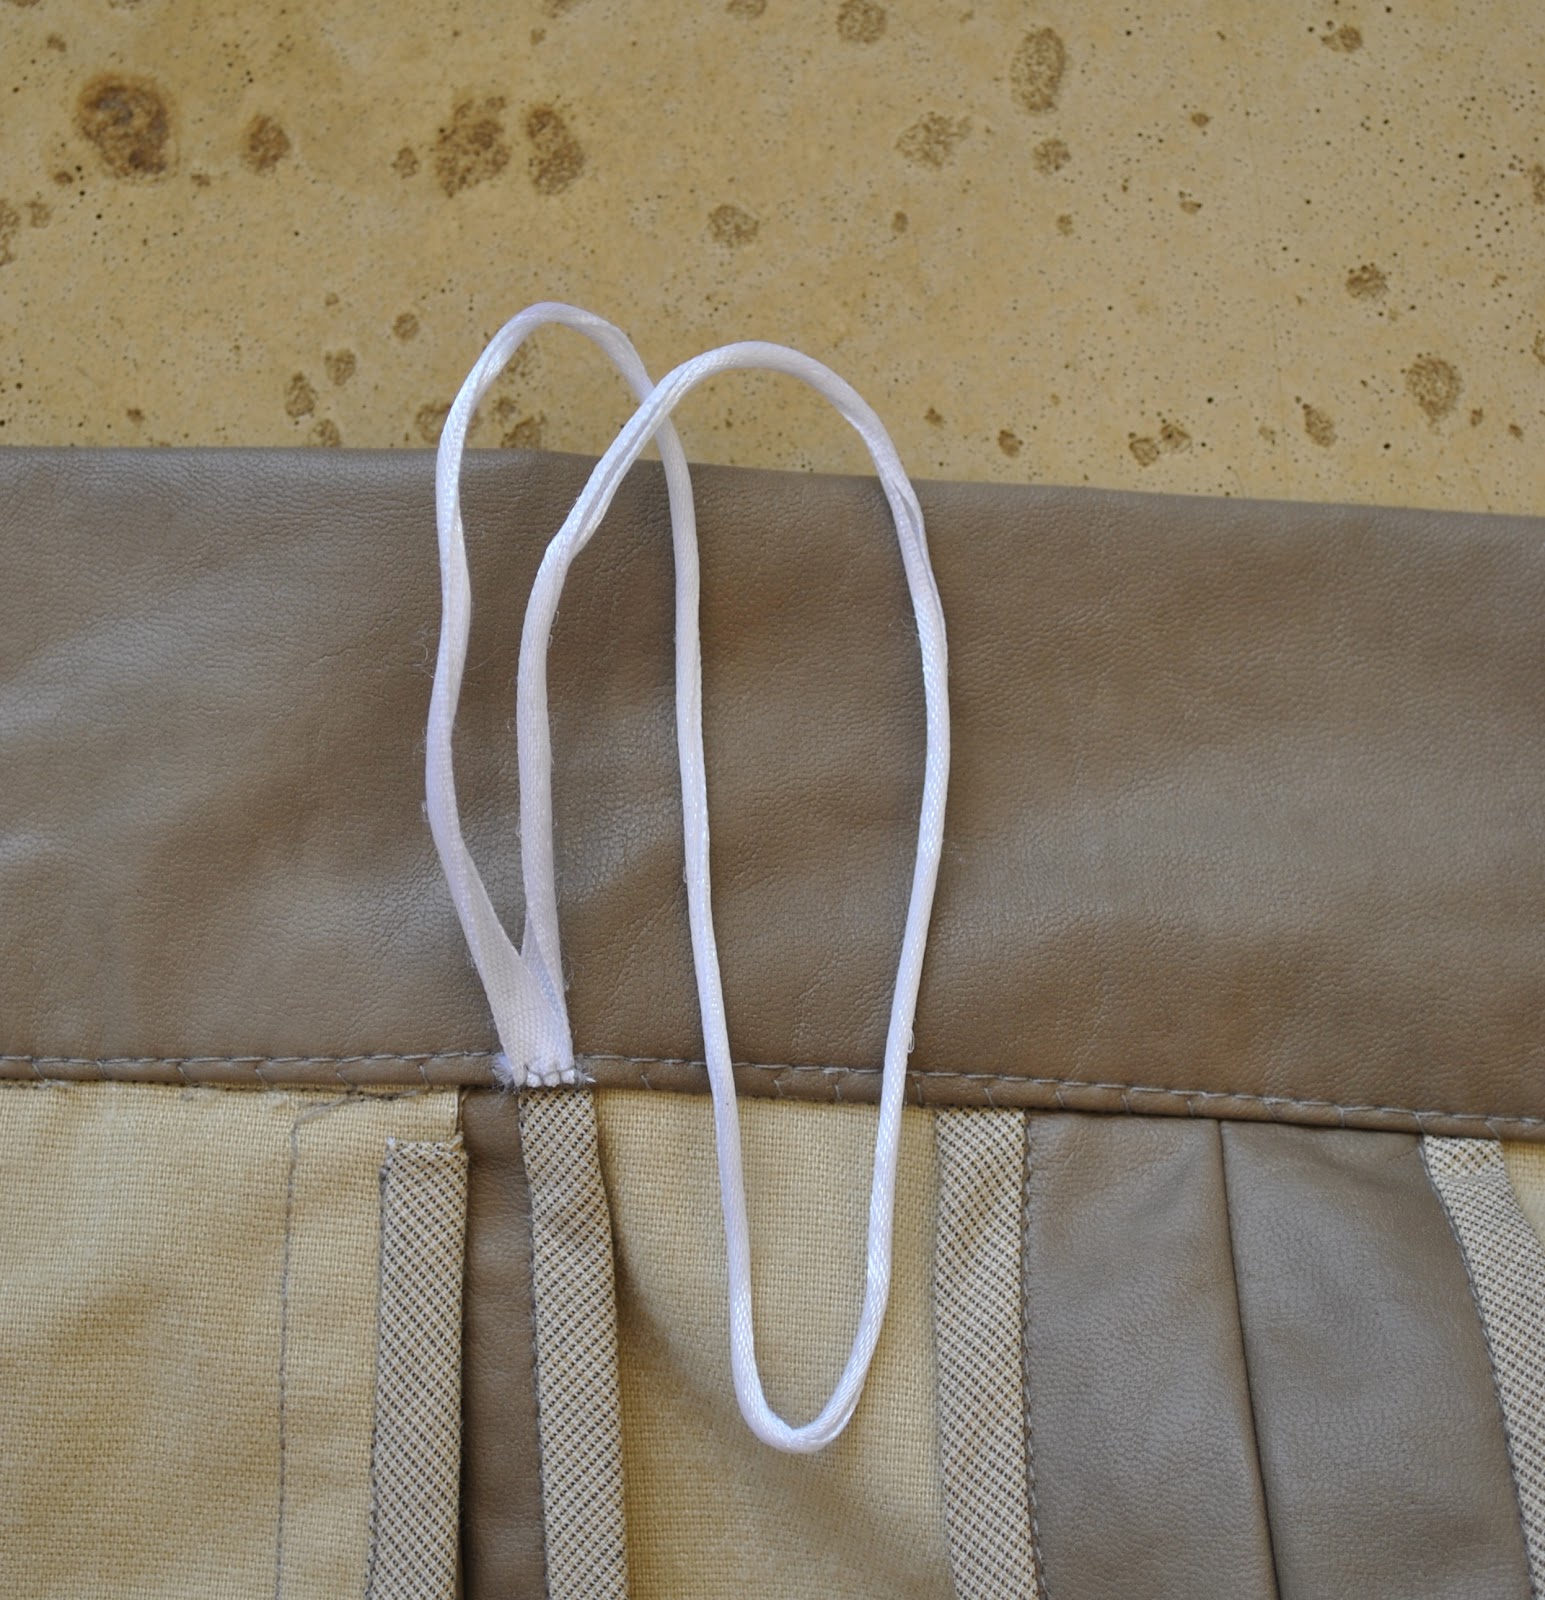
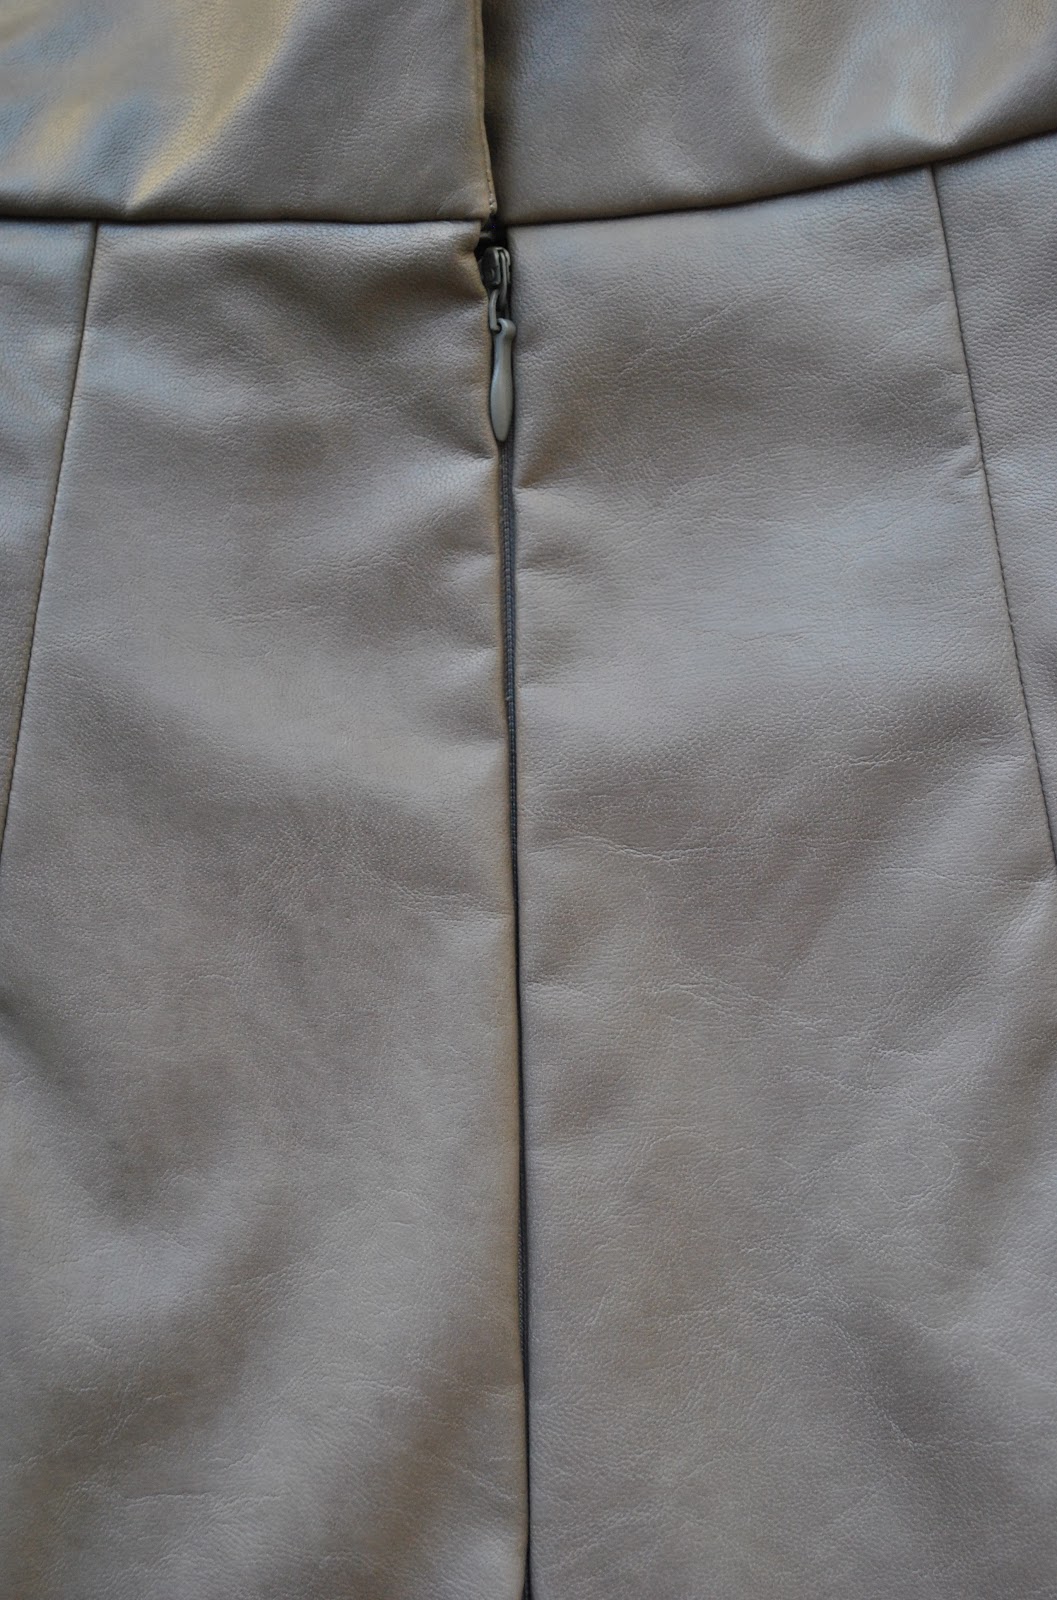
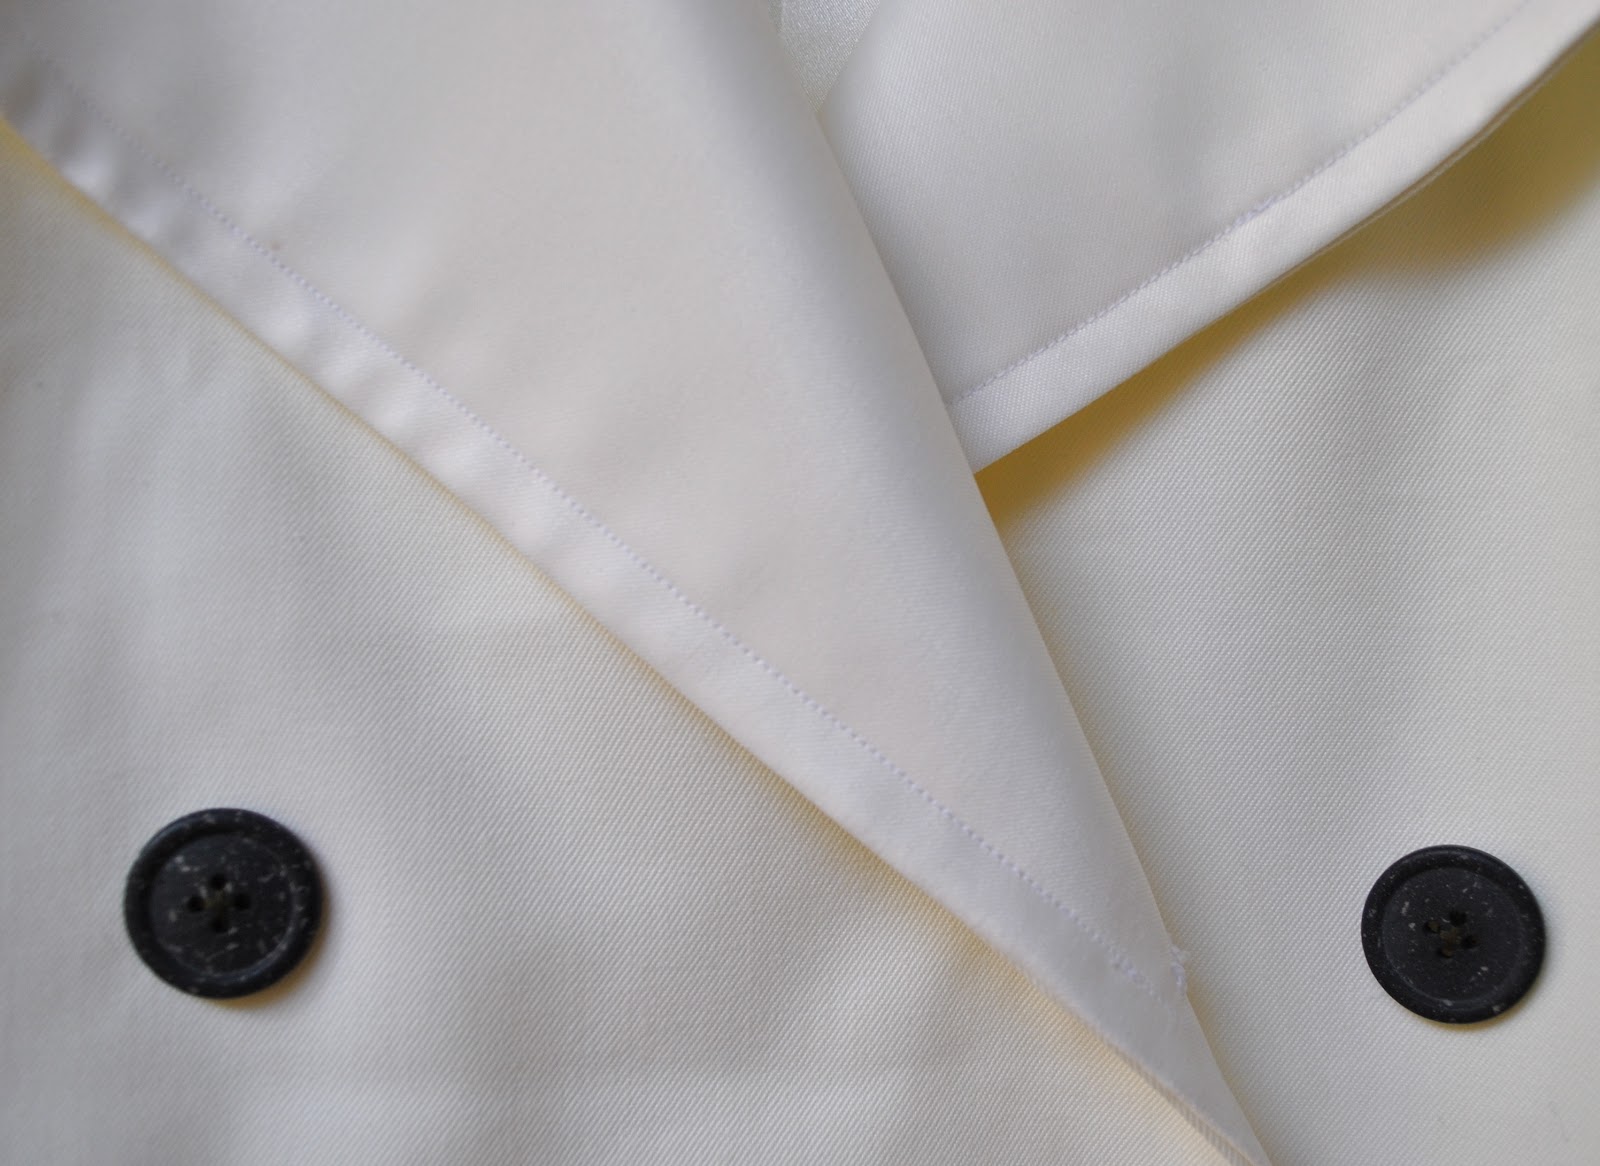
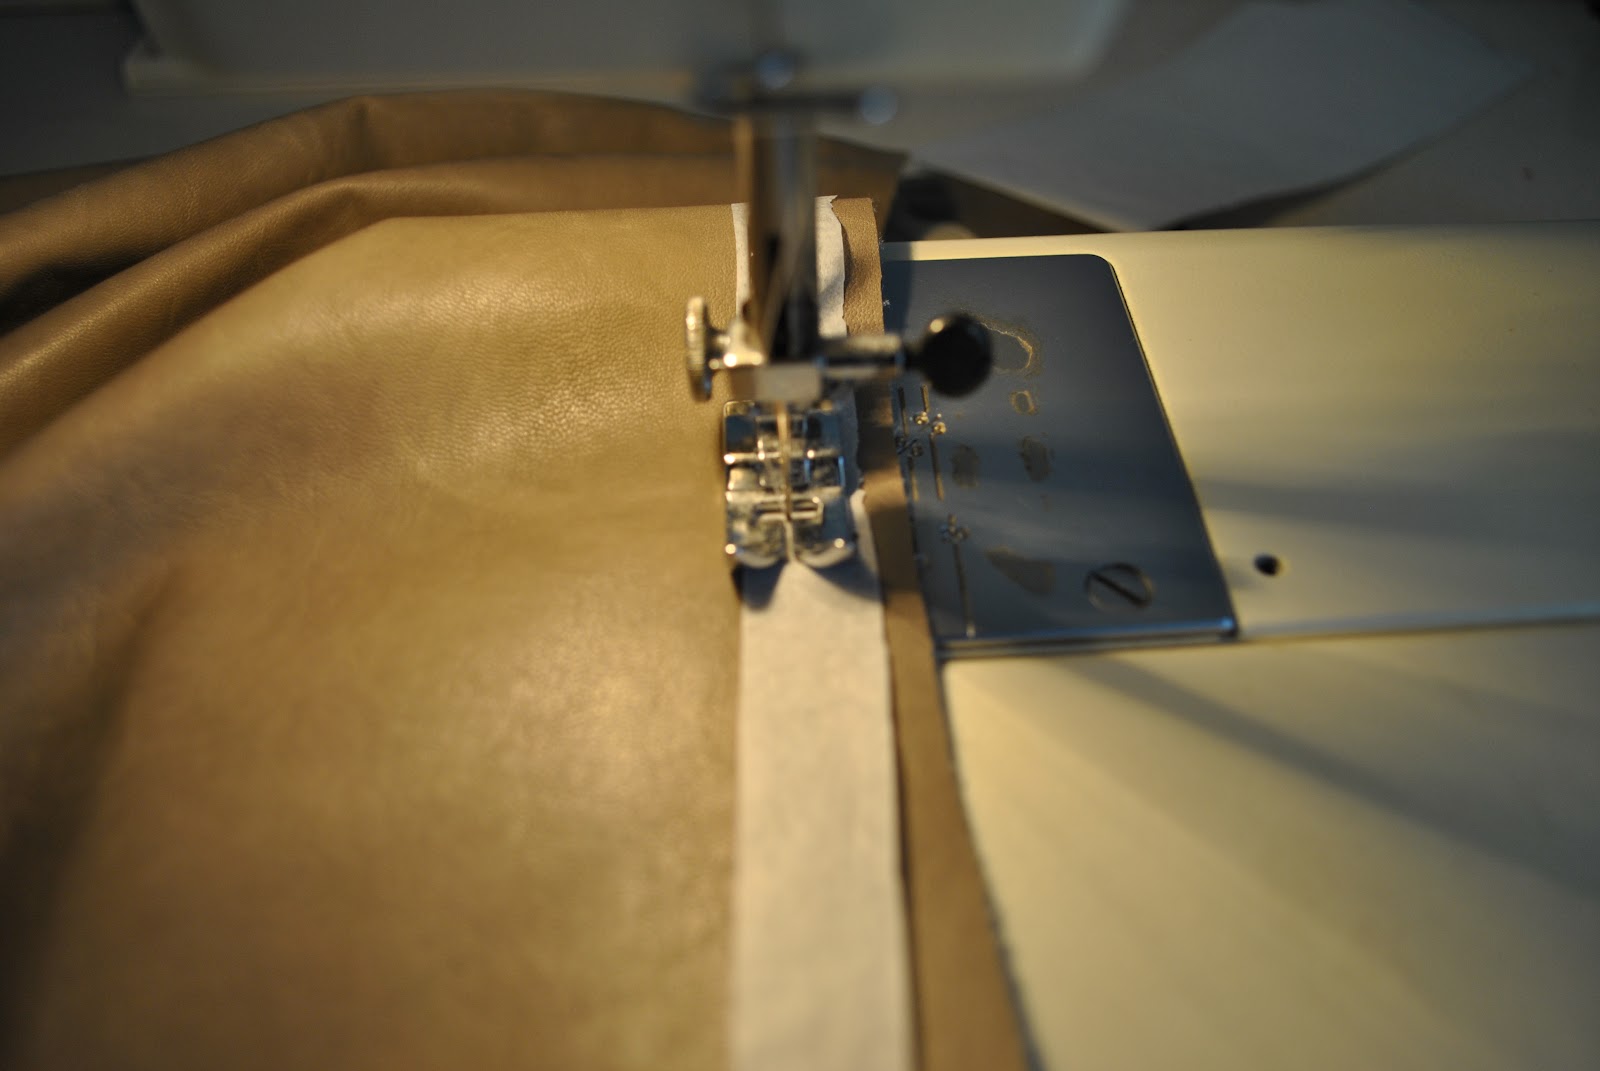
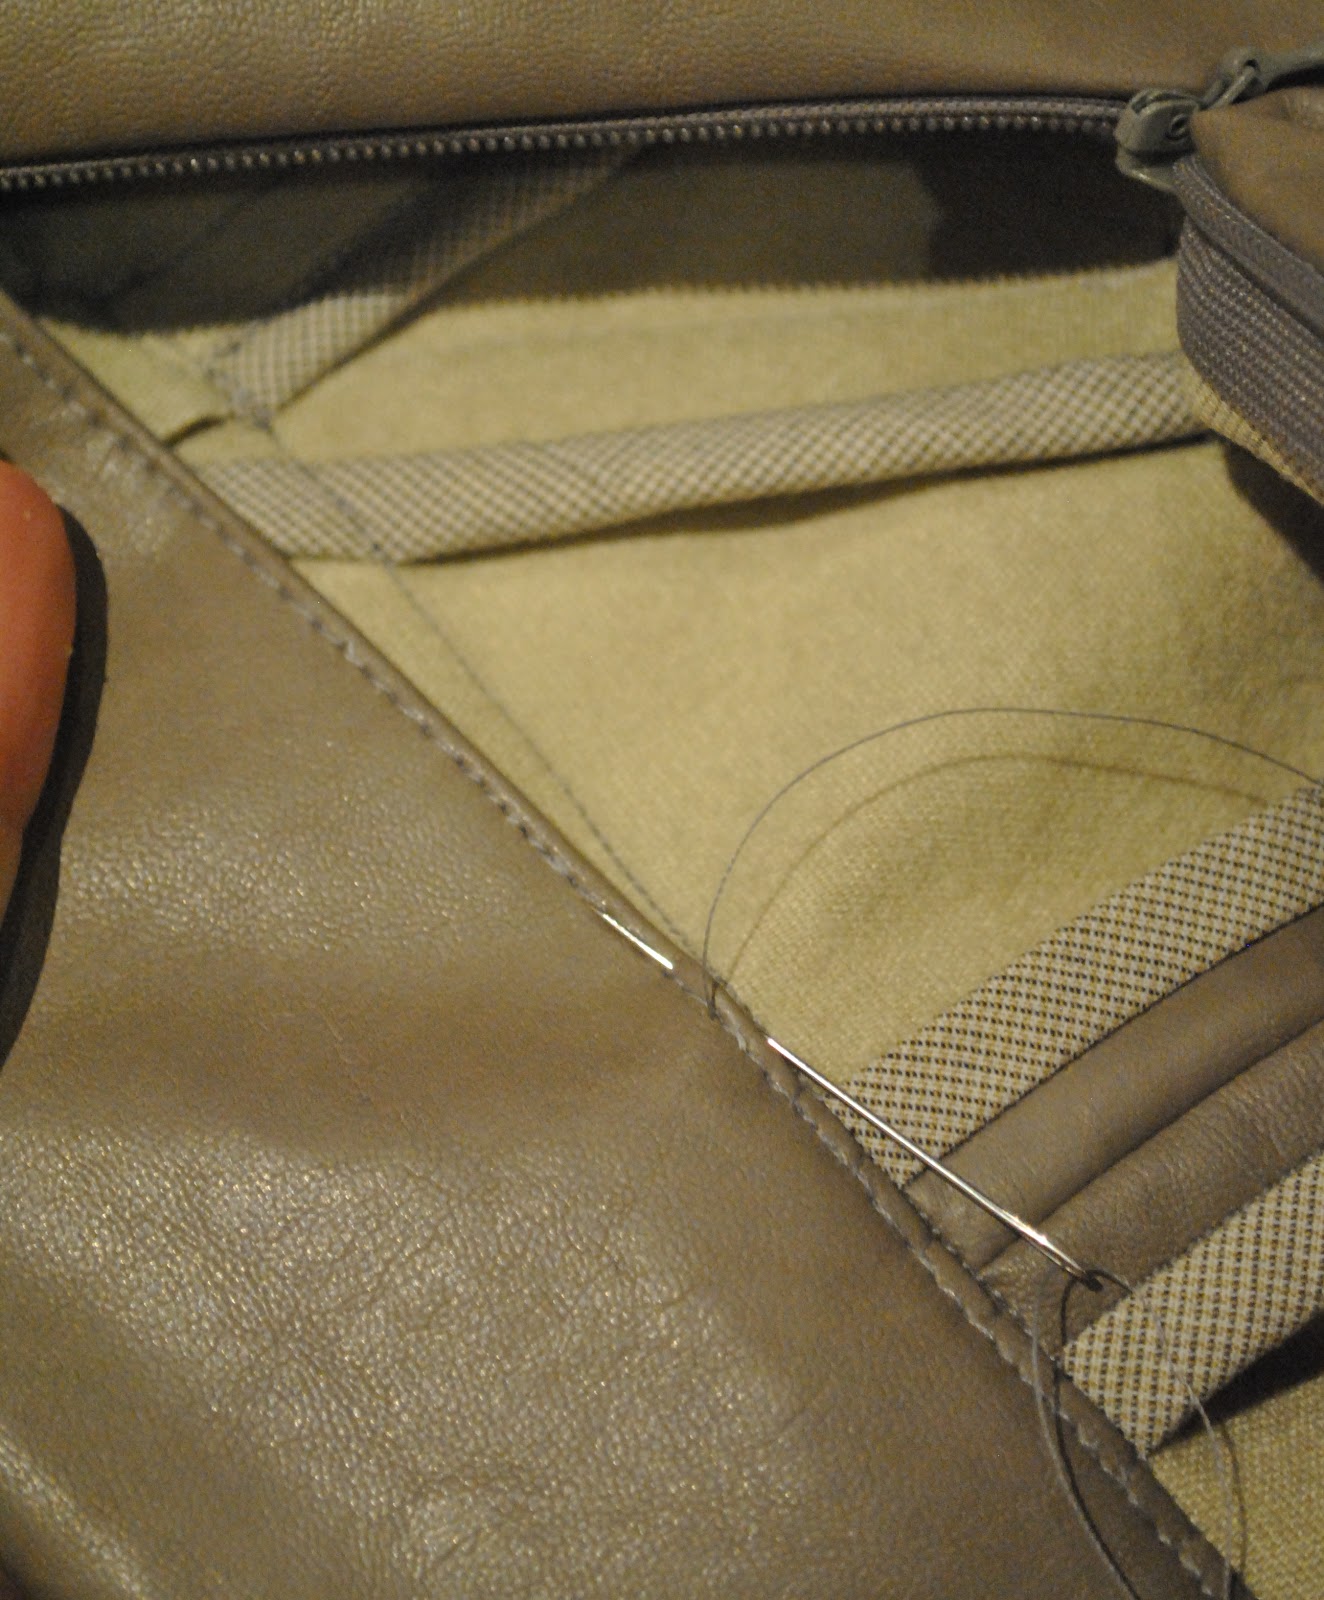
I’ve read that there is a teflon foot that one can use for working with leather and other “hide” like fabrics such as poly-urethane laminated cloth, PVC and other plastics; fabrics that have a “sticky” surface that adheres to the underside of the foot and so do not pass through the machine easily.  However, I didn’t want to buy a whole new foot just for the tiny amount of topstitching and stay-stitching needed for one, or even a few, garments; so I decided to try out my usual method for tricky fabrics…  I cut tissue paper into strips and hold this in place under the foot of the machine as I am sewing, laying it in place as I go and feeding in new strips as needed.
This worked a treat!

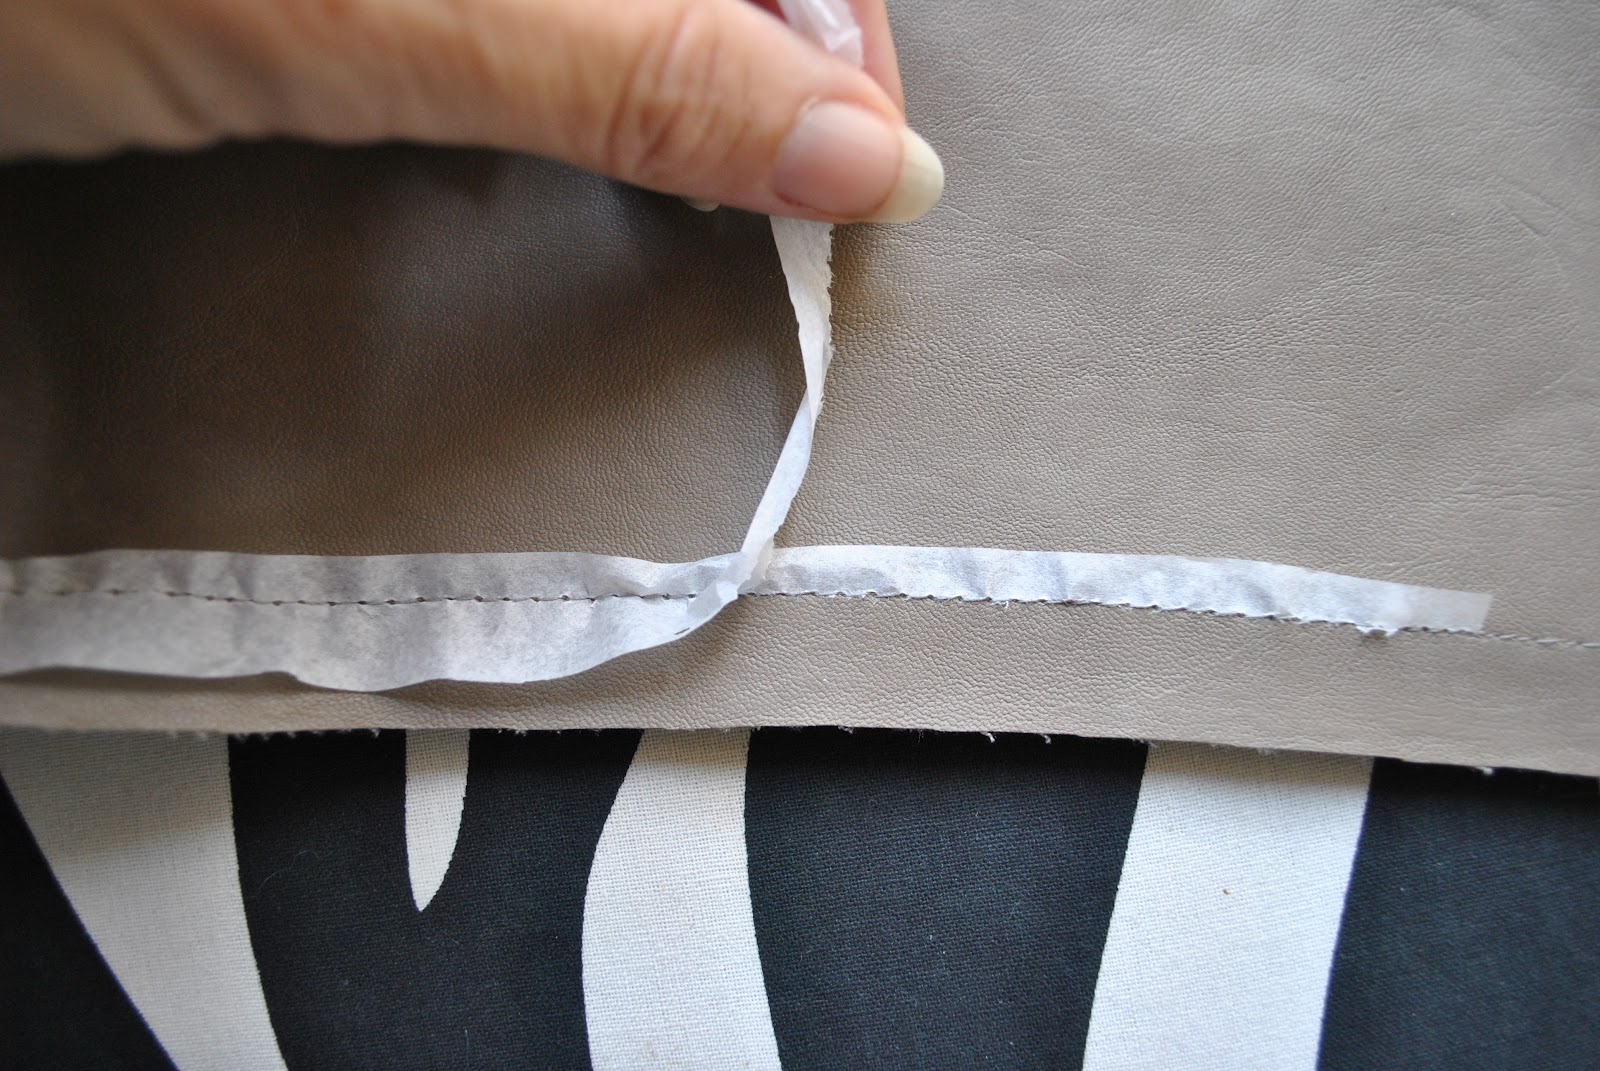
I used a denim needle, and set the machine to a slightly longer than normal stitch (3mm) and after stitching I simply pulled the paper off of each side of my stitching.  Easy, and free! since the tissue paper I use is… well, you know when you buy breakables and it gets wrapped up in a few sheets of thin tissue paper at the point of sale?  Well I keep that paper just for this purpose; waste not want not, and all that….  and cut it into strips when I need it.  Re-using and re-cycling!
Obviously, I didn’t need to use the tissue paper when I was sewing seams, fabric right sides together, since the backing fabric had a regular fabric-y texture that passed through my sewing machine just fine; and I found I didn’t need it for top-stitching the HongKong seaming down either.  The tissue strips were only necessary for the very small amount of top-stitching and stay-stitching called for in my pattern, which is great since it can be a kinda fiddly technique.  If one was top-stitching leather frequently then sure, it might well be worth investing in that teflon foot.

Incidentally, the tissue strip method is one I do use a lot of the time; any slippery and delicate fabrics such as silk and polyester chiffons, silk charmeuse, also with lightweight wool and rayon knits, and especially and always sewing delicates on the bias to avoid stretching; if I experience any difficulties I turn to the tissue paper treatment.  Also, the few times I have cut up and re-fashoned RTW knitted jumpers and cardigans; the tissue paper strips work like a charm enabling me to sew these highly fray-able, and more bulkier knits on my regular machine as well.  In fact all knits; from the very fragile to the very heavy hand-knits, will all go through one’s machine with ease using this method.

But getting off track there; back to the PU…
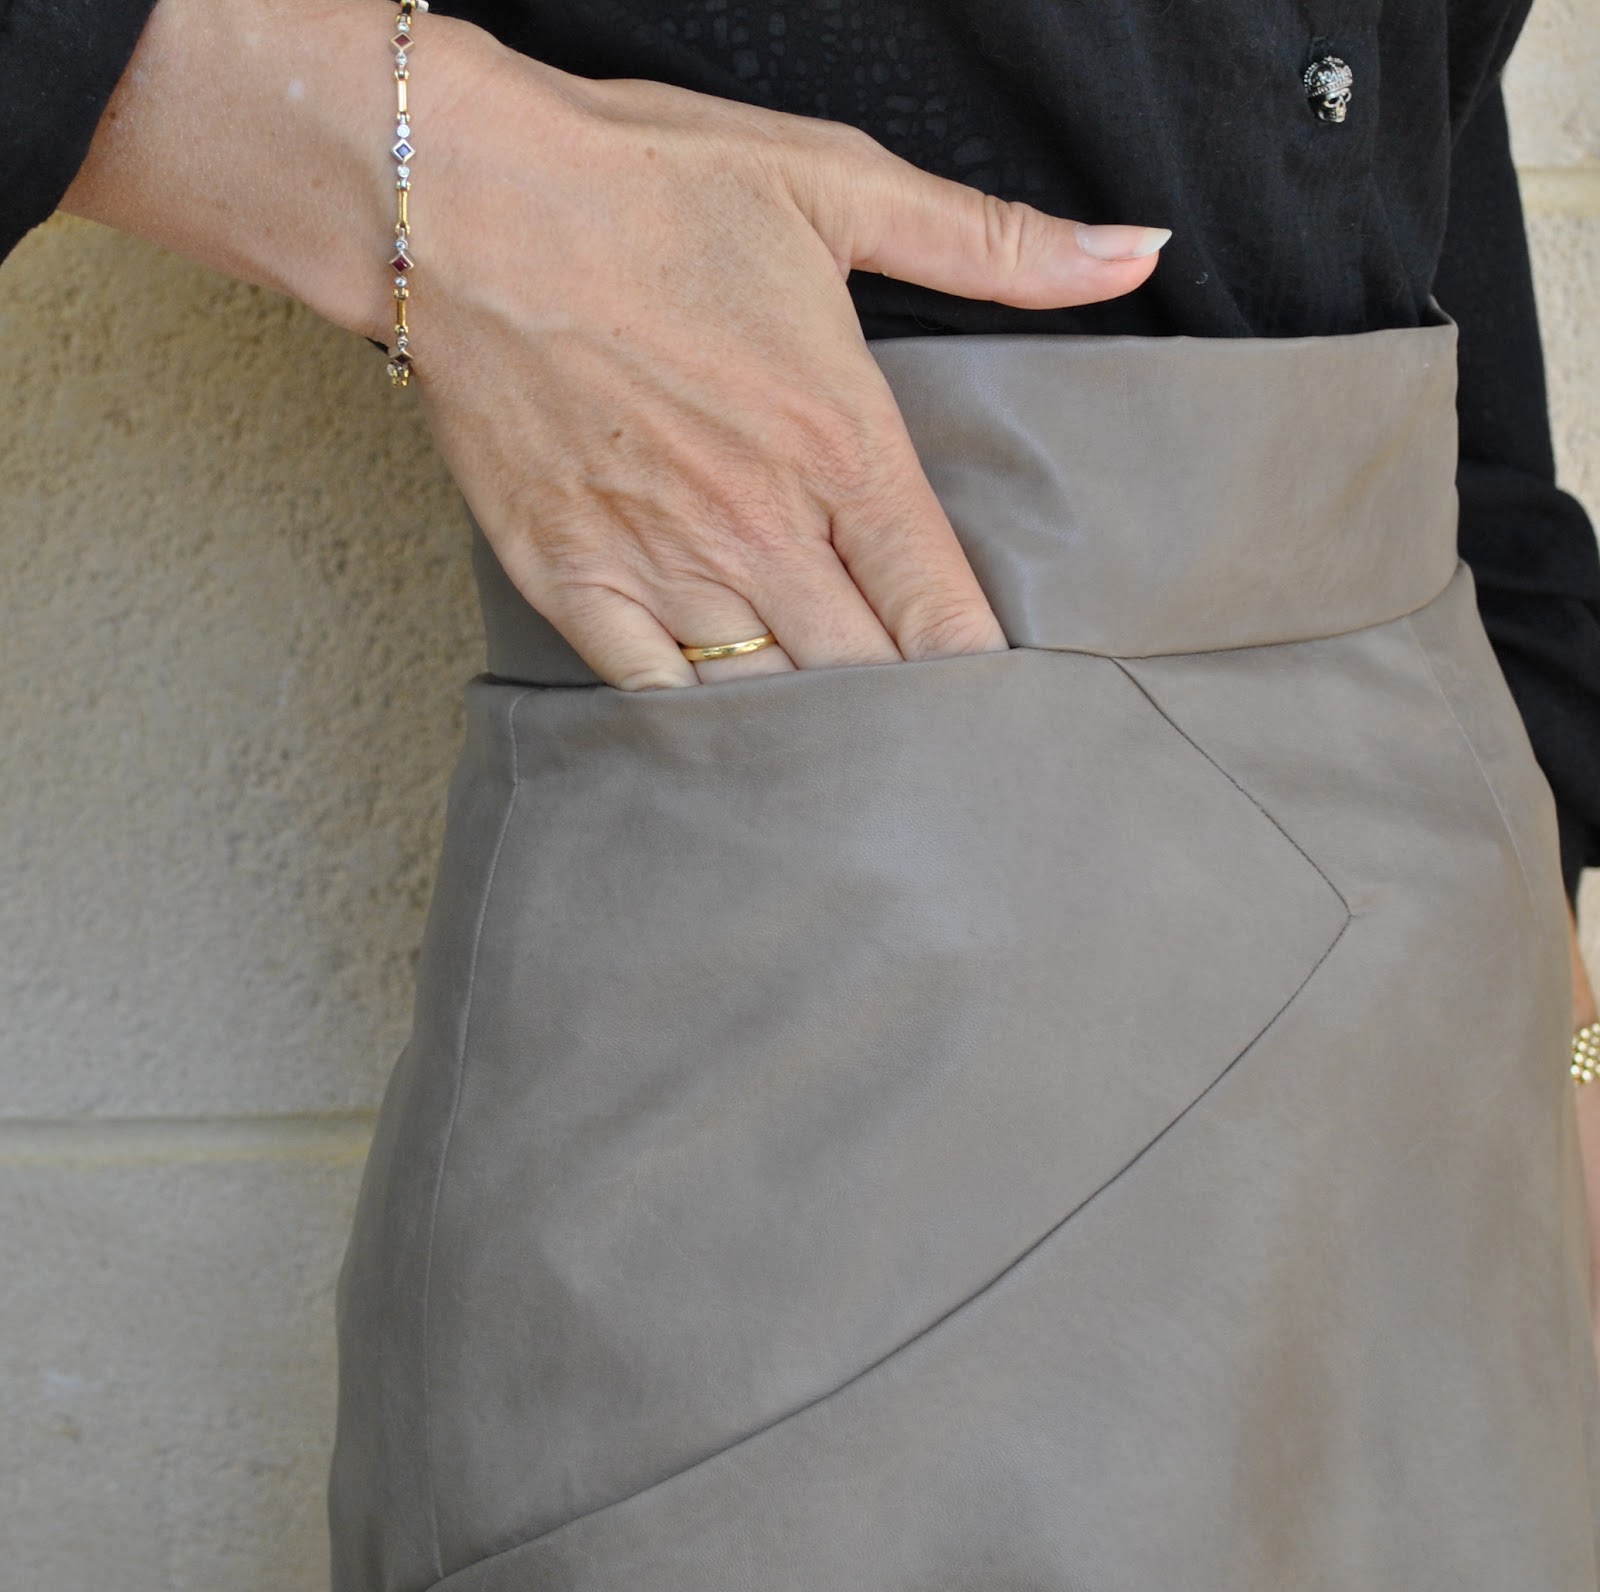
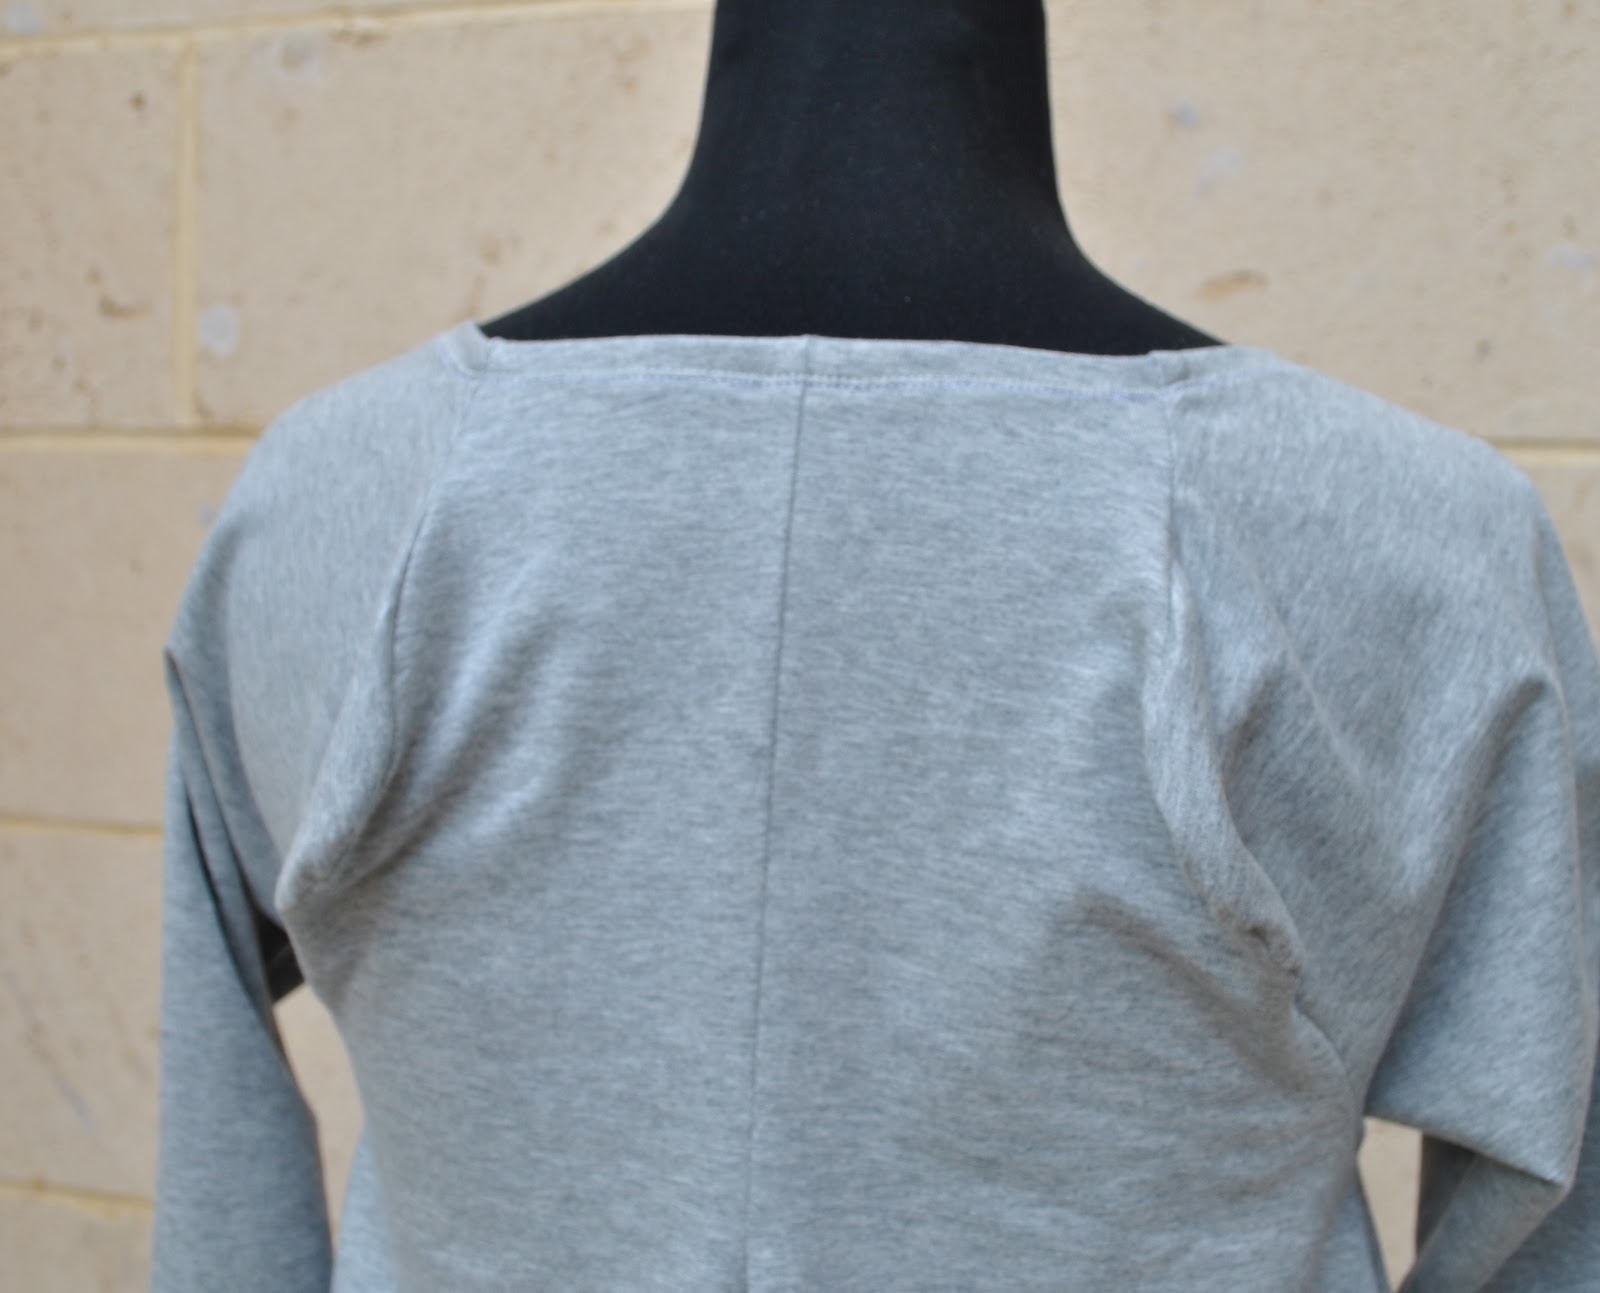
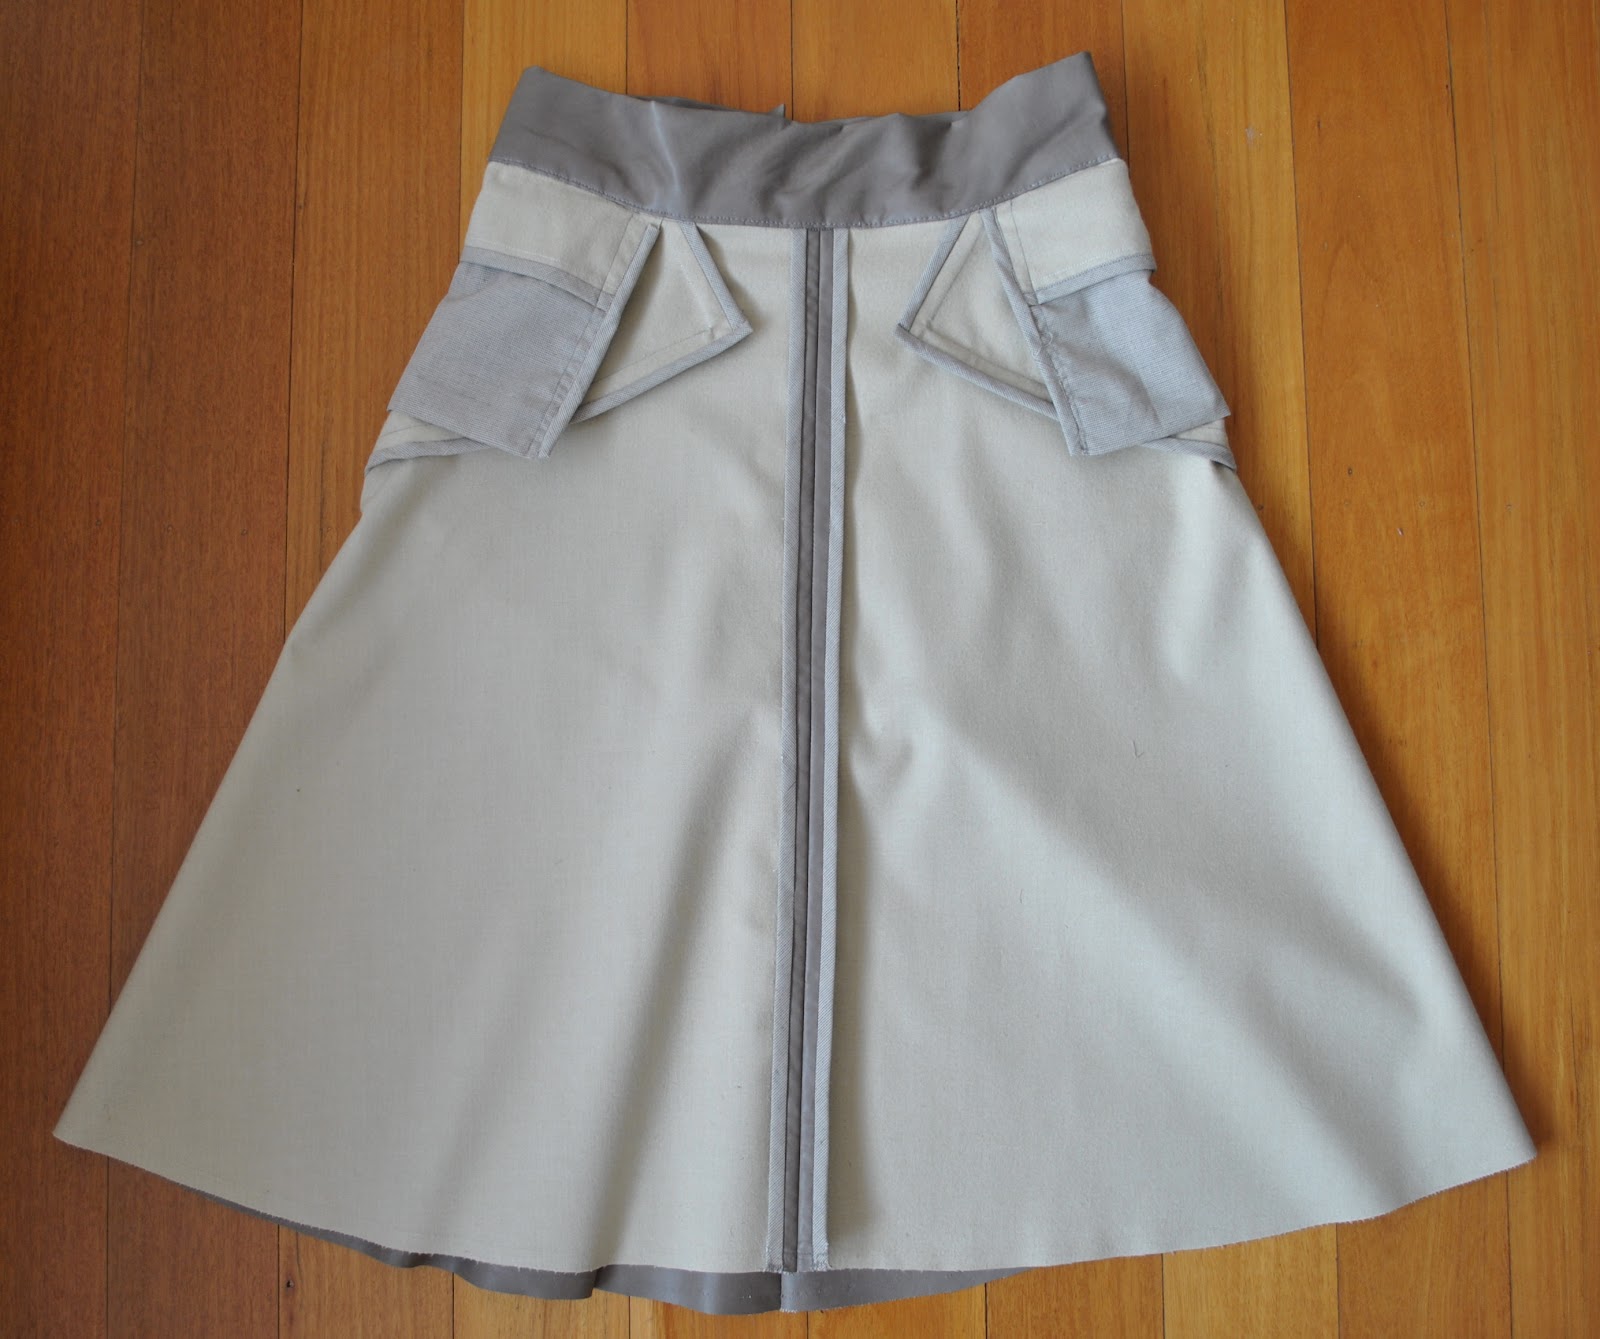
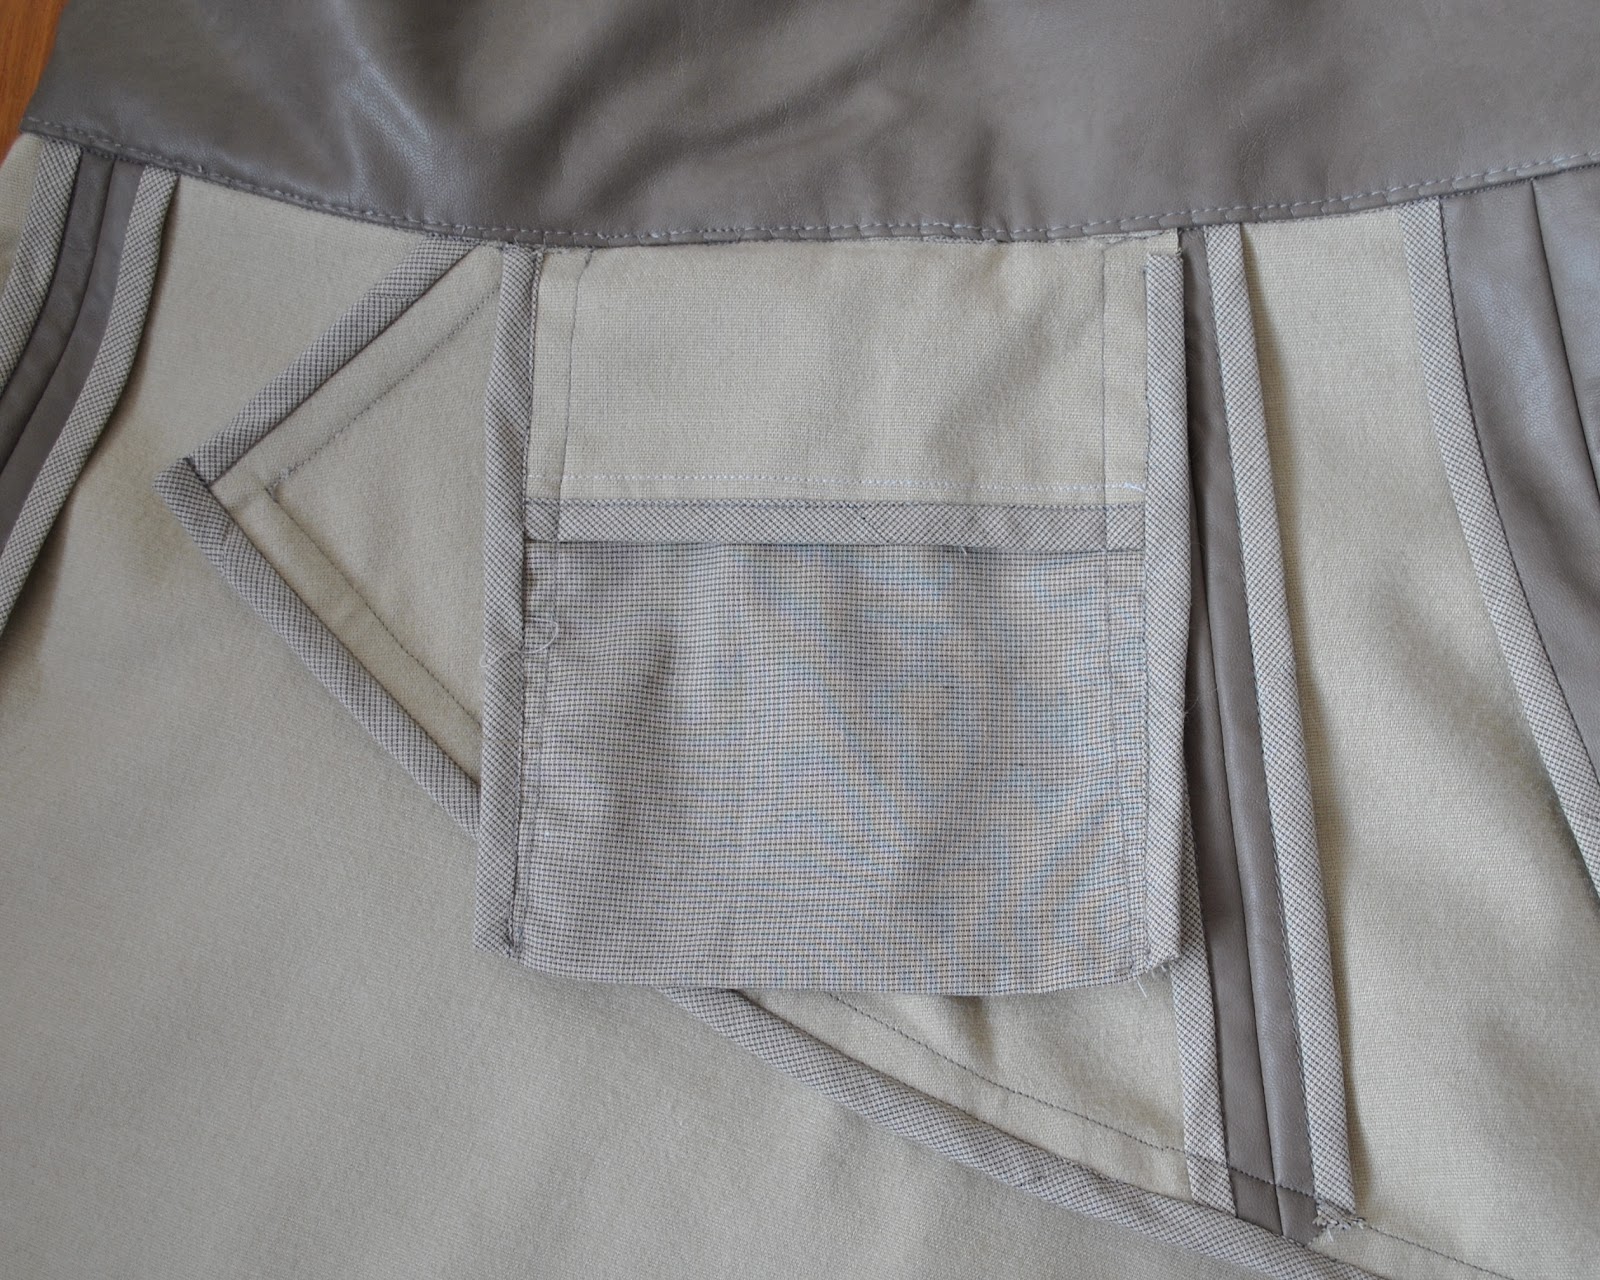
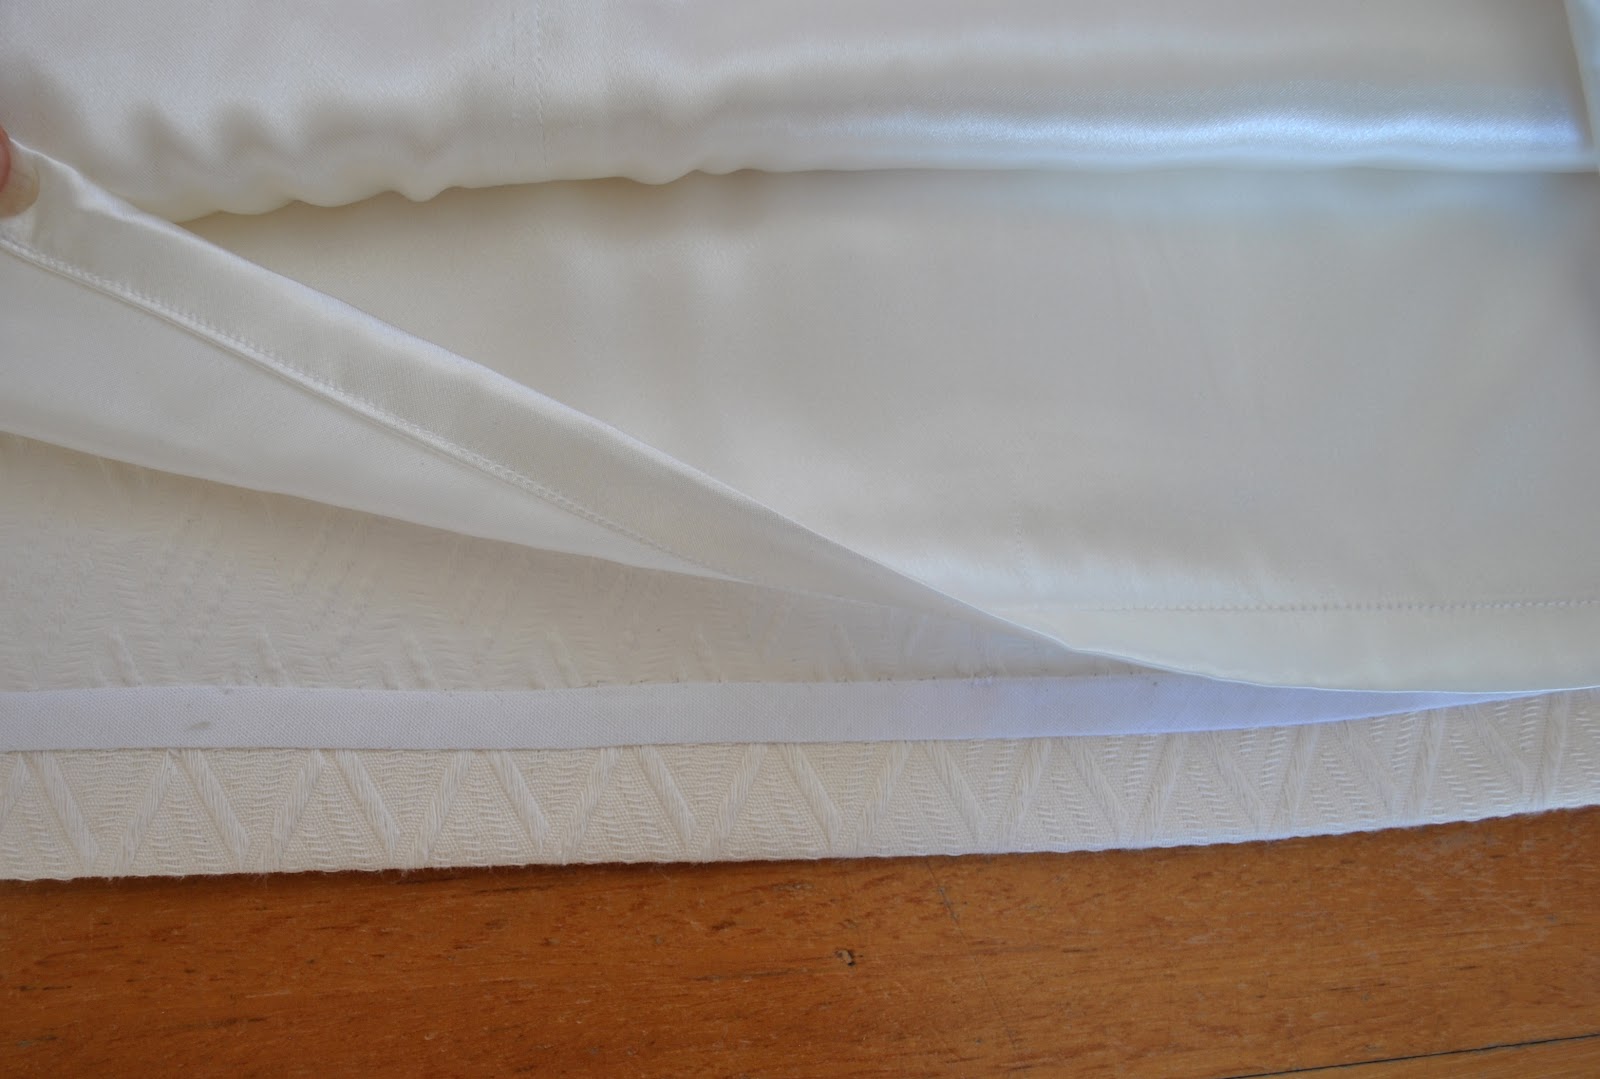
My second tip is for the waistband; sewing the waistband facing down inside.  My usual method using regular fabrics is to stitch a virtually invisible fell-stitch, picking up a scant one thread on one side then a scant one thread on the other, hiding the running thread under the fold of the waistband.  In this fabric however, I worried that this would not be sturdy enough.  Picking up just a scant fold of the PU, my thread ran the risk of not getting through to the backing fabric and just piercing the flimsy layer of laminate which could easily just tear away.  I did not want topstitching visible on the outer view of the waistband, and hand-stitching big ugly visible sturdy stitches, even on the inside of a garment, was not an option (years of conditioning cannot be ignored here!)  

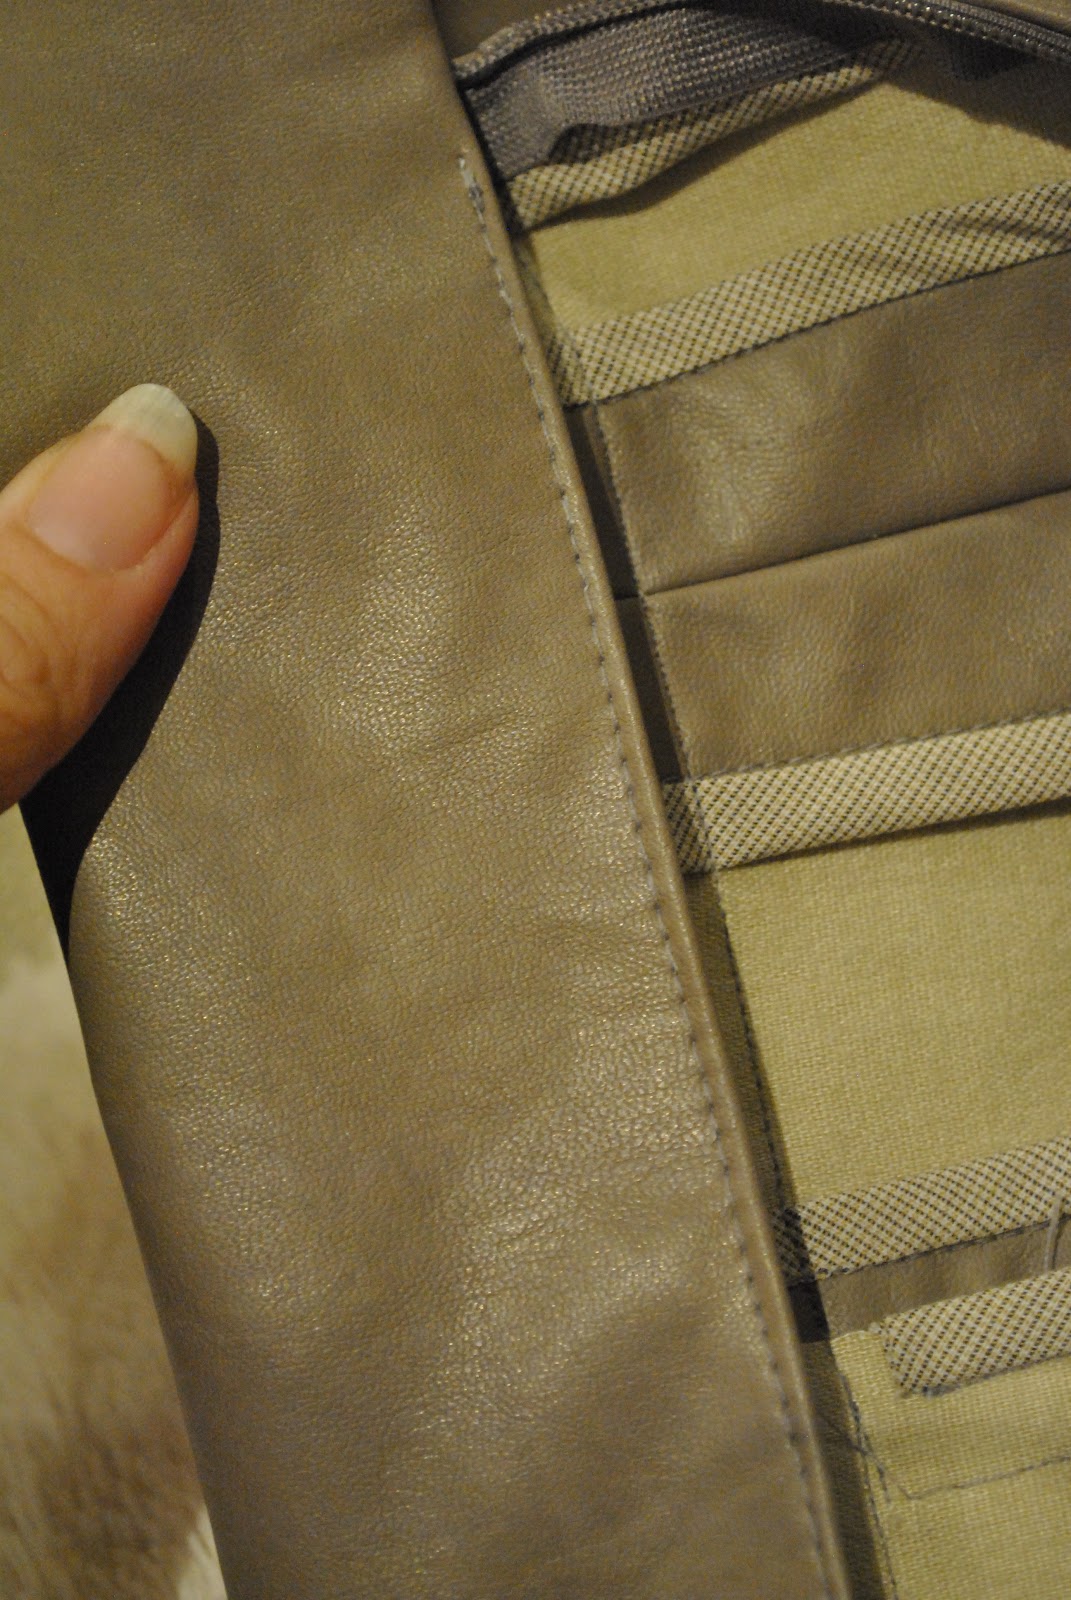
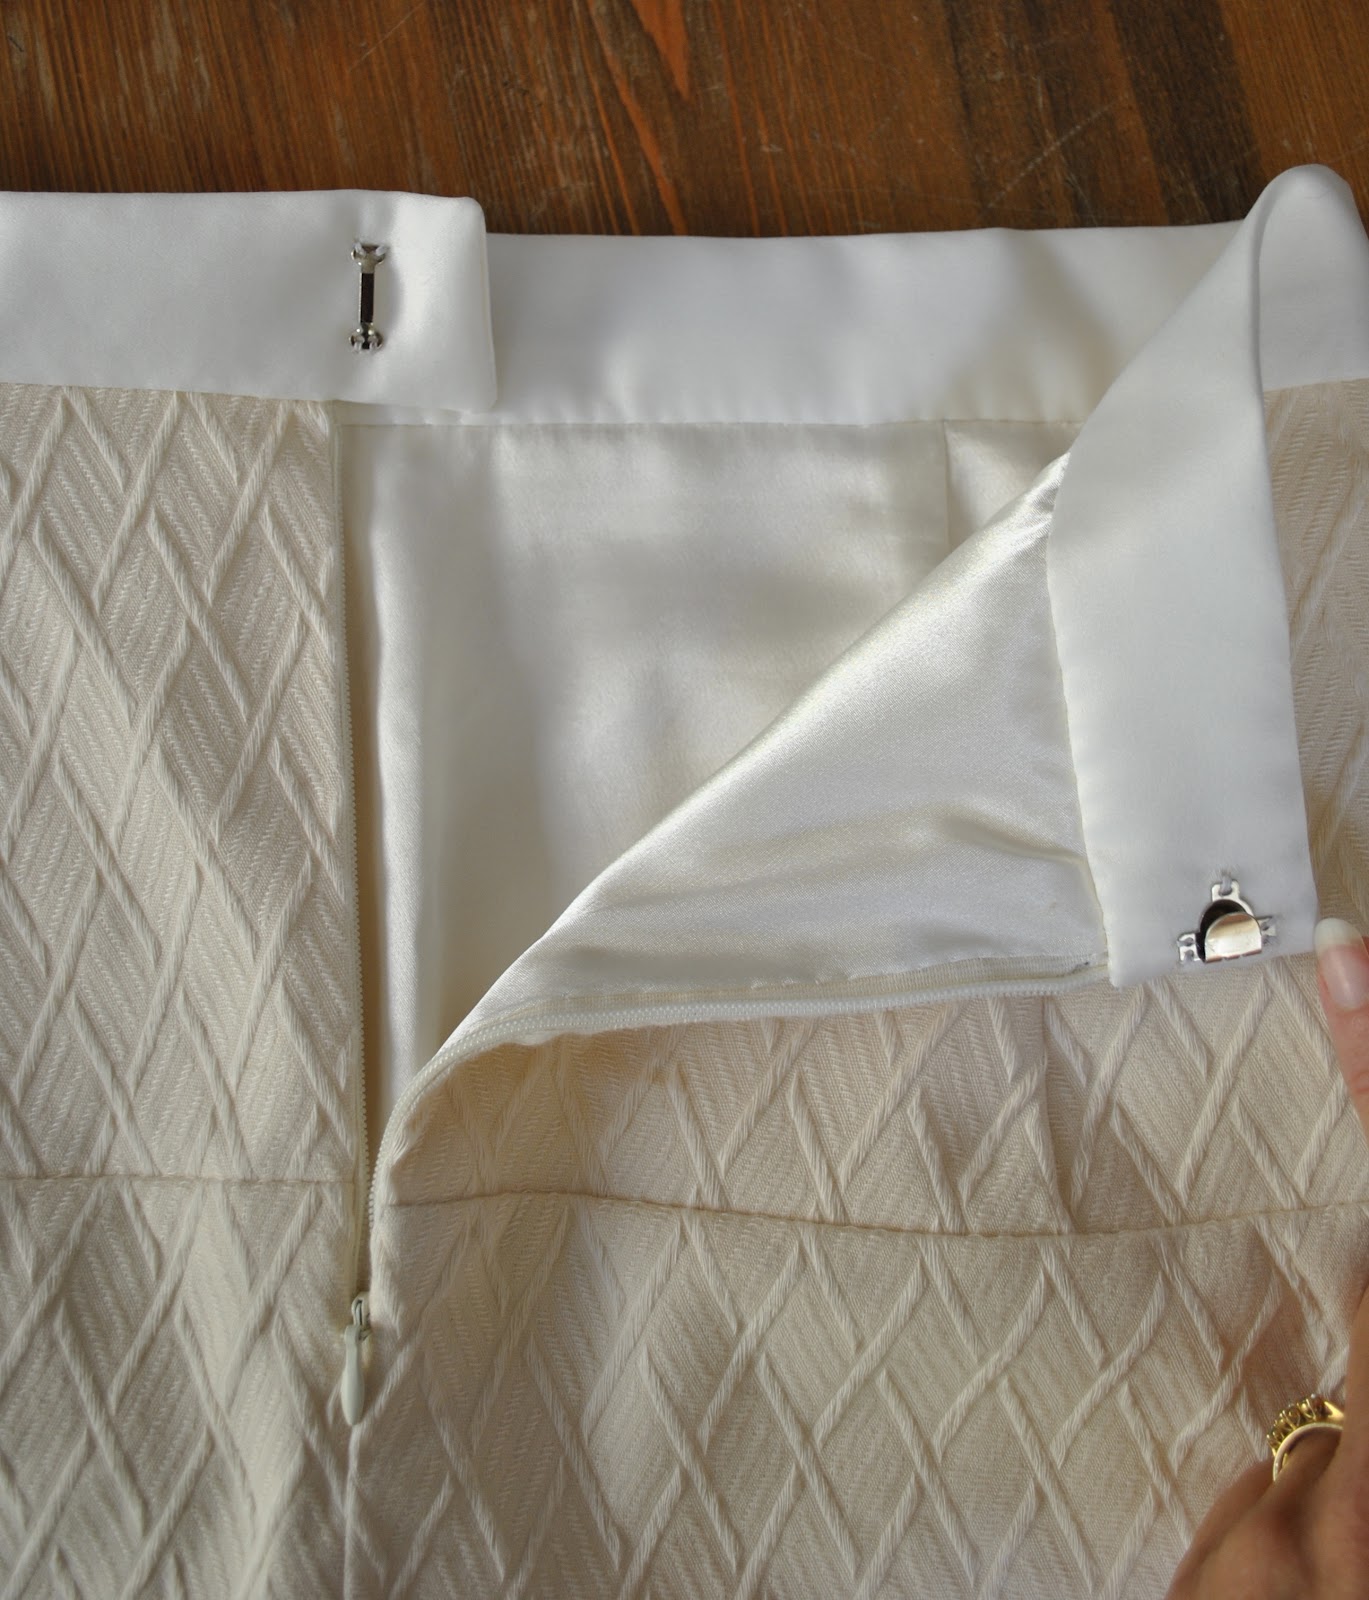
So I turned in the seam allowance of the waistband facing, and machined a nice even line of topstitching along just inside the fold by a scant 2mm, keeping the interfaced outer waistband free.  This provided a firm stitching line along which I could anchor the stitches, securing the waistband facing down to the waistband/skirt seams allowance.  It also provides a focal point, a visual foil that draws attention away from those small hand stitches.  See how those fell stitches are nearly invisible to the eye?

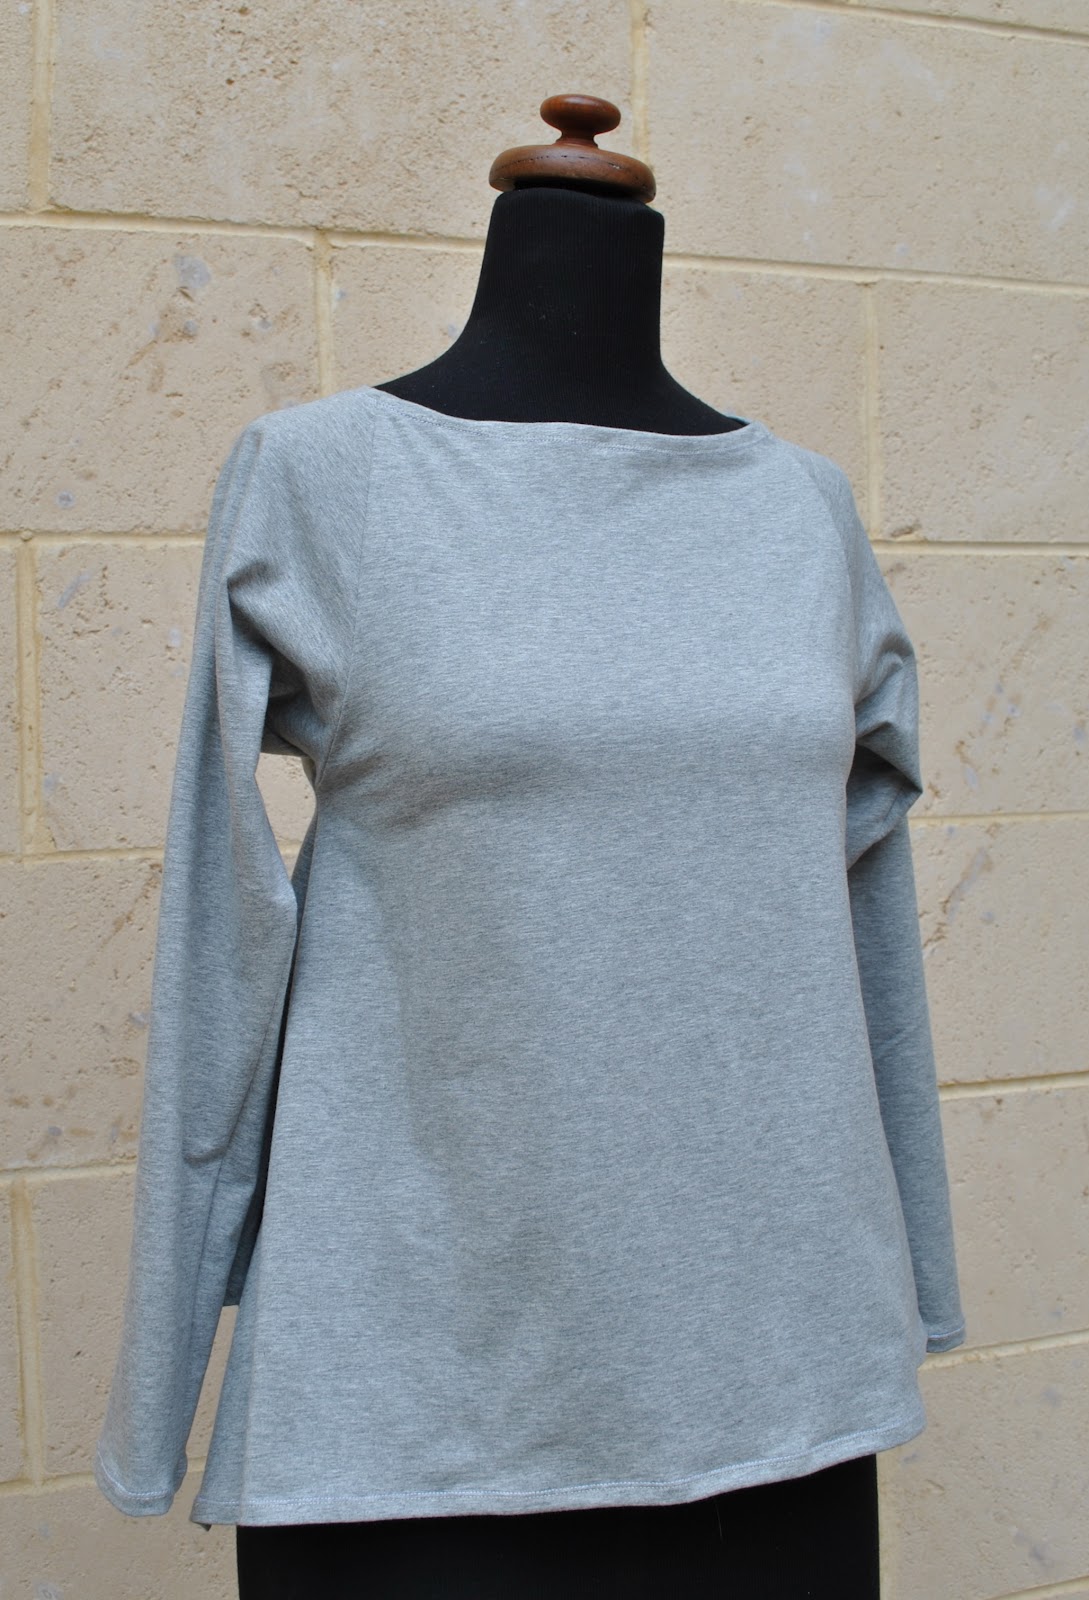
And no stitching visible on the outer waistband…

My last tip, a kinda obvious one hehe; I realised when I went to hang up my new skirt that the skirt hanger was going to leave permanent big ugly pinch marks on my beautiful pristine waistband.  So I hand stitched (fyi; blanket stitches) on some ribbon hanging-loops to the sides …  I say no! to big ugly pinch marks!
pinterestmail

Clipped Wings; a top

Here is my latest from Pattern Magic 3, by Tomoko Nakamichi; this is the top from p61/91. The seamlines at the side and centre back seams of this top are gently angled out, causing the top to fall in a series of rather lovely, loose, triangular folds around the small of one’s back.  Interesting, and also quite flattering.  I loved the wide high square neckline and the elegant long raglan sleeves.  I also loved that the top has a bland front view and a busy back view.  But to be honest; I wasn’t sure I loved the look of the “bumps” (pictured below). 
Without understanding the Japanese text, I think that the aforementioned bumps; two protrusions sprouting from the back of the raglan sleeve seam right where one’s scapulas sit; are intended to be the focus of the project, the challenge to be mastered from drafting and making up this piece.  But I’m afraid I just thought they looked a bit …er… odd.  As though if one was thinking of transforming oneself into an angel then the top was all ready with some pouches to accommodate one’s budding wings.  But sadly I am no angel  🙂
I went ahead and made up the top with the angel-wing bumps, for no better reason that to prove something to myself.  The long suffering Bessie modeled the bumpy version of the top for a photo (oh, it’s OK, like a true professional she doesn’t really mind how strange are the clothes I make her wear) 
below: the winged version; pre-clipping; see those bumps on the raglan seam?

Then straight away I unpicked that back raglan seam and sewed it up again, sans bumps!  Sorry, but sometimes the authenticity of the design is of a lesser consideration to me than the wearability, and I pretty certain a non-sewing observer would consider those bumps, clever little feature though they are, and definitely not an easier option than a straight seam; to be a mistake on my part.  So.  Off with their heads!
I used a rather nice cotton knit jersey from Knit Wit, in a light grey marle with distinct yellow undertones.  I bought a long length of this fabric last year, specifically for the purpose of running up Pattern Magic projects.  This is the first time I have bitten into it, having now used up the jersey knits in the stash given to me by my friend C.  Future projects using this grey fabric may or may not be subjected to some sort of colour treatment 🙂
I overlocked all the raw edges before sewing any seams, and the neckline, sleeve hems and lower hem are folded in once and finished with a twin needle on my sewing machine.  If you look real closely, you can see that I used a creamy-ivory thread and a white thread in the twin needle.  I didn’t bother with winding a second spool with the creamy colour that matches the yellow tones in my fabric, but y’know what? I think it turned out kinda cool.  The more I look at those two different colours the more I like that effect.  Will probably do that again!
Details:
Top; from p61/91 of Pattern Magic 3 (by Tomoko Nakamichi), and made of grey marle cotton knit jersey
Shorts; Burda 7723, hot pink linen, details here, and these shorts styled in 6 different ways here
Thongs; cheapies from Kmart (I know, but it was an emergency purchase.  My previous beach thongs broke)
(below; spot the dog…)
(btw; Beryl commented wondering whether the extra challenge I alluded to for Me-Made May was a pregnancy… NO!  but thank you so much for even considering me in that age bracket….!   I am flattered; but no, I will be travelling during the month of May!)
pinterestmail

A Genuine Leather (ette) skirt

I’ve made another winter skirt.  From the tanned hide of that elusive and rare wild beast; the leatherette.  Classy, non?
Hehe, so I’ve made bags and tablecloths using PVC before, pretty simple beginner’s type stuff; but this is the first wearable garment I’ve attempted from this sort of stuff.  Phwoar!  A first! (self high five)
I spotted this fab leatherette at Fabulous Fabrics, and practically pounced on it.  The colour is a pretty awesome colour for winter, no?  Sorta grey, sorta brown.  Very moi.  There was also a marvellous dirty pumpkin colour, which was pretty divine.  That one was darn tempting as well.  I’ll be honest with you, I dithered.  But eventually I had to choose a colour, just one colour, although it was like having to choose between two of my children.
Oh, it also came in black, but that caused no dithering on my part.  I was dither-less in the face of black.
I used the skirt pattern from Vogue 1170.  I have made the top from this pattern already, reviewed here, but this is the first time I have made the skirt.
I bound all the raw edges with HongKong binding, as stipulated, and although I did buy lining fabric I opted not to use it.  The built-in body and stiffness inherent in this type of coated fabric along with the frictionless texture of the backing stuff means that sticking to tights is not going to be a problem here.  The leatherette is surprisingly soft and pliable to wear, although I can tell it is going to take some getting used to.  I feel almost Barbarella in this.  Modern.  A bit suave and sophisticated; a little bit “cool”.  Very unlike me  🙂
above right; those funny fat seam allowances in the small of the back? That, my friends, is my sway back adjustment  🙂

The pattern stipulates a hemline facing, which I did, but it was utterly disastrous in this fabric.  With the facing in place the hemline went from previously smooth and free flowing to stiff and awkward and pokey-outy  horrible.  Finally I decided that the best finish was to have the curved edge trimmed as smoothly as I was capable of, and left raw and un-hemmed.  Which is what I did after unpicking the hem stitching, and the under-stitching, and I even rescued the HongKong seaming off the facing also to use for a future project  (waste not want not, and all that….)  That was a whole heap of painstaking unpicking, I tell you.
What else… oh, I made the pockets deeper.  The pocket was pieced for reduced bulk., so that the pocket facings on the outer edges of the pocket are leatherette and lightweight polycotton forms the bulk of the pocket piece.  This polycotton was harvested from one of my old Pattern Magic muslins and was also used for the HongKong seaming.  Unfortunately the placement of the pockets is right on the hipbone, which means that one cannot really use them for anything bulkier than a tissue or a credit card anyway.  Just saying.  But at least the pockets are there!
Details:
Skirt; Vogue 1170, “leatherette”
Shirt; my own design, using several patterns, of black cotton mix, details here
Shoes; Perrini (I’ve had these for donkey’s years)
Pattern Description:
Flared skirt has front and back seam details, back invisible zip closing and wide waistband
Pattern Sizing:
4-10.  I made mine a straight size 10.
Did it look like the photo/drawing on the pattern envelope once you had finished sewing it?
Well, mine resembles the line drawing on the envelope.  The photo on the envelope is completely featureless.  Black… really??  You can’t make out any details on the skirt at all!
Were the instructions easy to follow?
Yes.
What did you particularly like or dislike about the pattern?
Pretty, flirty and feminine, resembling a straight A-line from the front view, and then frilly and twirly from the back view.  The angular seaming between the skirt and the front yoke is a nice feature.  I also like that lovely wide high waistband, and the instruction to bind all the internal raw edges with HongKong seaming is a nice finishing touch.  I really like to see patterns encouraging people to extend themselves to use high quality internal finishes like this.
A small gripe, the pockets are situated right high on the hip, so they not really very useful.  Also, in my opinion, the more “twirly” a short skirt is the more difficult it can be to wear.  I added 10cm in length to the lower edge of my lower skirt pieces.
Fabric Used:
PU laminate or “leatherette”, lightweight polycotton for the HongKong seaming
Pattern alterations or any design changes you made:
 I thought it looked quite short on the envelope photograph so I lengthened the skirt by 10cm.  This meant the skirt facing pieces were completely different to the pattern piece; but that was no biggie, I just used my new longer skirt pieces themselves to cut the facings.  However, I ended up not using them because this method of hemming turned out to be disastrously bulky with my PU.  I went with a clean-cut raw edge.
I made my pocket pieces longer for a deeper pocket, and pieced them to be PU for the facings on the edges, and lightweight polycotton for the central main part of the pocket piece; for lesser bulk.
I removed width in the back/side back seams for a sway back adjustment.
Would you sew it again? Would you recommend it to others?
Yes, I would sew it up again … and already have!  😉   And yes!
Conclusion:
A very nice skirt pattern, with interesting seaming and a pretty yet modern silhouette.  However I do think the skirt length as it is in the pattern presents an unbalanced and slightly unflattering silhouette, and adding just 10cm to the length substantially improved the proportions of the skirt.  I think it is visually important that the lower flounce at the back of the skirt be at least as long as the fitted yoke sections above it.  Shorter; the effect is slightly “top heavy”.
pinterestmail

Curtaining skirt

It looks plain, but my new skirt has one fun and unusual little fact about its origins.
The fabric was part of the bundle of fabrics given to me by my friend C from her late mother’s stash.  That’s not the unusual little fact, btw…  actually, it seems like a lot of my new item posts start out with that statement, and yes, I fully appreciate my very lovely friend to give to me such a marvellous gift of fabric, and I am roaring through it at a most satisfying rate! Since using up this little bit I still have about four or five choice pieces left…
But about this piece; it is curtaining fabric.  Complete with the rubber black-out backing and all…  I know, right?!  cue images of sister Maria ripping down the nursery curtains in the Sound of  Music…  but waste not want not, hmm?  There was only quite a small piece of it, which along with the heavy texture dictated a skirt.
I decided to use my latest favourite skirt pattern, the one from Vogue 1247.  Every version of this skirt I have seen on the internet is extremely cute, and I can sense this is going to become another staple pattern for me too…  I love the way it is just like an ordinary little skirt, but has those fabulously unexpected pockets in the front.  Who would have thought pockets in such an unlikely place could be so successful?!
A commenter noted that one couldn’t put anything bulky in the pockets, and I agree, but really you couldn’t put pockets anywhere on a little skirt like this and expect them to carry very much.  They are just about the best pockets one could even think of for a silhouette like this, imo.  I reckon this was a stroke of genius on the part of the designer.  They are perfectly fine for a hanky, a credit card, a mobile phone, and a house key, and really; what more does a lady need?
I added about 10cm to the length of the lower skirt pieces, and flared them just very slightly towards the hemline (approx 1.5cm each side?); and still managed to get all the main pieces of the skirt out of the piece of fabric, but I had to cut the waistband out of other fabric.  For this I used heavy and stiff delustred satin (leftover from my trench coat), and I also had to piece together the pocket lining with some of this same fabric.  The skirt is lined with the leftover poly satin that was also used to line my ivory trench coat… so really, the skirt is like part of a matching set with that trench coat!
Because the curtain fabric is really quite heavy, I hemmed with a strip of bias cut cotton; meaning less bulk because I didn’t have to turn the fabric under twice, plus a longer skirt.  Given how tiny this skirt is already, I was aiming to get as much length as possible here!
Given my mad passion for ivory and other neutrals, methinks this is going to become a much worn little thing this winter…  bring it on!

Details:
Skirt; Vogue 1247 lengthened and lined, heavy cream curtaining fabric, ivory delustred satin waistband, ivory satin lining, my review of this pattern here
Shirt; Burda 7767 modified, khaki linen, details here
Sandals; akiel, from an op shop

pinterestmail

Random stooff…

1:  I saw this idea for seedlings on Better Homes and Gardens and thought  awwww, how cyooote!  So had a go myself….  these hold sweet peas (yup, planted on St Patricks Day, thus earning myself a gold star for being “traditional”) and parsley.  After this weekend, the bottoms will get lopped off to give the roots somewhere to escape, and they are going in the garden.  But in the meantime I think they have made quite a nice Easter-y table display, yes?
The two whole eggs were my failed attempt at natural egg dyeing.  The mustard-yellow is a result of being boiled up with turmeric, and that rather grotesque, emo, splotchy, Addams-family-grey one on the right is dyed with blueberries.  I lost heart after this one and didn’t bother trying out the spinach or the beetroot or the red cabbage; this what you can expect when the only eggs available are brown eggs.  I searched high and low for white eggs, even going to the drastic measure of peeking inside the boxes of caged-hen eggs  (eeek, caged??  quelle horreur!)  but no dice.  It seems there are simply no white eggs commercially available any more in the whole of Perth.
So…  the half shells were painted with acrylic paints.
Random stooff 2:
My husband likes to cook, and I graciously let him, whenever he wants to  😉  He is a very good cook too.  Way better than I.  Way more enthusiasm.  Enthusiasm is good.
Fired up with the urge to create after a Heston Blumenthal programme on the telly, he decided to have a go at the famous lemon tart.  Not just an ordinary ol’ lemon tart, but one cooked the scientific way.  The one that goes purely by temps and times.
So, here is Heston’s version….

And please admire my husband’s version, cooked to exactly the same recipe….

and btw, I am happy to report that it is absolutely delicious!!
So; has anyone else ever tried this or any other of those scientific recipes of Heston Blumenthal?  how did you go?

Random stooff 3:
The perfect nail varnish for Easter?  BYS White with One

And finally, Rs 4; I’ve signed up for Zoe‘s me-Made May…

I, Carolyn, sign up as a participant of Me-Made-May ’12. I endeavour to wear all me made clothing each day for the duration of May 2012′


 although taking part in the challenge this time will hold an added degree of difficulty for me, the specifics of which I will not divulge right now but will become blatantly apparent as time unfolds.  I may not blog each day, like I have done previously for these months, and I may not be able to wear a unique outfit each day although I shall try.  However I can promise some spectacular scenery  😉  We shall see how we go….
Later dudes!

pinterestmail

Easter Sunday

Fabio wishes you every success in your hunt…
and from me; much love (and chocolate)… and belated best wishes for a glorious weekend!

pinterestmail

Ivory trench coat

My new coat!
This is McCalls 5525, view D.  I have used this pattern before; my first version is view B, pictured here.  My second version here is mid-length also, and has the wide symmetrical collar with a button tab on the collar stand (in case it gets really cold, I suppose, so if you want to button it right up to the collar you can), and three-quarter length bell-shaped sleeves (pictured below).   I also made the in-princess-seam pockets a mite deeper and bigger than the pattern.  Have I said before how much I love this pattern?  Oh my… I can see from the post on my previous version that I stated I would be making this pattern again.  I can’t believe it has taken me this long!  I love trench coats.  I want more!
For my fabric, I used a lovely piece of cotton gabardine in a warm translucent-eggshell shade of ivory, that was in the bundle of fabrics given to me by my friend C from her late mother’s stash.  I knew the moment I laid eyes on it that it would be simply perfecto for a super stylish trench coat, like some of the oh-so dazzling white ones I have pinned from the last (Northern) winter.  Oh, did someone say “shows the dirt”?  Shushhhh!!  Banish those dirty thoughts!  Naturally my coat will stay pure as the driven snow all winter long since I am a master laundress (haha) and never ever indulge in outdoor activities (haha hahaha)  But what the hey, that is why Napisan was invented, no?  Ahh, Napisan, best friend of those addicted to pale clothes…. what would we do without you and your magical cleaning properties?
There was a hiccup to start.  Even though my piece of ivory loveliness was the perfect fabric for a trench coat, I did not have enough for an entire trench coat.   Hmmm.  A trifling setback.  But I resourcefully checked out the bridal section of Fabulous Fabrics… And y’know what? found some de-lustred satin, that was not only an almost pretty-darn-perfect match in colour and very acceptable match in texture, but also was of a thickness, stiffness and weight that was pretty darn identical what my gabardine would be like if block-fused with sturdy iron-on interfacing.  Which I joyfully realised that I then did not have to do.  Score!!!  So I cut all my pieces that required interfacing from the de-lustred satin, and saved myself that extra step of interfacing.  Such pieces being the front facings, collar stand and collar facings, tabs, and the self-fabric belt.  The other pieces were cut from my gabardine.
Funnily enough, I did this exact same thing, using two matching fabrics of different weights the first time I made up this pattern.  Life repeating itself…  🙂
For the lining I used a medium weight ivory satin.  This is quite thick too, so I’m hoping this will make it warm enough to wear all winter.  (Please don’t write to tell me how pathetic our winters are.  Yes, even in the dead of winter we are still 2000 miles away from the nearest snow.  No need to rub it in)
The buttons; I did not want perfectly black buttons, and found these at Fabulous Fabrics.  They are a deep deep blue-y charcoal with little flecks of ivory.  They could not be more perfect.
So, I realise this is quite a picture heavy post.  Please excuse that.  I guess I’m a mite proud of how it turned out  🙂  And to be fair you need a few pictures to address the all important question of which of these belts looks best with the coat; self-fabric belt (above), black leather belt (below), or even no belt at all (far below)?  Which do you think?

Details:
Coat; McCalls 5525, view D, ivory gabardine, ivory de-lustred satin, ivory satin lining, my review of this pattern here
Skirt; my own design, charcoal jersey knit, details here
Shoes; Misano, from Labels boutique

pinterestmail

A meaningful motto…

a …er, moonflower (?)
( it closes during the day)
munchies masterfully managed…
(rhubarb and pear custard cake)

…  and some mathematical musings for March.

Peekaboo in blue top
Fabric; a gift from my friend C
Pattern; from Pattern Magic 3, a gift (and used previously)
Total cost;  free
Grey Stripe dress
Fabric; $41.90
Pattern; self-drafted
Total cost; $41.90
Grey Stripe Tshirt
Fabric; leftovers from the above dress
Pattern; self drafted
Total cost; free
Bitumen-hued shorts
Fabric; leftovers
Thread; got started on a new 1000m spool of white; $13.95
Pattern; Burda 7723, used previously
Zip; 0.83
Buttons; from stash
Total cost; $14.78

pinterestmail
Switch to mobile version
↓