Yearly Archives: 2010

You are browsing the site archives by year.

Anzac Day

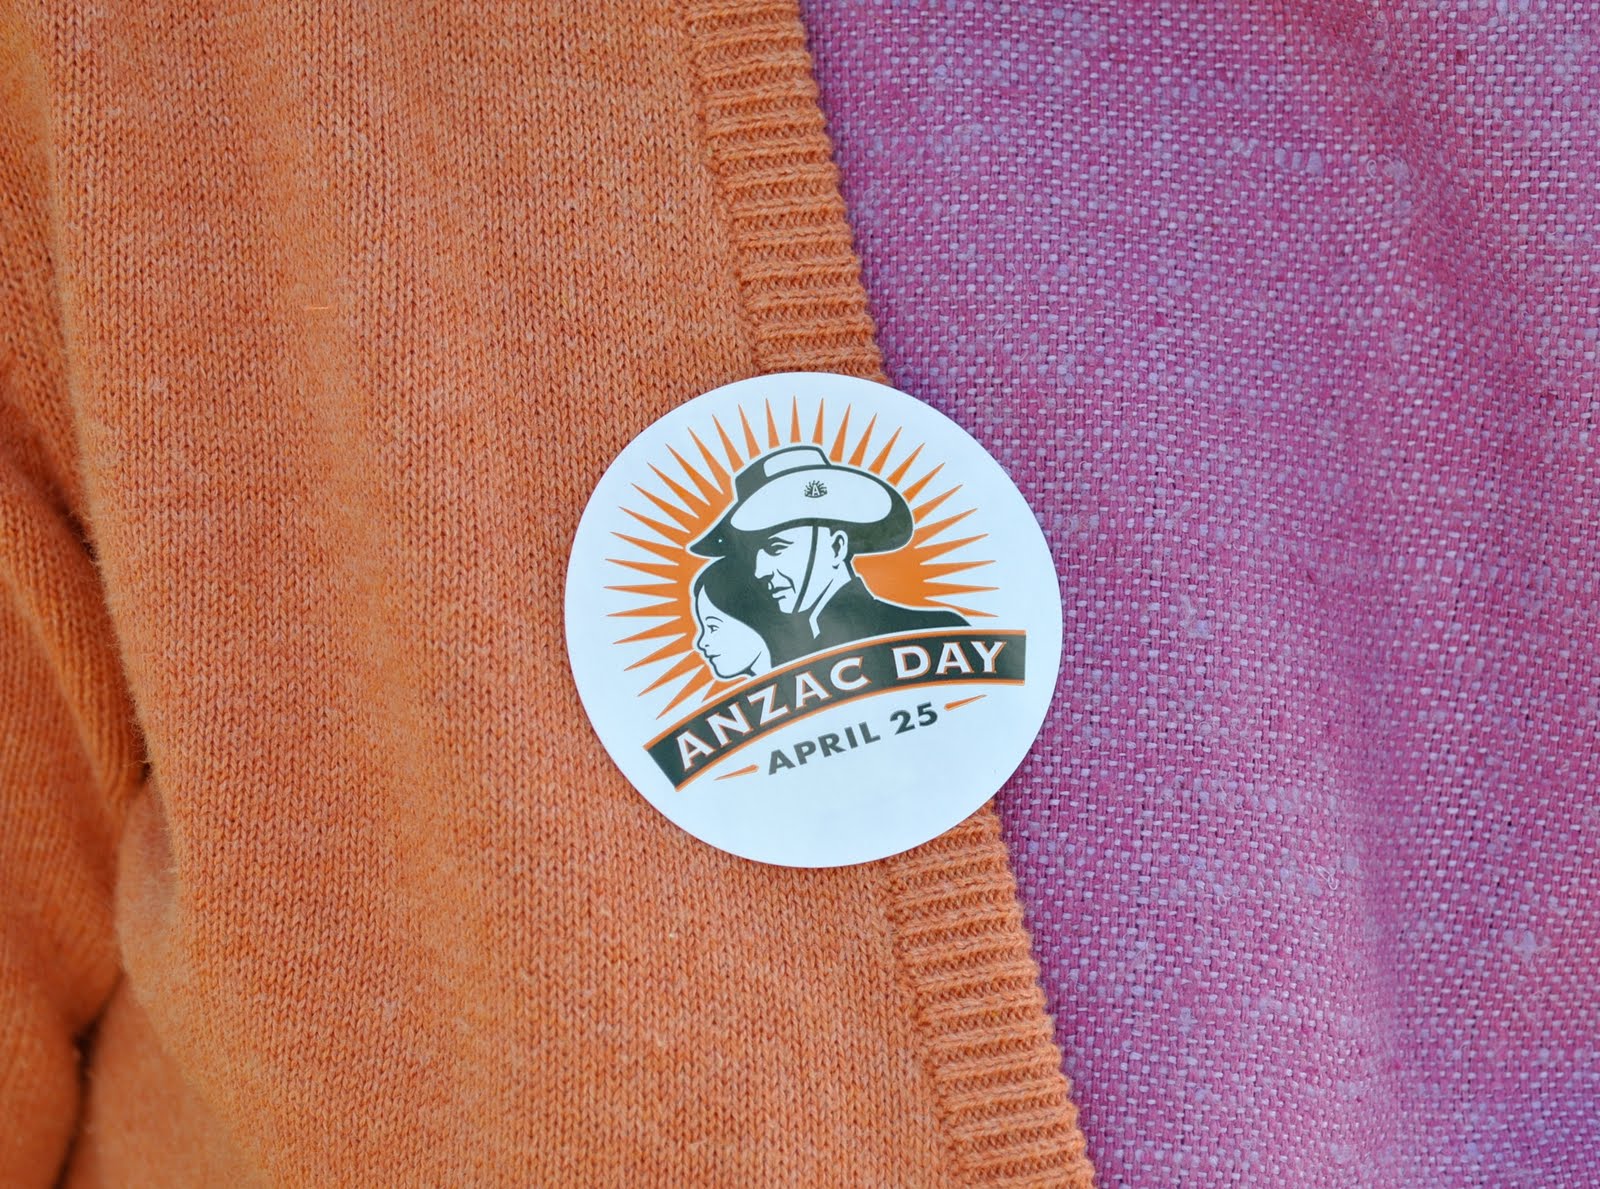
Today is Anzac Day, the day we commemorate soldiers fallen for our country.  The acronym ANZAC stands for Australian and New Zealand Army Corp, and originates from the days of the first World War when Australia and New Zealand were part of British territory and our soldiers were then British soldiers.  Anzacs were sent in to some of the toughest and most gruelling battles, if you haven’t seen the movie Gallipoli then I recommend it as a good little history lesson (Mel Gibson in an early role, and incidentally my uncle is in the movie in a small speaking part)
In the first World War, wives and mothers of the Anzacs baked these biscuits, known for their keeping qualities and sent them off to the soldiers overseas, thus the name.  I found an interesting fact on the internet, Anzac biscuits is a term protected legally, and it is illegal to sell them using the word “cookies”, so there you go.  Interesting bit of trivia there for you…  

Now, I am the world’s worst cook.  However these yummy little biscuits are so easy to bake that even I can’t stuff them up so I thought I’d share a recipe with you for today.  Anzac bikkie recipes are everywhere and you can find a zillion slight variations, this is the one I use.  Be assured that recipes on this blog will be few and far in between, as cooking is not my thing, but today is kinda special…
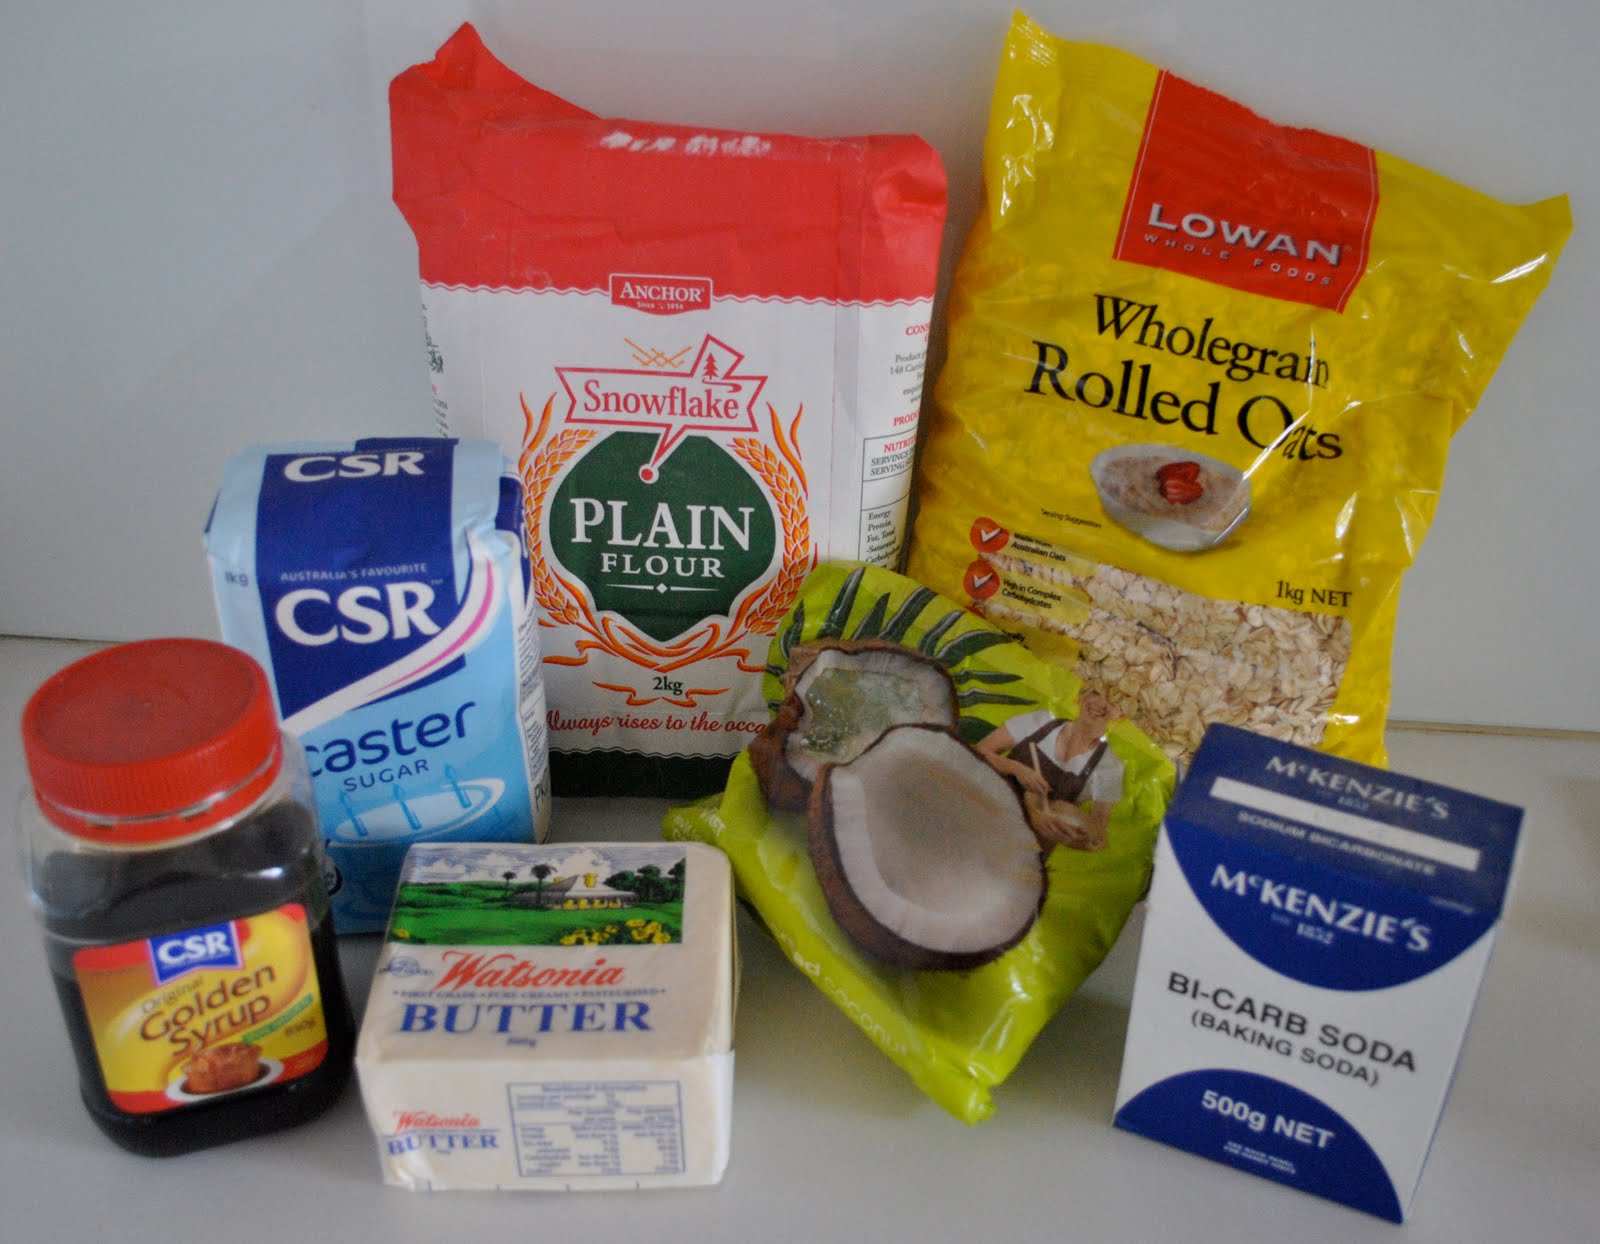
Anzac Biscuits
125g butter
2 tblsp golden syrup
3/4 cup rolled oats
3/4 cup plain flour
3/4 cup dessicated coconut
1/2 cup sugar
1 tsp bicarb of soda
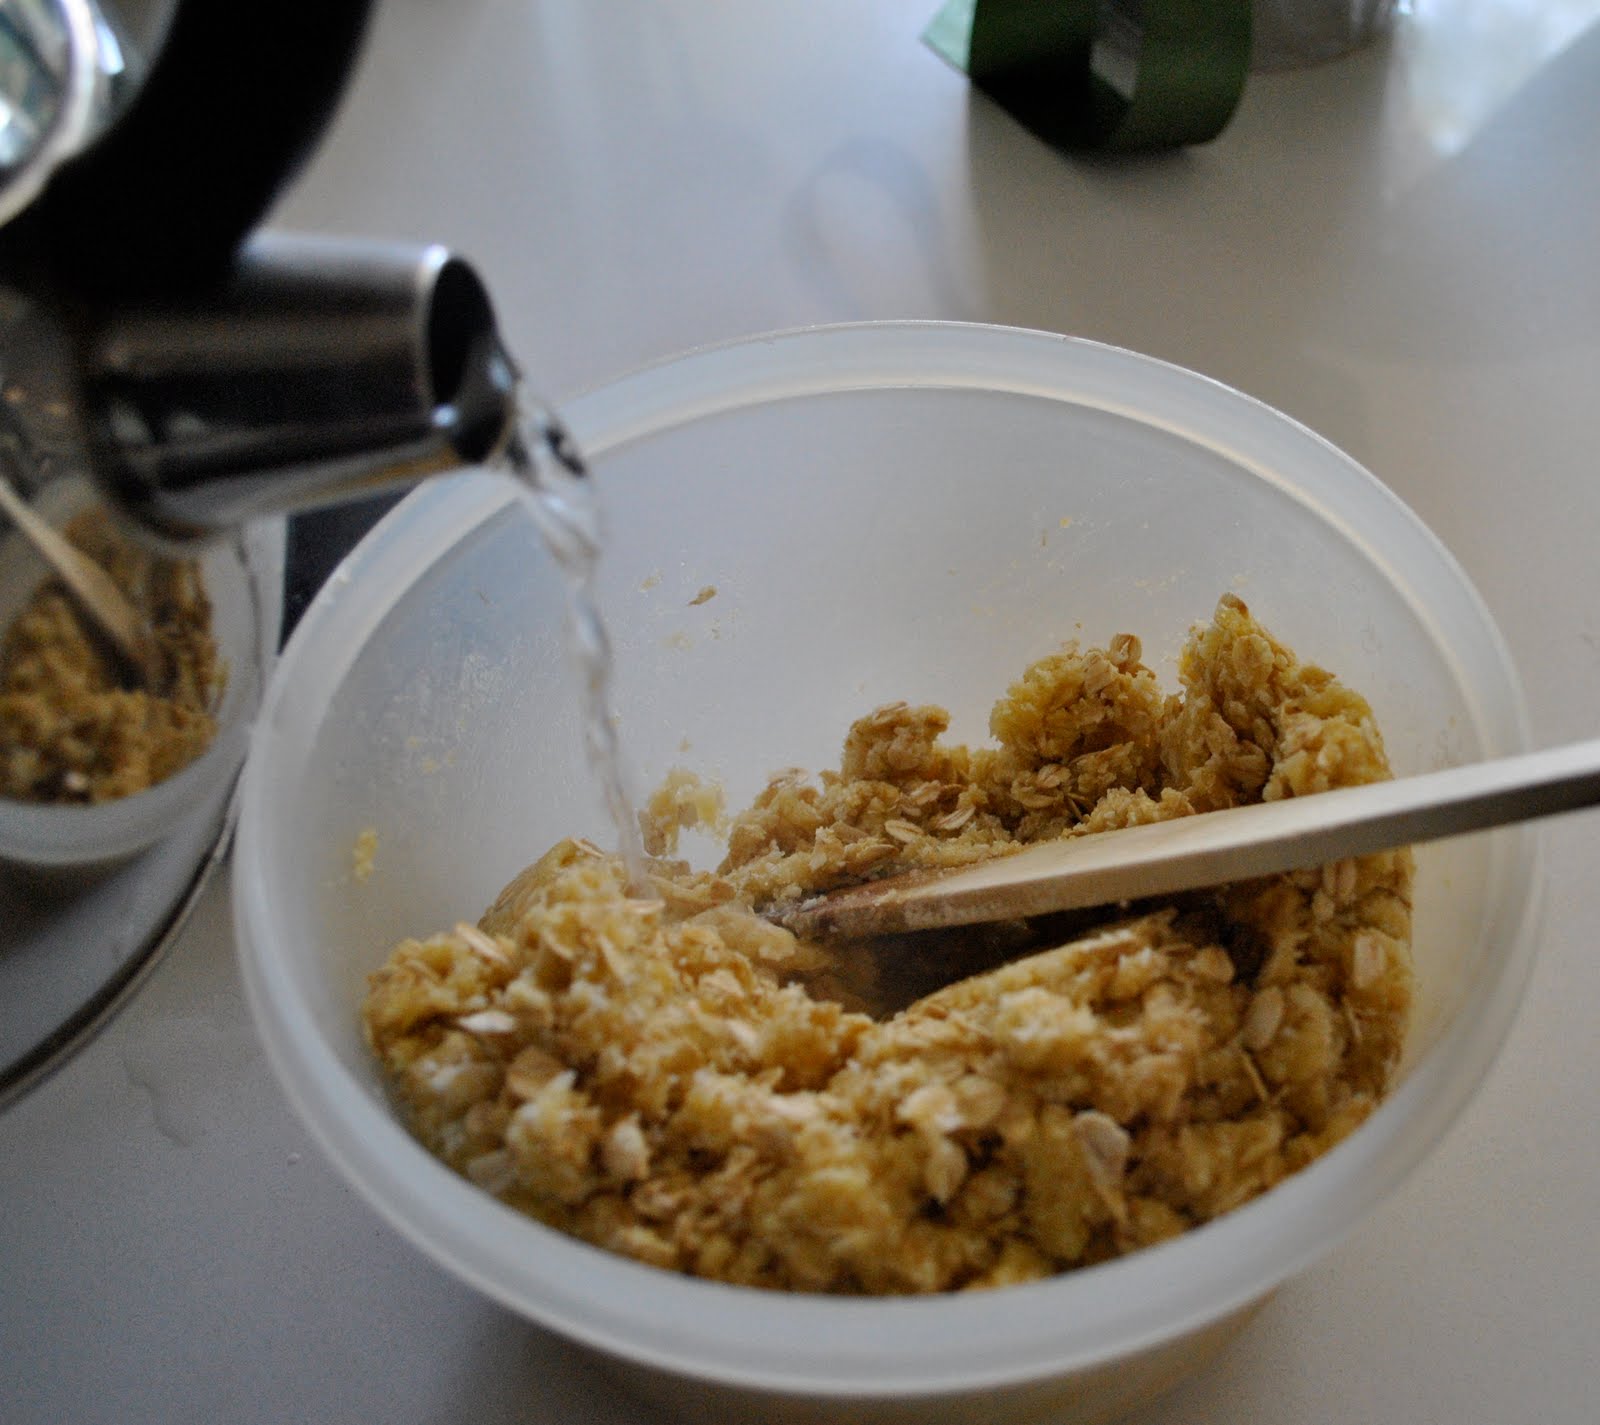
if needed, approx 2 tblps boiling water
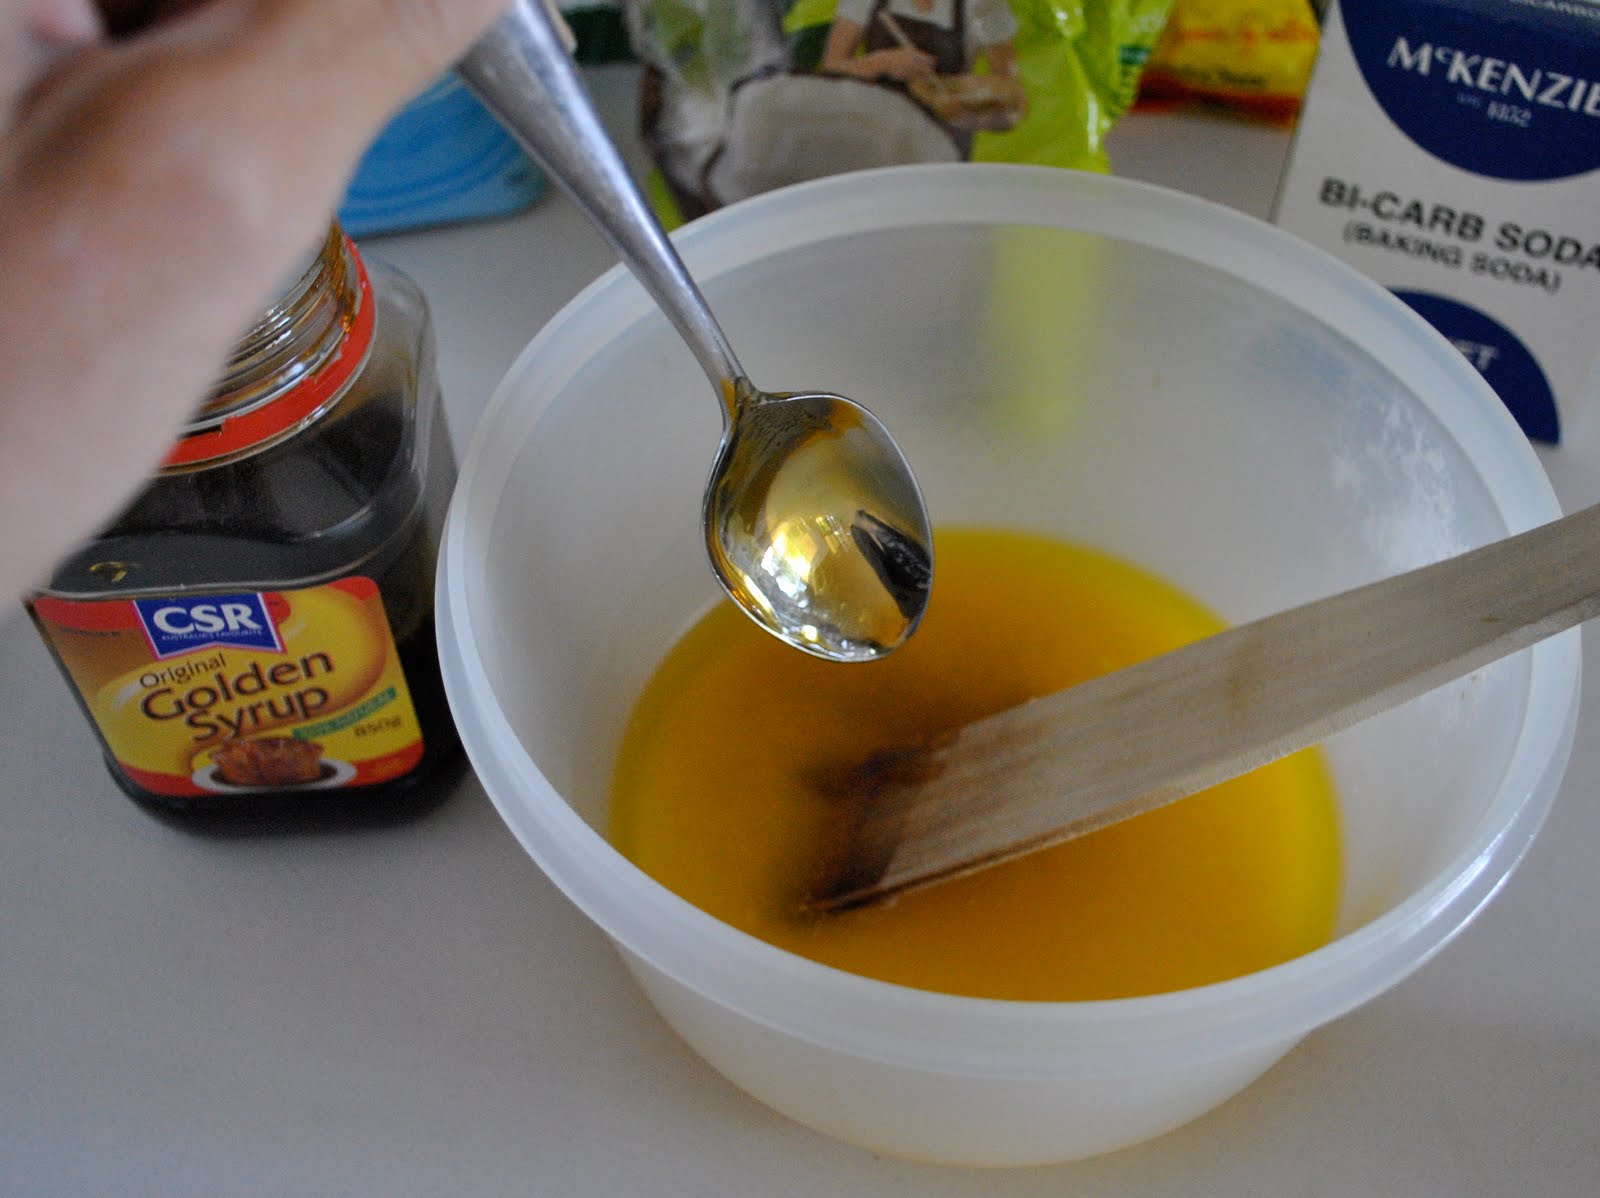
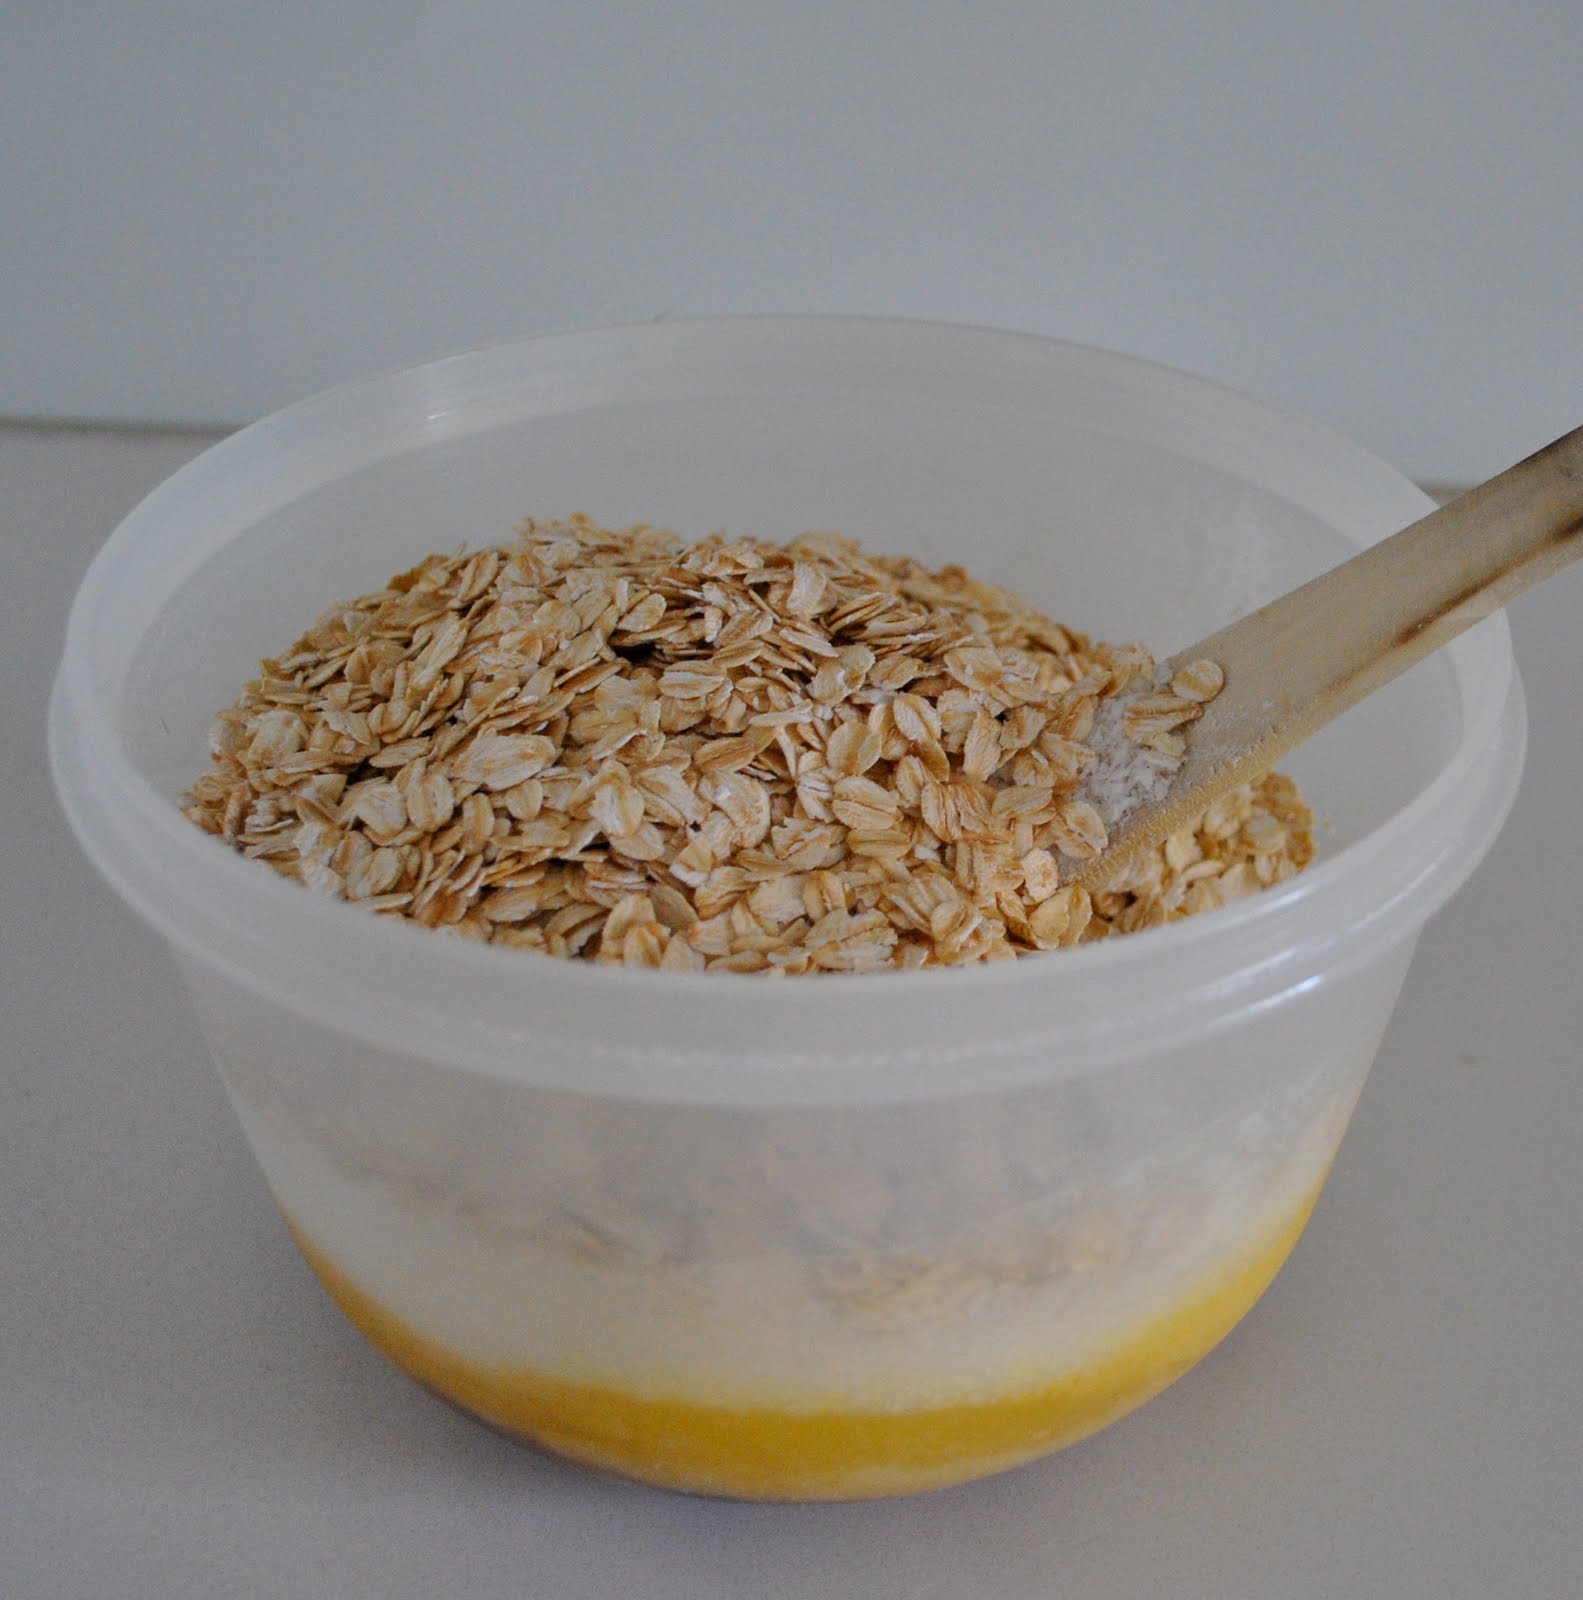
If you’re a one bowl wonder like me, melt your butter first.  Stir in golden syrup.  Add all the other ingredients and mix together.  Water can be added as an extra binder if the mixture is still a bit dry.
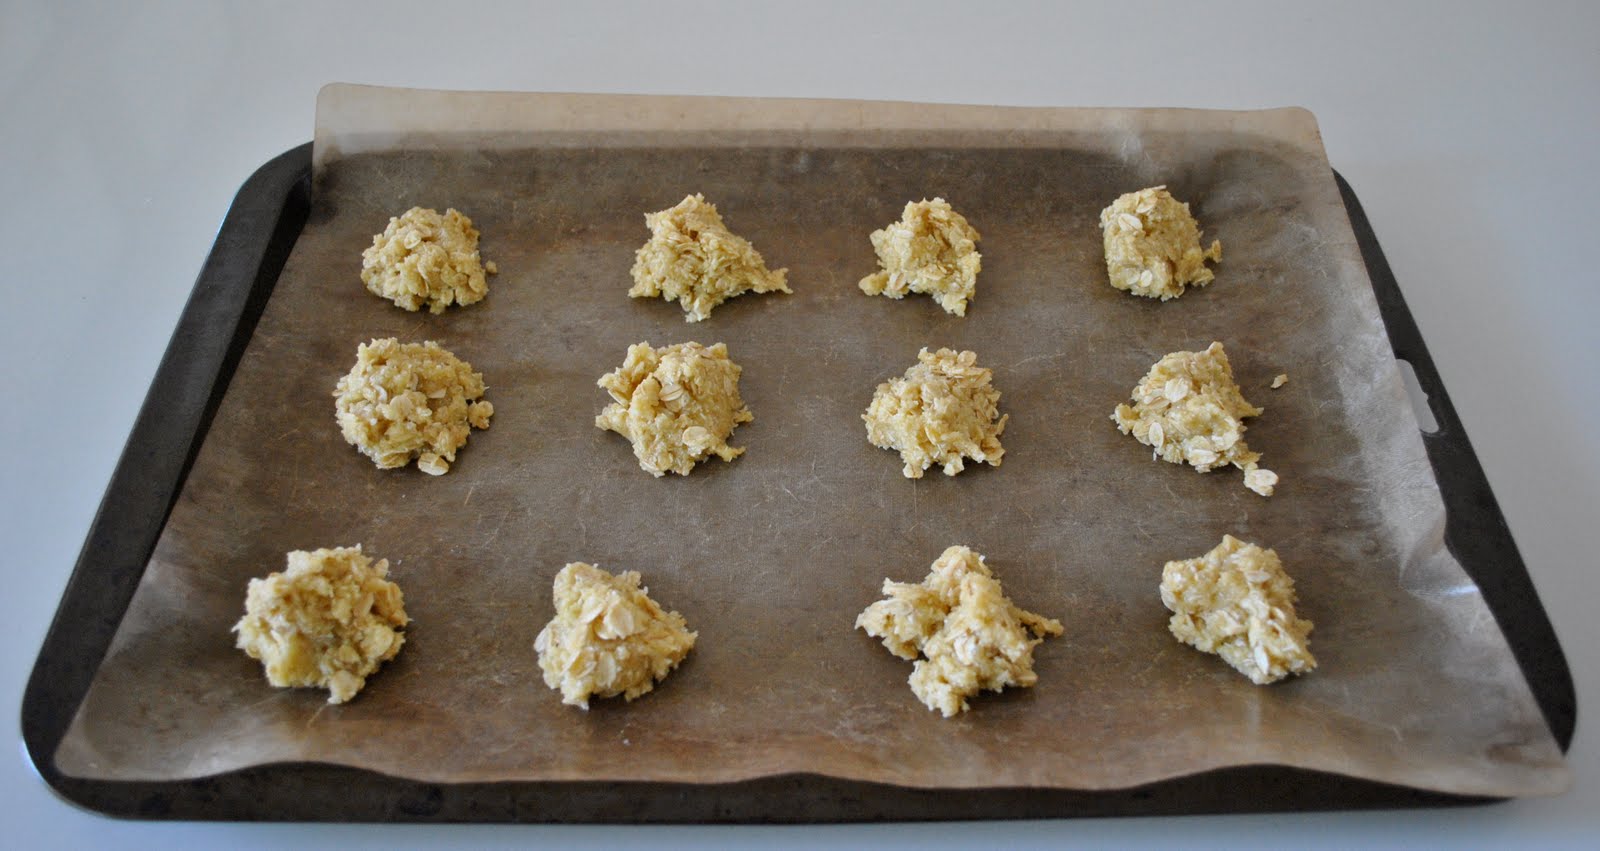
Drop spoonsful onto a baking tray.
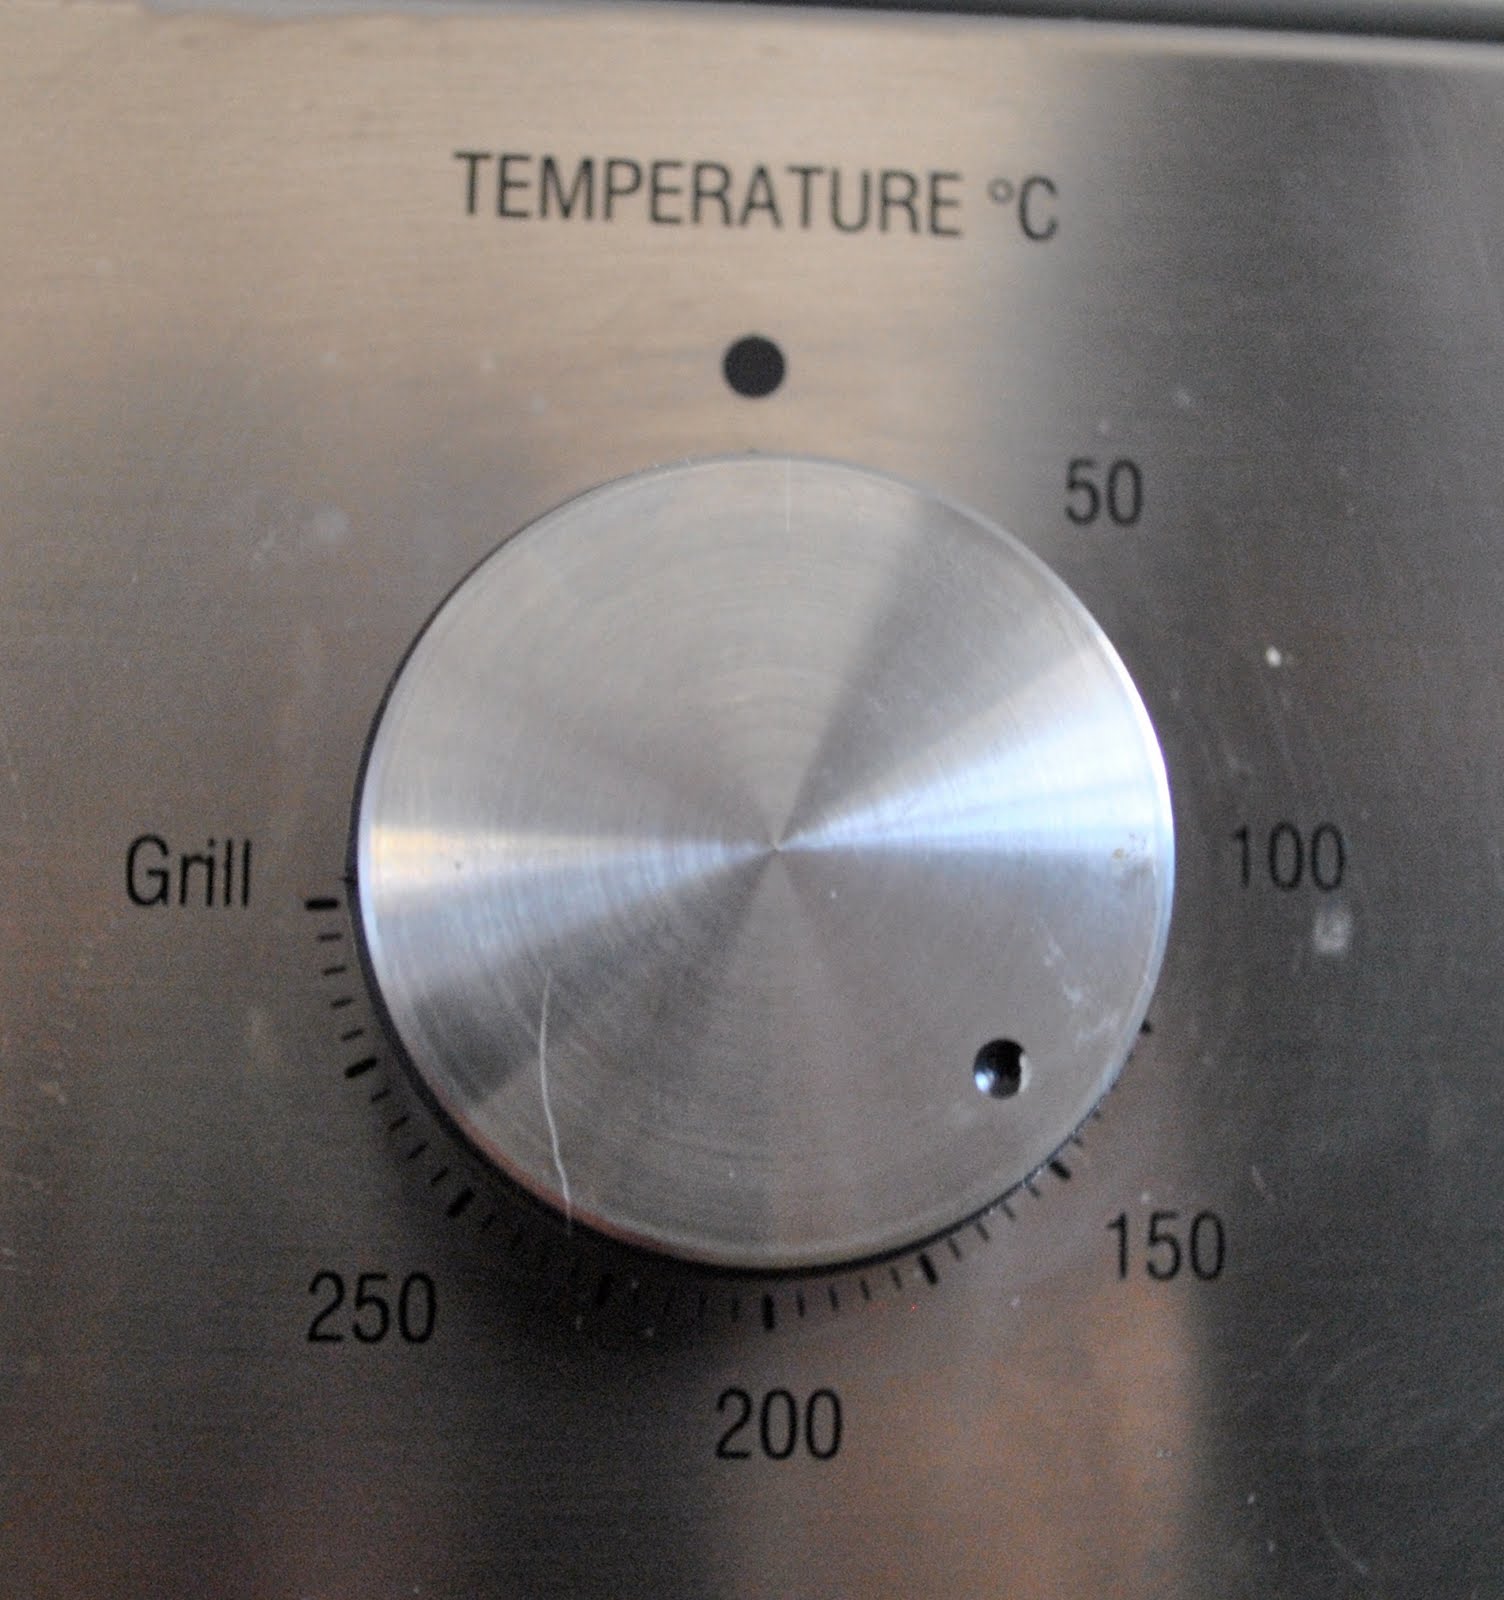
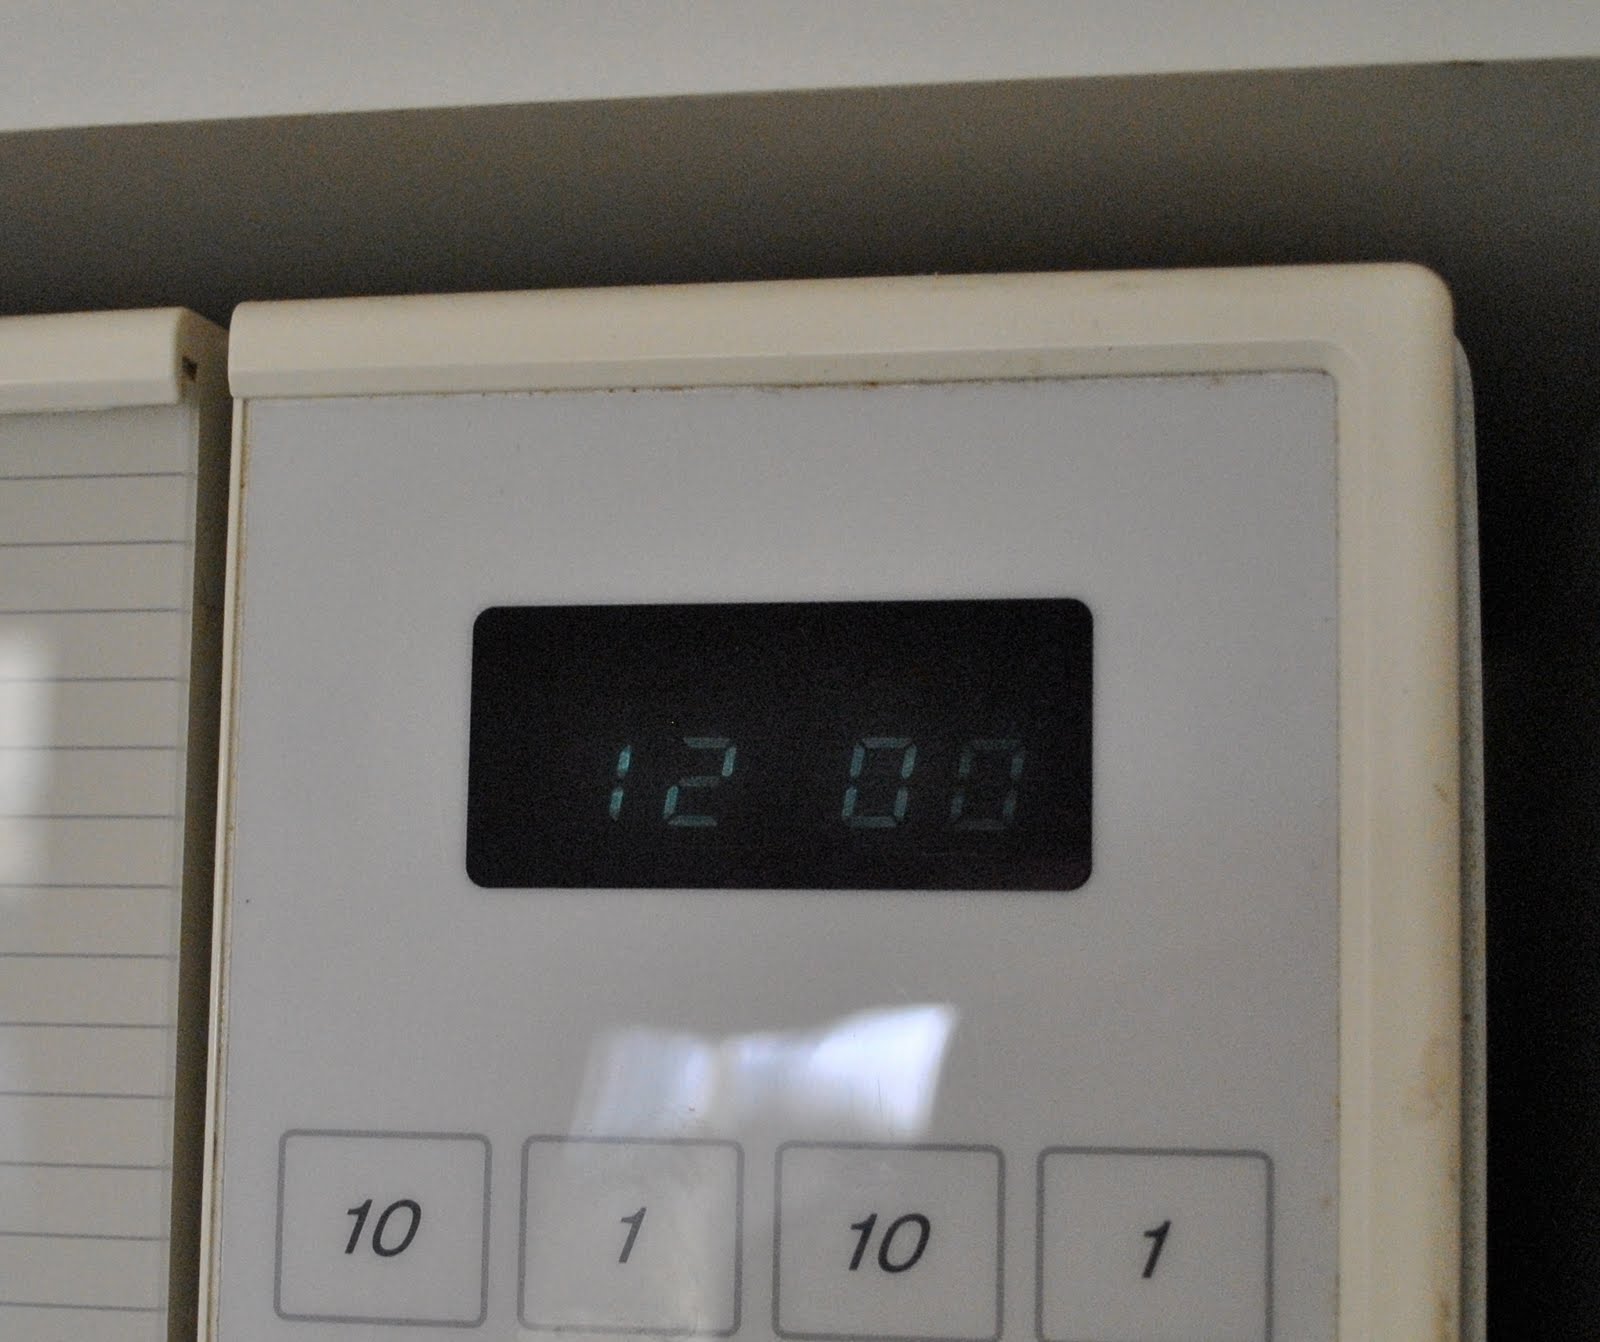
Bake at 160C (325F) for about 12 minutes.
Cool on a wire rack.

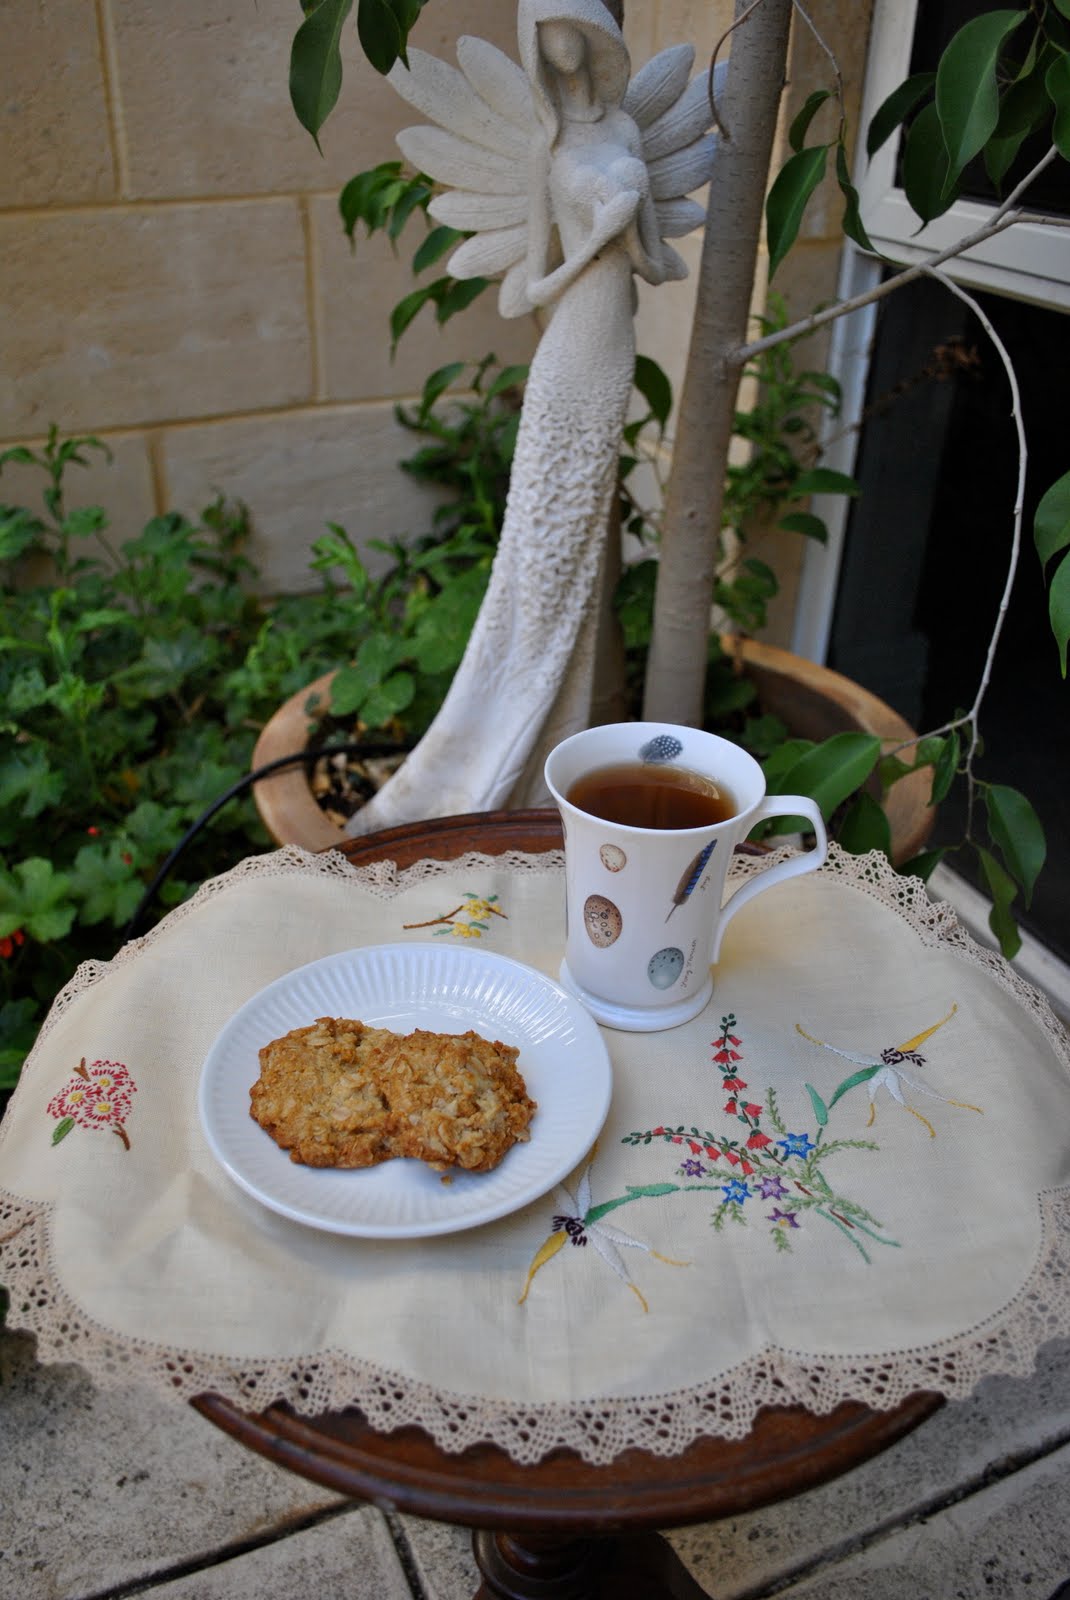
Sit back and as you nibble remember the Anzacs, or any soldier who has served for their country.

This little doily was hand-embroidered with Australian native flowers by either my grandmother or my great aunt… both of them very talented handcrafters.

pinterestmail

Anatomy of a ball dress, pt 4

Husband sadly working all this long weekend so I’m planning to get a lot done on my ball-gown.  Following is today’s effort…
Cut out the skirt pieces, sewed side seams, inserted the zip into the centre back.  This sounds simple, but this is the point at which I thought I would break down and cry.  Here’s what happened.  In good seamstress fashion I put a brand spanking new needle into my sewing machine before sewing this fabric.  The side seams and zip went in beautifully.  Then, without even thinking, I put the seams through the overlocker to finish the edges.  Hadn’t changed the overlocker needles!  Doh!  Now there are tiny thread-pull marks along the seams, that weren’t there before, thanks to the obviously blunt needles in the overlocker.  It was a real oh-no! moment.  There may or may not have been some bad language.  Note to self; overlocker needles are needles too, you know.  They’re not going to change themselves.  I’m reassuring myself that probably no one at the ball but me will notice as the pulls are thankfully really tiny, but still… they didn’t even have to be there.  Disappointed!

With right sides together sewed the skirt and its lining together around the bottom edge.  This was done after much experimenting with different hemming techniques on scraps.  I trialled rolled hemming (machine) and rolled hemming (overlocker) on the separate skirt and lining, then overlocker rolled hem on the two fabrics together.  Neither was satisfactory.  So I went with this method, which I think looks smooth and clean.

Trimmed the top to waist level and basted skirts closed.

Adjusted the corset top to the size I want it.  Now, of course I originally used a version of Simplicity 9775 to help me cut this, although this is really a junior pattern and I still had to resize and reshape it to me, an adult woman size.  And now its been altered and butchered even further.  My point is this; can I really say this corset has been made using this pattern any more?  The pattern pieces actually now bear no relation to any of the pattern pieces in the envelope.  I often face this dilemma when citing pattern numbers in this blog, as my final garment is rarely exactly made up to the pattern, which I consider a starting point only.  Anyone wishing to create something similar to my garments is going to have to bear this in mind when buying these patterns I’ve referenced.  This is why I add the disclaimer, “own design” in the details of an outfit.  Just saying.

Getting back to events; corset boning.  Everyone knows to snip the edges of their boning into nicely rounded curves, right?  To avoid nasty scratching from one’s own ball gown during your evening, this is a must do…  Incidentally, this plastic boning is the only type I’ve ever seen, although I’ve now heard of steel boning I’ve never seen it anywhere.  I think that’s because of living in sleepy lil’ ol’ Perth… 

The next step will be to drape some fashion fabric attractively and chic-ly across the bodice, and I’m hoping to achieve some sort of wow factor here.  This may or may not be my final outcome.  Stay tuned to find out…

pinterestmail

Mauve and apricot

It’s wonderful when you go to the wardrobe and discover a dress that you had almost forgotten you had.  And this is a new dress, it’s not that long since I made it, shame on me.  Must be getting forgetful, first sign of old age…?
I love this colour combination of the purple-y mauve with soft apricot orange, whispers “autumn” to me so well.  Later in the supermarket when I donated to the ANZAC’s and got this sticker, it happened to go so nicely with my outfit, fortuitous, no?
I met up with some friends for morning tea this morning, had a few errands afterwards and rounded up the day out with a revisit to Ricarda with my daughter so I could get a closer look at the clothes I saw in the parade the other night; up close I marvelled even more over the cut and construction of those lovely garments.  Of course the prices made us gasp, but if they weren’t expensive then they wouldn’t be so exciting, right?

Details:
Dress; Burda 8511, shot silk hessian
Cardigan; Nine, from Labels boutique
Boots; Enrico Antinori from Zomp shoes

pinterestmail

Anatomy of a ball dress, pt 3

OK.  This may not look like a lot of progress has been made, but it’s taken time nonetheless.
Firstly, the shot silk taffeta petticoat has been hemmed, by hand…

And the lining of the petticoat has been hemmed, by machine…

Then, since blogging about sewing machines and stuff recently I made time today to service my sewing machine …. (no picture, boring technical stuff)
Have cut out the lining of the overskirt, fitted it to myself, basted together…

And made two lining versions of the corset top, using Simplicity 9775, also fitted to me.

Doesn’t look very exciting I admit, but once I start adding the fashion fabric to the lining it will start to look like it’s on the home stretch.

Oh, the fashion parade last night?  With my usual lack of loquaciousness…. wow.  
No, just kidding, I was overwhelmed by the excitingness and interestingness of it all but I’ll try to remember enough to give a bit of an overview…  Of course now I feel like my wardrobe is oh-so boring and I now want to concentrate on making more interesting stuff to complement it…
I wish I could have taken pictures, but I’ve located some of the garments we saw last night on www.style.com
My favourite portion was the Comme des Garcons garments; all khaki and air force blue, and interesting shapes like… Hmm imagine a sort of de-structured, military nun, and you’re getting some idea.  Jackets like frankensteined trench coats, with mismatched fabric sleeves and random asymmetrical capelets,  BIG midcalf pleated skirts; I laughed with my friend R that my old school uniform skirt was a big pleated navy blue skirt just like the ones we saw and we teenage girls refused to wear it, but instead opted for the tight pencil skirt a la Grease.  Well, (shamefaced) it was the 80’s…  If only I’d known I would have hung on to my old school skirt, it would be tres chic for this season!!
There were also some interesting light grey wool dresses with overlays of apricot pink chiffon, like the lining was on the outside of the dress.  Formfitting, straight skirts below the knee; quite dreamy and pretty and so interesting (at right, Comme des Garcons, Fall 2009, from www.style.com).
There were also some “boyfriend” jackets in charcoal grey flannel that looked cosy and very wearable, slimline pants in khaki, air force blue and “greige”.  I secretly congratulated myself I already have some greige gabardine sitting in my stash that I’m planning some winter pants for…
For spring Isabel Marant offered some lovely formfitting short lacy dresses, with navy and white striped nipped-in blazers; a look I’m planning to file away for spring…
The Marc Jacobs look I liked the best was the trench coat (woah!! I’m halfway there) belted over tartan/check chiffon dresses; the dresses were a little froufrou for my taste but I liked the tartan idea…
The Alexander McQueen dresses were very lovely.  The parade I’d viewed on style.com had big stiffly structured dresses from vaguely skeletal aquatic reptilian printed fabrics that I thought were interesting but not particularly wearable; the versions that we saw last night used the same prints on soft jersey fabric, made up into very simply constructed short T-shirt dresses.  Really lovely; unfussy beach-chic and perfect for the Australian lifestyle.
I noticed a simply stunning necklace that I may have a go at a DIY at some stage; a multi-stranded pearl and diamante necklace with a BIG diamante pendant…
Some of the colour combinations I liked; obviously the khaki and air force blue was my favourite and one I’ll be using for sure, but this winter I also will be experimenting with hot pink paired with charcoal grey; and mustard yellow with charcoal and light grey; forest green and teal blue; and light grey paired with big gold jewellery…
Photos below, left from Marc Jacobs spring/summer 09, centre from Alexander McQueen spring/summer 10.  Imagine this McQueen print in a simple little T-shirt dress with cap sleeves, and that is what we saw…, and at right from Comme des Garcons fall 09, interesting details and mix of fabrics in this coat

pinterestmail

“Tablecloth” skirt, the black-and-white look

Remember how I said I’m often inspired by high end fashion shoots in making my daily outfit choices?  Well today I thought I’d share my inspiration shot with you today.  This outfit was in this month’s Vogue Australia.  Of course the original is Dolce and Gabbana head to foot and my version is low rent and handmade, but meh.
I don’t wear the black-and-white look very often but love this D&G outfit and was inspired to give it a go.  Being from a European fashion shoot it’s a springtime outfit, and I do think of the black-and-white look as being a very spring-y colour choice.  Now I’ve got it on though I’m very pleased with how this ensemble looks.  I also thrilled at how this skirt, first posted here, is shaping up in my wardrobe.  (And no, it’s not actually made from a lace tablecloth, but certainly inspired by them…!)  When I made it I thought it would be too summery to wear outside of the summer months, but am feeling very comfortable in it today with socks and boots.  It’s actually a tad warm for boots but I’m going on to a fashion parade tonight and the nights now are cool enough that my toes cry out for sock coverage… so a little overheating during the day is necessary here.
Speaking of fashion parades, I’m pretty excited about going tonight.  There will be some very swish-o labels on parade, so I’ll be doing lots of mental note-taking.  A sample of the labels promised are Isabel Marant, Alexander McQueen, Maison Martin Margiela,  Comme des Garcons and Junya Watanabe.   Yes, (air fist punch) Perth is finally getting some of the avant garde designs in stores!  Of course we love our boring basics, like Country Road etc but we love us some international wow-stuff too…

Details:
Skirt; own design, stretch lace
Camisole; Country Road
Cardigan; Picnic
Boots; Sunday, Andrea and Joen, from Uggy’s in Dunsborough
Market basket; can’t remember where I got it from

Photo above from Vogue magazine, 
Dolce and Gabbana Spring/Summer 2010, 
photographed by Steven Meisel

pinterestmail

Anatomy of a ball dress, pt 2

I apologise for the lack of progress pictures on this dress.  Pretty much I’ve had heaps of work and errands to catch up on, and am restricted to sewing in a more limited amount of spare time than I’m used to.  I hope I get it finished!!  No, I’m kidding, this dress will get finished, even if the pictures become a bit sporadic over the next week…
Oh, and thankyou everyone who commented positively on my petticoat in its early stages!  It’s so nice to receive lovely supportive comments, I’m very grateful for each and every one of them, you are all wonderfully kind people… Thankyou all so much!
So last night I finished draping the flounce to my satisfaction, folded down 1cm under the top edge and sewed it onto the petticoat with a double line of stitching.

I then inserted the zip and finished the centre back seam.  Haven’t put in a hook and eye as yet, doh!!
(Apologies for the poor quality of the following pictures.  I took these this evening and it’s too dark for outside photos…)

I handfinished the lining inside the petticoat, yes, my now well-documented obsession with having a nice looking inside; here is a photo of the inside of the bodice

And the petticoat so far.  I have to model it myself from now on because as I’ve blogged about previously, as wonderful a model as Bessie is she is bigger than me and so once the zip has gone in I can no longer do it up on her… 

The next step will be to hand hem the petticoat, which I will do in front of the idiot box tonight… stay tuned…

pinterestmail

Turquoise and sand

Today is the most magnificent day, with blue blue skies and not a cloud to be seen…  The last time I wore this skirt I went for bright bright bright, but I think I love it even more with these warm caramelly neutral tones like I’m wearing today.  Colours reminiscent of sandy beaches, crystal clear waves and clear blue skies, no?  I must be pining for the hues of summer already, although the weather today is glorious enough for the most perfect summer’s day.
And have a look at this fluffy little purr-monster.  She came up and instigated a love-fest while I was taking my photos today.  Have a look at those eyes!
Sadly I have lots of office work to get through even though I would much prefer to be out in the garden.  I’ve done a tiny bit more work on my ball gown but have hit a standstill…  I’m heading back up to the fabric shop after work to get a bit more fabric for my flounce, as the one I have pinned to the petticoat now is not as flouncy as I desire.  Must have plenty of flounce!  Flounce is gooood!  Tomorrow I should have more progress to show you.

Details:
Skirt; Vogue 1023, turquoise polycotton
Camisole; Cotton on, tossed out by my daughter
Cardigan; my own design, coffee and white net
Scarf; Country Road
Sandals; Salvo’s op shop
Nail varnish; Fool’s Paradise, BYS
Zoe; as herself

pinterestmail

Introducing my other children

Sandi asked me in a comment recently about sewing machines and which functions I thought were useful ones for dressmakers to have, so I thought this would be a good time to introduce my work-horses.
Firstly, my ordinary machine.  I’ve had this little beauty for about twenty years now and it’s been wonderful all this time.  It’s a very basic Janome machine, that is capable of forward stitching and zig-zag and has a reverse toggle.  Yup, that’s about it!!  Of course it does buttonholes too, but that is just a manipulation of the zig-zag stitch….  It also has six fancy stitches, which are on the far right of the green and blue labels on the top right.  I’ve used these stitches only once or twice in the whole time I’ve had it.  I’ve done all my adult sewing on this machine.  I really like it because, being so basic, I can service it myself, and have managed to carry out a few minor repairs once in a while too.  The most complex thing I’ve done is change its drive belt.  It has no computer and so no fancy automatic functions, but this suits me to a T.  My mother has a wonderful computer driven machine, and the one time I used it it’s automatic “needle up”/”needle down” function both startled me every time it did it, and frustrated me too.  Plus, she always seems to be having to take it in to get “looked at”. because some timing thing is out or some such trivial disfunction, which renders it unusable.  So annoying.  This would drive me round the bend if it was my machine.  
The one “modern” application I’ve seen on new machines that I think would be pretty useful is the automatic buttonhole maker.  I’ve seen shirts made using this function and the buttonholes are works of art, while my efforts fit into the category “the best I can do”.  After years of practice though at least I think I can say my buttonholes are now consistent, if not as perfect as the computer produced ones.  Meh.  Other than that, I’ve never felt the need for more than the basics offered by this machine.  It’s sewn its way through countless garments for me, countless clothes for my children through every stage of their lives, er, three shirts for my husband (poor man!), quilts, handicrafts, the curtains for two entire houses…  I couldn’t be happier with my little beast.

And here is my overlocker.  If my ordinary machine is the golden child in this family, then my poor overlocker is the problem child.  The Cain.  The evil sister.  
I got another Janome, and the big plus with them both being Janomes is that I can use the same foot pedal for both machines, I just switch the power cord from one machine to the other and bob’s your uncle.  Handy.  I have a love/hate relationship with this machine.  When all is going swimmingly then we are happy and harmonious together, completing our project.  If my overlocker is having a bad day, say has taken a dislike to the fabric I’m using, or has been threaded in a way that some tiny weeny little thing is not quite right then it can rapidly become the machine from hell.  Sometimes it can be the tiniest thing, one thread de-threads itself, overlocker throws a tantrum, and the re-threading can take ages, and use metres of thread.  I really only use the basic 4-thread serge, and the rolled hem function.  I don’t trust my sanity to try anything trickier on this thing…
There is a note in my overlocker instruction book that has me puzzled.  For oiling of the overlocker, it recommends once a week for normal use, and once in ten hours in continuous use.  (double take) Huh?  Every ten hours?  I’m wondering if this is some manual-writer’s idea of a joke.  I can imagine a few nerdy Janome technicians hunched giggling over their computers, “Ha ha ha, I’ve got a good one, let’s recommend re-oiling every ten hours, hehehe!!”  I mean seriously.  And what is “normal” use anyway (ah, the age-old question…!)  I only use my overlocker about once a week, anyway.

What machines do others use?

pinterestmail
Switch to mobile version
↓