Monthly Archives: October 2012

You are browsing the site archives by month.

Welcome to the fold


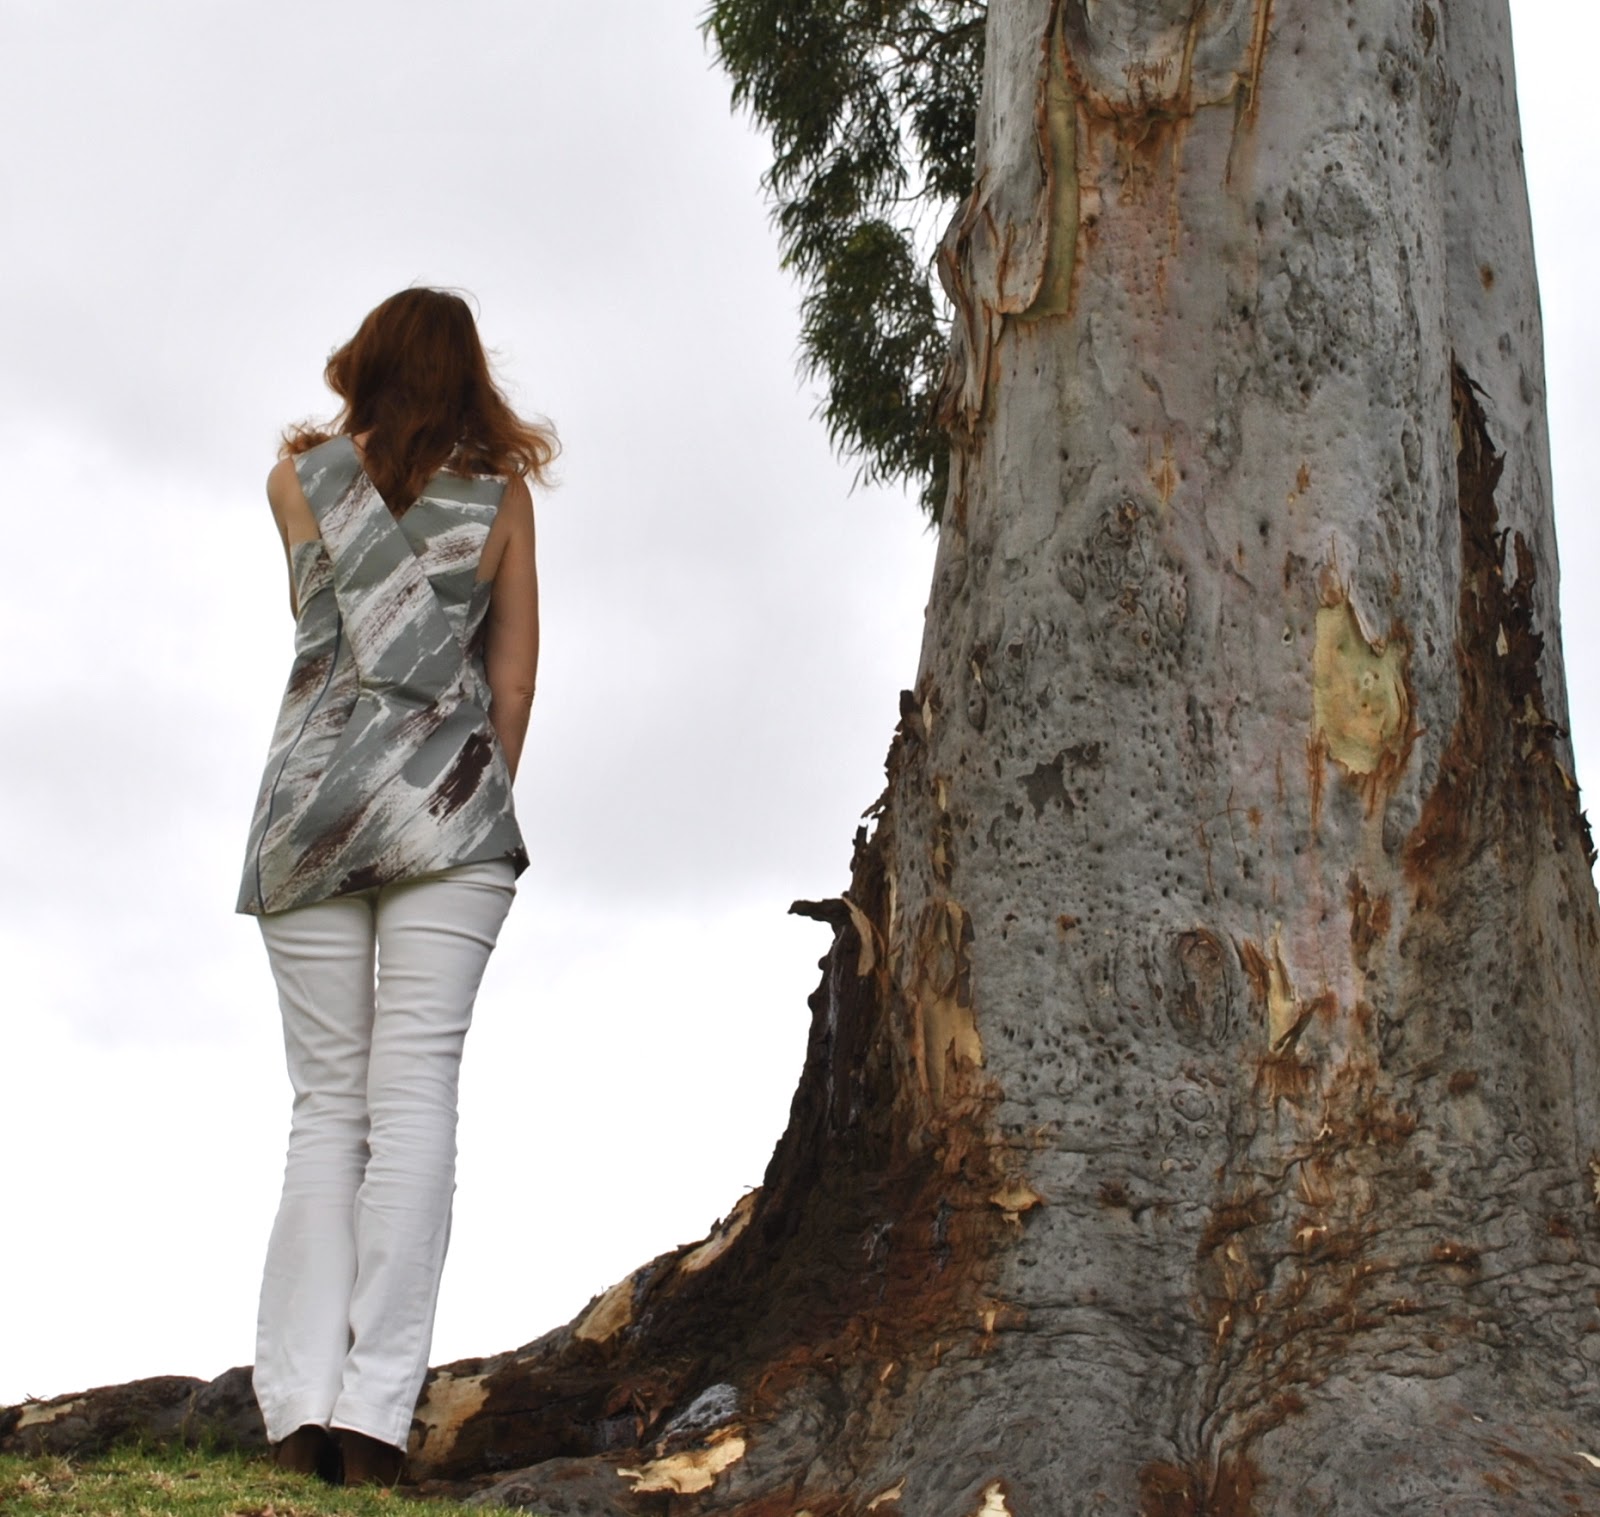
In a further small step towards overcoming scissor-phobia in the face of precious fabrics; I have made a new tunic top.
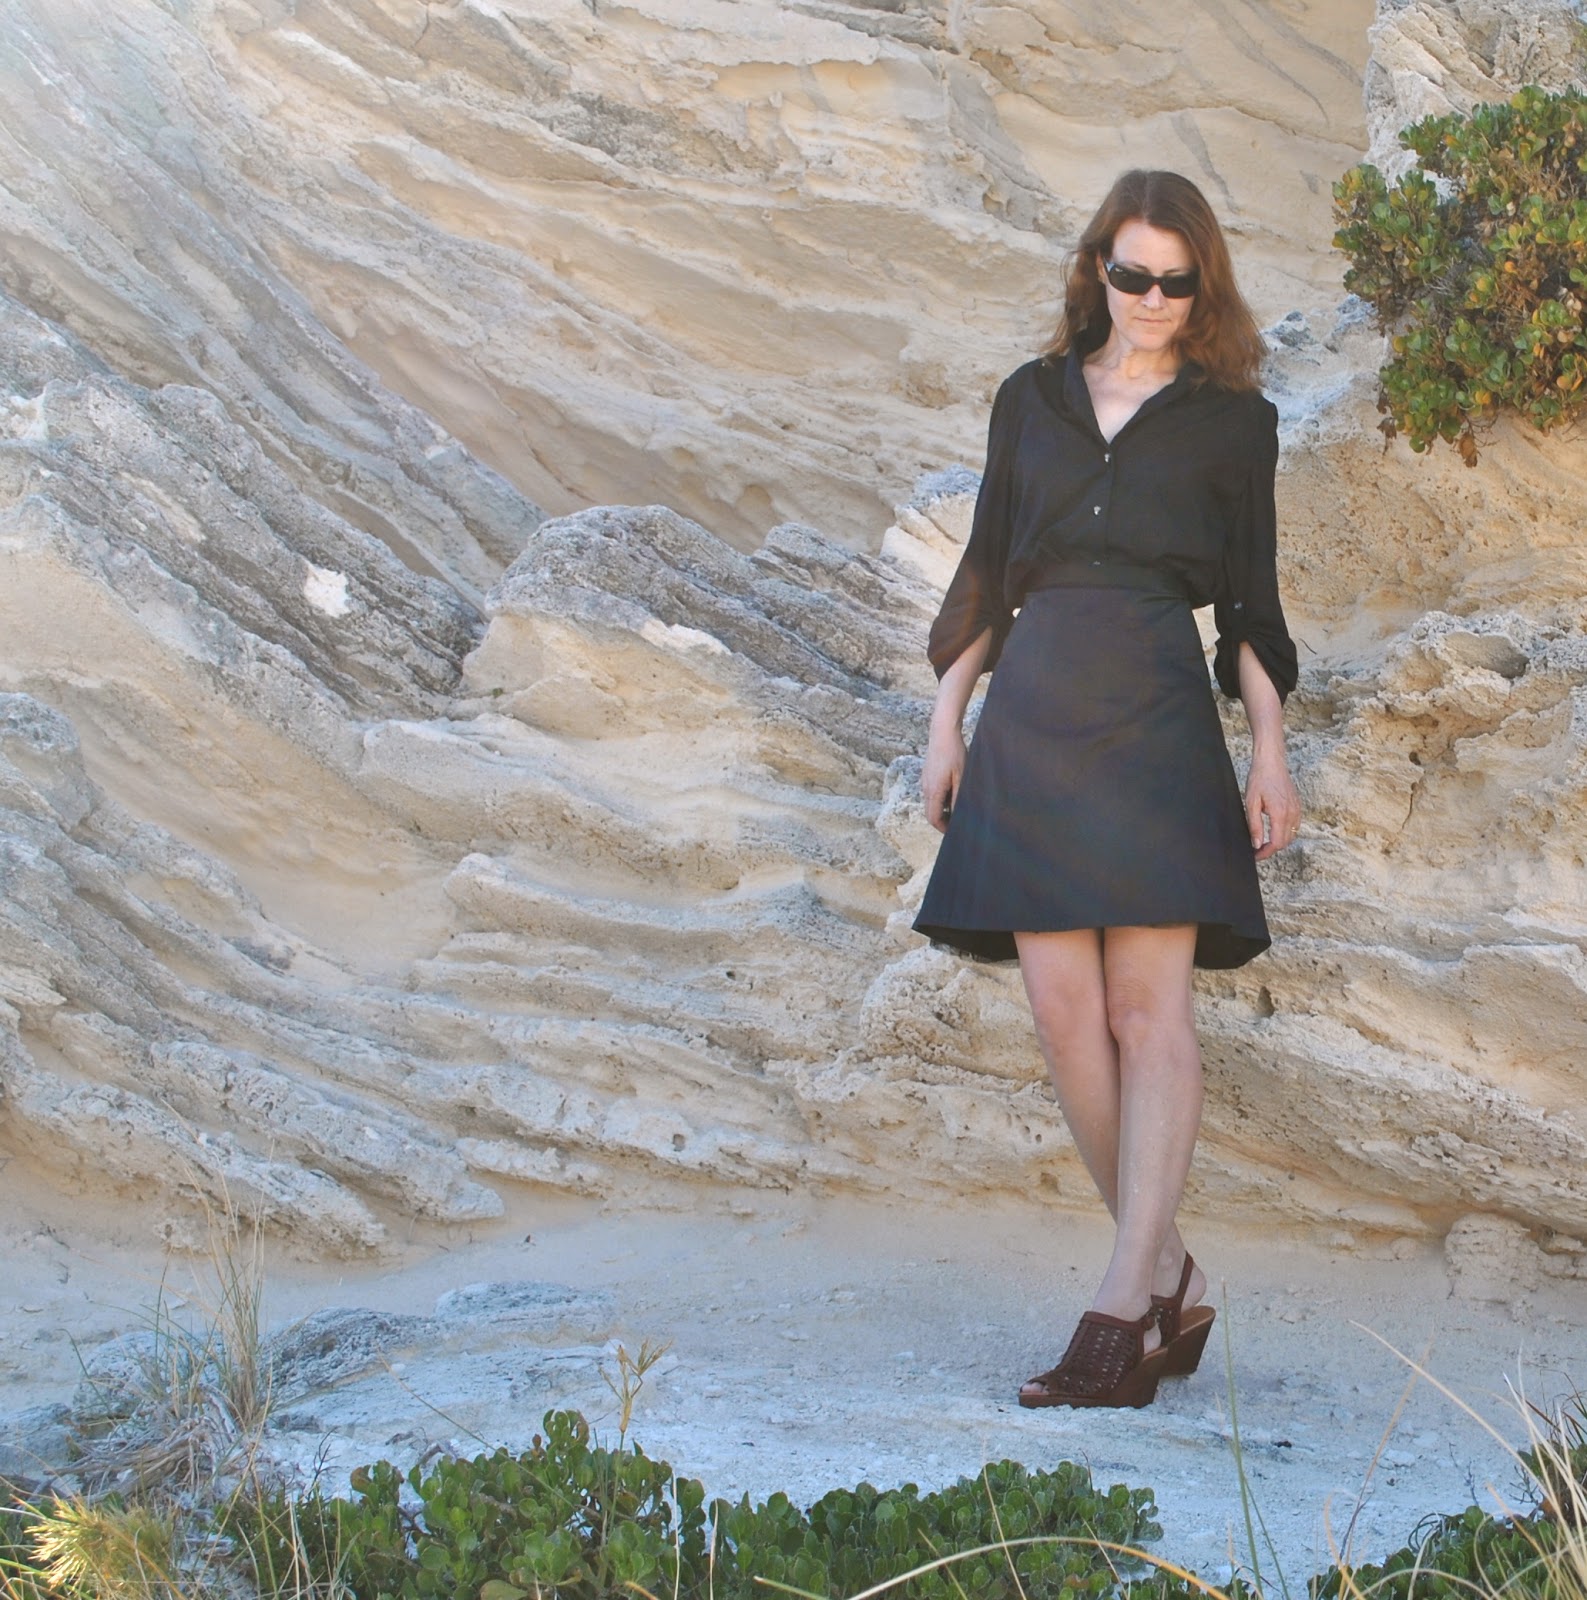
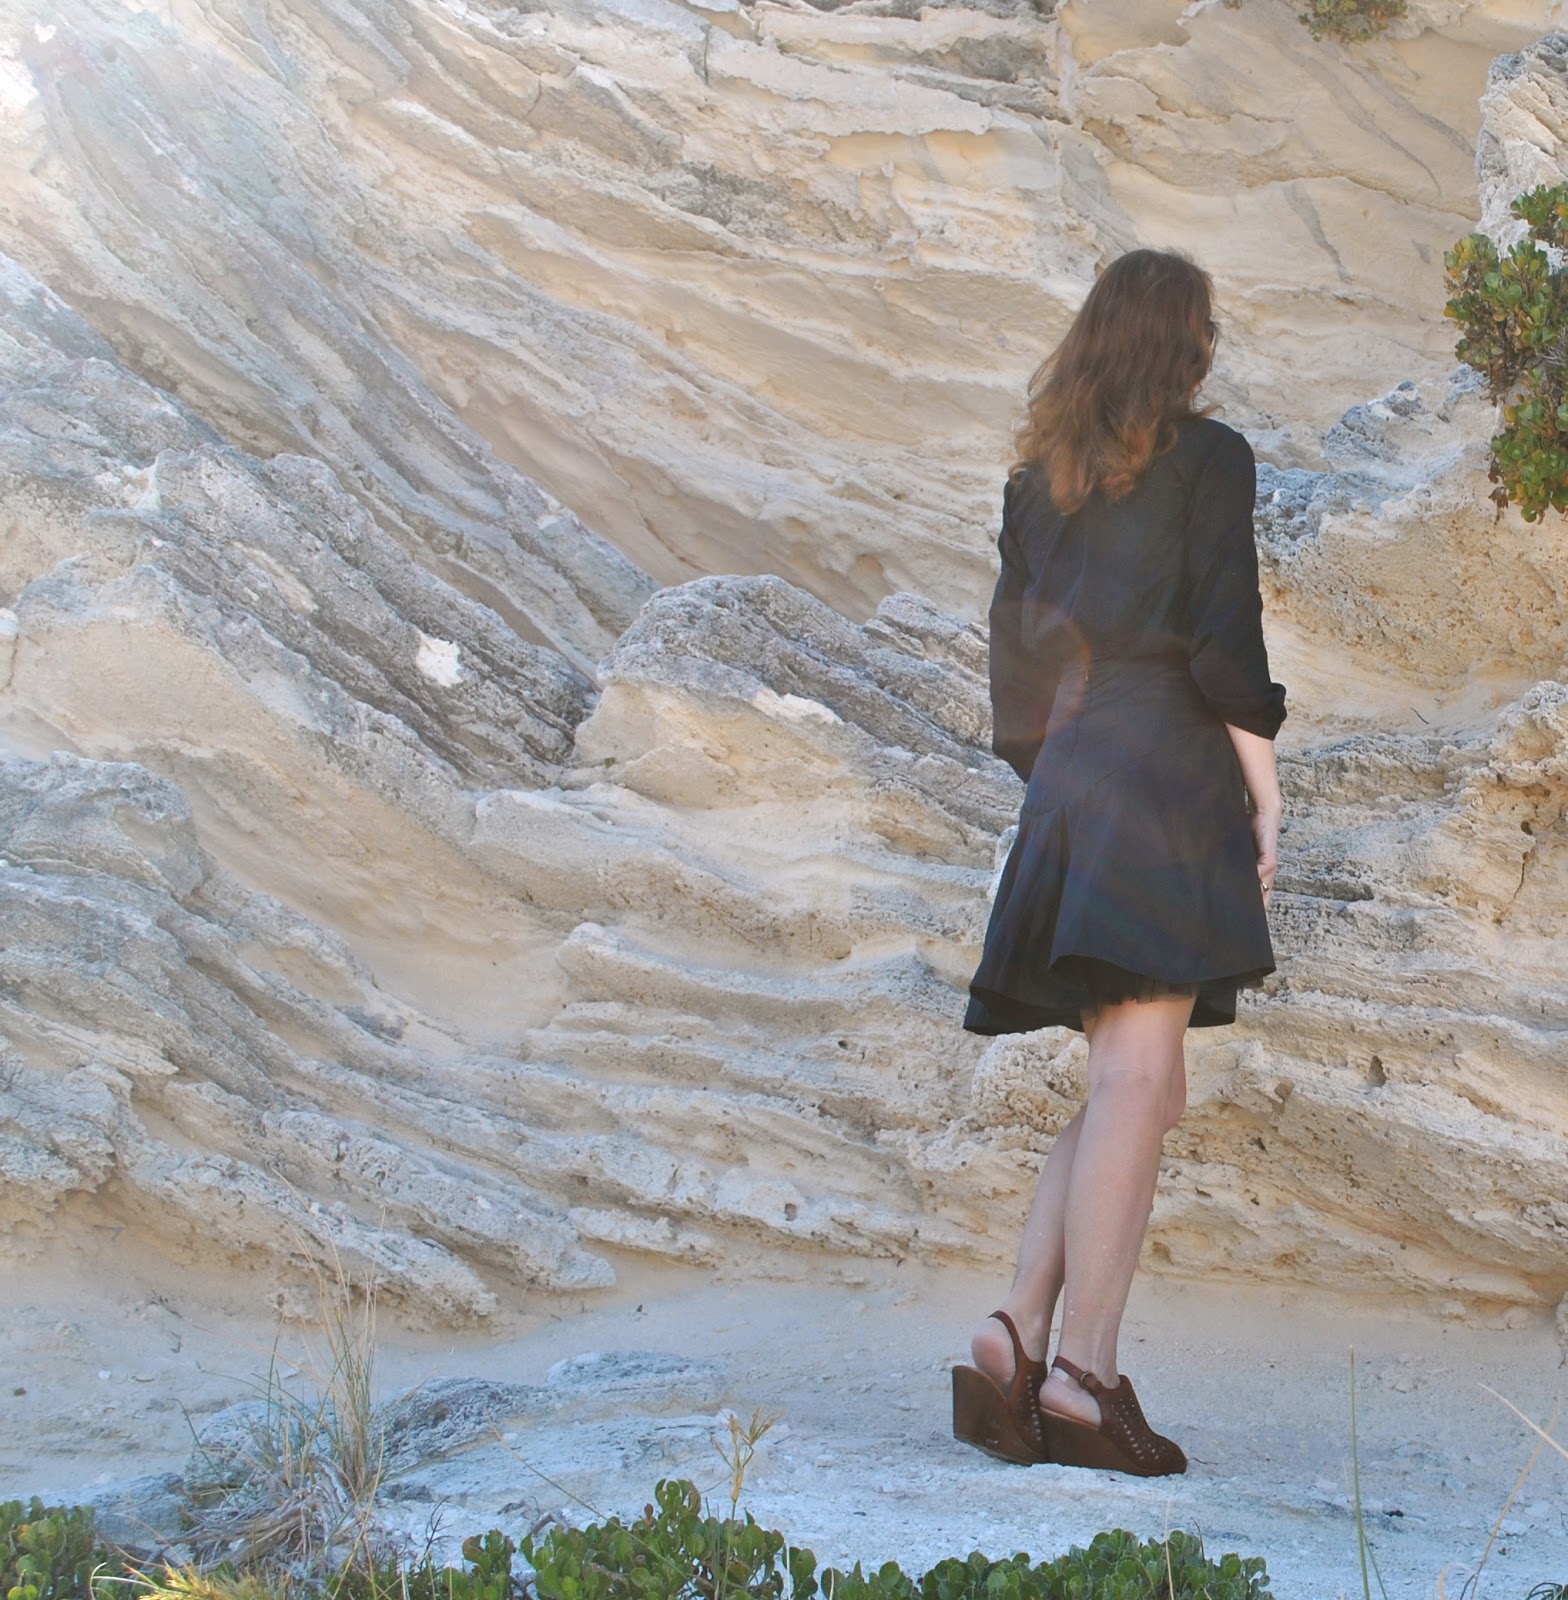
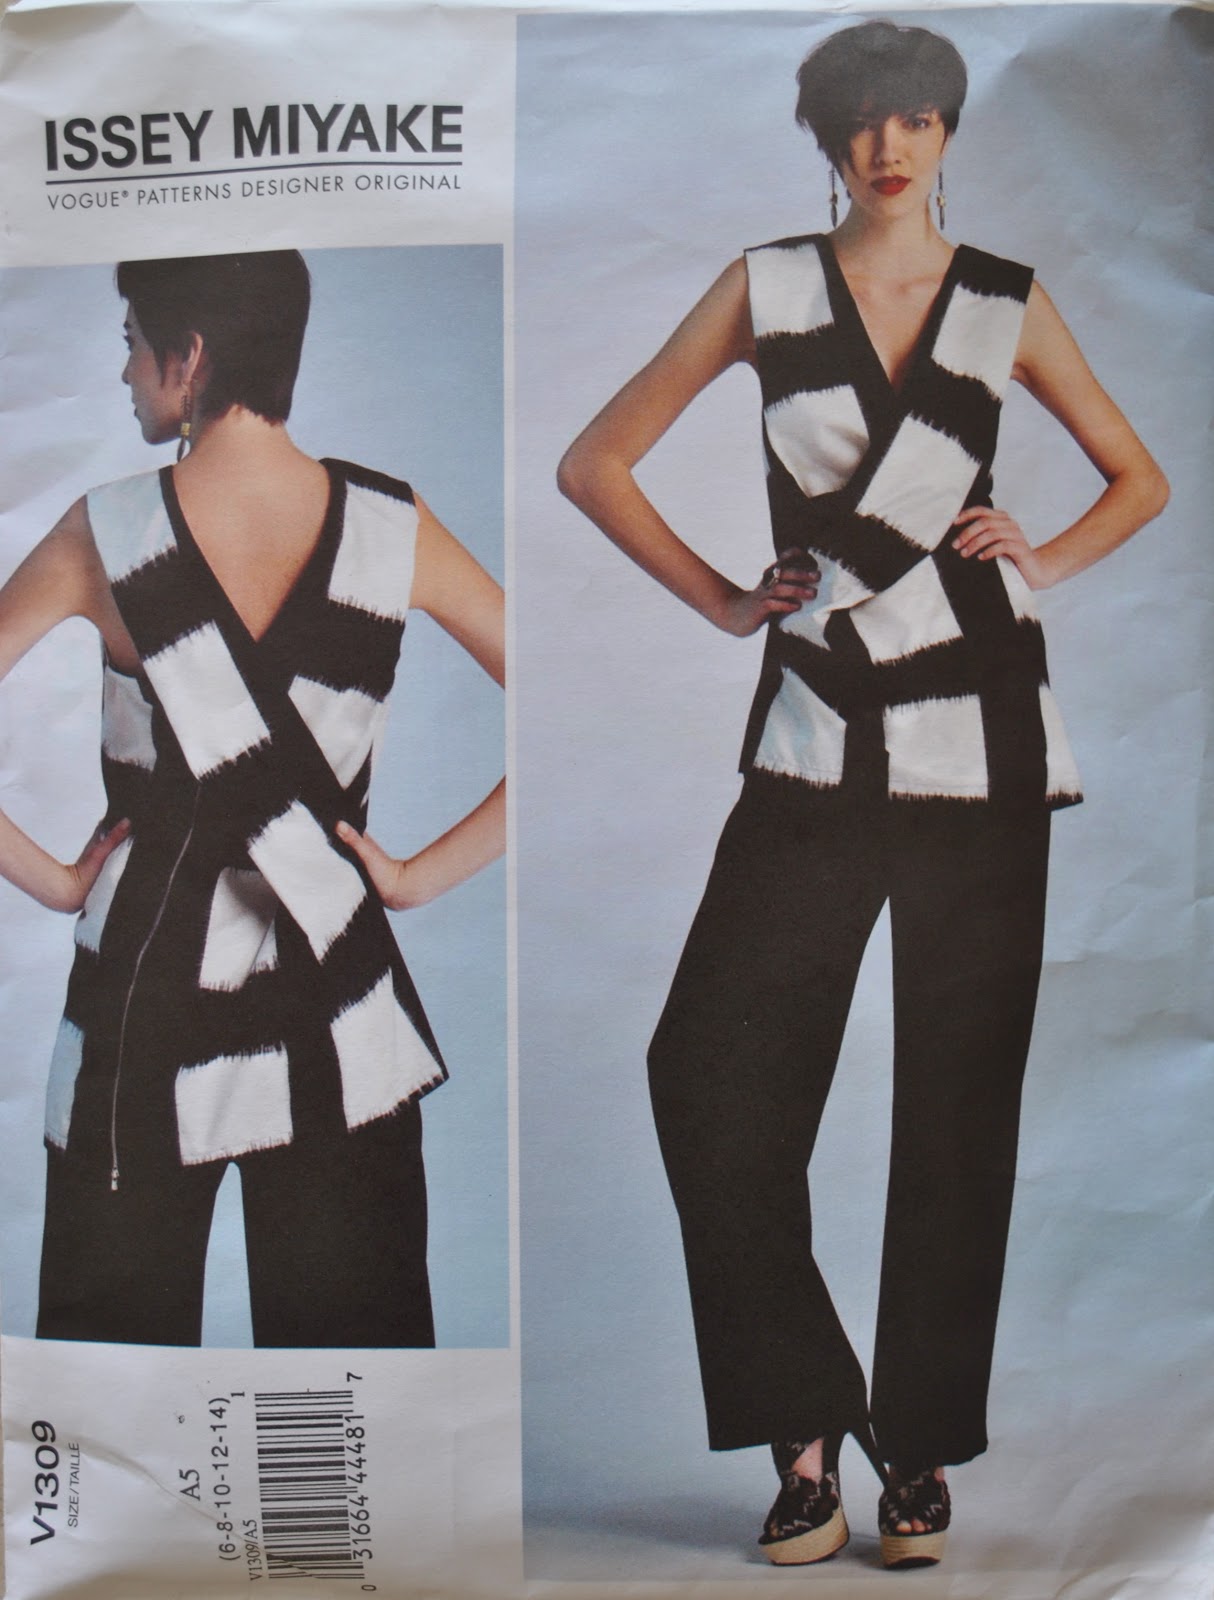
This is the top from Vogue 1309, and I have made it in a hand-painted silk dupion from Fabulous Fabrics. The fabric is pretty
fabulous, yes?  The strong uninhibited
strokes of dark chocolate and slate grey are so visually powerful and exciting.  They bring to my mind an abstract
representation of a windy stormy day; clouds streaking
across the sky, grey boughs bending in the wind, dead leaves whipping from the
ground and through the air.  Please note I took advantage of an appropriate weather moment for my photo op in honour….  🙂
I did not hand paint this fabric myself.  I have painted my own fabric in the past, but in this case I bought it all ready to go. It was ostensibly a
Christmas present from my husband, from last Christmas, last year, lol.  And ever since I opened my present (surprise!)  I’ve been on
the lookout for a worthy pattern … and when I clapped eyes on this Issey
Miyake pattern I instantly knew they would be perfect together, a match made in
heaven.  The pattern even
stipulated silk dupion, as if the designer knew that I had a piece of wild silk
dupion just awaiting a wild tunic pattern.  The times I actually obey those “recommended fabrics” instructions
printed on the pattern I can count on the fingers of one hand.  Hmmm, exaggerating there, I might be up
to a few more hands by now… but those times are still pathetic minorities;
small shining lights in a long rebellious history of sartorial disobedience.
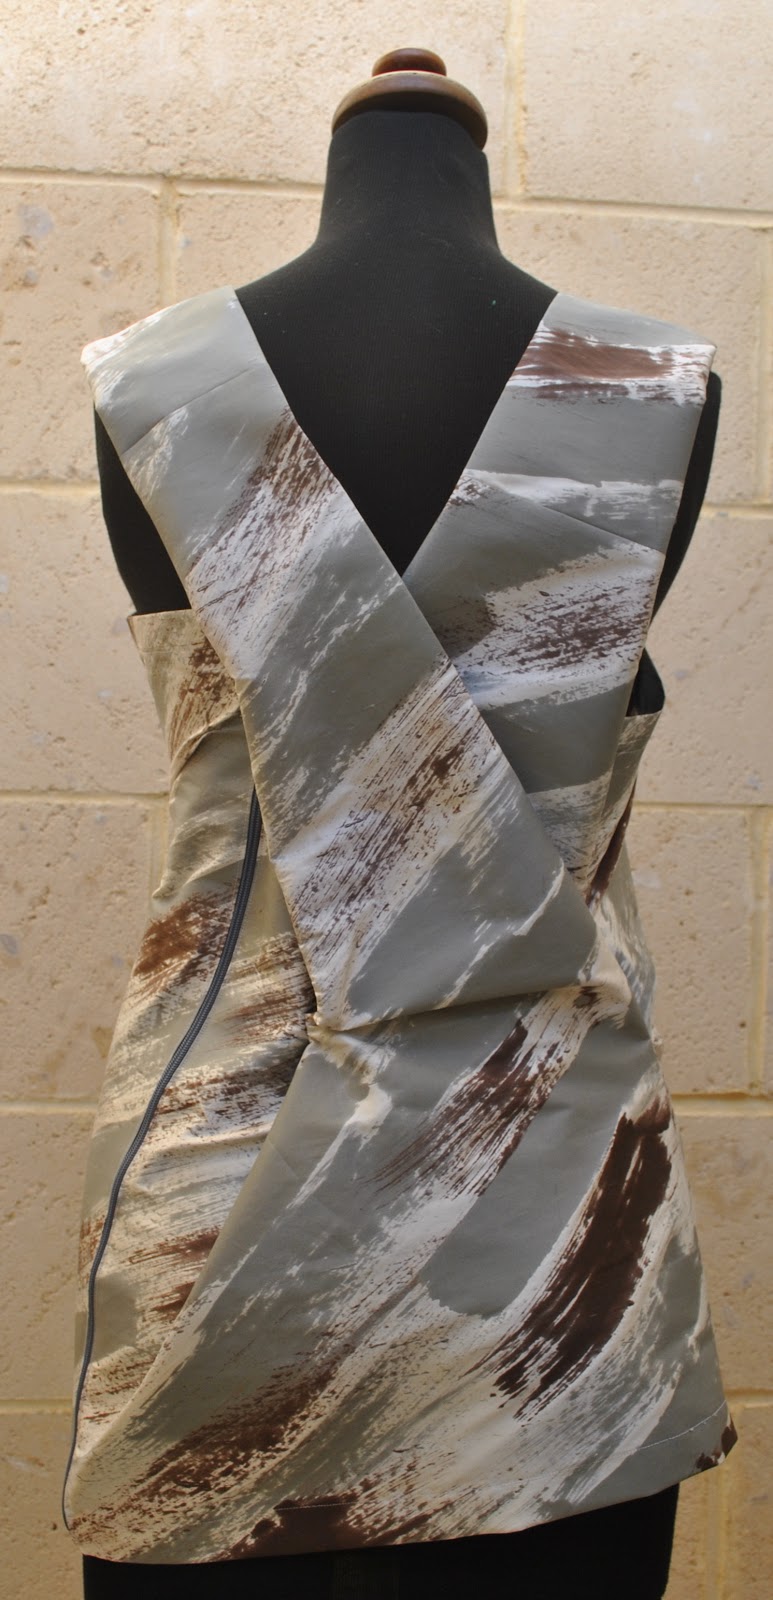
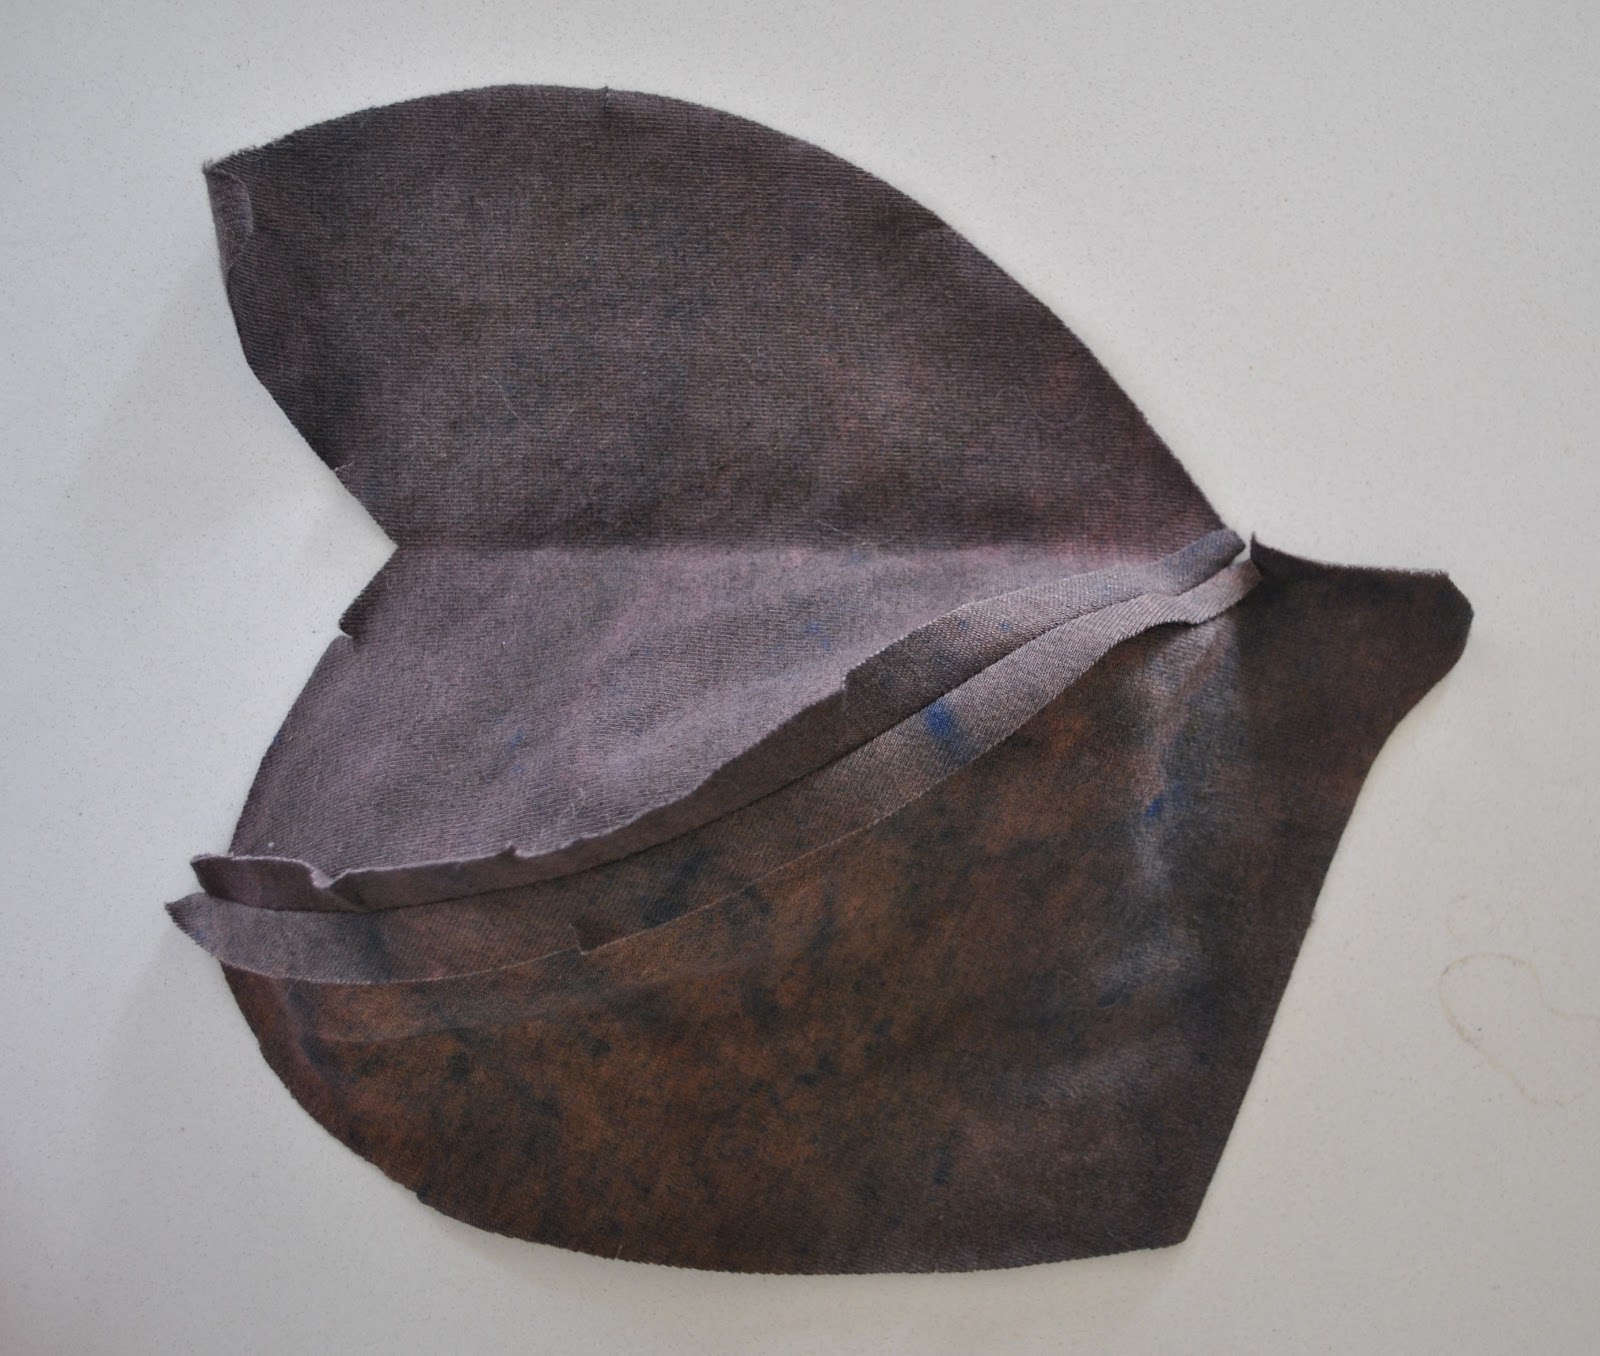
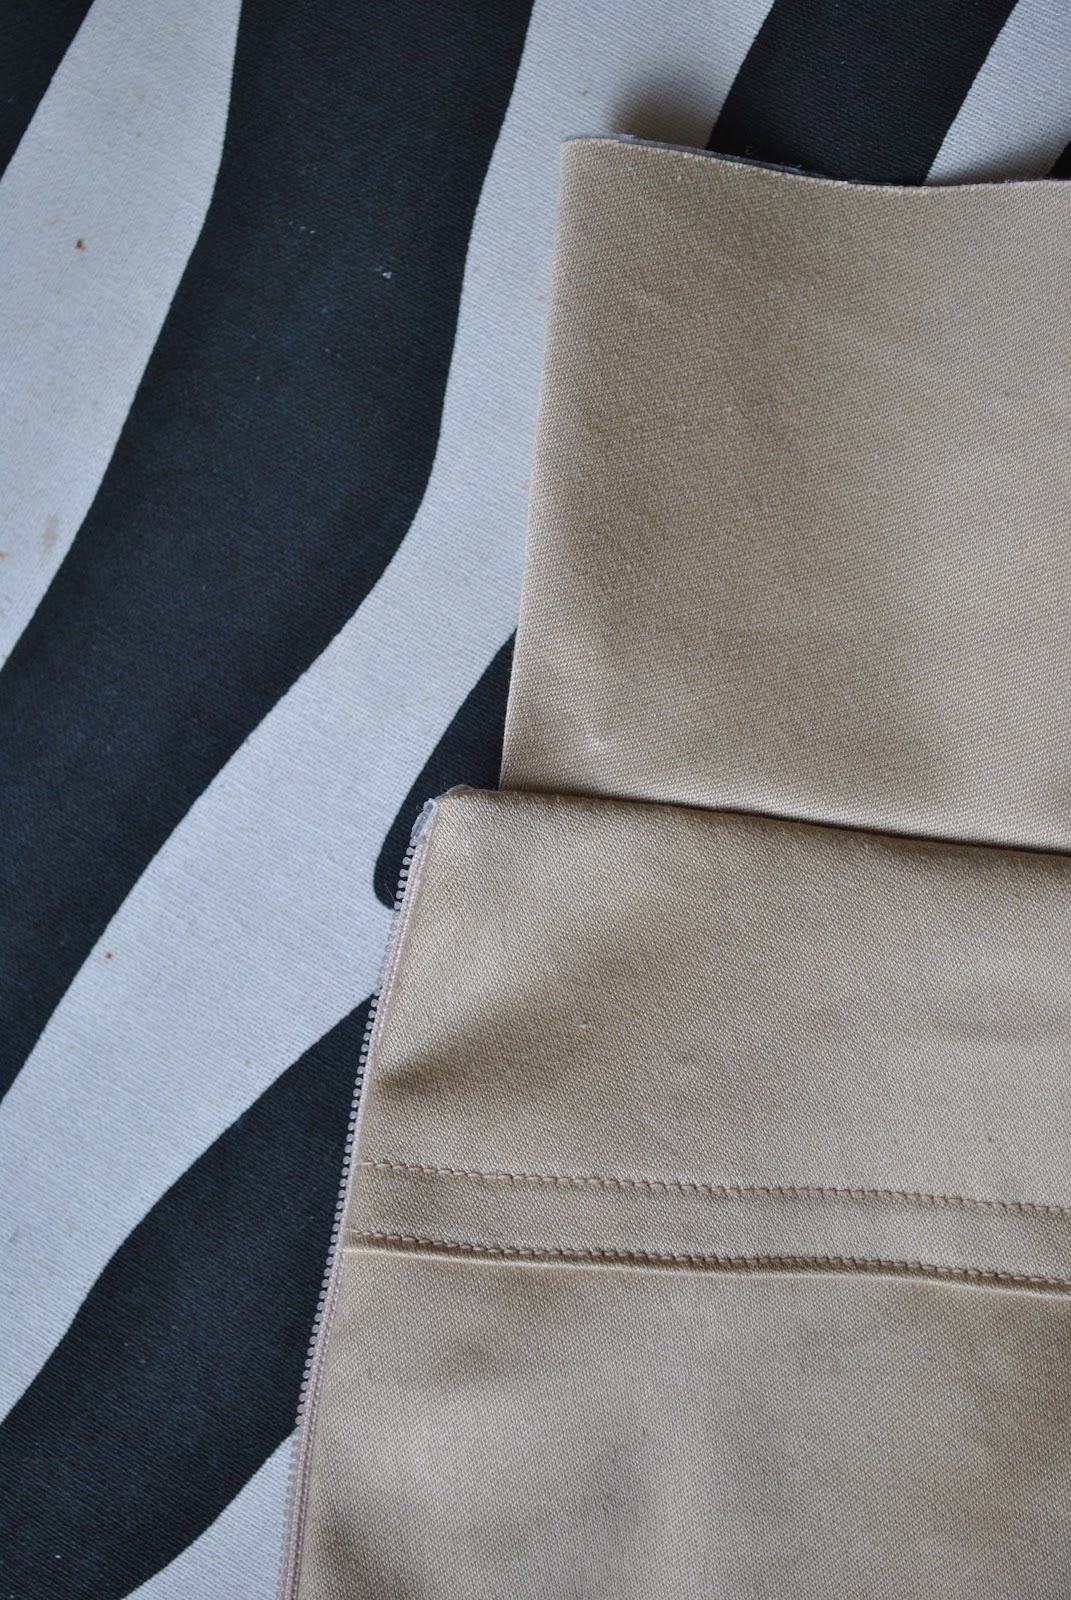
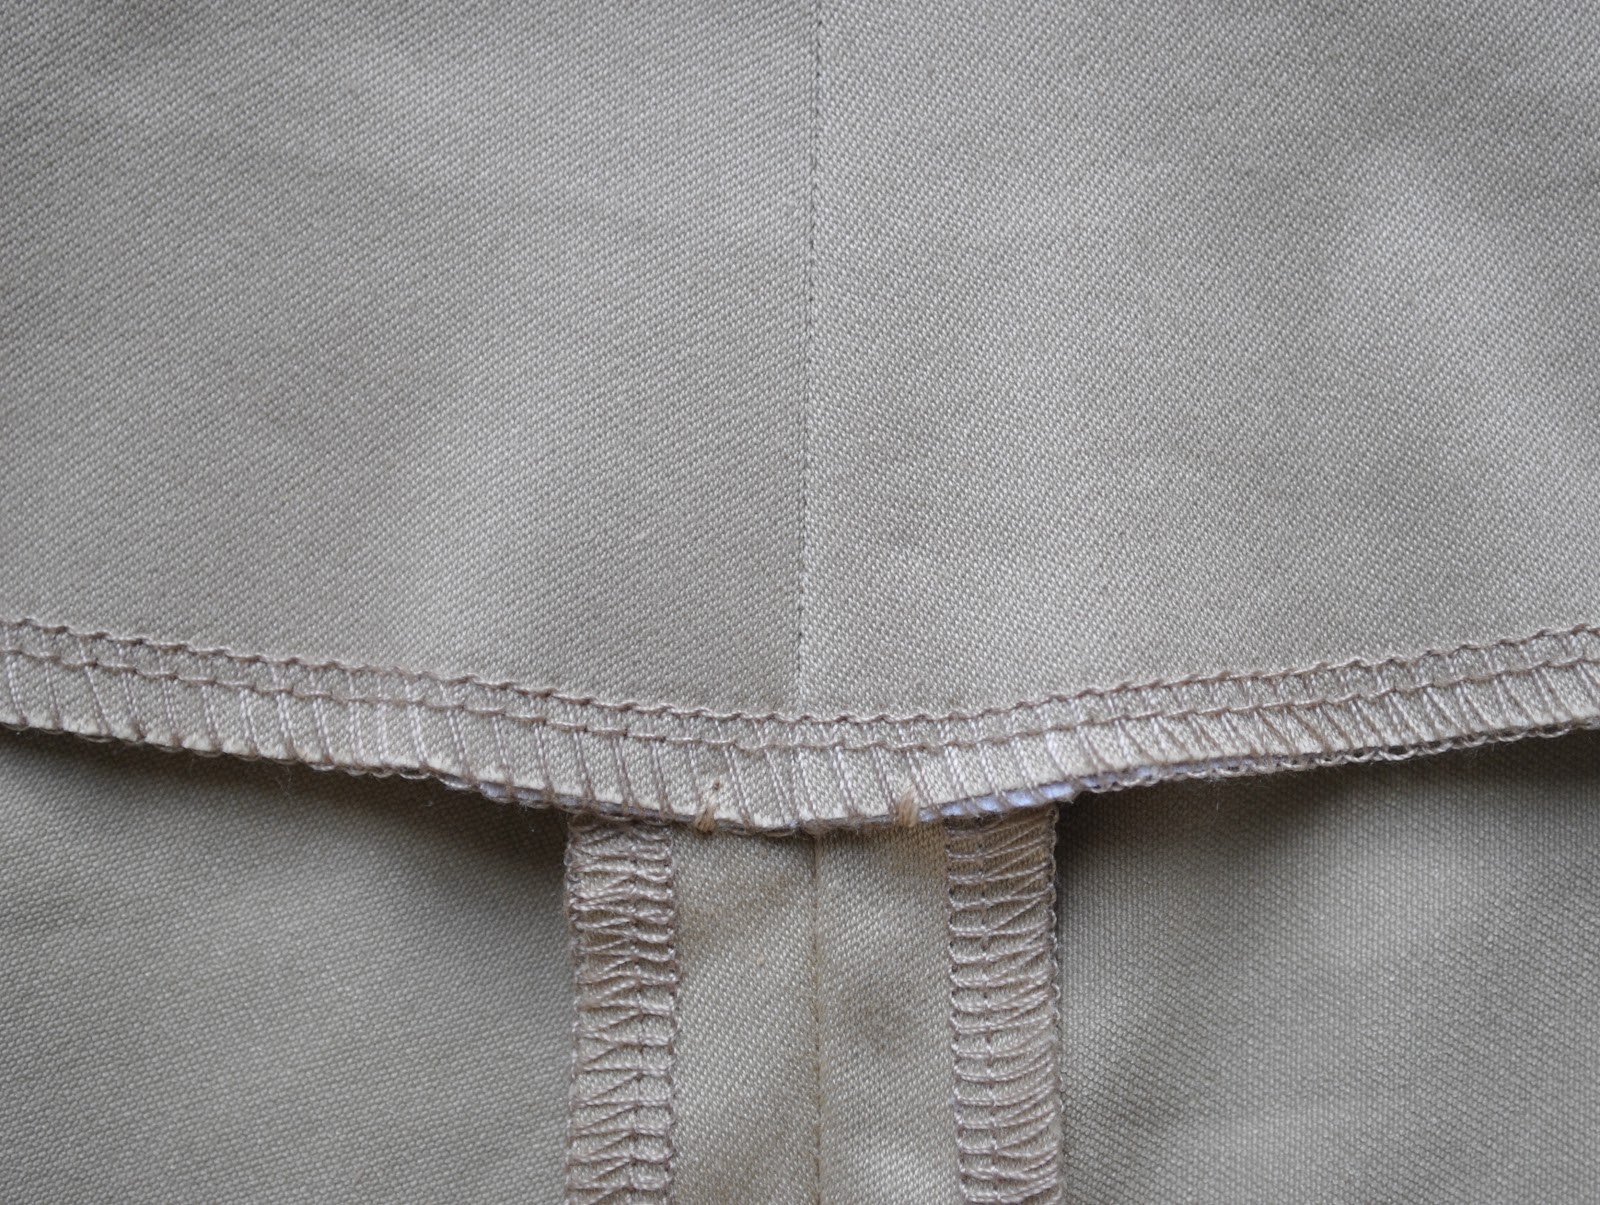
Above: at left; the front and at right; the back.  The fabric was er, quaite expensive and I only had one metre so I had to join pieces to get out that huge front/back piece.  My fabric was 150cm wide, and I cut the pieces on the cross.  The joins can be just seen at just about shoulder blade level, on each side at the back (above right)
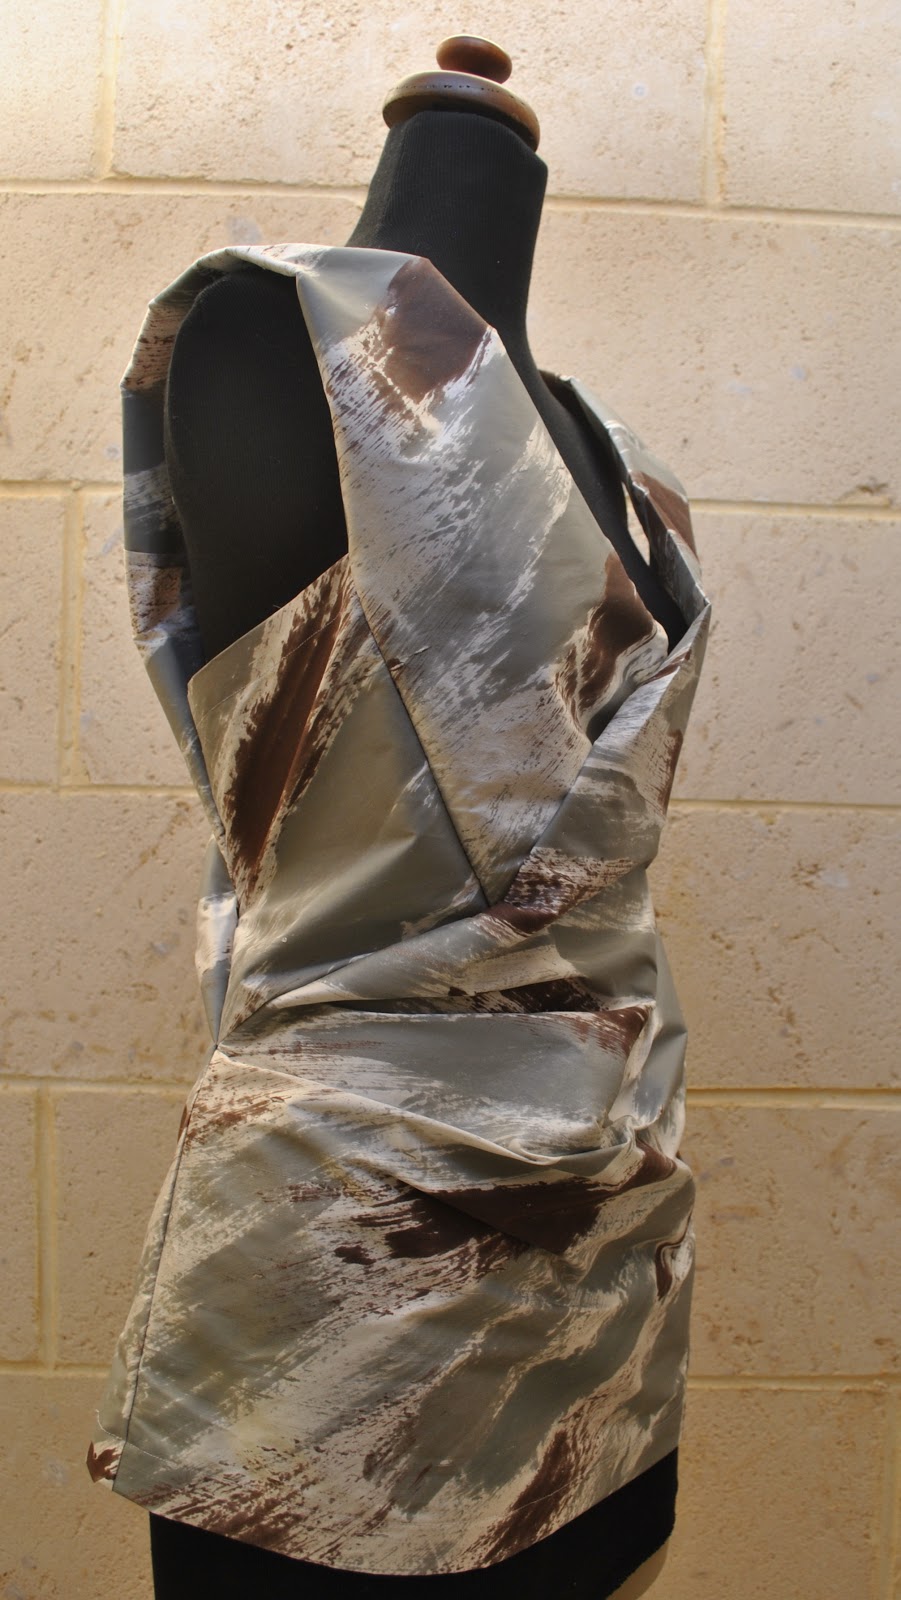
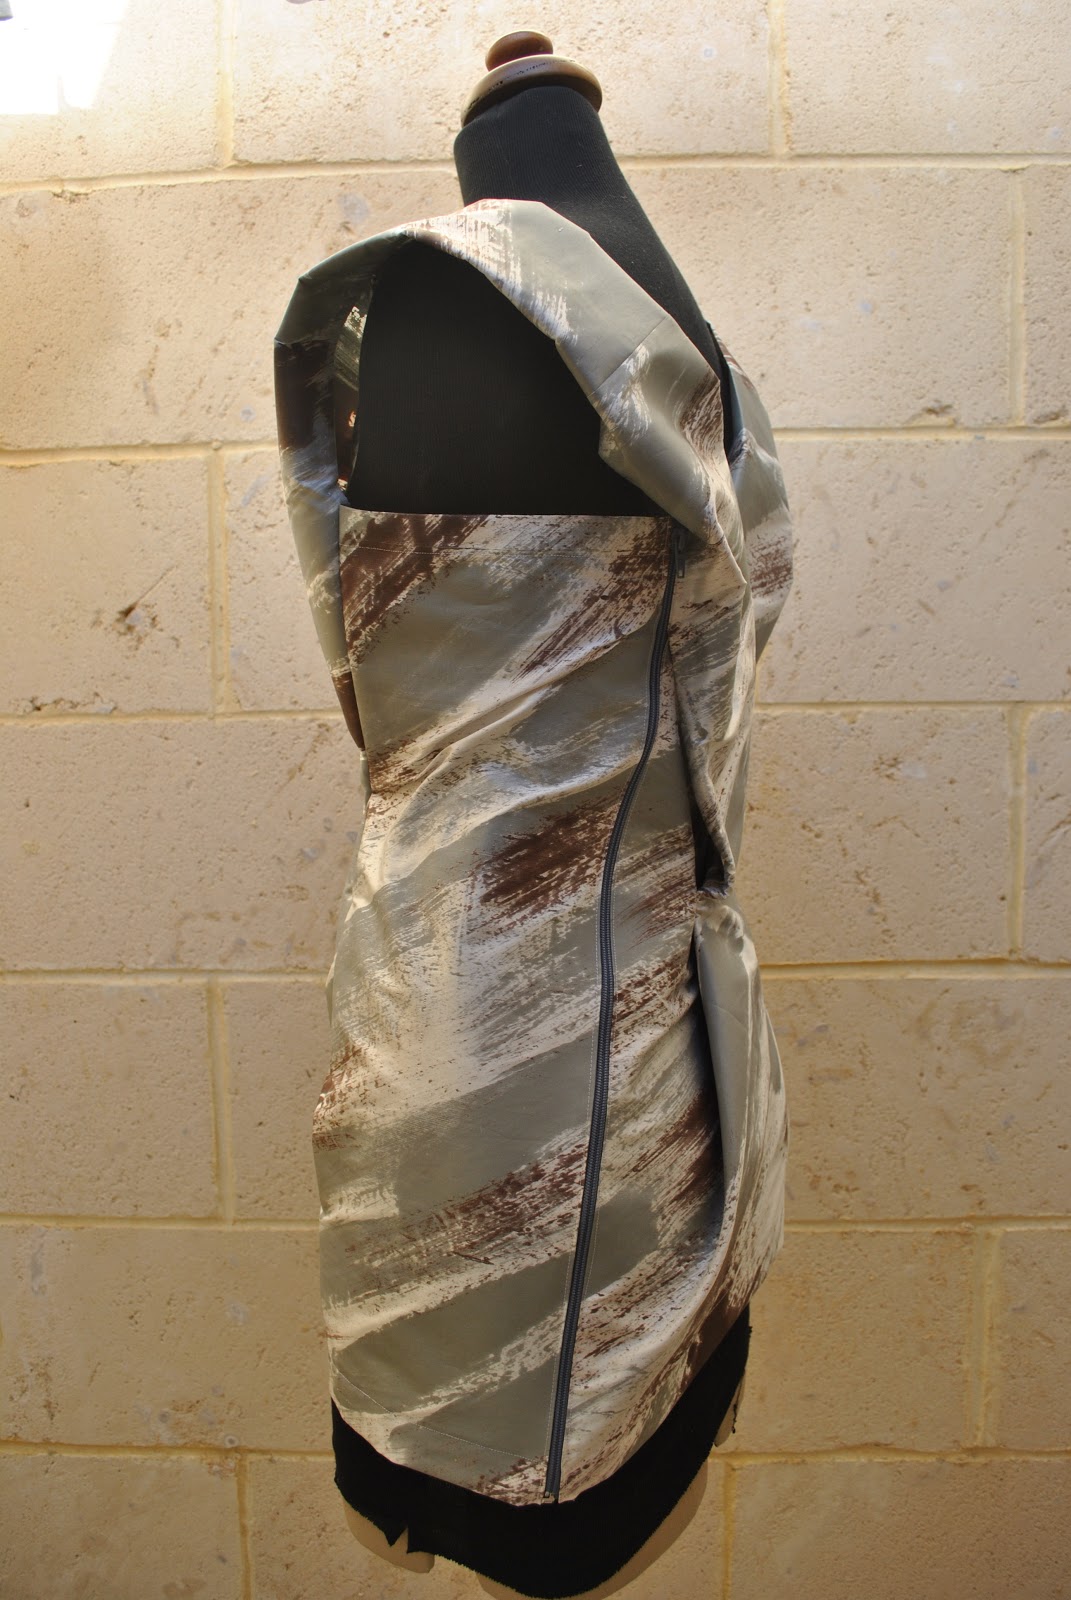
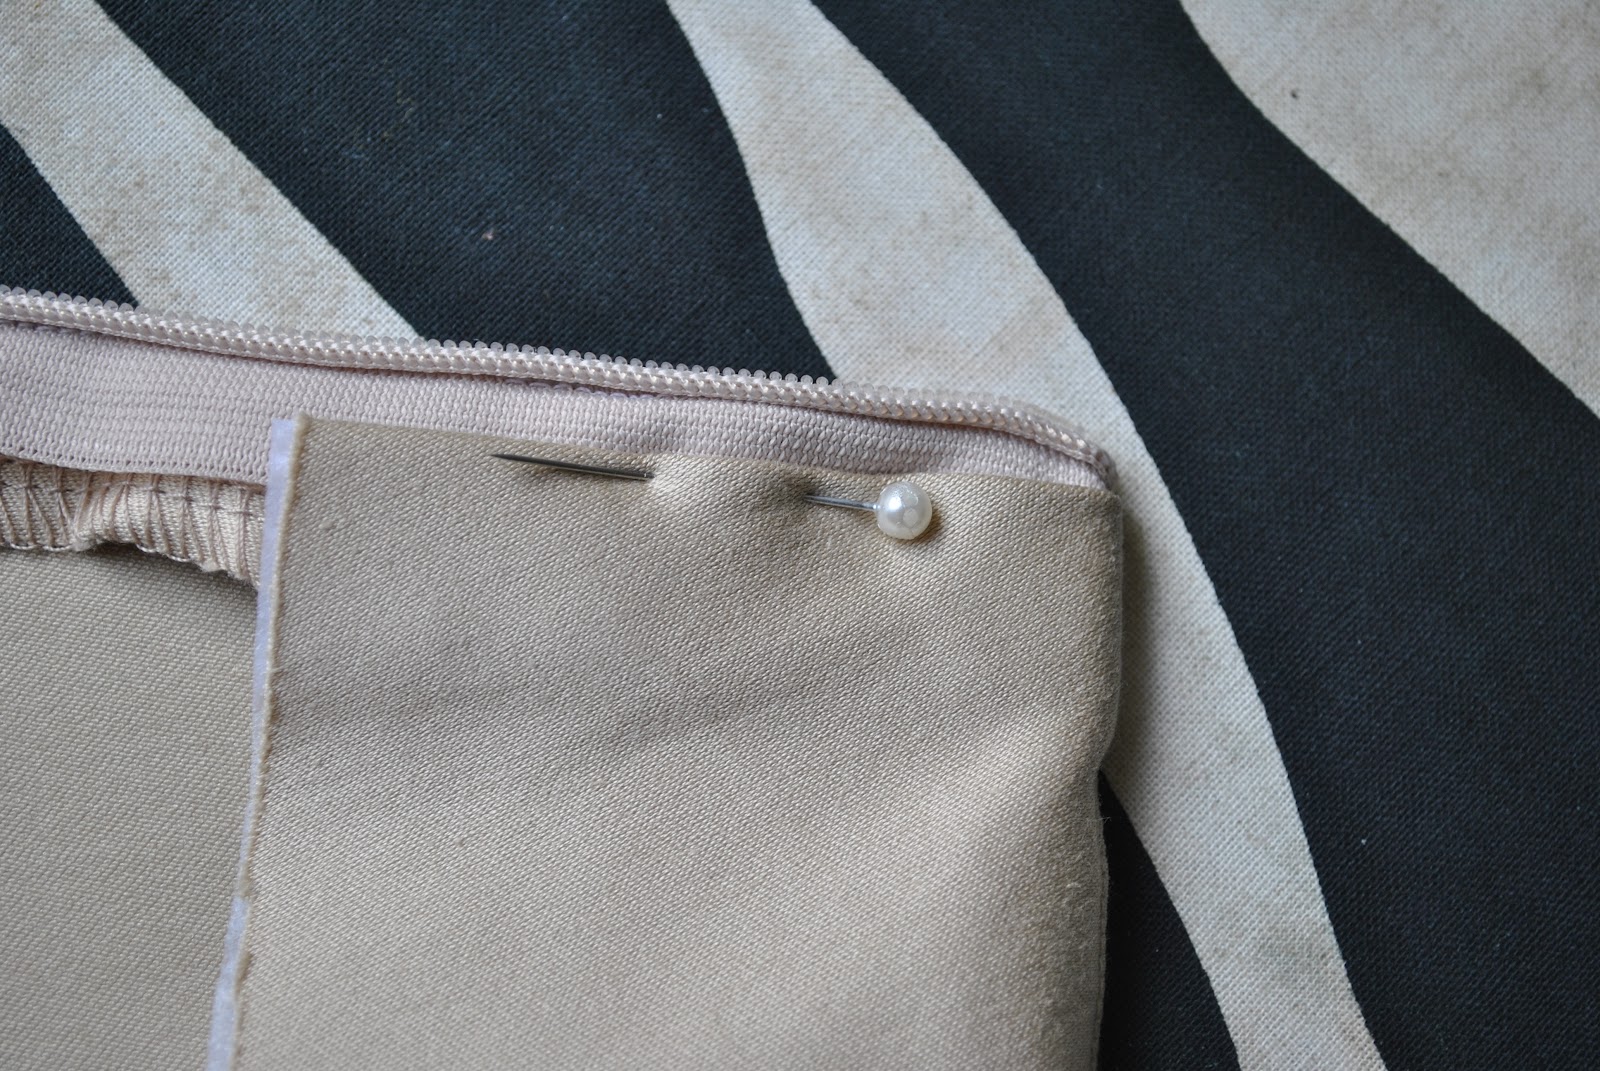
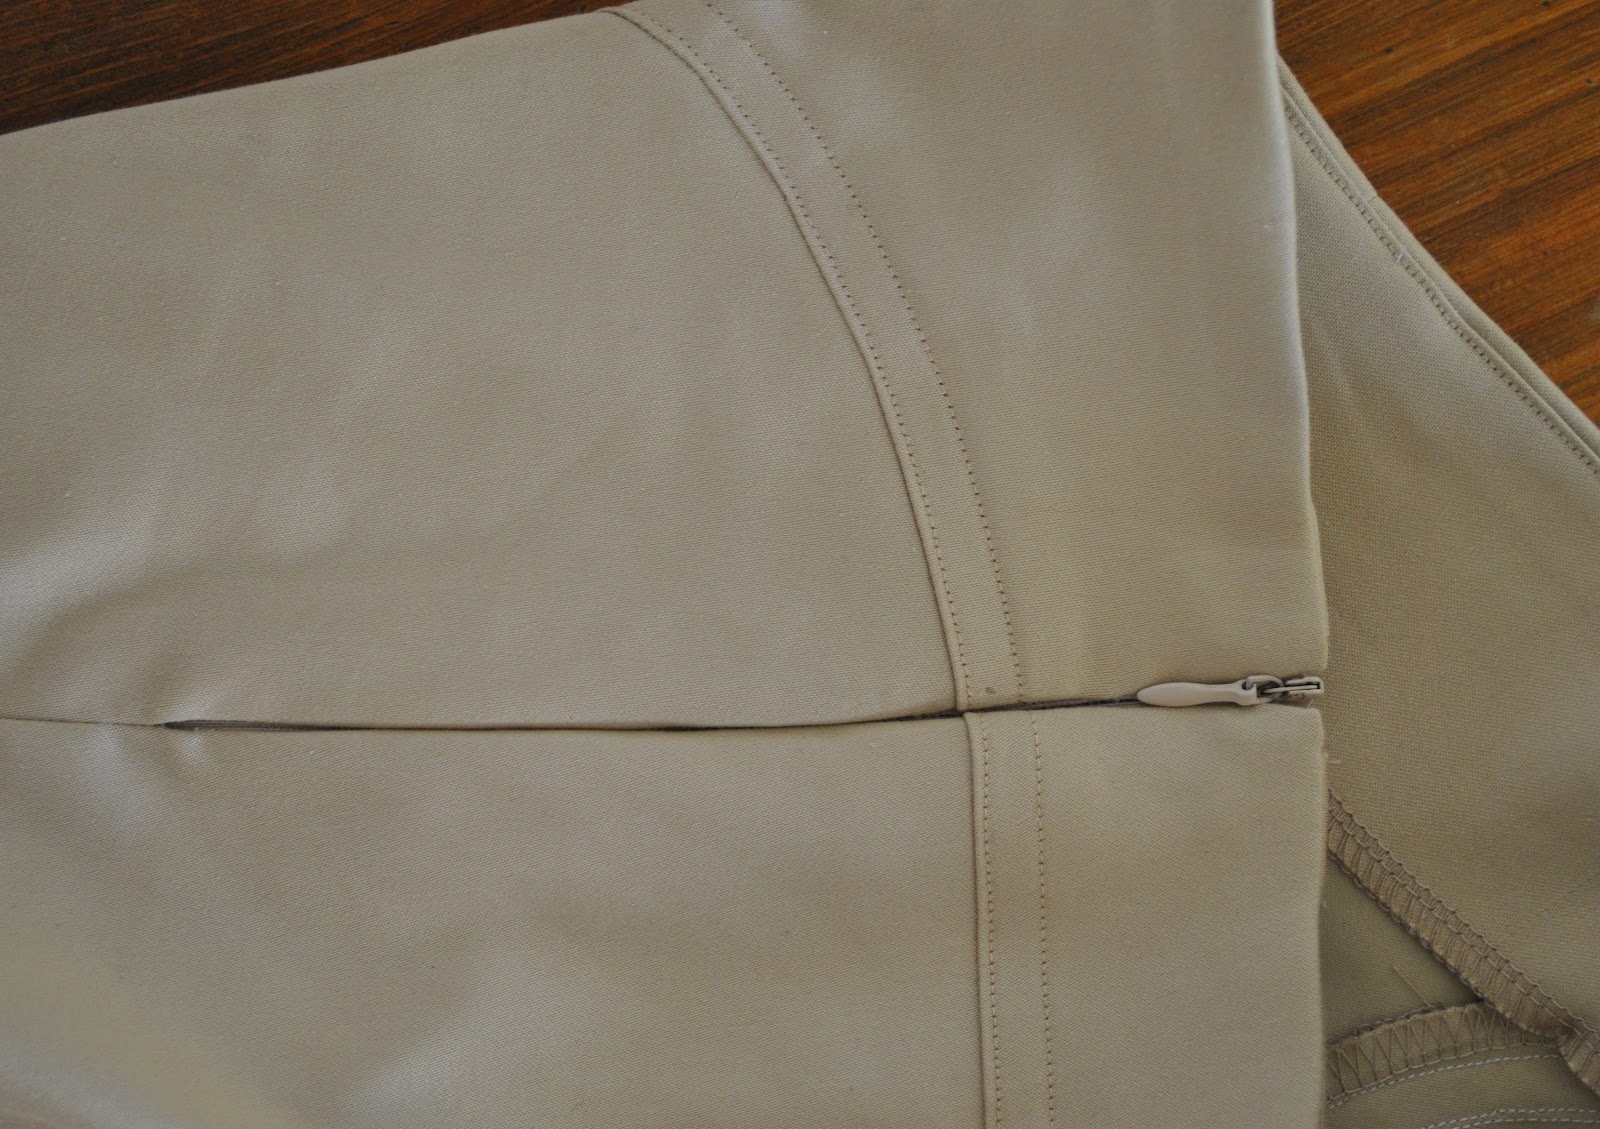
Above: side views right and left.  At right can be seen a small section I stitched down at the back to remove some of the blousiness across the back waist section.  I was fortunate to find a zip exactly the right length… this is a pattern in which if your zip is not the perfect length you DO have to adjust the pattern pieces to exactly accommodate your zip length.
This is a pretty challenging pattern … but I adore a
sewing challenge so I was like a pig-in-mud the day I made this, contentedly humming away to myself; totally in my happy place as I fiddled about, nutting out
those instructions.  The
construction of this is like a puzzle; each separate piece of the puzzle is simple and
uncomplicated in itself, but the process as a whole is not clear
or easy and the top does not go together intuitively.
I’ve written a pattern review below, but it’s worth
mentioning separately a couple of little tips I used to make things a tonne easier
for myself…
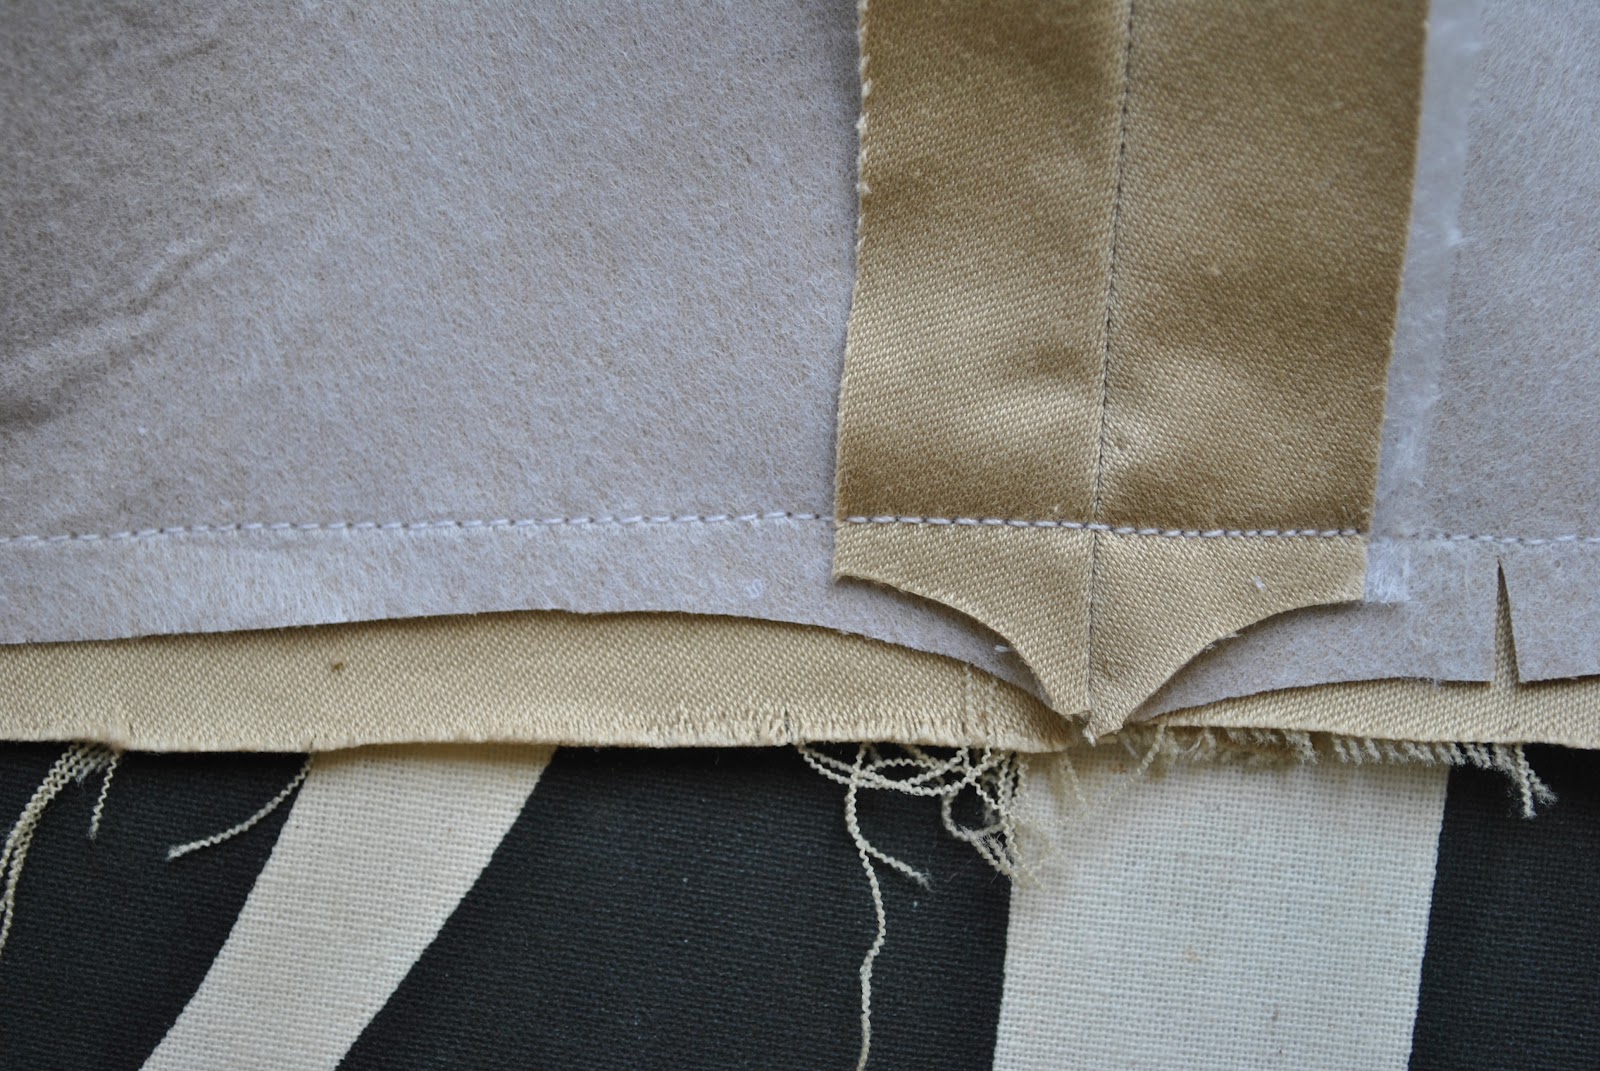
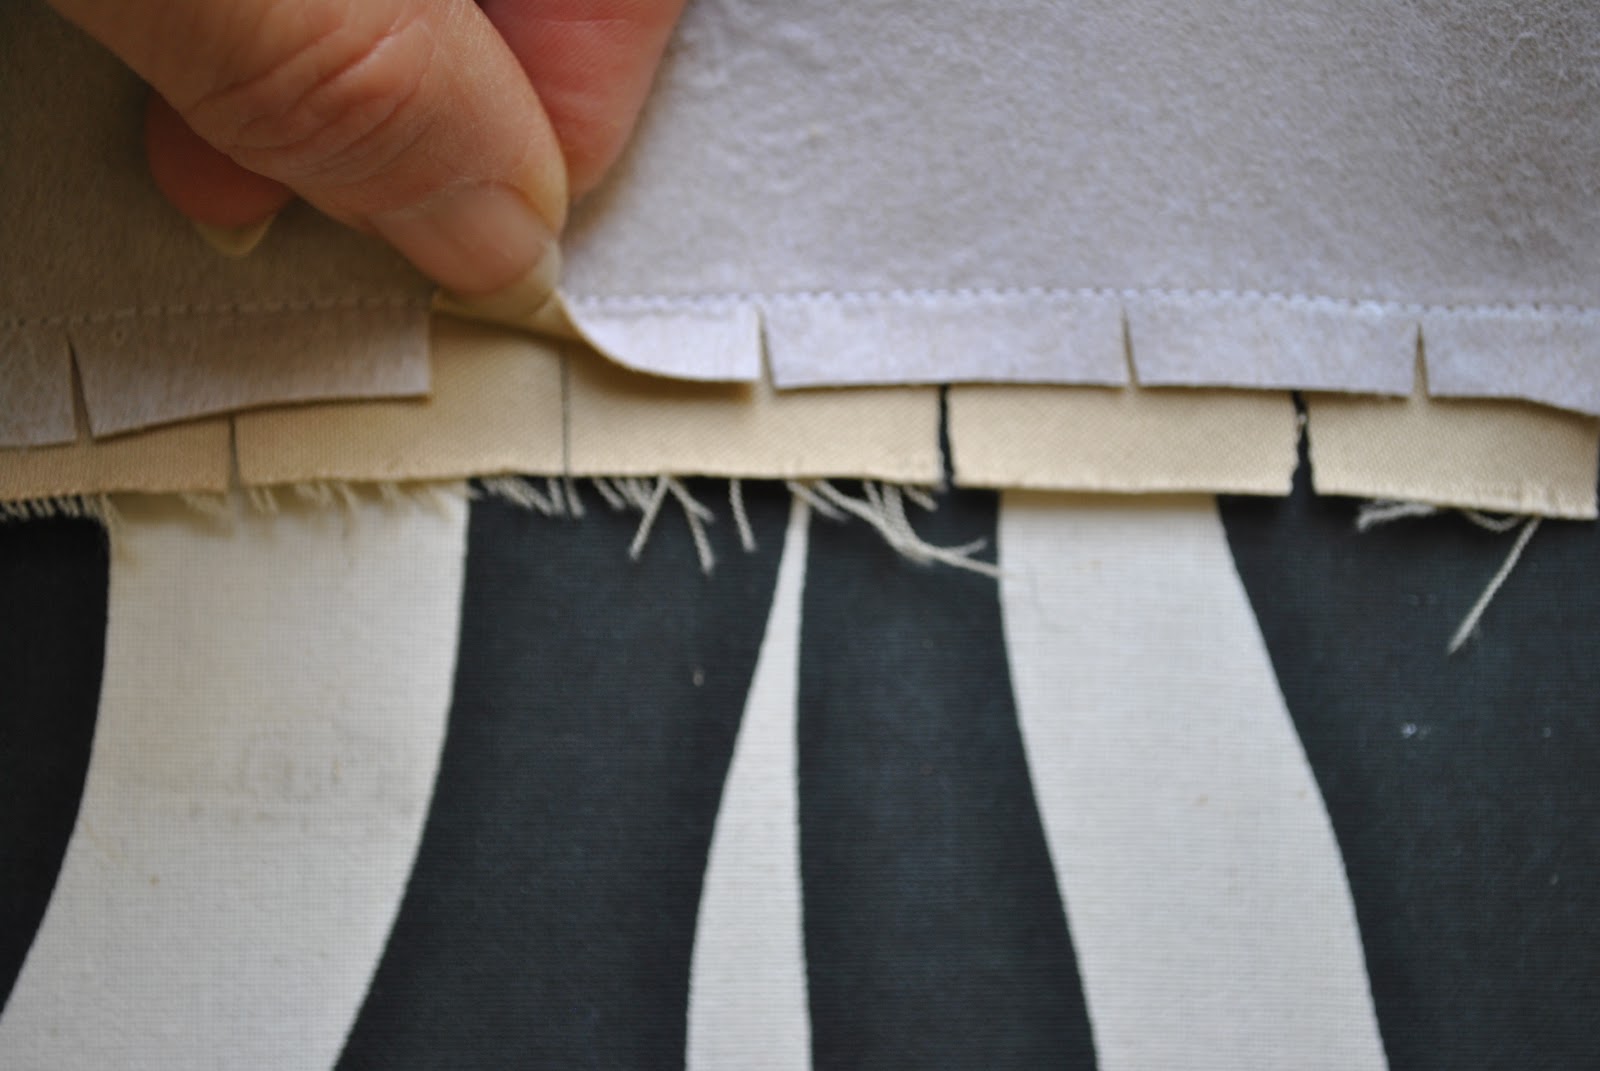
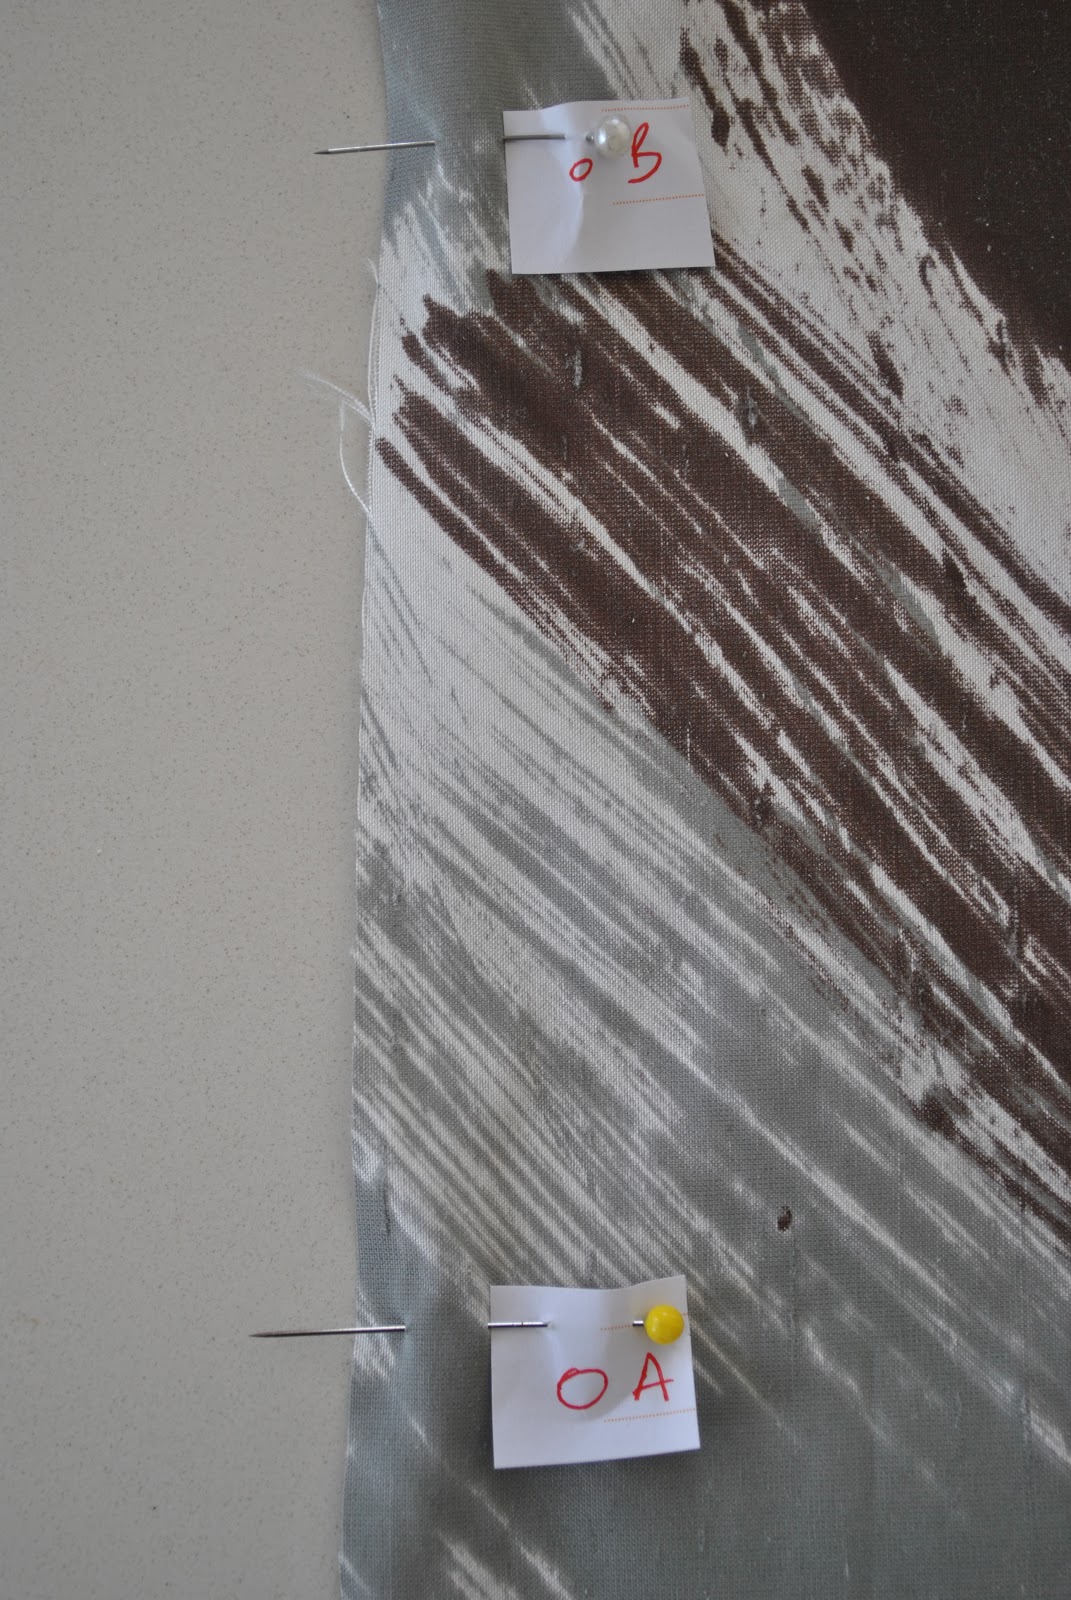
The markings on the pattern are small circles, large
circles and squares, and these are also marked from A to G inclusively.  You will
NOT be able to put this pattern together successfully unless you can identify
all of these on your pattern pieces… so I wrote all the markings (for example) OA, OB, oB, etc, designating large circle A,
large circle B, small circle B, etc, on
small squares of paper and pinned them to the exact spots.  Once this idea had occurred to me, it made
the whole seam matching process a heck of a lot easier.  A heck of a lot!!
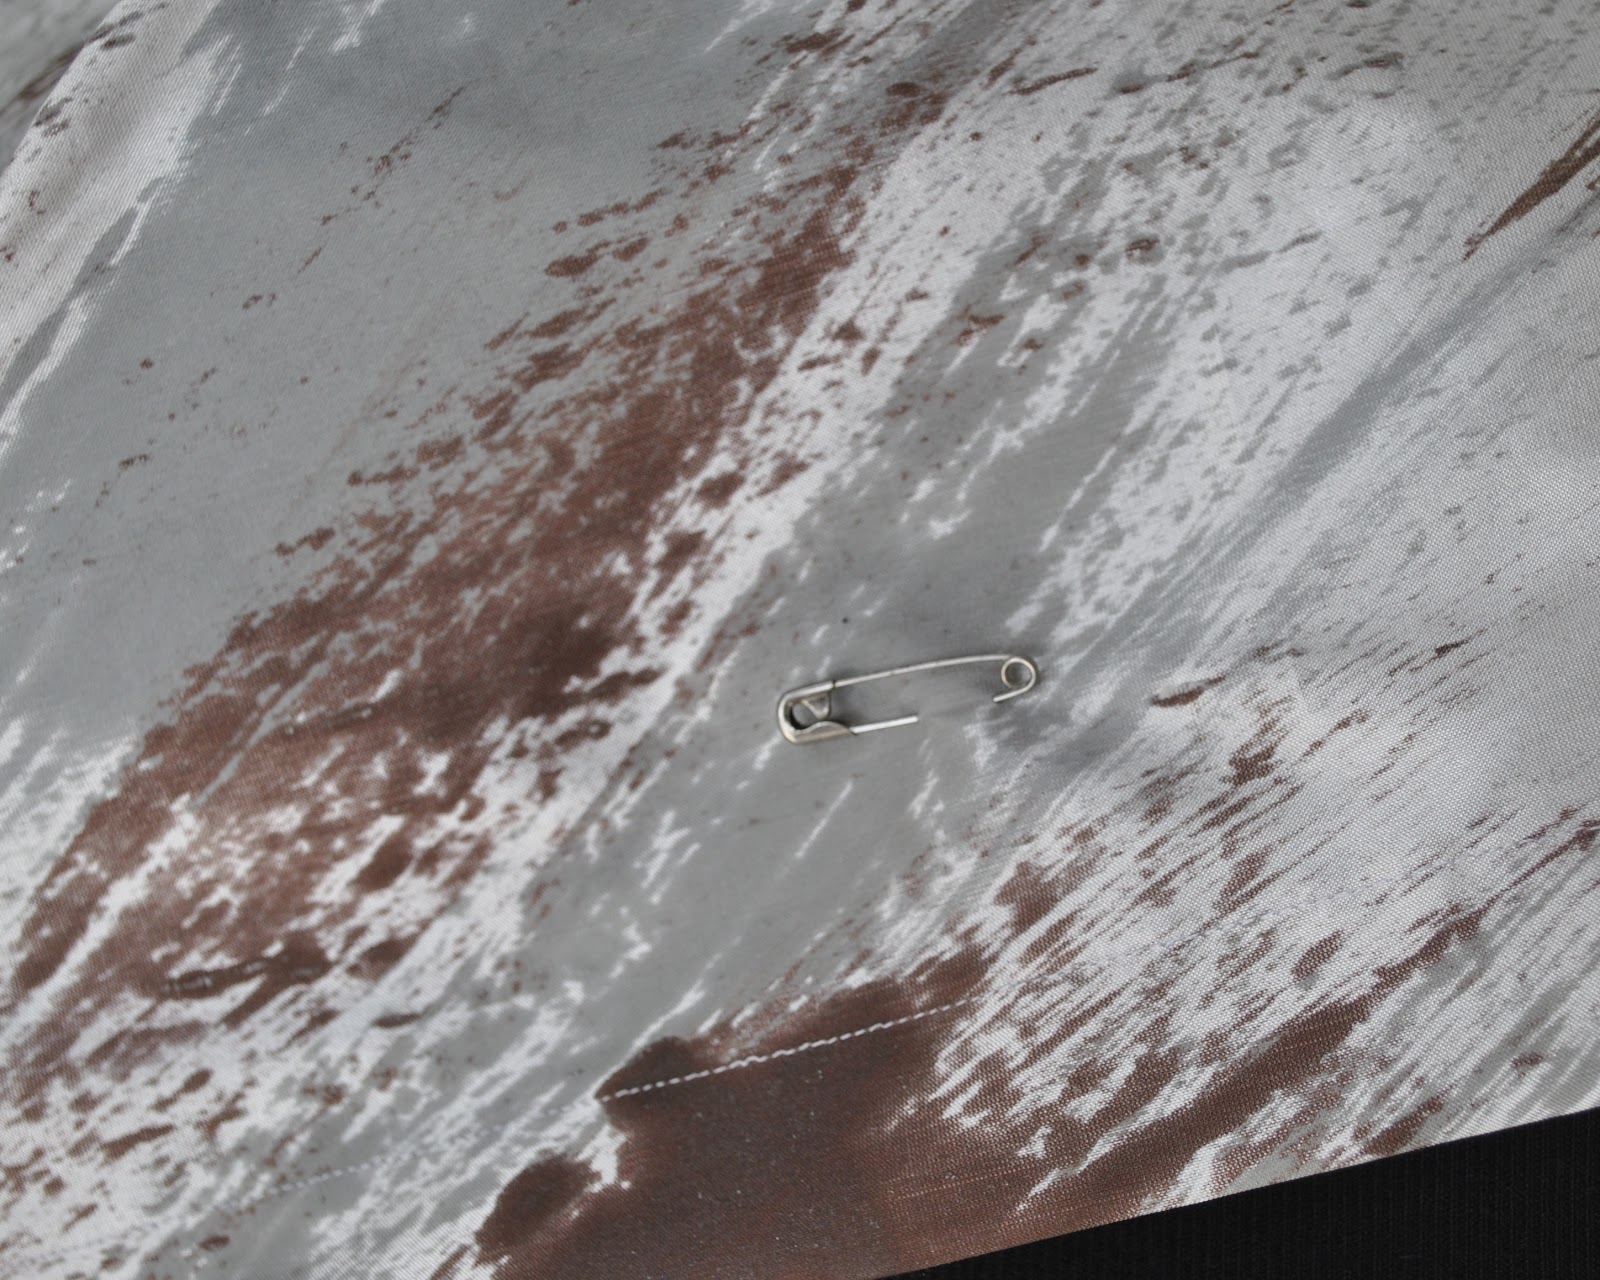
I also attached a safety pin marking the “back” of
the piece… this might sound too trivial to even mention it ….but I found that safety pin to be enormously helpful! since the front and the back
of this top are almost impossible to distinguish for much of the construction.
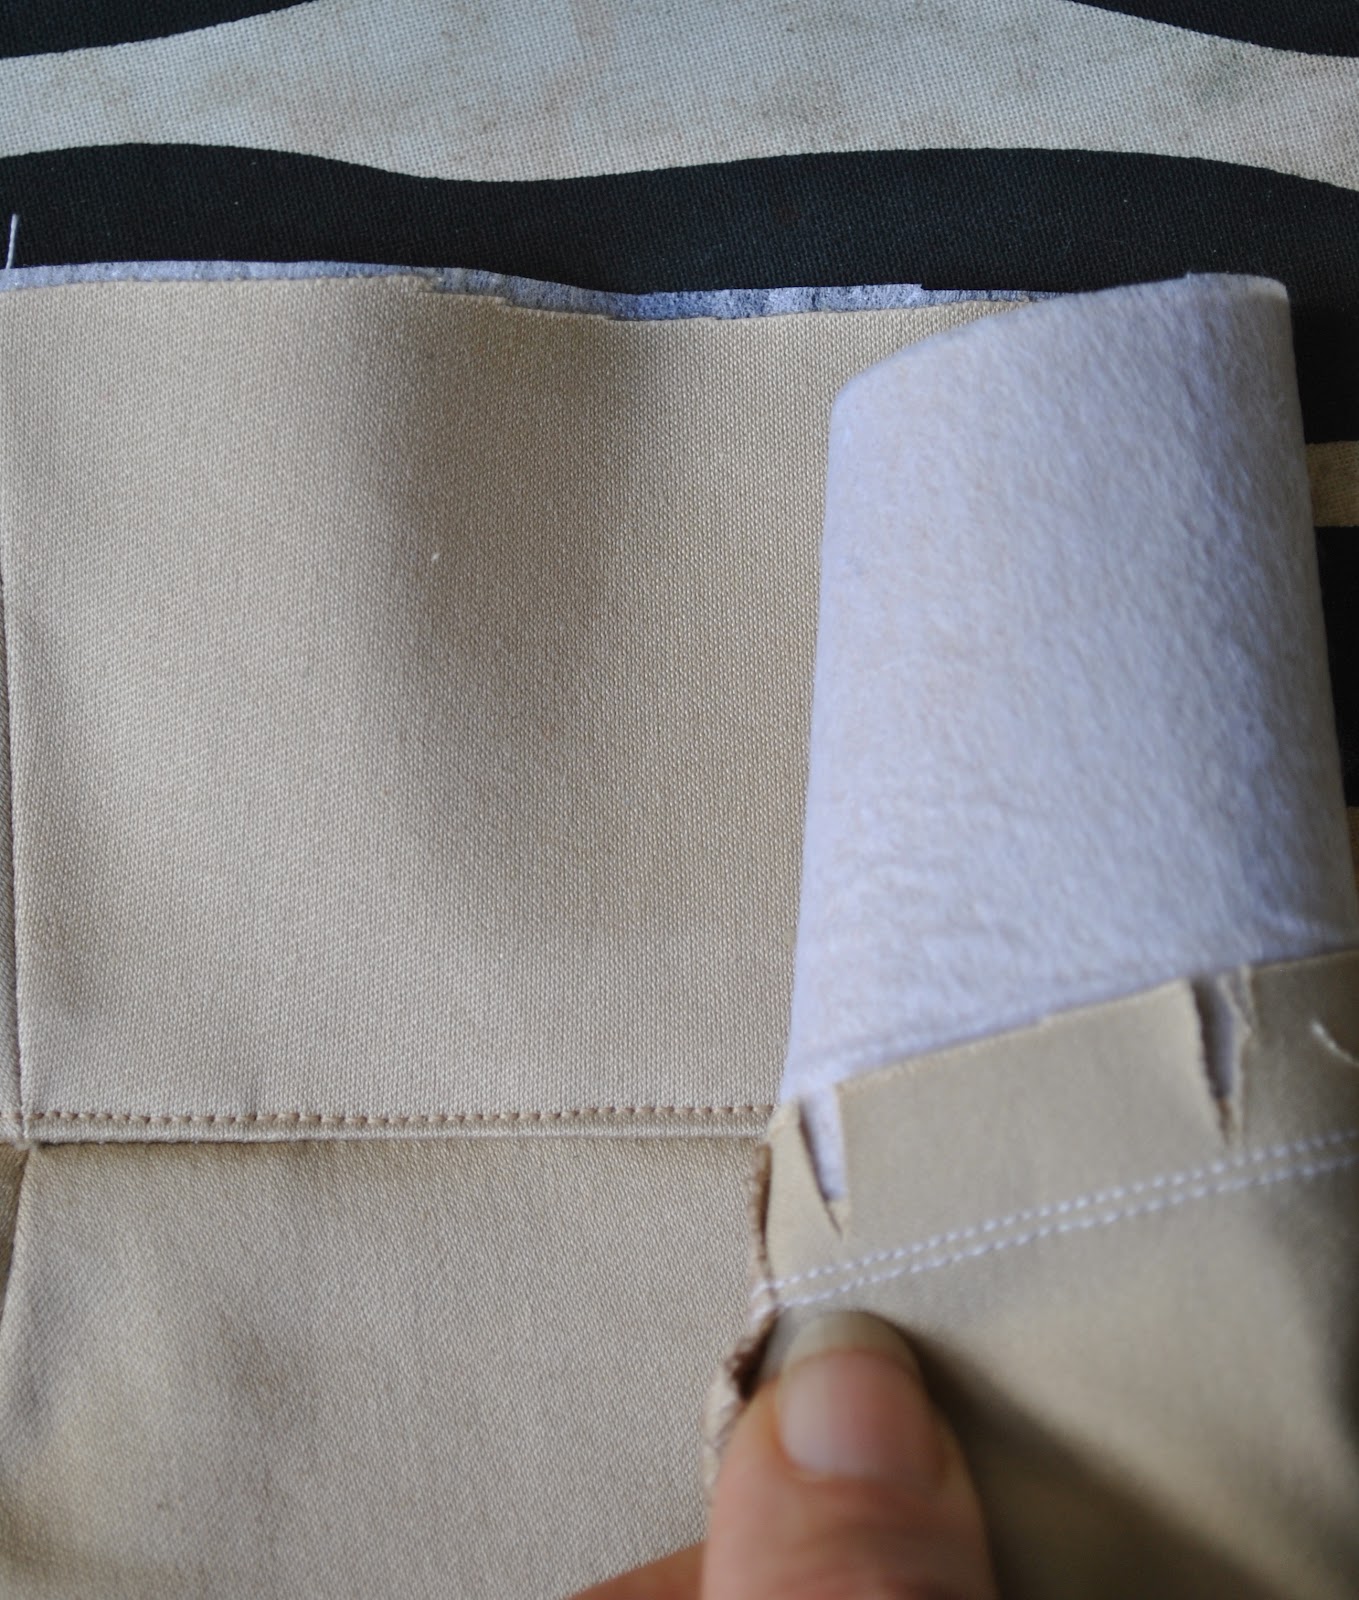
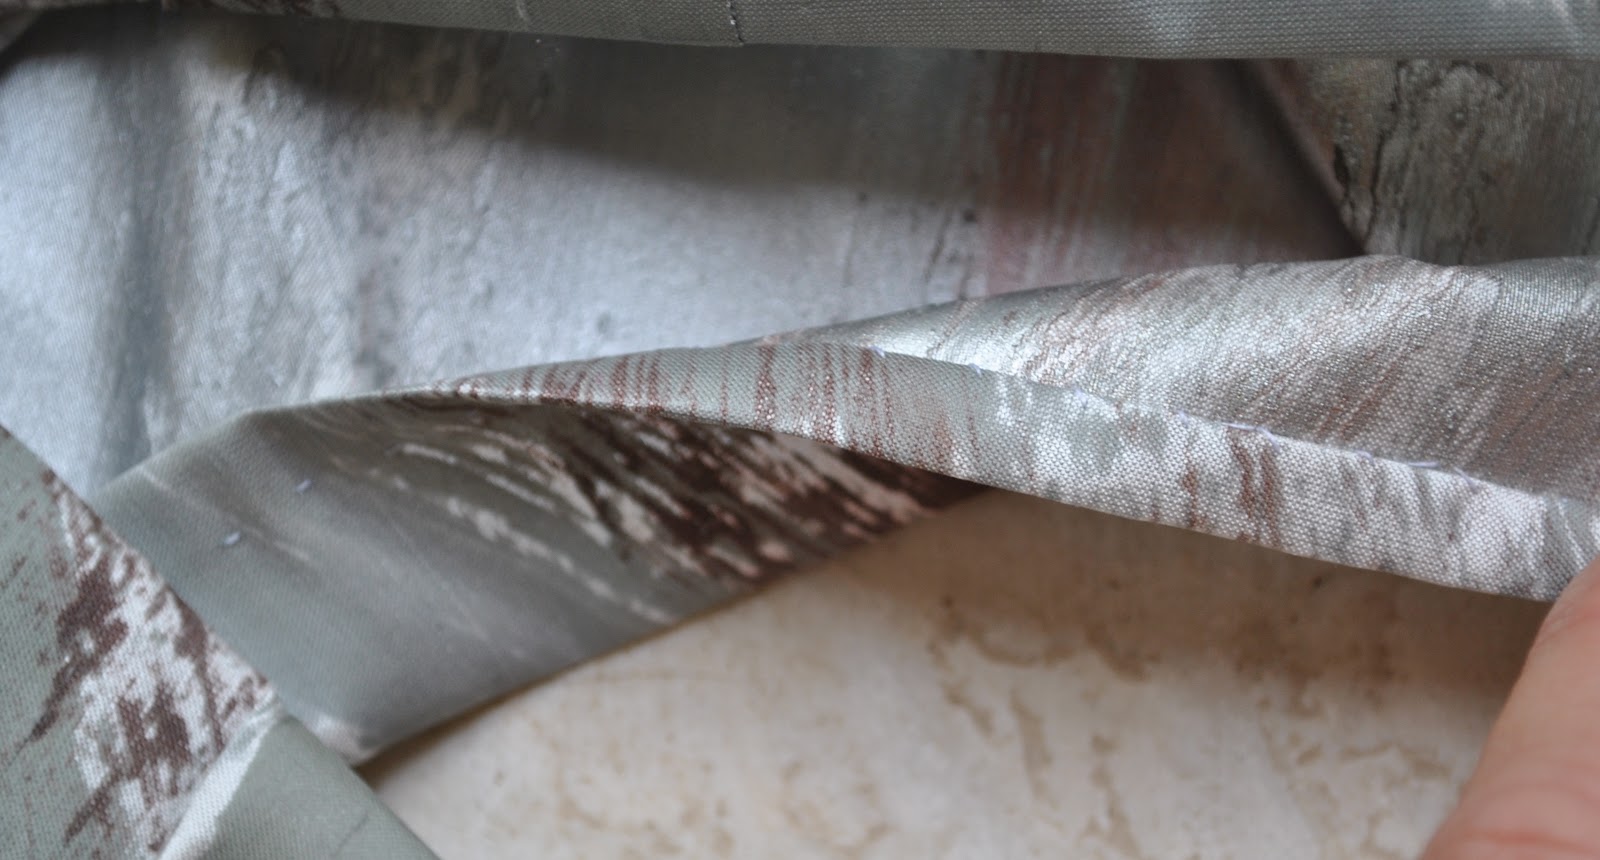
Finishing tips: the pattern left a few raw edges in obvious places ie, the neckline!  which looked a little messy imo, so I hand stitched a narrow hem along these to finish.  I also applied a few strategic hidden hand-stitches inside the V-neck to hold those two sides firmly and modestly together.
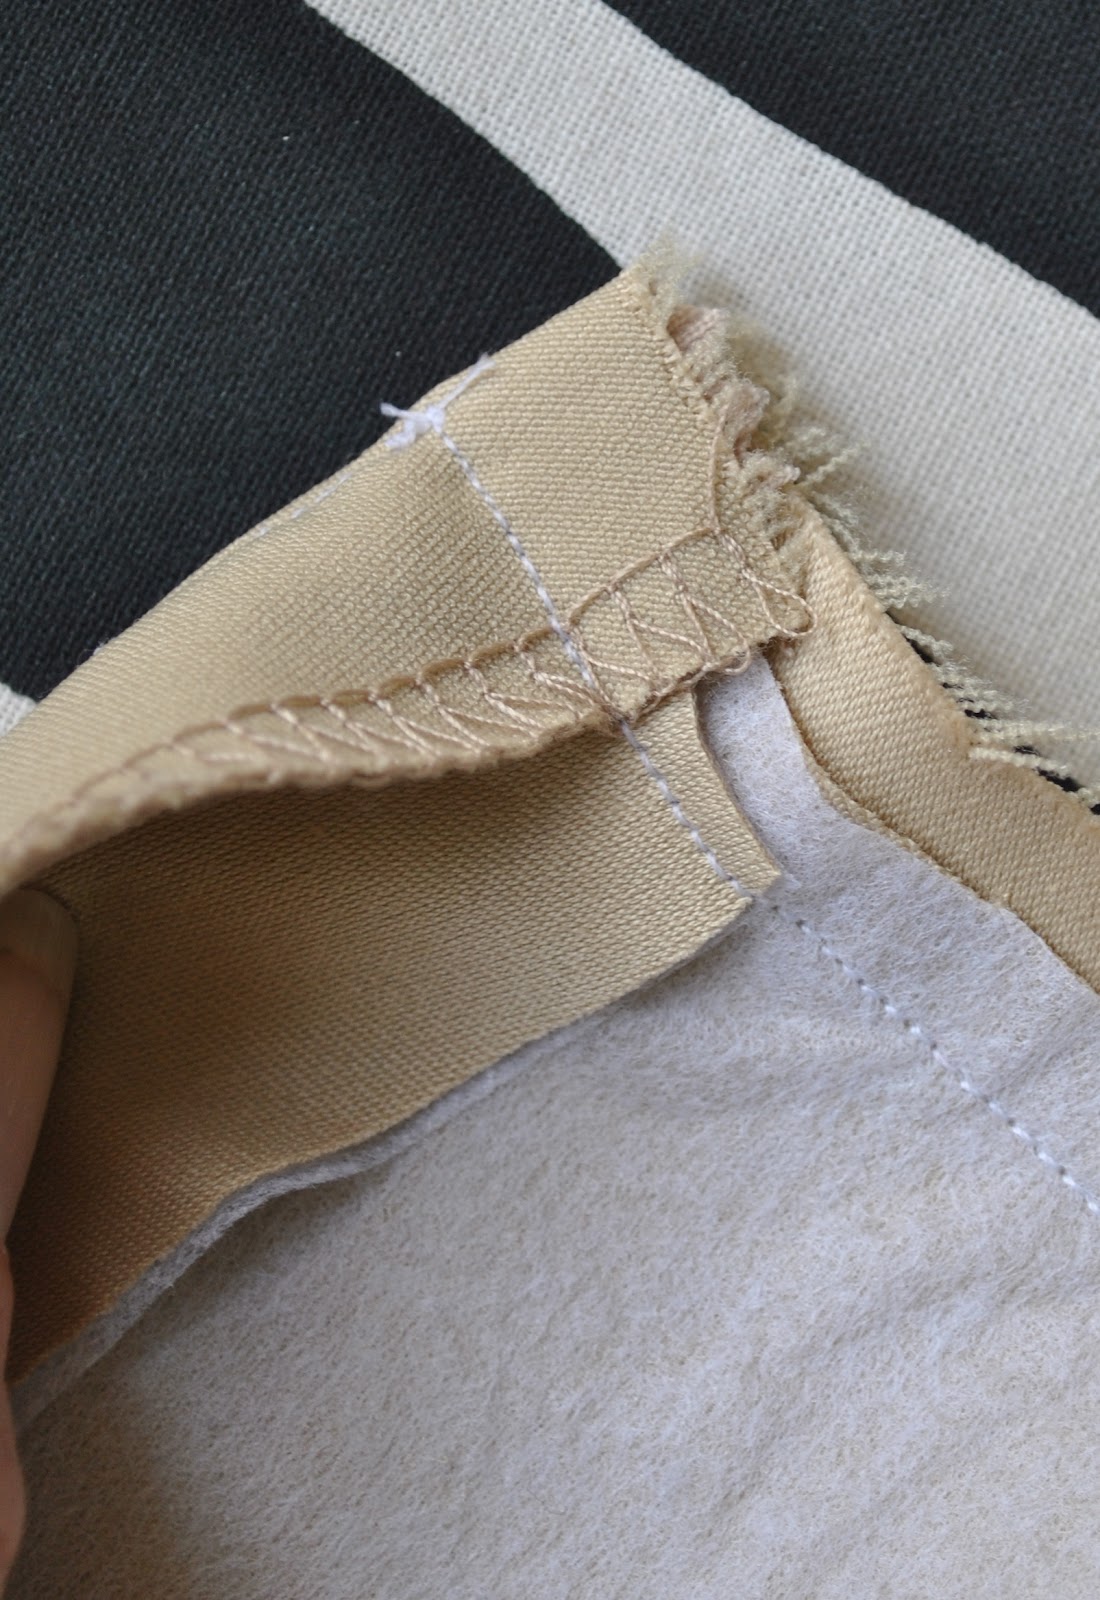
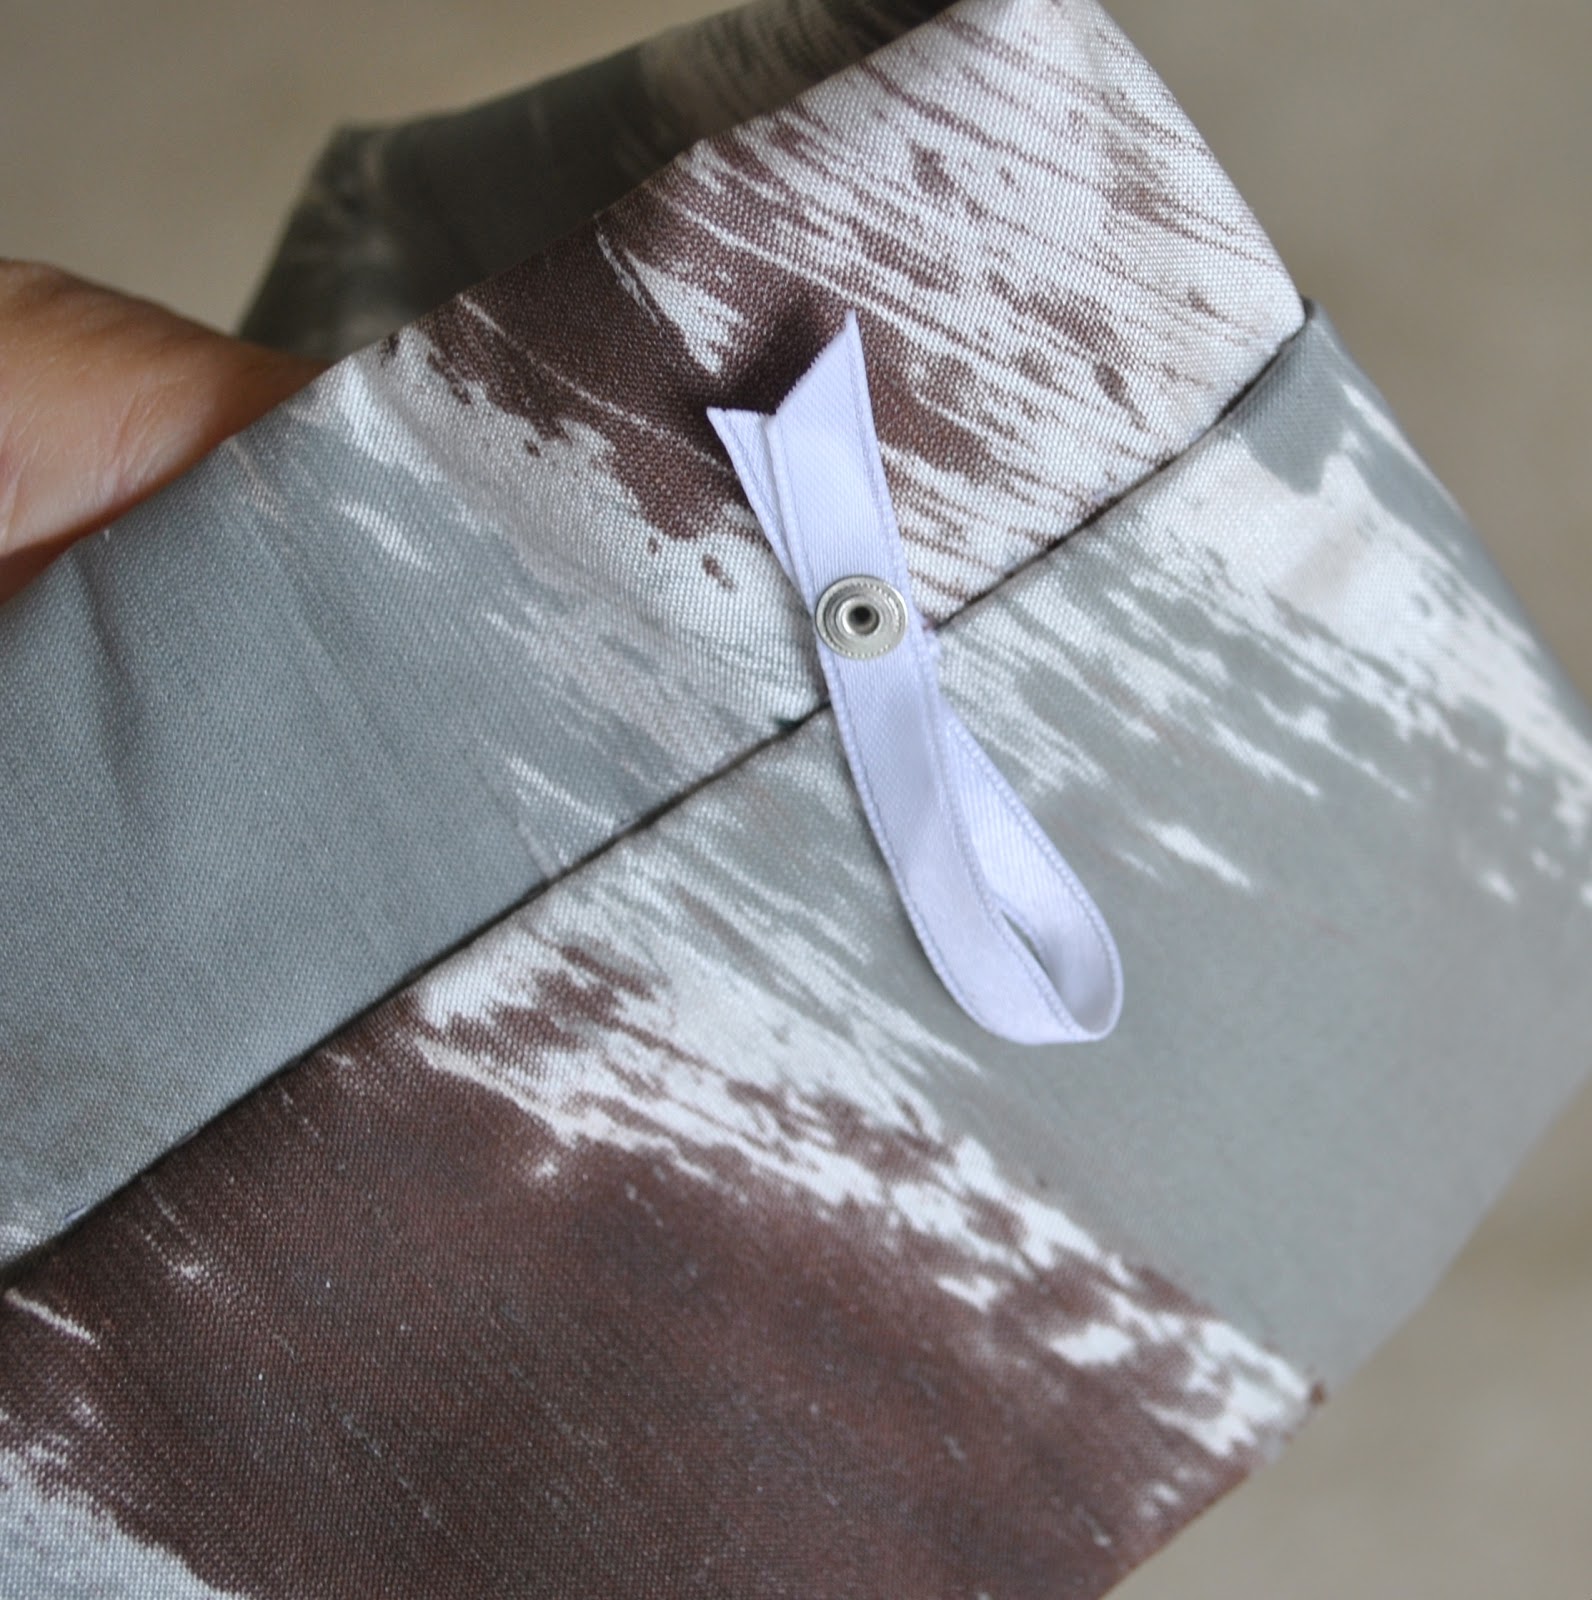
I hand-stitched lingerie holders to inside the shoulder straps, these were a gift from the lovely Yoshimi, thank you Yoshimi!

Details:
Top; Vogue 1309, hand-painted silk dupion from
Fabulous Fabrics
Jeans; Burda 7863 modified, white stretch denim, details here
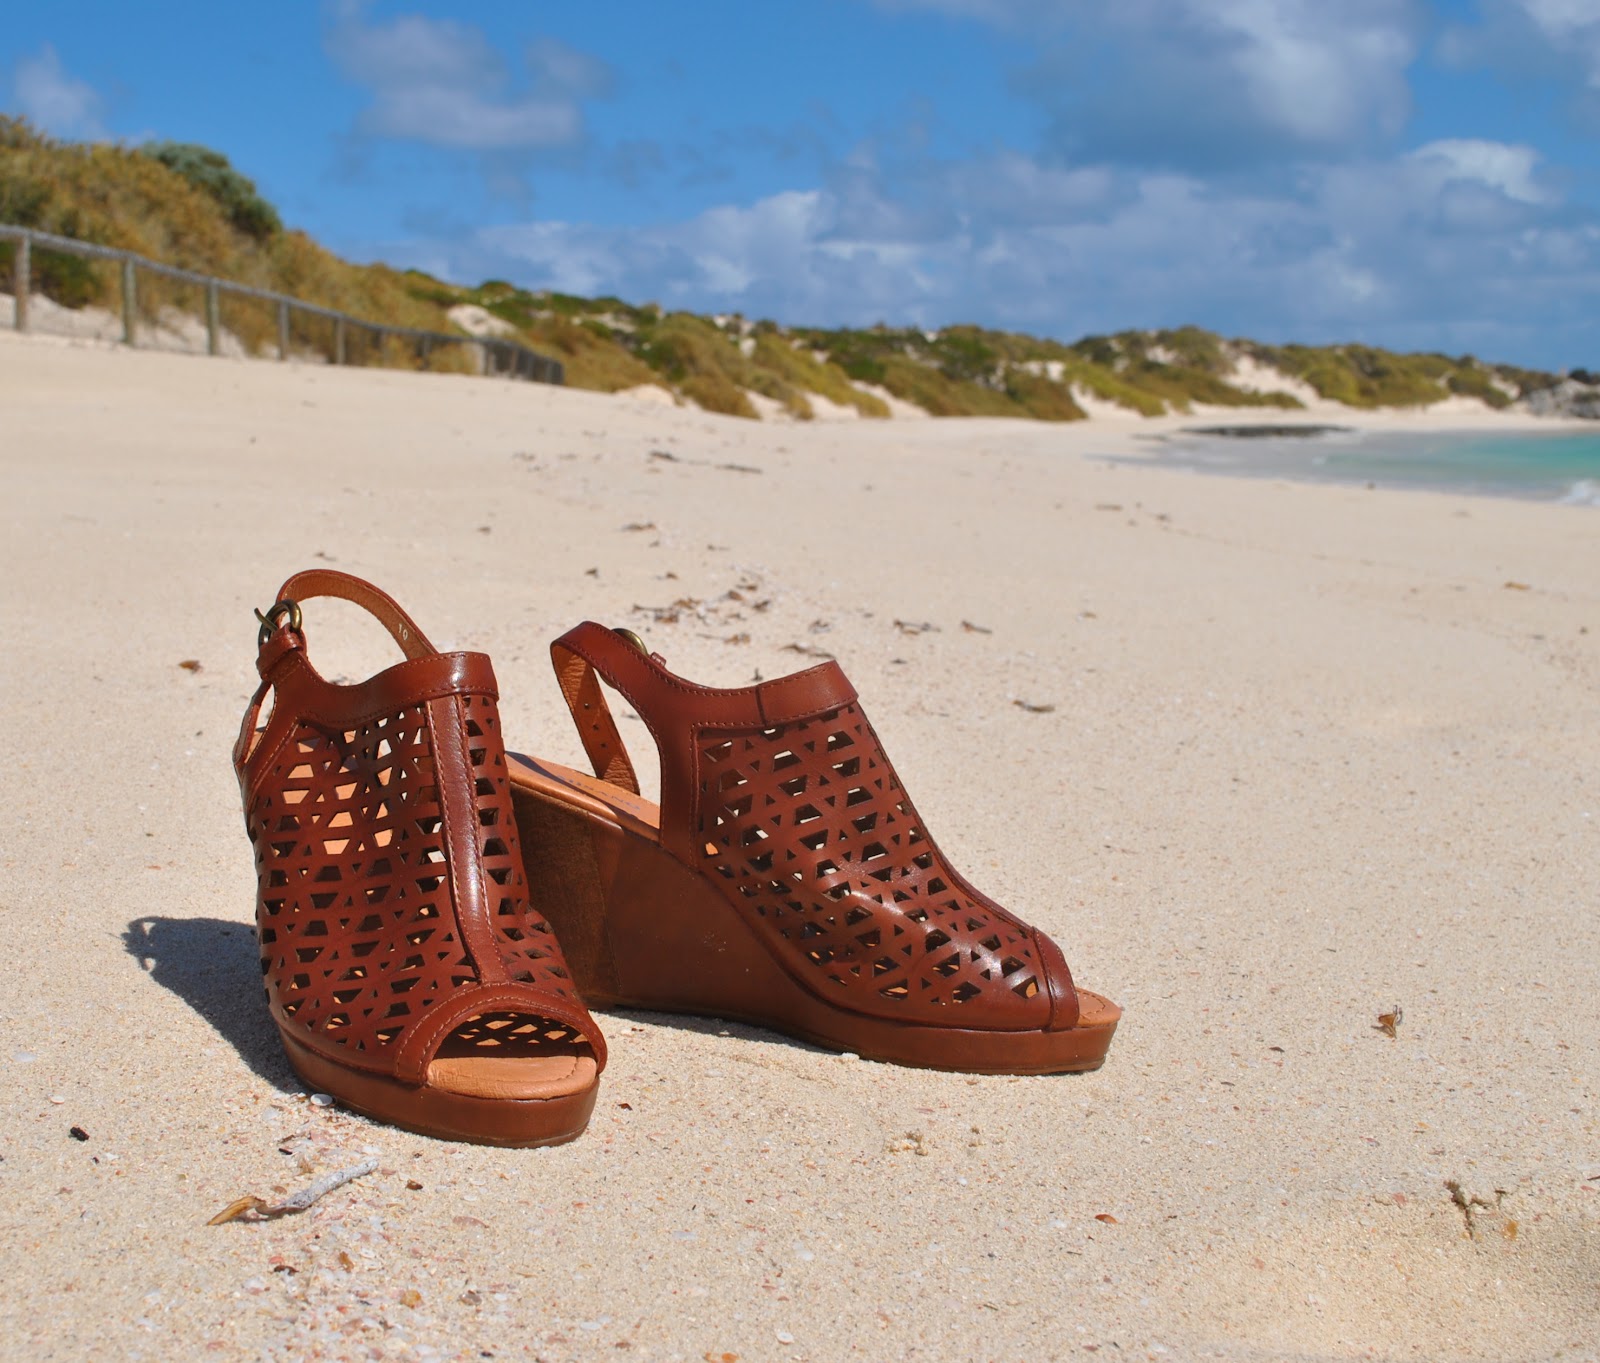
Shoes; c/o Misano

Pattern
Description:
Pullover
tunic has front and back cut-in-one, no shoulder and side seams, upper right
section, left panel, square armholes, left side back zip, shaped hemline,
stitched hem, unfinished and continuous bias finished edges.
Pattern
Sizing:
American
sizes 6-14; I cut the size 10
Did
it look like the photo/drawing on the pattern envelope once you had finished
sewing it?
Yes.
Were
the instructions easy to follow?
Well,
this pattern is not rated Advanced/Plus Difficile for nothing!  There may only be three rectangular
pattern pieces, well three once you have pieced three smaller paper pieces to
make the one ginormous front and back piece; and each step in itself is a short and straightforward seam…. but the construction of this top is not an
intuitive process and you really have to keep your wits about you.  I really had to stop and carefully check and
double check my markings for each and every step.
The markings are large and small circles and squares, variously marked from A to G
inclusively, and it is imperative to be able to identify them on the pattern
piece.
I
ended up writing on small squares of paper (for example)   OA, OB, oB, etc, designating
large circle A, large circle B, small circle B, etc, and pinning these at the
appropriate spots.  I highly
recommend other seamsters do the same! 
Once I took this step, things were streamlined and it was massively
helpful.  I also attached a safety
pin to the “back” during construction and just this simplest of things helped a
bunch when it came to working out which was the front and back and left and
right too.
What
did you particularly like or dislike about the pattern?
I
absolutely love the funky avant garde styling, and the challenge of putting
together a few plain and simple shapes to make a remarkably un-plain and
distinctly non-simple shape.
I
didn’t like how one ended up with some raw edges in obvious places, like the
neckline.  I hand-stitched a narrow
hem along all the raw exposed edges.
Not a dislike, just an important note to others making up the pattern; your zip does have to be exactly the recommended length, otherwise you must make adjustments to your pattern pieces to suit.
Fabric
Used:
Hand-painted
silk dupion
Pattern
alterations or any design changes you made:
After
completing the top, I hand-stitched a narrow double-folded hem along the raw
exposed edges at the front neckline crossover, the armhole edges and at the
back crossover, and applied a hidden few hand-stitches to hold the V-neck together at the centre front.
I
stitched a small section down at the left back to tame just a little of that
blousiness, this was just a stylistic choice on my part.
I hand-stitched lingerie holders inside the shoulder straps.
Would
you sew it again? Would you recommend it to others?
I
think I need just one of these ultra-distinctive tops in my wardrobe, but I
would not rule out sewing this one up again in my lifetime.  I recommend this pattern to the
advanced seamster who craves both an avante garde wardrobe and a sewing
challenge.
Conclusion:
Well,
I totes adore a sewing challenge and I sure got one here… 🙂 plus a unique top that is comfortable to wear
as well as interesting to look at. 
I call that a big win!

pinterestmail

Just add water

I thought I had timed things pretty well for this one, heading out to the beach on the first day of school term, a day when I knew it would be utterly deserted.  Instead I royally stuffed up by rocking up boom in the bloomin’ middle of the school holidays!!… doh!  This is what happens when you are out of the system, people; you forget all that school-related info previously of paramount importance, like exactly when the holidays start and end.
Ah yes… you forget…
hmmm, where was I?
Oh, yes, I’ve made my new bathers for the new summer season  🙂  

Actually I exaggerate, I was pretty lucky the beach was not crowded at all; enabling me to set up in a discreet pozzie for a few incognito piccies with the faithful doggie.
My new bathers are made using an old faithful pattern, McCalls 2772, modified to make the bikini top a tankini instead.  This is the sixth time I have made bathers using this patten,  and my third iteration of that same tankini modification to this pattern; so it has been such a goodie.  That is not even counting the times the bikini bottom pieces have been used to make undies, for which it has been pressed into service stacks more times!
I know it seems terribly boring, that I keep using the same pattern over and over again, and I briefly considered trying out something new.  Briefly.  You see, I’m kinda content with being repetitive.  Happy to be boring.  This pattern really does work for me; it suits me, both my tastes and my body type.  And, bathers are pretty important, y’know, since you spend such an huge amount of time in them over the long long summers we get here, you really want them to turn out as perfect-for-you as possible.  Road-tested, and check!
A secondary consideration is that I have worked out the past coupla times I’ve made these that a 2m packet of swimwear elastic is fair dinkum exactly the right quantity for my tankini version, and I mean down to the last 1-2cm.  It’s a sign!  If I wanted to make up the bikini; and I did actually pause for a few days before cutting to consider going that route this time round, then I would have to buy a second roll of 2m.  
The tankini won.
I used a denim-look swimwear fabric; bought from the Fabric Store in Melbourne during our recent visit.  The roll was marked “tiger lily” so I am really pretty curious as to how tiger lily used this in their own collection.  I suspect they probably did not use quite as much fabric per set as I did here.  I’m imagining three or maybe even four, tiny weeny little triangles each?  😀
Playing on the denim theme, I added topstitching in burnt orange, and also a mini patch pocket on the front hip, topstitched to look like a jeans back pocket.  It is functional, but probably won’t ever have anything actually put in it.  Can you imagine… oh, I’ll just put the house key (or something else reeeal important) here in my little pocket to keep it safe while I am swimming over in that churning rough and tumble surf….   
Yeaah, bad idea.  But still c’est tres cute, non?

Details:
Bathers; McCalls 2772, the bikini top modified to make it a tankini, of denim-look swimwear fabric
Hat; Country Road

pinterestmail

a Thank You!

 The simple and sweet purpose of this new blog award is simply to thank the lovely people who take the time to comment on your blog, which is nice since who doesn’t love and utterly adore to receive supportive comments?  I’m sure we all do…
Masustak eguzkitan and Donna: thank you, ladies!

There is no requirement to do anything like list stuff about yourself, just to pass it on to the last nine bloggers to comment on your blog…
So I’m interpreting that, rightly or wrongly, as the first nine on my previous post, not counting the ladies who passed it on to me.  I expect it will be one of those awards that moves through the sewing blogging community with lightning speed!

stitchywitch
Nikki
Karin
BeaJay
mema
Shelly
Kirsty
velosewer
themateriallady

One of my favourite bloggers shams would be in there too, except I happen to know she maintains an award-free blog.  But if you wish to take up this harmless, innocent and self-effacing little thing shams please feel free  :))
Gilly in UK should also be in there, only she does not have a blog… still; thank you for your gorgeous comment Gilly!
Thank you to all my lovely followers, please know that your supportive comments are very much treasured and appreciated!  You guys all rock!

pinterestmail

Aranciello

I’ve invented something!…  I think  🙂
Last month when I posted about my batch of limoncello, velosewer commented that she would love to make limoncello too but she only had oranges… of course my brain instantly leapt to exciting new possibilities; thank you so much for the fabulous inspiration velosewer!  It’s been brewing for the last month and is finally ready for its debut  🙂
This liqueur is based on the recipe I used for limoncello, but I substituted oranges instead.  Since I’ve never heard of this before, which I concede does not mean it does not exist, somewhere, but still, it’s new to me:   I am claiming the right to give it a name.  And since “arancia” is Italian for “orange” just like “limone” is Italian for “lemon”: thus “aranciello”  Pronounced the Italian way naturally… ah-rahn-chel-lo.  Si?

Aranciello
6 oranges
750mL vodka
225g sugar
435mL water

Place the oranges in a saucepan and cover with boiling water.  Set aside for 1 hour to soak.  Drain and pat dry.  Finely grate the oranges, and combine the rind and vodka in a jug.  (You don’t use the juice from the oranges in this recipe, but obviously they can be juiced and the juice can still be used somewhere; waste not want not   🙂  )
Heat the sugar and water in a saucepan over a low heat, stirring for 5 minutes or until the sugar has dissolved.  Increase heat to medium and bring to the boil.  Cook without stirring for 5 minutes, or until the syrup begins to thicken.  Set aside to cool.
Add cool syrup to the vodka mixture and pour into an airtight container.  Seal and store in a cool, dark place, shaking occasionally, for 1 month to develop the flavours.
Strain the vodka mixture through a fine sieve, into a clean sterilised airtight bottle.  Discard the rind.
Note: This liqueur must be served well chilled.  Place it in the freezer for 1 hour before serving.
Now of course, I did not actually discard the vodka-soaked rind after straining, any more than I did the vodka-soaked lemon rind when I made the limoncello last month.  Quelle horreur!  Anyone who reads this blog will know that I am a mad anti-waste crusader…
Each time, I’ve saved the rind and used it to make a raaather decadent, adults-only cake…
I can add in the recipe for this if anyone really wants it, but really it is just a basic common-or-garden butter cake with the vodka-soaked rind added at the butter/sugar creaming stage; easy peasy…  but tres delish!
Oh, in random blogging news, today is the third anniversary of my funny lil’ ol’ blog here.  I’ve managed to not click on that “delete blog” button all this time!  (wipes sweat off the ol’ brow)
Here’s to avoiding that hairy one for a few more years yet….  I’m mentally chinking aranciello-filled glasses with y’all right now  :))
Cheers peers!
pinterestmail

a Stellar set


Remember I mentioned I had done a little dyeing recently??   I still had scraps of leftovers of pale grey marle cotton jersey from KnitWit: leftover now from this Pattern Magic top, this set of lingerie, and this hoodie for Tim… I had enough for another set of lingerie, but to have two sets the same colour?? boring!

So I checked out the dye supplies… previously, before I started to make all my own clothes, I owned a Tshirt that was grey over-dyed with orange in a splotchy random way.  I always loved loved LOVED that Tshirt, and wanted to aim for something like…
And was thrilled to achieve a Galaxy!  The dye settled in nebula-like swirls of purple, grey, apricot and chocolate; with surprising indigo streaks and “stars” … it was even better than I could have hoped for.  I have no clue what caused those fantastic blue bits and sure didn’t expect it from an chestnut dye but whatever chemical reaction took place, it was serendipitous  🙂
I then soaked the dyed fabric in a strong salt solution to “set” it, and then held my breath and did a machine wash, and thankfully it remained just as gloriously galactic as when it first emerged from the dye-bath.
How did I achieve this little bit of outer space in fabric form??  I threw the dyeing rule-book out the window!  😀  I used 1/4 tspn of iDye in Chestnut, and with no pre-washing or pre-soaking, plunged my dry fabric within.  (gasp)  So my nebula was born from whatever sizing was still in the fabric, along with the dryness of the medium (ie. NOT pre-soaking the fabric)
btw, I would only recommend doing this with fabric you don’t particularly care about one way or another, obviously!    My tute for how I usually dye to get an even colour, is here.

To make my lingerie set, I used again KwikSew 3300 for the bra, with my usual adaption to incorporate a moulded cup insert (my review of this pattern here); and McCalls 2772 for the two pairs of matching undies.  I chose a lingerie elastic in a shade called “skin tone” but I like to think of it as “pale moon-yellow”.  Going on with that outer-space theme there.
And just saying…   using words like “skin tone” as colour-descriptive is problematic to me.  “Nude” is another one I do not use.  I mean, whose skin tone are they referring to?
But anyhoo, I just loved the contrast of pale yellow against the swirling purples and browns, and I made little pointy bows in a matching satin ribbon for the decoration.  I think it turned out kinda punky and funky and fun.

I made a slight alteration in cutting out the bra this time; I cut the top piece and its facing on a fold.  So they are one piece, thus eliminating a seam.  Goodness knows why I didn’t think of this before, it made a much nicer and smoother finish.

pinterestmail

Cut me a little Black

In my recent, gloriously ruthless, spring clean-out of my wardrobe, I culled an evening gown, originally made using Burda 8046 and first posted here.  I’ve worn it about seven times in total; none in the past three years; and have now decided it is too young for me.  Cassie didn’t want it either… so rather than toss it the Salvo’s way where someone might snap it up only to butcher it for something else, I decided I wanted to have that wicked pleasure for myself… mwahaha   🙂
The fabric of the lower skirt section is an almost translucent, lightweight, black silk taffeta, and it has a combined lining/crinoline of soft black tulle.  And please don’t worry about that beautiful heavily sequinned and beaded fabric on the bodice section, it will not be wasted and will be put to good use, I absolutely promise!

I was pretty pleased to get the skirt pieces of Vogue 1170 from the lower skirt section, and I also fashioned a new attached crinoline from the old one too.  This has a lot of extra gathering in the very back region, creating a really frothy bit to help that flounce flounce.  Hopefully in a feminine and attractive way  🙂

I even re-used the zip! hehe, of course it was too long but I left it long.  It is no bother; sandwiched unobtrusively between the skirt and those tulle gathers it cannot be seen or felt!
I eliminated the centre front seam and cut the skirt front/back section as one big massive piece.  I was able to do this by incorporating part of the ballgown side seams, and at the centre front and halfway around towards the back some of the original hem has also been left intact.   Instead of cutting a hemline facing as stipulated in the pattern, I hand-stitched a narrow hem to mimic the remains of the original on my ballgown.  My skirt is about 10cm longer than the pattern.

I also cut the centre back and side back pieces to incorporate my slight sway back alterations to the pattern, illustrated in my first version of this pattern here.
The waistband has a central vertical joining seam, and is about half the width, necessary adaptions due to the lack of fabric.  I think I do actually prefer it this narrower width too!

OK (deep breath, confession time)…. er, I left off the pockets too.
:O  
Hehe; normally I am such a rabid pocket-lover I wouldn’t dream of leaving off something so inherently marvellous, buuut…  (here we go) I sorta had to mostly through lack of fabric, but also, while wearing my previous two versions of this skirt pattern (here and here) I have found that I pretty much never use the pockets.  They are situated very high, and have a very narrow opening that is almost impossible to widen without disrupting the structural integrity of the skirt/waistband junction.  Furthermore: they are actually kind of a nuisance.  Since they are true “bags” that just hang there with nothing to tether them, they have a tendency to bunch up a bit when you’re putting the skirt on; and need to be manually smoothed down flat to avoid obvious bulges on one’s hips.  When the skirt is lined like this one; that is even more annoying to sort out: since you have to either do it from inside the pockets themselves (see previous note about laughably small pocket openings) or lift up the skirt and pull them down straight from underneath.   In short: I have to concede that this particular design is better off without them!   Shock!
And please admire my rather fantabulous new shoes for summer too.  They are from Misano, like my ballet flats.  This warm rich shade of caramel leather is definitely my kind of shade, and will liven up and enrich all of my favoured neutrals.  I like that practical wedge heel too, safer and a lot easier to get about in than a stiletto.  I am really looking forward to wearing them and wearing them.  These are going to be long term players in my shoe collection!

Details:
Skirt; Vogue 1170 with minor modifications, a refashion of an old ballgown; black silk taffeta with a black tulle crinoline, see my review of this pattern here
Shirt; my own design, of black polycotton, details here
Sandals; a gift from Misano

pinterestmail

Facings; some inner workings

I took a few photos while constructing the waistband of my new capri pants to illustrate a few of my own finishing methods, but first…
Online sewing tutorials.
Since starting my blog I have penned a few of my own sewing tutorials; snapping photos and writing happily and freely about my methods… but lately hesitation has crept in…
why? because scathing criticisms of online amateur sewing tutorials have popped up in the previously harmonious bloggy sewing world.  Some people out there loathe and detest them….  on the other hand, some people find satisfaction in seeing the inner workings of other people’s sewing projects.  Personally I do too… when they are done well.  I don’t enjoy seeing close-ups of snafu’s or obvious stuff ups.  If I have made a glaring mistake I prefer to unpick it, take it apart or do whatever possible to fix it up, not take a photo and show it off!
But I do really enjoy seeing beautiful finishes and inner workings; I strive to make my own the best I can and I like reading about how others achieve the same.
So.  
Finishing a facing, on an edge with an invisible zip closure.

The zip is in, and I’ve attached the interfaced waistband facing.
The next step is to trim and clip the seam allowances.  My own approach to trimming the seam allowances I have been doing for years, with no concrete memory of where I learnt it: the layers closest to the inside, or closest to your skin are trimmed away the most, graduating from a narrowest layer out to the wider-most layer closest to the outside of the garment, which are trimmed the least.  So, the wider allowances are always against the outside of the garment, the narrower ones to the inside.
I rarely trim the stitching of the seam itself away, but trim out to the edge, so as to preserve intact the backwards/forwards securing stitches at the beginning of the seam.

When clipping curves, and especially if the fabric is thick, I sometimes take the precaution of clipping in an offset pattern of clips, like so.  This lessens the likelihood of the seam allowances showing up like a little row of “teeth” in embossed shadows around the edge after pressing.

Below is the opening edge, with the facing folded back on itself (wrong sides together), and the zip edge with the garment seam allowance (with overlocked raw edge) folded over it, right sides together; and stitched.  I never ever ever (ever ever) diagonally clip away the corner of that fold, but leave it intact, just like this.  With care, when you turn it out you should be able to get a nice square point at the corner of facing/waistband just like below right.  If the corner does seem a tad too bulky with layers of fabric, turn it back out wrong side out and right on the very corner, just inside the seam allowance at the starting point of that stitching, give it a few good sharp whacks with a heavy wooden spoon to flatten it; then try turning it out again.  I promise you, this does work!!  Just be super careful not to whack the top of the zip….  This is an old “couture” trick which I read in the Vogue 8333 instructions.

Under-stitching.  When I was a younger slapdash thing I sometimes used to lazily skip this step.  So foolish!  It makes all the difference to a neatly turned faced edge.  Do it!

btw, a note on the different coloured threads I have used in this project…
this is not a tip really, but an economical thing; I save my matching coloured thread for any stitching that is going to be visible either inside or outside the garment.  I use either black or white whichever is the closest in shade, in this case white, for any stitching that is hidden away inside the folds of fabric.  This is because I buy matching colour threads for a project in the smaller and more expensive 100m reels; and I buy black and white thread in the cheaper 1000m reels.  I have a black and a white bobbin permanently threaded up, and wind a bobbin in my matching thread before a project, as well as the reels for the top of the machine in white/black and my matching thread: and interchange them depending on whether the thread is going to be visible or not.  I know this means extra fiddling about and is not a tip everyone wants to bother with, but it does save money, which can be spent on other things  🙂  This is why you can see some stitching, the visible stitching, is in the matching beige thread, and some stitching is in white.  I’m Ok with that because the white stitching is in the hidden spots, and will invisible both inside and outside of the finished garment.

Fold the facing opening edge in smoothly to an even width against the zip tape.  I nearly always have to adjust my waistbands, so it is not a given that this will be the same as the allowance dictated by the pattern piece.

It is only at this point that I finish the lower edge of the facing, all in one go.  This time I opted to use the overlocker for a flatter finish, but HongKong seams look real nice. I overlock the opening edge fold down in place as they are pinned above, and also the facing seam allowances down to the facing at this point.  Neat and tidy!

The facing edge is hand stitched to the zip tape using fell stitches.
The facing at the centre back and the other side seam is stitched to the seam allowances.  It can be seen clearly here how the seam allowances of the facing have been overlocked down to the the facing in just one pass of the overlocker.

Finito!
pinterestmail

First aid for thongs

My sister-in-law S gave me this fabulous quick and easy fix for thongs, to help eke out their oh-so-tragically-short life span for just a little bit longer… if you love wearing thongs as much as I do then this one is a real goodie.
The hole on my old pink pair had enlarged over time, enough for the thong-y bit to start popping out with frequent and very annoying regularity….  In my lifelong scientific observations and road-testing of the humble thong, I have observed that this is the traditional problem spot, the first piece of the apparatus to fail…

S suggested making use of another common and oft-unappreciated little household gadget, the bread-bag closure thing-y
clipping it on over the thong-y bit underneath  (please excuse the highly technical terms in use here) and pull it in nice and firm

voila!
There is a tiny bit of a hump underfoot but they will be perfectly good for a spare pair…
and your thongs will live on to walk another beach  🙂

pinterestmail
Switch to mobile version
↓