Yearly Archives: 2012

You are browsing the site archives by year.

Knitting tension tip

This saves a small amount of time…
If one is using a new-to-you yarn and knitting up a tension square, and you see that the tension is not yet quite right…

Don’t unravel what you have knitted so far; just switch straight to the new size needle and keep knitting on the same stitches.  Saves having to cast on a new set of stitches…

I find 6 rows is usually plenty for me to see if the tension is OK or not.

This is an old tip, taught to me many many years ago, and felt like a revelation to me at the time, hehe.  Probably many people know and use this one already.  I just thought to share it here since you never know it could be new and helpful to someone :)) …  and if you are anything like me and raring to get going with your yummy new project, tension squares are a pain and you just want to get them over with, with minimal fussing about!!

pinterestmail

Peppercorn cardigan


I have knitted a cardigan.
The pattern is Jo Sharp’s “Tweed
Coat” available as a free downloadable pattern here and the yarn is Jo Sharp Silkroad DK Tweed in Peppercorn (col 425) which I bought during the 30% off closing down sale of their shop here (chokes back a sob).  The only change I made to the pattern was to shorten it
by 25cm… I reckon this is a much more manageable and wearable length than that very very long version in the pattern.  Whilst I like super long cardis in theory, the reality is that they bottom out in no time at all, visually inflating one’s be-hind to ginormous proportions.  How do I know this? because I used to live in a coupla longline cardi’s in the 90’s and I have the rear-view pictures to prove it…    not pretty hehehe  😀
This cardigan has had a tiny preview on this blog already, and I have been working on it for er, quaite a while?, approximately mumble months with
just a short interlude for my holiday knitting project, the mustard cowl.  I am a slow knitter I think  🙂 since it is a very easy knit.  I left this cardigan half-finished at home while we were away, and knitted my cowl in the round using my
aeroplane-OK-ed Denise set.
So, pretty cool, huh?  In a grandpa-cardi kind of a way, hehe.  I am particularly fond of the collar.  A distinctly grandpa-y feature I think.  It’s OK, I am quite partial to looking like a nerd from time to time.  My default look, if you will  🙂
It has pockets.  Just saying.  In case you hadn’t noticed this awesome little detail  🙂
I only knitted 5
buttonholes and sewed on 5 buttons, because this is the number I had.  My Mum gave these to me, aren’t they sweet!  Thank you so much, Mum!  I could indeed pass for a big fat fluffy pussycat in this cardigan, for sure.
It’s very warm.  Super warm.  Toasty as.  This cardigan is cos-ay.  I’m as snug as a bug in a … cardigan  😀
3C  minimums?  Bring it on.
Yup, we have been having extremely cold mornings (for Perth) lately… probably because we have had almost no rain at all!  We have had about two short rainy spells since I finished my raincoat, so that has barely been christened yet.  It’s bad, I’m telling you!  And those clear blue skies translate to cold cold mornings.  It gets nice and warm around mid morning with all the blazing sunshine, but the early hours have been freezing.  Don’t get me wrong I am a big fan of sunshine, but we need the rain too!
Details:
Cardigan; Tweed
Coat (shortened) in Jo Sharp Silkroad DK Tweed in colour Peppercorn (col 425)
Jeans; Au Bonheur PLH08002 in
strawberry pink denim, details and my review of this pattern here
Tshirt; self-drafted, white
cotton jersey, details here
Socks; not seen, but hand-knitted by me too!  😀
Shoes; Francesco
Morichetti, from Zomp shoes
spot the dog…
pinterestmail

Sludgy little skirt; 6 different ways

I haven’t done one of these for a while! but that’s OK since I thought May and June came with somewhat of an overload of “daily outfits” posts, no?  😉
I am so thrilled with this little sludgy skirt, made using Vogue 1247 and originally posted about here, along with my review of this fab pattern.  In fact dressing it up in 6 different outfits felt a bit like cheating.  It is the perfect basic for my tastes… a plain little skirt is my favoured skirt silhouette,  and this deep purple-y brown shade I achieved through over-dyeing is a favoured neutral in my palette that goes with just about everything I own.  The only reservation I have is the length! it is just a touch on the short side even though my version is 5cm longer than the designer intended.  I wore it several times during the warmer months but always felt a tad self-conscious about bending over, which with my doggy, household-y lifestyle is pretty ridiculous.  However, in the winter months with tights, it has really come into its own!
These are all outfits I have worn over the past few weeks and I took each photo on the day I wore it.  With the exception of this first very summery one, natch.  I just put that one in for some seasonal variety…

Below: at left; the top and the skirt from Vogue 1247 worn both together, how the designer intended.  I just love the silhouette of this outfit, the oversized block-y top is perfectly balanced out by the form-fitting, plain little mini underneath.  There is no doubt in my mind I will make this skirt and this top up again in different fabrics, too!  I am totally not surprised that Pattern Review named this pattern one of the patterns of the year! At right; with my crazy patterned tights, and my twisty Pattern magic top, the skirt is a solid and unobtrusive little block of plainness to separate and balance out each of these eye-catching garments.

sludgy1

Below: at left; during a recent discussion with friends, someone remarked that the only two colours that did not go together were brown and grey.  I immediately became slightly obsessed with the thought of wearing those two colours together successfully.  I really love this outfit.  I found it interesting that the other greys in my outfit really brought out the purple in the skirt.  At right; the warm chocolate is nice and cosy-looking when worn with a warm all reddy-purple-y-raspberry palette.

sludgy2

Below: at left; The skirt blends in with an all-chocolate ensemble with just an expected touch of bright colour in a shocking pink pair of tights.  Random fact: I actually garnered a wolf-whistle from a passing truck in this outfit… ha!   😀  And at right; I saw a similar outfit to this in Australian Vogue magazine and tried to emulate it with my own wardrobe.  I really liked this, the combination of a casual chambray shirt with the mini and lace-up heels has a hip, comfy and pretty cool vibe, I thought.  The skirt’s plain shape means it looks equally good with shirts tucked in, or left hanging out.  I love this versatility in a skirt.

sludgy3

Which outfit here do you like the best?  Just for interest’s sake I am wearing the all raspberry hued outfit today.  Except it was pretty nippy earlier this morning, so gloves were on!

pinterestmail

Thoughts on a slow wardrobe…

This morning, I noticed a hole in one of my socks.  Now, your average non-sock-knitter wouldn’t give it a second thought, just toss them out, toddle off and spend a handful of bucks on a bunch of new ones.  But I fetched my darning mushroom…
And as usual when I do anything sock-related, I pondered life, the universe and everything…
 and about “things”.  One really appreciates “things” one has made oneself, don’t you think?  There is that first-hand experience of the time and effort that goes into making some thing.   You come to treasure that thing.  Ergo, you take care of it, and you fix it up if something happens to it.  So, that thing lives on to be useful again.

My handmade socks have really drilled this basic and yet game-changing notion in to me more than any other of my handmade things.  
I think I am less wasteful and more mindful of consumption, thanks to the hours I have spent knitting my own socks.  
Because for sure, knitting one’s own socks is a very humbling endeavour.  Particularly when one walks past those racks of socks in the department stores, $10 for 3 pairs.

I am often asked “why bother?” with a handmade wardrobe.  Why bother spending hours knitting your own socks when it takes so looooong and they are so cheap and easy to buy?  
Well, I don’t know…. but I do take good care of my socks now

(my tutorial on darning is here)

pinterestmail

A Velvet-y Dress

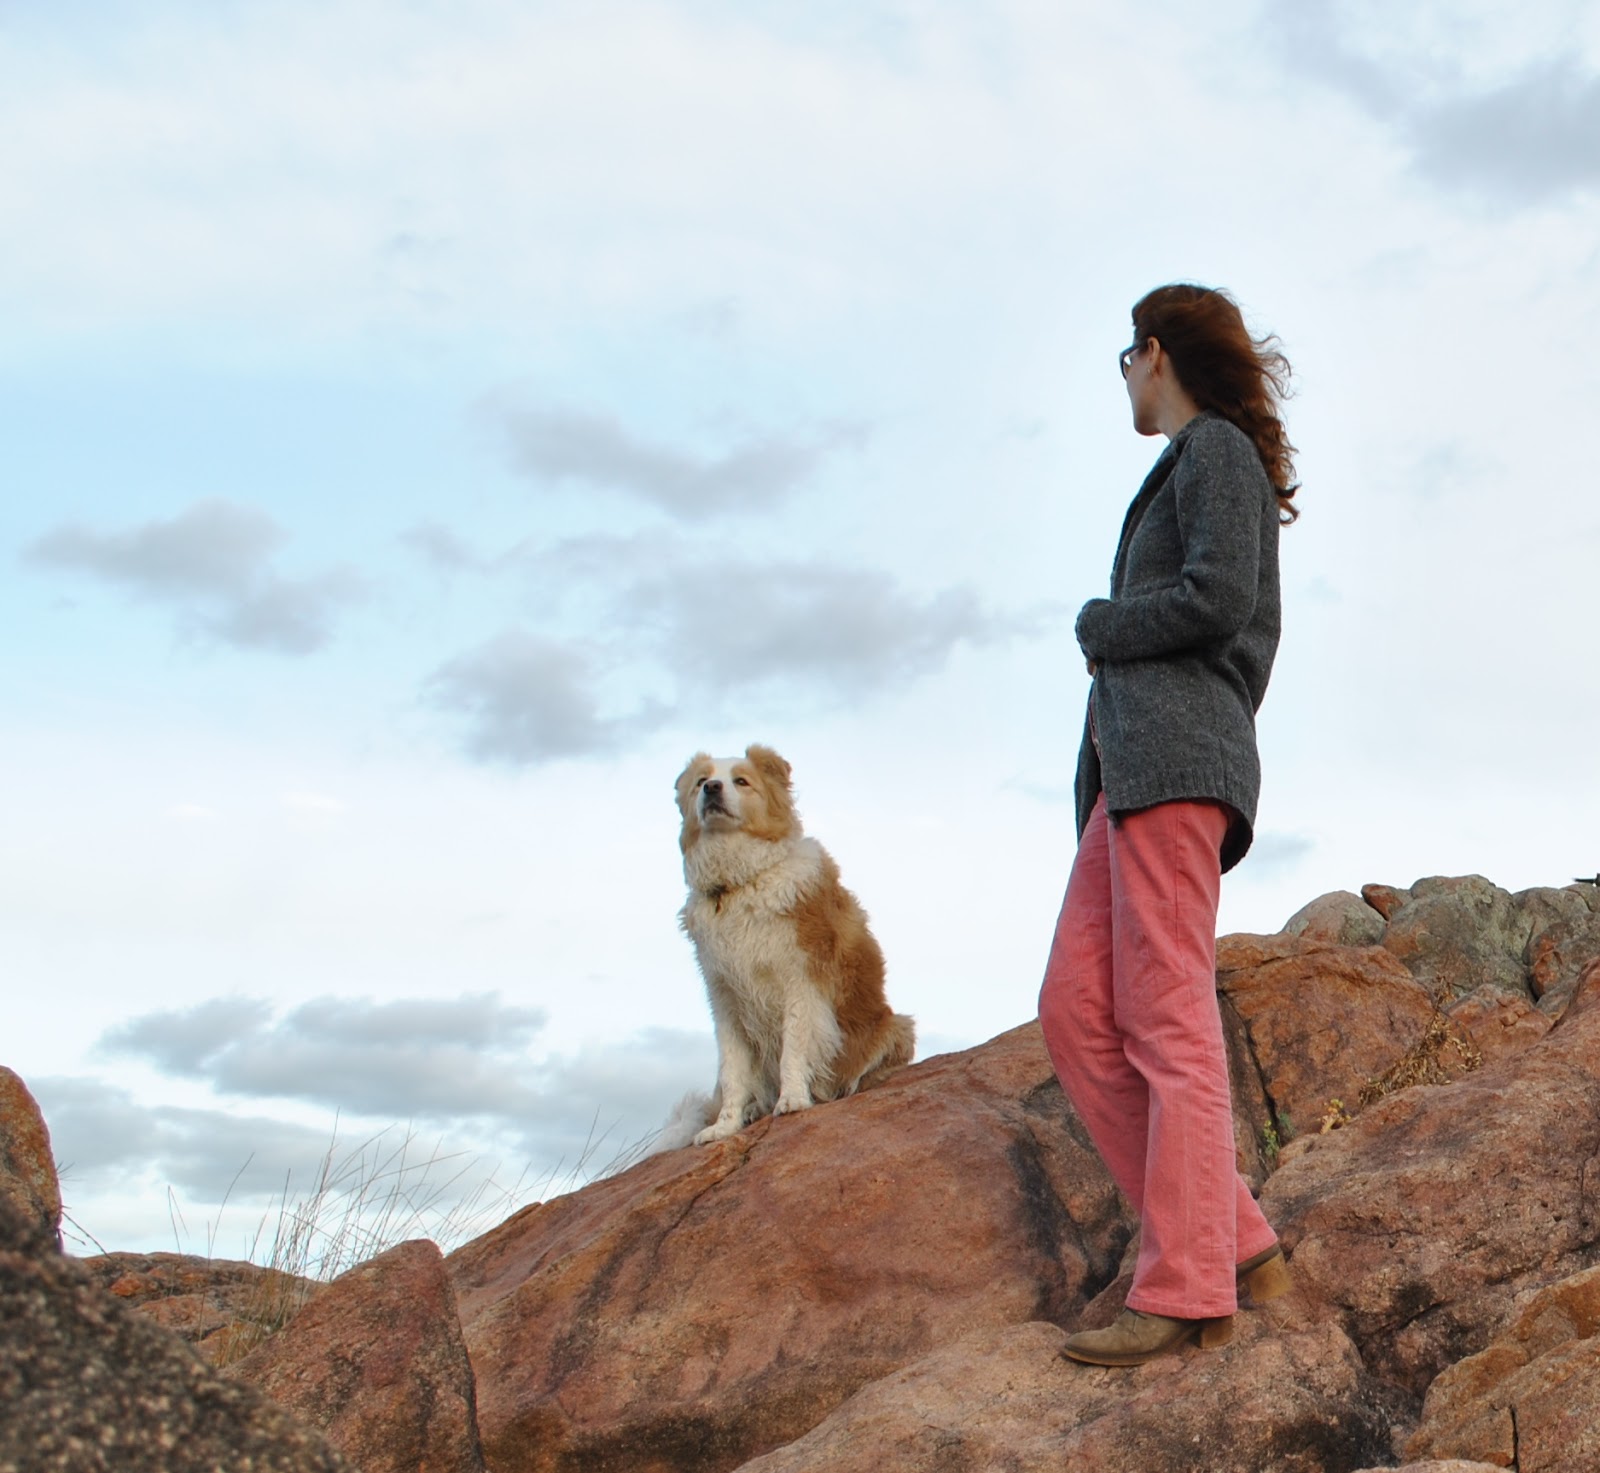
I desired to make for myself something quick and easy and selfishly frivolous…   and a Tshirt dress is very quick and easy, yes?  The fabric, a stretchy panne velvet from Fabulous Fabrics, is very lush; smooth and slippery and glides over the skin, the colour has the same gleaming, creamy-milky-white shimmer of
moonlight, and the texture is the same choppy and shadowed roughness of the moon’s craters.
I was quite struck with
Mary’s post particularly the bit about using fabric from the stash, allowing the fabric within to
achieve the potential you saw in it when you purchased it; to let it have its
moment in the sun.  So often I am
intimidated by my lovelier fabrics, and find myself dutifully using the cheaper
and lesser fabrics first, not ever rewarding myself by letting myself wallow in
the pleasure of the gorgeous ones. 
I have some very beautiful fabrics.  And I want to use them.  I want to have the fun of planning something with them,
cutting them, draping them, making something fabulous with them, even ruining them maybe but hopefully not!… one thing is for sure I am certainly not
enjoying them whilst everything sits folded up neatly in a cupboard.  Life is too short, no?
So yeah…  I am making a start  😀
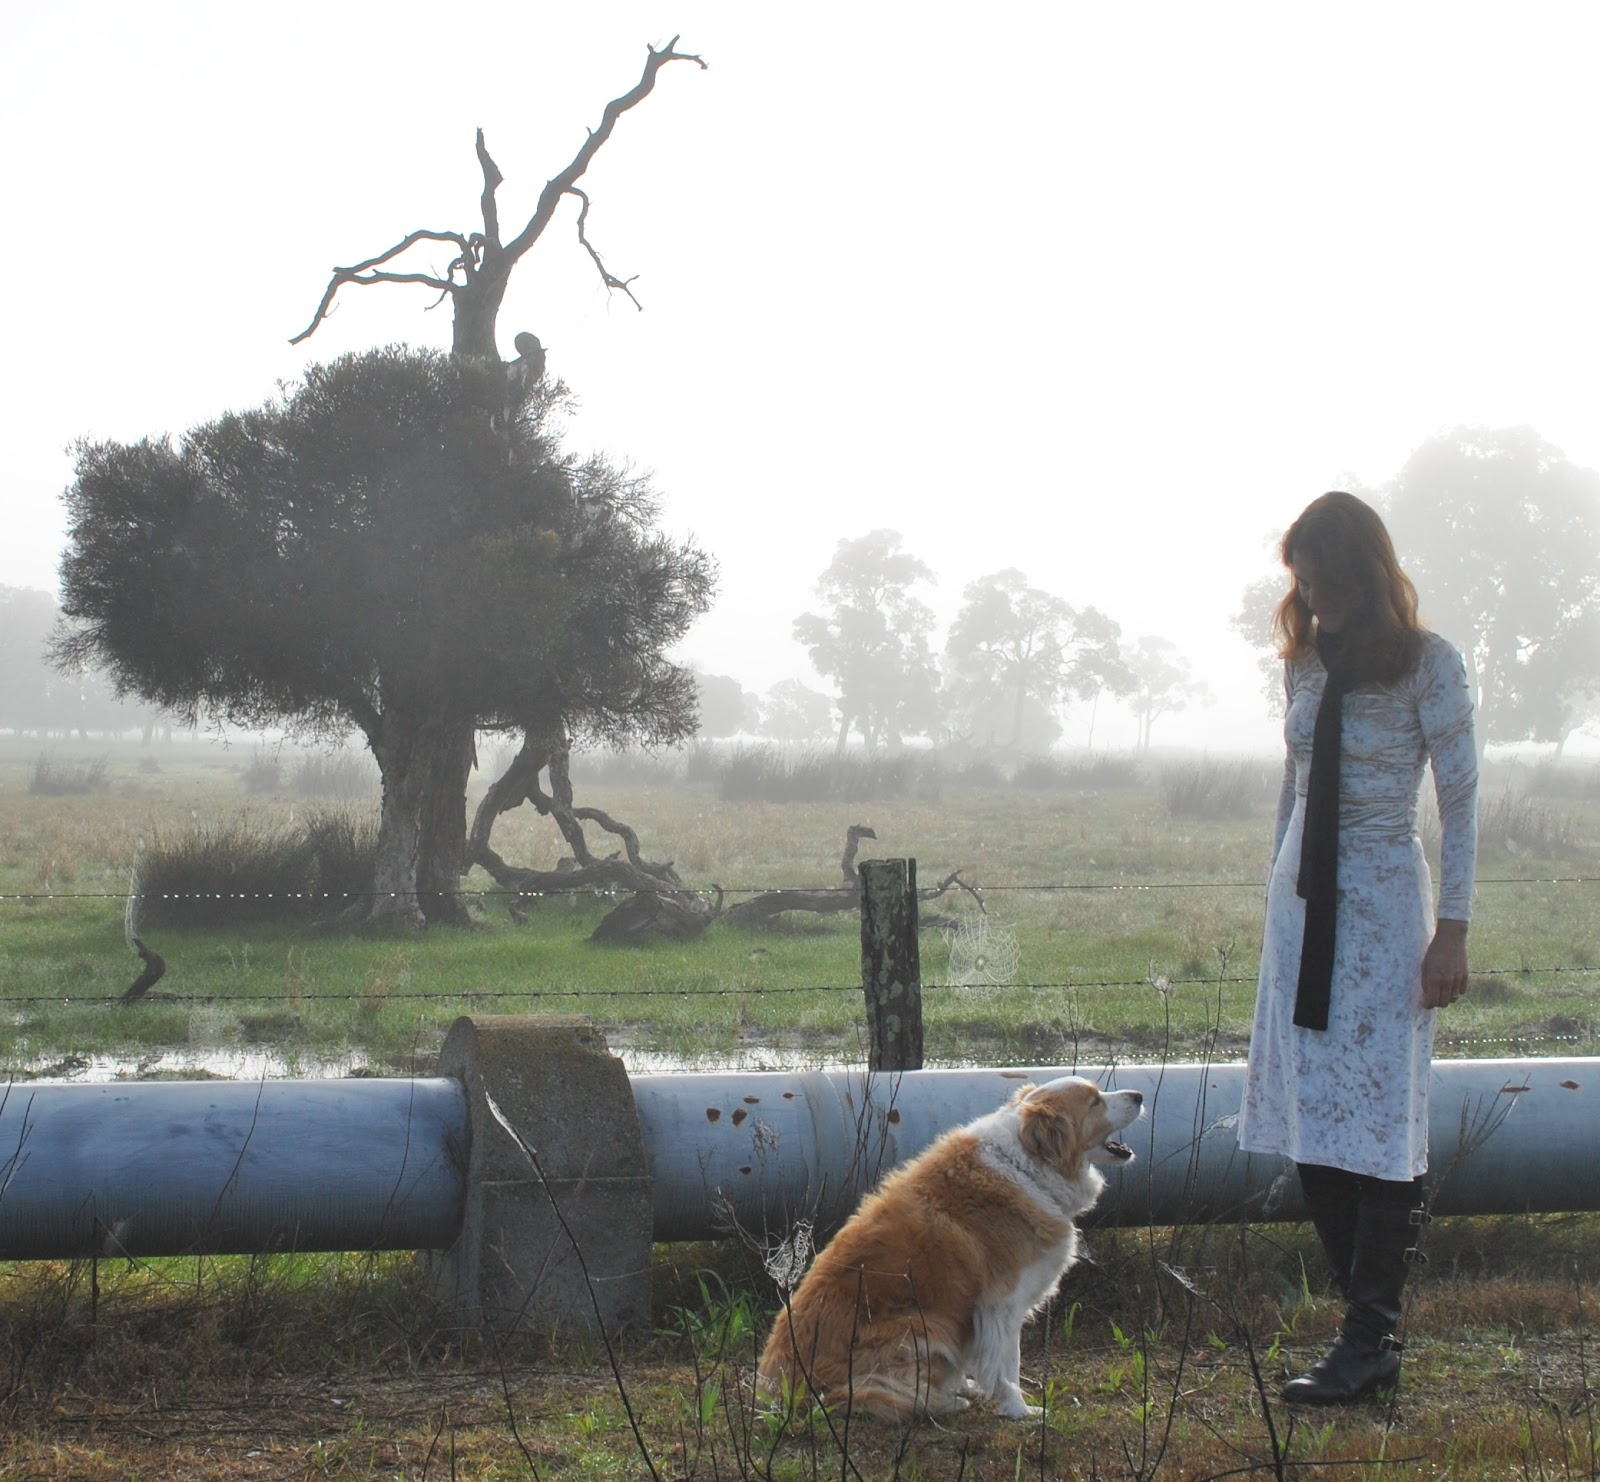
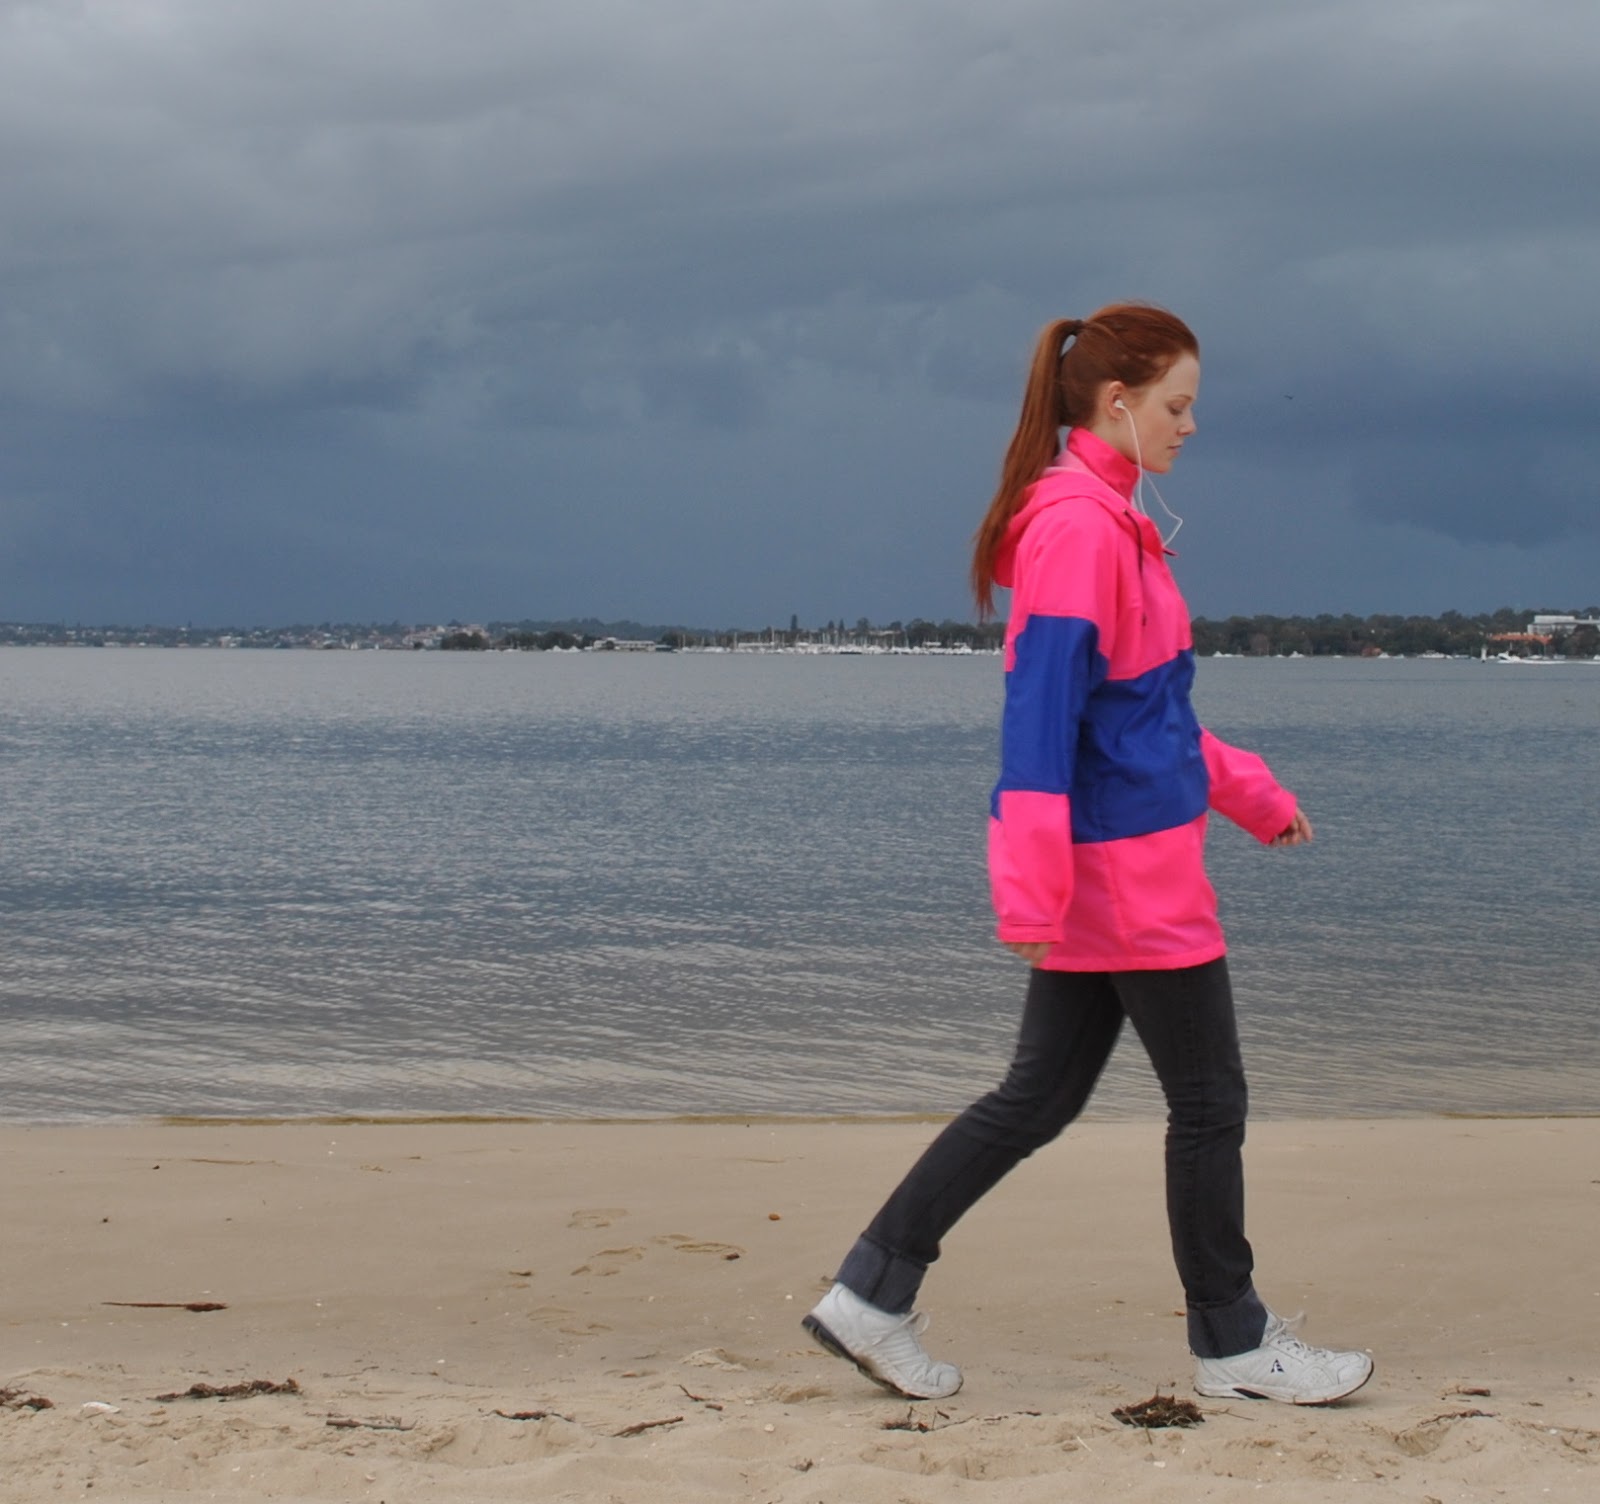
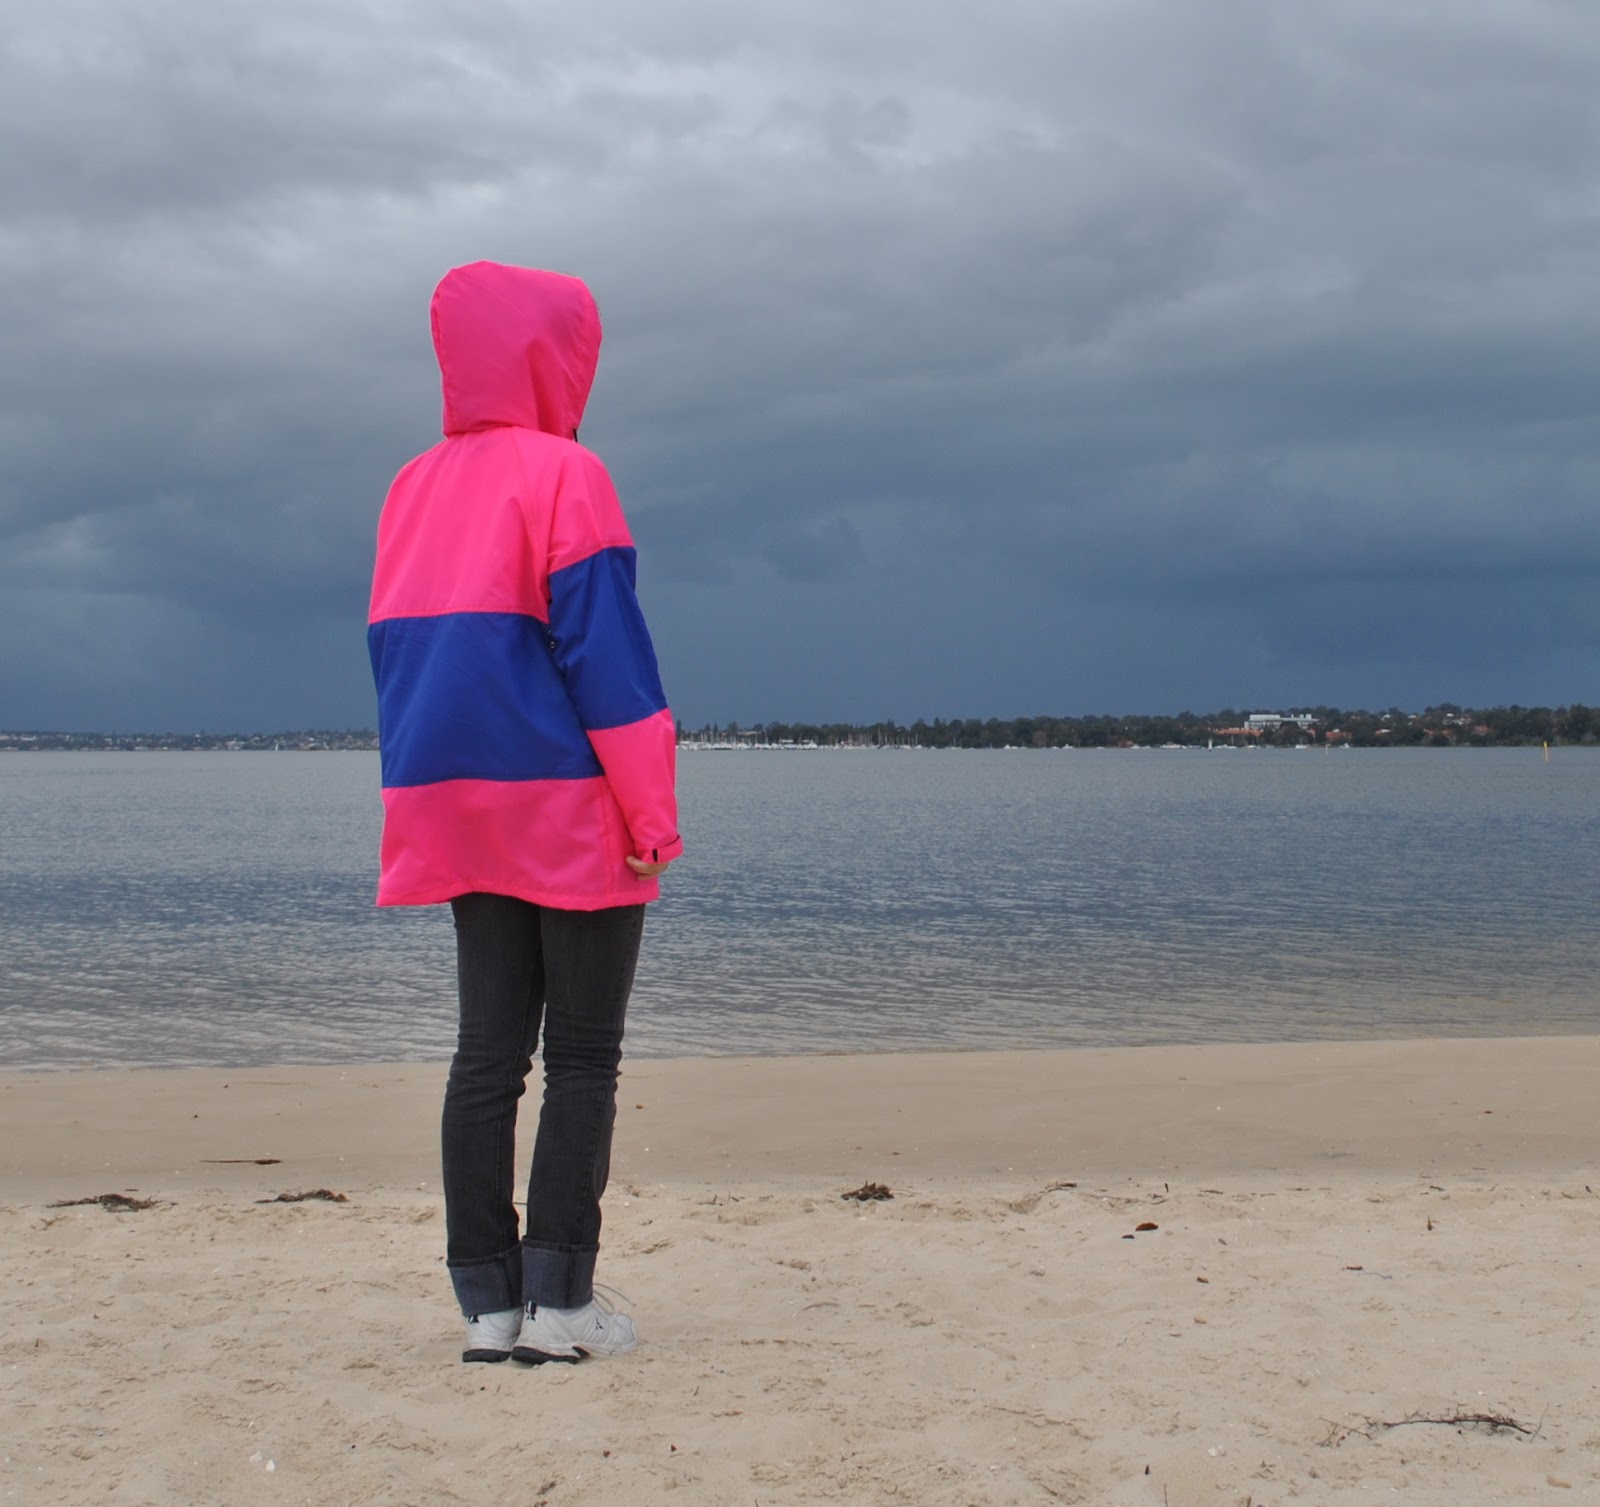
For this dress, I wanted a
winter-y version of my grey stripe dress, a Metalicus kind of a  thing.  And for the record, this is the exactly
the vision, or the “potential” I had in mind for it when I bought it too!
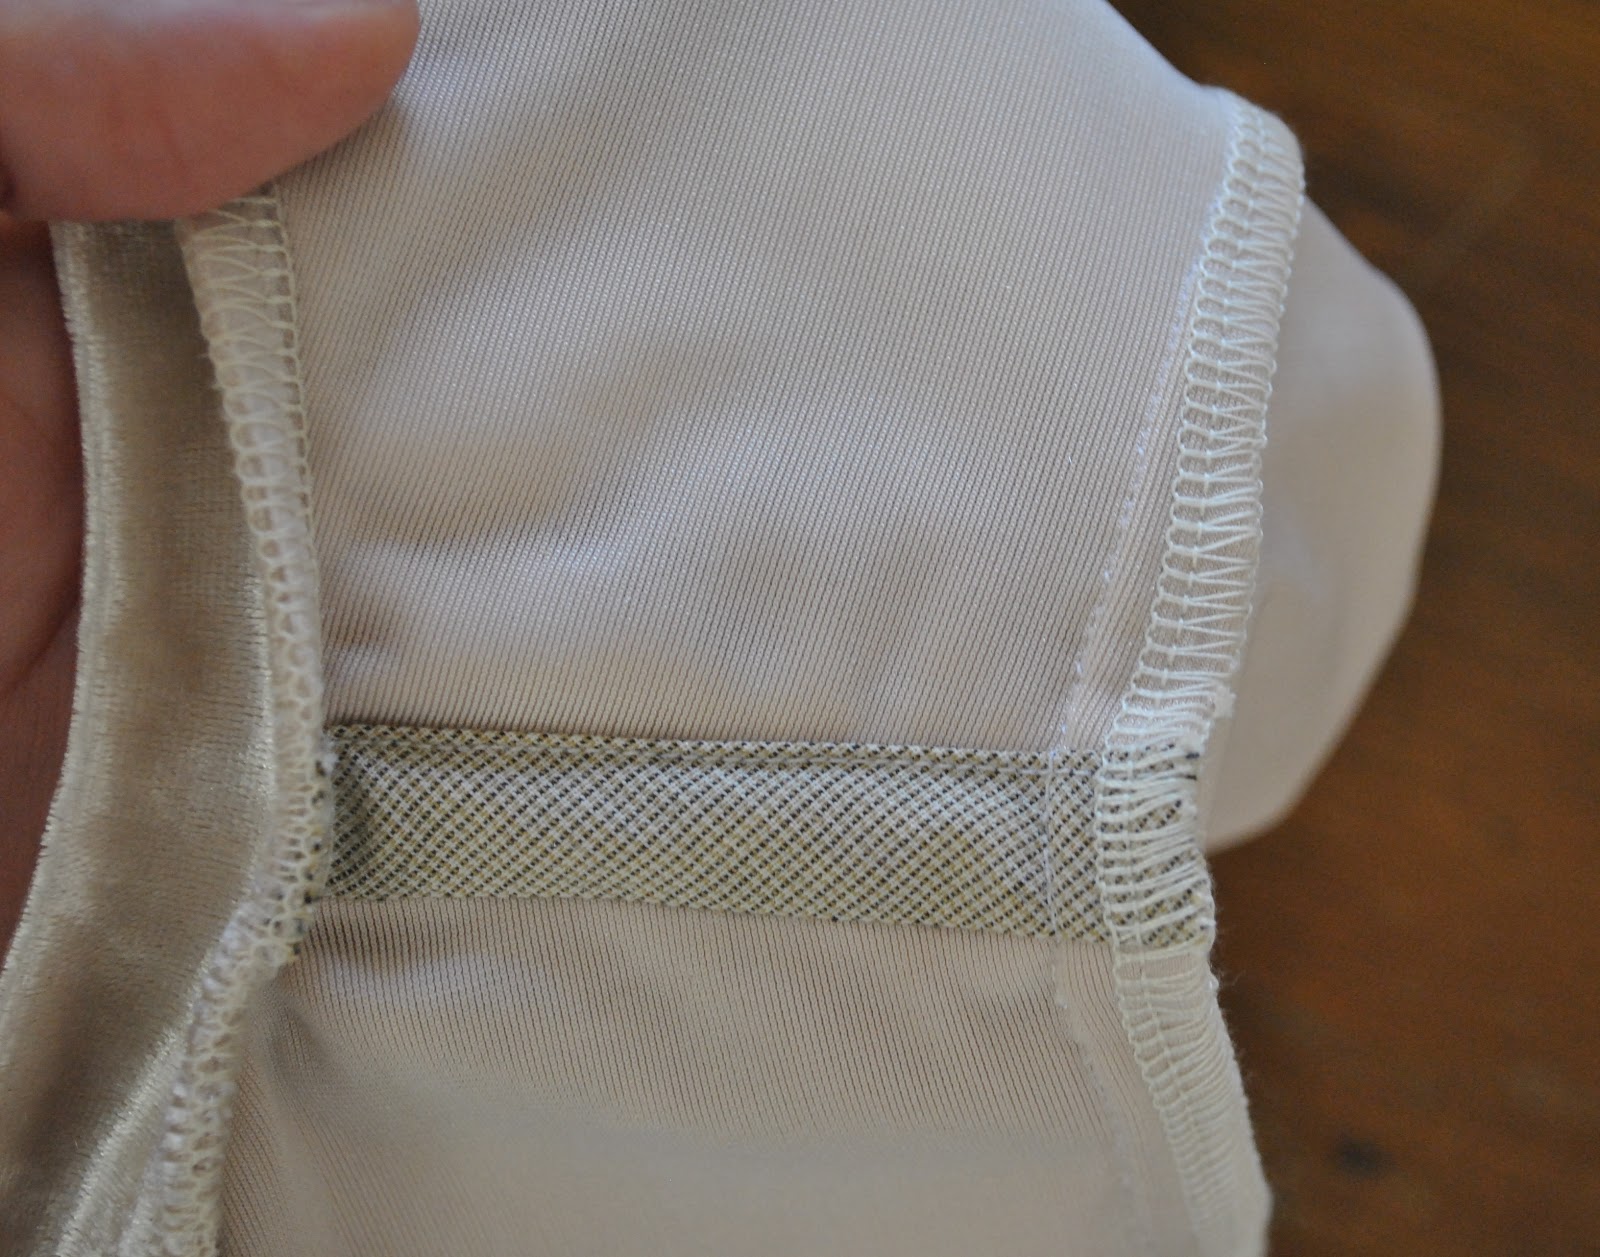
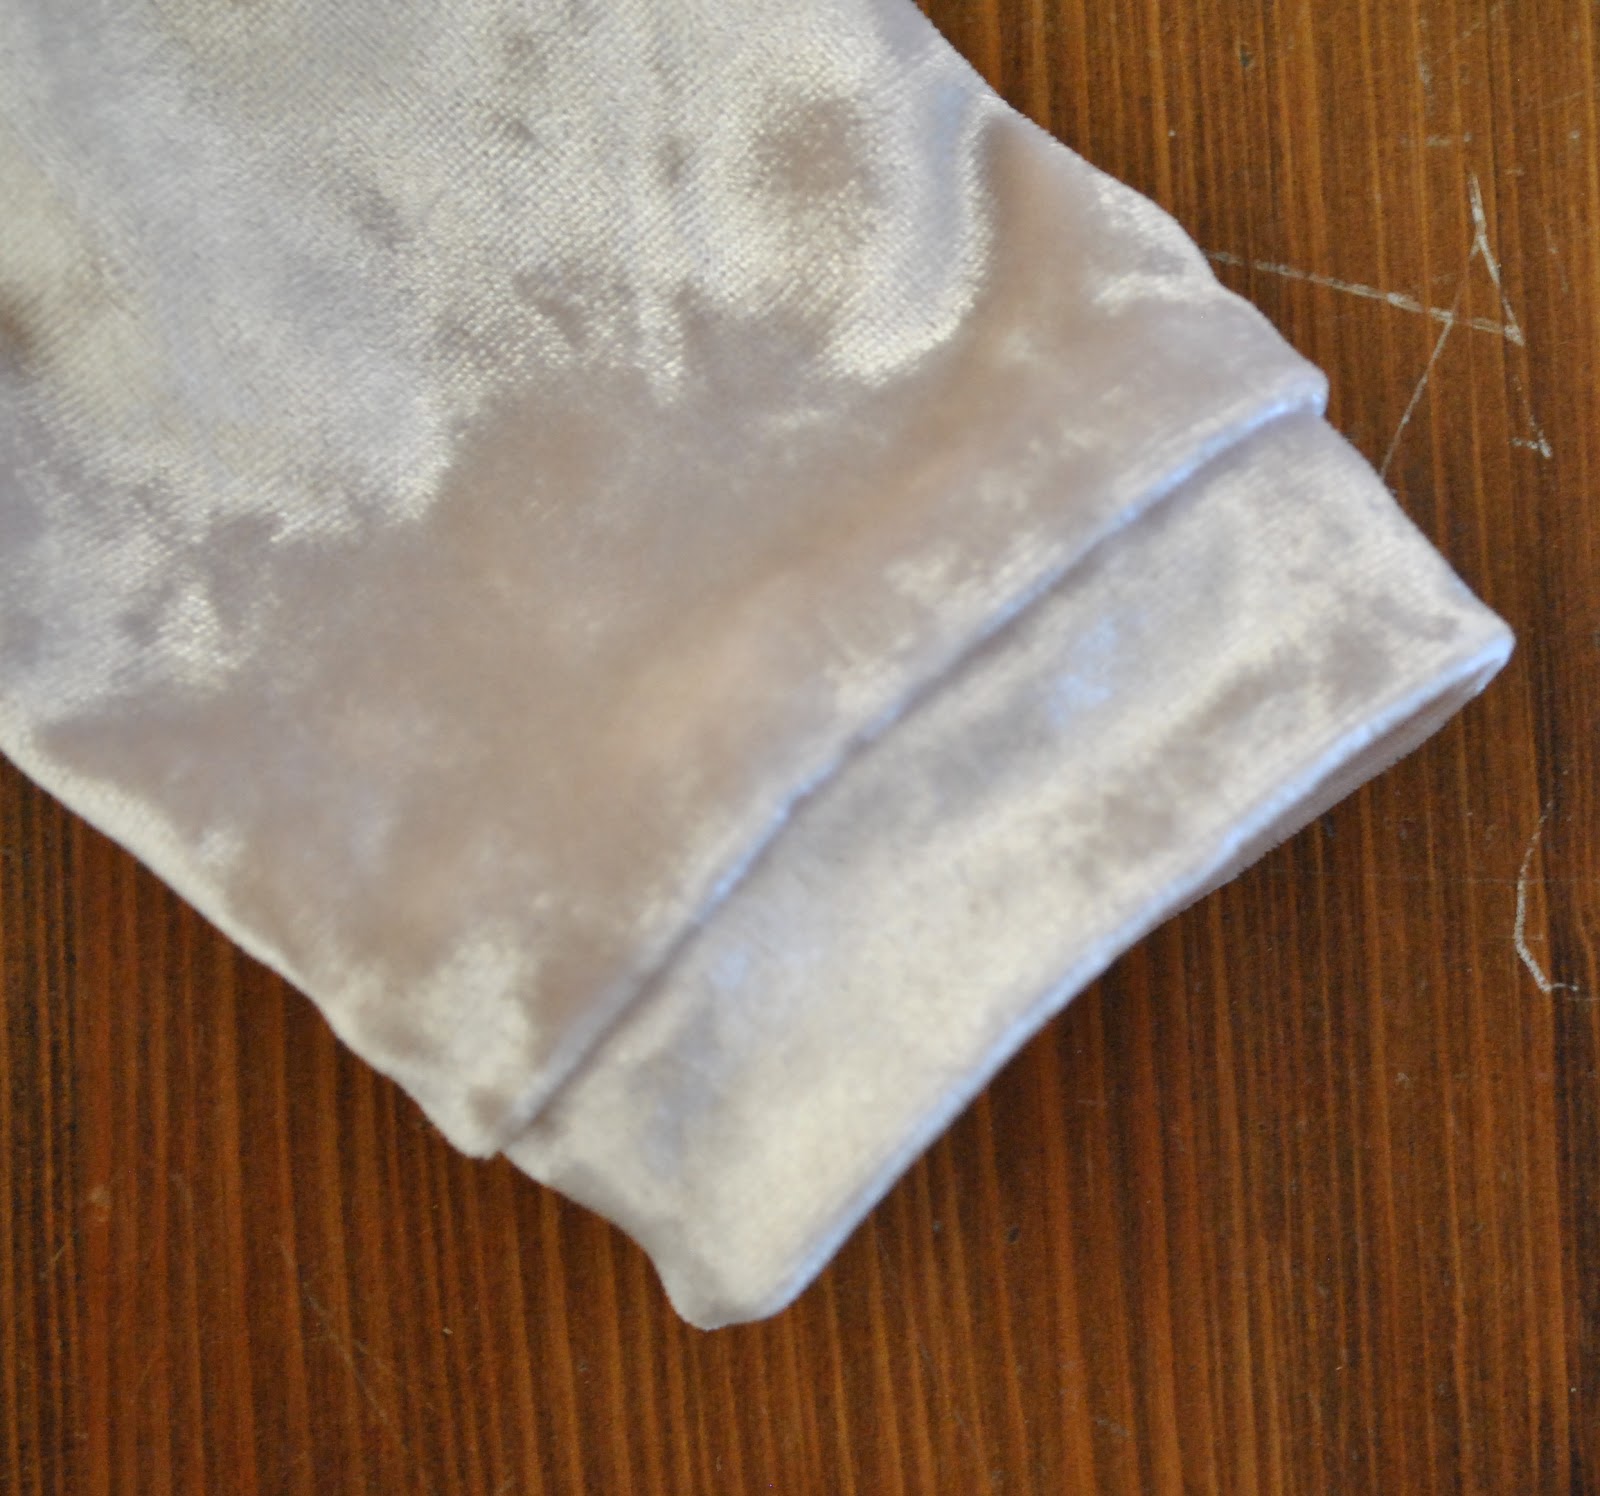
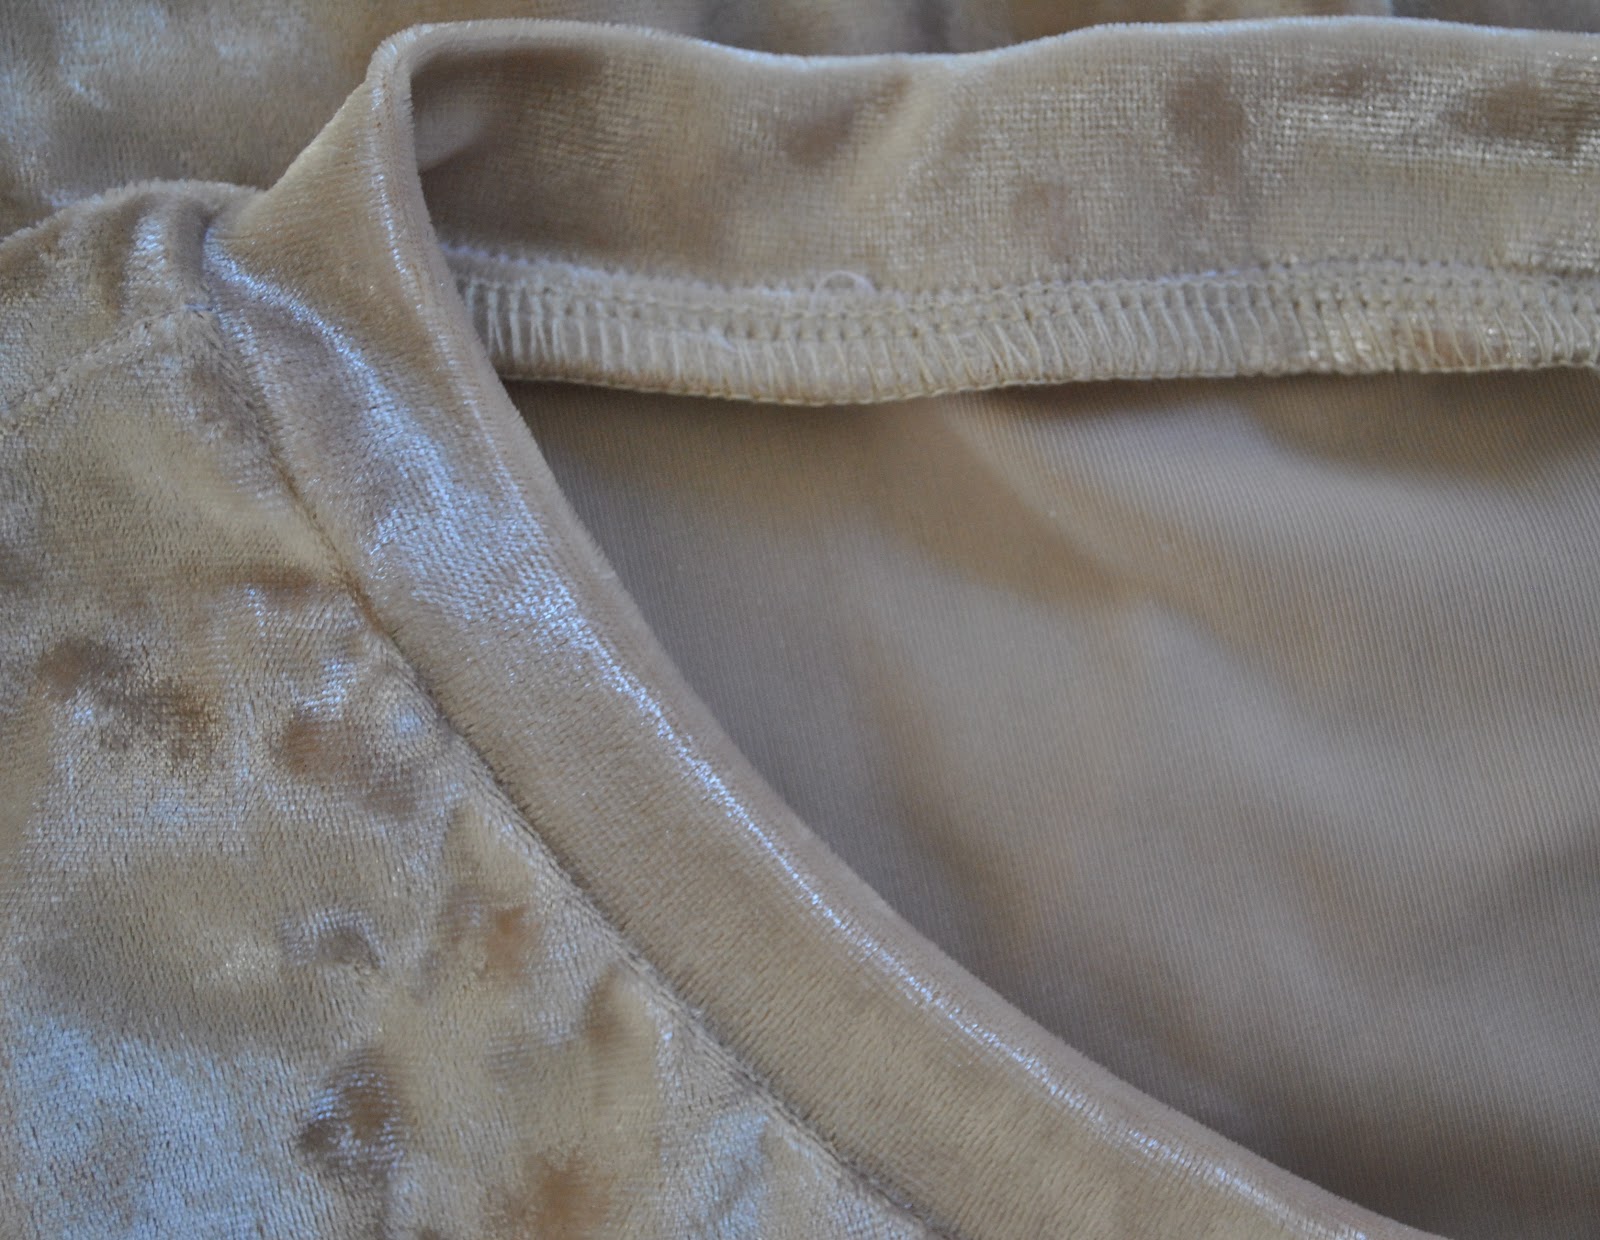
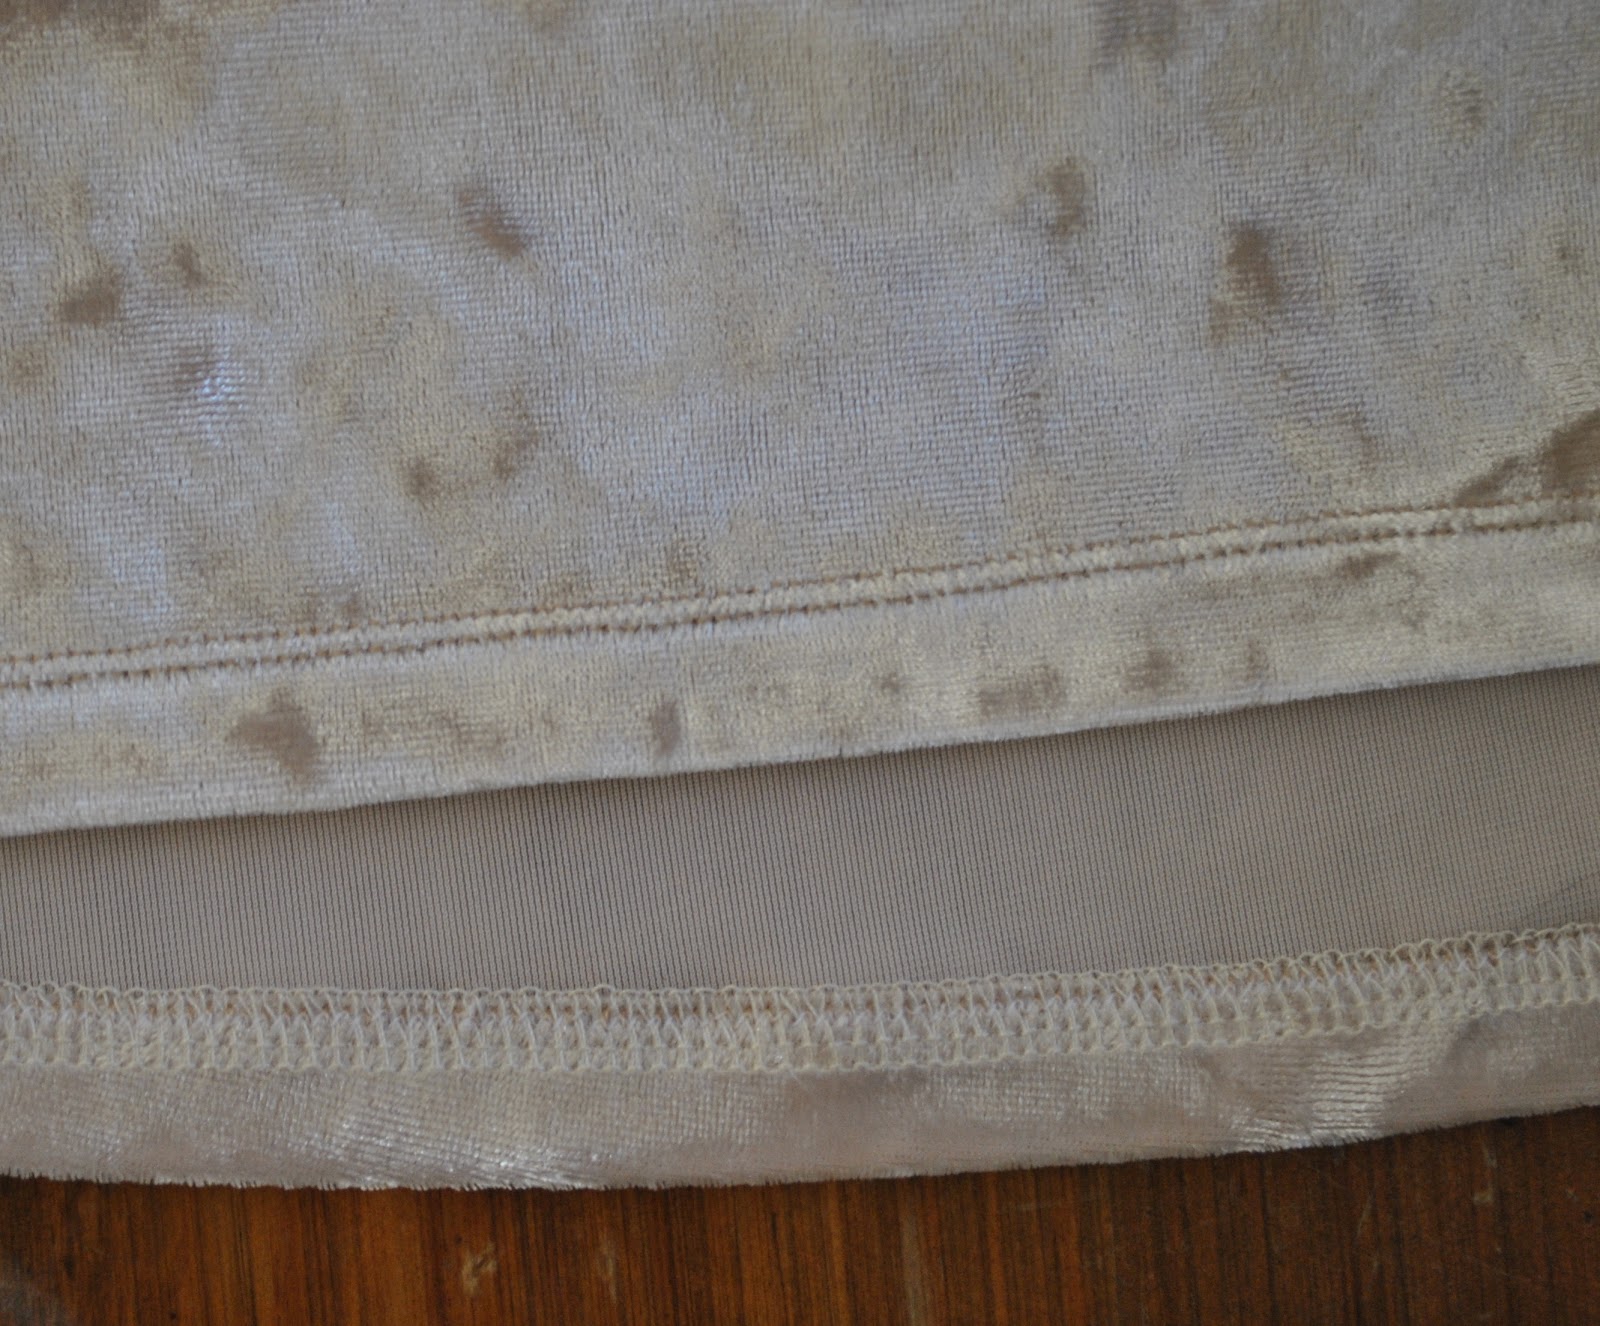
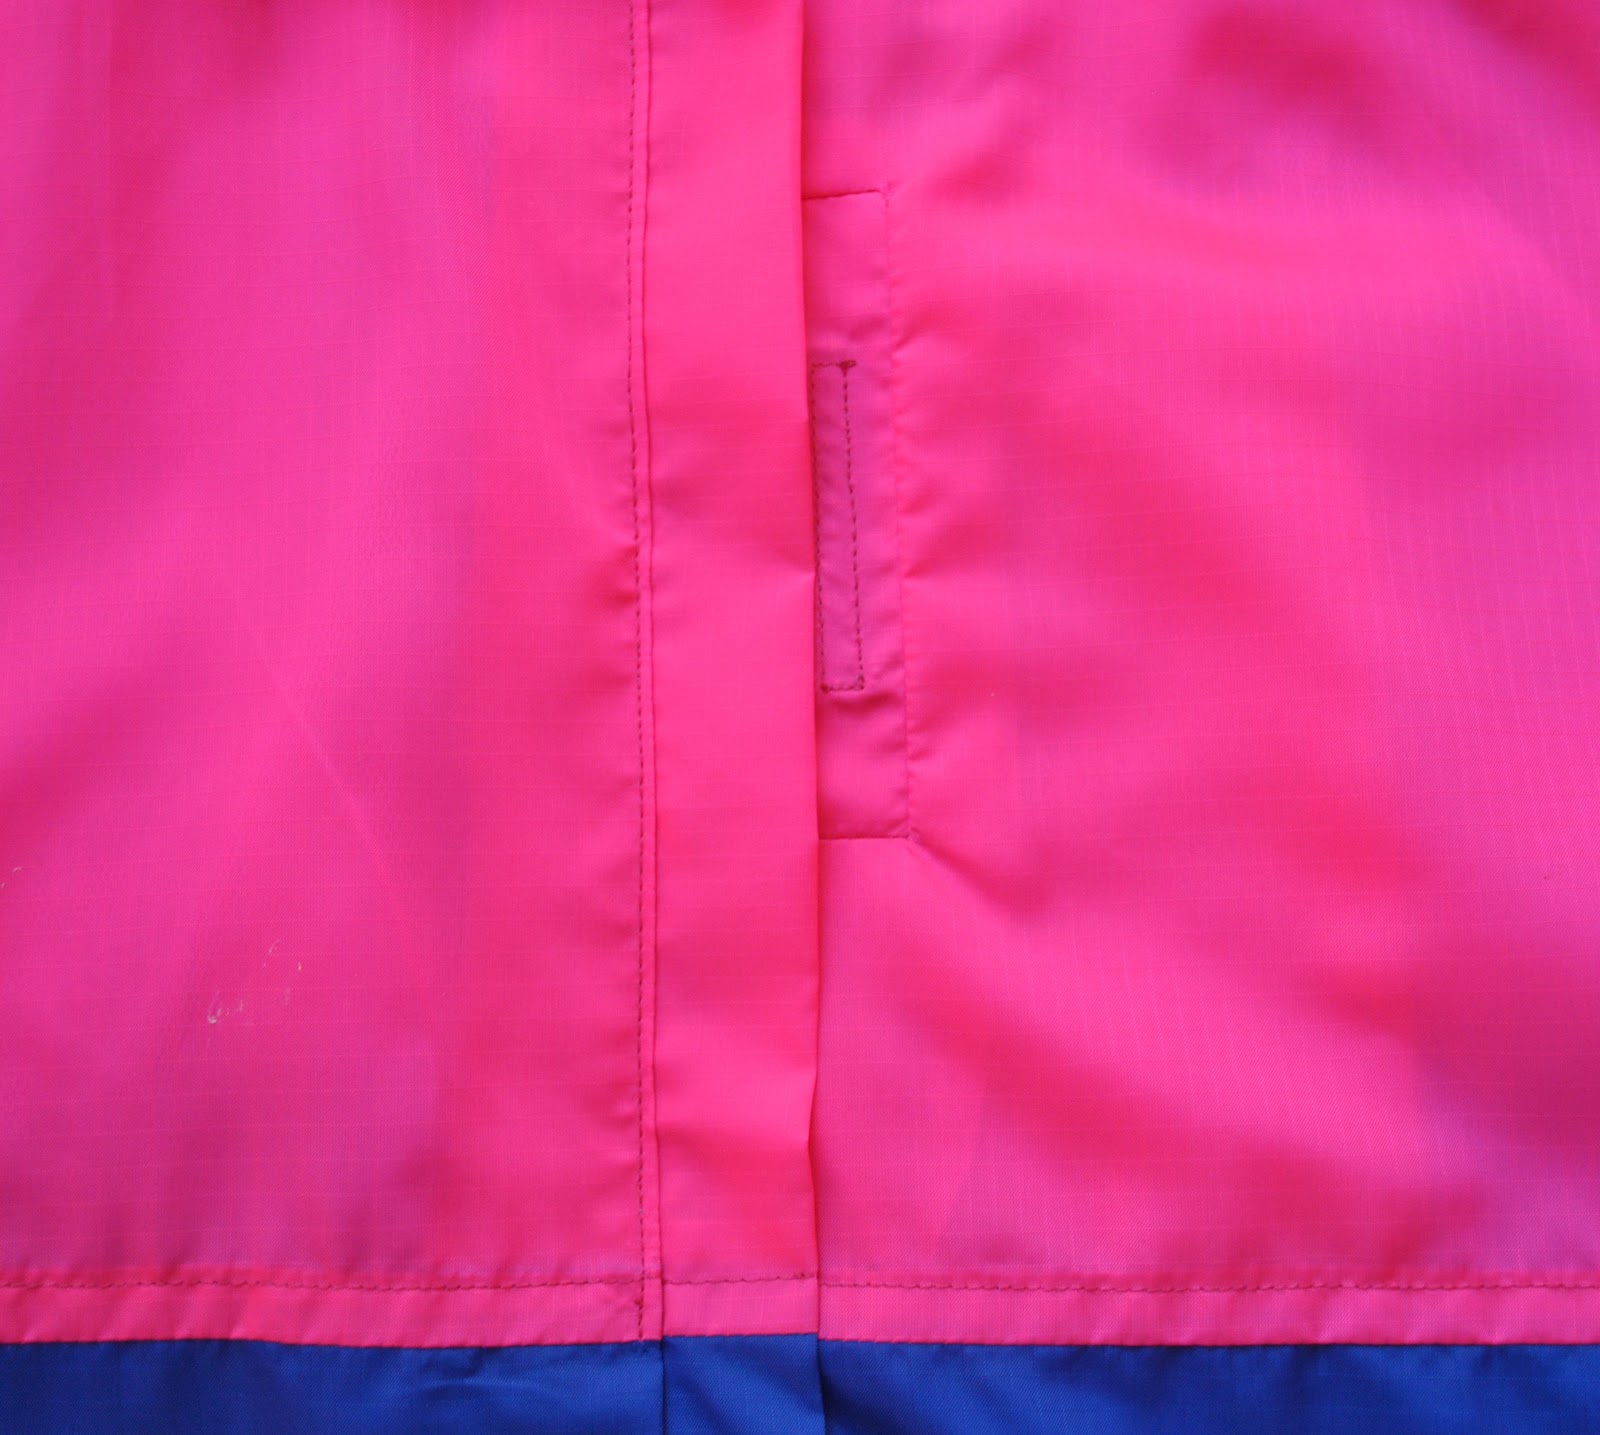
The shoulder seams are stabilised with short strips of bias cut poly-cotton, and the sleeve bands and
neckline band are circular bands sewed on using this very simple and easy method.  The lower hem is overlocked to finish the raw edge, turned up once,
and topstitched using a twin needle. 
I opted not to turn the lower hem up twice since the fabric has
quite a healthy pile to it and is thicker than it looks.  Making the dress quite cosy and warm, a
good one for winter! 
This is the easiest sort of
dress to make.  I drafted the
pattern myself, which is just a fancypants way of saying that I cut pieces
for a plain scoop-necked, long sleeved Tshirt, just very slightly gathered-in at the centre front: and then two “cone” shapes for the skirt
pieces, just a straight diagonal line from the waistline width out to the selvedge.  I really like this
A-line style of skirt.  It skims the body in a streamlined way and is therefore very figure flattering; far
more so than a gathered skirt would be. 
 And so easy.
Anyone can make a dress in
exactly the same way using a basic Tshirt pattern.  In fact, my honest opinion? save yourself some money, and
draft your own Tshirt pattern from a well fitting Tshirt you already have; honestly it is the
easiest thing in the world.  I’m
serious.  Even if you do not have
much experience at drafting your own patterns, trust me, this is the one you
should start with.  Get a Tshirt,
lay it down and trace around it. 
Done!  That’s free advice  🙂

So in the final
analysis I can see this dress probably going to be a very useful basic building
block in my winter wardrobe and not particularly frivolous at all.  I guess I failed that part of my
assignment.  But not to worry, I
have also unearthed some awfully frivolous fabric from the stash, which is
waiting patiently in the wings to be transformed into something definitely very
un-useful and very un-practical; in short horrendously gloriously frivolous!
and which I am steeling myself to take the scissors too… hehehe.
Soon, peeps!
Details:
Dress; self-drafted, of
shimmery oyster-white stretch panne velvet
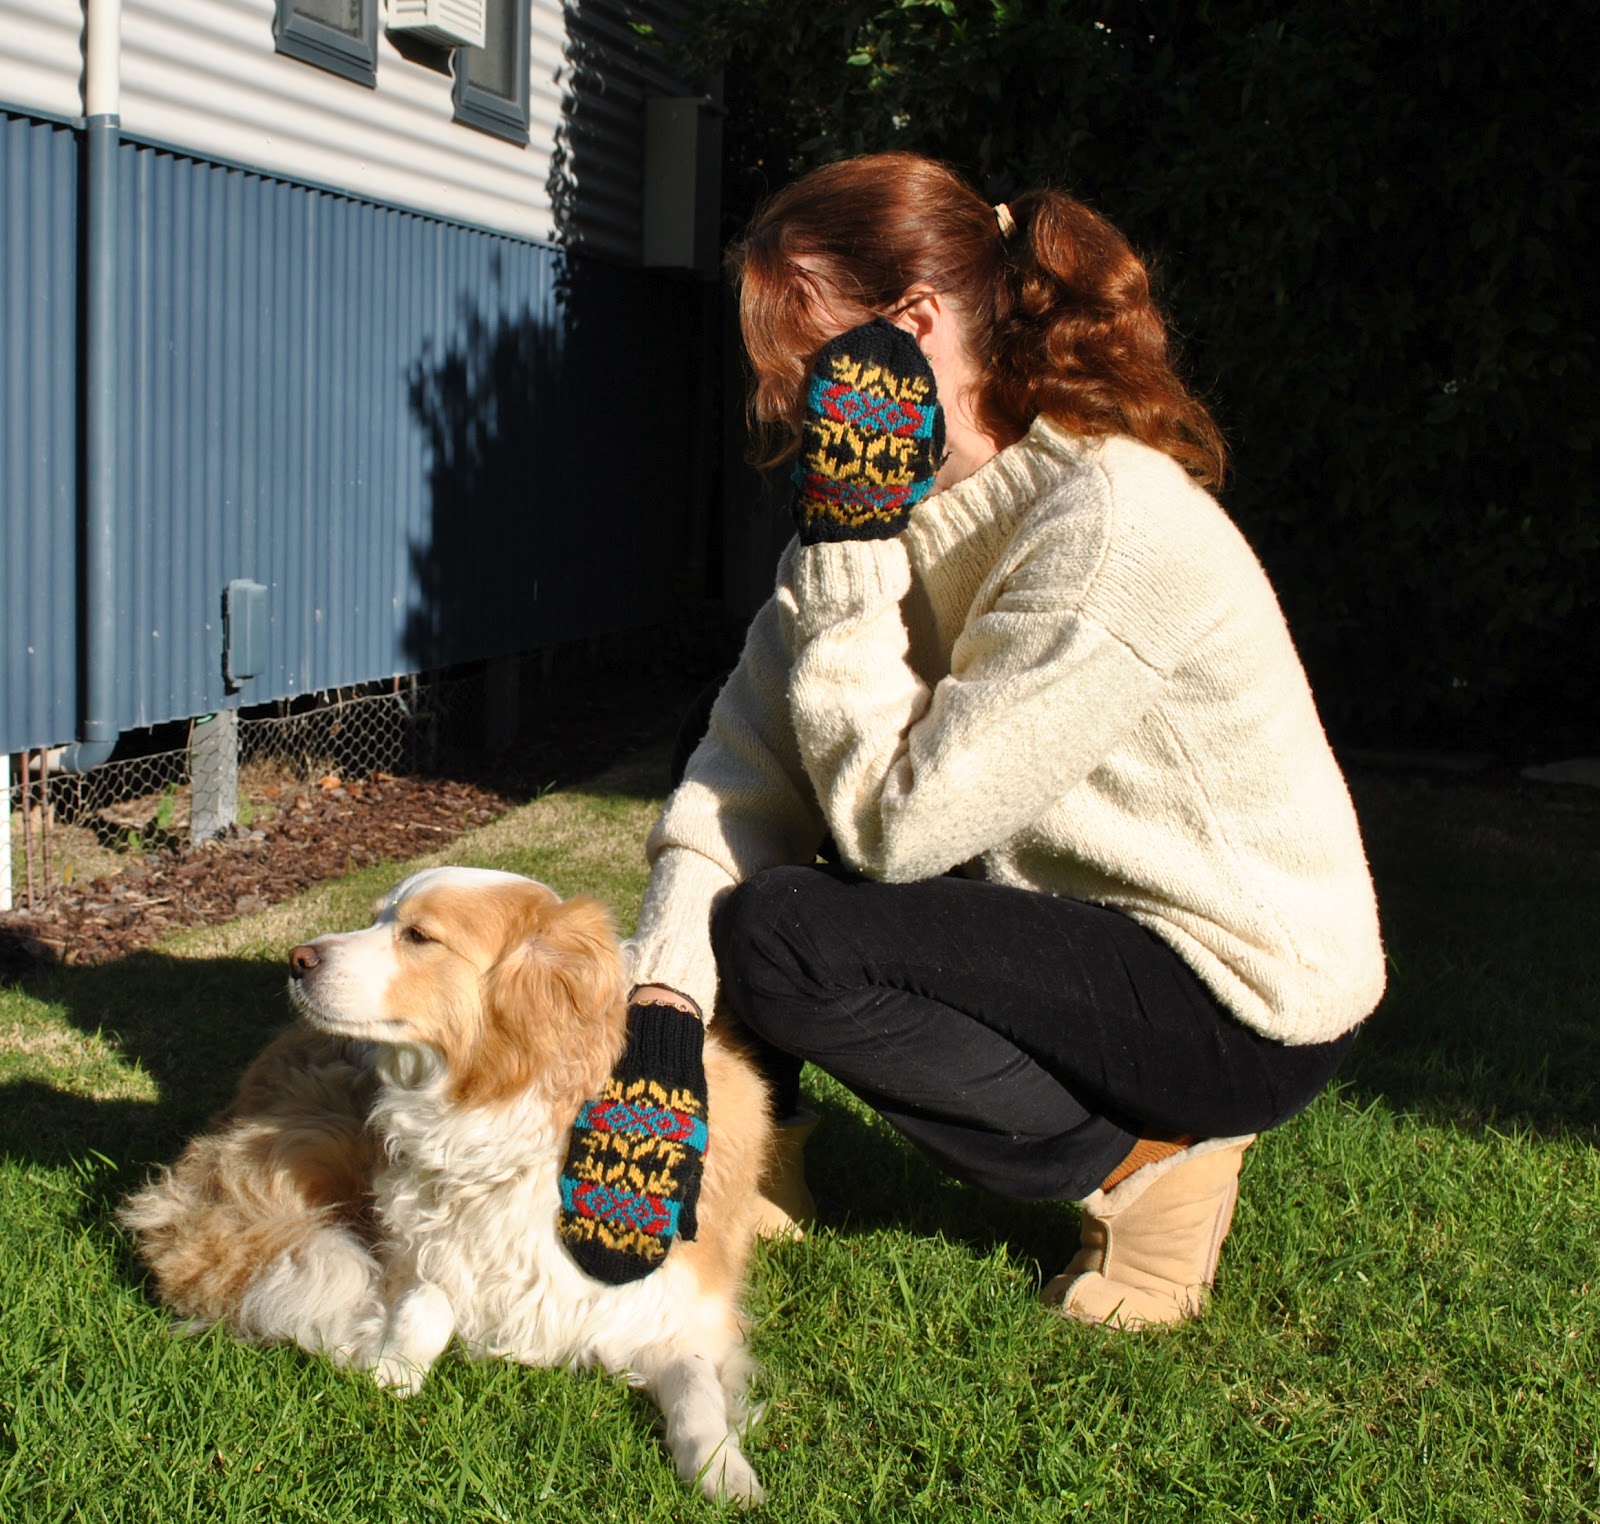
Scarf; knitted by me to my
own design, details here
Tights; voodoo
Boots; Andrea and Joen,
from Uggies in Dunsborough, now renamed Eco boutique
pinterestmail

On mittens, and making time for sewing

Rootling around in my winter woollies; I realised that I had never devoted a post before now to these mittens.
I knitted them yonks ago: probably when the children were really tiny, and probably using leftovers from one or another of my hand-knitted fair isle cardigans and jumpers that I was very keen on making at the time, and which have mostly appeared on this blog already.  The yarn is Patons 8ply, my yarn of choice for years and years and years because it came in a gloriously huge range of colours, tailor-made for lovers of fair isle knitting, and which sadly seems to be no more.
I have no memory of the pattern I used, but it is obviously a Scandinavian design, no?  (Later edit; Lydert advised that it is likely a true Fair Isle design from Scotland… thank you Lydert!)
I still love to wear them on really frosty mornings, that is; as long as the finer motor skills are not required   🙂
Each row has two strands of yarn, one carried behind the other, to form the colourful fair isle pattern.  The backs of the hands are still looking quite presentable, but unfortunately the palms are a bit fluffy now through wear.  But I think they still have a good many years left in them!  I think I will try to make for myself a new adapted pattern based on these, because just now I have noticed that the area around the base of the thumb is just a tad too tight across my hand.  I think the tightness is a minor detail that never bothered me before.  When I was a wee young strapping thing I was very accepting of minor discomforts in my handmade clothing and it is only as I have got more, er, mature (haha) that I have become more picky and fussy about The Perfect Fit.
Will keep you posted on the progress of that pattern…

Details:
Mittens; knitted by me, using Patons 8ply merino
Jumper; knitted by me to my own design, using Jo Sharp’s Aran Tweed, details here
Jeans; Burda 7863 modified, black stretch corduroy, details here
Socks; handknit by me, details here 
Ugg boots

I was highly flattered when Carole and Gilly both asked how I manage my sewing time, and even what was my schedule for weekly sewing…  thank you so much for the interest ladies!  
My “schedule” is a very NON-scheduled kind of a schedule, really.  A Clayton’s schedule.  The schedule you have when you’re not having a schedule, y’know  😀    That’s another antipodean-ism there btw…
Lately I am trying a new tack; to limit myself to just one project a week, and no more.  I figure; forcing myself to slow down means naturally paying plenty of attention to the finer details and finishing things off properly.  I’m not doing toooo bad about sticking to that one  🙂  but (blush) I do still have three more finished things to show here, just awaiting me taking some photographs and sitting down to write something coherent about them.  Often this bit takes me longer than the sewing bit  🙂
I don’t sew every day, but often if I am idly passing my laundry door I’m suddenly possessed and propelled by some mad demonic force beyond my control, over to the sewing machine, picking up whatever is on the go and doing a little bit.  Sometimes that little bit turns into a lot, as the sewing demon evilly tempts me to put off whatever it is I should be doing, just to do a little bit more sewing.  Oh, I’ll just put in this zip, or oh, I’ll just finish off this pocket, or whatever.  Oh, I really should walk away right now and NOT apply that iron-on interfacing to the collar… oh woops, look I just did.  Now I really just have to sew it together now, darnit…
Other times I might have just put on a load of washing and suddenly woosh!  I awake from a trance to find myself sitting at my sewing machine, doing just some little thing more.   The sewing demon is powerful, I tell you.  Cunning too.
It gets particularly malevolent  when I am all enthused and excited about a new project.  I will be super-restless about getting on with it, and obsessively think about it every moment I am not right there with it, working on it.  My raincoat was one of those projects; I worked on it solidly for several days. feverishly plotting over the minutiae of the construction details and the best possible order it should all go together.  
Until it was finished.  Then I am at peace and the demon is appeased.  
This house is clean.
well, momentarily anyway…. mwahahaha 😉

pinterestmail

Raincoat the Second

Ta da!  please allow me to present the raincoat that I have made for Cassie.
It is made using the same self-drafted pattern I used for my own raincoat, with just a few minor fitting adjustments.  All the details are identical to my own coat; the seams in the shell are French seams, waterproofed with Seam Grip, and the coat is fully lined with soft and lightweight white polyester net.
Cassie chose the colour herself and I am happy with the knowledge that she is unlikely to get run over crossing the road whilst wearing this  😉

I ran into a snag buying the pink fabric, that fortuitously turned into a stroke of brilliant good fortune: previously when buying the royal blue fabric for my own raincoat I had bought 3m to ensure I had plenty to play with, since there is nothing worse than running out of fabric halfway through a project, no?  It turned out 3m was plenty, in fact it was way more than plenty and I ended up with an annoyingly large leftover piece.  This is a pain, because I am really trying to rid my life of leftovers.  Especially icky nylon leftovers which have a very small desirability in my wardrobe.  So when I went in to buy the nylon for Cassie’s raincoat I asked for 2m of pink, and was mildly horrified when the roll only had 1.4m left on it.  But the cunning stash-busting part of my brain instantly saw a beautiful possibility….  a quick consultation with Cassie, who cheerfully agreed that yes, a wide blue stripe did indeed sound very nice (phew!) and I went home with the 1.4m of pink, joyful that I was going to be gainfully using up the rest of that blue nylon after all… and so quickly after it had joined the stash too!  (air fist punch) Yeeah!

Of course it was not all beer and skittles from then on; I did have to conjure up a bit of pattern placement magic, and do various mental calculations for various stripe scenarios, and there is one short extra piecing seam in the blue under one sleeve, but I did manage to squeak the raincoat out of my pieces of royal blue and pink successfully.  I’m pleased to report that the final scrap count is almost non-existent too (‘nother air fist punch).

There was a hiccup; the making of this second raincoat did not go as smoothly as the first.  You know how the second time you do a thing everything is supposed to go much much quicker and easier?
Well, no.

Halfway through, my ironing cloth slipped a bit and I managed to iron a hole in one almost-completed front.  It was a very small hole, but it was.  An.  Unmistakeable.  HOLE!  When I saw this; steam started to emit from the ol’ ears and I had to walk away to calm down for a few hours.
Once I had regained some composure, I returned to the coat and thought about possibilities.  Y’know when life gives you lemons there is always a silver lining, or something or another, yeah?  And I surprised myself with my own ingenuity by coming up with the idea of a little pocket for her iPod.  Where the offending hole was, there is now a welt, covering a little internal pocket.  It closes with a little mini-strip of velcro, with enough room at the top for the headphone cord to come out.  And fortuitously, the welt is in the perfect position where its vertical opening is covered by the zip placket when the zip is closed, improving waterproof-ability.  Yowza!  It’s like I planned it all along!!

Below left; I made the welt as small as I could that could still fit the iPod sliding in sideways, the pocket bag hangs below and to the side… Below right; I stitched the top of the pocket bag to the lining to help reduce the drag effect of having the pocket bag off to the side of its opening.  Fortunately, iPods are very lightweight!

I am happy now.
And y’know what?  I am even more ecstatically happy that none of my boys wants or needs a raincoat, and that this is the end of raincoats.  At least for now.  I’m raincoat-ed out.  I want to make something fun and easy and selfishly frivolous now!
Later, fellow self-fashionistas!

pinterestmail

Smalls

Hehe, I was thinking of calling this post “My First Bra”, but apart from making it sound like the breathless diary entry of a sweet young teen  (ahem) I have actually made two bras before; both years and years (and years) ago, neither of which are around any more for me to post about.  But this is the first in my blogging life; so , er, yeah…
I’ve kept to my Wardrobe Refashion pledge of 3? years ago to make all my own clothes, but always exempted myself from underwear; reasoning that I was doing enough in the handmade department already and that I could allow myself a small break here and there.  Also, up until a few years ago Bonds were still manufacturing undies in Australia, and I was OK with supporting a local business by buying them.  But then they went to the dark side, and started moving all their manufacturing to China.  When the last Bonds factory in Australia closed down a few years ago I knew my days as a Bond girl were numbered (wipes a sentimental tear from the old eye)  I liked being able to say I was a Bond girl!  And now my current smalls collection is… well, lets just say it is an absolute wonder my husband still finds me attractive.
One of my favourite bloggers Novita makes the most exquisite lingerie sets you have ever seen, each more lovely than the last; and her latest Red Lace Set finally tipped me over the edge and I decided that I just had to start making my own too.  I rushed out to Fabulous Fabrics for some pretty lace and bra bits…
The knickers pattern is Tanga, a free downloadable pattern from Burdastyle.  I had seen this on their site before, but the wonky mis-matched lace scallops in the blue sample pictured with the pattern were so distressing I never took it any further.  Novita’s set is beautifully constructed and so perfectly pretty, I woke up to the fact that this is actually a darn cute little pattern after all!
They are super-easy, and take all of about ten minutes to make from go to whoa; even if you do take an extra few seconds to match all the lace motifs…  😉  which of course I did.
Because I am a woman of a certain age and my lace is partially see through; I extended the panty liner piece up to make more of a full lining at the front of the knickers.
My bra pattern is self-drafted, with the help of an old bra.  This was, ahem, not super-easy  😀  I looked at a commercial pattern but decided in my usual foolishly gung-ho, can-do manner; how hard could it be?  Well, it turns out, it is quite hard to put together a self-drafted, well-fitting bra after all!
My bra looks pretty from the outside, but the insides are far from perfect.  It would not bear up to close inspection!  Unlike the first two bras I made years ago which were fairly basic, I tried to get all fancy with this one, lining and underlining it, with moulded cups and underwires in their own separate channels.  Putting it all together was a jigsaw puzzle!  So I have decided to buy a pattern for any future efforts, if anything just for the instructions on the correct and proper assembly!!
One “easy” feature I incorporated: it doesn’t have adjustable straps, because honestly; I feel like that feature is only on RTW bras because they have to fit the different over-the-shoulder lengths of many different sized women.  Since the bra has to fit only me, I decided that to have self-lace covered elastic straps would be fine.  And it is.  I did this for my first two bras too, and they were always perfectly fine.  When the elastic does eventually stretch out a bit through wear, I just unpicked the straps at the back, shortened them a tad, and re-sewed them back into position, easy peasy.
The bra also has a purchased hook and eye closure at the back.
So; after struggling through fitting and assembling this thing and half expecting it to turn out hideous; I was pleasantly surprised when I had the final try-on and discovered it to be beautifully easy to wear, soft and yet still supportive, fits perfectly; the most comfortable bra I own.  A very unexpected win!
Seriously; I have no idea how that happened.
So I will definitely be getting a proper pattern for next time.

pinterestmail
Switch to mobile version
↓