Yearly Archives: 2012

You are browsing the site archives by year.

Melbourne; a travel wardrobe….

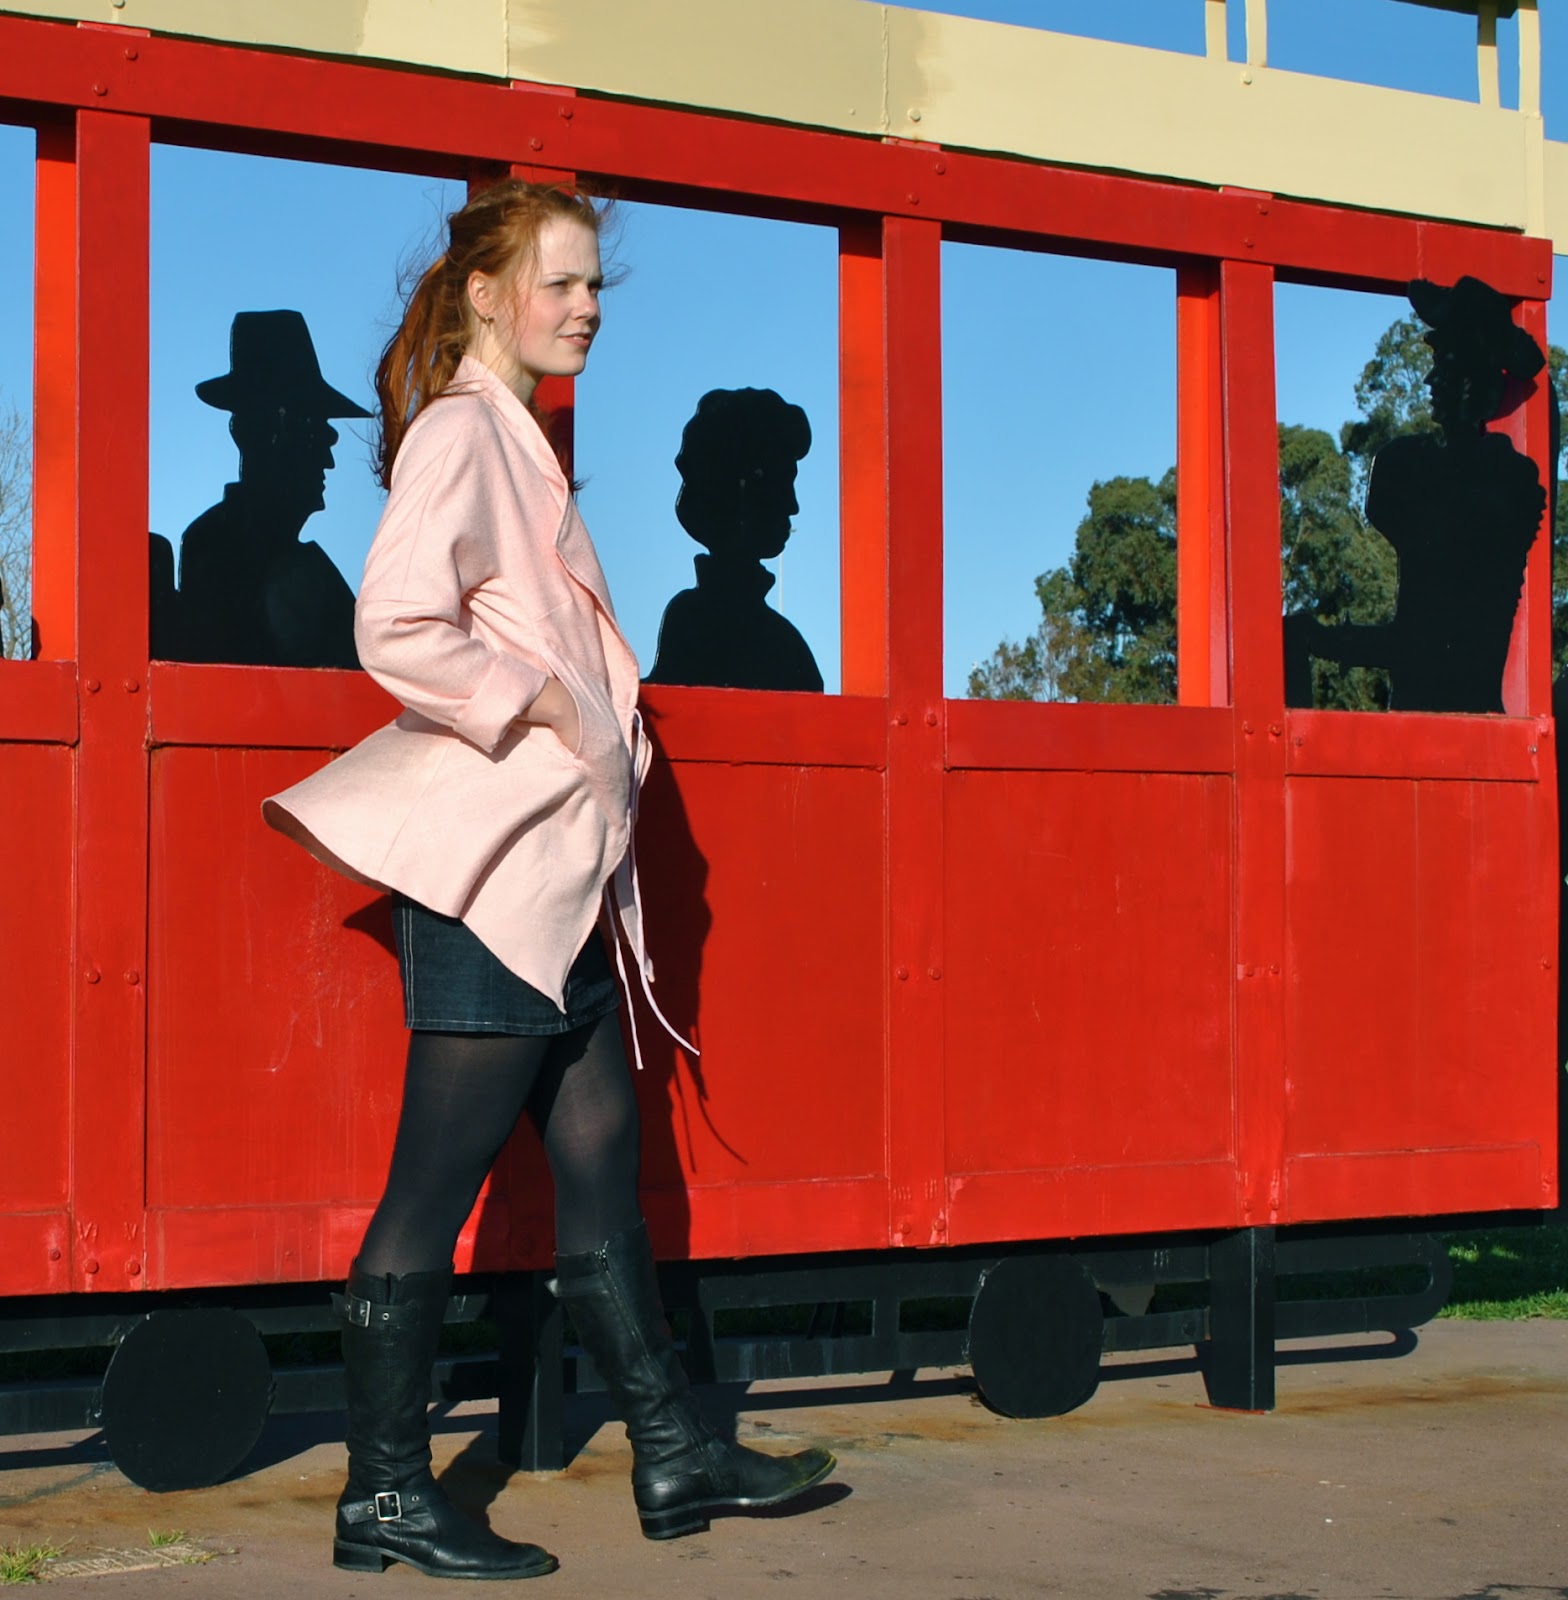
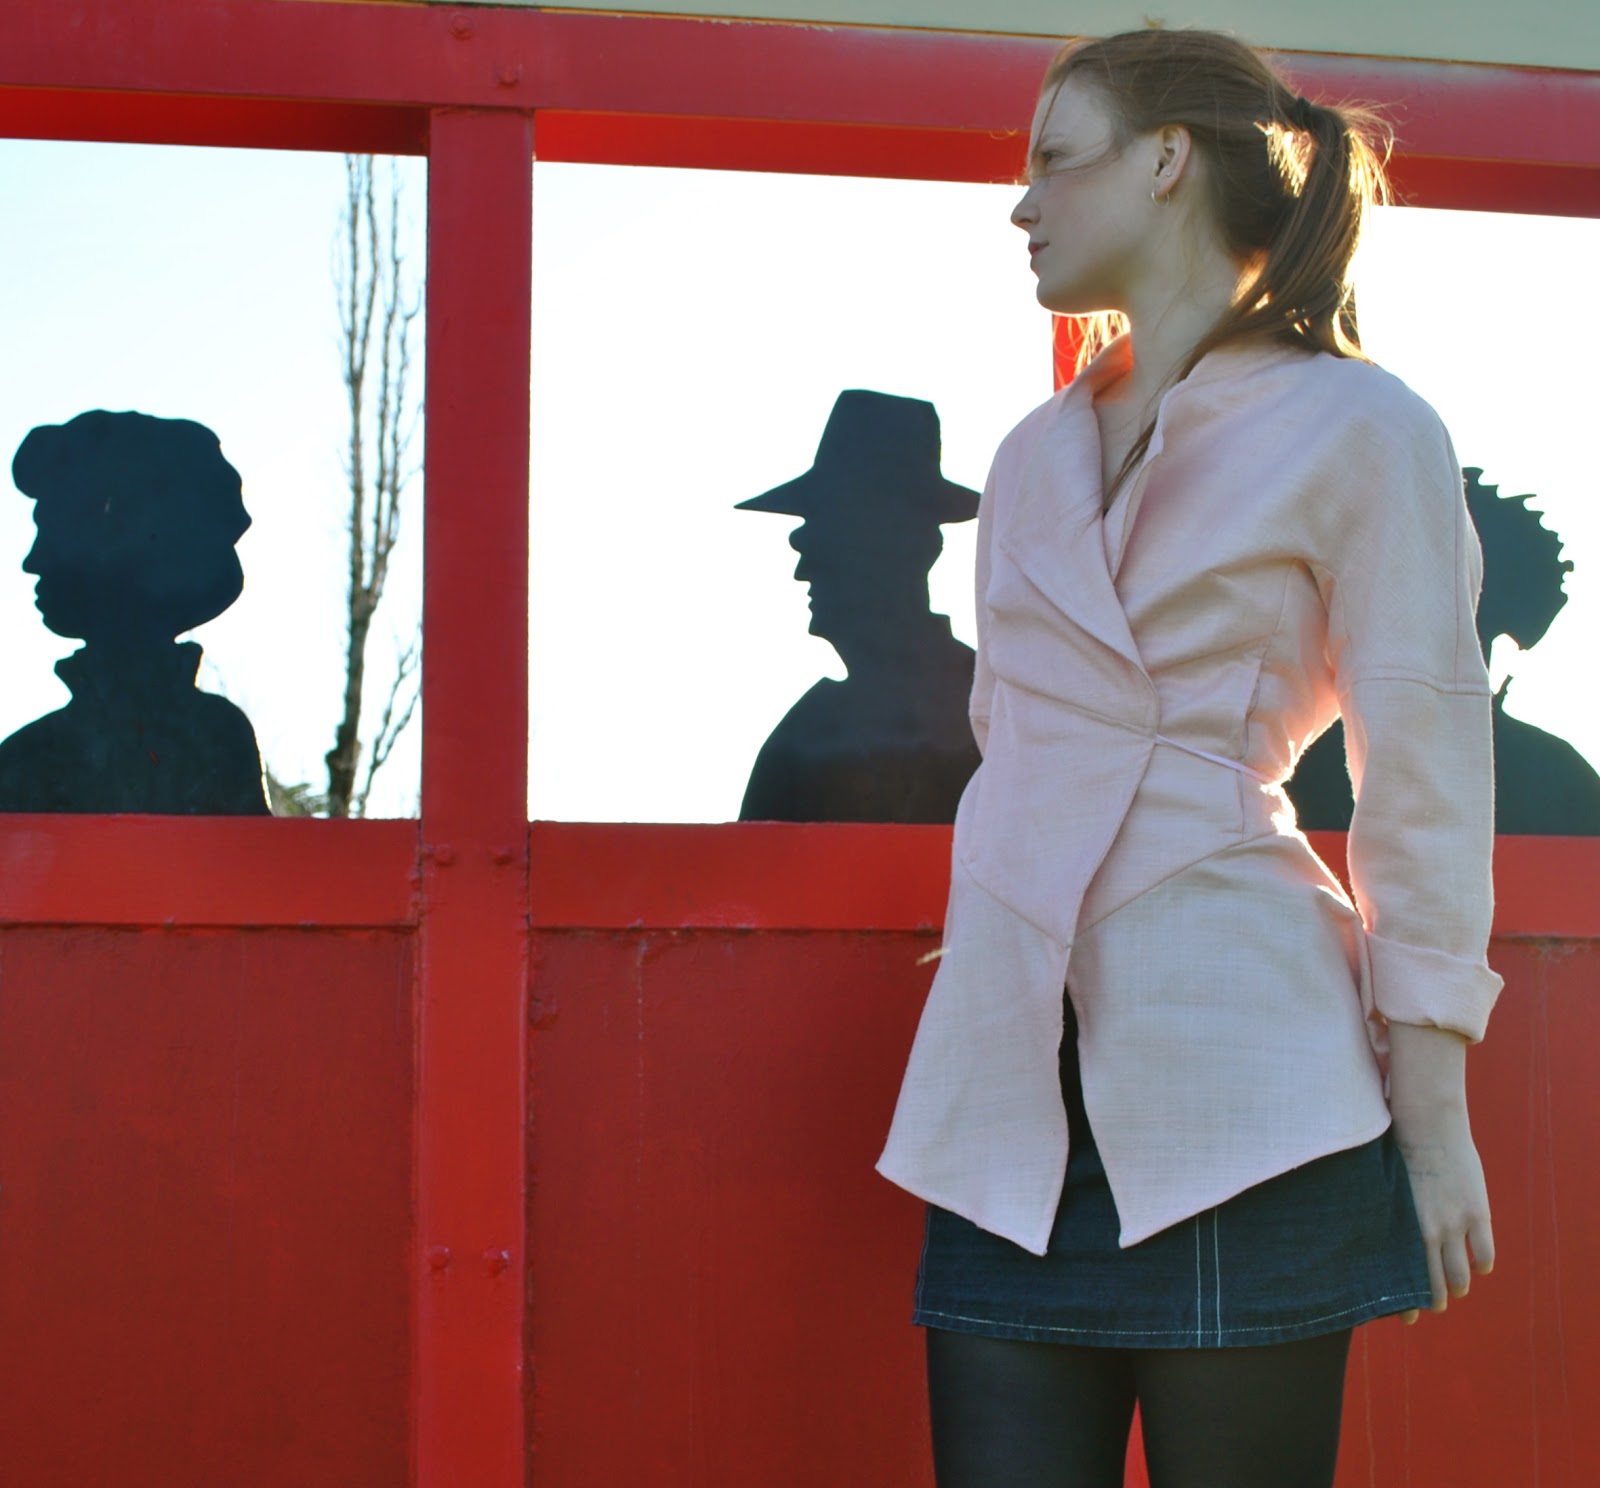
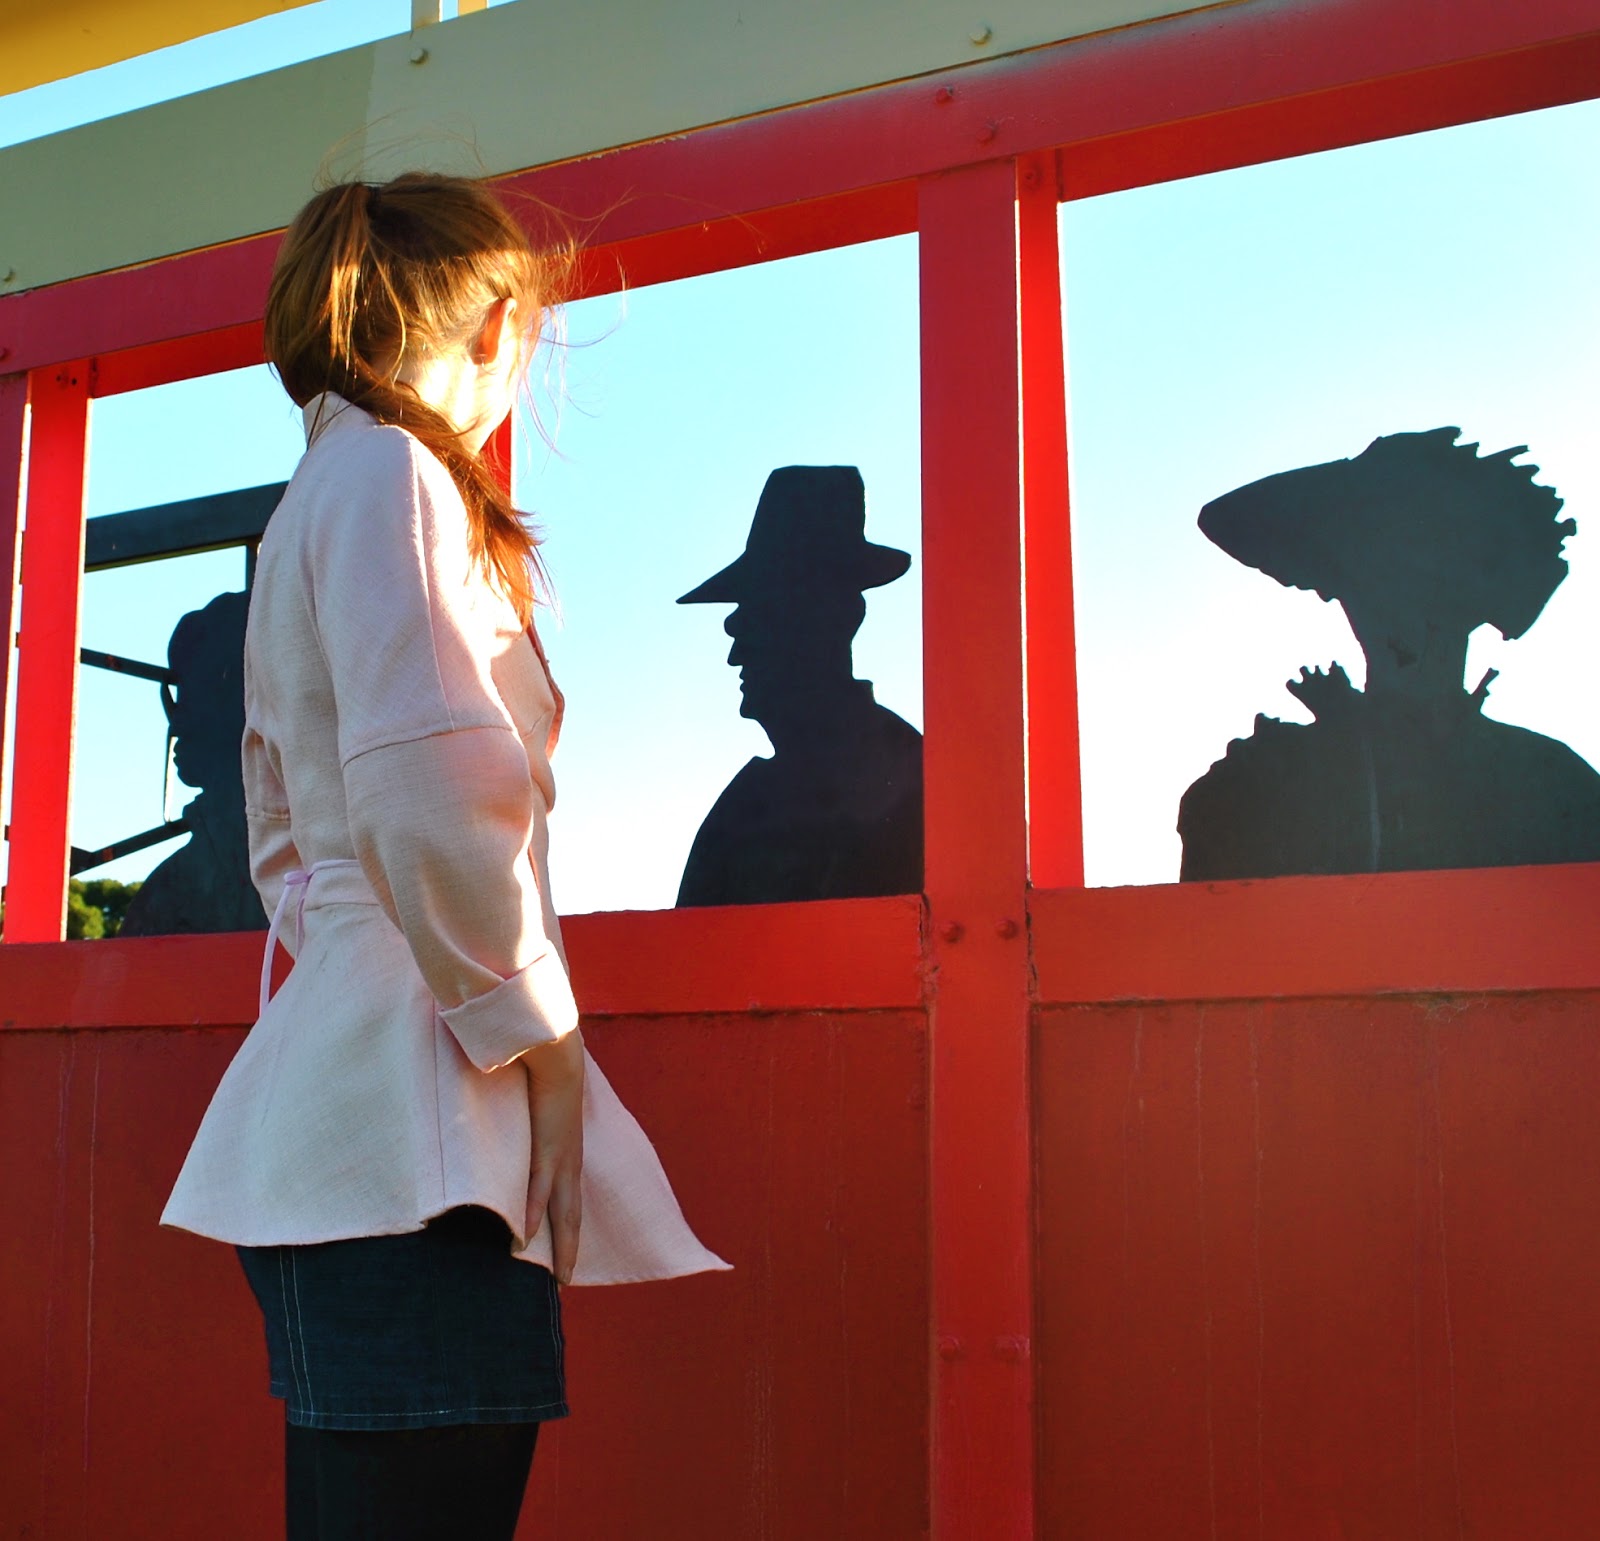
Last week we popped off for a short holiday to Melbourne… and since I know how much we all just LOVE to see what other women choose to pack for a holiday away … or is that just me?  Well I like to have a good old squiz at the capsule wardrobes other ladies put together for going away, but that’s because I am an incurably nosy busybody, hehehe.  But just in case others secretly like it too, I am sharing.
Plus, for myself for future holidays, I like to know too how successful was a particular selection and how well it all worked together.  So:

Time away
5 days
Where to:
Melbourne
Season:
the first days of spring.  Going by previous sojourns in Melbourne at this time of year I anticipated pretty cold conditions and was not let down, but we were pleasantly surprised by a few almost warm afternoons… The mornings were very brisk and the daytime highs ranged from 16C to 21C
Expected activities:
lots of city walking, art galleries and shopping
wining and dining each night
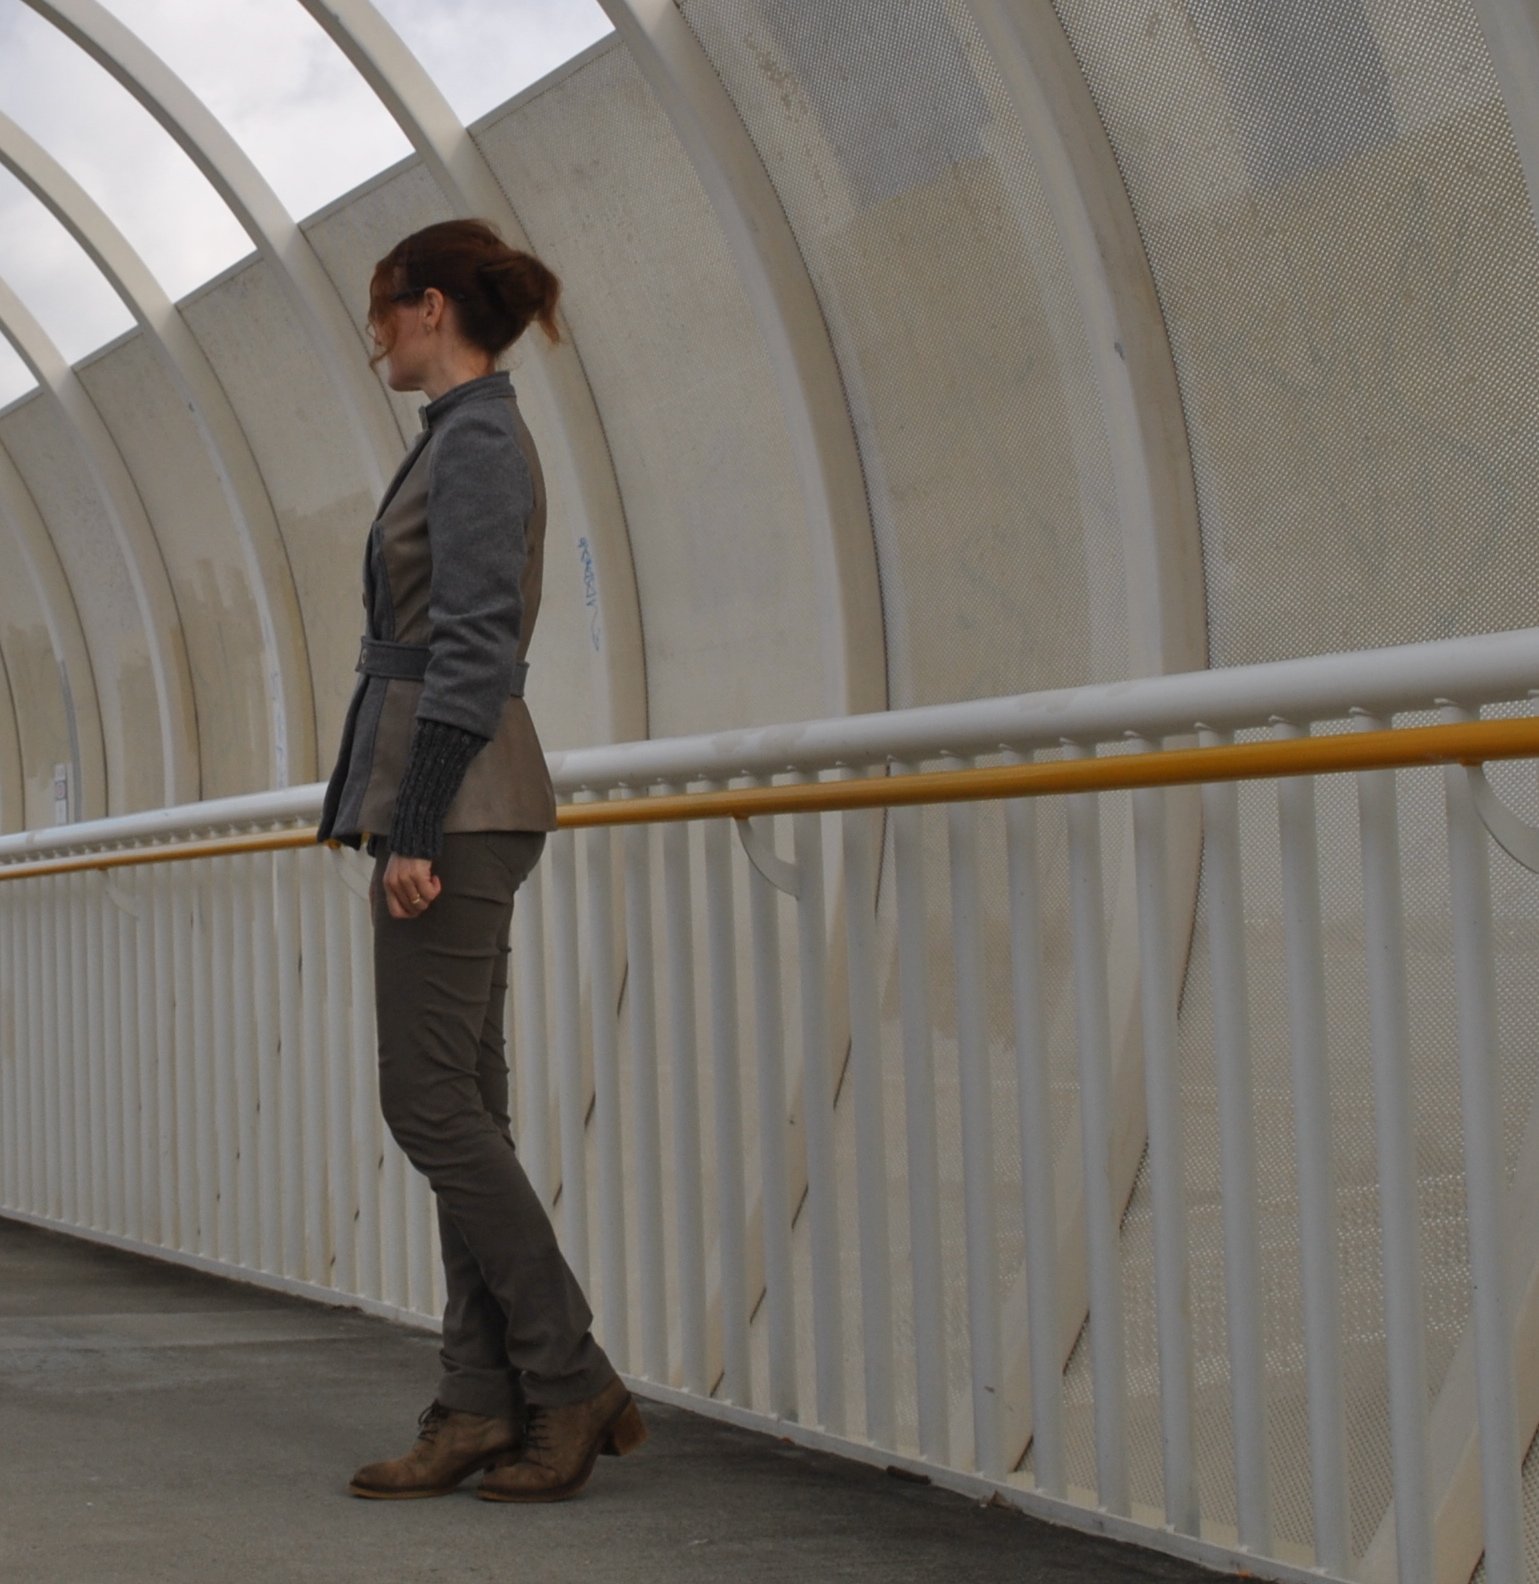
Colour scheme:Mostly muddy neutrals of charcoal grey, chocolate brown and khaki; with ivory, and just one spot of colour in my mustard cowl.

What I packed: (each garment is linked to its original construction post)

(left to right; top to bottom)

Ivory twist top; doesn’t impress laid out flat like this but I assure you it looks real nice on  🙂
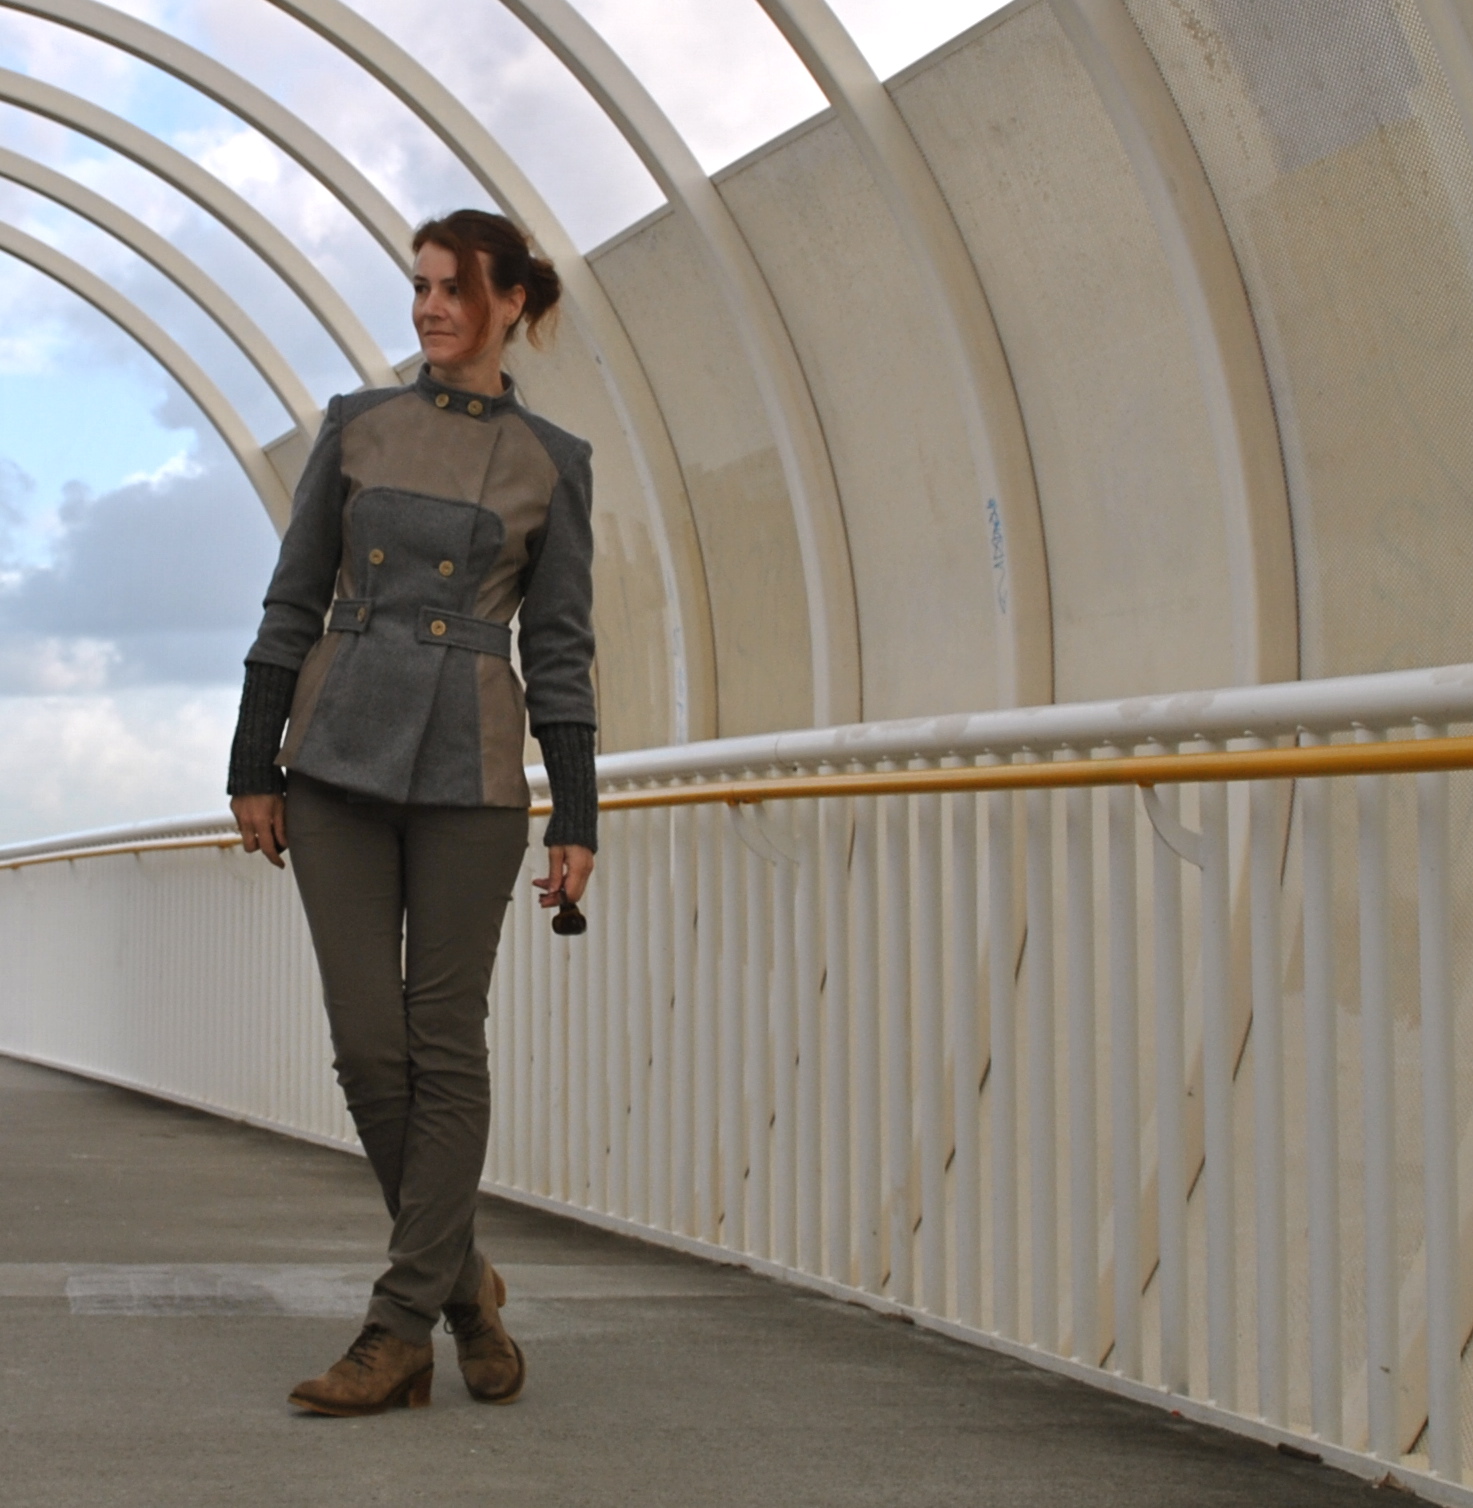
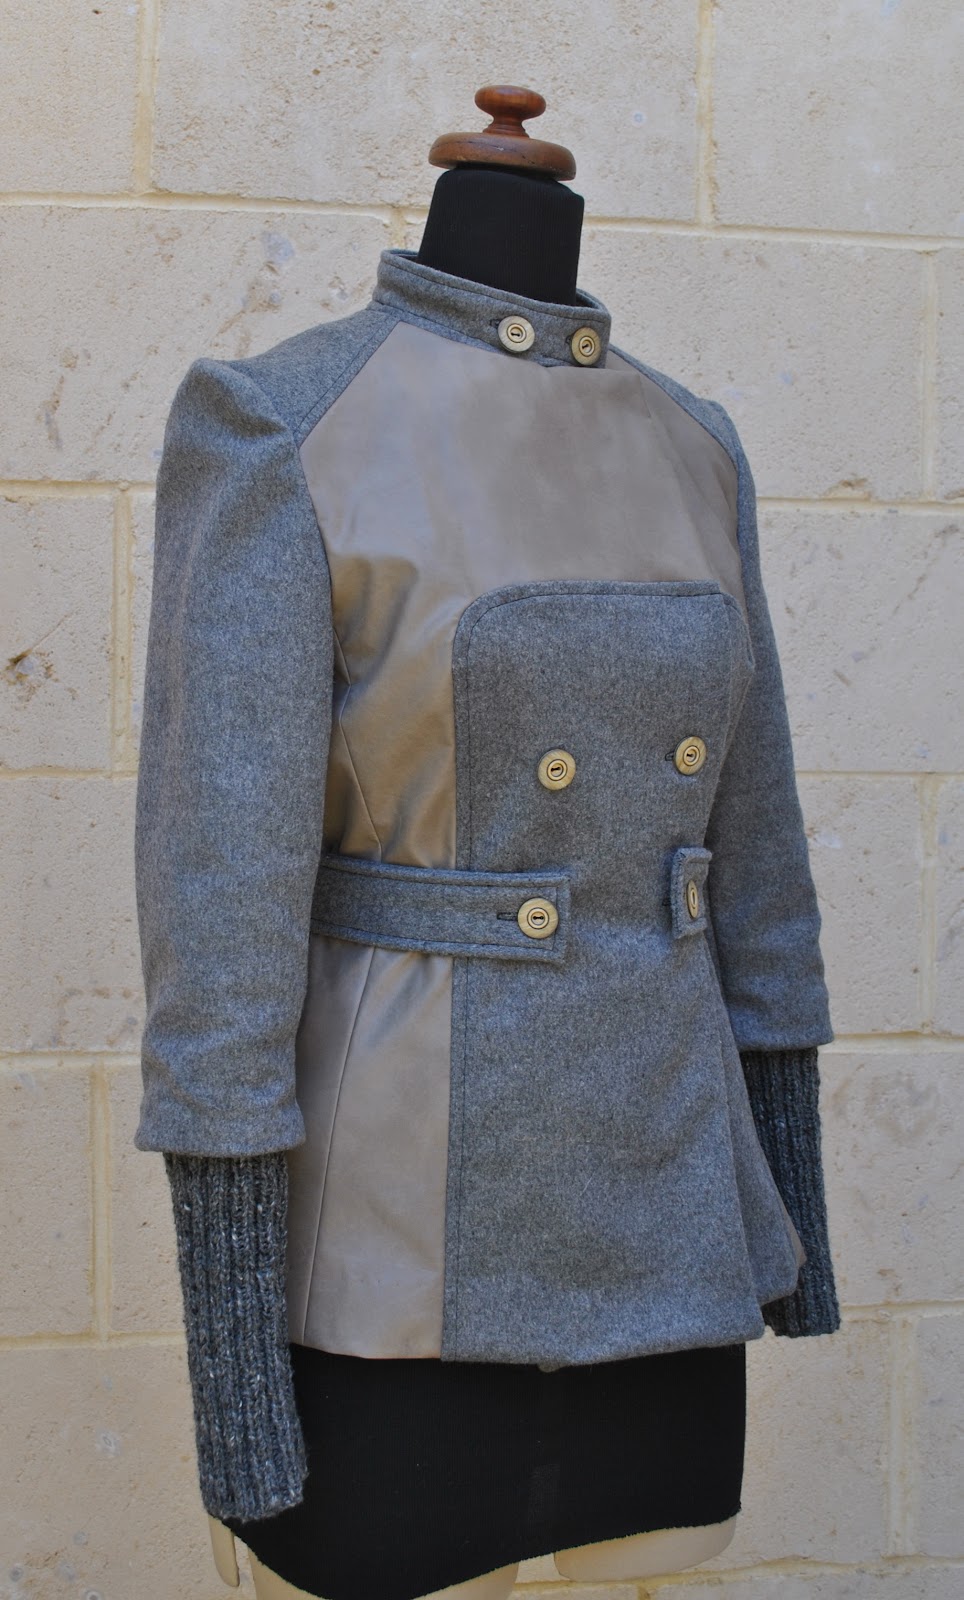
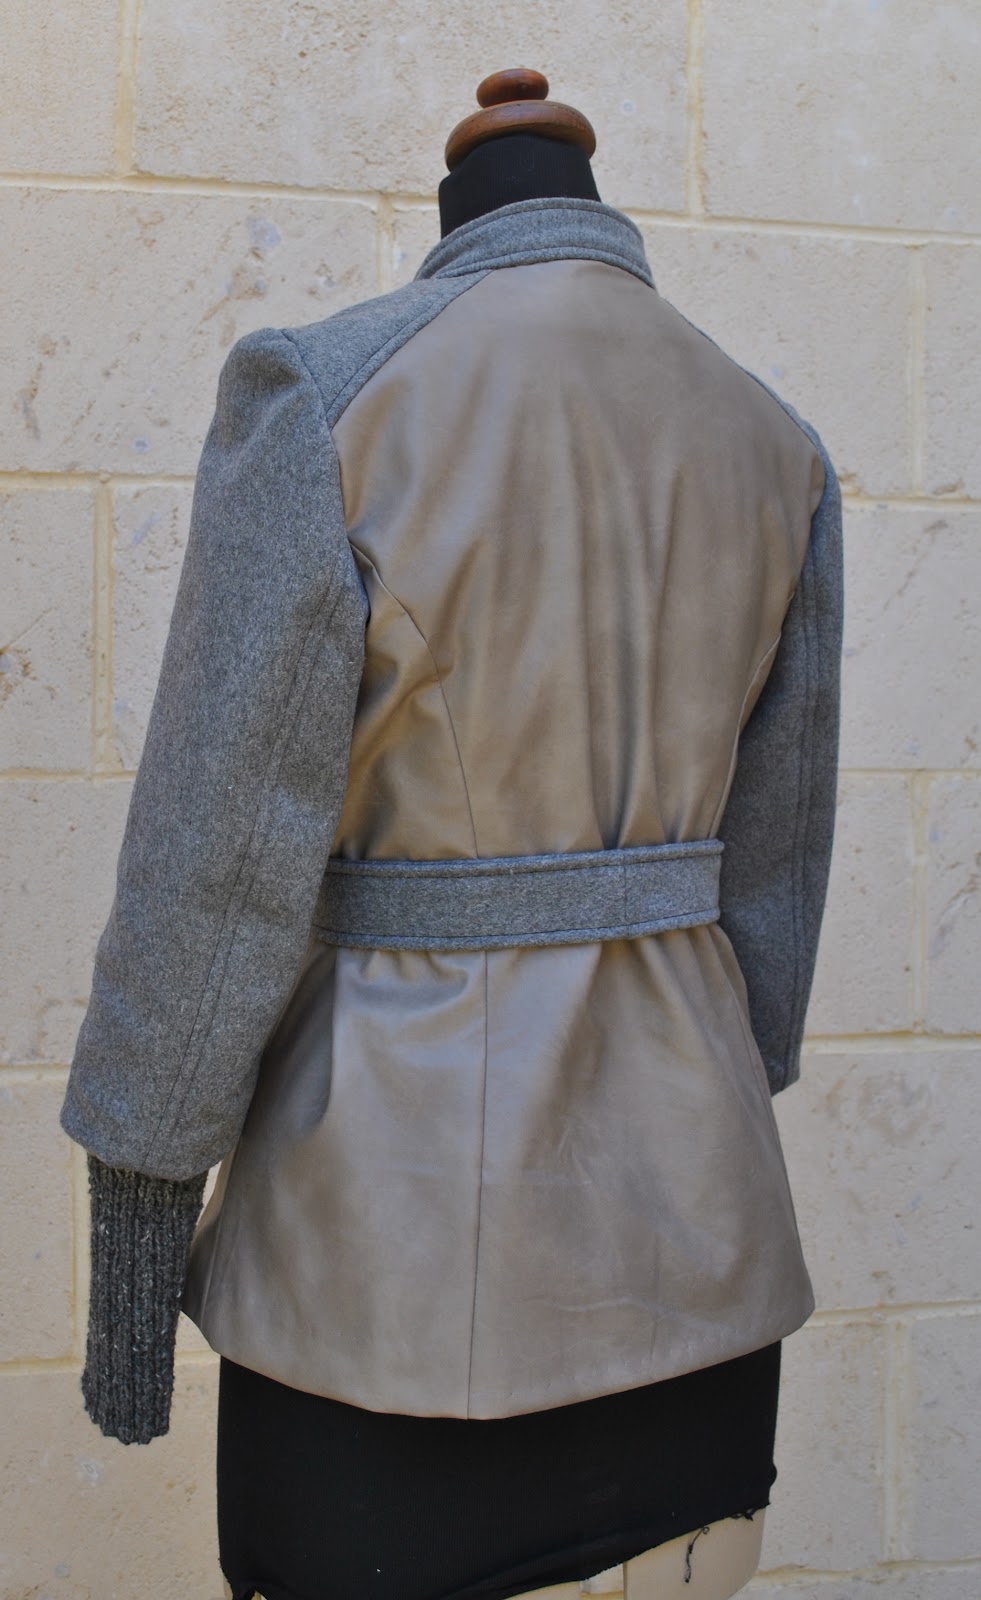
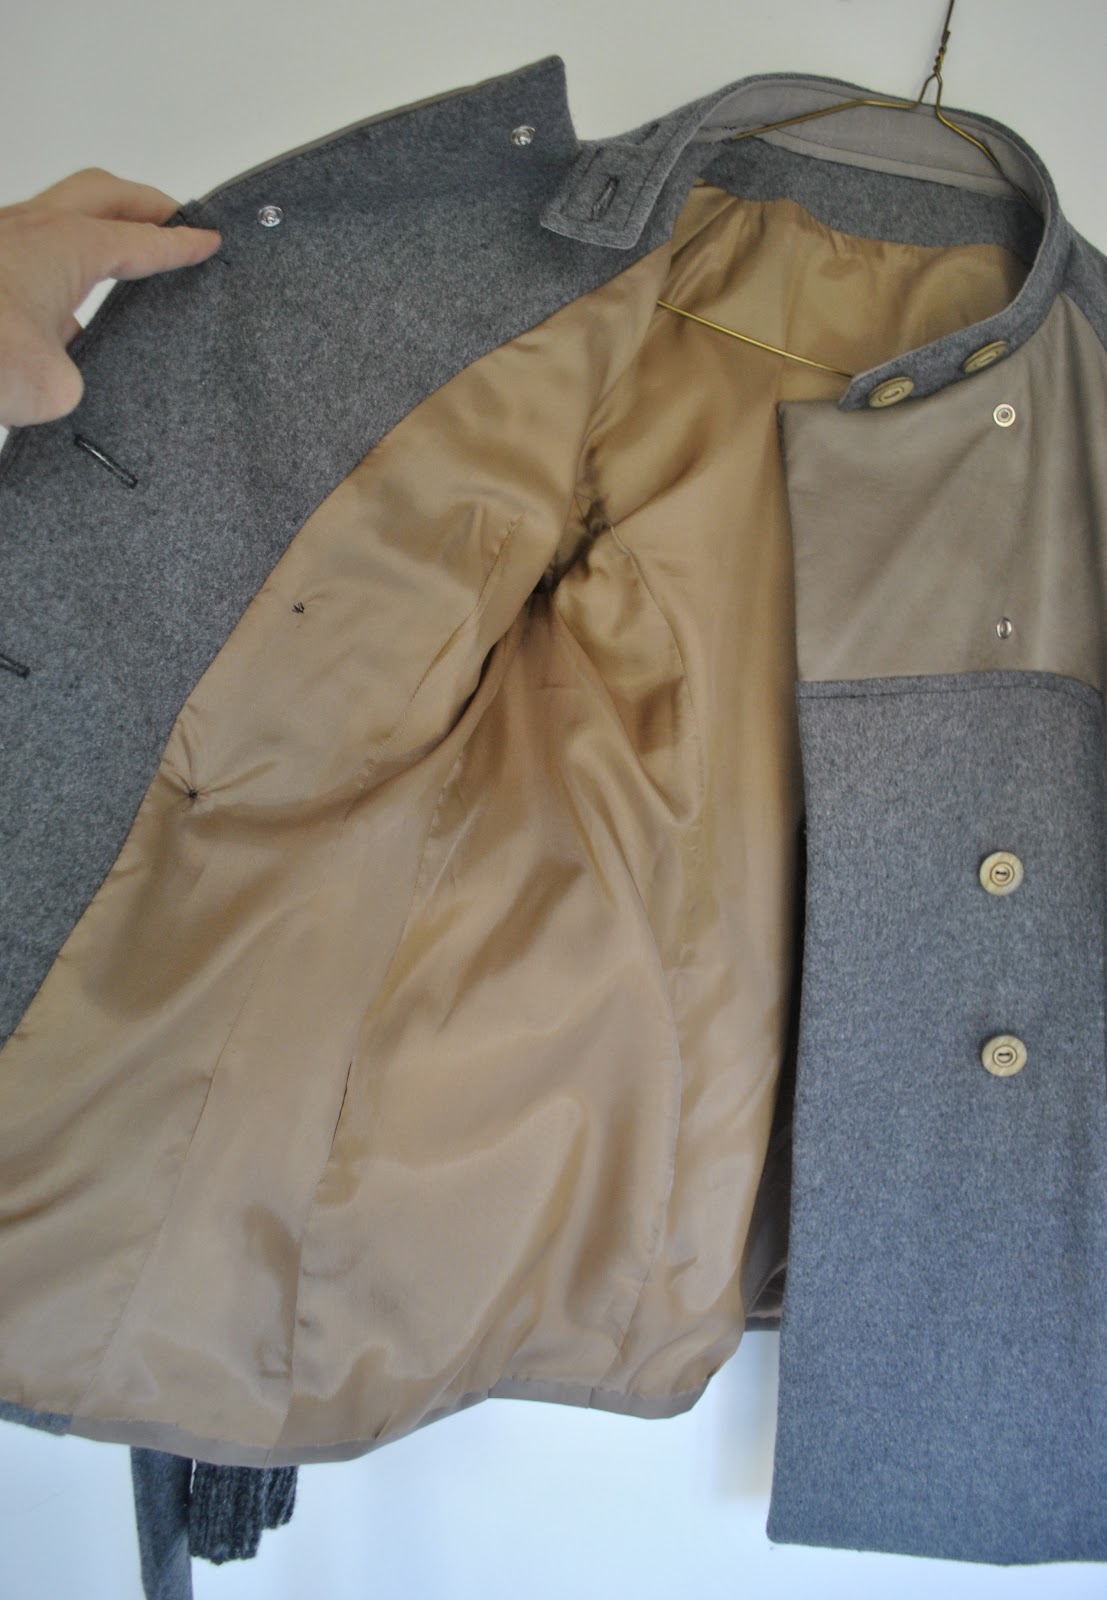
Charcoal grey coat; worn every evening and most days

Ivory stretch velvet dress; worn every evening
Mustard cable-knit cowl
Charcoal grey twist top; again, not so good off , but looks great on
Black motorcycle boots; worn every day
Chocolate brown leather gloves from DJ’s
Chocolate brown tights

Black tights
Black high heeled suede pumps; worn each evening
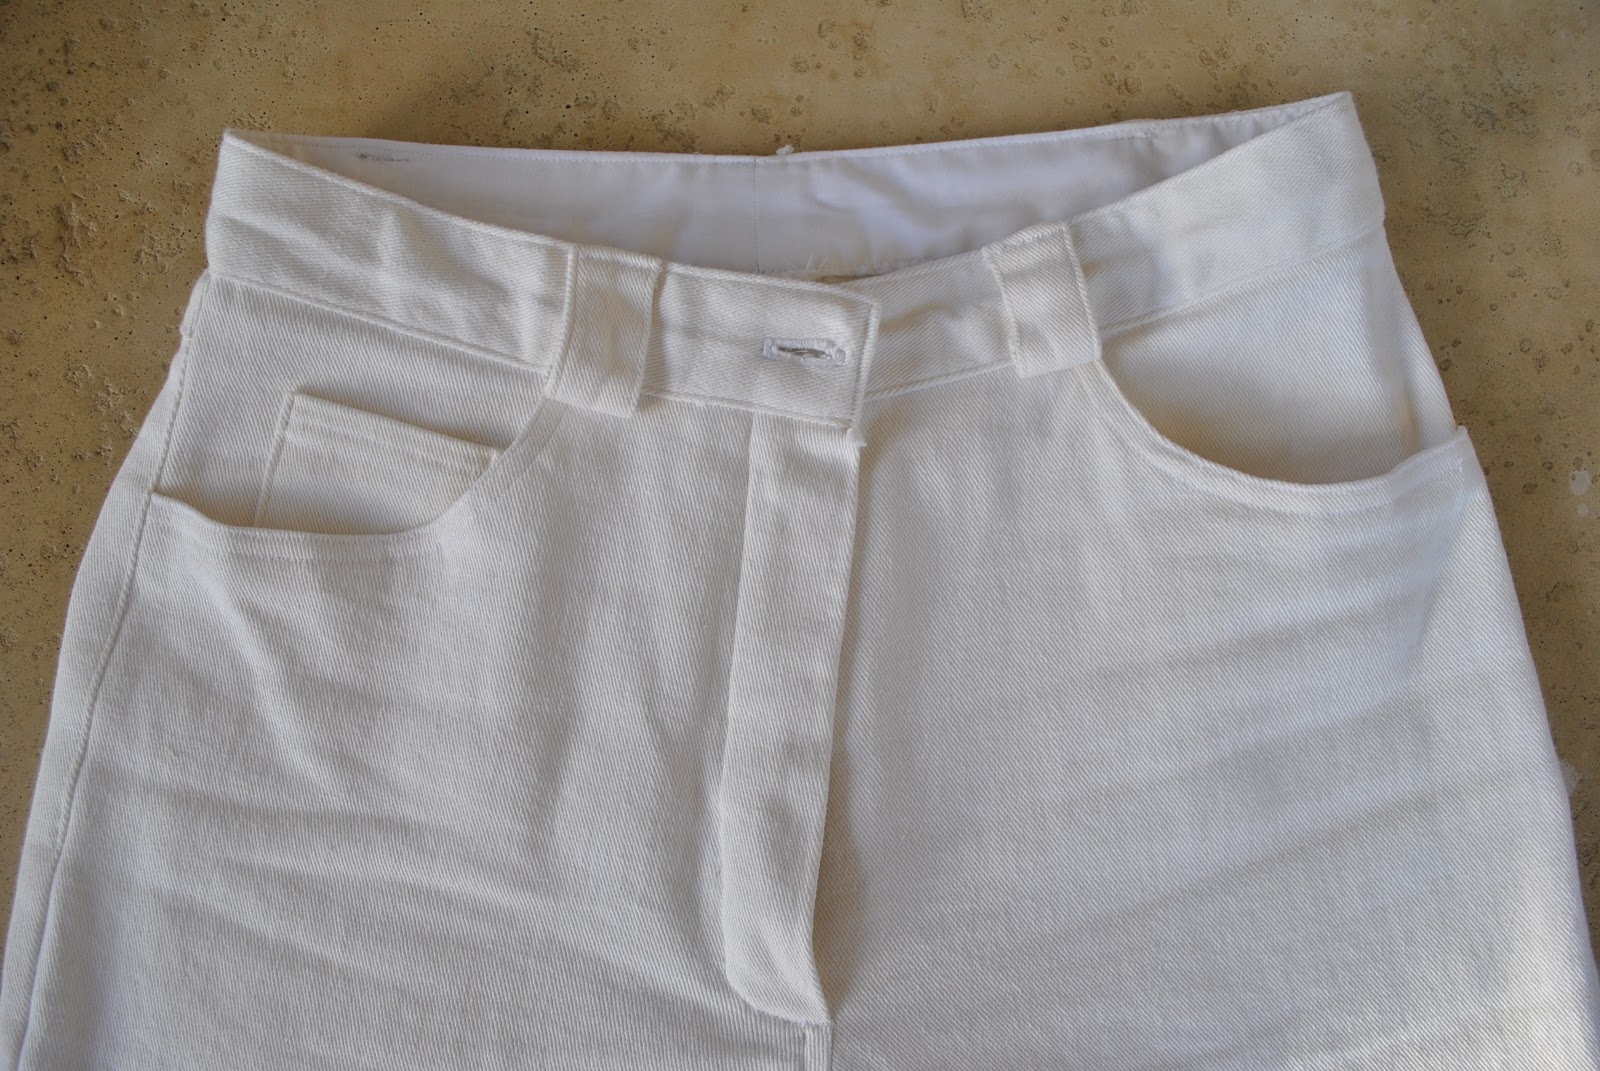
Charcoal grey top with obi belt
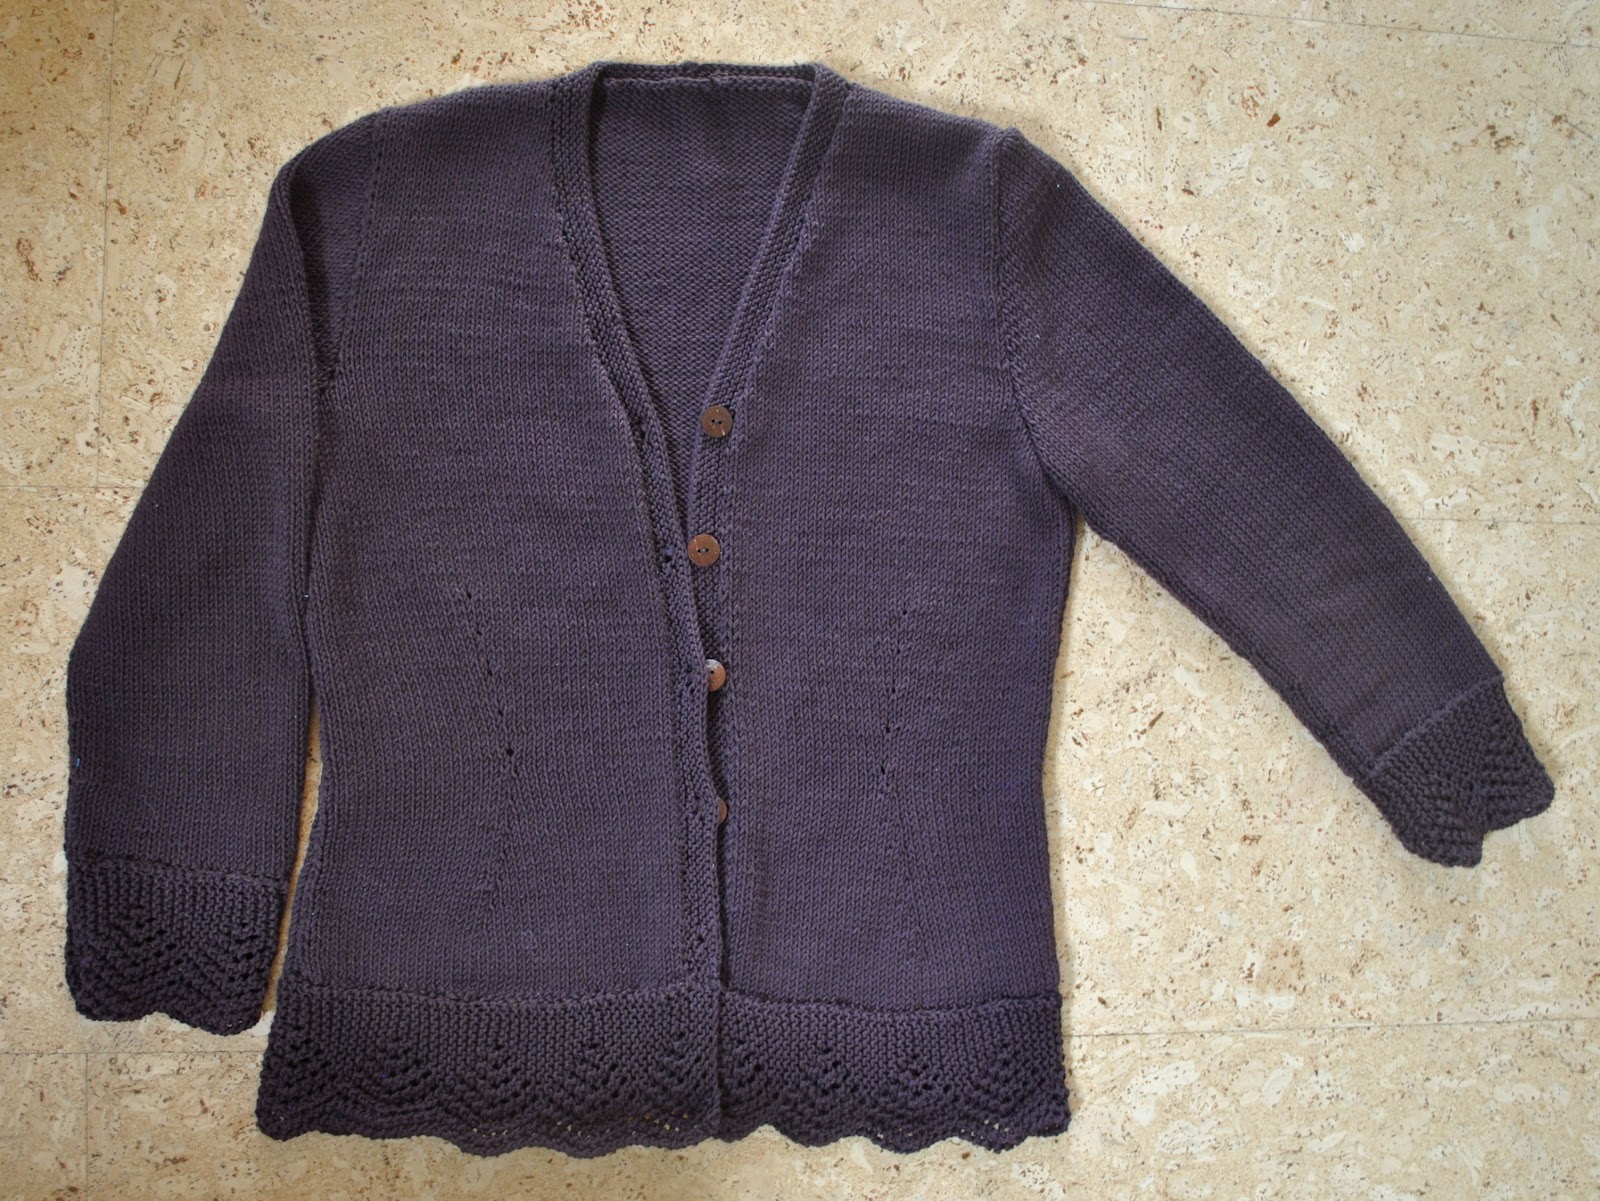
Chocolate brown cardigan (below; I forgot to put this in the main picture, woops)

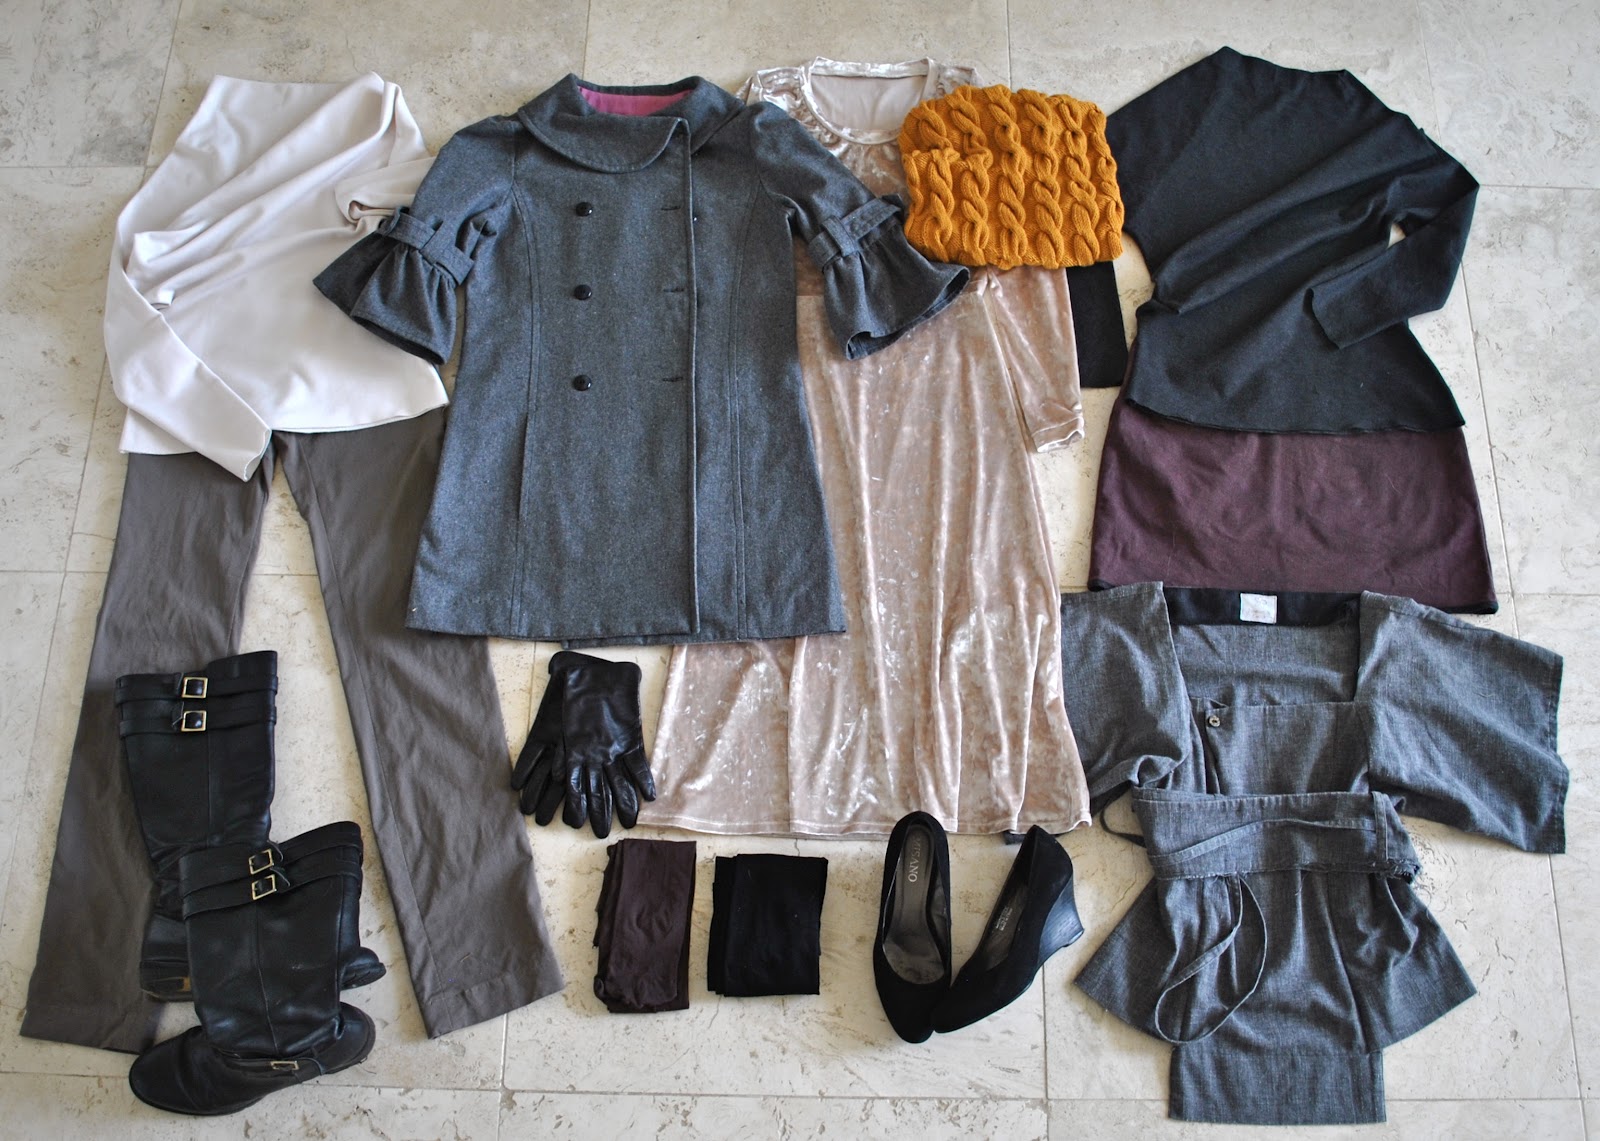
Not shown, but obviously I also packed the pj’s and my bathers.  I always take my bathers on each and every trip away, they don’t take up much room and you just never know!  As it turned out, the hotel had a sauna and a spa so taking them was a good decision  🙂

Verdict:
This was a near perfect cold-weather wardrobe for a short city getaway: I had plenty of choices, everything went together really well, and I felt appropriately smart and urban enough for Melbourne  🙂 
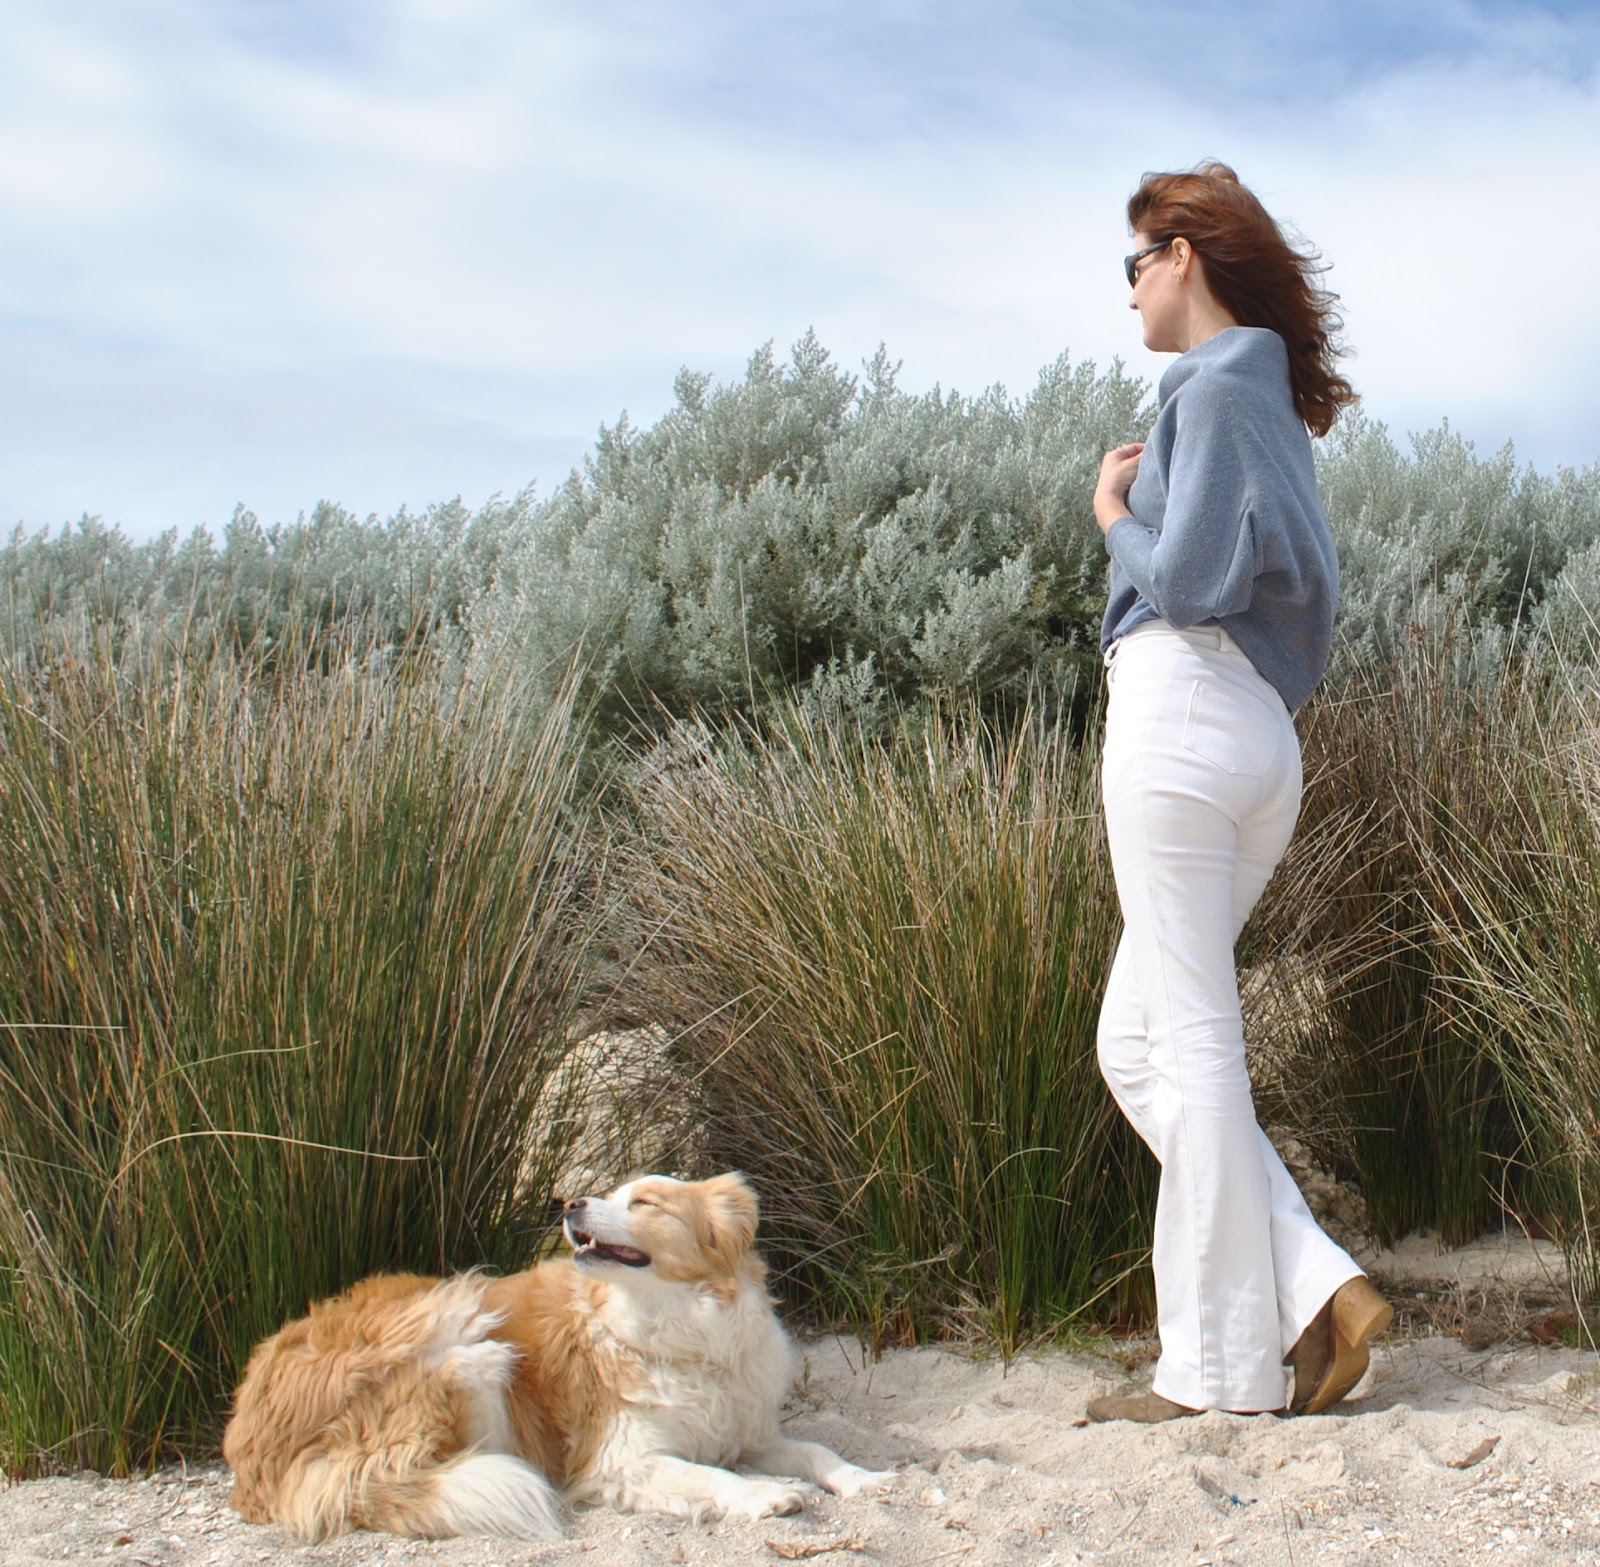
The shorter sleeved charcoal top with a self obi belt I packed just in case of a warm day, but  the weather was never warm enough for this top and it didn’t get worn even once!  Everything else got worn on at least two days each; I mixed and matched the two tops with both the little chocolate skirt and the khaki jeans, sometimes with either my grey coat or chocolate cardigan; and the mustard cowl on the one really cold day.  I wore the boots each and every day; and I confess here my feet did get a bit tired of wearing the boots! but they were comfy and practical and they went with everything.
I wore my ivory dress and the mustard cowl in the evenings out to dinner, with black tights and the high heeled black suede pumps.

Now onto the most important question uppermost on everyone’s mind; yes! I did pay a visit to each of my favourite Melbournian fabric stores, and yes, fabric has travelled home with me … plus this!
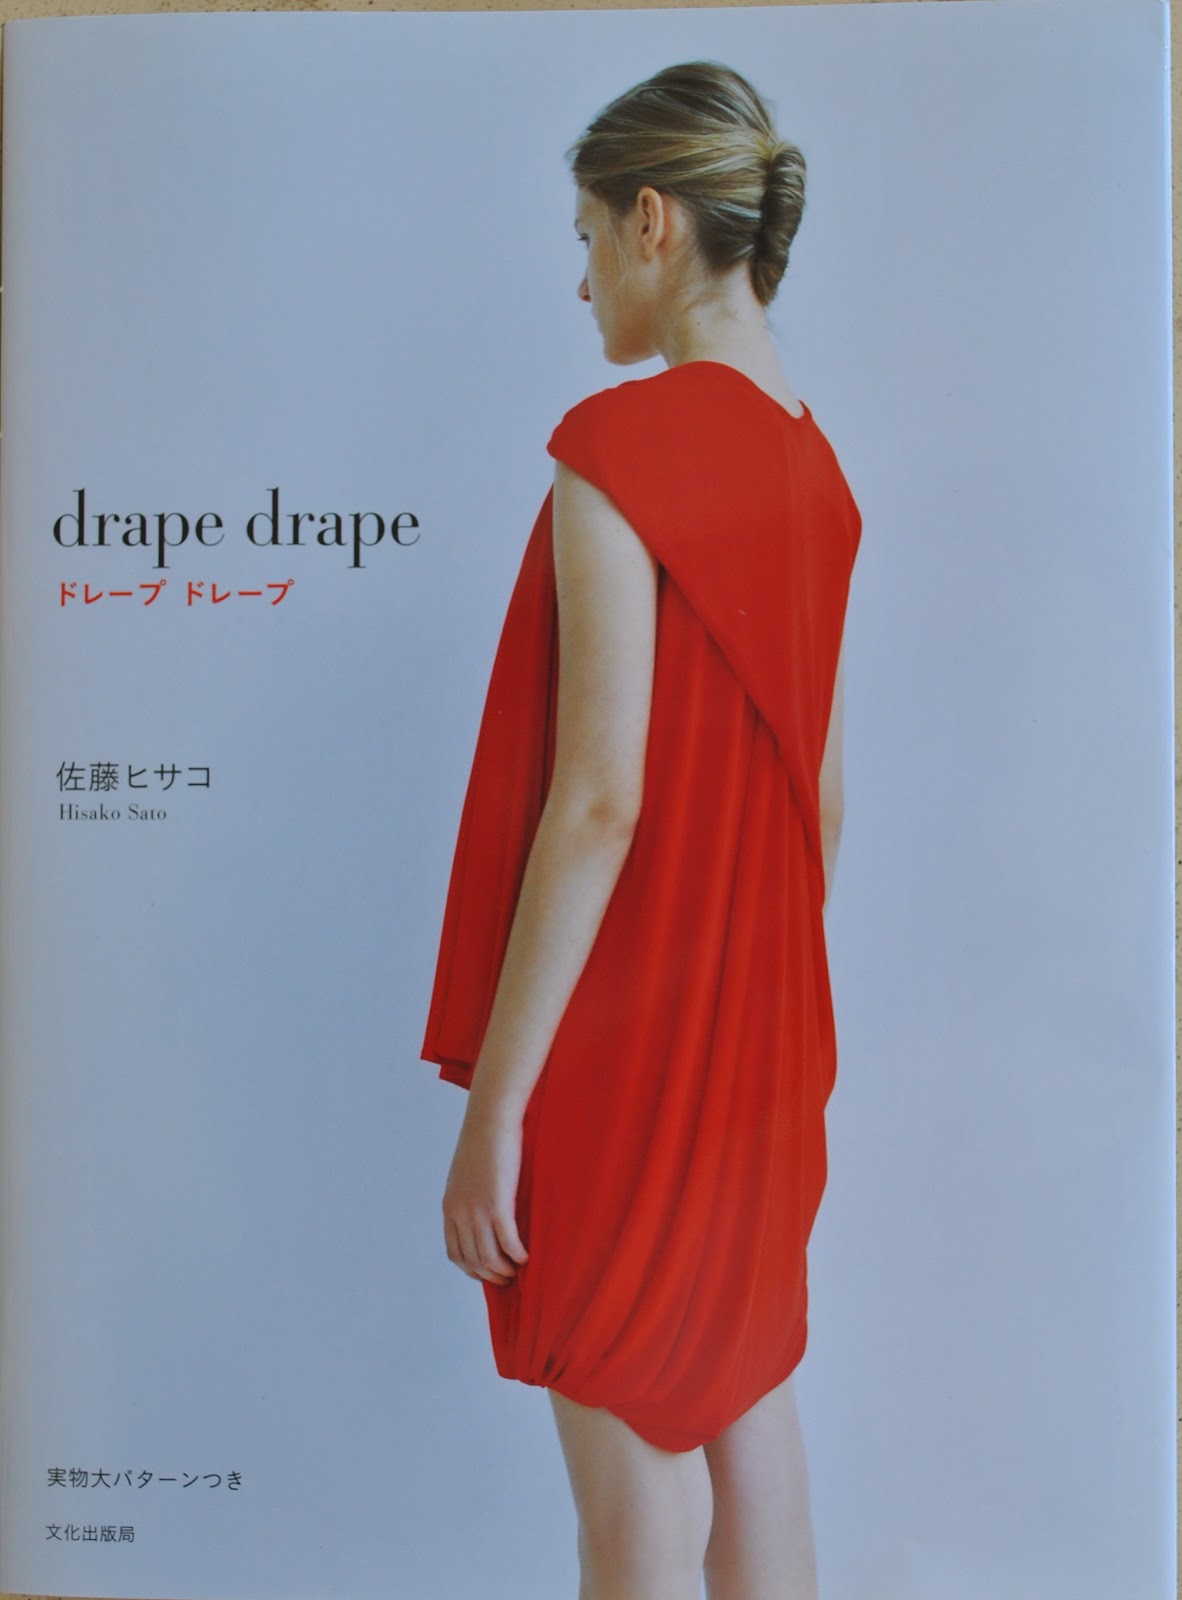
The Japanese version of drape drape by Hisako Sato was half price at Tessuti’s, how could I possibly resist?  It is a birthday present from my son, which I was to choose whilst I was over there  😉  Yes we are very practical gift-givers in my family…

I was pretty thrilled when a lady working in Tessuti’s recognised me and greeted me by name, and complimented my blog: thank you for serving me just into your lunch break, and also for your kind words!
Also Kazz was more sharp-eyed than I, and spotted me around and about too…   Kazz makes fabulous things showcased on her gorgeously detailed blog … hi, Kazz!  It would have been nice to hang out!

pinterestmail

Pretty in Pink

It’s been gorgeous here lately.  Fresh and exhilarating; cool and sunny and clear.  Everyone including moi is in high spirits, the days are sparkling and I’m even feeling the urge to clean out kitchen cupboards and wash curtains and eiderdowns, for heaven’s sake.  Wooee, spring casts some powerful magic, yeah?!
And I am in the mood to create like mad…   I’ve made a lightweight pinkie-wink thing for my light pinkie-wink daughter  🙂   More specifically, a loose over-sized jacket in a boyfriend style that we both reckon is tres chic, oui.
I used a new-to-me pattern Burda 7401, and the jacket is made of a lovely shell-pink hessian silk that I spotted on the $4 table at Fabulous Fabrics about a year ago, put there because it had some faded patches.  I looove the faded patches! and I think this soft and pretty colour is just glorious on her  🙂
The jacket fronts are supposed to meet in the centre front and tie closed, but because I made it oversized as opposed to fitting, I made it so she can fold the fronts over each other and wrap herself up in it; tie the long ties together at the back, to look like a more fitted style if she wants that.  I did this by leaving a small gap in the right back/side seam, for the tie to pass through to wrap around.  At first she preferred it wrapped up like this, but she now informs me she likes it open.  So she can shove her hands in those pockets… aah, a daughter after my own heart  😀
The silk hessian frays like billy-o, so I finished all the raw edges inside with HongKong seaming, in a lightweight cotton voile.
She is wearing it with a little denim skirt she made herself.  She is a pretty accomplished little seamster herself, and I reckon she should update her own blog one of these days and add in all the cool stuff she has been making for herself.
Details:
Jacket; Burda 7401, pink silk
Top; supre
Skirt (made by Cassie); Butterick 5488, lightweight denim

Pattern
Description:
Semi-fitted unlined jacket with unusual seaming; long underarm gussets, a short rounded stand-up collar, front pockets that are separate pieces patched together with remainder of the jacket front.  View B has longer sleeves, a tie front and peplum.
Pattern
Sizing:
Sizes 36-50 (US 10-24).  I made view B in a size 12 for my daughter, aiming for an oversized boyfriend jacket look.
Did
it look like the photo/drawing on the pattern envelope once you had finished
sewing it?
Yes.  Except that I adapted it so the ties can, if my daughter desires, become a self-belt that wraps it around around the body to cinch in the waist in a blouse-y way; an aesthetic that suits her style.
Were
the instructions easy to follow?
Yes: except that steps 4 and 5, inserting the side pieces, is not as simple to do as it makes out in the instructions.  You have to clip the heck out of those tight front and back underarm curves in order to sew those seams!
What
did you particularly like or dislike about the pattern?
For a casual jacket I think it is really chic; with slightly unusual seaming and an edgy style.  I love the shape of that softly flared peplum, it looks lovely either with the jacket wrapped or unwrapped.  There were no instructions to interface the front facing, which I thought about defying and rebelliously applying interfacing.  But I went with no interfacing on the front; which does make the jacket beautifully soft and unstructured, very casual and easy to wear.  I did apply interfacing to the back neck facing and to the collar to the foldline.
The jacket is designed to be unlined, but if you wanted to line it it would be pretty easy to do so.
Fabric
Used:
Hessian silk, and lightweight cotton voile for theHongKong seaming
Pattern
alterations or any design changes you made:
I bound all the raw edges inside with HongKong seaming. 
I left a small opening in the right back/side seam to allow the left front tie to pass through, wrap around the back and tie to the right front tie like a skinny self-belt.
Would
you sew it again? Would you recommend it to others?
I made this one for my daughter; and yes, I would very much like to make one for myself sometime… if I’m allowed to   🙂
Conclusion:
I love it and my daughter loves it, so it is a great success!  I’m glad I made it oversized, with the long body and  the loose unstructured sleeves rolled up it looks like a boyfriend jacket and very “now”.  The unusual seaming and pocket construction is a nice exercise for a seamster who is looking for something out of the ordinary.
pinterestmail

White-y tighties

hai there  🙂
oh sorry, were you expecting some fashion??
My set-up photo with just one lonely loyal dog sitting there really made me smile, so I had to put it in here.  For fun.

I’ve made some new jeans  🙂
These are made in a thick but stretchy denim from Spotlight in a lovely warm vanilla ice-cream shade, and using Burda 7863.  This is the seventh pair of jeans I have made using this pattern; it really is such a winner in my book!
I thought and thought and thought about the legs, whether to go skinny this time or not.  Whilst I looovee my khaki skinnies, I really do think that a slightly flared leg is actually way more flattering to my figure type.  And the reason we sew is that we can have clothes custom suited to our figure type and not be needlessly restricted to the silhouette being forced on us by the fashion powers-that-be for that season, yes?  Yes!
So I cut the legs based as closely as possible on my purple flares, which I have to confess are (whispers) my favourites.  Shhhh!  I never say so out loud, for fear of hurting the feelings of all my other pairs of jeans, but yah… my purplies really do make me feel extra specially good about myself every single time I put them on.  I can’t exactly put my finger on it; what is their secret.  They just work.  I am hoping these new ivory ones will be just as successful.
I cut my new jeans with the legs about 10cm longer, and with the slight flare, about 5cm in total from the knee out to the hemline.  I did a small alteration to pull in the waist at the small of the back also, a standard adjustment for me in jeans, and made very easy with the two-piece, shaped waistband in this pattern.

For the pocket decoration; there are two intersecting curves of closely-spaced zig-zag stitch done in mirror image on each pocket.  It’s hard to see them in the picture, white on white is hard to photograph! but I super highlighted the picture so it shows up as much as it does in real life.  It does, btw.  Show up, I mean.  The pure white top-stitching thread I used throughout highlights the warm, slightly yellow-y creaminess of the ivory fabric.
Oh, and yes, in case you’re wondering; it is quite difficult to take a photograph of your own be-hind, oh yes indeedy  🙂
I washed the fabric before cutting, then I made the jeans; then I washed them again before hemming to really guard against shrinkage.  I want these jeans to be plenty looong enough.  I think all the washing really helped with the fit too.
I added a coin pocket and a zip placket and also slightly altered the order of construction of the jeans, as outlined in this post for my purple jeans; which results in a more ready-to-wear look.  The pocket lining and waistband lining are cut from a sturdy but lightweight white cotton.

windy? o yeah…

Details:
Jeans; Burda 7863 with minor modifications, made of ivory stretch cotton denim; my review of this pattern here
Top; based on top “a” from shape shape (or Unique Clothes Any WayYou Like) by Natsuno Hiraiwa, made of blue shot cotton, details here
Cardigan; “wearing a square” from Pattern Magic 2 by Tomoko Nakamichi, blue/grey knit stuff, details here
Shoes; Francesco Morichetti, from Zomp shoes

pinterestmail

The Gentle Art of Preservation

… otherwise entitled: Further Developments in the Case of the Super-Prolific Citrus Trees
Our lemon tree’s desire to give give give and just keep on giving…. well,  I have been doing more good things with our produce  🙂  Limoncello!!  Aah, the taste of Italia, si?
And thank you all for those links to recipes for Limoncello, I used this one, the link sent to me by Sue, thank you!
Limoncello
6 lemons
750mL vodka
225g sugar
435mL water

Place the lemons in a saucepan and cover with boiling water.  Set aside for 1 hour to soak.  Drain and pat dry.  Finely grate the lemons, and combine the lemon rind and vodka in a jug.  (You don’t use the juice from the lemons in this recipe, but obviously the lemons can be juiced and the juice can still be used somewhere; waste not want not   🙂  )
Heat the sugar and water in a saucepan over a low heat, stirring for 5 minutes or until the sugar has dissolved.  Increase heat to medium and bring to the boil.  Cook without stirring for 5 minutes, or until the syrup begins to thicken.  Set aside to cool.
Add cool syrup to the vodka mixture and pour into an airtight container.  Seal and store in a cool, dark place, shaking occasionally, for 1 month to develop the flavours.
Strain the vodka mixture through a fine sieve, into a clean sterilised airtight bottle.  Discard the rind.

Note: This liqueur must be served well chilled.  Place it in the freezer for 1 hour before serving.

We are now so looking forward to long hot summer evenings taking tiny sips of limoncello in tonic water… I can taste it already.  Oh maybe that is because I just did.. hehehe  😀
And remember my plan to drink a-lemon-a-day?? well I am very pleased to report that  I have not been sick or felt even vaguely under the weather all this winter!  I’m positive that has been due to my (almost) daily dose of Vitamin C!  My family likewise has been perfectly well all winter, which is awesome.
From our cumquat tree:
Cumquat marmalade
2 cups cumquats, washed and sliced finely
2 cups water
juice of 1 lemon
2 cups sugar
if you have bumper crops of cumquats, double the quantities
Wash and slice fruit finely and remove the seeds, but don’t throw them away.
Place the fruit in a large saucepan, cover with water and soak overnight (8 hours).  Put the seeds in a separate small bowl and soak in a small amount of boiling water overnight also.
Next day, strain the liquid from the seeds.  Discard the seeds and add the water to the cumquats.  Cook gently on a low heat until the fruit is tender and the liquid is reduced by half.
Add the sugar and lemon juice.  When the sugar has dissolved, turn up the heat and boil rapidly while stirring constantly until the mixture jells, around 30-45 minutes.
To test if the marmalade is jelling, spoon a little onto a cold saucer.  if a skin forms and it glazes on the surface and wrinkles when touched, it is ready.  If it is still runny, boil for a little longer and test again.
That recipe is from an old Burke’s Backyard facts sheet.  Slicing the cumquats is fiddly and a bit of a pain, but I just set myself up in front of the TV and knocked off a huge batch over one evening.
(Later edit: I’ve had enough comments utilising a variety of different spellings for me to wish to confirm that “cumquats” with a “c” IS the correct spelling here in Australia  🙂  )
I neglected to mention it previously, but we have a little lime tree as well (pictured in the background of my limoncello above) and it too has been gallantly producing a bountiful harvest… so:
Lime curd
rind and juice of 5 limes
6 eggs
1 1/2 c sugar
125g butter

Lightly whisk the eggs and sugar together in a saucepan, then add the other ingredients.  Whisk continually over a medium heat until the mixture has thickened to a custard-like texture then allow to cool in the pan.  Decant into sterilised jars.

This is the same recipe I used for my lemon curd just with one extra lime added in, since the limes are a little smaller than the lemons.  I also added a titch of green food colouring to distinguish it from the lemon curd, but I think this could have been a bad idea.  According to my family it looks like jars of slime.  
Oh.  Mmmm.  Right.  Not such a hugely appetising description, mebbee?!  Previously it was a perfectly delectable shade of yellow.  So I would NOT recommend the green food colouring  🙂 
But whilst it may look slightly dubious I can assure you it still tastes absolutely delicious!  I think I like it even more than the lemon curd!

Finally, boring (sorry) but here are my additions for August

Fabric; $5.00
Patterns; KwikSew 3300
$11.75 and McCalls 2772, used previously
Underwires; $2.49
Cup inserts; $12.95
Bra closure;
$2.49
Elastic; $7.98
Buttons; old, from stash
Total cost: $41.66
Fabric; white Tshirts;
fabric previously accounted for, striped Tshirt and sleeve Tshirt, all
refashioned old garments and leftovers
Pattern; self drafted
Total cost for the 4
Tshirts: free
Fabric; birthday gift from
friends
Pattern; from Pattern Magic
3, been used before
Total cost: free
Fabric; from an old cardigan
and Tshirt
Zip; $2.99
Thread; $2.68
Total cost: $5.67
Fabric; $7.50
Patterns; KwikSew 3300 and
McCalls 2772, both used previously
Underwires; recycled from
old bra
Cup inserts; $12.95
Bra closure;
$2.49
Elastic; $2.99
Embroidery thread; old,  from stash
Total cost: $25.93
Fabric; $37.48
Thread; broke into a new
1000m reel of black $13.95
Pattern; self drafted
Total cost: $51.43 (but I am not including this cost in the total for my own wardrobe)
Fabric; about $50.00?
Yellow
jersey; $12.00
Pattern;
self-drafted
Brass
Snaps; $4.95
Total
cost; $66.95
Fabric;
all leftovers
Lining;
$8.39
Pattern;
from the Pattern Pyramid… free
Buttons;
$5.70
Total
cost; $14.09
Miscellaneous
No miscellaneous purchases
this month
Making the total for the second third of the year; $499.02
and my running total for the year so far $1132.06
pinterestmail

With Military Precision

My most recent creation: a jacket! made using pattern 104 from the Burdastyle magazine 09/2008 from the Pattern Pyramid giveaway.  Uber cool, yes?  I think so.
Flicking through the magazine; the military style of this jacket with the double breasted front, the rows of buttons, the high collar and the little buttoned-down belt really caught my eye, but not until looking at the fine print did I notice the cool knitted wristbands that are attached to the sleeve lining inside the sleeves …  sold!!  I immediately knew this was The One.  I totally love it; even though there is hardly any winter left here… shhh.  I should be able to squeeze in a few more wears at least, and I’ve always found it fab to have something sorta new-ish in the wardrobe for next year, the next time winter starts to creep up and you’re not quite ready  🙂
Even better, I made the jacket using all leftover fabrics and yarns from my stash; small-ish quantities that were too titchy tiny for any one thing alone, but still too much and too good quality to even dream of ditching.  I’ve noticed a few smartly tailored jackets in Vogue magazine lately, made from combinations of very different materials and the idea of following suit really appealed to me.

Above: both these ads taken from Vogue Australia.  At left; Burberry Prorsum, at right; JBrand. 

I used a browny-grey polyurethane laminate, originally from Fabulous Fabrics and leftover from this skirt, and a grey wool, originally from Spotlight and leftover from this coat.  Whoar, it felt gooood to use up that fabric!!  The knitted wristwarmers are knitted from Jo Sharp Silkroad DK Tweed in colour Peppercorn, the leftover yarn from this cardigan.  I didn’t have quite enough of the wool to knit the full length required, but I think they turned out quite long enough anyway.

I cut the back, sides and fronts of the jacket from the PU laminate: and the centre fronts, shoulders, collar, sleeves and the belt from the wool fabric.  Even though I did not have enough of either fabric to cut the whole jacket, I did have enough of both together to make the jacket 15cm longer than stipulated in the pattern, which suited me to a T.  I prefer a hip-length to a cropped jacket, particularly when in a very fitted style like this.  I left off the gathered peplum, and instead cut the back piece as one long piece.
The pattern directs for two short belts to be sewn in with the side/back seams; instead I made mine as one completely separate longer belt.  It still buttons onto the lower two front buttons, just like in the pattern.  I like the way the belt pulls in the back of the jacket, and gives me more of a “shape”.  I think it might have looked a little boxy for my tastes otherwise.
I topstitched onto the wool portion of the jacket, but avoided any topstitching on the PU laminate; because I know from brief experiments when making my skirt from this fabric that topstitching looks tres hidous on this stuff.
The collar is faced with a lightweight elephant-grey cotton rather than with self-fabric; this is because that wool is thick!  It was pretty hard to get all those double thickness shoulder and collar seams all sitting down on the inside nice and flat as it was, without the extra bulk of a woollen facing… for that reason I did not button the collar ends back on themselves as suggested in the pattern because the grey cotton facing fabric would have showed.  Instead my collar just crosses and buttons right end over the left.

The jacket is lined completely with a coffee-coloured polyacetate lining, from Fabulous Fabrics.  This, along with the buttons, also from Fabulous Fabrics, are the only things I had to buy!

Details:
Jacket; Burdastyle magazine 09/2008, 104, with minor modifications; made of wool, PU laminate, Jo Sharp Silkroad DK Tweed
Jeans; Burda 7863, khaki stretch gabardine, details and my review of this pattern here, and see these jeans styled in 6 different ways here
Shoes; Francesco Morichetti from Zomp shoes

Pattern Description:
Masculine, lady-like or sporty?  This jacket fulfils all three requirements!  The front in severe military style, the back with a feminine peplum, and the sleeves with long, hand-knitted cuffs that are attached to the lining.
Pattern Sizing:
European 36 to 44,  I made the size 38.
Did it look like the photo/drawing on the pattern envelope once you had finished sewing it?
I made mine 15cm longer; but otherwise yes
Were the instructions easy to follow?
They’re ok.  Burdastyle are well known for their challenging pattern instructions!  The instruction to sew the facing pieces together seems to be missing so if you have not made a lined jacket before you might get pretty confused in this section.
What did you particularly like or dislike about the pattern?
I just love the style!  Very interesting and quite unique.  I was particularly drawn to the knitted wrist-warmers feature; I just love combining different bits and bobs together in one garment like this!!
Fabric Used:
I used a combination of several fabrics; a PU-laminate and a charcoal wool for the jacket pieces, and Jo Sharp Silkroad DK Tweed for the wristwarmers.
Pattern alterations or any design changes you made:
My jacket is 15cm longer than stipulated, and I left off the gathered peplum and instead cut the back as one piece, as per jacket 105.  I made the belt as one long and completely separate belt, that encircles my waist so it nips in the back of the jacket, and gives me more shape.  My wool fabric used for the collar is very thick, so I faced the collar with a lightweight cotton.  For this reason I did not fold back the collar ends to button on themselves, but instead laid them over each other, so the ends button onto each other.
Would you sew it again? Would you recommend it to others?
I might sew this again! and I definitely recommend this interesting and fashion forward pattern to others!
Conclusion:
Well, I’m completely chuffed with my new jacket!  I really love trench coats and military style jackets, which is why I fell for this one; a nice combination of the two styles.  The double breasted front and high stand-up collar look smart and will be nice and cosy on a cold day.  I really love the belt, to nip in the waist.  I particularly adore the knitted wristwarmers.  All round a unique and very cool little jacket, and a really good choice for a cold weather jacket.

pinterestmail

the Pattern Pyramid is heading over to…

Roobeedoo, I shall be contacting you for your mailing address!
Thank you to everyone taking part, I had the biggest response to a giveaway ever which just goes to show what a popular concept it is  🙂
Thank you Karen!

pinterestmail

An olive and a skull

I’ve made some necklaces.
Cassie discovered the Bead Post in the old Post Office in Fremantle, just across from the railway station, and we paid them a visit.  Oh my gosh, so many beautiful beads!
A few years ago a group of my friends and I were fully into making costume jewellery, it was a bit of a fad.  My enthusiasm has waned somewhat, but it only takes one room full of beautiful beads to re-awaken the sleeping beading beast within, mwahaha.  I recalled that my sister-in-law had a birthday coming up, hehehe.  Yes.  My family are often the innocent victims of my passion for making stuff, and they are always such gracious recipients too.
As soon as I saw that glossy oval mossy-green bead I thought “olive!” and bought two little miniature red beads to be the pimiento in the middle, and some leather cord.  I made this one for my sister-in-law for her birthday.  I think this olive is very “her”.  Luckily she thought so too and put it on straight away, which I thought very kind and sweet of her.  I have a very high regard for good giftees.  My family are fantastic that way  🙂

I also fell utterly in love with a little skull bead.  I had the red bead and the clear teardrop already; so I made another pendant, fashioning the charms with organic twists of silver wire.  I like the way the little red bead is like a droplet of blood and the glass teardrop is like… well, a teardrop.
Sorta cute/modern-gothic, no?  I think so.

pinterestmail

Ultramarine corduroy skirt; 6 different ways

Y’know, sometimes you add something to your wardrobe purely on a crazy whim and you have a teeny niggling doubt about how well it is actually going to work?  This ultramarine corduroy skirt, made using Vogue 1170 and first posted here; is one of those things.  I grabbed the fabric without thinking about it very much during a mad Spotlight sale.. you know, one of those instinctive “ooh, pretty colour” moments when you are rushing past a table of fabrics on your way to the cutting counter and your brain is on autopilot, really focused on getting in the queue before it builds up too much.
I think one of the reasons I really like doing these 6 different ways posts for myself is because of that old old wardrobe rule of thumb taught to me when I was growing up… every new thing you add to your wardrobe must go with at least six other things.  I am a very whimsical seamster, but once I’ve got something I do still like to mix and match and make sure a thing has several good options to partner up with; not just one other thing.  One must be practical  (sigh)
Luckily bright blue has slotted in very well after all, and I’ve grown to love its punchy shock of colour against my traditional pale and/or sludgy neutrals!  I have worn each of these outfits over the past month or so, and taken each photo on the day that I wore it.  With the exception of the first very summery one; I just put that outfit in there to show a bit of seasonal variety so to speak.  The weather is still coldish here… well it is for me anyway.  I am such a wuss in that regard.  But things are warming up very nicely lately.  Spring is in the air!

Below: at left; the skirt worn with the pretty knotted blouse that is from that very same Vogue pattern.  They are designed to go together and I do think they look very nice together.  I like the textural clash of decadent glossy silk against the homely corduroy.  I will wear this outfit on a much warmer day  🙂  At right; the blue holds its own when worn as part of a trio of bright colours.  Colourblocking!  Still a trendy concept, yes?  According to the shop windows here-abouts it sure is anyway.  Brights are gonna be “in” for the down-under spring.

blueskirt1

Below: at left; these muddy mossy shades of green against bright bright blue felt “wrong” at first but then I really loved them and was pleased I had forced them together.  Such an unexpected combination, it worked beautifully!  I felt sorta “art student” or “urban hipster” in this ensemble.  I felt cool.  In my book that is a very good thing.  At right; on a colder rainy day I wore a warm and cosy, all-charcoal-grey outfit with just one slice of bright blue corduroy showing to add a peep of colour.

blueskirt2

Below: at left; playing it safe, letting the brilliant blue colour take centre stage and be the prima donna against neutrals of black and cream.  A nice outfit, I liked it.  It is plain, but then again maybe this is very me.  I am plain!  At right; worn along with all the other bright blue garments in my collection, and with just wine-red leggings to break up the colour scheme and add another shade to the mix.

blueskirt3

What am I wearing today? well, actually yesterday I wore the last all-ultramine-blue-with-the-red-leggings outfit, just above.  I meant to post this yesterday, but got distracted with writing my review for shape shape, hehe.  Today I am still wearing the skirt, but with something completely different!

pinterestmail
Switch to mobile version
↓