Blue bunches

Next up in my Japanese pattern book experiments…
When I saw this top in Pattern Magic 3, by Tomoko Nakamichi, I nicknamed it the “bunches” top.  Y’know because the other one on this same page was the “ponytail” top (not its real name, btw)  Well this one had two fabric thingies bursting out of each side of the self-fabric scrunchie thingy (it’s OK, I know what I’m talking about) so since we used to call this hairstyle “bunches” when I was in primary school then that is what I have dubbed this top.  In actuality, it has the same name as the ponytail top, (thread escaping loophole, thank you to Yoshimi, Janine and KD!) version A
But I have to admit the final result is actually not super “bunch”-y but is just sort of “knot”-y.  Even verging on “bow”-y.  This is because of my choice of fabric, a rather fine and light cotton knit and with not as much body as the green cotton jersey I used for the ponytail top.  So in my version here, that long casing for the bunches hasn’t held its shape at all but just collapses in on itself.  I thought that the lighter fabric would be better, but now I see that the thicker fabric did give a better structural result.  Don’t worry, I will still be wearing this top a whole bunch (hehe) this summer; its bright bright ultramarine blue shade is very vivid and therefore so very now.  Very colour-blocking…  See that, how I manage to slip trendy buzzwords like colour-blocking in to my posts like that, hmmm?  Oooh, I’m so with-it…  not!  But I do newly love this intense colour.  I confess I’m seriously craving shoes in this colour…
I think it can be worn successfully either way.  With the bunches at the back you get some interest at the back of the outfit, which is nice.  It’s noice it’s different it’s unusual… *  Often in an outfit there is nothing interesting to look at from the back view.  Something else I’ve discovered since I started taking pictures of my clothes…  
I think I like better it with the bunches at the back.  What do you think?

bunches; source

* an Aussie in-joke

Details:
Top; drafted from Pattern Magic 3, by Tomoko Nakamichi, made of lightweight cotton jersey knit
Skirt; my own modifications of Vogue 8363, burnt orange raw silk, details here, and this skirt styled in 6 different ways here
Sandals: la soffitadi Gilde, from Zomp shoes

pinterestmail

Wearing a triangle

First impressions can be deceiving.  And one’s first impressions of the “Wearing a Triangle” design from Pattern Magic 2 might just be that it is one of the least wearable designs in the book.  That was my own naive silly first impression anyway… I admit this photograph of the garment did not endear me to it one little bit; it was a disturbing reminder of the freaky monster shape the rather dishy (in those days, sigh) Alec Baldwin transformed himself into in Beetlejuice. 

(Alec Baldwin at right, in not-so-dishy mode)

I had a bit of a crush on Alec Baldwin way back then, and this apparition when it appeared in the movie was like a bucket of water over my girlish daydreams…

But the more I though about the Wearing a Triangle design, the more I started to think that it did have great potential to suit my style… if a few seams were left unstitched, and in a light flow-y fabric… hmmm, so I went and found some really light flow-y fabric.  Fortunately for me, Fabulous Fabrics had this sheer, ultra-flowy, navy blue muslin-y stuff on their super cheapo bargain table… I bought quite a lot.  Hangs head in shame at the utter failure to stash-bust there… “but it was so cheap”, she wails unconvincingly.  You might be seeing something else made out of this fabric, hehe…  But this particular fabric was just the ticket.  And I’m so happy with the result!  This project may well turn out to be a surprise favourite from the book, so far the odds are good…
I love the long, pointy handkerchief hems, and the vaguely hoodie shape hinted at with the top point of the triangle.  The drape-y, sharply A-line folds of lightweight billowy fabric are lovely and easy to wear, and I think quite flattering.  The very light and loose nature of this garment makes it a perfect summer cover-up.  I’m planning to wear this faux hoodie-of-sorts to the beach over shorts and over my wide-leg white linen pants on hot evenings.  The lightness and looseness will keep it cool, while the long sleeves will keep me from getting sunburnt.

Details:
Top; the “Wearing a Triangle” design from Pattern Magic 2, by Tomoko Nakamichi, made of navy blue muslin
Camisole (underneath); Country Road
Shorts; Burda 7723 modified to be flat-fronted and flared,  made of yellow embroidered cotton, details here
Thongs; Mountain Design

flat view
back view

Dressmaking details (for diehards who are interested in the sewing nitty gritty)
The design was quite time-and-resource consuming to draft.  This is because there are several stages…  cutting the triangles of fabric and making up a sort of half-stage fabric muslin, and then cutting armholes and using that much fabric again to draft the pattern with sleeves.  At this stage I was (uncharacteristically) not confident about the size so I went on to make a trial garment as well…  I used up practically half an old sheet just on the drafting of the pattern stage.  To my naturally very stingy frugal nature using up so much fabric, even “waste” fabric, for just one little top pattern was like torture.
The seams are sewed and overlocked to finish, the lower and neck edges overlocked and then folded in once and top-stitched.  The sleeve ends were finished with a “lettuce-leaf” rolled hem on my overlocker, I really like this slightly romantic finish to a casual long sleeve.
The design calls for the lower hem to be stitched closed partway along each end of the bottom edge of the triangle; I left these parts unstitched, which to my eyes improves the design immensely.  Ya, I know it doesn’t look so much like a structural “triangle” now, but I’m very OK with that.  And; final analysis, using up that half an old sheet on toile-ing was totally worth it!
side view

pinterestmail

Bathers, 2011

Exactly the same pattern as last year.  Boring? well, maybe; of course I do like to try out new patterns every now and again but I just illogically wanted to have the exact same silhouette again this year.  You do sometimes, y’know?  I’m a woman so I’m allowed to be illogical….. (and it precedes that I am allowed to make that little joke, only since I am a woman…  twisted logic there, but that can be a useful tool, in the right hands, hehe)  But I digress….
A tankini is a style that works for me.  Last year I really liked the slightly old-fashioned appearance of that little skirt over the hips a lot, and this gathered bust with wide halter neck also flatters my figure I think.  Last year I had cut up an old bra and used it to fill out those cups a bit, but I ended up taking them out after only a few swims because they just about drove me mad moving around in there!  This year I figured that what I’ve got naturally will just have to do…
The pattern I used is a real oldie; one that I bought so many years ago it is one of those with just the one size in the envelope.  Yeah, remember those…?  I’ve used this pattern five times now, slightly different variations for different years, although I only have photos of last year’s version and now this year’s; since in the time-honoured fashion amongst women of a certain age I have traditionally avoided having my photo taken in bathers… there’s that thing about feeling exposed, and “someone might see/recognise me” thus my clever semi-disguise here with my big floppy hat, hehe.  Somewhat akin to an emu with its head in a hole; if I can’t see the camera then maybe it can’t see me… ?  But my reasoning now is thus; if I am going to wear my bathers out to a public beach and in full view of strangers there, then to not wear them for my blog seems to be weirdly hypocritical.  There’re two more samples of logic there; flawed? or not?  I’ll leave you to judge…
This variation is based on the bikini with my own alterations.  The fabric is the same as this petticoat… when I was buying it I bought a little extra especially for this project, just because I fancied an overly cheerful sunflower-bright pair of bathers this year.  Seems kinda optimistic, y’know  (hmmm, definitely illogical…)

Details:
Tankini; variation of McCalls 2772, with a flared skirt section of my own design, swimwear fabric
Hat; Country Road

pinterestmail

Harvey Two-Face

So, we don’t do Halloween here in Australia.  
But in the last few years; each year it seems my children are attending parties that have a Halloween theme.  Different from how it is in other countries; just invited kids together on the one premises, and no door-knocking and begging the neighbours for food, thank goodness.   This kind of Halloween is acceptable to me.
But still requiring a costume.
So true to form Tim informs me on Friday (the day before the party) that he wants to go as Harvey Two-Face, the character from Batman who has one half of his body all acid-burnt and crazy and evil, whilst the other half is a neat, respectable looking business man.  Can I make a half-and-half suit and shirt set fitting the brief in, like, 24 hours??  
Hehehe; funny.  Oh.  You’re serious?  Oh, well, no! sorry.  Superpowers, I have not….  But I could possibly divide up two old suits and shirts and splice them together….?  So it was off to the op-shop.  Naturally, Friday was a public holiday in Perth… oh, did you know, we’ve had a VIP in town??  Yeees, so almost everything was shut, but a bit of phoning around informed us that the op-shops in the CBD were open that day.  So in we went.  Entering Good Sammy’s I immediately scanned the clientele; hoping against hope to catch sight of Her Majesty… maybe checking out the hat and bag sections? … but  (sigh) she must have already been in and cleaned up before us because there wasn’t much of a selection.  
Disappointed!
But we did manage to score some rather paltry bits and pieces.

Bit of butchering and slashing and fudging together later…

It was all a bit mashed together; of course nothing slotted together easily and needless to say there are no HongKong finishes!, and I couldn’t help thinking if only I had had a bit more time and if Spotlight had been open I felt could have had some fun and done something really wild and funky with the “evil” side, but we did the best we could with limited time and resources.  And I was pretty chuffed that he got the Best Costume award!!
Later edit; yup, he did put horrible blotchy red and pink make-up on the evil half of his face later on…  so dya reckon he is sufficiently supervillain-ous?

pinterestmail

Wave-y welts; a how-to

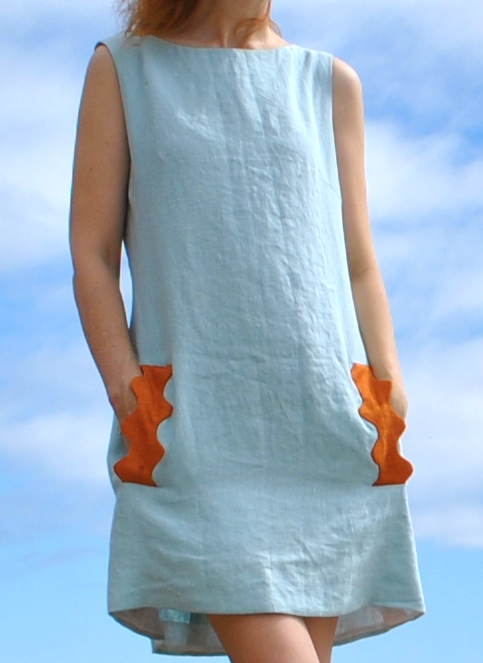
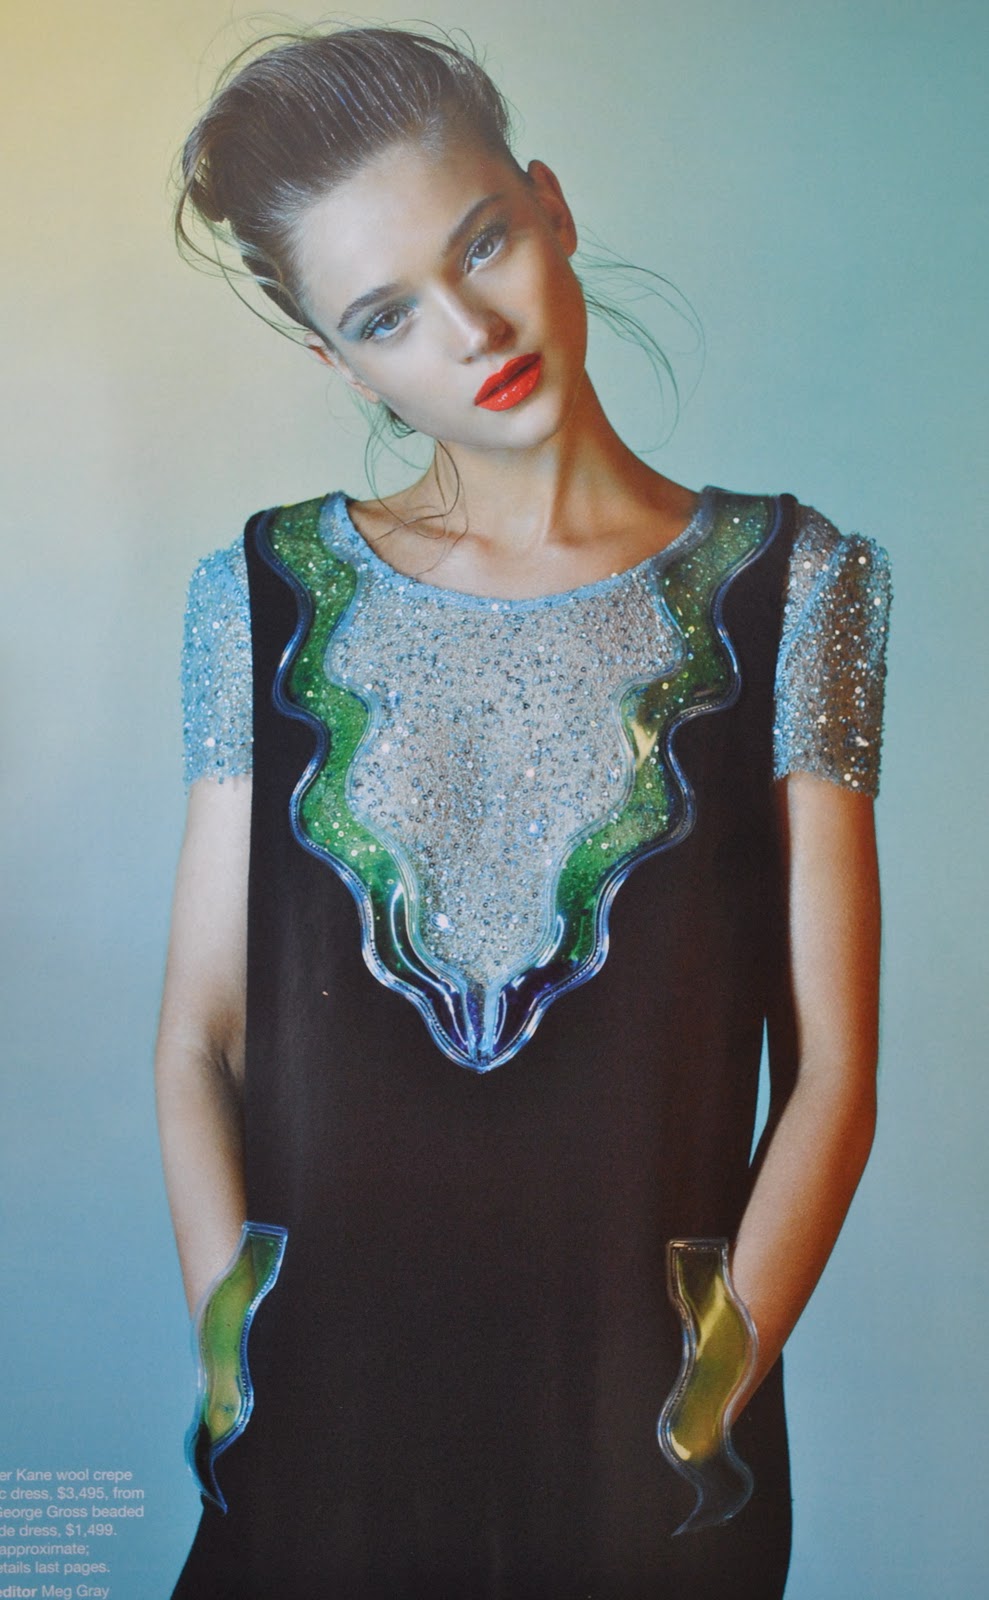
Some mistakenly thought my wave-y welts were ric-rac; well they’re not!  I made them myself!… although if you do have access to such a thing as giant ric-rac (I have never come across any such thing! but then Perth is a small place) then I suppose you could use it for these welts if you want…   As it happens I did take a few photos during the process of making these… partly so I could have a record myself of how I did it since I was doing this on the fly, but also  just in case anyone was interested in making their own shaped welts for a pocket… and some were, so thank you so much for asking!!   😀  
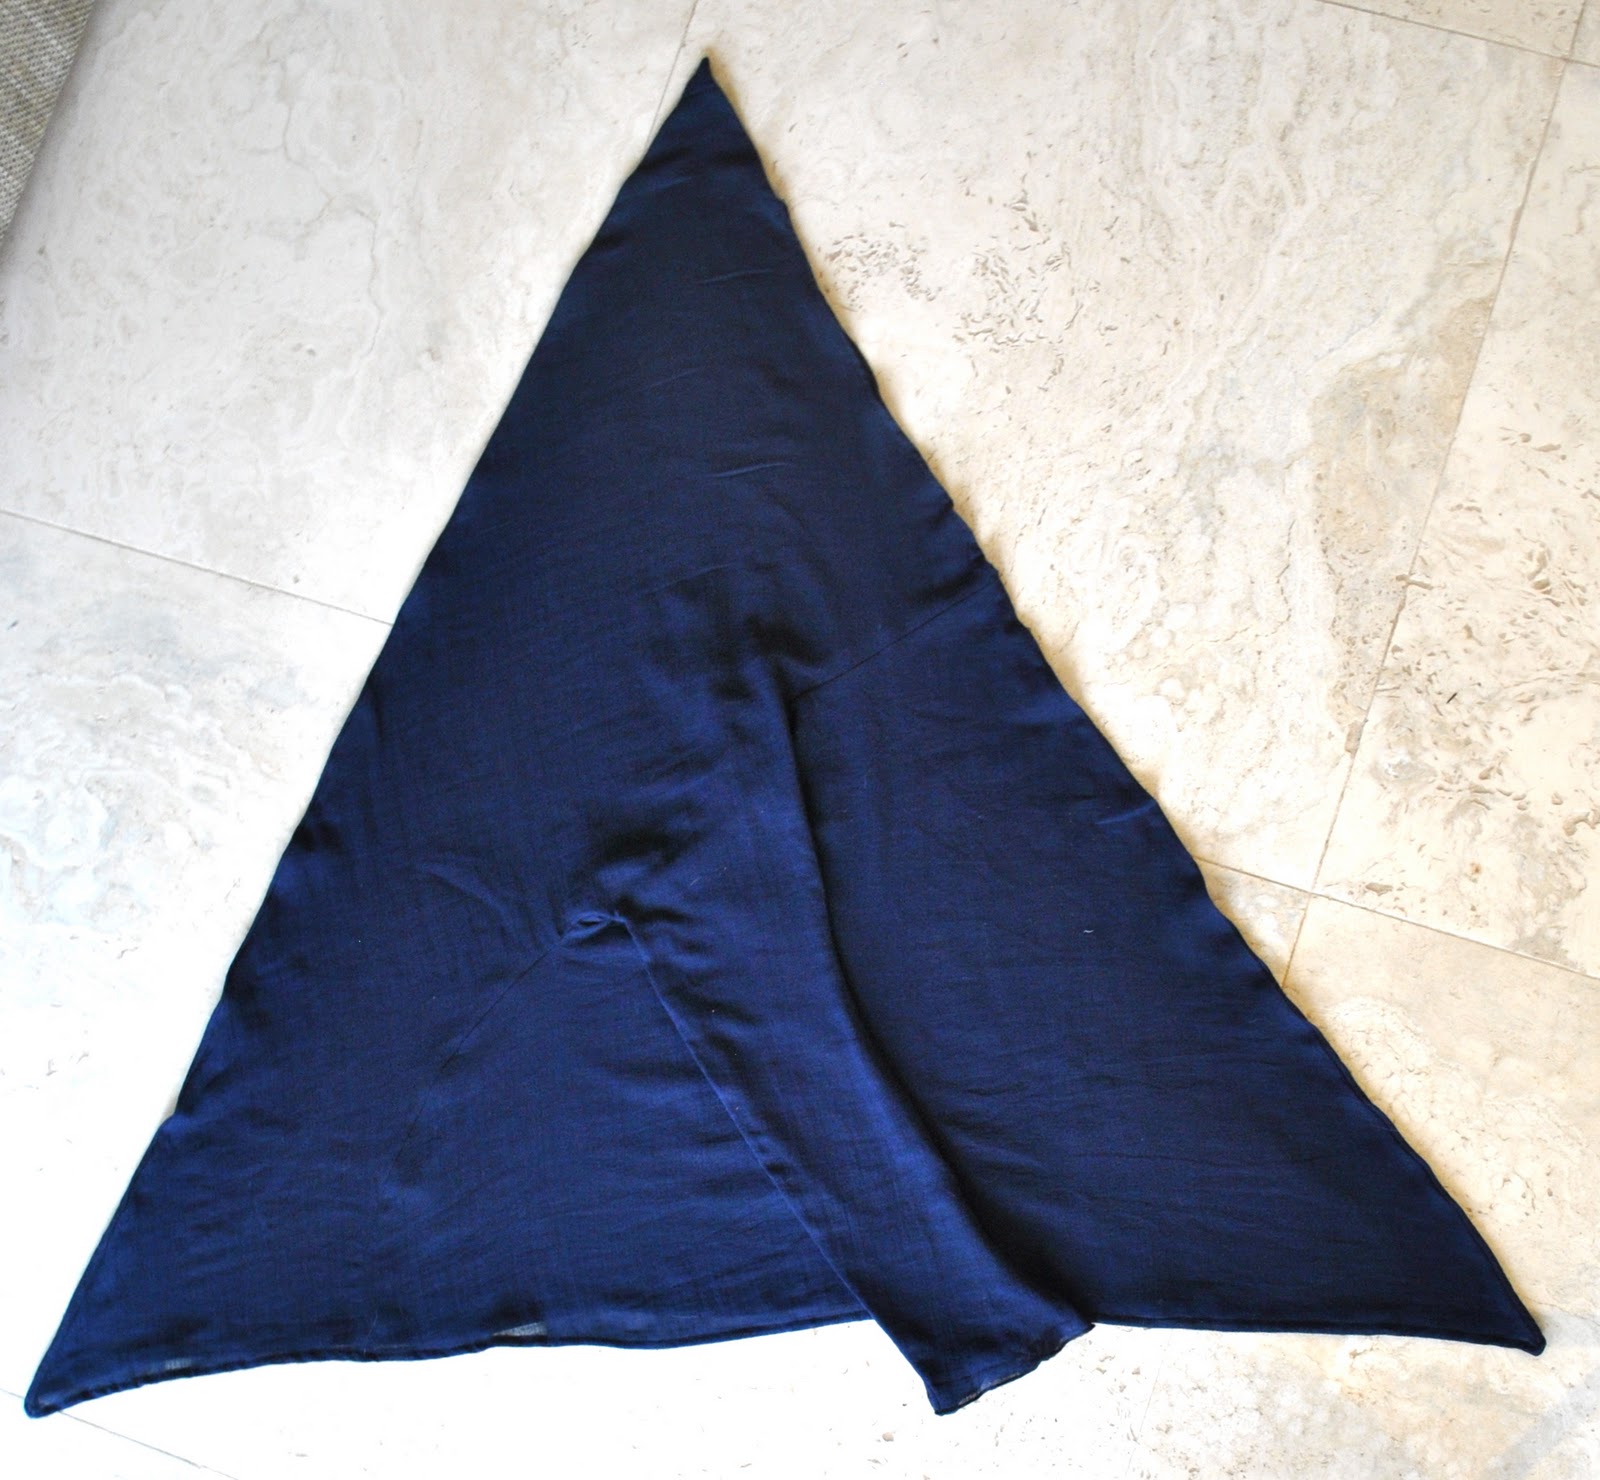
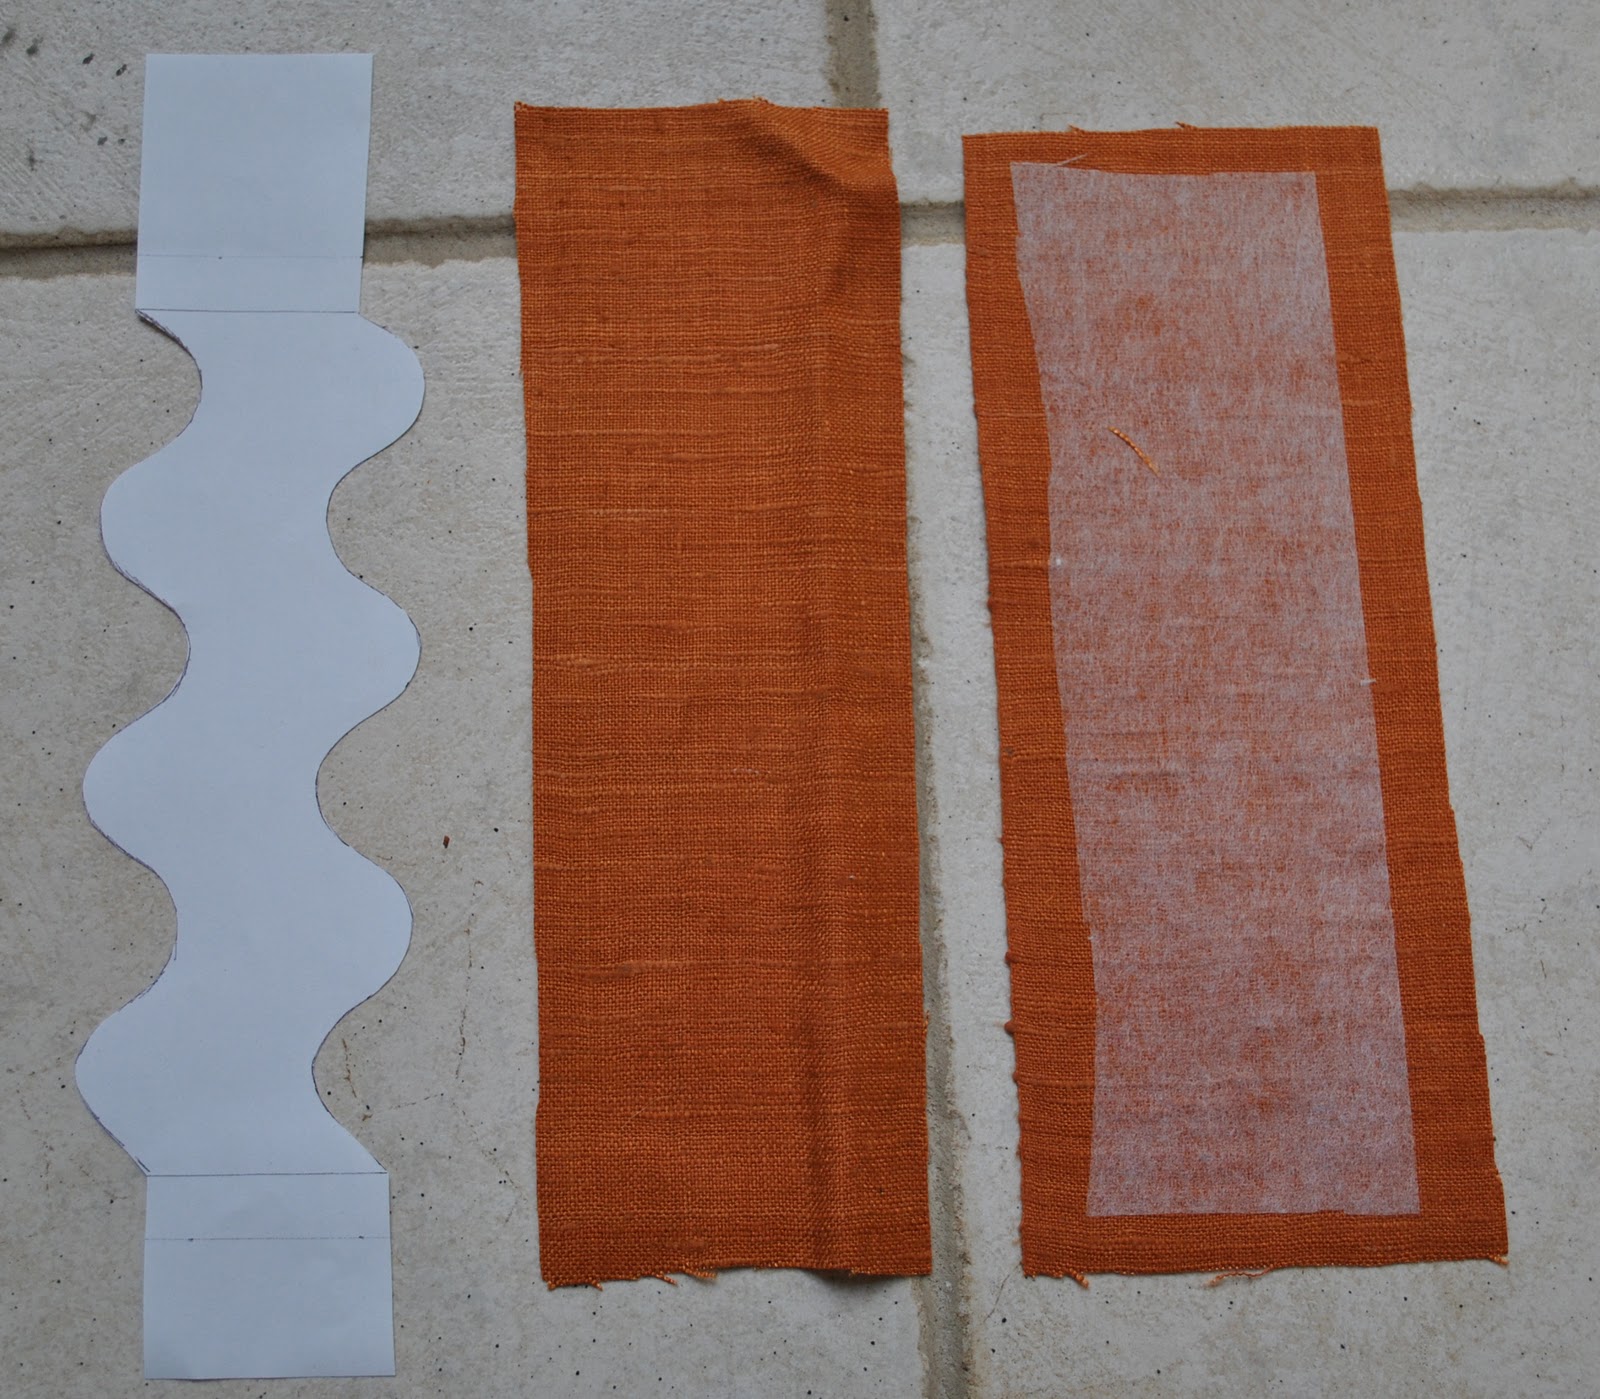
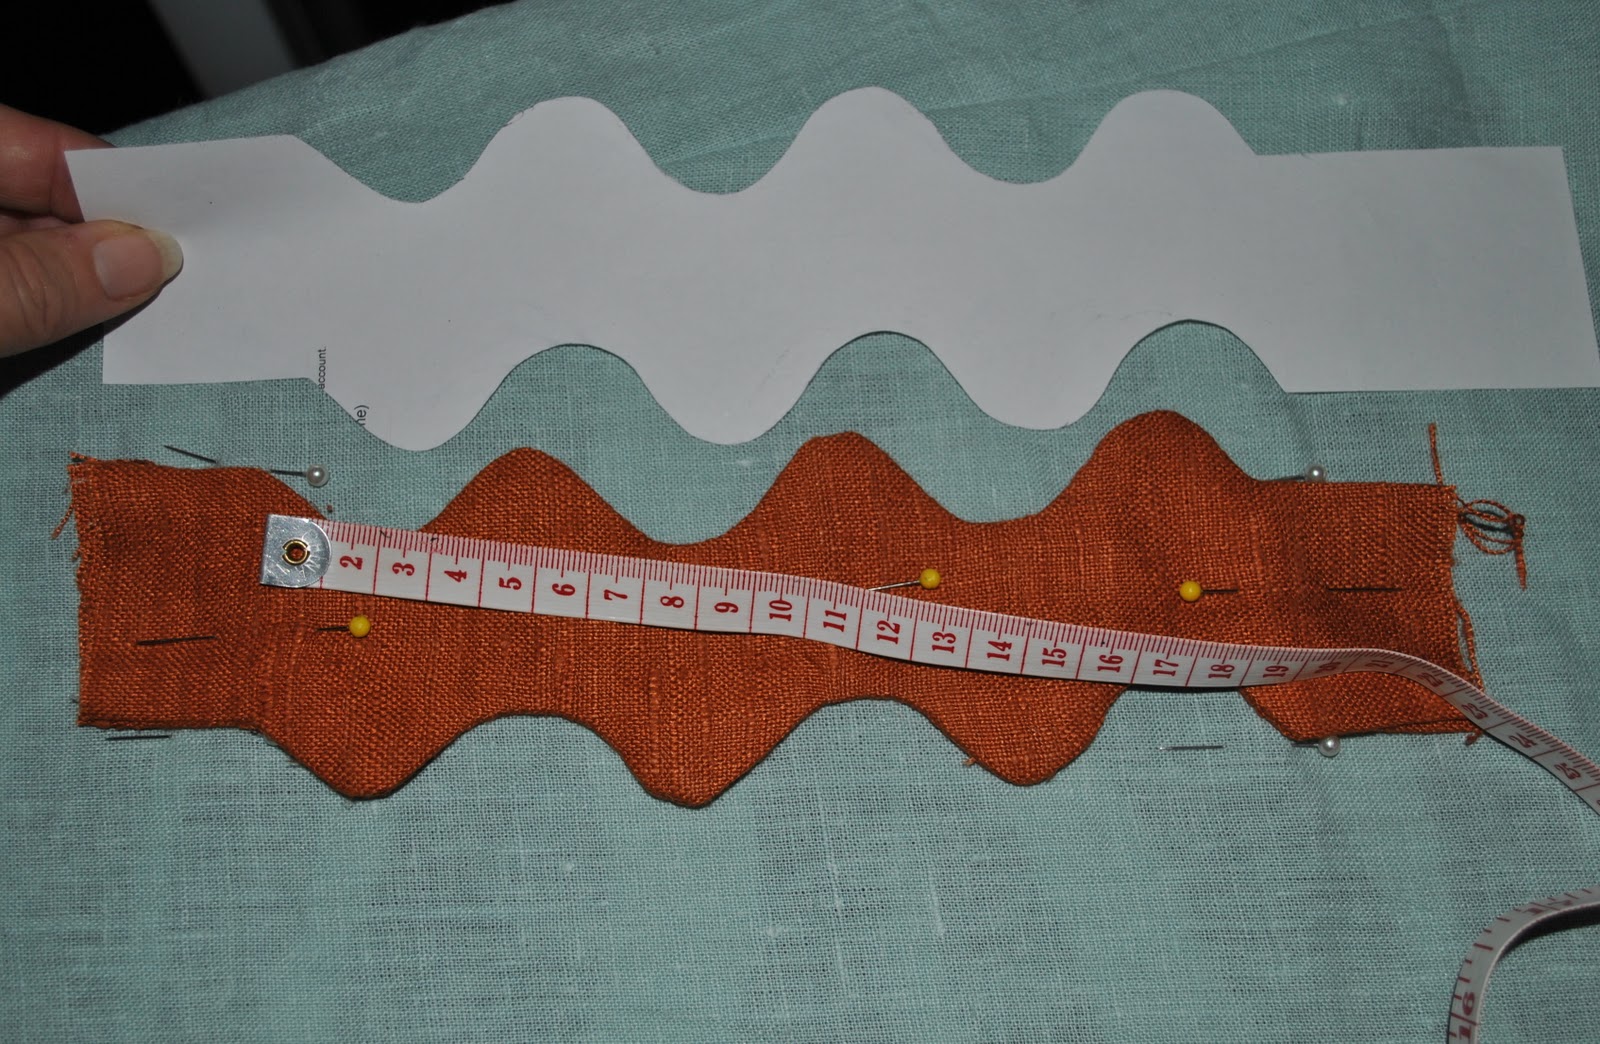
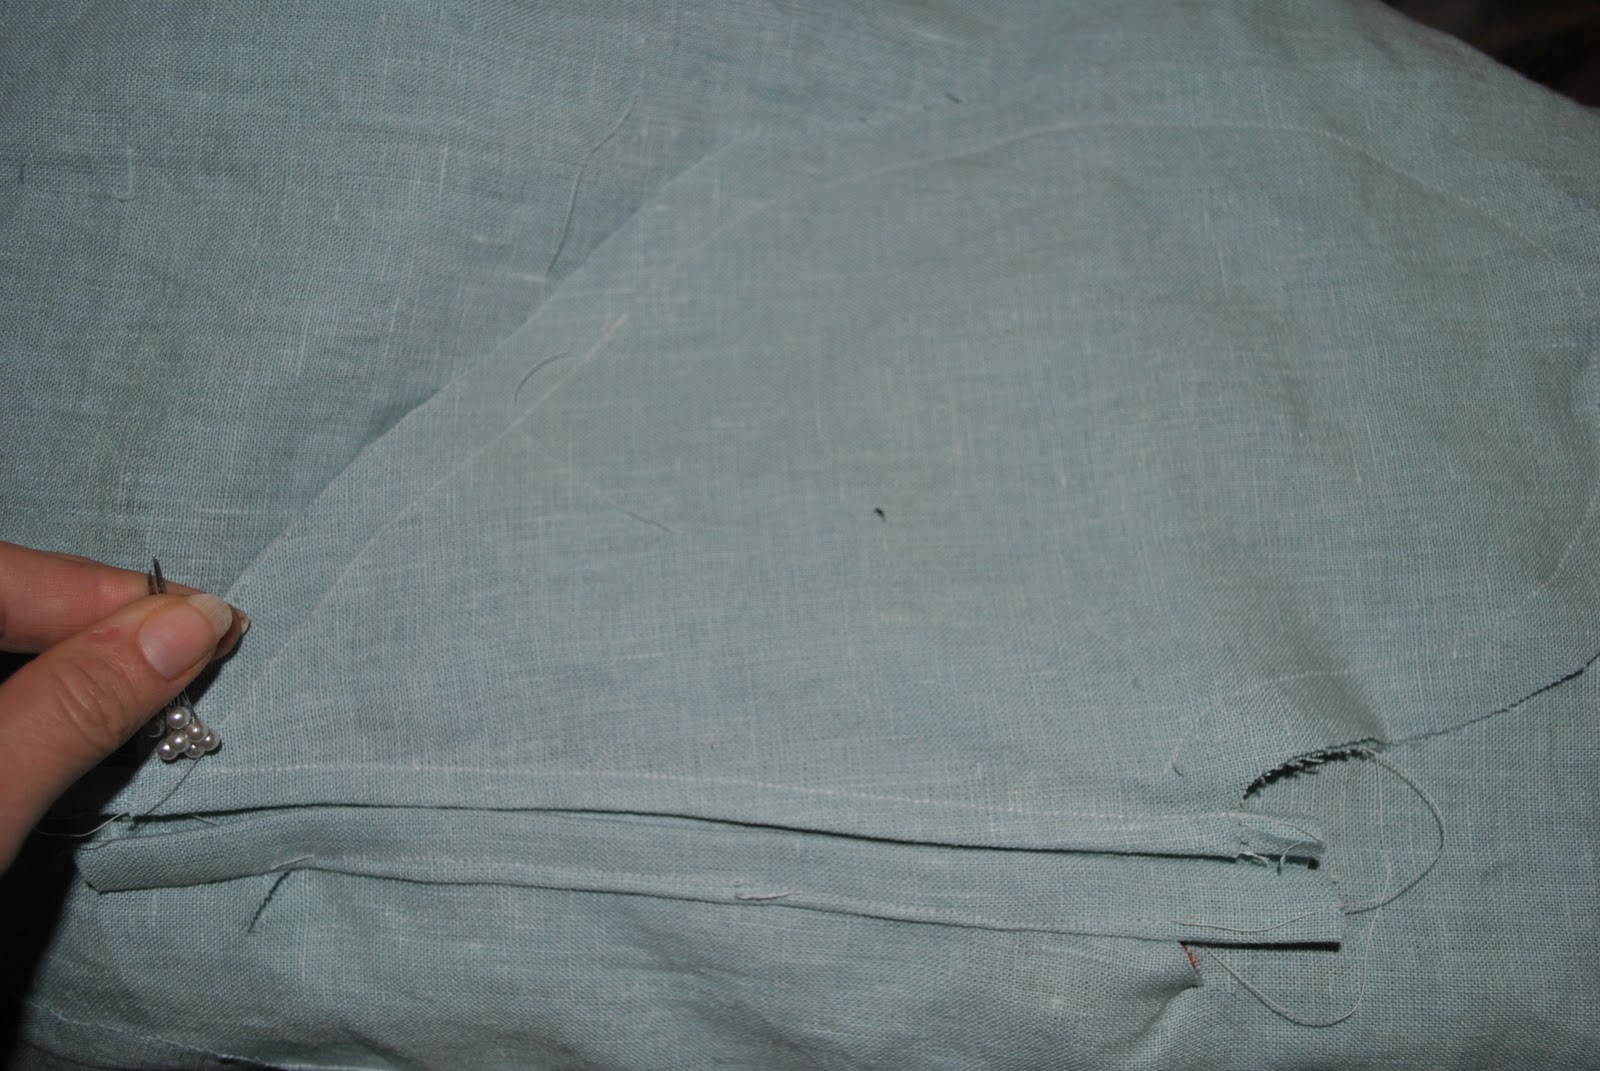
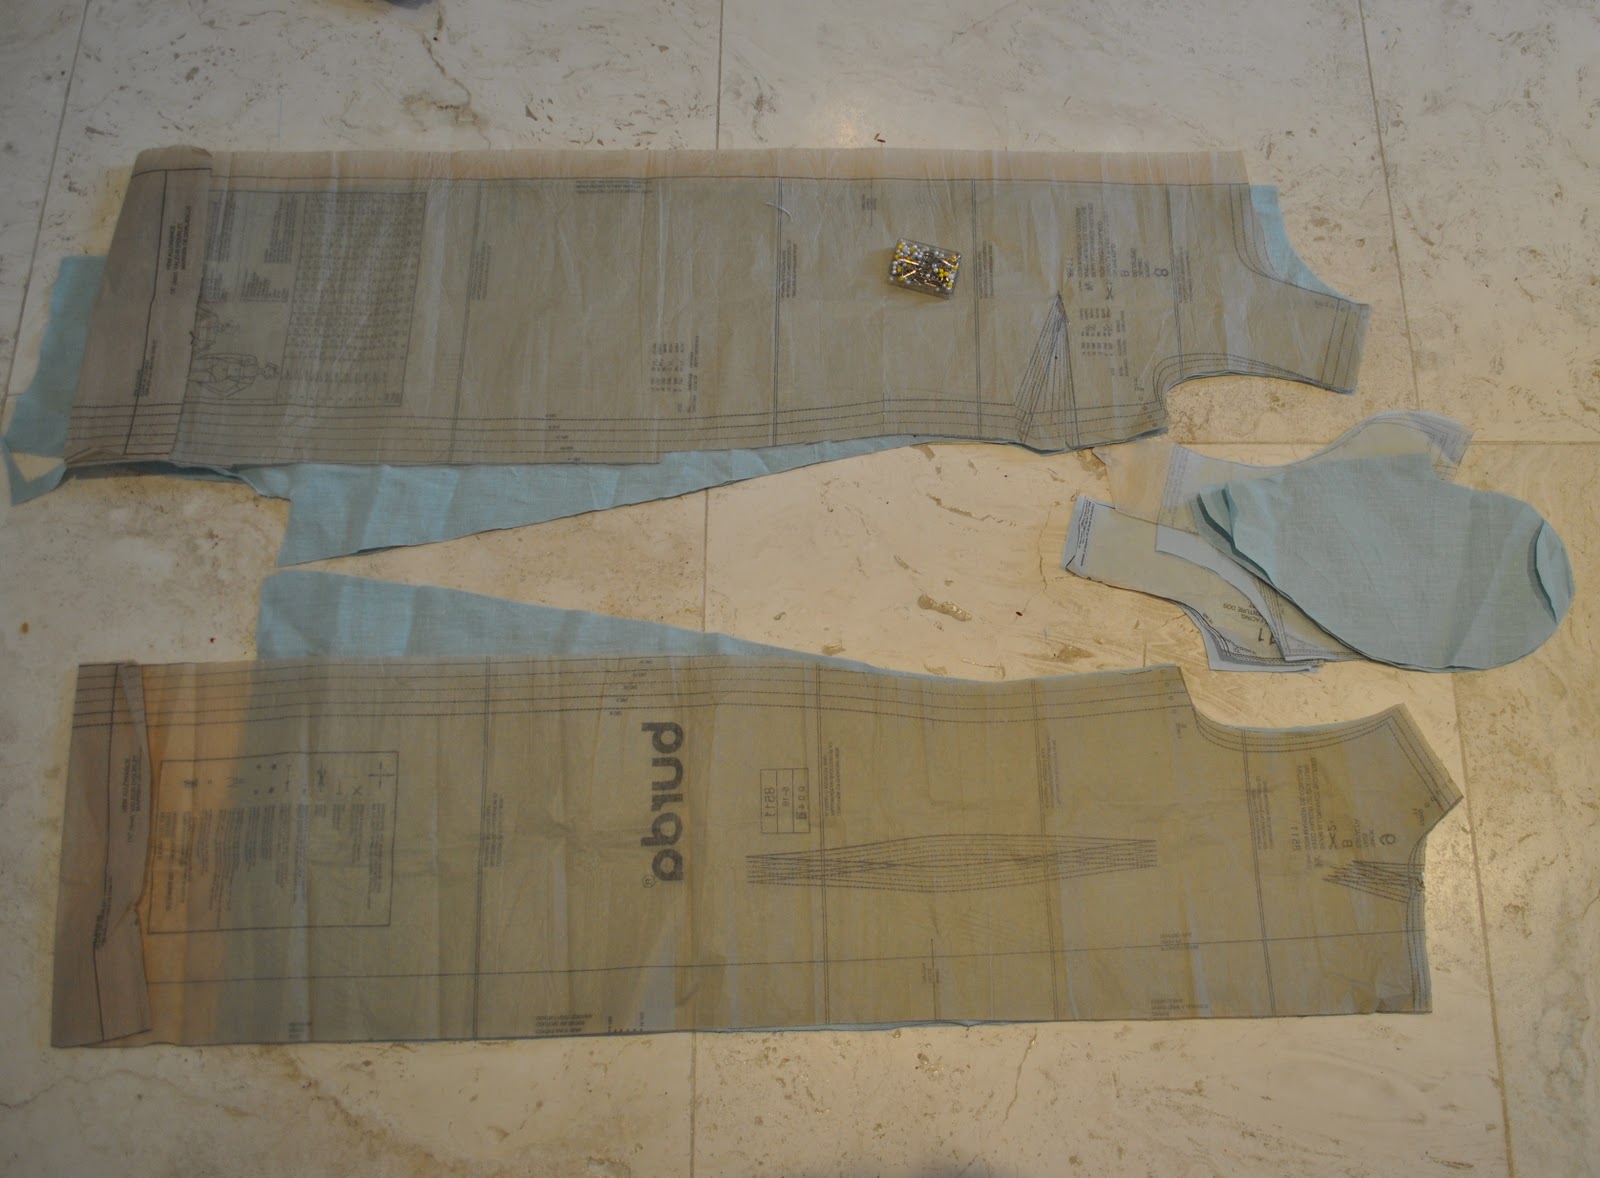
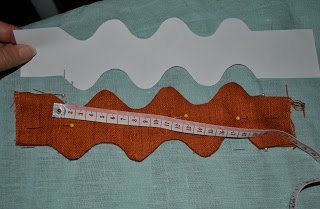
I had laid down my hand and drawn around it to get a pocket piece; and based the length of my welt on the length of the opening edge of this piece… and then drew out the shape I wanted for my welts on paper… this is a sine wave…  (that’s my geeky side coming out for you there, yup, I am a fully paid up member of nerds anonymous) Note; that although my shape is a sinuous curve; the four outermost corners of the design still form an exact rectangle…  having this will make it easier!  I also cut out four large-enough rectangles of my fabric and applied iron-on interfacing to two of them.

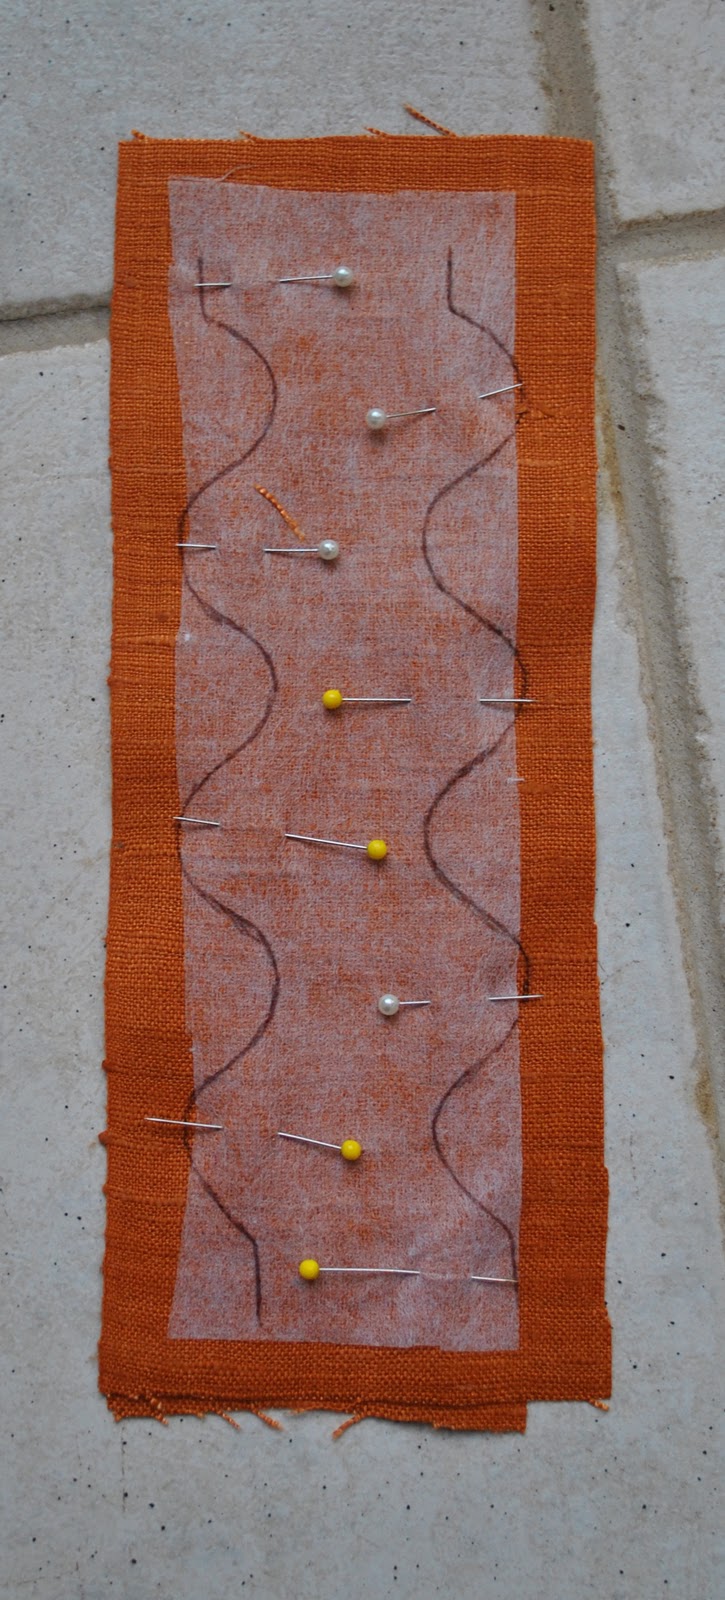
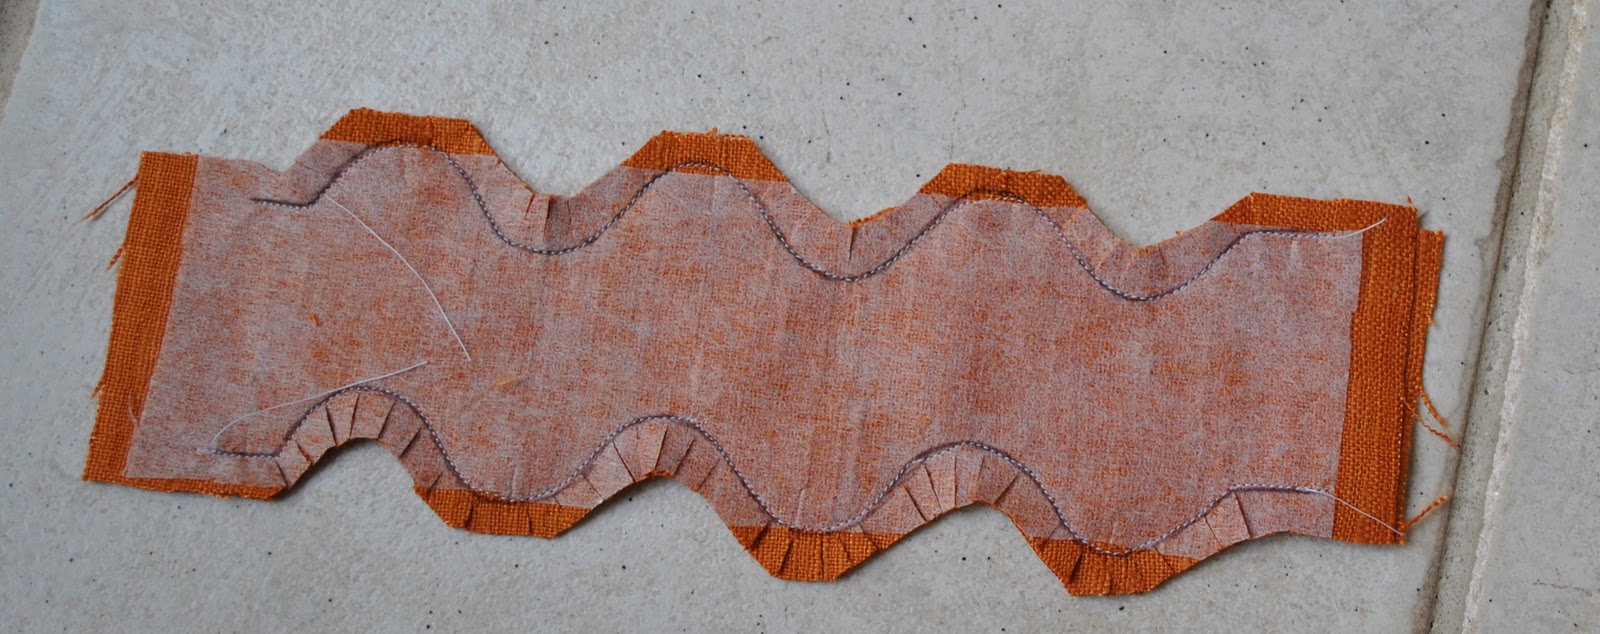
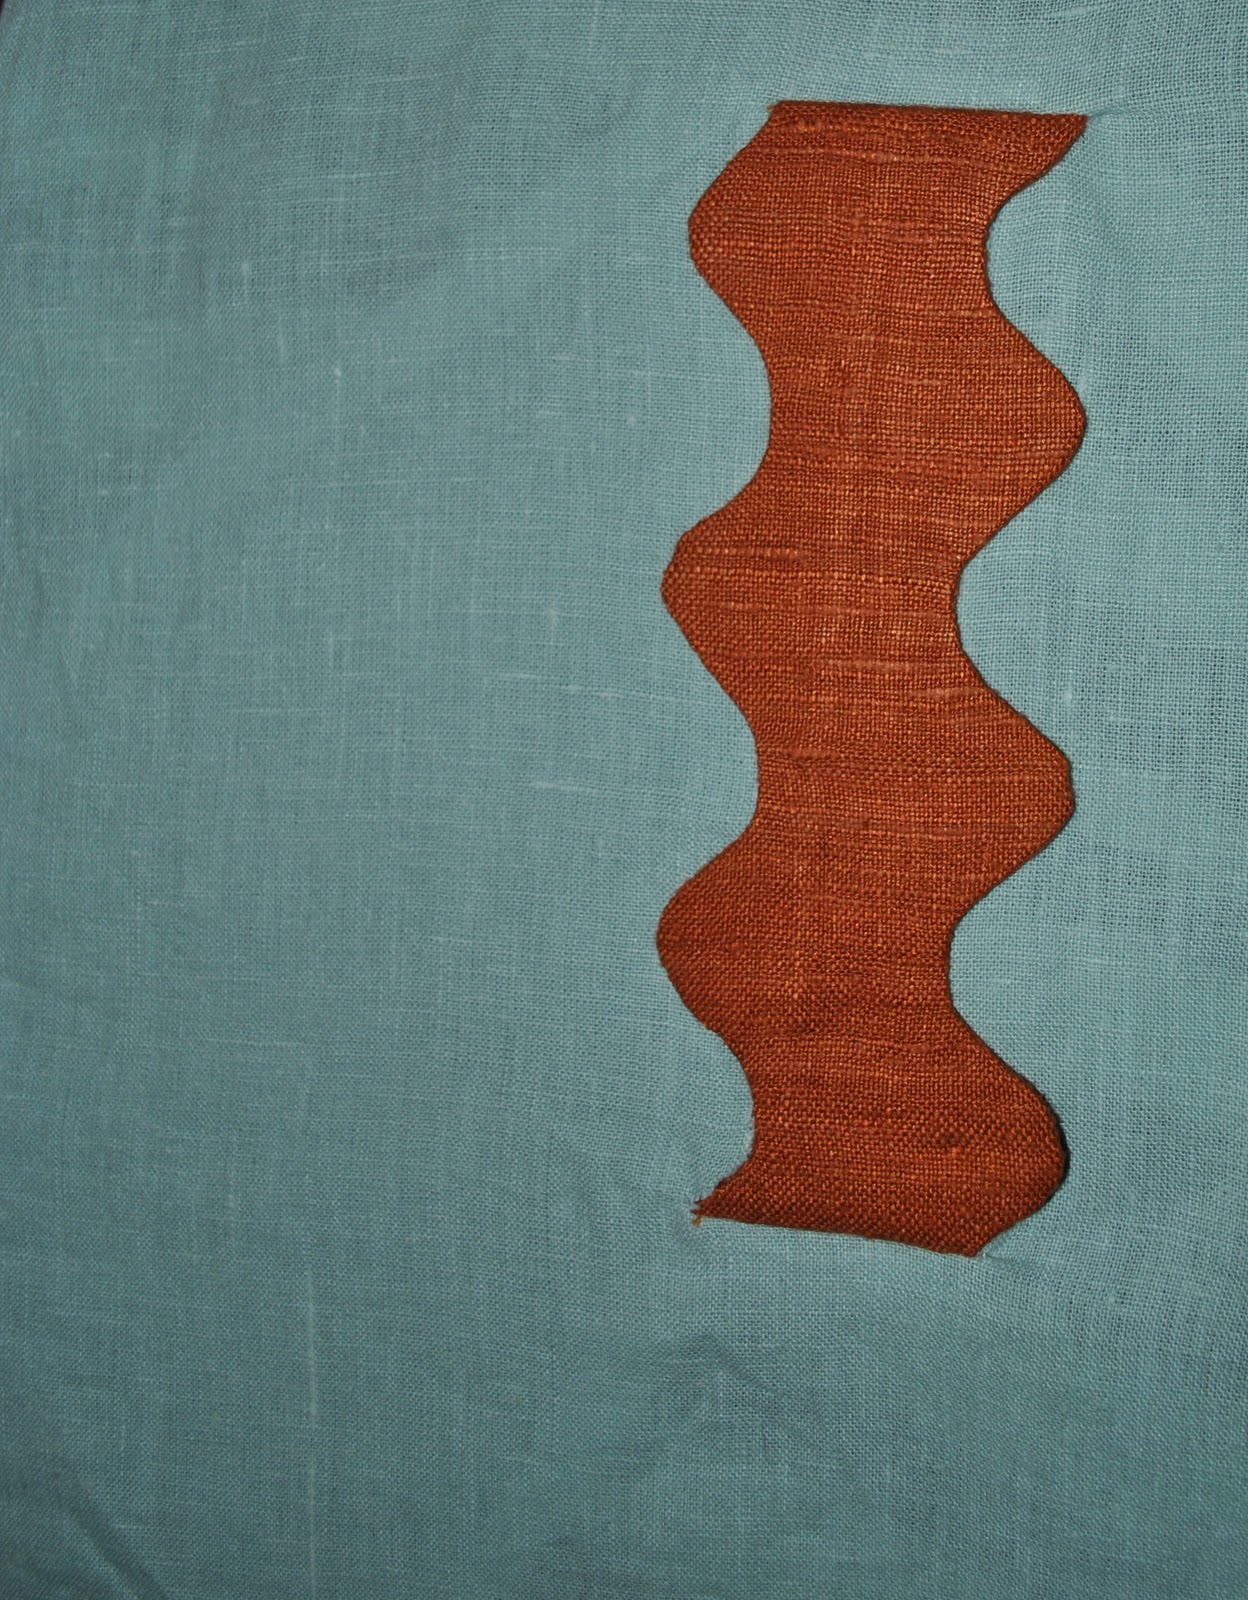
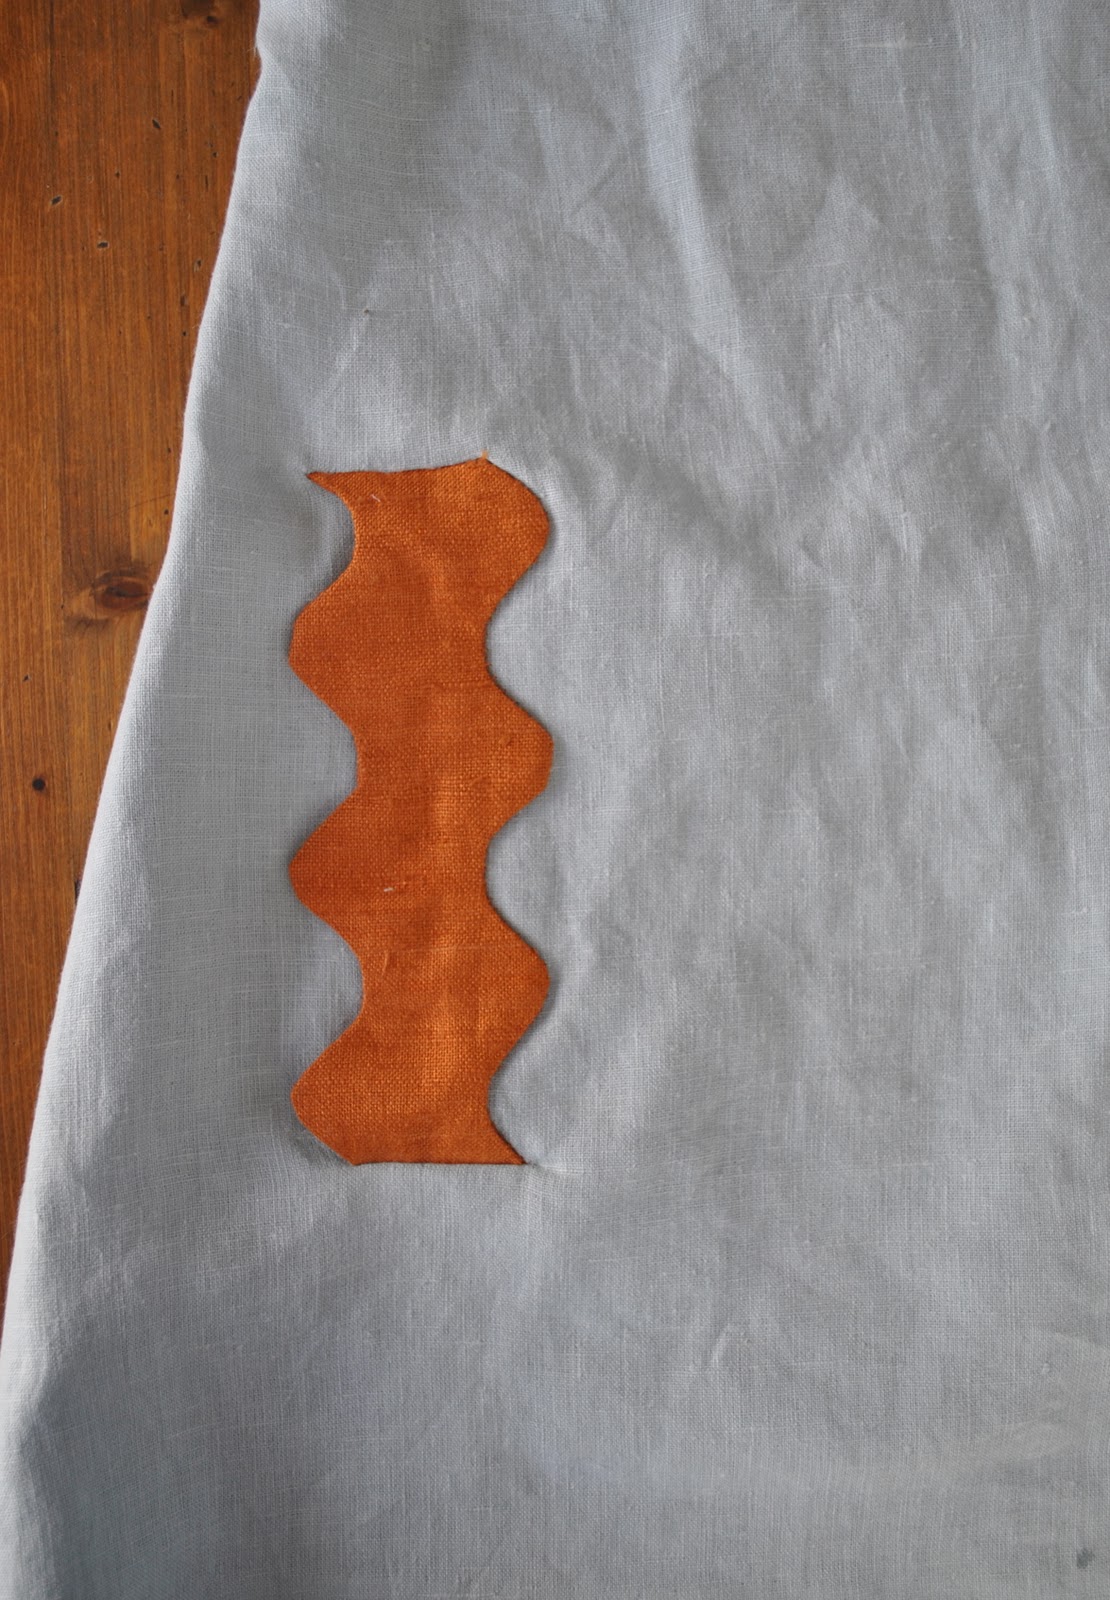
Draw the design onto the interfaced piece, do the second one as a mirror image.  Pin an interfaced piece to a non-interfaced piece, right sides together, and sew as slowly and as accurately as possible along your marked curves.

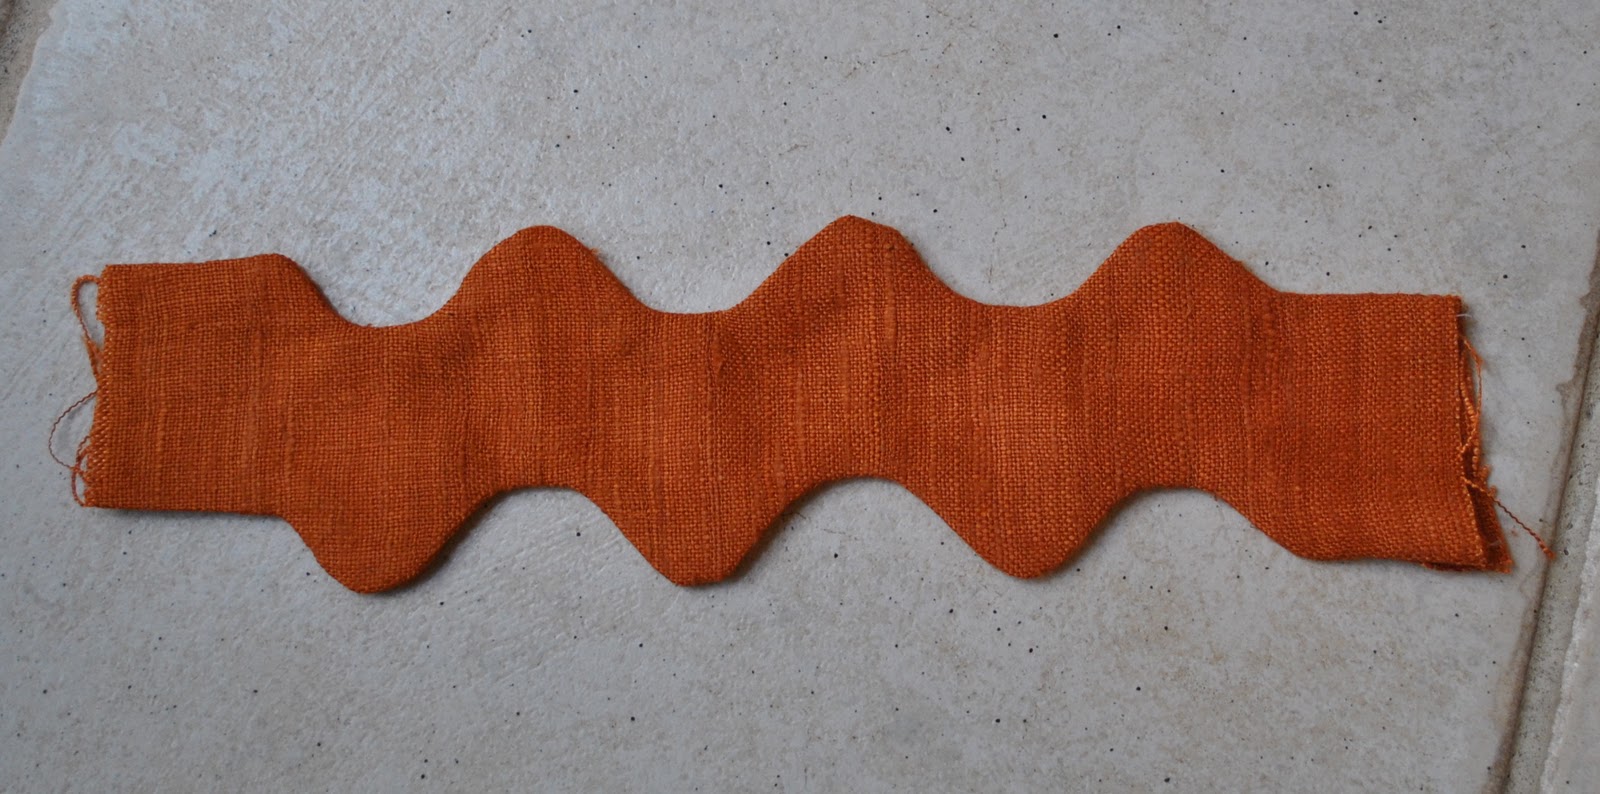
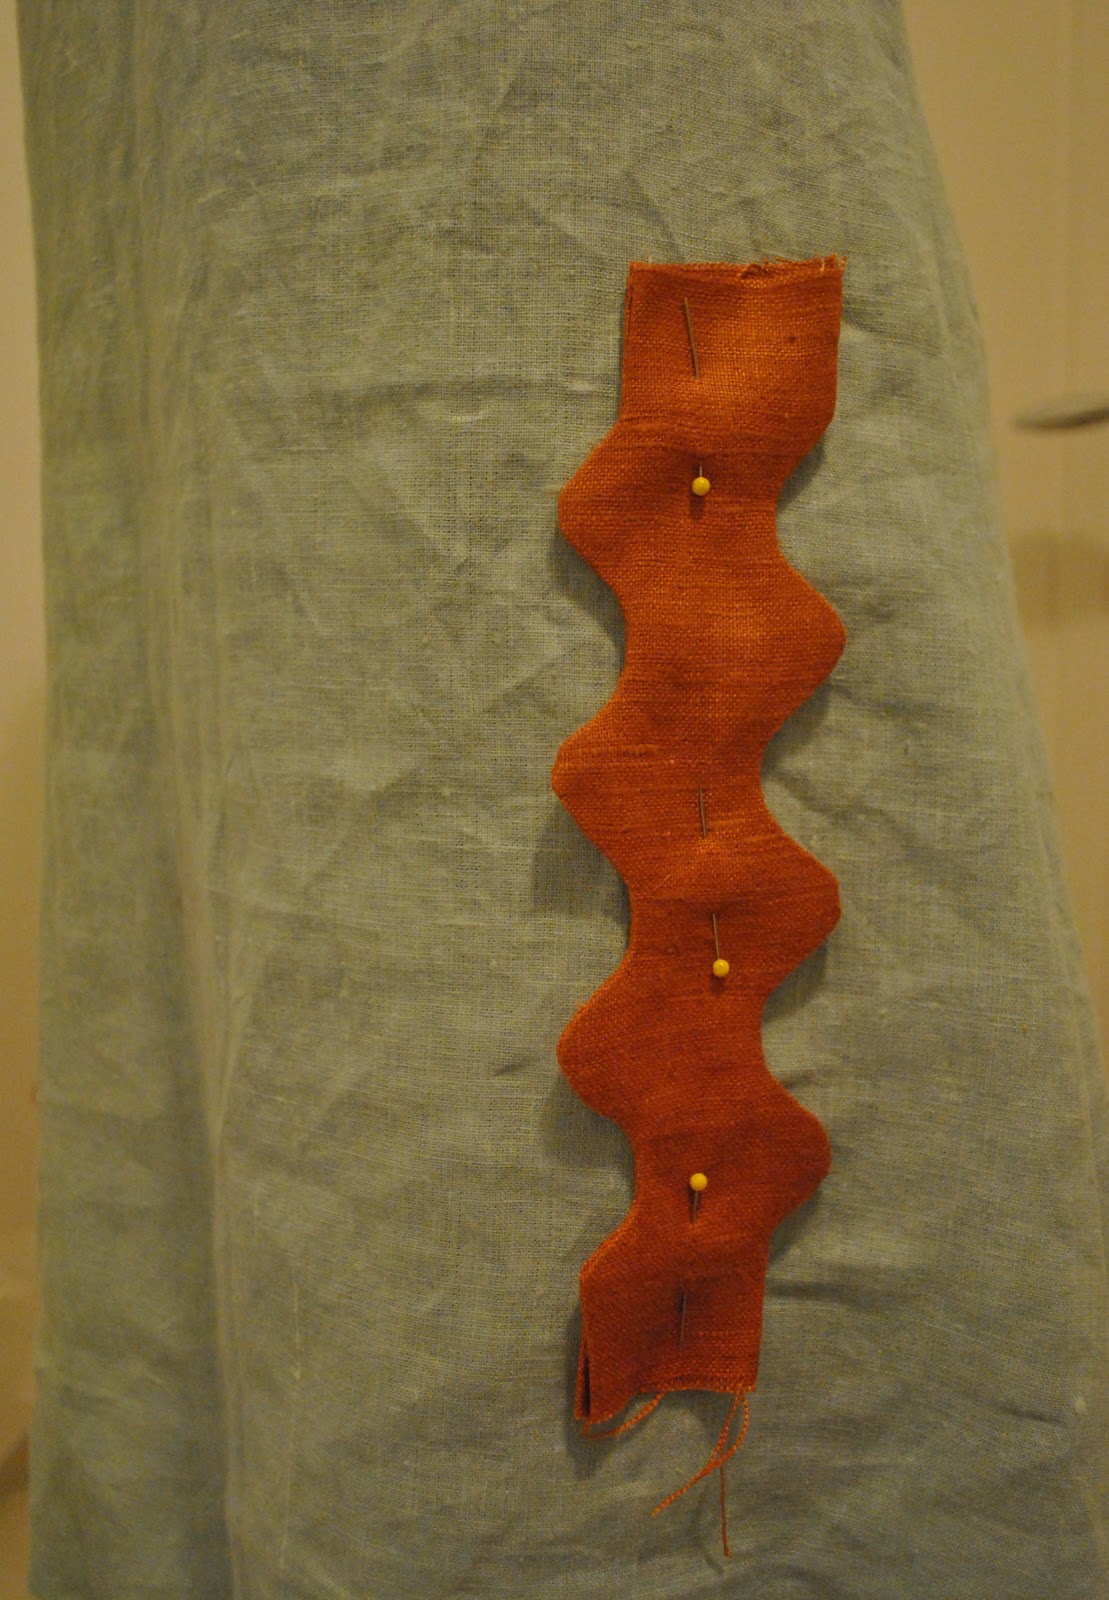
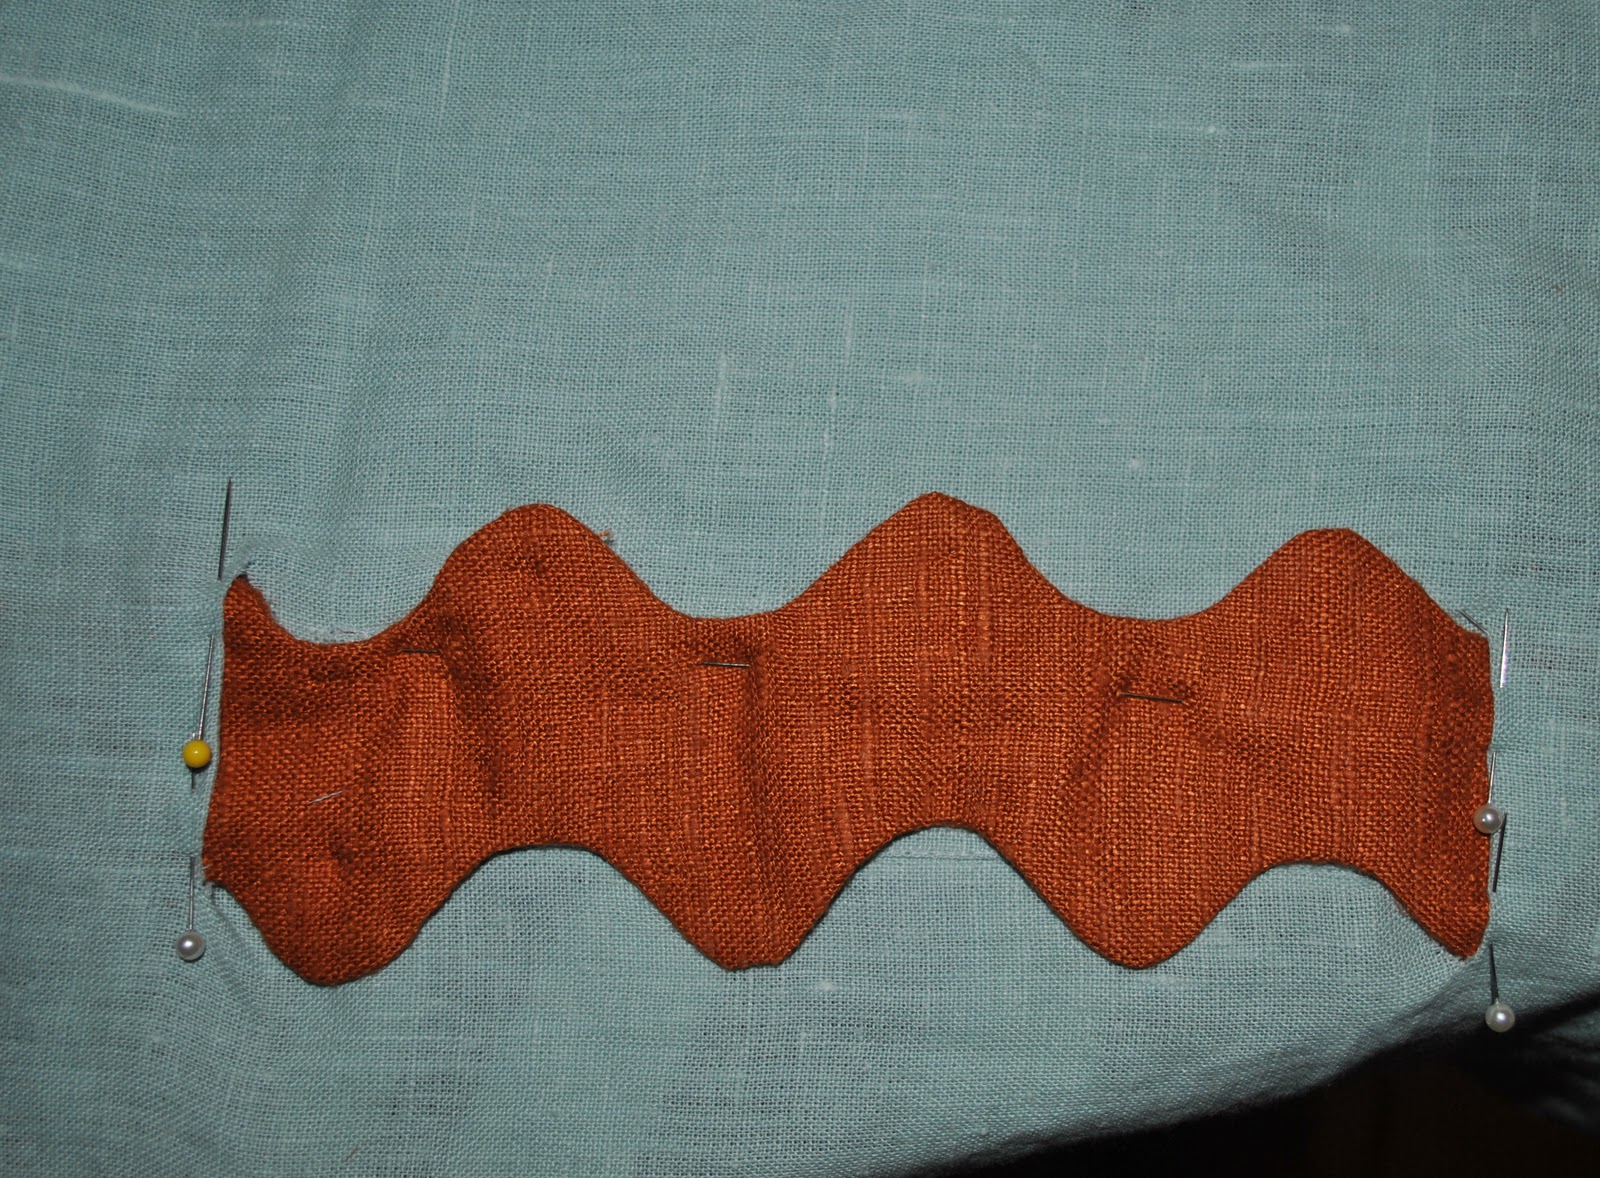
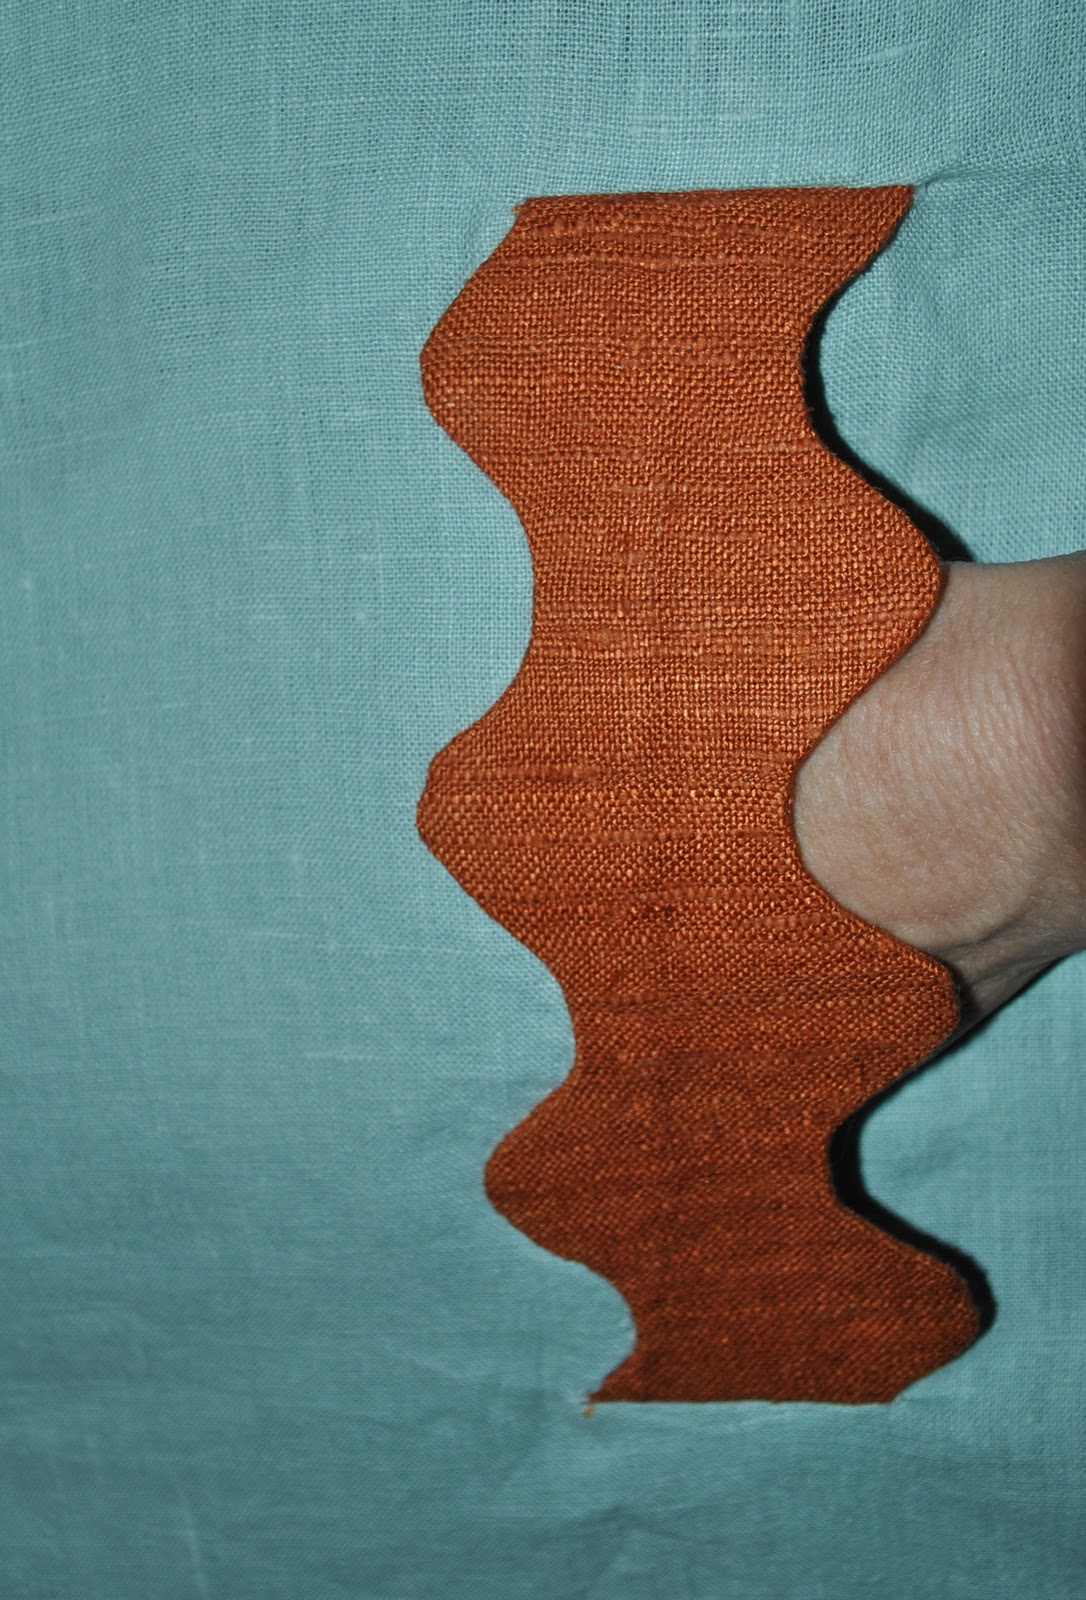
Trim and clip along the curved edges and turn right side out.  Press; with your finger inside to ease out those curves to sit smooth and even.  Voila; welts!  Well; potential welts… hehe, hang in there  🙂

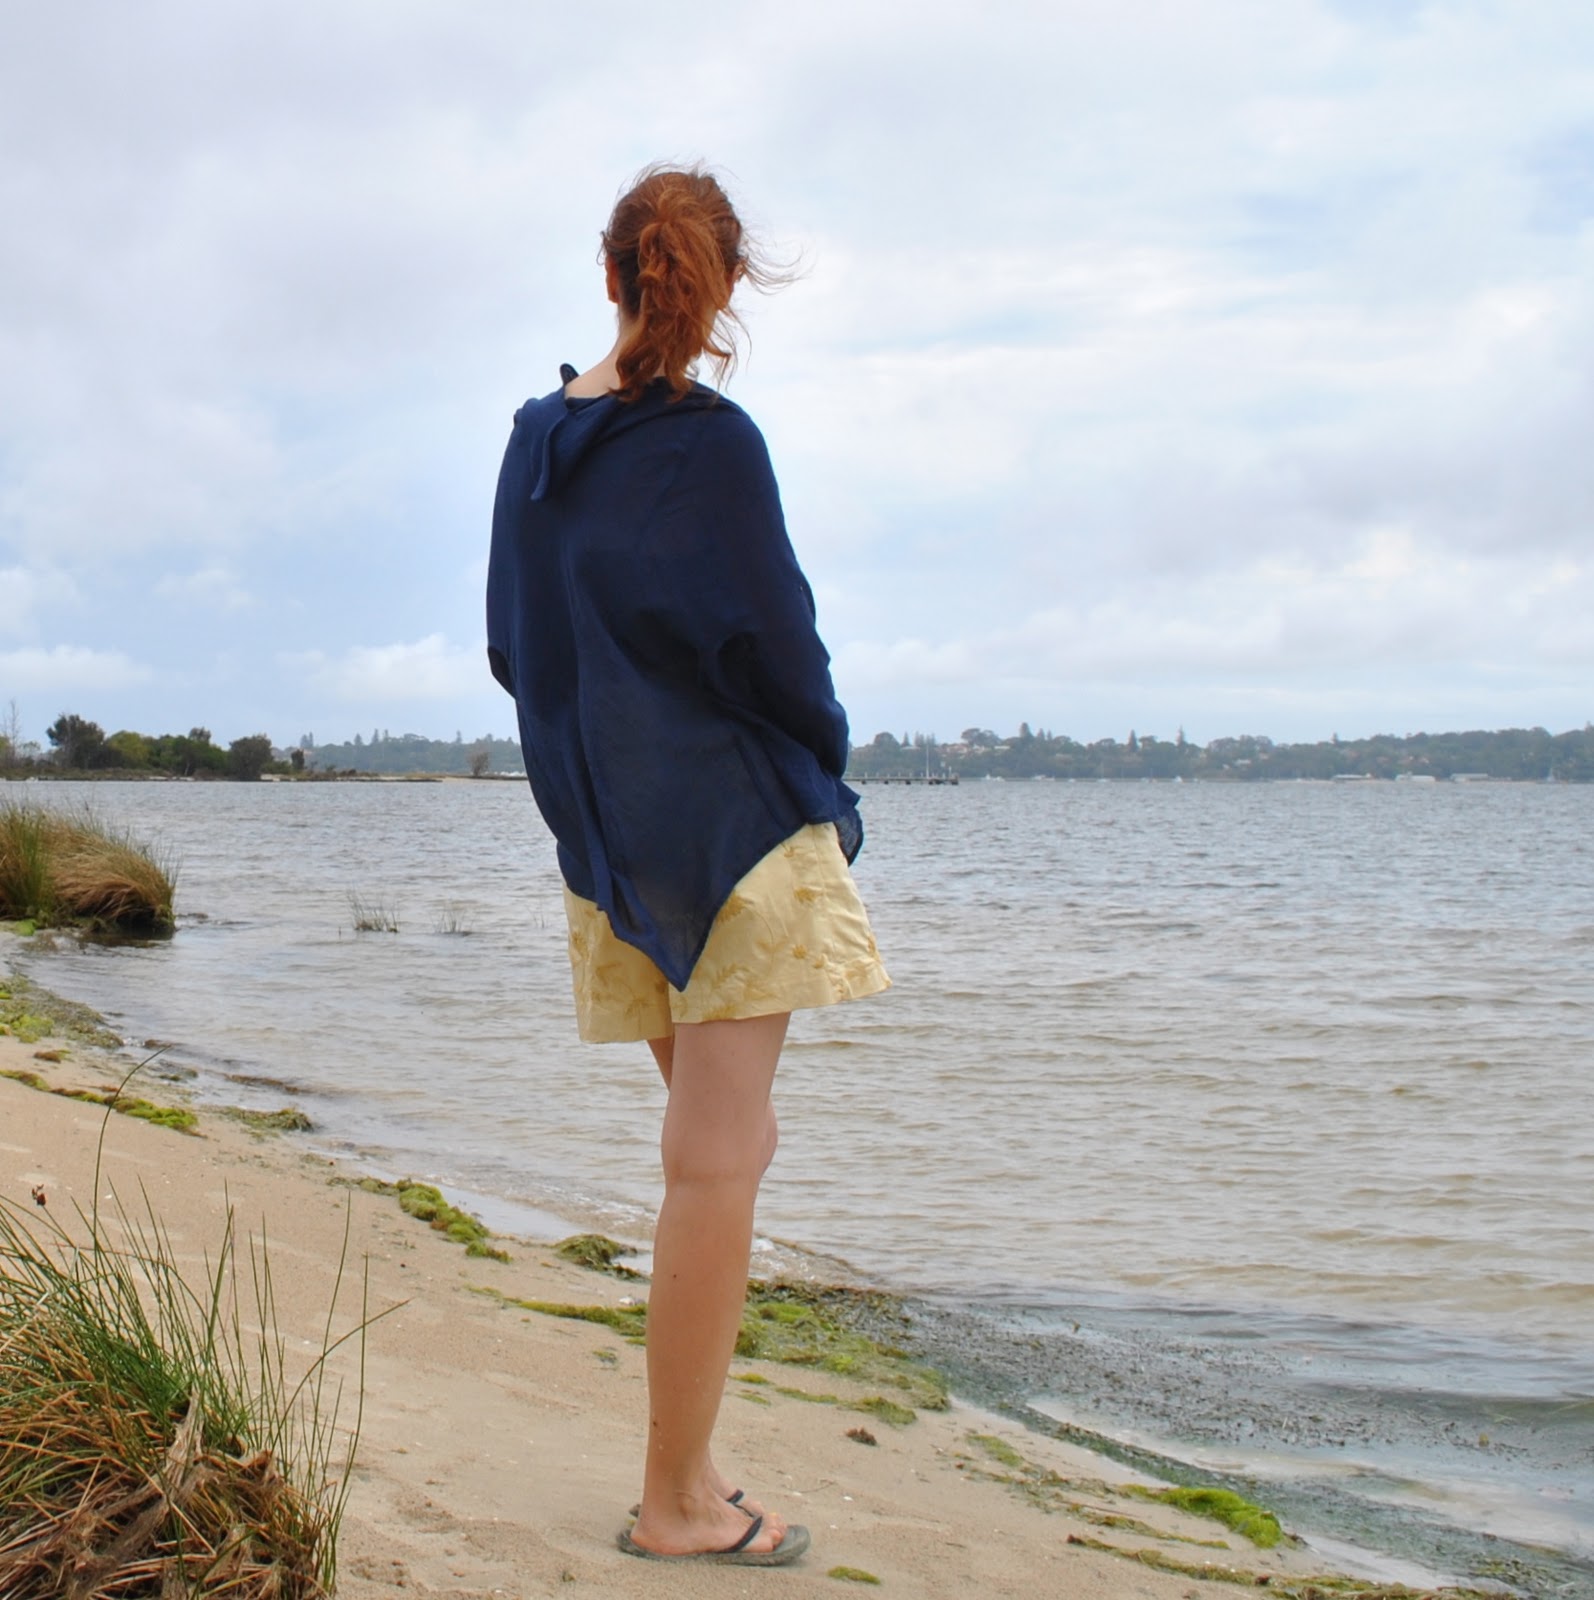
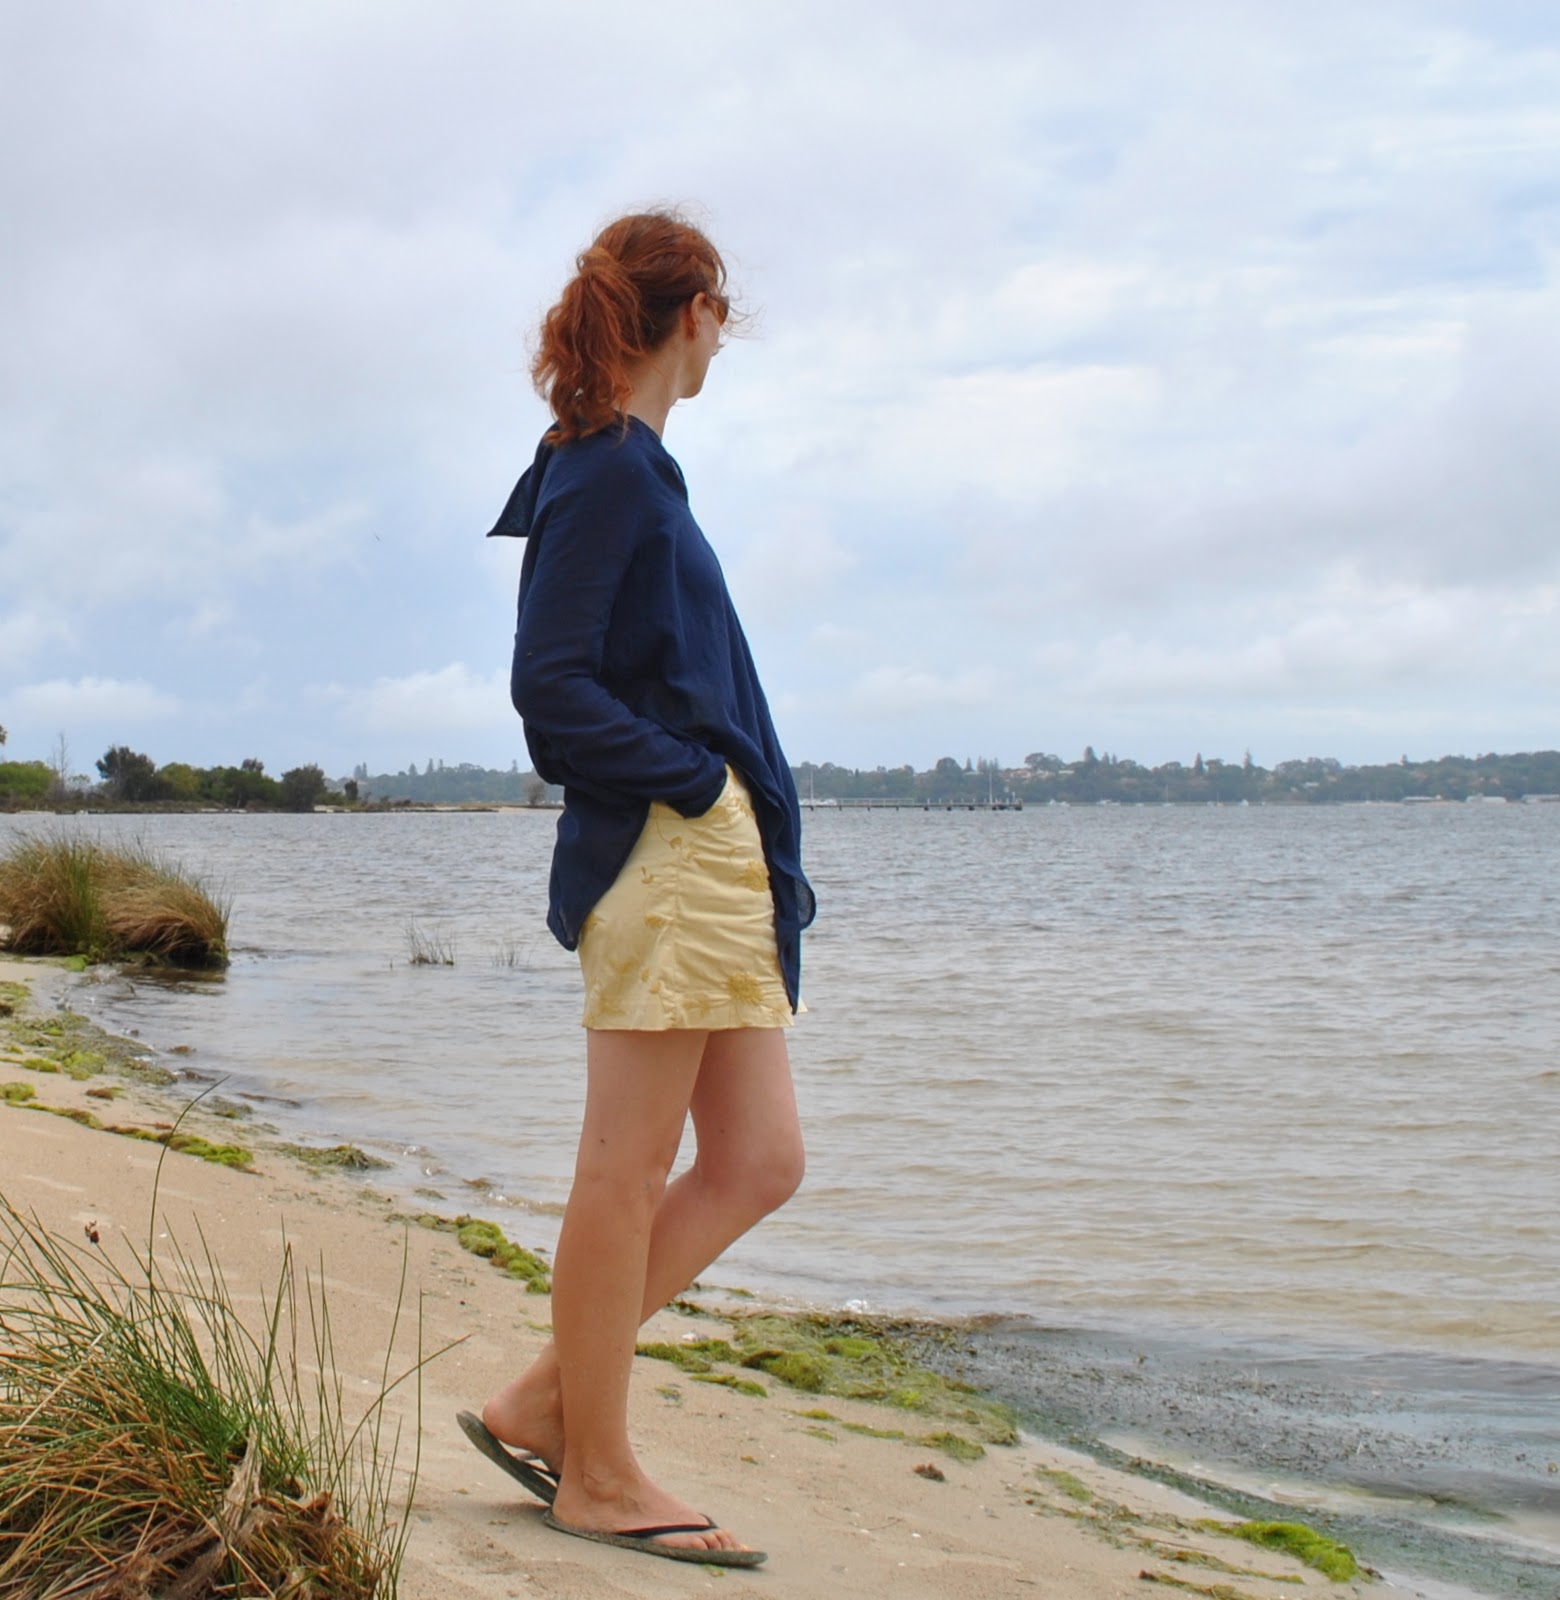
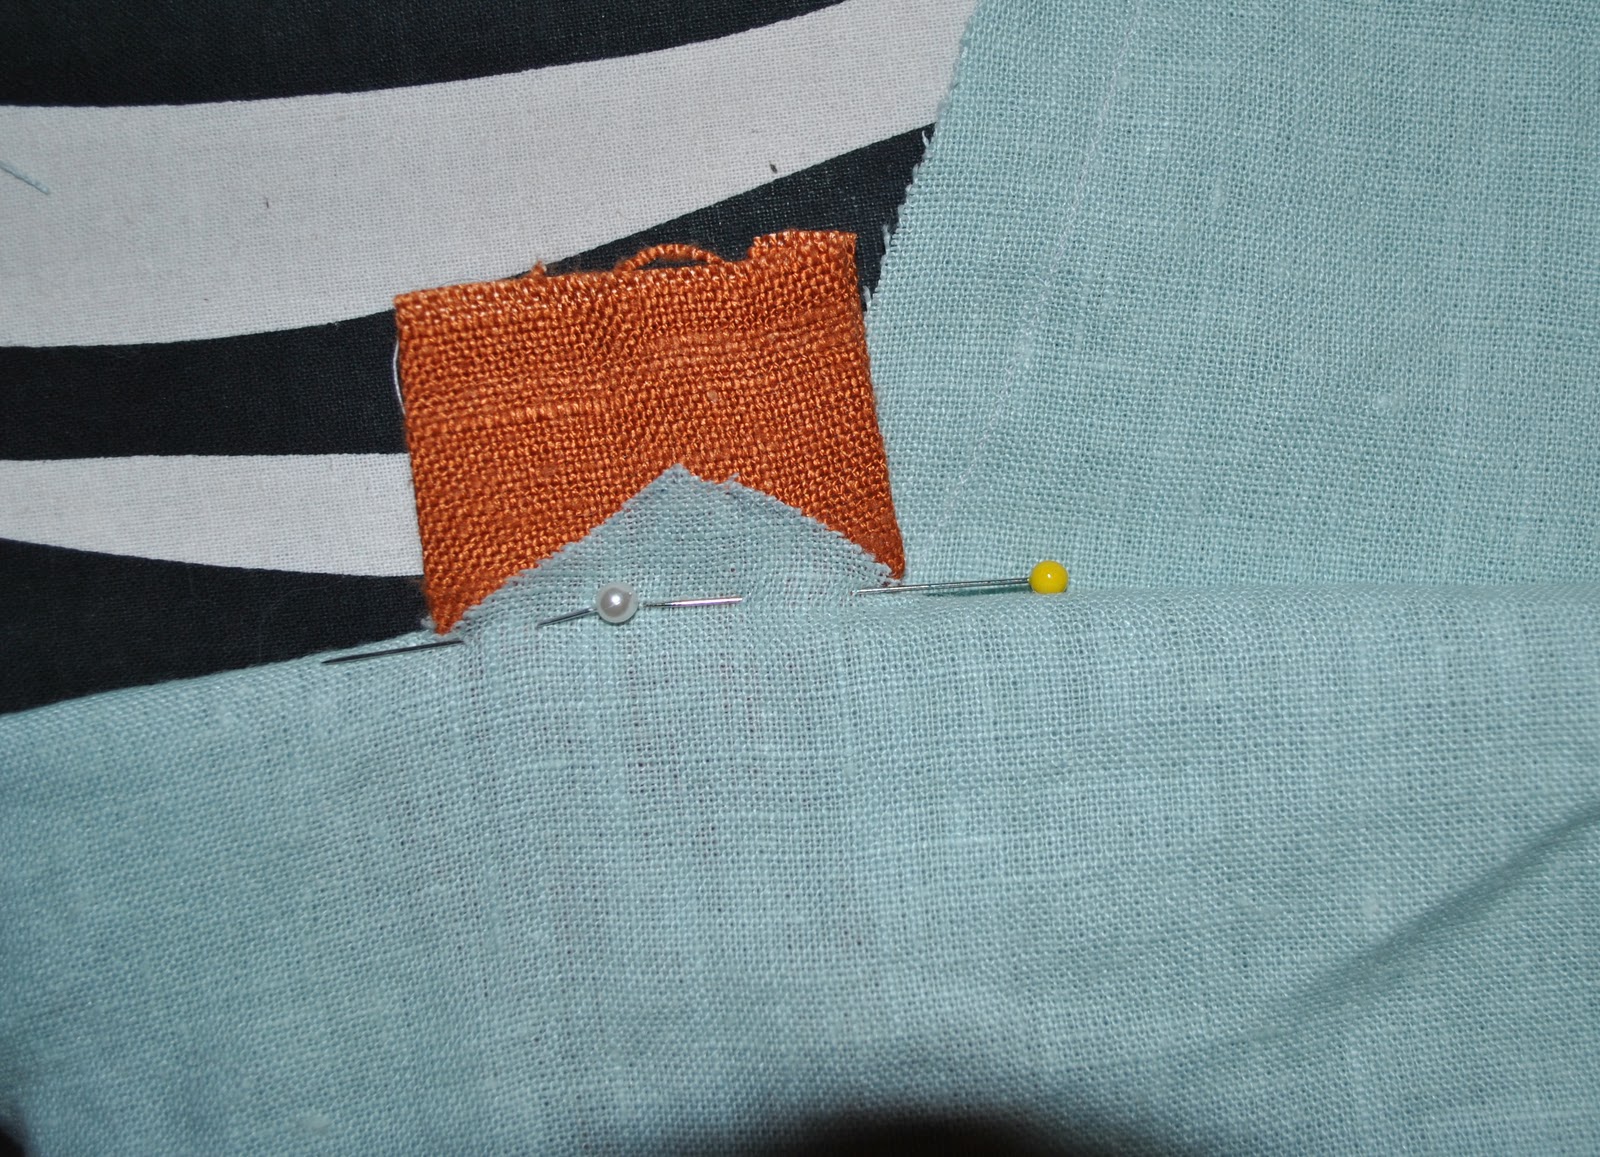
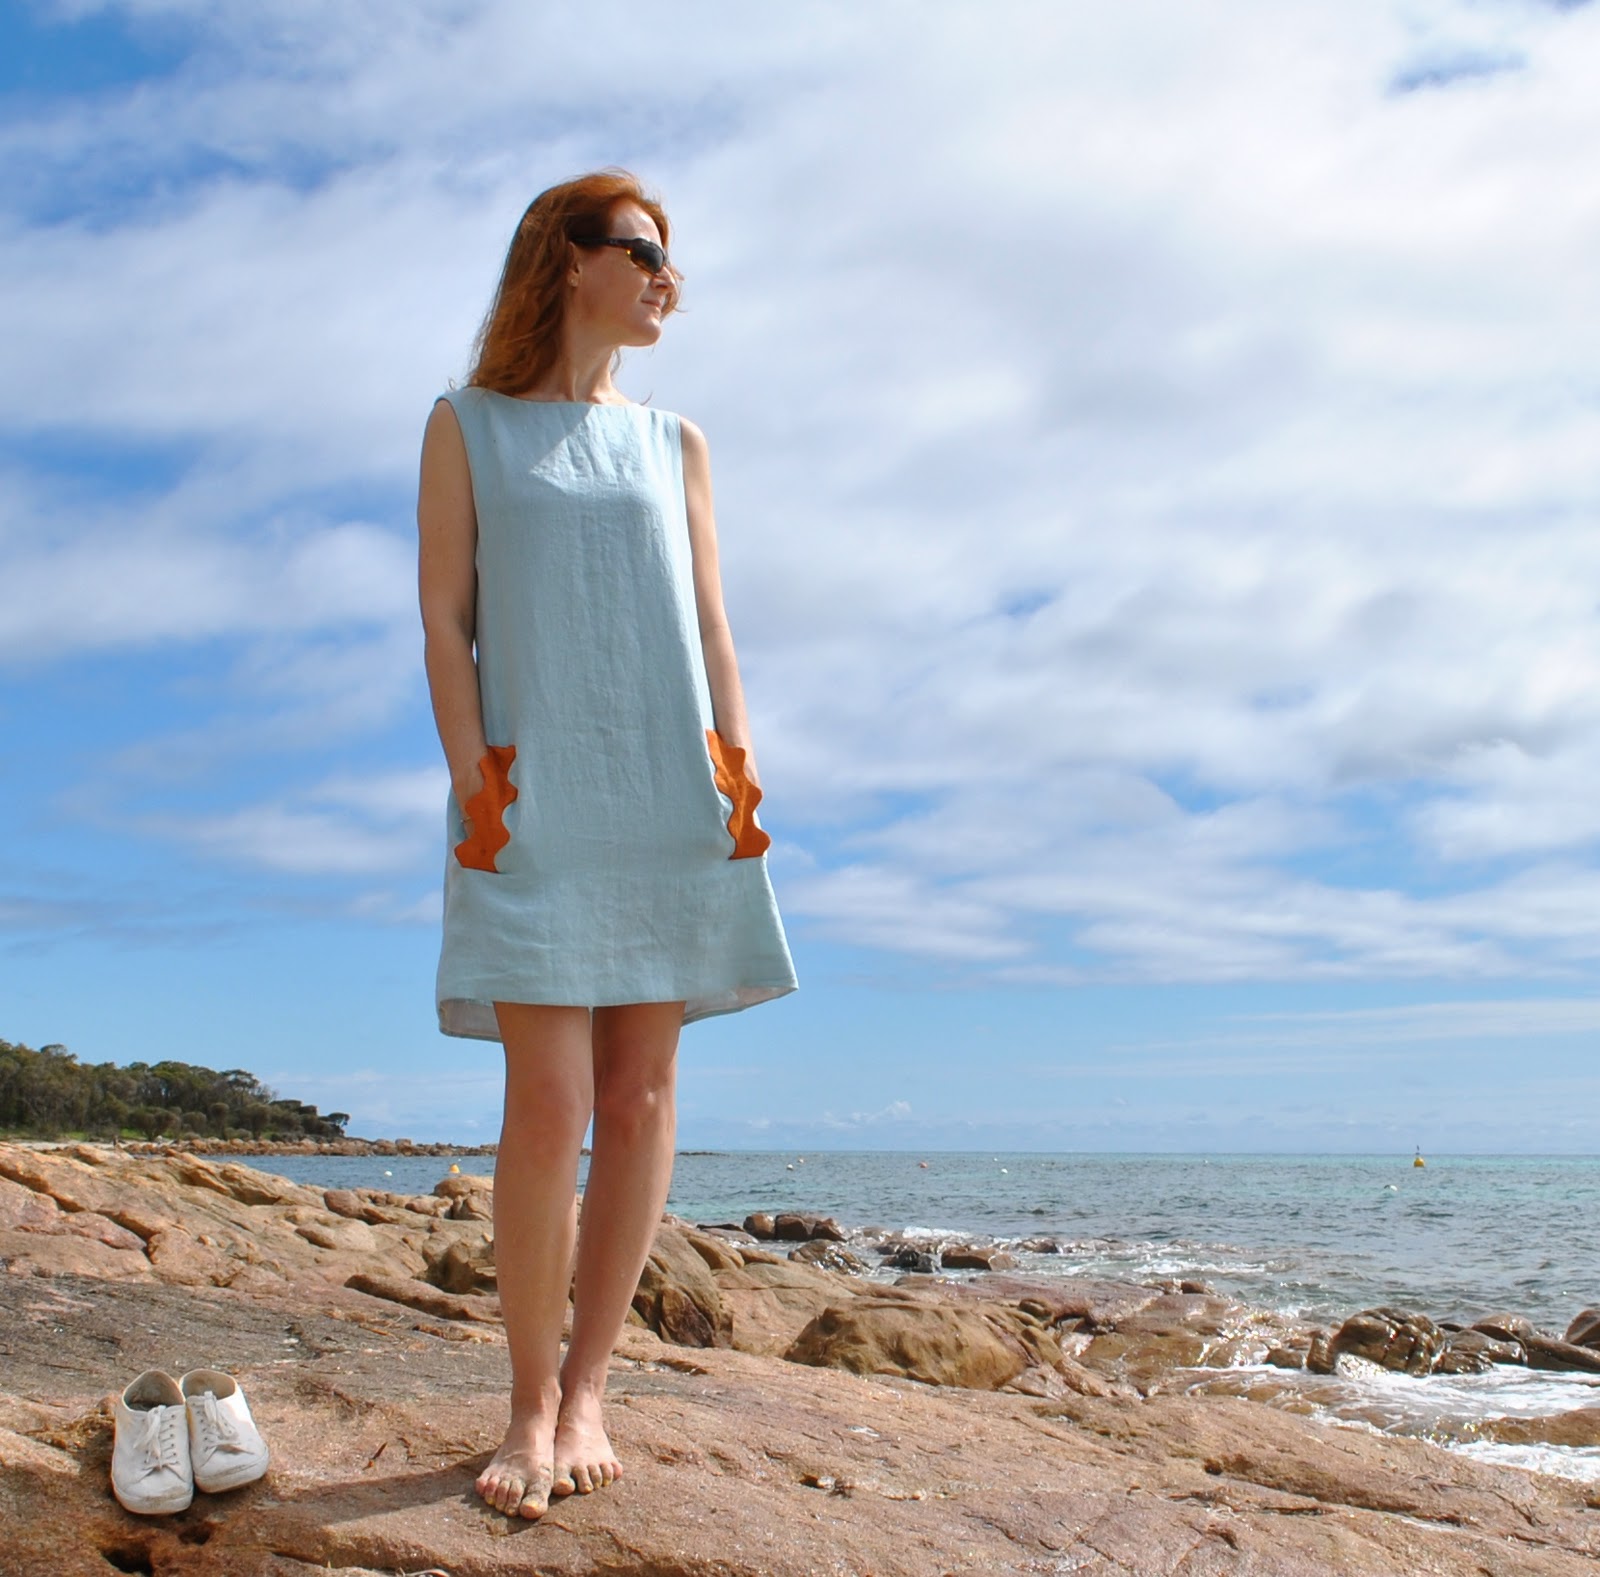
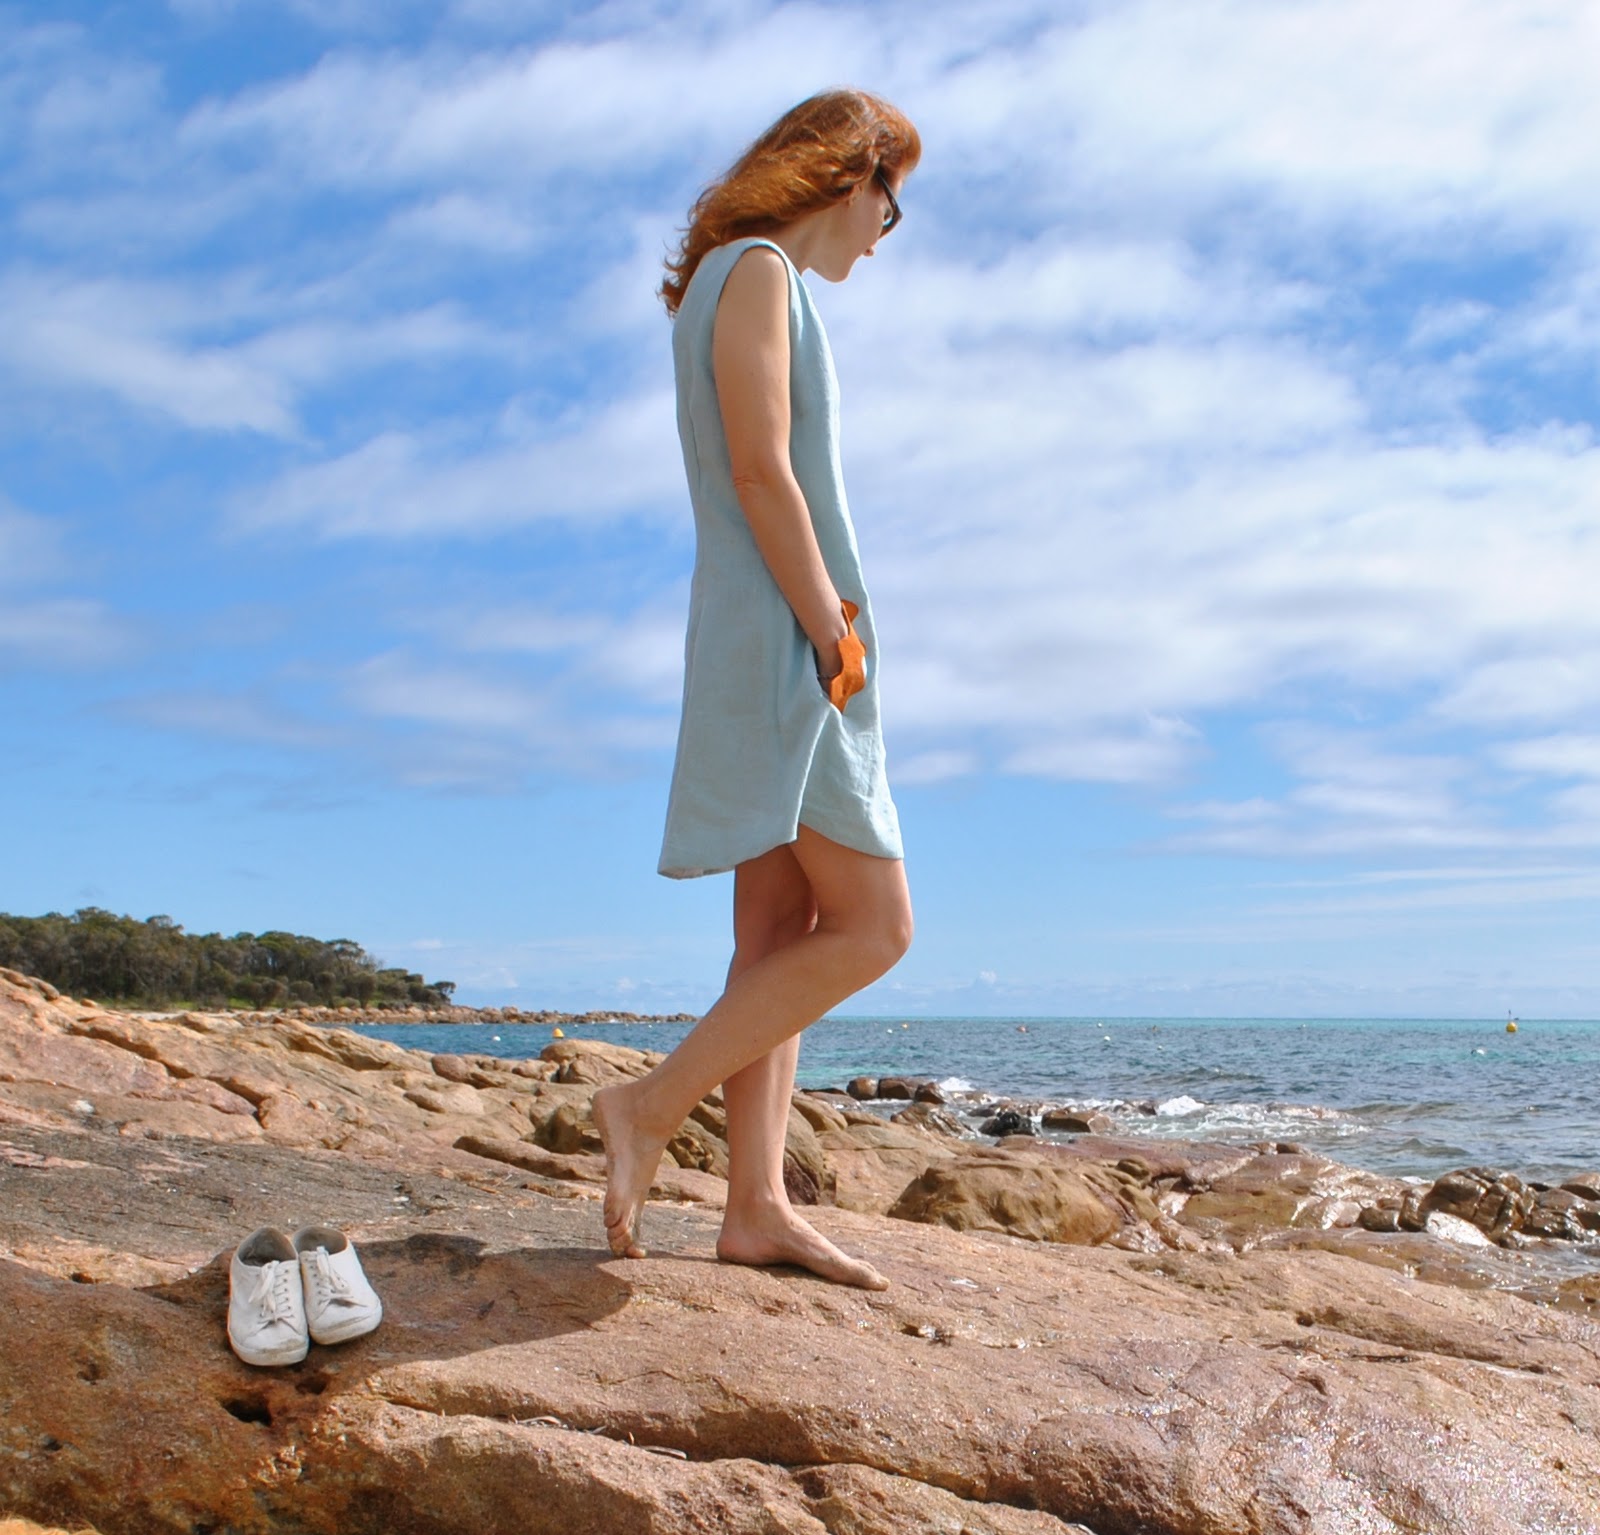
Now I tried on my dress and pinned the welts onto the outside of my dress where I wanted them to sit; so they were in a comfortable position for my hands.  This is an individual thing… for me it is at about hip-bone height, but it is also a toss-up as to where you want the welts to sit aesthetically, to be in a visually good spot on the dress.  I find a comfortable spot for my hands is quite wide-set, but I still wanted for both the welts to be quite visible at the same time from the front view of the dress…

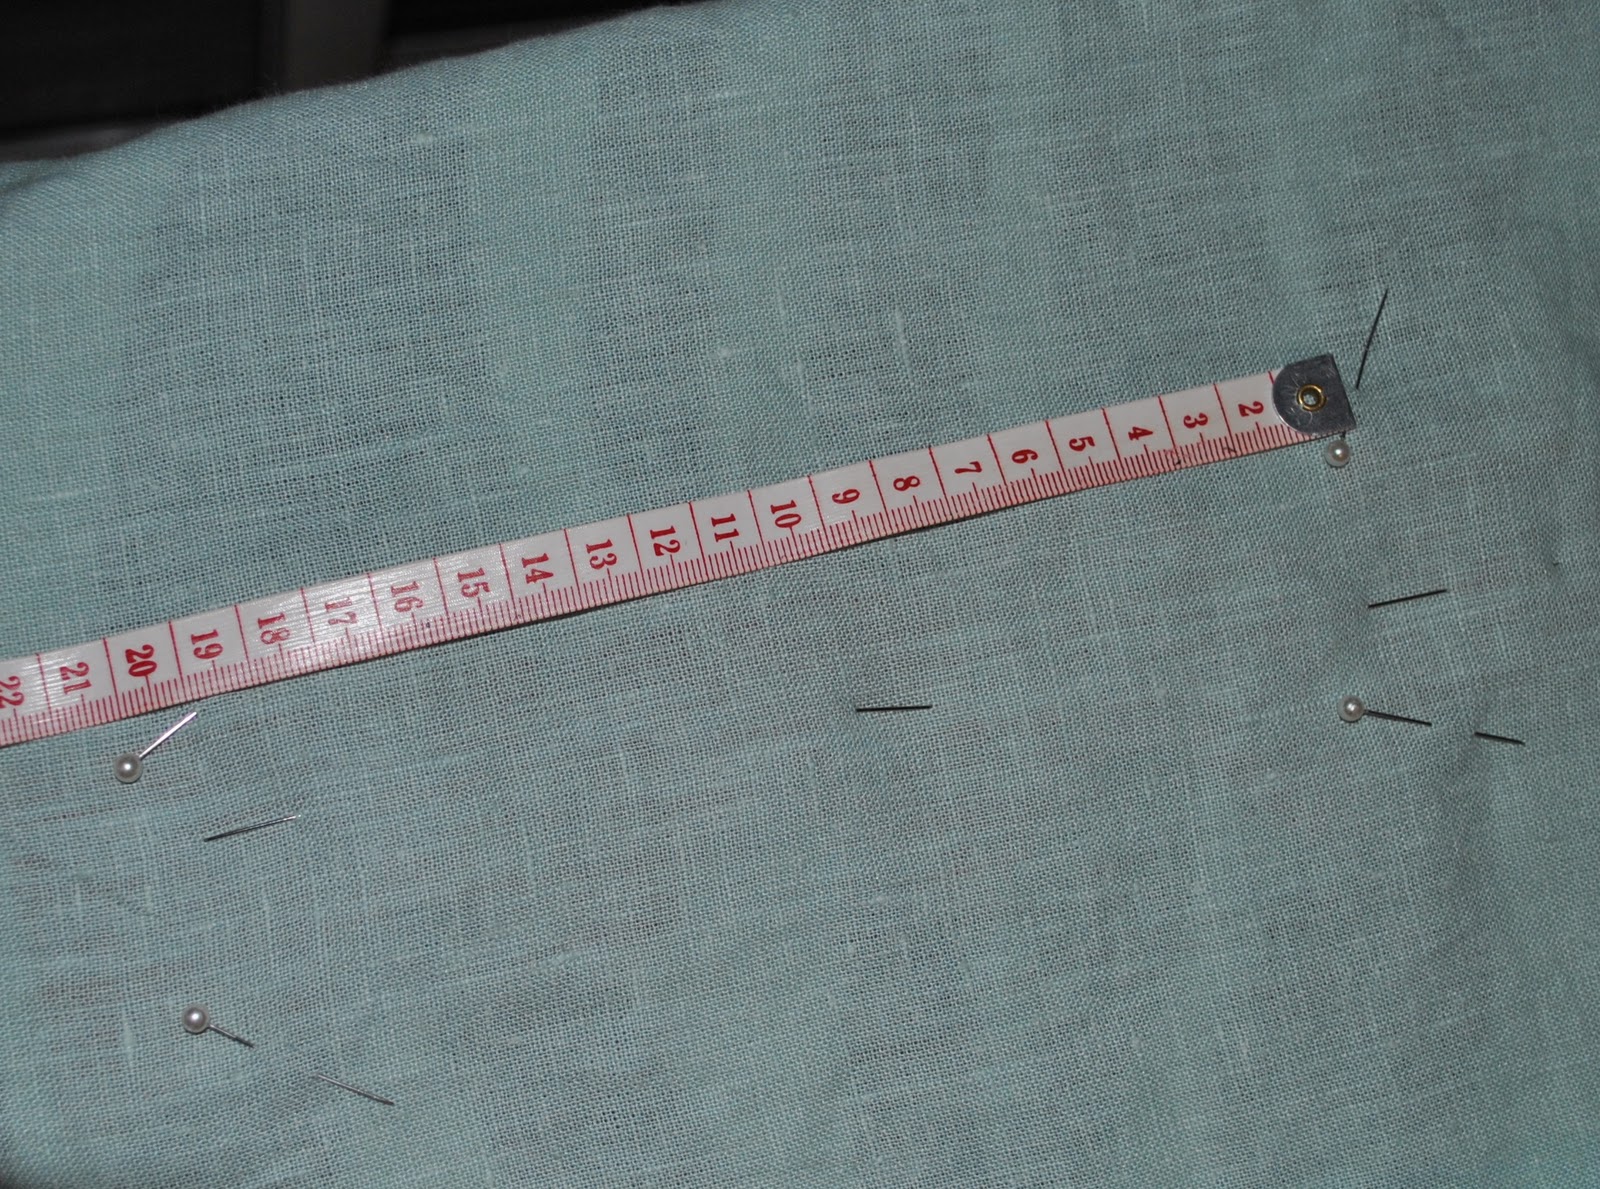
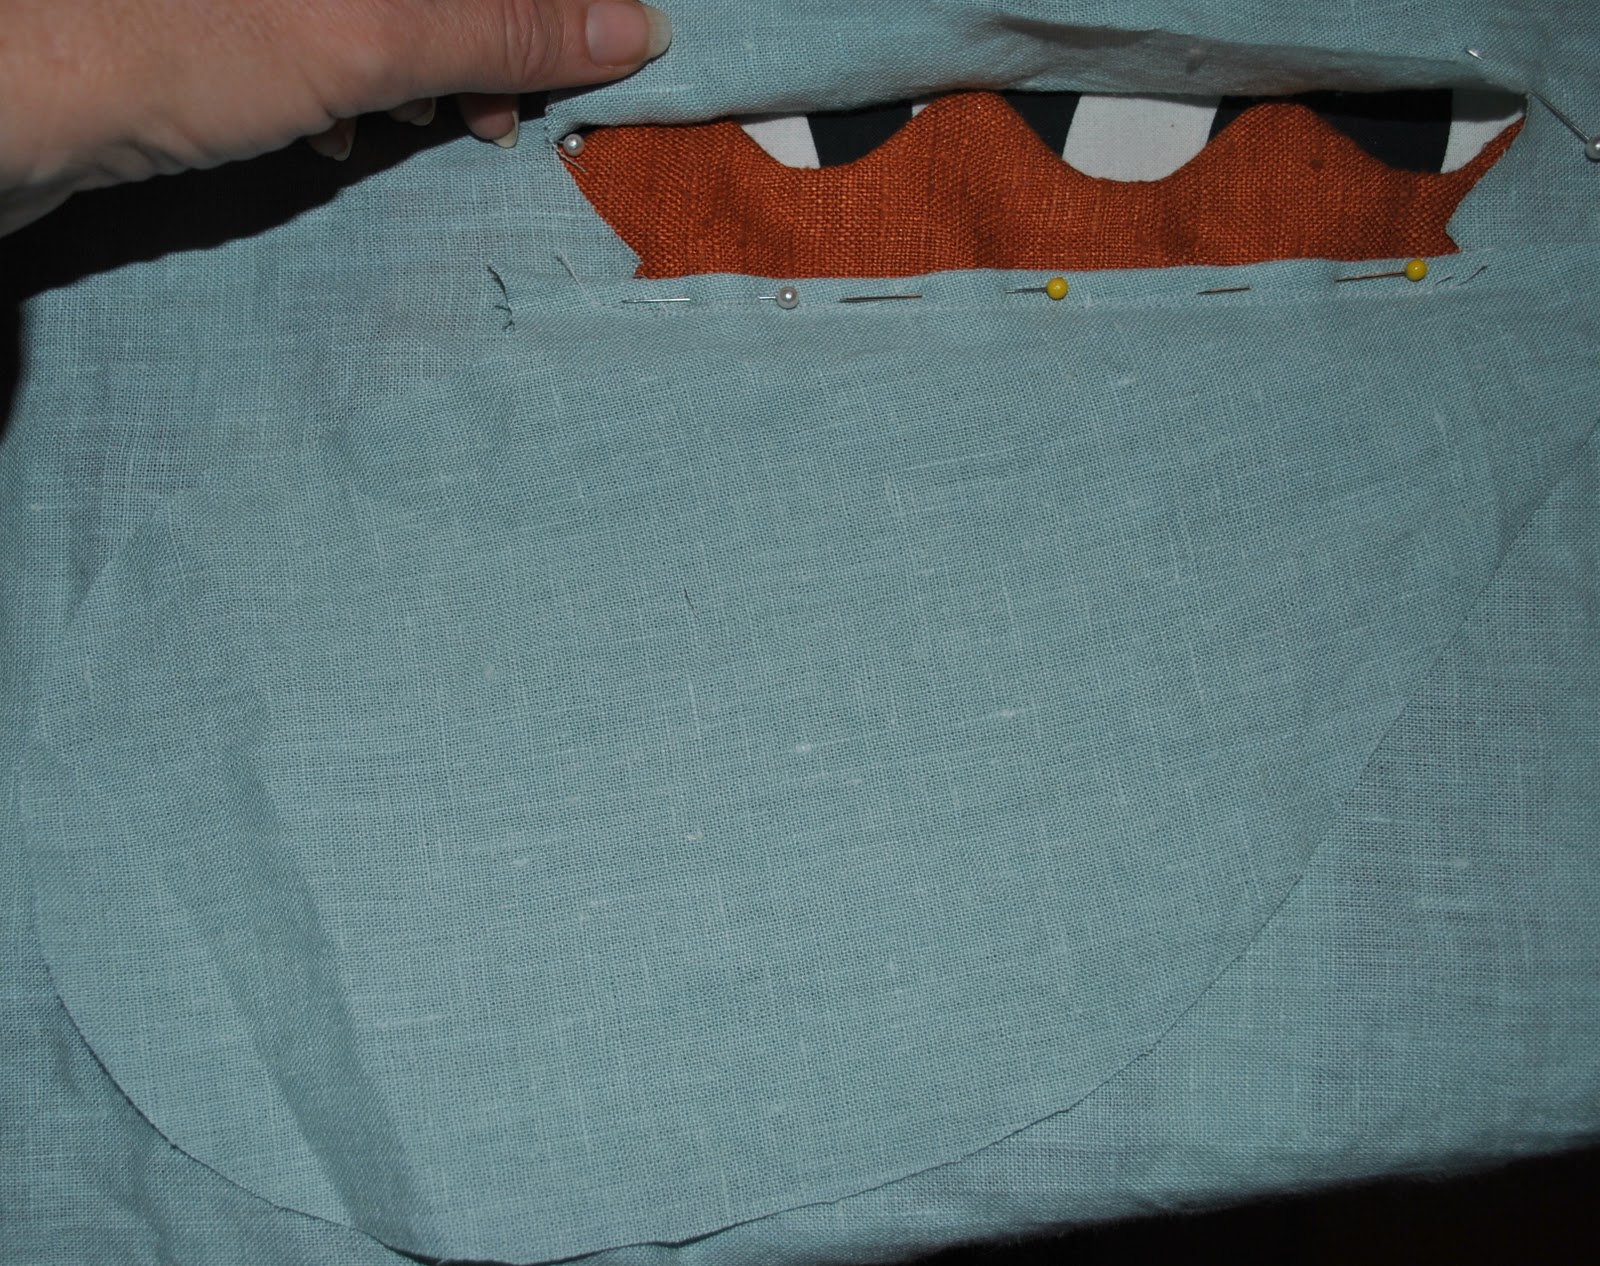
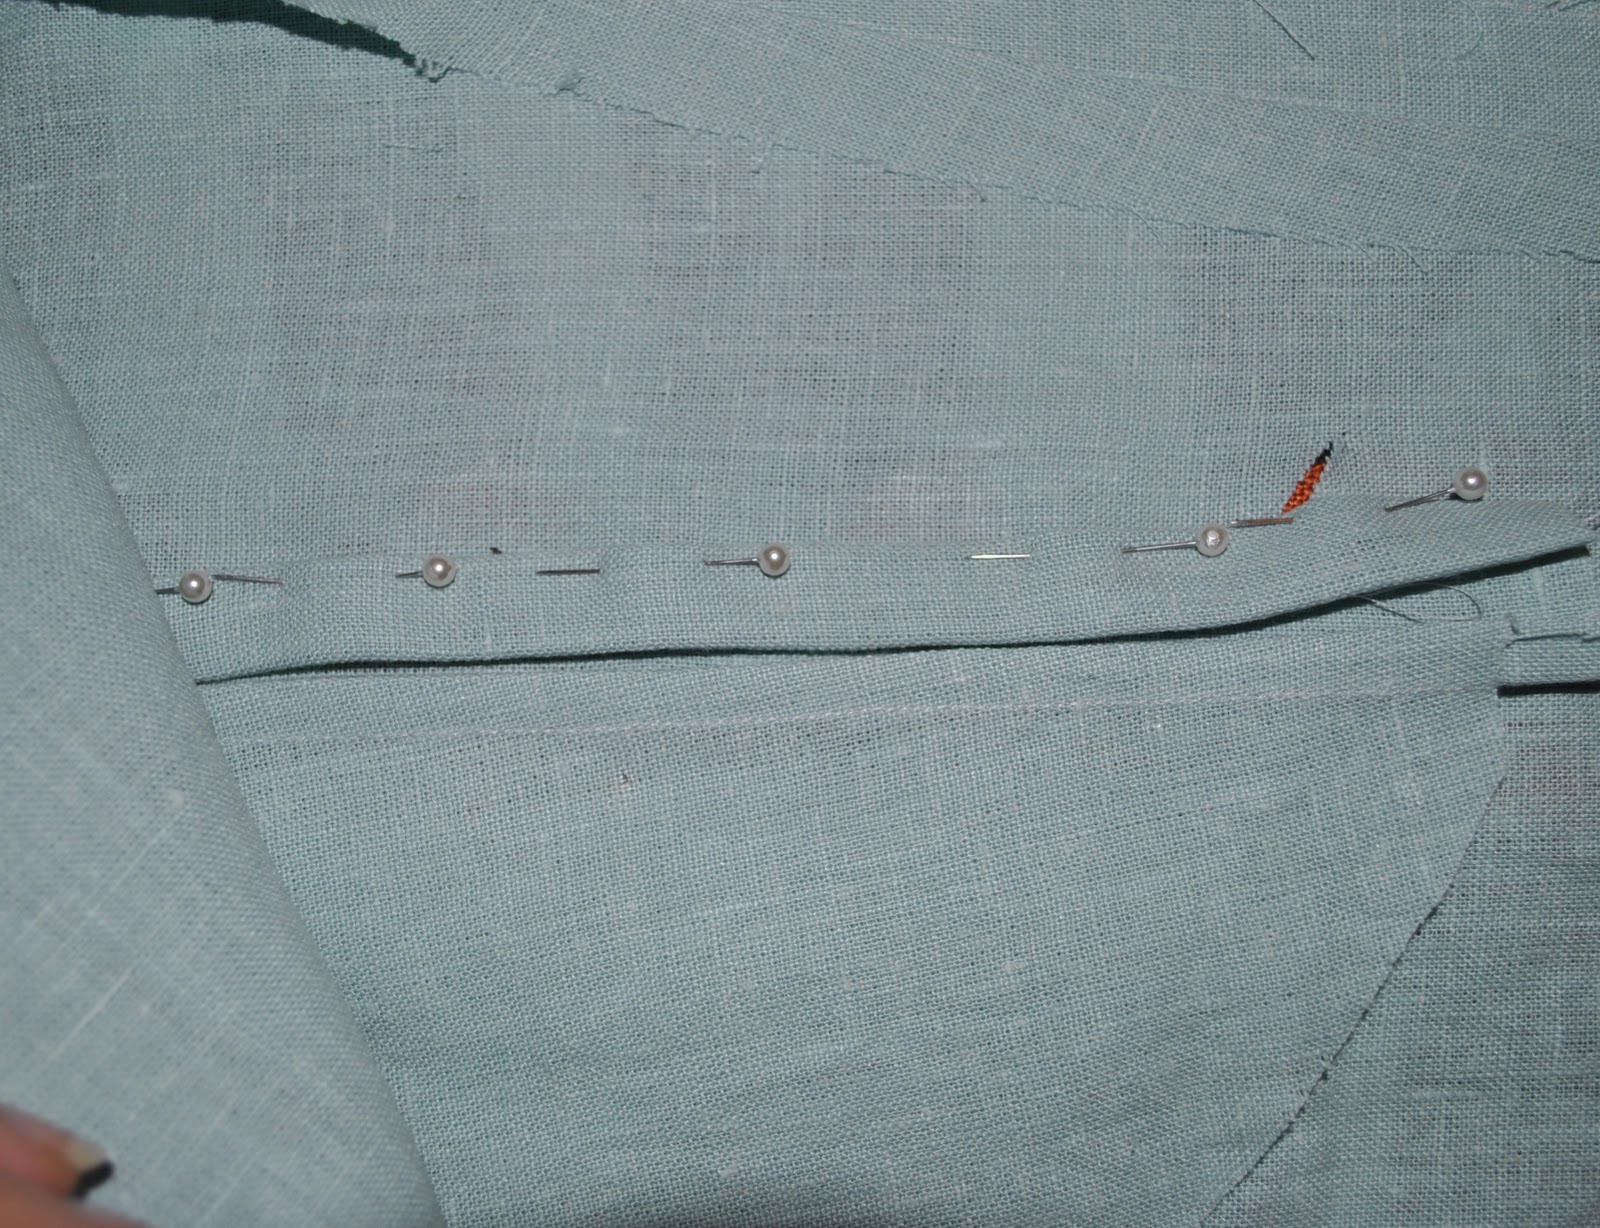
Mark the corner points of the welt design onto your dress with pins, and check to make sure that your two marked rectangles (which are your welt positions) have the exact same dimensions as each other, and as your paper piece… also that your two welt positions are exactly equal distance from the side seams, have the same “angle” and are exactly level to each other on your dress (sorry if I am stating the obvious, but it is best to say it than not…they are a pretty stand-out feature and wouldn’t it be awful if after all your hard work one was “off’!)  I reckon it is also a good idea to double check on the inside, where it is easier to tell inaccuracies since the visual distraction of the actual welt is not there.

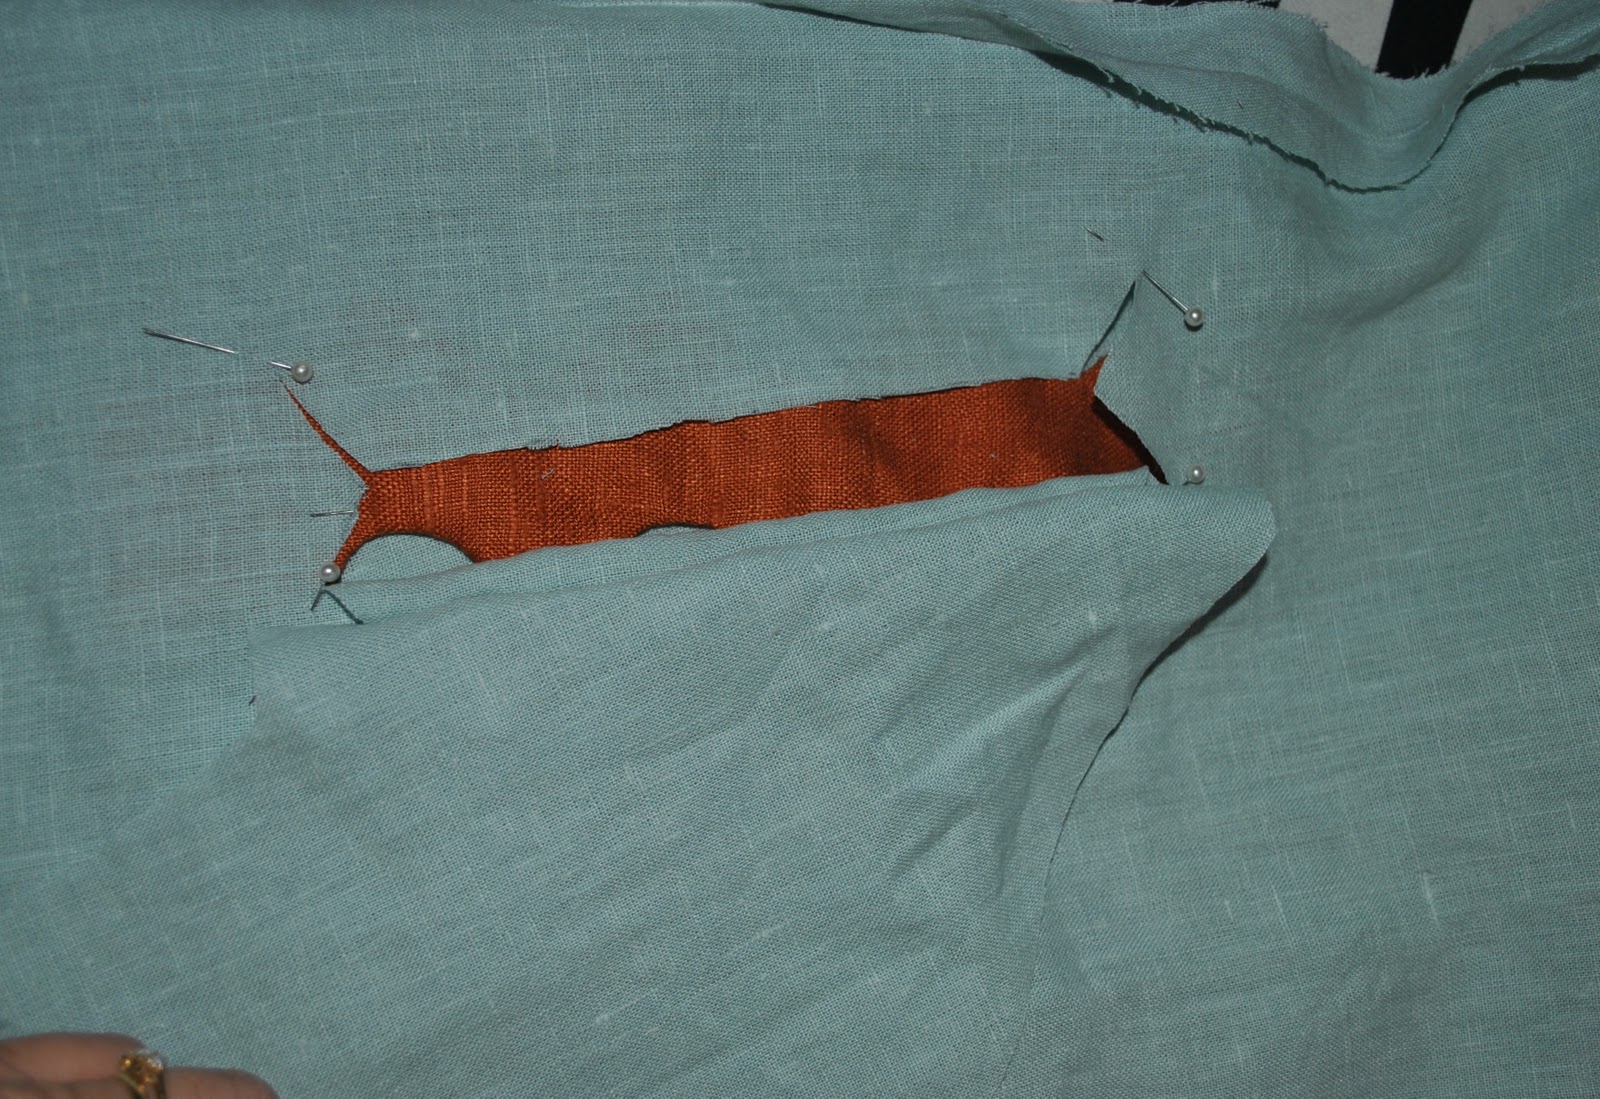
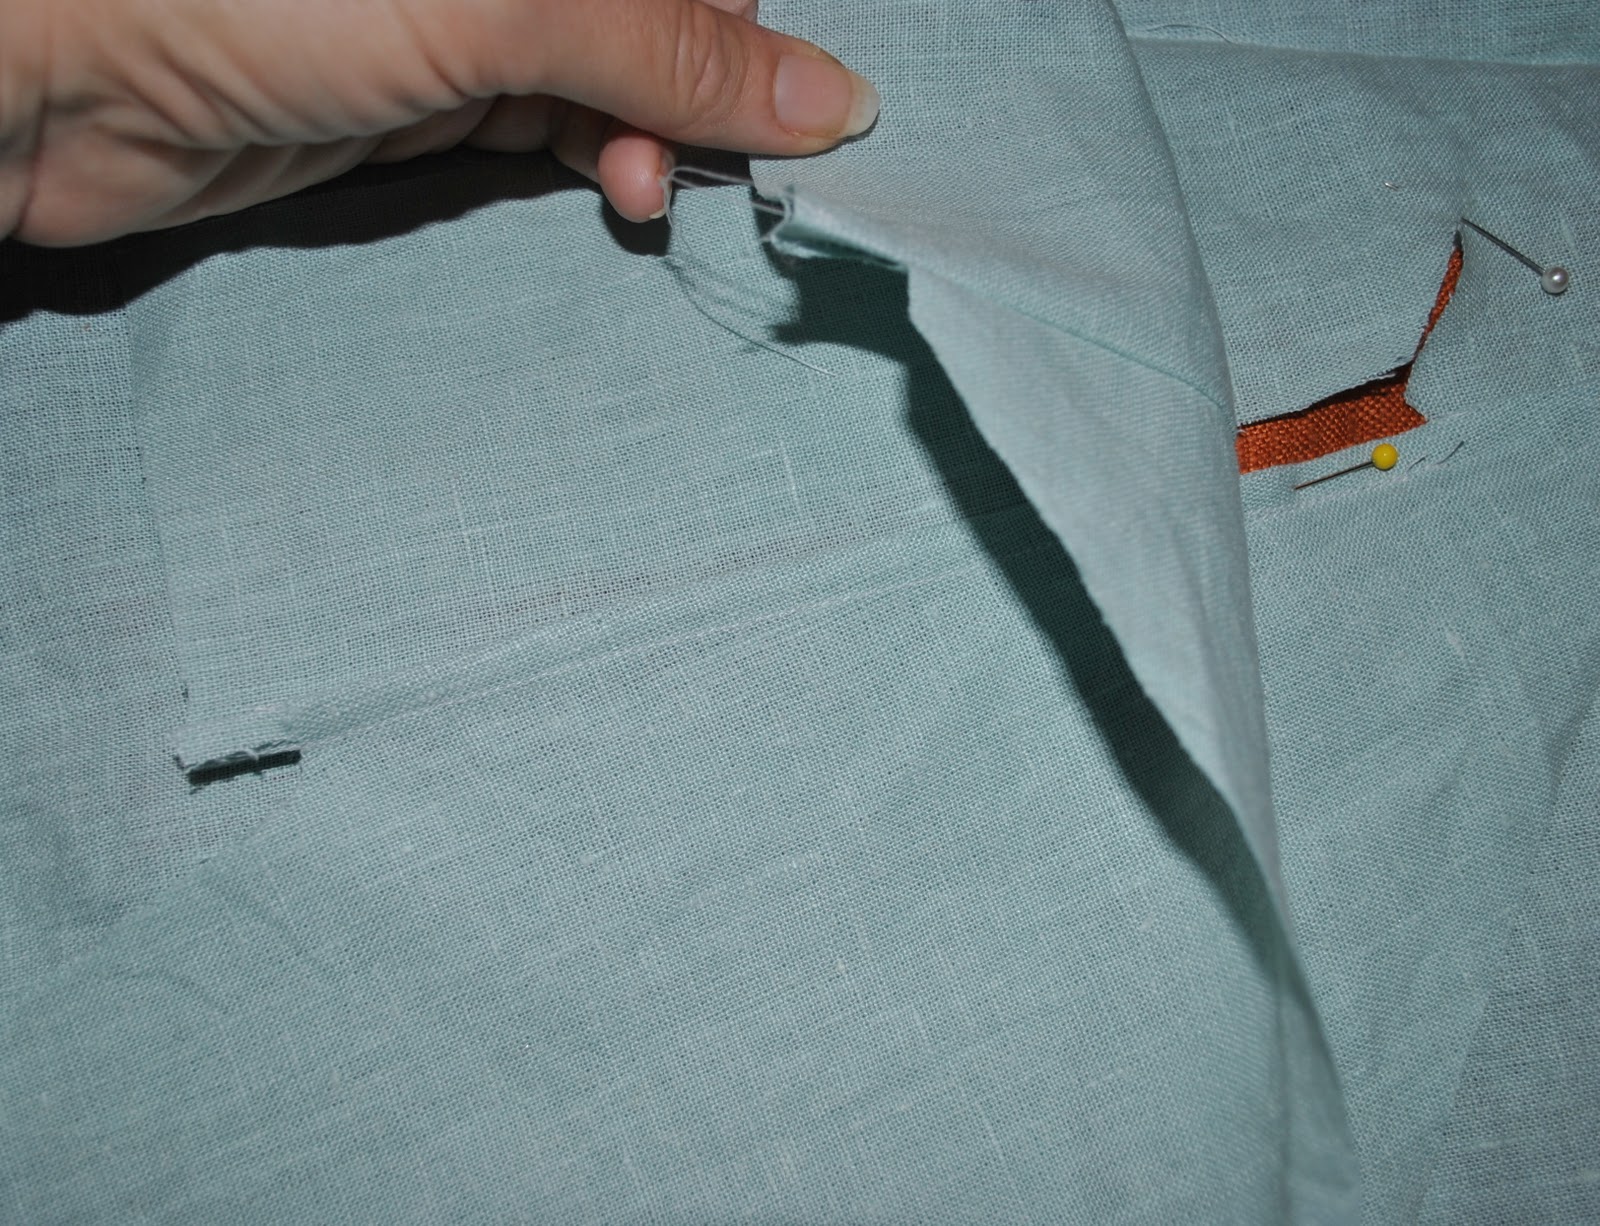
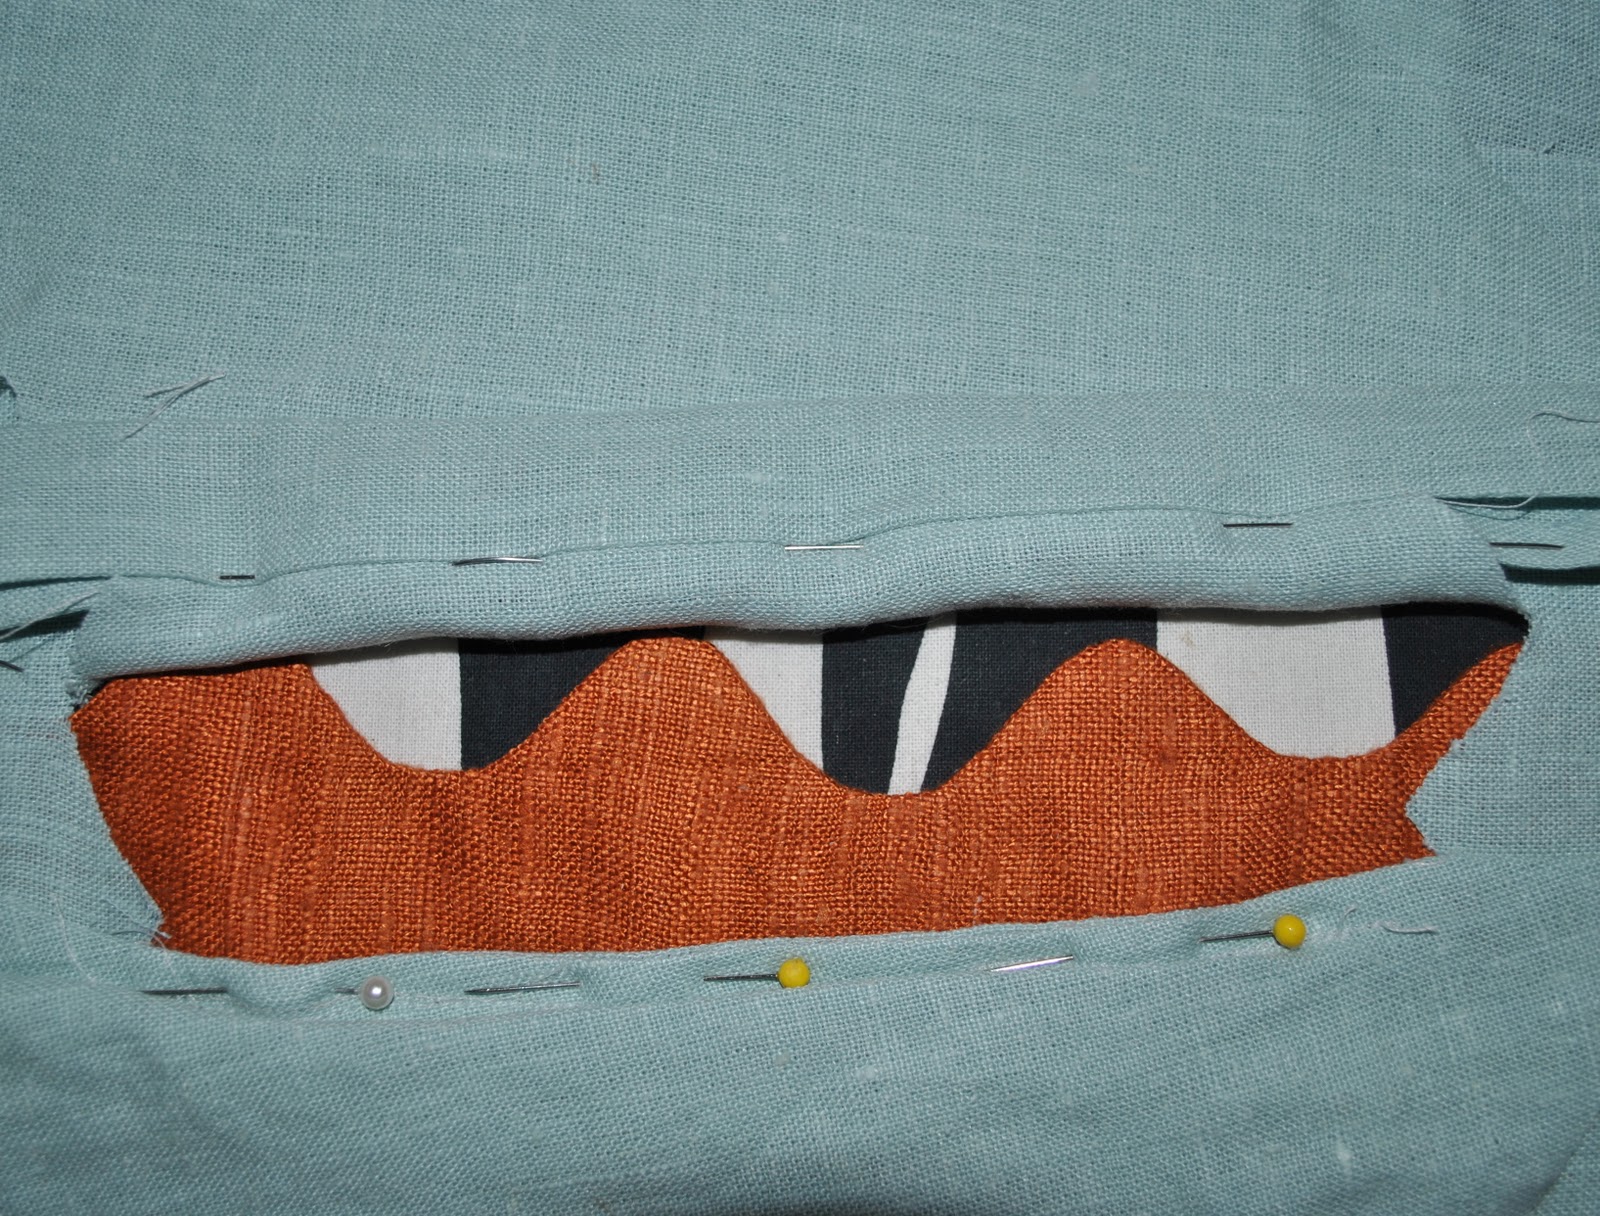
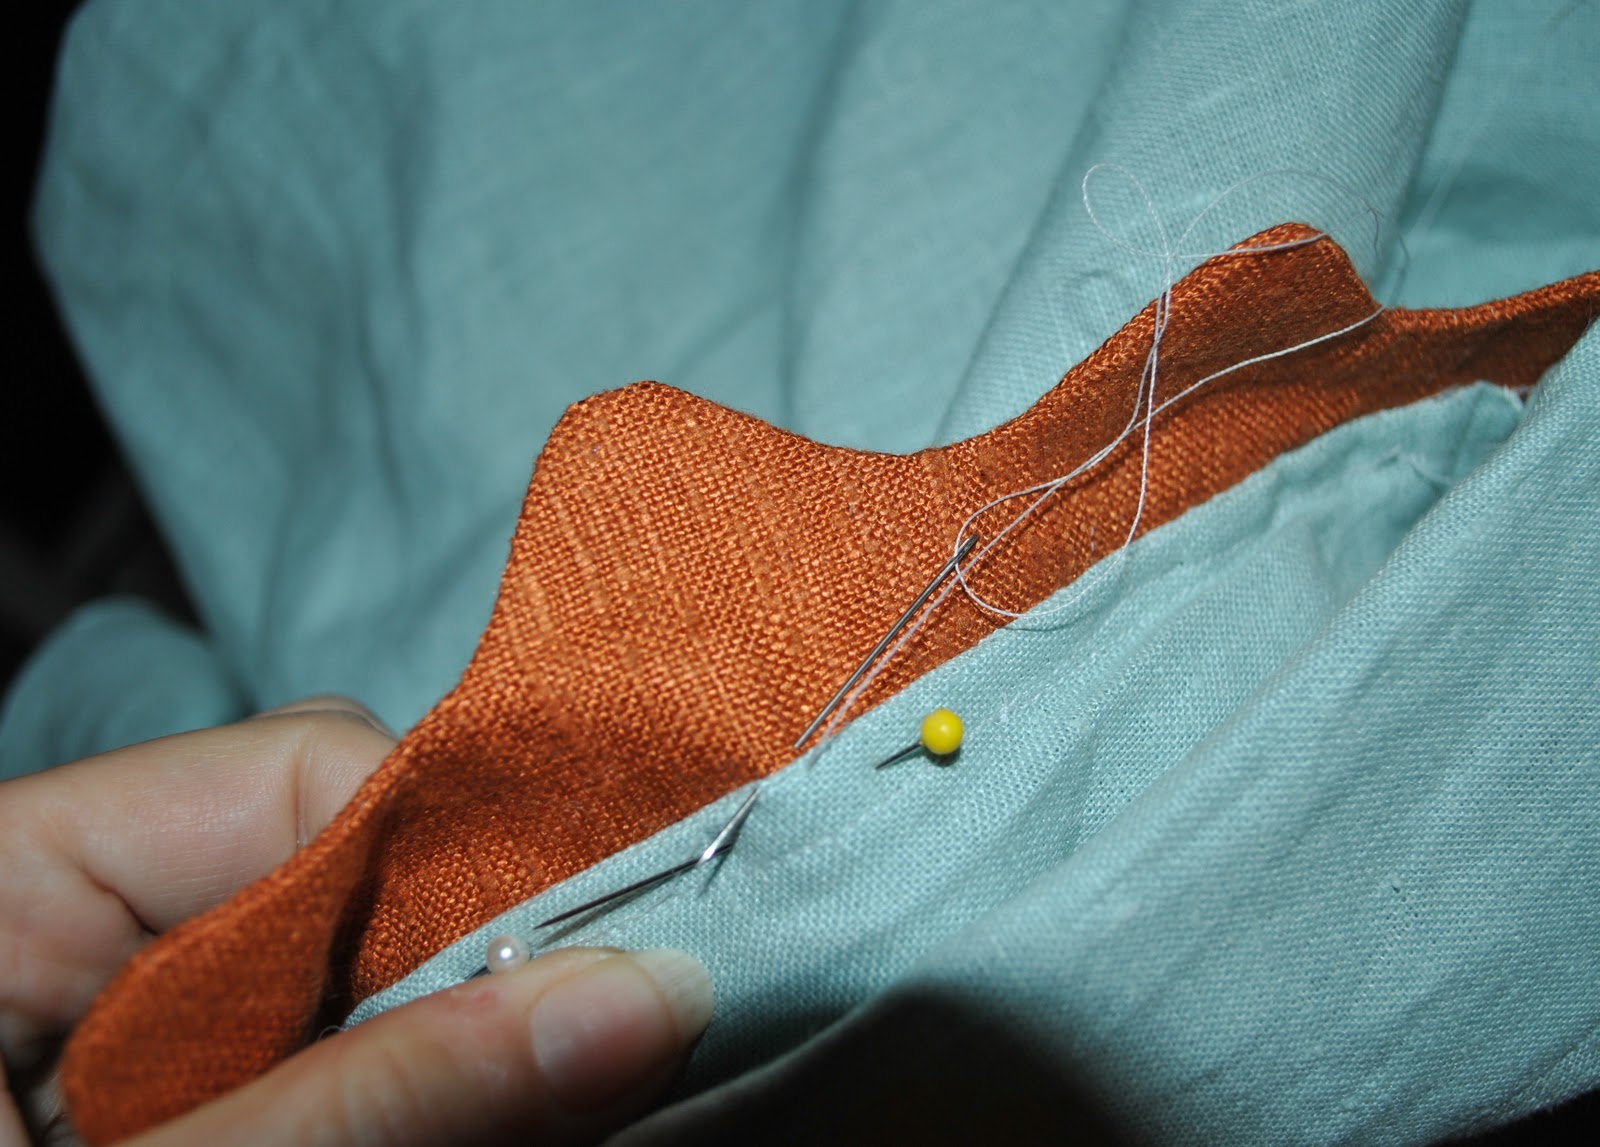
Carefully snip (the dress fabric only; be careful not to snip into your welt!) down the middle line of the marked rectangle, and in shallow angles  out to the corner points.  The shallowness of the angle cuts to the corners should be dictated by whether of not you have a sharp inner curve of the welt at the corner; cut the corner angle accordingly to be hidden by this…  Join one pocket piece to the inner cut edge of the slit. I joined mine in a French seam, but that is only because I am sometimes obsessive about raw edges…. this is not strictly necessary… then pin the inner edge of this seam to the underside of the welt.

Now for the other pocket piece; at this point I realised it needed an “extension” for it to fit properly inside the welt and onto the the other pocket piece, so I cut a rectangle of fabric for the second pocket piece and joined them in a French seam, then laid down the extended pocket piece onto the first pocket piece, aligning those French seams and the raw pocket edges…  

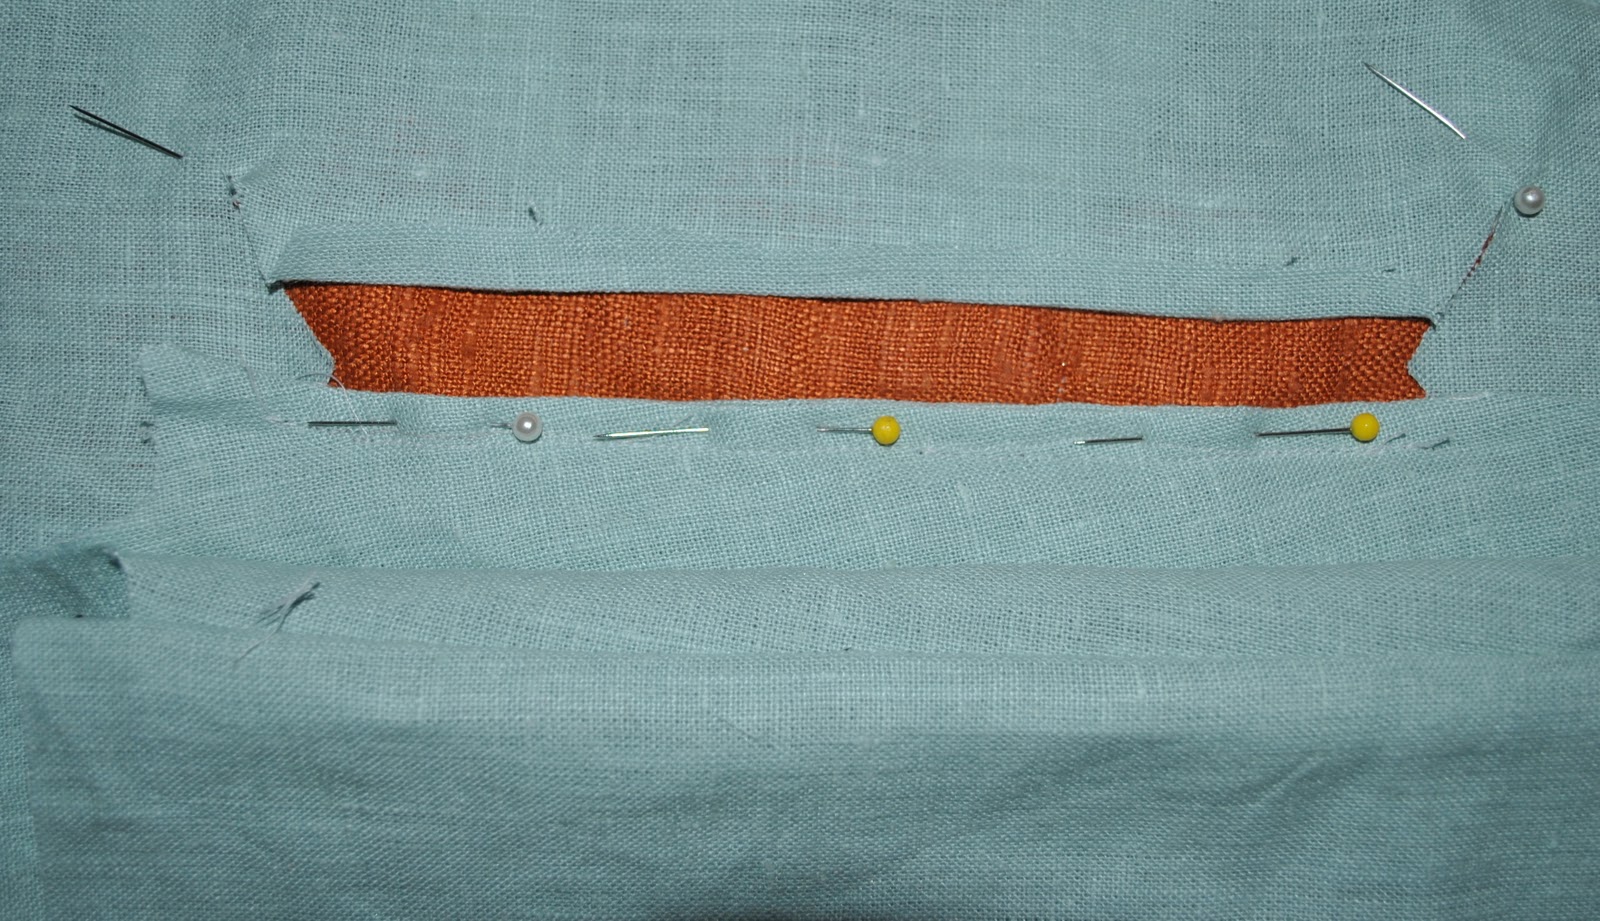
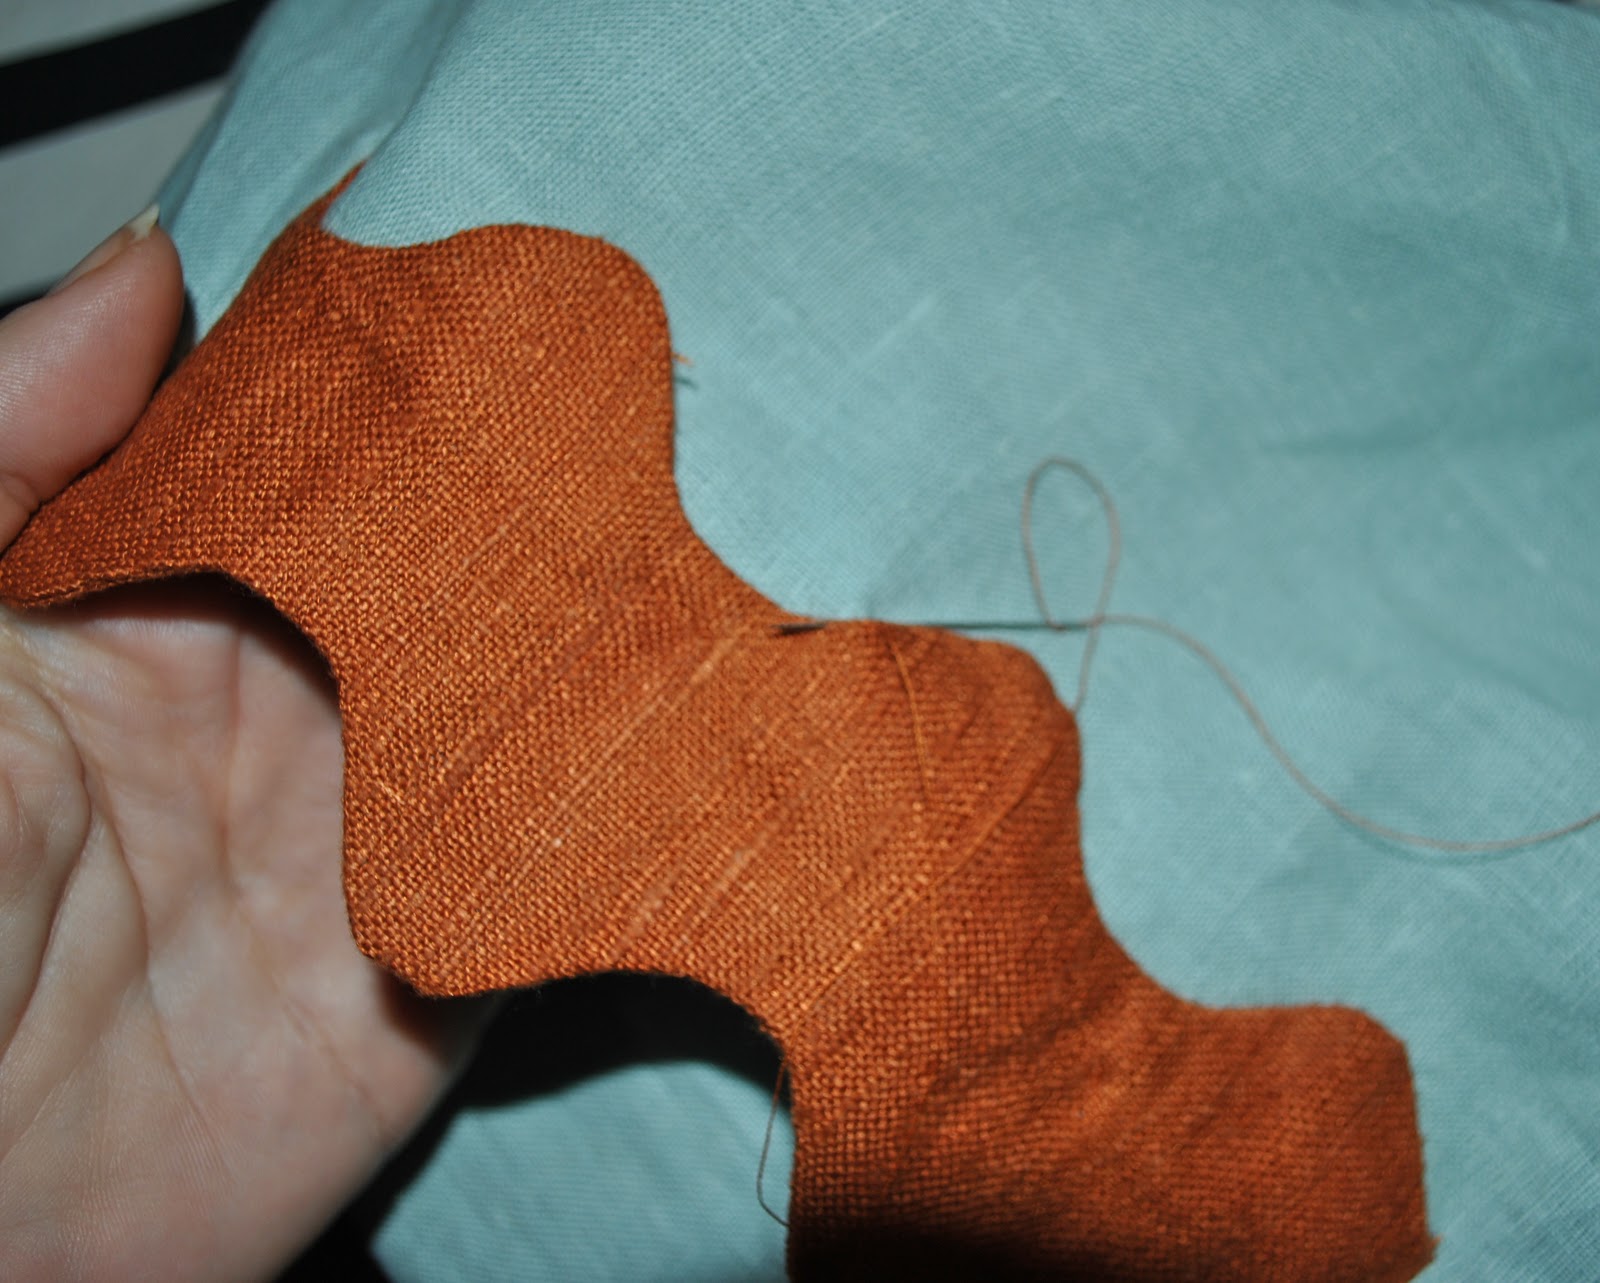
Turn in a narrow fold on the other long cut edge of the slit, and press.

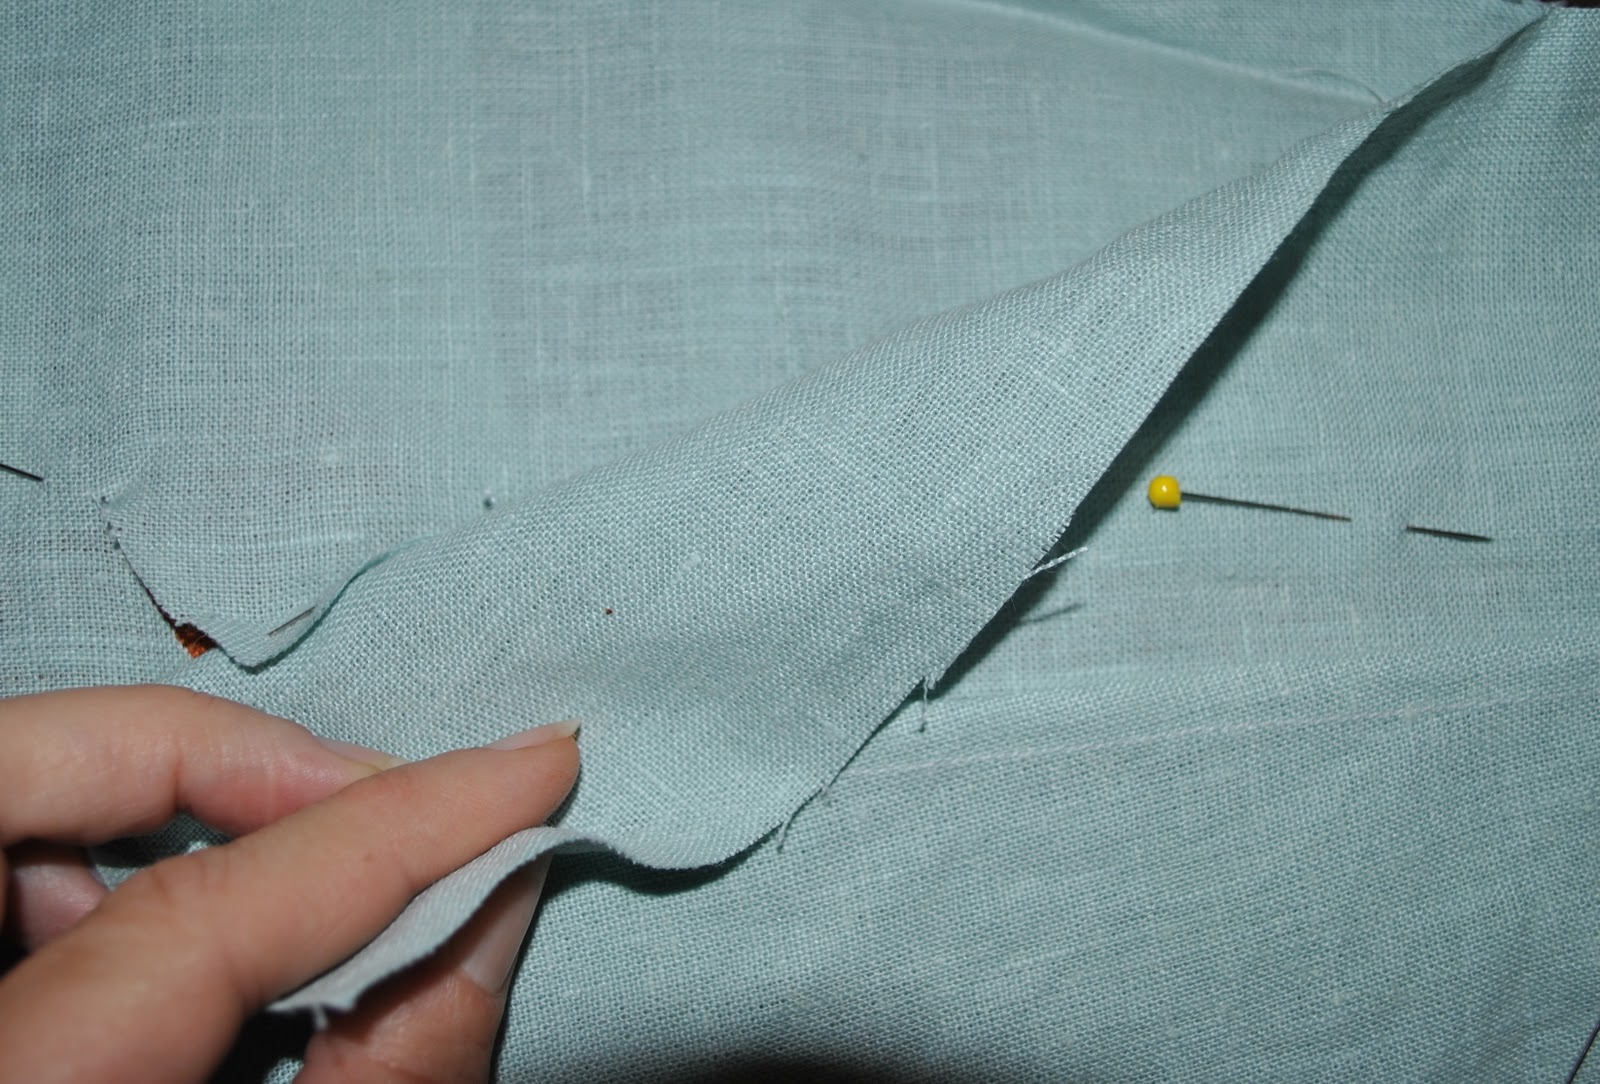
Lay the extension on the second pocket piece over this fold, to be nice and flat and even; and pin the top single layer of that new fold together with the extension piece of the pocket… sew together in the ditch of the pressed fold.

I trimmed down that long free edge of the extension piece and tucked in the raw edge and folded the extension piece over and enclosing this seam allowance, and pressed and topstitched it down in the ditch of the previous seam, thus enclosing all raw edges.  Yeah, basically a flat-felled seam…  🙂

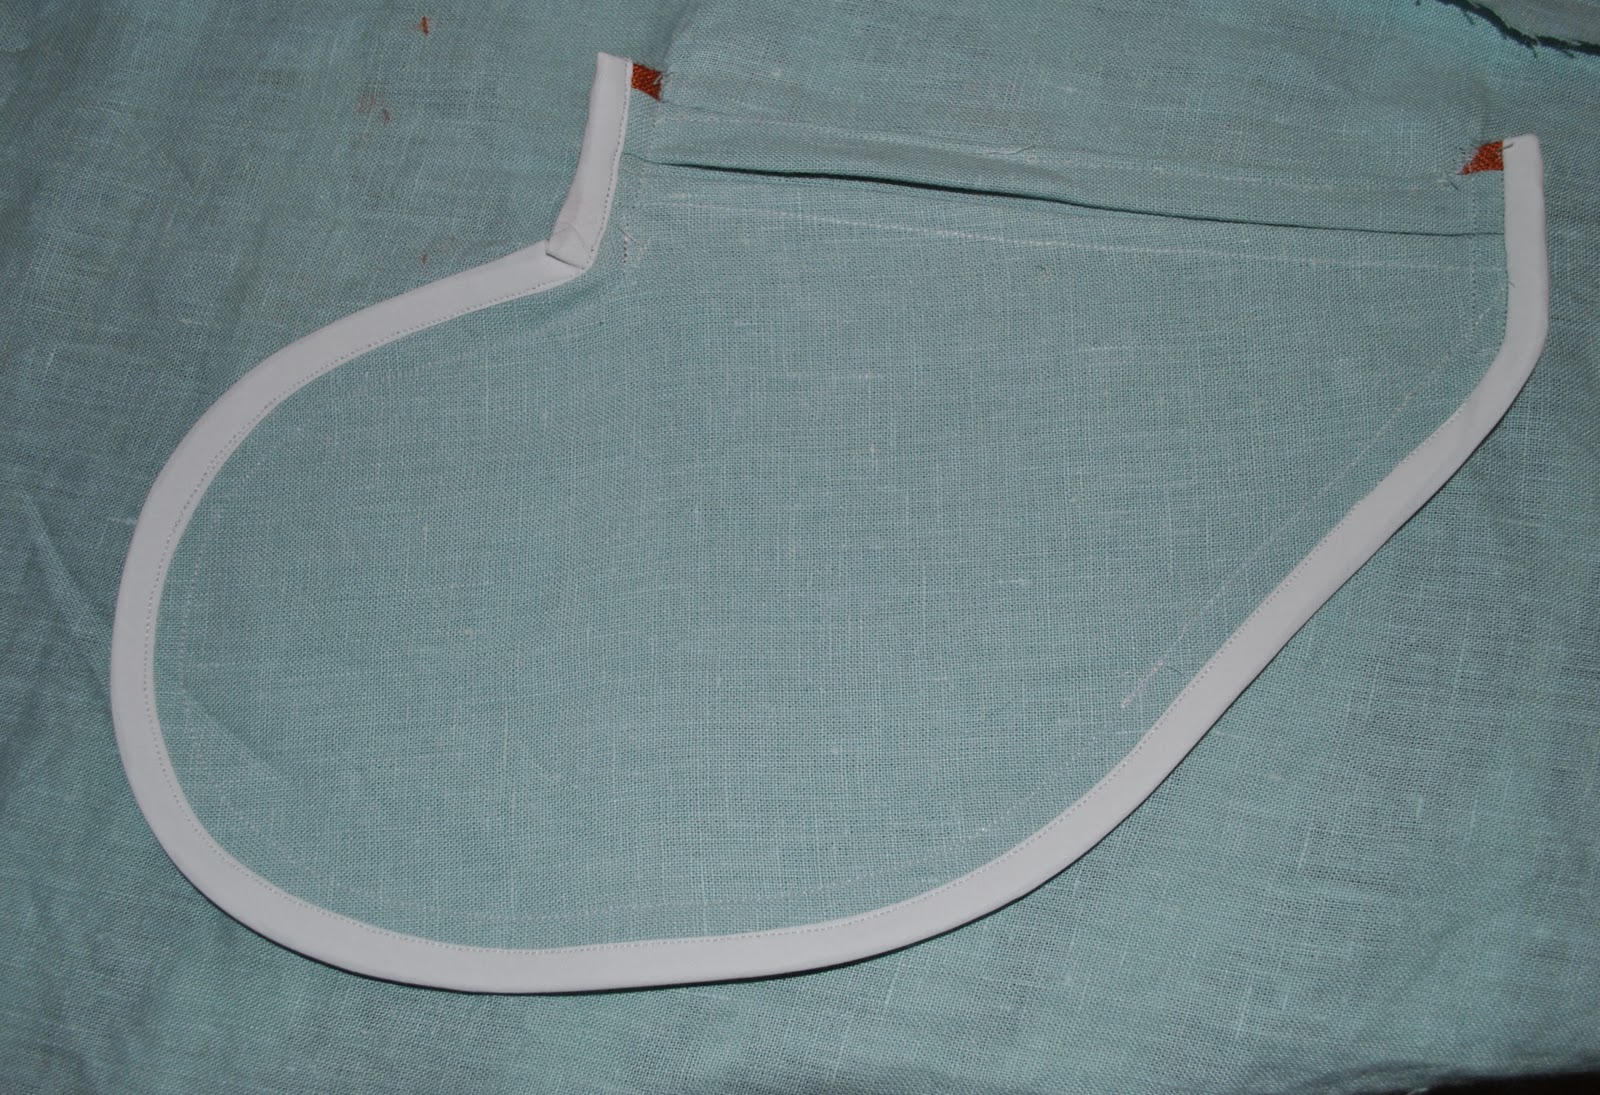
Finally laid those two pocket pieces together, pinned and sewed together around the long curved edge.

On the outside; turned under the small snipped triangular top and bottom edges, and pinned and finger pressed them into place…

On the inside; carefully transferred the pins to the finger-pressed folds and stitched the short raw triangular ends to the welt allowances, keeping everything else free.

On the inside; invisibly fell-stitch the inner (unextended) pocket piece to the inside of the welt piece

On the outside, and using matching thread, invisibly fell-stitch the outer edge of the welt to the dress.

On the inside, trim the welt edges even with the pocket seam allowances, and enclose the seam in a HongKong seam.  Not essential, but it does look so much nicer and well finished, doesn’t it?

Finished!

pinterestmail

Wave-y orange welts

I made a little sundress.
First impressions are that this is just a very plain little thing with minimal detailing.  Note … first impressions.   The apparent plain-ness is intentional because I wanted for the one and only detail to stand out big-time; those wave-y pocket welts (my own added feature), which took a little bit of working out and of which I am inordinately proud.  Why? well they are not just decorative, but functional; and happily situated over satisfyingly HUGE pockets. 
I have to say, one of the (many) reasons I like to sew for myself is so that I can add pockets to things… silly?  maybe, but a practical sort of silly, which is OK in my book.
I’m very pleased with how those wave-y welts turned out.  I was directly inspired by this Christopher Kane dress (at right) with those wonderfully wave-y details.  The pocket welts and collar on this dress are heat-sealed plastic filled with gel of a satisfyingly toxic shade of nuclear-waste green.  Love it!  However since gel-filled plastic is currently beyond the capabilities of my little sewing room I just tried to reproduce the look in fabric.
The dress is all made using leftover fabric scraps, and the wave-y welts were basically me experimenting and playing about which happily worked out just how I’d hoped.  The dress fabric is sea-foam green linen, the leftover bit from the shirt I made for my husband here.  I was sooo glad there was a little bit of leftover, since I had been such a good wife-y, making him a shirt and all.  I thought I deserved to keep this little bit for my own devious purposes, mwahaha.  And the pocket welts are of the leftover fabric from my burnt orange skirt, here.  The facings and pocket linings are of baby blue cotton, a biggish piece from my stash that is not a colour beloved by nor even suited to anyone in my family; but has still been incredibly useful.  It is getting eaten away slowly but surely for little things like this…

Later edit: I wrote a how-to on making those wave-y welt pockets here.  Thank you for showing an interest!

Details:
Dress; based on Burda 8511, sea-foam green linen with burnt orange raw silk pocket welts
Shoes; Country Road

The dress is loosely based on an old favourite Burda 8511, and the pockets and welts are my own added feature.  This dress pattern is a very useful one, that I have used several times, but it has a fairly form-fitting silhouette that cannot accommodate pockets.  So I flared out the skirt part of the dress slightly, so that shoving my hands down deep into those pockets is both possible and comfortable.  Just this small detail alone is deeply satisfying…  I also altered the depth and length of the back darts to make the dress a more flattering fit to my shape.  Namely, because I have a slight sway-back, I generally make the back darts deeper and lower, and because I also have a narrow torso I take in the side seams in the upper torso region as well.  These are my standard fitting alterations for this pattern.
All the internal raw edges are finished with HongKong seaming and the lower hem is finished with a wider cut strip of bias.  Little secret; that bias hem strip is not just there as a quality dressmaking finish, but pretty well necessary in this case… This dress was cut from such a small scrap, the amount of actual dress fabric in that hem is about 5mm!

pinterestmail

Cat’s eyes

(a mixture of BYS Mint Condition and Bright Light)
As soon as the weather warms up enough to bare the ol’ tootsies I like to get some funky nail varnish on to my toenails.  The weirder and wilder the better.

This week I wanted something toxic.  Something urban and nuclear-waste.  Something neon and horrifically bad taste.  So I was sitting outside and painting this on when I was joined by a friendly and furry lovely in the mood for companionship.  She came purring over and flopped down beside me and as she blinked lazily at me it struck me that the crazy shade of my nail varnish exactly matched the golden-green luminosity of her eyes, how they appeared bathed in the reflected glow of warm sunlight off the bright new grass…  at once the colour became less toxic to my eyes and suddenly one that was rather lovely, natural and beautiful.  

… is there no such thing as an “un-natural” shade?

pinterestmail

the winner is…

Thank you so much to all those who entered the giveaway and left such nice comments about my L(ong)BD.  Your kind words never fail to put a smile on my face and make my day!!

pinterestmail
Switch to mobile version
↓