HongKong seaming

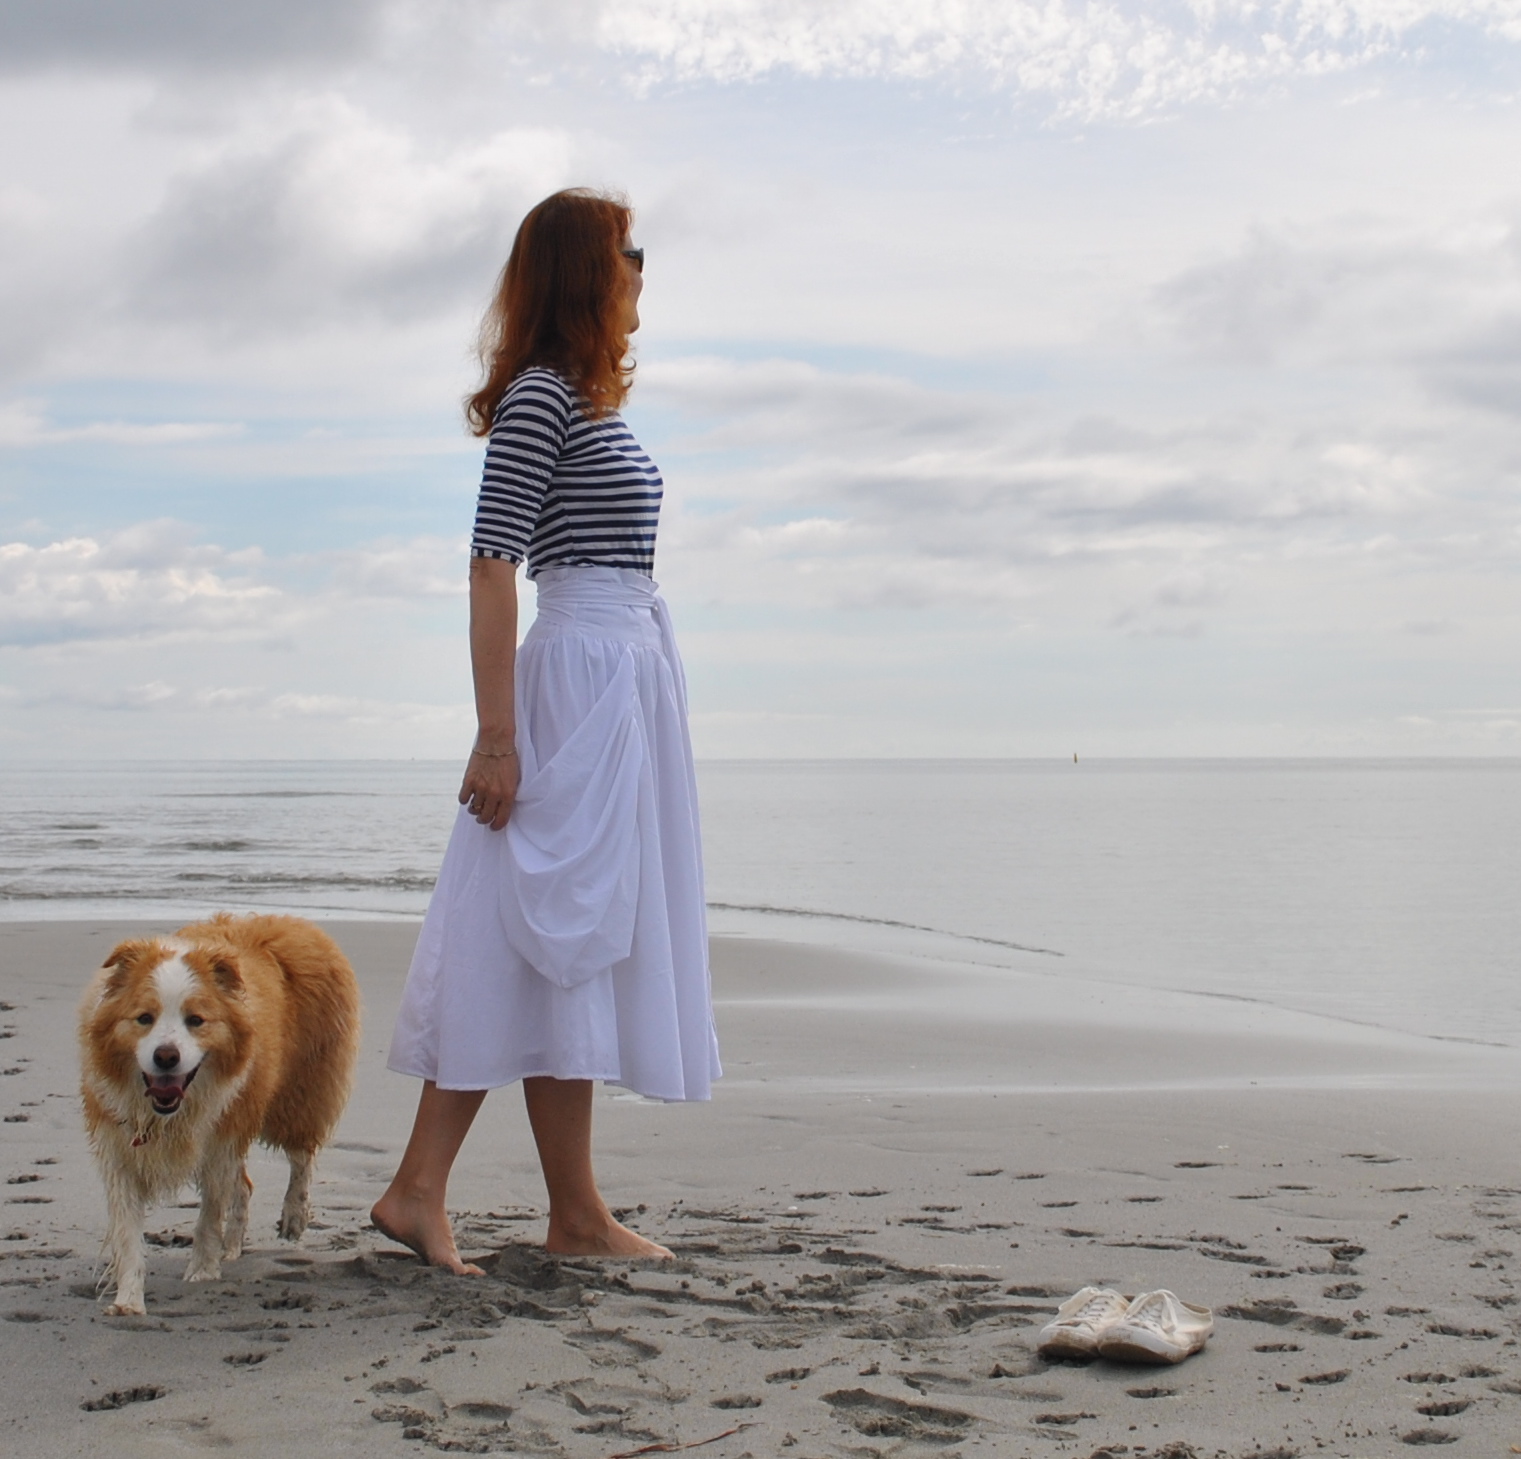
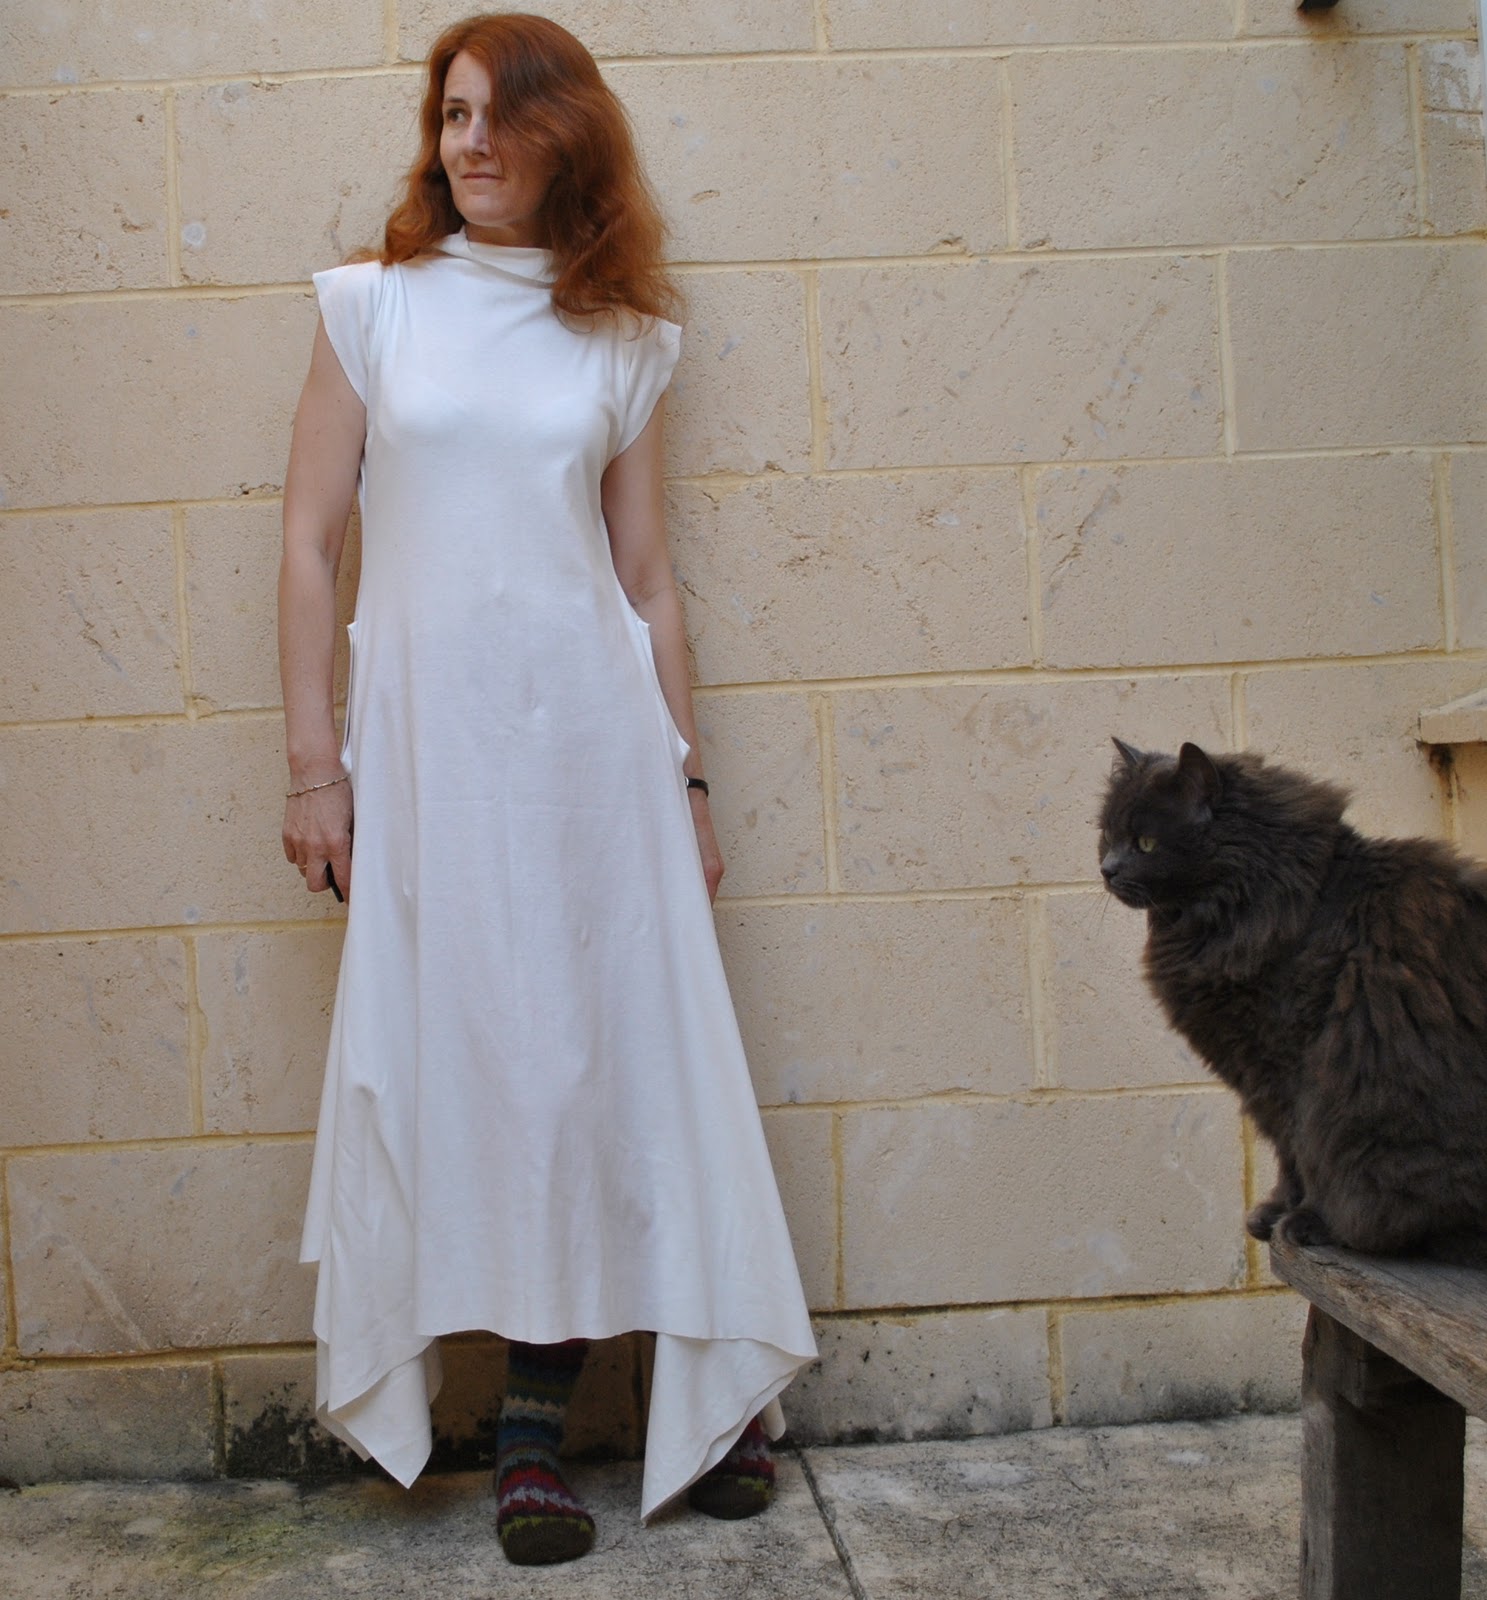
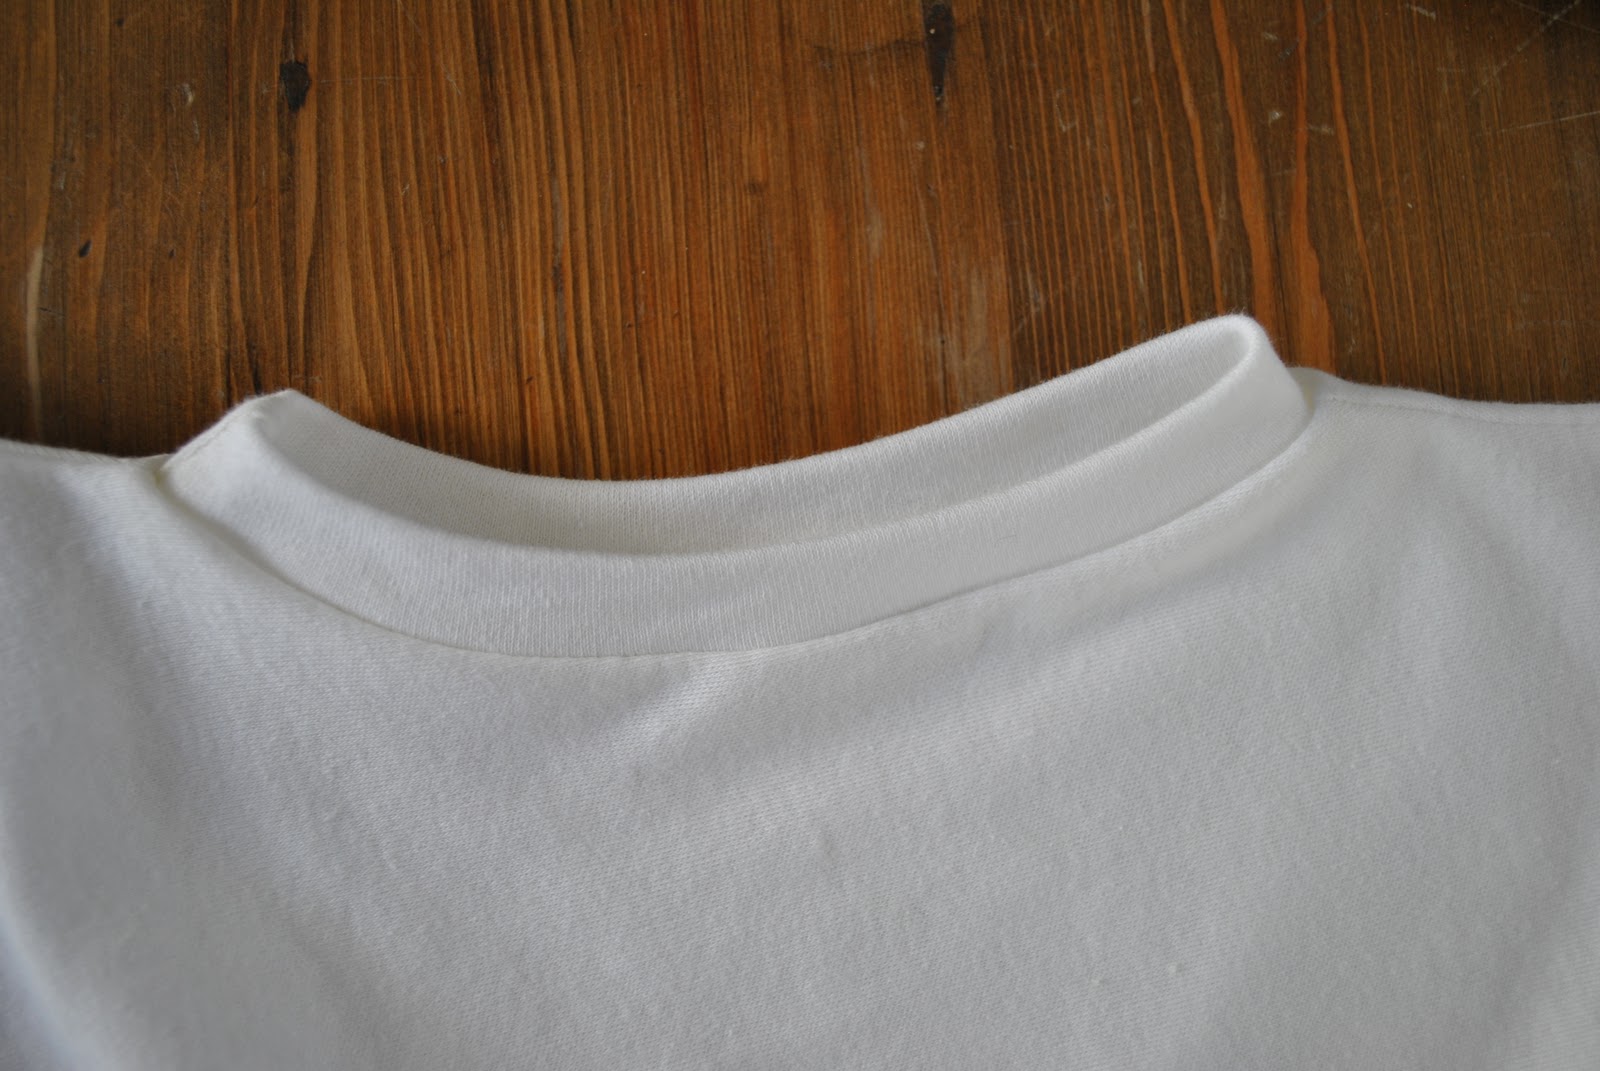
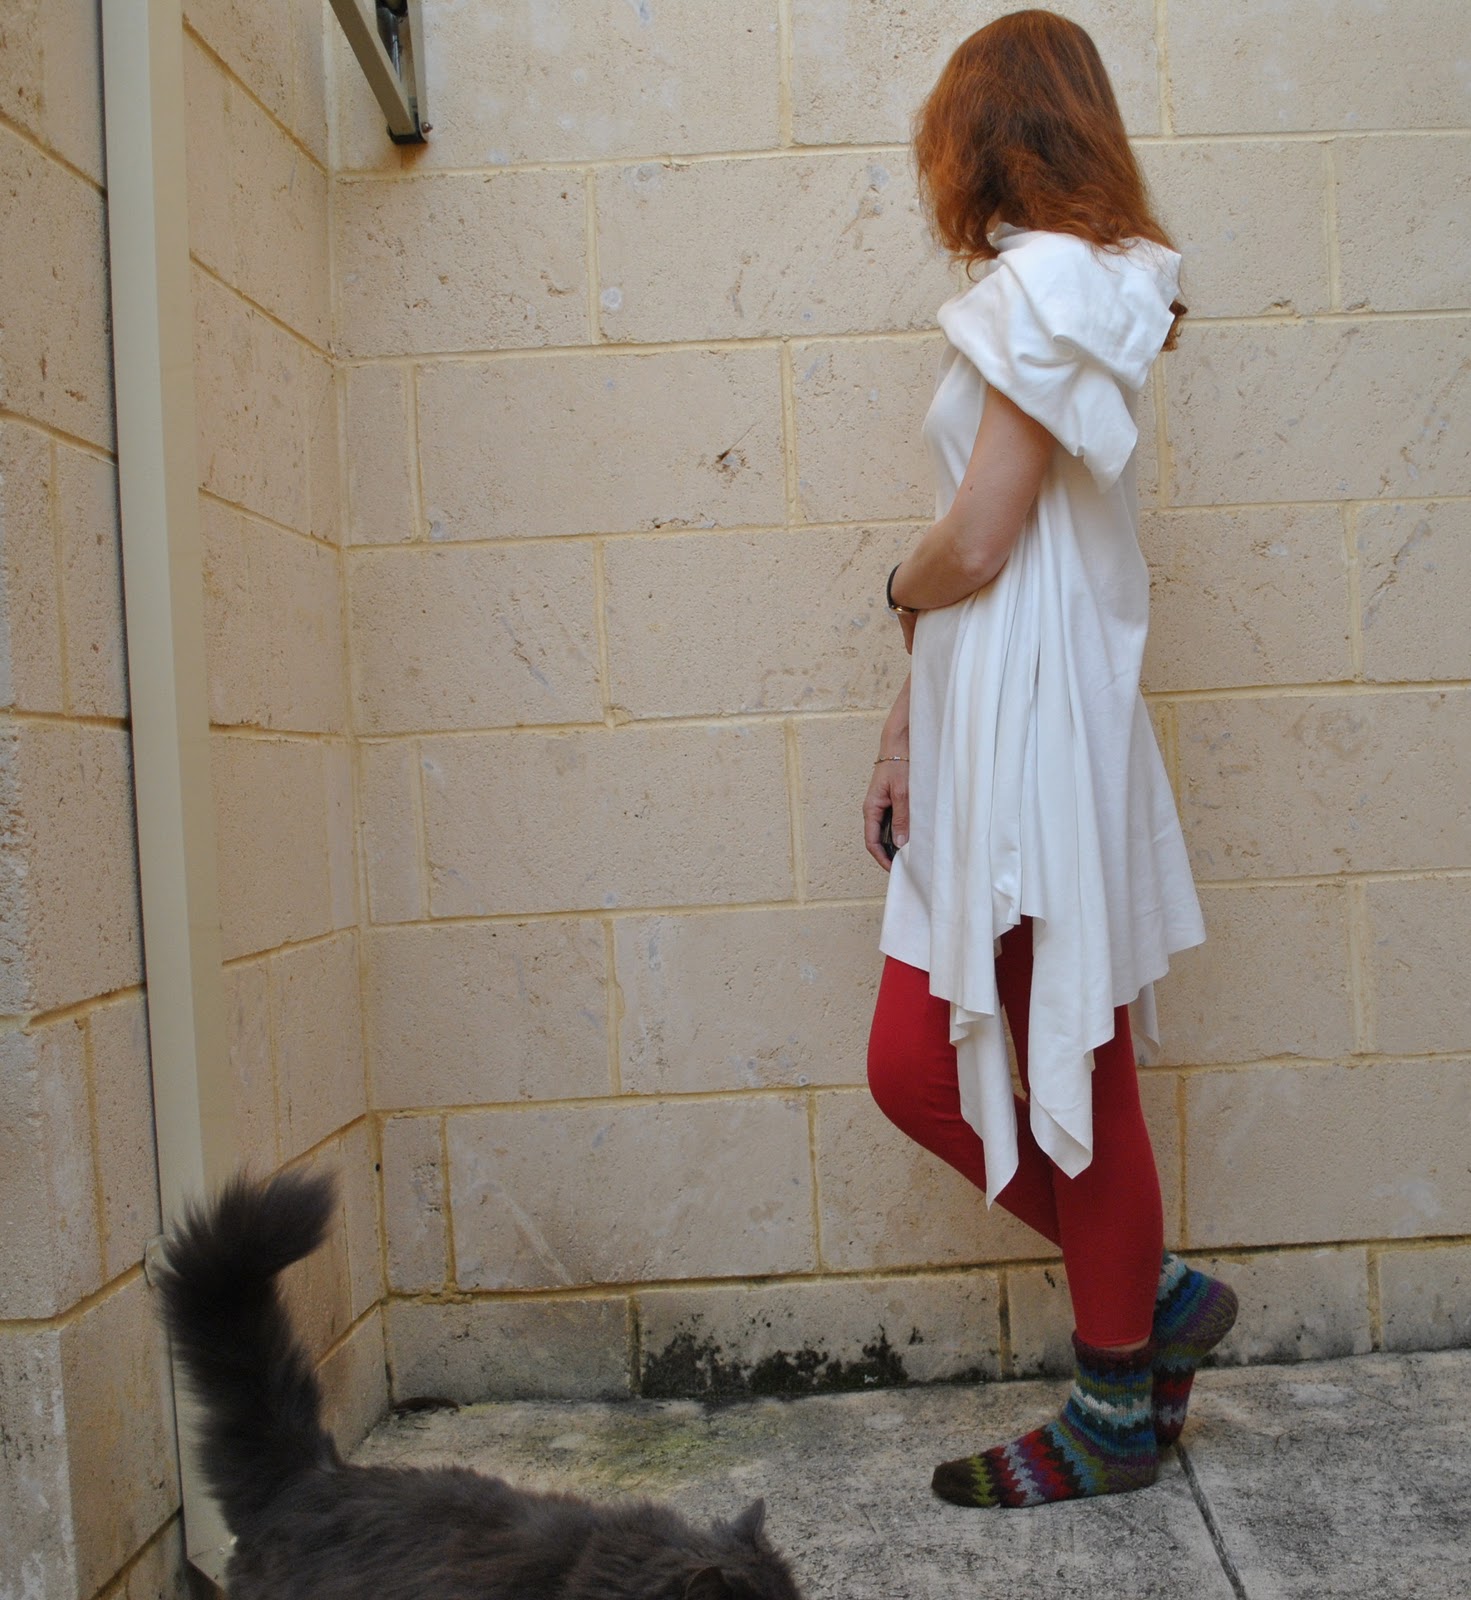
(OK, so I wrote this post a while back, during self-stitched September, and then just got caught up in the whole outfit-documenting side of things and forgot about it… ! so it may seem a bit out of date since I made this skirt about a month ago, hehe.  But HongKong seaming is still something that is always relevant, never out of style right?  So, here goes…)

It may sound silly but I often like for the insides of my wardrobe to look as well constructed and as well finished as the outsides, like those of the upper end designer clothes that inspire me.  Beautiful finishes give me a lot of pleasure whenever I lay eyes upon them.  And it makes good common sense to give both your fabric as well as your own time invested in your handiwork the respect they deserve by finishing off as well as possible.  Why?  Because your time is valuable, and you’re worth it!
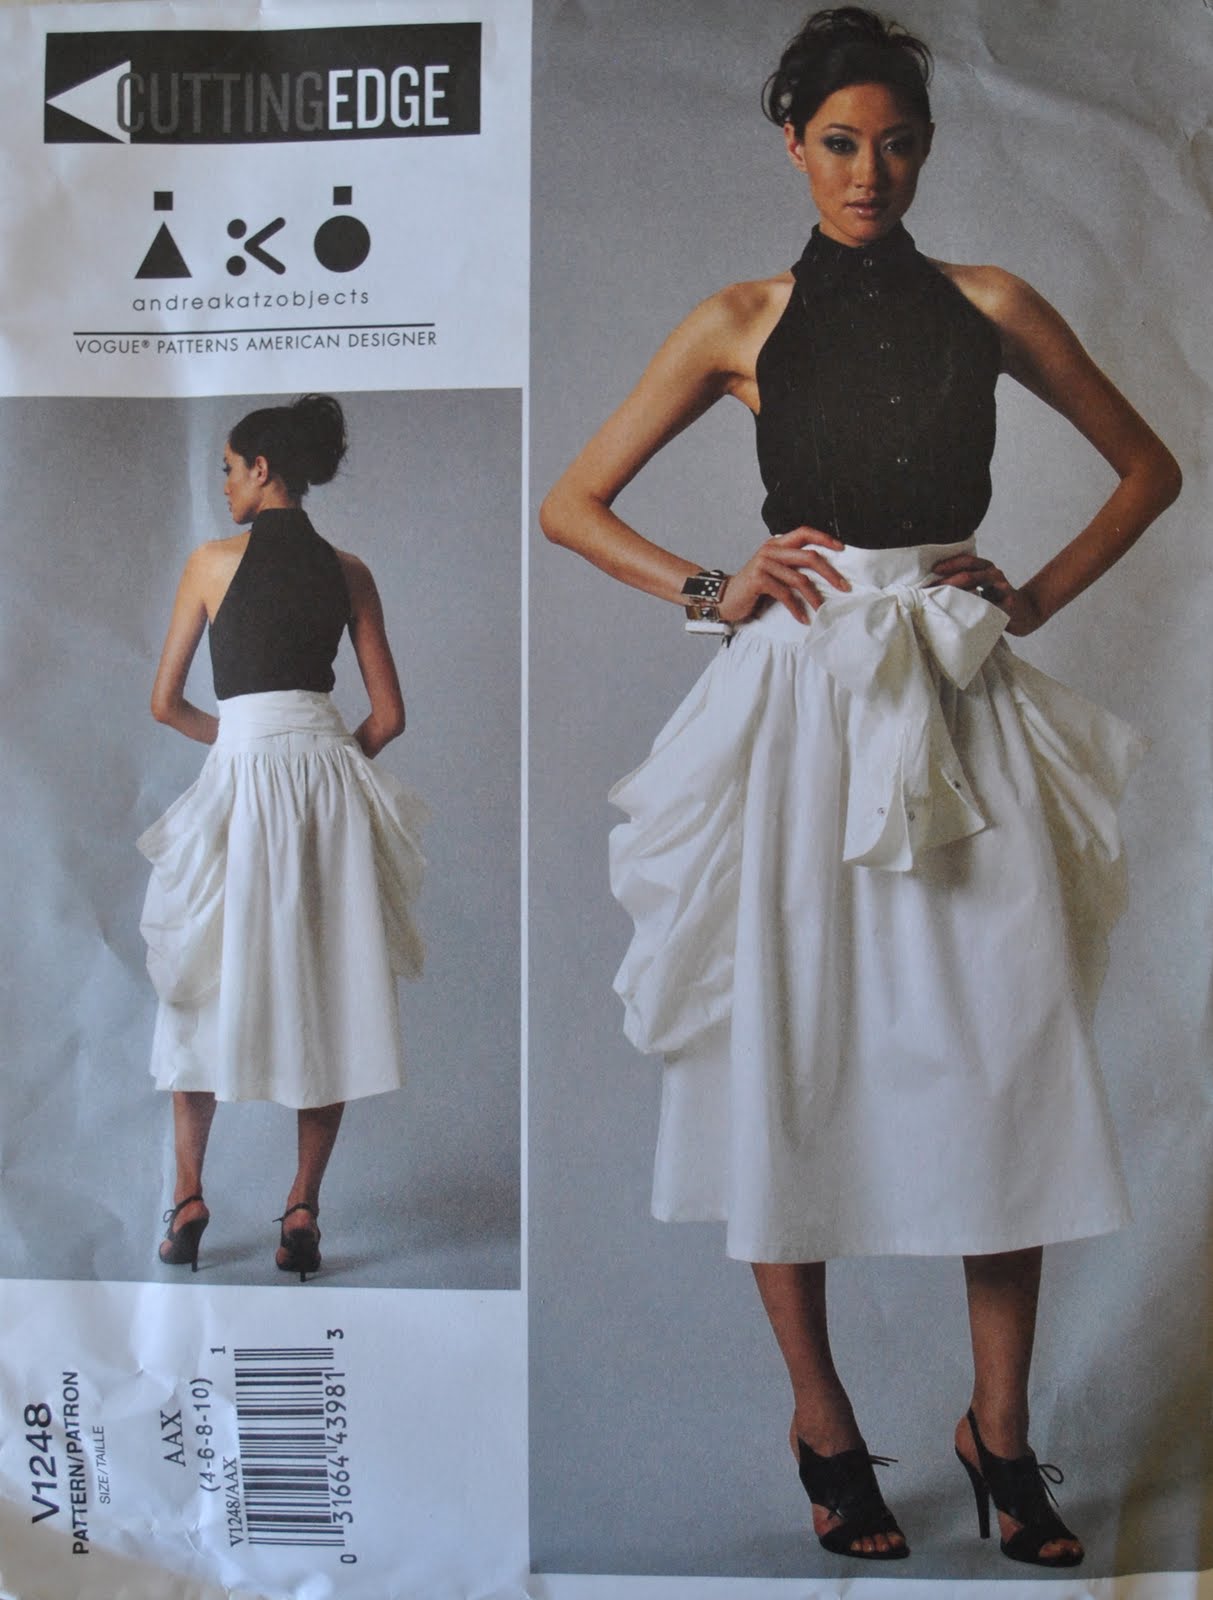
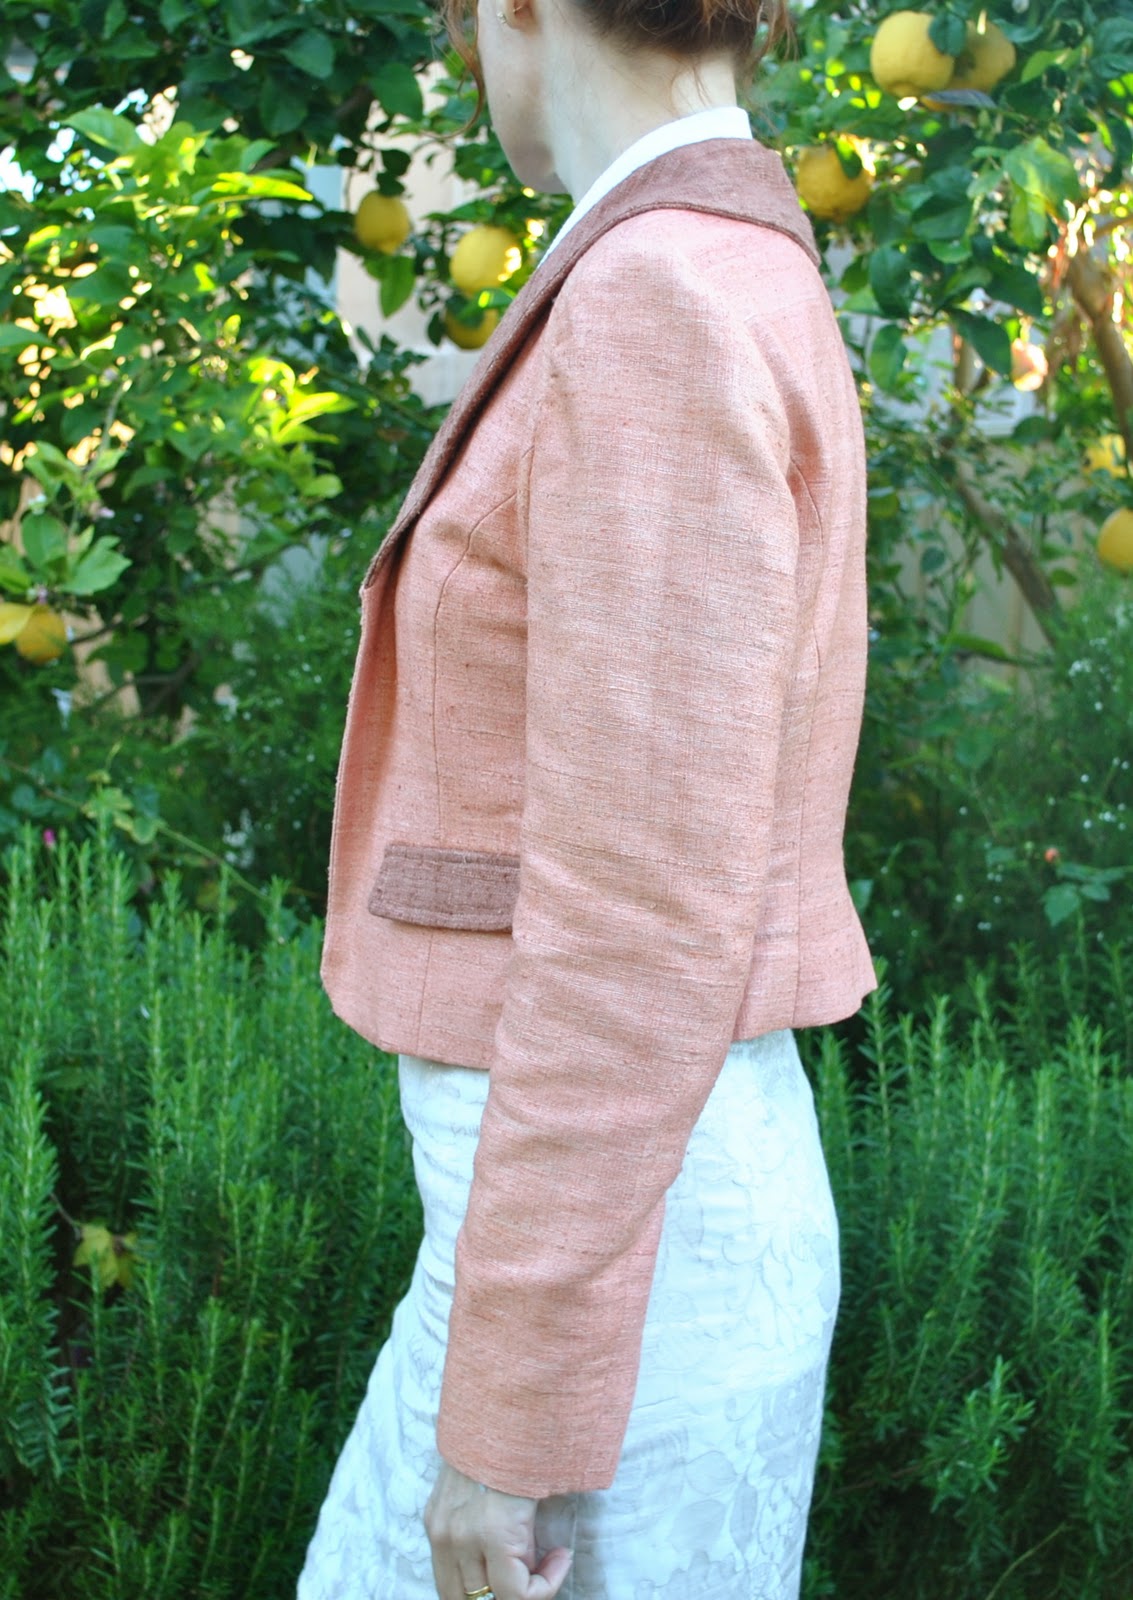
HongKong seaming is a finish I sometimes like to add to the internal raw edges of unlined coats and jackets, and to those of my better skirts.  It is an especially good finish for high-fraying fabrics that are kinda special; such as silks, wools and blends of these; ie, fabrics that are worth it.  You know what I mean, right?
HongKong seaming may seem like too much hard work, but it is not really that much effort, honestly!  Big pluses; it only requires a very little fabric, looks pretty, and is the best way, bar none, to finish off the raw edges of thickish fabrics that fray easily. 
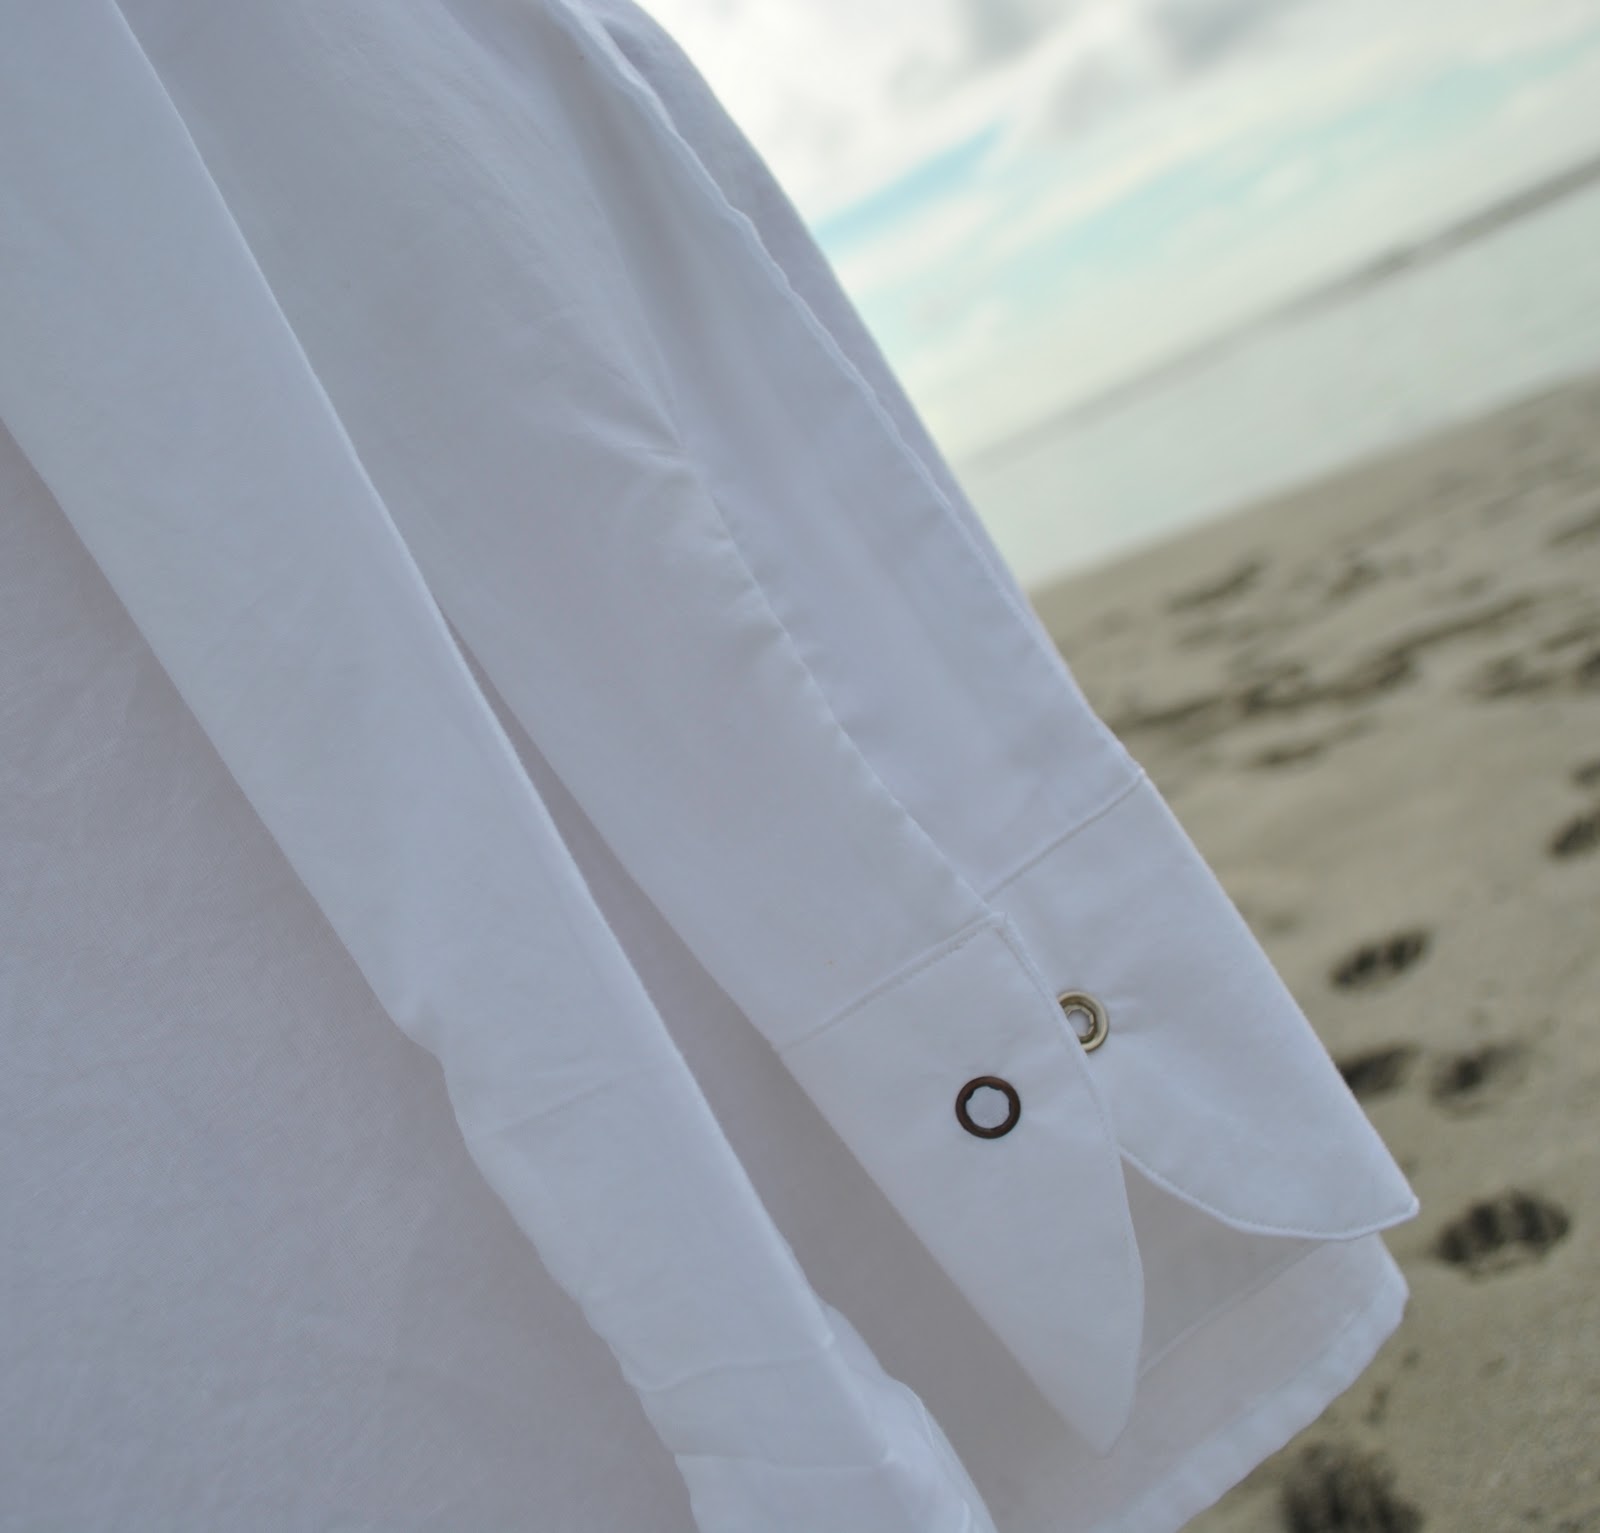
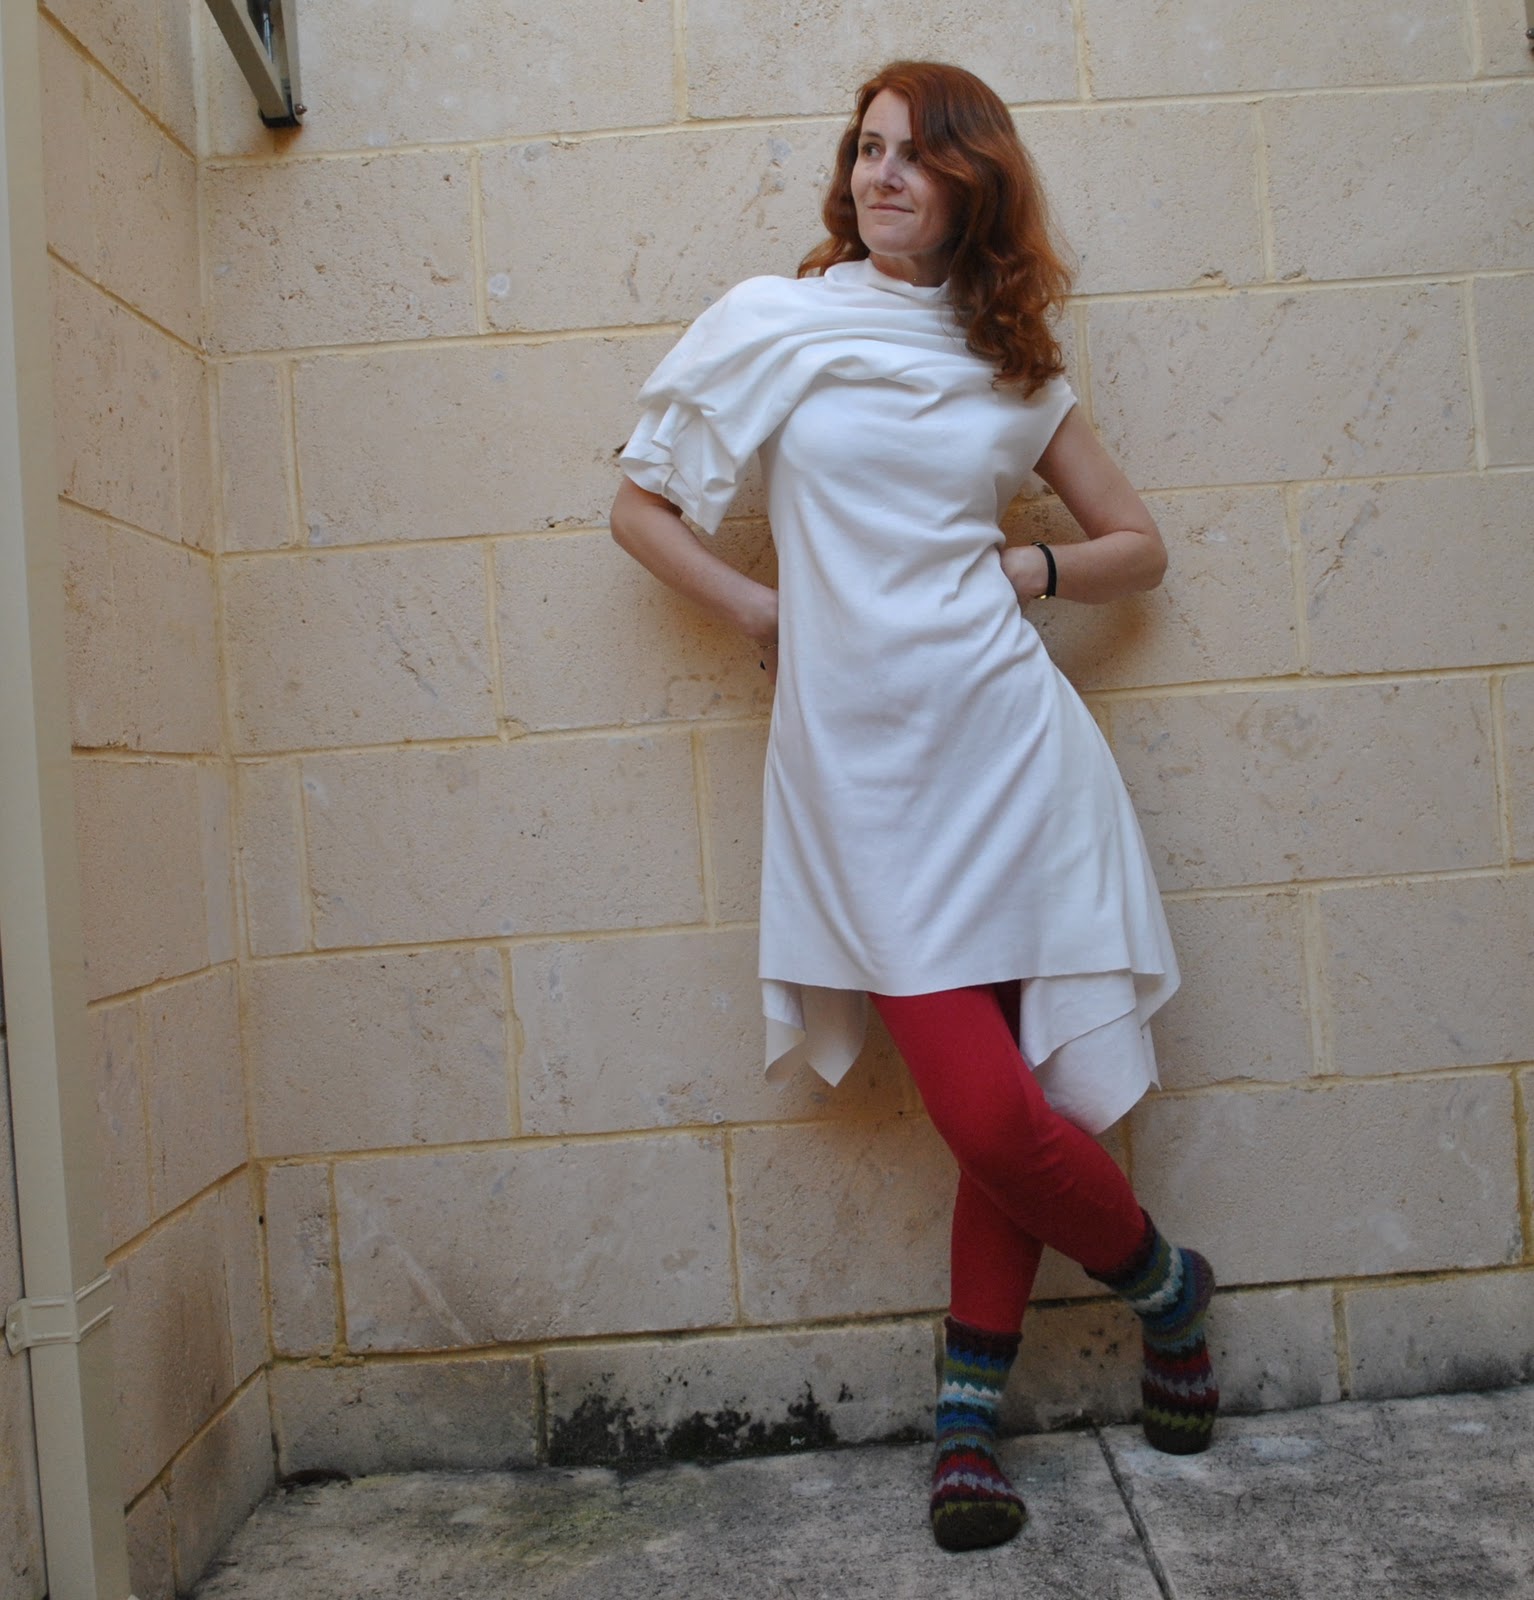
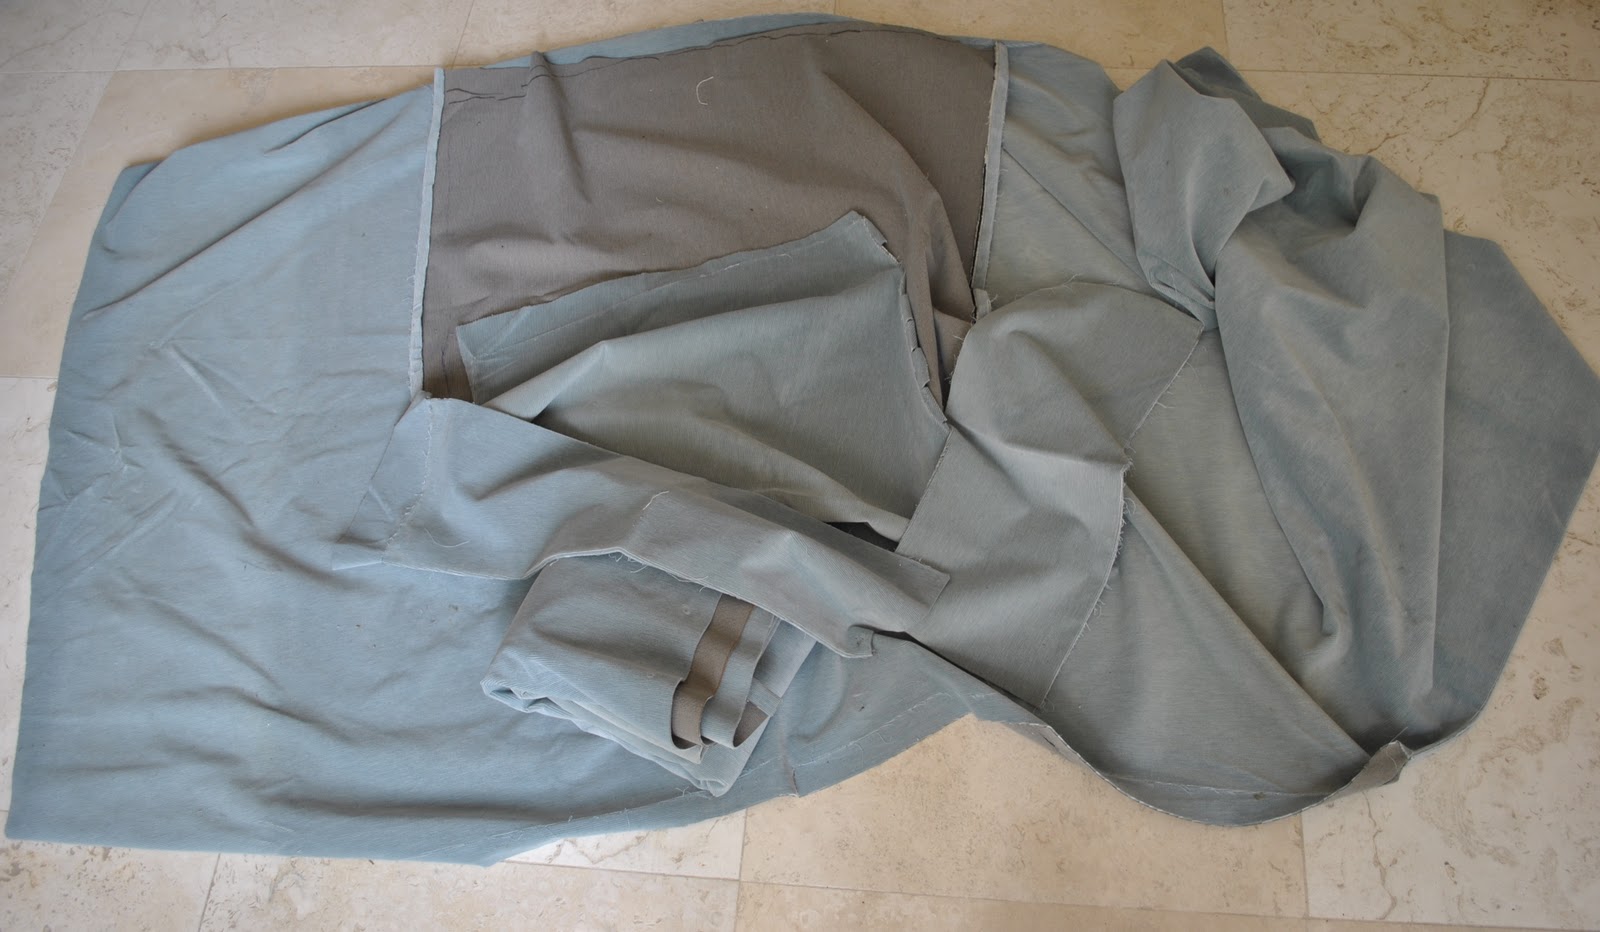
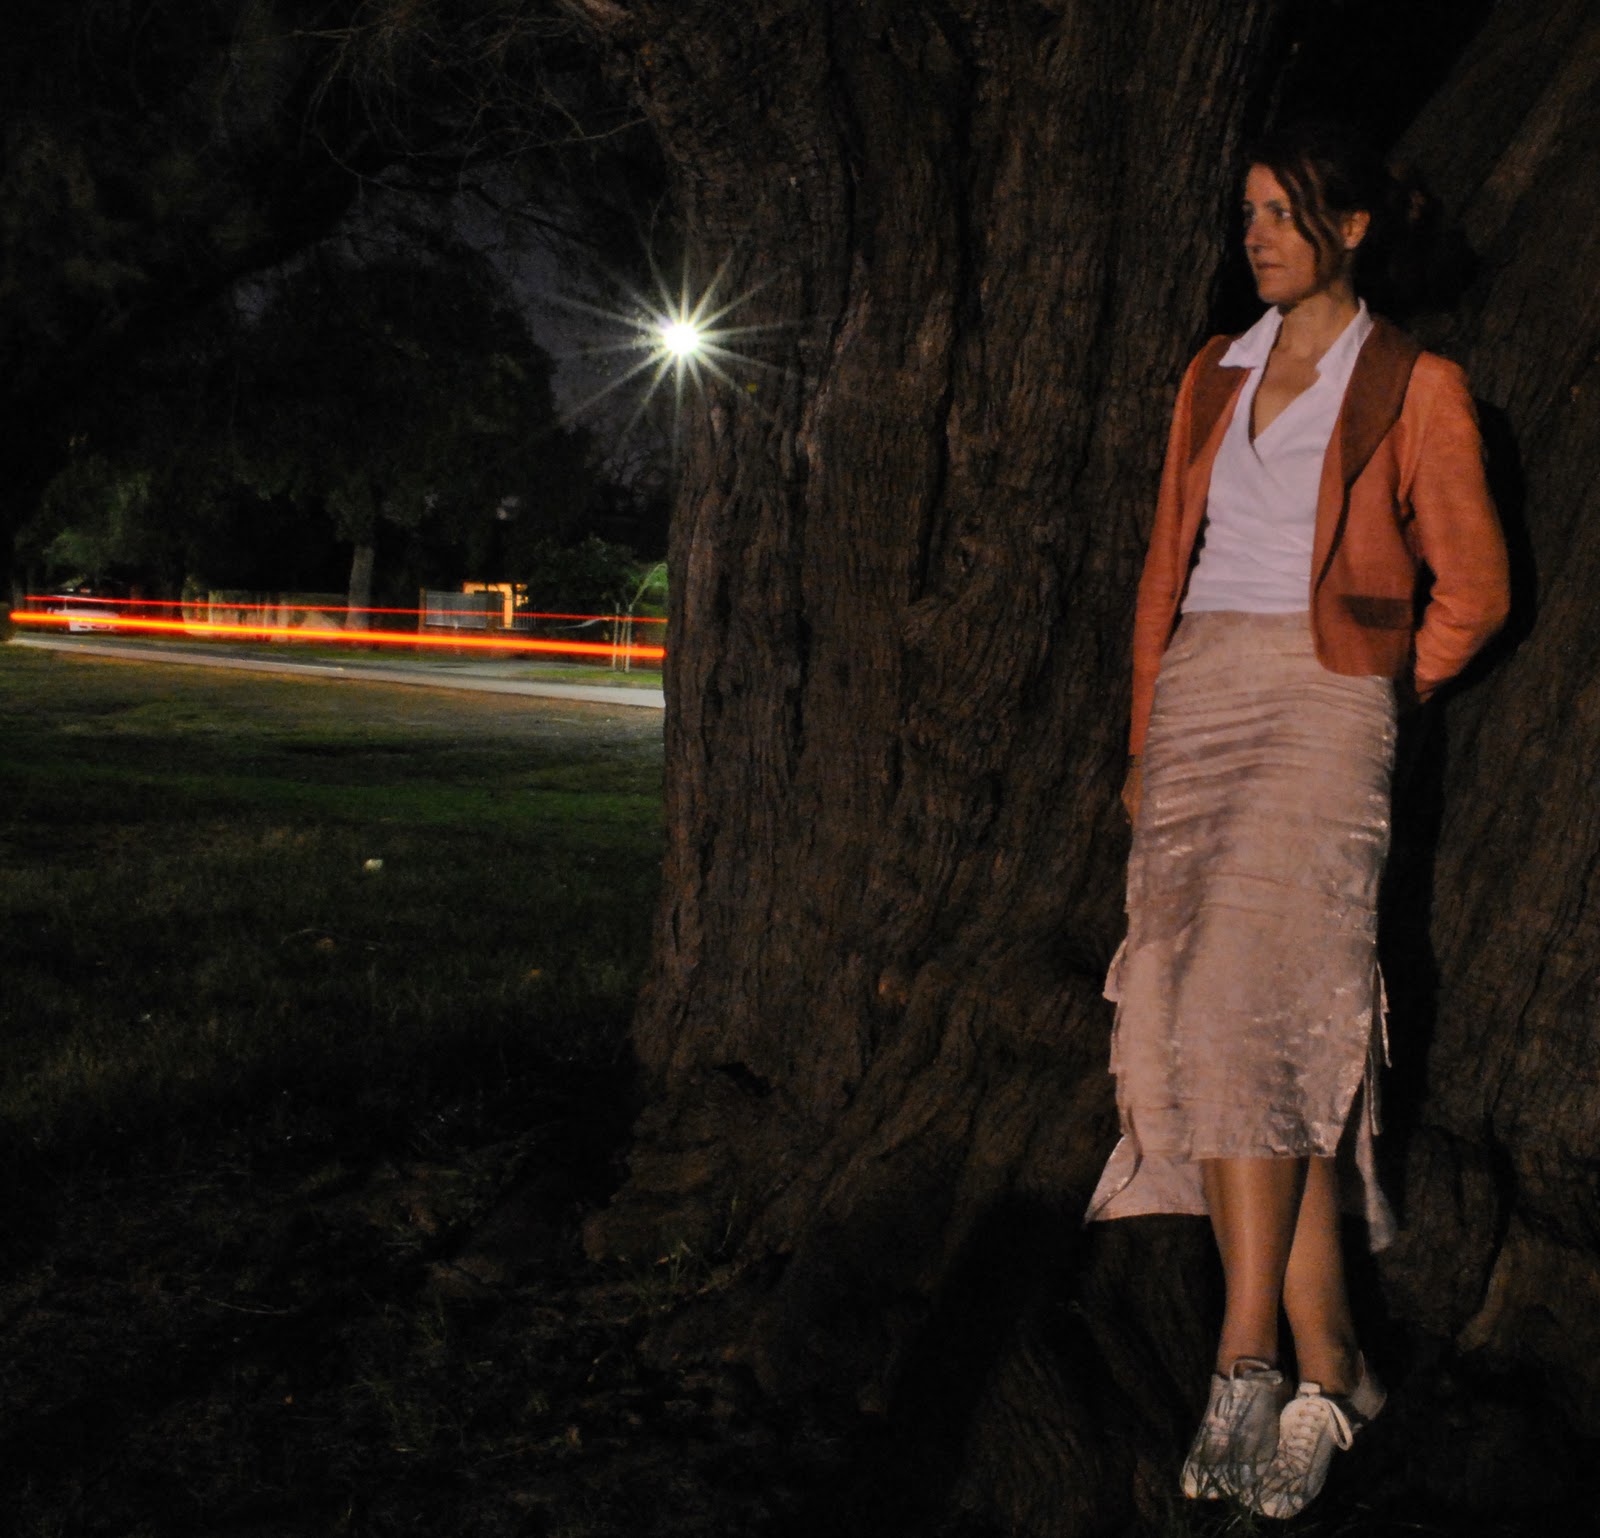
To finish off the seams of an ordinary little skirt plus enough for a wider bias binding strip to finish the hem, you only need about 40cm of a light or medium-weight woven fabric, ideally cotton or a polycotton.  Actually I only needed this much because I was cutting the pocket linings from the same fabric, you could easily get away with a lot less.  You can just use scraps if need be, no probs.  You can go with a matching fabric or a contrasting fabric for fun.  In the case of this burnt orange skirt I chose a contrasting burgundy for both the seaming and lining fabric.  (Yup, I know that no one but me will ever see the yumminess of these rich autumnal shades together, but this hidden colour punch still pleases me nonetheless!)  Wash a coupla times to remove the sizing and deal with all that pesky shrinkage.  Then cut a few strips on the bias; approximately 3.5cm (1 3/8 inch) in width.  I also measure the length of the lower skirt/jacket edge and cut a wider bias strip (approx width of 5cm, or 2 inch) for the hem binding.

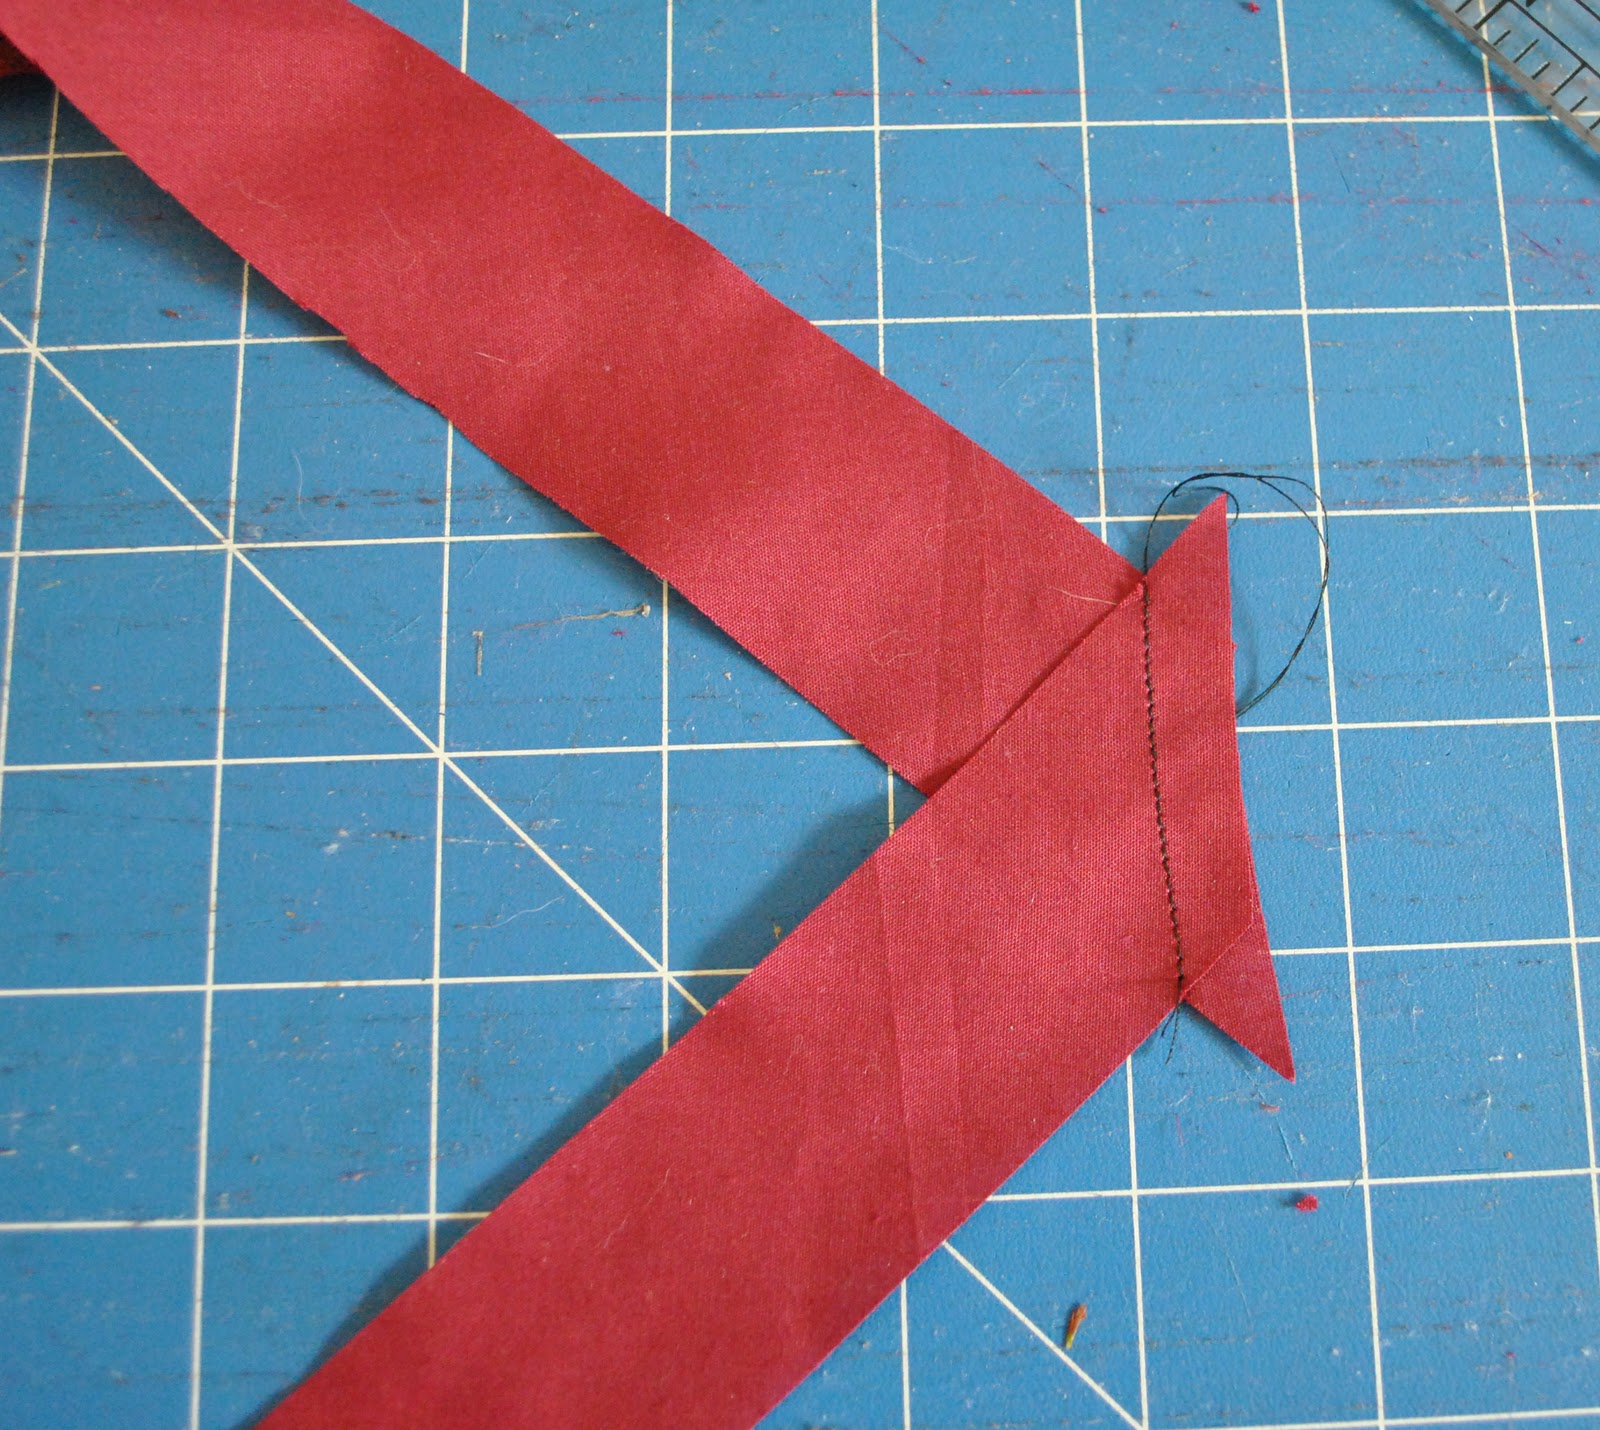
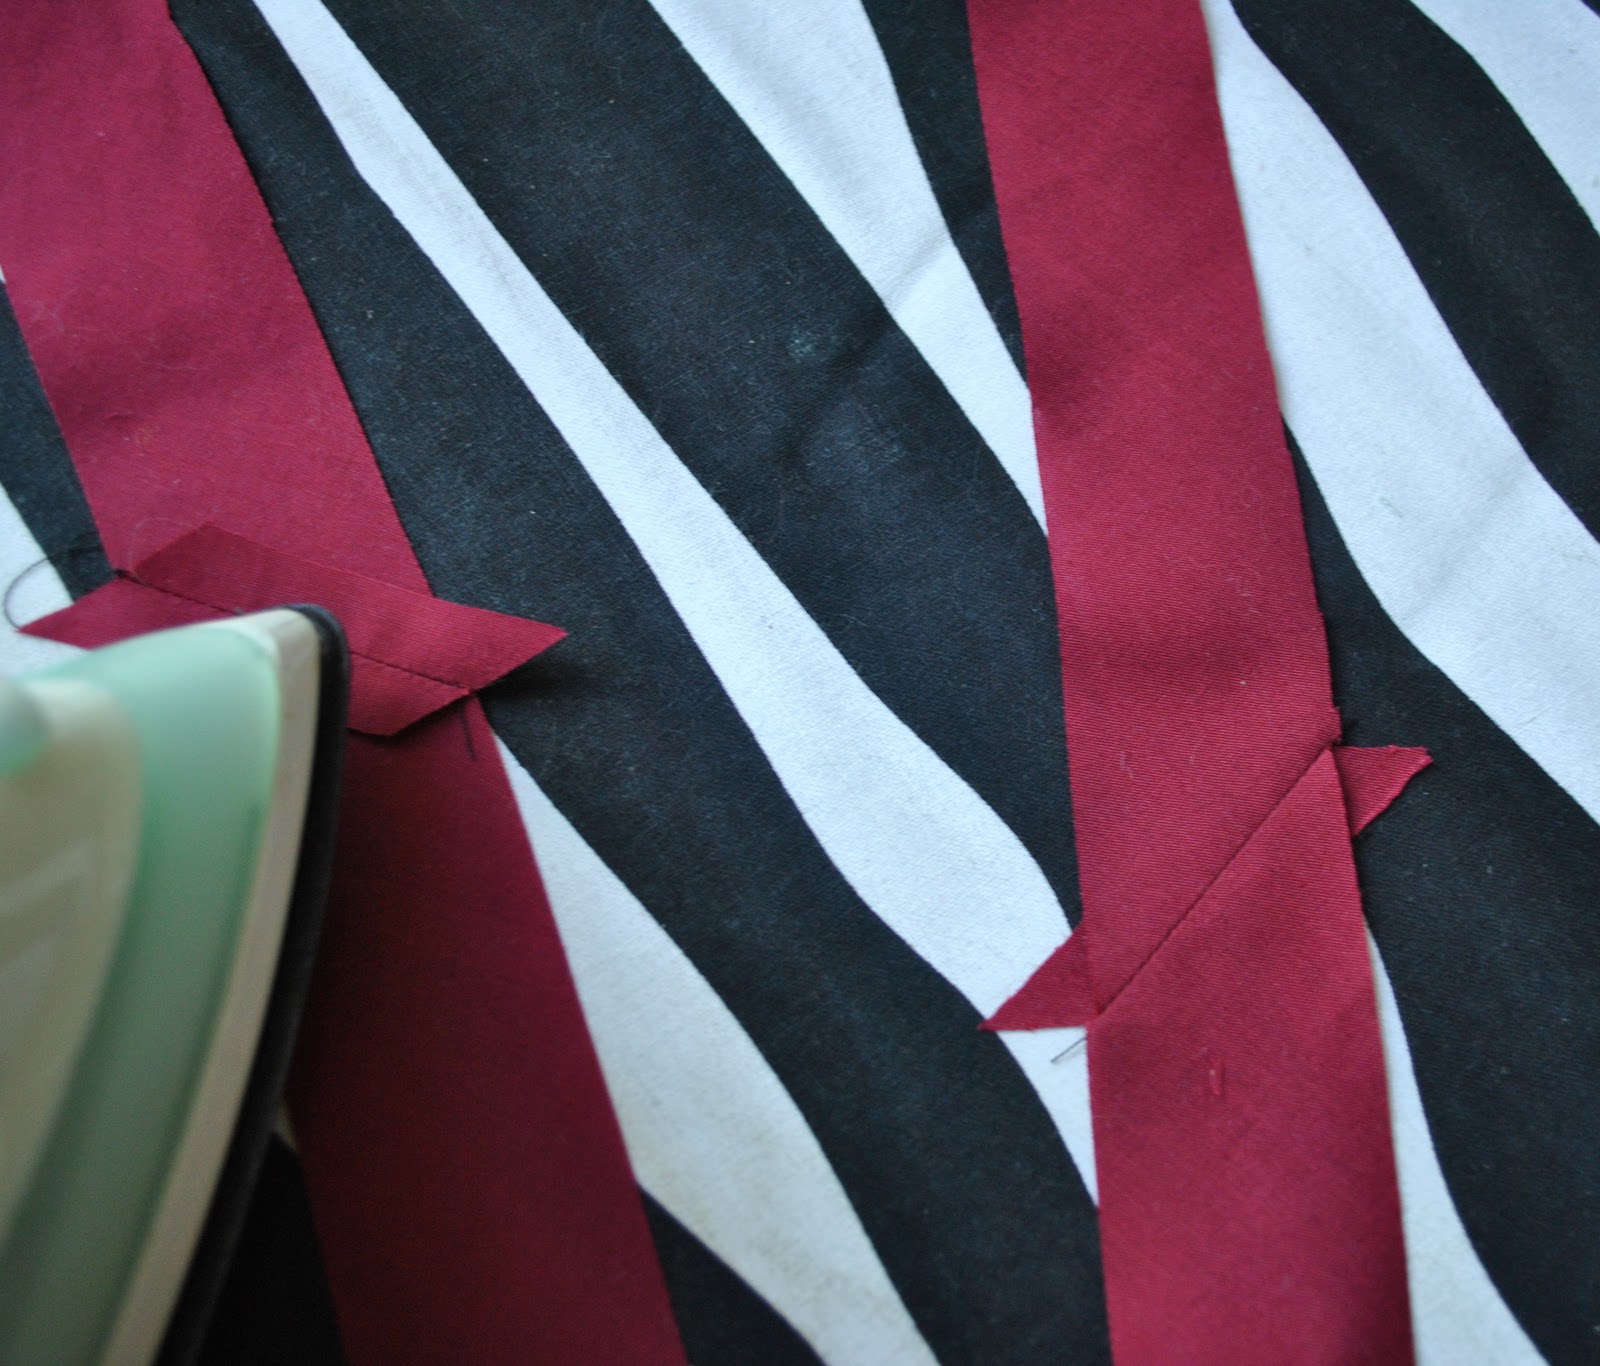
Join together end on end like so, to get a continuous strip of bias binding…

Press the seam allowances open.

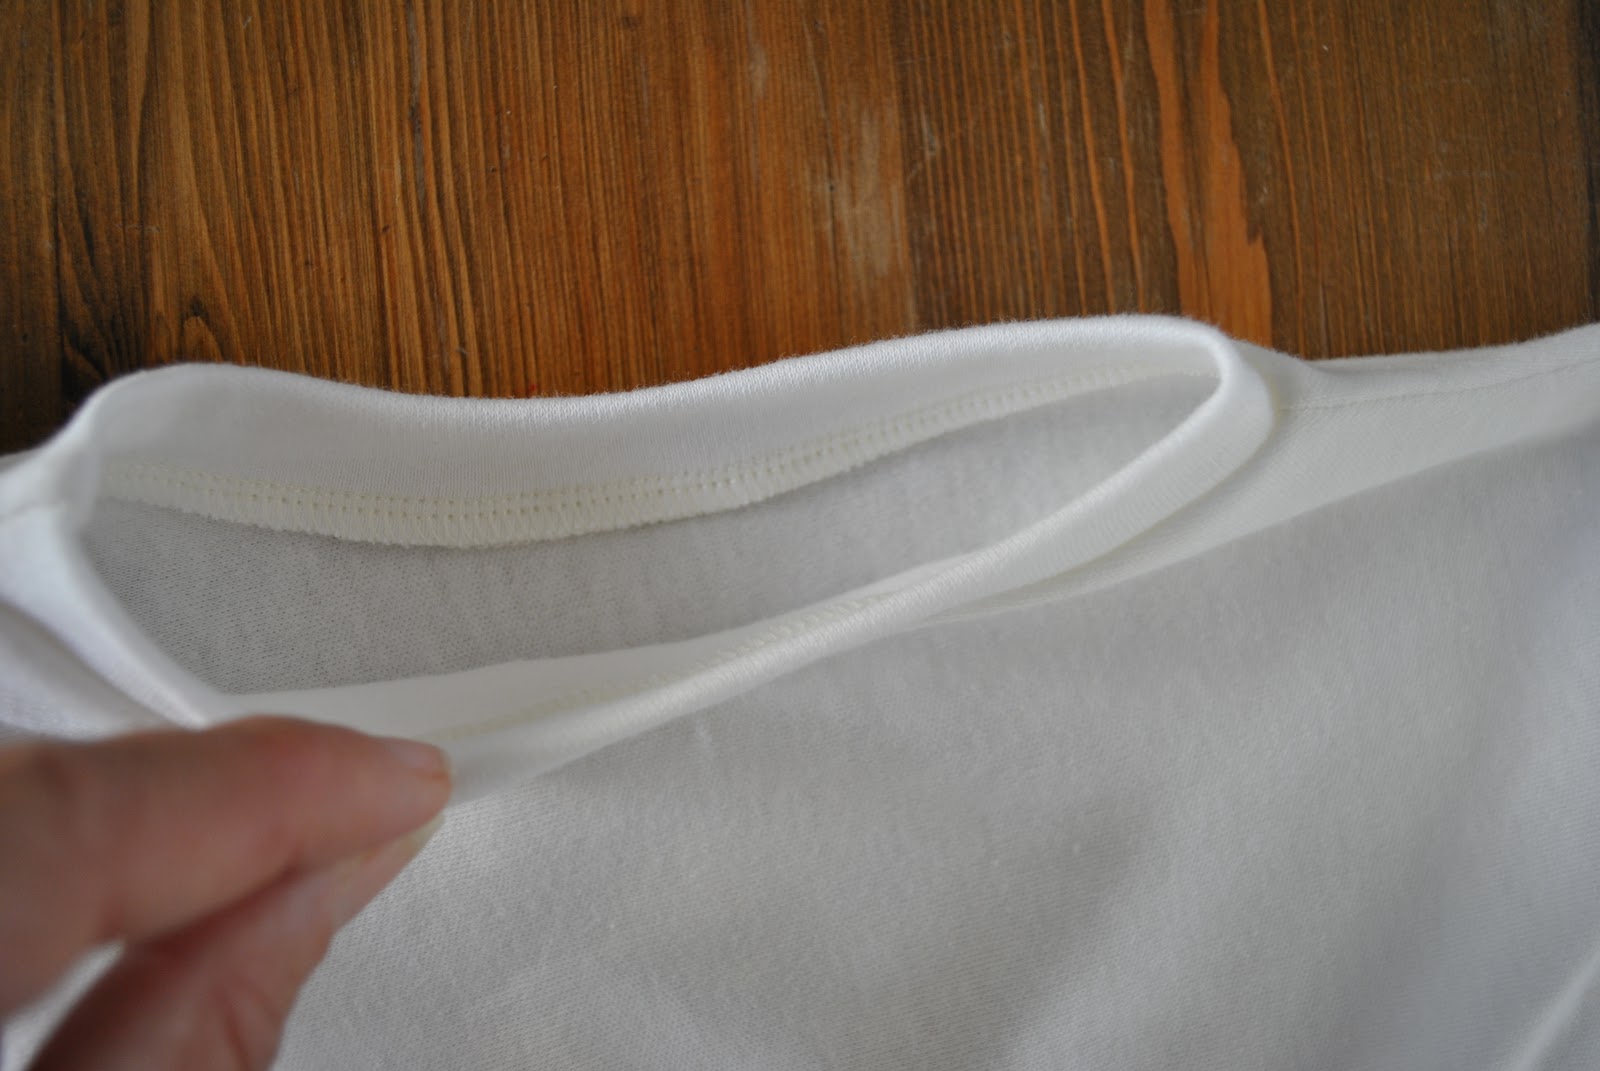
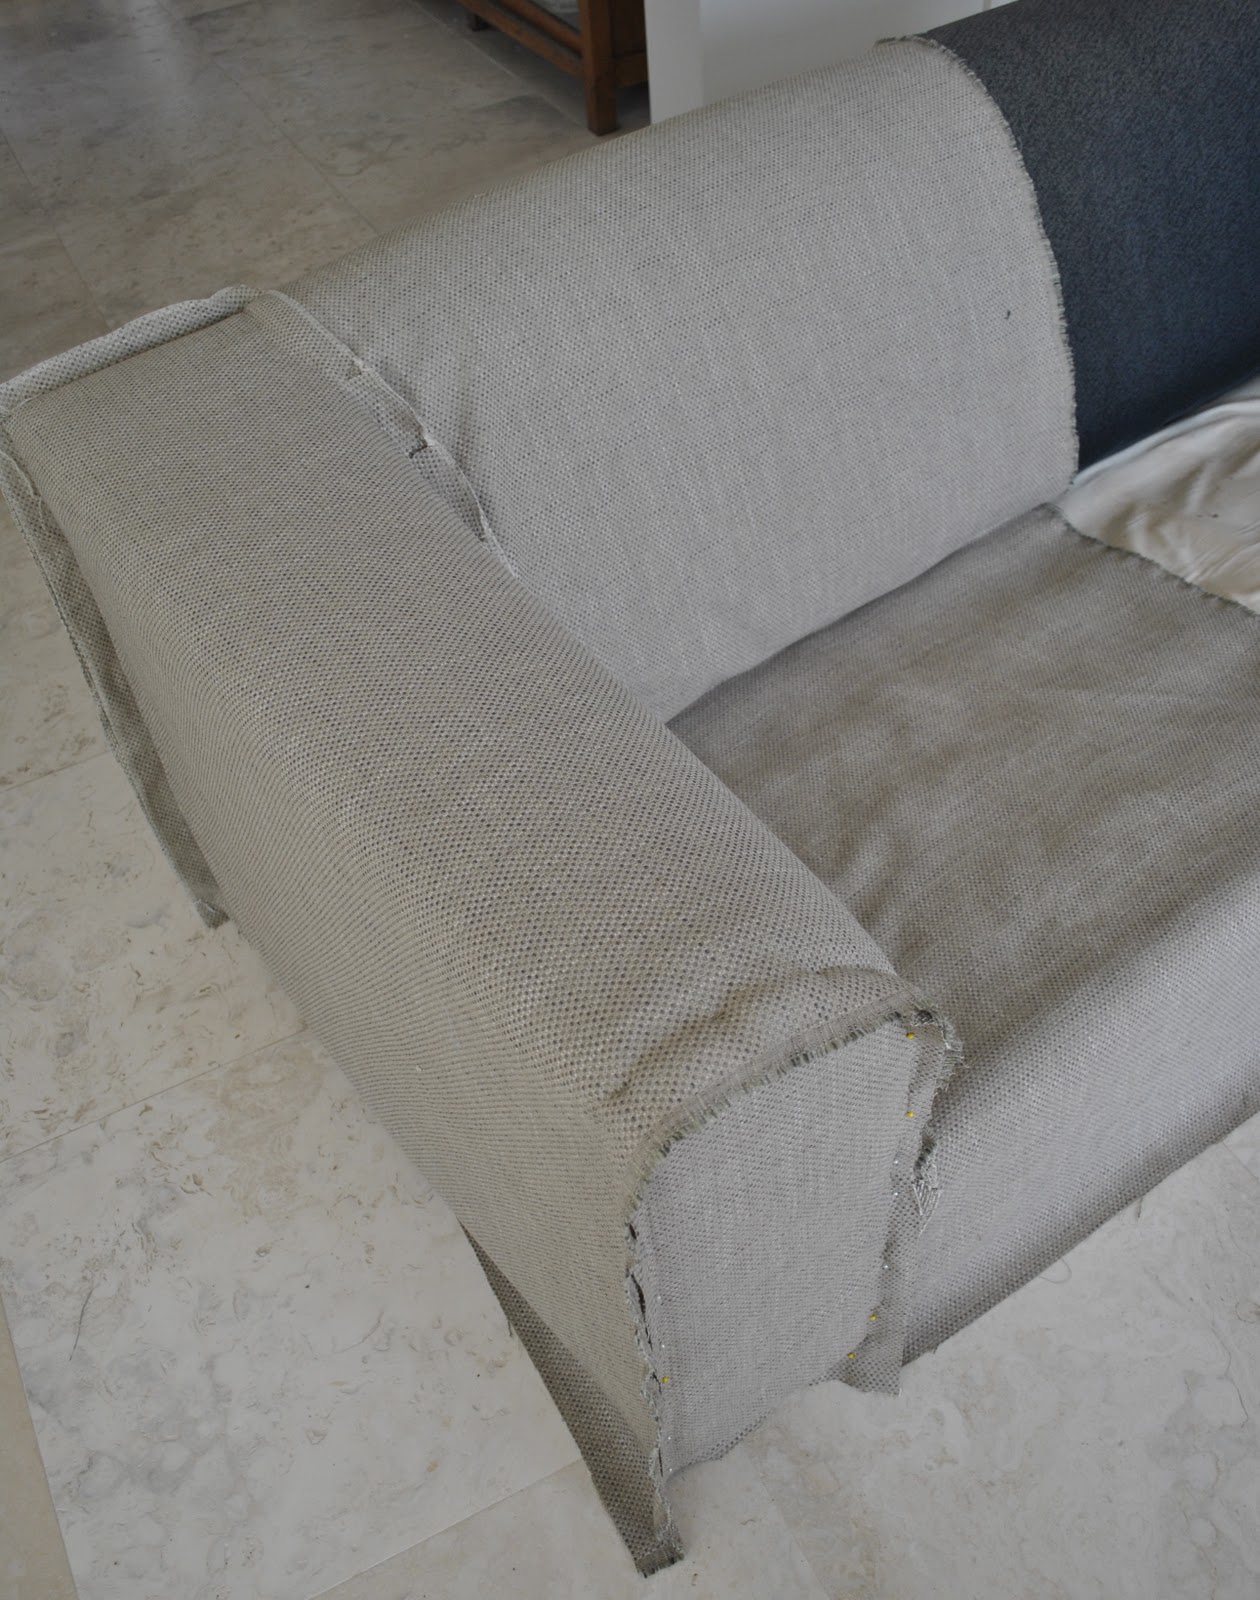
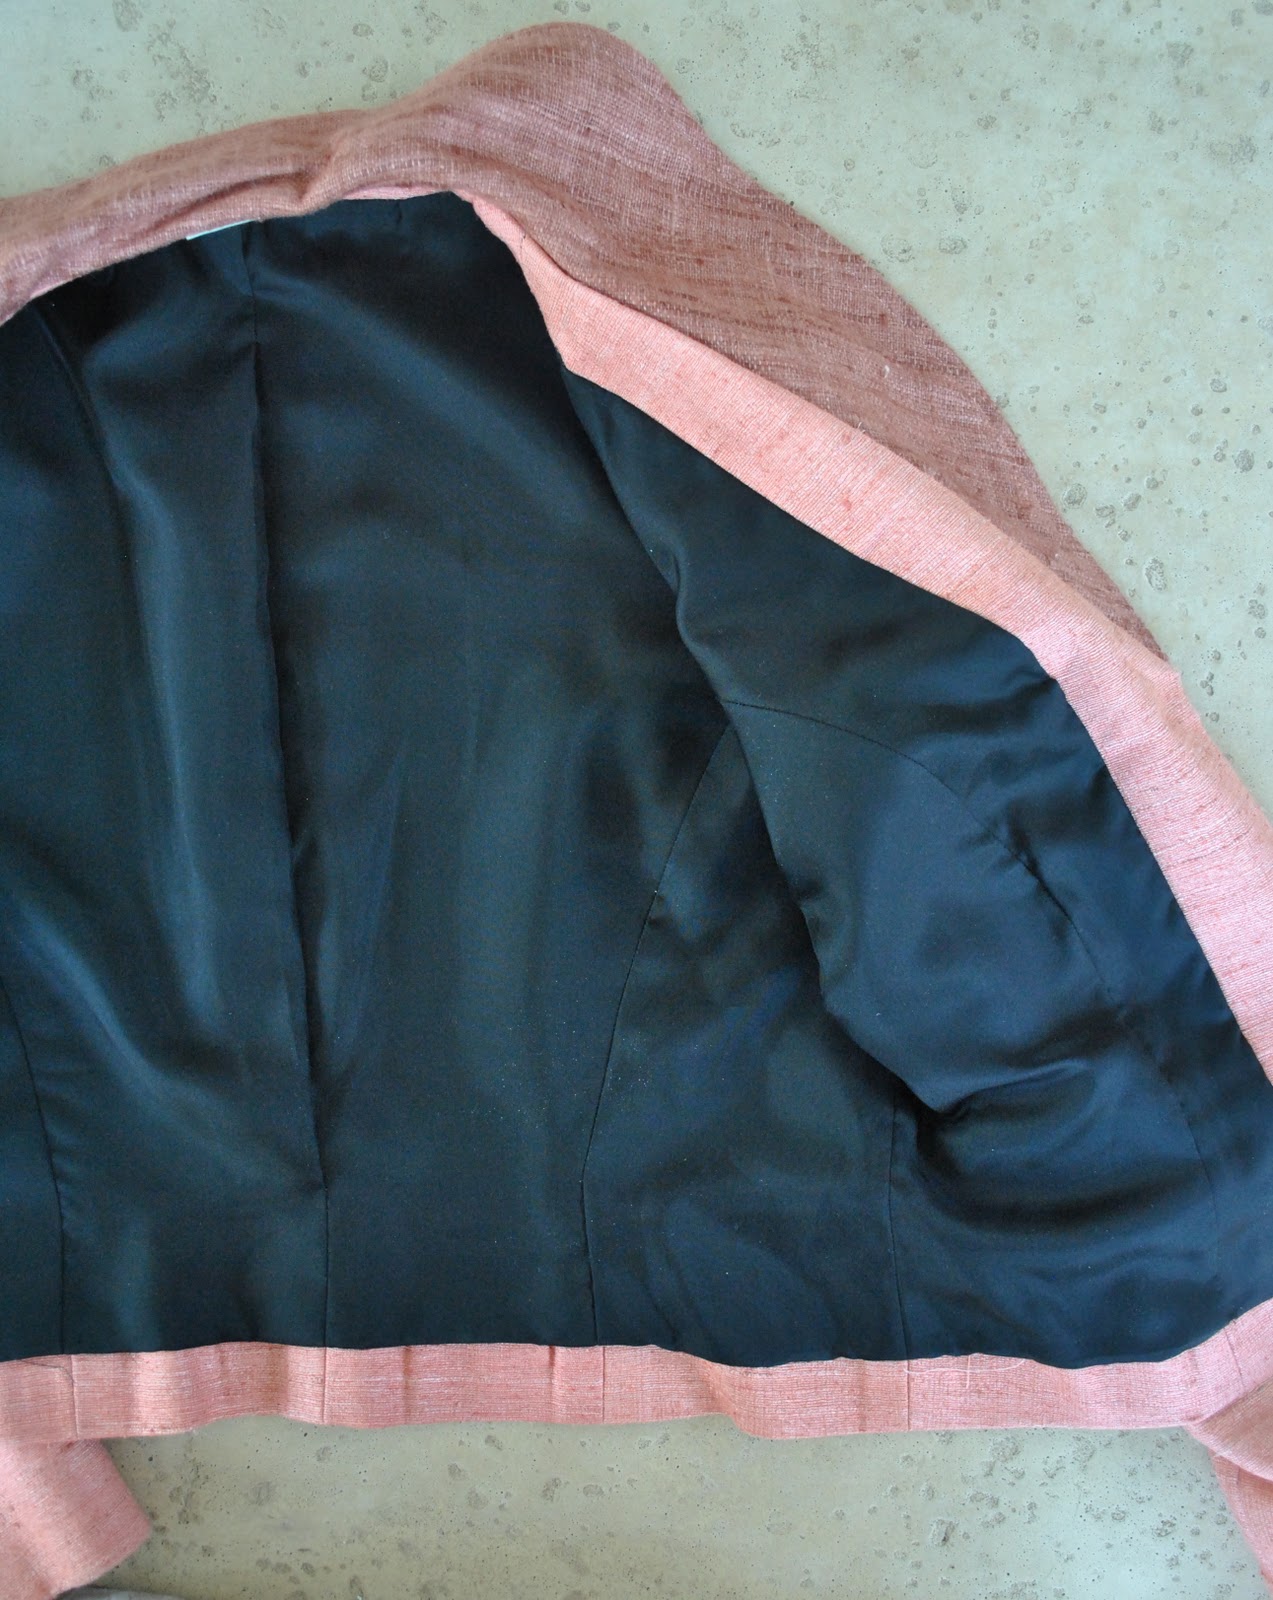
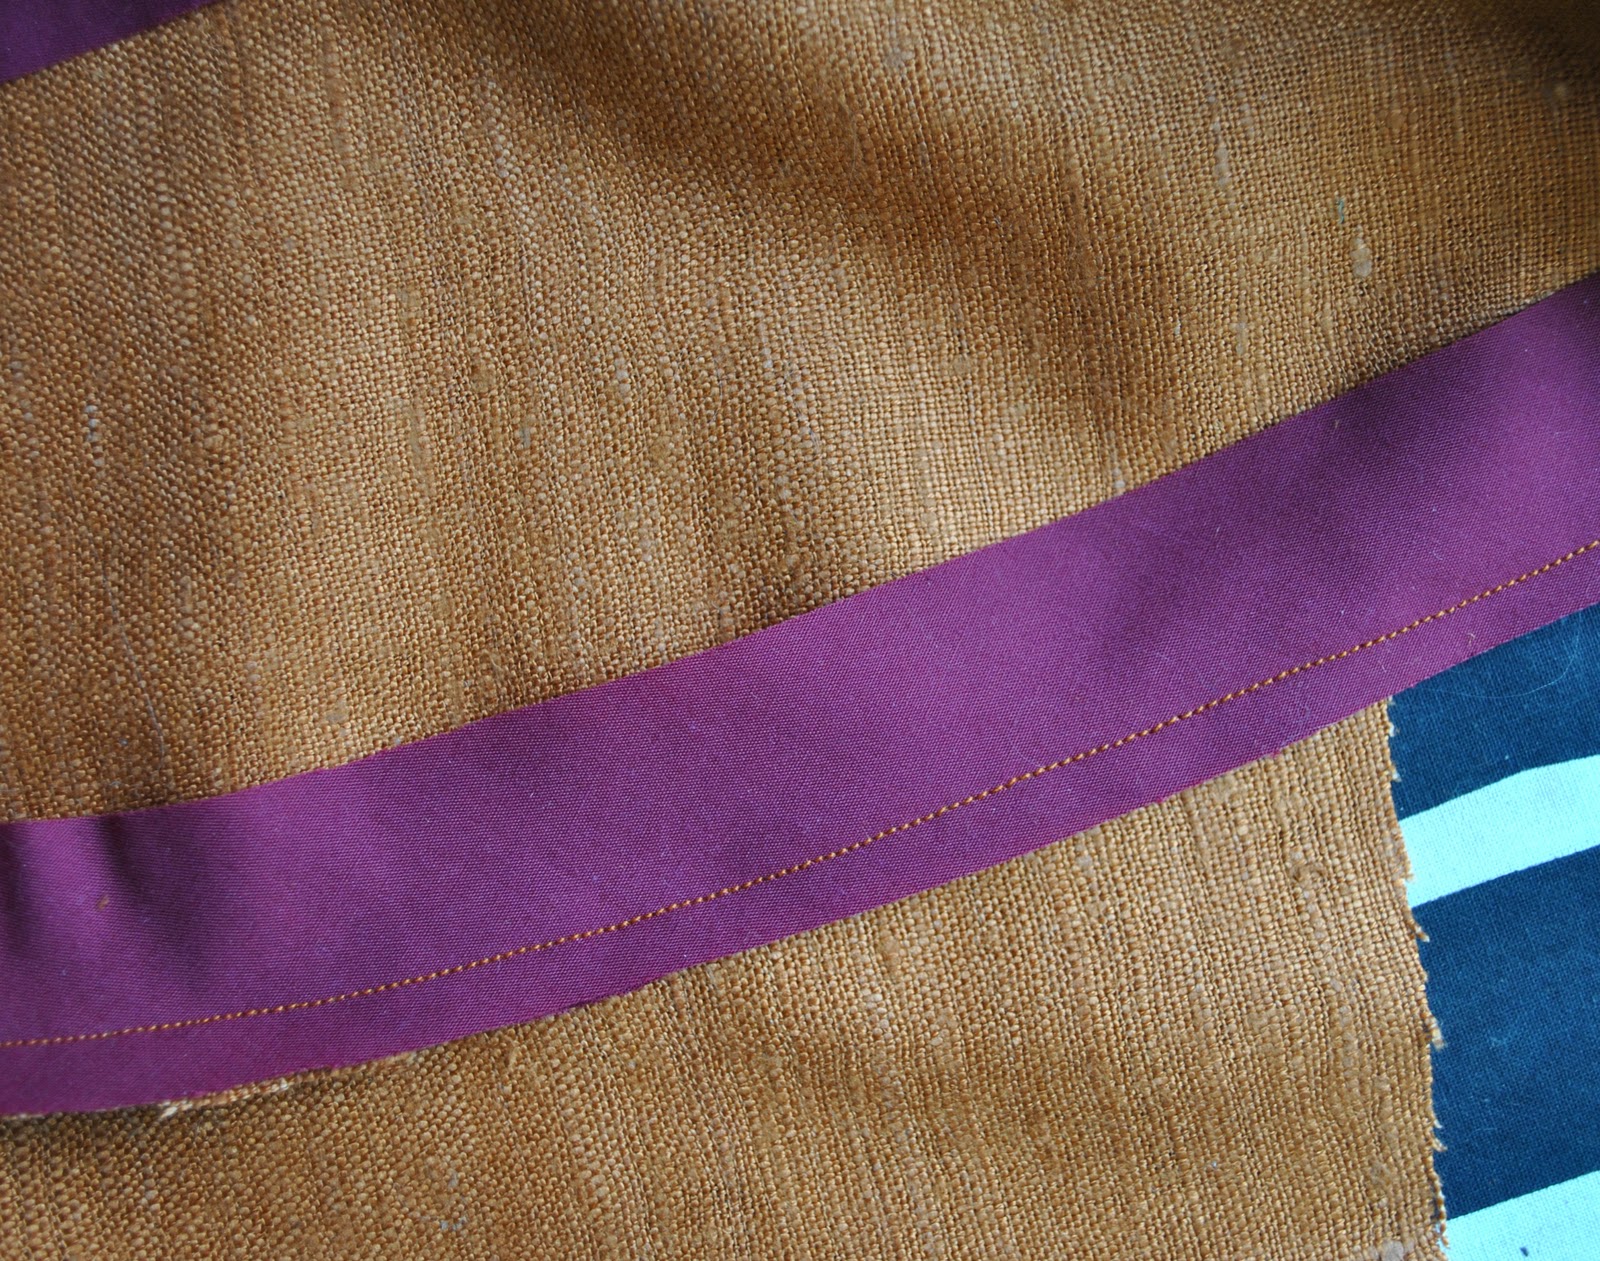
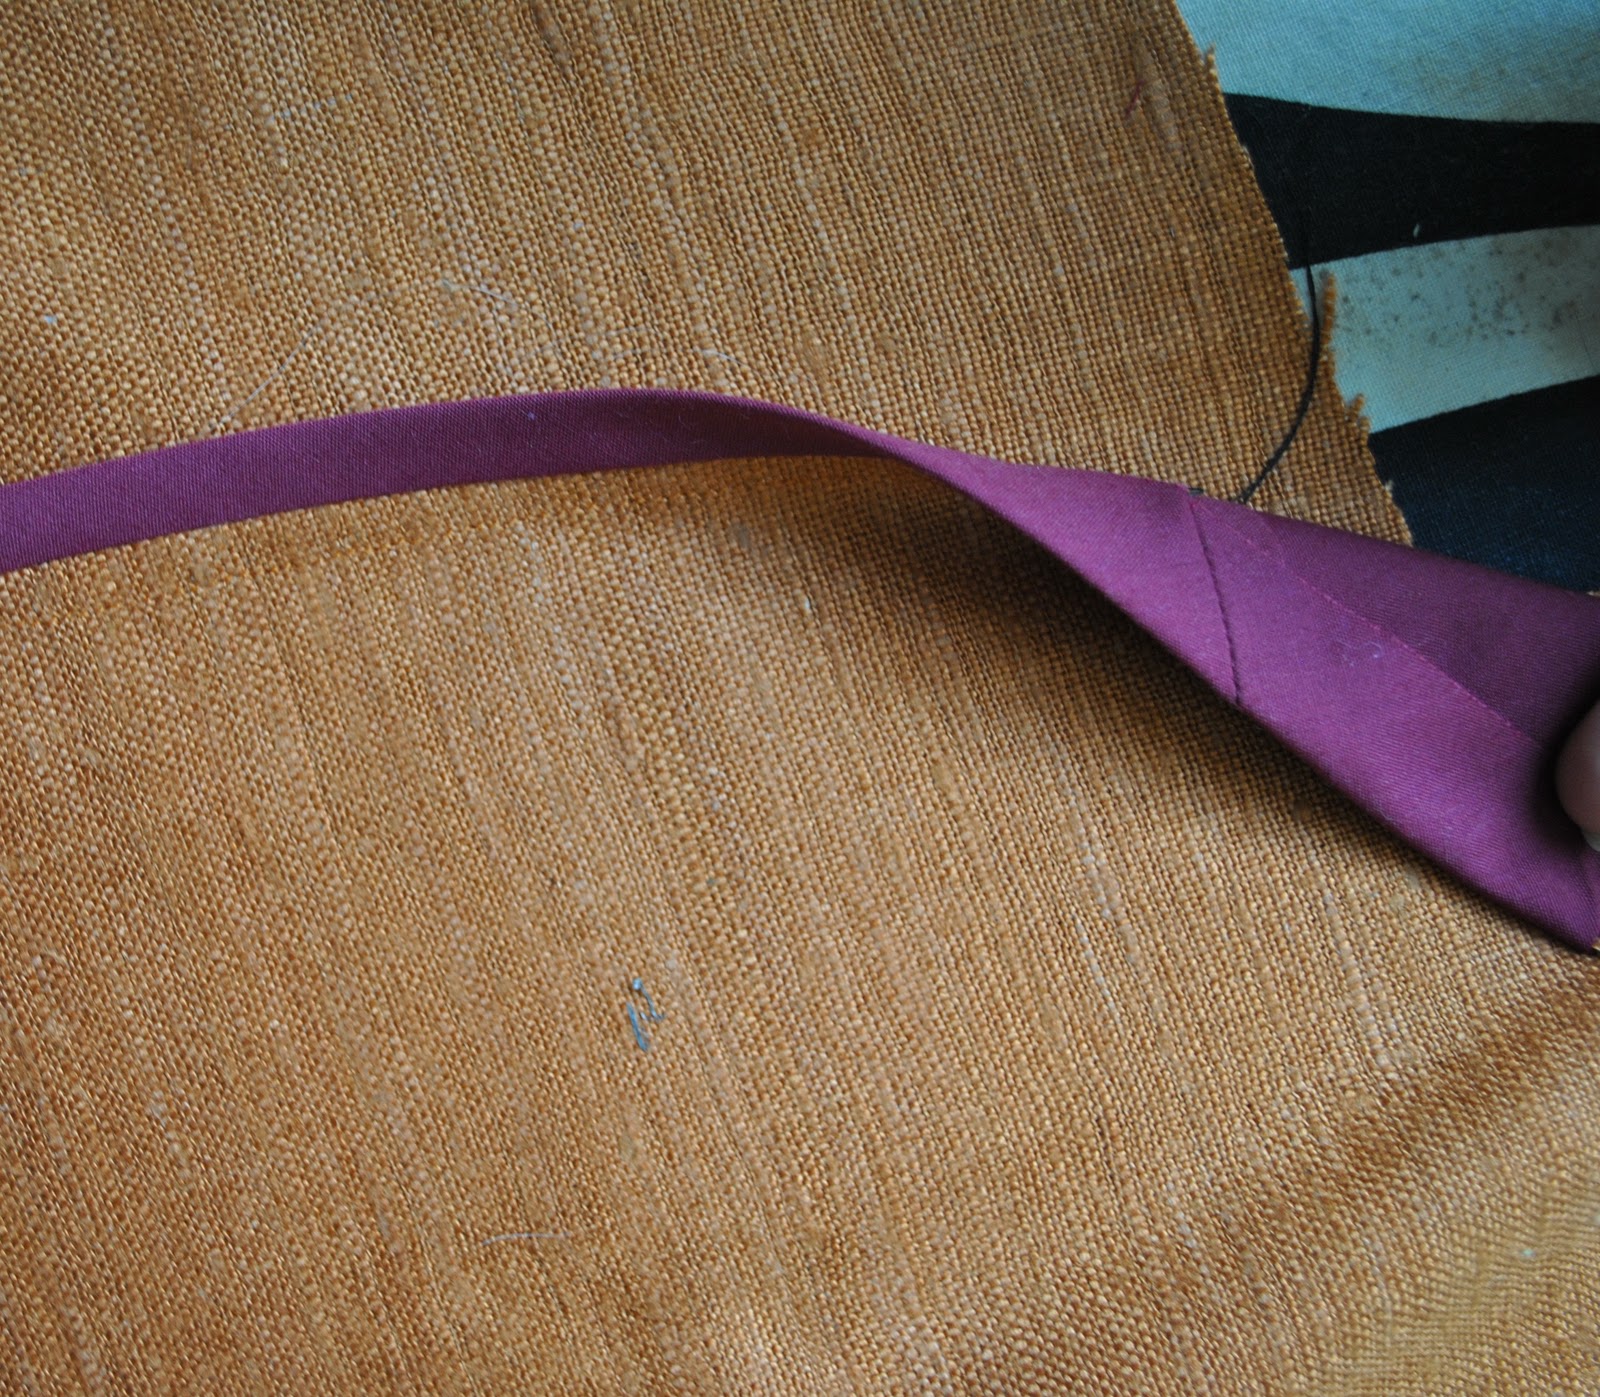
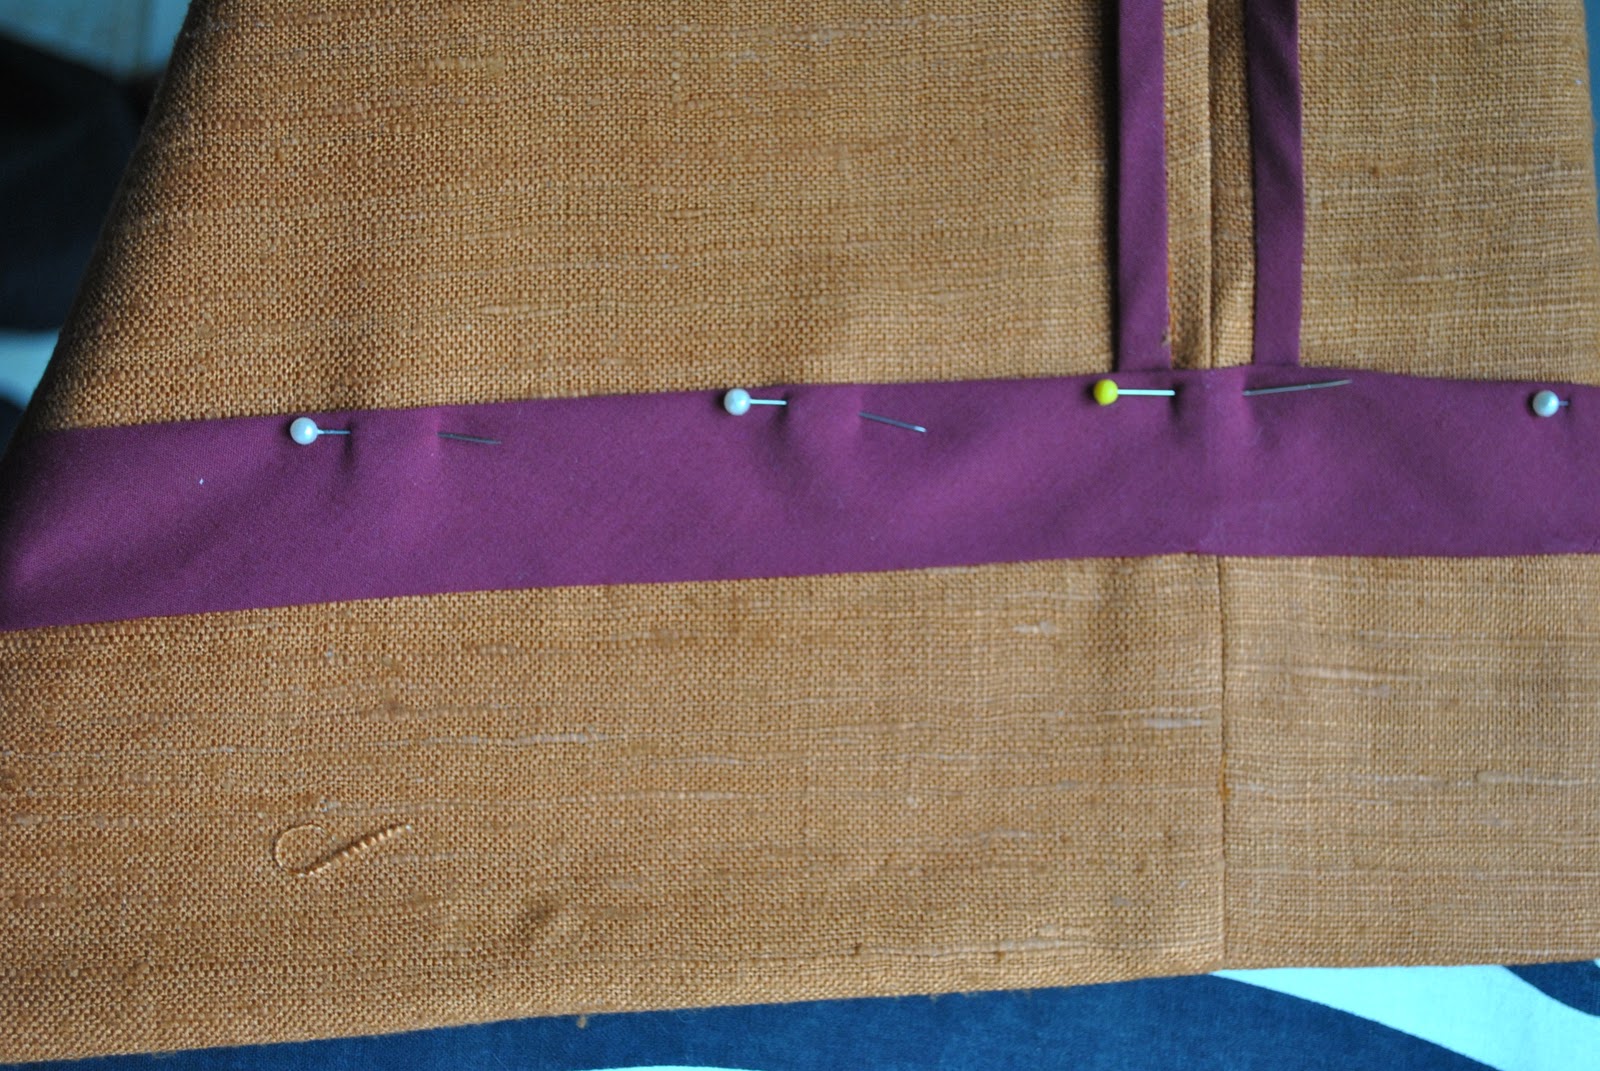
Lay against the raw edge of your fabric, and sew together in a narrow 6mm (1/4 inch) seam.

Fold the bias strip back over the seam and press the seam binding back over itself…  
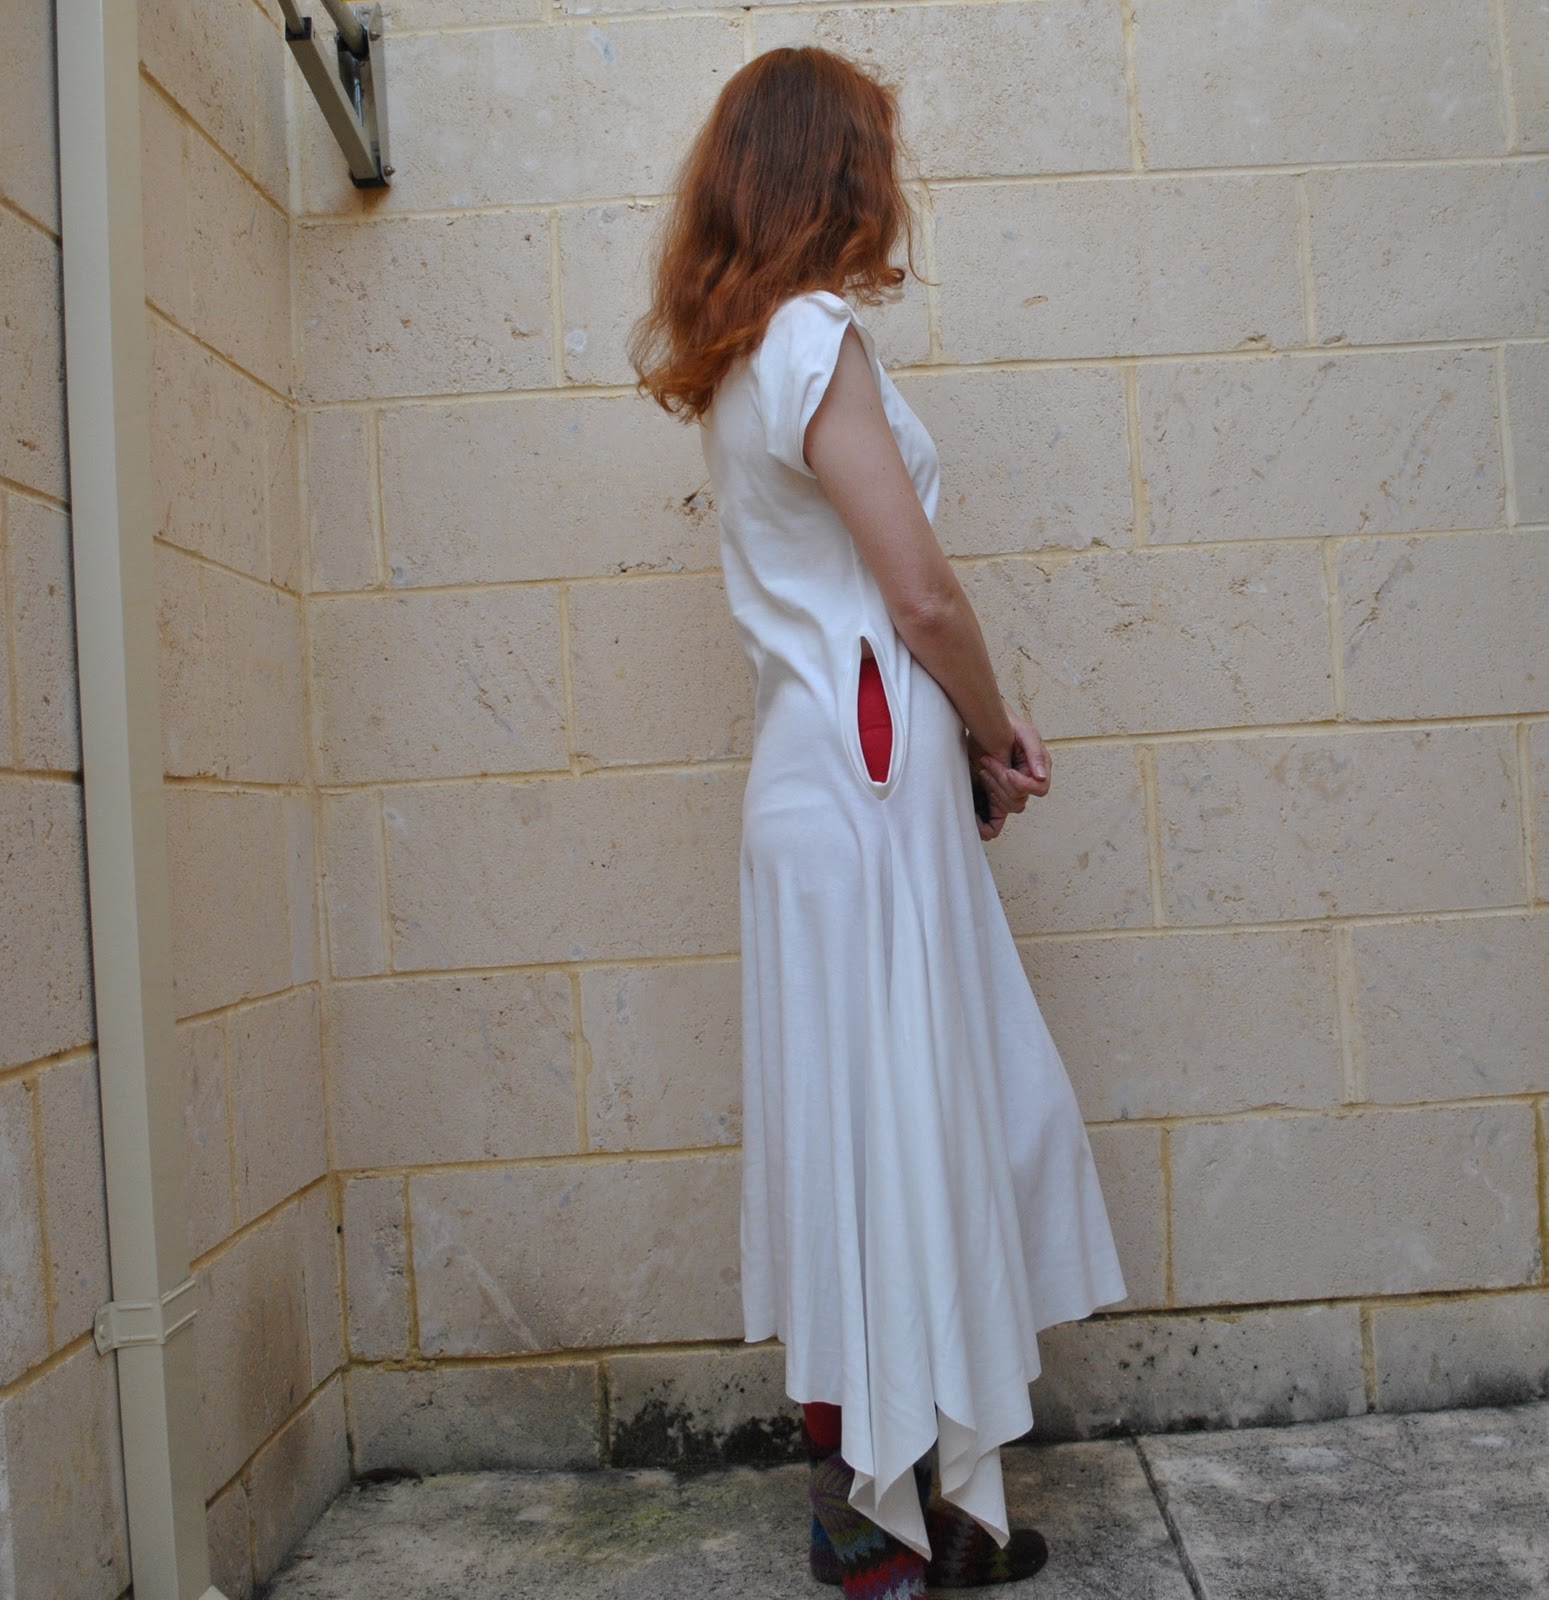
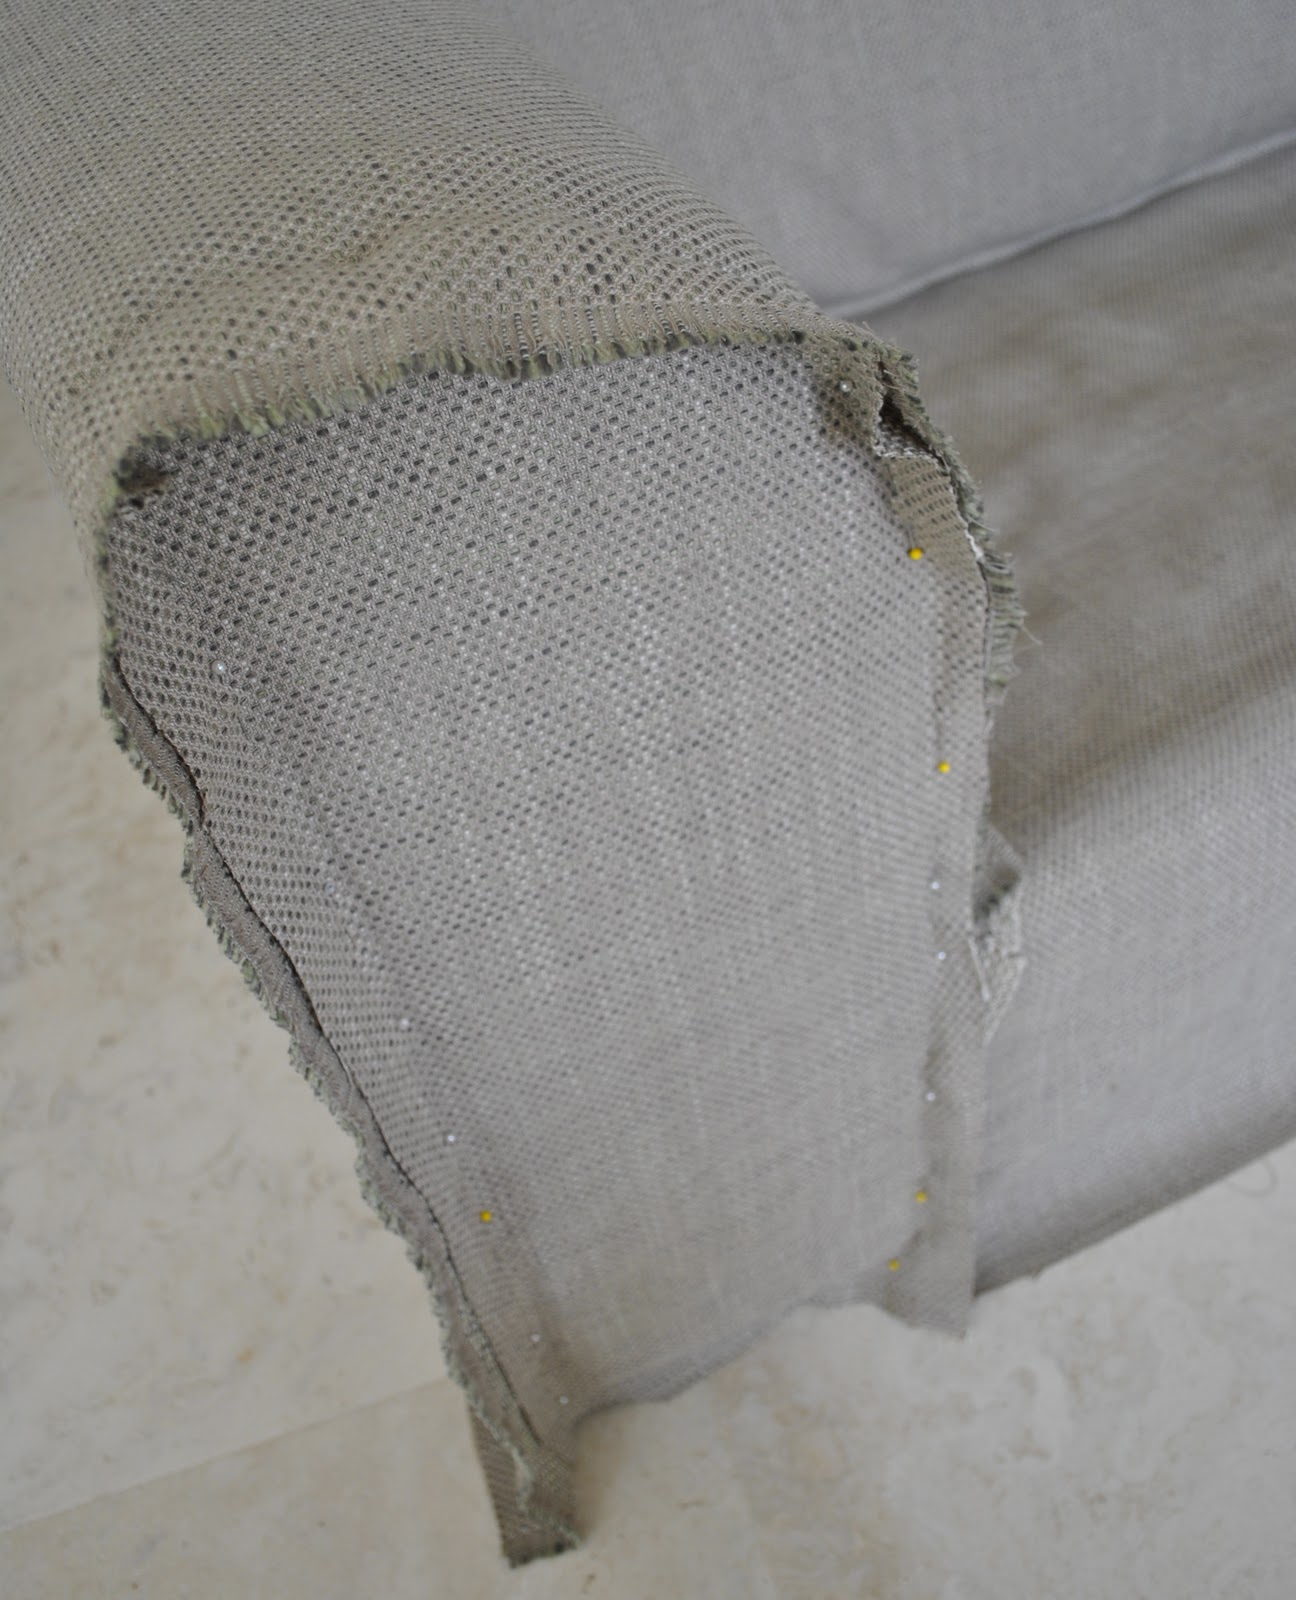
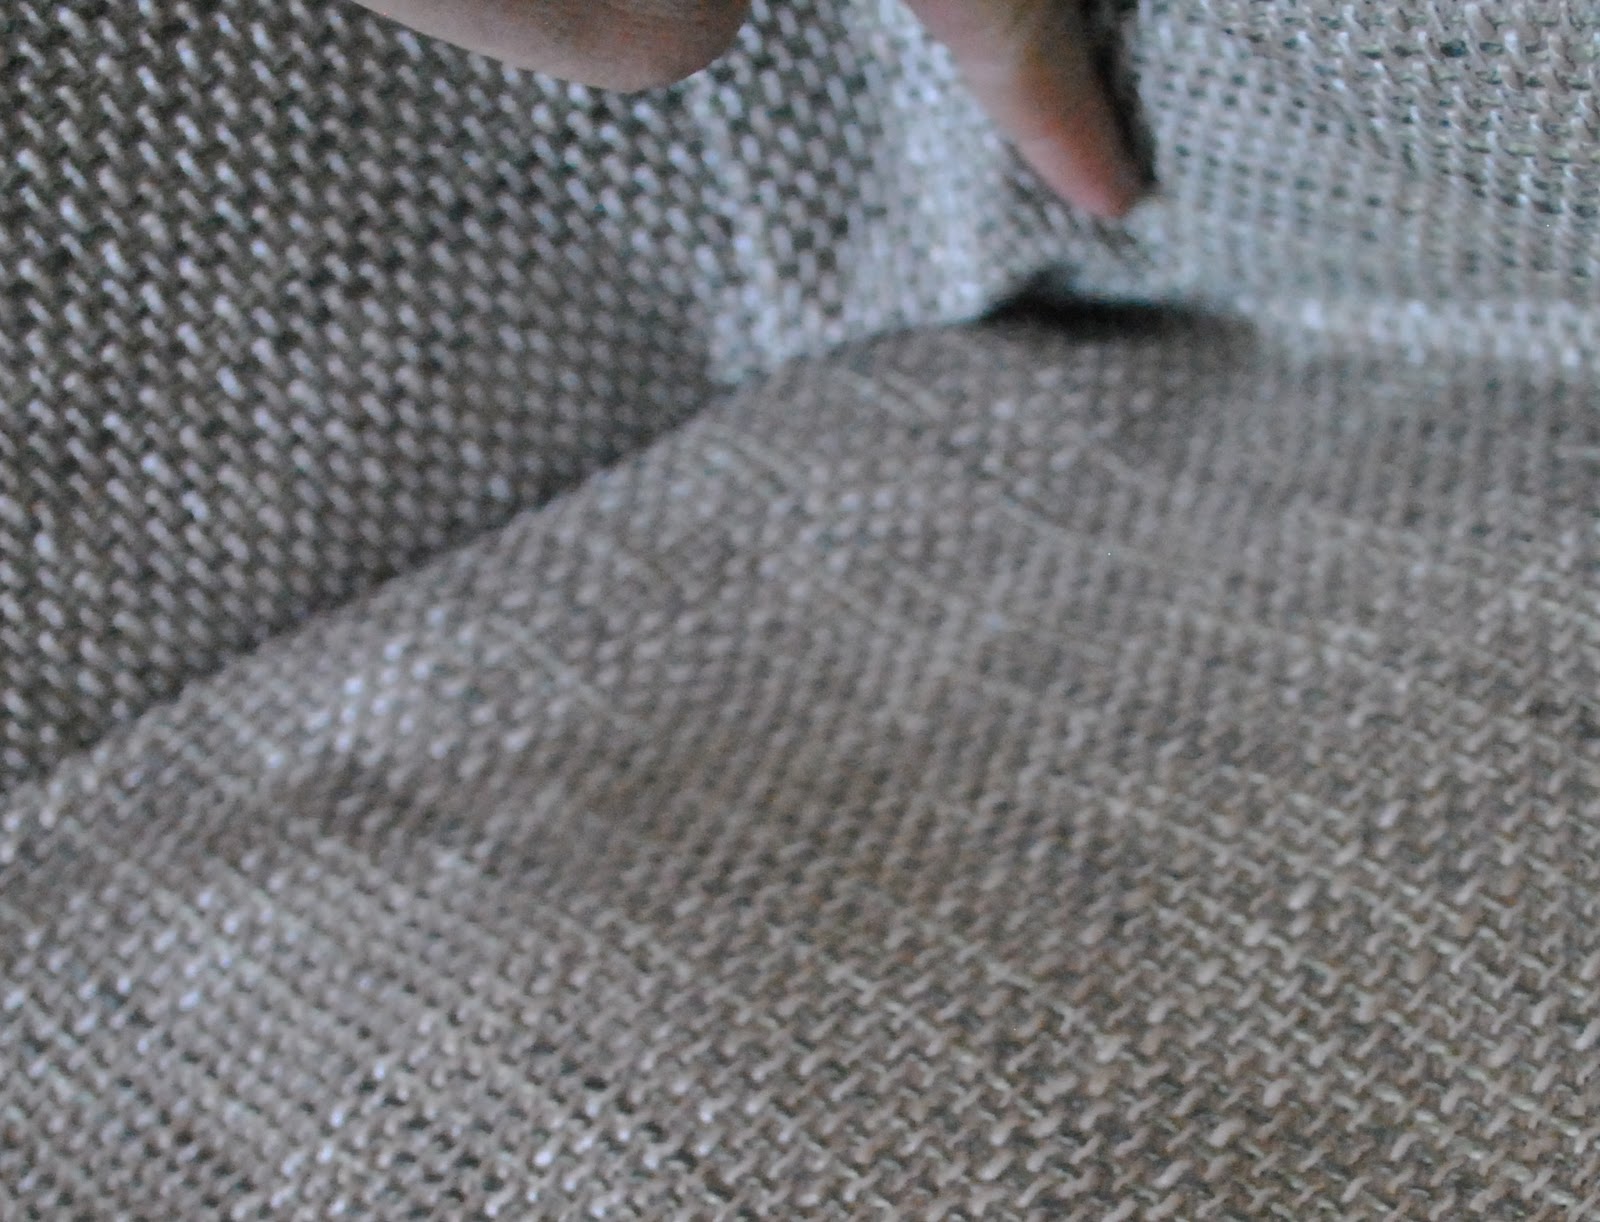
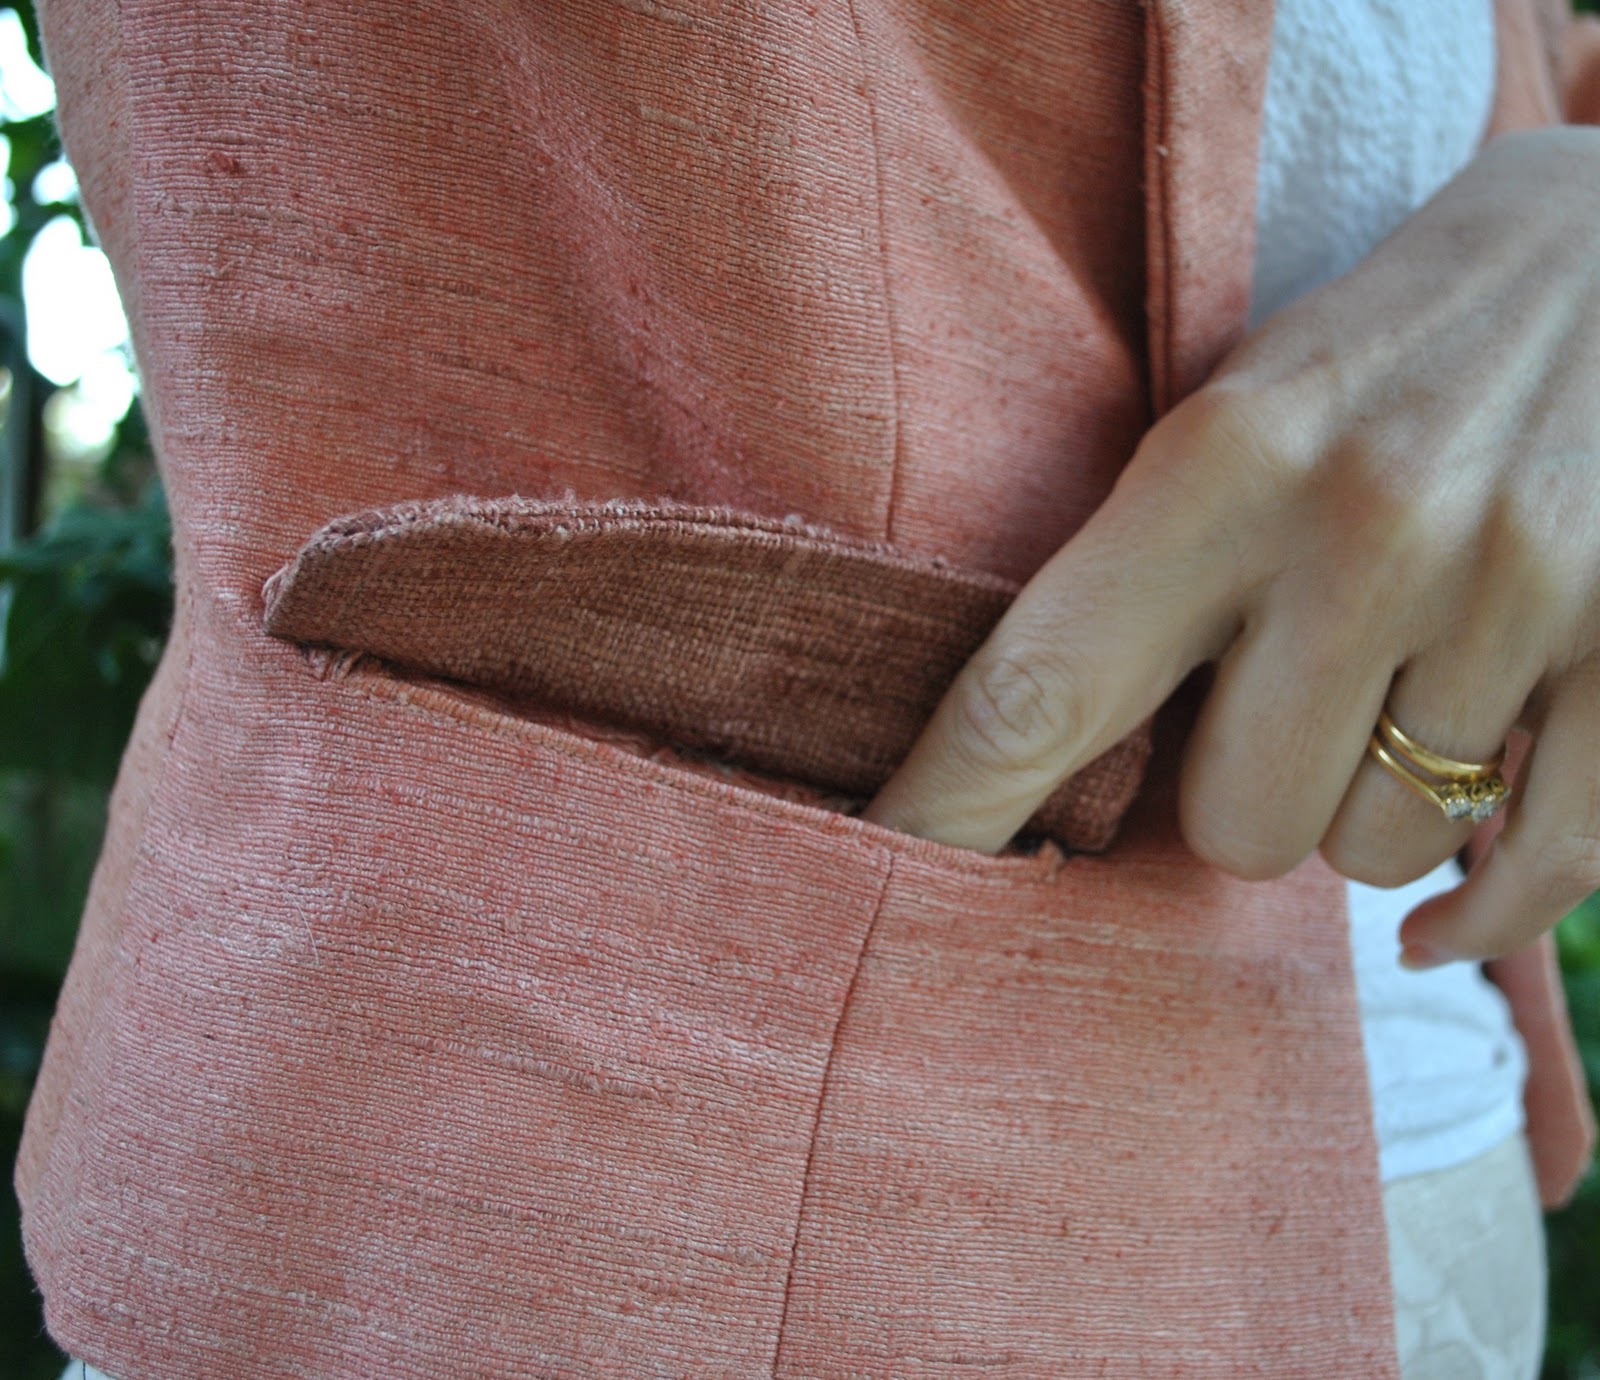
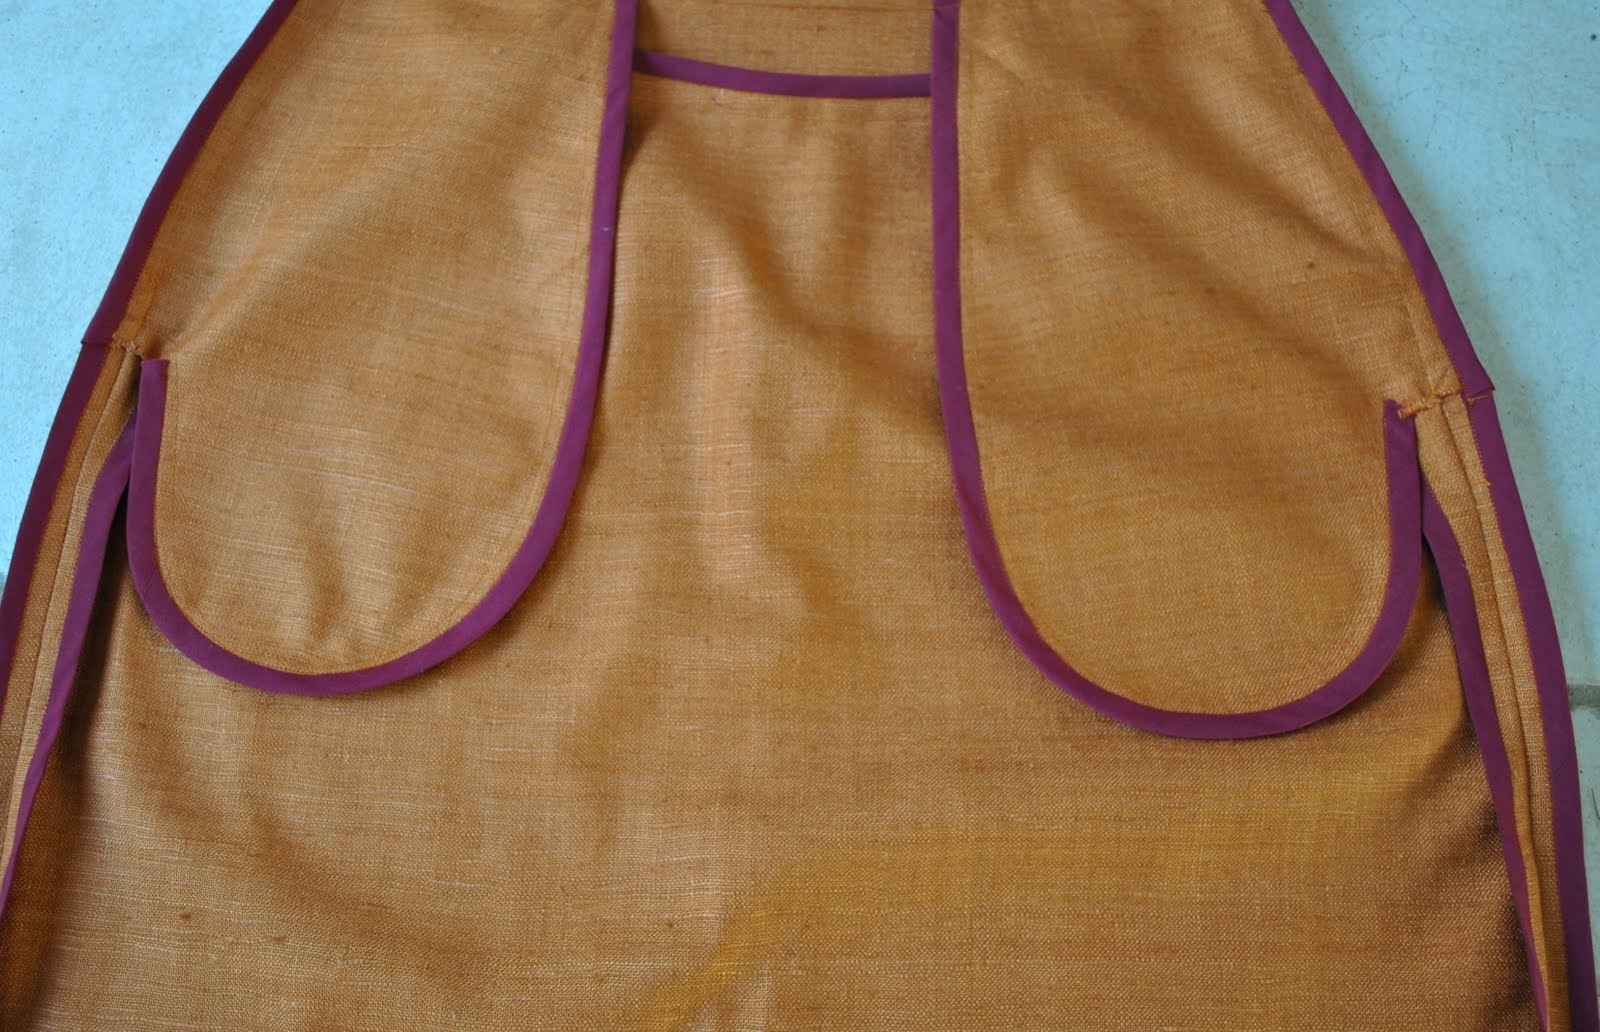
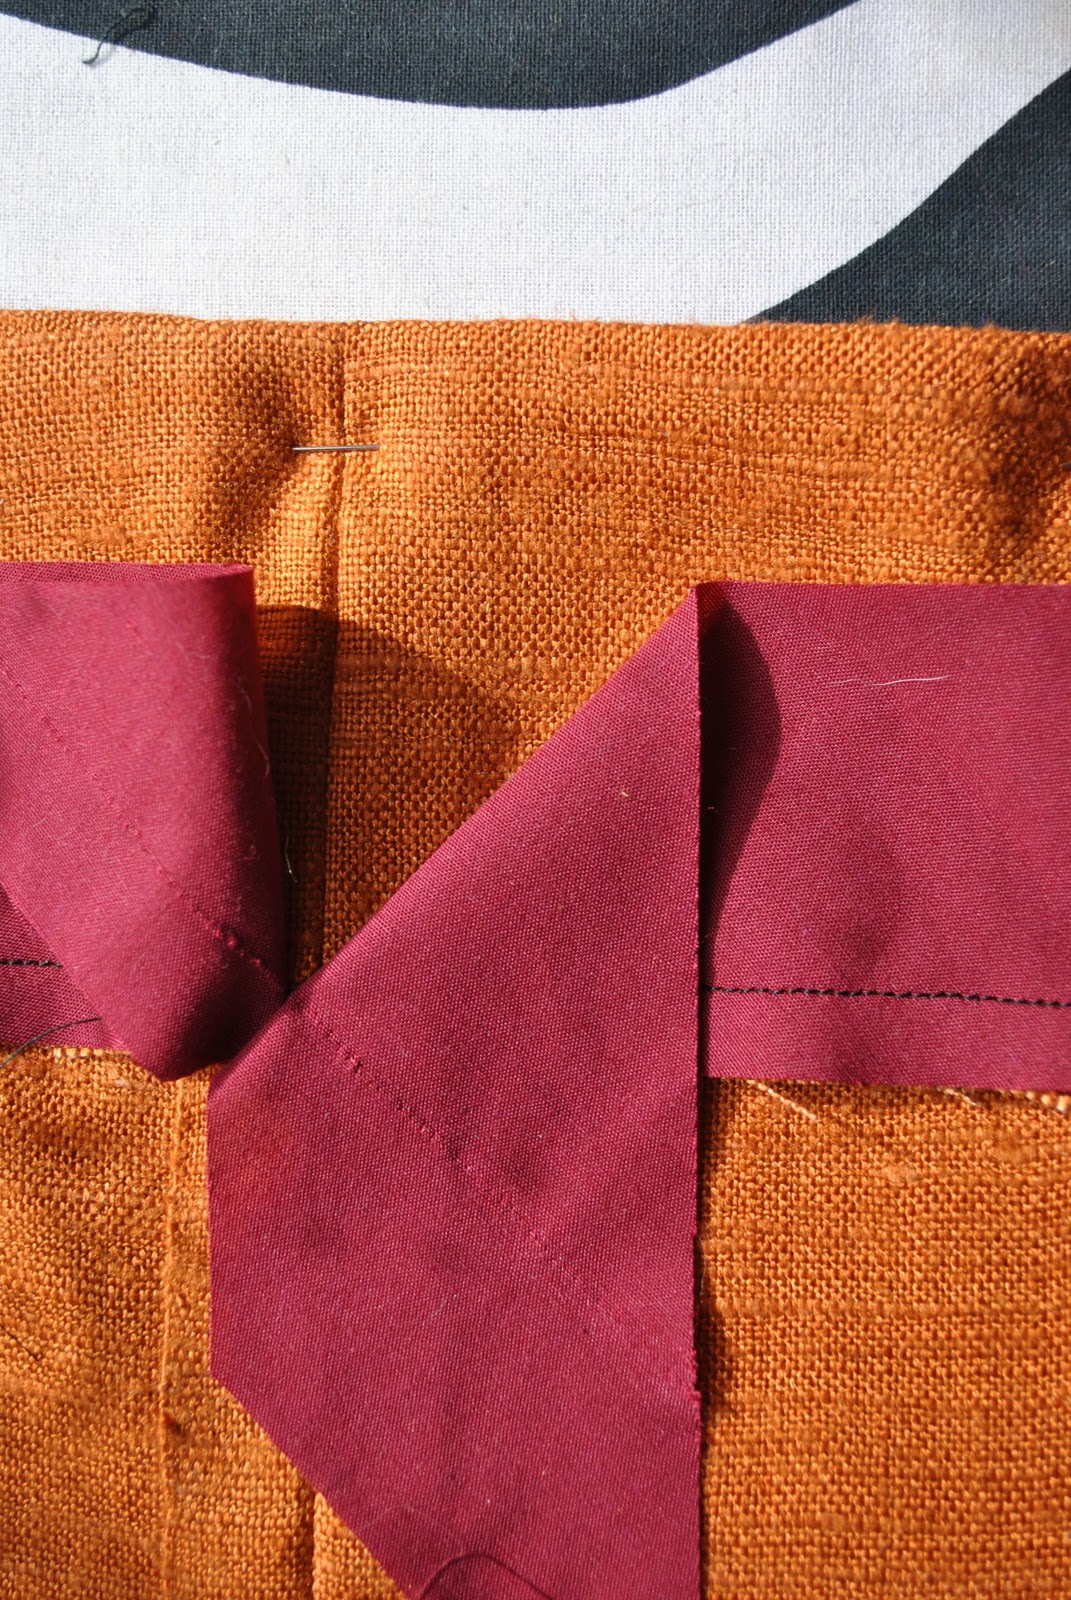
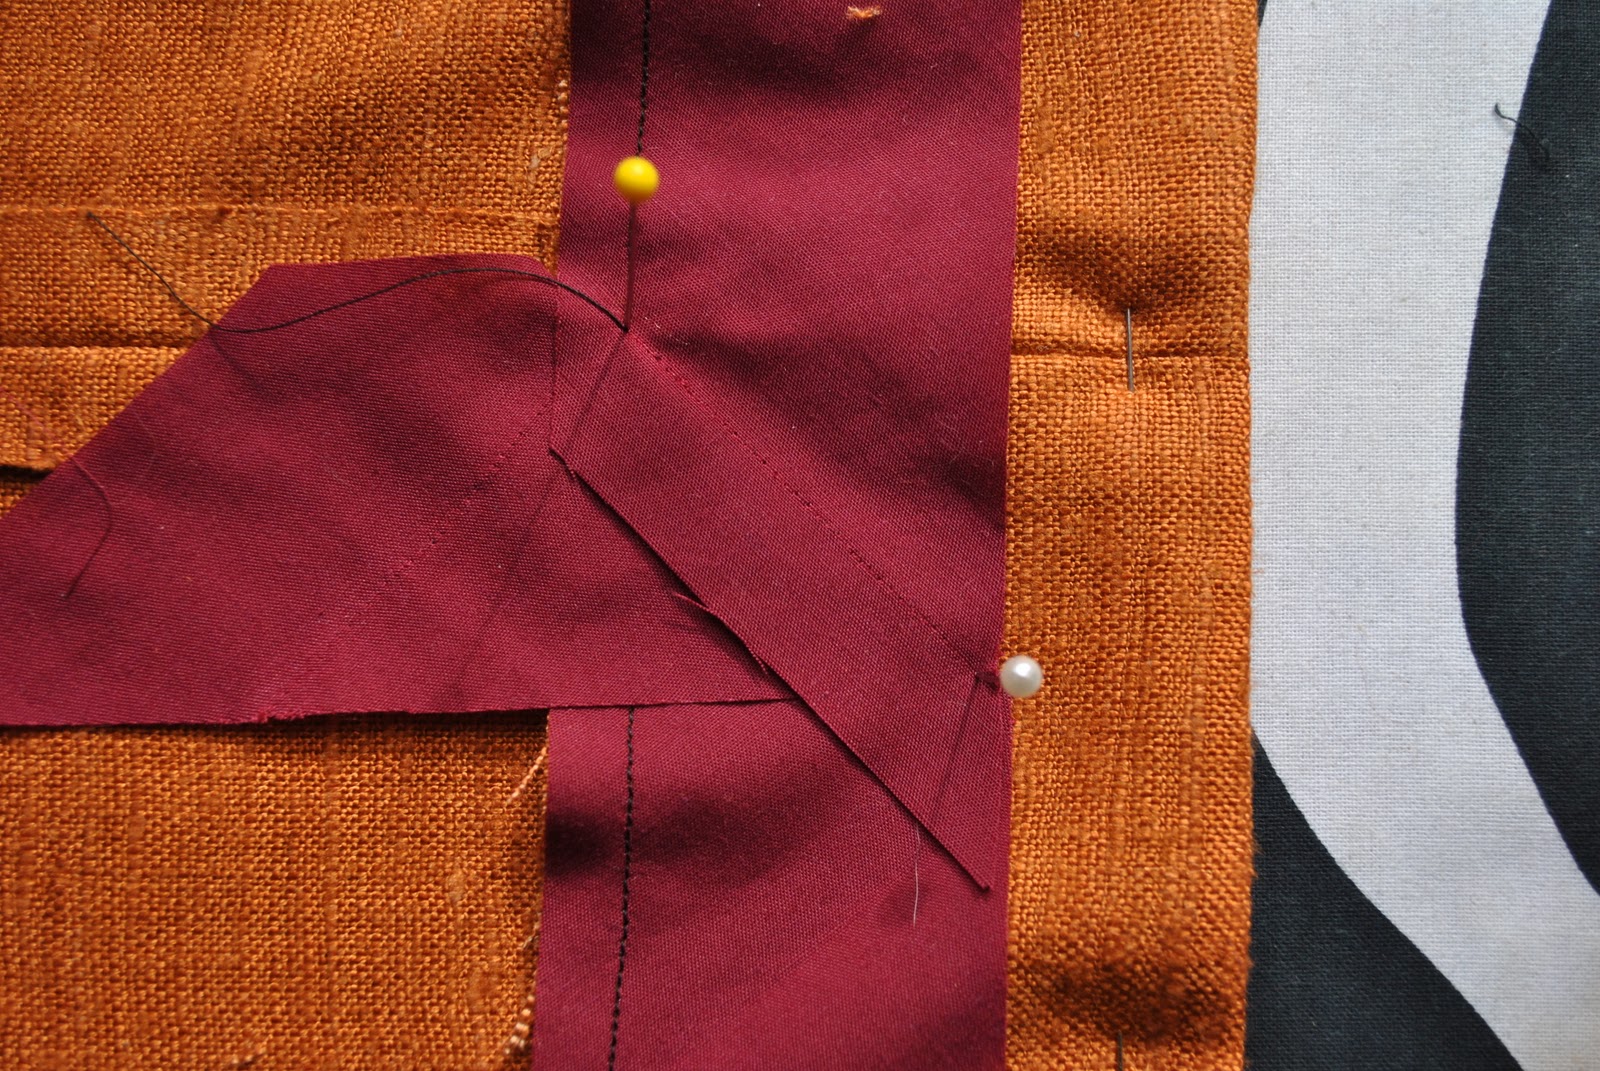
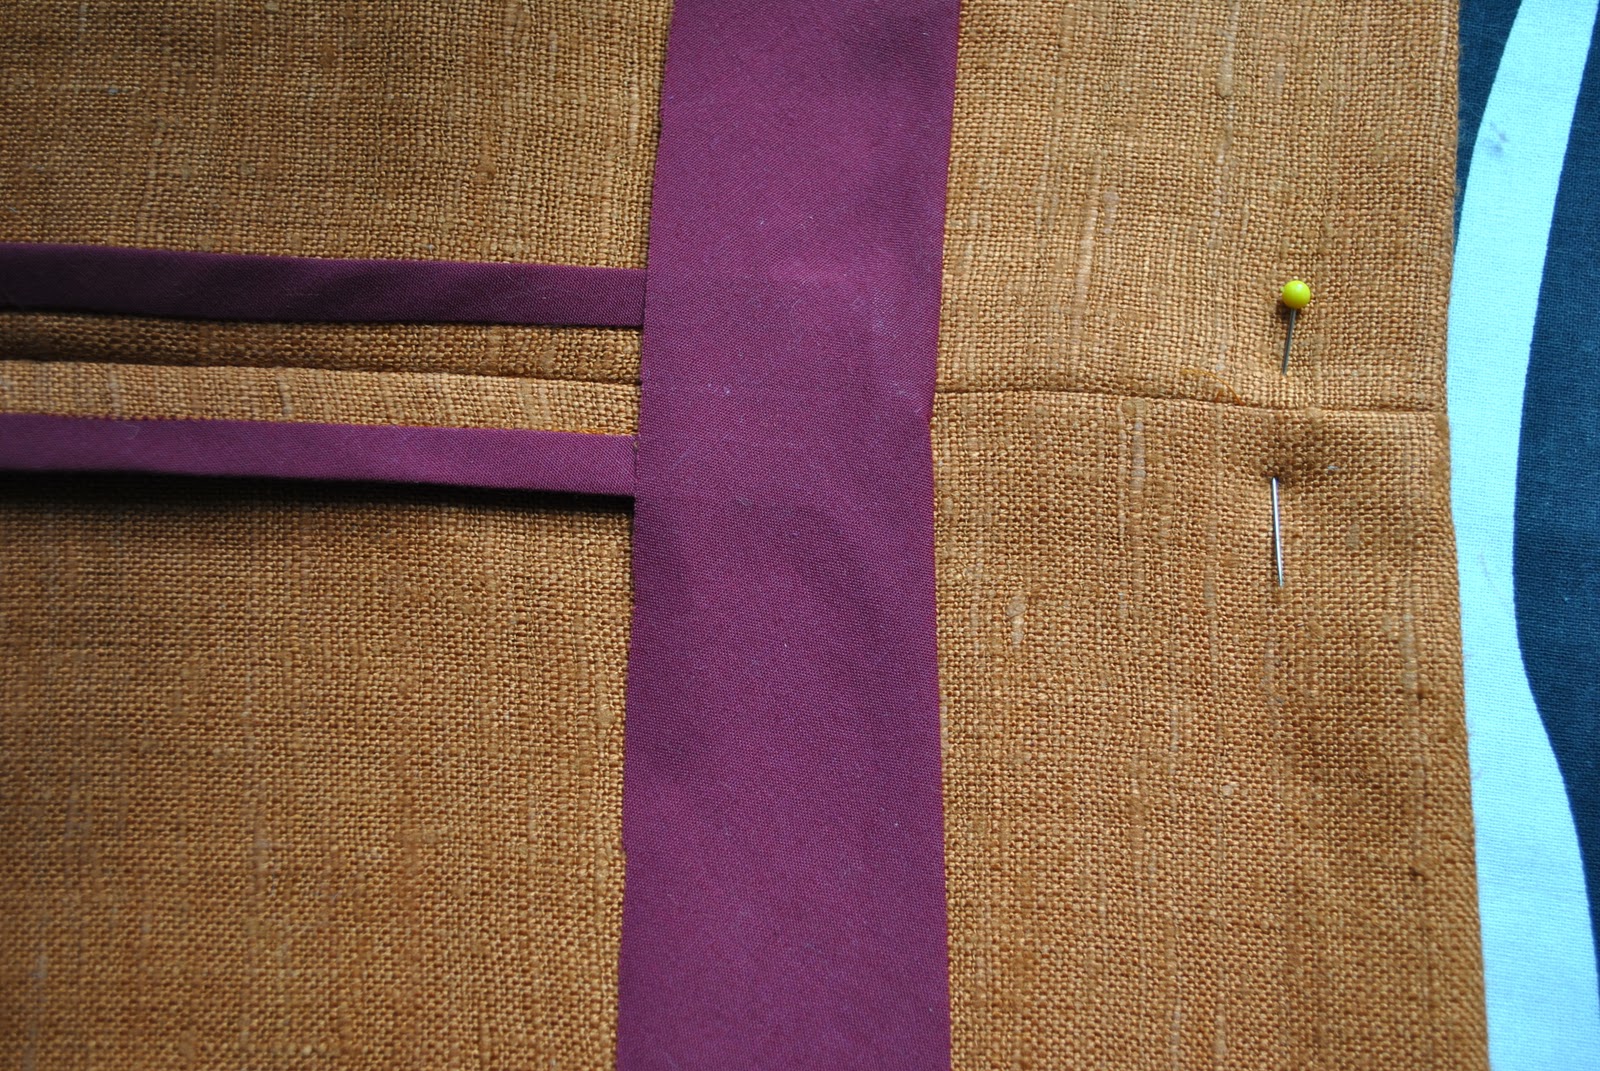
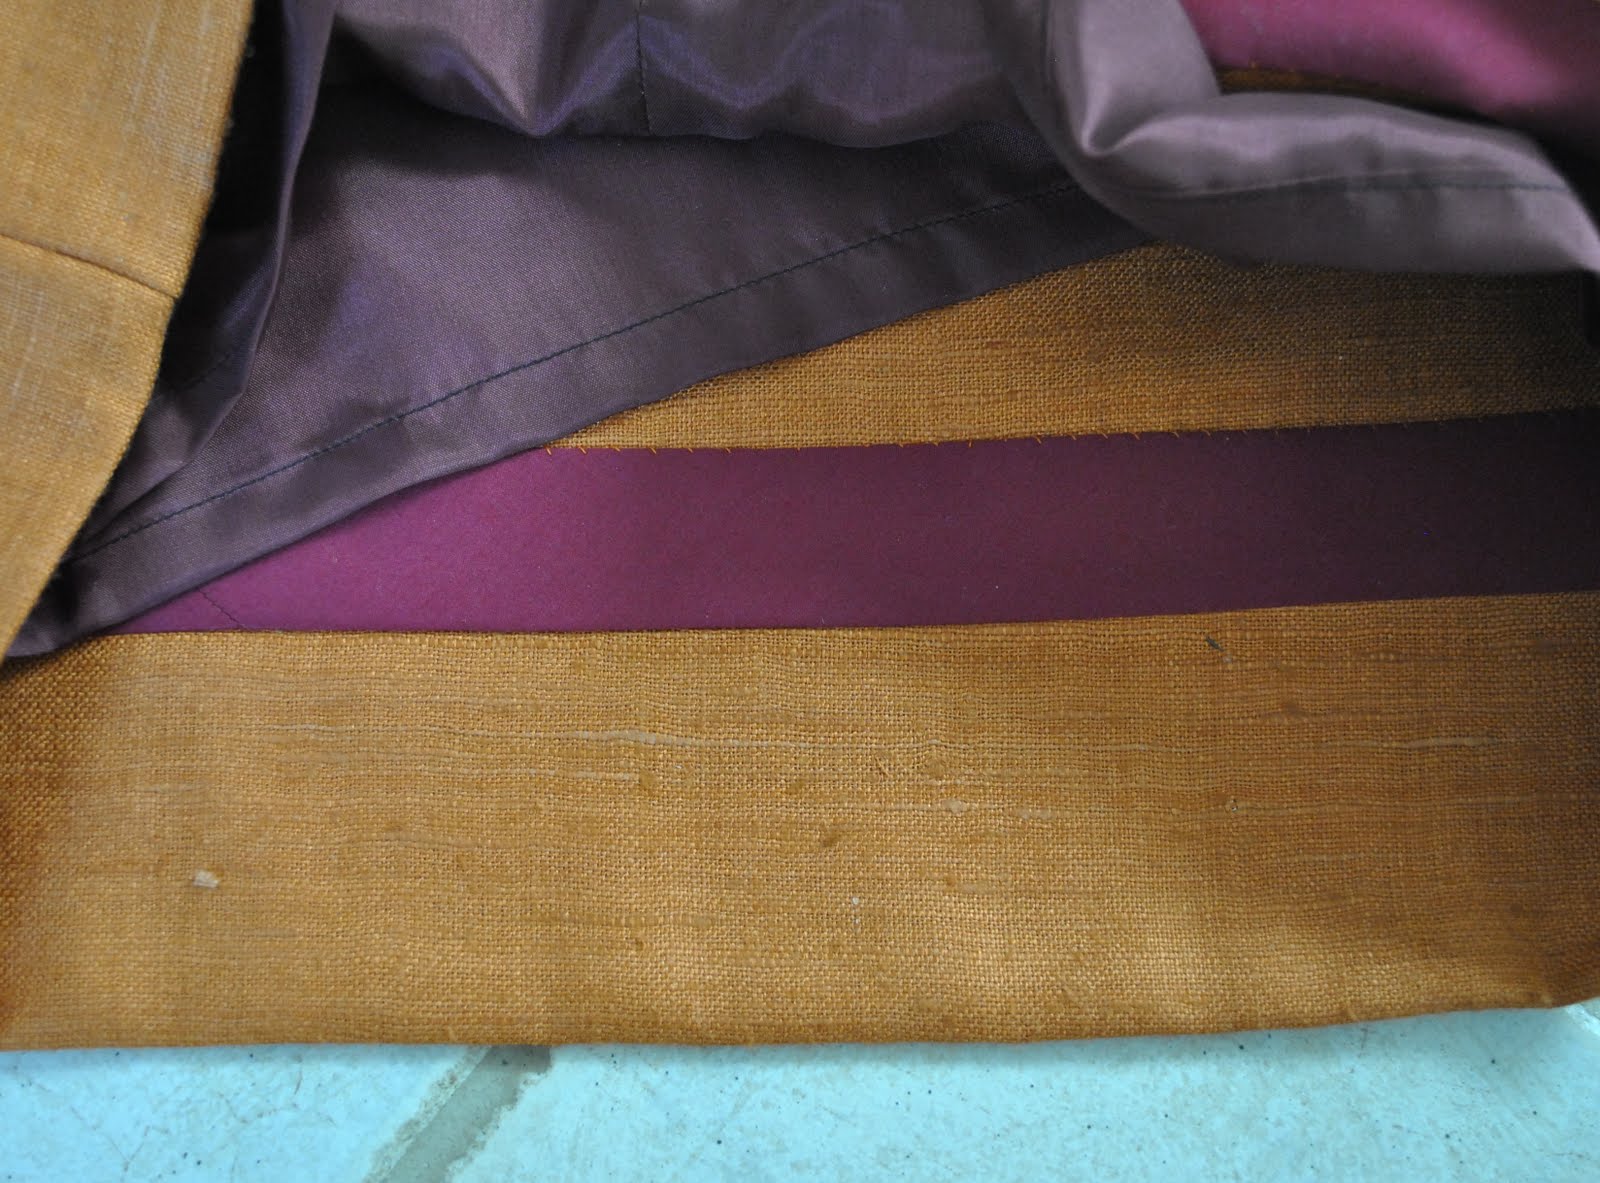
Now fold the fabric back over underneath the seam allowances to enclose the raw edges within the bias strip.  I don’t press at this stage, but just stitch in the ditch of the first stitching. holding the bias strip in place and smoothing it down as I sew.  Being bias cut; it should settle into place well, moulding itself smoothly around curves with the need for any ease stitching. (this is the inside pocket edge, and the pocket lining of the same fabric can be seen underneath)

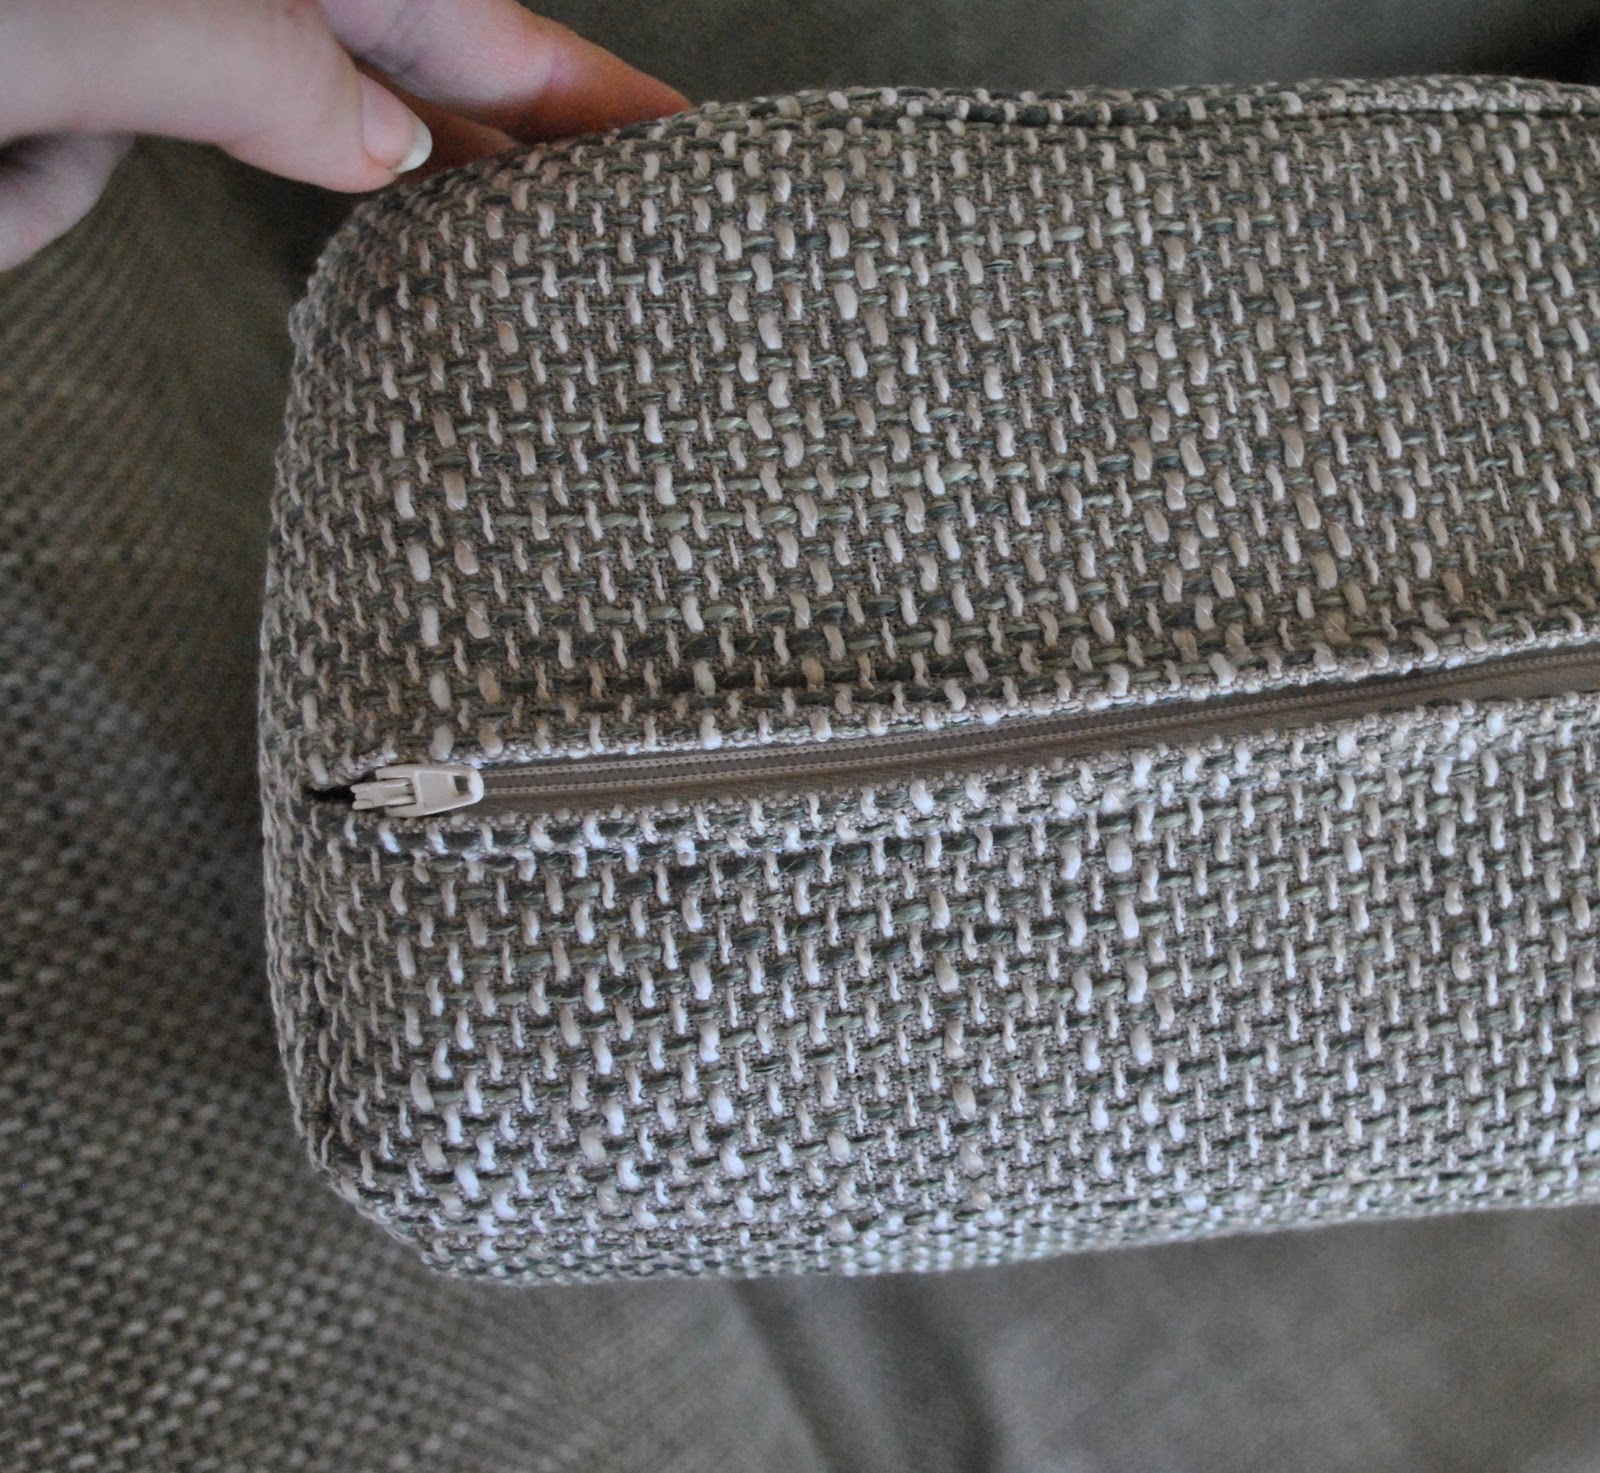
For the hem binding, the raw edges are sewn in a narrow 6mm seam allowance the same way.  Probably the most difficult bit out of this whole procedure here is joining the two ends together in a perfect bias seam to meet up exactly at the stop/start sewing point.

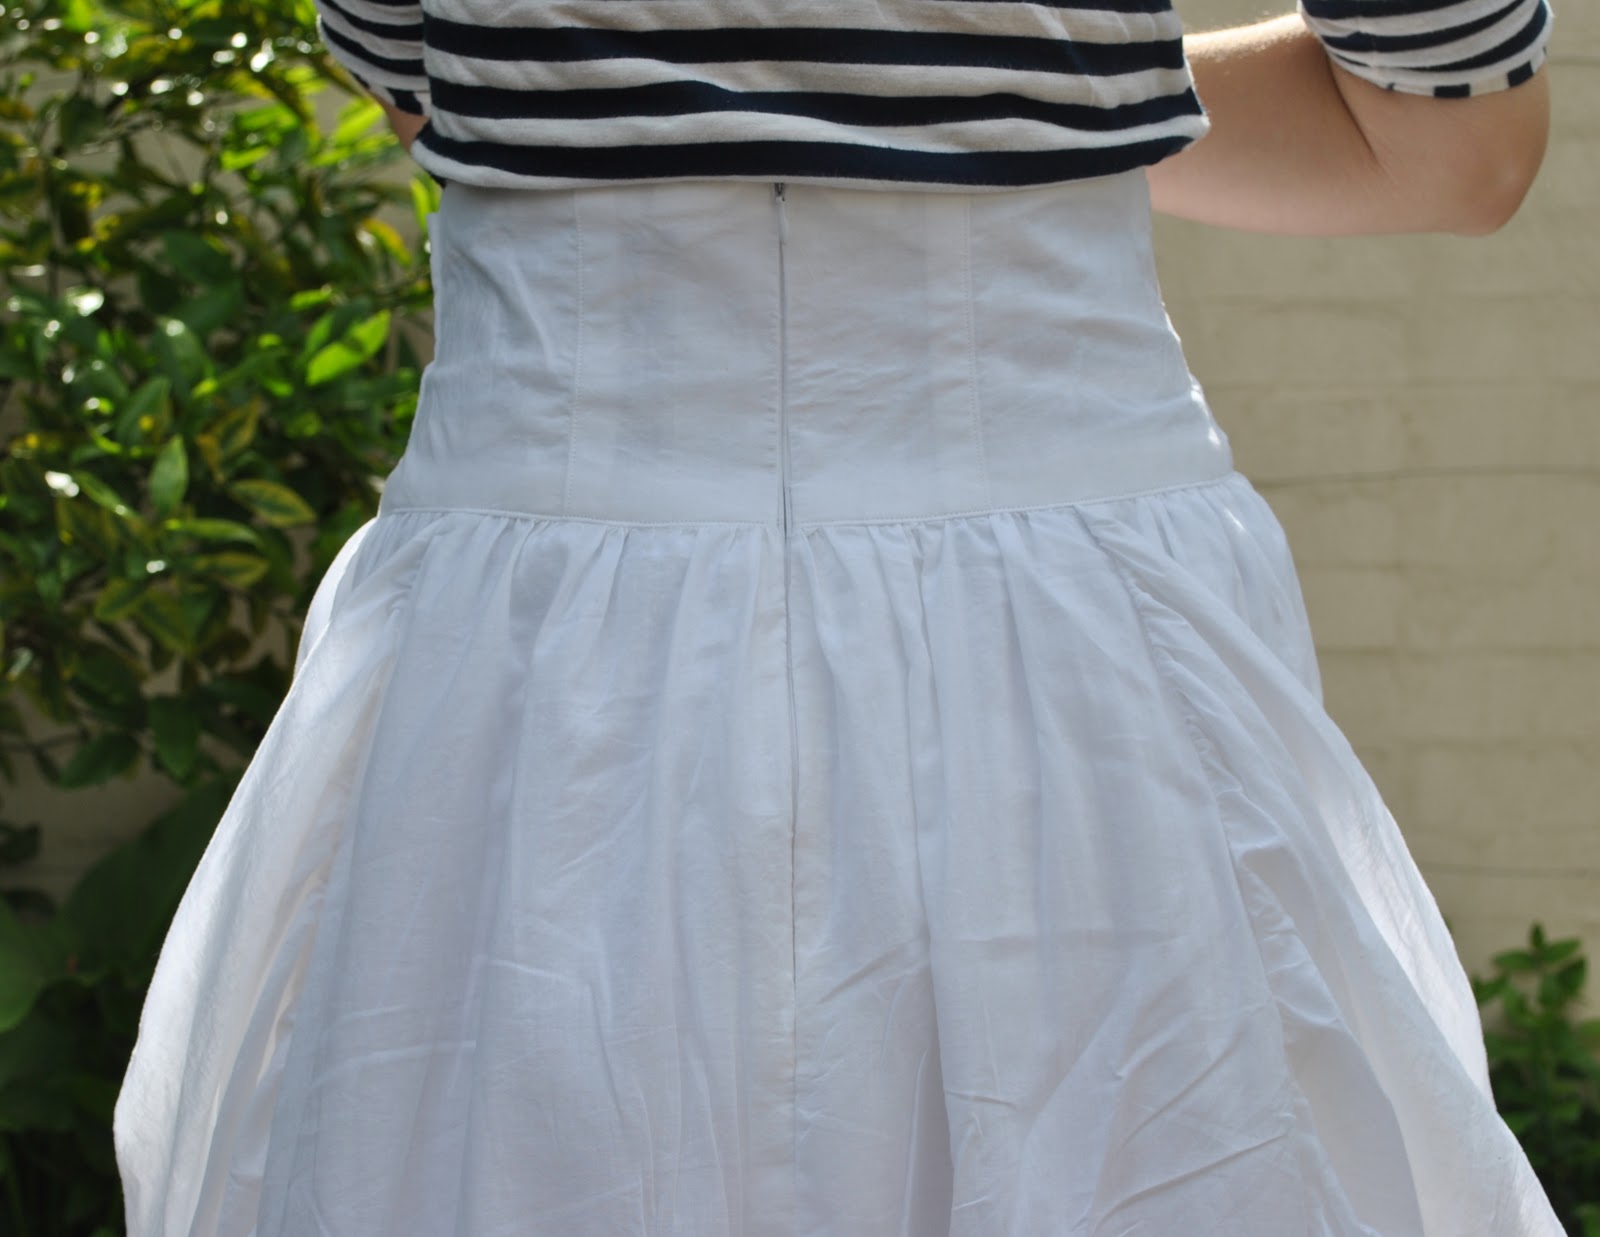
The bias strip is pressed up, and a narrow 6mm seam allowance pressed down on the upper edge.  This pressed edge is simply slipstitched down invisibly in place.

Voila!  Now how easy was that?  No real biggie, right… once you’ve tried HongKong seaming I promise it is something you will want to incorporate into special projects again and again.

pinterestmail

Do you like big pockets…?

… if so then this is the skirt for you!  I have never seen pockets to rival these, ever.  I knew (intellectually) the pockets were big by the picture on the pattern envelope, but the (realistic) first sight of the pocket pattern piece was still a bit of a shock.  Seriously about as big as the skirt pieces, and the skirt pieces are big.  Lol!!
But of course, the pockets are not mere pockets at all, but a clever design feature to enhance the pouffiness, the floatiness, and the gathered, over-the-top loveliness that is the hallmark of this beautifully feminine skirt pattern.  Side note; my husband commented spontaneously that he loved me in big floaty skirts like this; double WIN! since I love it too.
Funny little anecdote about the pattern… I first saw this on shams’s blog and knew I just had to have it.  Those shirt sleeve cuffs on the ends of the sashes; so adorable!!  (salivating) must have… 
I immediately visited Fabulous Fabrics and asked for the pattern… no, they didn’t have it.  I was actually hoping against hope that it was miraculously hidden in the back of the pattern drawer since I had already looked through the Vogue catalogue and noticed it wasn’t there (eek!)  I assumed its time had come and gone.  I then started trawling ebay, looking for somebody getting rid of their old copy… no dice, although I did fall victim to must-have-itis for a maxi-dress pattern… the product of which has also recently exited my sewing room and been welcomed into the wardrobe… But I digress…   
So, in a masterstroke of going to every extreme to get that pattern by hook or by crook, I did some more detective work and eventually discovered and joined BMV where I was amazed to see I could get it for a price that was an incredibly delightful surprise; $3.99.  This is about a fifth of the usual price of Vogue patterns in Australia… no, I am not kidding nor exaggerating!!)  The cheap price just reinforced my belief that it must be an old pattern and I was lucky to have found it…  My pattern arrived and I was supremely happy.  Then, get this, the last time I was in Fabulous Fabrics (er, yesterday, hehe… yup I am a regular, on a first name basis with staff) I had a quick flick through the new spring Vogue catalogue, and you guessed it, there was the pattern.  It is actually new season, like this season!  To us southern hemispheries, that is…  thus all finally became clear to this very behind-the-times seamstress why I hadn’t been able to get it before… doh!
I used a very light cotton voile, which I sometimes use as a lining fabric, and the same fabric for both the skirt main and for the lining.  I completely love the long long sashes with shirt cuffs on the end, a fun and quirky touch that drew me to the pattern in the first place.  Because of this little feature, to my mind the skirt just had to made of white cotton.  Nothing else would do…  Those shirt cuffs just wouldn’t have the same witty flair unless the style directly referenced the Classic White Shirt.  Plus I just adore big white floaty skirts for summer.
And those pockets…? well, they are graaaand, in every sense of the word.  I don’t think I could actually really put anything in those pockets, really.  Stuff could get lost forever in there…
I have some more fabric to make up the little top as well, but for now, below is my review of the skirt pattern…

Details:
Skirt; Vogue 1248, white cotton voile
Shirt; self-drafted, navy and white stripe cotton jersey, details here
Shoes; Country Road

Pattern Description:
Skirt, gathered, flared and lined, with fitted contoured waistband, centre back zip closure and long attached side sashes with shirt cuff features.  HUGE gathered pockets.
Pattern sizing; 
I bought the AA 8-12, and cut a size 10.
Did it look like the photo/drawing on the pattern envelope once you had finished sewing it?
Just about exactly, since I used white fabric too!
Were the instructions easy to follow?
yes
What did you particularly like or dislike about the pattern?
The pattern is great.  Vogue patterns are always accompanied by clear instructions and detailed illustrations. The pattern pieces went together beautifully.
There is one small thing I would change… the instructions stipulate to gather each skirt piece individually, before joining them together along the side seams.  I find I get a much better and smoother gathering result when the whole skirt is gathered as a whole; that is, you join up the skirt pieces at the side seams, THEN run the gathering stitch around the skirt top in one long go.  This is because I find that the first and last few centimetres of gathering do not gather as evenly or as ideally as if they were part of one long continuous line of stitching and if the skirt is broken up into several sections you have several of these gathering stitch stop/starts.  I would recommend to gather the skirt as a whole.  And also to gather the lining skirt as a whole, too.
Fabric Used:
very lightweight cotton voile
Pattern alterations or any design changes you made:
I took about 5cm (2″) overall off the waist band pieces.  Also I gathered the skirt as a whole, as discussed above.
Would you sew it again? Would you recommend it to others?
Yes, I think I might sew this again, I love it!  I highly recommend this skirt pattern to others.  Just bear in mind it needs very lightweight drapey fabric, because of all that gathering.  I have some fabric to sew the little top, so I will review that separately.
Conclusion:
I just love this skirt!  Firstly, the silhouette is delightfully feminine, and the floatiness and frothiness of all those light gathered swathes of fabric floating about you is highly satisfying.  I feel just so darn feminine in a skirt like this!!
Secondly, the shirt cuffs on the ends of those sashes are completely adorable and what drew me to this pattern in the first place.  Such a witty and unique little detail, that really makes the skirt stand head and shoulders above your average everyday gathered skirt.  Not to mention those pockets, which must be the biggest in known history!  Another fun and interesting feature…
I’m going to love wearing this skirt over this summer!

pinterestmail

Pattern Magic 3; dress with 4 sleeves

… aka; the design on page 18.  I’m sorry I don’t know the correct English translation of its name; but it is the design I picked as my favourite from the very first flick through of this marvellous book.   I apologise for the photo overload, like seriously!  Sooo many photos sorry, and particularly after my oft-repeated rant about the vanity of zillions of photos of the same blinking outfit, in one post…. yikes.  But this dress has several unusual little features, creating lots of different views that all needed picturing to appreciate them.  I tried to keep the numbers down, honestly.   The thing is; innovative fashion sometimes needs to be seen from lots of angles in order to appreciate all the little extras.  So that makes it all OK now, yah?  Still friends…?
And now guess what… this is the same dress….!

No, I’m not kidding… the back views…
still the same dress…

It is very easy to draft and make up, and I used a medium-weight cotton jersey.  I fiddled about a bit with the shaping to get a more shapely middle section, because the dress as it is is rather sacklike.  Oh, OK then, it is still pretty sacklike.  My husband commented I looked “choir-y”.  Thanks, sweetie.  Actually, I’m very happy to add another costume-y thing into my wardrobe.  Terri commented on my Futuristic Nun dress that she like the idea of me as a nun, and I have to secretly admit that I like the idea of myself as a nun too.. and a choirboy sounds like a pretty good sartorial aspiration too, methinks.
I also added length, which eventually got shaved off again, piecemeal.  It was a toss-up between having an extremely loooong dress when worn one way, and a pretty short dress when worn the other way.  I strived for the best compromise I could… and I think I can still wear this decently the short way, sans tights.

So, it has three openings at the top, which could be either sleeves or a neck-hole, whichever you prefer.  These are funnel shaped.. and I decided to leave the edges raw here.  Partially because my fabric was a little thicker than ideal, and to hem would have added some bulk and made the edges more defined.  I decided this was not what I wanted here.  When these sleeves/neckholes are acting as a scarf, you really want the whole area to be quite floppy and soft, and if I had hemmed or faced these areas they would have lost this quality…  The lower edge is similarly left raw.
There are two additional holes at mid hip height.  When you are wearing the dress at full length, they appear as sort of pocketholes, but without the actual pockets.  So, you will need to wear either tights underneath the dress, as I have here, or a long camisole.  That is unless you like for your undies to be on display…  but hey, nobody’s judging …  much.

When you use these holes as armholes, this is when the whole top bit becomes a kind of scarf.  Pretty cool, huh?  These lower holes needed proper edging, so I finished them with a narrow band overlocked in a ring, folded right sides together along the long midline, and then simply overlocked in place.

more side views…

And kbenco requested a view of the heel of Mum’s socks; so here it is.  The stripes join in a kind of star design; yup, they are pretty clever, yes?

Details:
Dress; the design on p18, drafted from the Japanese pattern book Pattern Magic 3, by Tomoko Nakamichi; ivory cotton jersey
Tights; my own design; red cotton jersey here, my tutorial for drafting your own custom fit tights here
Socks; handknit by my mother, here

pinterestmail

Sage green lounge suite

I am so proud of my latest project that I will not sully the experience by babbling about it…

Oh OK then, I will.  Cannot resist a little showing off, hehe…  ðŸ˜€
Remember this?  Going back yonks ago I wrote about re-covering our lounge suite (way back here!), and mentioned that it needed doing again soon; well, I have finally got my act into gear and got it done.  Took me from 8am Sunday morning and finished around 10.30pm Sunday evening, but it was done, and I am pretty jolly proud I kept it confined into a one-day project too…  yippeee!

(this is the “before” cover; 2 yrs ago)

We bought this lounge suite twenty years ago, and I’ve recovered it approximately every five years.  I’ve found the old covers are really on their last legs by this time… yup, we have three teenagers, three cats and a dog, so I guess we are pretty tough on our furniture!  This is the fourth time I have re-covered this lounge suite and I think the outcome gets better and better each time.  Nice to know practise really does make perfect, yes?!
This time I am nearly completely satisfied.
I took a few photos during to illustrate the process, but really it’s not a difficult thing to do, just, well, tiring.  Tiring just because of the unwieldiness and bulkiness of it all…  Struggling around with large swathes of upholstery weight fabric and draping and pinning, removing to carry over to the sewing machine, sewing, over to the overlocker, overlocking, carrying back to the lounge, re-fitting etc, is just a fairly draining exercise, full stop.
We chose this heavy hessian-like fabric which has a ecru warp, and a variegated weft of grey and sage green threads through it, resulting in a refreshingly light and bright sage-green/grey hue. 

 To make my covers, I’ve kept one each of the important pieces from my first re-cover of this suite to use as a template for each new cover and this helps massively each time… 

I cut out the bigger pieces first and lay them in position, wrong sides out.  Pin together, smoothing out any bubbles and aligning the grain to be as straight as possible, overlocking all the raw edges and sewing along the pinned lines.  

I incorporated a fold, where the back of the seat meets the backrest, for some ease and to lessen strain on the back and seat areas of the cover when you are sitting on the couch.  Yes, lounge suites need ease too!

Each cover and cushion cover was pinned and fitted together and basically finished inside out, and only turned right side out when it was ready for final fitting in place.  Craig took off the old covers, and fixed a broken strap in the innards of one of the couches, which we only discovered was broken when we took the covers off!  He also stapled the edges of the finished and fitted-into-place covers underneath to the wooden frame of the couch, and re-screwed the little wooden “feet” back into place over.  Most importantly, he made dinner so I could continue working on the seat cushions undisturbed…. 🙂
 Each of the four seat cushions has a zip on the back edge, so these can removed for individual laundering, if necessary.

I just love it.  We all do.  It’s not a new suite, but it feels like we have one now.   Everybody is trying to be eco-conscious and green in all our choices, which means re-using and re-cycling as much as we can; but there is no denying the truth that something new, and especially something big like your lounge suite, is a very uplifting thing to have in your life.  Agreed?  So our lounge suite is not new, but it sure feels brand new all over again, and I feel good about achieving that newness buzz without having to go down the path of actually buying new furniture.  And it gives the whole room a lift and makes everything feel so fresh and clean again… 
And hopefully will last for at least another five years!!

(What will I do with the remains of the old covers??  Well to start with probably two new dog bed covers.  We only have one dog, but she has two beds…  go figure.  Spoilt, or what?!)

pinterestmail

Some foot fabulousness; hand-knit by Mum

My mother gave me a special gift for my birthday recently, two works of art designed to adorn the foot-al region of my person: a pair of her famous Turkish socks.  Well, famous in our own family, anyway… traditionally she has only made these for the males in the family so I feel pretty honoured and privileged to be the first female recipient of a pair; cough cough, did I hear gender privilege anyone?  Ahem… 
Putting my Mum’s creations here on the ol’ blog is always a humbling experience, as it just highlights to the max the vast superiority of her handiwork and creativity to my own.  I usually turn out socks of the very basic kind, true I choose yummy colours that I love but there is no difficulty level in that, and my socks themselves are pretty utilitarian in style.  When I lay eyes on Mum’s work I feel dead boring in my own output.  sigh
The pattern, as in decoratively, of these socks is created in the fair isle knitting method, that is carrying the unused colour loosely at the back of the work and bringing it forward when it is needed, and the pattern, as in construction-wise, of these socks is the Turkish method of knitting socks.  That is, starting from the toe and knitting up the foot to end at the top “hole” that you stick your foot in.  This method is the opposite from my usual preferred way of sock knitting, the English method, starting at the top and finishing at the toe.   Knitting socks in the Turkish method of course has the huge advantage which is that you can knit contentedly away, making each sock exactly the same length until you have used up your available wool… and not run the risk of running out of wool halfway down the foot section, a terrifying possibility with the English method.
But I digress; I know from experience that knitting one’s own socks is a passion reserved for just the initiated few; so instead of me dwelling on the finer points of sock manufacture, please instead admire Mum’s work above…
On a side note; modelling socks, definitely my favourite.  You may not be surprised that I am kinda low on my modelling mojo.  However socks… well!  No need to worry about a bad hair day, weird facial expressions and who knows (or cares) what hideousness I am actually wearing elsewhere on my person?  My feet are looking beautiful, so yay!

Socks; handknit by my mother using 8 ply yarns

pinterestmail

A weepy day…

… not because it is the last day of self-stitched September natch, which would ordinarily make it a day of yay!-ness.  No, today is the last day of school for my son Sam and we attended a mother/son service together in the school chapel this morning.  It was pretty moving and I will admit to the lump in the throat and a few odd tears…  One thing the boys do is to present their mother with a rose, and it was a pleasant surprise to me when the colour of the rose Sam gave me accessorised my ensemble so well … fortuitous, or what!  We had morning tea together and strolled around the garden and chatted.  So a sorta emotional morning; but nice and sweet emotional, not horrid emotional, so that’s OK.
Thoughts on the dress:
You’ve seen this exact ensemble before, when I introduced this dress here on the blog.  I was pretty happy with how these raspberry pink sandals went with it, really says “summer!” I think.  I just may have been saving this dress for this special occasion this month…  ðŸ™‚  It received several nice compliments from friends, which is always a plus, hehe.  It is super comfortable to wear, and the skirts ripple and swish most satisfyingly around your legs as you walk, and in the breeze, so I’m pretty happy with it.  I can see it getting a lot more use for barbies, parties and get-togethers over the next few months as the social season starts to kick in and roar into life.  The last few years my party dresses have been relatively colourless (the three lace dresses I wore recently during this month; the pink, the beige-and-silver and the beige-and-black, are all ex-party dresses from previous years)  So you can see this super-saturation in colour is a big departure.  Good to have something different once in a while, yes?  I reckon it’s always wise to be well prepared with a fab party dress way in advance of the social season.  The last thing you want is to be madly running up some complicated number in panicky desperation mere hours before a big event.  Much better to have worked through any problems of a pattern and/or fabric in a stress-free environment… and I’ve already discussed the teething problems I had with this pattern!  But it all worked out to the best in the end; realistically if I’d ended up with the planned white version working out then that would have been yet another colourless party dress, right?  So it was meant to be, I reckon.

Details:
Dress; made utilising the twisted front design from Pattern Magic by Tomoko Nakamichi, teal silk jersey and with a yellow lycra petticoat of my own design underneath, details here
Sandals; Pedro Miralles, from Soletta shoes

Self-stitched September; I was planning to write some claptrap insightful meaningful thoughts on my feelings about self-stitched September this time around, but hmmm.  I don’t want to say this the wrong way… I really appreciate the great community that Zoe sets up each time, and there is a little core group of people that always make it worthwhile.  We leave supportive comments for each other and I look forward to seeing what everybody has been sewing and how they put it together.  However I did receive one dodgy comment when somebody called me a show-off.  That made me think I didn’t want to do it any more.  But when I start something I see it through, so I finished off the month, in hopefully as non-show-off-y a way as I could.
I’ve written before about how one tiny seed of negativity can sadly and wrongly wipe out a whole host of positivity.  It is wrong and it shouldn’t be that way.  But it just is.  So I am a bit doubtful if I want to go there again.
But to finish on a positive note; the other nesting black swan I mentioned has successfully hatched her brood today (or last night maybe, in between yesterday’s walk and today’s walk anyway…) I was thrilled to see four cygnets in this batch…  So it is baby season in a big way down at the river… here are some more brand new families that I have seen over the last few days.  Please enjoy the baby bird cuteness!

pinterestmail

The Futuristic Nun

Self-stitched September, the penultimate day!!
Some thoughts on the day; lovely weather, things are warming up beautifully around here!  Walking this morning was so lovely, the highlight of my day.  Apart from that a fairly uneventful schedule; office work, cooking, blah blah blah.  Oh I forgot, I have been sewing!  And I have a couple of new things to show off now!!  But I’ll hold off until after self-stitched September is over.  I’ll write more about my thoughts on the challenge this time around, tomorrow… when it is actually over (tiny yay!! with a self high-five that I’ve almost finished)
My dress; I know it’s kind of an unusual one… I made it a few years ago inspired by the fabric.  I’ve always loved the contrast between the heavy shimmer-y grey/purple fabric and the flimsy white fabric that is a pseudo petticoat.  Together they reminded me somehow of a nun’s robe.  Soon after finishing it I read a report about a runway show (I think it might have been Rick Owens, or Helmut Lang, someone like that??) and the journalist described the parade as like being confronted by an army of futuristic nuns stomping down the catwalk… well who could resist an image like that?  Certainly not me.  So that is how I’ve always thought of this dress.  It isn’t a copy of any dress, or doesn’t even look like anything that was in the collection, but I picture sister Perpetua giving aid to the needy on board a space-ship being garbed in something like this.  You see I do sometimes play little games with my apparel, even if they are very silly games, hehe.  I wore my brown cardigan for some of the day too.
Yesterday a birthday gift from my parents arrived.  LOOOOOK!
Here are some of my favourite projects, that will probably be attempted first.  Ohmygosh, I just have soooo many plans…

Details:
Dress; my own design based on Burda 8511, grey/purple shimmer-y stuff and white cotton, white velvet ribbon
Cardigan; my own design, of Jo Sharp Silk Road DK Tweed in Brindle
Shoes; Country Road

pinterestmail

Sherbie jacket

… so named because it is exactly the same colour as of one of my favourite childhood lollies.
Thank you for the feedback on the Spring colour challenge yesterday!  I am still up in the air over whether I will actually join in officially or not; but in the meantime I have chosen a colour palette based on stash fabrics that I want to make up, and realised that this little jacket fitted in with it perfectly!
I’m embarrassed to admit that I made this about three years ago, and have barely worn it.  It has probably been worn about three times in total!  But I was doing a bit of clothing rotation; cleaning out my wardrobe and sorting out some warmer weather gear for the new season and came across it again in a suitcase of spring clothes and decided it was high time I brought into regular circulation.  It is actually quite a goodie if I say so myself… 😉 and I plan to make it a staple for this spring.
It is Burda 7723, a pattern which has been seen here quite a lot.  That is because I have made up the shorts loads of times… but the jacket just this once.  It is of sherbie-apricot coloured raw silk, and has a contrasting darker apricot coloured hessian silk collar and pocket flaps.  Those pocket flaps are not just for show, there are real pockets underneath but they are pretty small and probably not useful for anything bigger than a mobile phone, house key and a credit card.  Well, all a woman needs, hehe…. 🙂  The jacket is fully lined in black acetate lining fabric.  Goodness knows why I chose black, I guess I must have thought it was a cool idea at the time.  I’m thinking the black lining looks a little weird now…
Some thoughts on the other things;
The pale pink layered damask skirt made about four years ago, I was super sad to spot a few areas around the welt seams where the fabric is starting to wear through age… and I still adore this skirt.  Noooooo!
The little sleeveless white wrap blouse, another old spring/summer staple.
Now I have to explain the extra random piccie below, I feel like a bit of a fool because I stuffed up.  I went out on my walk and took a nice picture for self-stitched September, and to show off the jacket… and thought that was that.  Then remembered that today was day of the mini-challenge; the night-shot; doh!  So normally I can’t bear there to be more than one photo of the same outfit in a post.  You’ve probably noticed that I will generally have one photo only, except for details shots or a back/side view or if there is some extra added feature and so on…  I’m just like, one shot is enough already!  But I just have to join in the mini photo challenge, so I nipped out to our street tree and took a night shot too… and there it is below.  So I’m sorry if you too hate multiple photos of the same outfit; and I sympathise.  But unfortunately you just couldn’t see much detail of the jacket in the night-shot, so it just had to be done!
But the good news; I did learn how to take a night shot on my camera… something that is new to me.  The shutter speed is set to 30 seconds, and I just stood as still as possible for those 30 seconds.  That is why you can see some car lights zooming down the street behind me!  I’m just amazed the picture worked out… pretty cool, huh?

Details:
Jacket; Burda 7723, apricot raw silk, darker apricot silk collar and pocket flaps, lined in black acetate
Top; NewLook 6252, white seersucker
Skirt; my own design based on Vogue 7303 (a basic A-line skirt pattern) pale pink shimmer-y damask, to see this skirt styled in 6 different ways go here
Sandshoes; Country Road

pinterestmail
Switch to mobile version
↓