

 My final creation for the year! and a couple of other things too, since of course I found/have recently finished more unblogged items which I am including although technically I didn’t “make” them. But first things first… I shall start with my new tartan dress. I did make this!

I think I’ve had a bit of a thing for a voluminous skirt lately, and this one is also on the flooffy side! I used a pattern I’ve had on my “want-to-make” list for years; Burda 10/2009;119, but altered it somewhat:
A) mine is longer and at the same time, more voluminous, more of a midi length than the knee-length in the magazine,
B) I added in extra seaming, to showcase both a bias and an on-grain tartan layout, and making it more user-friendly to put together, and
C) I changed the width of the skirt panels so I could pattern match the tartan across the skirt pleats and still get the correct width panel into the waist.
(A) needs no further explanation, so I’ll move straight on to B …. The pattern has you cutting a full-dress length centre panel that is pleated from neckline to waistline… rather than have a whole lot of, possibly unnecessarily bulky pleats in my bodice, AND having to pattern match the darn things… I cut the centre panel of the bodice separate from the skirt, and as a finished width, with no pleats.

I also cut the back bodice in three pieces similarly to the front; with a centre back centre bodice on the fold, and two bodice side pieces; and put an invisible zip in the left side seam of the dress. Not only does a side seam zip make it easier to put on and take off the dress, but obviously … no pattern matching of plaids along either side of an invisible zip!! Since I was cutting the back bodice in this way, I took the opportunity to rotate out the waist-shaping darts, incorporating the shaping into the seams.
I’m doing the Burda styling thing here…


The back skirt pieces were cut similarly to the front skirt pieces; so as to have two side pieces and a generously pleated centre panel. Maximum skirt volume!!! Oh, I also cut all pieces so the bodice seamlines would match up vertically with the skirt seamlines… it just looks a lot neater. OH! and also my skirt side pieces are just a touch more flared all round, not by much, just a few inches at hem level each side, but multiplied over the four gores and it adds up nicely!

As for point C; I carefully folded and basted the plaids together so as to pattern match the tartan perfectly across them, and then cut the centre front and back skirt panels at the finished width as indicated in the pattern. Because of the width of my plaids, the skirt centre panels ended up a lot wider than those in the pattern, which is fine with me #maximumflooff
Originally I kept the pleats stitched together vertically for a little bit at the top of the skirt, but in the end decided it looked nicer for them to flare out immediately out of the waistline.
The skirt side pieces, as with the bodice side pieces, are cut on the bias.

can I just point out… ^^ those little Sophie-ears!! ^^
The last modification, which almost goes with saying because I’m a well-documented pocket freak, was… well I guess it just got said! I used my most used pattern piece for this, which is one I drew up to fit my own inelegantly large hands. I cut it from an old Vogue magazine cover, which is a nice thick glossy card; and it lives permanently stashed in a handy place adjacent to my sewing machine.
My fabric! is a really nice, poly-viscose suiting from Minerva. I realise poly-viscose might not sound very nice, but it really has an extraordinarily realistic wool-like feeling to it and is lovely and soft against the skin!
One of the things I really like about this dress is that while it definitely has a winter-y vibe to it, it’s sleeveless and not body-hugging either, so I think it’s going to be ok to wear it in spring and autumn, and even cooler summer days too. In winter it would definitely need a long sleeved skivvy or tee underneath, and tights, and I’m looking forward to wearing it like that too!

The next thing! I didn’t make this dress but I did devote an entire day to making it fit for Kelly to wear so I’m totally OK with documenting my creative input here… I remember now it was presented to me basically a few days before I flew out the the US for my holiday with Yoshimi, which is why it slipped my mind to document it here before! 🙂
Tim and Kelly were groomsman and bridesmaid respectively for their friends T and G; who were likewise their groomsman and bridesmaid respectively! and together Kelly and G had ordered the below dress off the internet … and btw, can I take this opportunity to say? never ever ever order a dress off the internet at the last minute! Kelly had specified “for maternity” and sent in her measurements and it was “supposed” to be made to measure – inverted commas there because of course when it turned up it was instantly apparent that it was not at all suitable for maternity and also, nowhere near made to measure. For a start, there was an insurmountable gap of five inches between the two sides of the invisible zip, and obviously poor Kelly with her pregnant belly was going to do even more baby-growing in the two weeks before the wedding!

She brought it around for some urgent adjustments…
When I opened it up, I could NOT BELIEVE the innards of this dress… it looks so soft and floaty and comfortable in the modelled picture, doesn’t it? well far from it; the insides were built like a Sherman tank…
The bodice lining AND the underlining were interfaced with firm and inflexible horsehair stiffening that had been securely fused to the fabric. The princess seams were boned, believe it or not, with the boning going directly over the bustline. SO uncomfortable! The skirt looks softly gathered into the waistline with a little self-fabric belt, and you might think it had an elastic waistband? well NO, of course the skirt was gathered into a securely stitched and totally inflexible waistline. The neckline/off-the-shoulder ruffle was very not-Kelly too, she’s just not a ruffle person at all. So the first thing was to cut it off, as neatly as possible close to the neckline edge, leaving a chic little spaghetti strap.
I actually needed to harvest fabric from somewhere to put some wedges into the side seams of the inner skirts anyway, so was glad to be able to get some so easily from the ruffle!

I opened up the side seams of the two inner layers: the underlining and the lining; and inserted wedges to add in the needed 5″ of extra width, so the zip could close at the back. I had a bit of pretty-good matching linen, which I used for the bodice; these wedges needed to be strong because these were the layers that had been stiffened with iron-on interfacing, I also ended up using the linen in the skirt underlining for opacity, and the chiffon from the ruffle in the lining, so it looked nice on the inside. I know it didn’t really need to “look nice” on the inside because this was emergency butchery at best, but you know; old habits die hard! After all this, the ribbon hanging loops needed unpicking and repositioning too.
just to clarify; this is the INSIDE of the dress!! I needed to say this because yes indeed I’m aware it all looks a wee bit scrappy… 😉

For the shell; I unpicked and opened up most of the waistline seam and let out the gathers for the required 5-6 inches of needed extra width, then restitched it up. And re-inserted the belt loops.

Finally, it’s hard to see from the before picture, but the bodice had too much vertical height, and horizontal folds of chiffon ballooned out quite unattractively over the bust and waist seam… so I turned up as much of the extra volume as I could into a sort of horizontal “cuff” just underneath the top neckline edge. Cassie kindly hand-stitched this down invisibly for me 🙂

It was all a bit rough and ready really, but at least Kelly was comfortable, and carried it off beautifully, plus I think she looked lovely! And look at my handsome boy!!
The last thing, that I worked on yesterday actually! was binding this baby quilt… When we went down to visit Craig’s parents for Christmas, his Mum took it out and asked me if I could please bind it for her as she was not going to get the time or the opportunity to finish it herself. Of course I obliged!

She had appliquéd and embroidered all these cute little motifs on squares of calico, and patched the quilt top together, and quilted it with decorative stitching, stitched around the edge where the binding was to go.

She couldn’t find any more of the blue fabric that she had wanted to use for the actual binding, but I assured her I could probably find something that matched.

It took a bit of searching because I didn’t actually have a nicely matching plain blue cotton after all, but I dug out this old shirt of Tim’s? Sam’s? I’d thought it was one of Craig’s old shirts but he assures me it wasn’t his. I’m not sure now which of the boys it belonged too, but I thought it was a lovely colour match for the quilt! checks in soft green and yellow, and blue too. I cut strips on the bias and bound the quilt by machine on the top edge, and by hand underneath. It was quite interesting to me that the sleeves were plenty for the job! I’ve always marvelled at how men’s sleeves take up a TONNE of fabric, and here’s more proof!

btw, I could not find a good tutorial online for a nicely mitred corners for a quilt; all the ones that popped up had you encasing the edges in the folded-up bias strip and just machine stitching the lot, catching the underneath edge along with the top edge all in one go. Maybe I’m a snob, OK I probably am! but that just isn’t nearly neat enough for me and you run the risk of the machine stitching underneath looking all wonky, and maybe even not catching the underneath edge at all, since you can’t see what’s going on under there. In my opinion. So I worked out my own way which I think turned out quite neat, and think I’ll write a tutorial on here sometime, when I get time. If I get time. Next year, no doubt!
SO CUTE! I think Tim and Kelly are going to love it!


 I’ve made lots of Closet Core patterns’ Ebony tees and dresses for others and this is the first one for me! I finally used this absolutely beautiful, delicate grey/green wool knit that I bought in Tokyo, one of of our trips over there. It’s beautiful stuff, with an almost lace-like texture to it, but unfortunately it had developed a few little moth holes over the years since I bought it.

 I stitched the outer and lining together around the neckline, and under stitched using a wide, shallow zigzag stitch. I also handstitched them together at the underarm points, just to anchor the lining inside secretly.


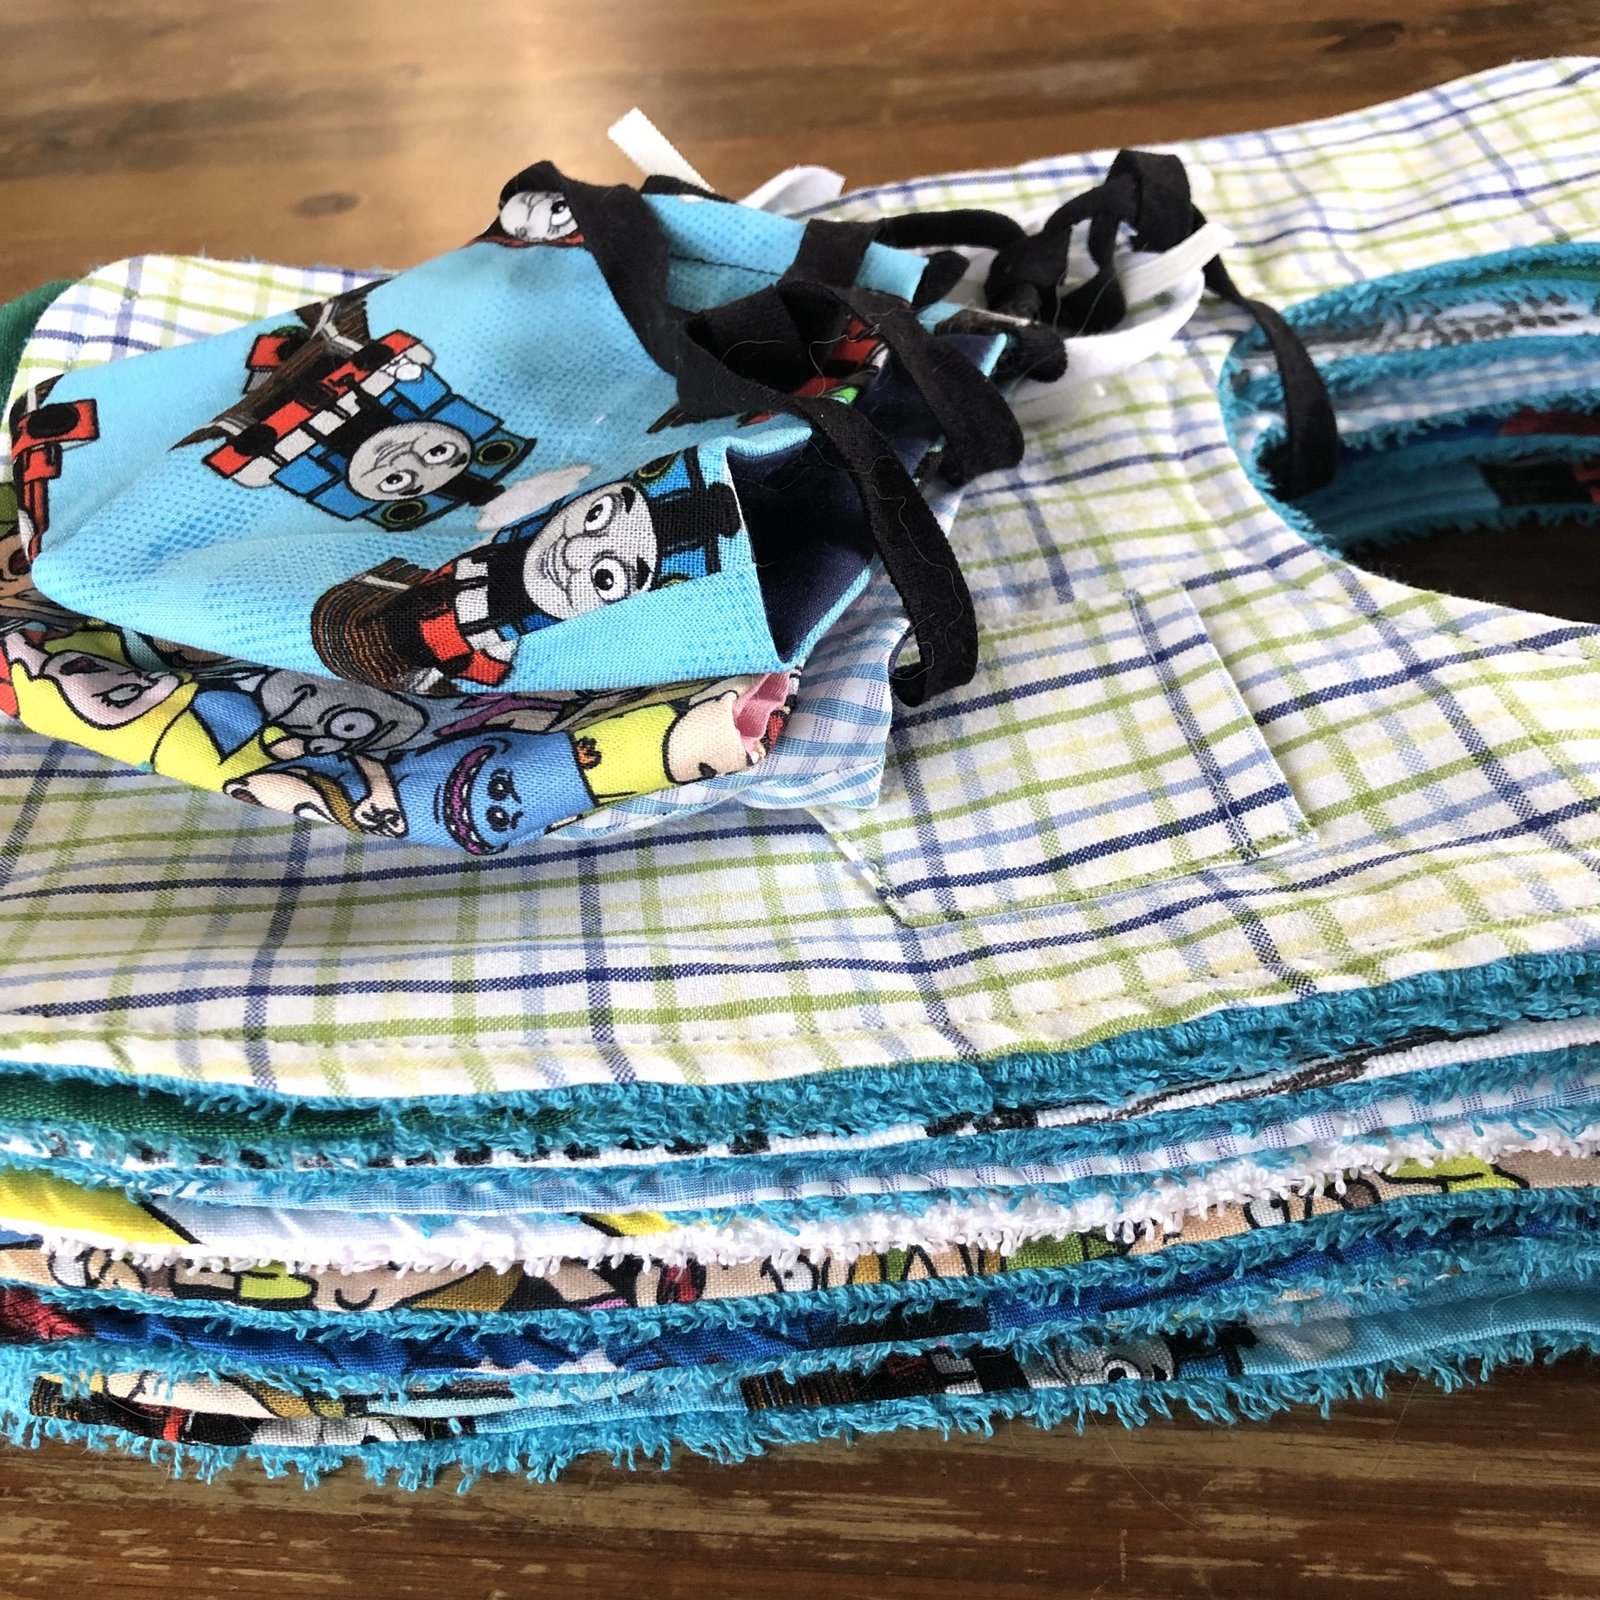
 These are made using the piece from Butterick 5583, and the fabrics are all scraps and leftovers from other projects. One of them is from one of Cassie’s old skirts, another two are from Craig’s old shirts, and one of the boys’. The other cute prints are all from the leftovers from Craig’s surgical caps, fabric originally from Spotlight. The backing is thin cotton towelling, that I already had in my stash too.


 Last month I also devoted some time to updating the pj situation in my life, and in little Theo’s life too! It suddenly got really really cold overnight, and my fave old bunny pj’s, that I still LOVE btw are sadly too thin to really cut it any more…


 Pretty cute, huh?!


 Kelly found the design and Tim suggested it be a joint project between us, with me making the swing and Tim taking care of the woodwork etc… Kelly and Arthur and I went to Spotlight together and bought the stuff… apart from the fact that it was like 41C that day it was fun!
 Arthur’s first trip to Spotlight!
 Here is my (amended) pattern…
 I think it all turned out super pretty! Also, delicious, obviously! btw, this quantity pictured looks a bit mean but is really just for “pretty” photographic purposes, because everyone got at least four times this amount in little reusable lunchboxes. I used


 I made the matching onesie using my current favourite onesie pattern, Burda 9434. I made it using a scrap of cream coloured cotton jersey, and white plastic snaps, that I bought along with their matching tool from Spotlight. I don’t know why I haven’t used these before! because they really are far superior to the metal versions… I’m only sad that the white plastic did not take up the dye, like AT ALL. Oh yes, I obviously dyed the cream onesie to make it motley brown, like Yoda’s robes. I used dark brown thread so it would match the final colour.


