Tag Archives: Carolyn

some odds and ends

Just recently I took part in me-made May again, and had a month of taking my own photos once more.  It feels funny to go back to this, since I’ve completely got out of the habit of taking daily photos, but I do enjoy joining in with me-made May.  It helps me to take stock of the items in my wardrobe that I really like and those that I don’t! and also identify any gaps in my wardrobe…

So these are my daily outfits for the month… there are 32 outfits for 31 days because we had one evening out for my sister-in-law’s birthday party for which I wore a separate outfit from during the day (pic5).  I made every item of clothing I’m wearing in every outfit, except for my black hiking boots and white sandshoes.  I did make the sandals in pic14 though!

Thoughts; (warning; skip this bit if you find wardrobe analysis boring!). I liked all my outfits although there are 1-2 things I pinpointed as being shabby and maybe not really up for public consumption any more (overdyed blue dress and the tomato cardigan from picture 1).  I also resurrected a few things from storage to wear again, and was reminded how much I love them really.  (chambray top from pic26, overdyed dress from pic12, jeans from pic 25, jeans from pic32, the shirt I made for Craig in pic16). Surprisingly (for me) I hated nothing, which is good, and makes me think I might need to retire those things I chose NOT to wear during the month!  I conscientiously tried to wear something different every day and only discovered that I’d doubled up on a few things after the event.  I wore my pink Pinjarra cardigan twice (pics 10 & 23) and also my little raspberry jacket twice (pics 9 & 25), and my brown knitted cardigan three times (pics 7, 13 & 24).  For the last few years I’d got into the habit of not wearing jeans very often since I became convinced that I look terrible in them.  However, lately I’ve found to my surprise that I don’t mind how they look on me.  So, I’m planning to make a new pair of jeans, surprise surprise!  Wardrobe gaps: well, sorry to sound like a broken record, however as old pocket-less items die they are only going to be replaced with pocket-equipped items!  This is absolutely not negotiable.

In the end, me-made May is a bit biased in that I don’t get to wear my truly summery things nor my truly wintery things either.  It’s all the middle ground, trans-seasonal things that suit middle ground temperatures.  I mean, this is fine; because the majority of my wardrobe is obviously middle range things weather-wise… however sometimes I think I should do this sort of analysis privately for a hot month and a cold month too.

I also kept a pictorial record of my purple hair wash too! just for fun. :). The colour was quite intense to start with and had washed out to a shade I REALLY love after 2-3 washes.  I took the 6th picture today, the colour is quite subtle now, but it still noticeable, I think.  In a good way!  However, this is a lesson to me that if I ever use a purple colour wash again to just use maybe a third of the tube, at most!

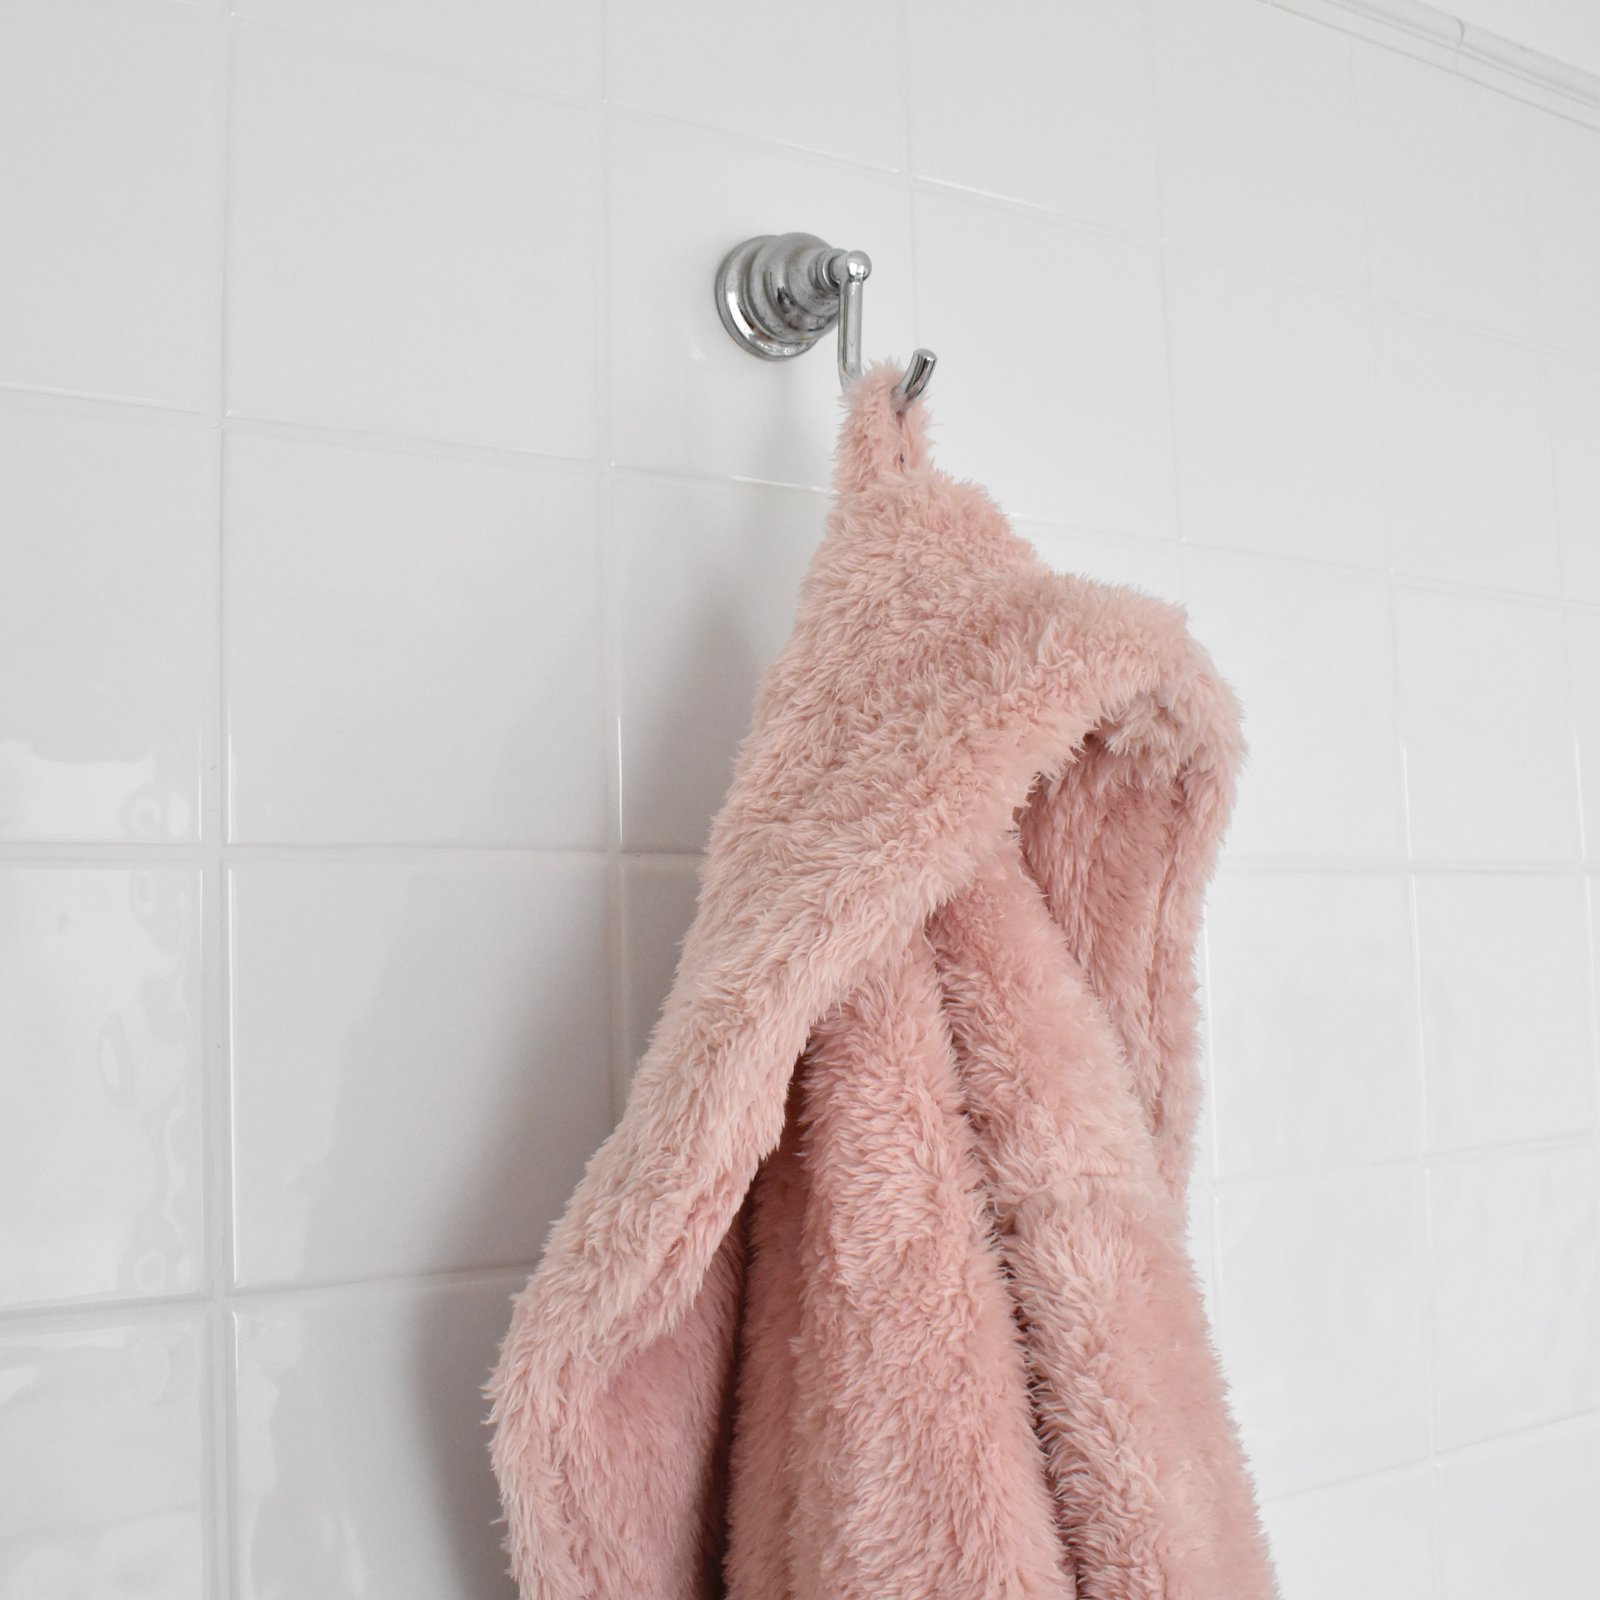
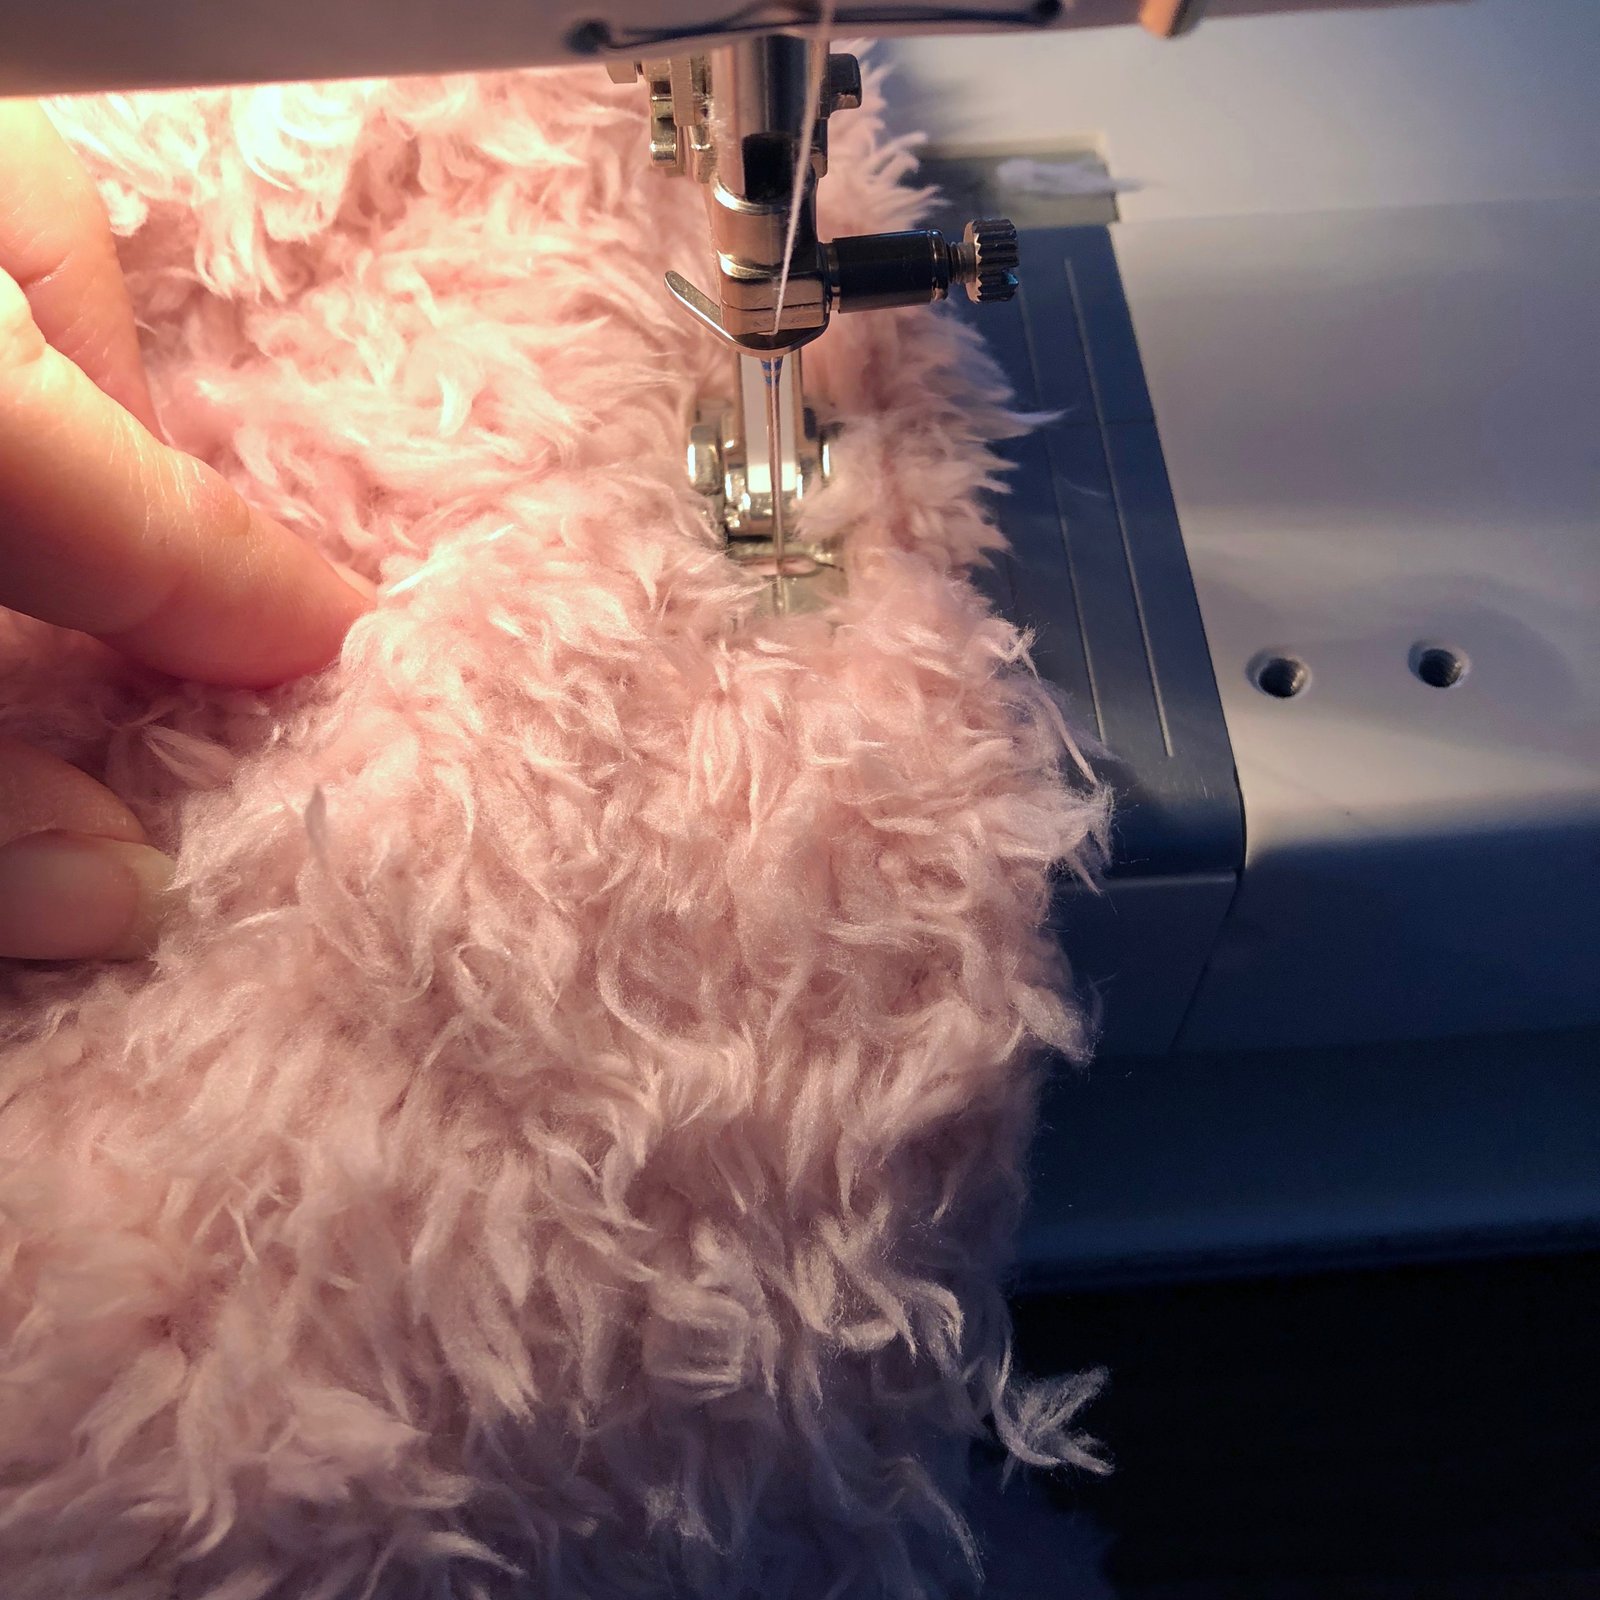
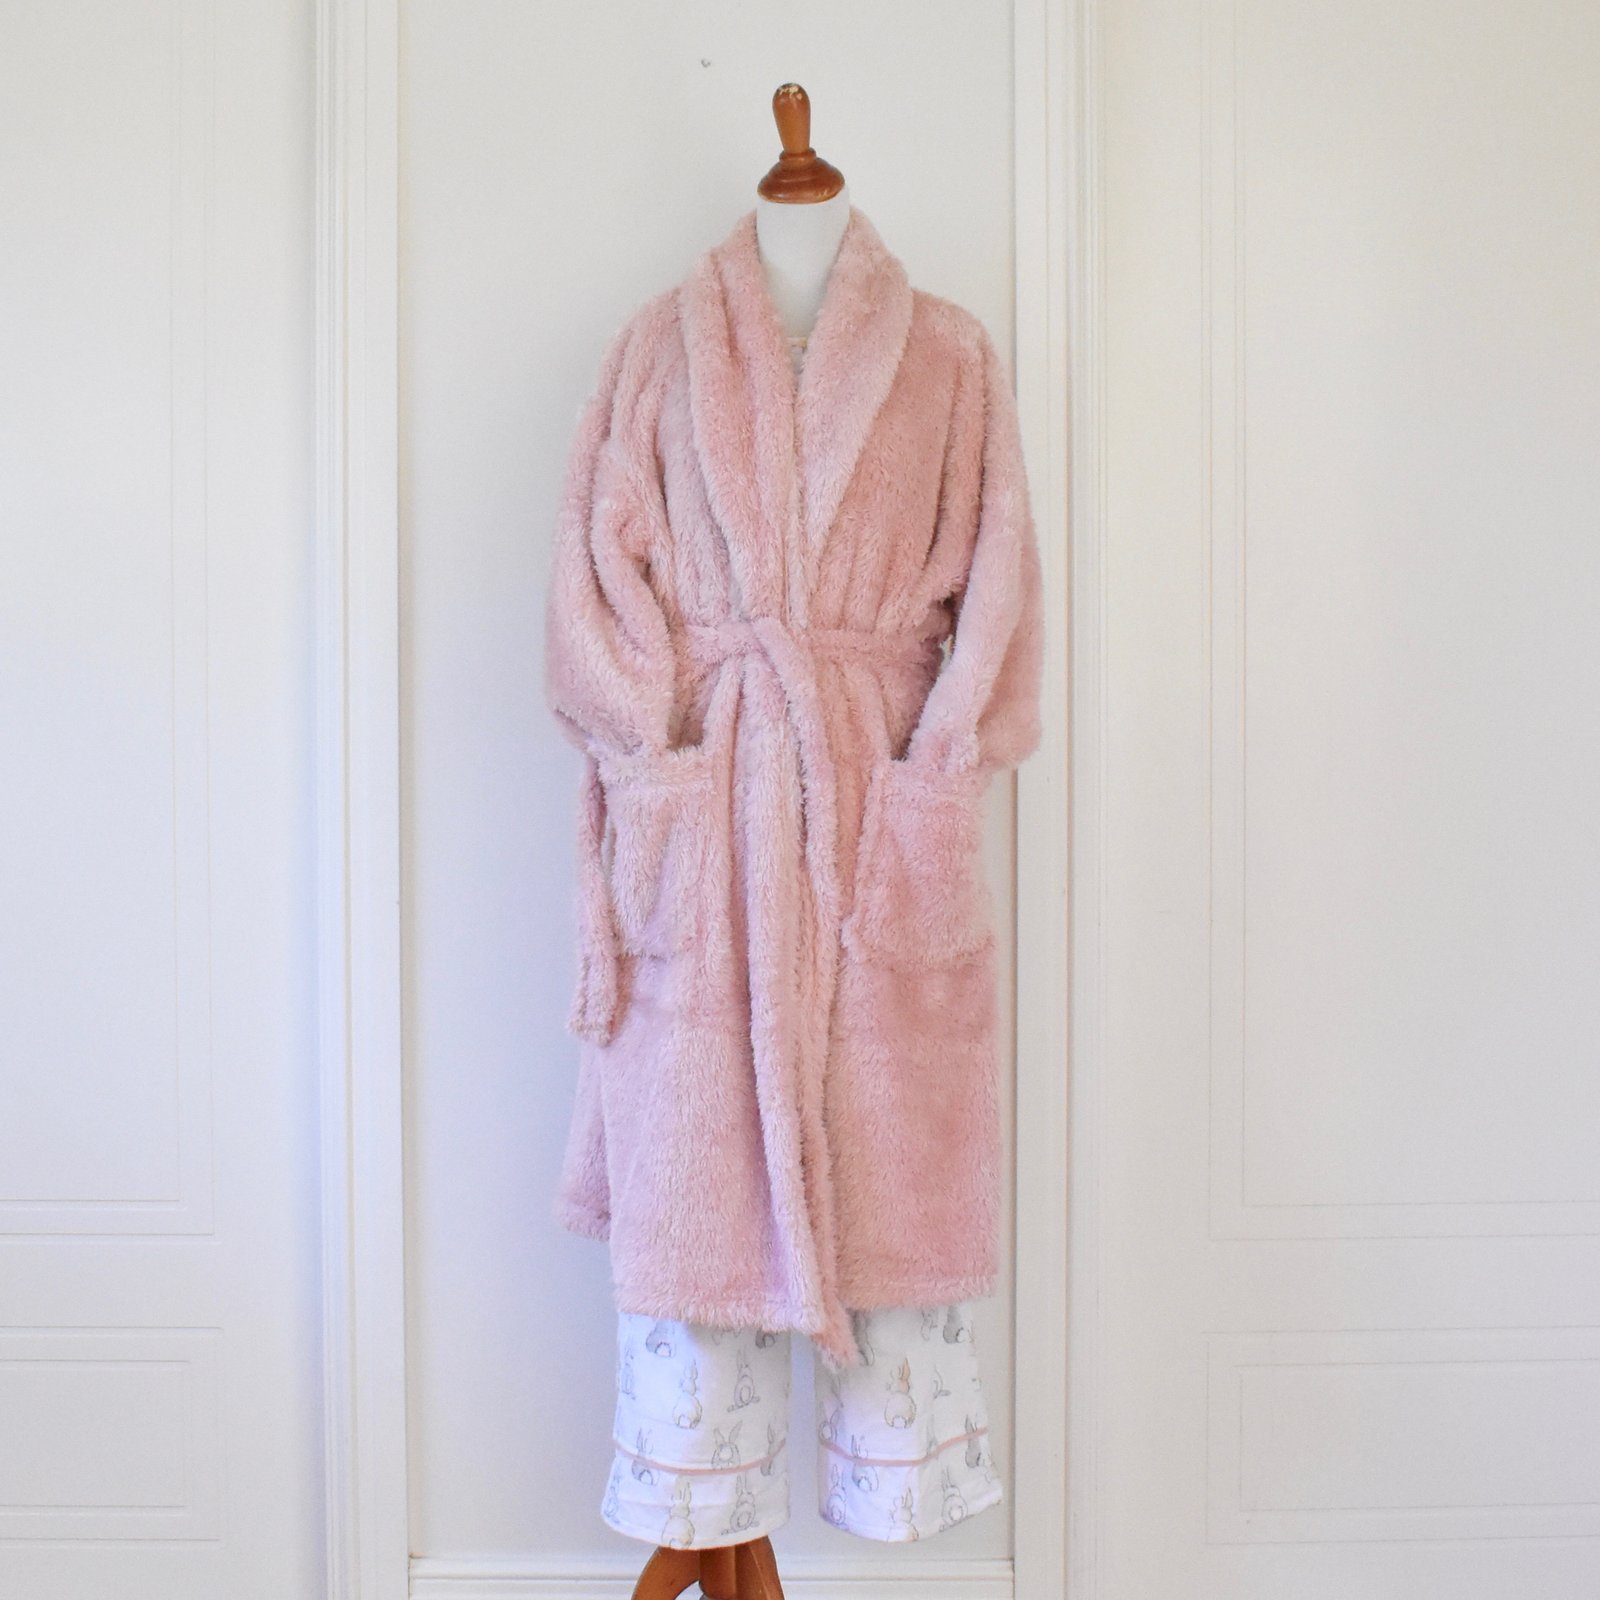
I made something else last month; a new pair of winter jammies…  I used the Closet Core pattern that is my namesake of course, the Carolyn pyjamas for the bottoms.  The top is vaguely similar to my usual pattern Burda 10/2009; 121 that I’ve used for winter pj tops in the past, but I’ve somehow managed to lose the pattern I’d traced out.  I didn’t feel like re-tracing it, so instead I just laid down last year’s top and traced around the outside, haha.  I added oversized pockets to the front, because I always need pockets.

I had to buy new fabric thus breaking my no-buy rule… but it was a necessary sin since I had no flannelette in my possession!  I bought as little as I dared and managed to use the entire amount, so I’m forgiving myself!  The bunny print cotton flannelette is of course from Spotlight, and I bought a small amount of white to give some contrast because I always like a bit of contrast.  To be honest, I searched and searched for some garishly cotton candy coloured unicorn print flannelette which would have been my absolute ideal… and was extremely disappointed to find nothing like that.  These sweet blush-pink bunnies are reasonably cute enough so they will do.  For now!

In closing; a favourite moment from me-made May was the day when Cassie, Theo, Gilbert and I visited the Subiaco Flower festival together… we had such a lovely afternoon!

(photo taken by a kind lady passing by)

pinterestmail

pj’s

Oh man!  I have been unable to post here for quite a while and was starting to wonder; could this be the end of Handmade by Carolyn…?  Fortunately my clever husband worked the problem out.  Then I wrote a whole post and posted it, and it just disappeared, poof! into the ether.  So upsetting!  I’m going to try for a second time, so hopefully this time it will not!

Pj’s.  I’ve made a few.

Firstly, for me, I used my namesake pattern, the Closet Core Carolyn PJ’s for my pants and a Burda pattern, 10/2009, 121 for the top.  Sometimes I think I should make the Carolyn top as a pj top too, but I really prefer my pj tops to be buttonless. As well as saving buttonholes for a shirt that I will wear awake, and out of the house.  Well, buttonholes are an effort!

I know I pledged to not buy any new fabric until I’d used up my stash, and I had to buy some flannelette for these, which is a little bad but not really because I really needed new winter jammies.  I managed to use up every last scrap by slapping some patch pockets on the front of the top; which makes me feel very thrifty and virtuous, so it’s all good in the end.  The white flannelette was already in my stash, leftover from a previous jammie-making venture.  Both from Spotlight.

Next up; I made pj pants for Cassie, and mini matching ones for Theo.  So cute that they can match each other!  Cassie’s are the Closet Core Carolyn pattern, and I left the front open at her request, just in case she decides to go though another pregnancy in the next few years.

I added a press stud at the waistline and a drawstring so they can still be closed easily.  The drawstring is attached to a bit of elastic threaded through the back of the waistband.  I cut out and stitched in her Spoonflower label… oh I forgot to mention!  The print on the fabric is her own design in her Spoonflower shop, printed on fleece from their range.  We were using this small length as a cot blanket for when the kiddies slept over, but it’s outgrown that function and needed up cycling.  So now it’s pj’s!

Theo’s matching pants are Burda 9436 modified slightly to be pj bottoms by eliminating pockets and adding elasticated cuffs, and his little red raglan T-shirt is self drafted.  It’s cut from a massive “remnant” that I bought from a Morrison seconds sale, once upon a time.  When I say, remnant, I mean about 6m although I’ve been too depressed to ever actually measure this.  I don’t know what I was thinking, buying it; honestly.  I must have been mad.  It’s my current intention to use up this remnant as soon as possible… I’m making good headway too, results to appear here soon.  I hope!

Next up, for Arthur.  For the pants, I used the same Burda 9436 as for Theo, lengthened because he is much taller; and grey sweat shirting fabric from the stash.  The two little T-shirts (same self drafted pattern again) are made using his Dad, Tim’s old T-shirts.  Yes, I still have some of these left! and actually it’s getting quite hard to cut Arthur sized T-shirts from adult-sized T-shirts, believe it or not; so I’m planning to power through all the T-shirts pretty quickly now.

Lastly, and completely random I know; I made some lemon macarons because I had lemons, and because I kinda wanted to prove to myself I was still capable.  Very very pleased with how they turned out!

pinterestmail

nighty night!

Last month I also devoted some time to updating the pj situation in my life, and in little Theo’s life too!  It suddenly got really really cold overnight, and my fave old bunny pj’s, that I still LOVE btw are sadly too thin to really cut it any more…

I actually bought both the white and mustard, fluffy cotton flannelette at Spotlight very early out of our first lockdown last year… I panicked that we might have another lockdown and I would need new pj’s and that I didn’t have the fabric for a new pair, so rushed out and quickly bought some.  Then decided my bunny pj’s would be fine for another year after all.  Anyway, they’ve been made now and ooooo, they’re so fluffy and awesomely warm I’m in heaven as soon as I put them on..  😀

I used my namesake pattern, the Closet Core patterns Carolyn pj’s for the bottoms, and for the tops I used my now standby pj top pattern Burda 10-2009, 121; which is just so quick and easy and comfortable.  I jazzed up both pieces by incorporating a bit of faux piping in some horizontally placed seams.  I used the selvedge of both white and mustard flannelette in their opposite pieces’ nd found a piece of gorgeous raspberry cotton jersey in my stash in both to tie them both together.  The selvedges are just single thickness with the selvedge edge facing out, and the raspberry jersey is folded once with the folded edge facing out.  On the inside, all the raw edges are overlocked together to finish, and the seam allowances are stitched UP in all cases.

One of the best things is that I think they look great with my fluffy pink robe, that I made two years ago and that is still going strong.  It’s VERY IMPORTANT that one should look exceptionally well put together even in one’s pj’s, ahem…

Also, little Theo needed a sleeping bag… we had some very cold nights during June and Cassie had put in a request.  I already had both these pieces of fabric in my stash too… the red fleece, well I’d previously used most of it to make kangaroo pouches last year, when we had the bushfire wildlife care callouts.  I still had a few pieces big enough to cut out the sleeping bag, fortunately! I cut the collar and cuffs from striped cotton jersey, just to make it look more interesting and fun.  The only thing I needed to buy in all of this was the red zip… I feel like my stash busting efforts are going really well!

Oh of course, the pattern… this is Butterick 5583 and I added 18cm in length because he is apparently a very tall baby!

pinterestmail

a colourful coat

I made this new coat-ish/dress-ish/shirt-ish sort of a thing for myself!

How beautiful is this linen??  It’s stunning, isn’t it.  I’m head over heels in love with the print – gorgeously colourful, bird-strewn, with the looks of an ancient, beautiful patchwork… the colours are so painterly/flower-garden with that lovely distressed quality that appeals to my quixotic little heart that likes stuff to be rustic but also pretty too.   I’d only bought a shortish length really, and it really teetered on the verge of being Too Good To Cut, I had it laid out for quite a while, trying to gathering the courage to take the scissors to it!  I only managed it really because it was on my list of twelve things and having those intentions blogged sorta forces me to stick by my own self-commitments.  I bought it some time last year from Fabulous Fabrics, using a voucher that was a birthday gift from some of my lovely friends.

The pattern is the Carolyn pj pattern by Closet Core patterns, yes, the one named after ME!  I can’t say still how thrilled I STILL am to have a pattern named after me, it was such a huge honour, and I often think how I’d like to have more of “my” pattern in my own wardrobe too… I still wear my white Carolyn shirt quite a lot.  I saw Rosie from ArtworkerProjects had made her Carolyn as a shirtdress, and this made me think I’d like to make something like that, and I’d also seen, and pinned this beautiful coat once upon a time, and the two thoughts slowly alchemistry-ed  and absolved themselves into this one project in my mind, eventually…

I lengthened the body pieces, obviously, and I also lengthened the turning point of the lapel a little, so the coat buttons a little lower than it does on the pattern.  The other, internal, change I made was to add a back facing… this stabilises this area, something not necessary in a shirt but that you definitely want in a coat, for sure!

Oh, I added pockets… #ofcourse

I finished all the internal raw edges with HongKong seaming… because obviously in a garment that will flap open while you’re wearing it you want the insides to be as pretty as possible!  For this, I used the leftovers of the turquoise poplin, that I used for one of the masks I made for Craig’s Mum.

Now’s the moment when I indulge in a bit of zero-waste bragging, ahem #insufferable?  #moi? … so; I made a long bias strip using the entirety of the turquoise leftovers and have about 15cm of it left…  when this happens in a project it’s actually SO satisfying!!  Also, there are only the smallest of the colourful linen print scraps leftover too…  I might have enough for a doll’s mini-dress, but not much else!

For the button, and continuing on with my policy of not buying any buttons unless I Absolutely Have To; I found this purple, wool-covered button in my stash, and I love how it doesn’t really match, but at the same time it’s kind of a perfect match too.

So, if you hate obsessiveness in sewing, look away right now.  I initially just used off- white thread in my bobbin for when I stitched down the front and back facings… and it looked pretty terrible. I tried to not let it bother me, but ultimately twas a lost cause… eventually I had to unpick most of it and re-do it using matching threads.  So, some of the sections are in blue, some are in red, some are in off-white and some in pink.  Yes, this is a weird thing to do, but I’m very satisfied with how it looks, so… yeah.  I think it was worth unpicking and re-doing, from my point of view!

This is the latest, and ninth, thing in my little collection of twelve things, that I proposed I would make for myself at the beginning of the year and … regretted…?  many times over?!?!  ok, not so much “regretted-regretted”, because I sincerely love all the fabrics, and have sincerely loved all of the finished products too, just “regretted” as in “have struggled with” as in I just don’t have as much spare time nowadays to lavish on them as I initially thought I would.  I’m NOT trying to busy-brag because I kinda loooooathe when some people go on and on about not having time for fun stuff like it’s your job or something, so I apologise for those overtones… wooo!  Sorry about that.

Anyway!  I’m so happy I’ve got this made! and also that I stuck with my original “coat” plan and didn’t get sidetracked into some little sundress like I was SORELY tempted to do instead, multiple times over!  I really love it!


Details:

Coat; from the Closet Core patterns Carolyn pj pattern, linen from Fabulous Fabrics
White dress; Vogue 1351, white crepe from Fabulous Fabrics, details here
Sandals; ye olde favourites from Zomp boutique

pinterestmail

bunny tails and lots of pink fluff

So in a bit of a tangent from wedding sewing; the weather has turned super cold, unseasonably so actually, for this early 🙁 and my old winter pj’s had got drastically thin to the point where I’ve accidentally poked a finger nail through the fabric in several spots lately, ahem.  I was desperate!  Oh, and since I mentioned it? the wedding dress is basically finished!! but obviously I will not be sharing full shots until after the Big Day, though I am sharing a few details here and there over on my instagram account.  And I’ve sort of gone as far as I can on the other wedding sewing duties, for a short while, anyway!

I’d found this adorable bunny print cotton flannelette at Spotlight…  I love their little round bums complete with fluffy cottontails!  And the ones with little pink paw pads are even cuter!  btw I am fully aware that as an Australian I am honour bound to despise rabbits, and on an intellectual level I do, honestly.  But also, look how adorable!

For patterns; I used the eponymous Carolyn Pyjama pattern by Closet Case patterns for the bottoms of course! and for the top I used a plain Burdastyle T-top pattern I’ve used a few times before, Burda 10/2009;121, with minor modifications – story of my sewing life, hehe.

To enhance and pick up the pink of the bunny paws, I found a small scrap of pink jersey in my stash, leftover from this T-shirt I made for Cassie, and cut strips to inset in the joining seam of the top, and then I cut the bottoms off the pj bottoms and inserted a strip in each of the pj legs too.

My old brown bathrobe was also long overdue to be replaced; the kids gave it to me for Mother’s Day about 20 years ago?!!  I’d seen a pink bathrobe advertised in the Spotlight catalogue which looked promising, however when I checked it out it actually wasn’t pink at all, but more of a greyish-mushroom pink.  Quaite hideous and tres disappointing!  As luck would have it though, right beside the offending, not-pink bathrobe was a bin of fluffy throw rugs – oh excuse me, cuddle blankets, and one was the most perfect shade of cherry-blossom pink a girl could hope for.  I was instantly rendered powerless to resist and bought it with rose-covered spectacles and in a loveheart-pink daze.

And so I whipped up my own bathrobe!  I’m so much in love with this, it’s not even funny.  In fact I’m wearing it right this second.  It’s so flooffffy!! and soft, and as light as a pretty pink cloud.  And warm!  I’m super happy with how it turned out.  I made it to have a shawl collar, deep deep patch pockets, and belt loops for the self belt…

… and a hanging loop tucked under the collar facing…

The blanket was already hemmed on all sides when I bought it, obviously; so I resourcefully utilised these hems in the lower edge, the sleeve lower edges, and the tops of the pockets.  The belt is also cut from one long side edge, and I simply folded over the raw edge and zig-zagged it over the ready-finished hem.  Funny thing; the huge loft of this fluffy fabric meant I could hardly see what on earth I was doing while sewing this, seam allowance accuracy?  HA!!!

Also, there was FLUFFF EVERYWHERE; all over the table, the floor and flying up from the sewing machine too… could hardly believe it was producing so much and with still plenty of massive fluffiness remaining, thank goodness!  Of course I was wearing something dark coloured while sewing it.  Murphy’s Law.  I looked like I’d been through the wash with a tissue in my pocket…!

I’m gonna pop some caaaash, only got twenty dollars in ma pocket…

All raw edges for both pj’s and robe are finished inside on the overlocker, and the pink-inset seams are further topstitched down in a sort of faux-flat-felling effect.

Details:

Robe; my own design
Top; Burdastyle 09/2010;121
Bottoms; Closet Case patterns Carolyn pyjamas

Winter?  I am ready!

Oh! almost forgot…. I had a big enough portion of the fluffy blanket leftover to make a new cushion cover too.  Now I just have to keep it safe from The Marauding Doggie; whose favourite evening activity is to select a fluffy cushion and sit sucking and gently kneading it for ages.  This might be a losing battle!

pinterestmail

I made some stuff…

So, what are the latest whatevers to wing their way out of the atelier, hmmm?  Well, I’ve been making LOADS of things, just nothing much to show for it, as yet.  Remember I mentioned I was making a pattern?  Well, making a pattern comes with making a truckload of muslins, of course.  I’ve actually made 13 dresses in the last month alone, albeit they’re made from old sheets and are a bit rough, but still.  Am I going to count these in my “one refashion a month” resolution? no, that wouldn’t be fair.  How’s the pattern coming along? swimmingly! which is fab… I’m almost at the testing phase, I will be incredibly happy to get there after 8 months of preparation.  8 MONTHS!

In more tangible making results, I made a little romper for Sarah’s new little boy…  Sarah LOVES stripes, so the descent into stripe-matching madness struck once again.  I used Butterick 6372, which I’ve made twice previously, and just altered it slightly to be a romper, and added that cute little pocket.  Would you believe I re-did that little pocket THREE flipping times??  First I made a curved bottom pocket, which was pretty awful, followed by a flat bottomed pocket.  Equally awful.  I do really like the pointed bottom pocket though, I think it’s super cute.  It’s my favourite part about the whole romper actually!

The striped cotton terry is from Spotlight, hopefully the last piece of fabric I will buy this year, given Project Stash Reduction is a goal this year.  The red cuffs and pockets were culled from a Wildcats Tshirt from my refashioning pile.  Thus partially fulfilling my once-a-month refashioning resolution #virtouslyRubbingFingernailsOnChest.

There was a little bit of leftover striped fabric, so I also made an adult sized beanie, using a pattern made by Andrea of fabric epiphanies.  I’m afraid though that I couldn’t for the life of me work out how to print it up so the sizing square was the correct scale… three attempts later, and eventually I settled for “pretty close”.  I estimated my beanie is actually about 7-8% bigger than the pattern, and then Sarah informed me it is too small! aaaagh!  It is a pretty cute pattern though, I will still probably give it another go one day  🙂

The stripes do match up all around though, both inside and out, a matter of personal pride for me.  I bound the beanie using a strip of blue merino, given to me by Mum.

So, after cutting the romper cuffs and pocket from the Tshirt, I still had quite a chunk of Tshirt leftover, well this wouldn’t do!  I immediately realised, as you do; that I could get two pairs of knickers and a bra from the leftovers.  Well, I’m sure that is the first thought anyone would think, hmmm?

I used the cloth habit Watson pattern, and cut out a bra plus two sets of matching knickers… yes, it was an XL Tshirt. I avoided as much of the advertising as possible and tried to stick to just the Wildcats logos as much as I could.

As I was making it, it occurred to me… is jungle January still a thing?  See, in the past few years I’ve been in the habit of making a set of underwear for jungle January, and one of the things about the basketball is that the Perth Arena is known as “the Jungle” during the Wildcats games.  Like, they’re always screaming  “WELCOME TO THE JUNGLE!!!!!!” and going on about “…. HERE IN THE JUNGLE…!!!!”   “Jungle” I guess because, wildcats.  Anyway, it occurred to me that I was serendipitously making a jungle-themed set of underwear again.  Without even meaning to!  Win!!!

Do you wanna hear something funny?

I’ve been in the throes of making this set for several weeks now, fitting it in as light relief in between working on my pattern, you know; and I took it along to the sewing guild meeting yesterday in the hopes of finishing it up.  And there I had the joy of seeing Emma also making a Watson bra.  Except her’s was really beautiful; super pretty, with chartreuse lace, pink and blue elastics, generally all round gorgeous and very feminine.  Just absolutely lovely in every way.  Such a contrast to my sorta … lowbrow one made from an old basketball Tshirt,  With logos, and everything.  Like something a teenager might wear.  Or more like, refuse to.  Omigawd, so embarrassing. I swear I don’t try to be like this.  It just happens.  Every now and again, I think back to an anonymous commenter who used to frequent my blog, and who couldn’t resist from pointing out my 1) immaturity and 2) unnecessary penny-pinching-ness, among other things.  Ahem, guilty as charged!

Fully lined with a lightweight stretchy stuff that I discovered during my stash clean out…  My tutorial for fully lining this pattern to enclose the seams, is here


I thought about not posting this next one… but wellll, here goes… I’ve also made another thing, squeezed out from the Wildcats Tshirt, I mentioned it was an XL yeah?! I also got a little cropped top, much nothing to write home about at all… I made it specifically for my new workout aspirations.  I hadn’t made any working out or losing weight resolutions on New Year’s Eve … but just lately I’ve been feeling a bit stodgy and decidedly… “matronly”, is the only word I can think of.  So I decided to do something about it, and purchased the Kayla Itsines Bikini BodyGuide.  One thing you’re supposed to do before even getting started is take a picture of yourself, preferably in a sports crop top and little shorts, and then take a new picture in the same ensemble every week as you work through the guide.  So obviously I had to make myself a little crop top, asap!  I used my customised version of the Closet Case Nettie bodysuit pattern and whipped up this super basic thing, just edged with a line of white overlocking thread around all the edges, which I think looks nice with my little white shorts.  I made those too.. they’re are the eponymous Carolyn pyjama shorts.  I rolled them up a bit, to show as much abdomen as I dared.  Hopefully, it’s going to become a more shapely one in a few weeks!  Don’t worry, I will not be posting a new picture here every week, but I’ll probably do an summary when I finished the course!

I started out with the beginner’s schedule, and practically killed myself just doing day 1!!

before… 

SaveSave

SaveSave

SaveSave

SaveSave

SaveSave

SaveSaveSaveSave

SaveSave

SaveSave

SaveSave

SaveSave

SaveSave

pinterestmail

a little bit of haute couture…

…haha, just kidding.  I’ve made some winter jammies for myself.

I bought this lovely, cosy, fluffy cotton flannelette from Spotlight months ago, actually during their 40% off everything sale in the height of summer, you know; when it’s so hot the thought of fluffy anything  is too awful to contemplate…  however it was rather fun to be able to choose from the full, pre-season range of prints and not just the end-of-season rejects like I normally do, ‘cos I shop at the beginning of winter when all the good stuff has all sold out … it really does pay to plan ahead!   Who knew?! I chose this cutie cute-ums woodland animal print… too adorable for words, hmmm?…  btw, cutesie little prints are not just for the kiddies.  Old hags like me are allowed to wear them too, y’know.  I almost bought a pink cupcake print, but this one does co-ordinate nicely with my fluffy slippers.  

One’s sleepwear must always co-ordinate with one’s pussycats too, a mandate not often mentioned in fashion must-does even though it’s pretty darn IMPERATIVE

gratuitous pussycat pic

Patterns: well, in the past I’ve used the old pair of pyjama bottoms for all my new ones, and I almost did this time too then I was suddenly like, hold up… I actually have a lovely new pyjama pattern, and one that was named FOR MEEEE!! still pinching myself that Heather was so kind…!  Obviously, the ol’ ego kicked in and held sway, and I made Carolyn pyjama bottoms.  🙂  I had to make them a little bit shorter due to not quite enough fabric … I didn’t take into account that my print was directional so I wouldn’t be able to flip the pattern pieces upside down! *kicking myself* I’ve previously made the shorts version of the pattern twice, here and here.

The top; well I used my standby Burdastyle 10-2009; 121 modified a bit… this time to have a higher, wider neckline with no centre front slit.  I’ve found in the past that having the low V-neckline in pyjamas, my chest actually gets quite cold in winter and I’ve resorted to wearing scarves over my pyjamas… ridiculous!!  so I cut the neckline high so my chest is covered up.  I’ve used this Burda pattern three times before… here, here, and here; twice for pyjama tops.  It’s pretty plain and boring and the easiest thing in the world to make up since you don’t even have to set in any sleeves… it’s basically like a completely shapeless flat sack with cut-on sleeves, sewn up.  I require very little by the way of fancy elegance in my pyjama tops, so boom, done!  I overlocked all the raw edges and topstitched the seam allowances down, like faux-flatfelled seams.


You may be forgiven for wondering… why hasn’t Carolyn used the Carolyn top pattern too? well, I did think about it, however I currently have other plans for that top awaiting in the wings; Rosie, @artworkerprojects on instagram has made so many beautiful versions of the pattern including this amazing dress.  This version is my favouritest of favourite Carolyns that I have ever EVER seen!  and I have the devious intention of shamelessly copying her… very soon, hehehe.

In the meantime… sweet dreams!

Details:

Top; Burda 10/2009;121, white cotton flannelette
Bottoms; Closet Case patterns Carolyn pyjamas, cotton flannelette
Slippers; made by me from floor mops, details here

Also, nothing to do with sewing, so yes, this is a little bit random … recipes make a very rare appearance here on my blog since cooking is not really my thing, but I’ve developed the perfect muesli!!  this is SO YUMMY that I just had to share.

I prefer a fruit-free muesli, and for years I’ve been a loyal fan of a commercial brand, until it suddenly and inexplicably changed the formula to have quite a noticeable and very strong vanilla flavour. This completely ruined it for me.  I been searching for another one, unsuccessfully… all the ones on the market here either have too much fat or sugar, or contain very highly process components like puffed rice; eww!  So I finally got proactive and made my own.

This recipe gives a very nutty and wholesome muesli, that is not sweet.  I LOVE IT.

Muesli

1/2 c pecans, roughly chopped
1/2 c flaked almonds
1/4 c sesame seeds
1/2 c pumpkin seeds
1/2 c sunflower seeds
1/4 c linseeds
1/4 c black chia seeds  (optional; I only included these because we happened to have some that needed using up)
3 c rolled oats

Dry toast each ingredient separately in a frying pan over low heat, using no oil.  The only exception is linseeds, which I’ve discovered will fly all over the place like popcorn so I don’t toast these!  Stir frequently while toasting to avoid burning, and tip each into the same bowl once toasted and before doing the next ingredient.  Do the rolled oats in batches.  Mix ’em all together and let the muesli cool completely before storing in an airtight container.

I like it best mixed with natural unsweetened yogurt… enjoy!

pinterestmail

a passing housewife

passing housewife

What am I?  I am a passing housewife!!!

Hehehe just to explain, Izumi Curtis is a character from my favourite Japanese anime Fullmetal Alchemist.  She always introduces herself as just a passing housewife, and so is the character I can relate to the most.  And so, when it comes to choosing an anime character for myself… Izumi Curtis, I choose you!!!! …that’s a pikachu reference there, in case it did not translate…

Izumi Curtis, character and artwork by Hiromu Arakawa

Artwork_of_Izumi_Curtis

So, firstly… WHY??  well, in Northbridge there is a retro video-gaming bar called Respawn that my kids like to go to… and I should just slip in here that this VERY MUCH a young adult’s kind of a place to hang out on Friday and/or Saturday night.  Anyway, last night was Mum’s Night, like a nod to Mother’s Day last weekend, and the deal was that if you brought your Mum you all got free entry.  So naturally, Sam and Cassie hatched a plot that I would be going along with them.  Of course I said yes! how often do I get invited out on the town with my adult kids? pretty rarely, that’s what!  I won’t say never, since my kids are pretty fun and relaxed and not usually embarrassed by my company, but going out to a nightclub in Northbridge is not generally a family thing to do, mmmm?  Fellow Perthies will attest to that  😉

Another thing about Respawn is that people often cosplay it up… and so I set about planning and making my costume…  I made a sleeveless white shirt-dress/coat-dress, I wore my recently completed Morgan boyfriend jeans, and I made a pair of Japanese toilet slippers like the ones Izumi always wears.

vogue 8997 ccf carolynmorgan jeans

Coat-dress/shirt-dress:

I used two patterns; Vogue 8997, a dress pattern, and for the notched collar I adapted the neckline and spliced on the collar from Closet Case patterns Carolyn pyjamas.

Alterations:  for the collar, I added width to the centre back lines of both collar pieces, to fit the width neckline I was after.  I also squared off the collar points somewhat, so as to match the more square collar points of Izumi’s coat dress.  For the dress; I cut the bodice fronts to have a centre front opening and adapted the neckline to have the notched collar bit, and added enough extra width in the centre front to accommodate the button and buttonhole band.  Likewise the front skirt piece has the buttoned opening.  Likewise I cut the back skirt to have a centre back seam, and added a bit extra to the lower part of the opening to hem it.

shirtdress

The bodice front and back are in double fabric, and self-lined, so as to enclose the princess seams within the layers.  Even though this is just a costume, I reckon there’s no need to cut corners and do a shoddy job of sewing it!  I had a small moment of shock when my own Mum suggested just cutting the collar in a  single layer of fabric and leave it with a raw edge … oh the horror!!  I dunno, call me obsessive, but nowadays I could probably not sew a garment all rough-shod like that in all good conscience.  Making all my clothes for the past few years and I am now a fair dinkum full-on, signed up member of the well-made clothing snob club, right here.

bodice closeup

Izumi’s coat-dress/shirt-dress is very well fitted, practically skin tight across her bosom which suggests a stretchy fabric.  However the collar is also quite structured and stiff-looking, more like a regular woven-fabric shirt collar.  So, to get that tight, fitted look; I used two different fabrics in my bodice, a stretch and a non-stretch.  Actually, I used three different fabrics all together… but more on that later…. to get the fitted tightness of the bodice AND the structured collar, I cut the bodice front and back from stiff woven ripstop cotton, and I cut the bodice side fronts and backs from stretchy bengaline.  This way, there is stretch at my sides, but the shirt fronts maintain that nice crisp look of a tailored notched collar shirt.  When fitting the shirt-dress/coat-dress to myself, I left the side seams until the last thing, and the final step was to pull in those bodice side seams nice and tight.

And yes, the skirt is a different, woven cotton… one that is not so stiff and has a bit more flow to it, more suitable to a skirt than the rip-stop.  All are long term residents from my stash, probably from Fabulous Fabrics originally.  The white buttons were harvested from a recently chucked-out doona cover.

slippers

Slippers:  Izumi always wears these Japanese toilet slippers…. this is to reiterate her status as a humble housewife and that she spends her days cleaning and doing housework.  I made these very quickly and simply, the padding is cut from my good old yoga mat, covered with black cotton cut from an old Tshirt.  For the uppers and the underneath bit, I used some very stiff thick black cotton from Remida, from when Meggipeg kindly invited me to go with her the other day.  I did the WC letters on the top by couching with some thick, white wool, leftover from Cassie’s beanie that I knitted her for Christmas.

couching

Another pretty important component of Izumi’s look is the Flamel tattoo.  Cassie drew this on with a ballpoint pen; it was a little bit hidden on me, but ’twas there…

flamel

And, you may be wondering… did I wear this outfit, and these slippers in the streets of Northbridge and in the club? well yes I did!  You can rest assured that the other Mums were of course wearing all black, and heels or ankle booties and the like… but not I!  I am just! a passing! HOUSEWIFE!!!!!!

izumi curtis back

pictured in the club…

IMG_2453

pinterestmail
Switch to mobile version
↓