Tag Archives: Cassie

Oh, this old thing…

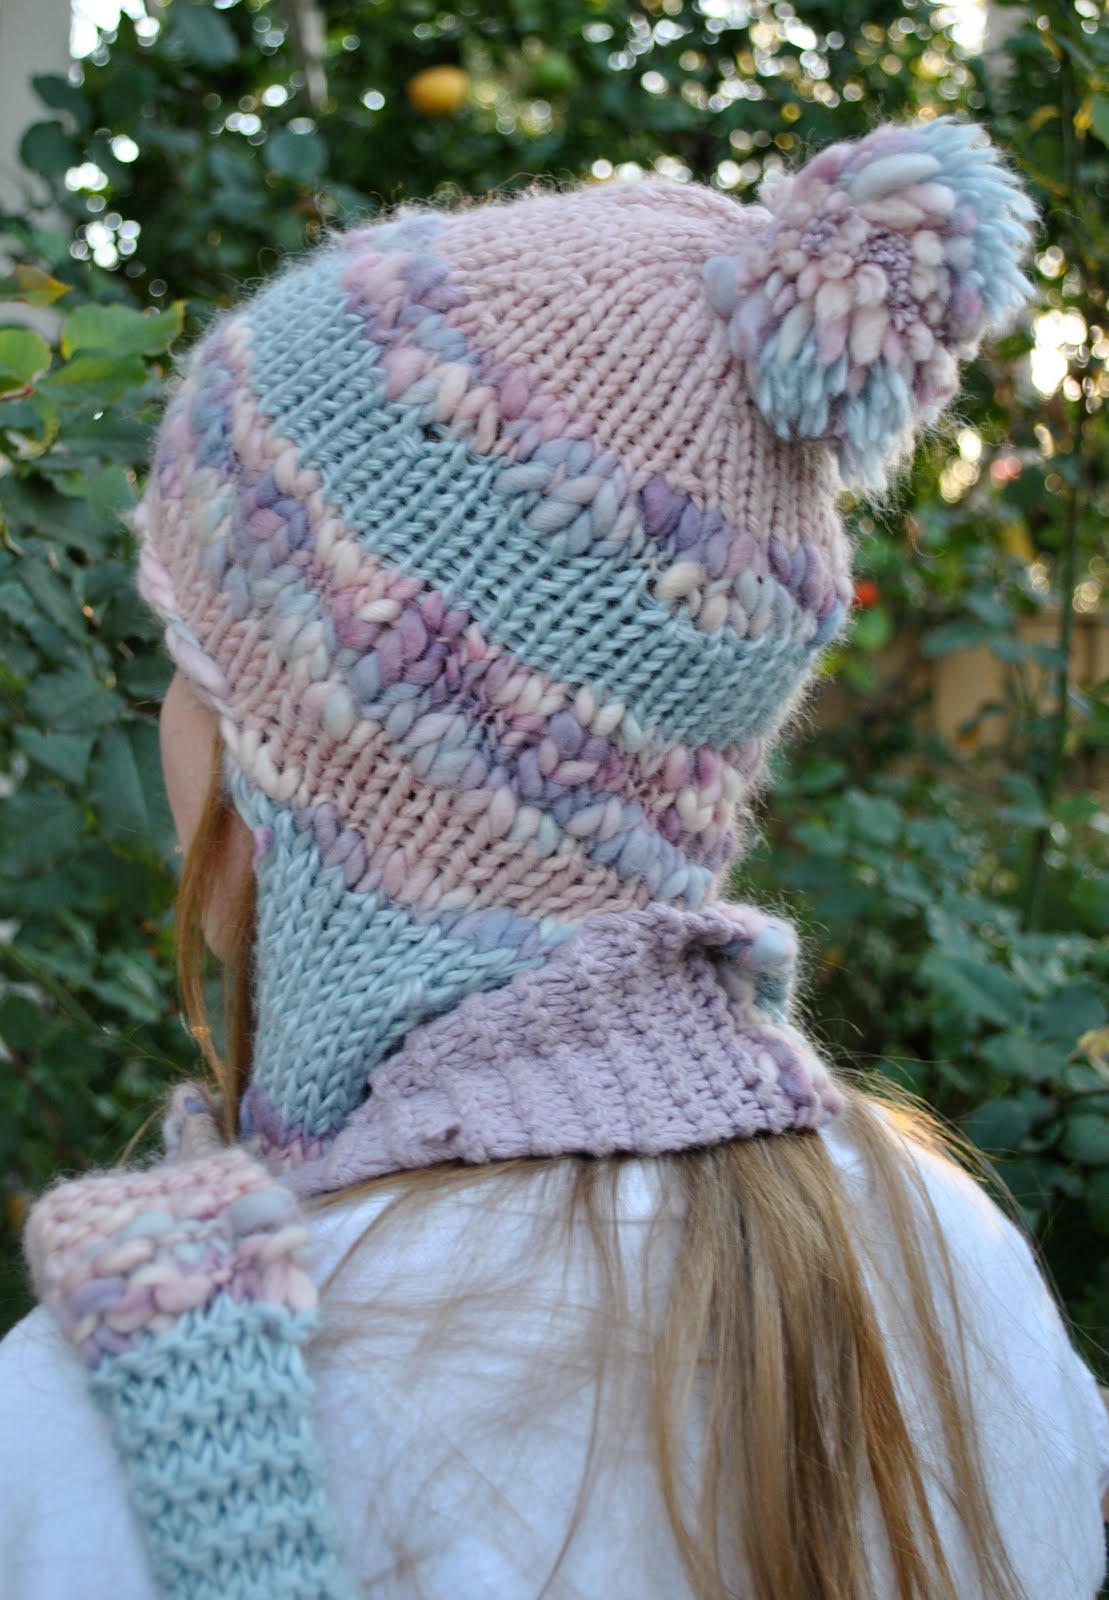
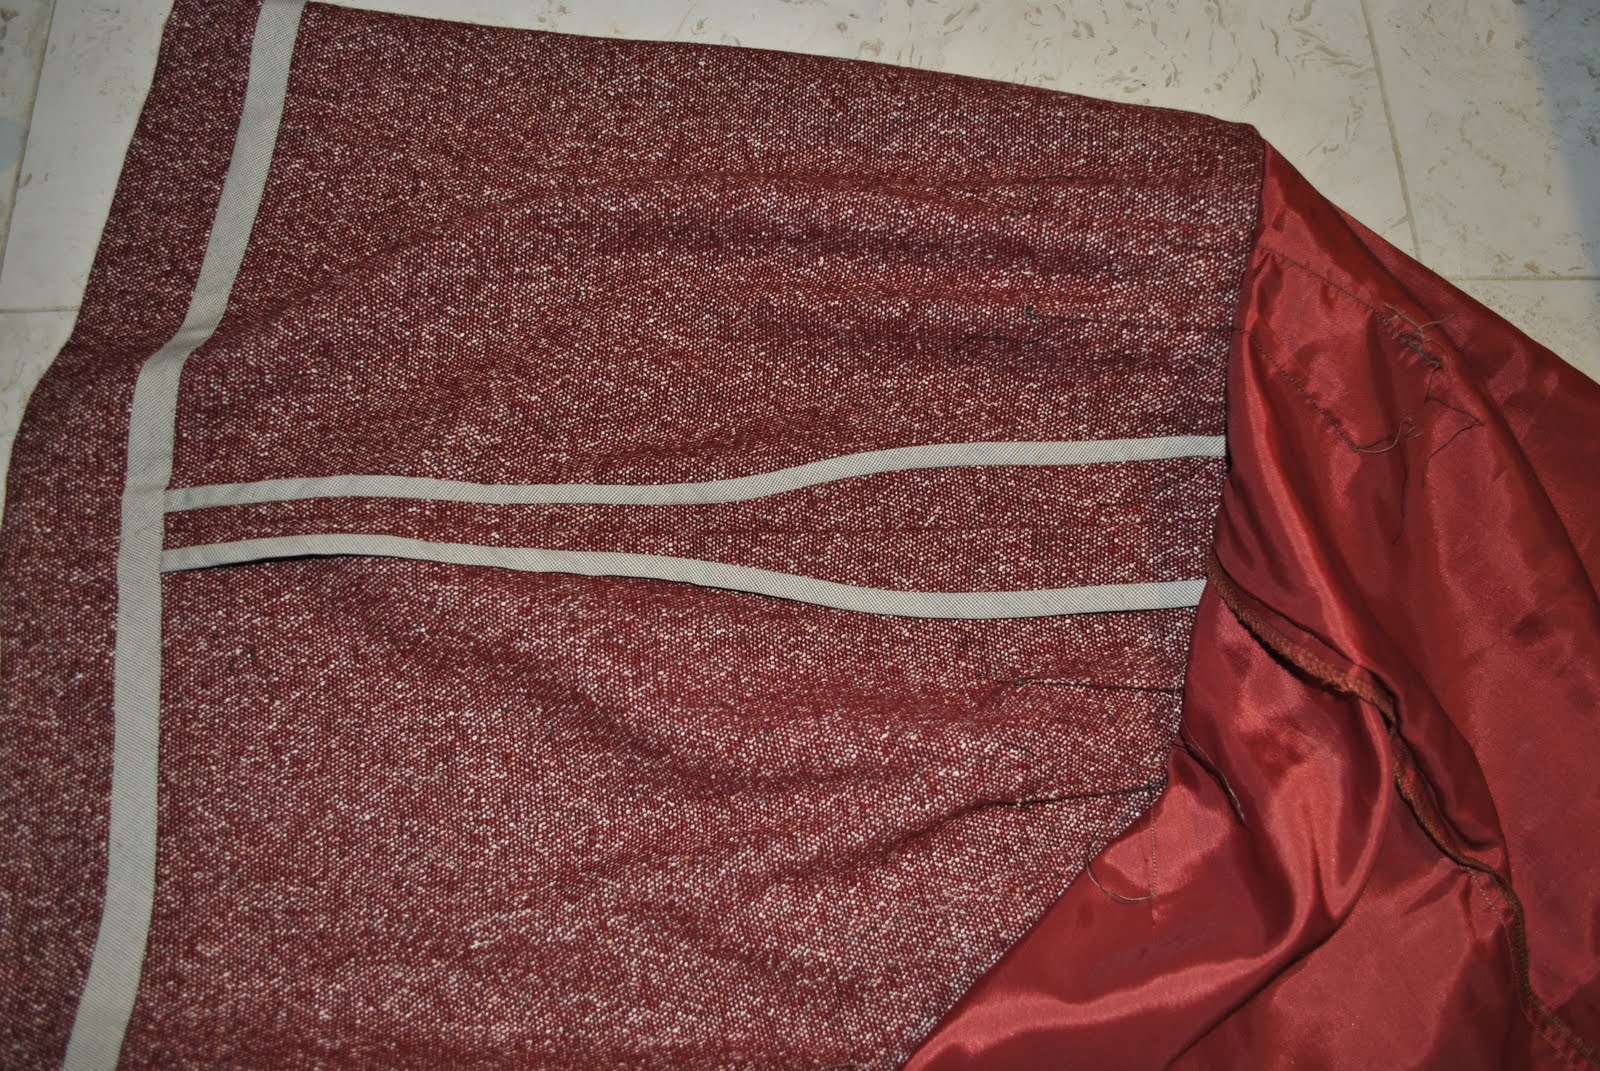
… and a few more old creations.  (Don’t worry, these are drawing to an inevitable endpoint, as I go forwards through time and eventually wind up at “now”, at which point these posts will finish and you will be seeing new stuff only…  It’s just that one of the goals I set myself was to document as much as I could of my handmade things in this blog, so bear with me here.  This is a finite process…)
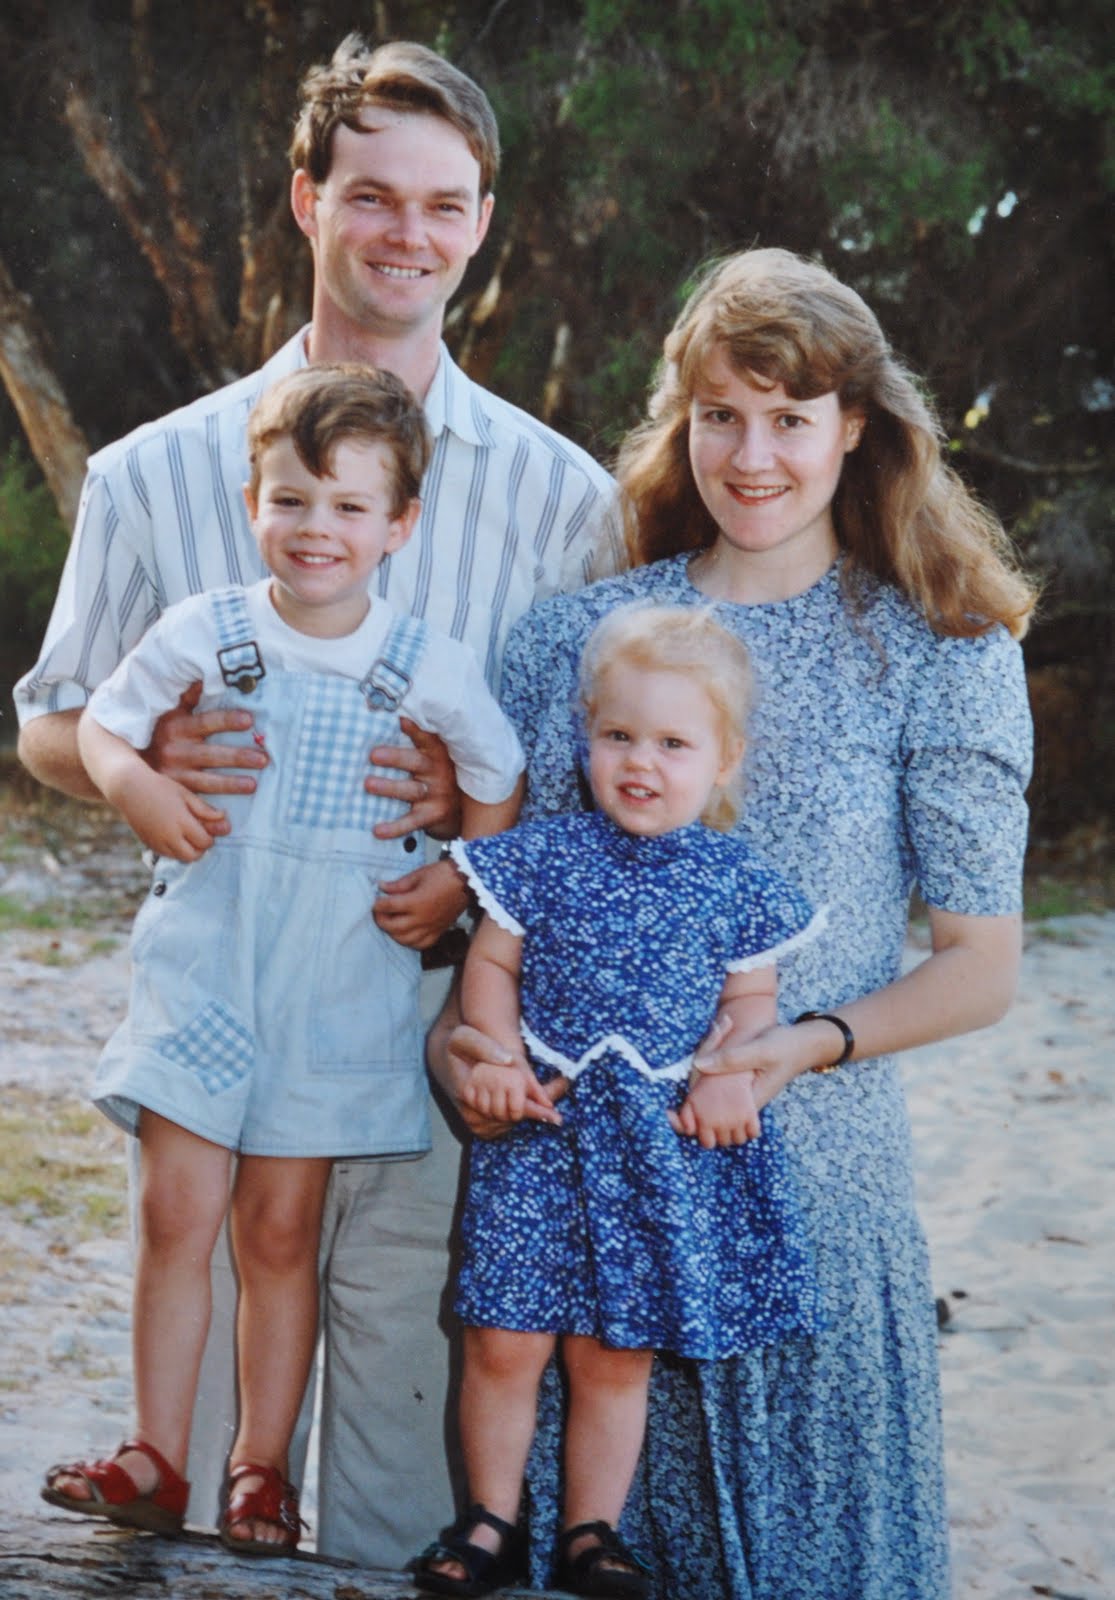
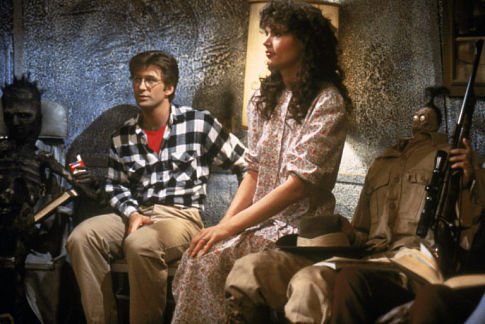
This is our little family (Sam on the way) in more stuff I made; Tim’s (Topkids) overall has been seen before here.  I made my dress, completely inspired by the dress (below) in Beetlejuice, do you remember this?  I basically fell in love with this loose long floral dress and set out to make myself close to an exact copy of it for myself.   Fortuitously it worked well as a maternity dress too.  I felt lucky that dropped waist blouse-y Laura Ashley numbers were quite fashionable during the years I was producing children…
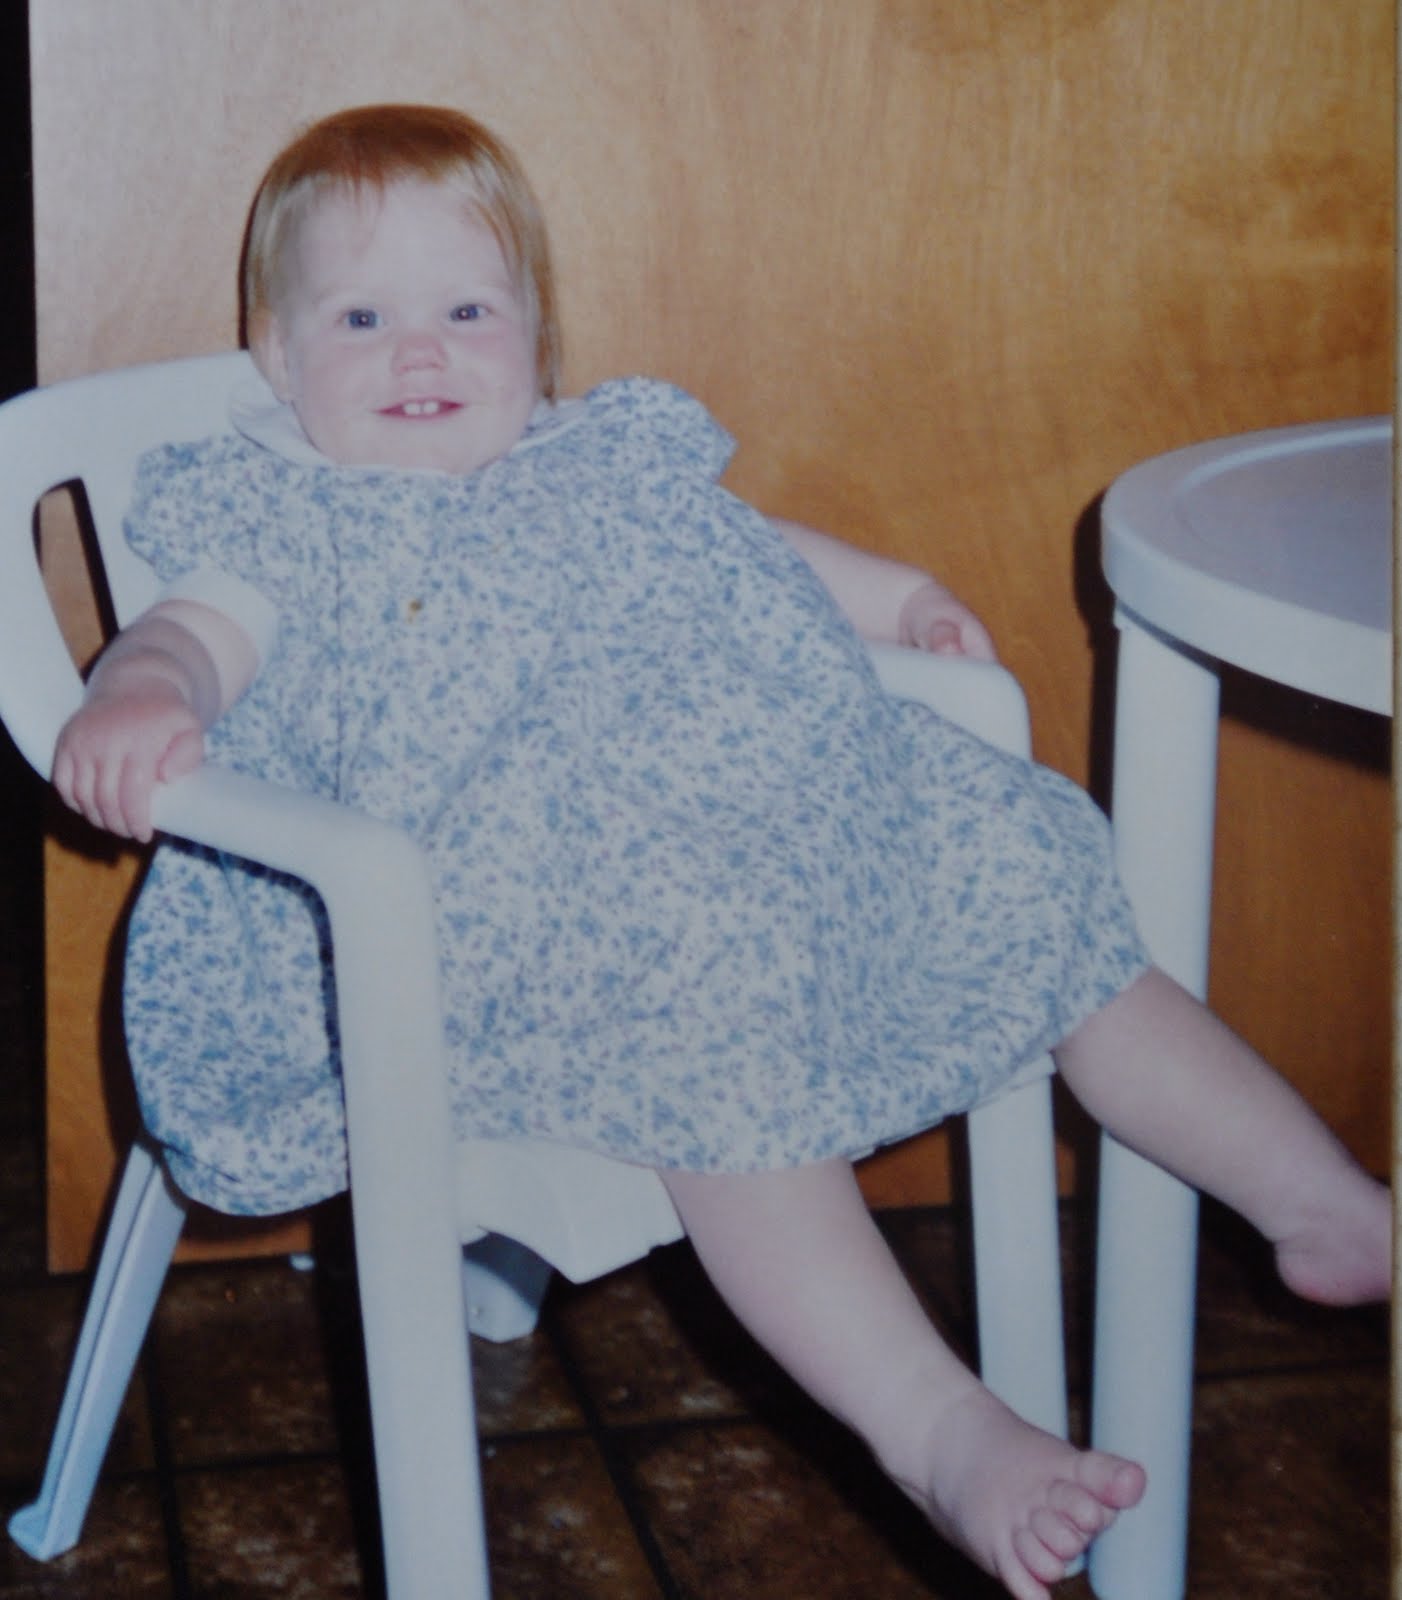
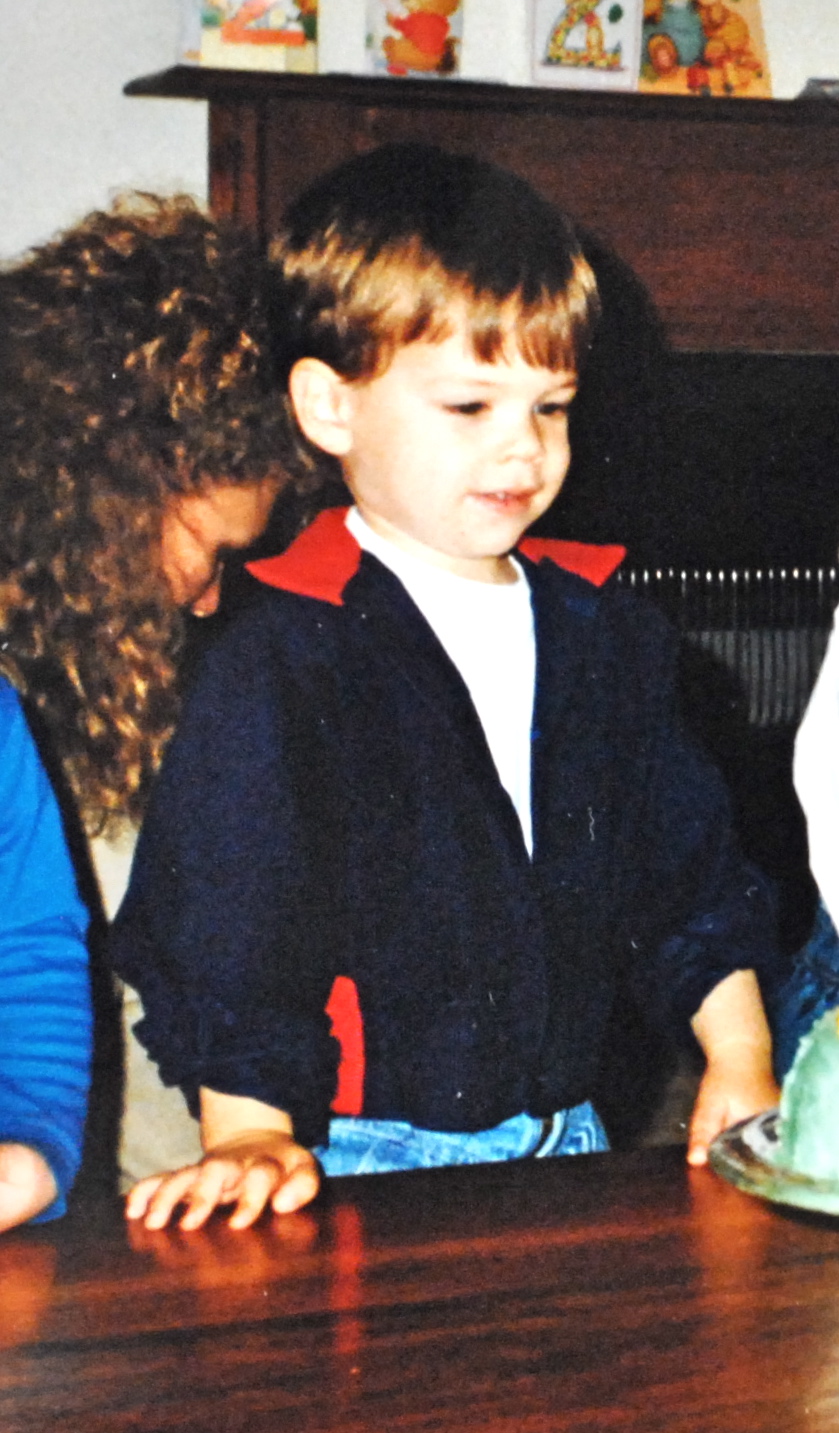
The blue floral dress with lace trim that Cassie is wearing is a TopKids pattern.

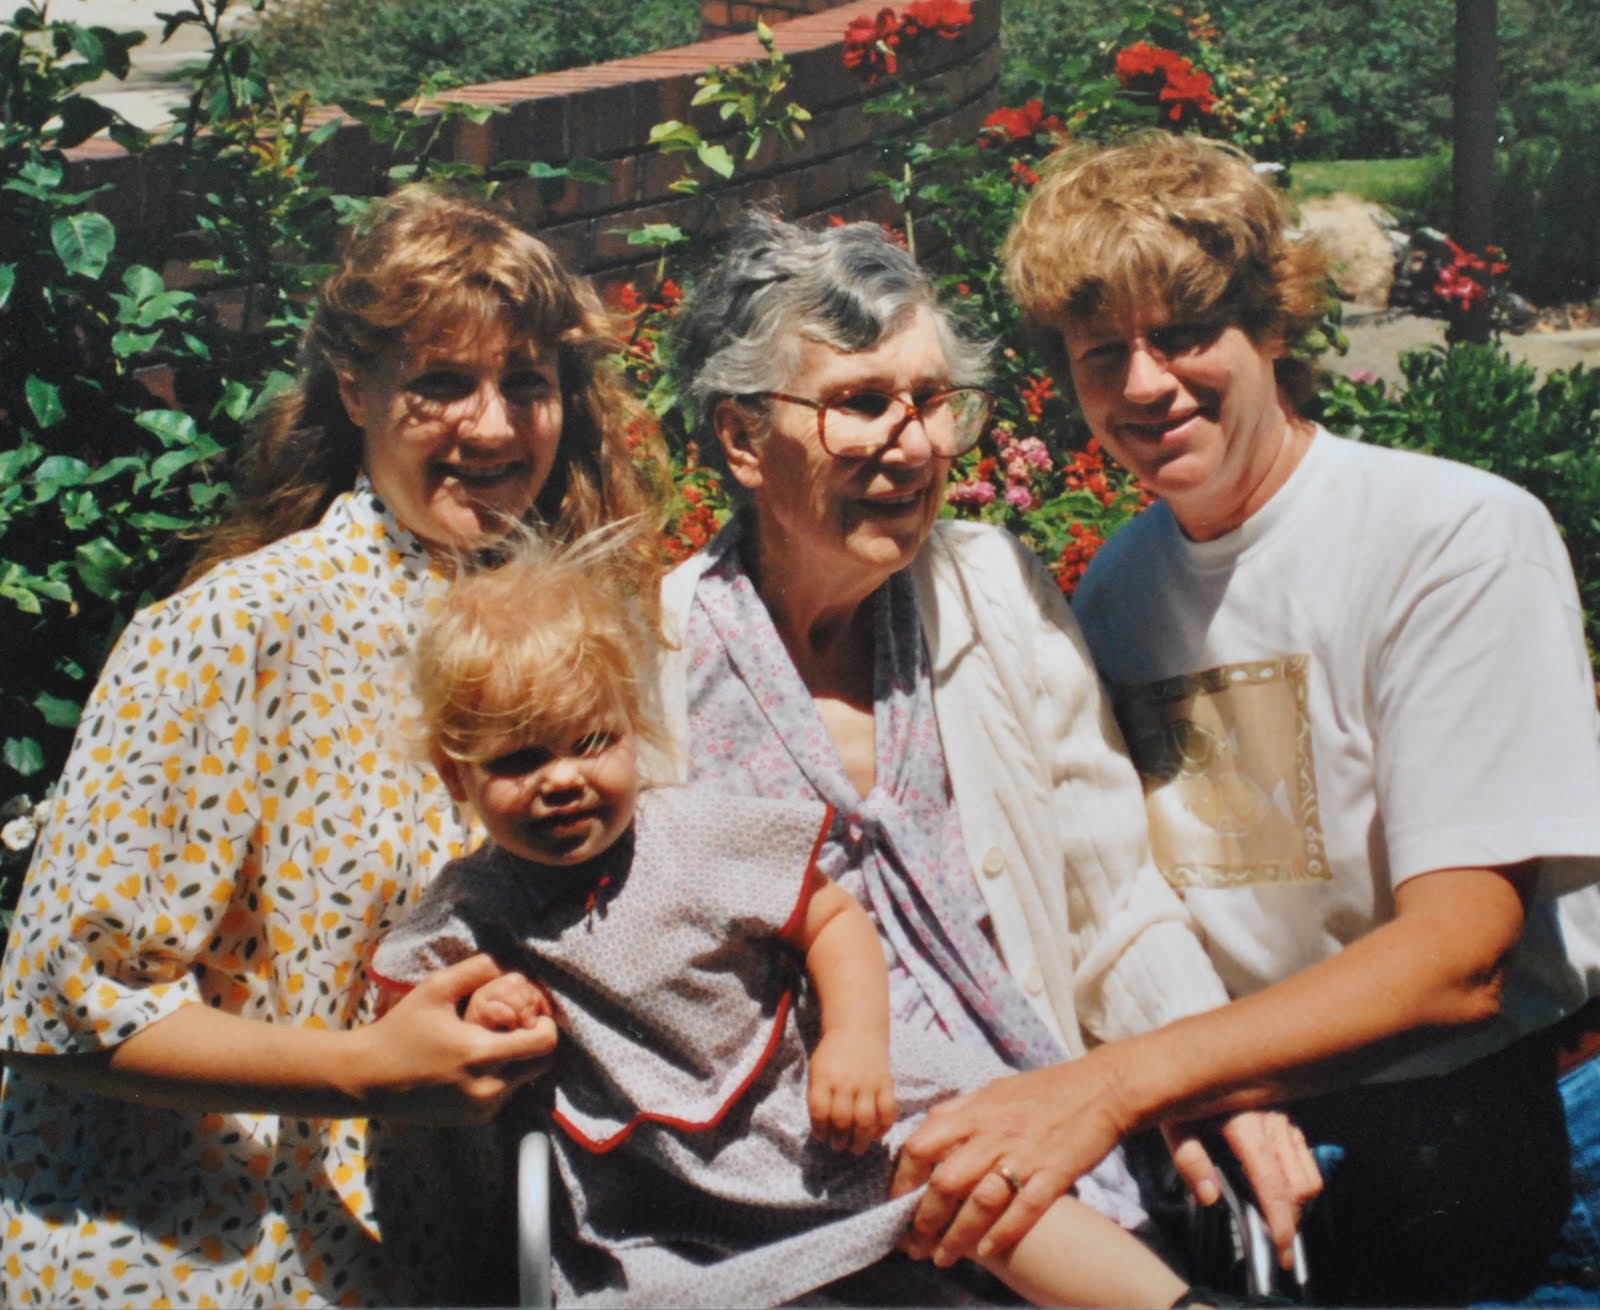
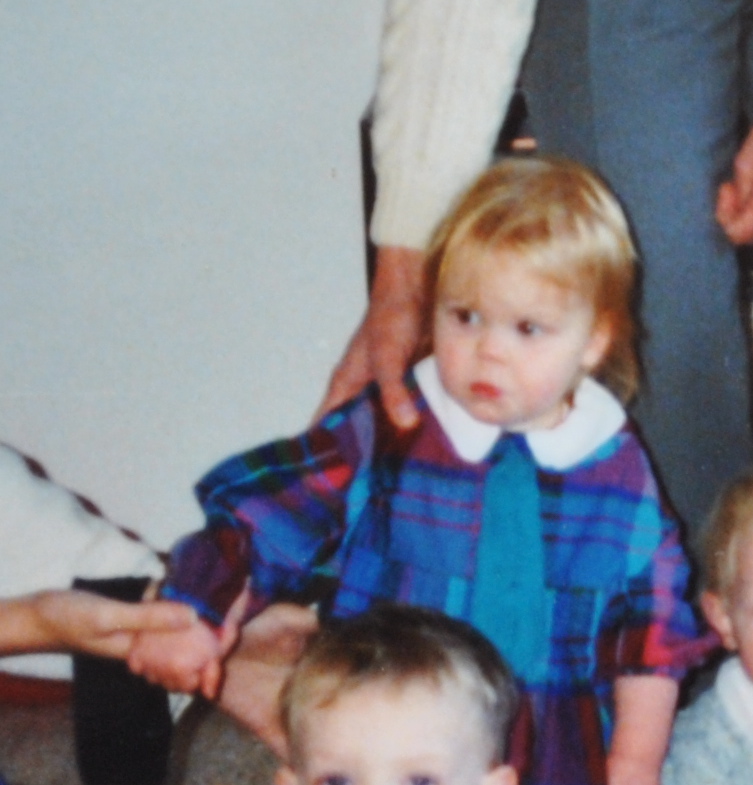
Below is a four generation picture; my grandmother, mother, Cassie and me.  Cassie is wearing a dress made to the same pattern as the blue one above.  It is interesting how the very different fabrics used give each dress a completely different feel; this one seems kinda “smart” while the floral and lace above give a far more “pretty and dressy enough for a party” feel, no?  Perhaps this tiny set of two dresses makes up another miniature rogue’s gallery (like yesterday), seeing the different looks you can get from one pattern by varying minor details; in this case the fabric.

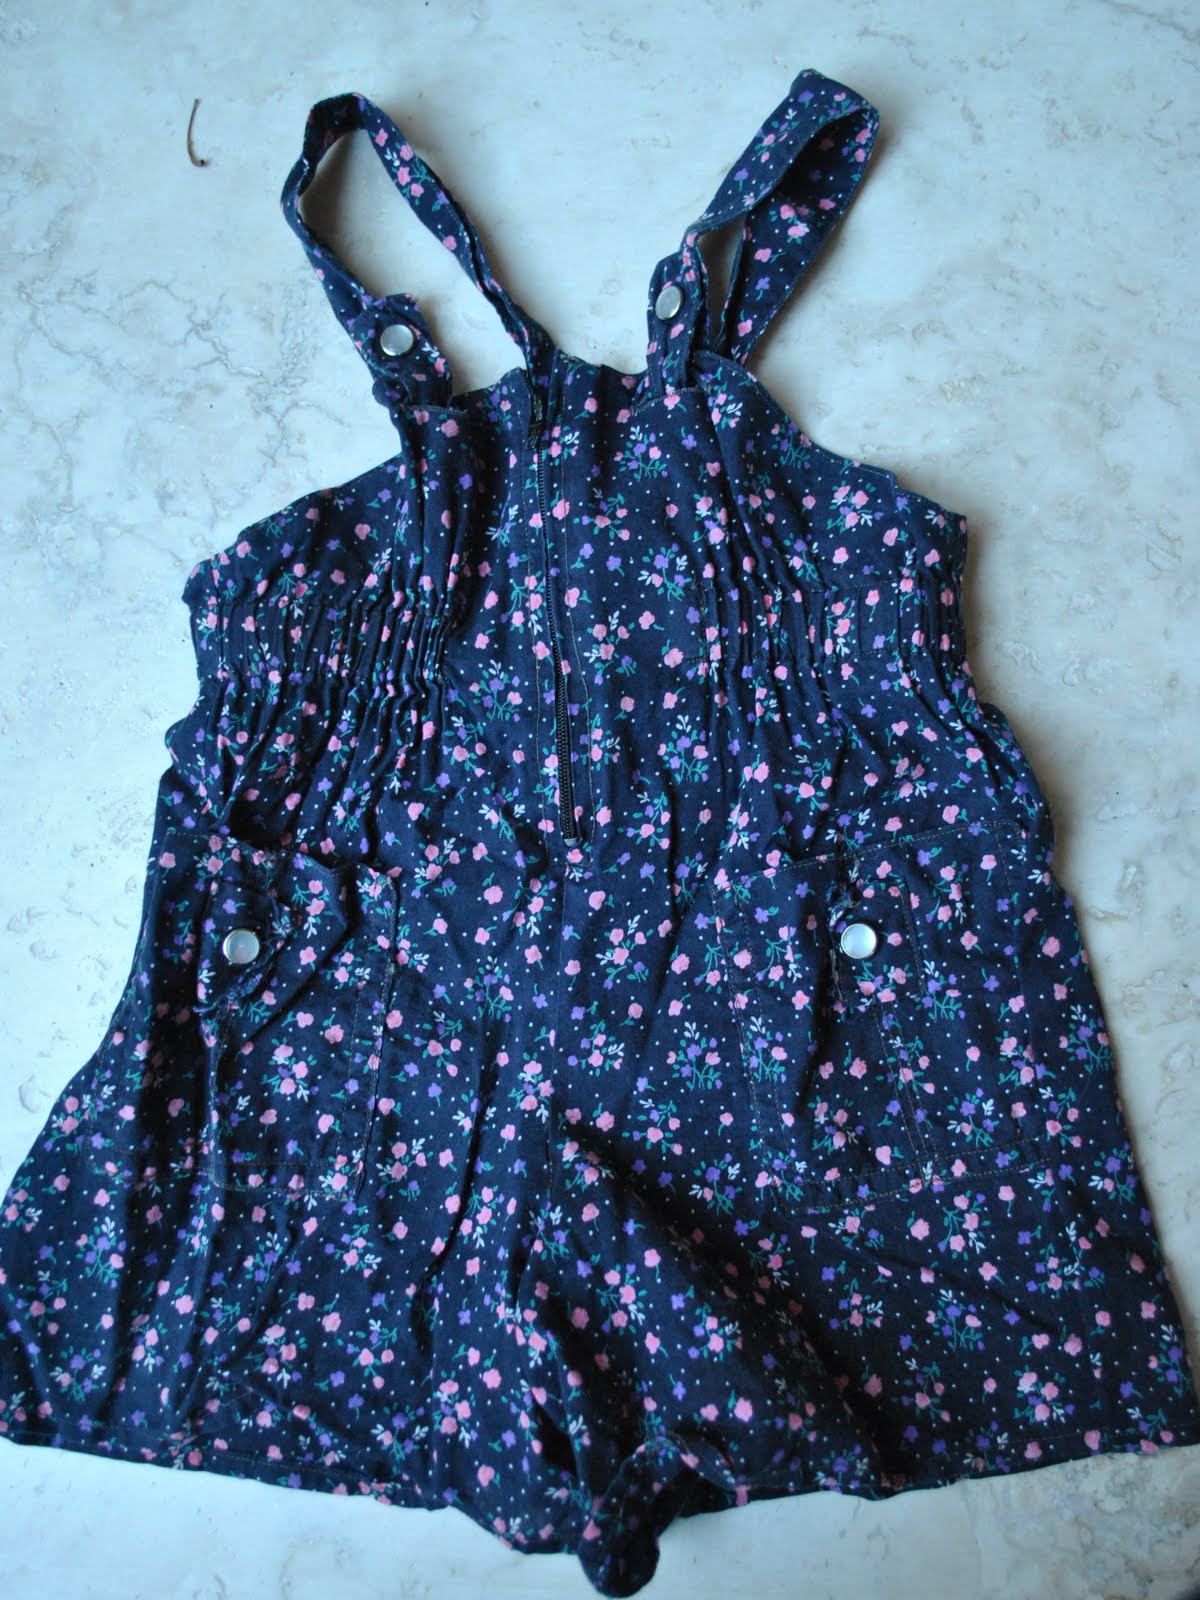
This little romper is literally the only thing that I made for my own children and passed on to other little relatives that was returned to me (!) but unfortunately without the little blouse I had made to go with it.  It had a really cute pink blouse to wear underneath, with a Peter Pan collar and full batwing sleeves gathered into elasticated wrists.  The little floral romper here has a zip up the centre front and tabs with pearl snaps on the pockets and shoulder straps.  From TopKids patterns.

Below is a  picture of Tim and Cassie on Tim’s fourth birthday (Sam is around by now, but is not in this picture!)  Cassie is wearing a dress that was truly one of my favourites, out of all that I had made for her!  It was of a lovely floral brushed cotton in very pretty shades of blue, green and violet, and had a sailor collar of soft ivory brushed cotton, around which I topstitched on a pale blue satin ribbon edging to enhance the sailor-y look.  I loved seeing her in this dress…. she looks so pretty, doesn’t she?

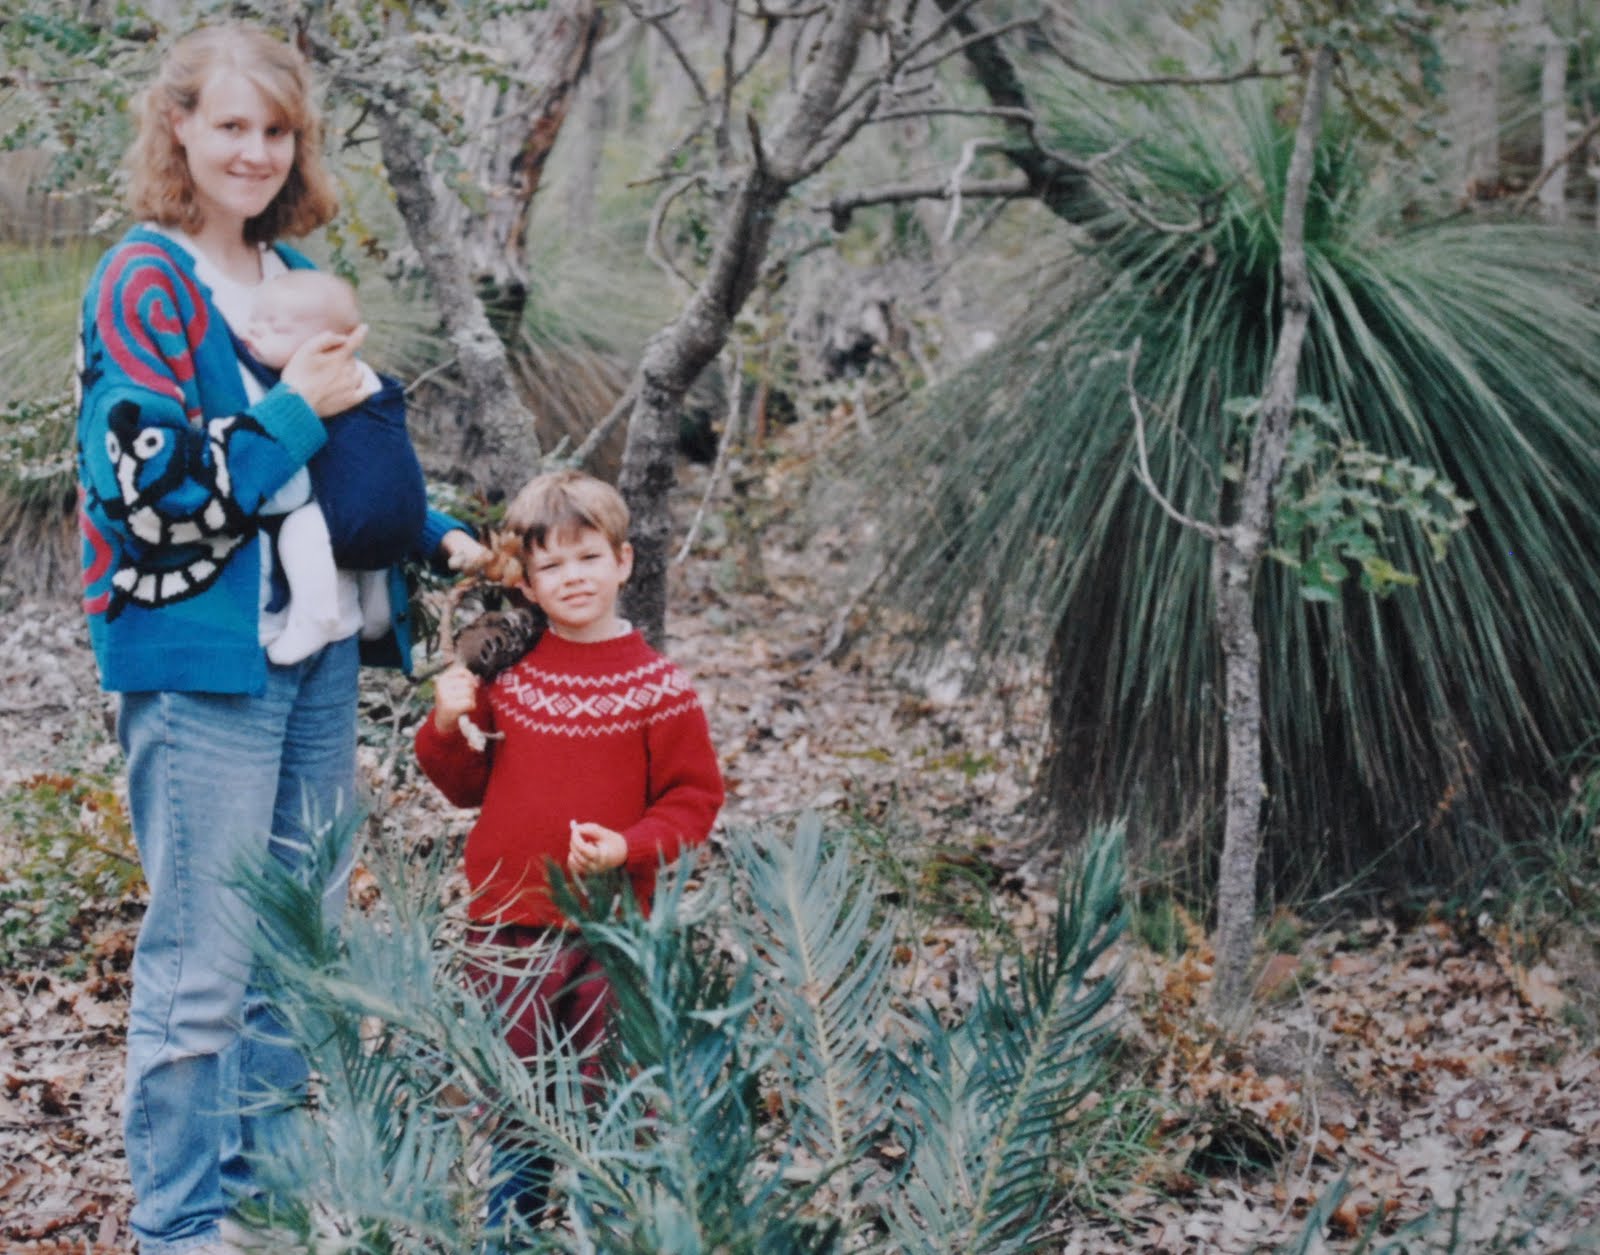
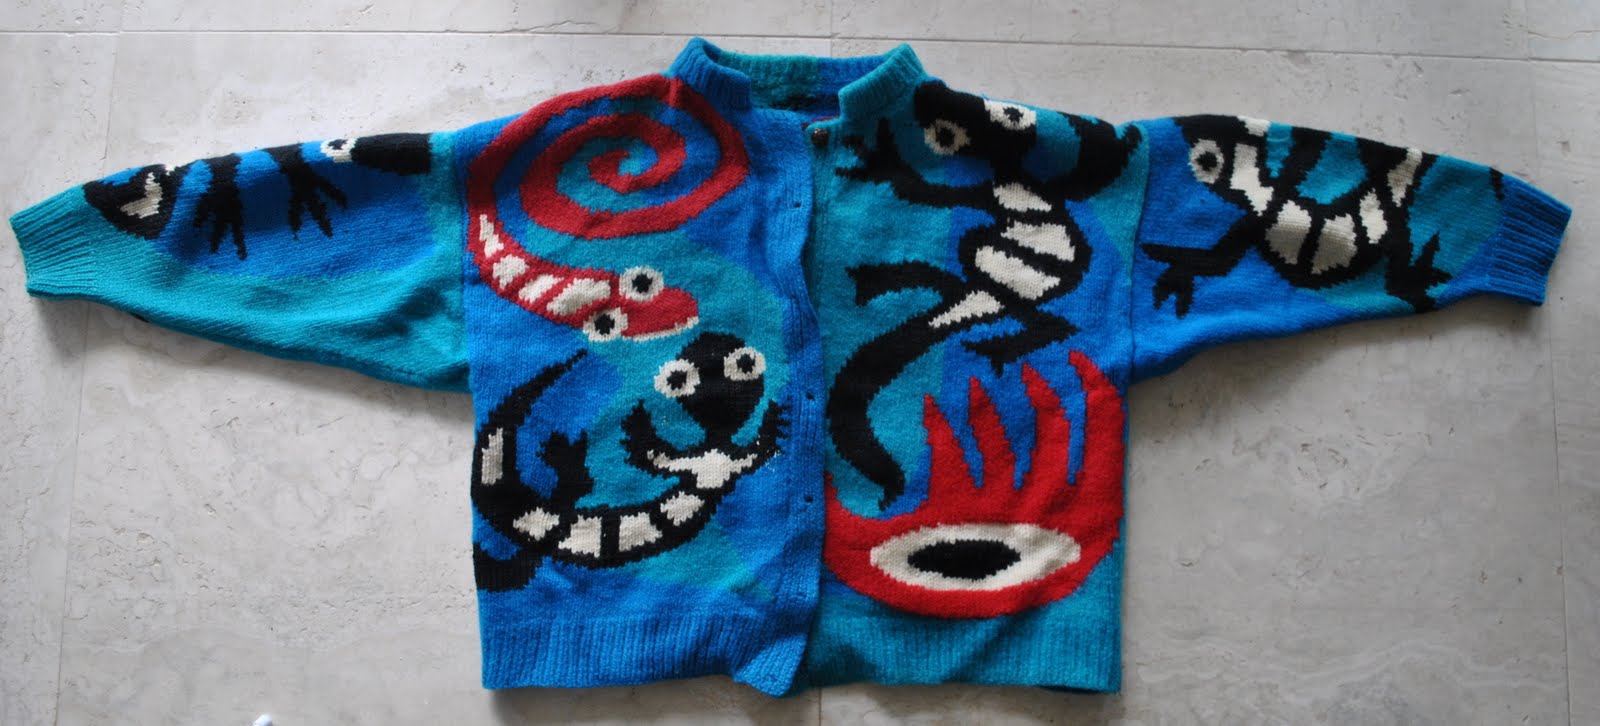
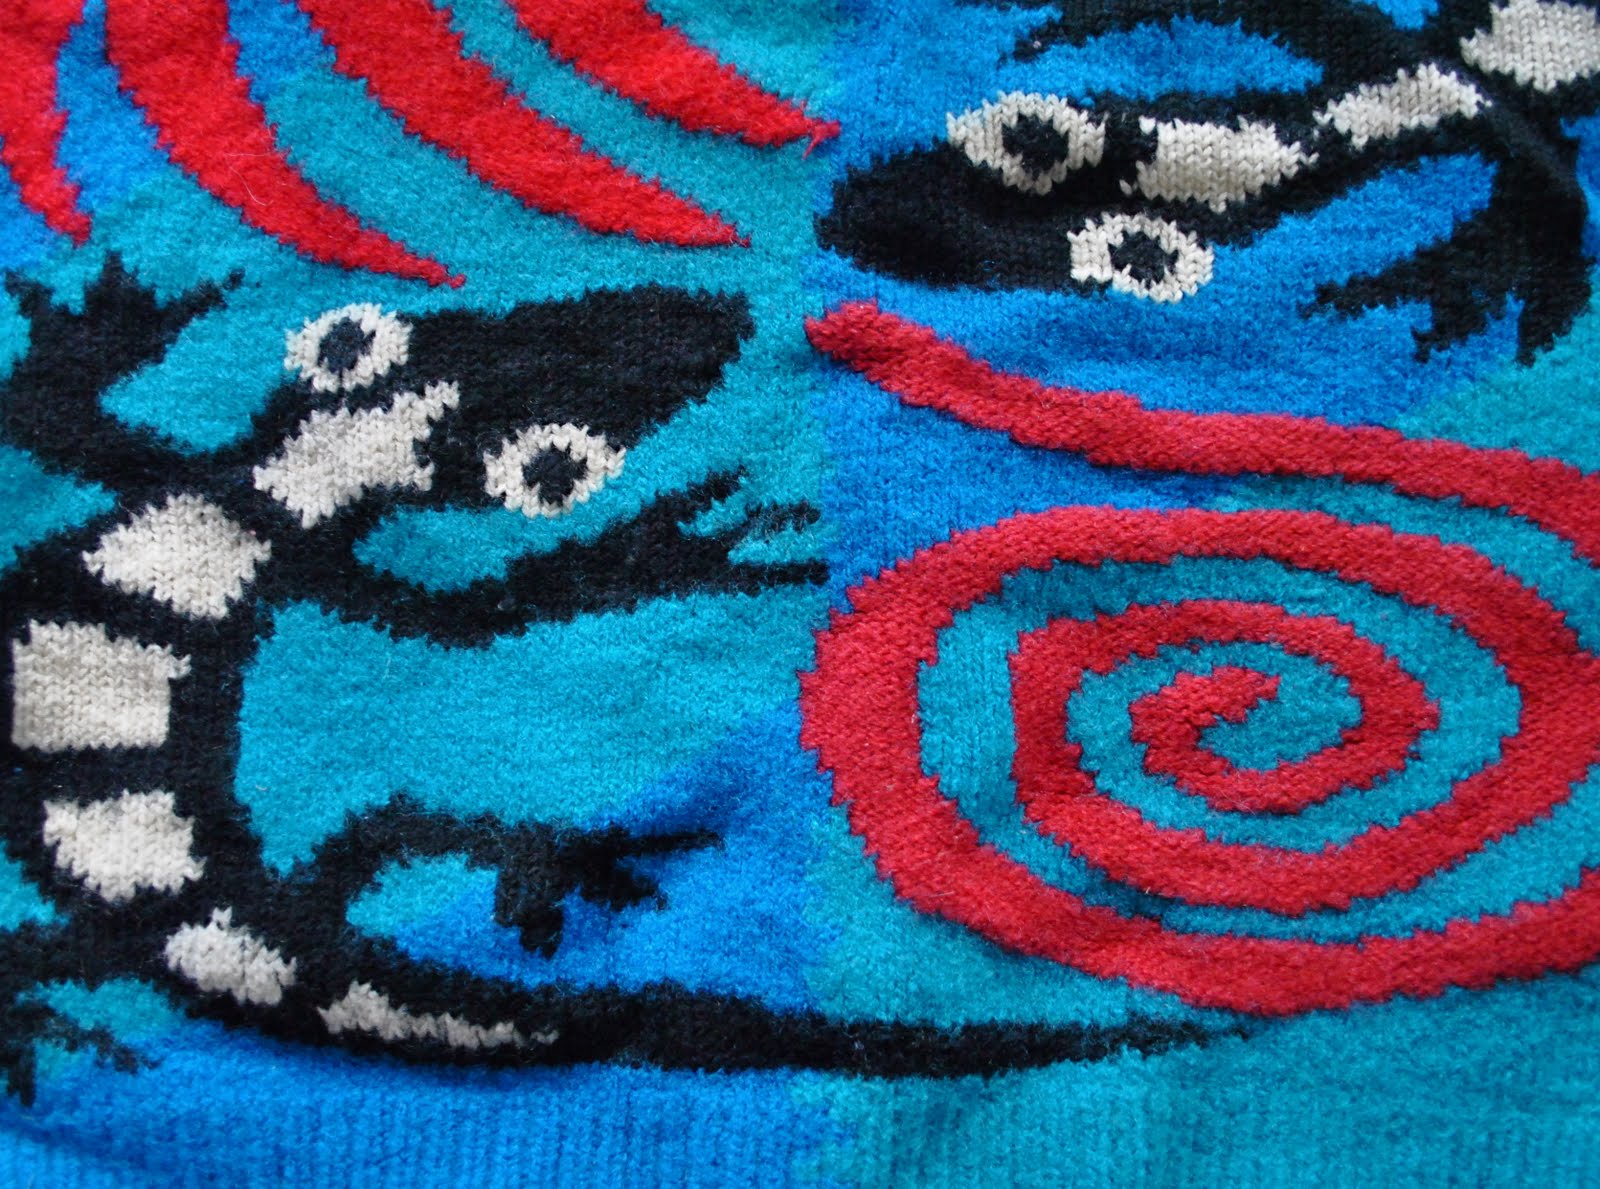
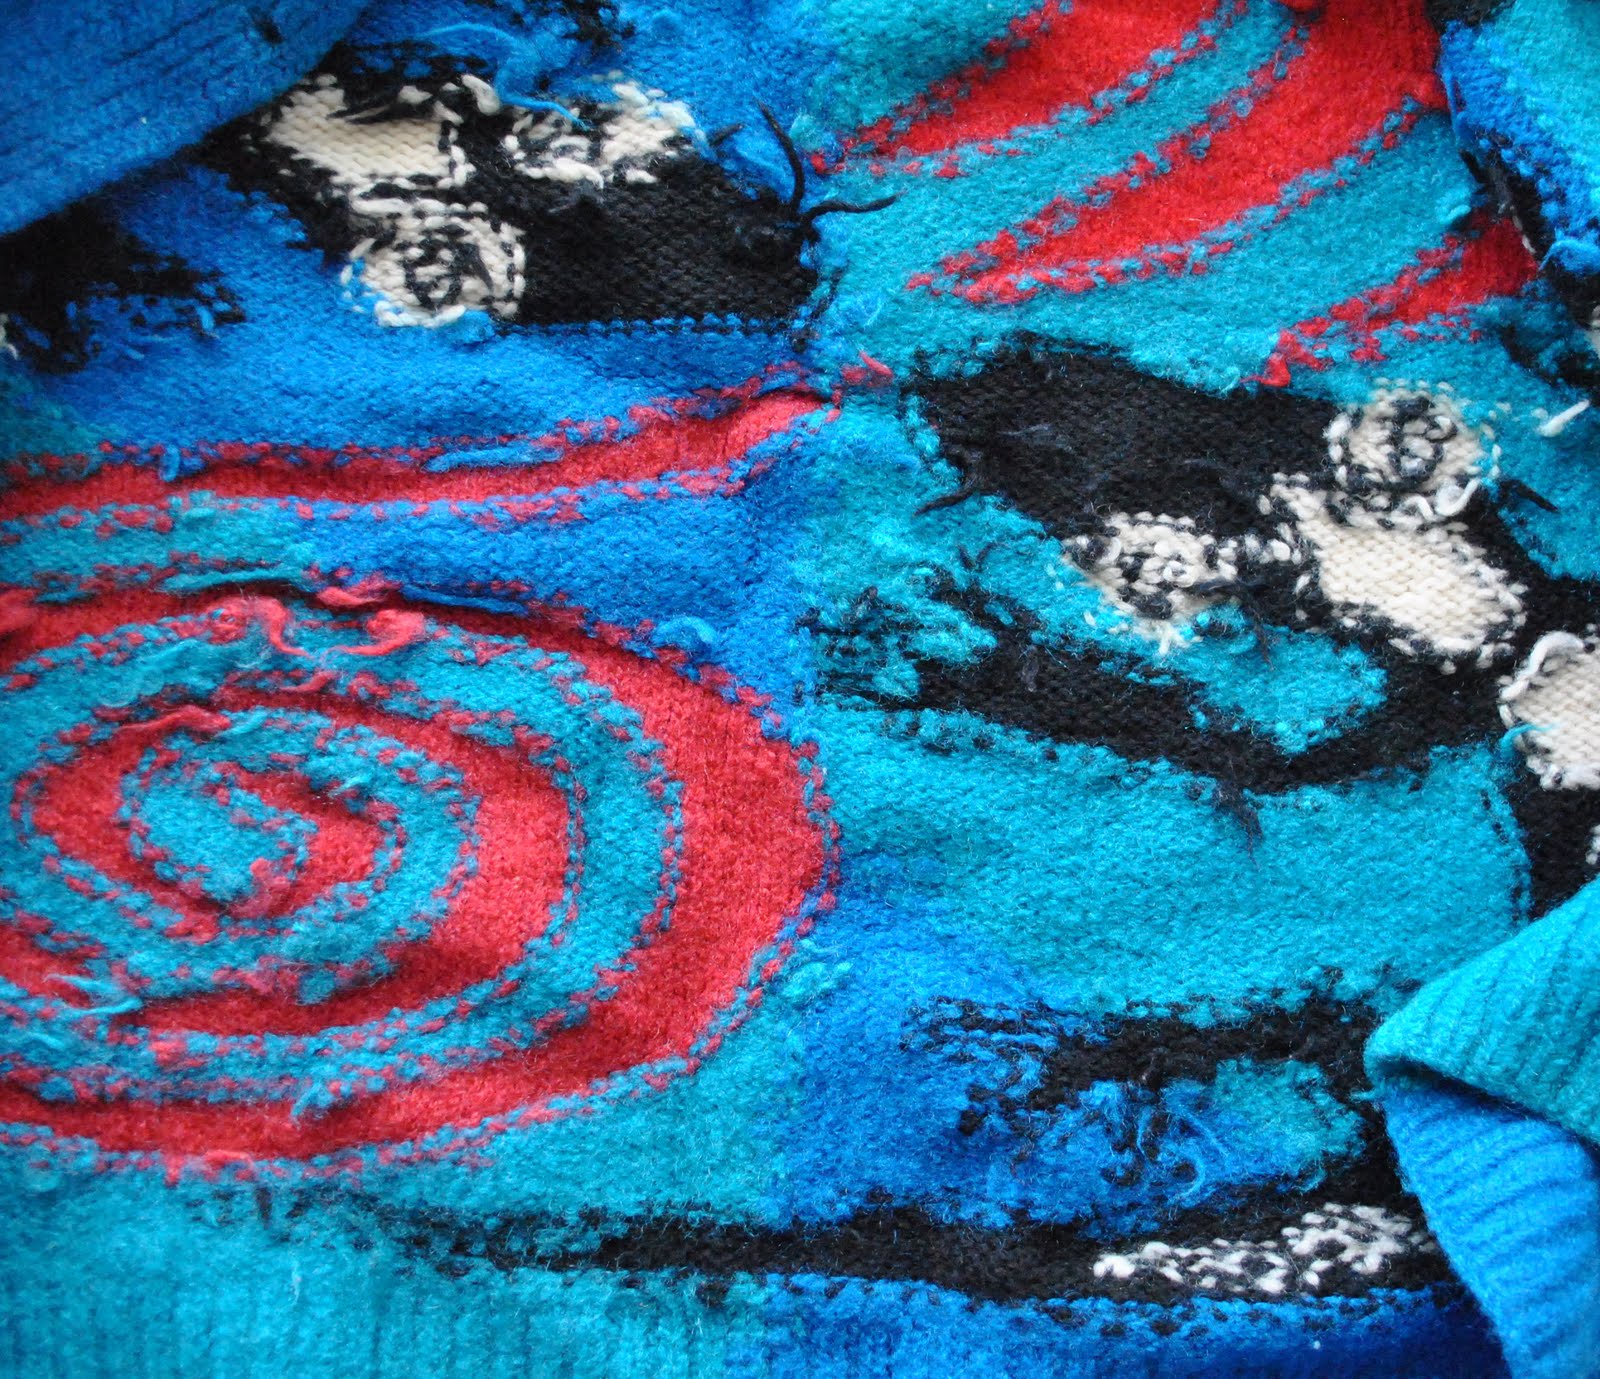
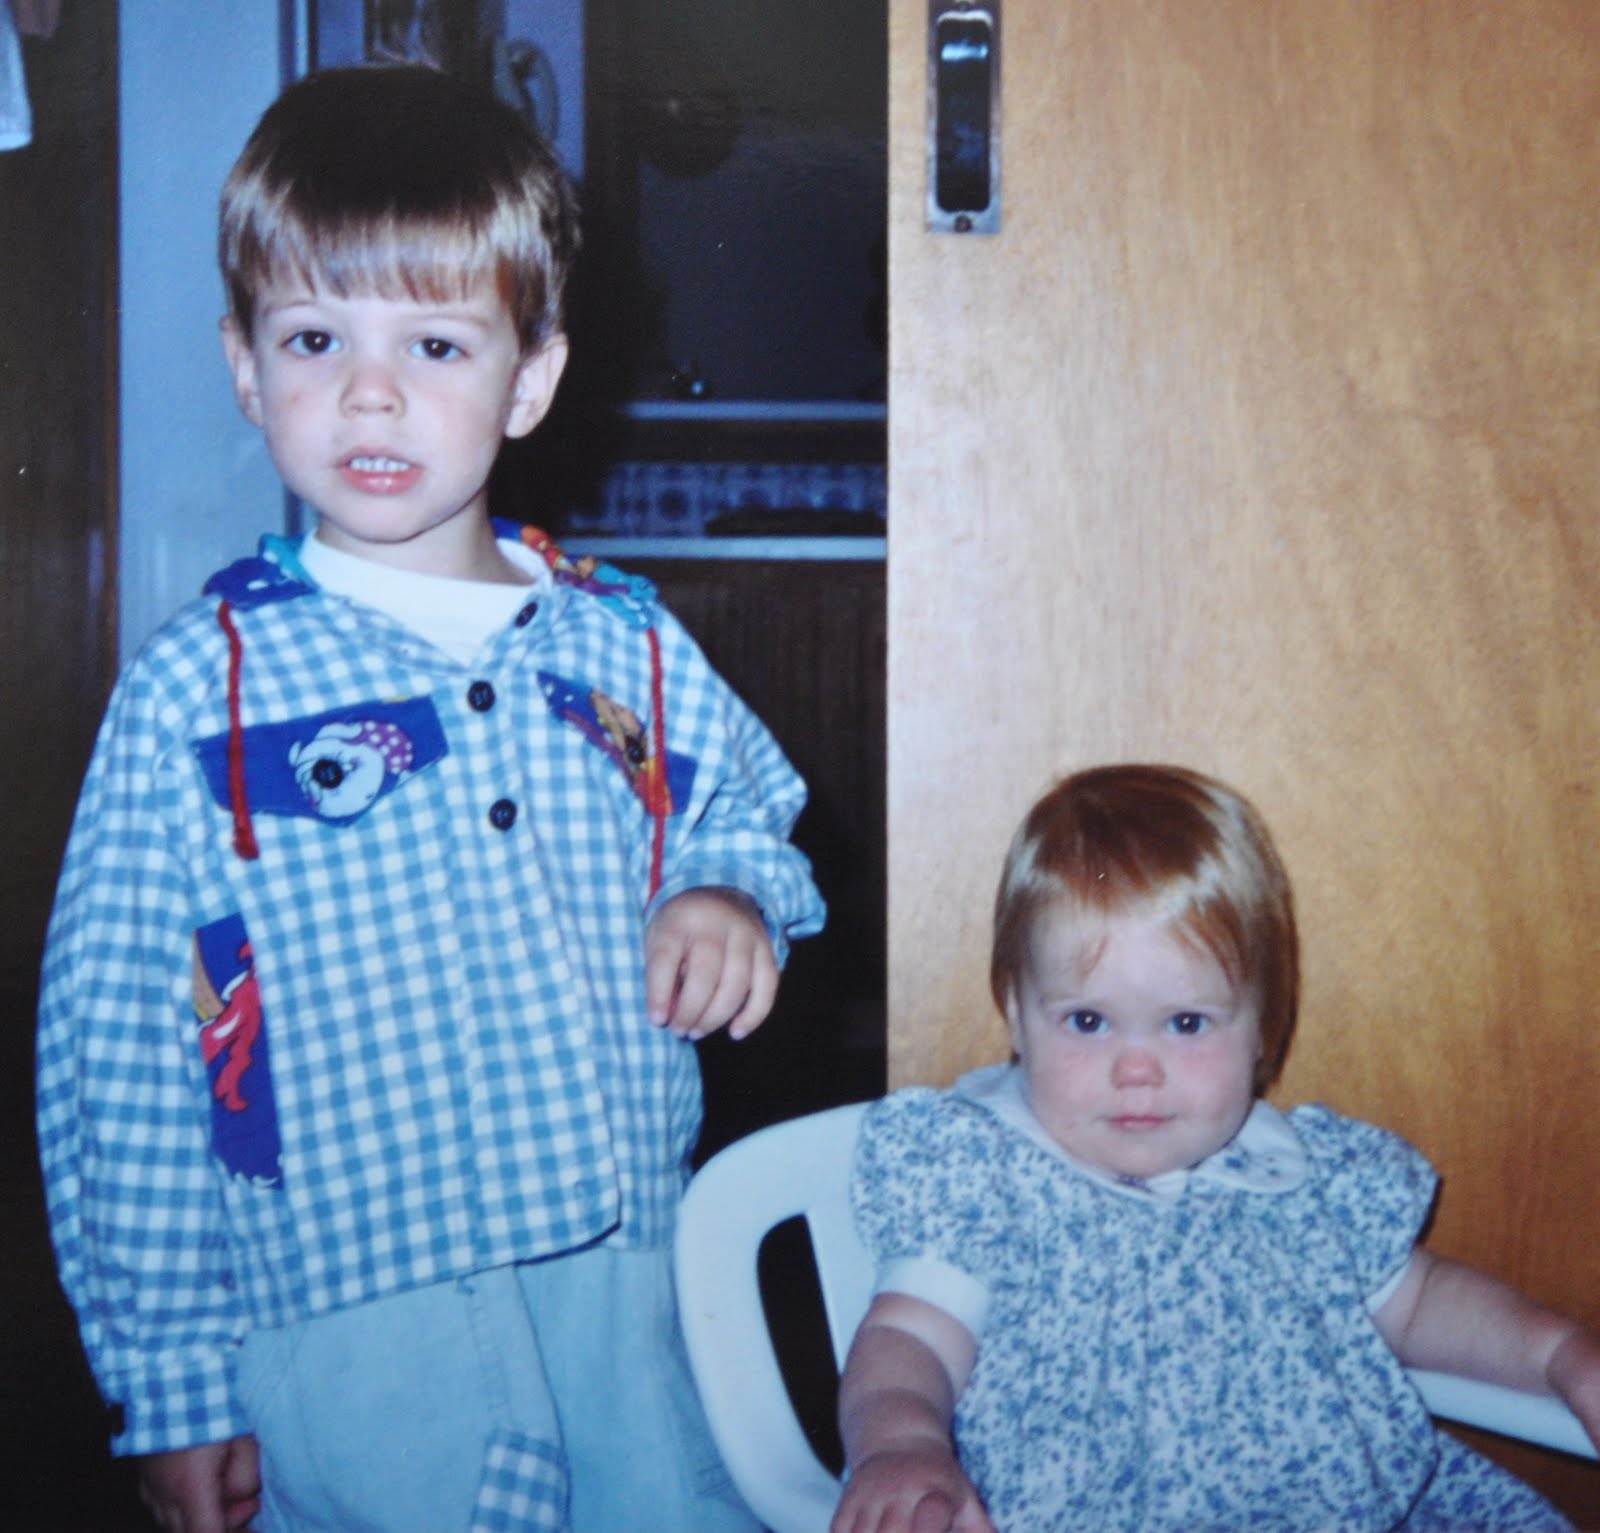
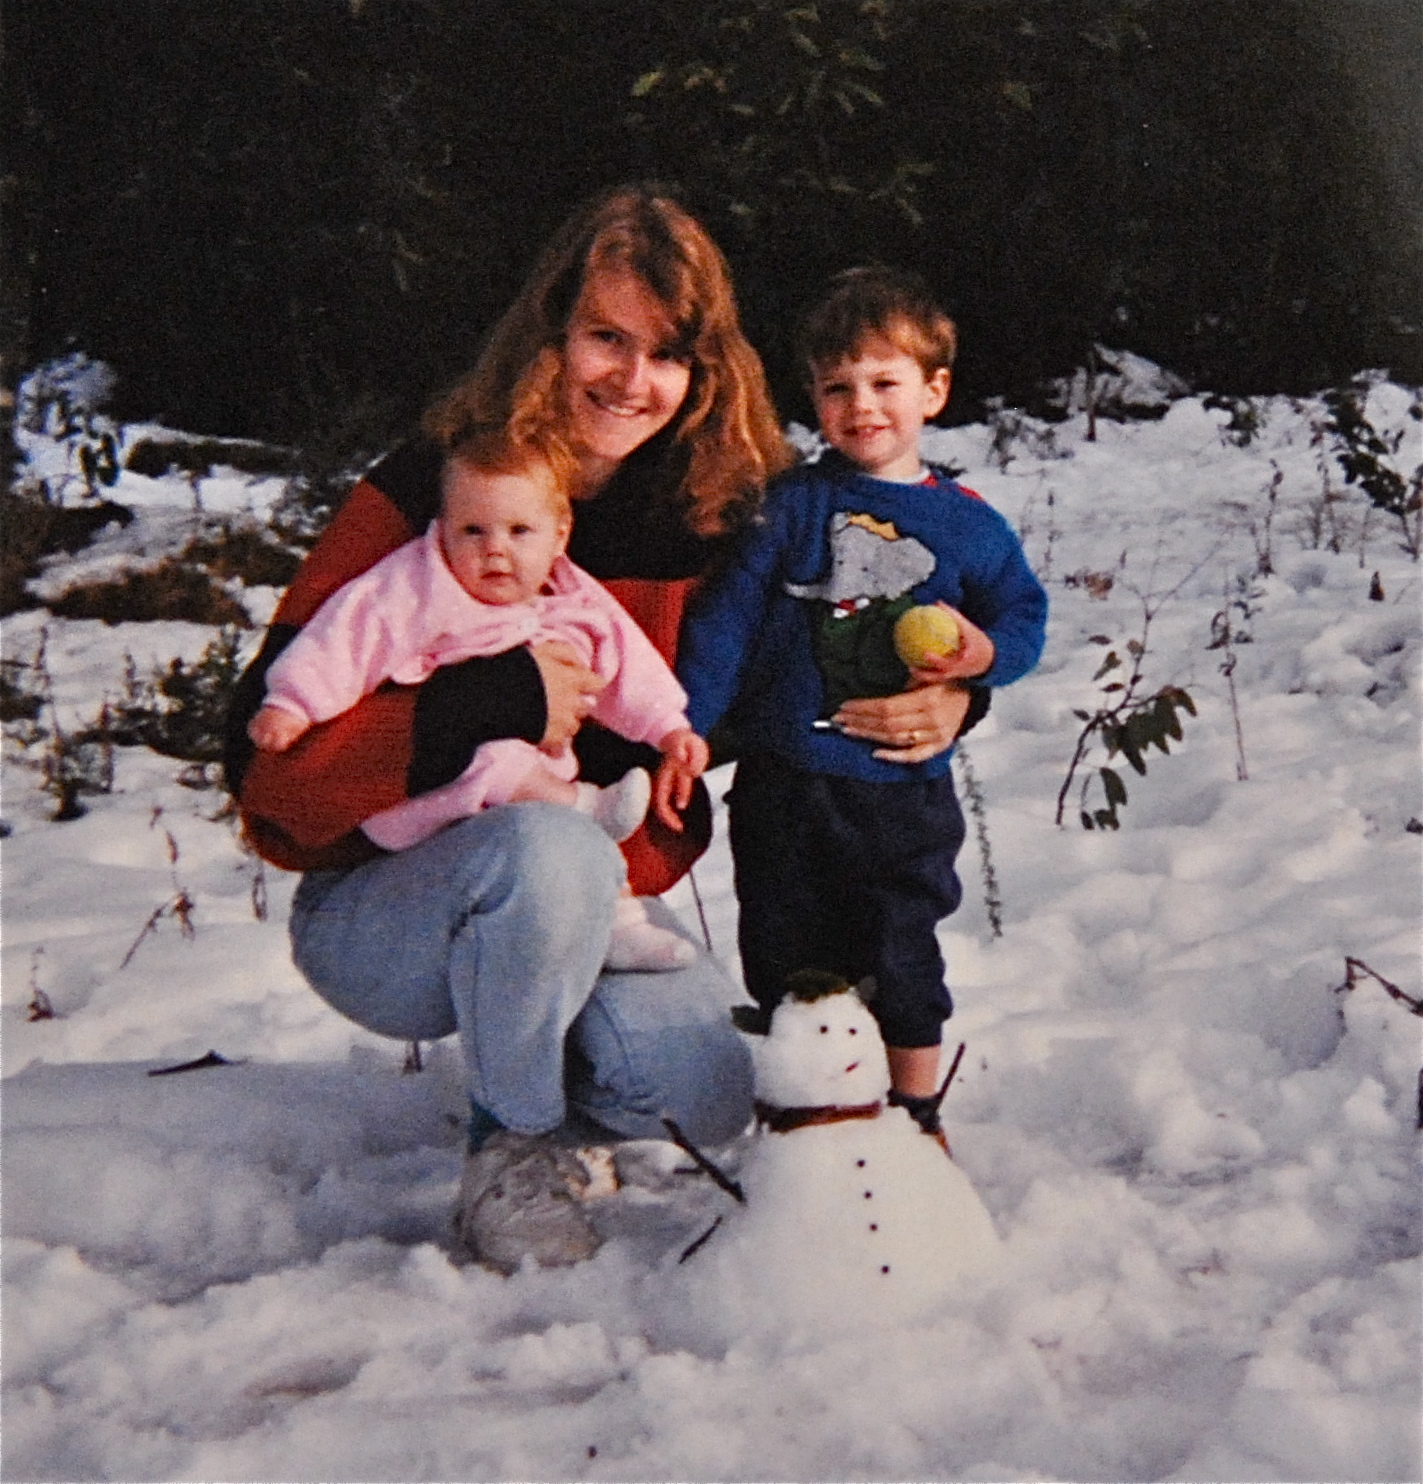
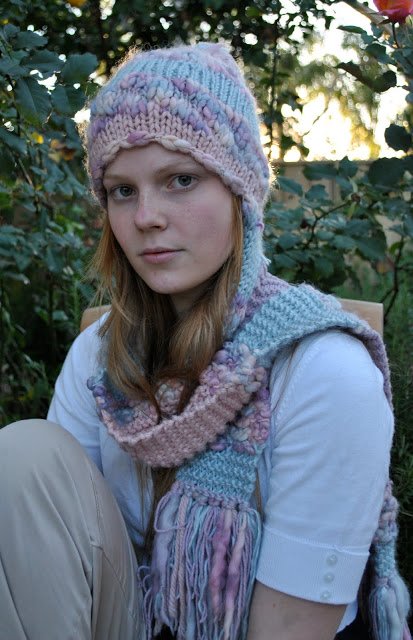
Below; I am with Tim and a fairly brand new Sam in a baby sling… Tim is wearing a red-and-white fair isle jumper knitted by my Mum, and I am wearing a blue, turquoise, red and pink cardigan with black and white geckoes that I knitted from a pattern, the details of which are unknown, sorry.  It is knitted entirely in the intarsia method, with each section of colour in each row, in individual balls (ie, that is 15 different balls for some rows…), and is possibly the most complex thing I have ever knitted.  Each row of the pattern was different from each other row, as you can imagine.  Even the two sleeves were different from each other!  The main of the knitting is in stocking stitch, but the red and pink sections are in reverse stocking stitch…  my modern-day me is actually pretty impressed with my olden-day more-patient me.  
I am embarrassed to admit that I went on to lose all appreciation of my own time and effort, and painted the entire interior of a house while wearing this thing, which explains some tiny spots of white paint now adorning the front.  Also it has gone camping with us (and I recall wearing it 24/7 including sleeping in it on one particularly cold camping trip) and it has been a bed-jacket too.  I still have it, but needless to say don’t really wear it anymore.  It has slightly felted, through bad washing.
(Later edit; in reply to some comments, it’s a bit hazy in my memory now but I’m pretty sure I made this before I had little kiddies underfoot… just no pictures!)

below; the wrong side, showing the intarsia method of knitting used…
pinterestmail

A leopard print daughter…

We bought enough of this gorgeous leopard print stretchy stuff in lovely caramels and warm golden brown shades to make this little Cat-girl set; Cassie made the Tshirt herself, drafting her own design based on a Tshirt she already has and that fits her well, and I made the leopard print leggings using my own pattern.
The side and armhole seams of the Tshirt are overlocked, and Cassie hand slip-stitched the lower and sleeve hems, and the neckline down in place.
Theoretically, the leggings were made to my pattern and so fit me too, but I’m doubtful I have the edge factor to pull these off! … they will be living permanently in Cassie’s collection.

Details:
Tshirt; made by Cassie to her own design, print stretch stuff
Leggings; made by me to my own design, leopard print stretch stuff, my tutorial on making your own custom fit leggings here
Denim skirt; Just Jeans
Boots; bought in Japan… tres cool, no?

pinterestmail

Another trip down memory lane…

…  Remember when I said I had only once before made Cassie and myself matching clothes? Well this is Cassie’s dress, that was made from the leftover scraps of a dress I had made myself.  Her little dress, made using a TopKids pattern, has a white Peter Pan collar, and a miniature faux man’s tie in turquoise fabric, itself the leftovers from these shorts (so you can see how long I hang onto scraps…!)  I’m sorry it’s not a very good picture, and what’s more I have no pics of my own dress in this fabric; but imagine this maroon, deep turquoise and red large-scale plaid in one of those 90’s style shirt-dresses with a high small collar, long sleeves and a big full gathered skirt.  Something like the red version of this pattern at right… yes, very very very 90’s.  I hope I haven’t shattered any delusions of myself as a style maven now!  At least I never liked shoulder pads so never used them.
So I’ve got that going for me…    (Can anyone recognise that quote?)

Tim is wearing here a little jumper here that I knitted for him using scraps of wool from other projects… rather cleverly eked out if I say so myself, so that the front, back and both sleeves had the same colours and in the same proportions!  Knitters will know this is not necessarily a simple thing to achieve when you are working with scraps…  It went from the dark shades of purple, blue and green at the bottom through grey, then pale blue then the palest yellow and back to navy blue at the top, and the colours were not in defined stripes but faded together in an ombre effect.  I did this by knitting two colours together per row in the fair-isle knitting method.

In this picture, Tim is wearing another jumper I knitted, and I can’t recall now if it was from a pattern or if I took the embroidered teddy bear design from a cross stitch and just transposed it to a knitwear graph… yup, memory not what it used to be!  Again using scraps for the teddies.  Cassie is wearing a little dress I made for her using a TopKids pattern.  It was in two different white and navy blue prints, one a polka dot and the other a floral.  The fabric was slightly fluffy, brushed cotton, and I sewed in white piping around the collar, sleeve cuffs, the single curved breast pocket and around the dropped waistline where the buttoned-up blouse joined the skirt part of the dress.  It was quite cute, no? and a nice and warm little number for winter!

And the quote?  From that great 90’s cinema classic, Caddyshack.

pinterestmail

Layered rusty-red wool skirt

So, using the leftover bit of fabric from my rusty-red wool skirt, combined with the cut-off from when I decided to make my long skirt shorter, I made Cassie a little layered skirt.  Using the same pattern as I did for my own skirt, Vogue 8363.  I even managed to reuse the cut-off lining as well for the lining for this skirt, and covered a button the same way… and now I really have used all of this gorgeous Japanese wool/silk fabric!
I only had tiny scraps of suitably coloured thin cotton left; so not all of the seams in this skirt are Hong Kong bound, but the most visible ones are.  I really debated whether or not to even go this extra step, for my daughter, being a typical teenager, is still learning respect for her clothes.  I can almost guarantee that this skirt will be discarded in a little puddled heap on the floor of her room unless I am there to explode and guilt-trip her into picking it up immediamente!  However, I eventually decided that the fabric was indeed worth the small time and effort put into finishing off the seams properly, and that it was high time she experienced a bit of sartorial classiness in her apparel.  Plus it might inspire tidiness and respect.  Plus it might inspire her to try doing this in her own sewing creations.  Plus I could use the practise…
So anyhoo, I went there, and finished off most of the inner seams.
She has shown her approval by wearing it out with her friends already; high praise.  So I’m happy!

Now I’m sure the thought has occurred, are matching mother/daughter outfits a common occurrence in this household?  Well, actually no.  I’m not that sort of a Mum that needs to have a mini-me…  this is only the second time in her life I have made us matching garments, and this has been for the same reason each time, a largish bit of leftover fabric that was of too good quality to leave.
I think we will probably both take good care to not wear our skirts at the same time!
Oh, and on a sewing note I have gone back to edit my review to include the following… another reason I really like this new Vogue skirt pattern.
The skirt front has four darts, two each side of the centreline, and each skirt back has two darts each also, making eight hip-to-waist darts into the waistband overall.  For somebody with mine (and Cassie’s) figure type. a small waist compared to our hip measurement, or pear-shaped; this is a very helpful feature for getting a good fit.  I sewed in an extra 3mm off the waist-end of each dart, which left only about 1.5cm extra to be taken in off each side seam at the waist.  With my usual Vogue 7303, which has only four darts overall, each dart has to be much more drastically taken in, and the side seams also.  Having those four extra darts meant for a much more even distribution in removing the excess.
To illustrate: below is my skirt; not Cassie’s that is pictured above, but hers is very similar… the hemline with the bias finishing is at the left of the picture and the waist band is at the right underneath the lining which has been pulled up to reveal that side seam.  See how much excess width is taken in off each of those side seams from the hips to the waist?  Well, about twice that is usually required when the pattern has less darts on the fronts and backs.  Yes, I could just measure out and put in some extra darts myself, but I’m an extremely lazy seamstress in many ways, and have always just gone for removing the extra width off the darts and seams already there!  Having this pattern, with the extra darts marked in, all evenly spaced out ready for me is a much more attractive option to me!  And yes, I sometimes do opt to leave that excess seam allowance there like this, and not cut it off.  Especially in the case of a special skirt like this that I intend to last most of my life anyway.  Just in case I ever do need to let the skirt out.

pinterestmail

Featuring small versions of Tim and Cassie…

Whizzing back a few years now…
and here are some more of the little outfits I made for my children when they were small.  These were “good” outfits, but of course I used to dress my children in good outfits on a day-to-day basis anyway, reasoning that they wouldn’t fit into them for very long!  So these clothes were worn to parties, to playgroup, to picnics, as well as for playing in the sandpit at home and to the beach; anywhere.  We’re not the sort of family to ever be precious about our clothes.  Oh, OK then… with the exception of that Chanel style coat, I admit it.
These designs were all from TopKids magazines.  I still have all nine of the magazines I bought, although none of the patterns I traced out!  They were such wonderful magazines.. ooer, I’ve probably said that a few, or a dozen, times before, haven’t I?  I’ve got this tendency to rave about them, sorry.  Such a pity they were discontinued.  I’ve never seen such great, trendy, funky, interesting little children’s patterns anywhere else since.

The dress Cassie is wearing has a few rows of smocking on the bodice and a little white Peter Pan collar, on which I hand embroidered a few flowers, stems and leaves mimicking the design in the floral.  Another cute little dress that has gone, goodness knows where…
Tim’s outfit was a little short overall, of a light denim fabric and with patches of a thickish checked cotton.  I was pretty proud of this, and he wore it tonnes of times, until it got holes in the bottom…  That red button sewn on the front is an aeroplane.

The button-up boxy little jacket is of the same light denim fabric, and has contrasting fabric for the pocket flaps and the hoodie part of it.  The contrasting fabric is printed with cheerful hippos setting sail in sailing boats.

The pictures of Cassie alone and of the two of them, were taken on her first birthday.

pinterestmail

A navy corduroy jacket, and a Babar jumper

Today I bring two flashbacks; two, because I don’t have very good photos of either one to warrant an individual post, and because I am trying to whizz through these old projects a little faster than I have been up until now… These items are both things I made for Tim when he was about two.
The first is a little navy blue corduroy biker-styled jacket that zipped up the front (biker-styled… for a two year old, lol!), which I toddler-ised by using contrasting red for the collar and trimmings, the pattern from a Topkids magazine.  Even though Tim wore it a lot, this is the best photo I have of it…

And the second is a little jumper that I knitted using a pattern from a Women’s Weekly magazine.  Babar is embroidered on the front over the knitting stitches.  He wore this a lot… and I have heaps of photos of him wearing this, but these are the only ones even vaguely showing off that embroidery!  The lower picture, taken at Lake Mountain in Victoria, is the first time these sandgropers had ever ever seen snow in our lives!  We made a little snowman!
(translation: sandgropers = Western Australians)

pinterestmail

Cassie’s dress

This is the dress I made our daughter for her Christmas present this year.  I know her tastes very well and could picture exactly the dress I wanted to make for her, but was quite anxious about how to go about it.  Cassie is the most difficult one in the family for me to sew surprises for, for the following reasons:

1. In order for her to like it, it had to fit her perfectly; neither tight or clingy, or worse, saggy and baggy.
2. I wanted it to be a length that made both of us happy.  Once upon a time, not too long ago, if you had drawn up as a simple Venn diagram of preferred dress/skirt lengths for Cassie, comprising two sets representing mine and Cassie’s preferences; the intersection of the two sets would have been quite a tiny one.  Luckily she has grown up some and is aware that while barely bum-skimming skirts might be greatly appreciated by guys when a girl bends over to pick something up, that sight of publicly exposed knickers is often a moment of horrified self-awareness for that same girl’s friends.  “OMG, don’t tell me I’ve ever looked like that?!!
3. She loves sewing herself, so is always super aware of what I am currently sewing.  She also loves to go through the fabric stash, looking for something suitable for herself, and often wants to come with me if I go fabric shopping.  This makes embarking on a secretive project an extreme challenge.

So, how to make her a secret Christmas dress, that fitted perfectly, and of a length that she would be happy with?
Well of course, it couldn’t really be much of a secret in the end.  But she has a sense of humour and we managed a compromise… she stood in the laundry with her eyes shut while I did the fitting.  Again with her eyes shut, a mutually satisfying length was decided on.  The surprise for her was just the final look.
The stretch lace I used for this very simple Tshirt dress is of course see-through on its own, so I lined the dress completely with a soft silky like jersey matched in colour to the dress.  The sleeves are unlined.  I positioned the body and sleeve pieces on the length of fabric so the natural edging edges the sleeves and lower hem.  The seams are all overlocked to finish on the inside.  I didn’t finish the lower edge of the lining because it is that wonderful type of jersey that never frays. 
I think she looks just beautiful in it.
And she loves it too, so I couldn’t ask for a more happy result!

pinterestmail

Cool Bunnykins

This is a very late post today!  Been a busy day…

This is a beanie/scarf thingy I knitted for my daughter Cassie several years ago.  Knitted from a variety of different yarns, to my own design…
I used four balls of yarn, three solid colours (1=pink, 2=blue, 3= lavender) plus one ball of chunky, bobbly one ply yarn.
Tension; 12 stitches to 10cm
To start: make the pom-pom first, also wind off enough yarn of each of the colours for the tassels on the ends of the scarves at the start of the project.  This will ensure you have enough yarn for these bits.
Tassels are approximately 30cm in length, I use a small paperback book to wind the yarn around, and you will need approximately 20cm worth for a good thickness.  I used lots of colour 3, lavender in my tassels, which is why there turned out to be not much lavender in the beanie itself! *blush*  Colours and numbers of rows in each colour are up to the individual according to taste, the following is the combination I used here.
Beanie: the beanie was knitted in the round, from the crown down to the rim.
Cast on 7 stitches.
Row 1; K2 in each stitch (14 stitches)
K 1 row
K1, inc 1 in next stitch, repeat until end (21 st)
K1 row
K 1, inc 1 in next stitch, repeat until end (31 st)
K 1 row
K2, inc 1 in next stitch, repeat until end (41 st)
K 1 row
K3, inc 1 in next stitch, repeat until end (51 st)
K 1 row
K4, inc 1 in next stitch, repeat until end(61 st)
K 5 row
(change to bobbly yarn) K 3 rows
(change to colour 2) K 7 rows
(change to bobbly yarn) K 6 rows
(change to colour 1) K 4 rows
(change to bobbly yarn) cast of very loosely in bobbly yarn, until there are 24 stitches left, divide into two sets of 12 stitches and continue knitting on each set of 12 stitches separately.
Continue in stocking stitch, alternating yarns as follows:
(colour 2) 10 rows stocking stitch
(bobbly yarn) 4 rows stocking stitch
(colour 2) 10 rows garter stitch
(bobbly yarn) 4 rows garter stitch
(colour 1) 24 rows garter stitch
(bobbly yarn) 4 rows garter stitch
(colour 2) 18 rows garter stitch
(bobbly yarn) 4 rows garter stitch
(colour 3) 30 rows garter stitch
(bobbly yarn) 8 rows garter stitch
(colour 2) 6 rows garter stitch
Cast off.
Loop tassels through the cast off stitches, and sew pom pom onto crown.
Done!
Of course, colours and the numbers of rows in each colour are up to the individual according to taste, this pattern is the combination I used for this particular beanie.   Really though, colours can be used however you choose, basically just keep changing colours at whim and knitting away happily until you get the length you want, or all the yarns are used up completely; ta-dah! zero waste!
pinterestmail
Switch to mobile version
↓