Tag Archives: Daily Outfit

Knots

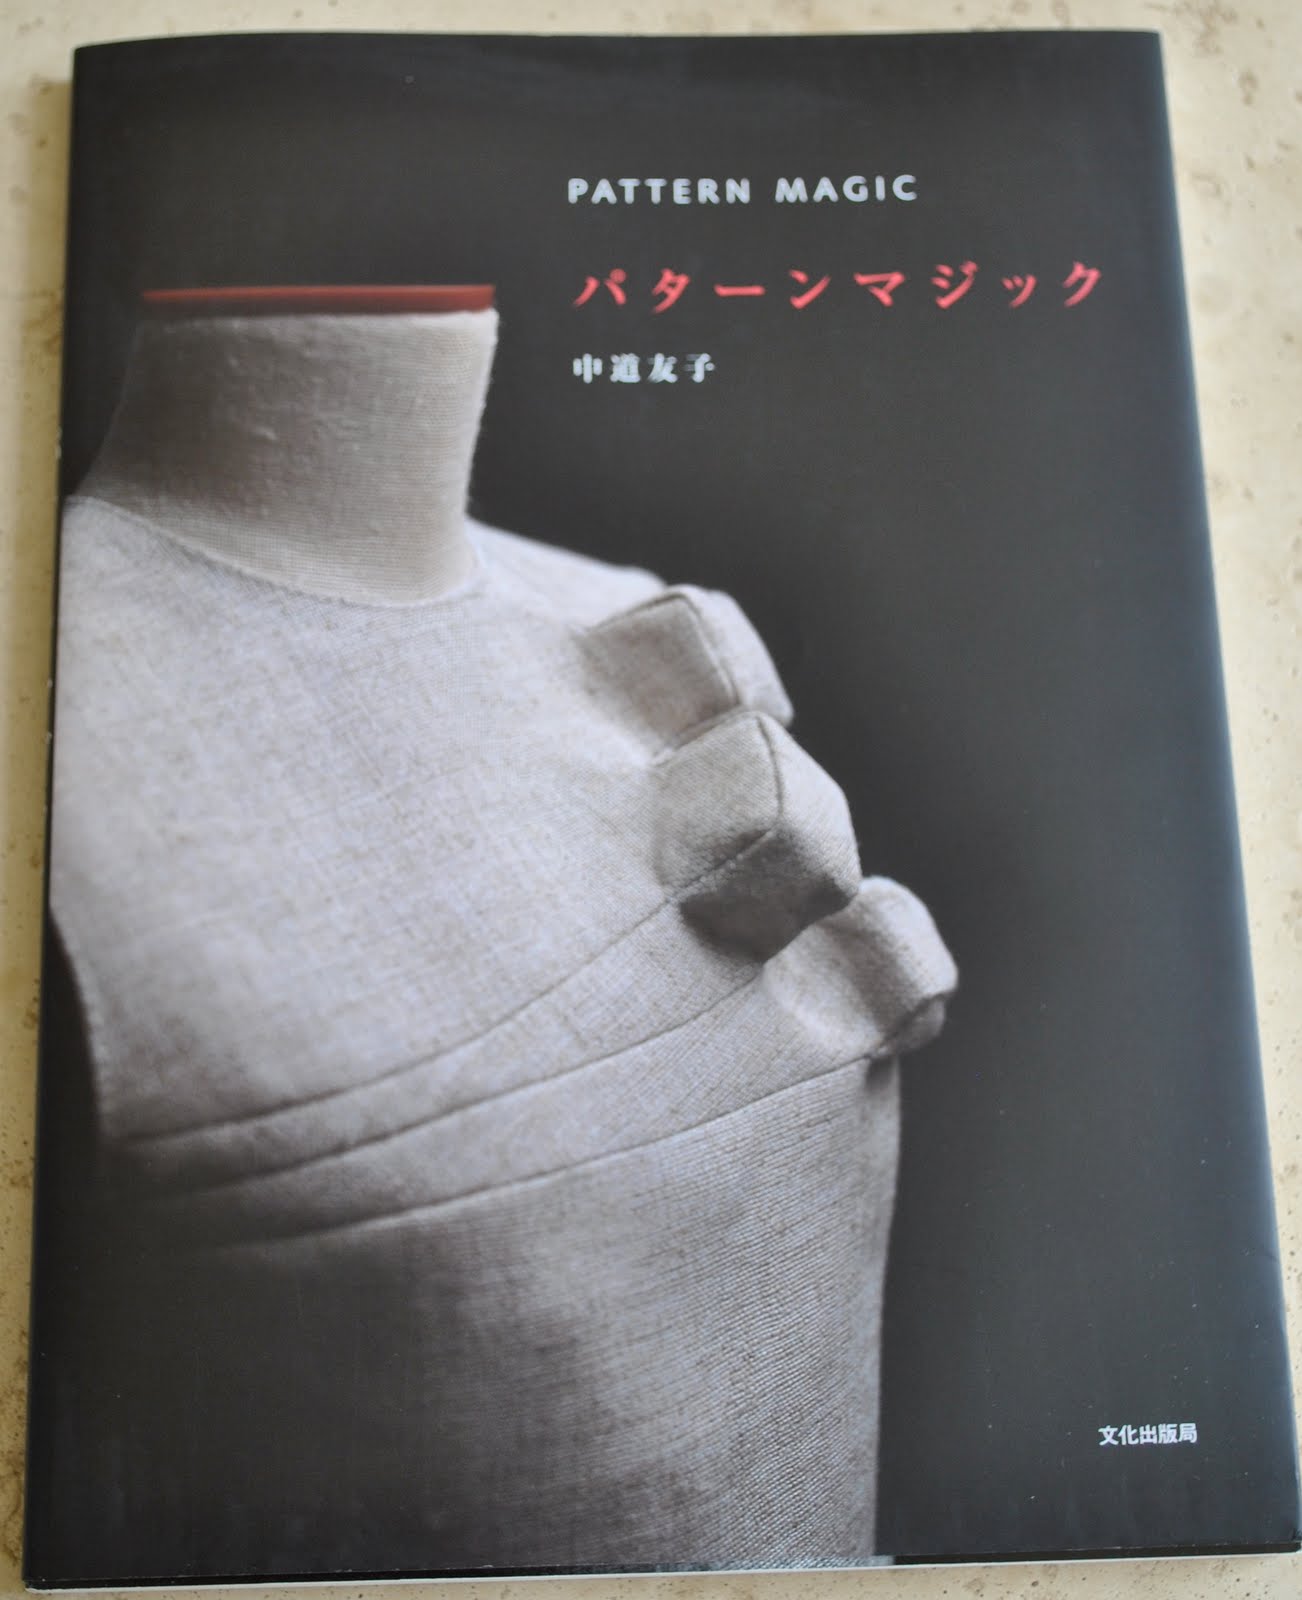
I’ve made a dress, utilising the design on p52 of Pattern Magic, by Tomoko Nakamichi.
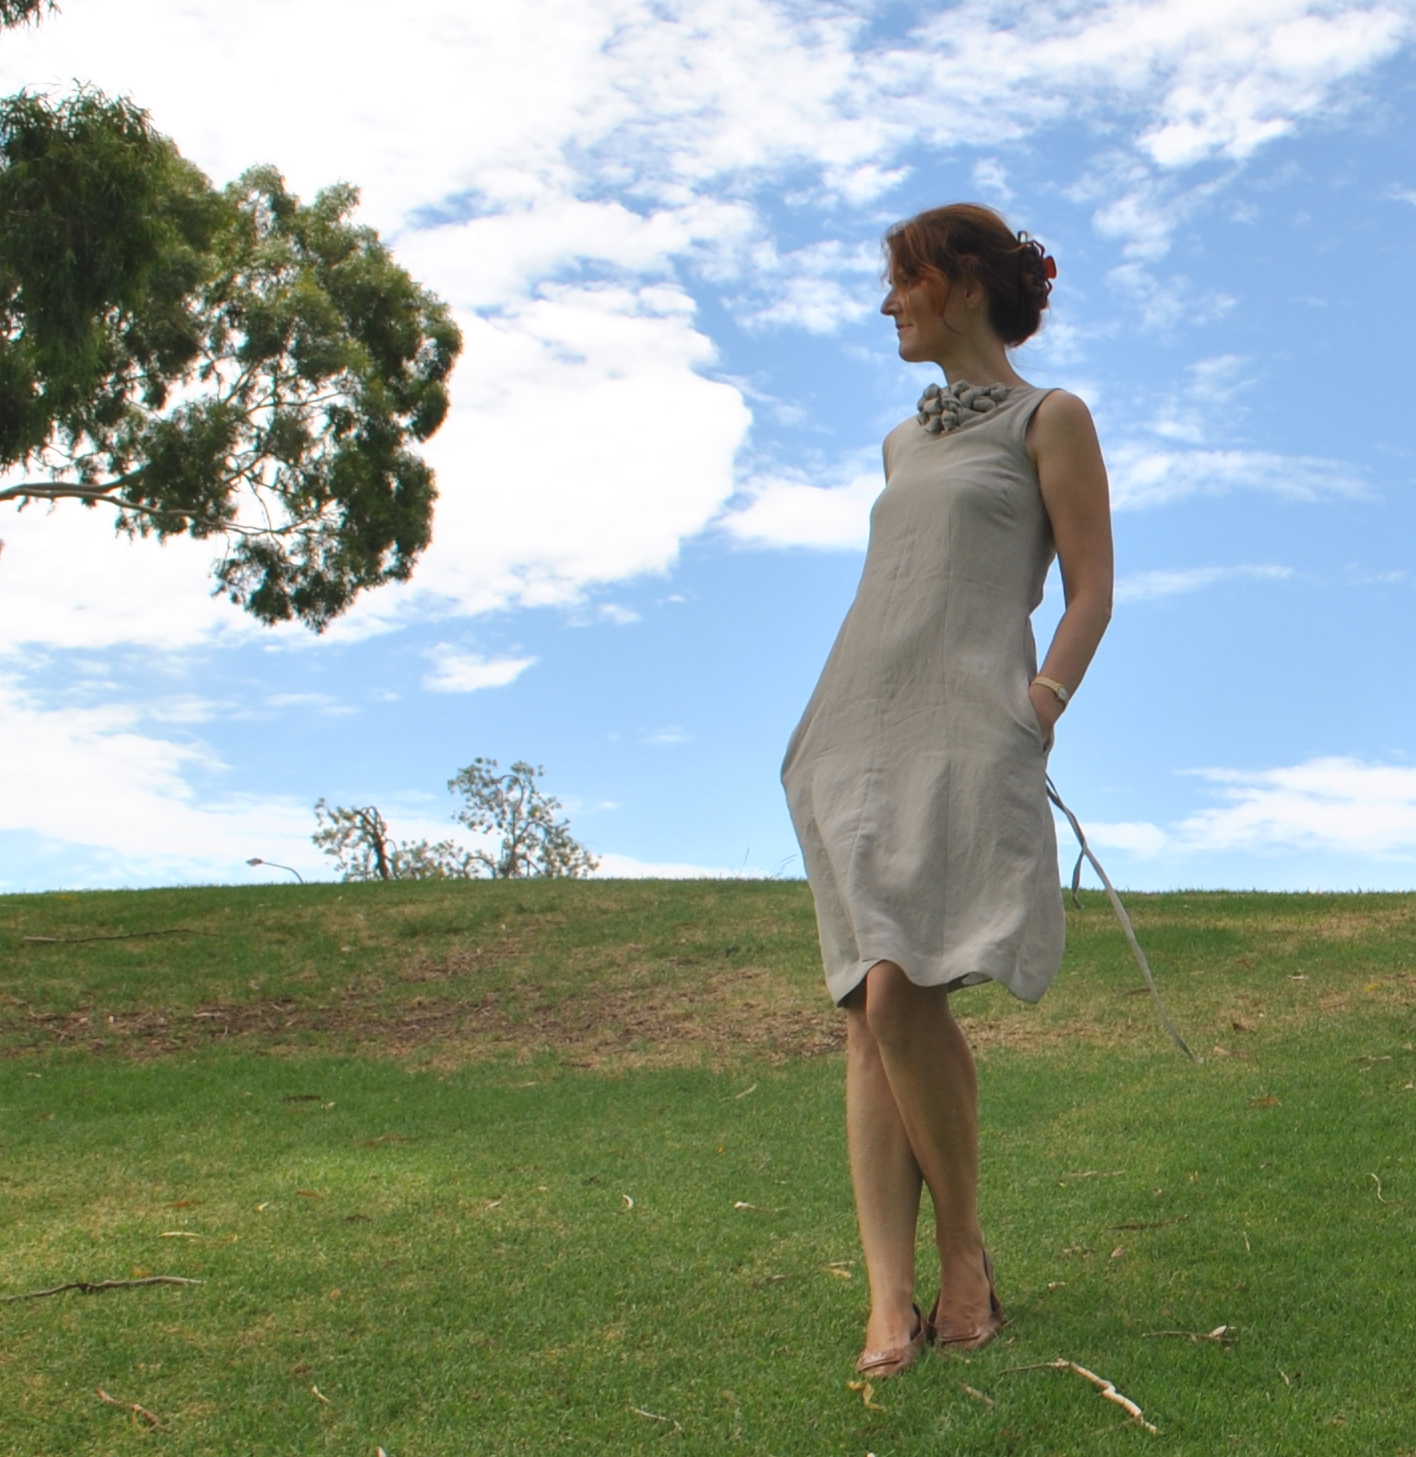
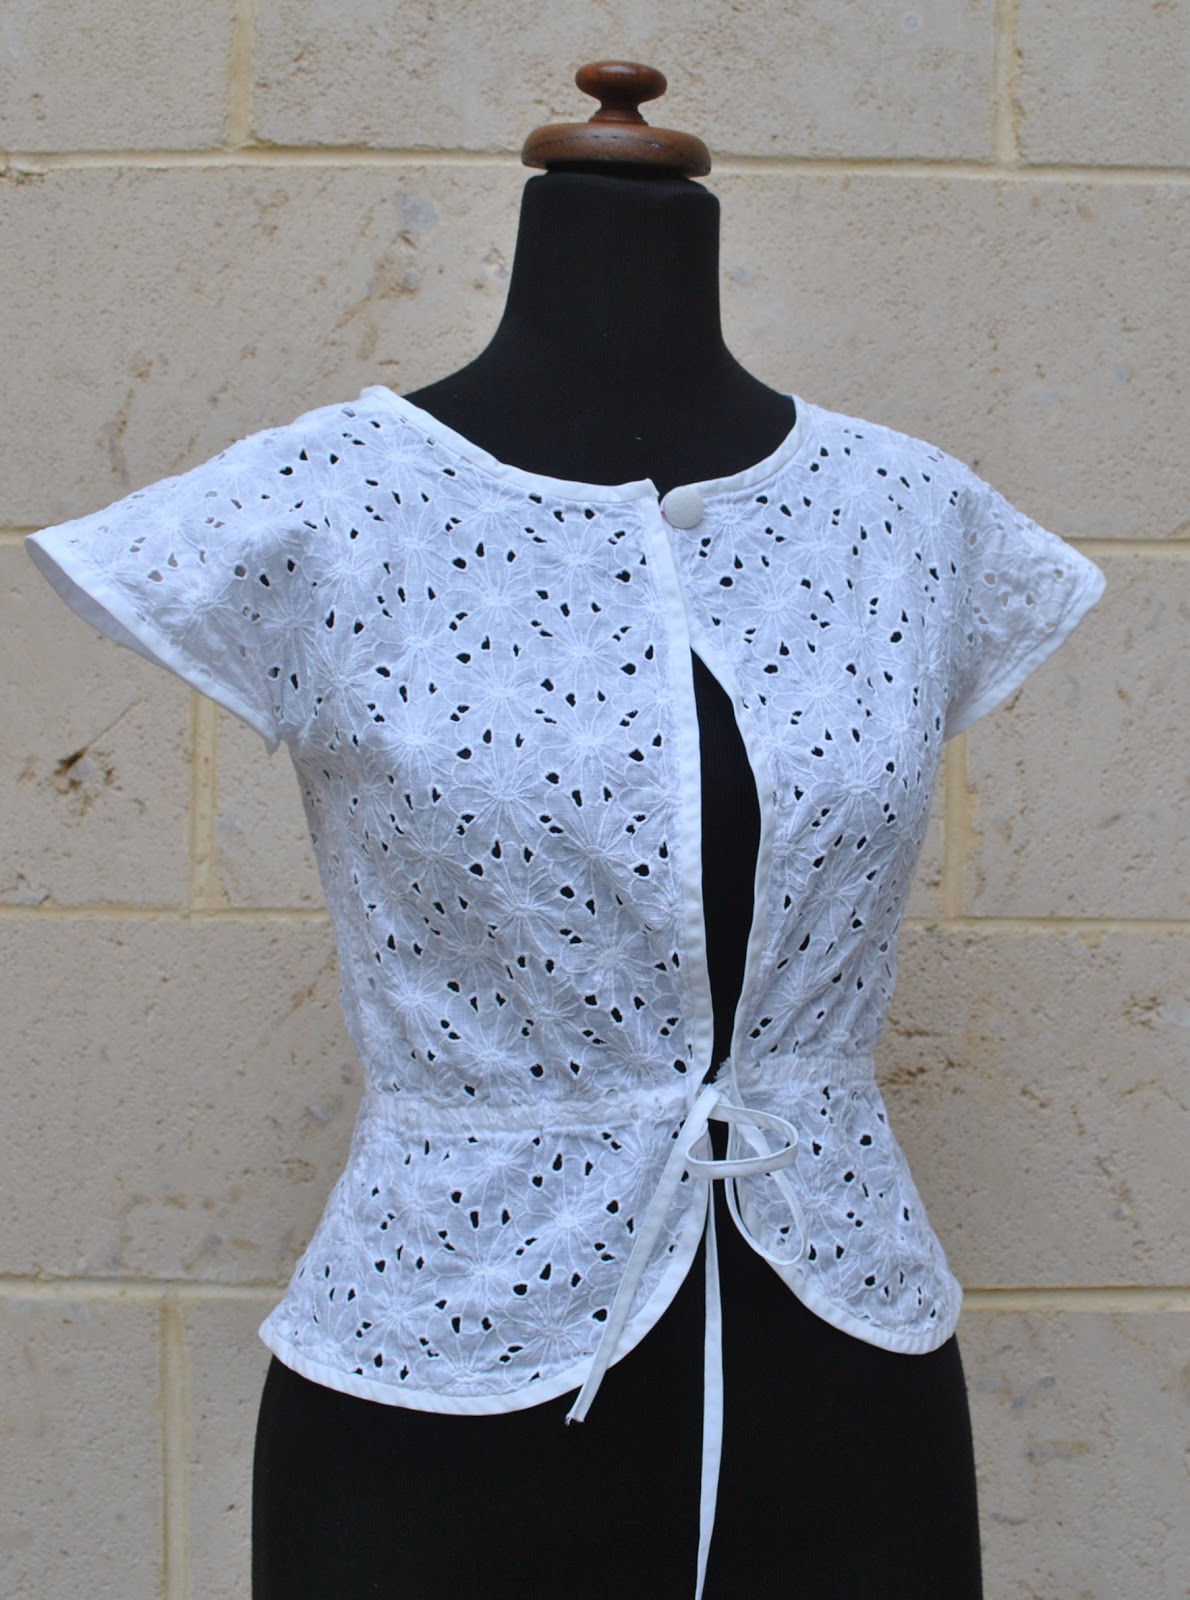
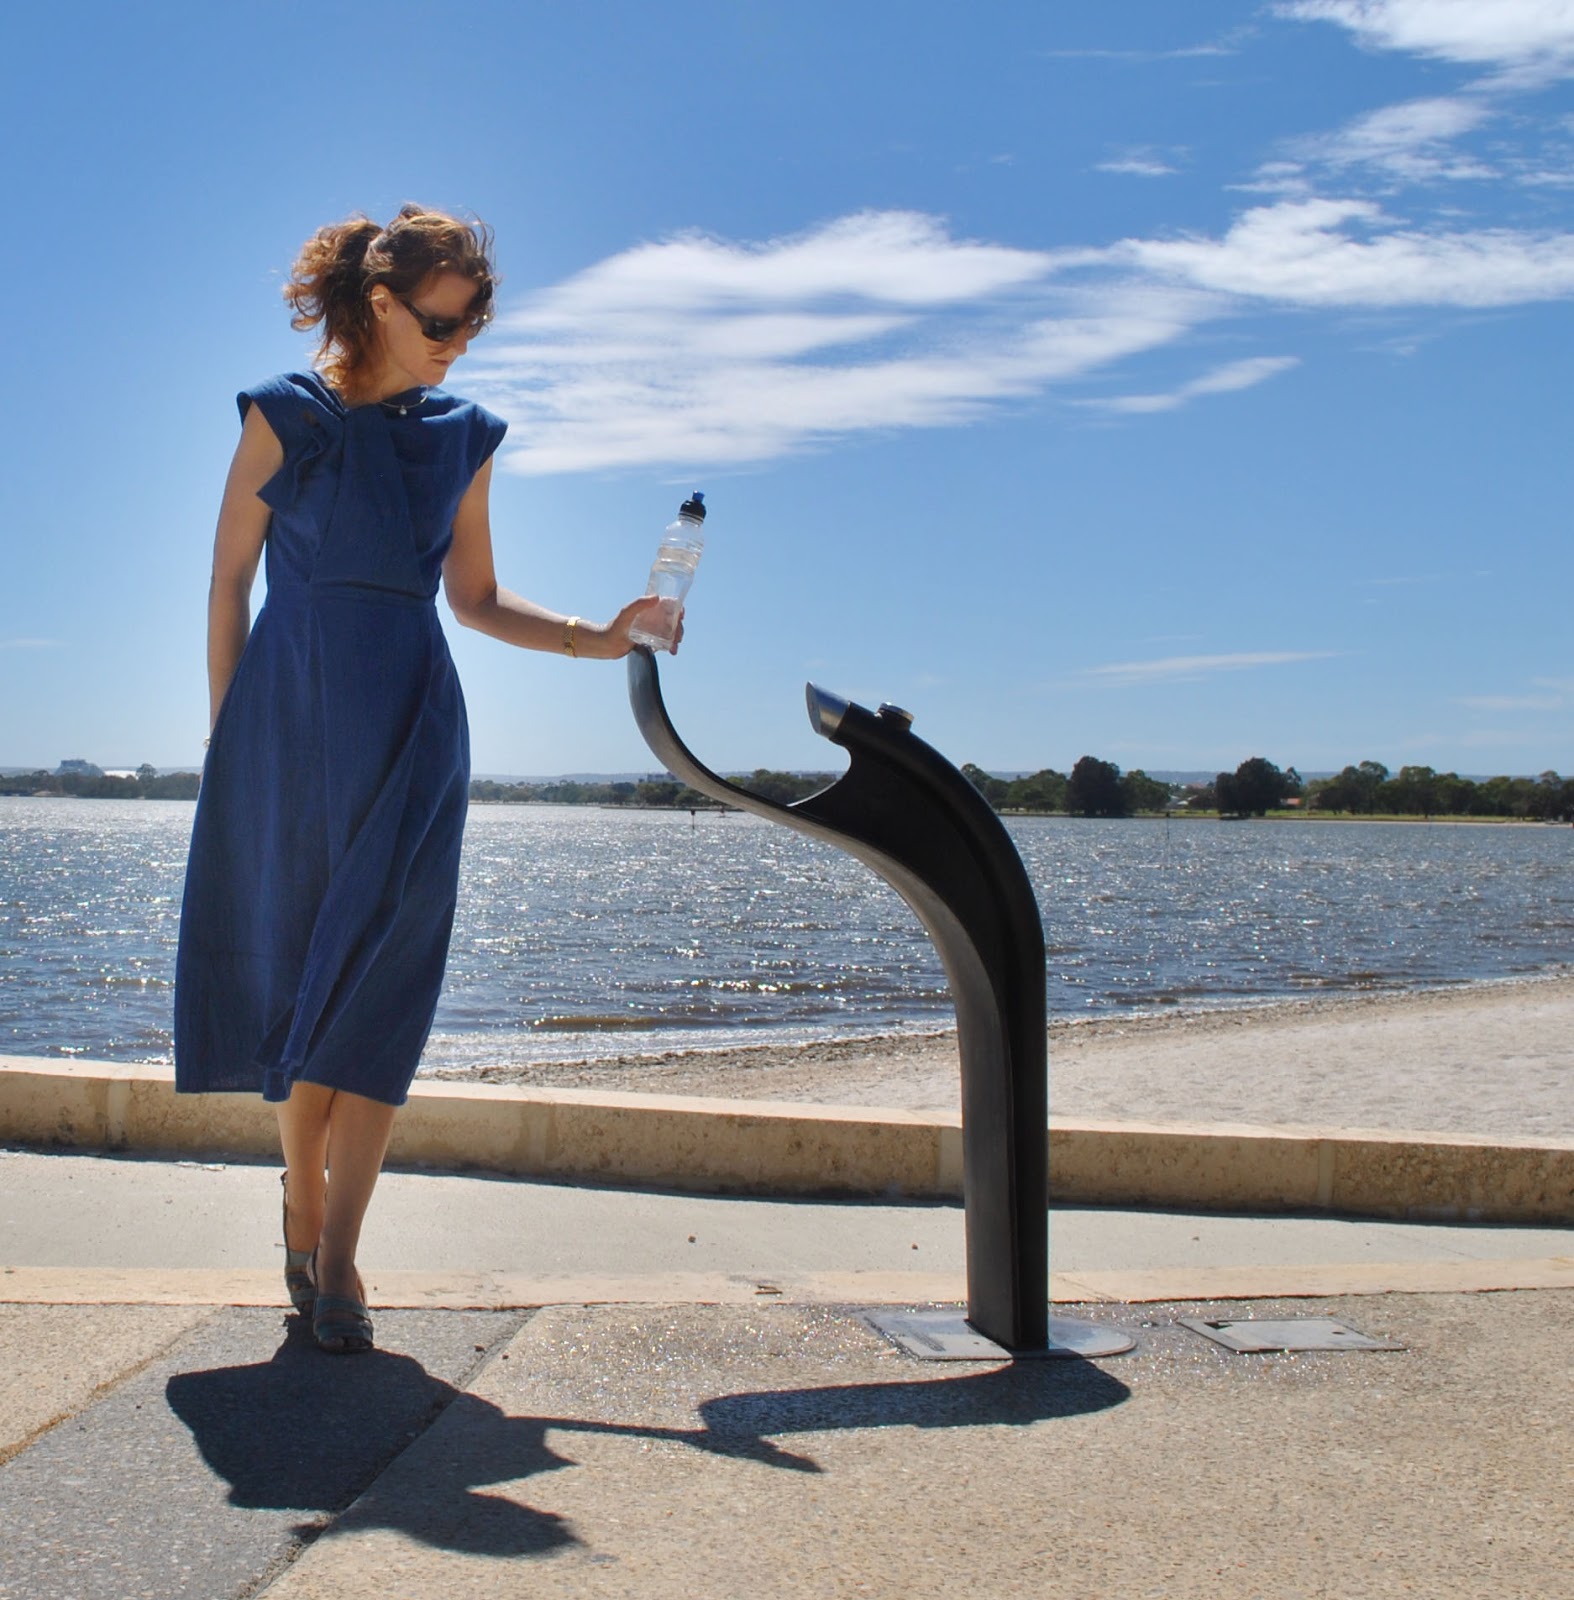
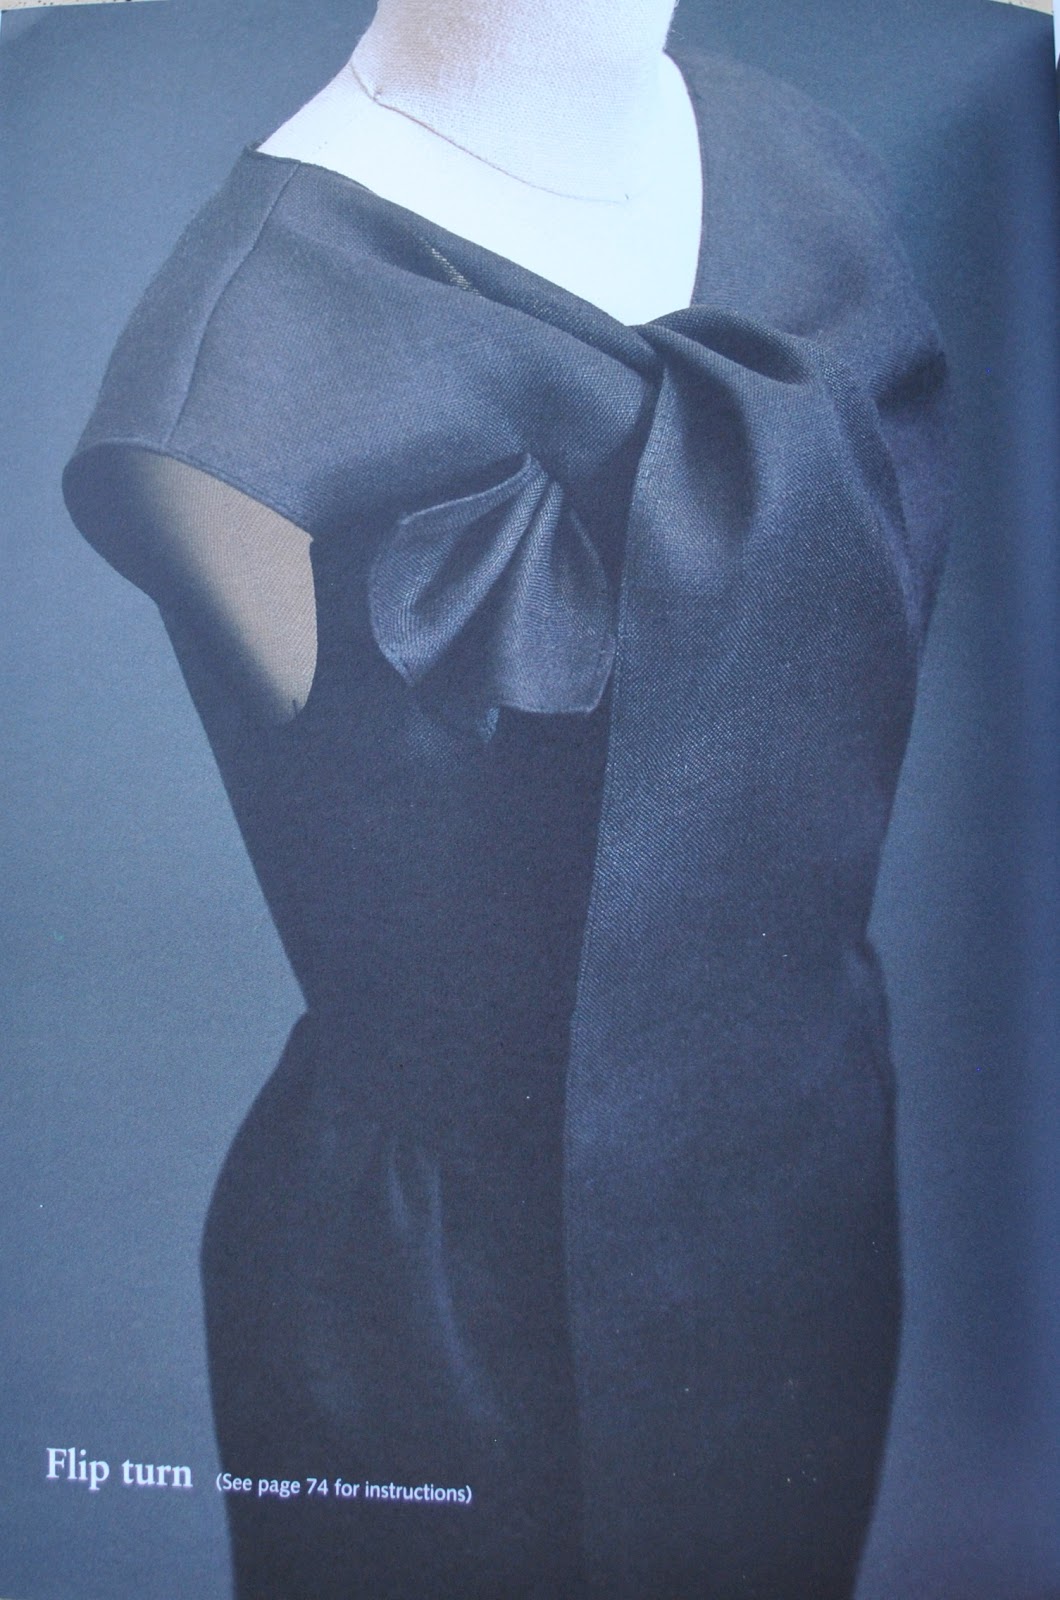
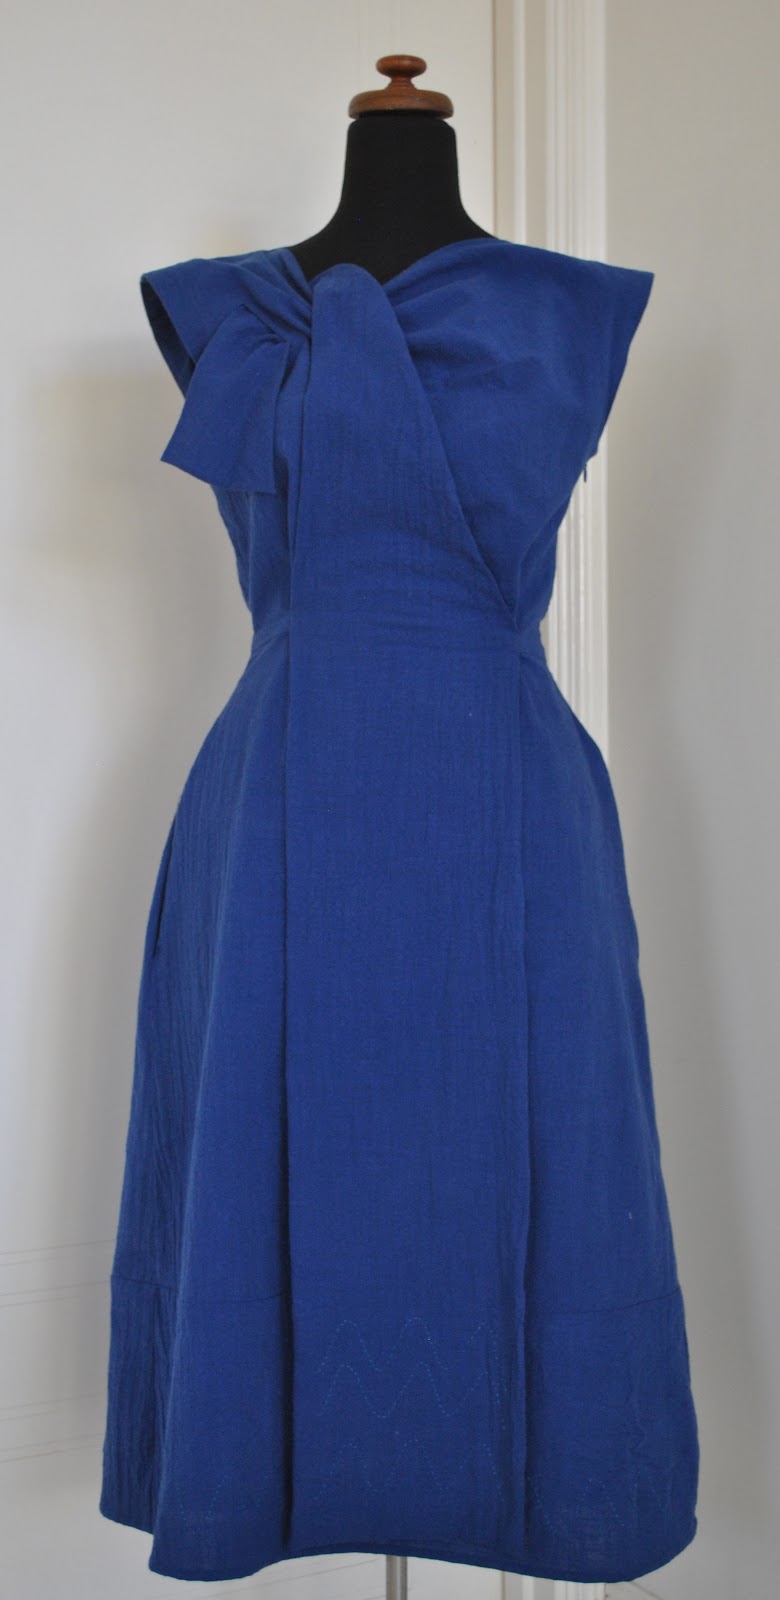
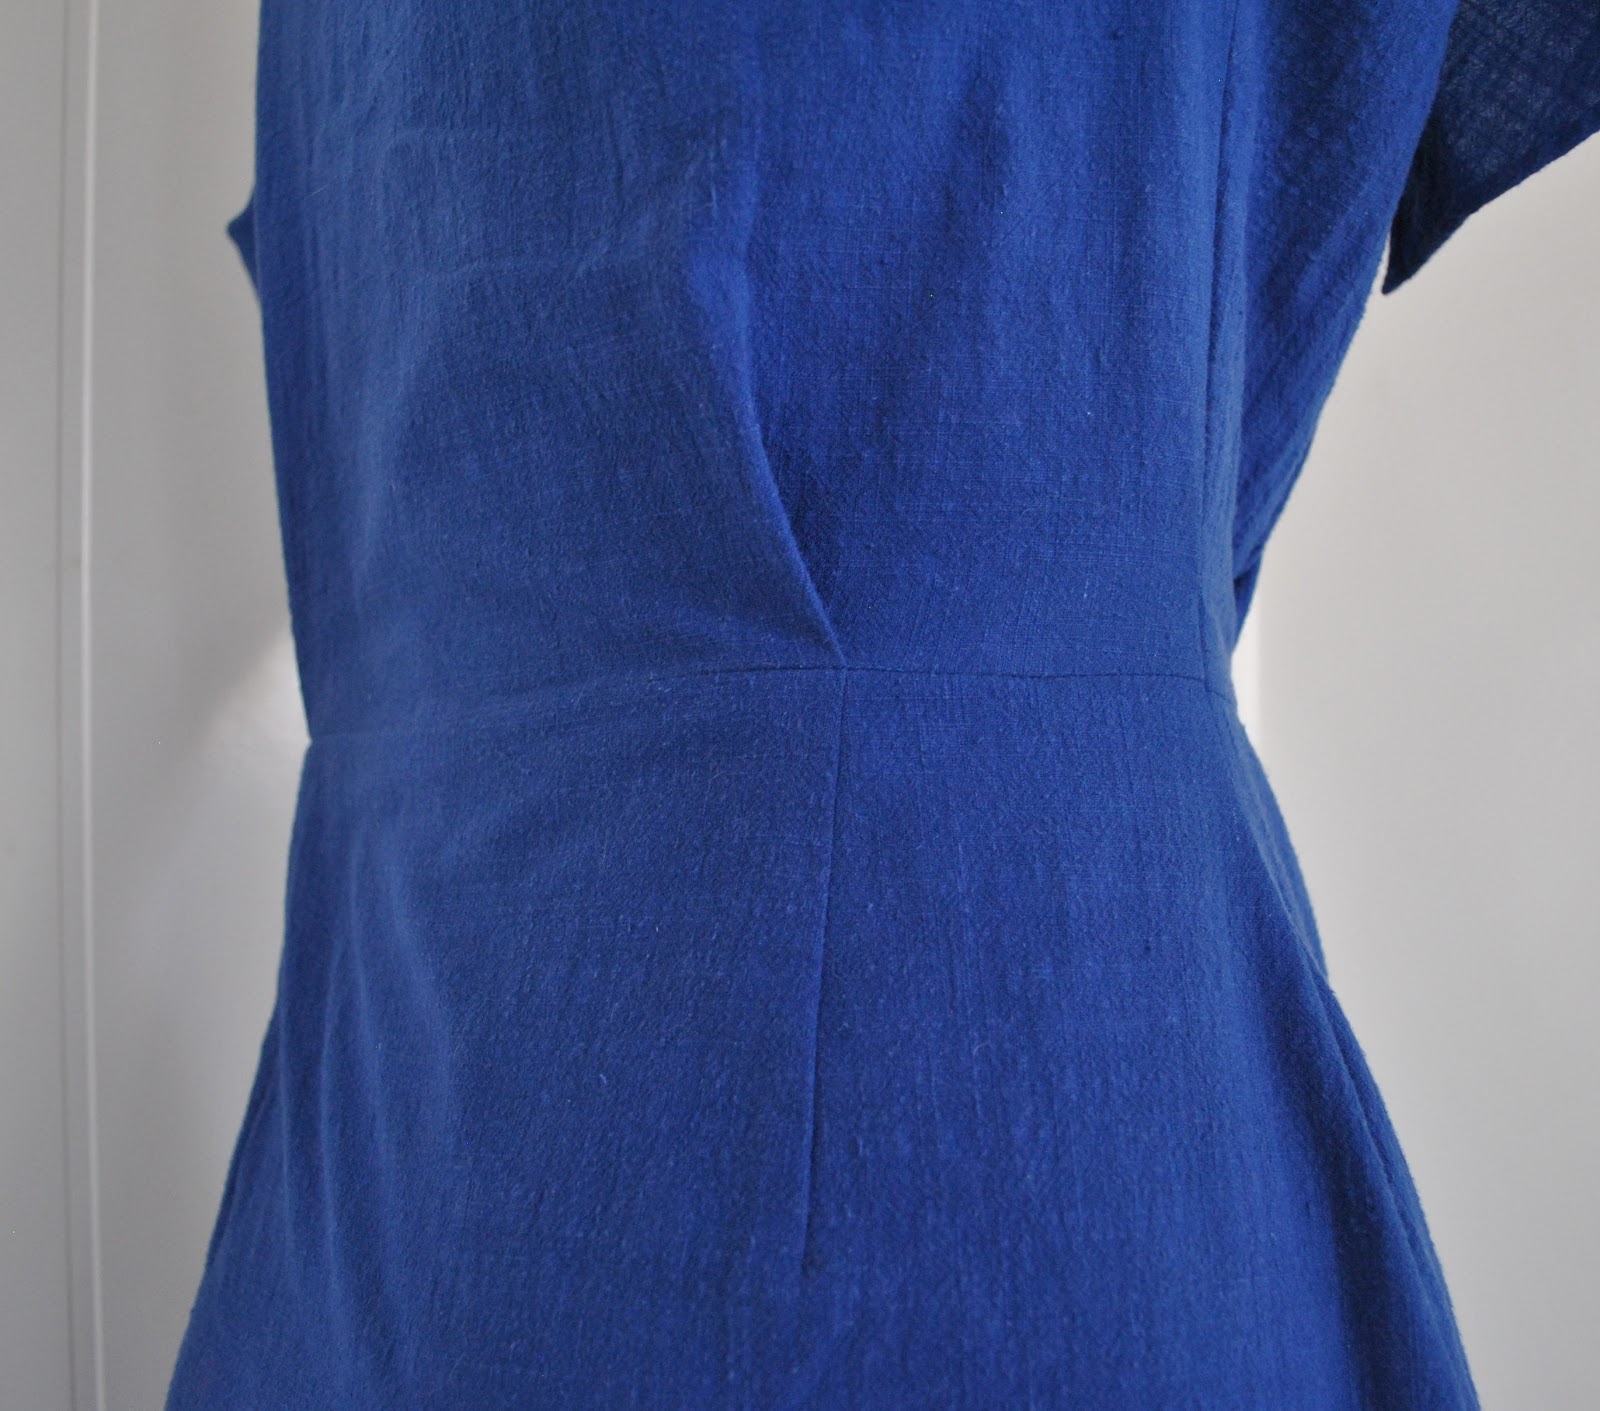
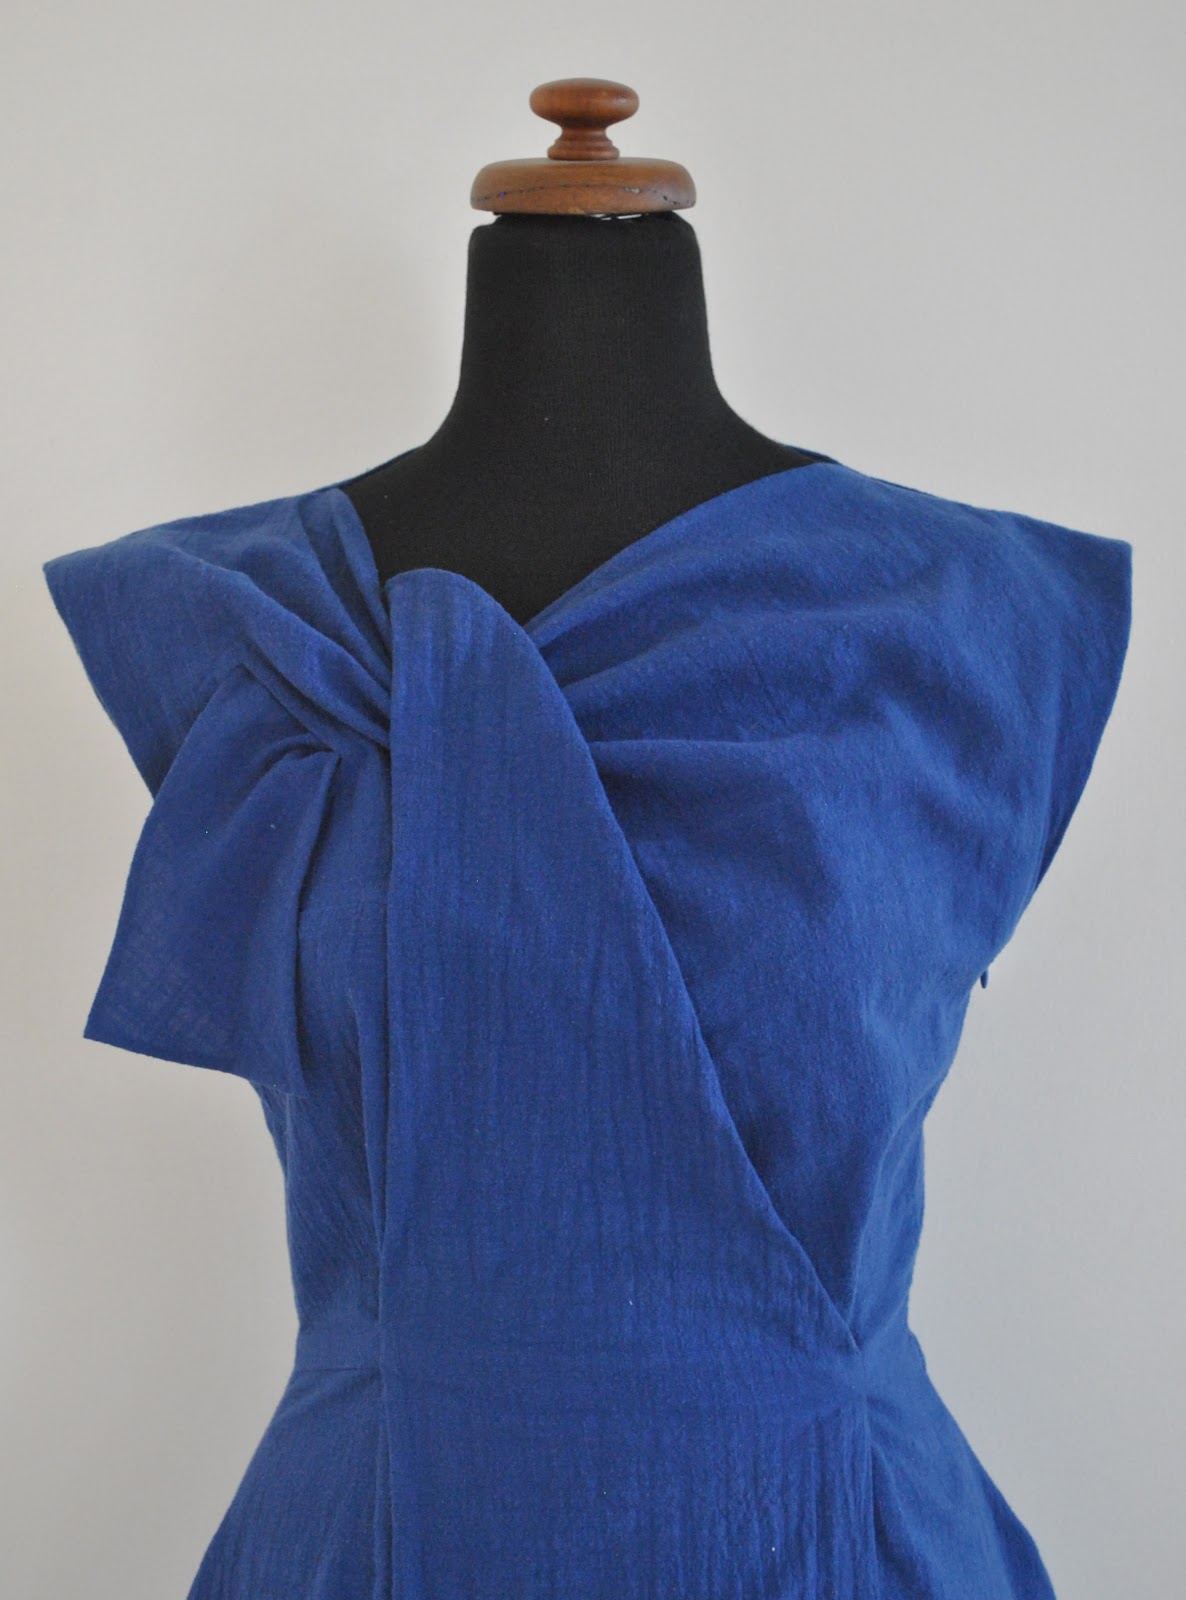
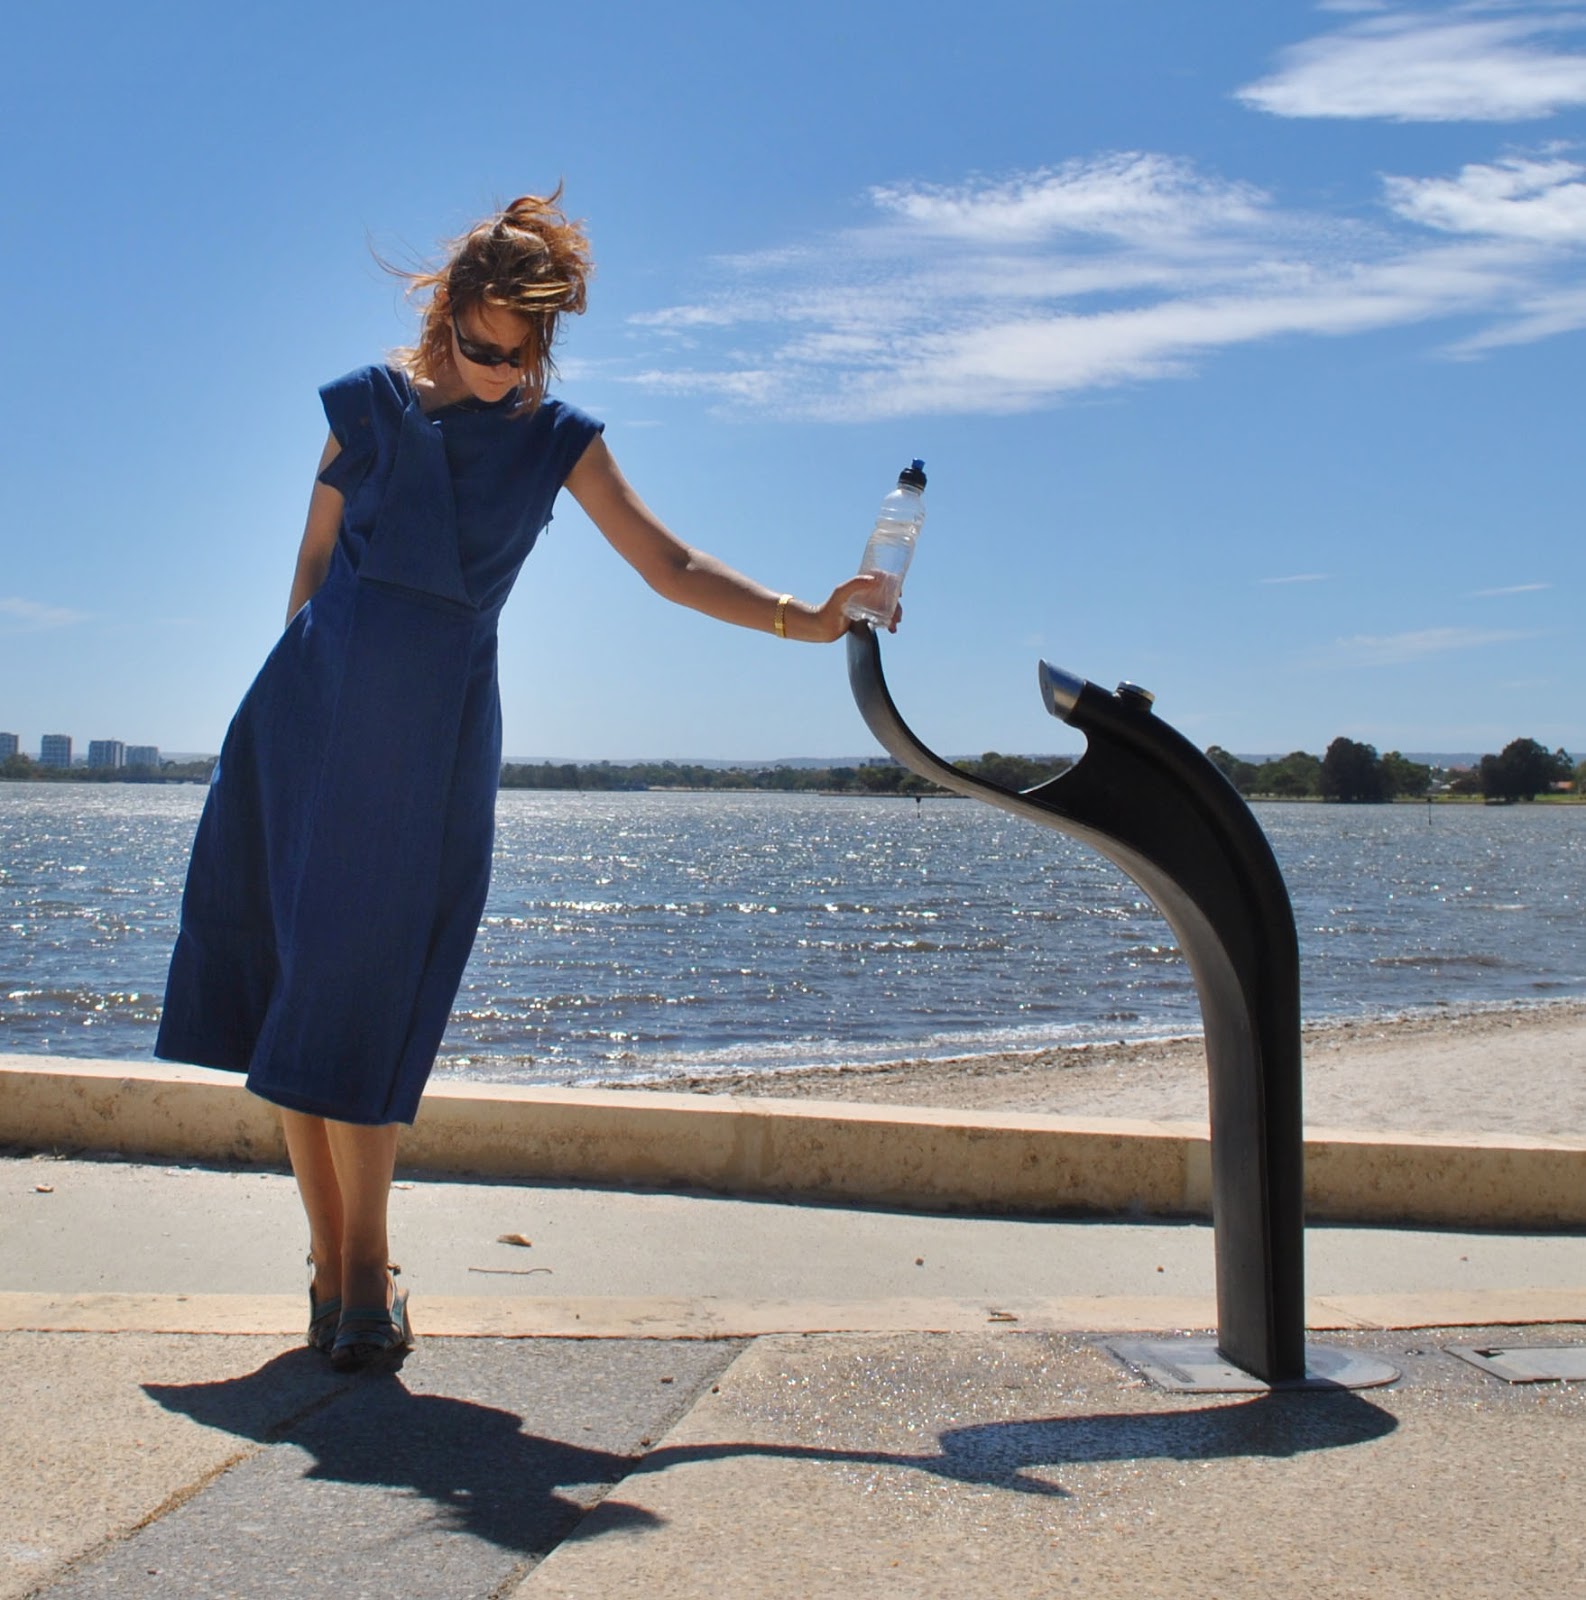
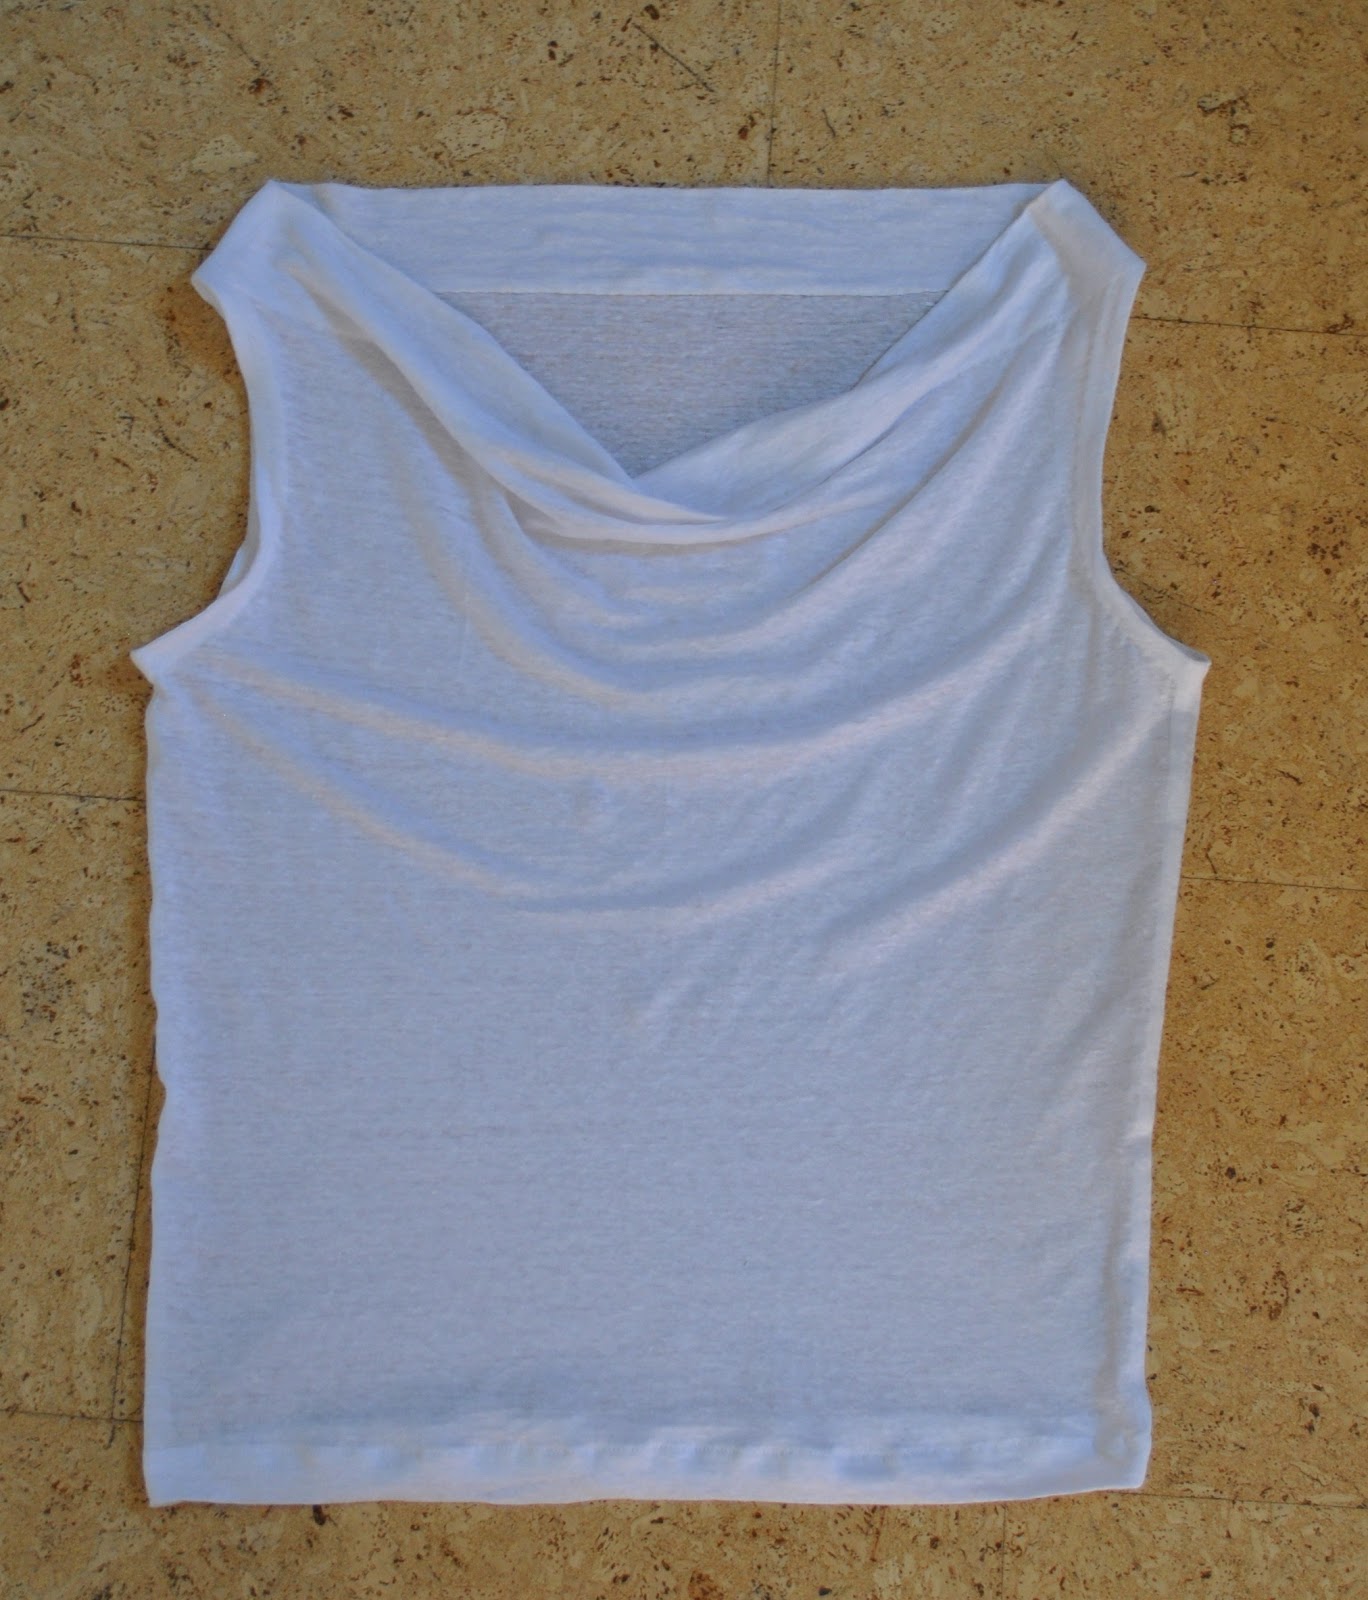
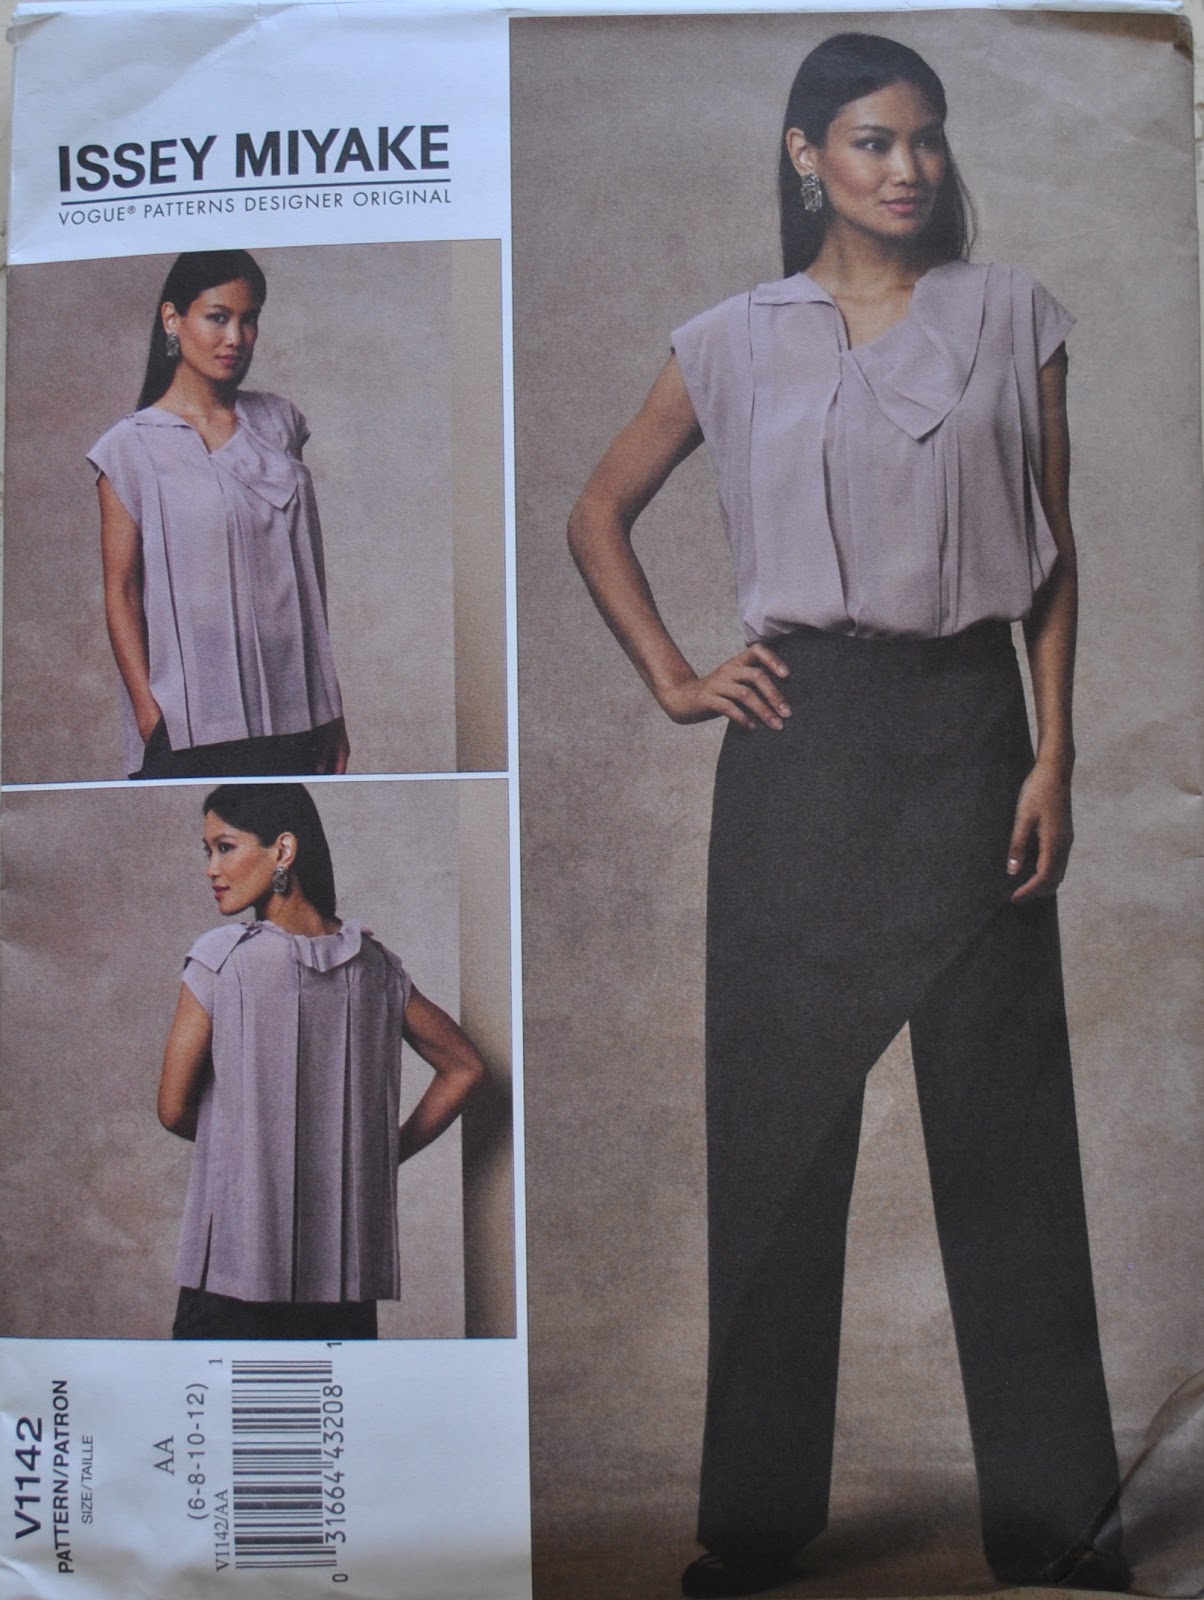
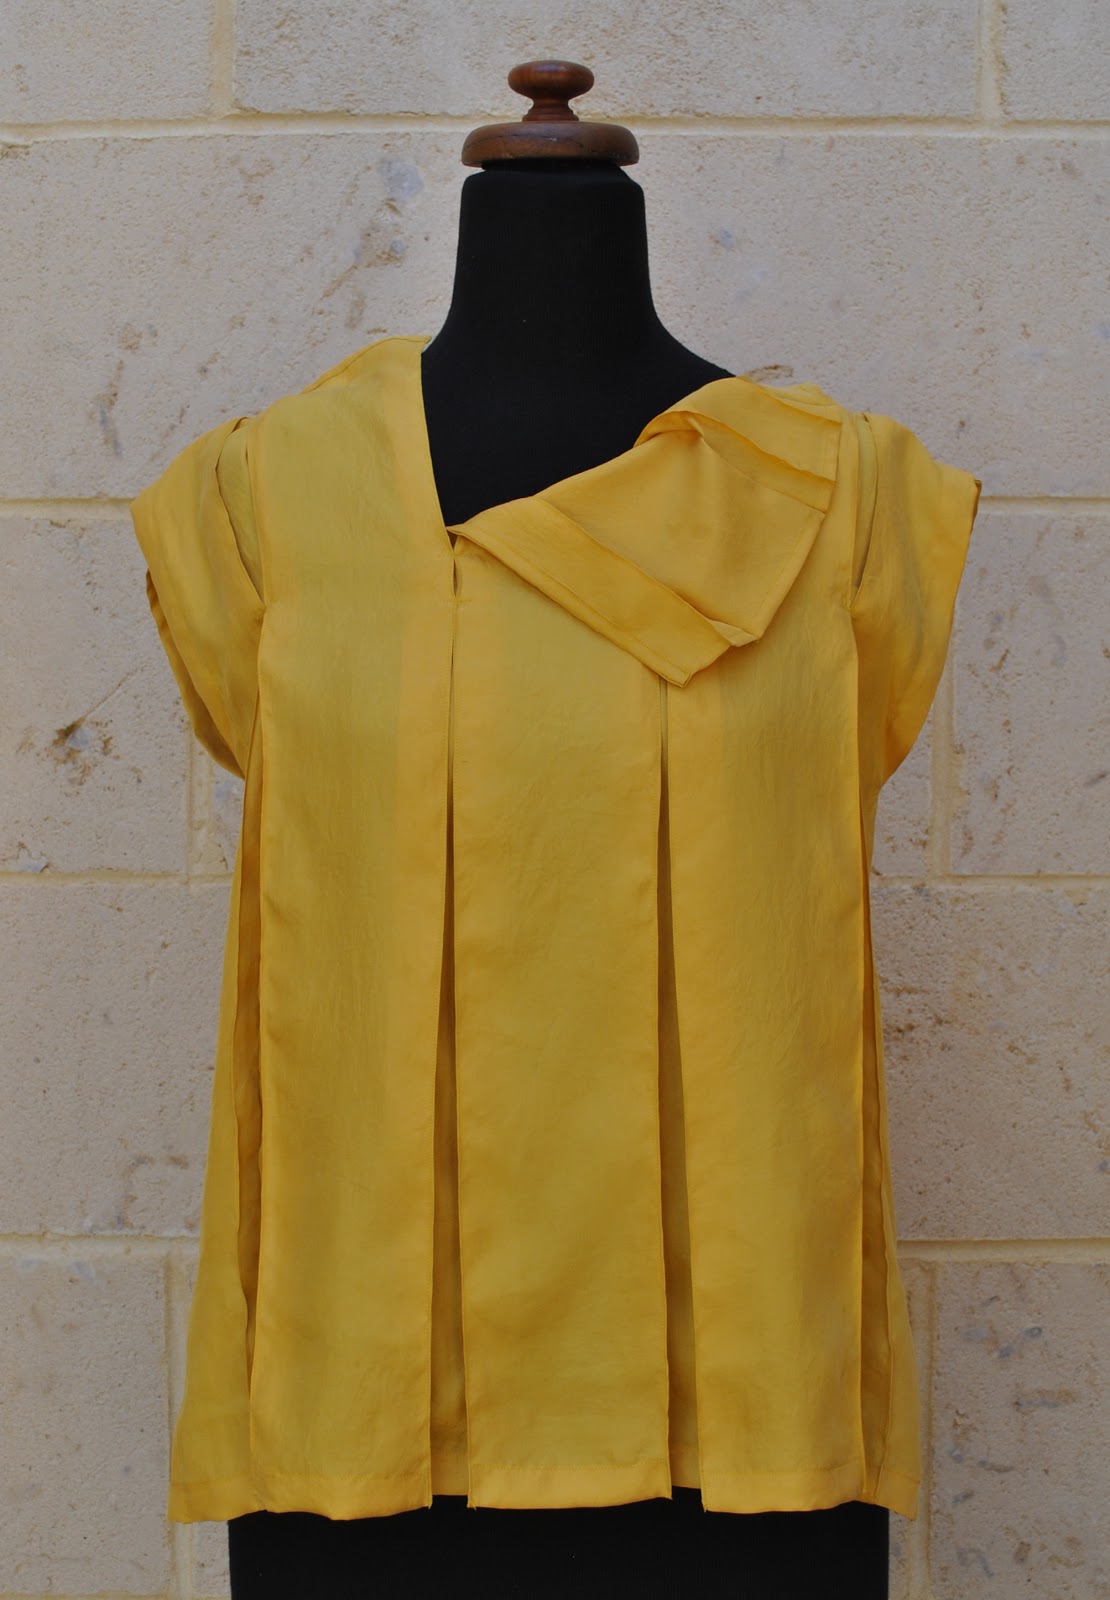
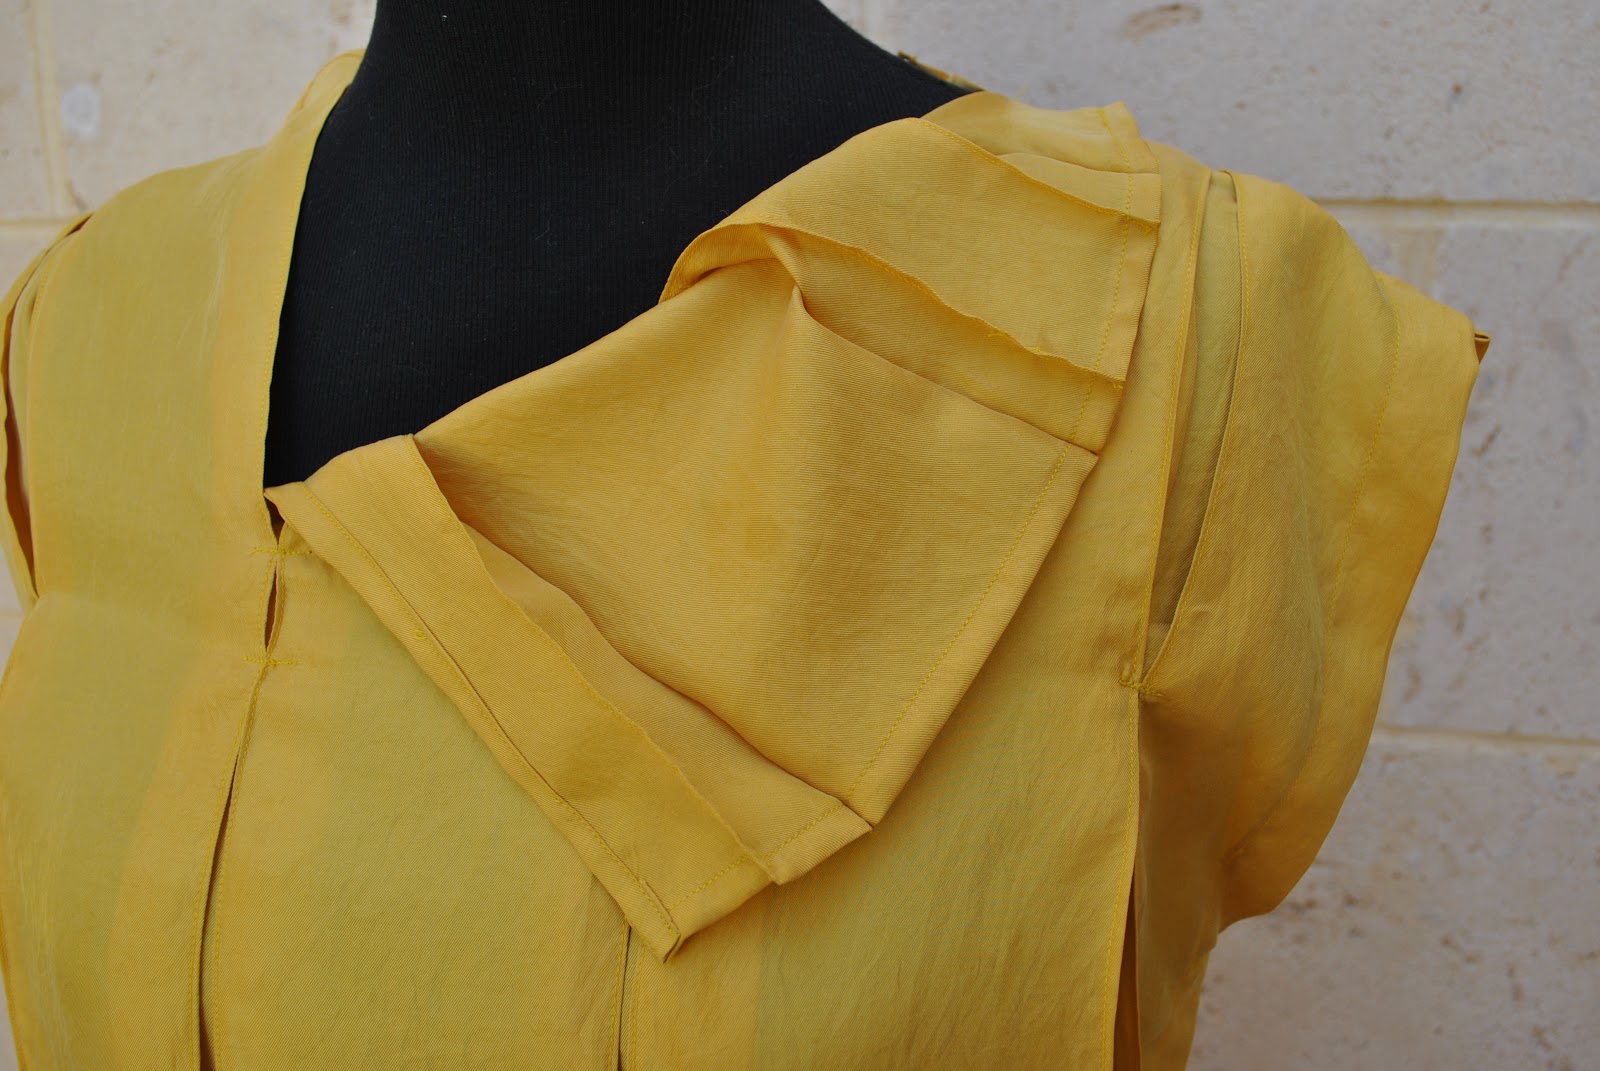
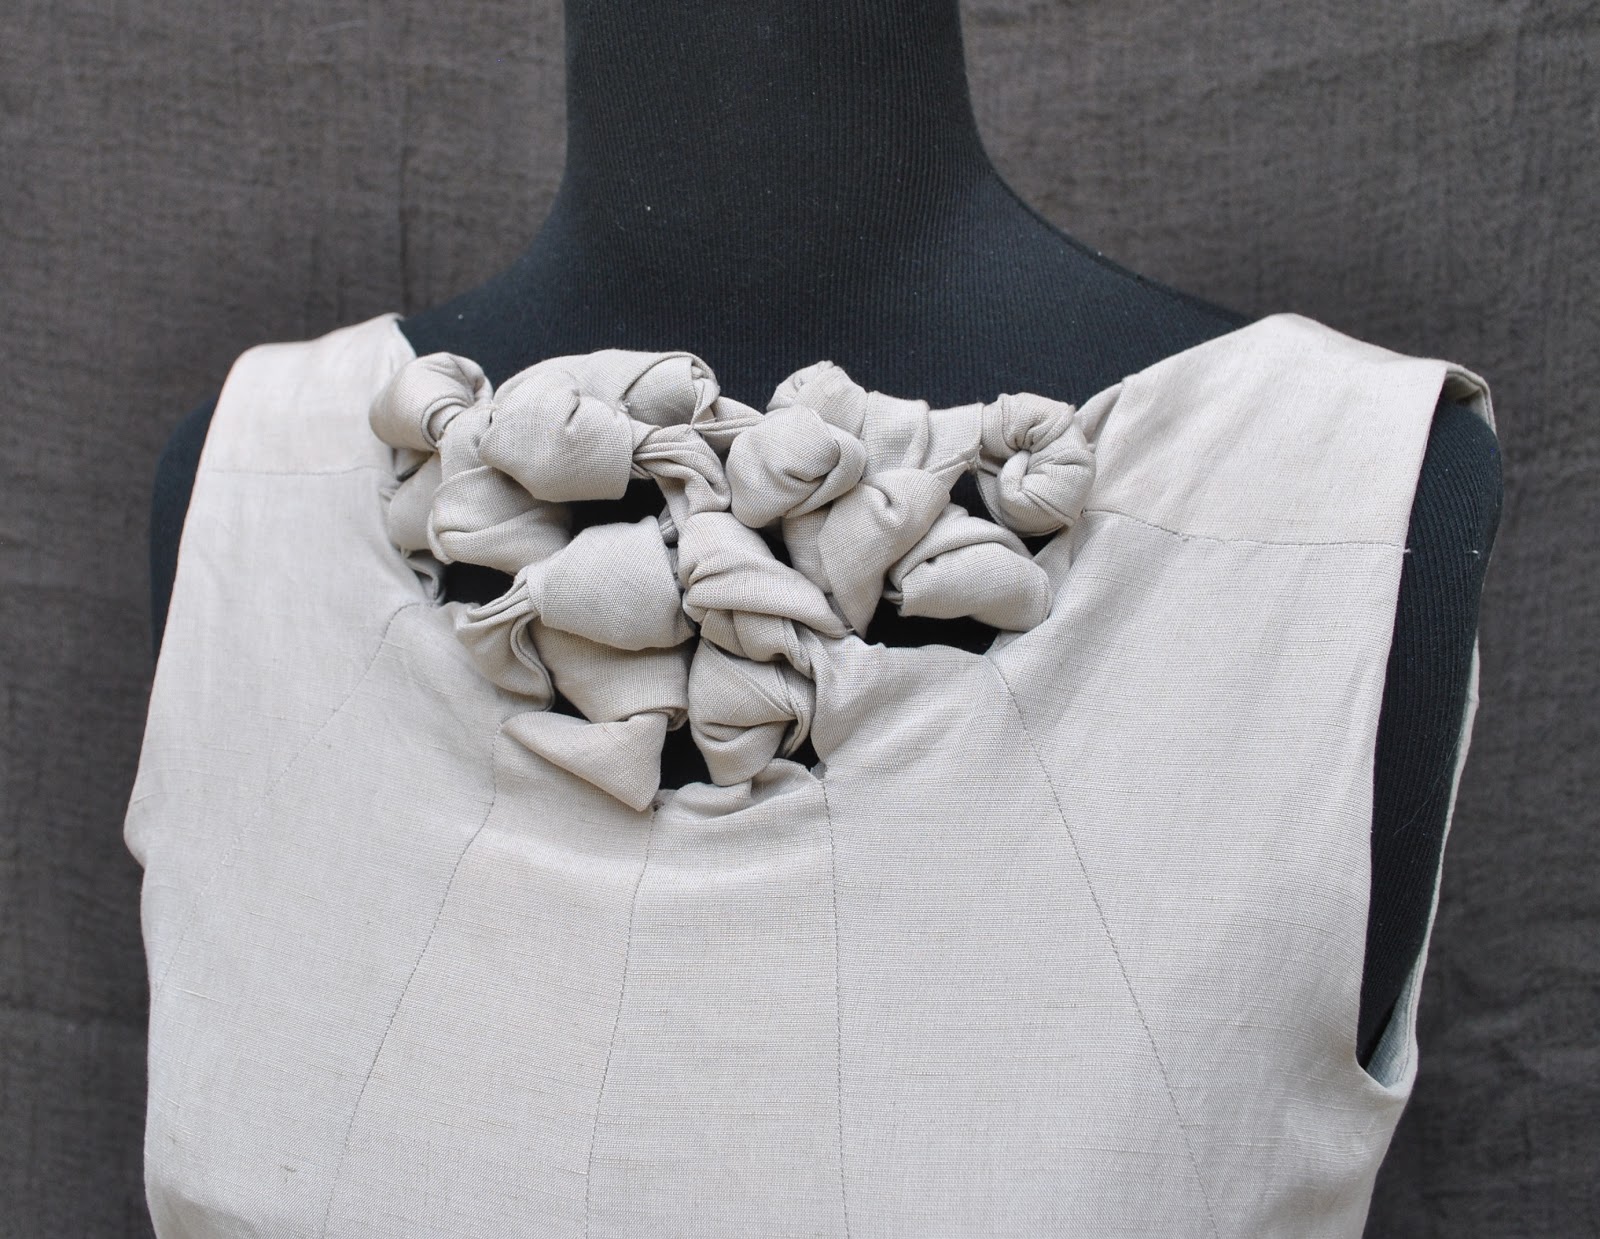
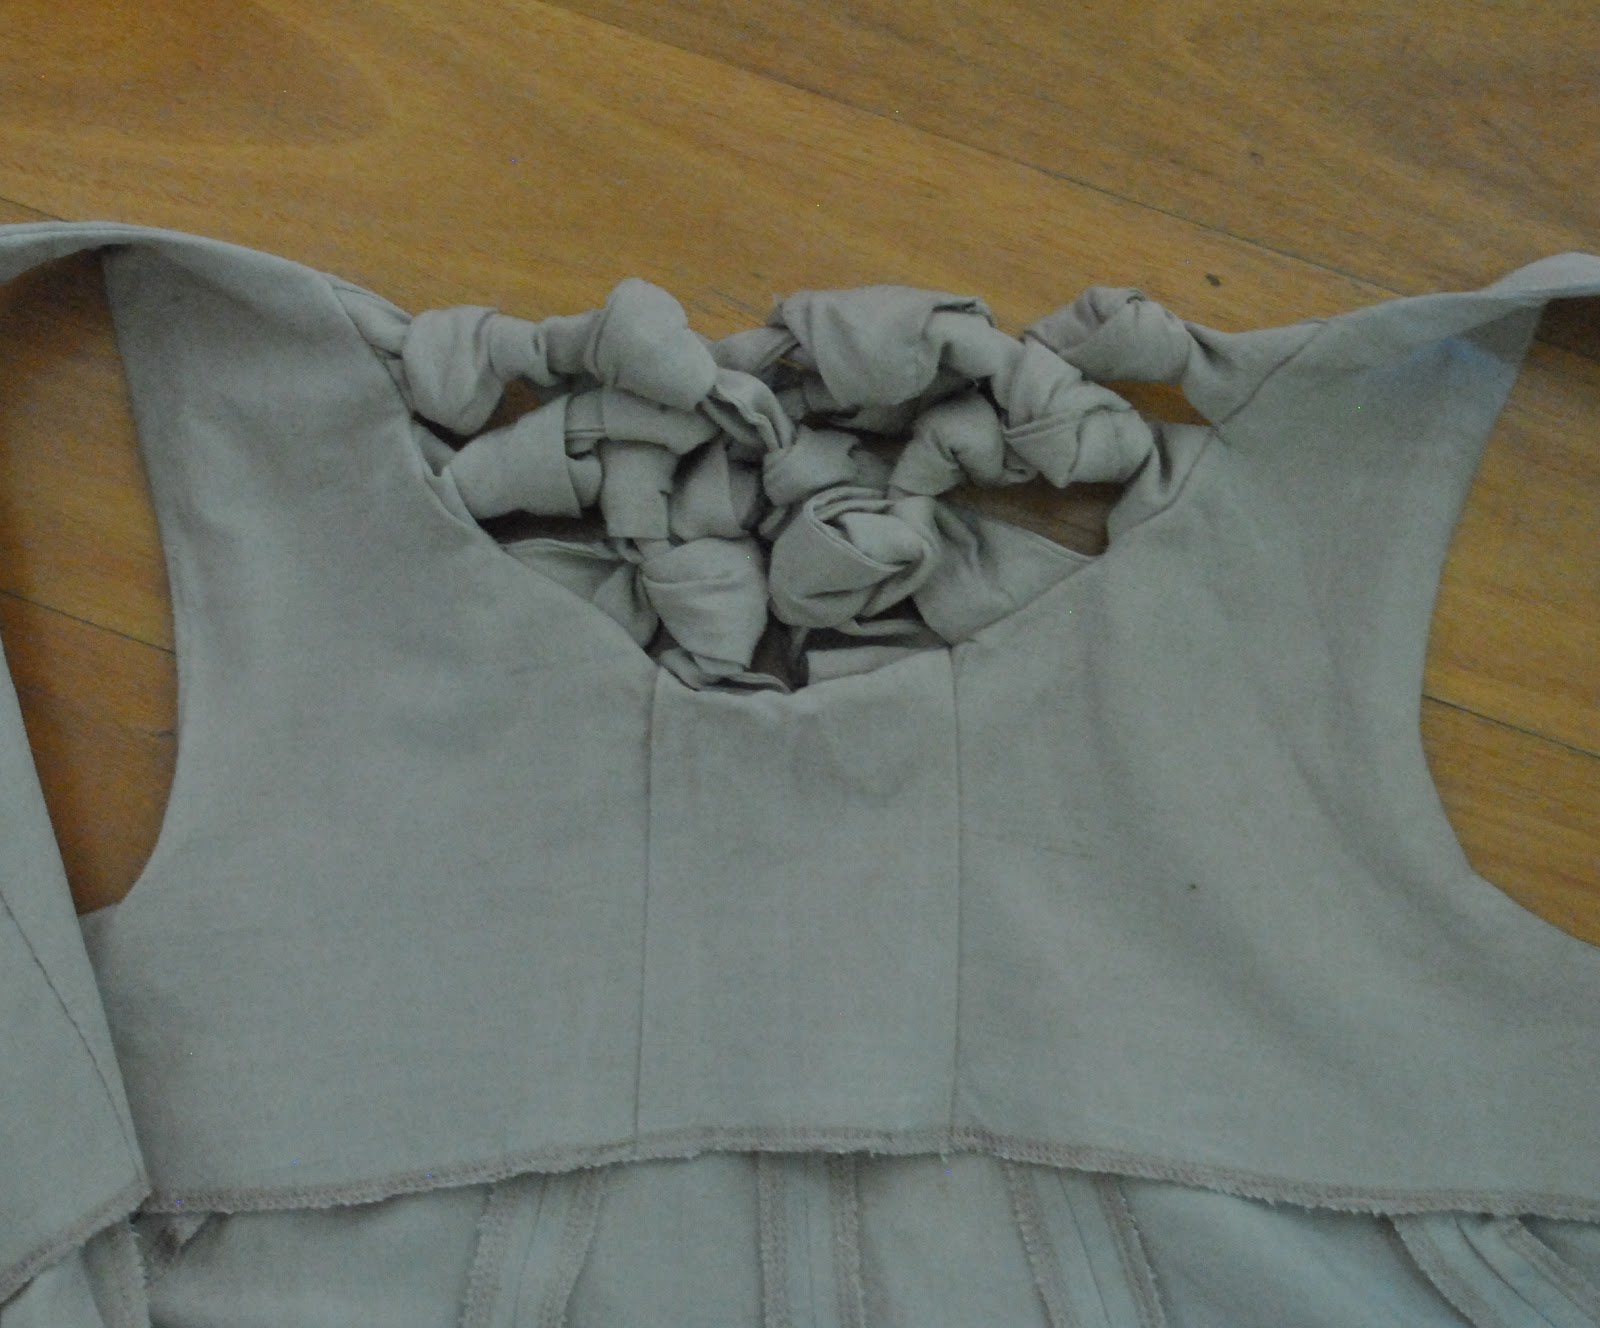
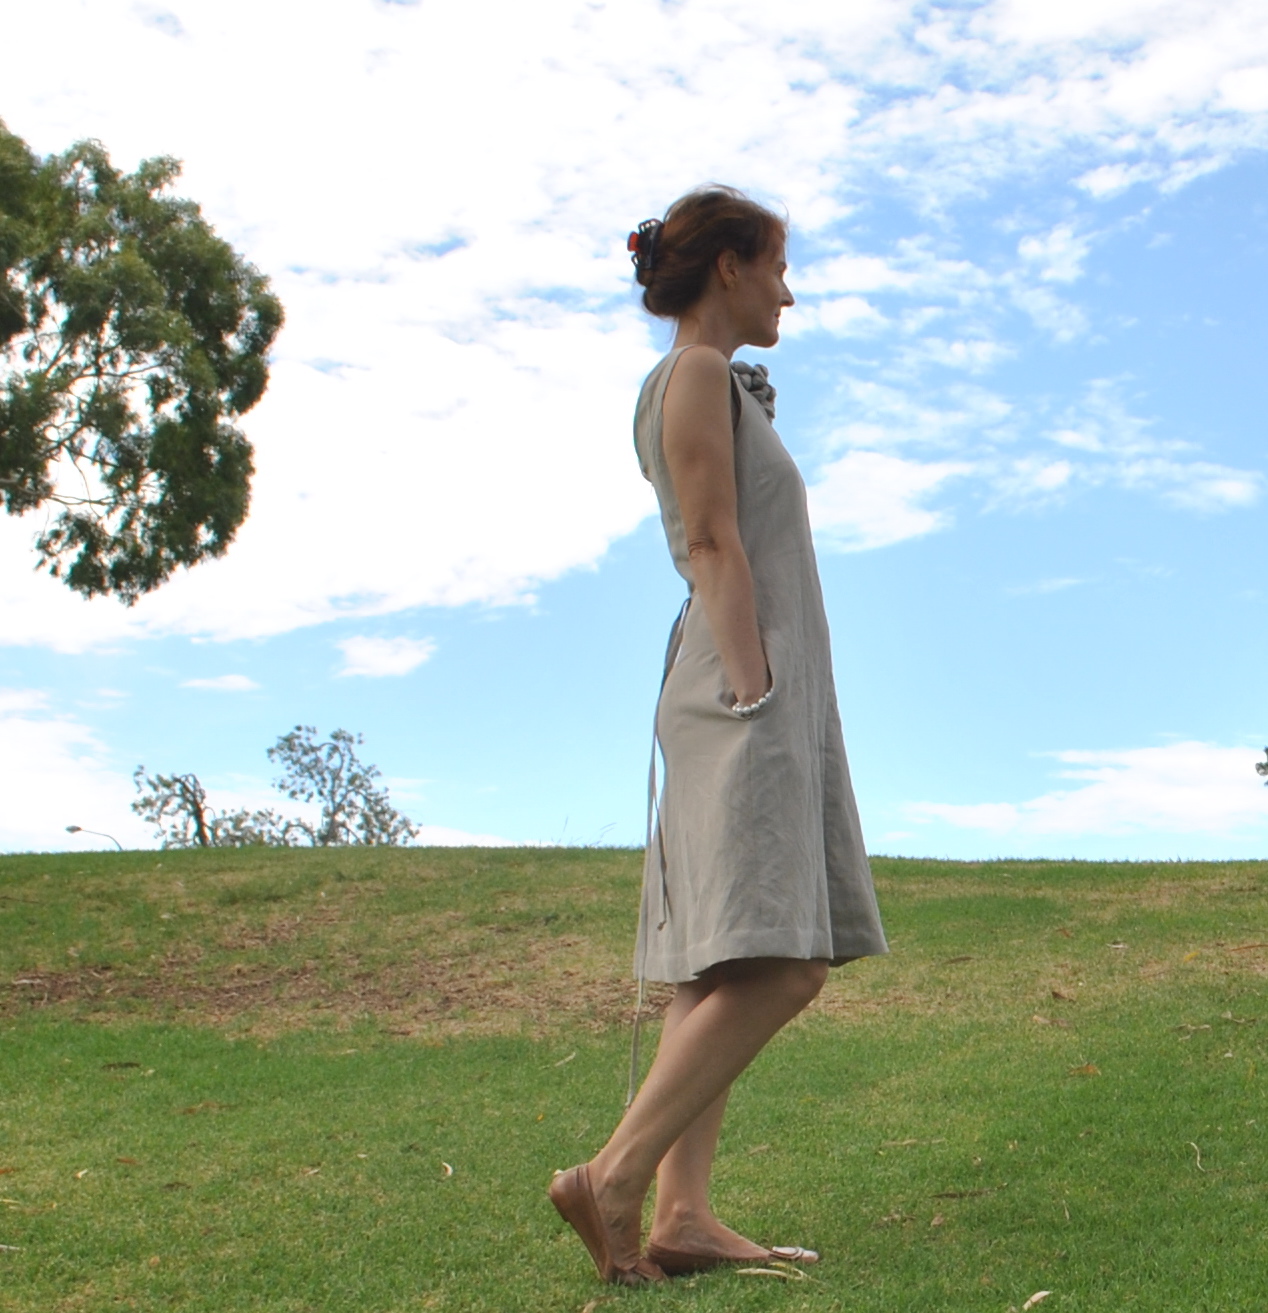
This appears to be a fairly plain dress on a casual glance.  But it is not.  It has a “feature”:  a feature that like many Pattern Magic features, seems to the casual, non-sewing observer to be a superficially simple thing, like “so? what could possibly be difficult about that??” but in actuality, getting to the nitty gritty of it, is a fair dinkum epic saga to put together seamlessly and successfully.  In this case, the feature is that the bodice explodes out into an incorporated posy of entwined knots that looks sorta like a statement neckpiece, or maybe a 3D sculptural bib.  Prof Nakamichi describes it as “By bringing together several knots that resemble tiny bells I have created a unique garment that evokes the sounds of bells ringing”
This is achieved by the front being six pieces… four of these end in a long strip; which is later tied into knots which you weave together as artistically as you can.  Counting from a shoulder; sections 1 and 6; and sections 3 and 8; are each one piece; comprising two sections joined by a bridge, so these joining bridges have to be knotted before you can sew the top sections to the rest of the front. 

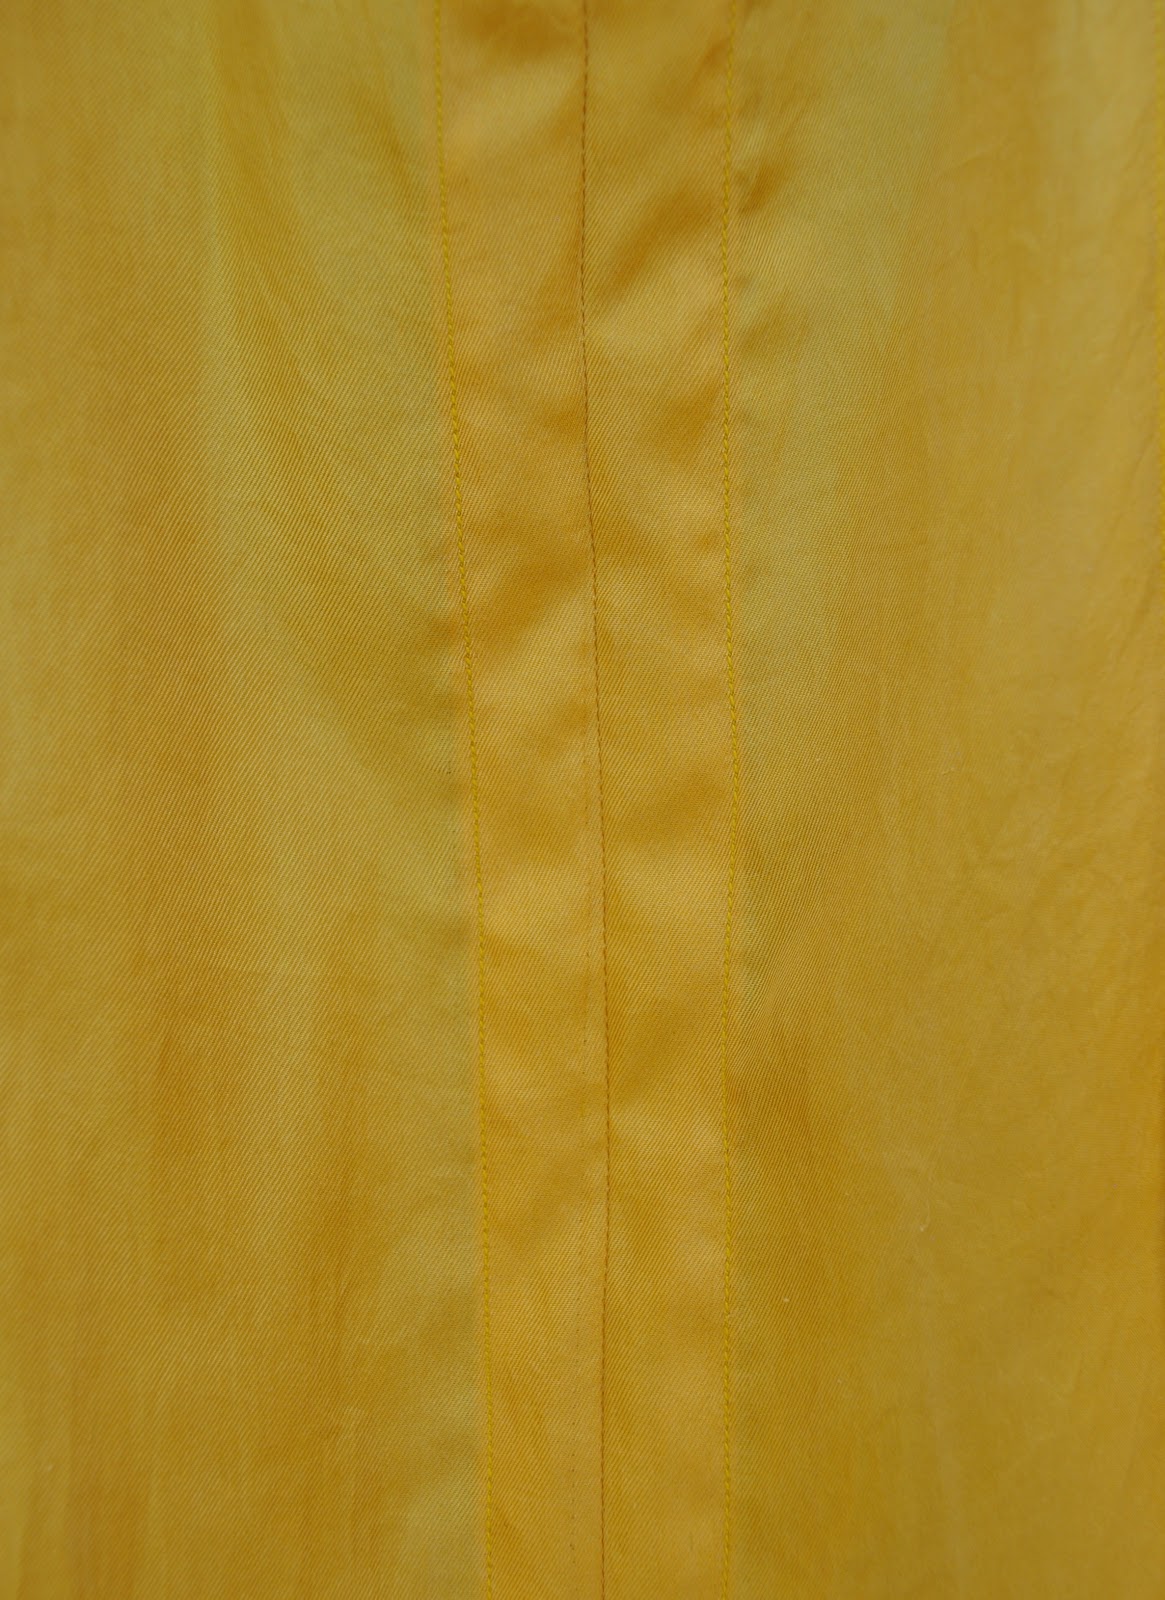
I made my dress using a light stone coloured, linen/silk mix, bought from Fabulous Fabrics about four years ago.  Yes! a long time ago!  This was another length of fabric previously Too Good To Actually Use.
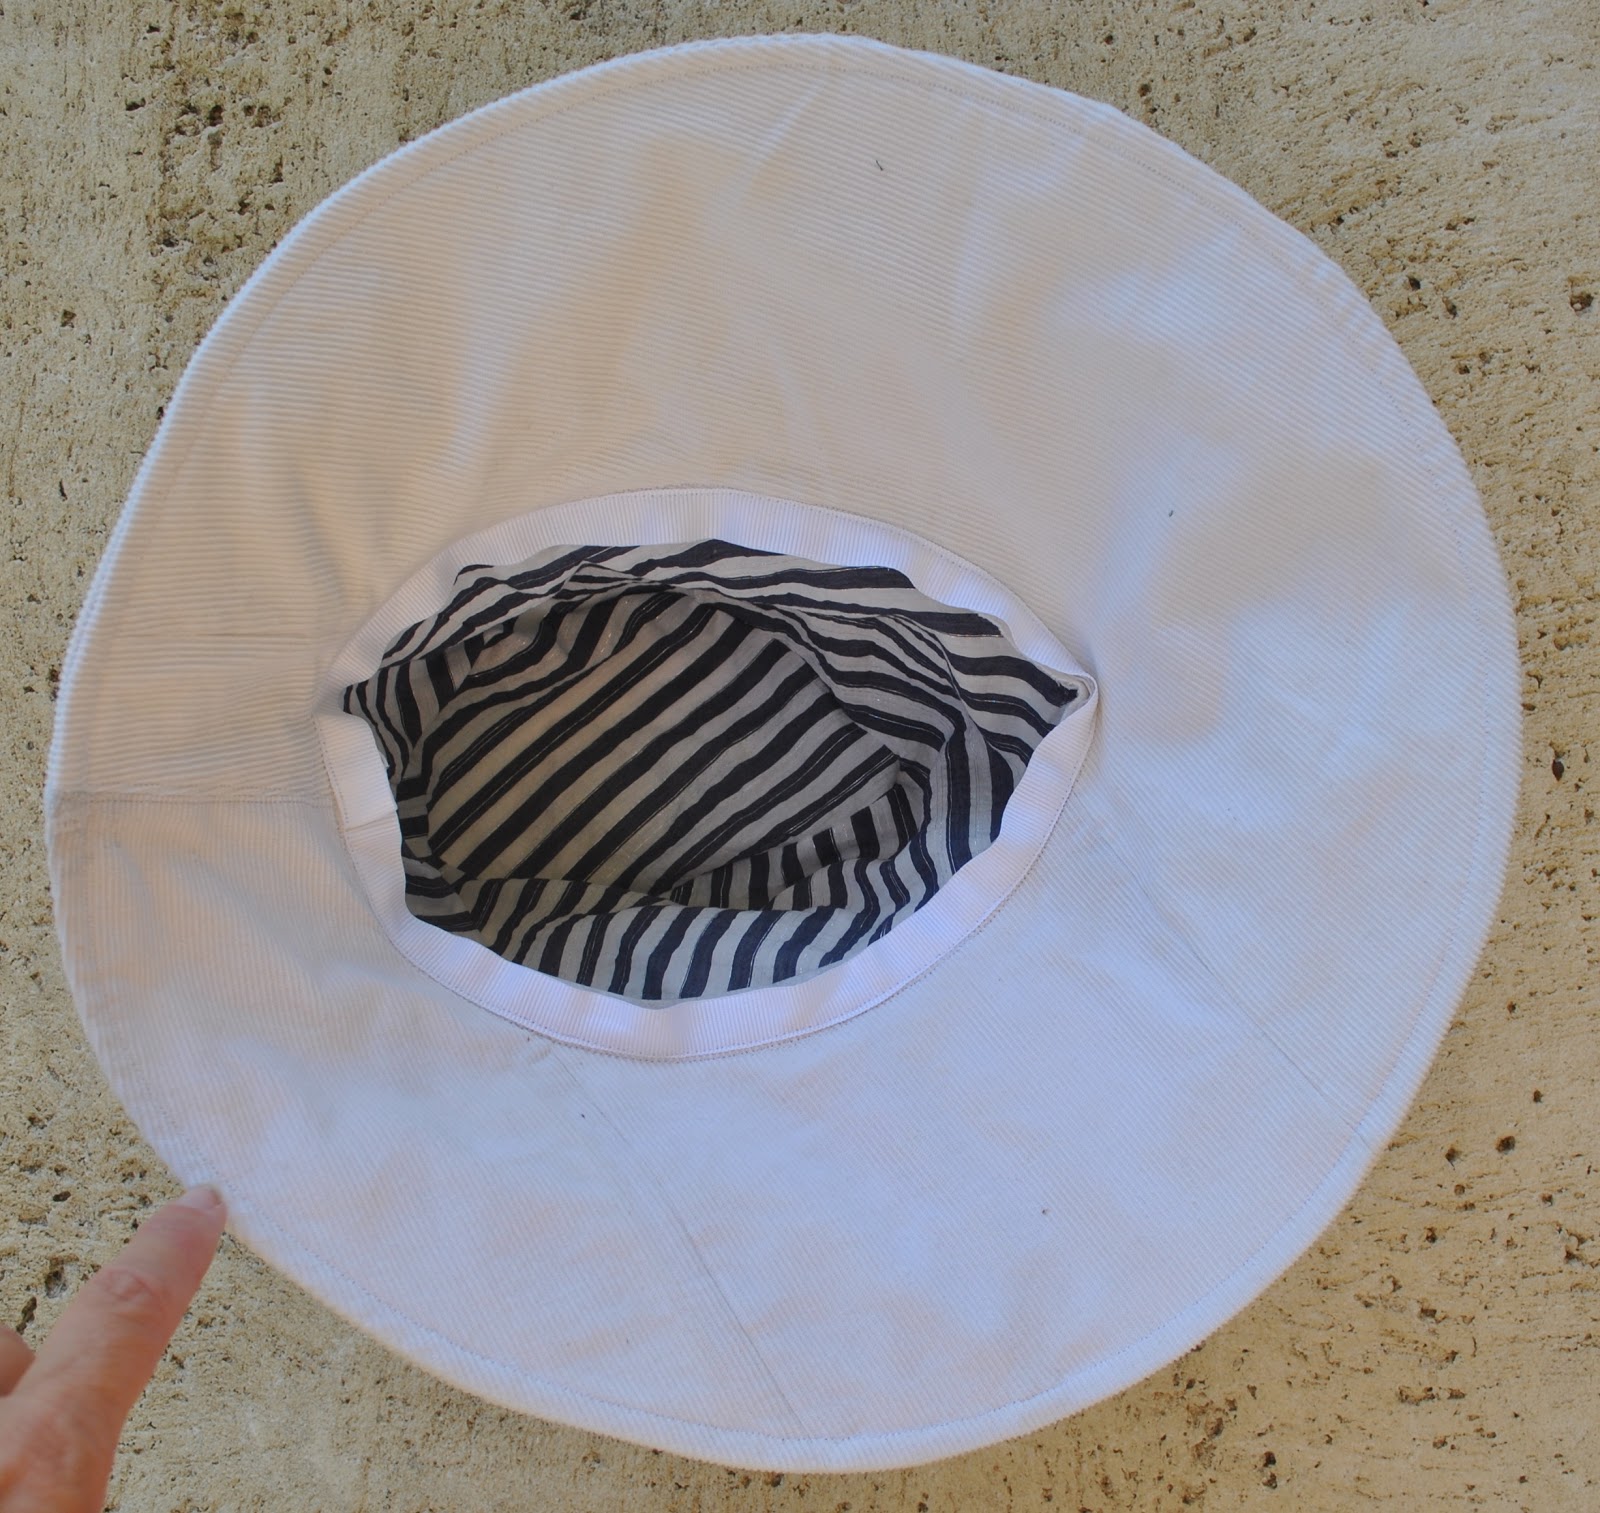
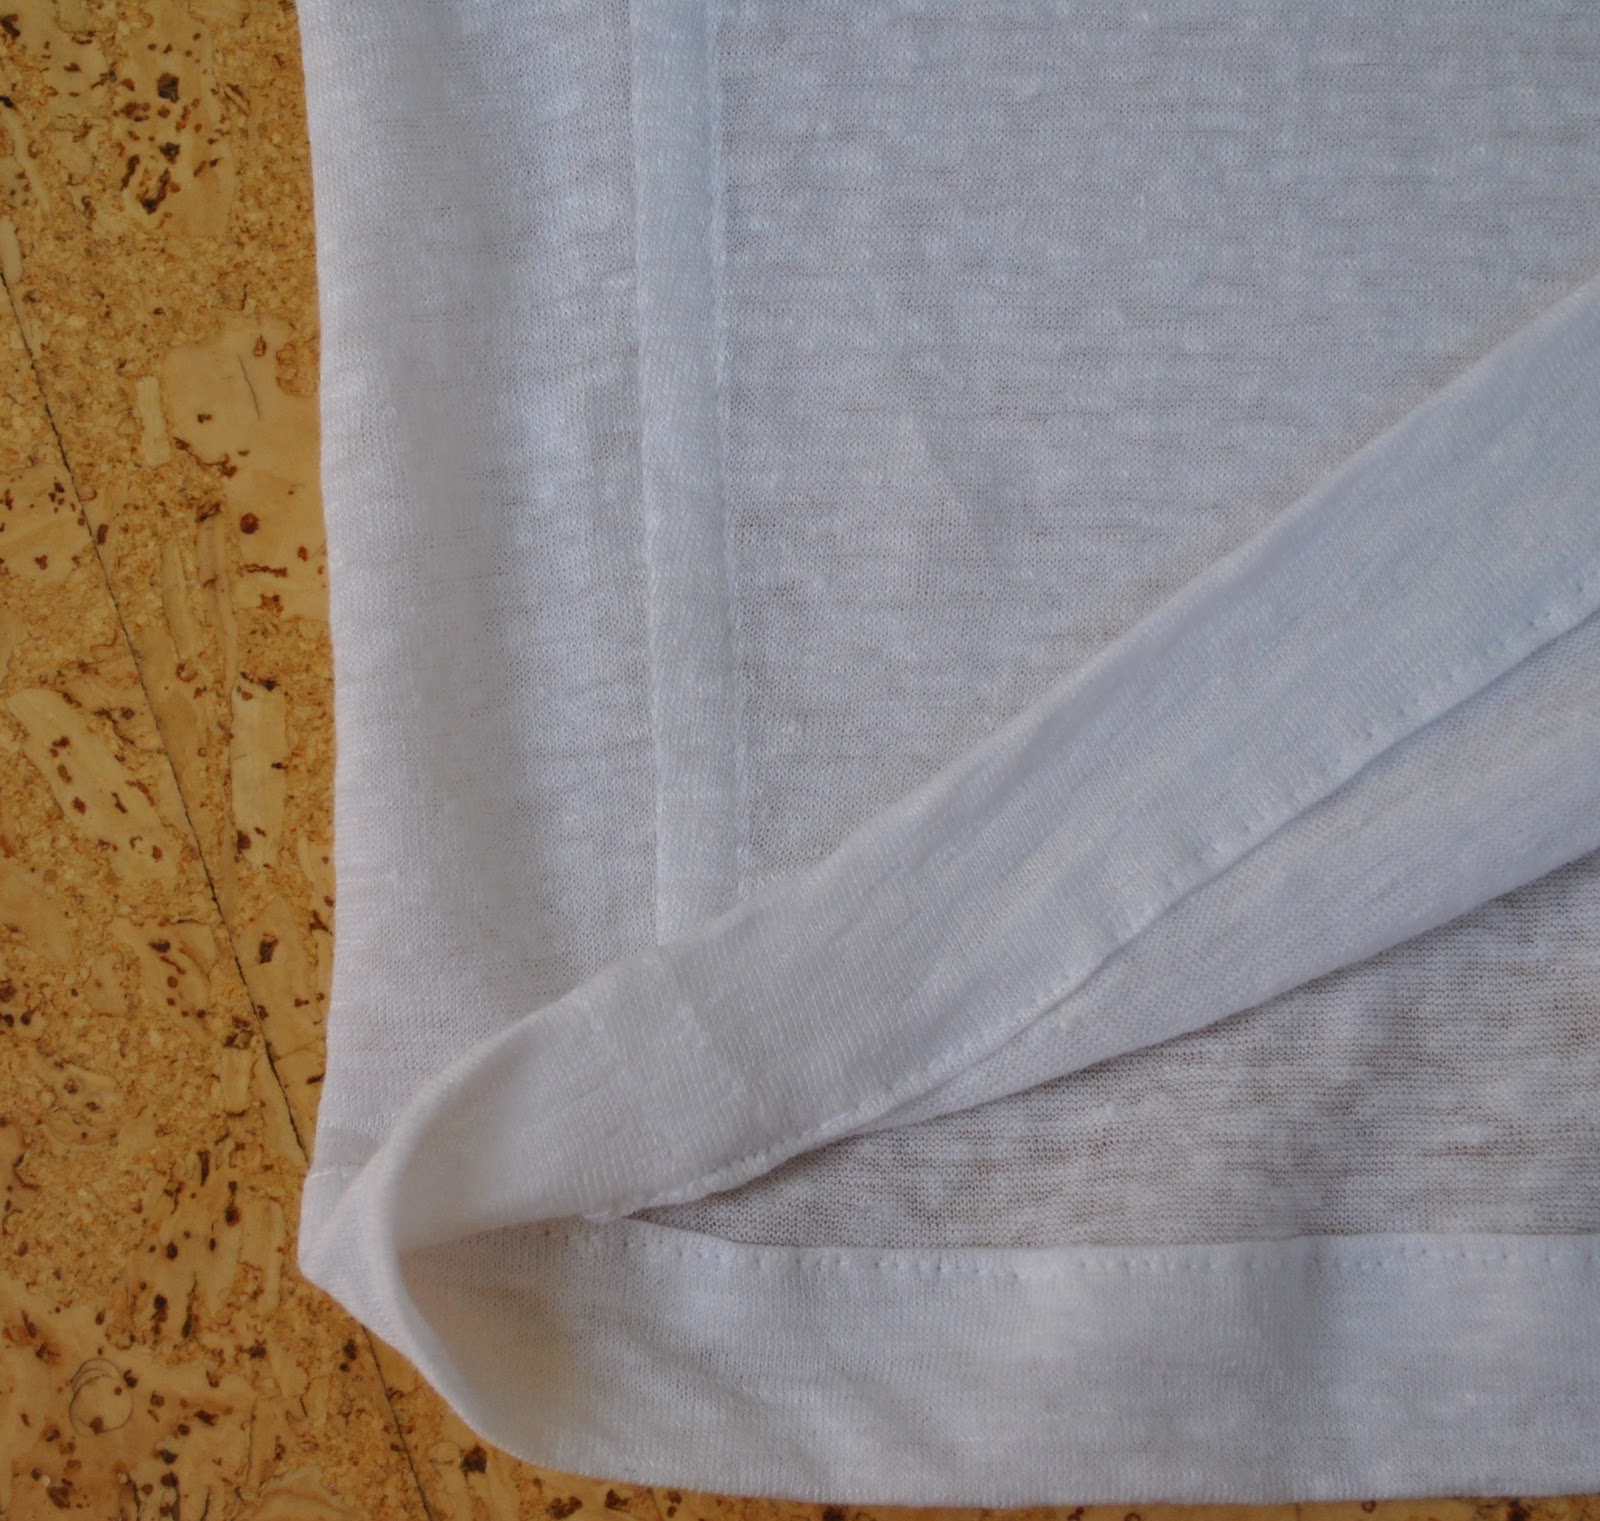
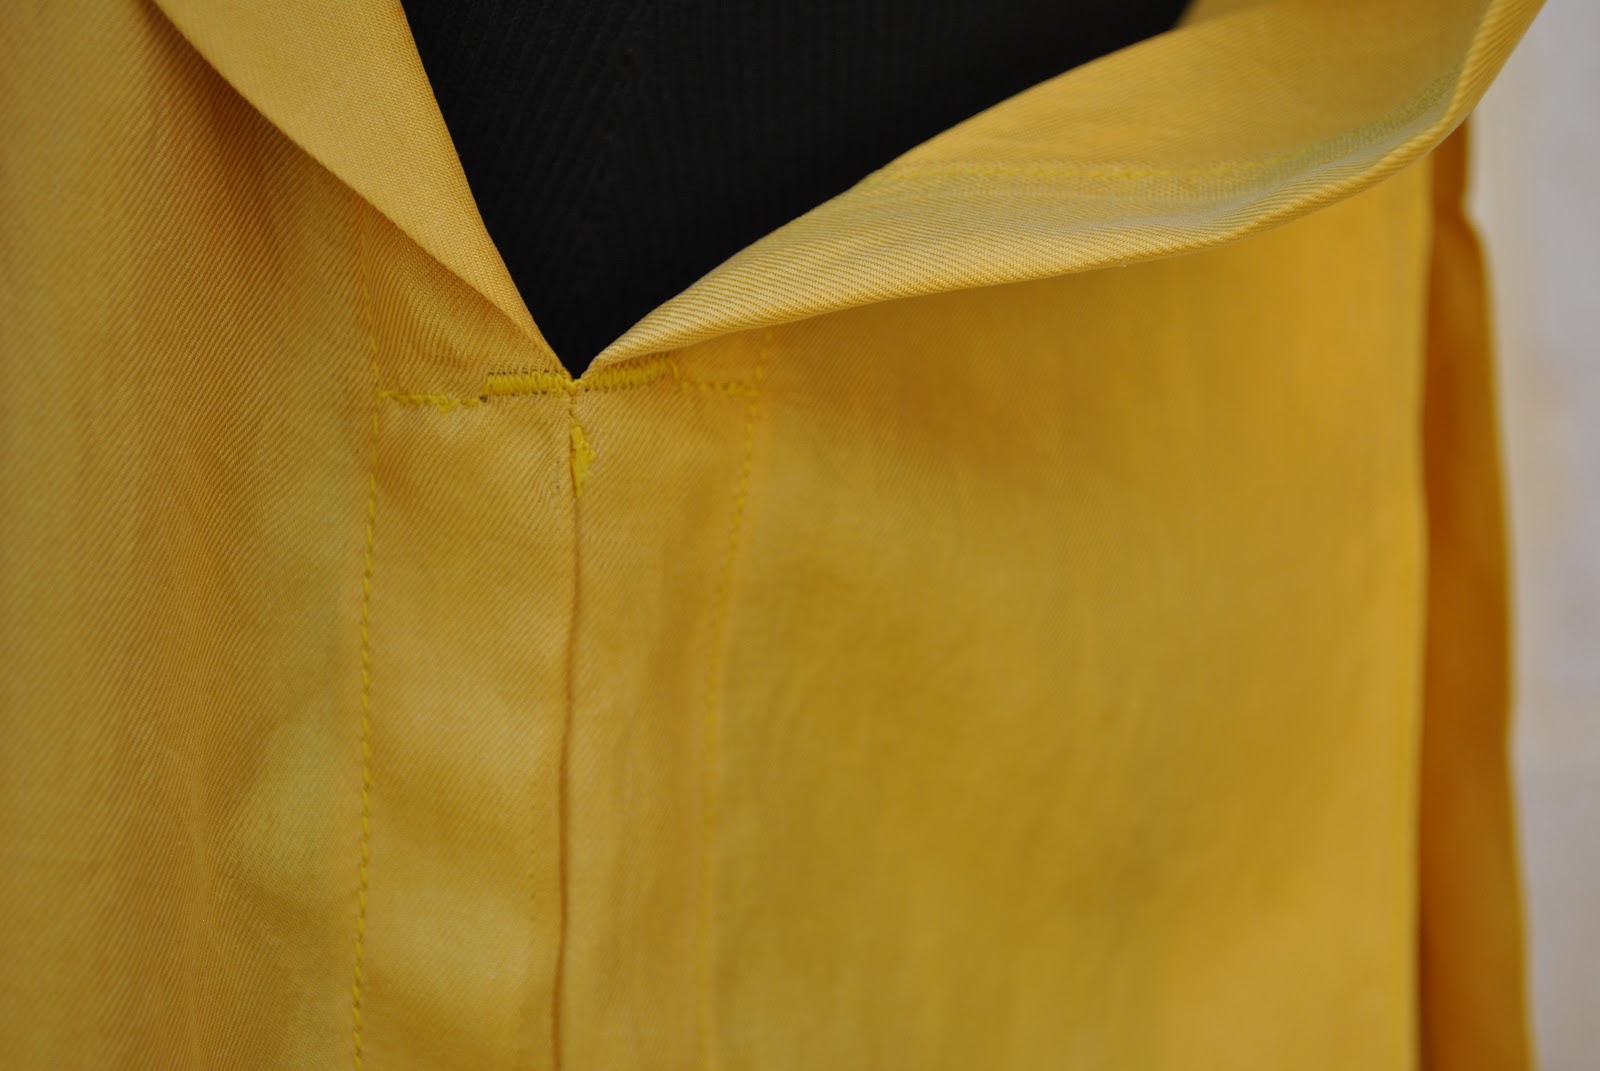
Due to the nature of the design; some of the strips are cut on the bias and some on the half bias.  To save fabric and add stability I cut all the facing strips on the grain.  I faced and turned out each strip separately, and then later sewed on the bodice facings.  When it came to facing that front neckline, I sewed each section at a time and checked each obsessively for a smooth finish before proceeding to the next one; shoulders first and finishing at the centre front.

front bodice facing

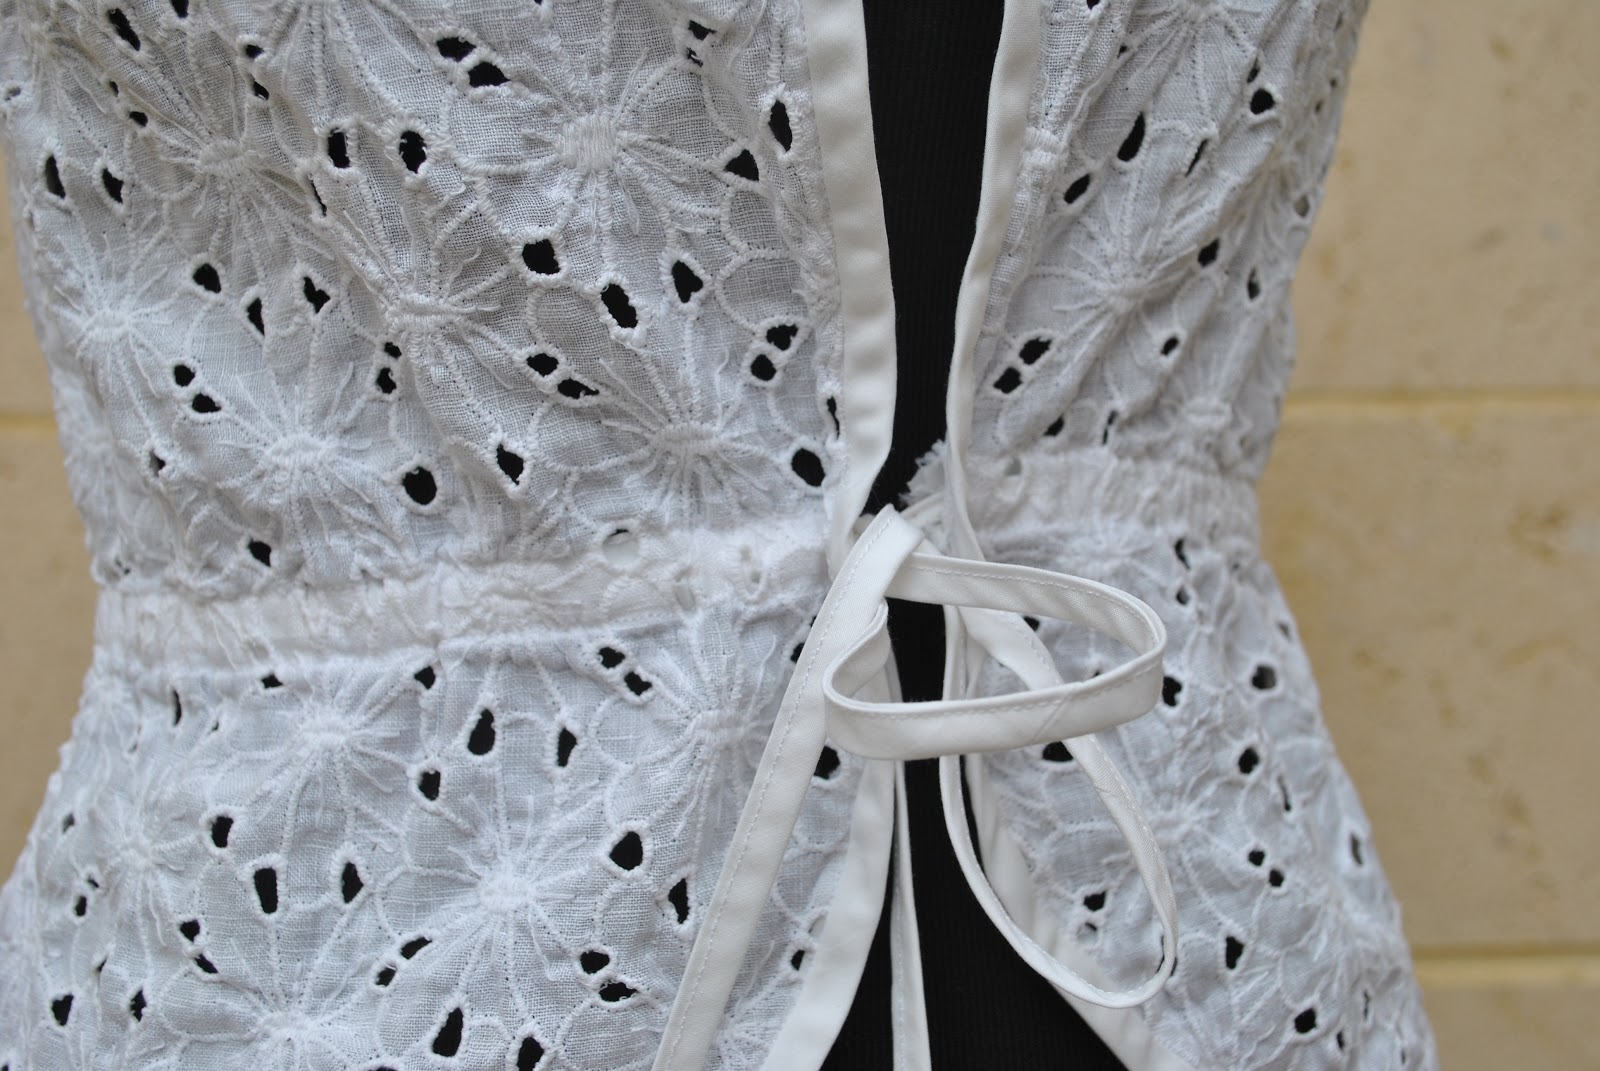
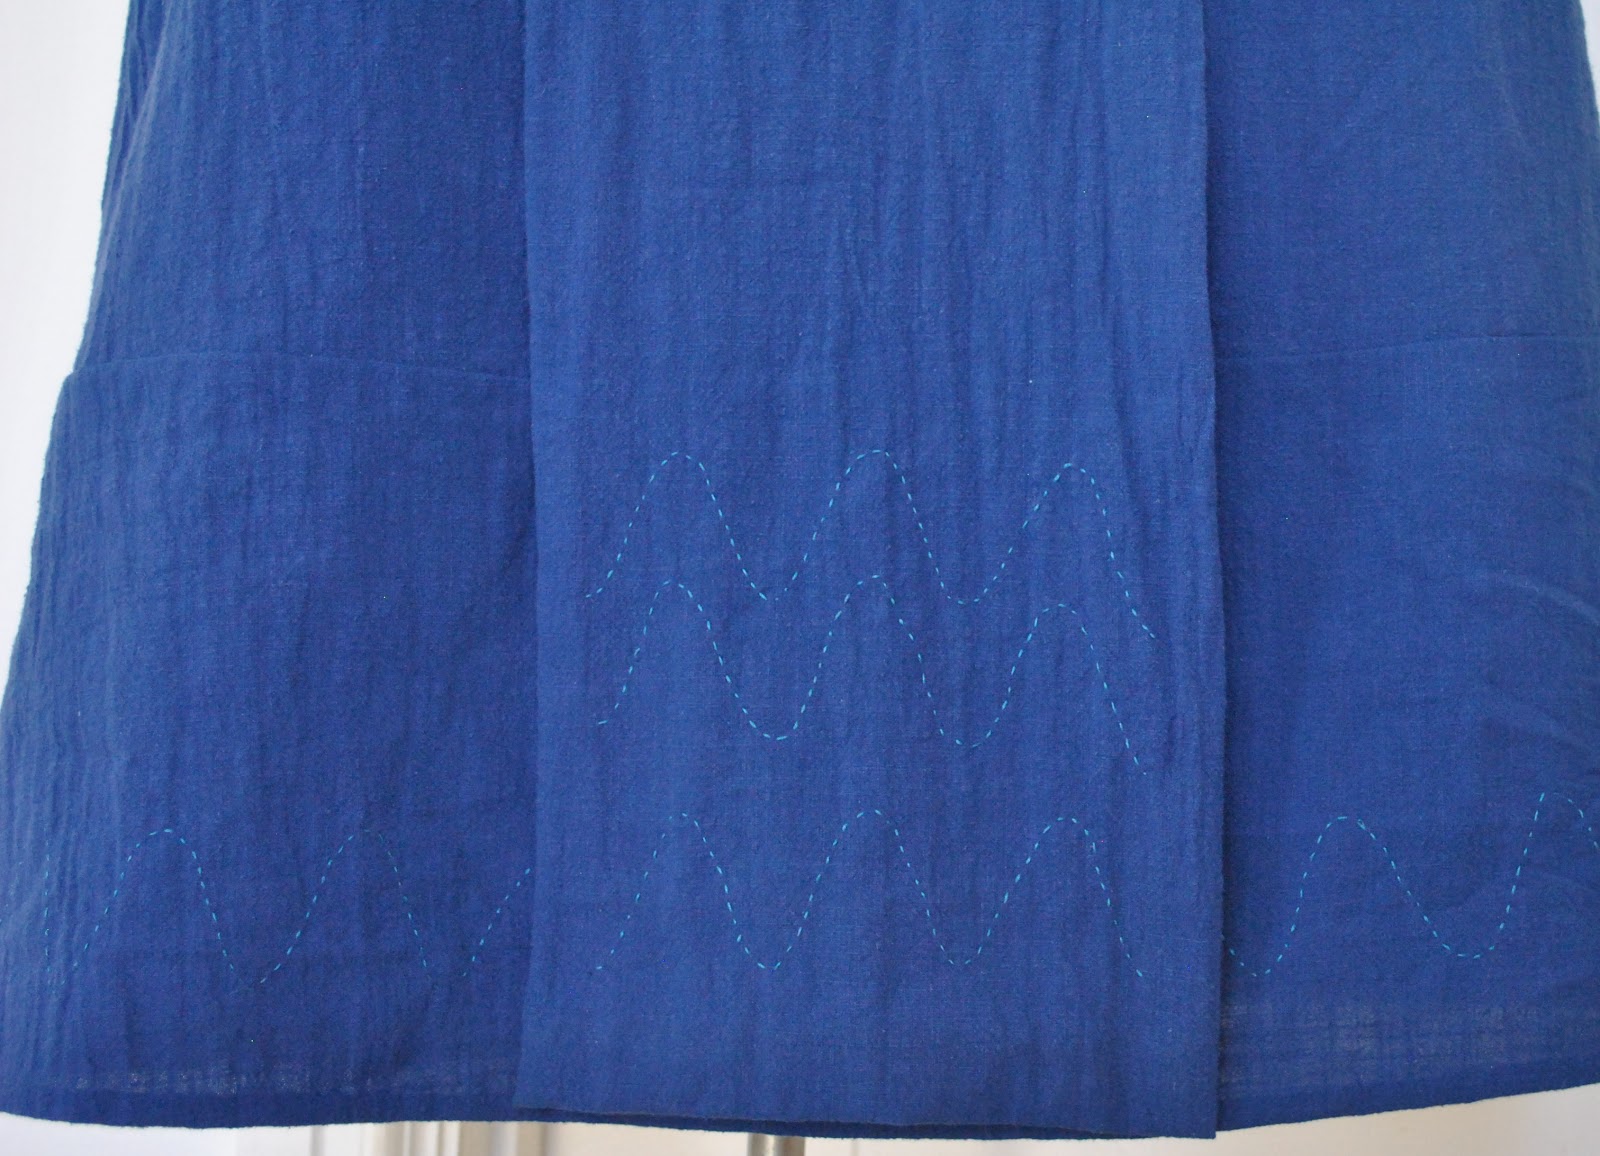
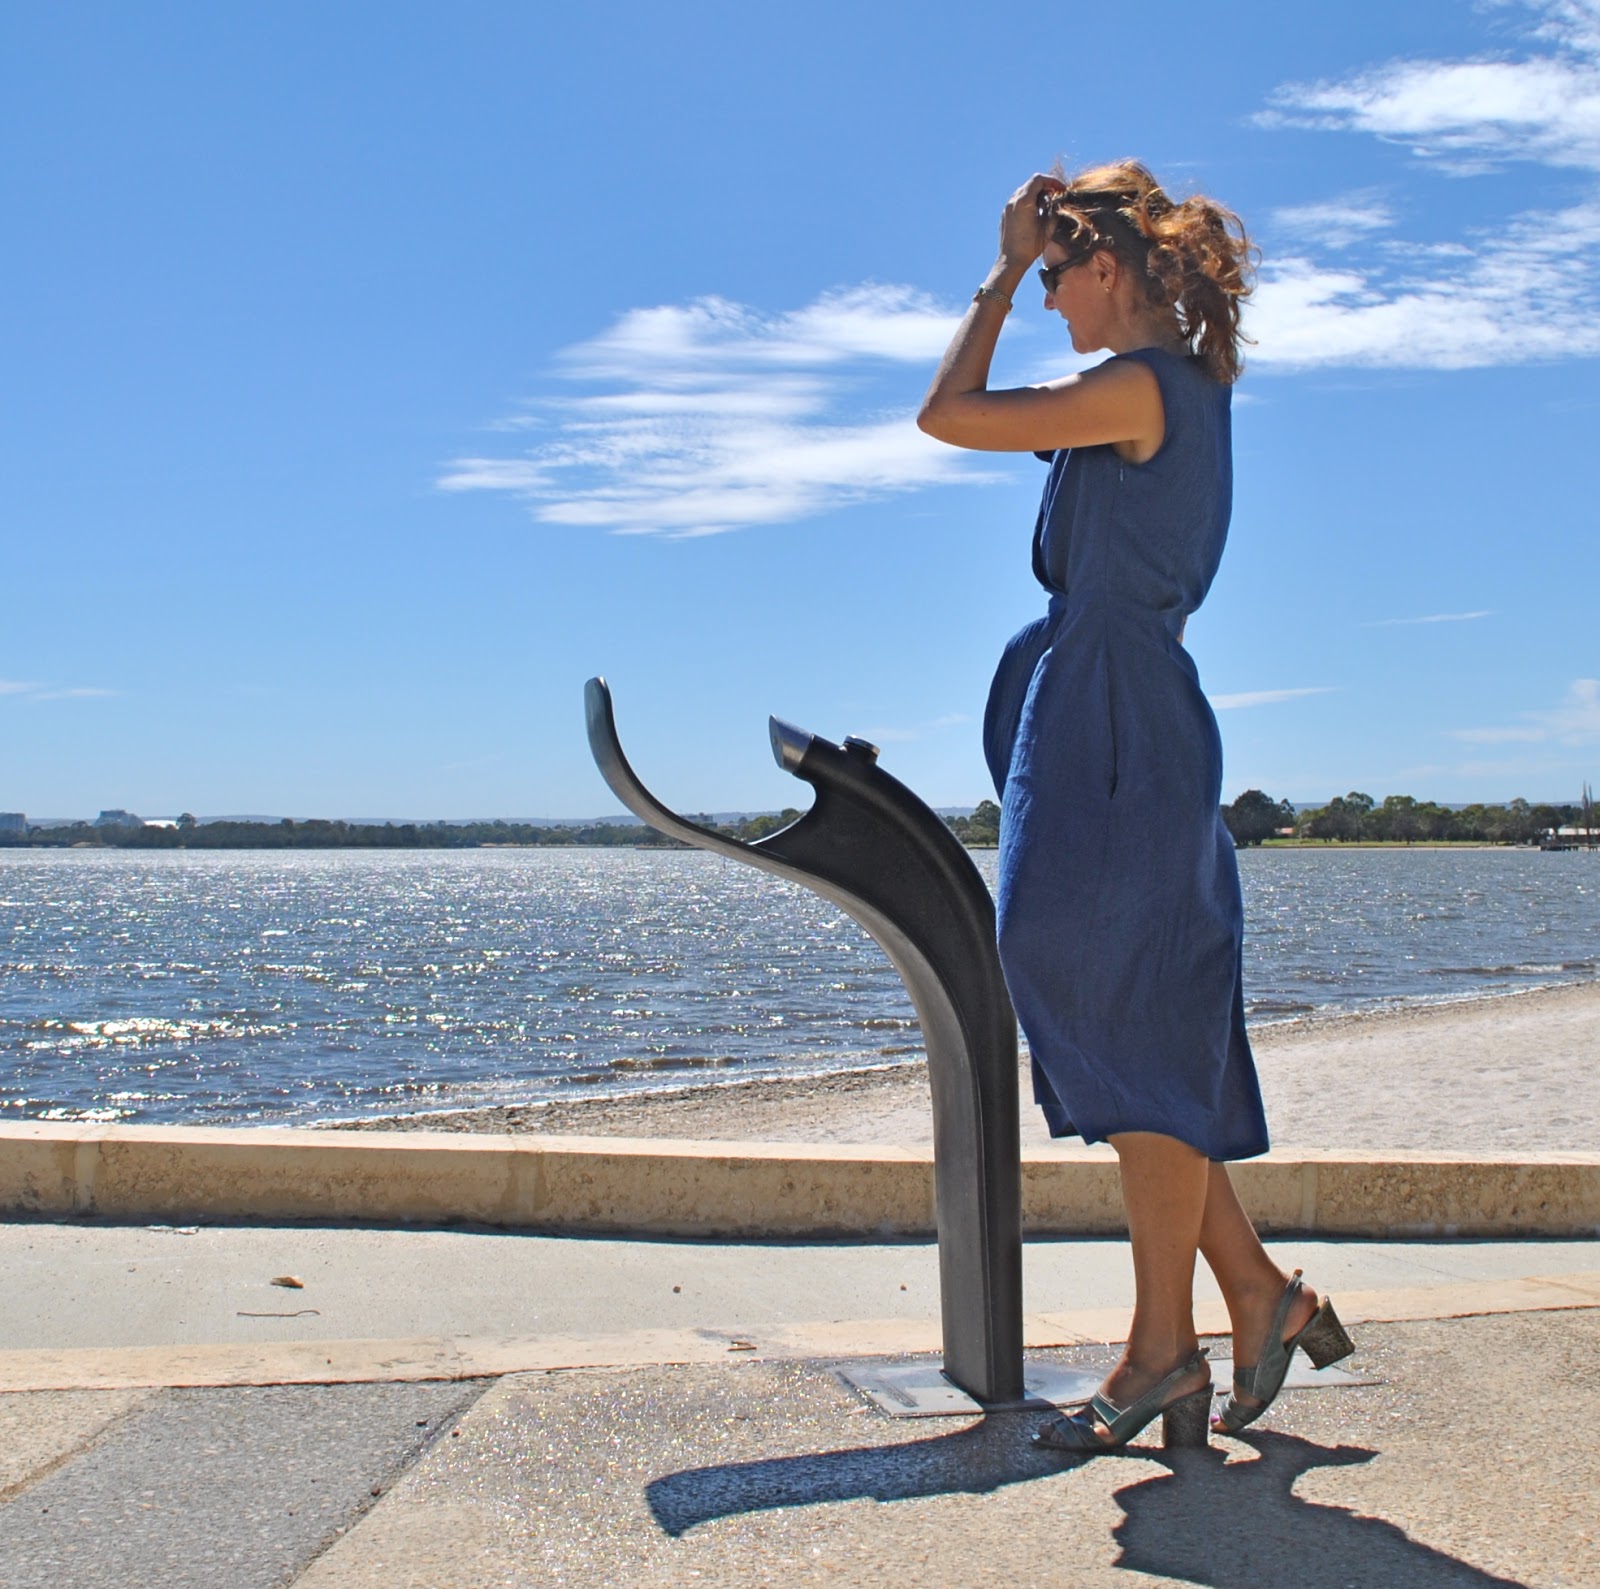
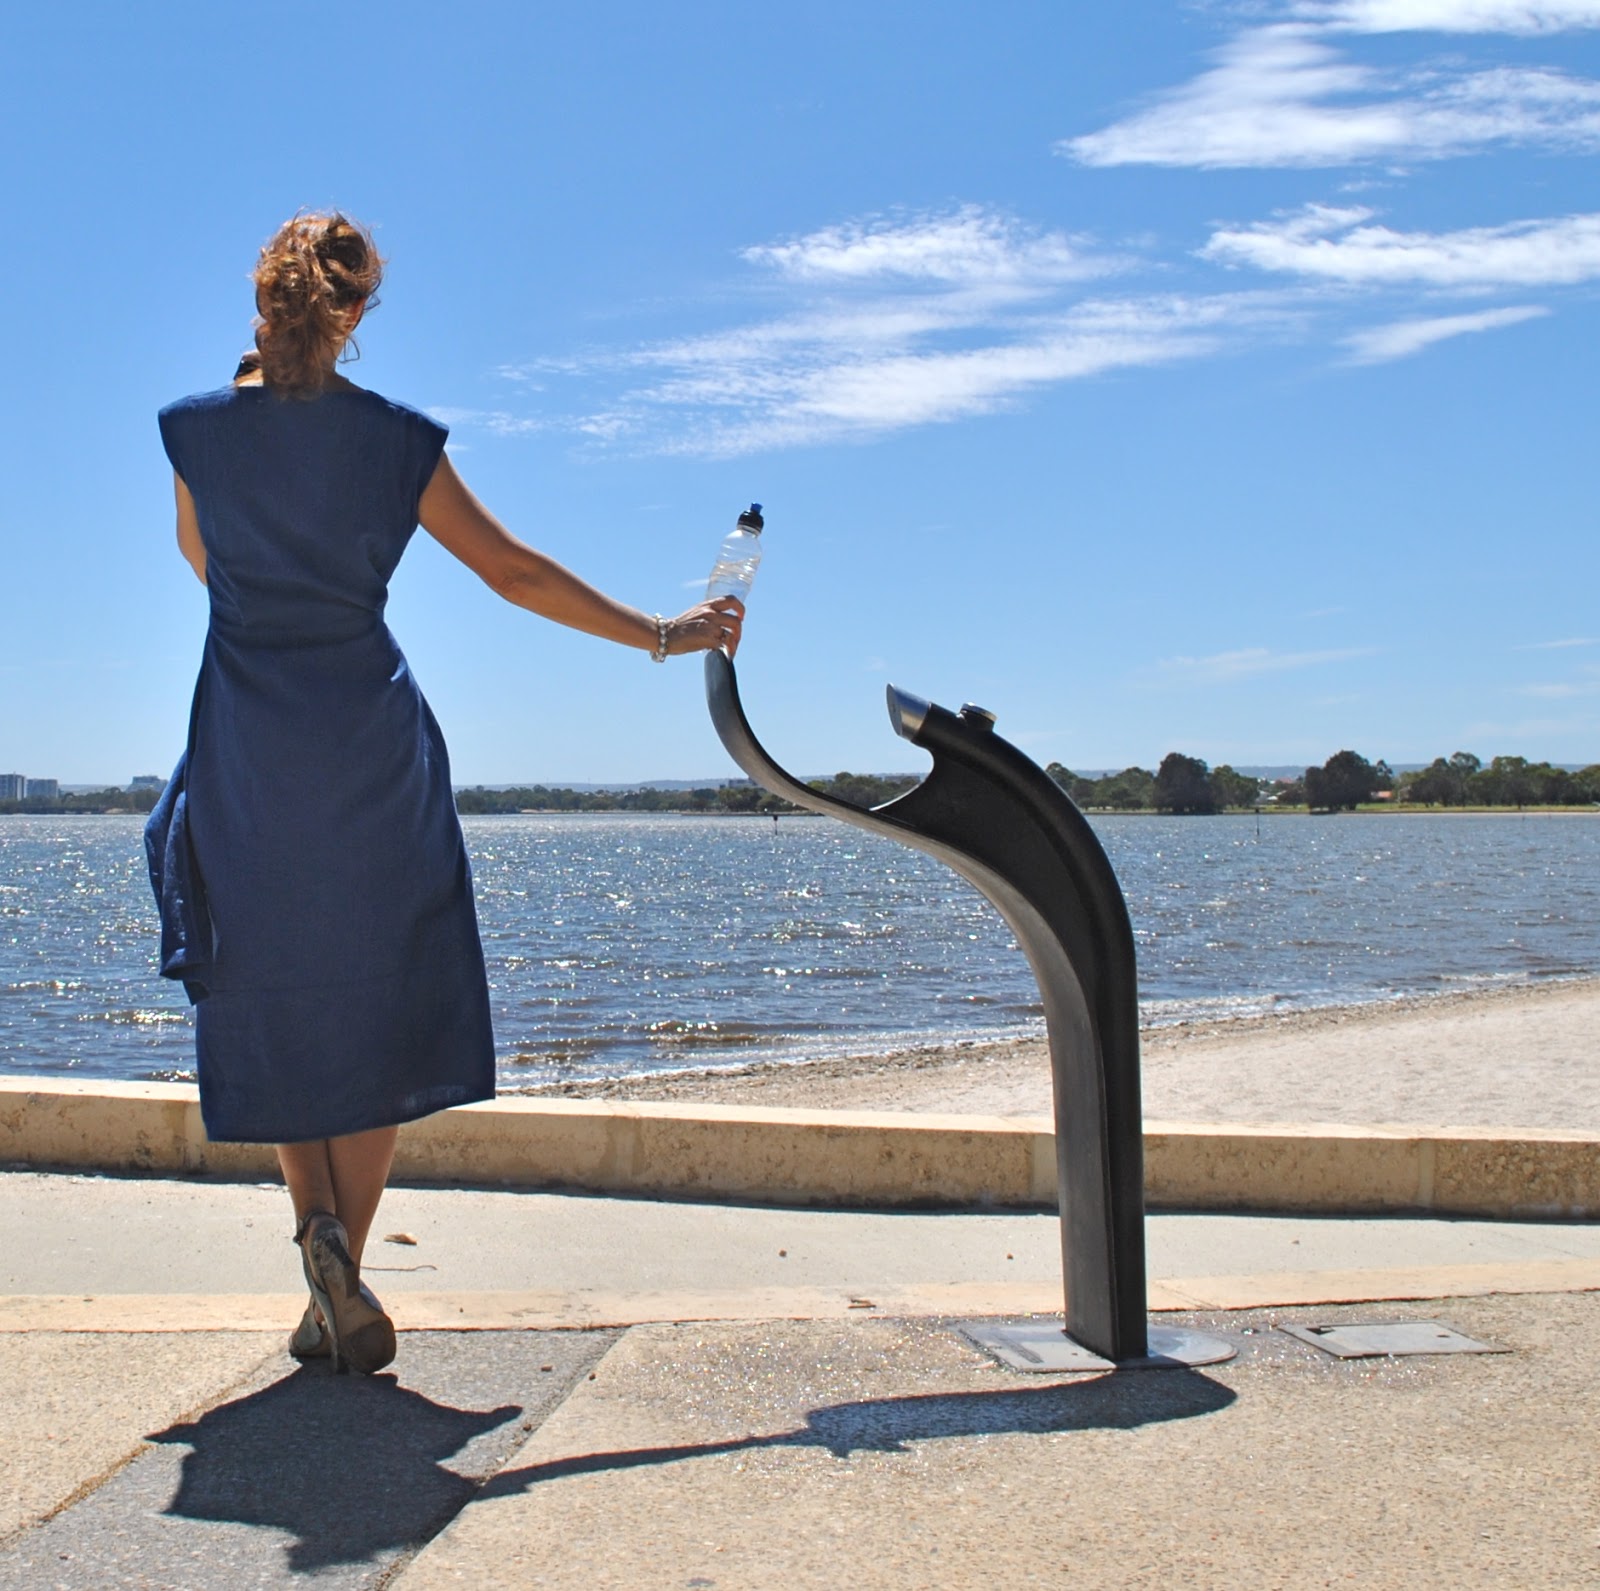
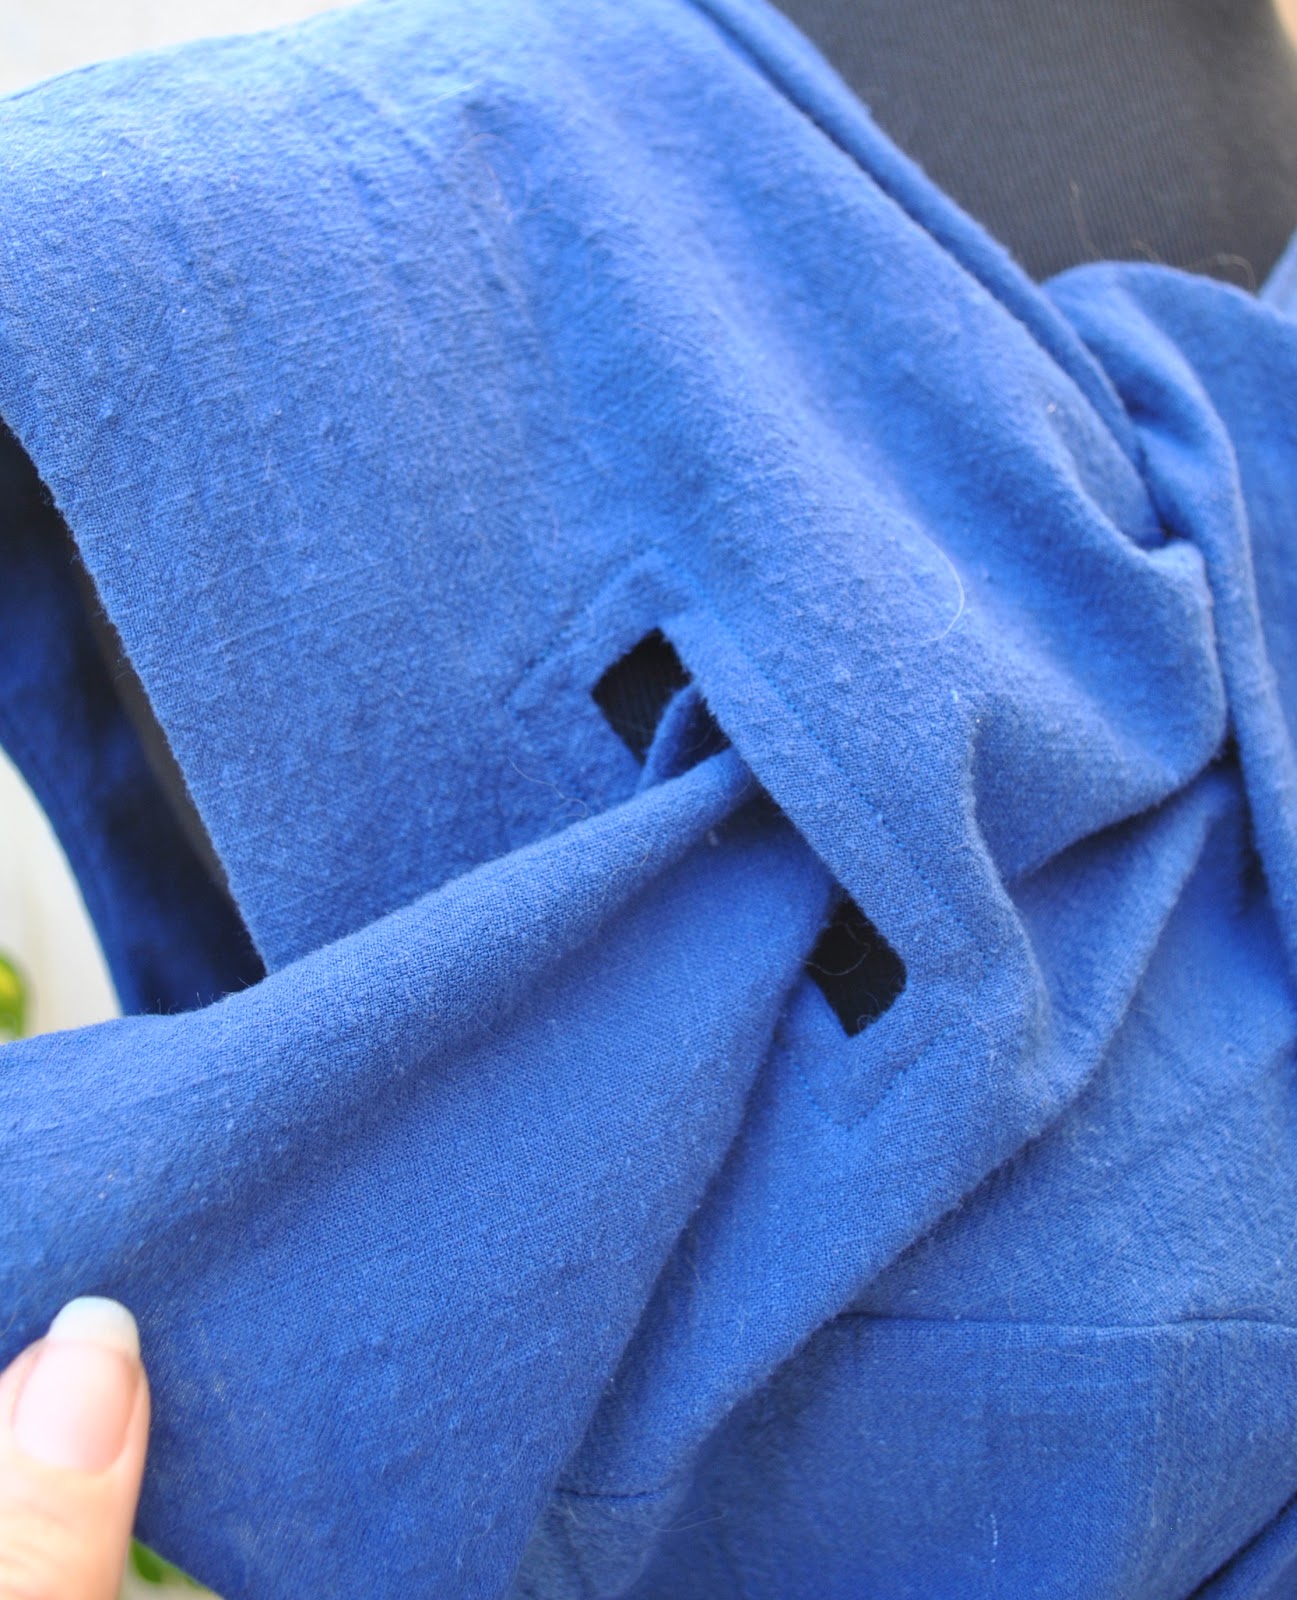
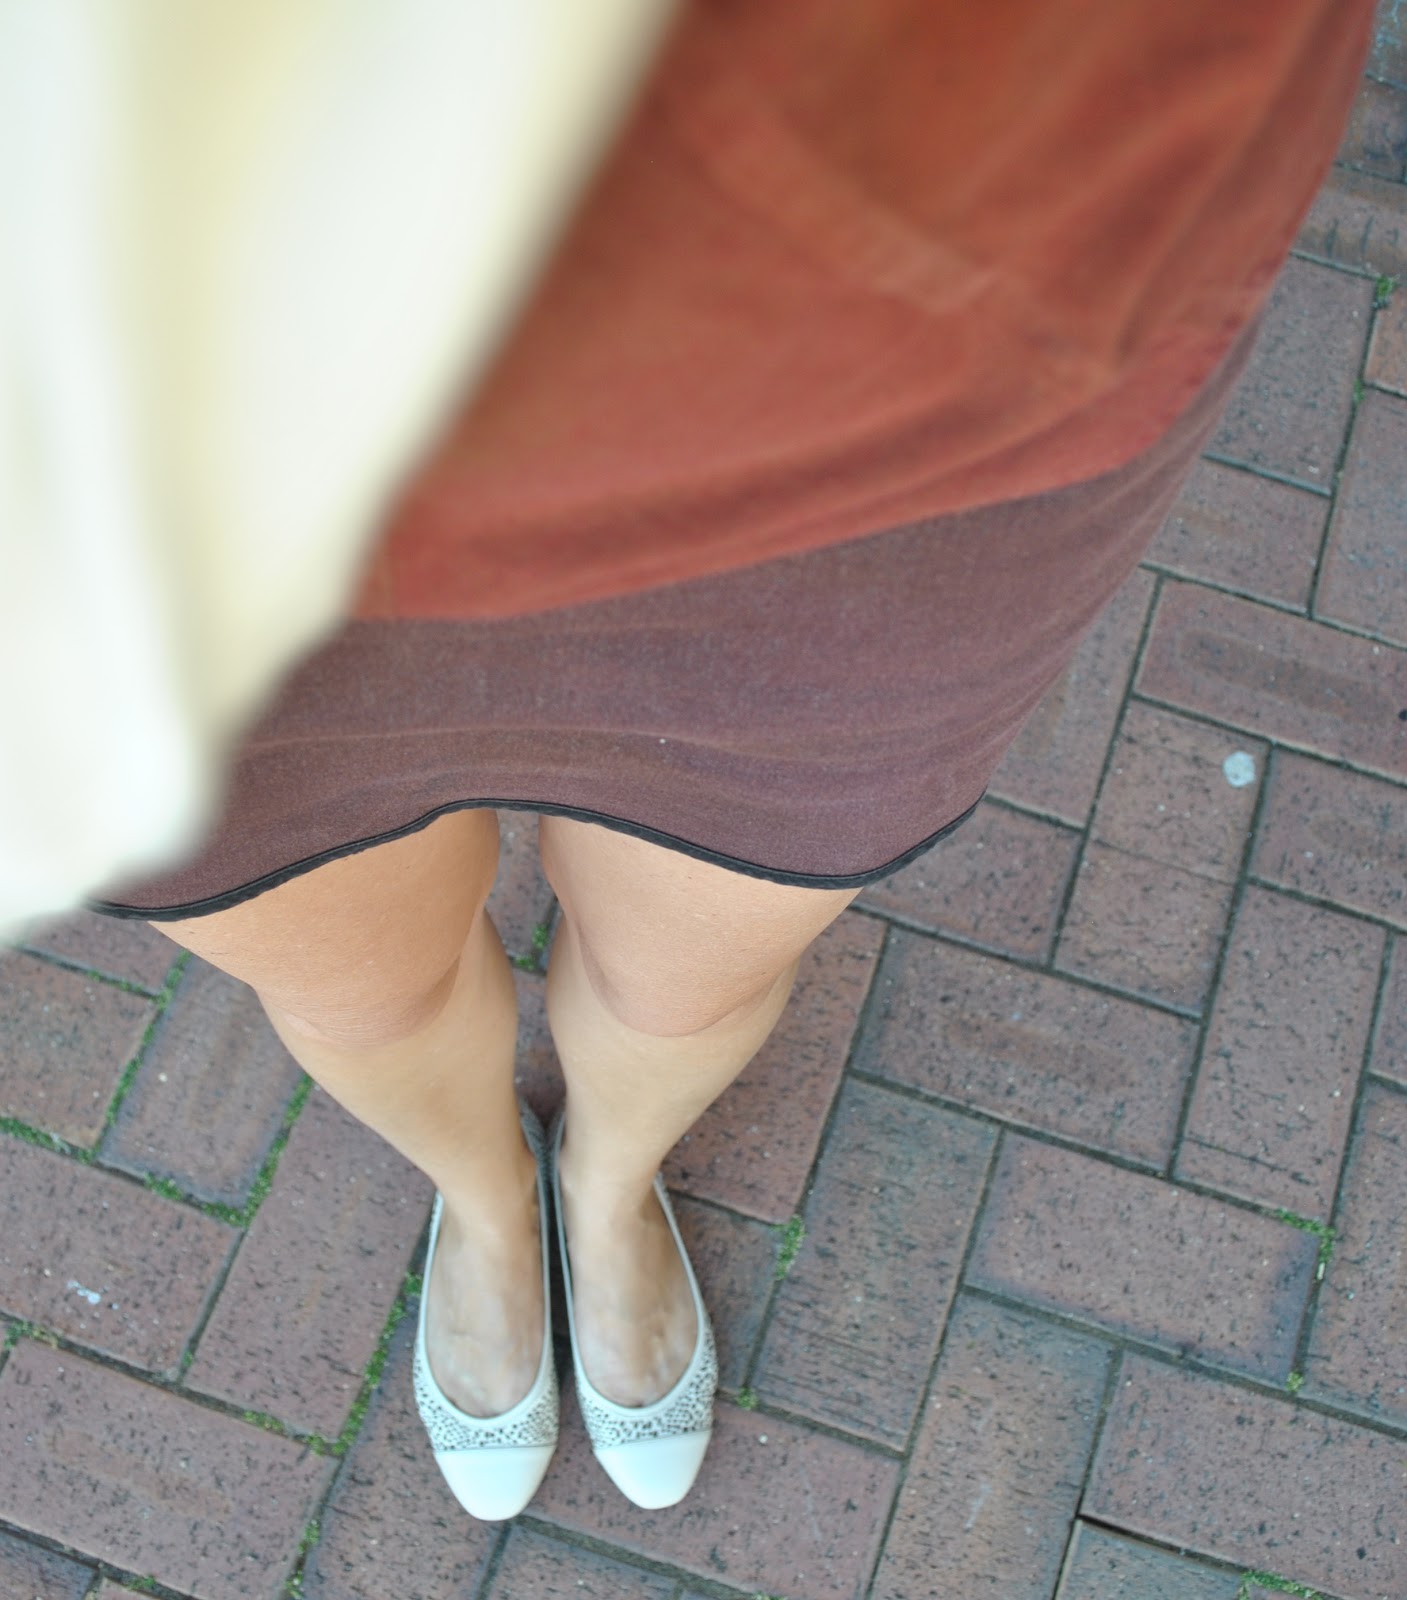
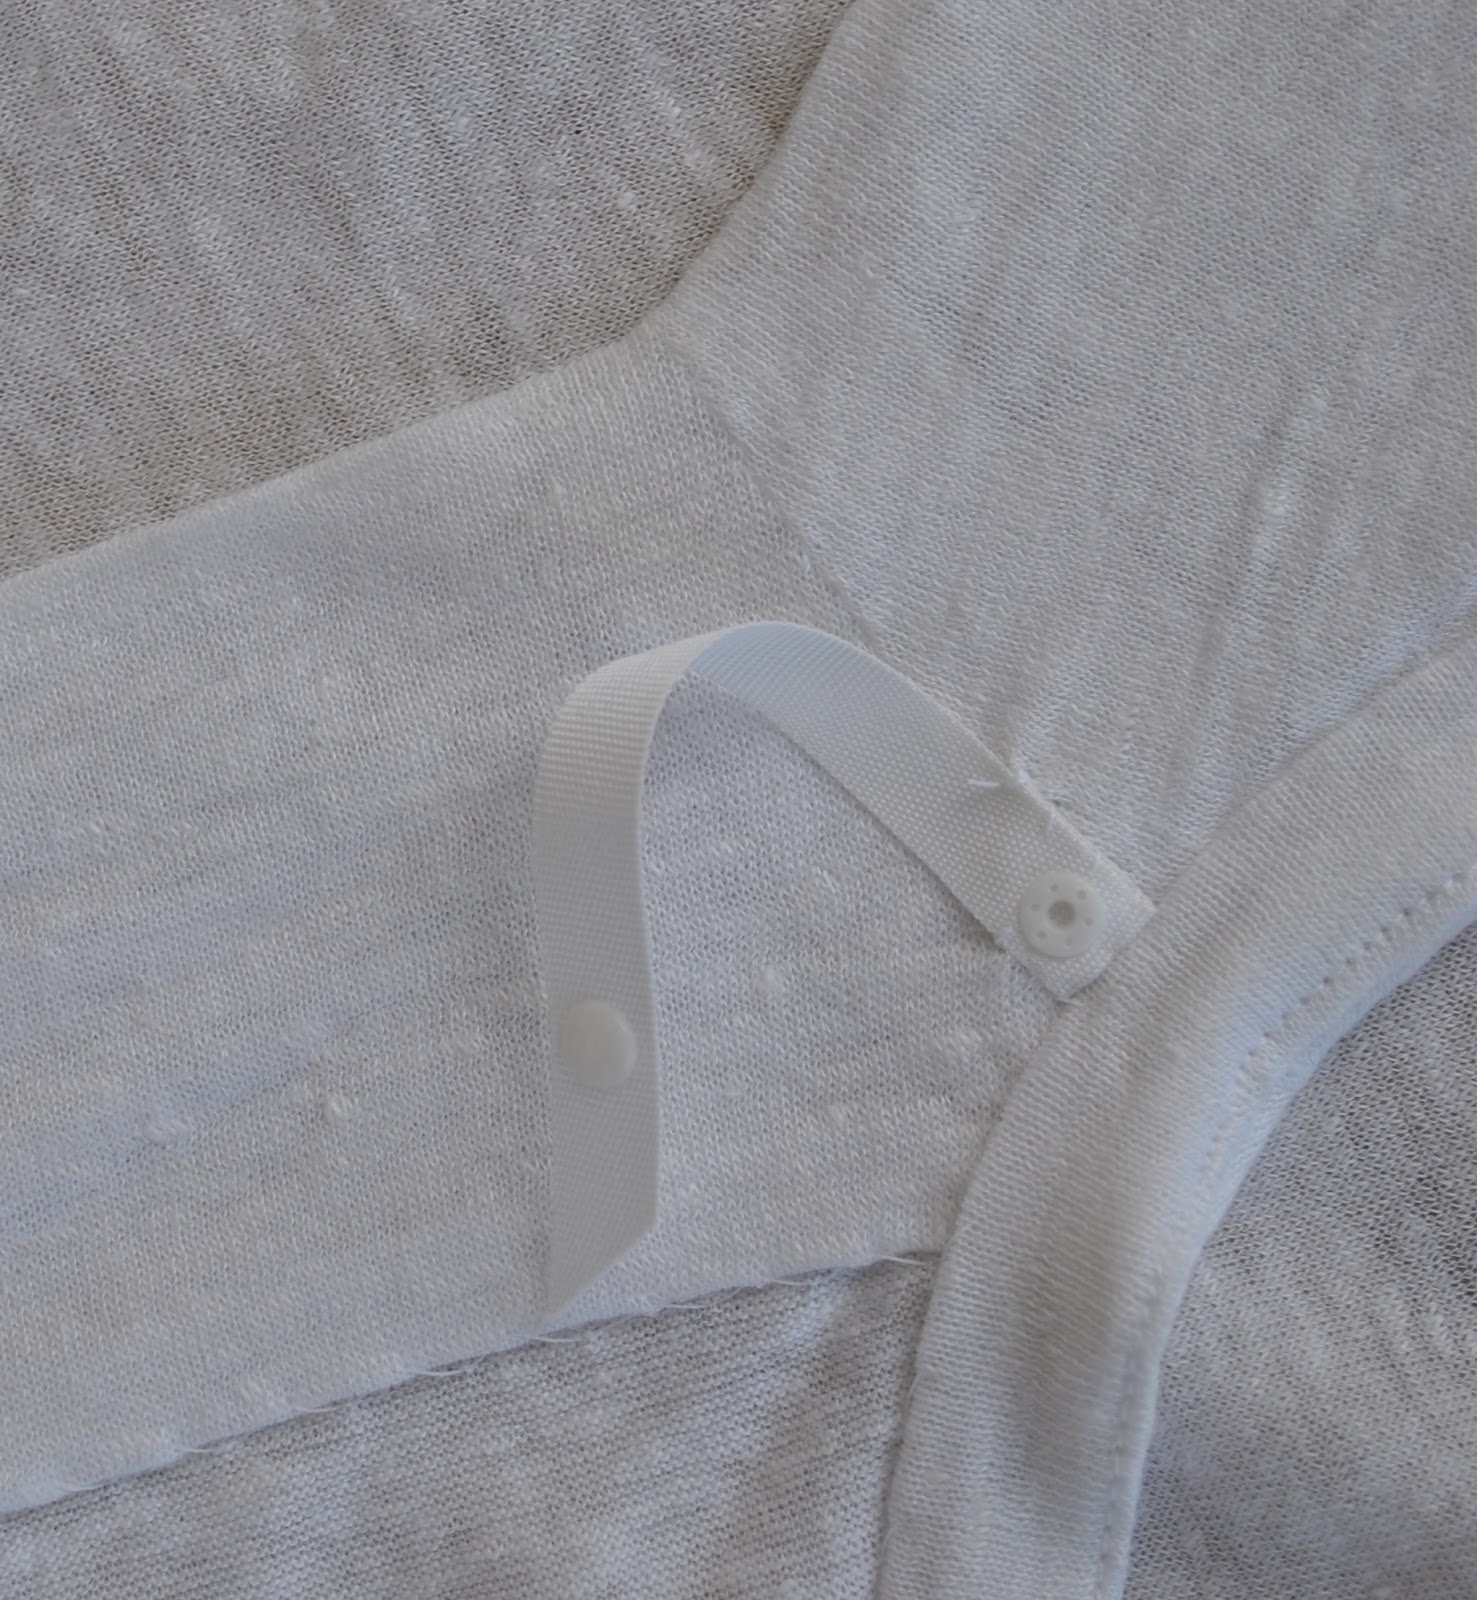
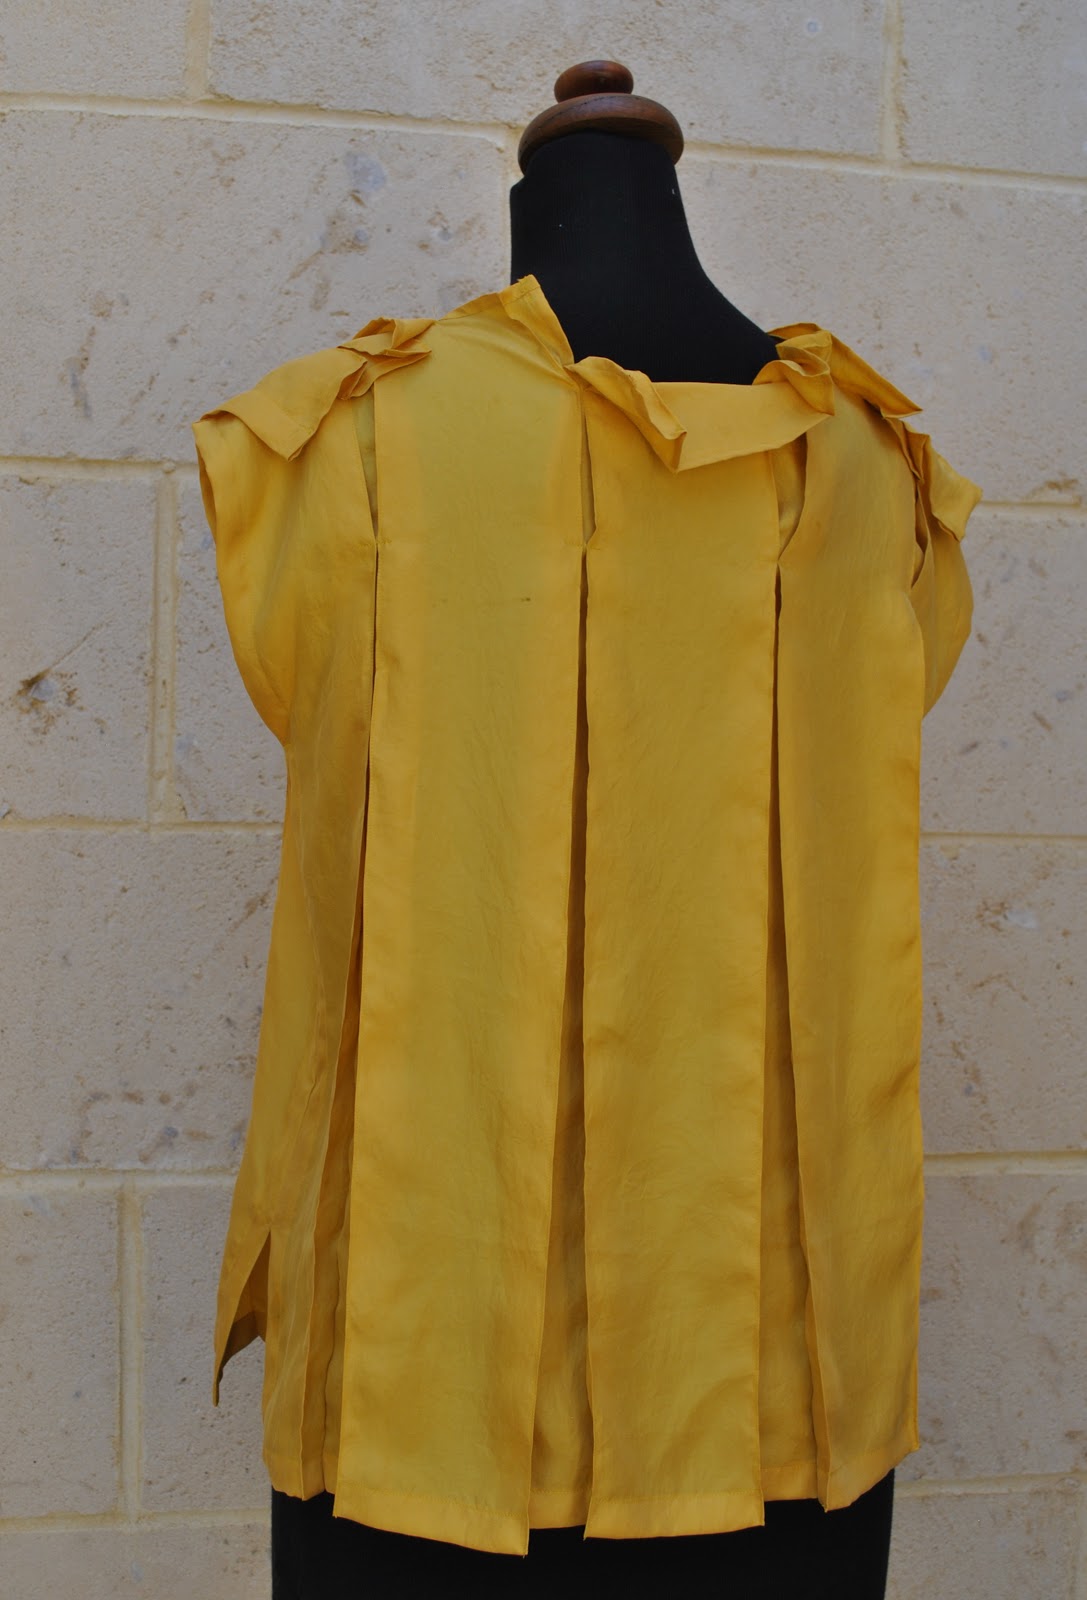
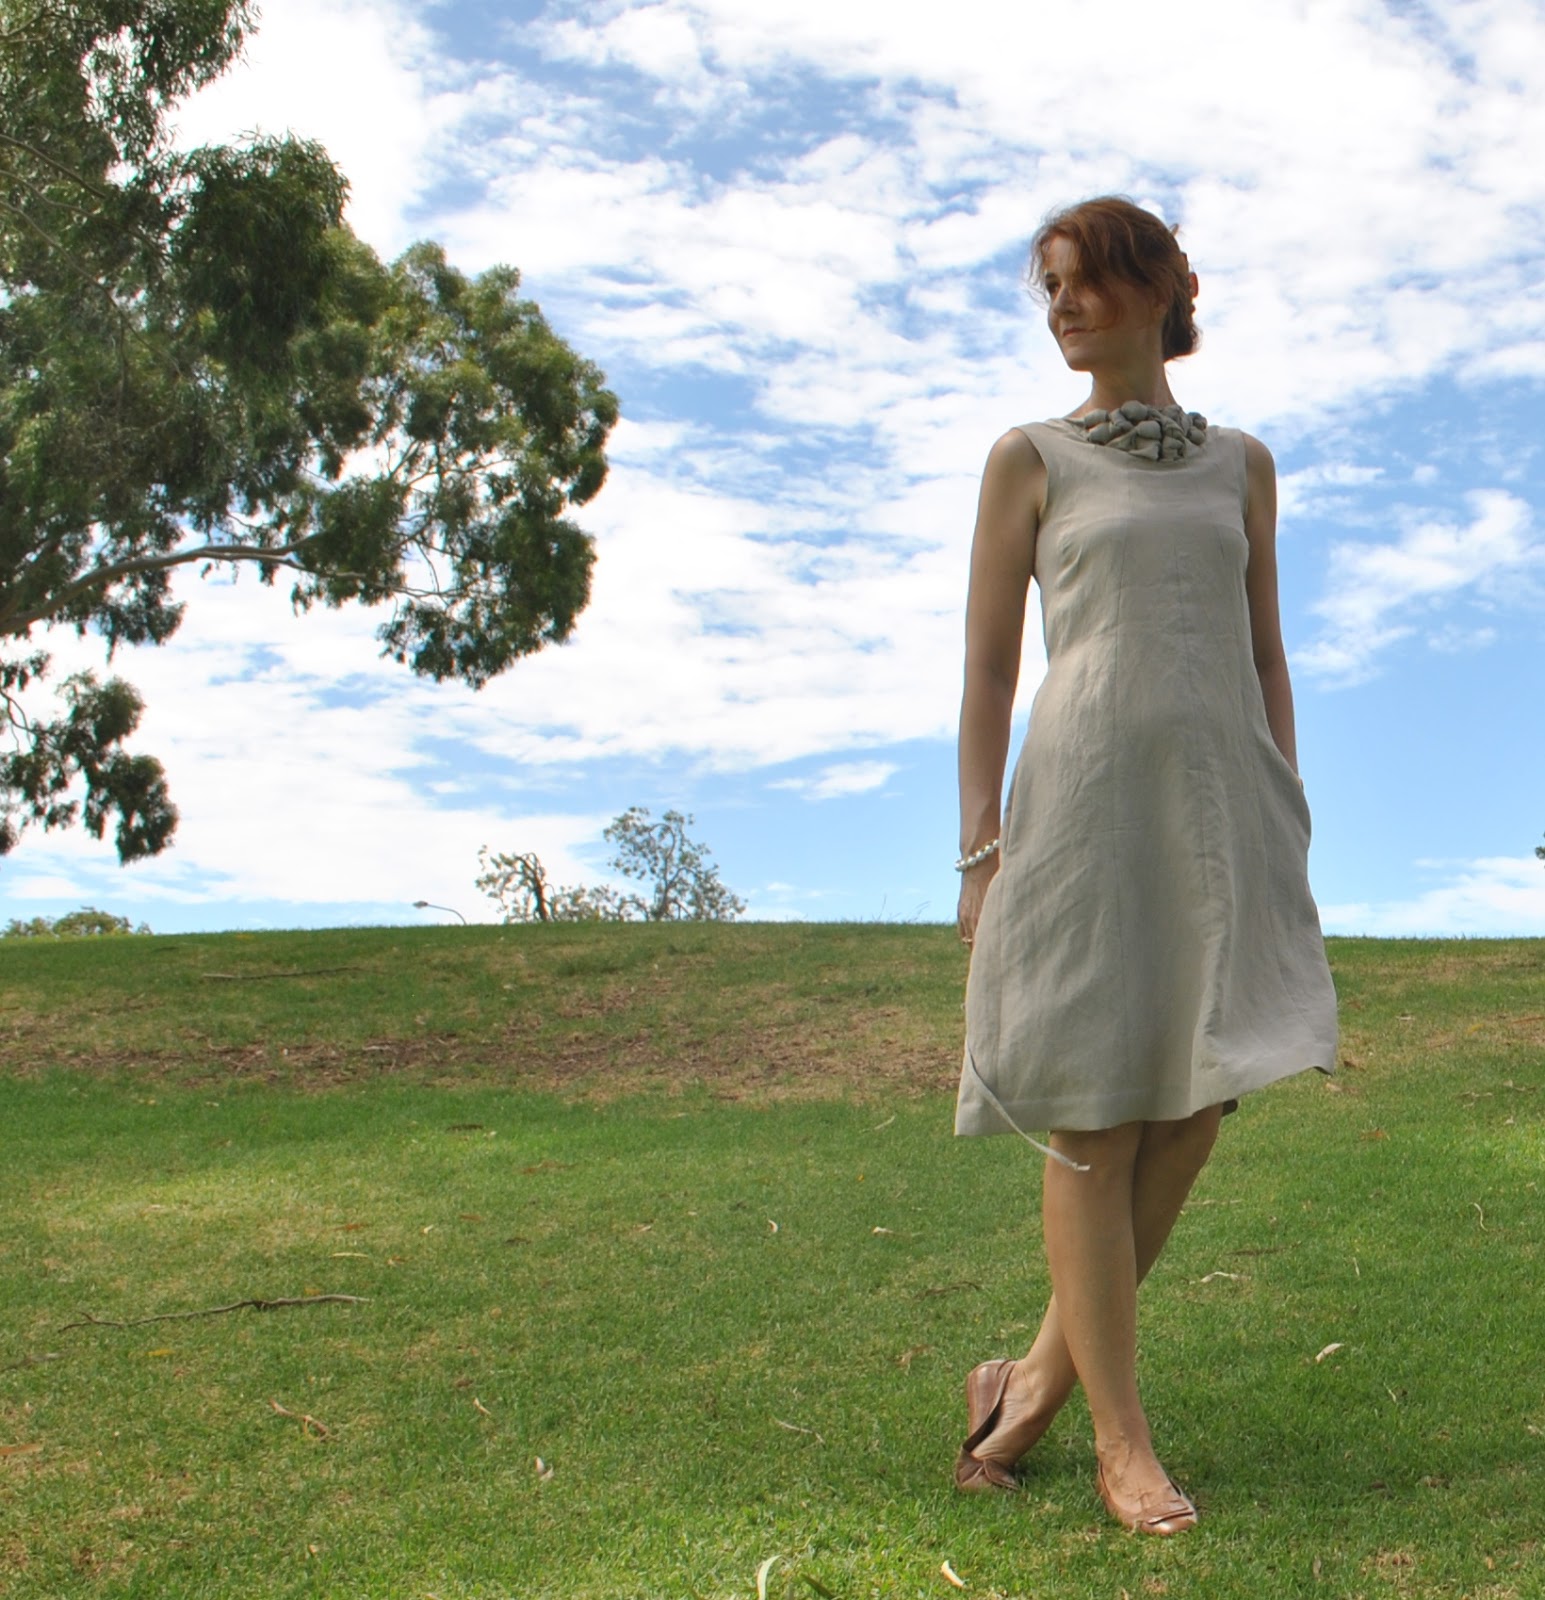
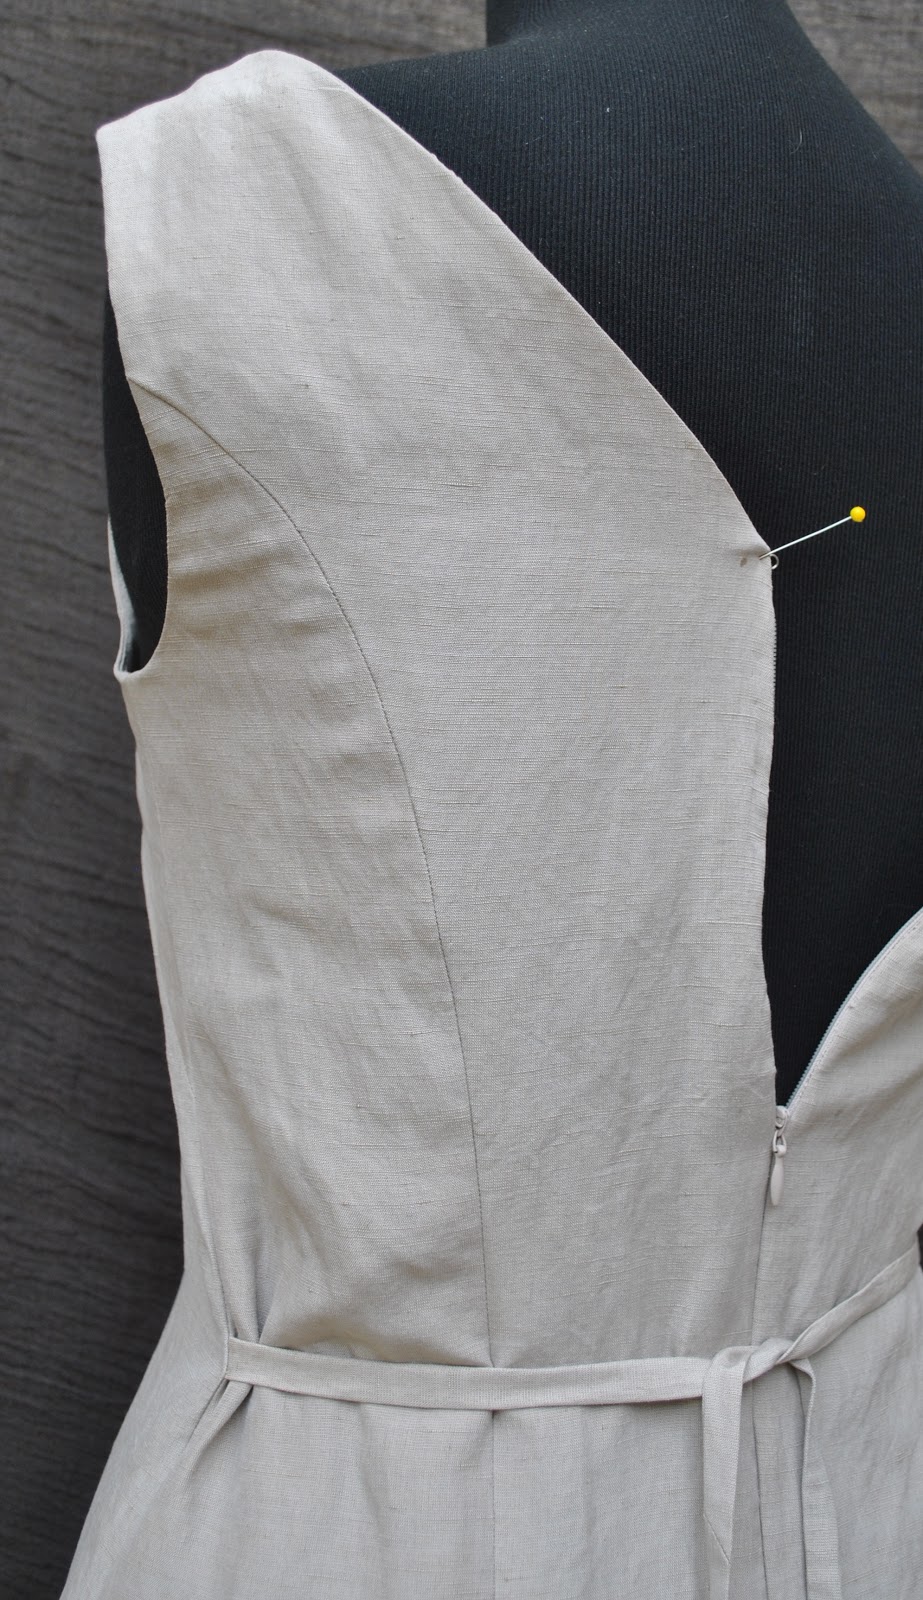
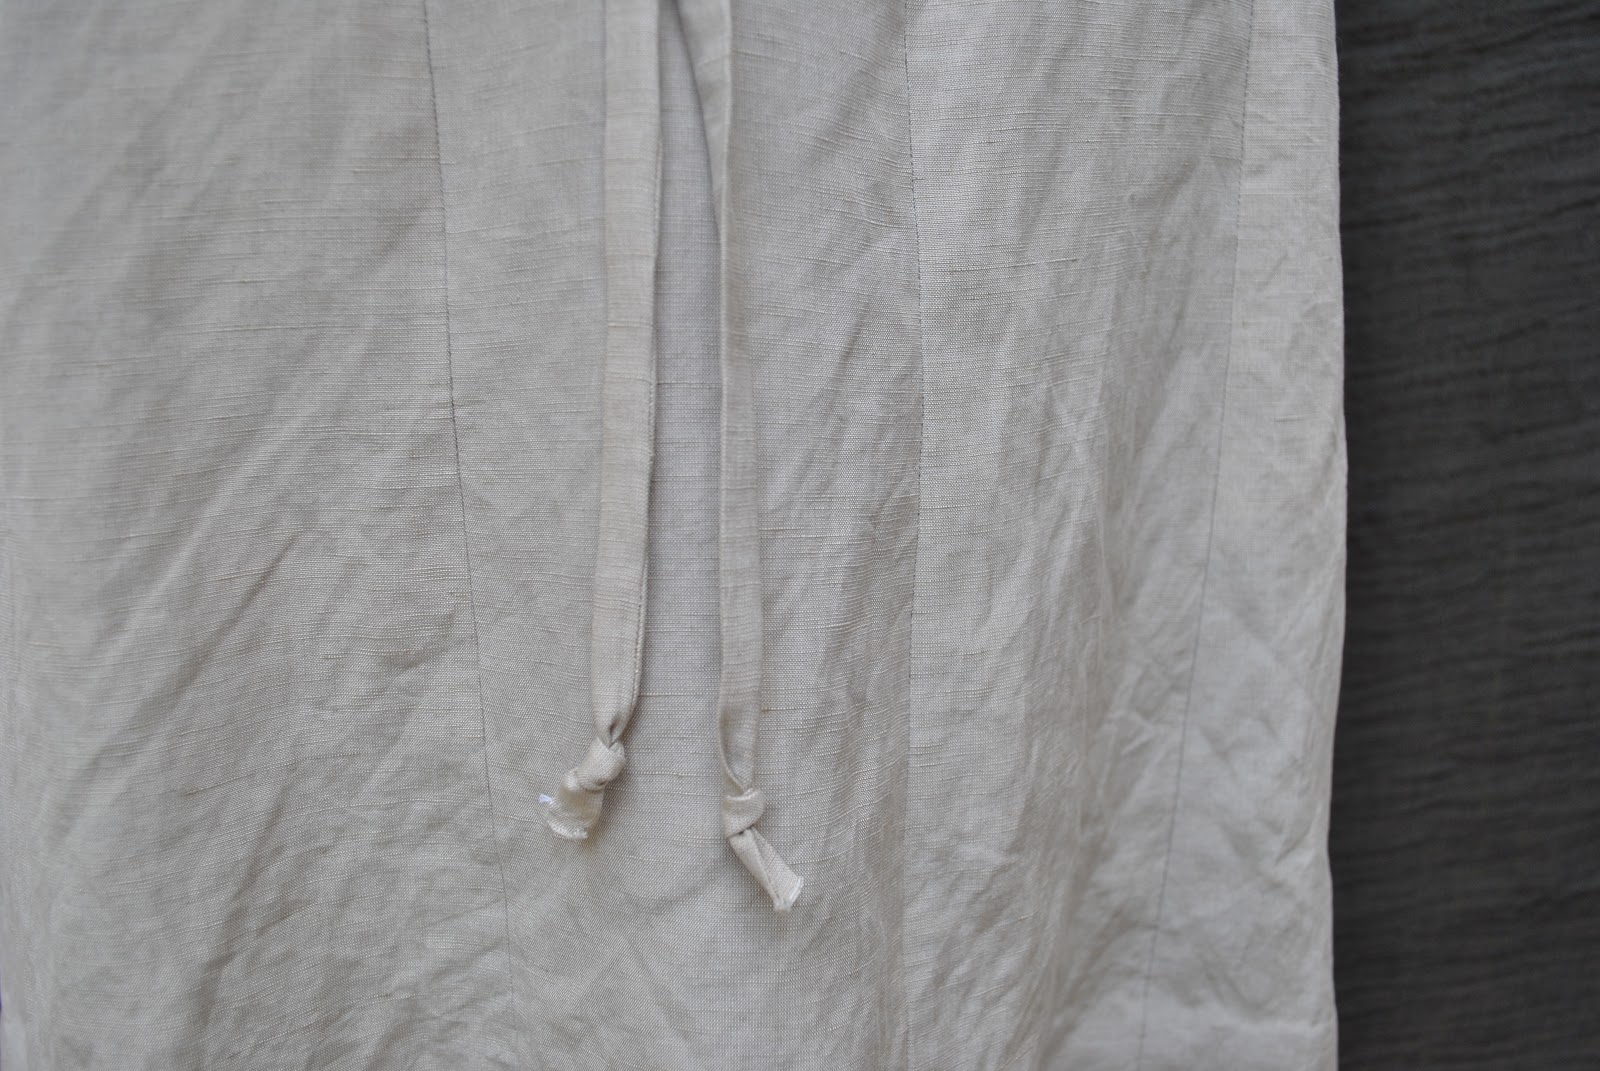
The back is four pieces; interestingly in a princess seamed arrangement.  The dress closure is by invisible zip in the centre back seam, and the back neckline is a modest V-line.  I added deep, inseam side pockets, and attached a self skinny belt in the side seams to tie at the back.  This adds a bit of shape to it, and provides some visual interest at the back, which is otherwise rather plain.  The ends of the belt are tied in little knots, a tiny design echo of those knots at the neckline at the front.

This is probably one of the top ten most difficult makes I’ve ever attempted.  Vogue Advanced/Plus Difficile?? pfff, Pattern Magic farts in your general direction!*
However I am, in inverse proportion to the degree of difficulty involved; stupidly pleased with it.  I think maybe I am a sewing room masochist, deriving a perverse enjoyment from the torture of difficult dressmaking challenges.  What a weirdo, huh?  But I’m thinking of something easy next.

Monty Python of course!

Details:
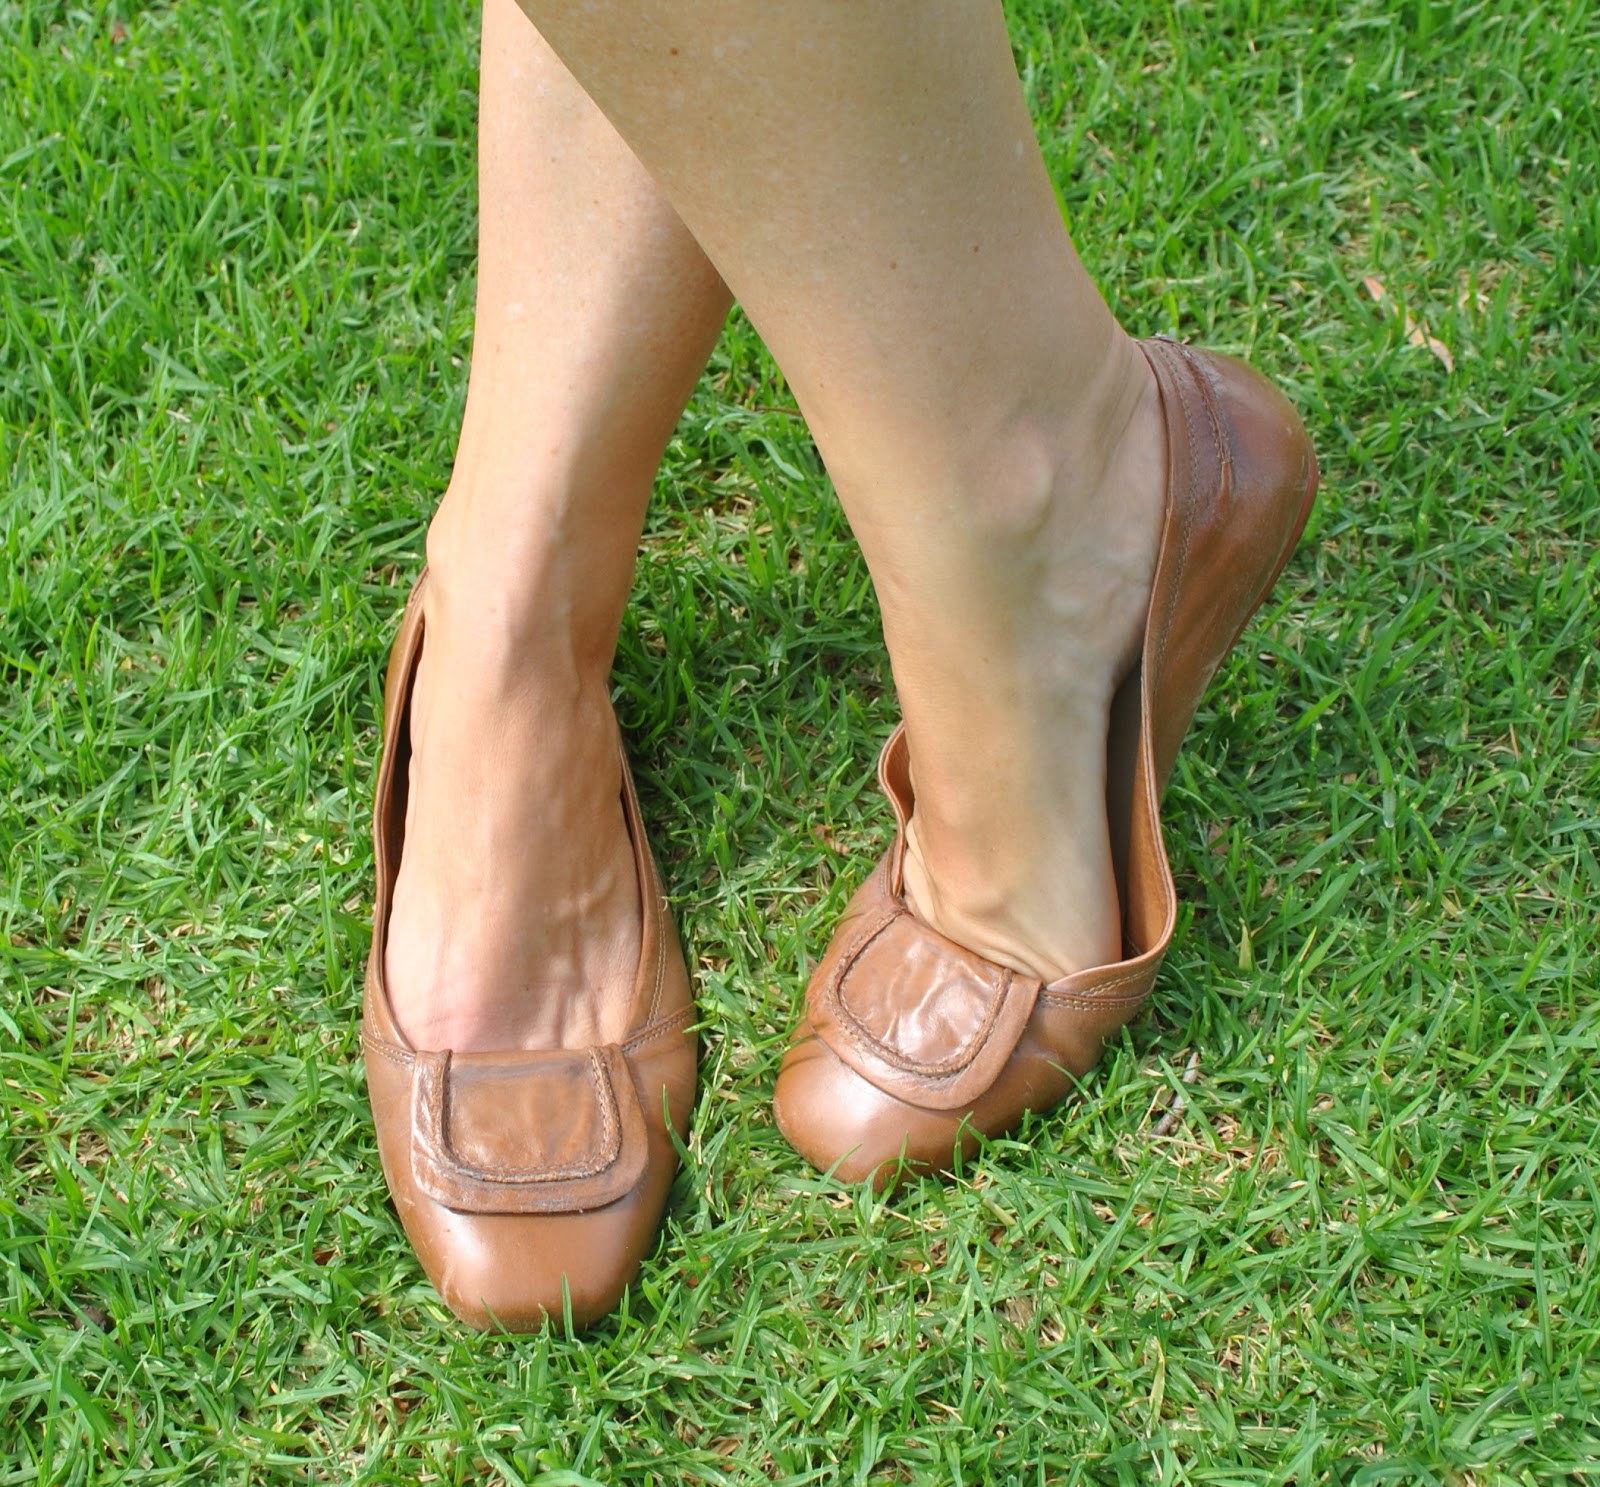
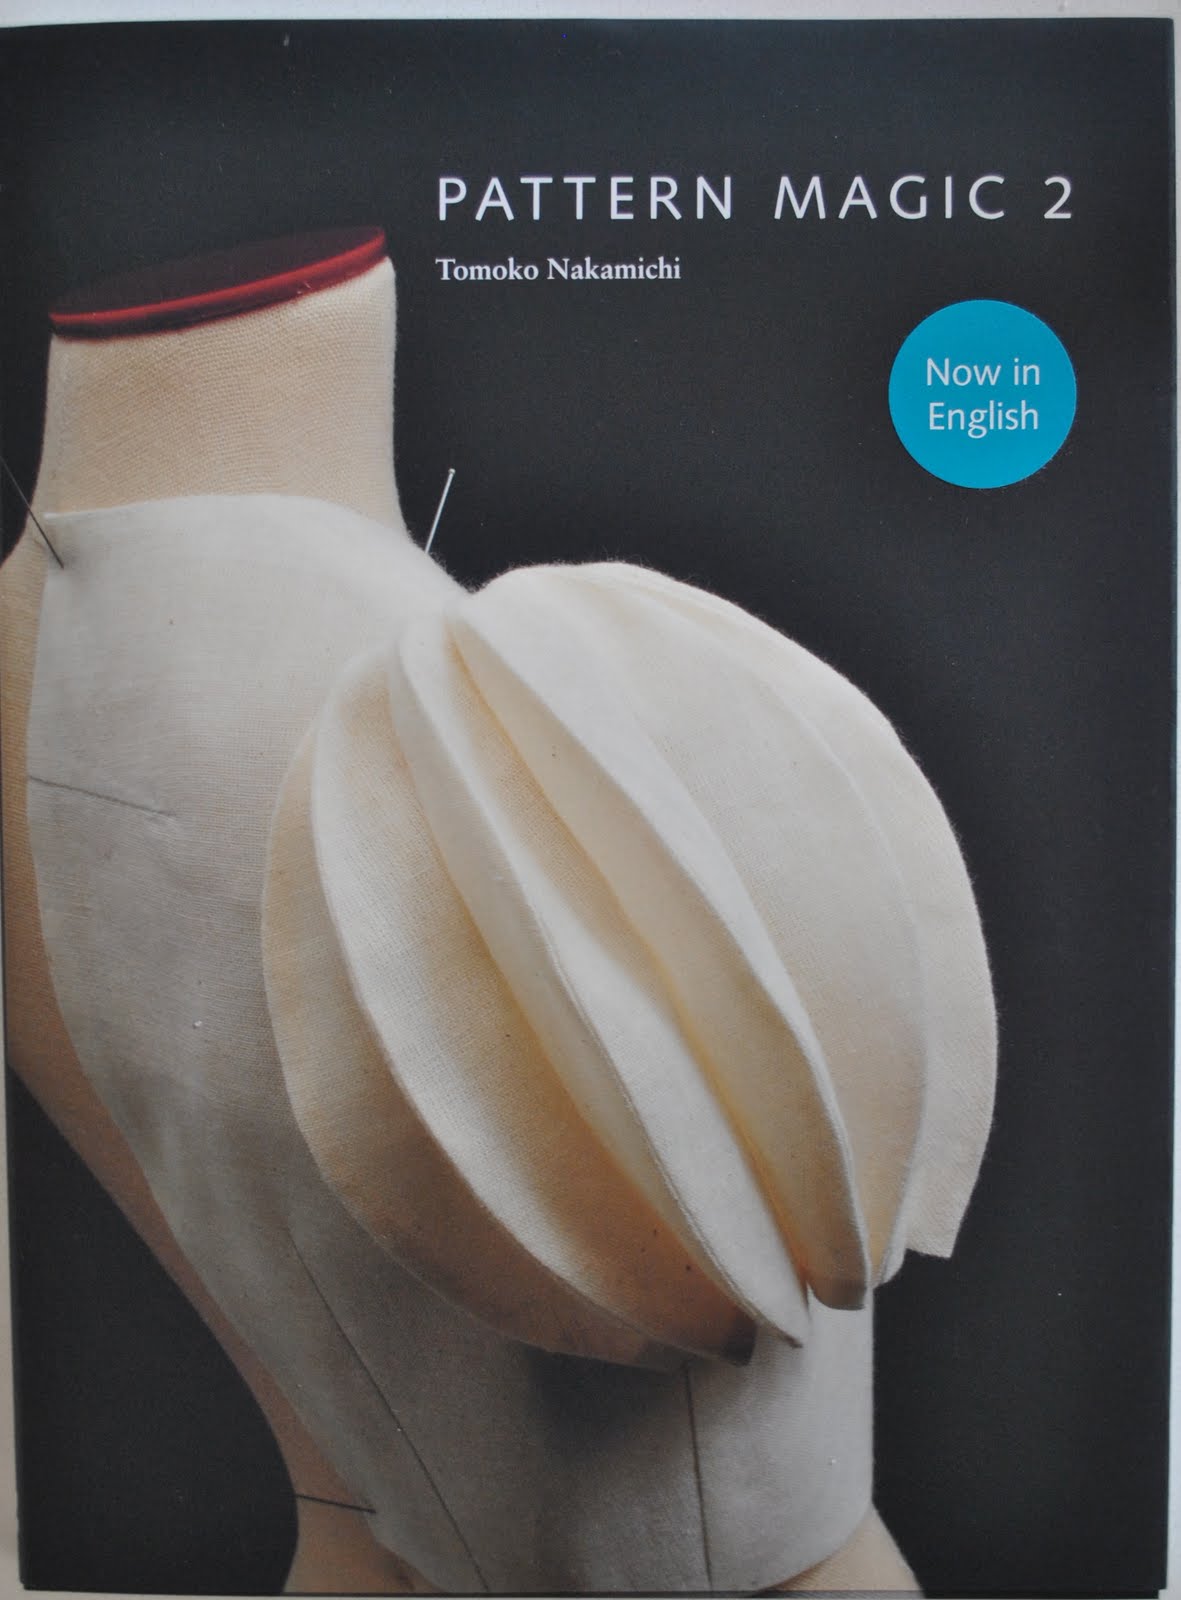
Dress; adapted from the design on p53 of Pattern Magic 2 by Tomoko Nakamichi, light brown silk/linen
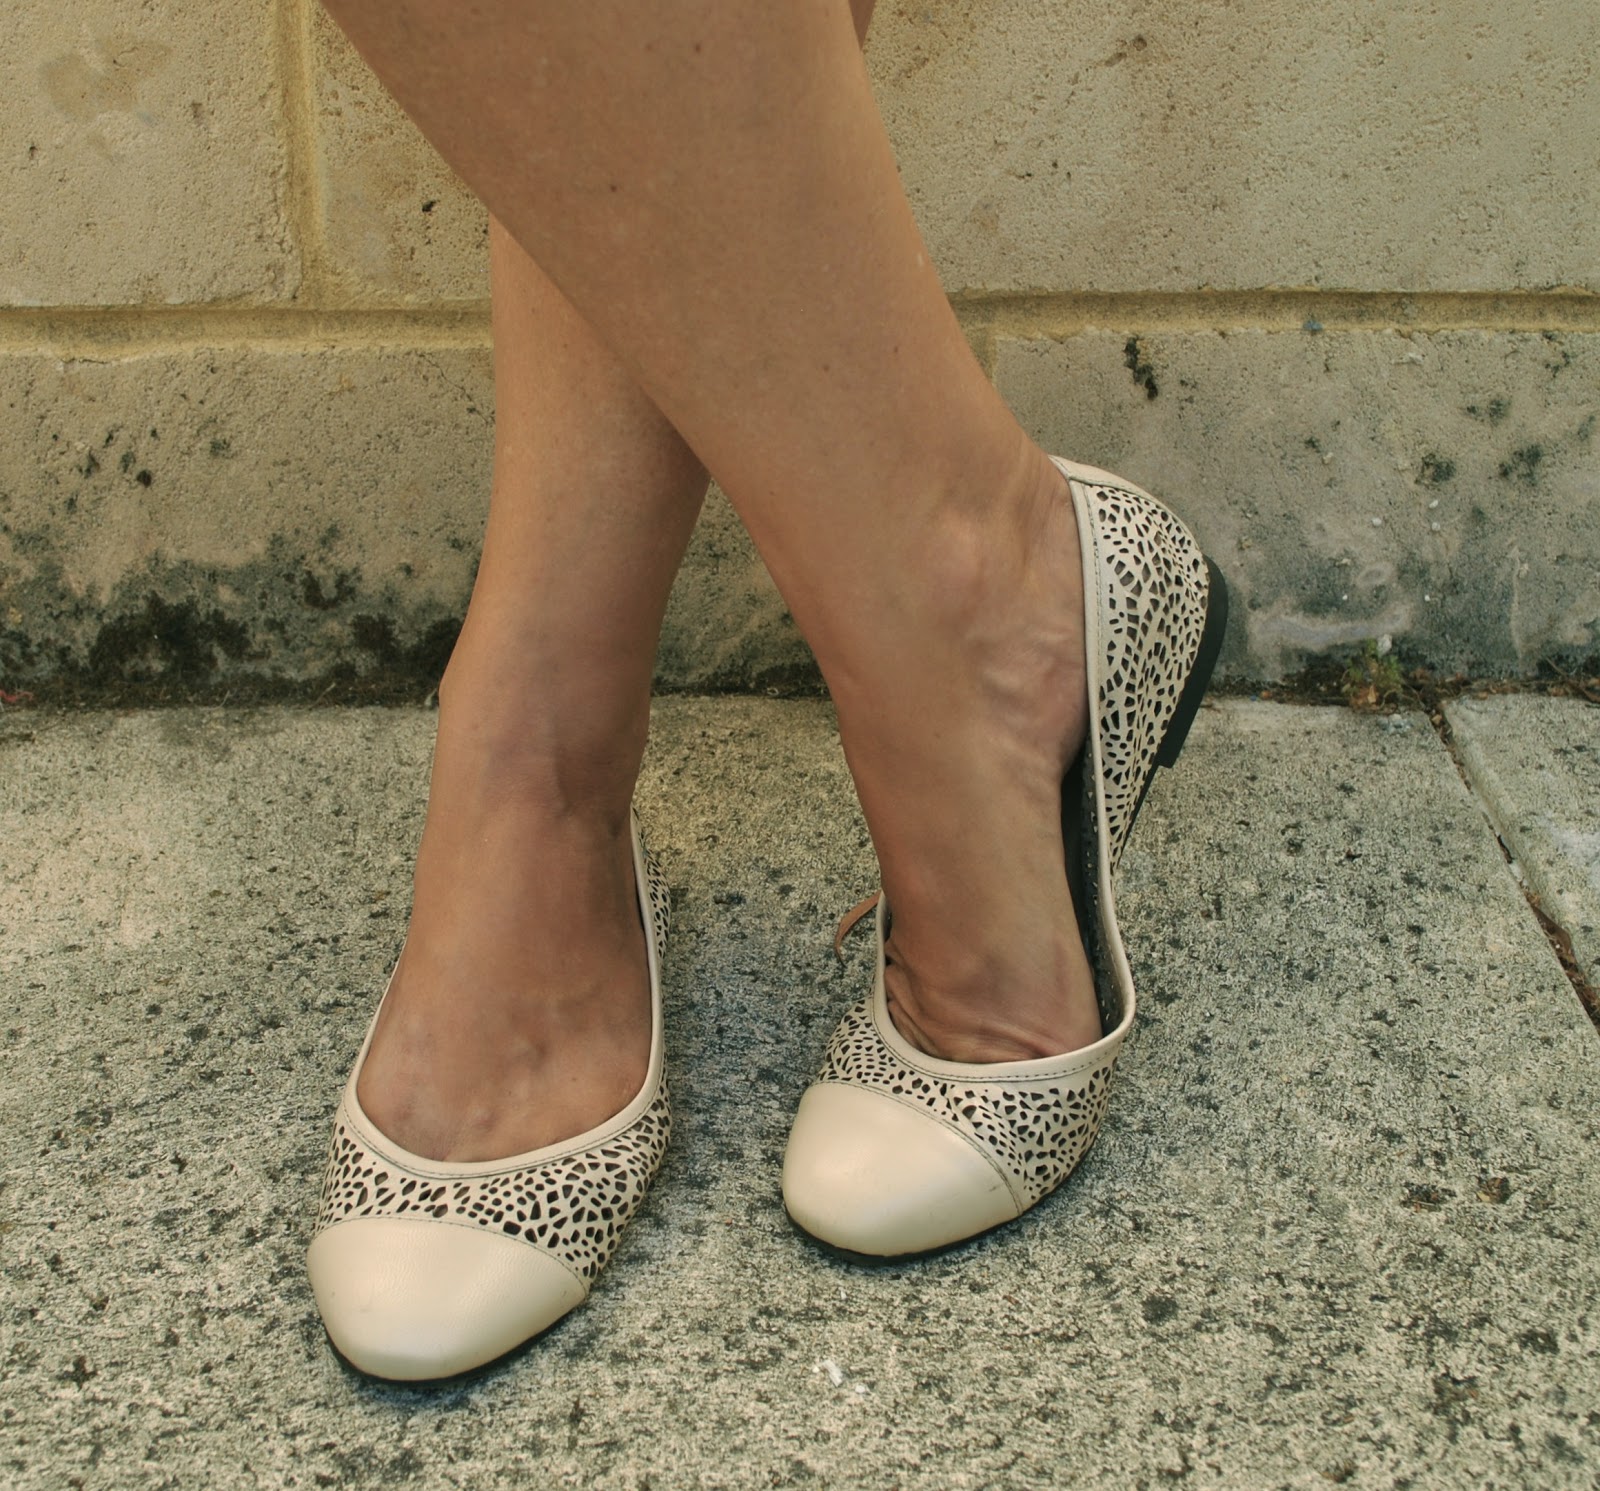
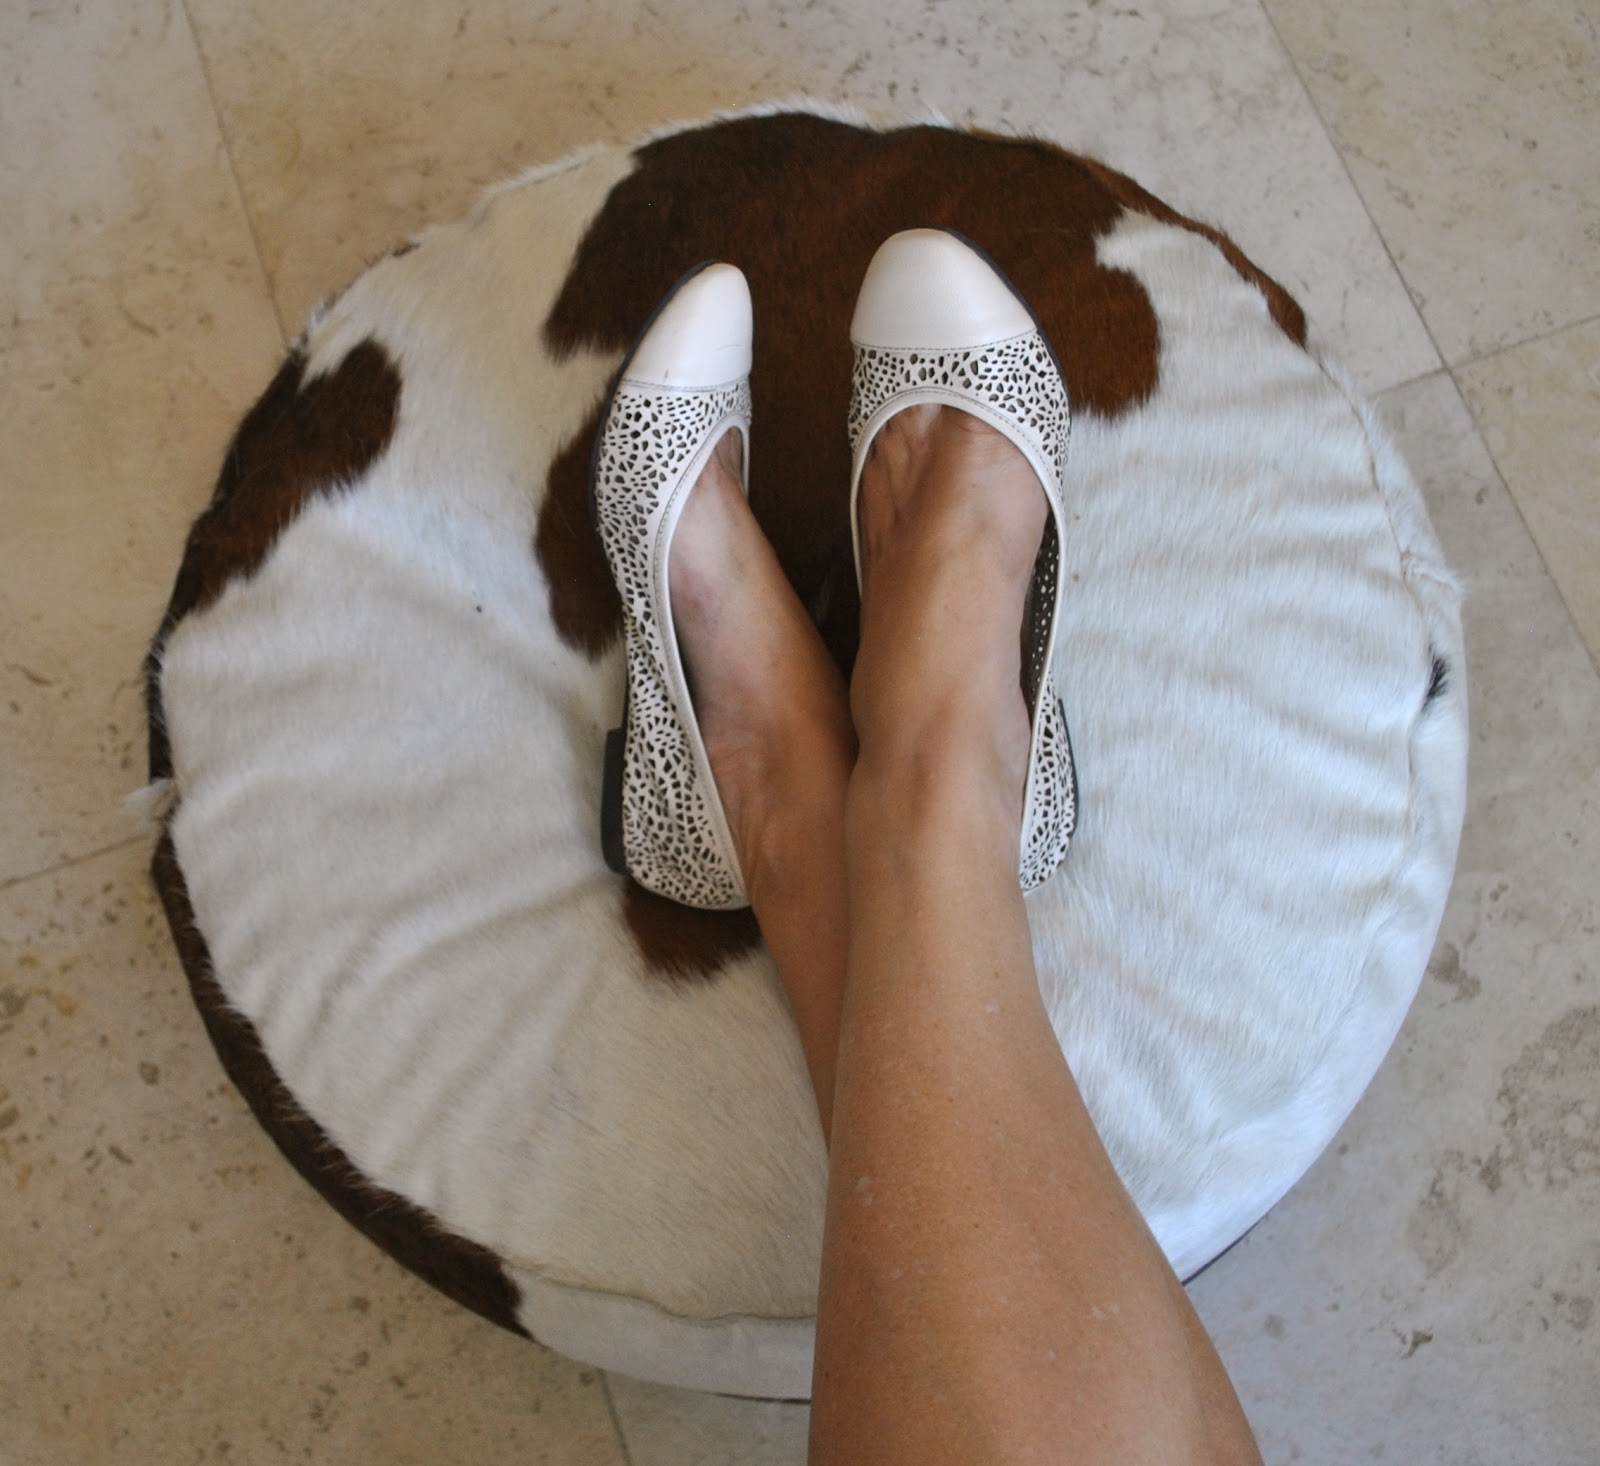
Shoes; new! for autumn!!  c/o Misano

pinterestmail

Cut-out things

I made this little lace jacket/cardi/top thing many years ago, probably ten years ago! way before I started my blog, but even though it has appeared here a coupla times I’ve just realised it’s never been shown, as it were.  So here it is, up close and personal.
The design is my own, perhaps copied from something I saw in a magazine, I think.  It only took up a very small piece, about 50cm of embroidered cut-out linen from Fabulous Fabrics.  The sleeves are just little caps, extensions of the armholes.  All the raw edges are simply encased in self-made bias binding of white cotton, and at the waist is a drawstring in an inner casing, both also made from bias cut white cotton strips.  The neckline closes with a button and a little ribbon loop.  I used a tiny length of pale lavender satin ribbon for the loop because I didn’t have any white at the time, and it’s always bugged me that it’s not white.  Not so much that I’ve ever changed it, though!! so I guess it’s not that much of an annoyance to me, reeeally.  You can’t even see the ribbon when it’s buttoned up anyway  šŸ™‚
It’s still going strong, probably because it doesn’t get worn a whole bunch!  but I’ll never toss it out.  It’s nice to have as a hot weather “cardi”, for when I want to look smart.  And I’ve discovered it goes really nicely with these cut-out ballet flats… (woot)

Details:
Top; my own design, embroidered cut-out linen
Dress; Burda 8071, of pale blue silk, details here
Shoes; c/o Misano

pinterestmail

Pisces II

… the other fish!  Because we all know Pisces has two fish, right?  šŸ™‚  although I’m afraid the best I could eke out was one and a half fish from the length I had!

I made a skirt for myself from the remains of the sparkly silver sequinned fabric.   I do think that when it comes to the problem of wearing a
fabric of a colour and/or texture that you don’t really feel suits you: then having it in the form of a skirt, thus away from your face, is a terrific solution!

Although I am not sure as yet as to the wisdom of drawing attention to my hips, the widest part of my body by dressing them to closely resemble a disco ball, but we shall see…
I used Vogue 8363, and made the skirt to be a single
pieced, double darted front, with deep, front slanted pockets, and a two piece,
double darted back with a central invisible zip closure.  It is fully lined.  Basically the same as the little black skirt I made for Cassie, except that I made the silhouette a tad more A-line,
rather than pencil.
I have another piece of … er, dressmaking advice? a thought? for this sequinned fabric: I didn’t want to blunt my good dressmaking shears on those sequins so I tried using my ordinary, cheap household scissors, that I use for paper, sticky tape, cutting open plastic food packaging and just about anything and everything household-y.  They worked like a charm! And I saved my good scissors šŸ™‚
The pewter/silver silk dupion I used for the
pockets, pocket lining and waistband was a scrap from the bundle of fabrics,
given to me by my friend C from her late mother’s stash, and the grey polyacetate
lining fabric was a small leftover piece from this maxi skirt; made years ago
and long since passed to charity.  btw, I switched back to my good dressmaking shears again for the “proper” fabric  šŸ™‚
The darts in the lining are not stitched but simply folded at the top, and the fold sewed down in the waistband stitching line.  This is a good idea when sewing skirt linings, it reduces wearing strain on the thin lining fabric.
I even had the right shade and length grey zip and hook and eye closure
in my stash too.  So this is a
terrific little stash buster skirt, using up a three smallish, different but
nicely co-ordinating pieces of fabric which were individually awkward but whose
joining together created a harmonious whole arguably more useful than if they
had remained a pile of nicely co-ordinating scraps. 
And barely a skerrick of
fabric is leftover.
Well, maybe just a skerrick…. šŸ˜‰

Details:
Shirt; Burda 8497, white cotton, details here
Skirt Vogue 8363 fully lined, silver sequined
stretch fabric, with pewter silk dupion pockets, pocket lining and waistband,
my review of this pattern here.
Sandals; Misano

pinterestmail

You can leave your hat on…

I’ve made a hat.
I used Vogue 8844, and the fabric is a soft ivory
corduroy, harvested from a pair of Cassie’s old worn-out jeans that has been
living in my good sammies pile for the past four or five years.   As evidenced by that half gone
leg there, these jeans were also the source of the White parliament, pictured here…
The hat is lined with blue and ivory striped stuff
leftover from Sam’s stripe-y shirt, and the inner seam finished with white grosgrain
ribbon.  

You know that very stiff, heavyweight,
iron-on interfacing? that is useful about once in a blue moon?  I’ve had a huge length sitting
untouched in my stash for many many years.  Well, I guess we must have had a blue moon since I managed
to use a bit in this project.  The
hat pieces are all interfaced with this stuff.

I felt pretty good about getting all of the hat
pieces cut out from the jeans. 
Most of the pattern pieces were too big to cut out in one piece, on the
grain and with the nap of the corduroy (they all are, btw… self pat on the
back)  So I had to do a bit of
piecing.  You can see some of the
seams in this picture, but I’m OK with those seams.  I feel too smugly virtuous about re-using old textiles to
feel bad about a few extra seams in a thing!  Eco-smugness; don’t you just hate that biz  šŸ˜‰
I
wondered about the sizes, which is partially
why I decided to use a re-cycled textile for my first time making this pattern…
not the main reason, I am firmly
committed to mindfully re-using old textiles when I can.  But anyway, about the sizing;
My
head measurement almost exactly corresponded to the S, so I made this
size.  And I couldn’t be more
thrilled with the fit, it cups my scone snugly and is neither tight nor
loose.  There was a brisk-ish breeze
on the beach the day I wore my hat for the first time and photographed it here,
and it stayed firmly and comfortably in place.  I never felt it was in danger of flying away!
The sizing
in this pattern works, y’all!!!

incidentally there is a just-there dog in the below picture  šŸ˜‰
Some advice for those wishing to re-purpose those
long skinny jeans leg pieces into a new sewing project requiring wider pieces?  I recommend doing all the piecing for
each component, using your pattern piece as a rough guide as to where and how
much to add on, and leaving at least
a few centimetres leeway around all the edges.  Stick religiously to cutting the joining edges and sewing
seams along the grainline of the fabric AND ensure fabric nap is consistent.   After sewing pieces together, lay the patchworked piece down flat
and only then accurately cut out the
pattern piece.  This way is much
easier than accurately cutting out little part-pieces and then trying to join
them together to fit the pattern piece. 
J
Details:
Hat; Vogue 8844, ivory corduroy
Top; the bamboo shoot top, Pattern Magic by Tomoko
Nakamichi, white linen, details here
Shorts; Burda 7723 slightly modified, embroidered
yellow cotton, details here
Pattern
Description:
Four
lined hats, each offered in XS, S, M and L.  A; contrast lining, D; contrast band and bow.
Pattern
Sizing:
XS 52cm
(20.5 in), S 55cm (21.5 in); M 57cm (22.5 in); L 60cm (23.5 in)  I made the S.
Did
it look like the photo/drawing on the pattern envelope once you had finished
sewing it?
Yes. I
made view C, leaving off the chin straps.
Were
the instructions easy to follow?
Yes
What
did you particularly like or dislike about the pattern?
It is
a nice stylish hat, easy to make.  The
slightly shaped top and crown lend a chic, vaguely Indiana Jones-ish air to the
hat.
Really,
there is absolutely nothing to dislike about this pattern; it’s a hat, and it
works!
Fabric
Used:
Cotton
corduroy
Pattern
alterations or any design changes you made:
None.  But if a wider brimmed hat was desired;
it would be a cinch to just add a few centimeters on to the outer edge of the
brim curve to achieve this.
Would
you sew it again? Would you recommend it to others?
I
expect so, and yes  šŸ™‚
Conclusion:
This
is a great basic pattern which I think will be very useful. I made mine in
ivory corduroy for a summery-looking, wide-brimmed sunhat, but as illustrated
on the pattern envelope it would work equally well made up in tweed or a richly coloured
velvet or some other winter appropriate fabric to make a smart version for
winter.  
let’s play spot the dog again
pinterestmail

Aquarius

… the water bearer!
So this dress incorporates the design from page 56 of Pattern Magic 2, by
Tomoko Nakamichi.  It is described as “a flip turn draped design tie appears from the
slit in the front bodice for a complex and beautiful effect.”
When I was playing with ideas for the Aquarius theme I had in my head; I imagined that front panel as a swimmer shooting out of the watery waves that are embroidered around the hem of the dress, up the front of the dress, and diving back into the water at the neckline.  Yeah, I do occasionally have an overactive imagination….  šŸ™‚

To represent the Aquarian waves I embroidered a running stitch sine wave around the lower hem of the dress, and on the full-length front panel.  I originally had lazy-daisy water droplets going down the side of that front panel too… but the family veto-ed that one,  thought they were naff.  Hmf!  šŸ˜€
I do like the visually peaceful hypnosis of sine waves.  Design-wise I’ve used them before.
And Aquarius is sometimes represented with a waves vaguely reminiscent of sine waves too.
The deep blue fabric is slightly rough and slightly crinkly cotton from Fabulous Fabrics.  I absolutely love this stuff.  It feels like it’s going to be so comfy and easy to live it.  When I found it in the store I bought some in each of the four colours!  This blue is the first piece to go under the knife scissors  šŸ™‚

I really like this longer length too.   I’ve already got a few short dresses and I wanted to go with something different this time.  I think it’s quite elegant, and the proportion of skirt to bodice lend the dress a more graceful and refined silhouette.

Details:
Dress; partly self-drafted, based on the flip turn design from page 56 of Pattern Magic 2, by Tomoko Nakamichi, blue cotton
Sandals; la soffitada Gilde, from Zomp shoes

Construction blah blah blah…
I drafted the dress a little differently from that suggested in the book… in this case I gave the dress a long darted true A-line skirt with satisfyingly deep deep inseam pockets.  To fit the back skirt to my slight swayback, I sewed modified darts in the skirt, and folded pleats in the bodice at the same position.  This allows the bodice to blouse out nicely from out of a fitted waistline.  The front skirt and bodice have the same dart/pleat thing happening.  This is a waist-slimming trick  šŸ˜‰

It is photographed here on Bessie who is bigger than I am, so it does blouse out more blousily on me.  The back of the dress is quite plain…

The dress is put on and taken off with a long invisible zip in the left side seam, and that long front panel is invisibly stitched down to the dress at the waistline.

The front neckline has to accommodate the flip turn tie, so I finished it with a narrow hem.  The back neckline and armscyes have interfaced facings.  The bodice slit has been finished like a letterbox opening, with a hemmed rectangle of facing fabric.  Like a welt-less and pocket-less welt pocket, if that makes any sense.  After wearing the dress for a few hours the pokey-out end ceased diving obediently into the water, and instead kept slipping sneakily back inside the dress, so I anchored it firmly in position on the inside along the sides of the letterbox opening.  It’s not going anywhere now!

pinterestmail

Taupe is dope

Actually, I think the colour of my new ballet flats and scarf is more ecru than taupe, but the name printed on the side of the shoe box was “taupe”.  So I’m running with it.  Seeing as not much at all rhymes with ecru.  
But whatevs … shoes!  in one of my favourite colours.  Or is that even a colour?  šŸ™‚  I’m thinking these are almost animal print.  What I love is that what “looks” like a spotty print is actually little irregularly shaped perforations in the leather, providing natural ventilation for hot sweaty feet.  That’s a real plus on hot sticky days like we are getting.  Win!
Technically speaking, the new “scarf” is just a wide strip of soft, silk/linen jersey knit bought at the Morrison remnant sale.  I originally thought to make lingerie with it, but now I’ve decided that I could well use a soft little summer scarf in this non-colour.  Well the colour is perfection incarnate, no?  It exactly matches the ballet flats.  So, it has migrated from the stash and into the wardrobe, and is getting worn.  Yes!  Wearable stash!   I don’t think this counts as stashbusting, but…  šŸ˜‰  I might still use it for lingerie.  Mebbe, mebbe not.  I’m still thinking about that, but in the meantime it’s doing fab as a scarf.
I do love a light airy scarf; so fantastic for protecting the decolletage from the notoriously harsh Australian sun.  If I’m driving I often rearrange it over my right arm, and it’s amazing how effective it is at keeping one cool, just keeping that direct sunlight off.

The latest addition to the Navel-Gazing Fashion Blogger’s Society photo collection.

Details:
Top; Vogue 1247, details here, made of cotton dyed by me, my review of this pattern here, and see this top styled in 6 different ways here
Skirt; Vogue 1247, made of stretch denim then dyed,  details and my review of this pattern here, and see this skirt styled in 6 different ways here
Scarf; remnant
Shoes; c/o Misano

(if you’re new, I’ve pledged to wear only clothes handmade by me this year and to sketch my daily outfits in my Fashionary.  I’m calling this the paper doll project)

Some more navel-gazing; this time about the outfit fourth along… (seen first here) this was one of my earlier refashions from Wardrobe Re-fashion days.    This is one that I sometimes forget to wear, because it is “old”, isn’t conventionally pretty and is even a little strange…  and sometimes I have to wear a thing for a day to decide whether I still love it or not.   But whenever I do wear this skirt and top ensemble I’m reminded how much I do love slightly weird clothes.  I think I want to get back to making interesting things again.  
Anyhoo, I decided again that the men’s shirt ensemble is definitely a keeper.  The same cannot be said for something from the previous week, which I am taking the scissors too… pretty soon  šŸ˜‰

pinterestmail

Drape-ity drape

I have made a new top and a new skirt!  and am combining the two new garments in one post; since they kinda go together so well and all, and actually the skirt is so… well, bland and basic that frankly it doesn’t deserve its own post. My top is a modified version of the loose drape top, pattern no. 1 from drape drape, by Hisako Sato.  I used a soft slightly crinkly white cotton jersey, bought from the Fabric Store in Melbourne during my most recent trip.  Regarding the design; I really loved those lovely soft drapes of that front and back neckline, however, like JenC noted in a comment, this top made up as per the pattern is a … er, raaaather revealing garment.  As in, very very revealing.  The photographs in the book have been carefully selected, but it’s plain to see that the model is a hair’s breadth away from being topless.  And more, the top would be falling off one’s shoulders, only like, all the time
But I thought it would be pretty easy to alter the pattern to be less revealing while still maintaining the essence of those beautifully soft falls of fabric at the neckline.  I took out a good 20cm in width from the horizontal line of the front drape, and close to 30cm from the back drape, re-drawing in the armhole and side seams to be the same as the original, tapering out to the same hemline, and keeping those neckline edges cut straight on the cross so as to keep the self-facing as part of the same pattern piece, on a fold.  Terrific design feature btw, for those frightened of finishing knits this is an excellent easy way out!
Reducing the width has given me a top with the same flavour that attracted me to the original, but with coverage… yes, I may have some nice lingerie now, but I don’t want to be modelling it out in public for everyone on the street!
The side seams are flat felled, and I hand slipstitched the facings and armhole bindings in place for a smooth clean look on the outside.  I also added lingerie straps to the shoulder seams inside to prevent the top slipping off my shoulders, since in spite of taking out a whole lotta drape it is still that kind of design!
And I’m very happy with the result.  Such a cool and elegant design.  I can see this being lengthened very successfully, to make a simply gorgeous little cocktail sheath; how lovely would that look? 
The skirt.  Less exciting.  But ironically, its the bland and boring stuff that often turns into the amazingly useful and versatile stuff too, though; don’t you think?  The skirt is self-drafted, and identical in every way to this charcoal skirt from a few years ago, that has been utterly indispensible for layering and mixing and matching in my handmade wardrobe.  Indispensible, I tell you!  I used a piece of mystery fabric, part of the bundle given to me by my friend C from her late mother’s stash, and it is also the leftovers from this little Pattern Magic jacket.  Thus qualifying it for an itty bitty stash-busting garment!  Actually the top was also made using an itty bitty piece of fabric, less than 1m, but since I bought that fabric only three months ago I don’t know if it truly qualifies as “stash”  What do you think?  How long should fabric be in the stash before one can safely attribute it Stash Status??  One month?  Six months?  More than a year?
But the skirt is a definite stash-buster… goodness only knows how old that fabric is.  This grey side is the reverse side to that I used for the “wearing a square” jacket, a smooth, blue-grey colour, with a double-knit look to its texture.

Details:
Top; modified version of the loose drape top, pattern no.1 from drape drape by Hisako Sato, white cotton
Skirt; my own design, blue grey double-knitty type of stuff.
Sandals; c/o Misano

pinterestmail

Yellow pleats. please!


Yes, my title is swiped
shamelessly from Issey Miyake’s famous 1993 collection, but I reckon that is OK
since this is an Issey Miyake
designĀ  šŸ˜‰

And you’ve probably noticed that it is yellow.Ā Ā A yellow top.Ā  Very yellow.Ā  Quaite
quaite yellow.Ā  As yellow as.
I’ve just been feeling very yellow-philic lately.Ā  Don’t bother to look that word up, I
just made it up just then.
ā€œPhilicā€, meaning ā€œattracted toā€ of course.
Oh, you’re welcome.
Don’t ever say this blog is not ed-you-cational!
I’ve been hunting for yellow fabric for ages…. and it just
doesn’t ever seem to be ā€œinā€.Ā  And
I don’t mean pastel primrose yellow, which is inexplicably always represented but which is tooĀ dreadful on me: I wanted intense! Ā Saffron
yellow!Ā  Fierce yellow!Ā  Bold yellow!
Finally I spotted this satisfyingly ferocious, yellow silk
in the Fabric Store, in Melbourne, during our trip away last September, and
snapped it up!Ā  Then came the decision
of what to make it in… a decision swiftly and easily made when I laid eyes upon this Issey
Miyake pattern, Vogue 1142.Ā  My
yellow silk is that very flimsy and flighty stuff, the sort that slithers
across the table with the slightest breathe, so I knew it would be a good
choice; not too bulky when tripled up with this pleat-tastic design.
Oh, another
made-up word.Ā  Honestly….
I wrote a pattern review, below, but there is a kinda major issue with
making up this pattern that I thought it worth mentioning separately… the
pattern instruction just says ā€œfold pleats in place, and pressā€ and then those pleats are not even mentioned again, like bob’s your
uncle and that is all that is needed.
Hello? The sharpness and evenness of those perfectly spaced
pleats is only, like absolutely integral
to the visual success of the design imo.
Wouldn’t those merely pressed-down pleats simply wash out with the very
first wash??? Or, even just fall out on their own, with wear? Ā Ā And then your top will just be a
formless flowy thing; which admittedly could still probably look quite pretty, but
will not be the tiniest bit sculptural and would have lost all the character of the
original.Ā  I really like the sharp sculptural
lines of the one on the cover.
Accordingly I took the precaution of edge-stitching each and
every pleat down immediately after pressing.Ā  This step was fiddly, and accounted for the bulk of my time
to make the top; but I think it is essential to keep those pleats nice and
crisp for forever: so therefore it is worth it.Ā  In fact I just hopped over to Pattern review to check out
the other reviews and noticed that no one else mentioned how they
tackled the permanency or lack thereof, of their pleating; and I am curious as
to how their pleats fared in the wash??


Some deet shots; there is a heck of a lot of topstitching in this top;

edge-stitching on the outer folds of each pleatĀ and the inner edges too,

the side seams are flat-felled in wide seam allowances

there is strategic stitching, artfully placed on the outside
of the pleats, to fuse them together

and also bar-tacks at the vulnerable side-seam/armhole
point as well as the upper edge of the side seam split, to add strength to spots that are subject to strain during wear.

Details:
Top; Vogue 1142, yellow silk
Shorts; Burda 7723, white linen, details and my review of this pattern here
Sandals; Misano


Pattern
Description:

Loose-fitting
pull-over top has pleats and stitched hems. Wrong side of fabric shows.
Pattern
Sizing:

American
sizes 6-14; I cut the size 10
Did
it look like the photo/drawing on the pattern envelope once you had finished
sewing it?

Yes.
Were
the instructions easy to follow?

Ohh,
the instructions are very easy to follow…
In my opinion a lot of extra top-stitching is essential in order to prepare
this garment to stand up to normal washing and wearing.
What
did you particularly like or dislike about the pattern?

I
absolutely love the design concept; the way a
couple of almost-rectangles can be tweaked here and there before being… well
to put it frankly; pretty much slapped roughly together, and magically become transformed
into a rather romantic, artistic and very unusual blouse.
Fabric
Used:

Very
thin and slippery silk
Pattern
alterations or any design changes you made:

After
pressing each pleat in place, I edge-stitched each and every fold of each pleat,
to make it a permanent fold.
Yup.Ā  Each, and.Ā  Every.Ā  Fold.Ā  To not do this would be to lose all those pleats with the very first
wash.Ā  And since I spent about five
minutes carefully measuring each fold
before pressing; losing them was not an option I wanted to consider!
In
fact I cannot understand why the permanency of the pleats is not considered and
addressed in the instructions…
Would
you sew it again? Would you recommend it to others?
Yes, I
probably will want another one of this summery and airy little top sometime.Ā  I recommend this top pattern to the meticulous seamster who craves romance and drama in her wardrobe, but still likes to be comfy.
Conclusion:
It is super comfortable
and very forgiving to wear, and nicely easy breezy for summer.Ā  On top of that, it is a delightfully unusual, undeniably cool and
very funky garment.Ā  I feel rather
artistique in this topĀ  Ā šŸ™‚


pinterestmail
Switch to mobile version
↓