Tag Archives: Daily Outfit

Thoughts on weeding out…

I did a big clean-out of my wardrobe on the weekend.   
Sounds silly, but cleaning out one’s wardrobe is an occasion accompanied by soul-searching.  We identify so much with our clothes; throwing out old garments is often throwing out memories and little bits of yourself, cathartic but a wee bit gut-wrenching.  I ended up transferring to the Good Sammy’s pile quite a lot; gone are the garments that I am feeling half-hearted about; or that only look OK if worn underneath something to hide a hole; or are shabby and worn; or were half of a set of which the other half has long gone and so is now a wardrobe “orphan”… I now have left only things that I really like and that make me feel great when I am wearing them.  
Sounds good.  At times like this I get all excited that I will end up with an Officially Co-ordinating and Cohesive Wardrobe.  A manageably small number of (well-made, but of course) garments: Co-ordinating, in that they all go together in a planned, but still interesting and visually pleasing colour scheme and Cohesive, in that they have a definite style that is recognisably “me” and that I am comfortable in.  
I know…  (in sing song) day-dreaming!  I did not…  I suspect like a lot of women, my wardrobe and tastes are utterly all over the shop.  I still have a little bit of this and a little bit of that.  Precious little of which is particularly co-ordinating OR cohesive.
Er, doesn’t sound so good…
 So, do I have a schizophrenic wardrobe?  And if so, could it be because I have a schizophrenic approach to my own wardrobe?   I want to be “individual”, but not ridiculous nor outdated.  I would like to look “with-it”, but the thought that I might look identical to everyone else is a stiflingly depressing one… yowza, no wonder my wardrobe is dichotomous!
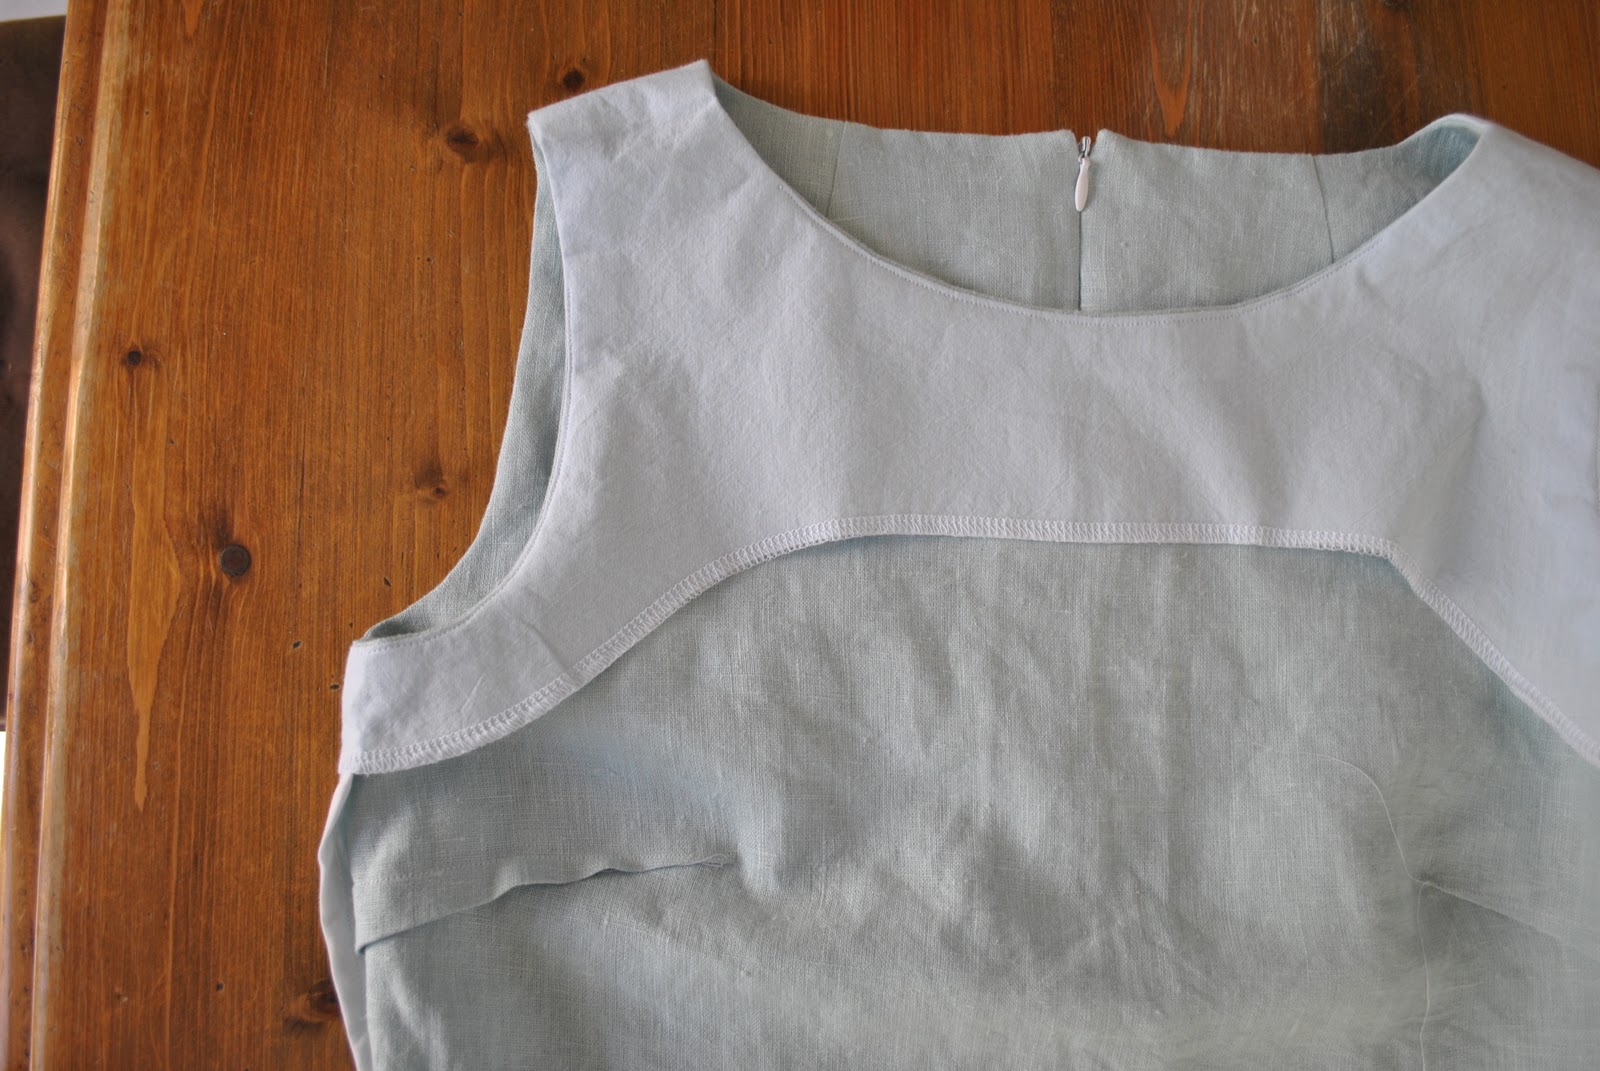
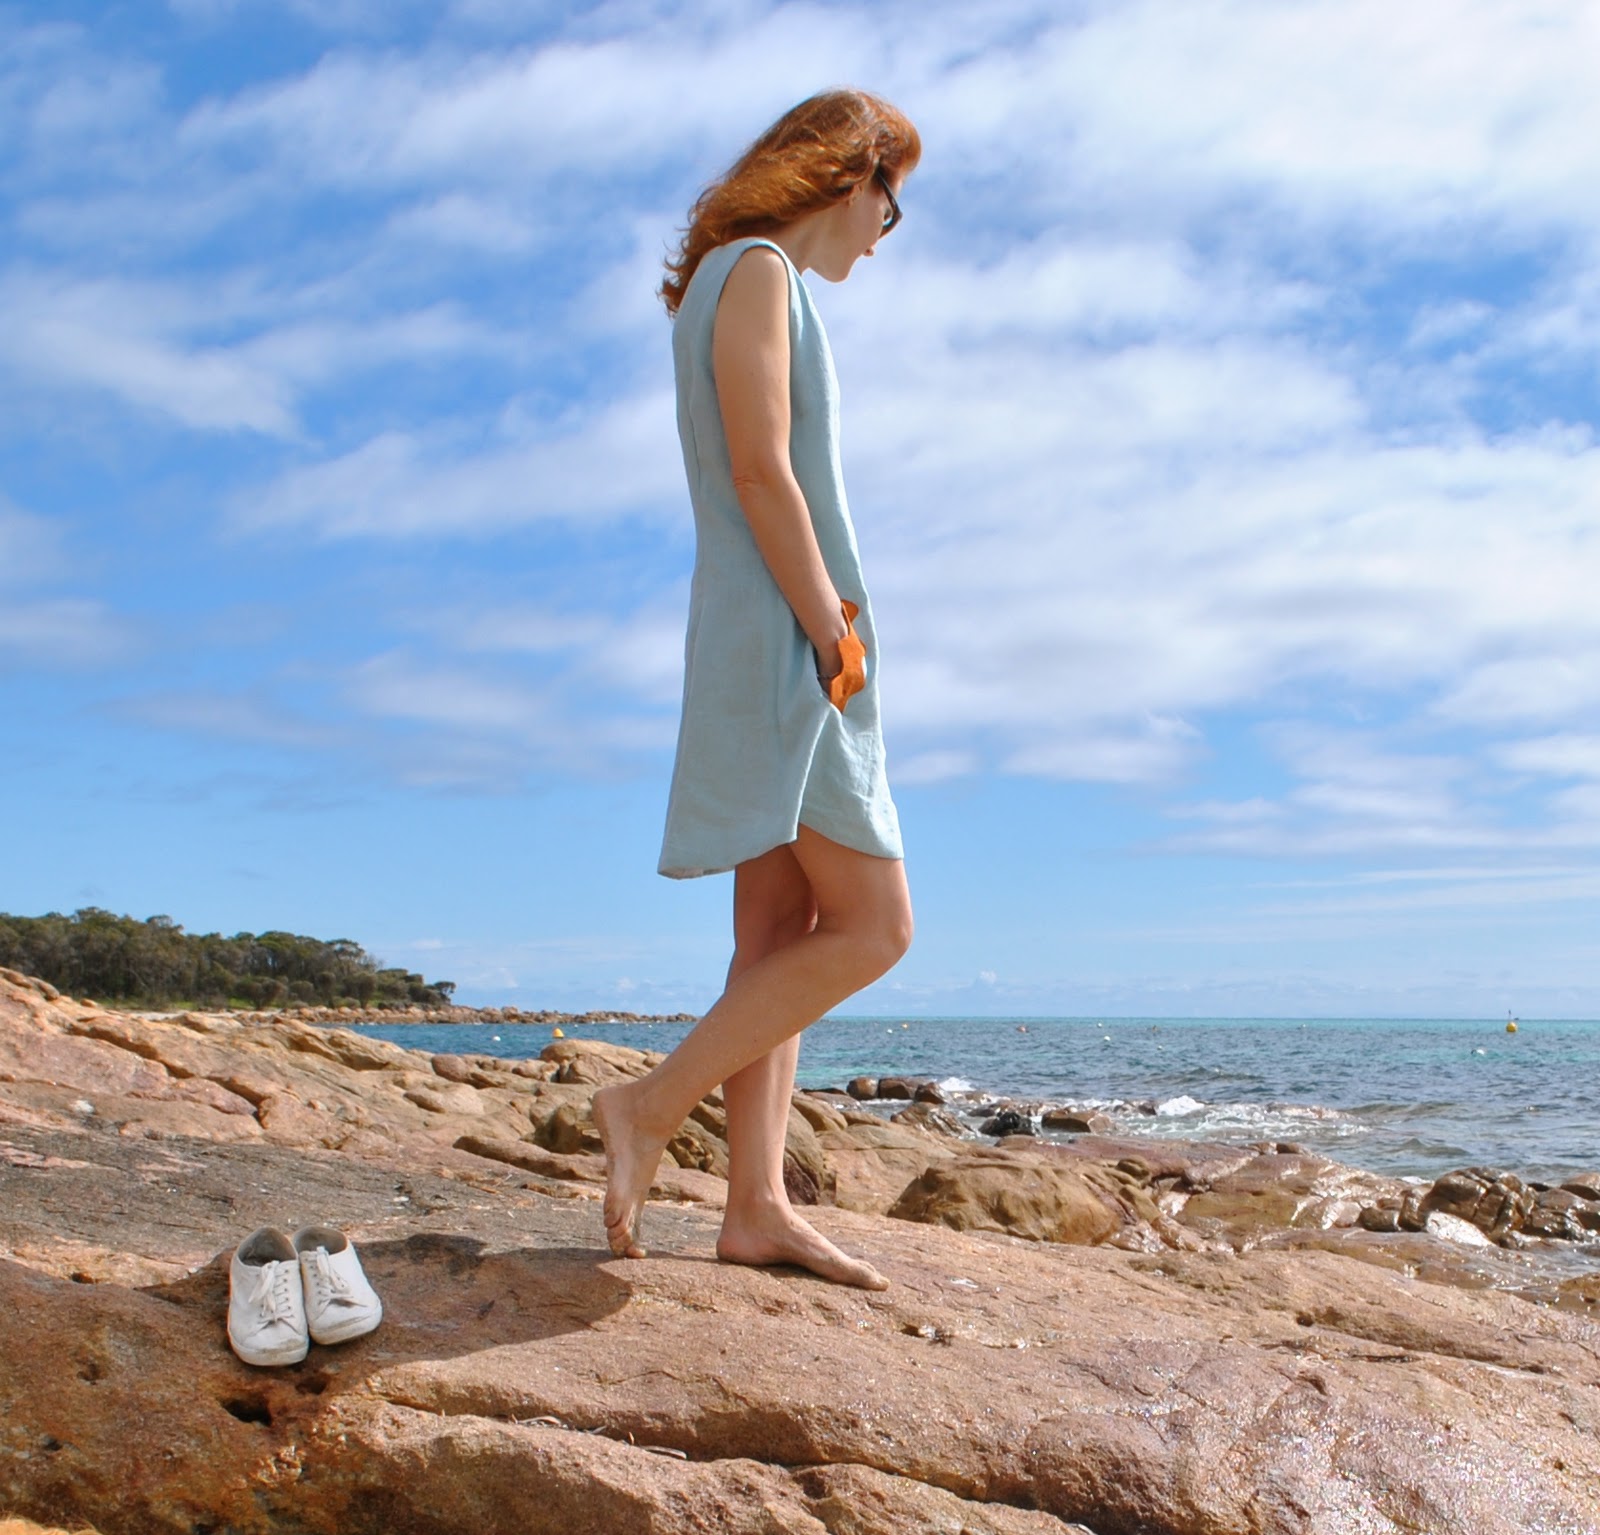
Or I should look at this positively; it is diverse.  I have a flexible wardrobe.  I do have a smaller number of clothes, but still something for every occasion (mostly)  And (if you have been with me for a while you will have noticed this) my dressmaking policy has been changing over the past year or so… I am concentrating more and more on quality, not quantity.  When I make something it is going to be as well-made as I am capable; even it this means taking twice as long.  I don’t want to settle for imperfect.
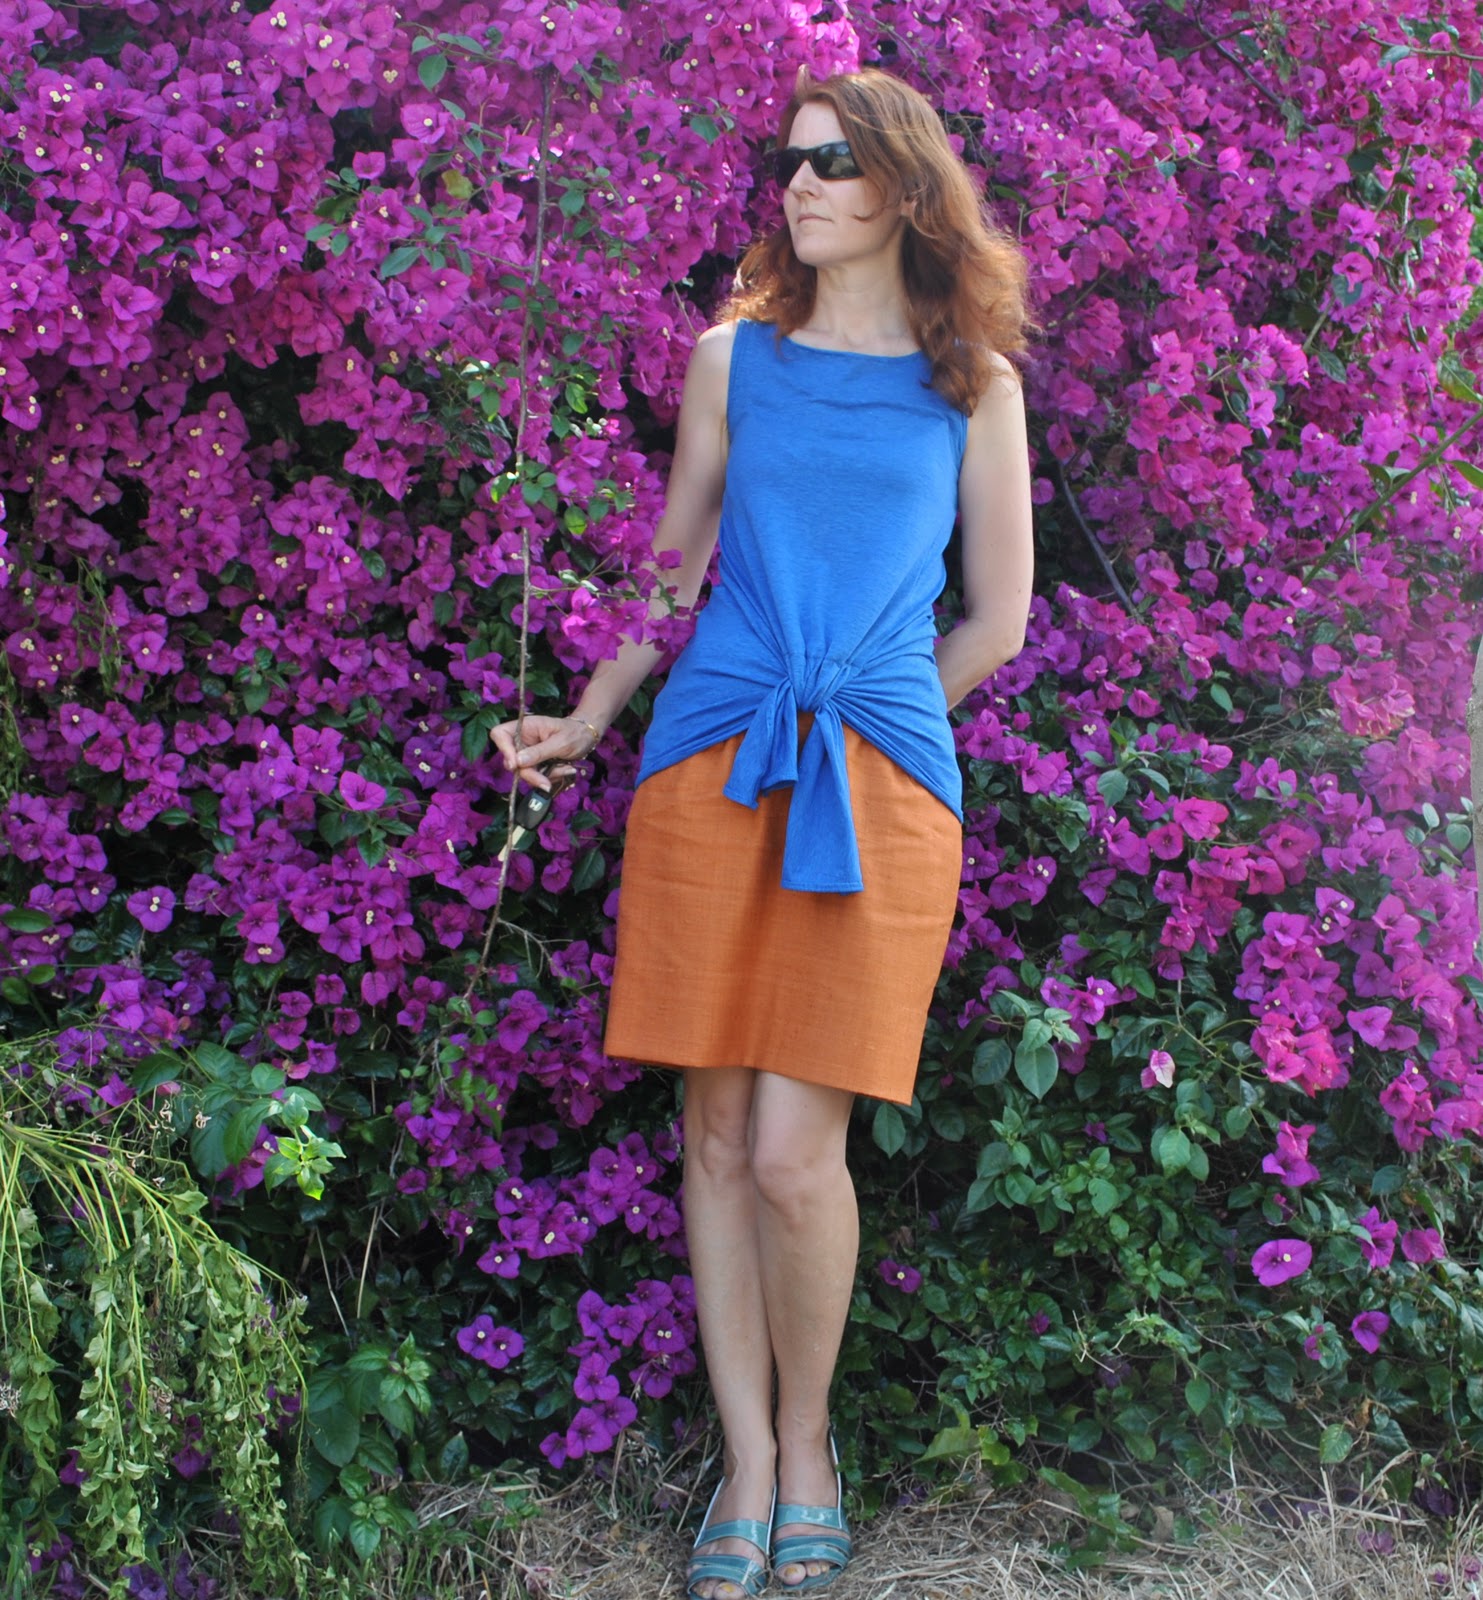
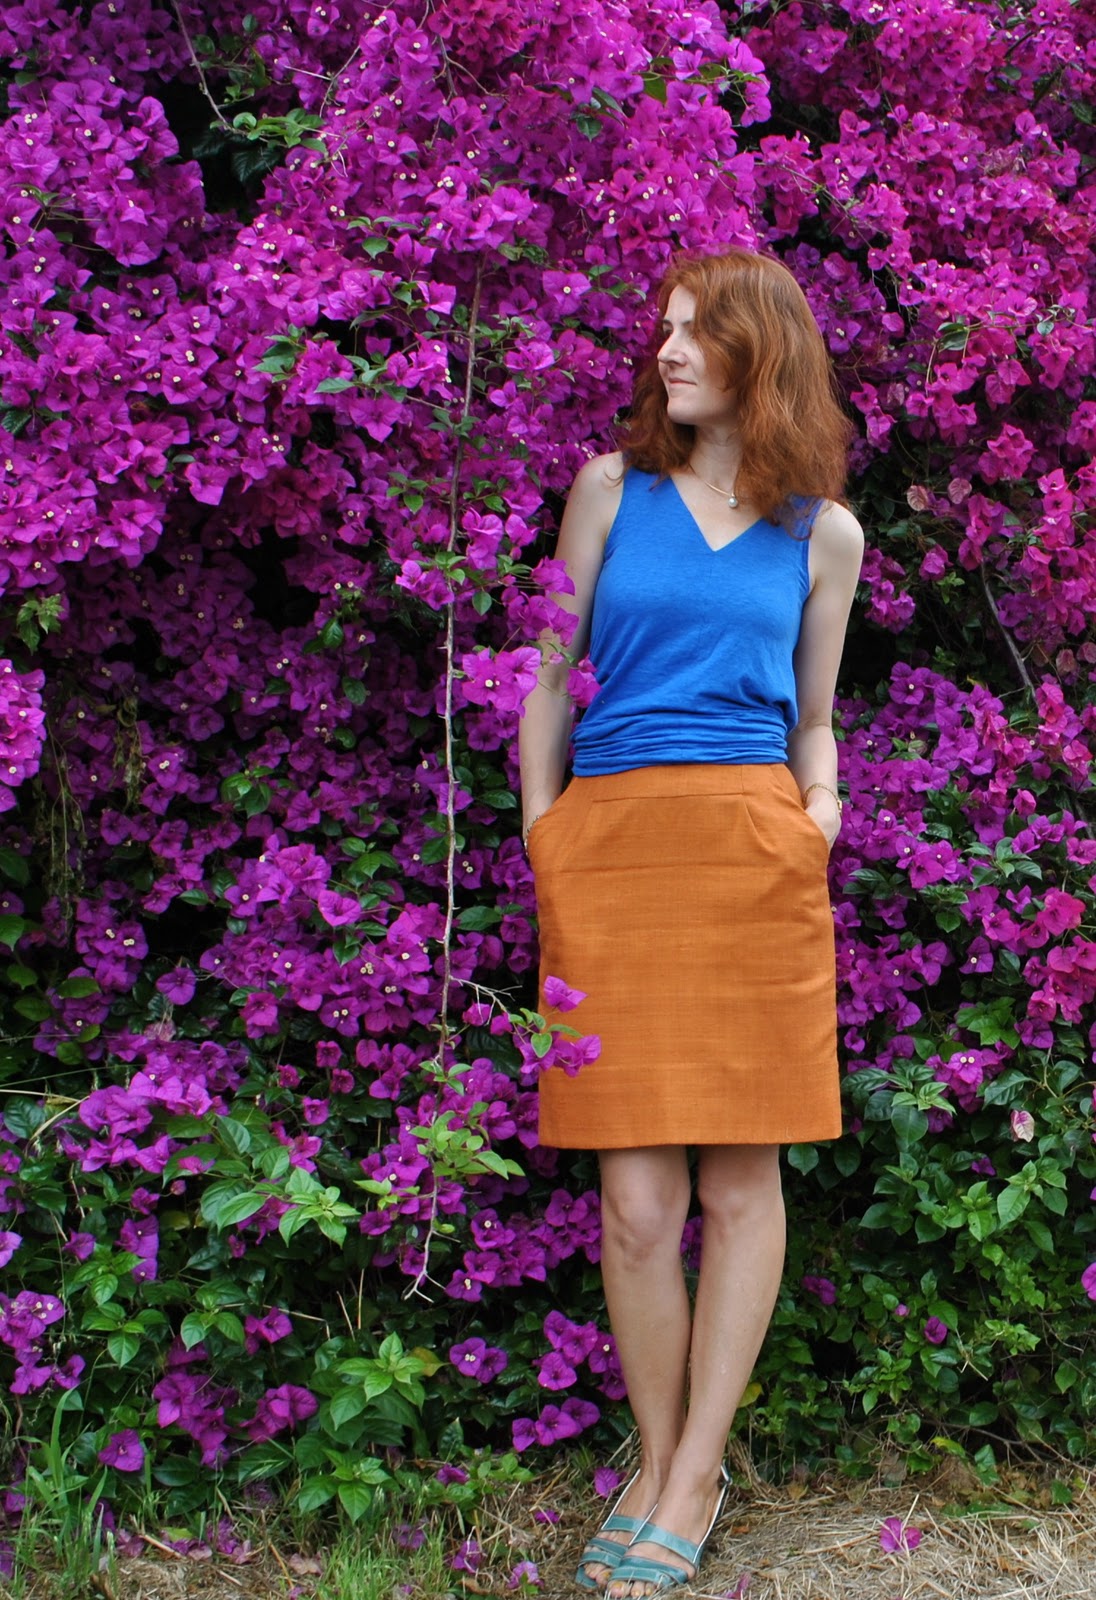
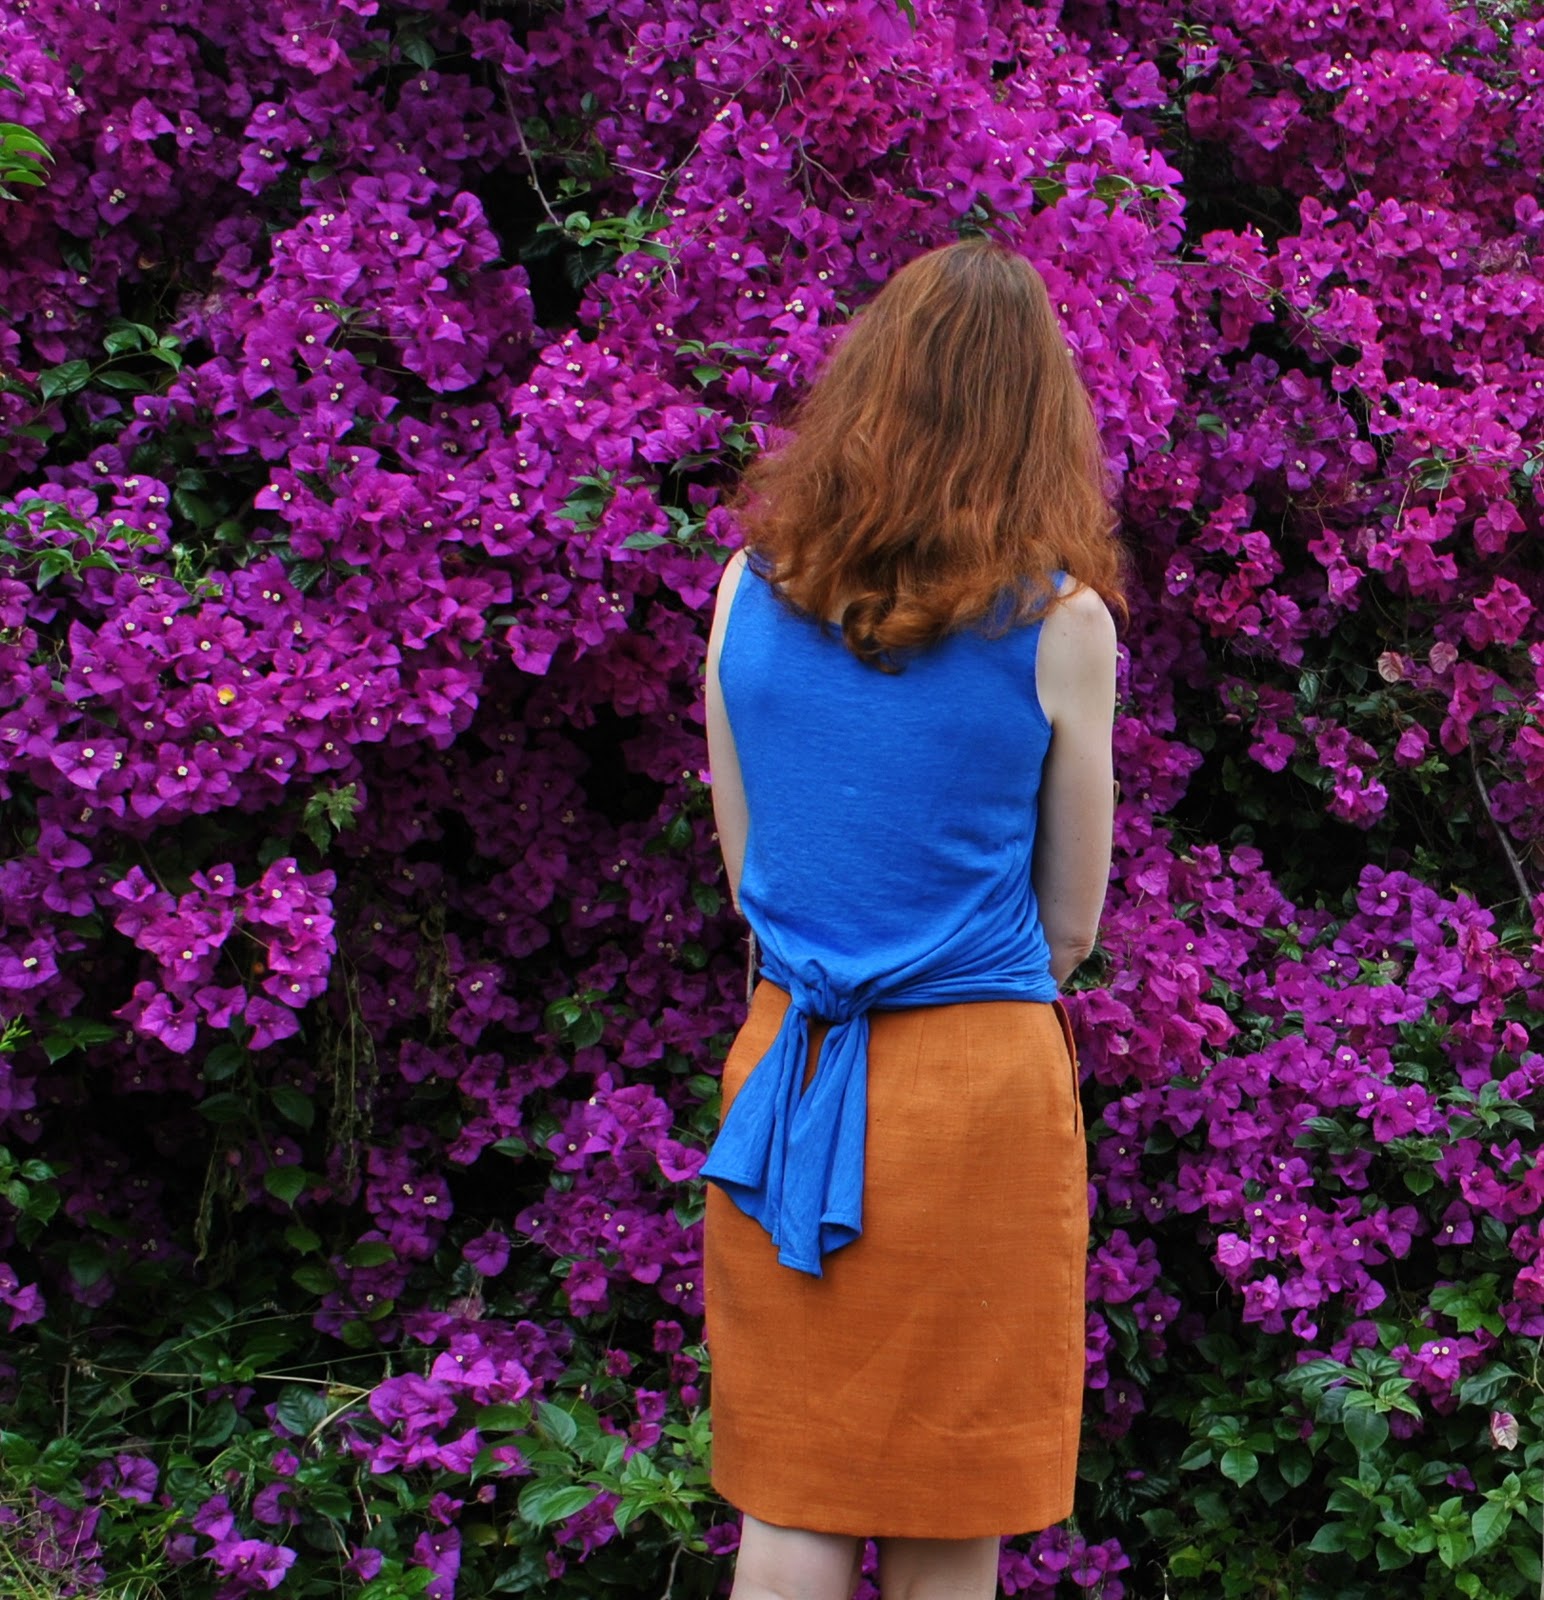
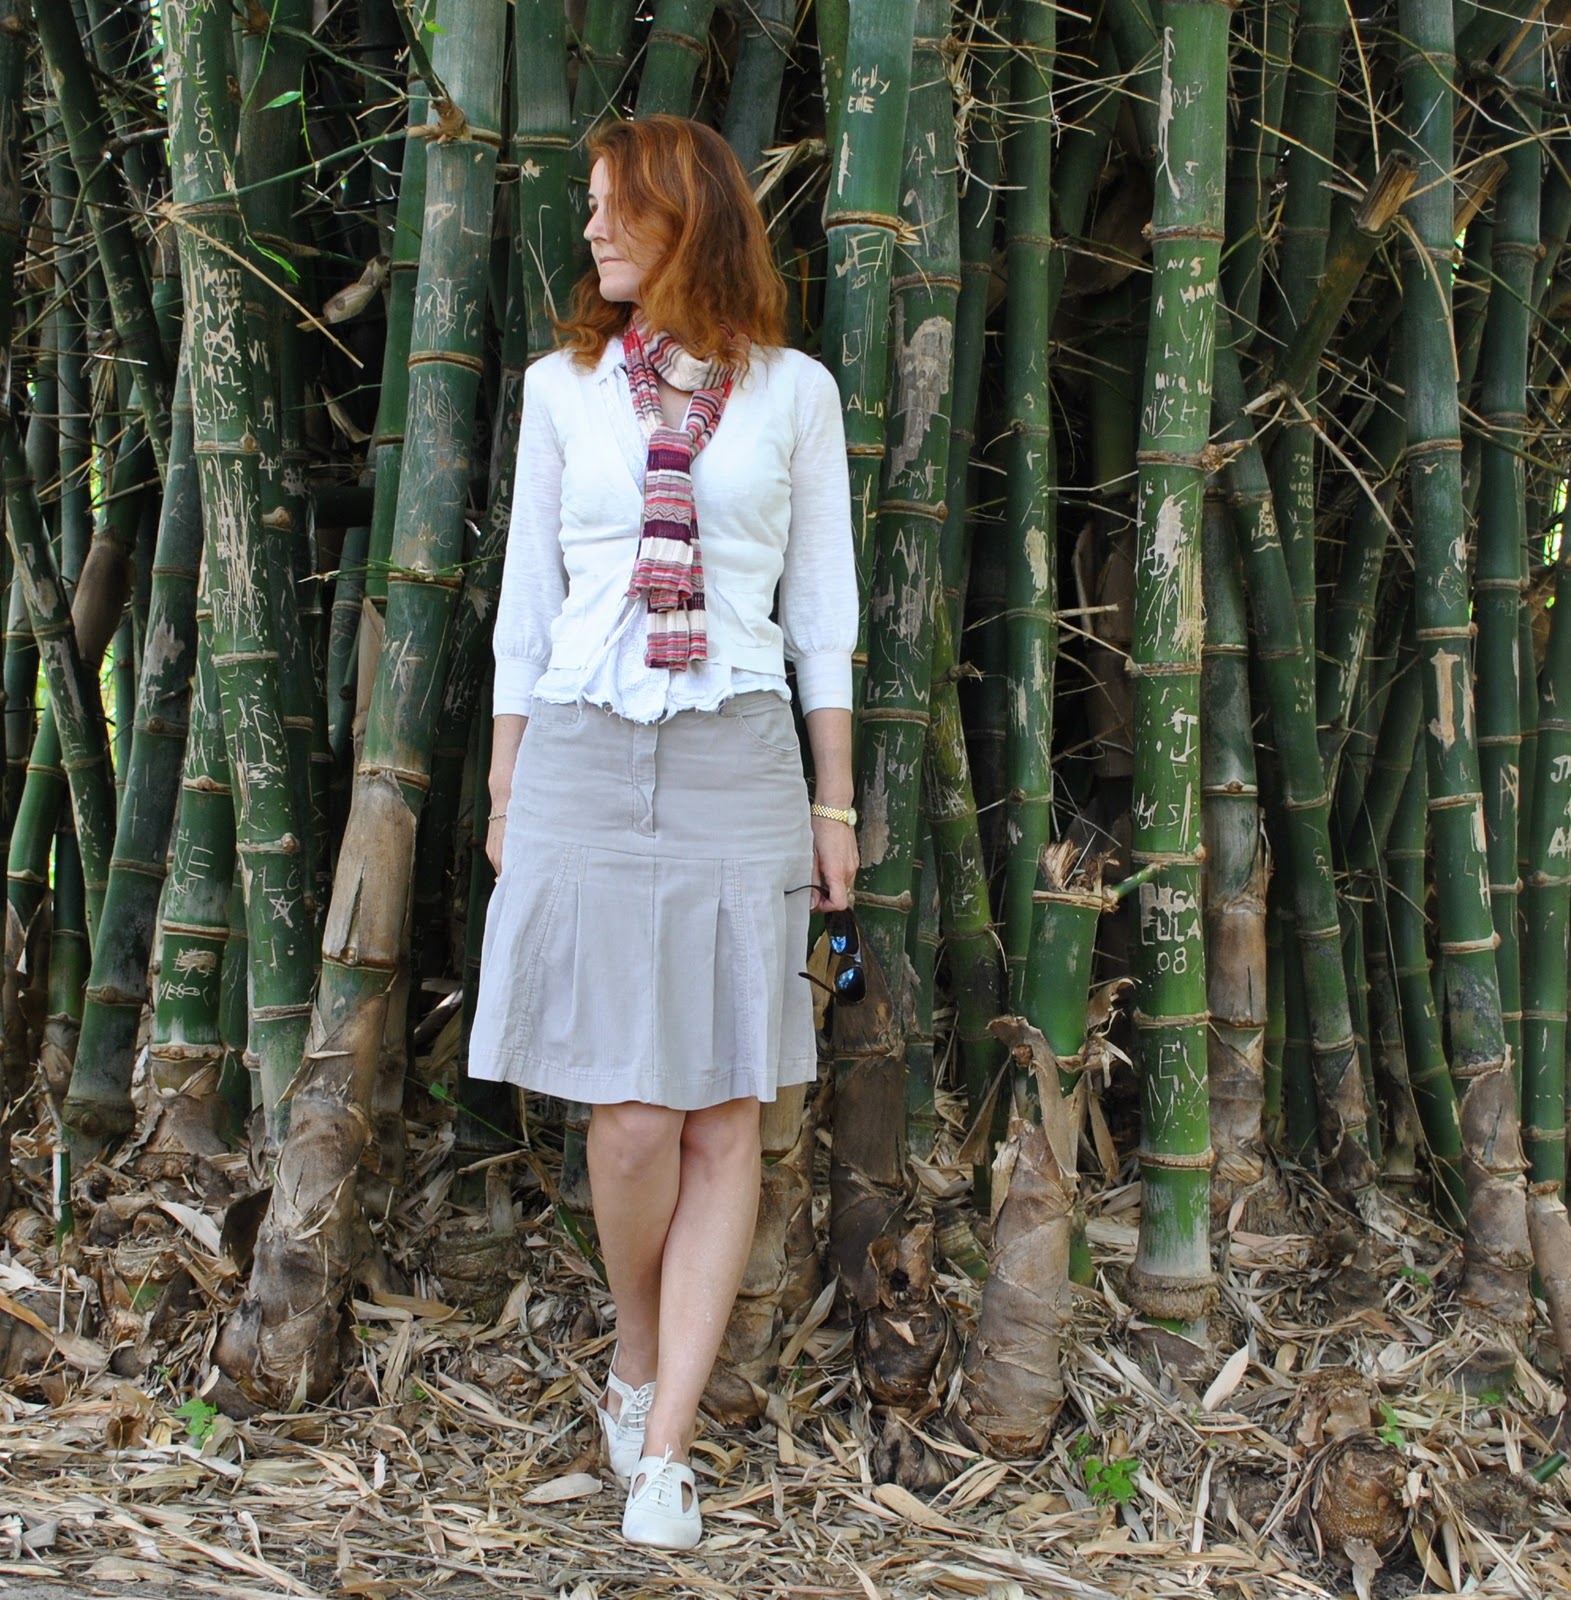
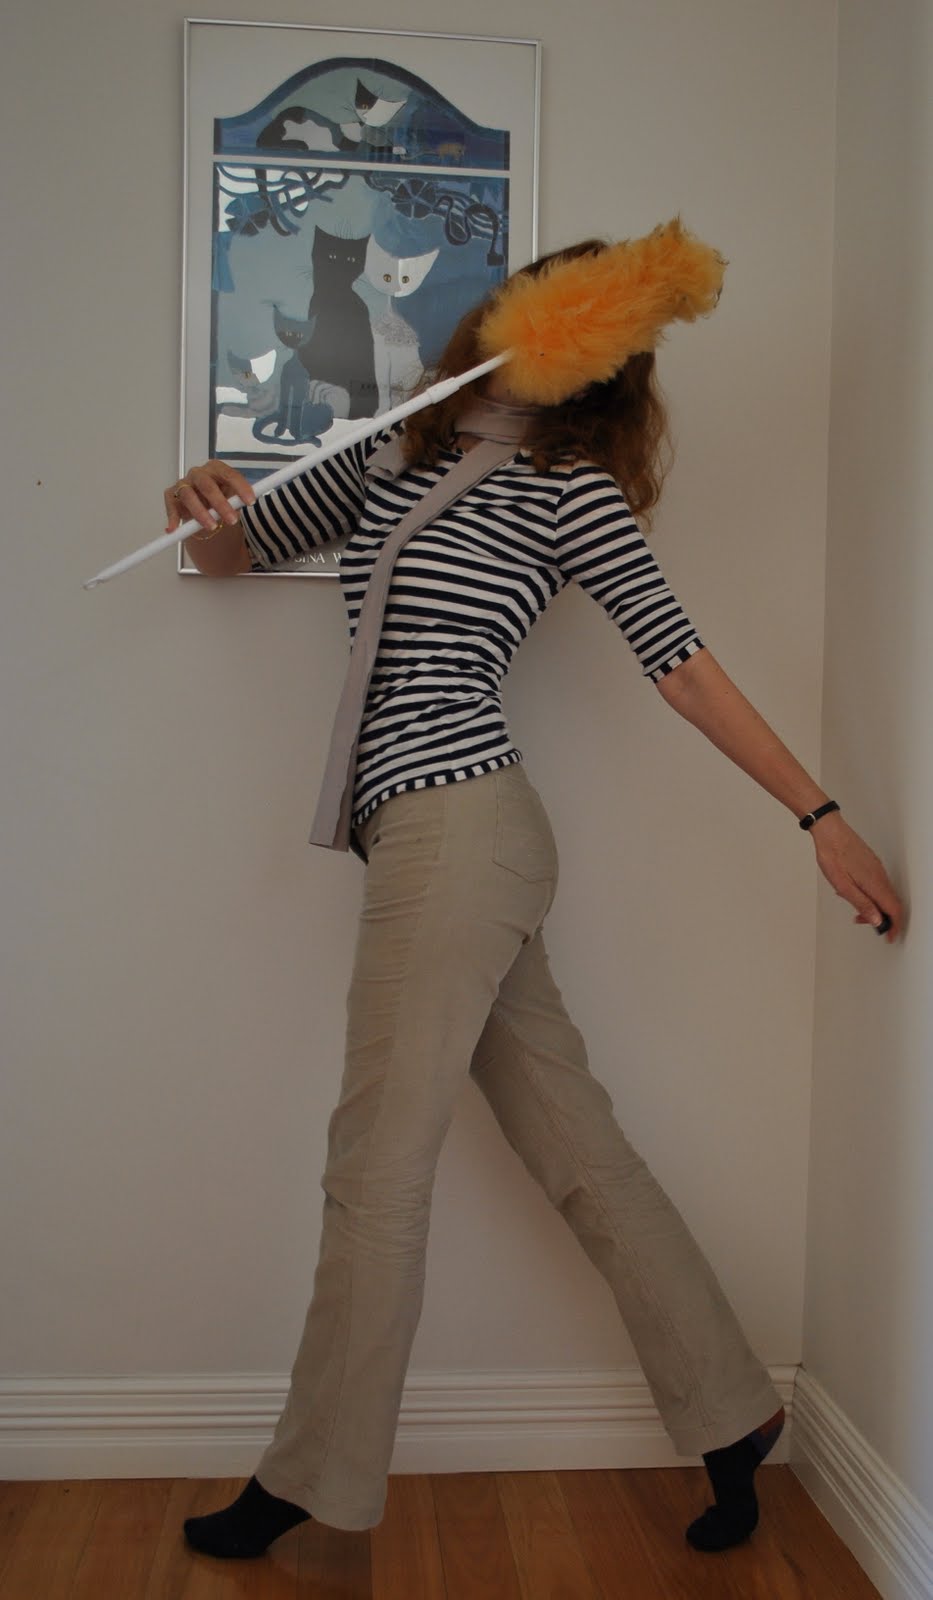
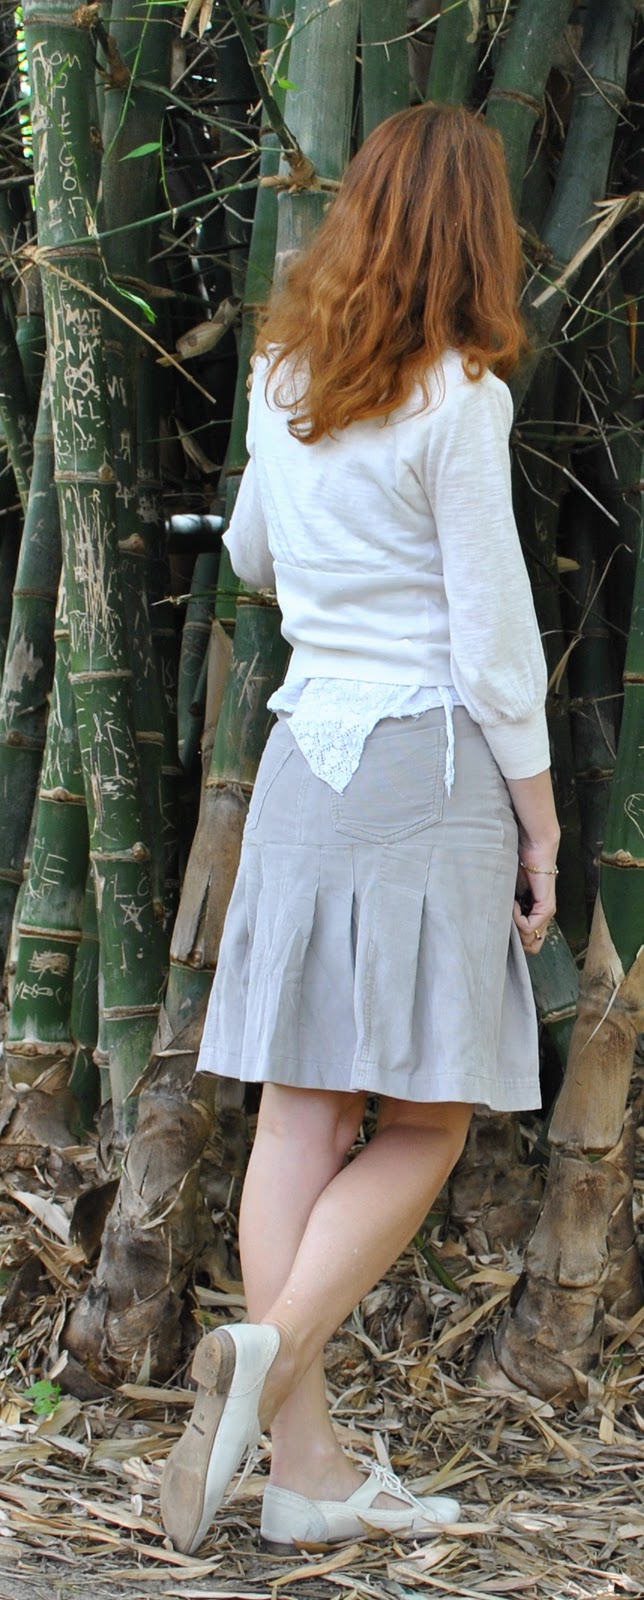
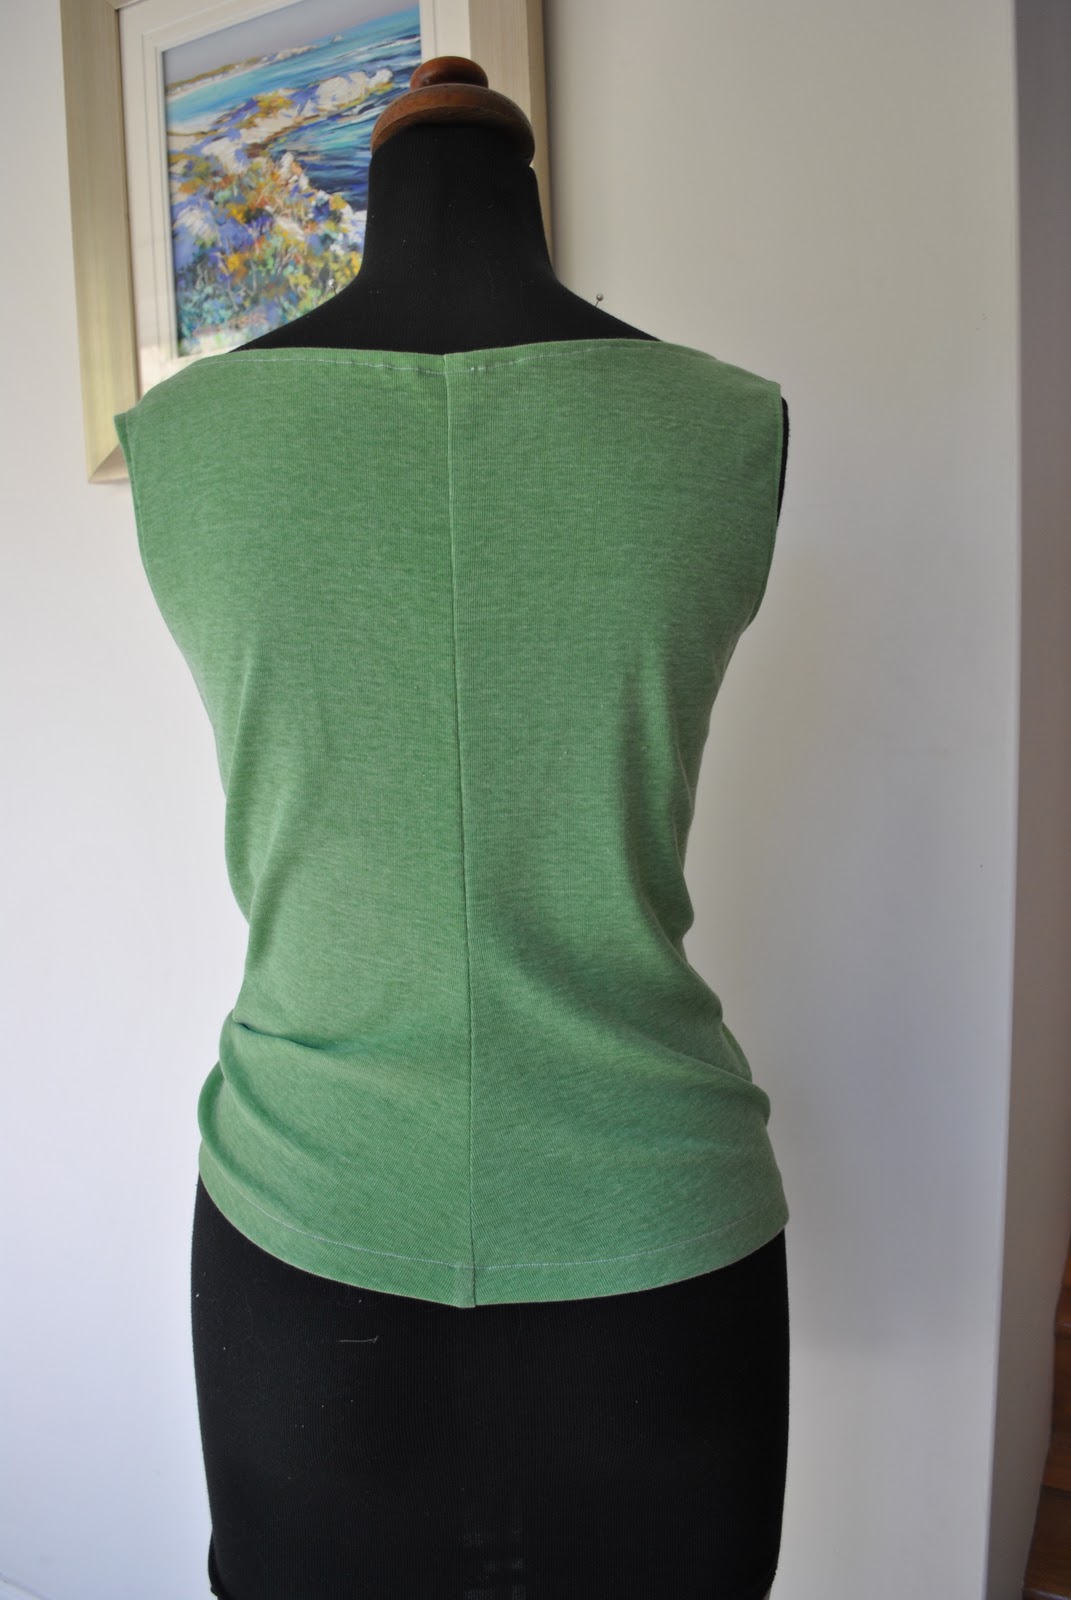
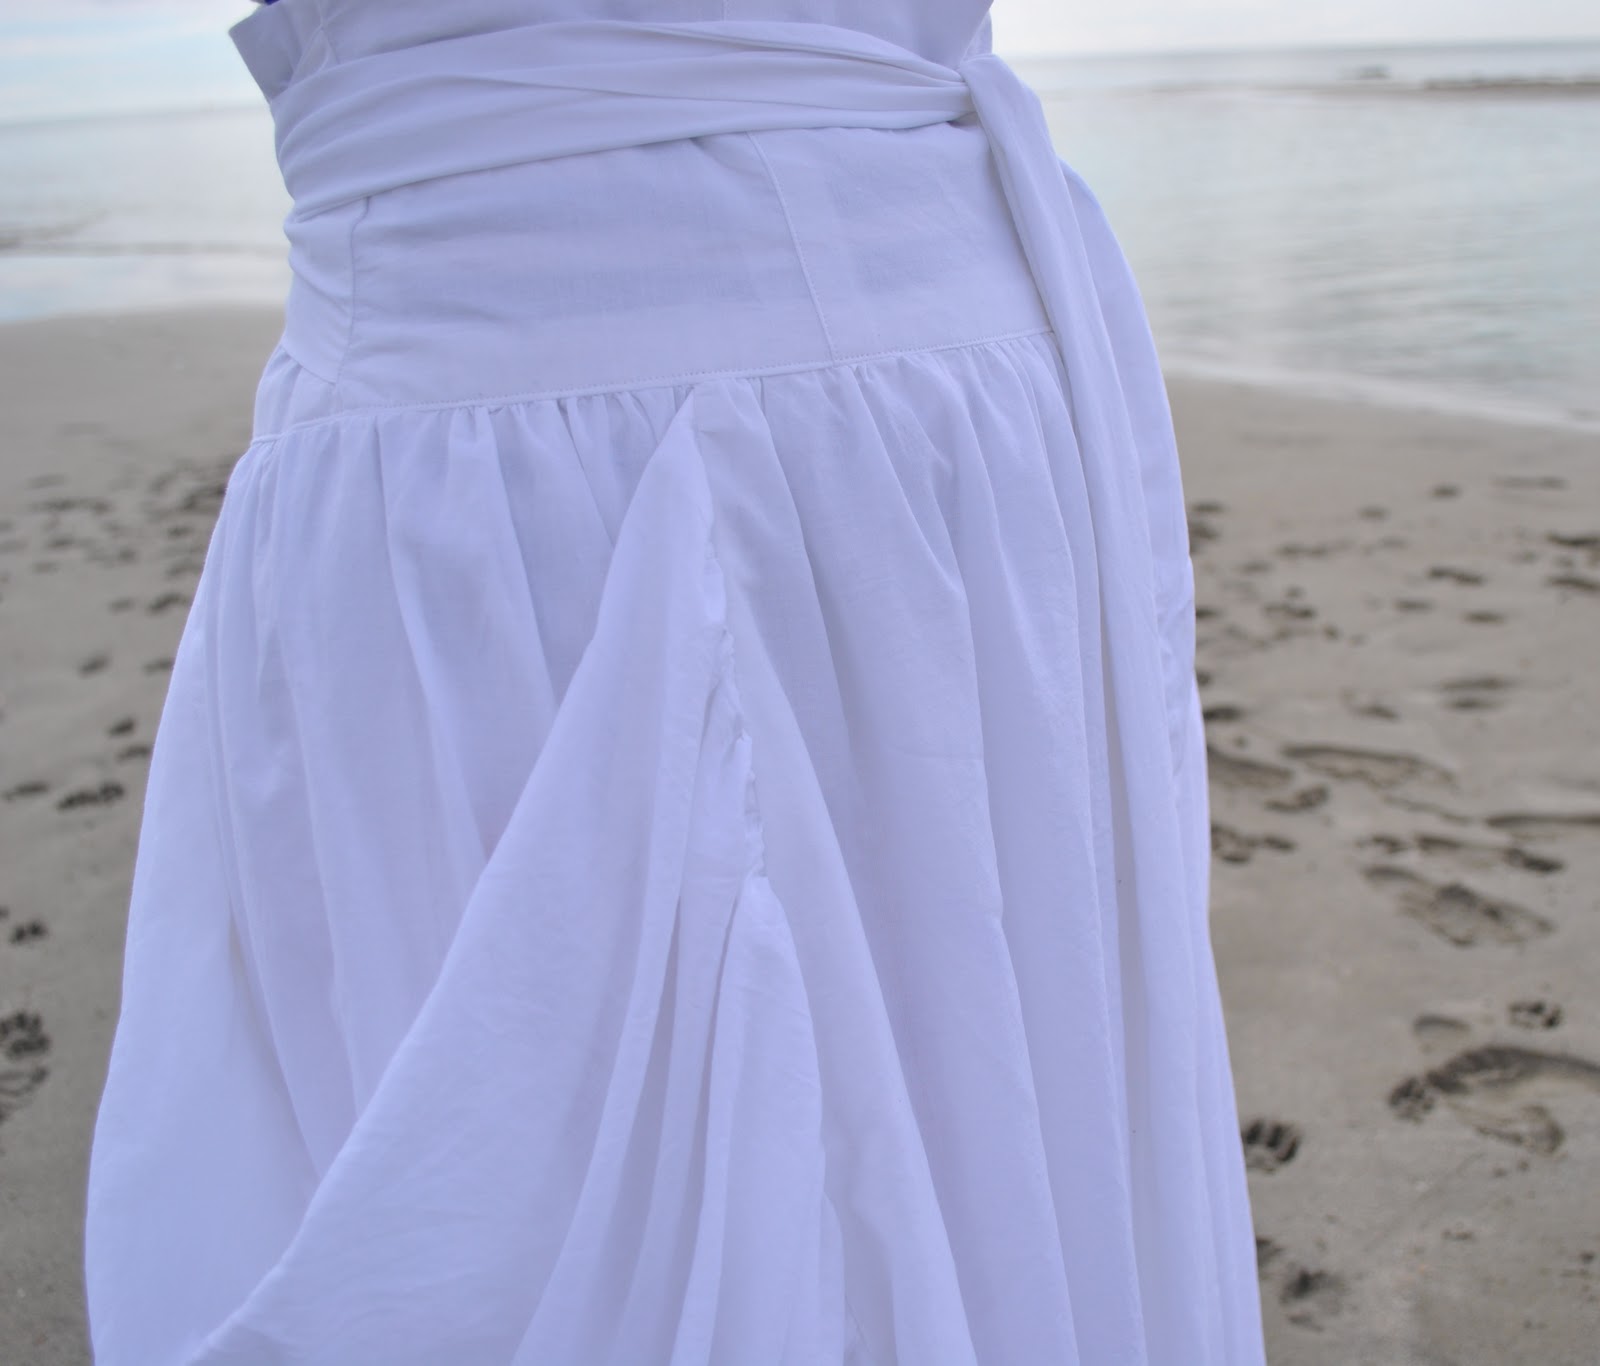
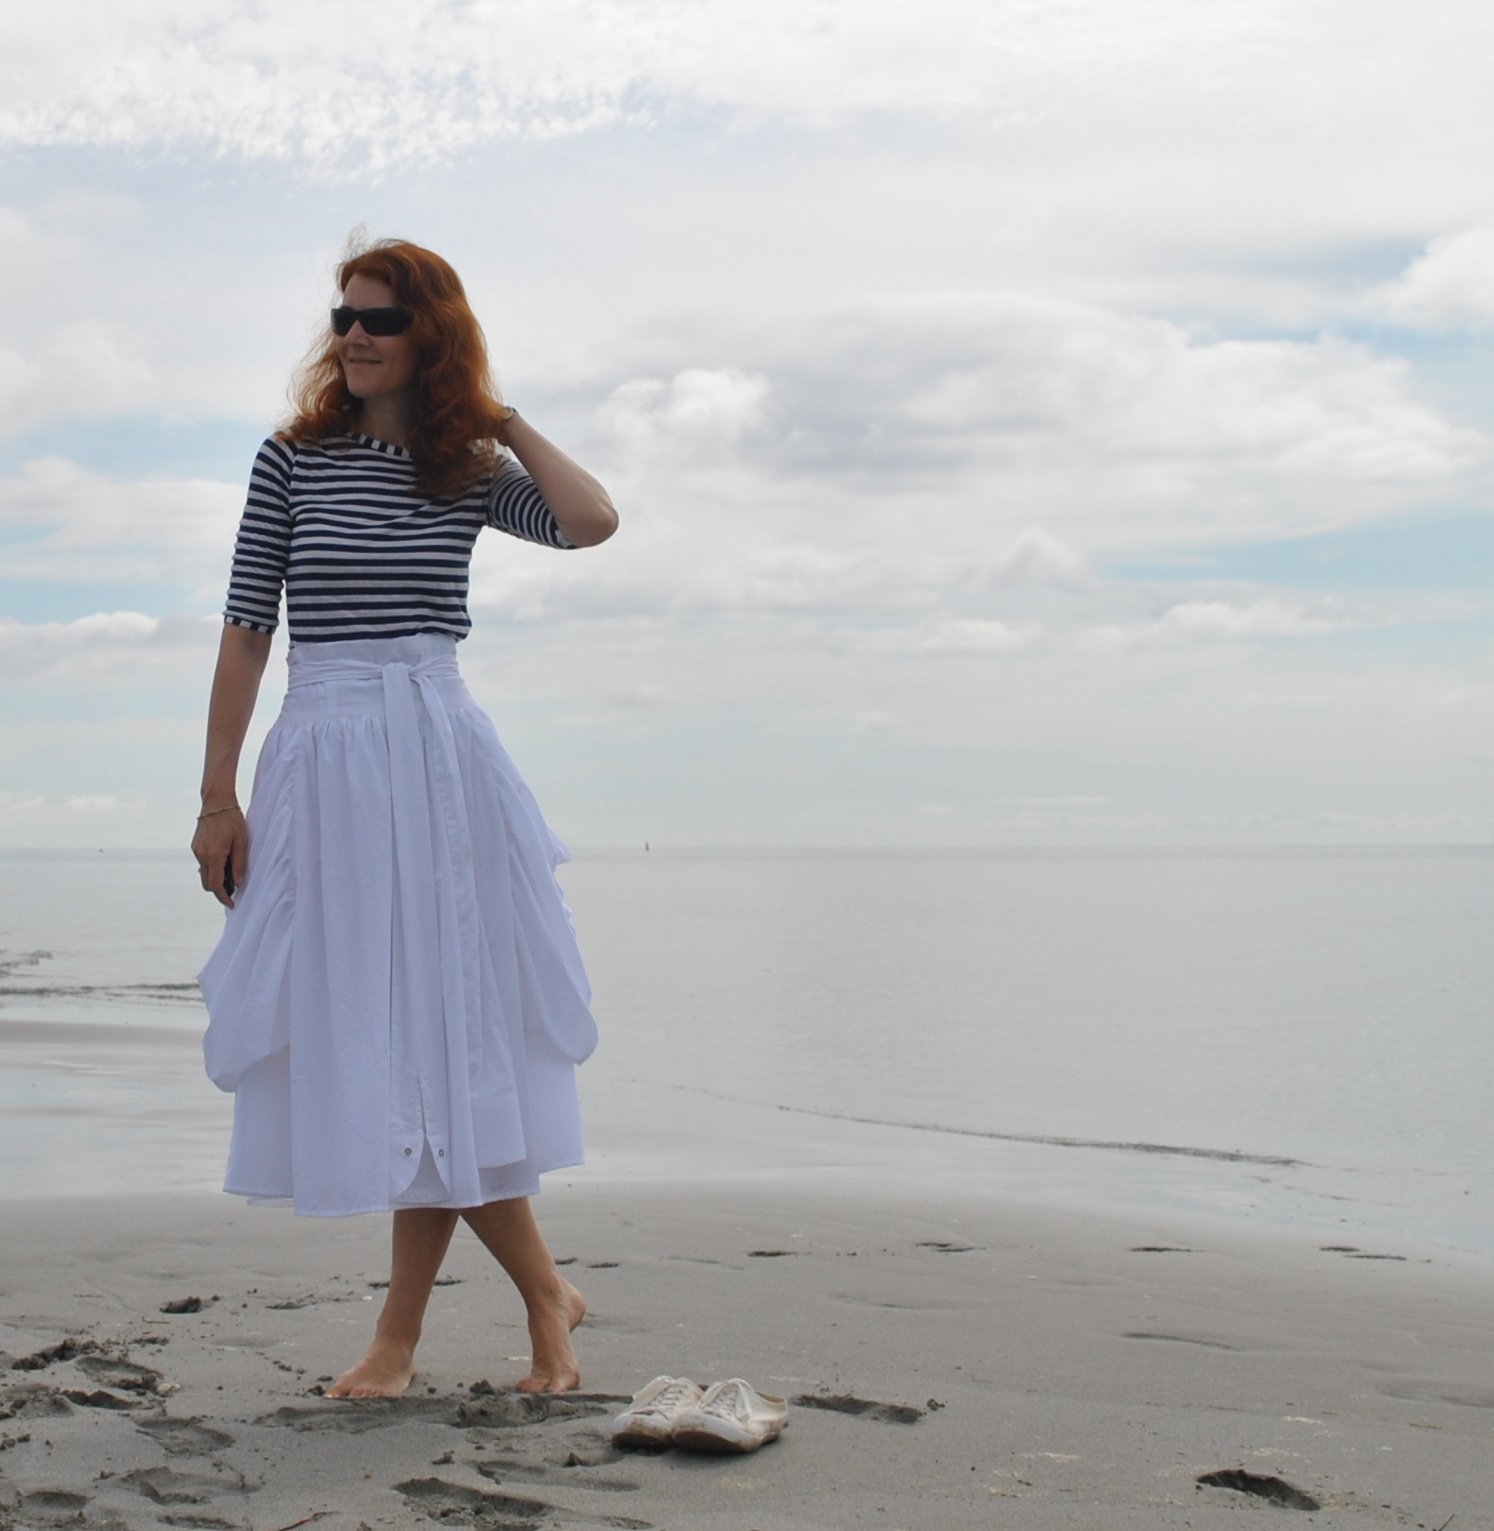
So I still have a solid little collection of garments in neutral earthy shades and in a simple relaxed-fit style.  And, today being a windy and overcast day it felt right to throw together for myself this colonial “Out of Africa”-style outfit.  I do feel very “safe” in looks like this, and it also felt comfy and weather appropriate.

 However…. on my weekend trip to the fabric store to get a single reel of cotton I do confess a small length of shocking pink linen has now somehow joined my stash too… oops!  (she said innocently) I can’t imagine how that got in there!  So the summery brights continue to sneak in…
Details:
Shirt; Burda 7767 modified, of olive green linen, details here
Skirt; skirt “d” from Unique Clothes Any Way You Like by Natsuno Hiraiwa, of silver grey crepe, details here, and see this skirt styled in 6 different ways here
Quadruple wrapped skinny belt; had for years
Shoes; Bronx, from Zomp shoes
pinterestmail

Blue bunches

Next up in my Japanese pattern book experiments…
When I saw this top in Pattern Magic 3, by Tomoko Nakamichi, I nicknamed it the “bunches” top.  Y’know because the other one on this same page was the “ponytail” top (not its real name, btw)  Well this one had two fabric thingies bursting out of each side of the self-fabric scrunchie thingy (it’s OK, I know what I’m talking about) so since we used to call this hairstyle “bunches” when I was in primary school then that is what I have dubbed this top.  In actuality, it has the same name as the ponytail top, (thread escaping loophole, thank you to Yoshimi, Janine and KD!) version A
But I have to admit the final result is actually not super “bunch”-y but is just sort of “knot”-y.  Even verging on “bow”-y.  This is because of my choice of fabric, a rather fine and light cotton knit and with not as much body as the green cotton jersey I used for the ponytail top.  So in my version here, that long casing for the bunches hasn’t held its shape at all but just collapses in on itself.  I thought that the lighter fabric would be better, but now I see that the thicker fabric did give a better structural result.  Don’t worry, I will still be wearing this top a whole bunch (hehe) this summer; its bright bright ultramarine blue shade is very vivid and therefore so very now.  Very colour-blocking…  See that, how I manage to slip trendy buzzwords like colour-blocking in to my posts like that, hmmm?  Oooh, I’m so with-it…  not!  But I do newly love this intense colour.  I confess I’m seriously craving shoes in this colour…
I think it can be worn successfully either way.  With the bunches at the back you get some interest at the back of the outfit, which is nice.  It’s noice it’s different it’s unusual… *  Often in an outfit there is nothing interesting to look at from the back view.  Something else I’ve discovered since I started taking pictures of my clothes…  
I think I like better it with the bunches at the back.  What do you think?

bunches; source

* an Aussie in-joke

Details:
Top; drafted from Pattern Magic 3, by Tomoko Nakamichi, made of lightweight cotton jersey knit
Skirt; my own modifications of Vogue 8363, burnt orange raw silk, details here, and this skirt styled in 6 different ways here
Sandals: la soffitadi Gilde, from Zomp shoes

pinterestmail

Wearing a triangle

First impressions can be deceiving.  And one’s first impressions of the “Wearing a Triangle” design from Pattern Magic 2 might just be that it is one of the least wearable designs in the book.  That was my own naive silly first impression anyway… I admit this photograph of the garment did not endear me to it one little bit; it was a disturbing reminder of the freaky monster shape the rather dishy (in those days, sigh) Alec Baldwin transformed himself into in Beetlejuice. 

(Alec Baldwin at right, in not-so-dishy mode)

I had a bit of a crush on Alec Baldwin way back then, and this apparition when it appeared in the movie was like a bucket of water over my girlish daydreams…

But the more I though about the Wearing a Triangle design, the more I started to think that it did have great potential to suit my style… if a few seams were left unstitched, and in a light flow-y fabric… hmmm, so I went and found some really light flow-y fabric.  Fortunately for me, Fabulous Fabrics had this sheer, ultra-flowy, navy blue muslin-y stuff on their super cheapo bargain table… I bought quite a lot.  Hangs head in shame at the utter failure to stash-bust there… “but it was so cheap”, she wails unconvincingly.  You might be seeing something else made out of this fabric, hehe…  But this particular fabric was just the ticket.  And I’m so happy with the result!  This project may well turn out to be a surprise favourite from the book, so far the odds are good…
I love the long, pointy handkerchief hems, and the vaguely hoodie shape hinted at with the top point of the triangle.  The drape-y, sharply A-line folds of lightweight billowy fabric are lovely and easy to wear, and I think quite flattering.  The very light and loose nature of this garment makes it a perfect summer cover-up.  I’m planning to wear this faux hoodie-of-sorts to the beach over shorts and over my wide-leg white linen pants on hot evenings.  The lightness and looseness will keep it cool, while the long sleeves will keep me from getting sunburnt.

Details:
Top; the “Wearing a Triangle” design from Pattern Magic 2, by Tomoko Nakamichi, made of navy blue muslin
Camisole (underneath); Country Road
Shorts; Burda 7723 modified to be flat-fronted and flared,  made of yellow embroidered cotton, details here
Thongs; Mountain Design

flat view
back view

Dressmaking details (for diehards who are interested in the sewing nitty gritty)
The design was quite time-and-resource consuming to draft.  This is because there are several stages…  cutting the triangles of fabric and making up a sort of half-stage fabric muslin, and then cutting armholes and using that much fabric again to draft the pattern with sleeves.  At this stage I was (uncharacteristically) not confident about the size so I went on to make a trial garment as well…  I used up practically half an old sheet just on the drafting of the pattern stage.  To my naturally very stingy frugal nature using up so much fabric, even “waste” fabric, for just one little top pattern was like torture.
The seams are sewed and overlocked to finish, the lower and neck edges overlocked and then folded in once and top-stitched.  The sleeve ends were finished with a “lettuce-leaf” rolled hem on my overlocker, I really like this slightly romantic finish to a casual long sleeve.
The design calls for the lower hem to be stitched closed partway along each end of the bottom edge of the triangle; I left these parts unstitched, which to my eyes improves the design immensely.  Ya, I know it doesn’t look so much like a structural “triangle” now, but I’m very OK with that.  And; final analysis, using up that half an old sheet on toile-ing was totally worth it!
side view

pinterestmail

Wave-y orange welts

I made a little sundress.
First impressions are that this is just a very plain little thing with minimal detailing.  Note … first impressions.   The apparent plain-ness is intentional because I wanted for the one and only detail to stand out big-time; those wave-y pocket welts (my own added feature), which took a little bit of working out and of which I am inordinately proud.  Why? well they are not just decorative, but functional; and happily situated over satisfyingly HUGE pockets. 
I have to say, one of the (many) reasons I like to sew for myself is so that I can add pockets to things… silly?  maybe, but a practical sort of silly, which is OK in my book.
I’m very pleased with how those wave-y welts turned out.  I was directly inspired by this Christopher Kane dress (at right) with those wonderfully wave-y details.  The pocket welts and collar on this dress are heat-sealed plastic filled with gel of a satisfyingly toxic shade of nuclear-waste green.  Love it!  However since gel-filled plastic is currently beyond the capabilities of my little sewing room I just tried to reproduce the look in fabric.
The dress is all made using leftover fabric scraps, and the wave-y welts were basically me experimenting and playing about which happily worked out just how I’d hoped.  The dress fabric is sea-foam green linen, the leftover bit from the shirt I made for my husband here.  I was sooo glad there was a little bit of leftover, since I had been such a good wife-y, making him a shirt and all.  I thought I deserved to keep this little bit for my own devious purposes, mwahaha.  And the pocket welts are of the leftover fabric from my burnt orange skirt, here.  The facings and pocket linings are of baby blue cotton, a biggish piece from my stash that is not a colour beloved by nor even suited to anyone in my family; but has still been incredibly useful.  It is getting eaten away slowly but surely for little things like this…

Later edit: I wrote a how-to on making those wave-y welt pockets here.  Thank you for showing an interest!

Details:
Dress; based on Burda 8511, sea-foam green linen with burnt orange raw silk pocket welts
Shoes; Country Road

The dress is loosely based on an old favourite Burda 8511, and the pockets and welts are my own added feature.  This dress pattern is a very useful one, that I have used several times, but it has a fairly form-fitting silhouette that cannot accommodate pockets.  So I flared out the skirt part of the dress slightly, so that shoving my hands down deep into those pockets is both possible and comfortable.  Just this small detail alone is deeply satisfying…  I also altered the depth and length of the back darts to make the dress a more flattering fit to my shape.  Namely, because I have a slight sway-back, I generally make the back darts deeper and lower, and because I also have a narrow torso I take in the side seams in the upper torso region as well.  These are my standard fitting alterations for this pattern.
All the internal raw edges are finished with HongKong seaming and the lower hem is finished with a wider cut strip of bias.  Little secret; that bias hem strip is not just there as a quality dressmaking finish, but pretty well necessary in this case… This dress was cut from such a small scrap, the amount of actual dress fabric in that hem is about 5mm!

pinterestmail

Turning old jeans into a skirt…

…  I decided it was high time for another refashion since I still have a small mountain of perfectly good fabric in the form of old clothing sitting in my stash.  eep!  Do you remember these jeans?   They had got a bit saggy and baggy about the crotch and seat area, thanks to me using almost-stretchless fabric.  Thus I learnt jeans really are so much better with a bit of stretch in them… anyhoo so I could barely stand to see myself in them as jeans anymore but the corduroy was still in pretty good knick overall, and I still absolutely looooove the colour.  It’s the perfect “white” for me, a sort of warm shade of grey-white that I love.  Oyster white, to get all referentially descriptive, if you like that sort of thing.  Yeah, I do too  ðŸ™‚
So.  I’ve seen dozens of jeans-to-skirt refashions on the net but none of them have ever ever appealed to me.  Why?  People can’t get past dealing with that big curved crotch seam, and will just leave it there, sew it down boom onto the front of their new skirt as is, and I just can’t bear that look.  When I do a refashion I want it to actually look like a skirt, thanks, and not for people to look at it and go, “oh, she obviously converted her old jeans into a skirt, yeah.  Hmmm.  Okaaaaay…  No attempt to do anything at all about that crotch seam….  And what about the rest of the fabric from the legs?  Why not make use of that somehow?”
So I gave it some thought and came up with this refashion (details below), that actually used up nearly all of the fabric from my old jeans.  The whole top bit, with the waistband, fly, side pockets, coin pocket and rear patch pockets is still there completely intact too.  I think it ended up looking quite fun and flippy, and almost sporty too, don’t you?

Details:
Skirt; my own design, a refashion of an old pair of off-white corduroy jeans (originally made by me too, using Burda 7863 here)
Blouse; Butterick 4985, ivory eyelet cheesecloth with lace trim
Cardigan; Country Road
Scarf; Missoni
Shoes; Bronx, from Zomp shoes

It was a pretty simple refashion…. firstly I cut off the top bit, and unpicked the curved part of that offending crotch seam.  

Pinned and resewed centre front and centre back respectively into a straight front and back seam… aaah; already, things are looking a lot more skirt-like here, right?   I also re-double-topstitched that centre back seam down again to match how it was originally…

Now for the legs bit…
Measuring and allowing for an equal depth hem cut each two leg pieces in almost-half horizontally.  

I wanted to keep the original hem down at the bottom of the legs intact, and so just unpicked a small area of hem near the outside leg seam… so I could unpick that long outside leg seam.  I chose the outside leg seam for unpicking like this since I had originally double-topstitched the inside leg seam down, and so the outer leg seam was a far easier option here…!!  And those double topstitched seams makes a nice random feature on the final skirt too.This gave me four largish pieces of leg, in pairs of two mirror images.  I used the lower leg pieces (with the hem mostly intact) for the skirt front and the upper leg pieces (which as yet have no hem) for the skirt back, and checking to make sure the nap of the corduroy is all the same way as each other and the top of the skirt, sewed up the side seams, and centre front and back seams.

The  next step was to arrange the excess fabric in the lower skirt piece into folds so that it fitted the upper skirt piece.  This was just a matter of measuring and arranging the folds to be as near as perfect mirror images of each other, front and back, and checking every now and again to see that it was fitting into the top section.  

Once the folds were all evenly in place I basted them all and then sewed the skirt top and skirt bottom together.  I top-stitched each fold down in place by about 5cm vertically, some single- and some of them double-topstitching.  Then hemmed the skirt back, to match the hem of the skirt front (which is already in place, and only required the centre front bit of the hem to be sewn into place…)

Voila!  A new skirt, and with very little waste!  The only waste fabric was from the crotch area, plus I ended up shaving a few inches off the top of the lower skirt section also to get a length that pleased me.  Note, I took length off the top of the skirt, not the bottom, since I was keeping that existing lower hem in place.  When re-fashioning a garment it is well worth incorporating those existing hems into your new garment somehow, since years of washing and wearing creates a permanent and very visible line of wear into the fabric, and a fold that will never ever iron out … thus removing length from that top area (that will just be disappearing into the joining seam anyway) is definitely the way to go here.

Better, yes?
pinterestmail

Pattern Magic 3; ponytail top B


I’ve made an interesting little top…  
This from the marvellous book Pattern Magic 3 by Tomoko Nakamichi.  I’ve nicknamed it my “ponytail” top (version B), because of the way the pieces are pulled together, bunched up and held together with a sort of self-scrunchie and flow out of the other end like a girl’s ponytail.  As for its real name… well my husband and I have seriously spent the last Half.  An.  Hour; pouring over Japanese character translations and come up with “pulling hair through a hole”.  Could be completely wrong, but just maaaybe my nickname might be vaguely related to its true name bestowed by its Japanese designer?  If somebody actually knows and could correct my bad translation then that would be super wonderful, hehe.  
So, on the down side I think I am a failure at Japanese  :(((
But on the bright side I don’t think my new top is a failure  ðŸ™‚
Pretty cool, no?  It has a wide, slightly cowled neckline which is quiiiite nice, but which is a wee bit flappy on my figure, so I just fold that down into the inside and it looks pretty good like that.  I considered stitching it down to the inside, but decided that isn’t really necessary as it sits down nicely all by itself.  
All the seams are stitched, then the raw edges overlocked together to finish.  The raw edges of the hems, armholes and neckline were overlocked, then the allowances turned under once and topstitched in place.   Simple dimple!
I used some green cotton jersey that has been in my stash for yonks, initially intended for some St Patrick’s Day thing which never got made.  And I still have a bit left over which I am in the process of transforming into a little cardi… 

Top; this is one of the designs on p58 of Pattern Magic 3, by Tomoko Nakamichi, made of green cotton jersey
Skirt; Vogue 1023, turquoise synthetic stuff, details here, and this skirt styled in 6 different ways here
Sandals; lasoffitada Gilde, from Zomp shoes

pinterestmail

Do you like big pockets…?

… if so then this is the skirt for you!  I have never seen pockets to rival these, ever.  I knew (intellectually) the pockets were big by the picture on the pattern envelope, but the (realistic) first sight of the pocket pattern piece was still a bit of a shock.  Seriously about as big as the skirt pieces, and the skirt pieces are big.  Lol!!
But of course, the pockets are not mere pockets at all, but a clever design feature to enhance the pouffiness, the floatiness, and the gathered, over-the-top loveliness that is the hallmark of this beautifully feminine skirt pattern.  Side note; my husband commented spontaneously that he loved me in big floaty skirts like this; double WIN! since I love it too.
Funny little anecdote about the pattern… I first saw this on shams’s blog and knew I just had to have it.  Those shirt sleeve cuffs on the ends of the sashes; so adorable!!  (salivating) must have… 
I immediately visited Fabulous Fabrics and asked for the pattern… no, they didn’t have it.  I was actually hoping against hope that it was miraculously hidden in the back of the pattern drawer since I had already looked through the Vogue catalogue and noticed it wasn’t there (eek!)  I assumed its time had come and gone.  I then started trawling ebay, looking for somebody getting rid of their old copy… no dice, although I did fall victim to must-have-itis for a maxi-dress pattern… the product of which has also recently exited my sewing room and been welcomed into the wardrobe… But I digress…   
So, in a masterstroke of going to every extreme to get that pattern by hook or by crook, I did some more detective work and eventually discovered and joined BMV where I was amazed to see I could get it for a price that was an incredibly delightful surprise; $3.99.  This is about a fifth of the usual price of Vogue patterns in Australia… no, I am not kidding nor exaggerating!!)  The cheap price just reinforced my belief that it must be an old pattern and I was lucky to have found it…  My pattern arrived and I was supremely happy.  Then, get this, the last time I was in Fabulous Fabrics (er, yesterday, hehe… yup I am a regular, on a first name basis with staff) I had a quick flick through the new spring Vogue catalogue, and you guessed it, there was the pattern.  It is actually new season, like this season!  To us southern hemispheries, that is…  thus all finally became clear to this very behind-the-times seamstress why I hadn’t been able to get it before… doh!
I used a very light cotton voile, which I sometimes use as a lining fabric, and the same fabric for both the skirt main and for the lining.  I completely love the long long sashes with shirt cuffs on the end, a fun and quirky touch that drew me to the pattern in the first place.  Because of this little feature, to my mind the skirt just had to made of white cotton.  Nothing else would do…  Those shirt cuffs just wouldn’t have the same witty flair unless the style directly referenced the Classic White Shirt.  Plus I just adore big white floaty skirts for summer.
And those pockets…? well, they are graaaand, in every sense of the word.  I don’t think I could actually really put anything in those pockets, really.  Stuff could get lost forever in there…
I have some more fabric to make up the little top as well, but for now, below is my review of the skirt pattern…

Details:
Skirt; Vogue 1248, white cotton voile
Shirt; self-drafted, navy and white stripe cotton jersey, details here
Shoes; Country Road

Pattern Description:
Skirt, gathered, flared and lined, with fitted contoured waistband, centre back zip closure and long attached side sashes with shirt cuff features.  HUGE gathered pockets.
Pattern sizing; 
I bought the AA 8-12, and cut a size 10.
Did it look like the photo/drawing on the pattern envelope once you had finished sewing it?
Just about exactly, since I used white fabric too!
Were the instructions easy to follow?
yes
What did you particularly like or dislike about the pattern?
The pattern is great.  Vogue patterns are always accompanied by clear instructions and detailed illustrations. The pattern pieces went together beautifully.
There is one small thing I would change… the instructions stipulate to gather each skirt piece individually, before joining them together along the side seams.  I find I get a much better and smoother gathering result when the whole skirt is gathered as a whole; that is, you join up the skirt pieces at the side seams, THEN run the gathering stitch around the skirt top in one long go.  This is because I find that the first and last few centimetres of gathering do not gather as evenly or as ideally as if they were part of one long continuous line of stitching and if the skirt is broken up into several sections you have several of these gathering stitch stop/starts.  I would recommend to gather the skirt as a whole.  And also to gather the lining skirt as a whole, too.
Fabric Used:
very lightweight cotton voile
Pattern alterations or any design changes you made:
I took about 5cm (2″) overall off the waist band pieces.  Also I gathered the skirt as a whole, as discussed above.
Would you sew it again? Would you recommend it to others?
Yes, I think I might sew this again, I love it!  I highly recommend this skirt pattern to others.  Just bear in mind it needs very lightweight drapey fabric, because of all that gathering.  I have some fabric to sew the little top, so I will review that separately.
Conclusion:
I just love this skirt!  Firstly, the silhouette is delightfully feminine, and the floatiness and frothiness of all those light gathered swathes of fabric floating about you is highly satisfying.  I feel just so darn feminine in a skirt like this!!
Secondly, the shirt cuffs on the ends of those sashes are completely adorable and what drew me to this pattern in the first place.  Such a witty and unique little detail, that really makes the skirt stand head and shoulders above your average everyday gathered skirt.  Not to mention those pockets, which must be the biggest in known history!  Another fun and interesting feature…
I’m going to love wearing this skirt over this summer!

pinterestmail

A weepy day…

… not because it is the last day of self-stitched September natch, which would ordinarily make it a day of yay!-ness.  No, today is the last day of school for my son Sam and we attended a mother/son service together in the school chapel this morning.  It was pretty moving and I will admit to the lump in the throat and a few odd tears…  One thing the boys do is to present their mother with a rose, and it was a pleasant surprise to me when the colour of the rose Sam gave me accessorised my ensemble so well … fortuitous, or what!  We had morning tea together and strolled around the garden and chatted.  So a sorta emotional morning; but nice and sweet emotional, not horrid emotional, so that’s OK.
Thoughts on the dress:
You’ve seen this exact ensemble before, when I introduced this dress here on the blog.  I was pretty happy with how these raspberry pink sandals went with it, really says “summer!” I think.  I just may have been saving this dress for this special occasion this month…  ðŸ™‚  It received several nice compliments from friends, which is always a plus, hehe.  It is super comfortable to wear, and the skirts ripple and swish most satisfyingly around your legs as you walk, and in the breeze, so I’m pretty happy with it.  I can see it getting a lot more use for barbies, parties and get-togethers over the next few months as the social season starts to kick in and roar into life.  The last few years my party dresses have been relatively colourless (the three lace dresses I wore recently during this month; the pink, the beige-and-silver and the beige-and-black, are all ex-party dresses from previous years)  So you can see this super-saturation in colour is a big departure.  Good to have something different once in a while, yes?  I reckon it’s always wise to be well prepared with a fab party dress way in advance of the social season.  The last thing you want is to be madly running up some complicated number in panicky desperation mere hours before a big event.  Much better to have worked through any problems of a pattern and/or fabric in a stress-free environment… and I’ve already discussed the teething problems I had with this pattern!  But it all worked out to the best in the end; realistically if I’d ended up with the planned white version working out then that would have been yet another colourless party dress, right?  So it was meant to be, I reckon.

Details:
Dress; made utilising the twisted front design from Pattern Magic by Tomoko Nakamichi, teal silk jersey and with a yellow lycra petticoat of my own design underneath, details here
Sandals; Pedro Miralles, from Soletta shoes

Self-stitched September; I was planning to write some claptrap insightful meaningful thoughts on my feelings about self-stitched September this time around, but hmmm.  I don’t want to say this the wrong way… I really appreciate the great community that Zoe sets up each time, and there is a little core group of people that always make it worthwhile.  We leave supportive comments for each other and I look forward to seeing what everybody has been sewing and how they put it together.  However I did receive one dodgy comment when somebody called me a show-off.  That made me think I didn’t want to do it any more.  But when I start something I see it through, so I finished off the month, in hopefully as non-show-off-y a way as I could.
I’ve written before about how one tiny seed of negativity can sadly and wrongly wipe out a whole host of positivity.  It is wrong and it shouldn’t be that way.  But it just is.  So I am a bit doubtful if I want to go there again.
But to finish on a positive note; the other nesting black swan I mentioned has successfully hatched her brood today (or last night maybe, in between yesterday’s walk and today’s walk anyway…) I was thrilled to see four cygnets in this batch…  So it is baby season in a big way down at the river… here are some more brand new families that I have seen over the last few days.  Please enjoy the baby bird cuteness!

pinterestmail
Switch to mobile version
↓