Tag Archives: Dress

Sorta Missoni

Firstly, thank you so much for all those lovely comments on my cardigan!  I was overwhelmed to read so many kind words… and with regard to my little rant; also to stress that I am not down on Burdastyle per se, which has so many talented and madly creative people to delight and inspire; but just their sucky anonymous ratings system…  yes anonymous.  A situation beloved by trolls, am I right?  It’s just a mystery to me why they’ve still got it…  but in short I shall continue to virtually hang-out at Burdastyle and contribute, while simultaneously and quietly acknowledging that the ratings system blows.  


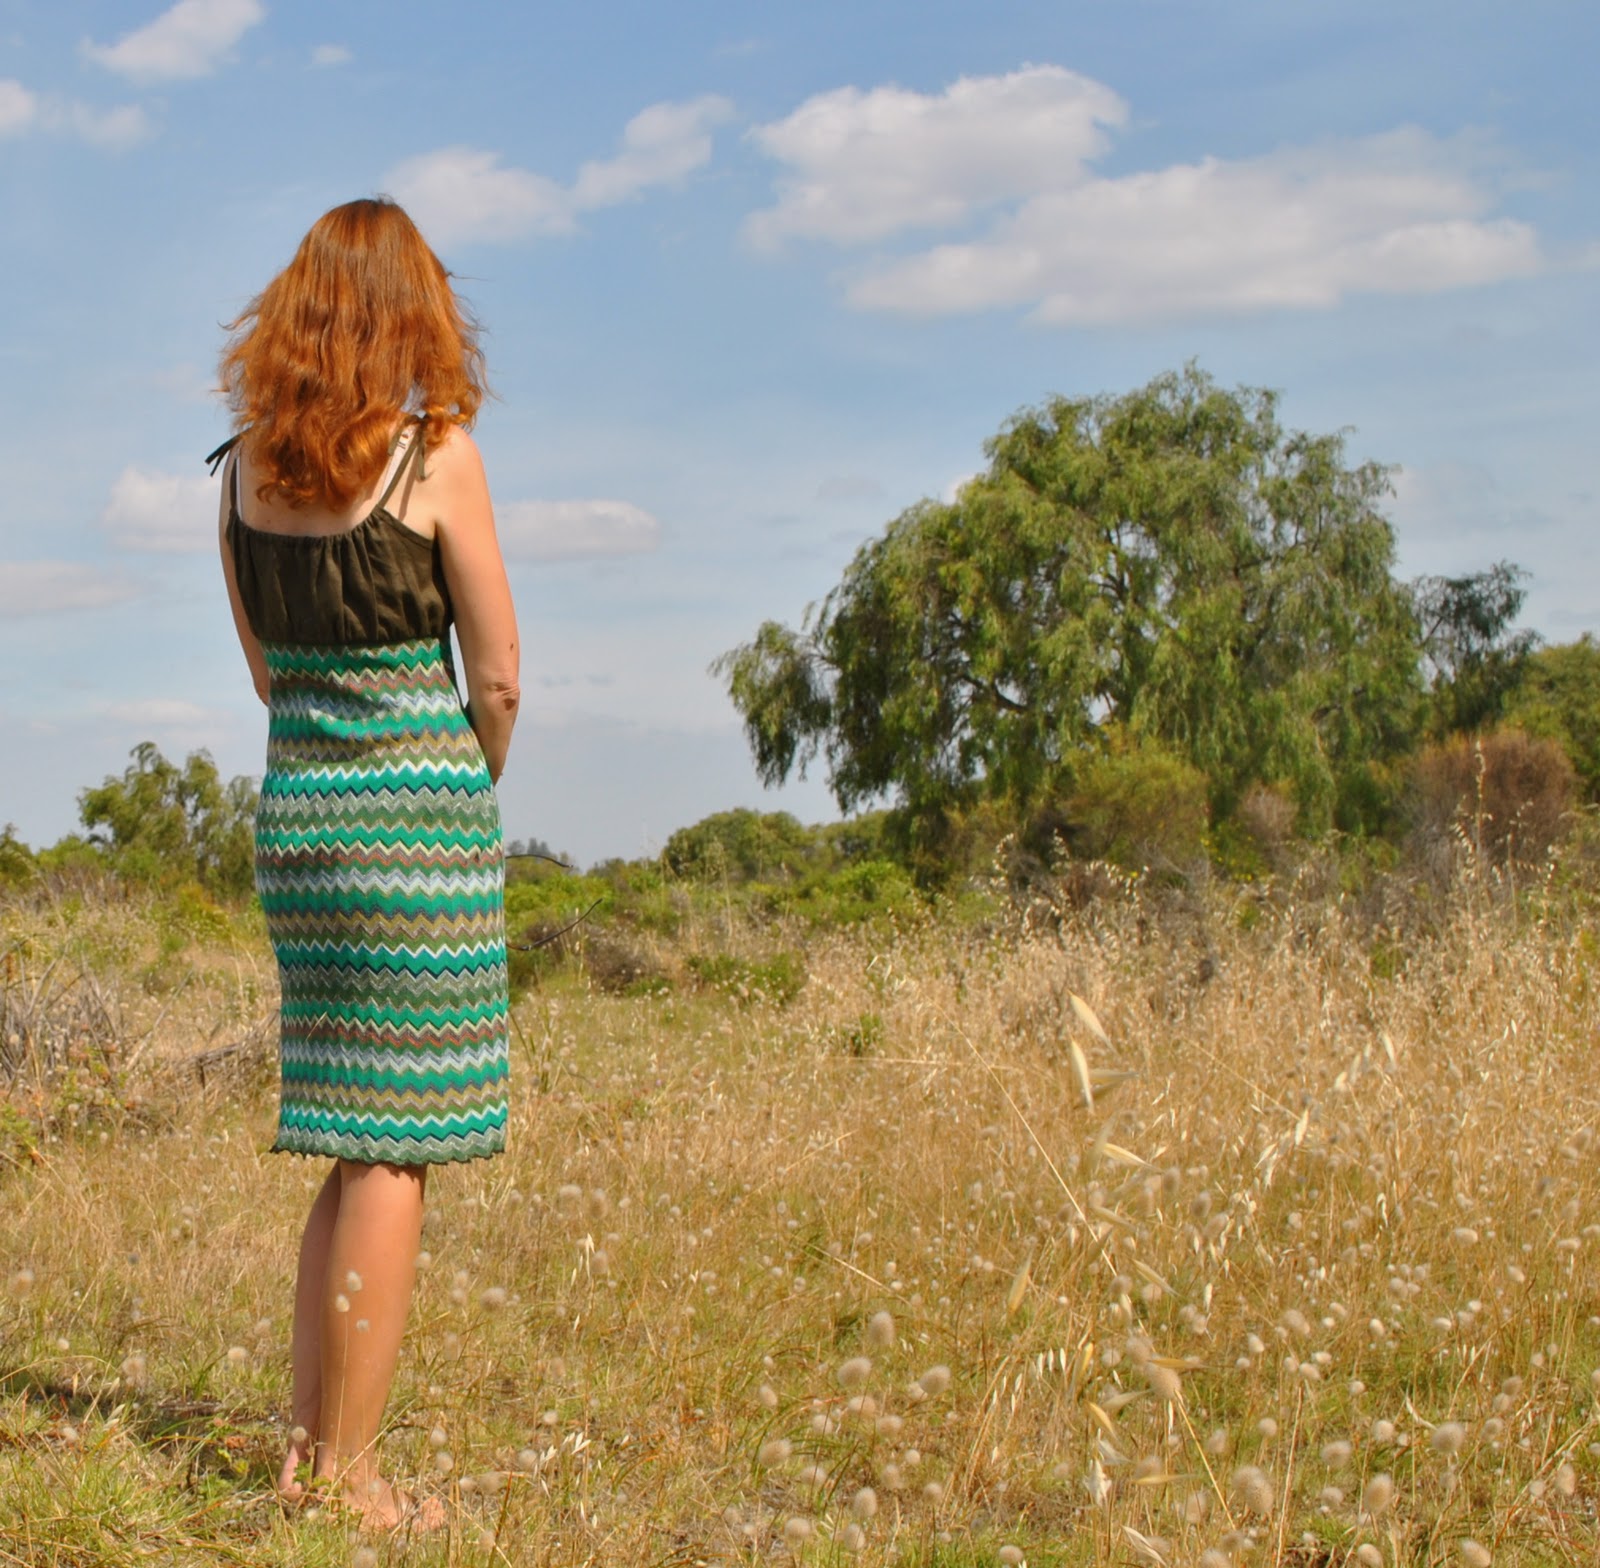
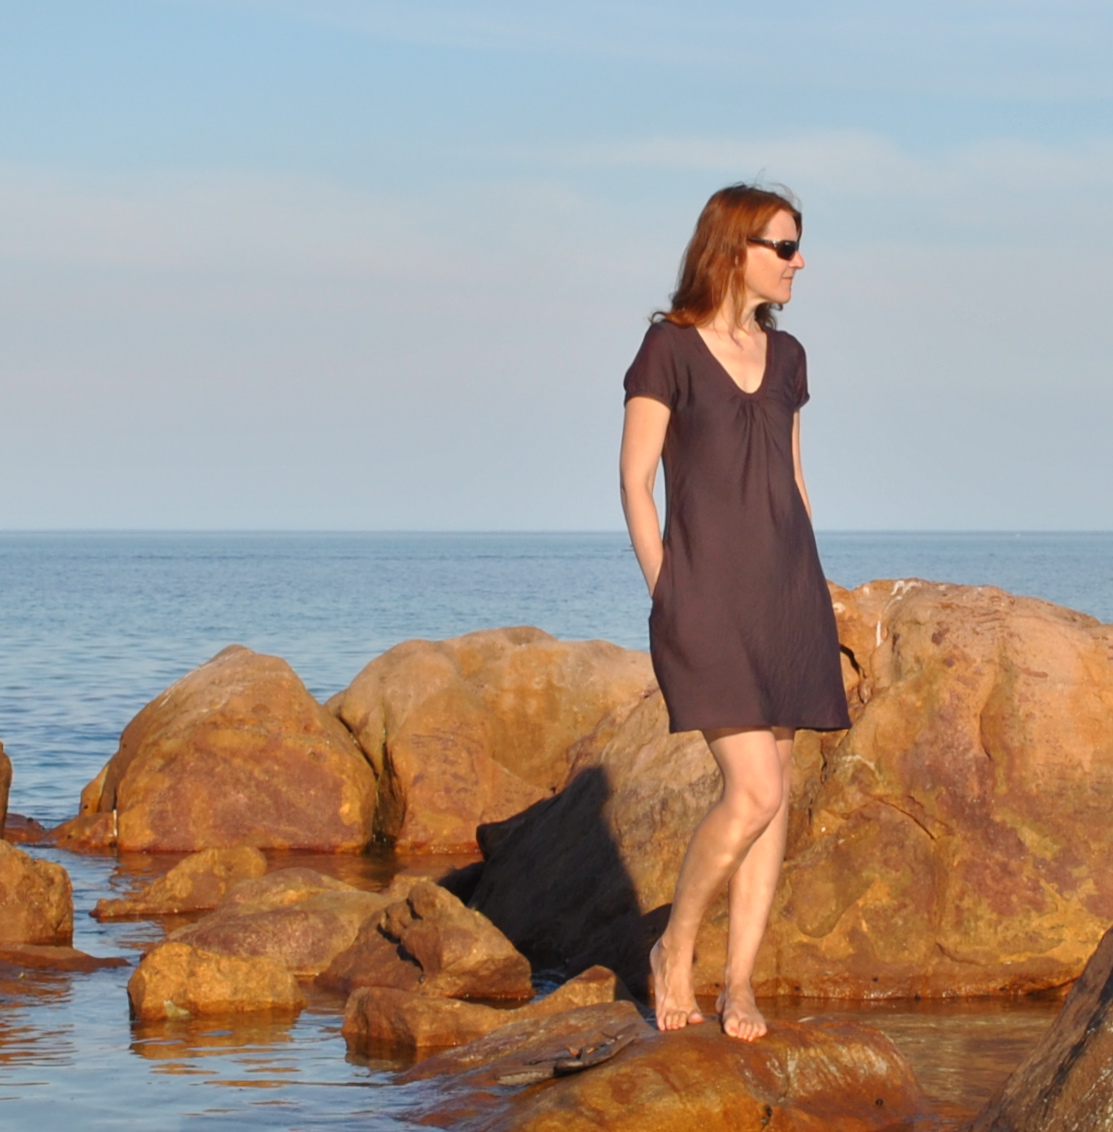
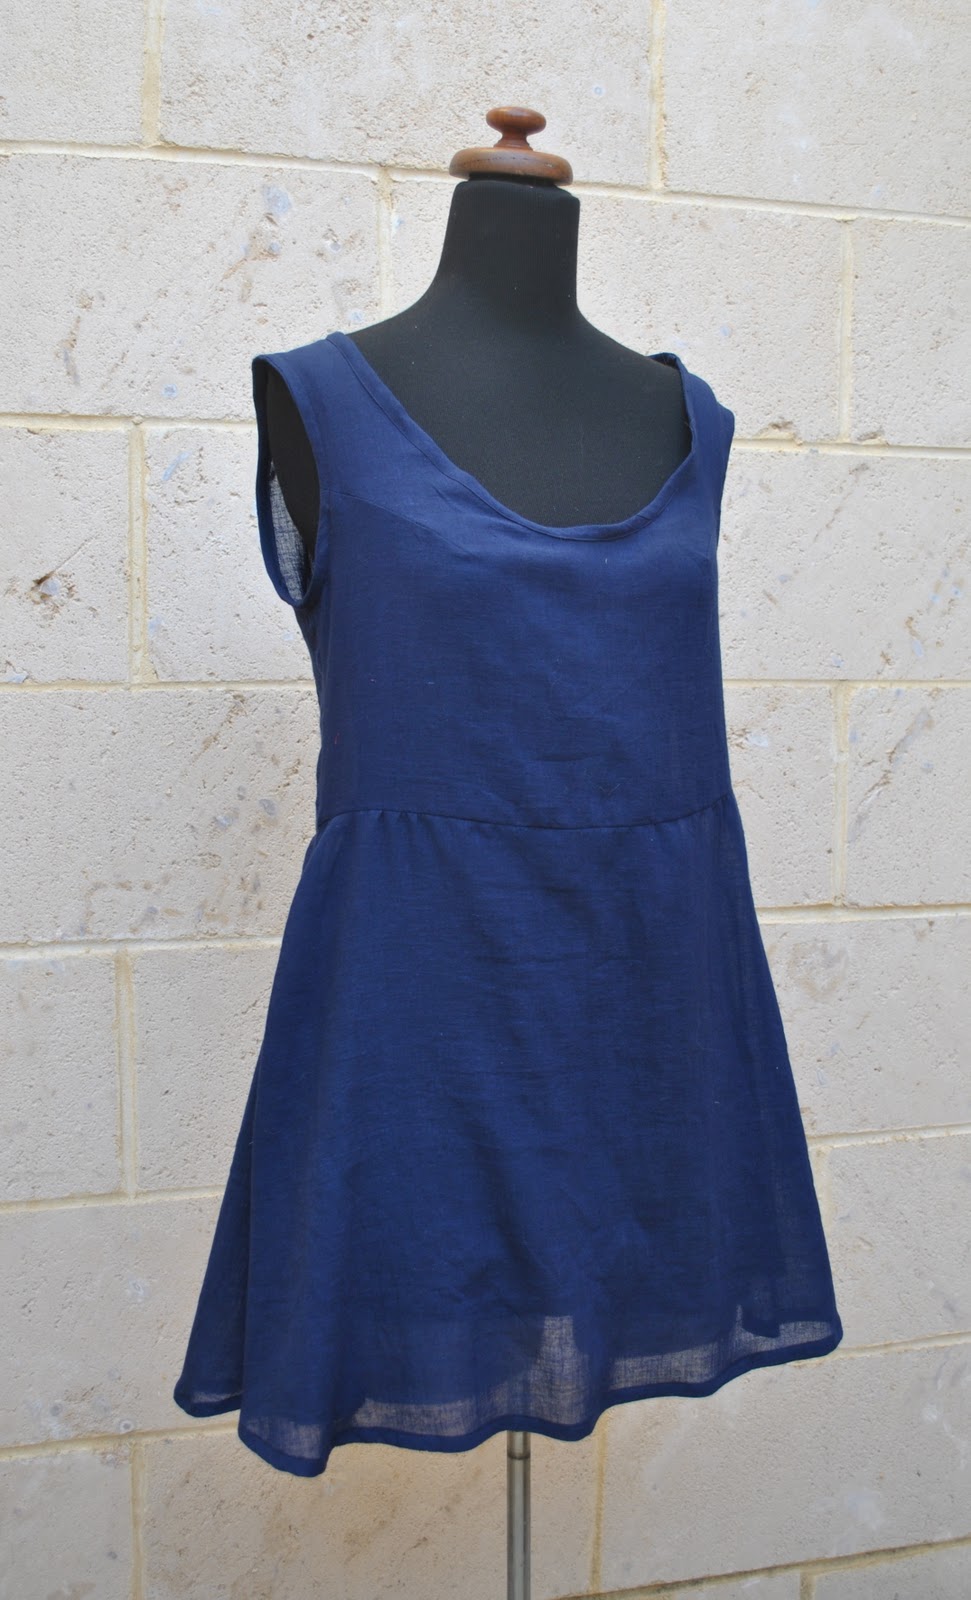
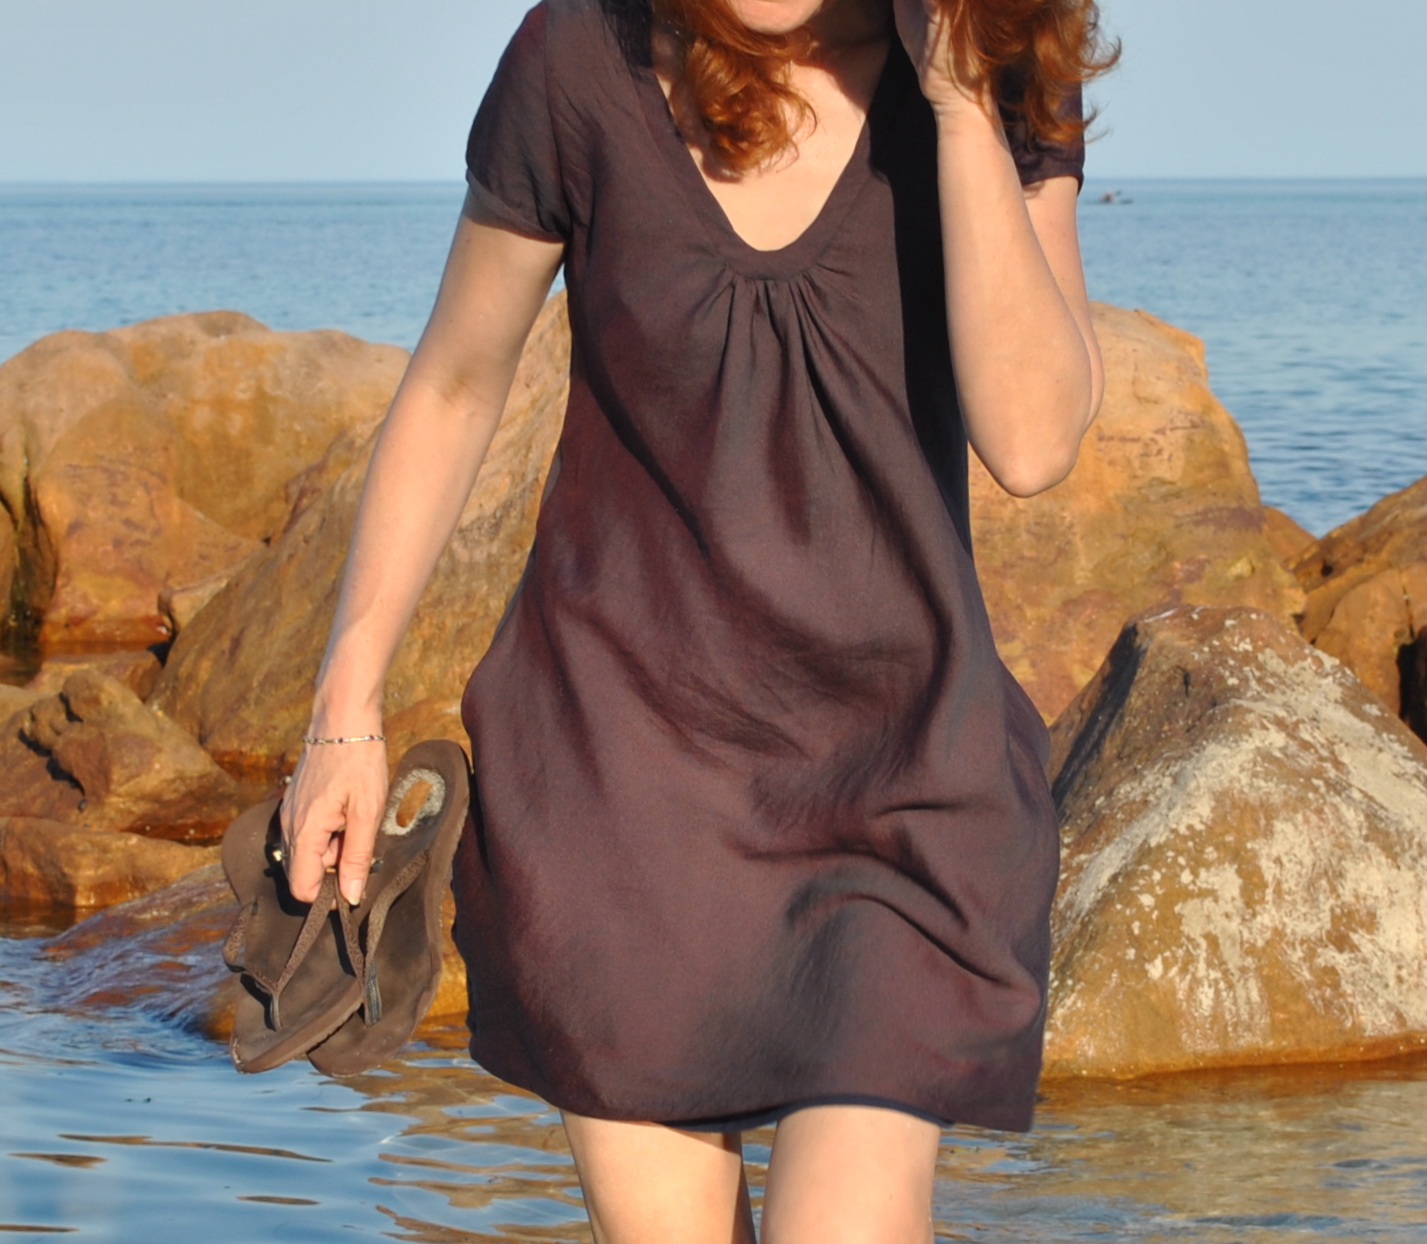
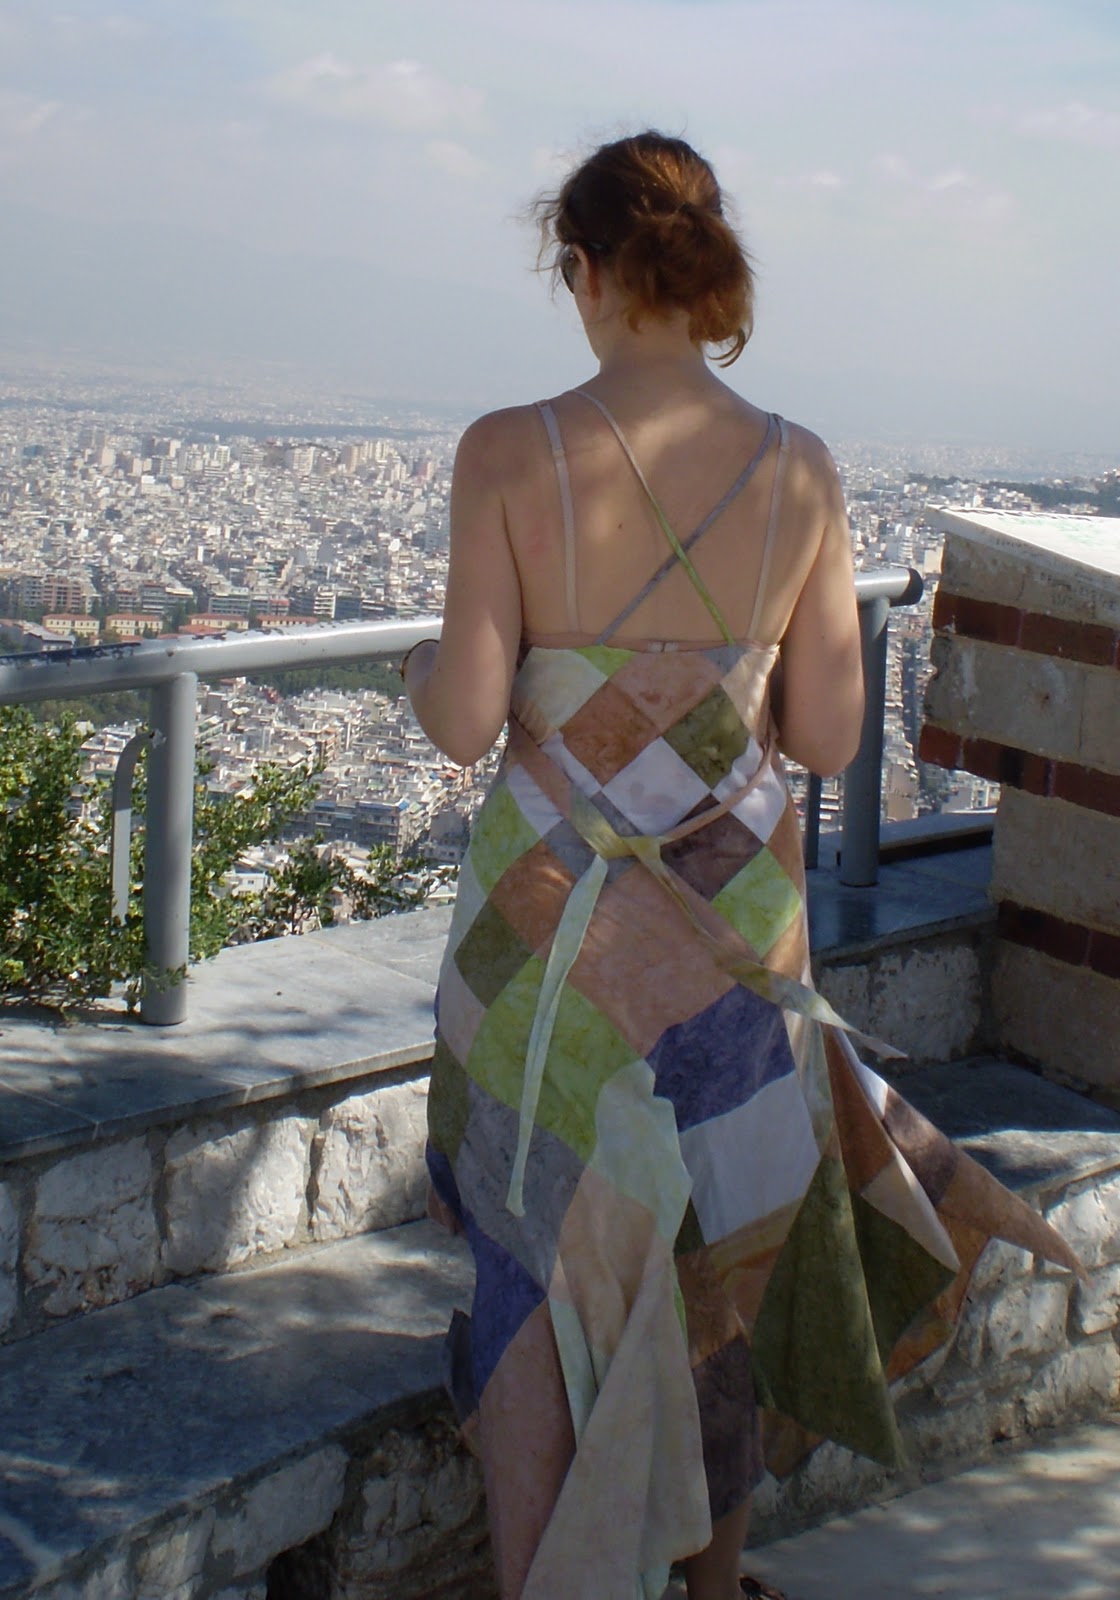
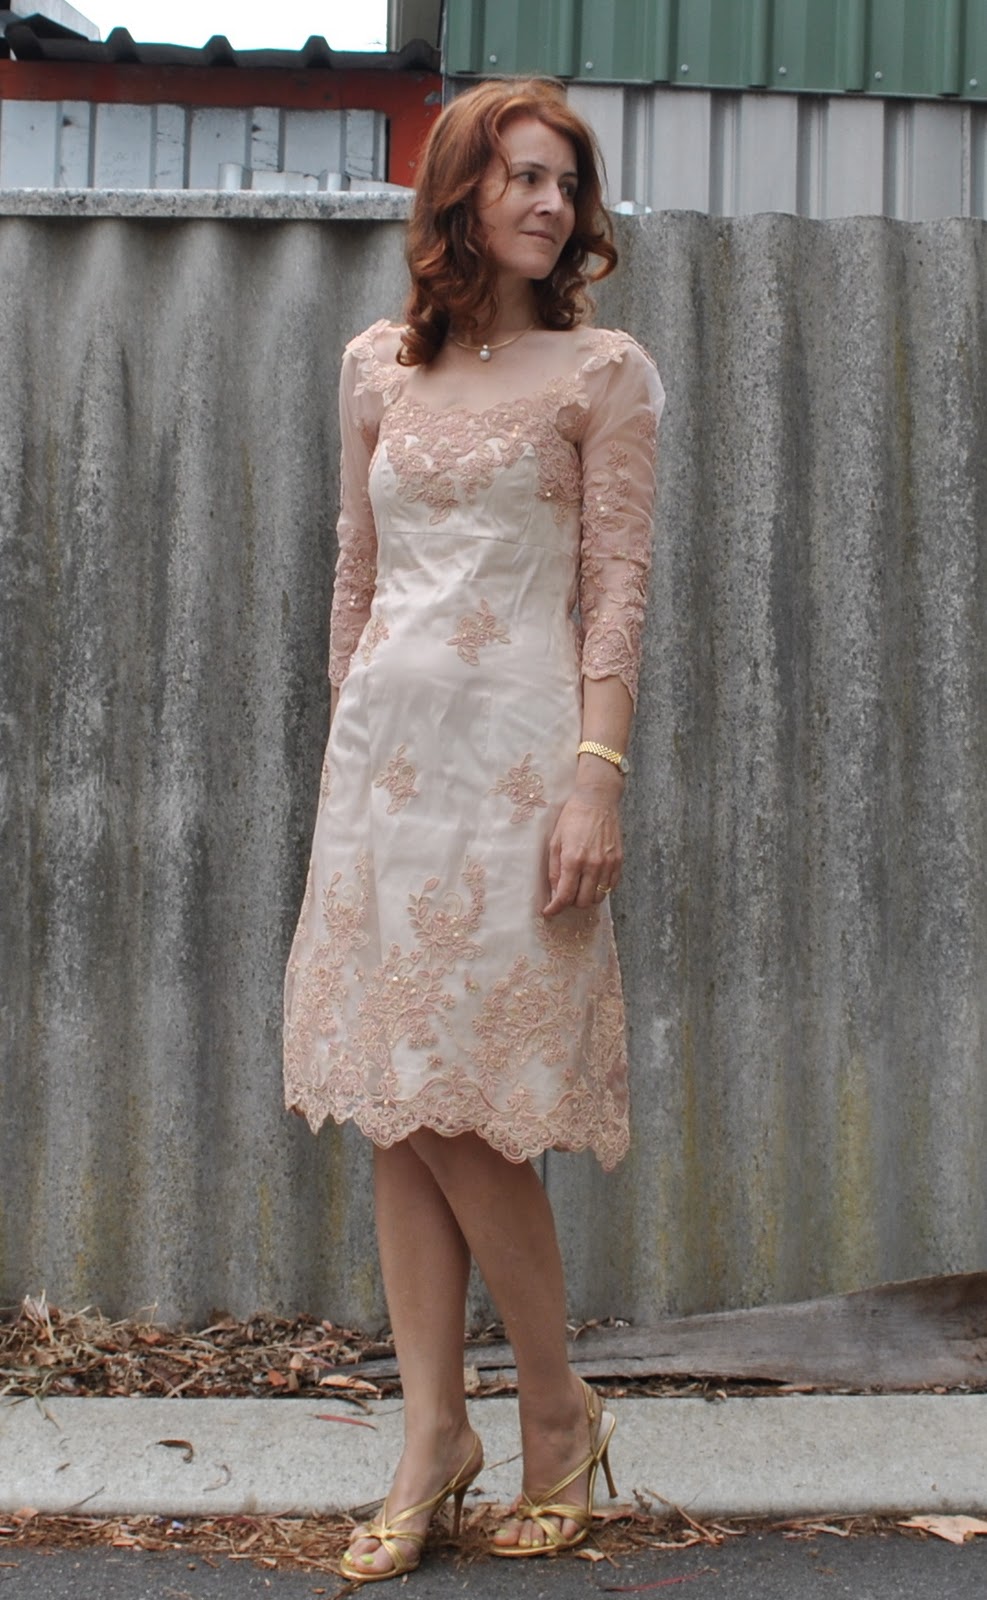
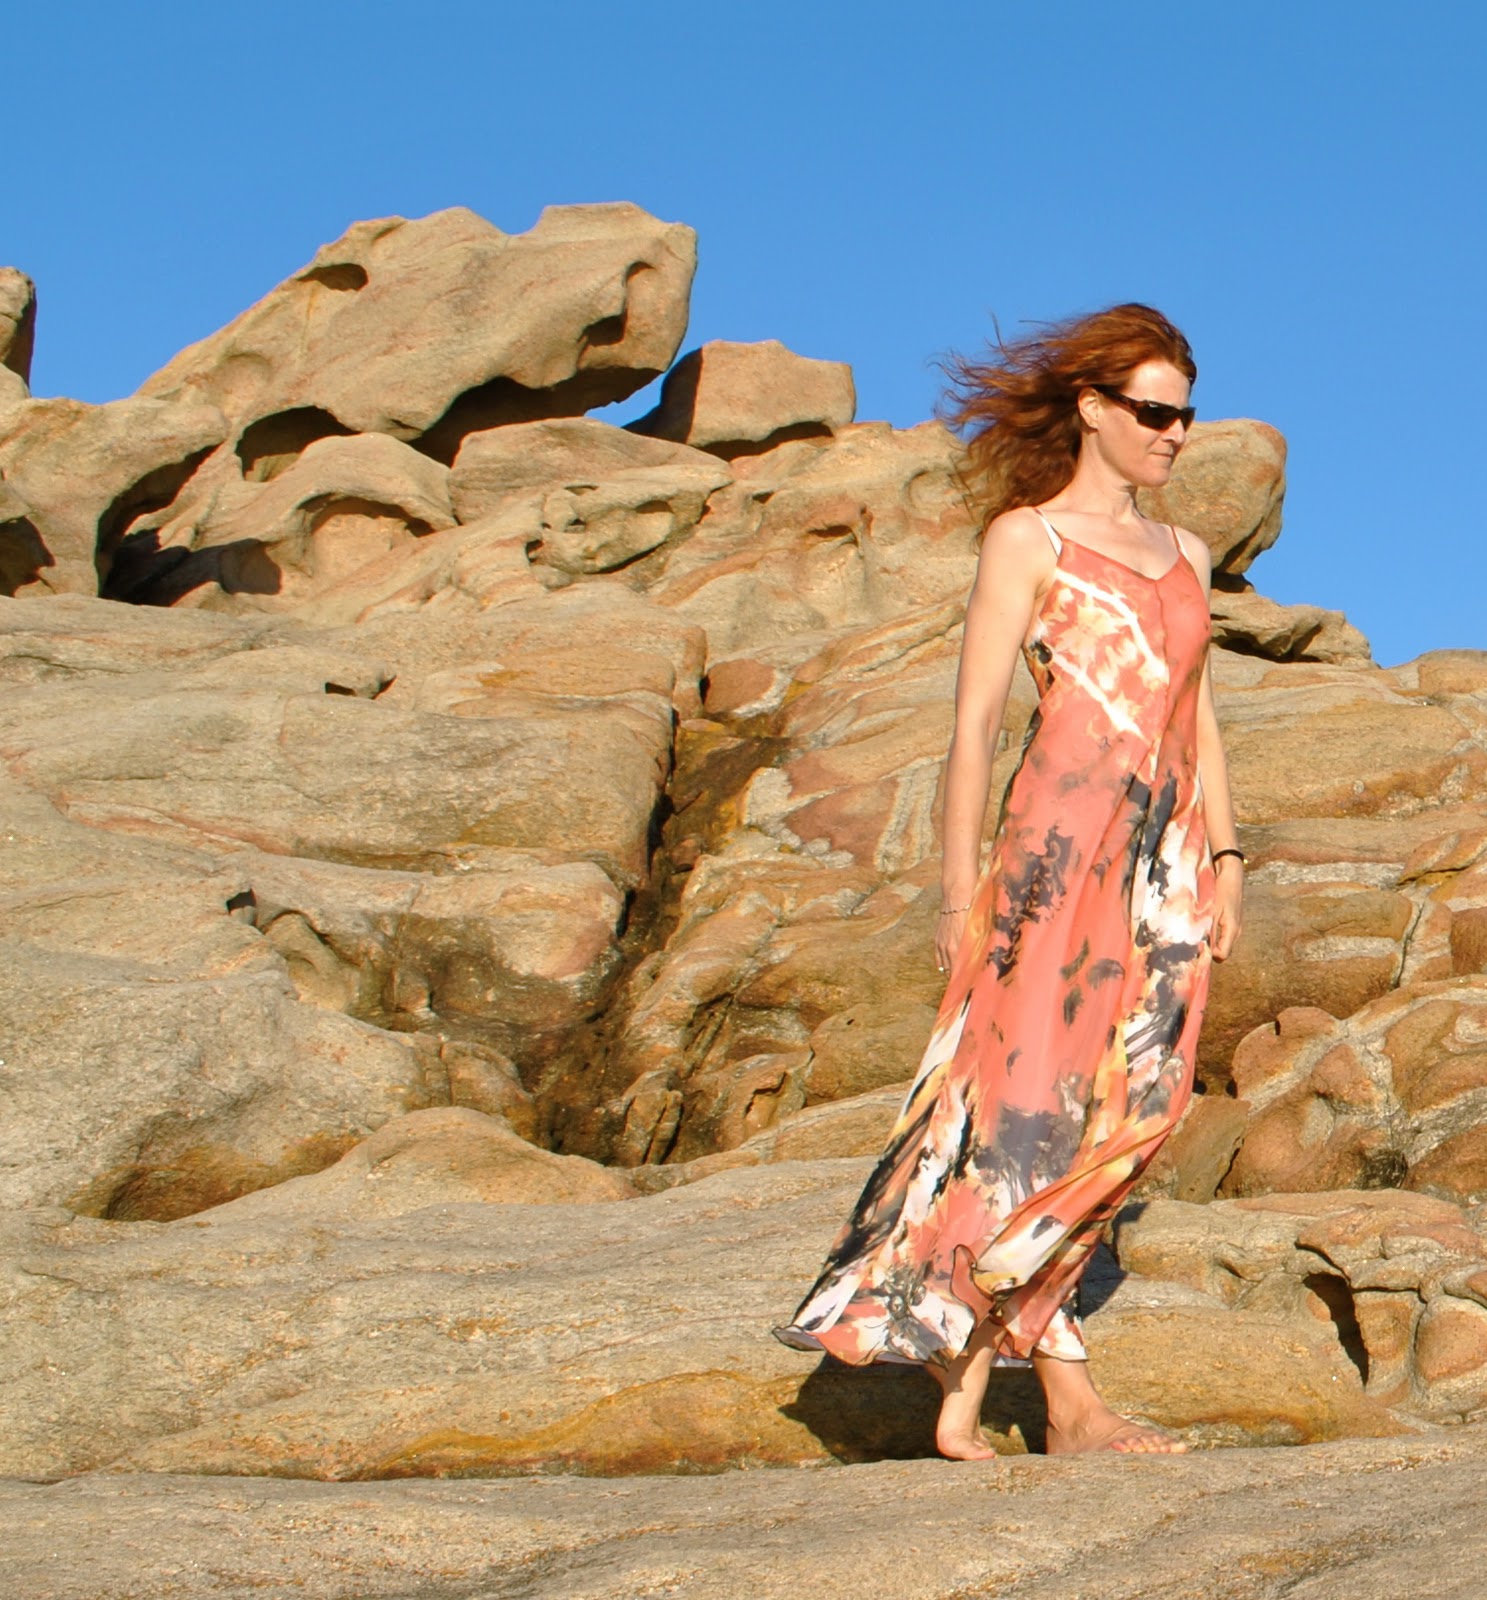
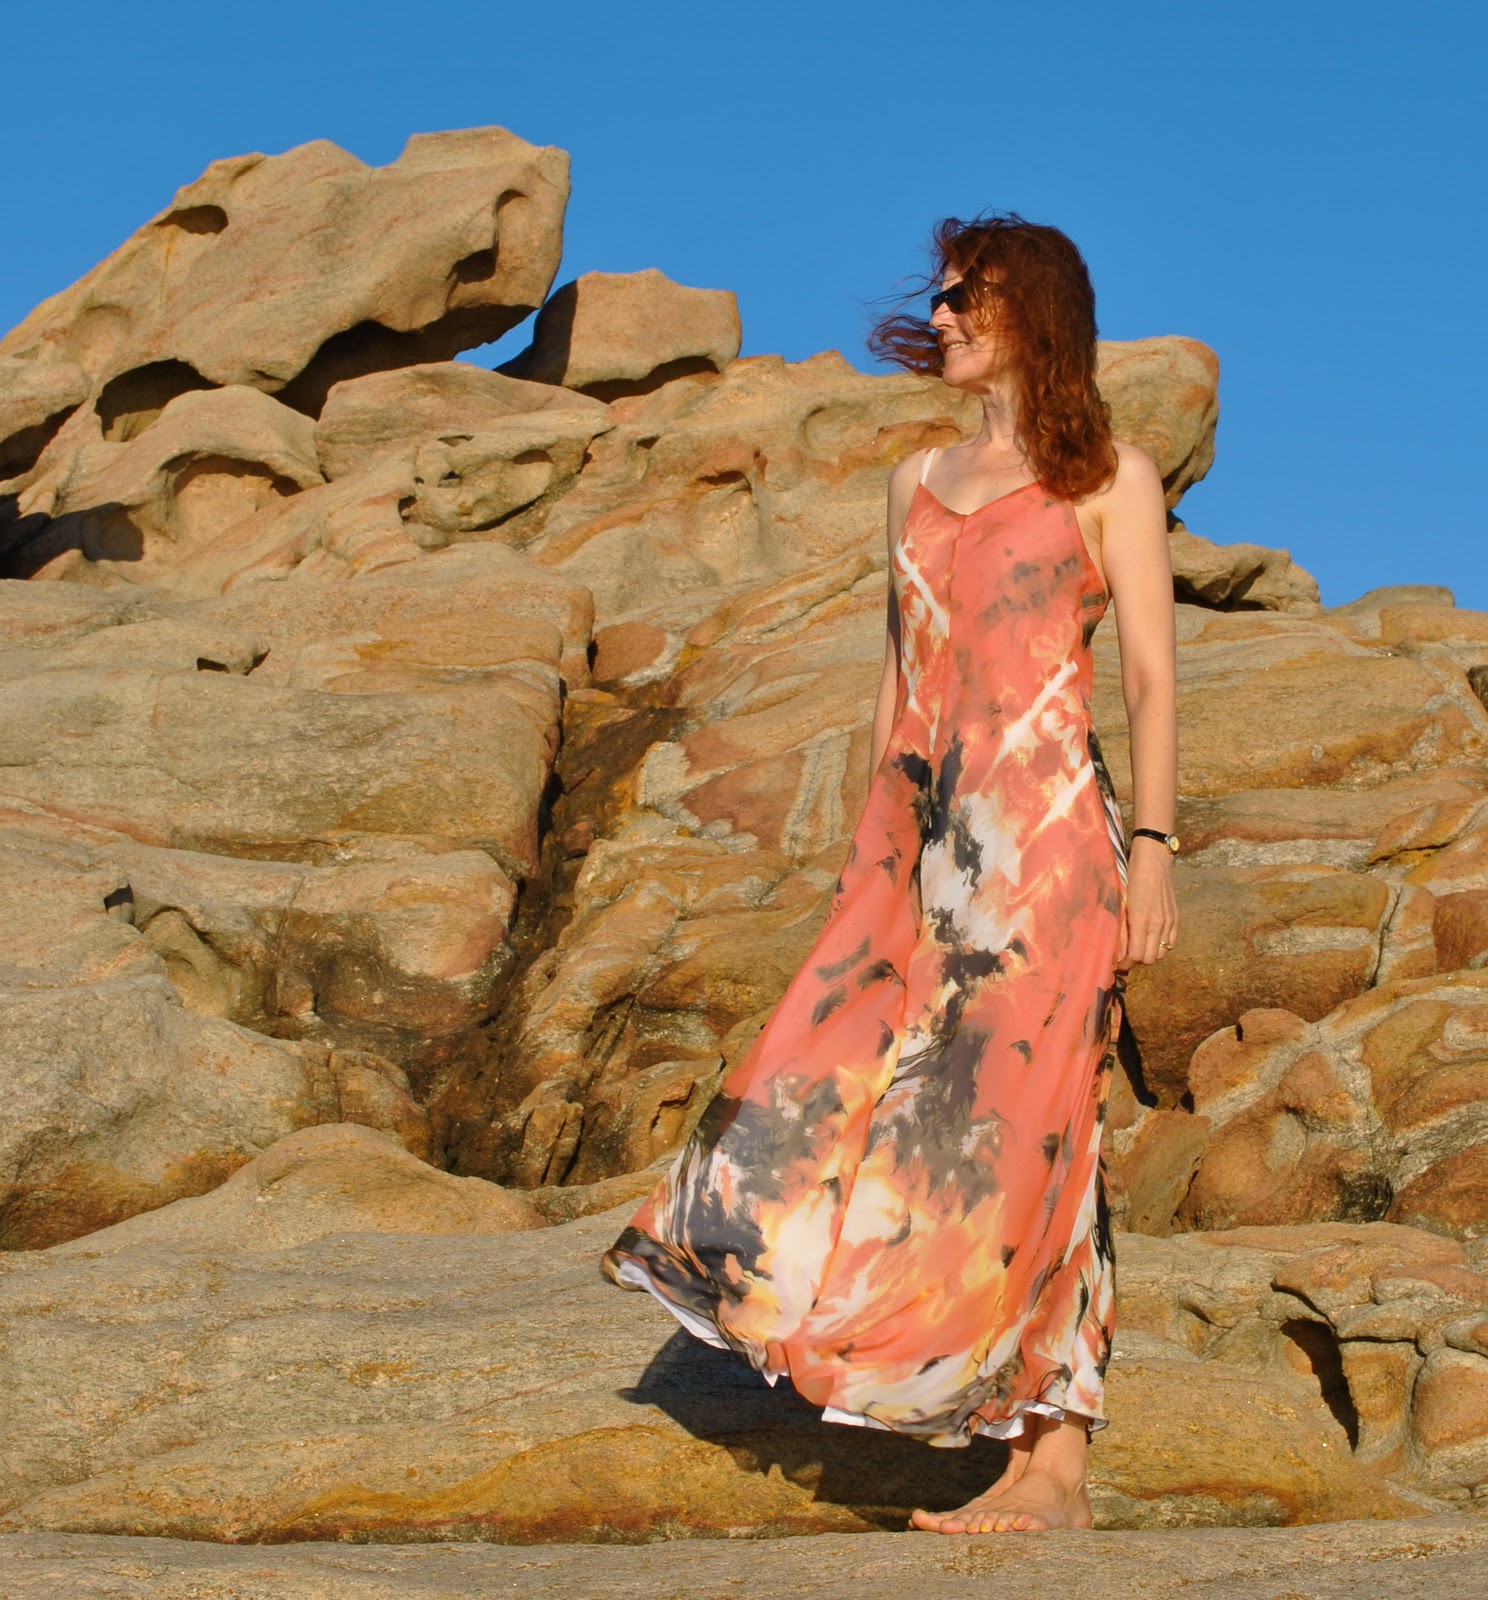
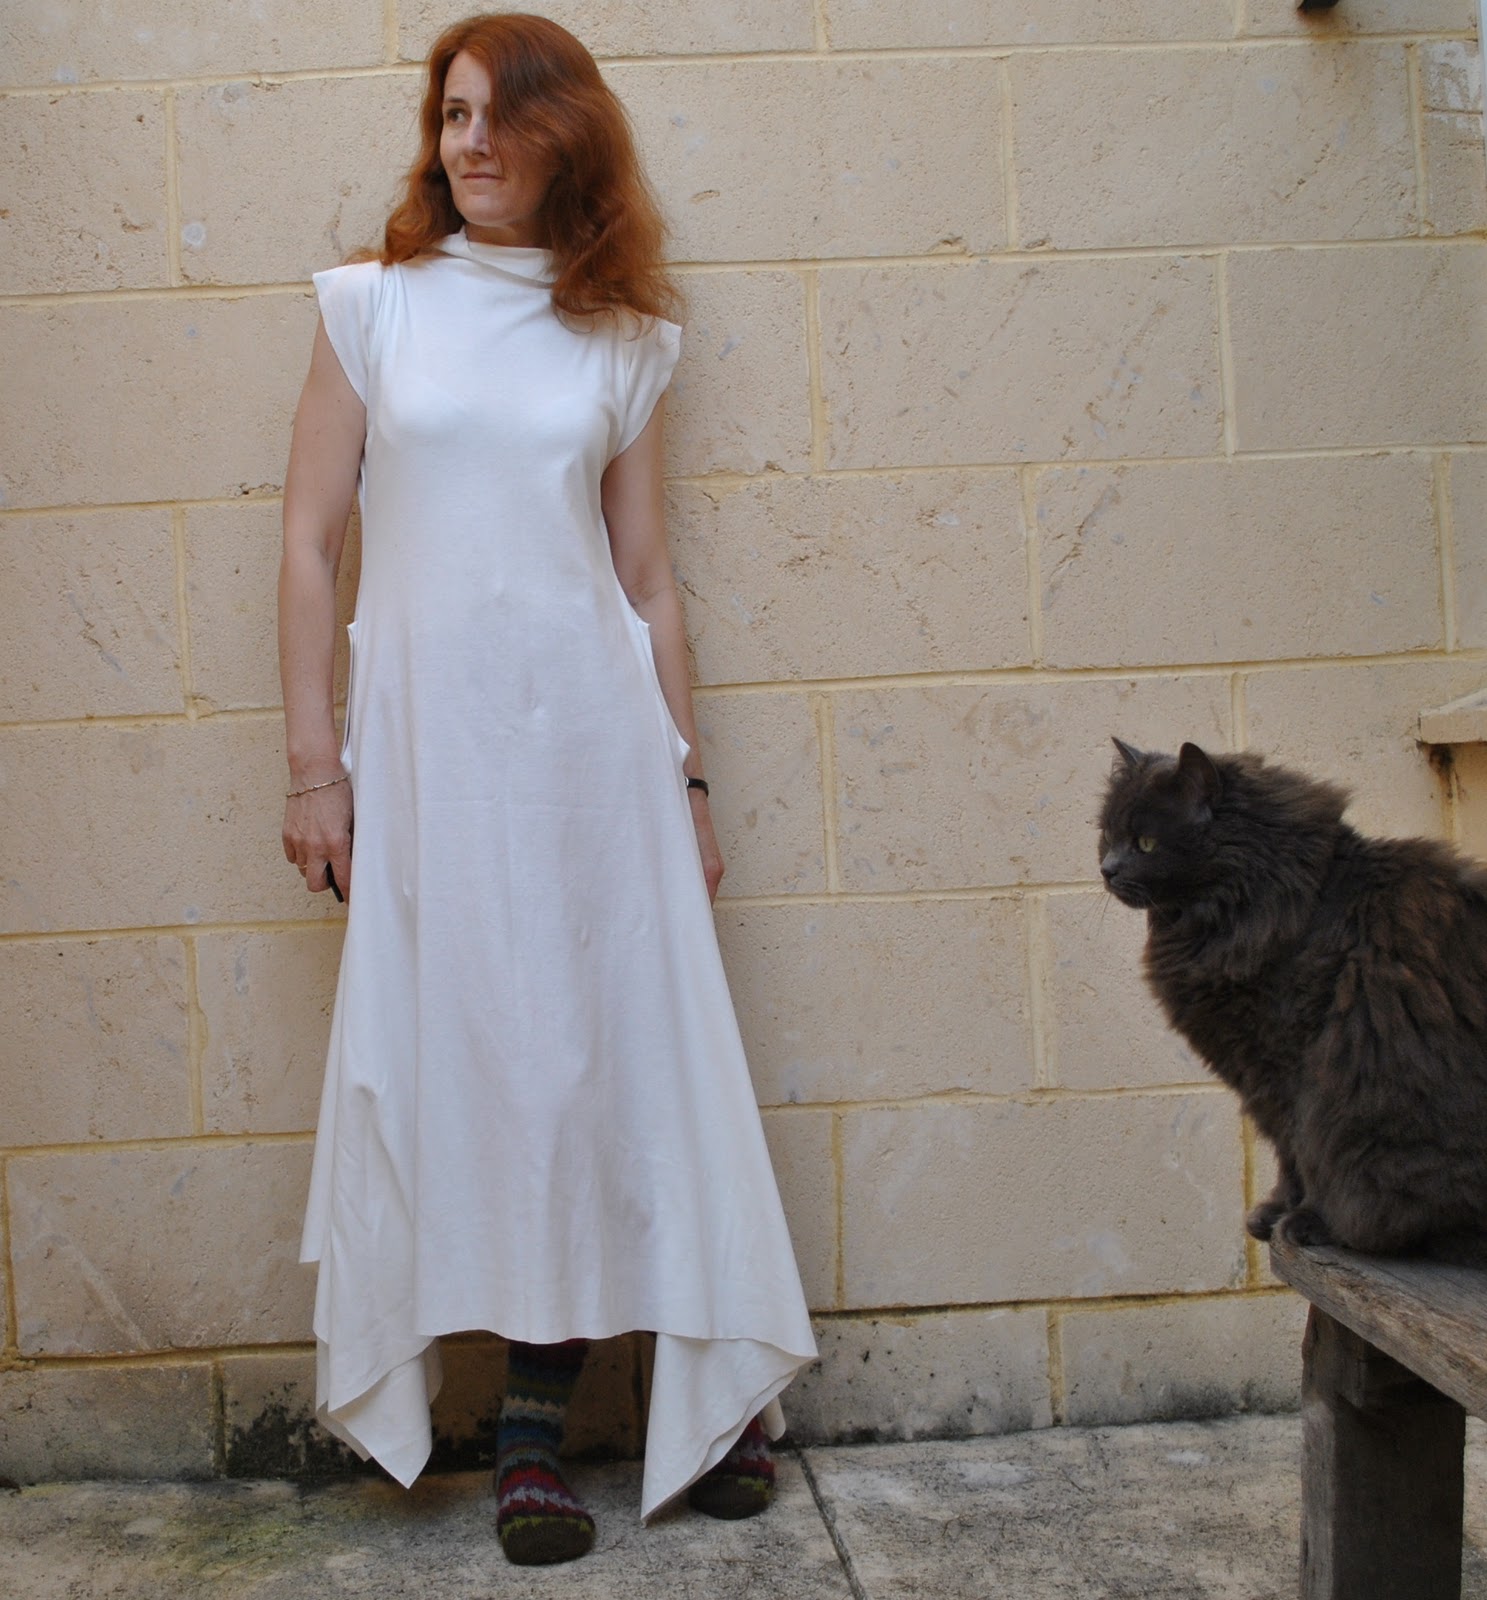
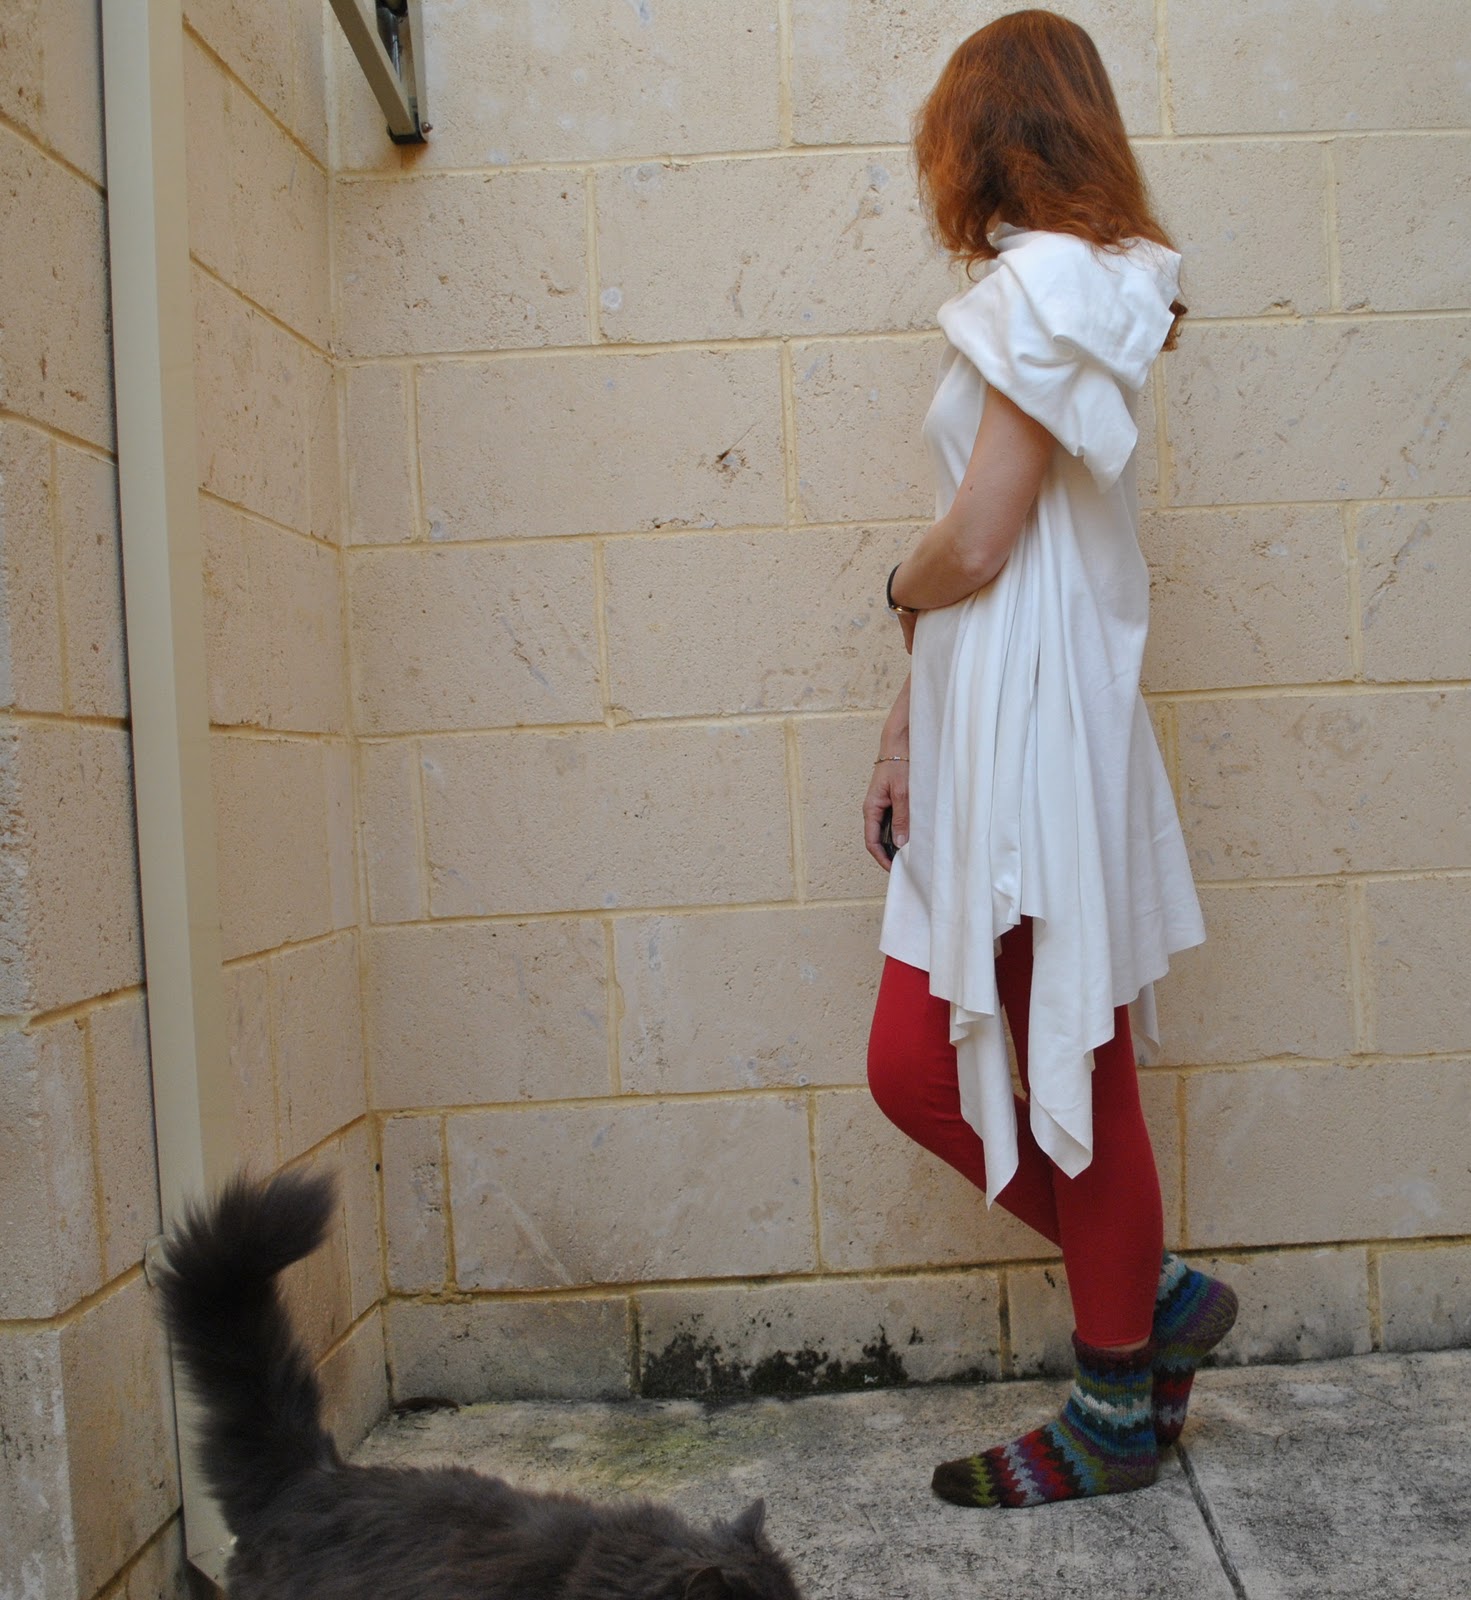
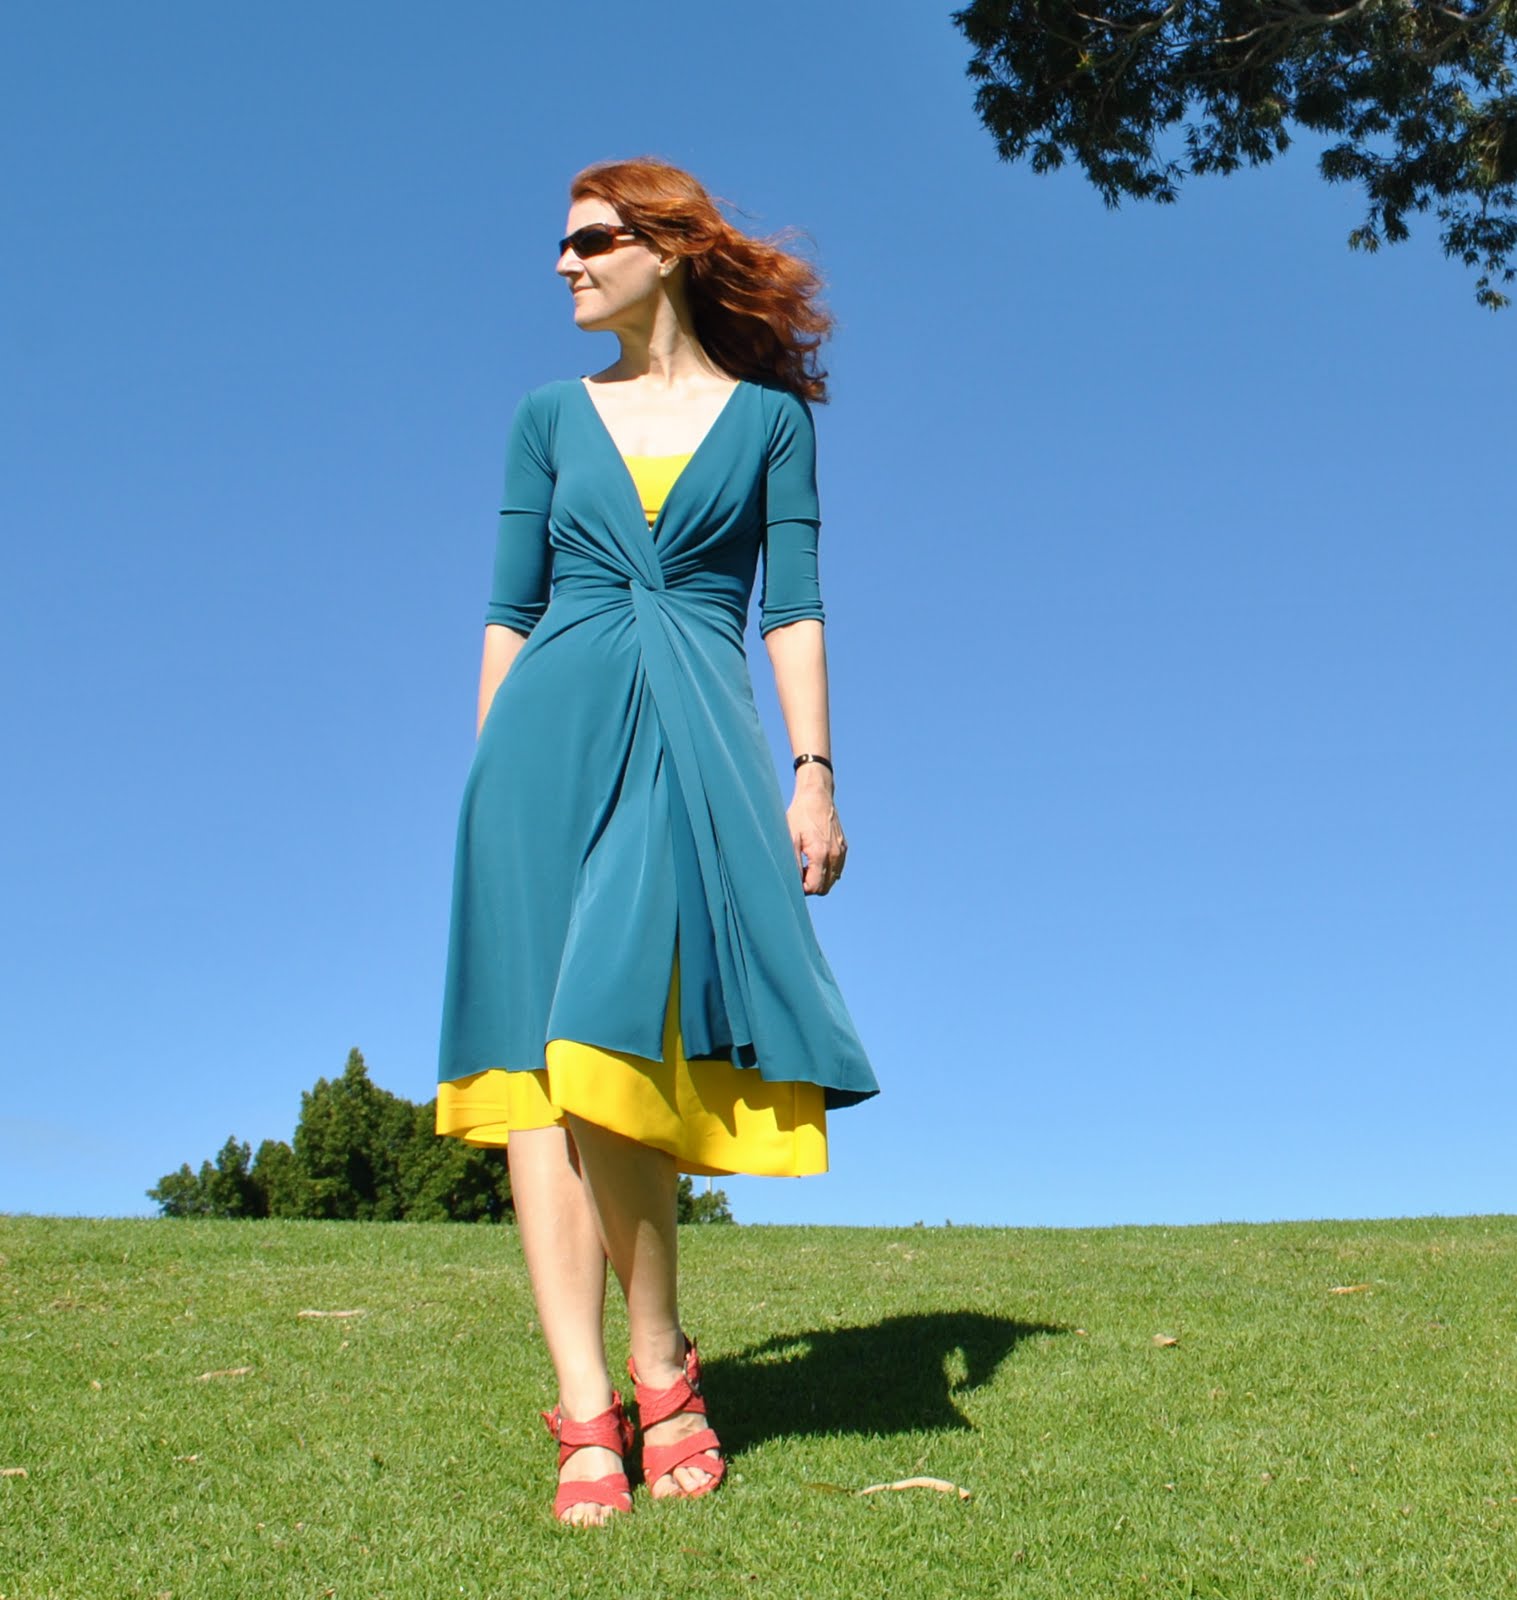
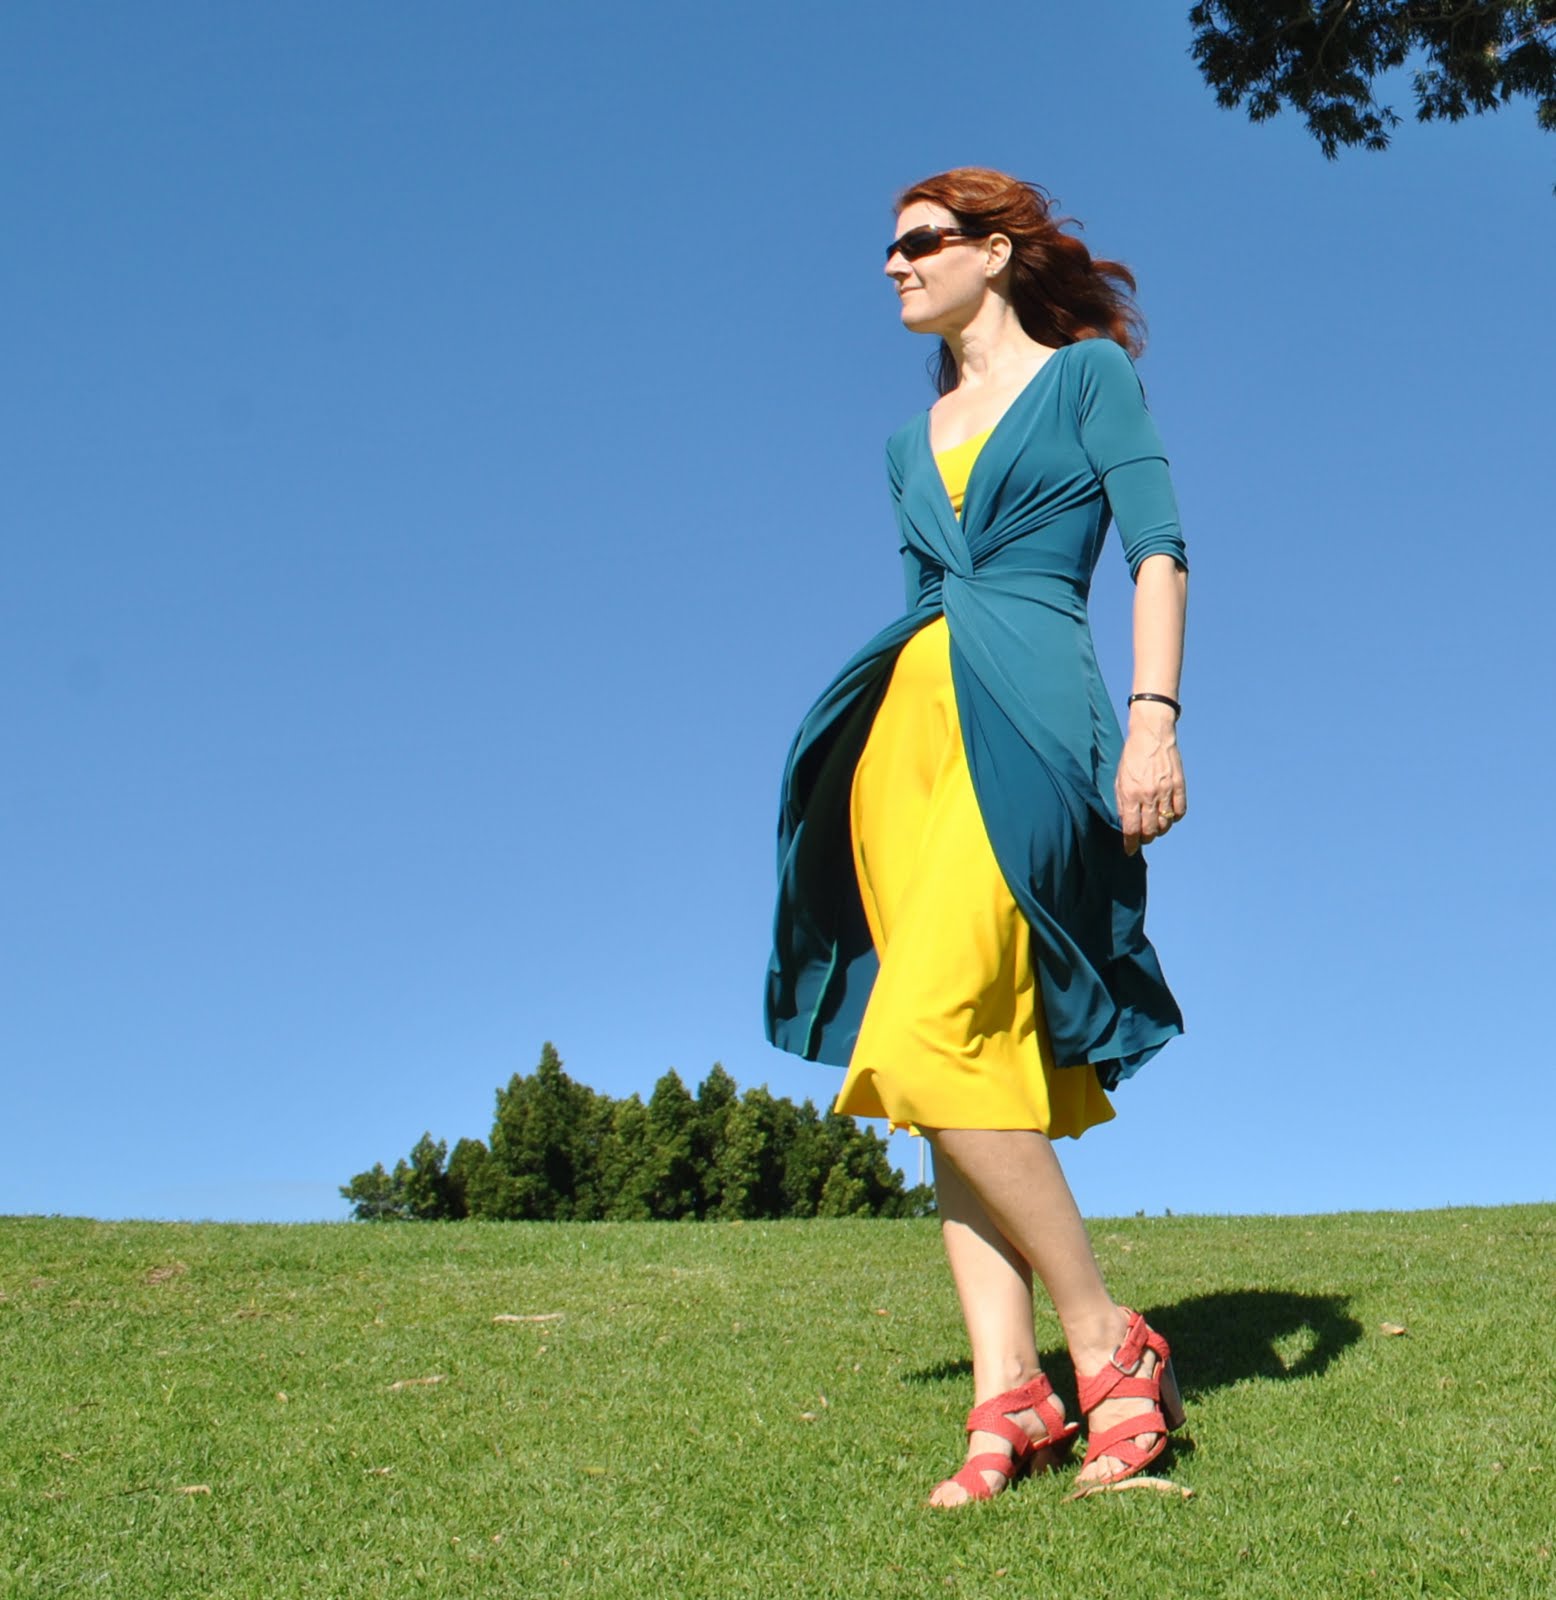
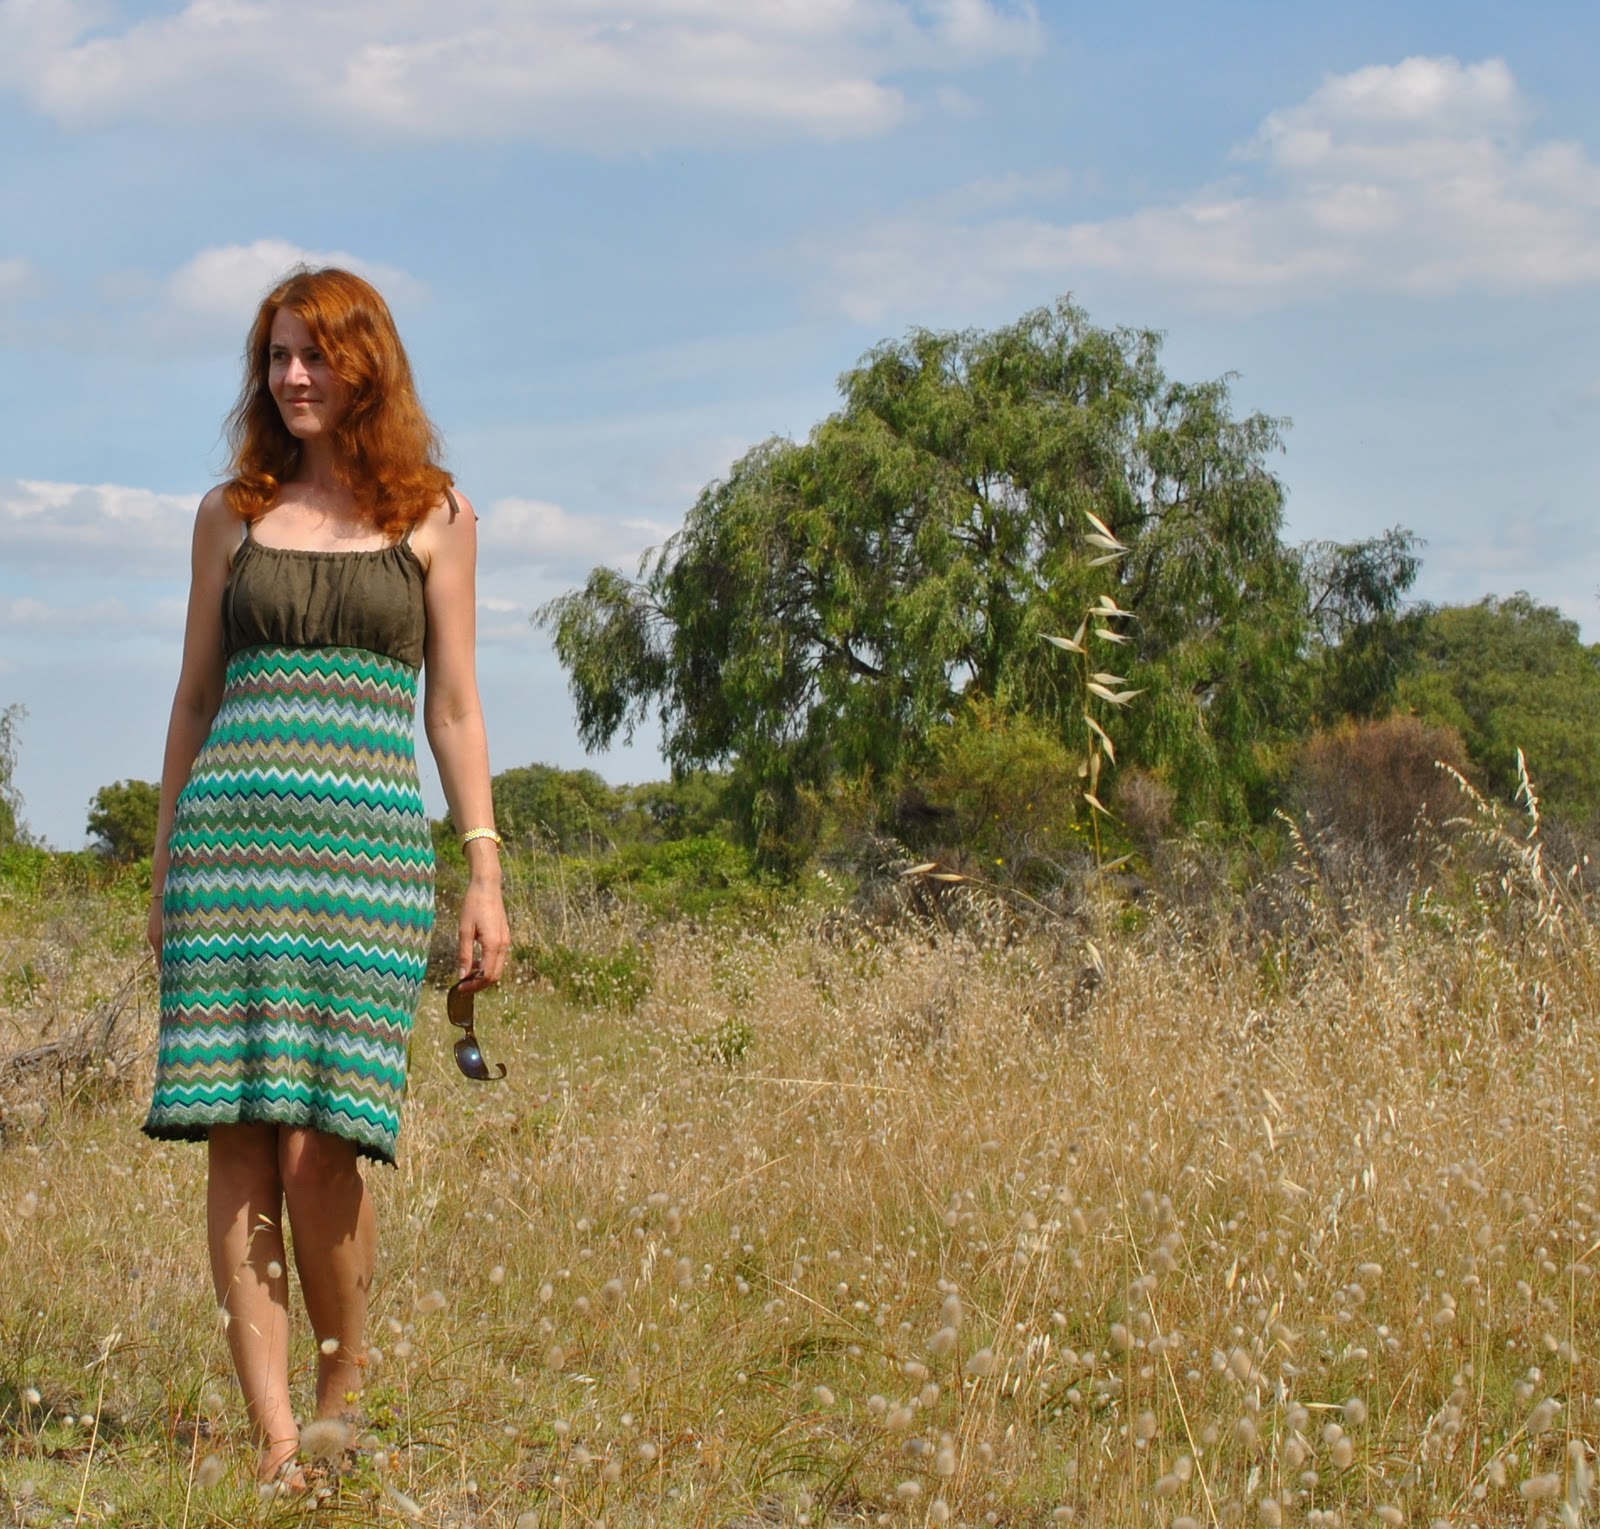
But on to far more exciting affairs, ahem; my new dress.  The lovely Passiona Cottee sent me this gorgeousness in fabric form in a very generous give-away last year; thank you so much Passiona!
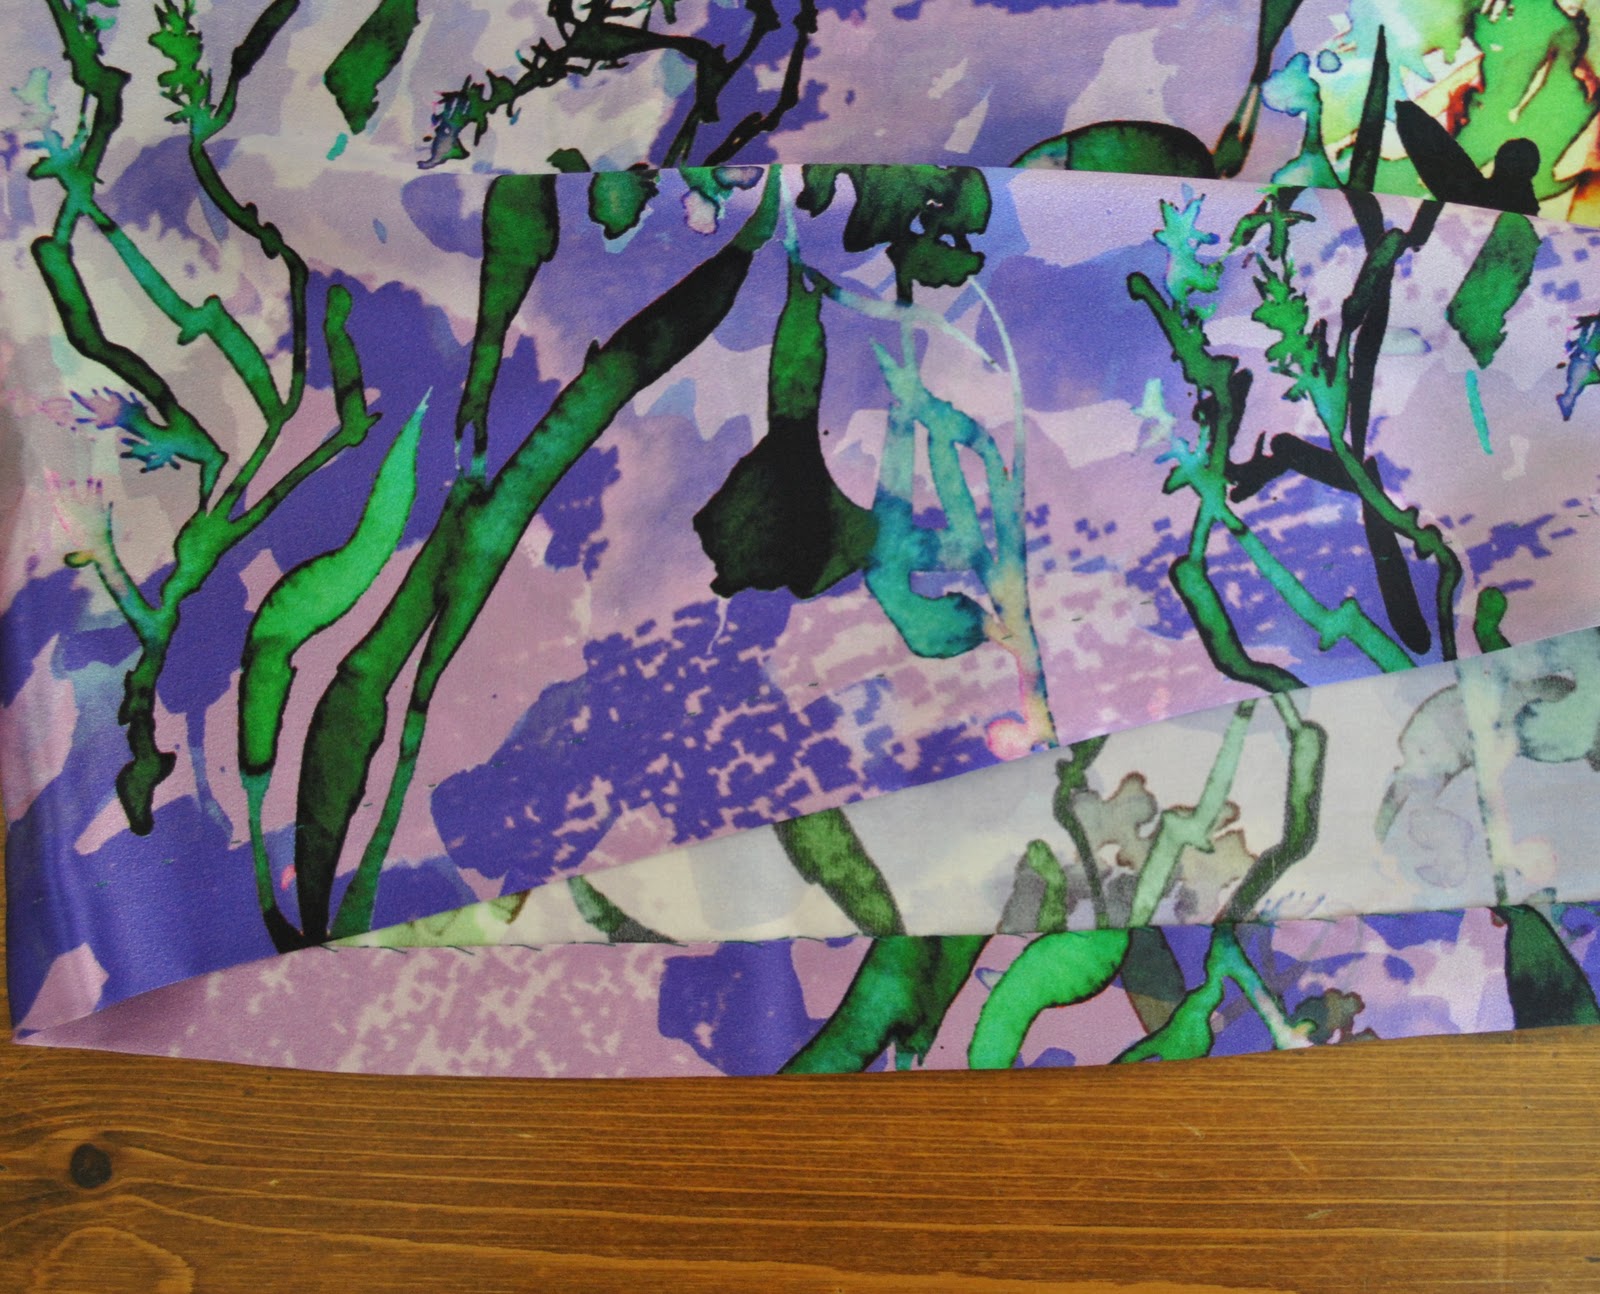
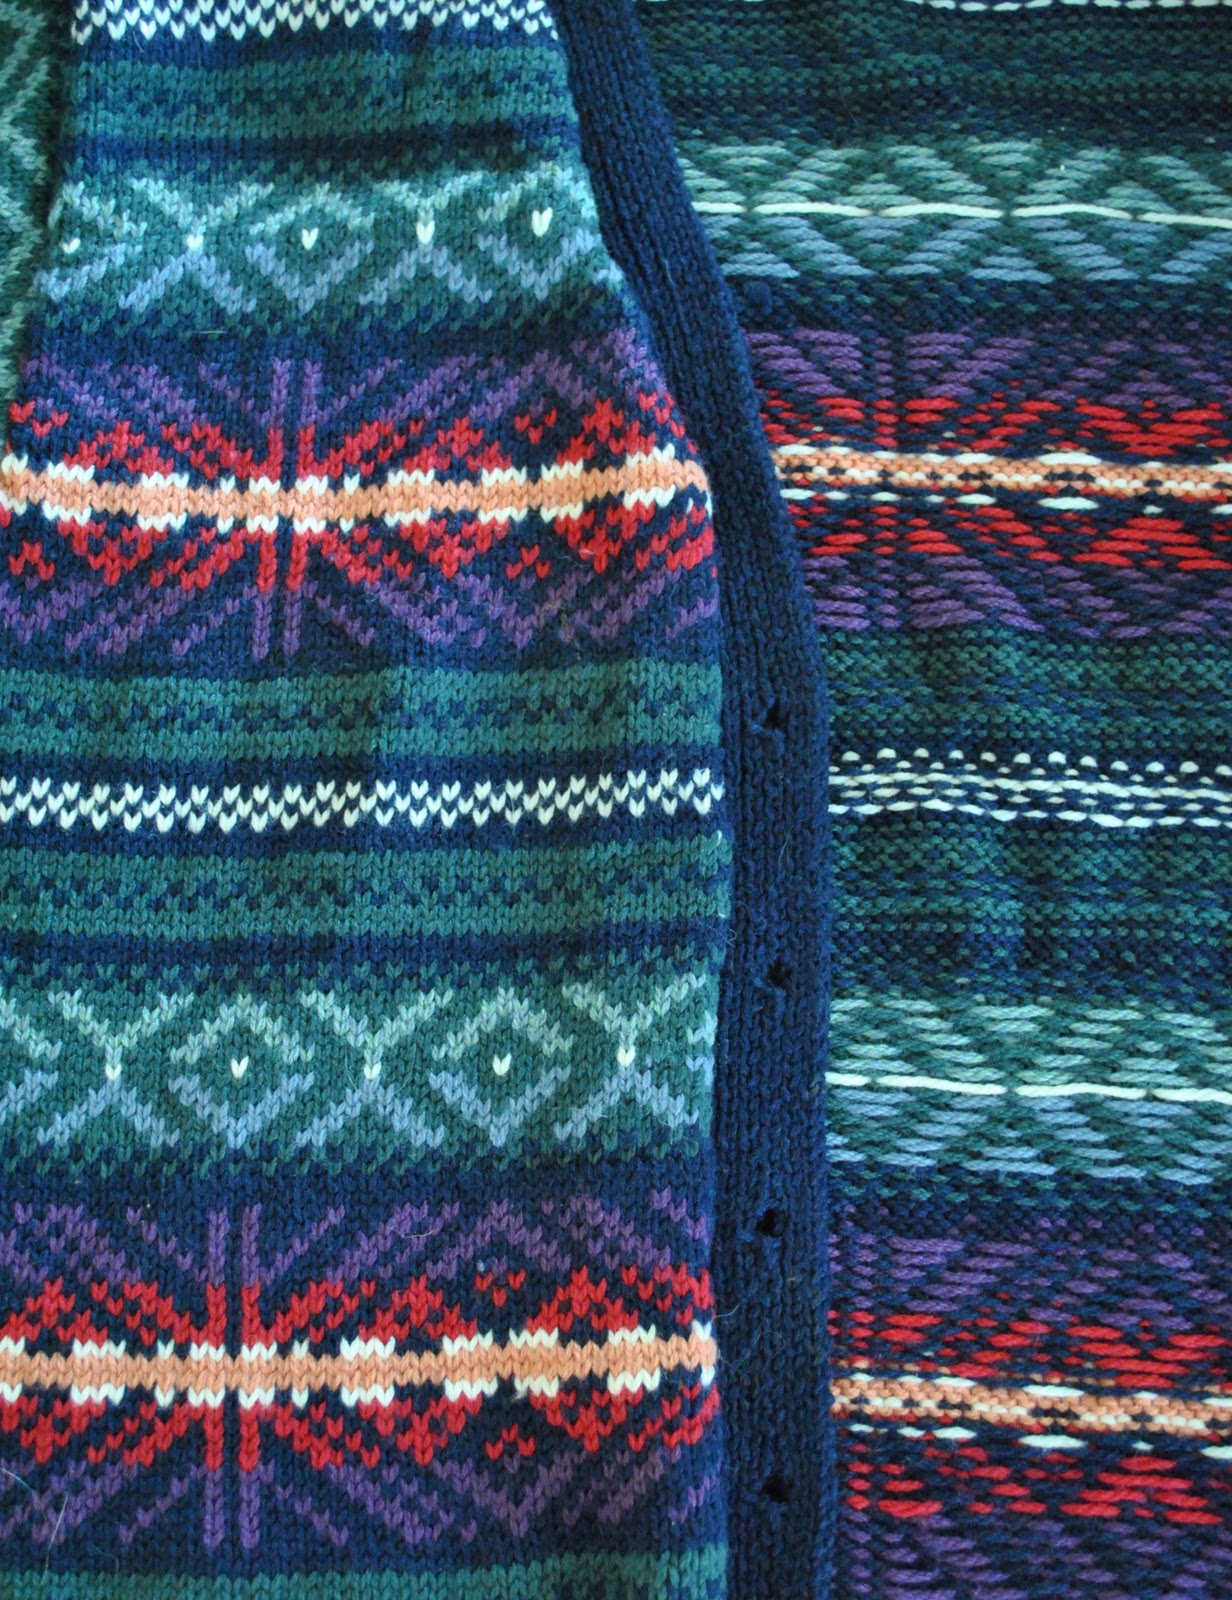
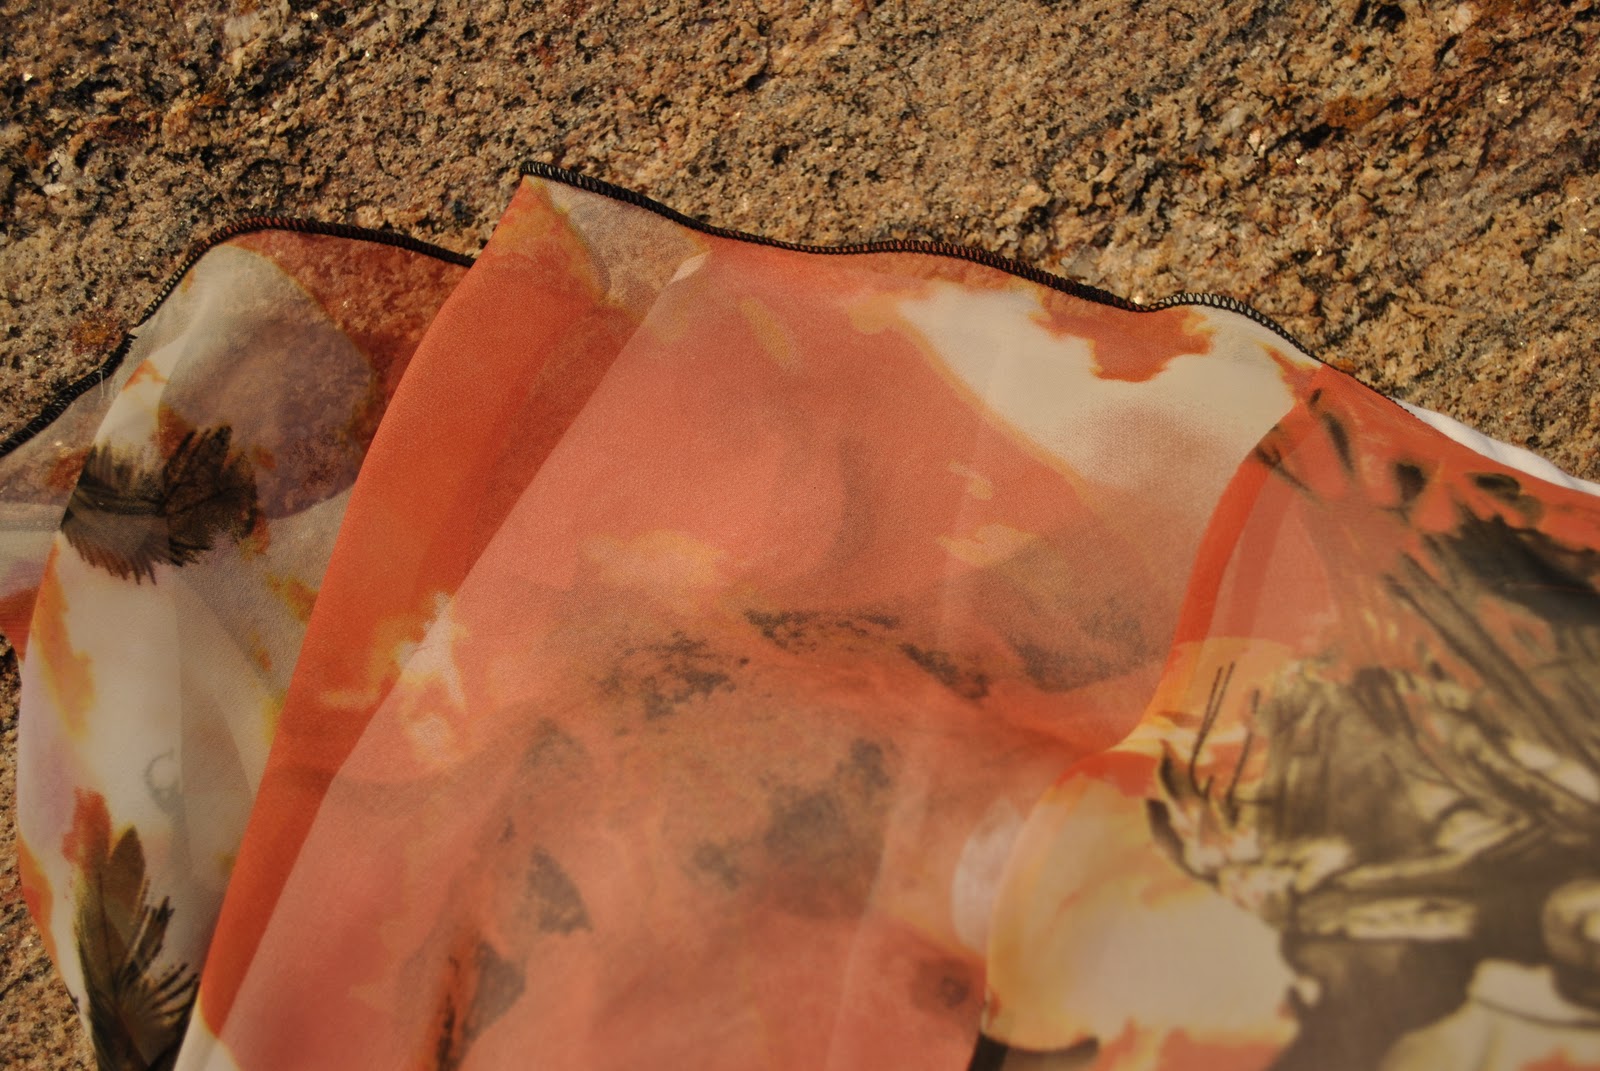
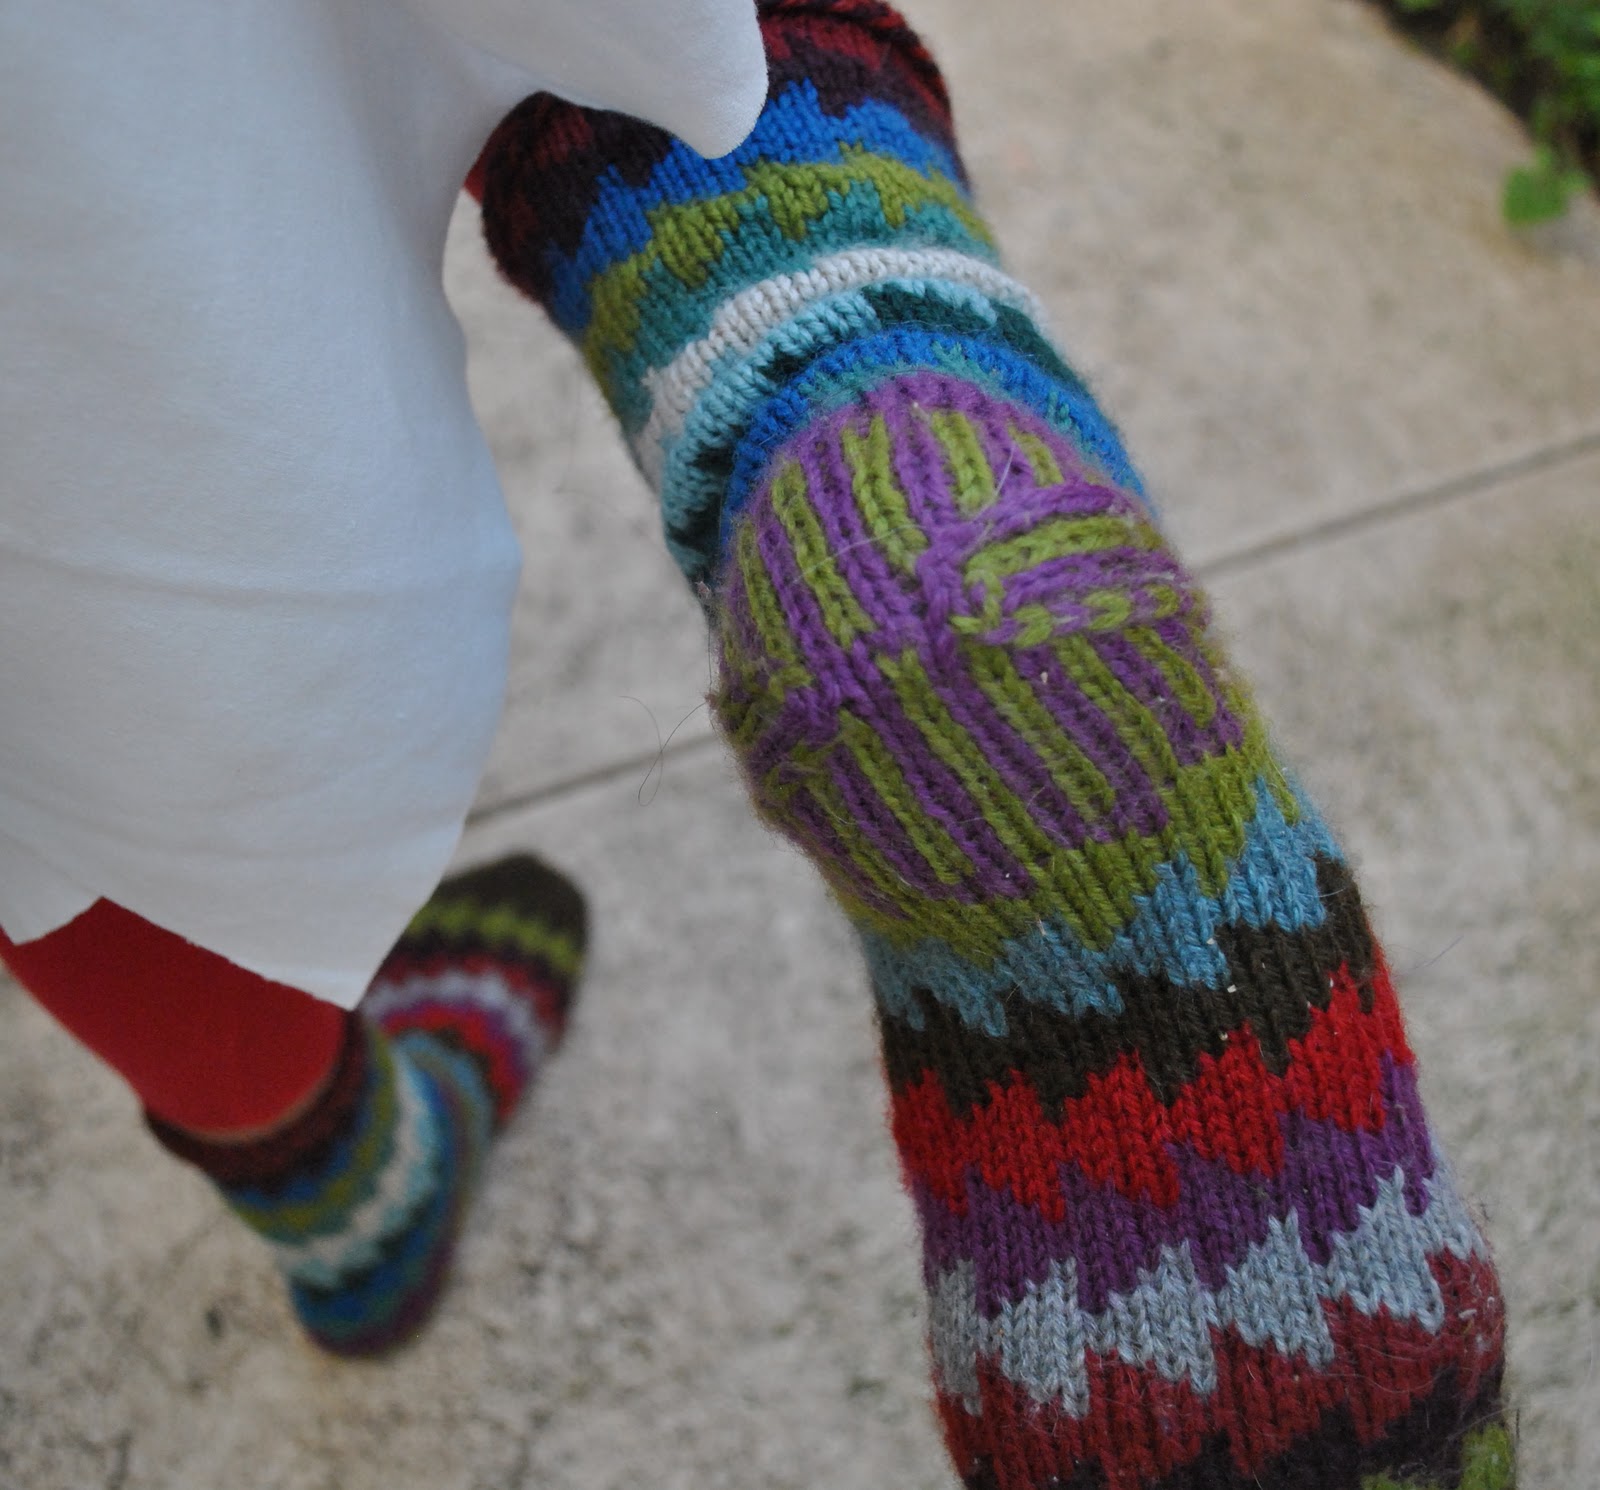
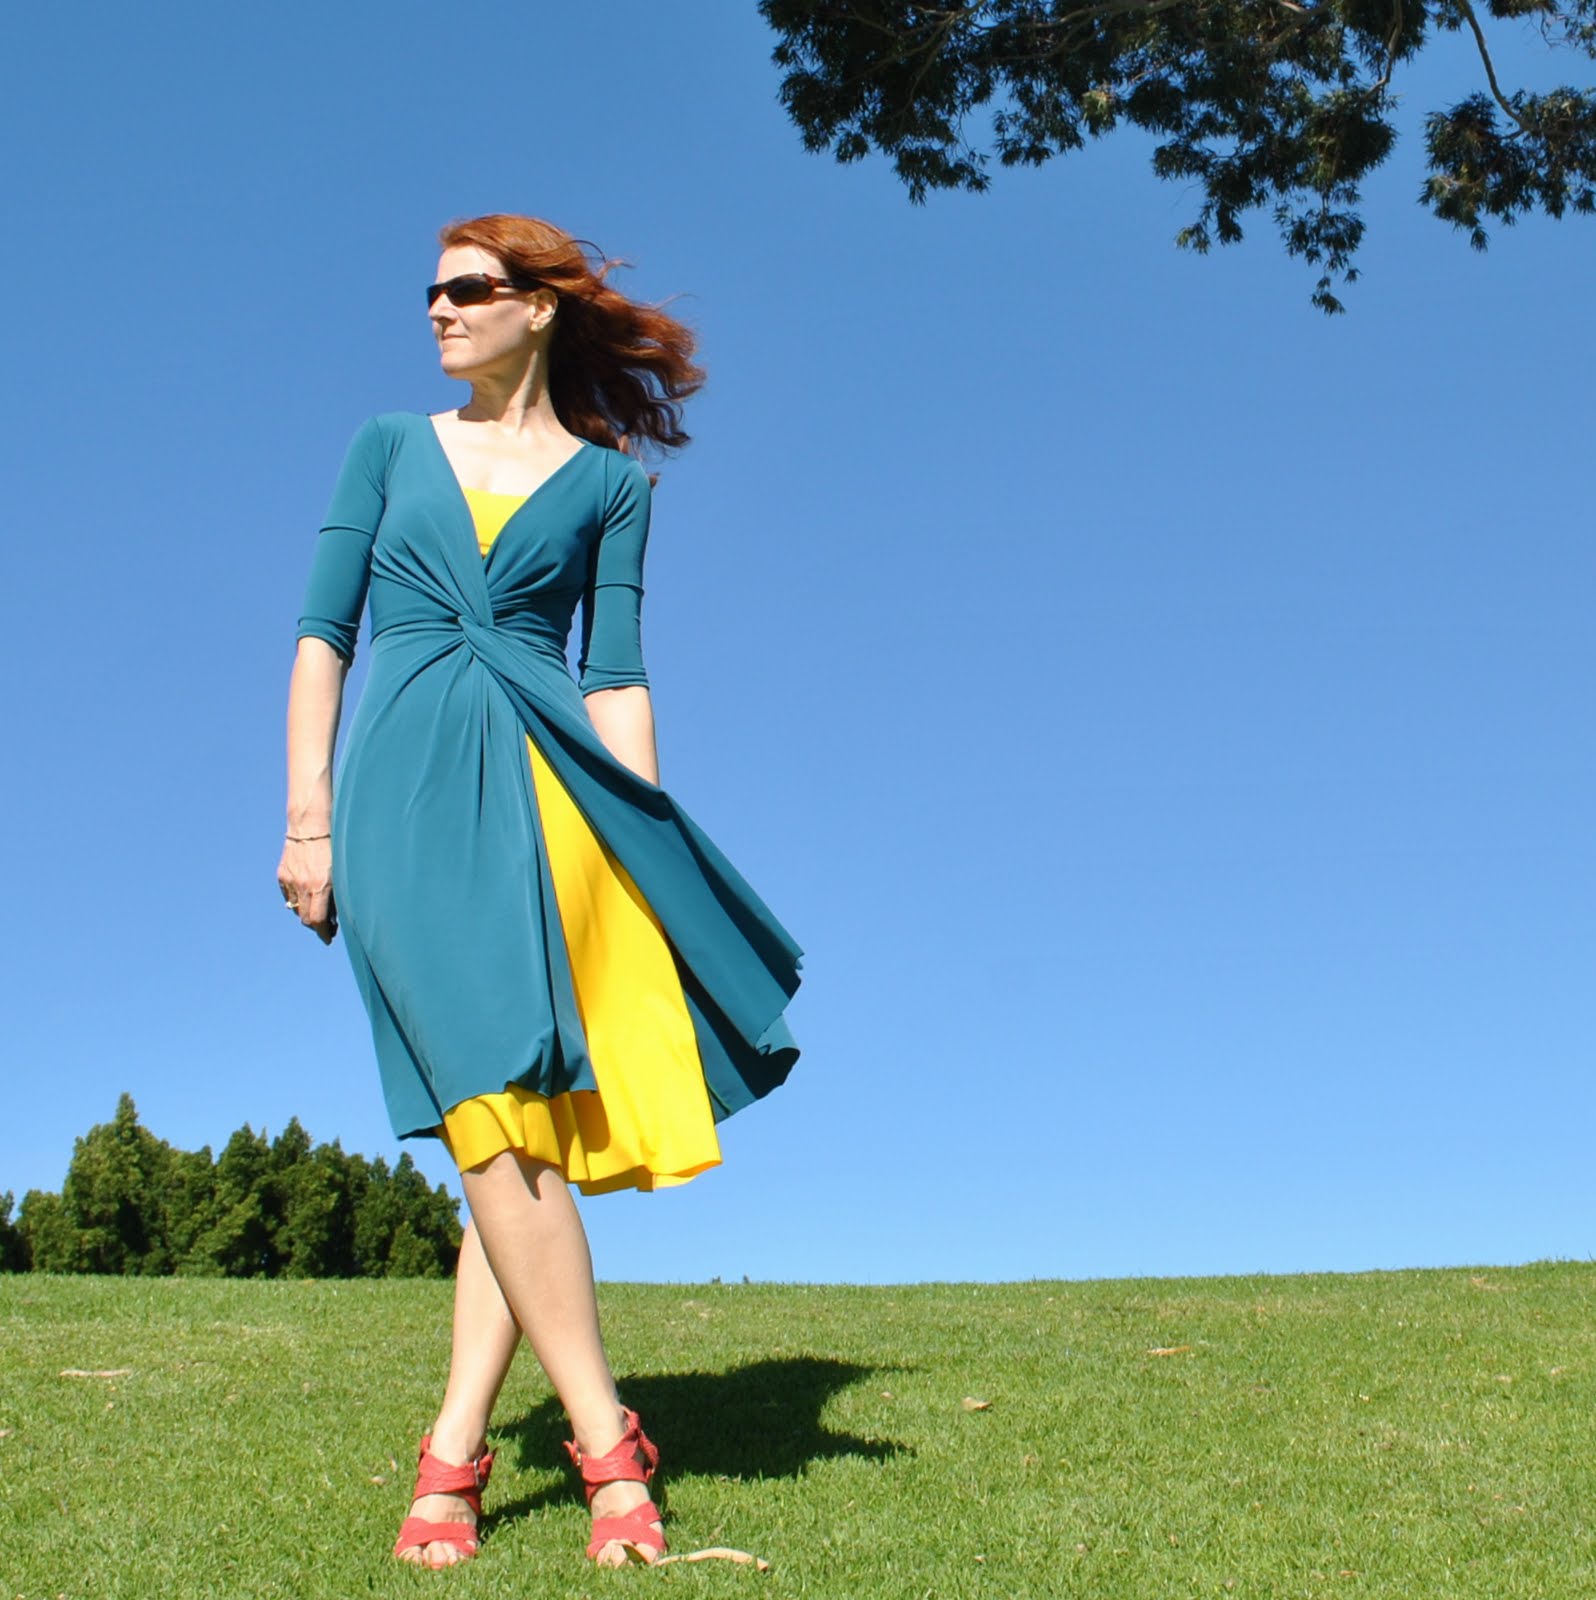
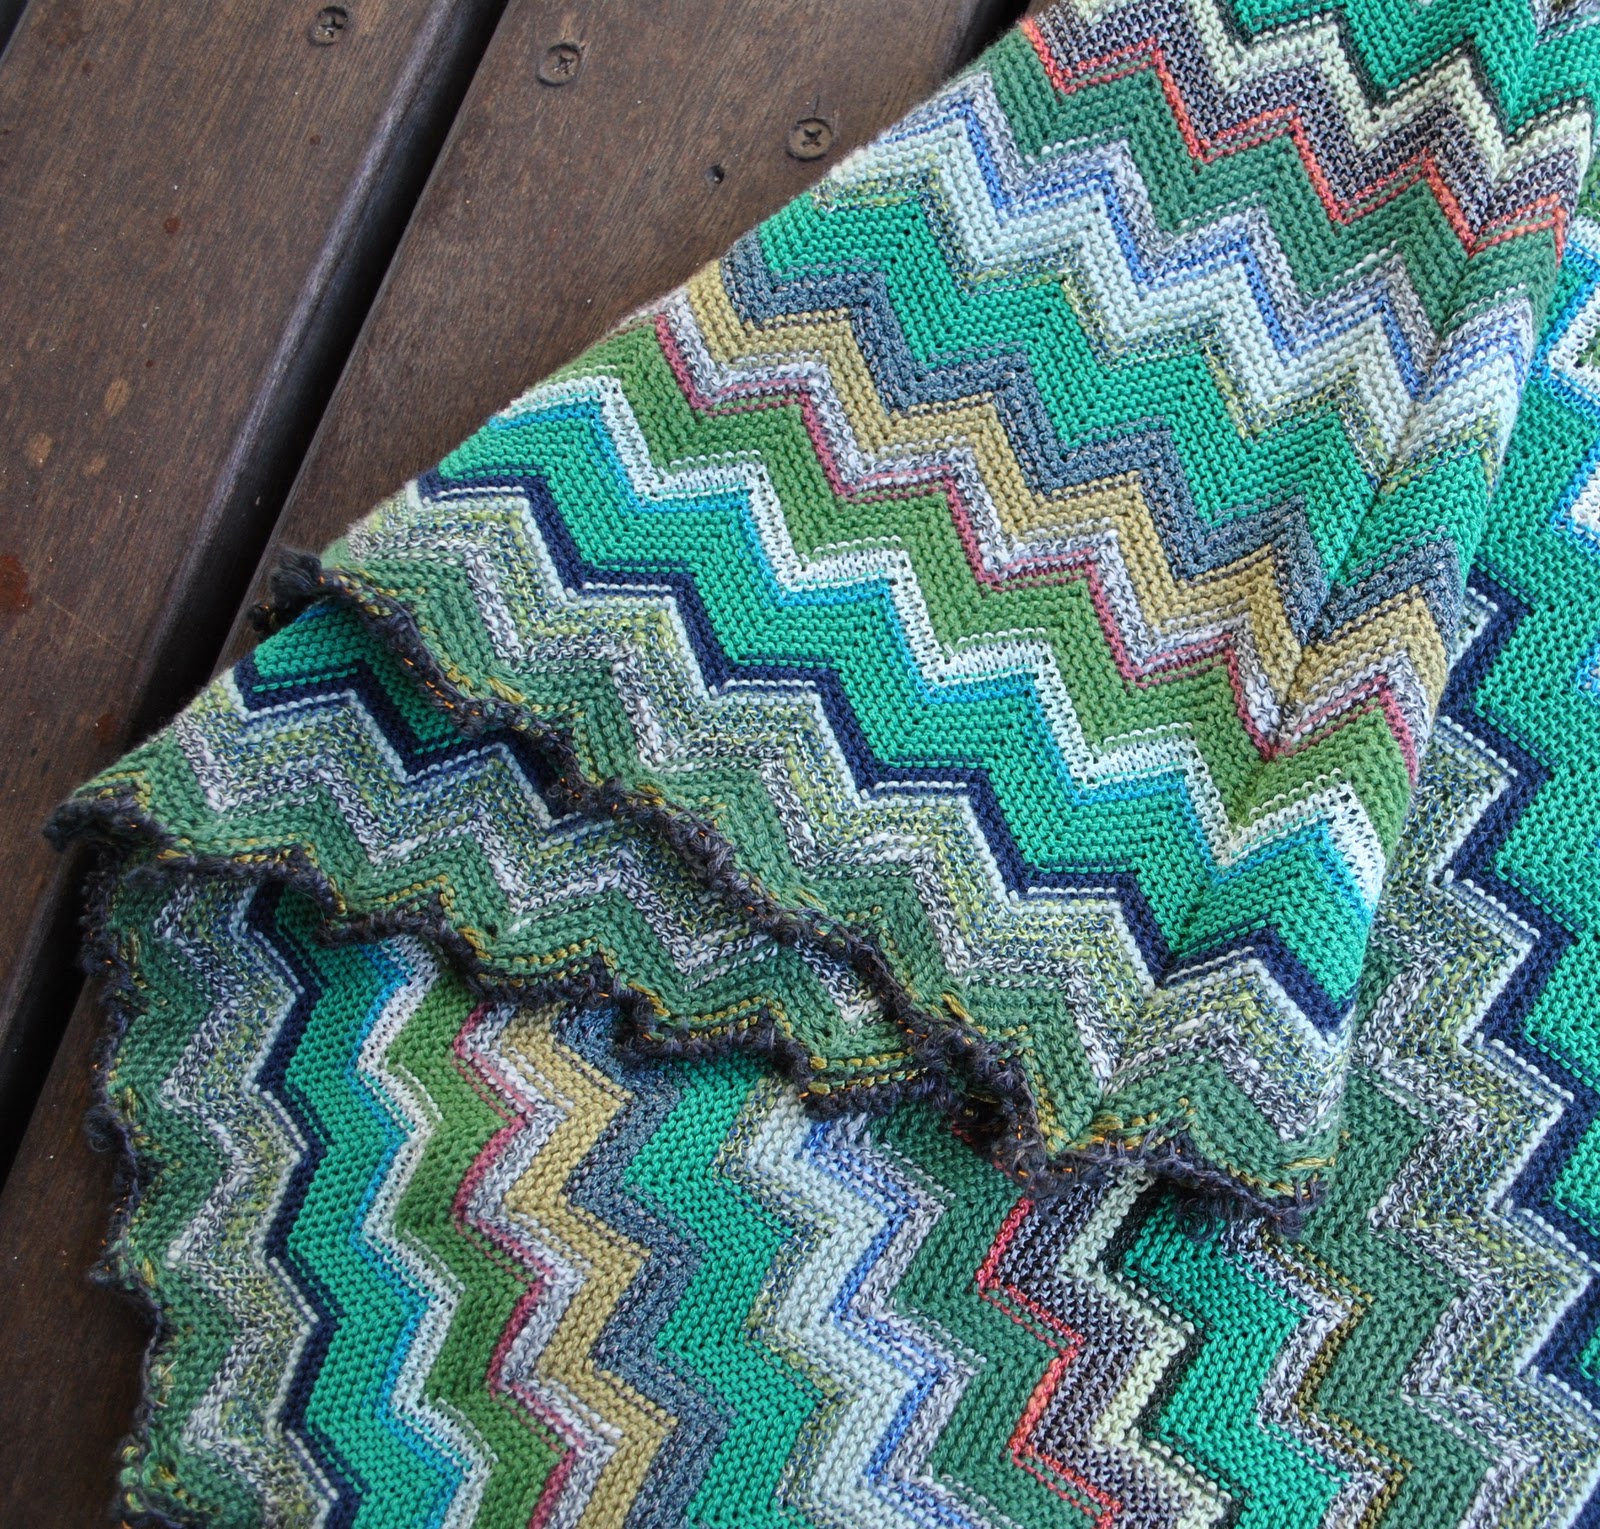
The fabric immediately struck me as very like a Missoni style of fabric, maybe a diffusion line?  I wish I knew for sure…  The fabric has the signature Missoni design; those distinctive stacked zigzags in a multitude of colours (although having said that I do actually possess a genuine Missoni scarf, seen here, that has hardly any zigzag).   Close inspection of my sample revealed seemingly every shade of green under the sun.  Das is gut.  Green is definitely me.  Adding interest to the colour mix; a bit of rust, a dash of salt-and-pepper, a hint of sky blue, the odd startle of vivid orange and even a few rows of ivory; all melding together in a disparate and yet pleasing cacophony of oily swampy shades… 
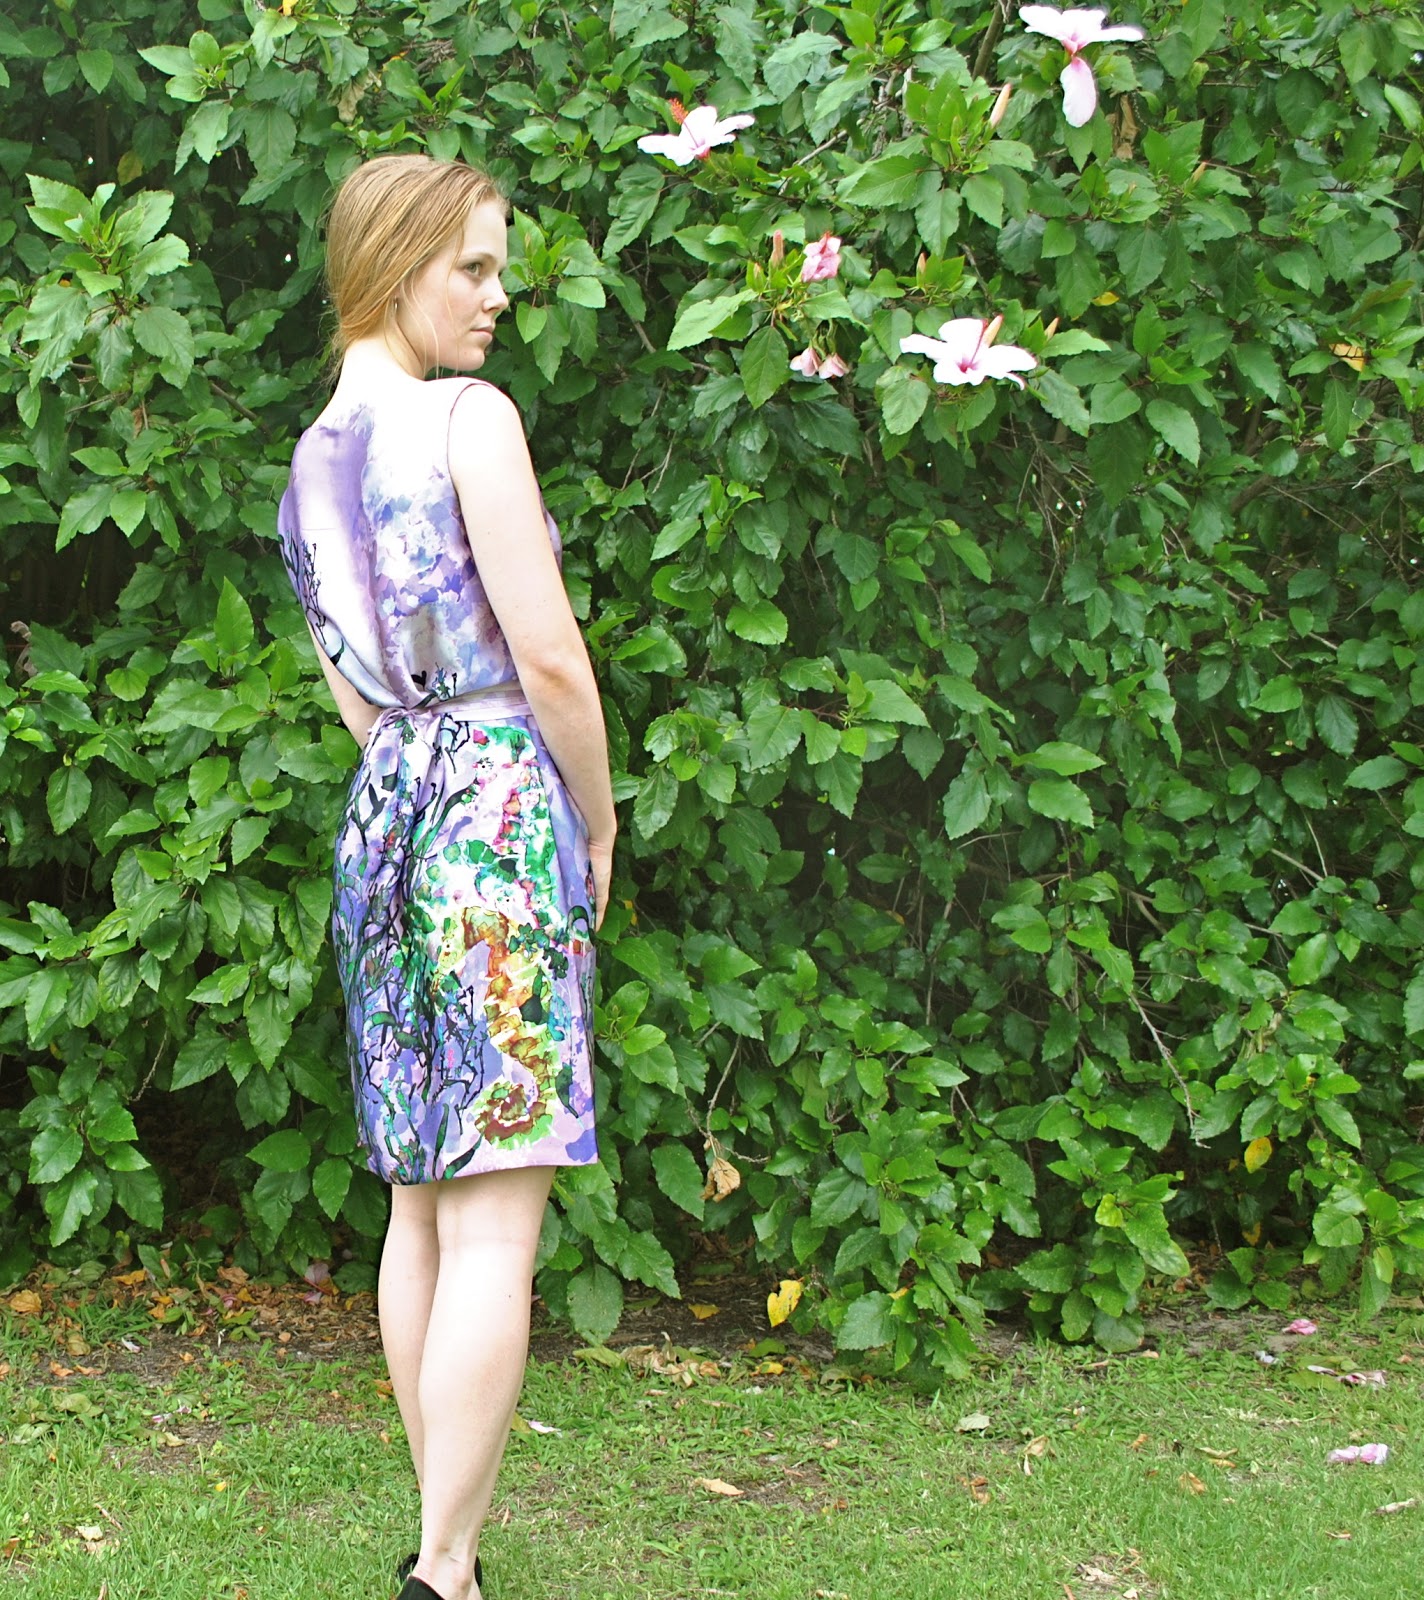
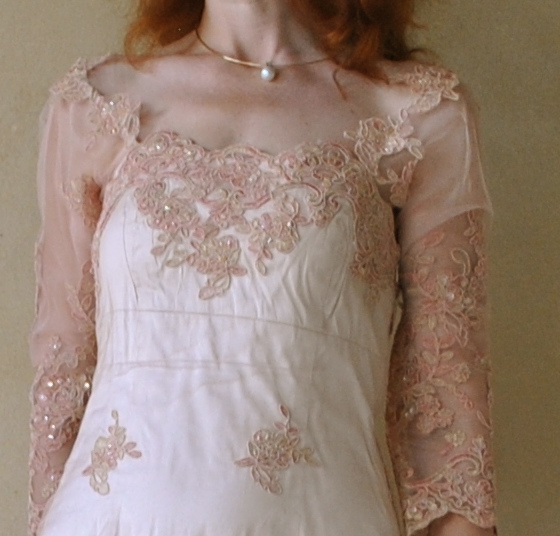
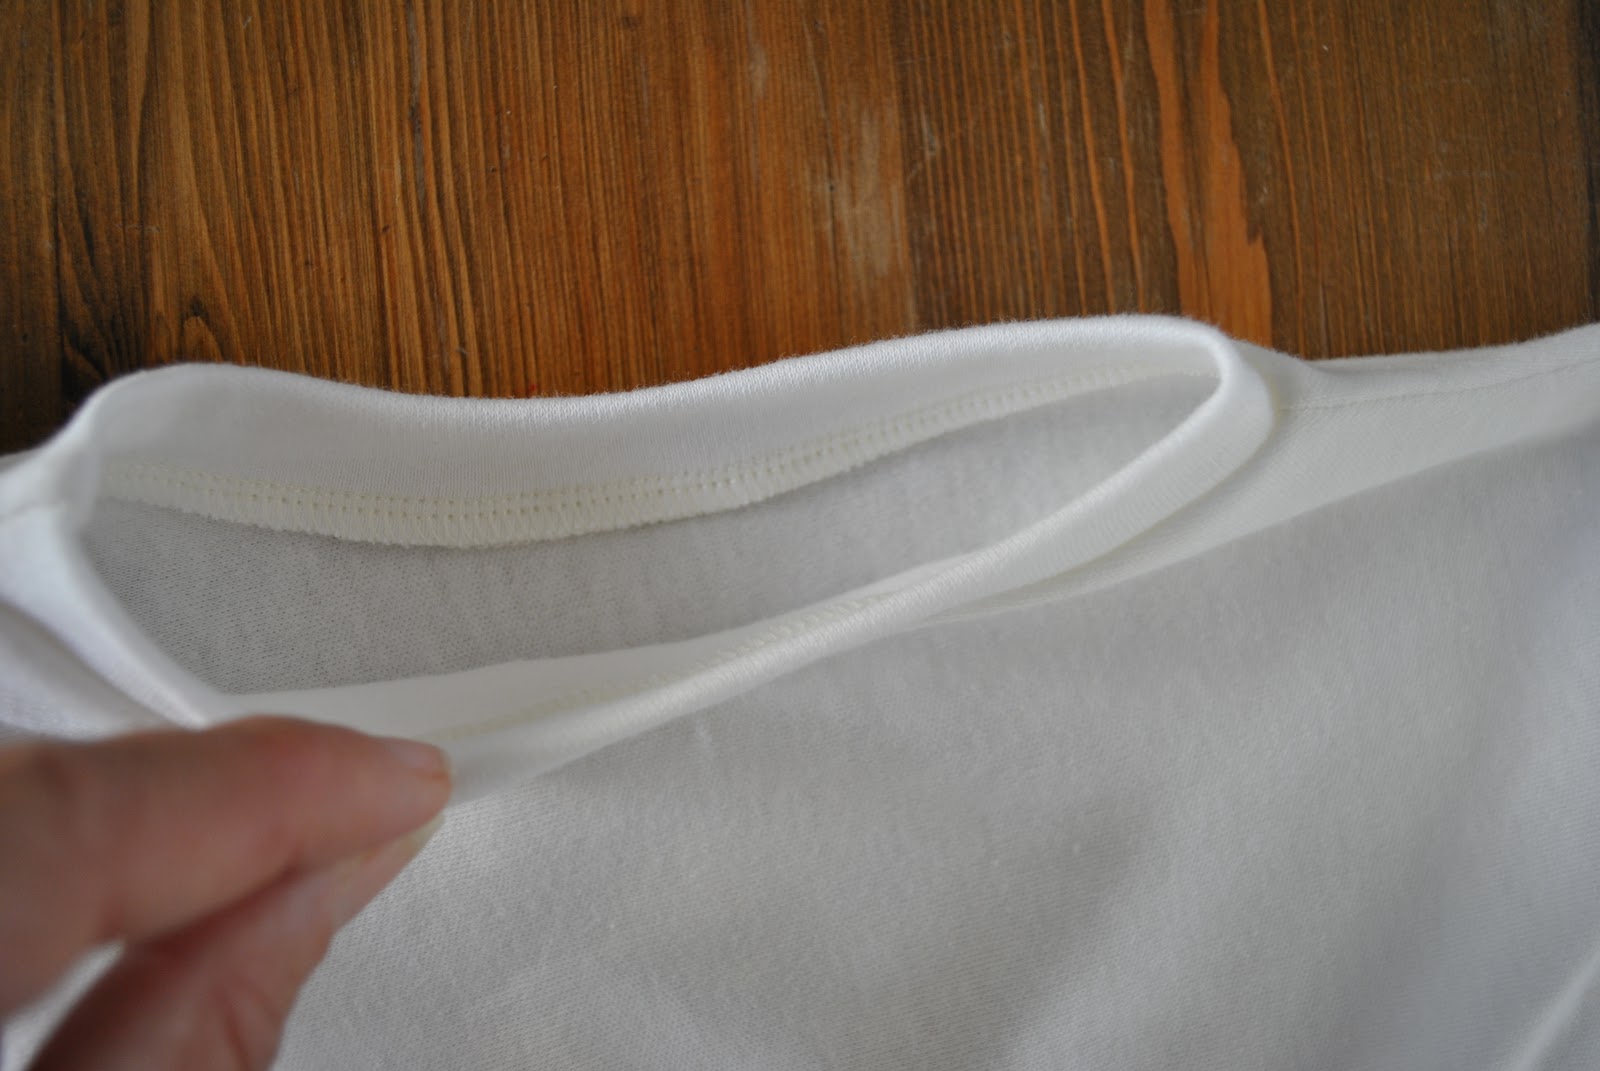
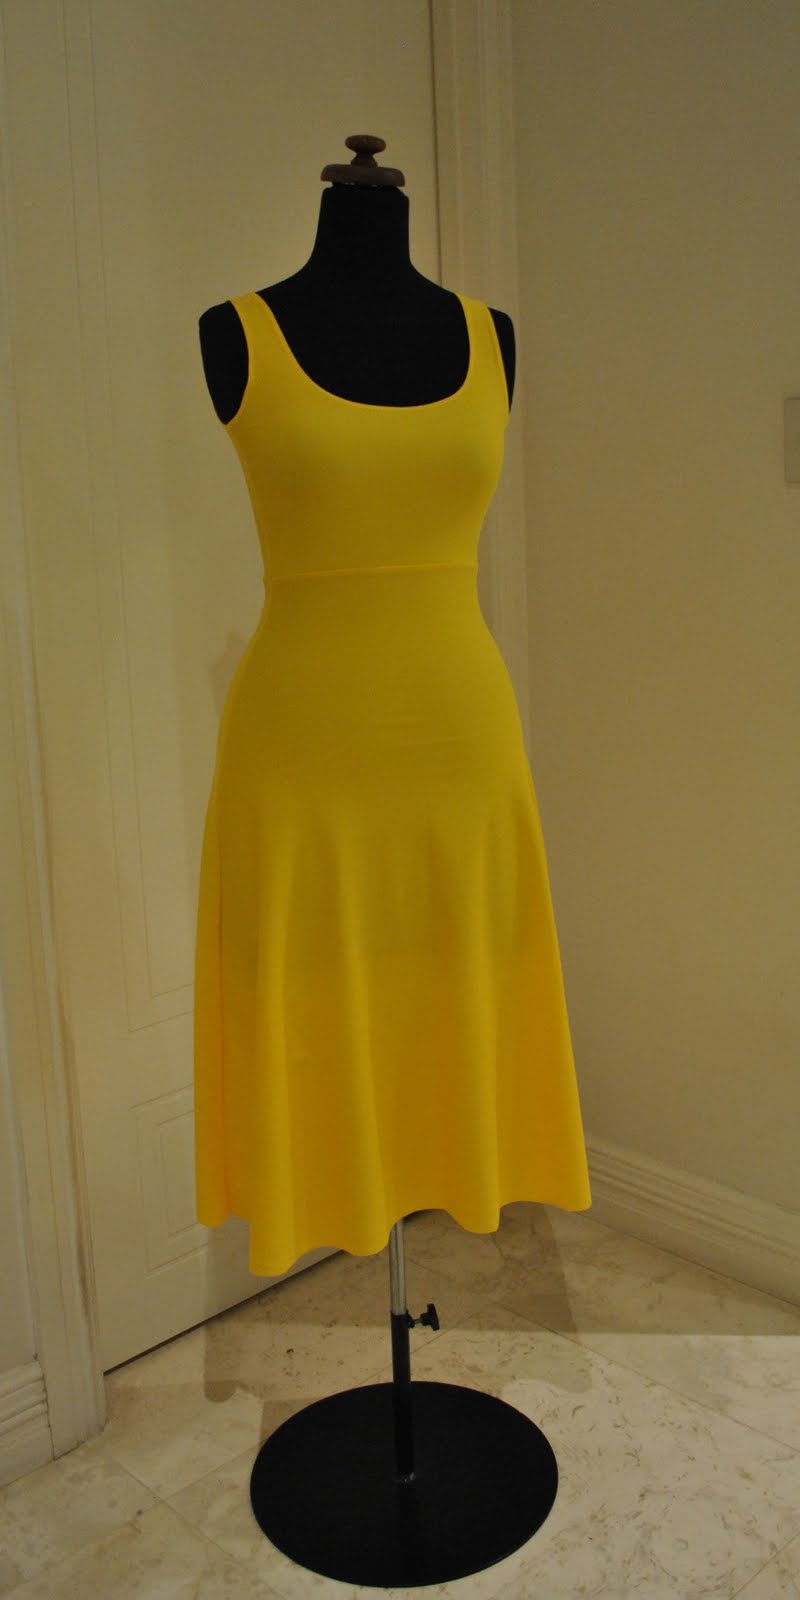
Missoni is a stalwart of the Italian fashion scene and so I wanted make it up into something Italian inspired, and dreamed up this design with a blouse-y linen bodice reminiscent to me of those loosely gathered Italian peasant tops…  I only had the teensiest bit of the knit fabric really.  Actually, (warning; eco boast following) I used basically the entire piece of fabric… and the bodice is the leftovers from this shirt… so the dress is green in more ways than the obvious, hehe…
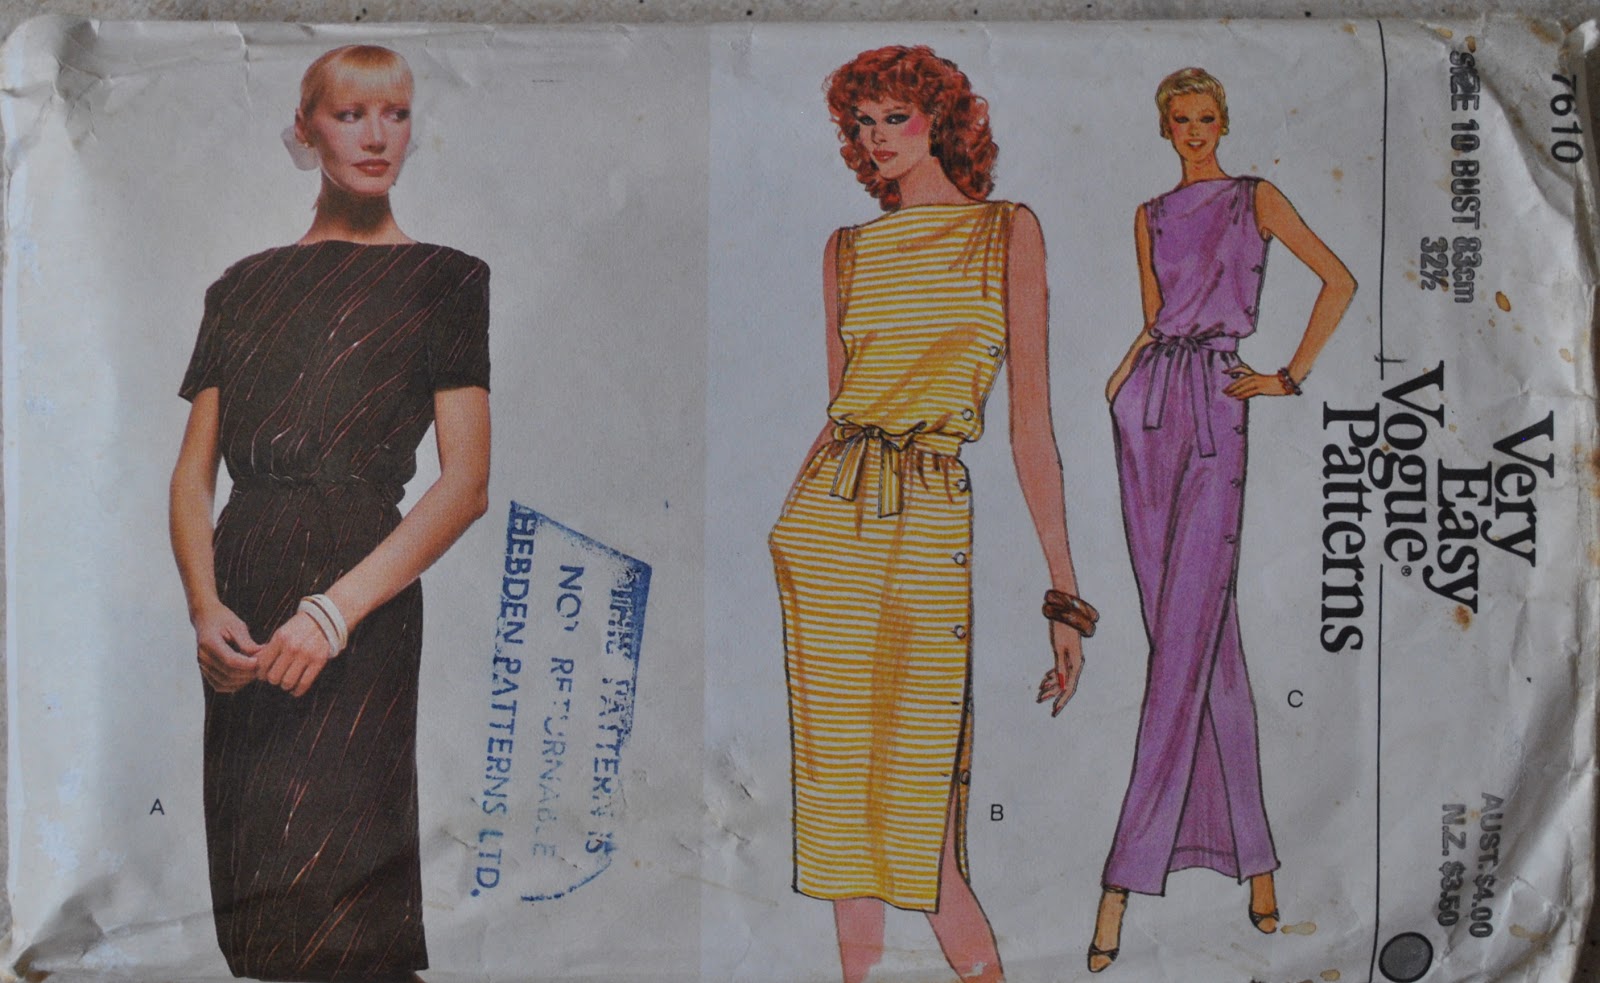
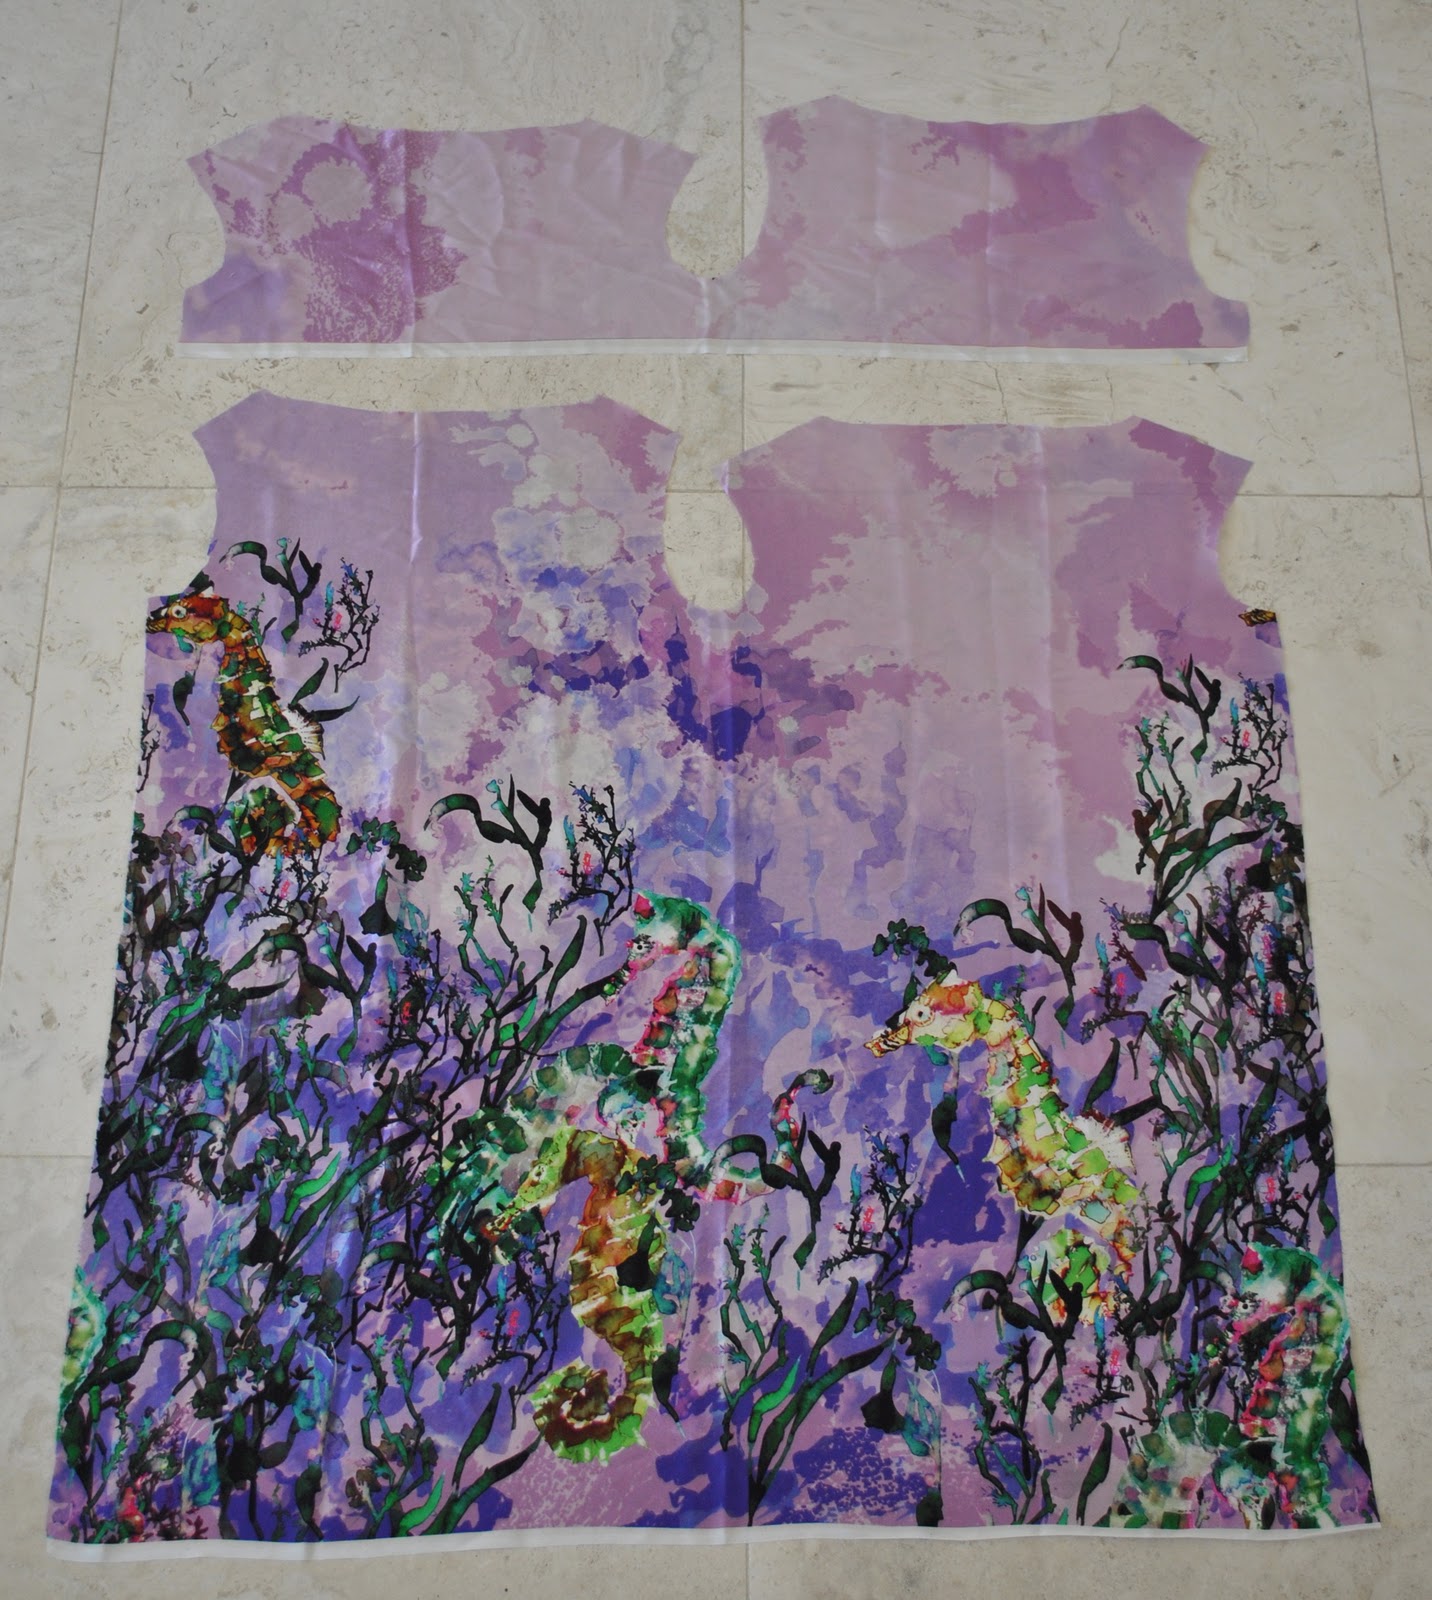
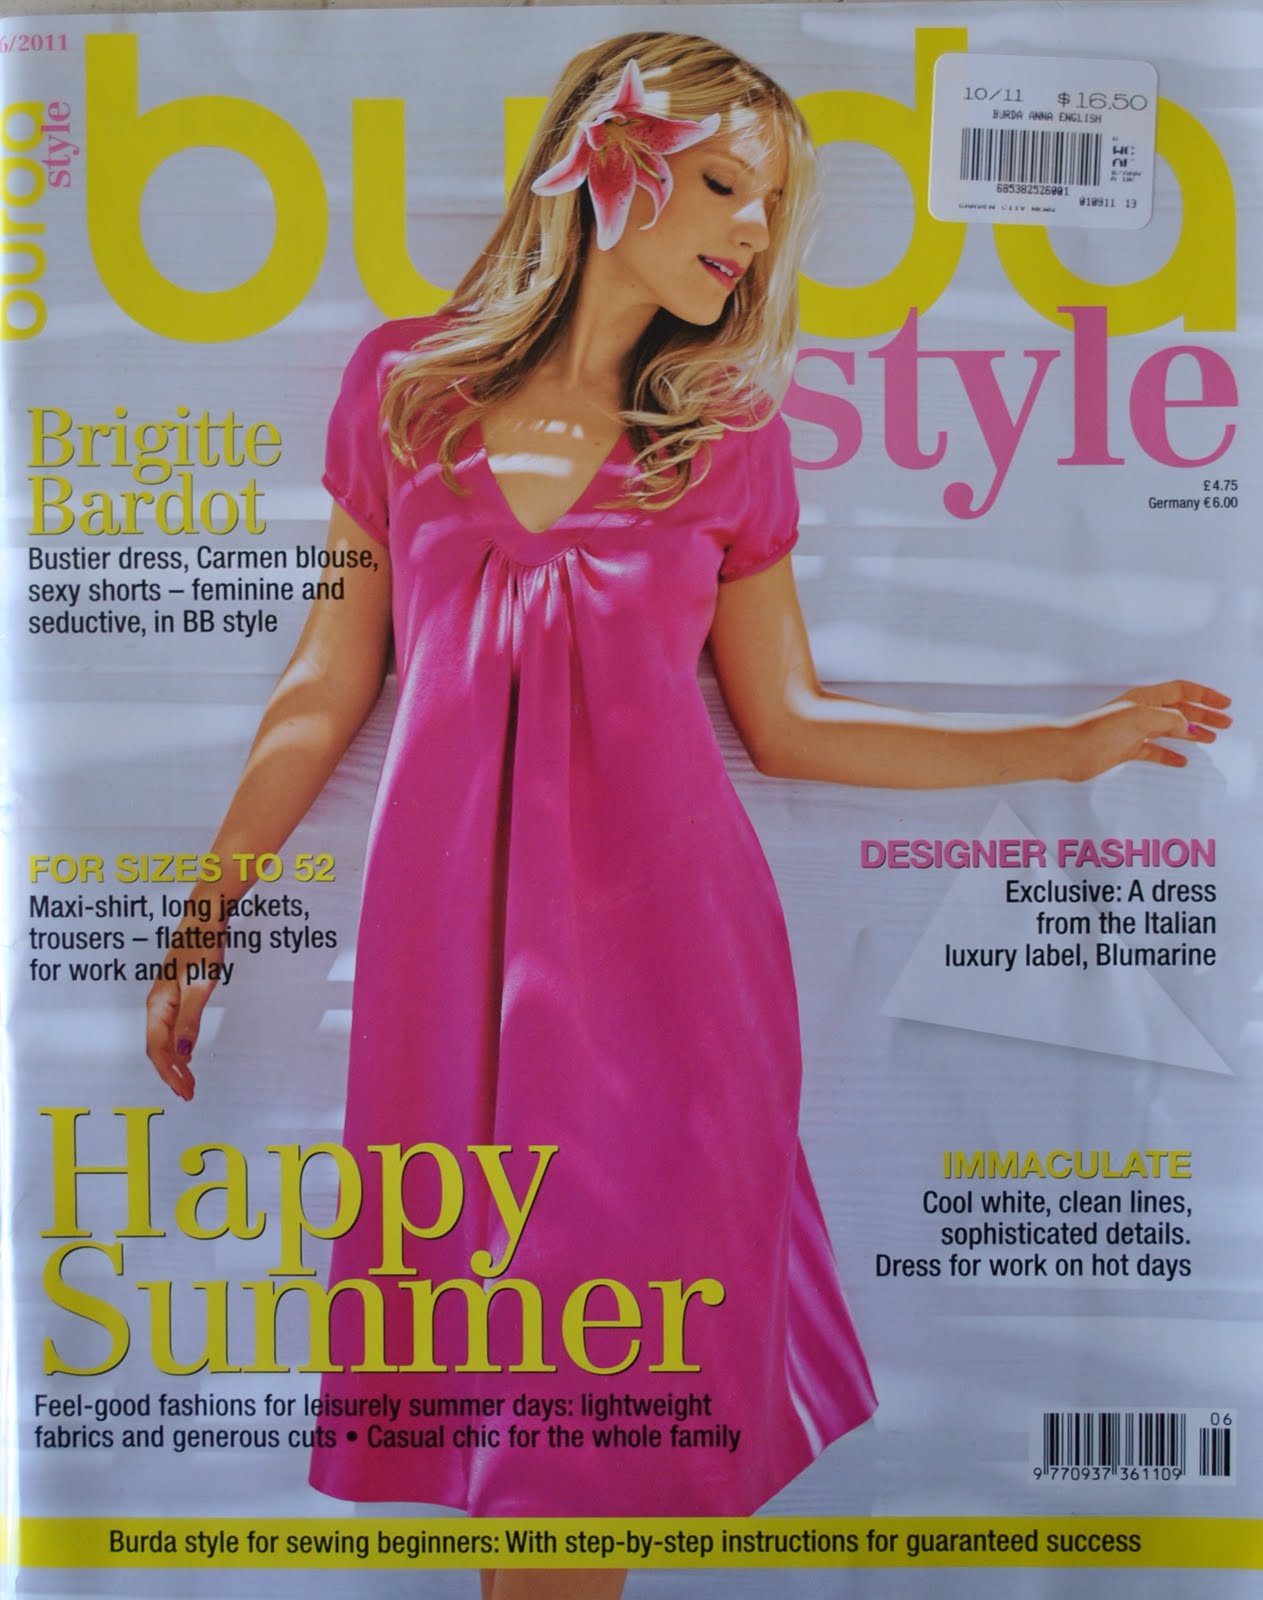
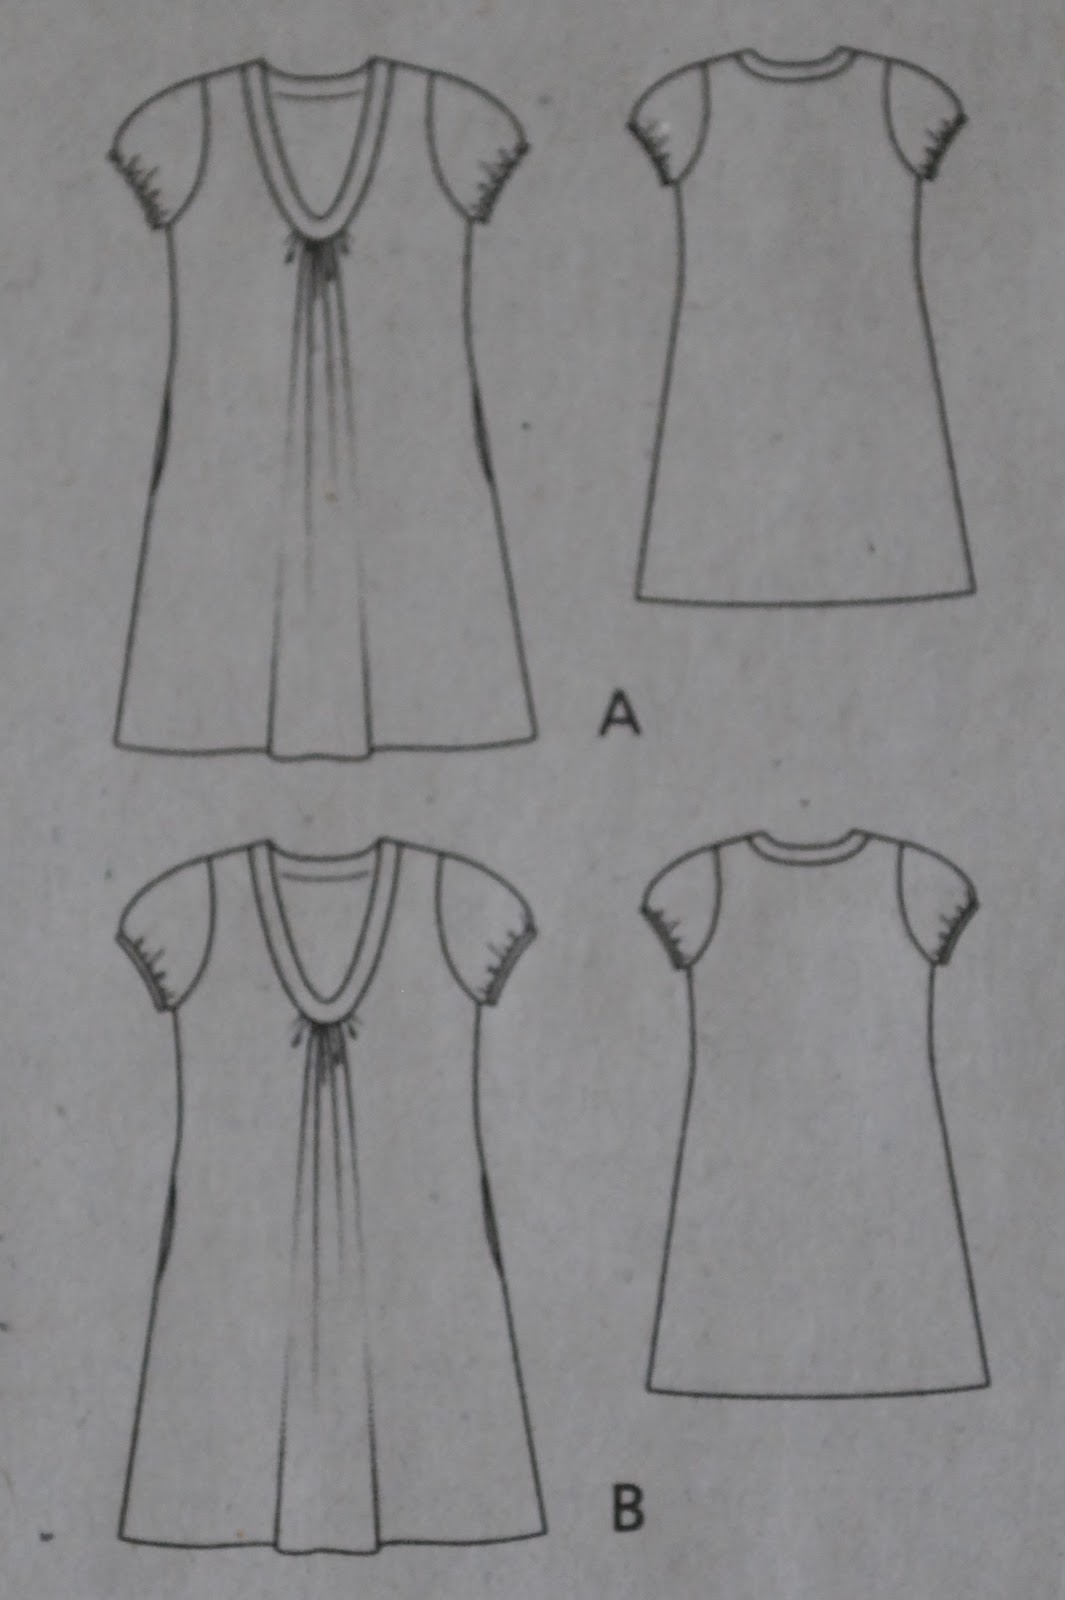
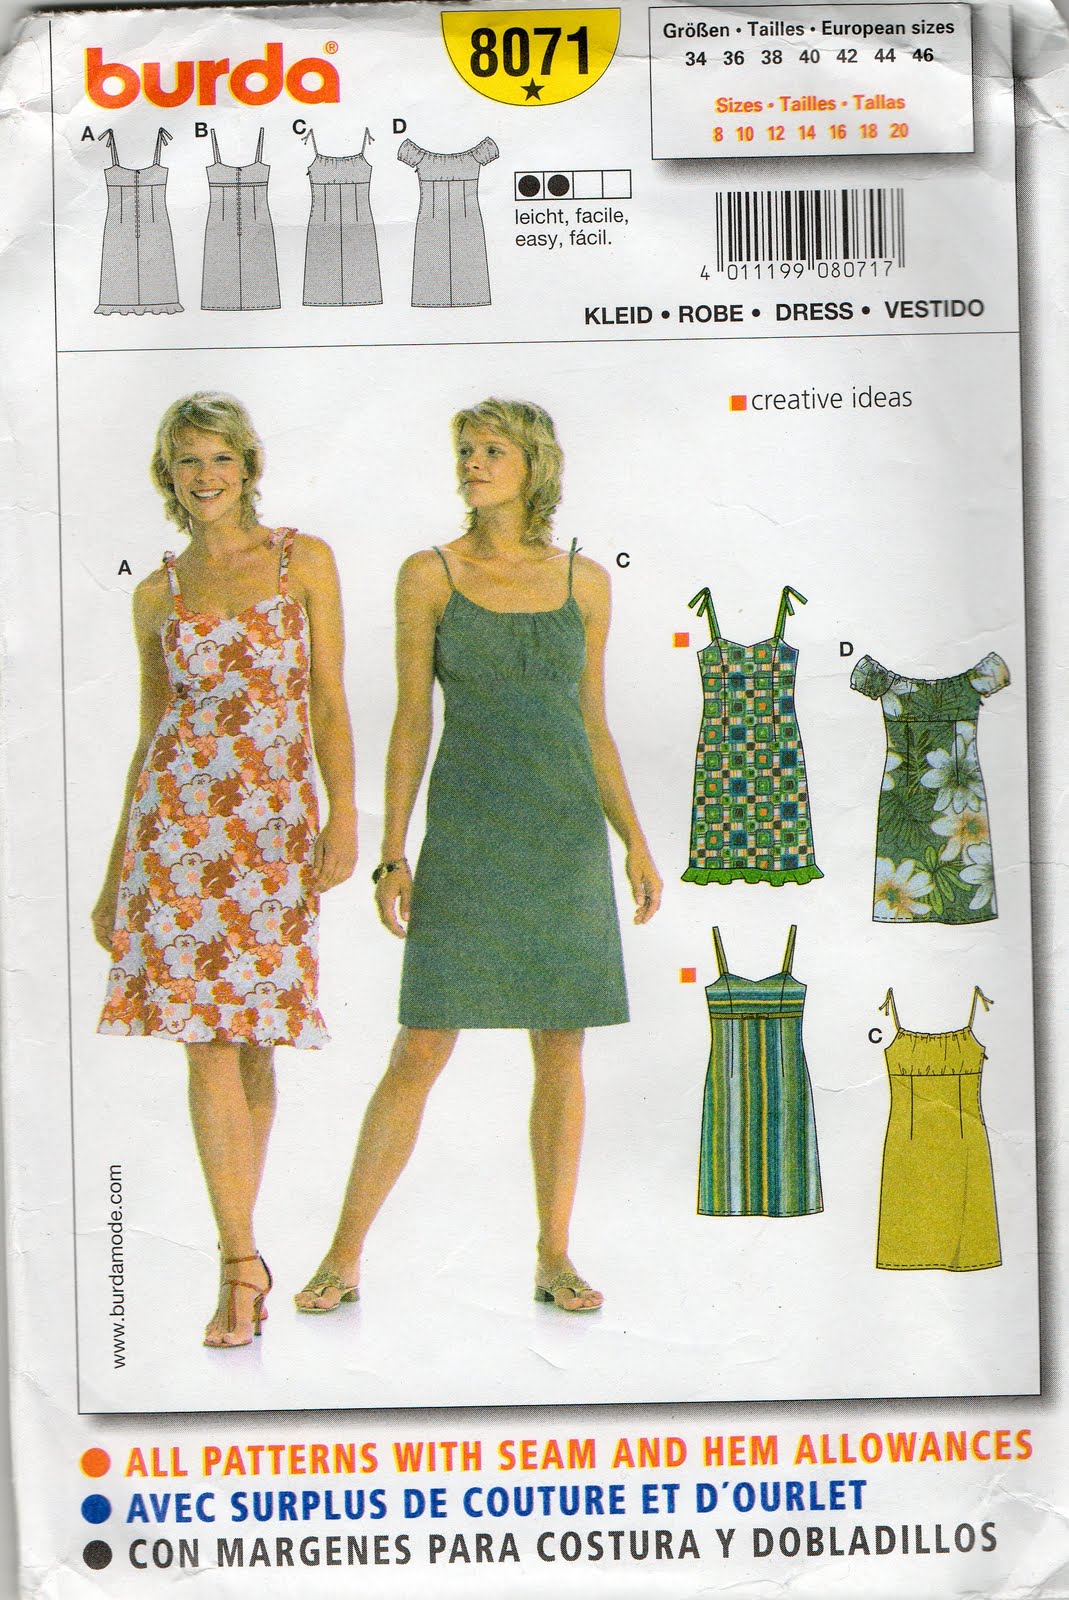
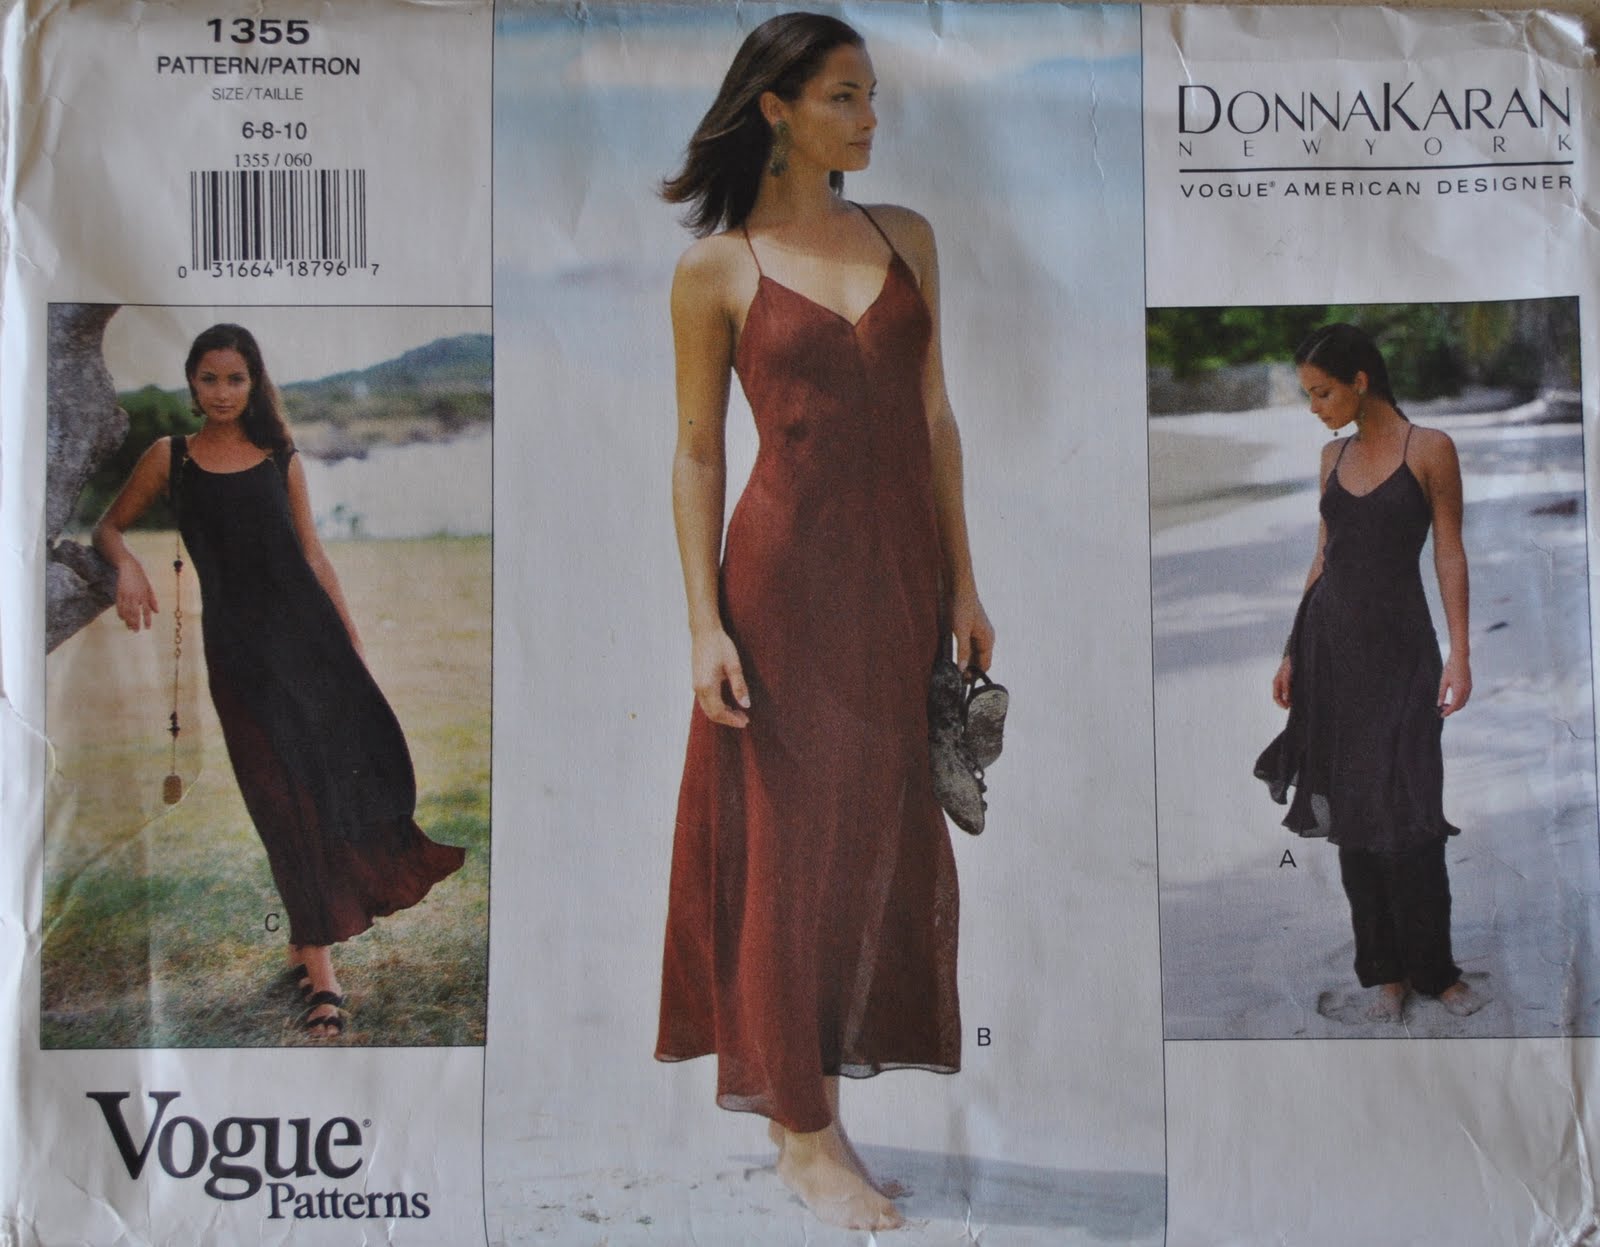
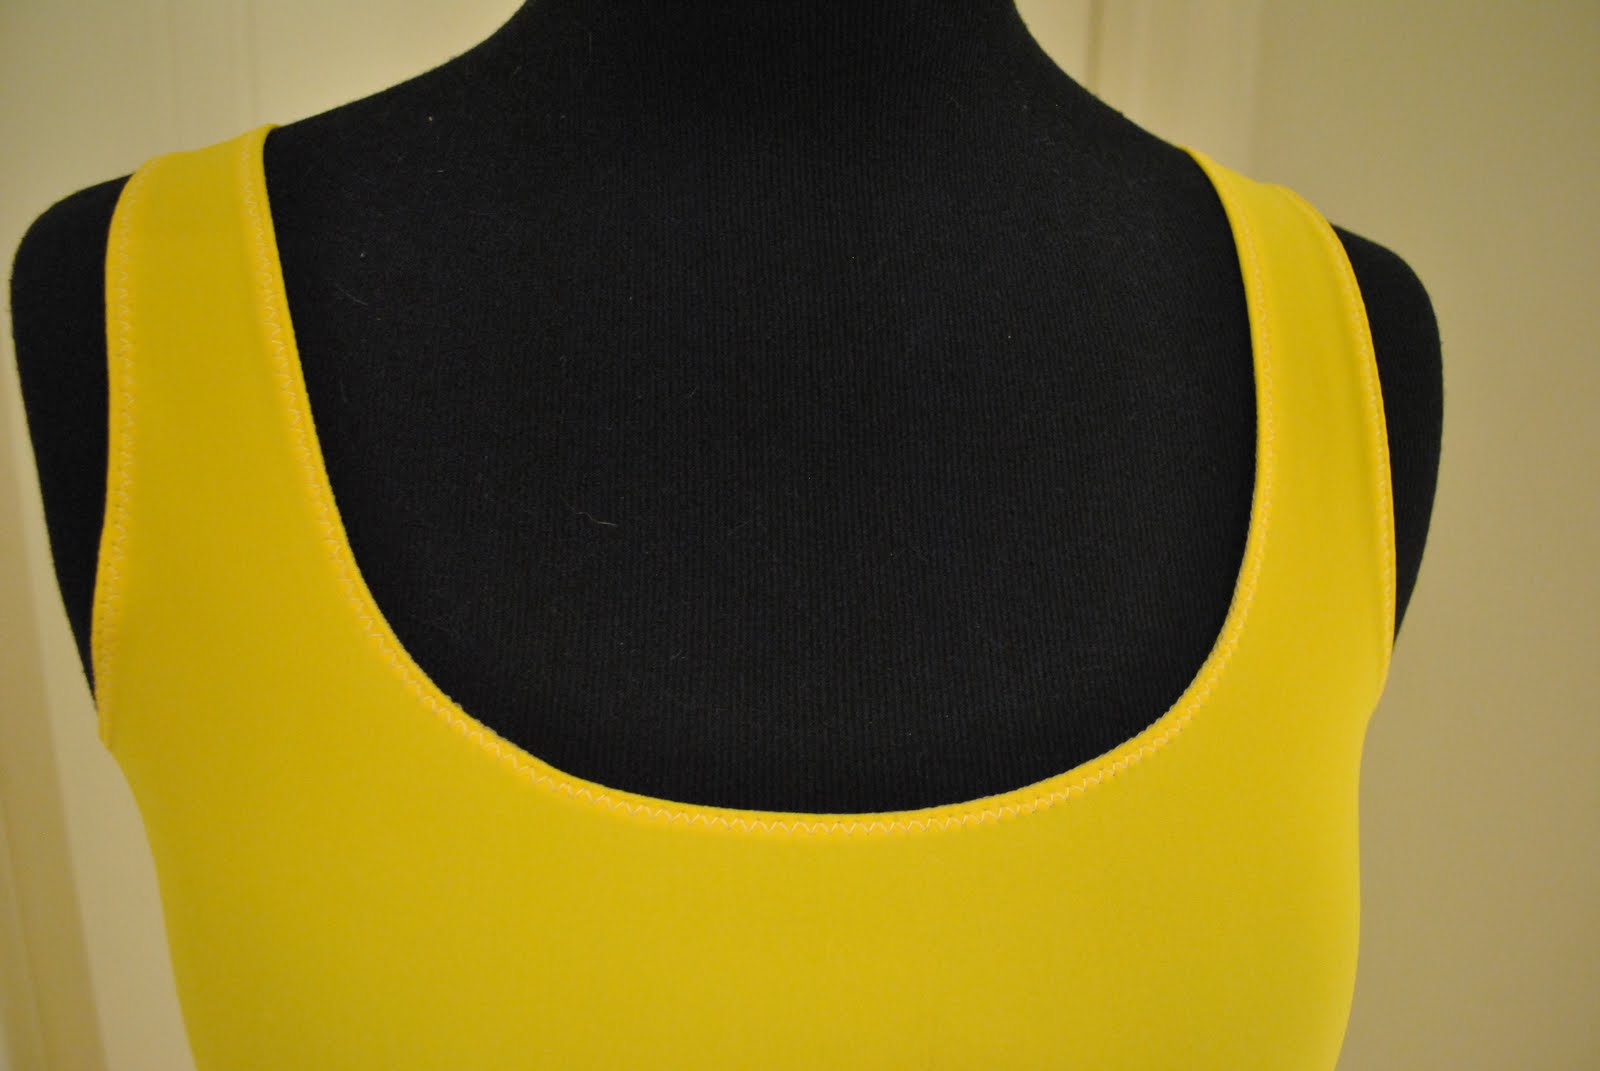
I used Burda 8071, a real tried and true, standby pattern that I’ve used heaps of times before.  Lost count actually… (hmmmm just did a mental count, and including two dresses that have gone years ago, I’ve used this pattern nine times now.  Yowza!)
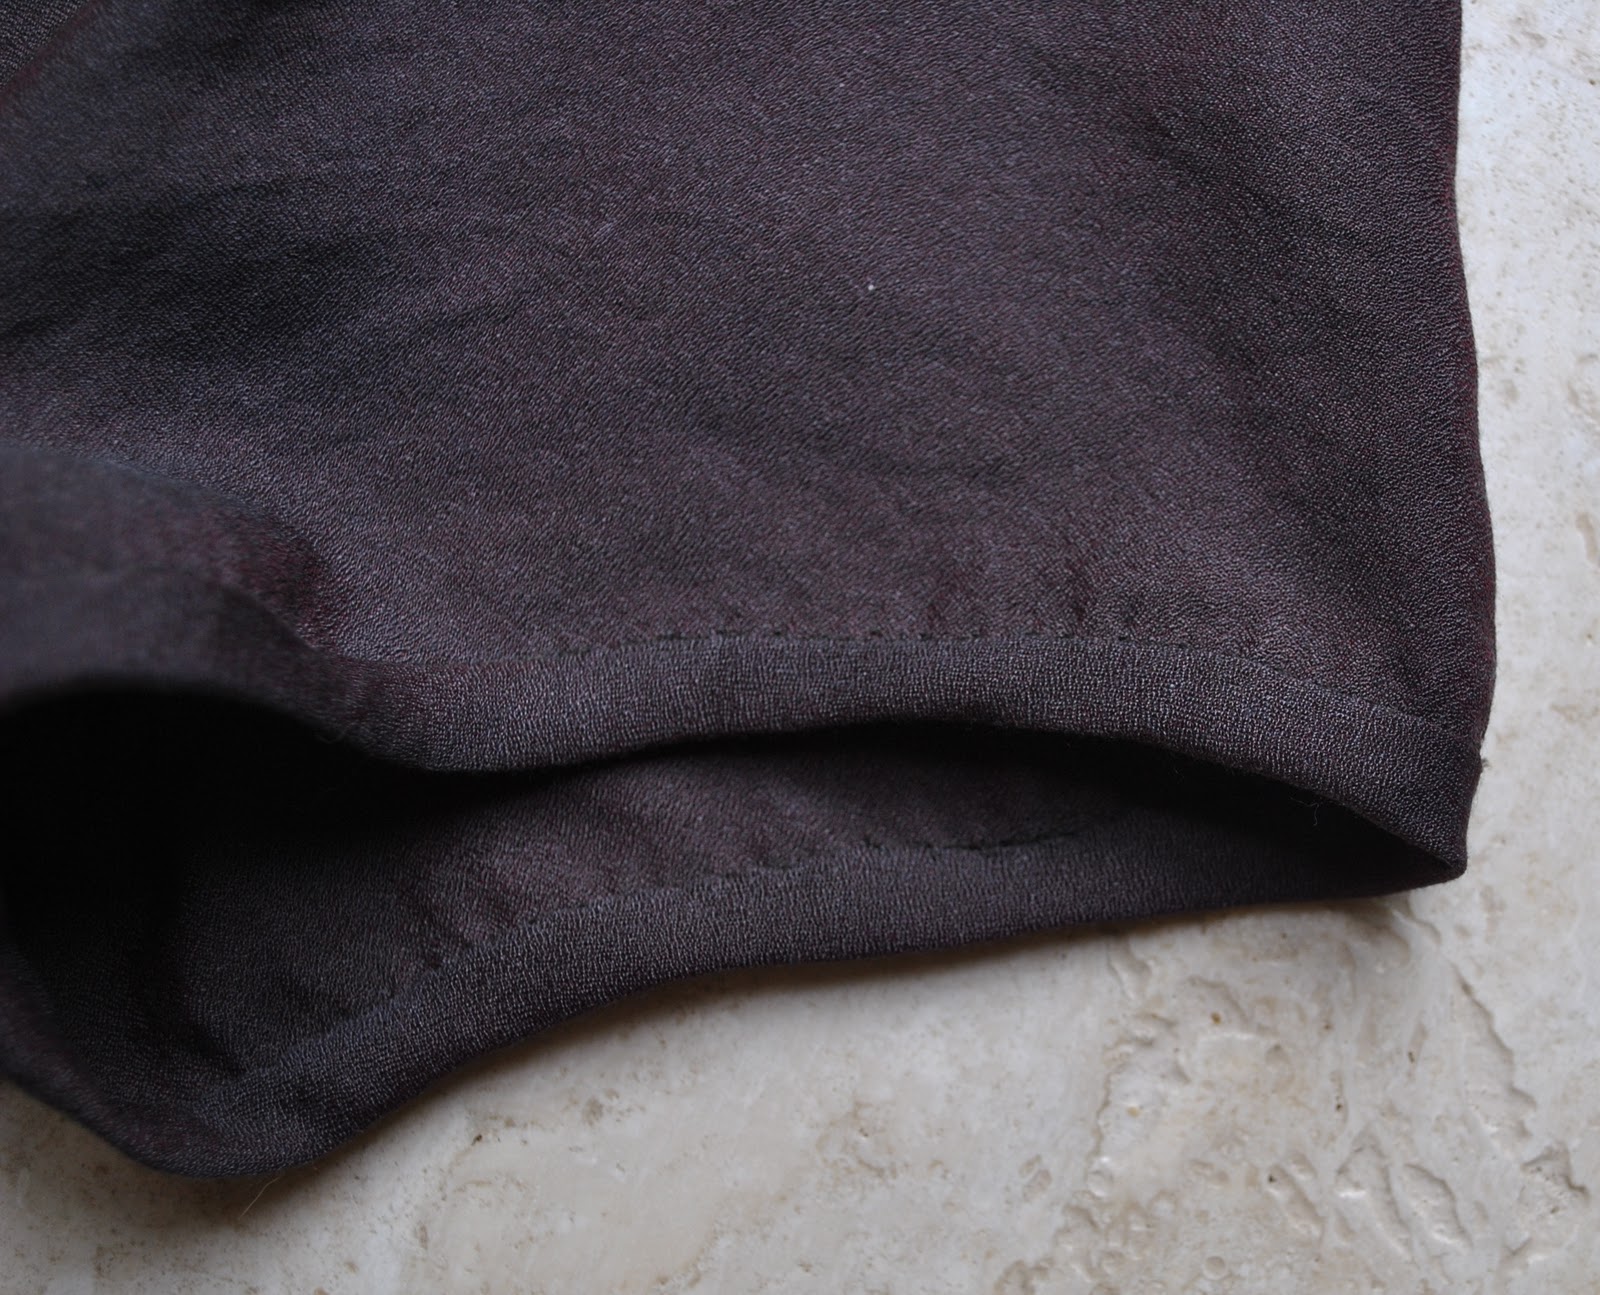
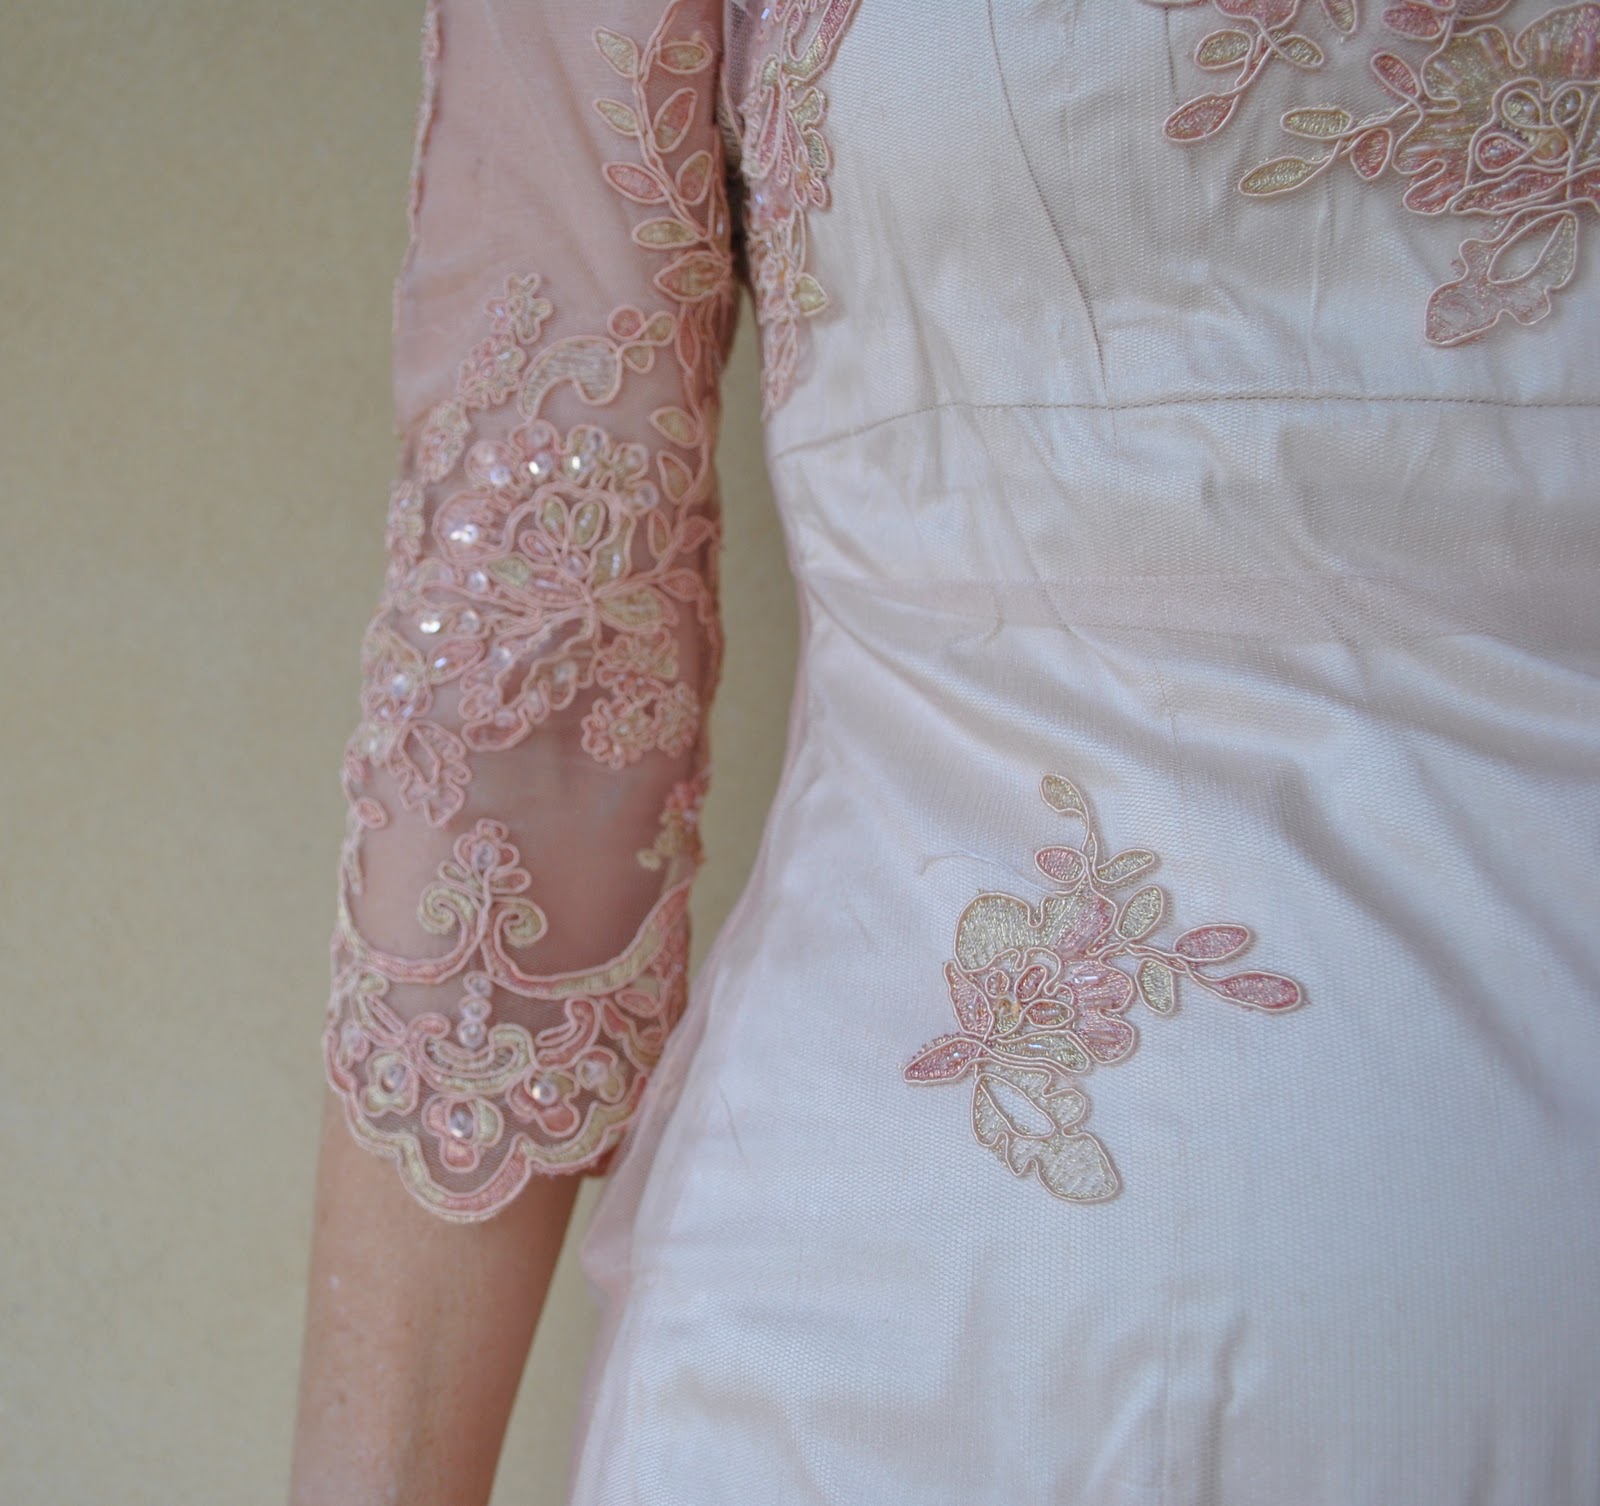
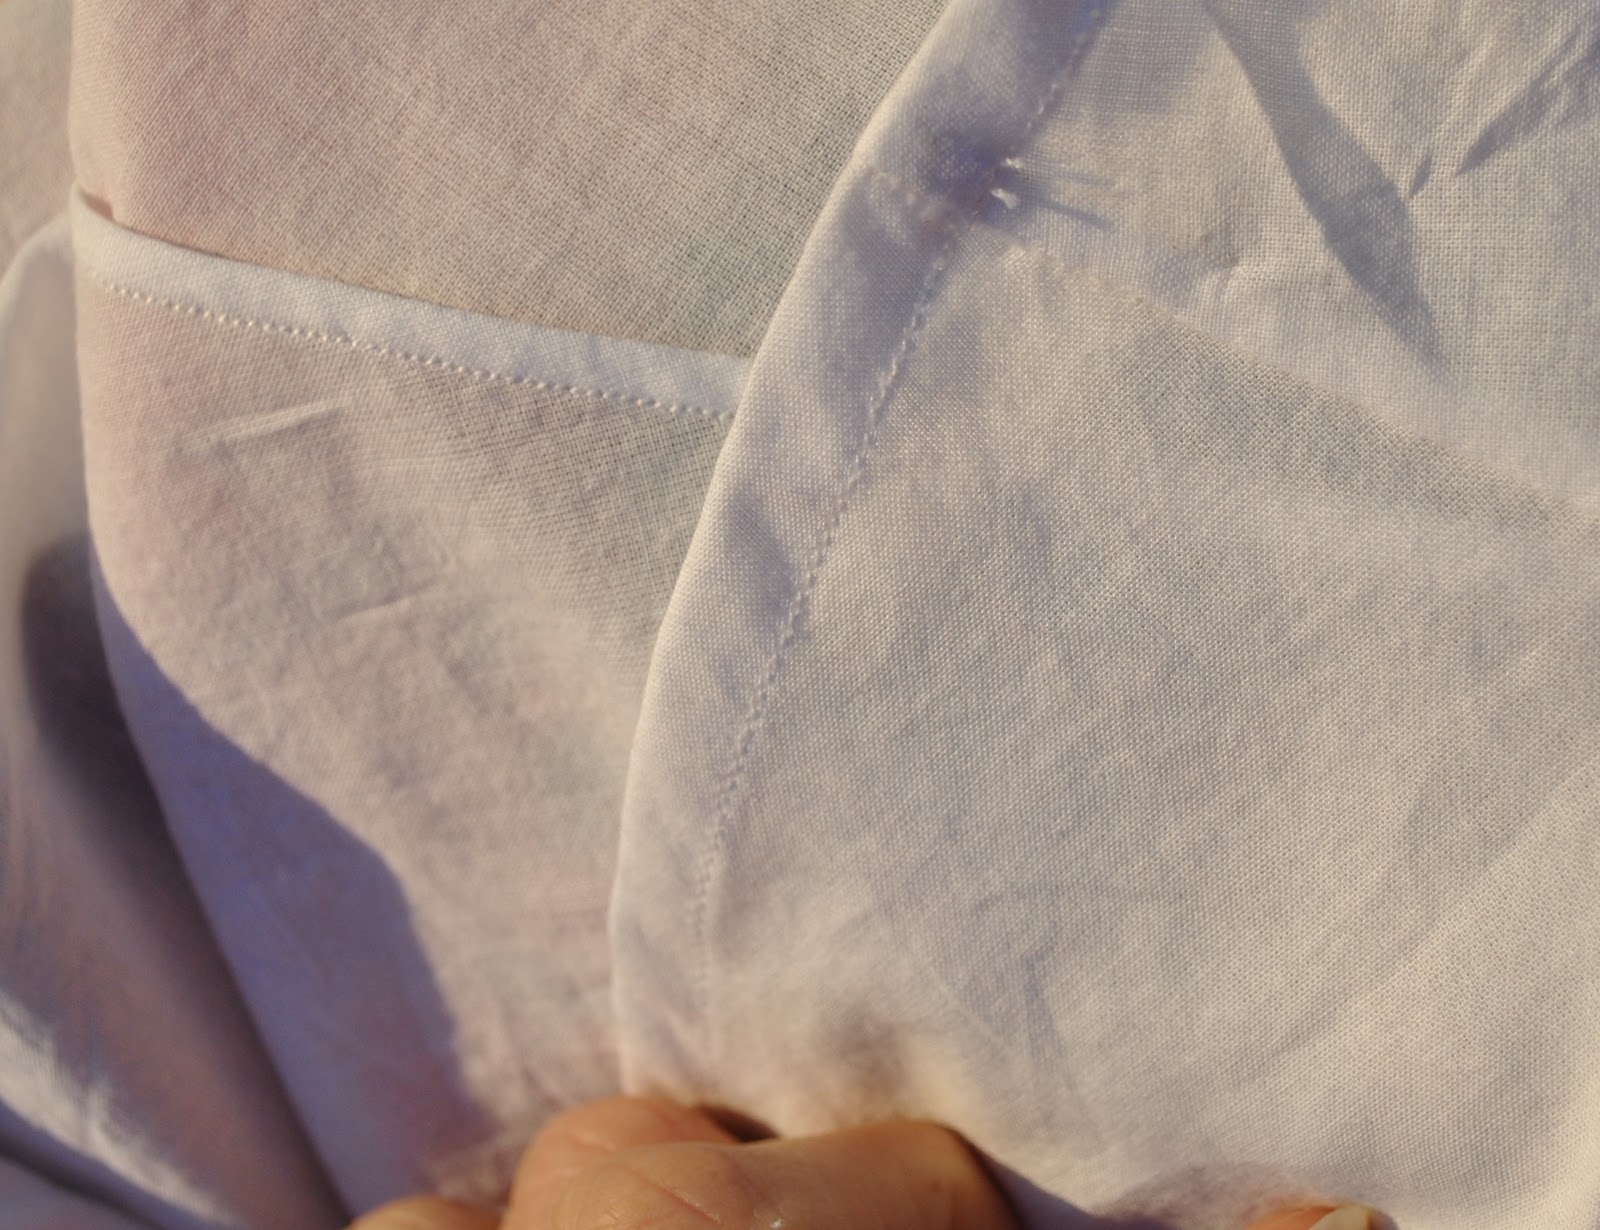
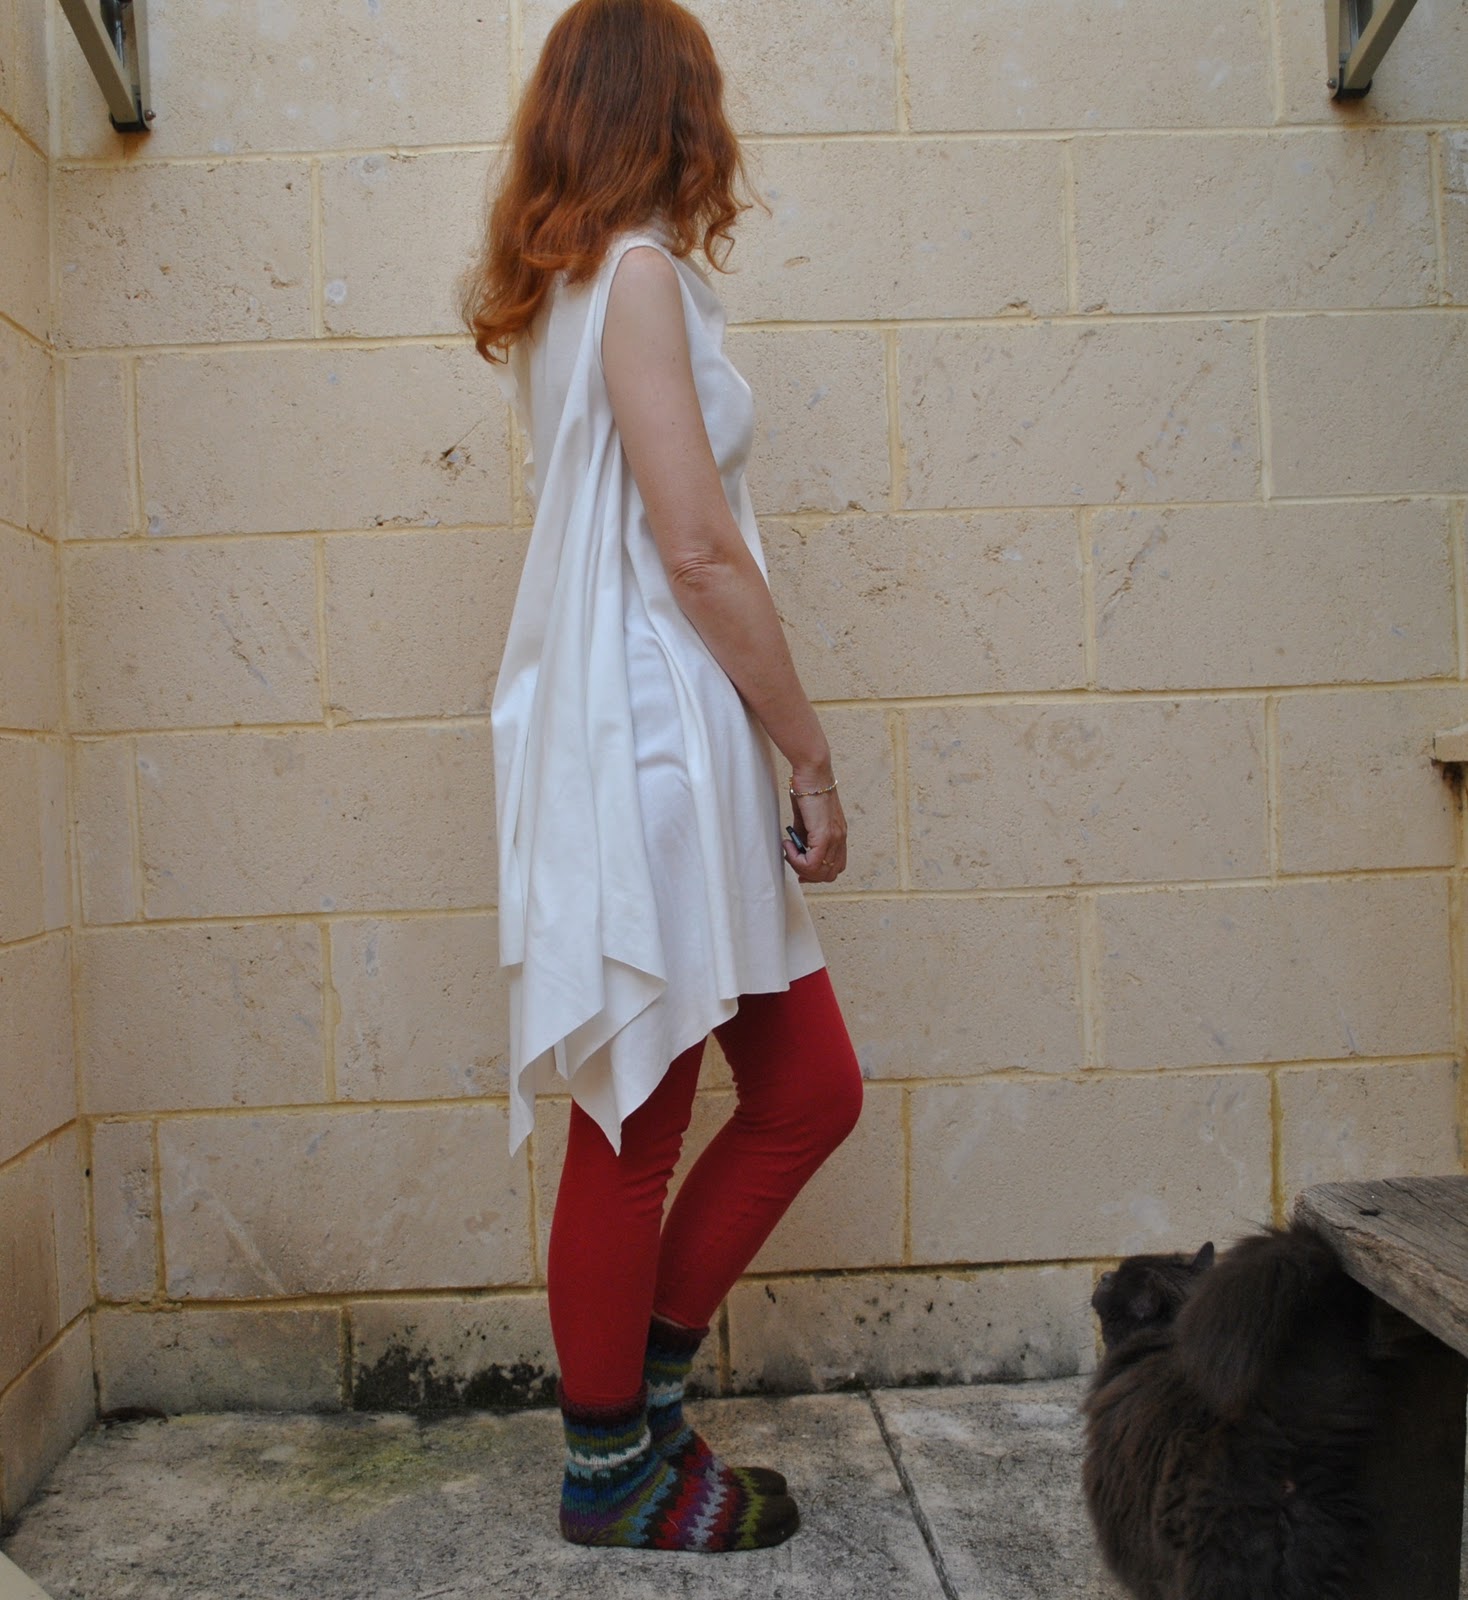
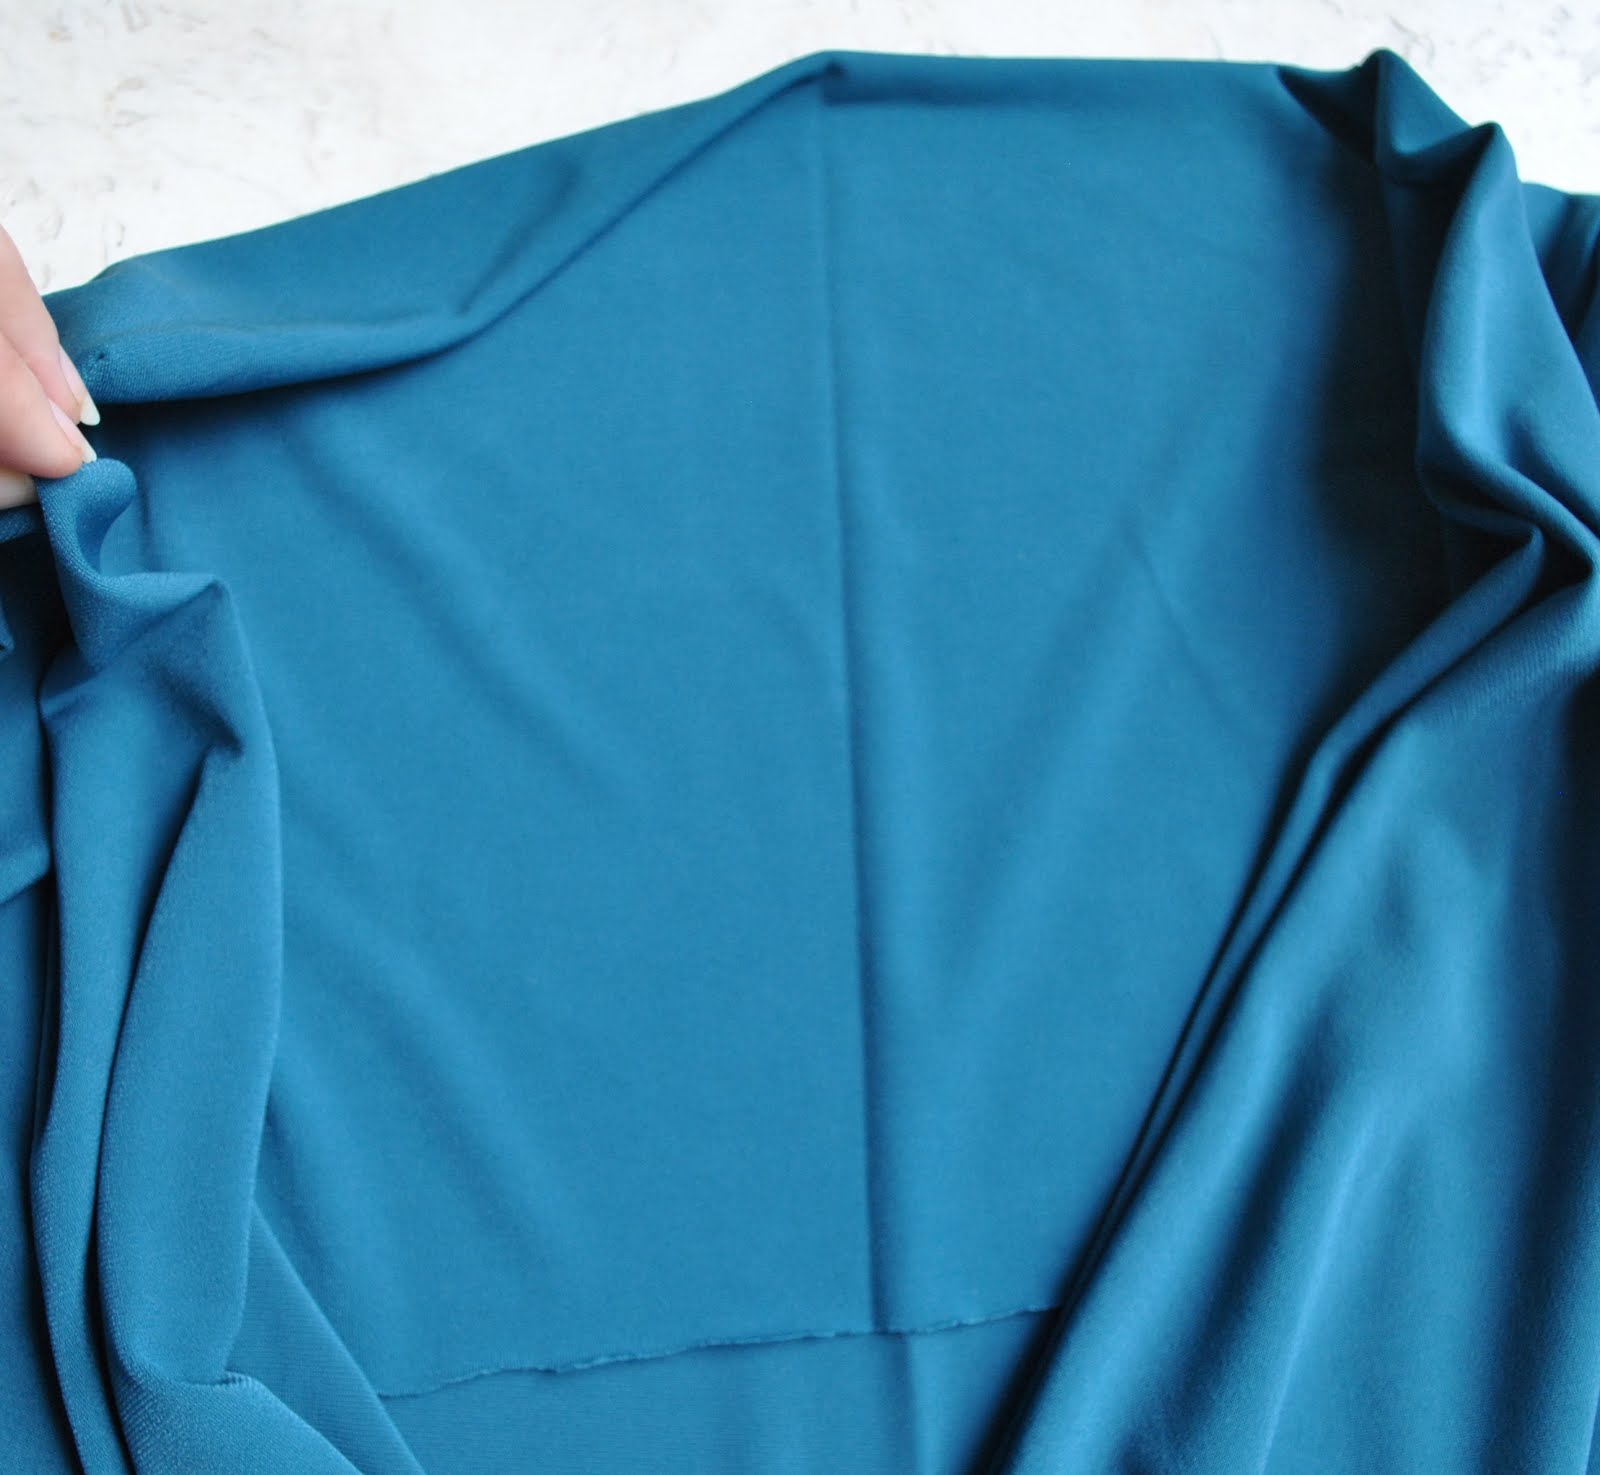
The dress piece was cut with the right side on the fold, to eliminate as much of this side seam as I could.  Also, in lieu of body darts which would have destroyed the regularity of the zigzag design, I cut the exact allowance of each dart from straight out of the side edges of the dress pieces (I’ve done this before too, for this dress here.  Works a treat for where sewn-in darts in the fabric are not what you really want, but you still want the shape). 
I hand basted the remainder of the right side side edge invisibly together from the right side to ensure the pattern was matched perfectly.
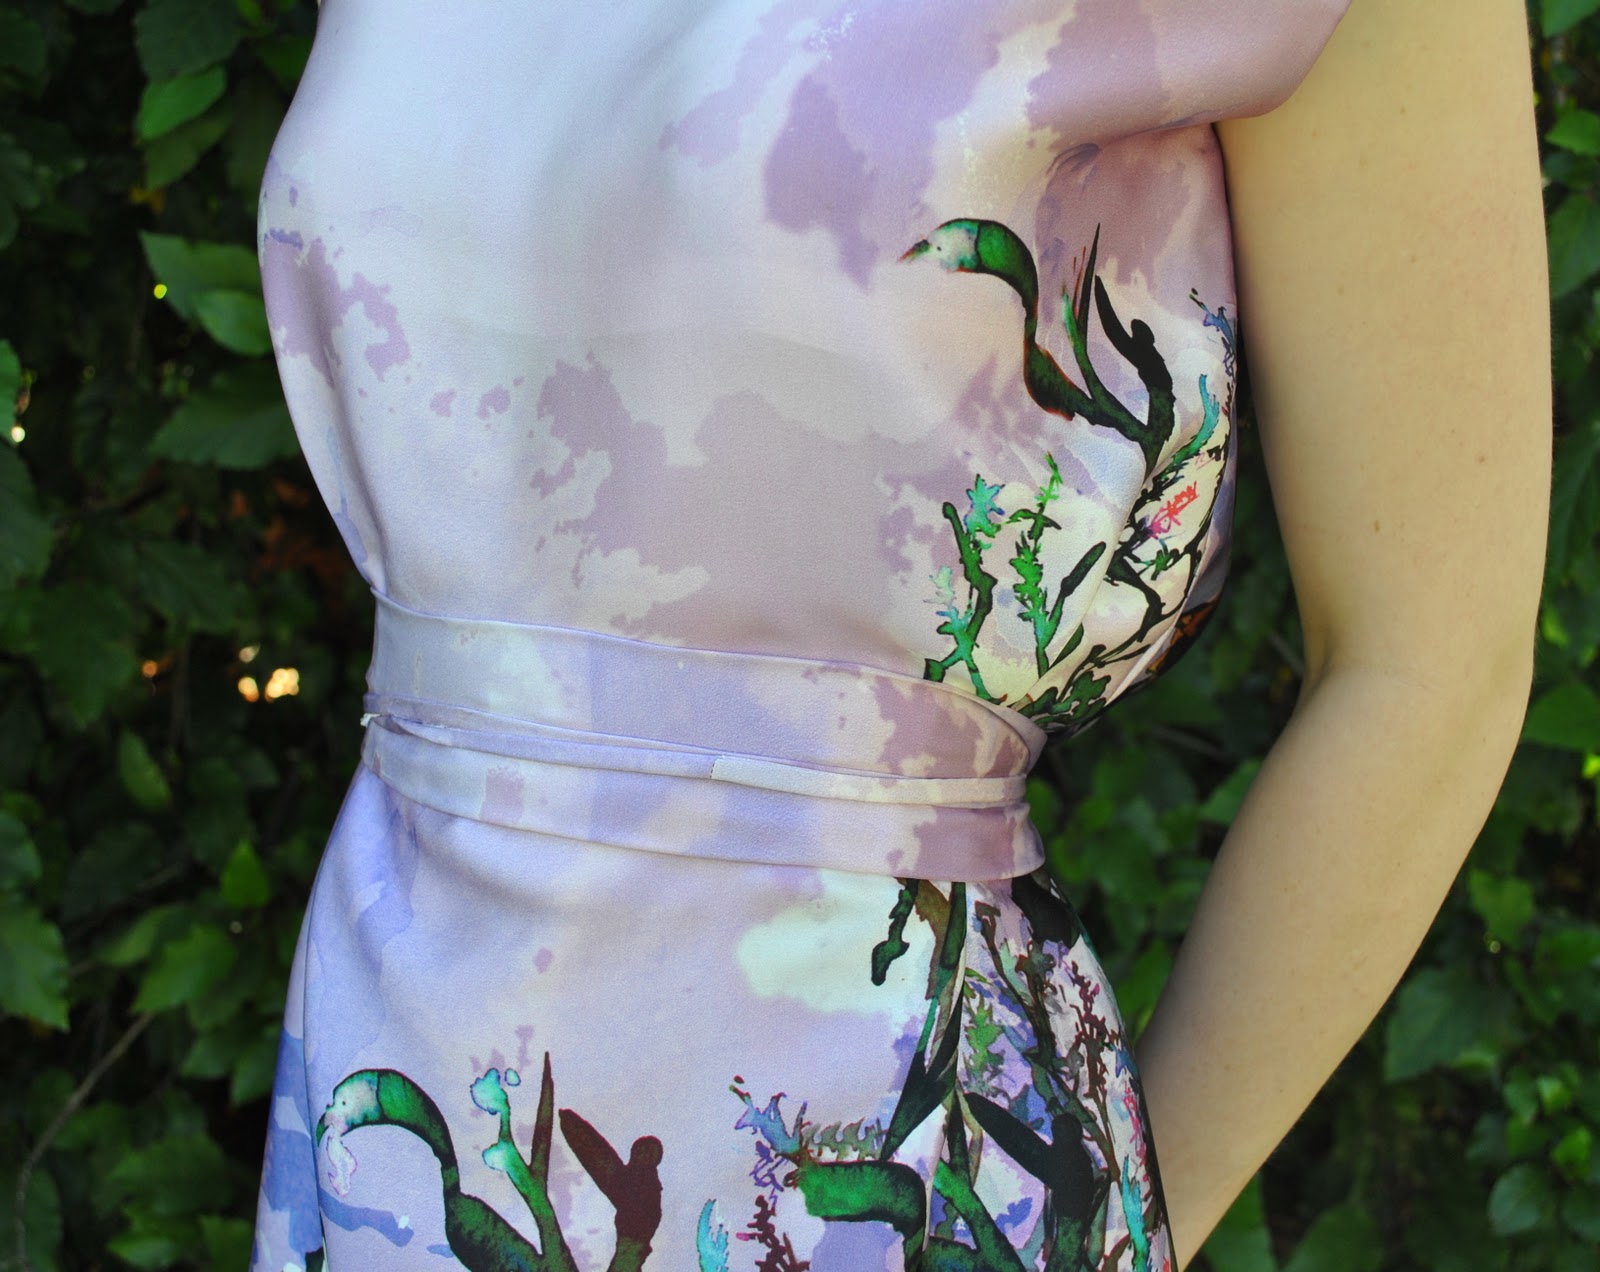
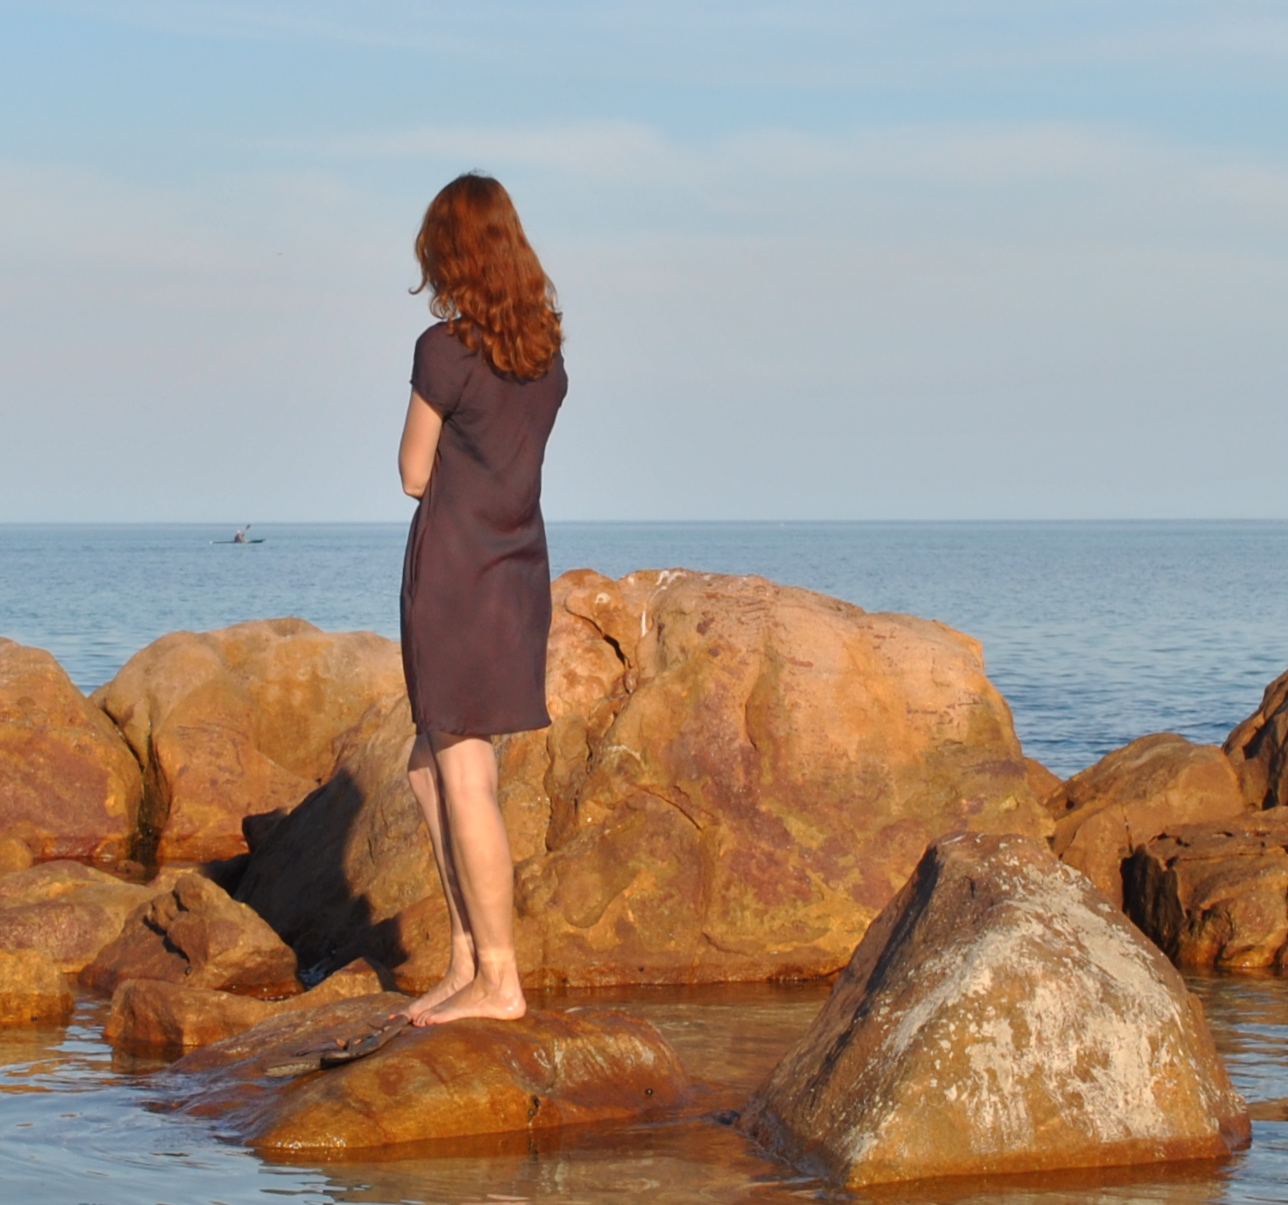
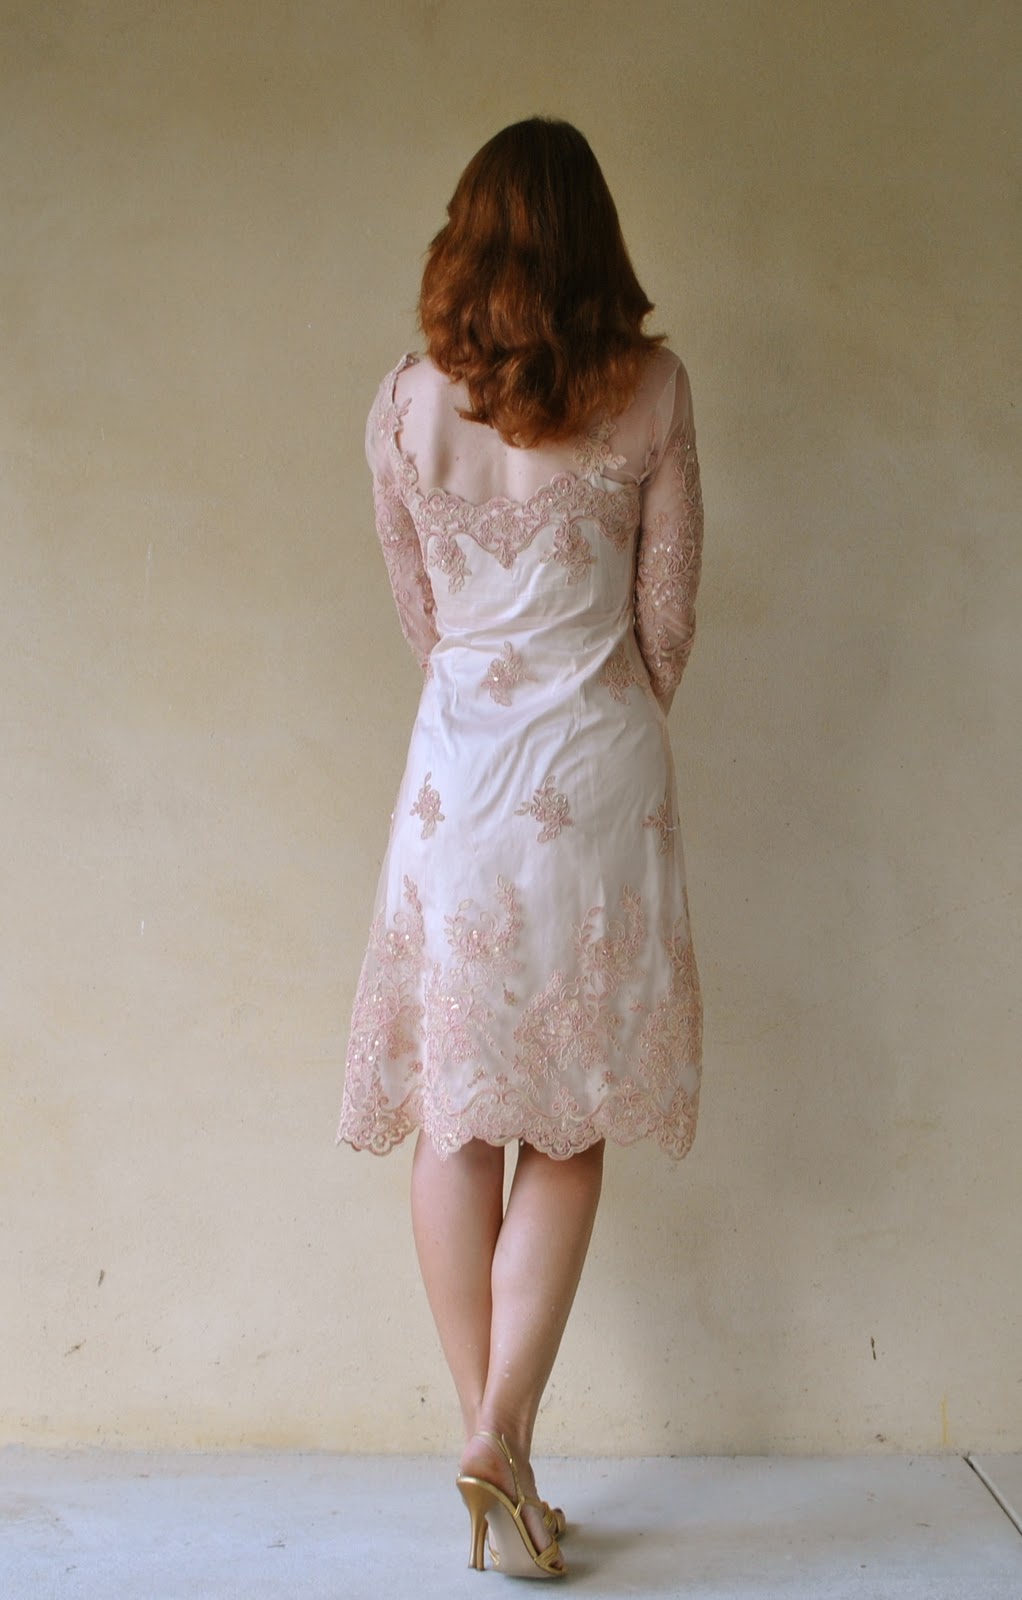
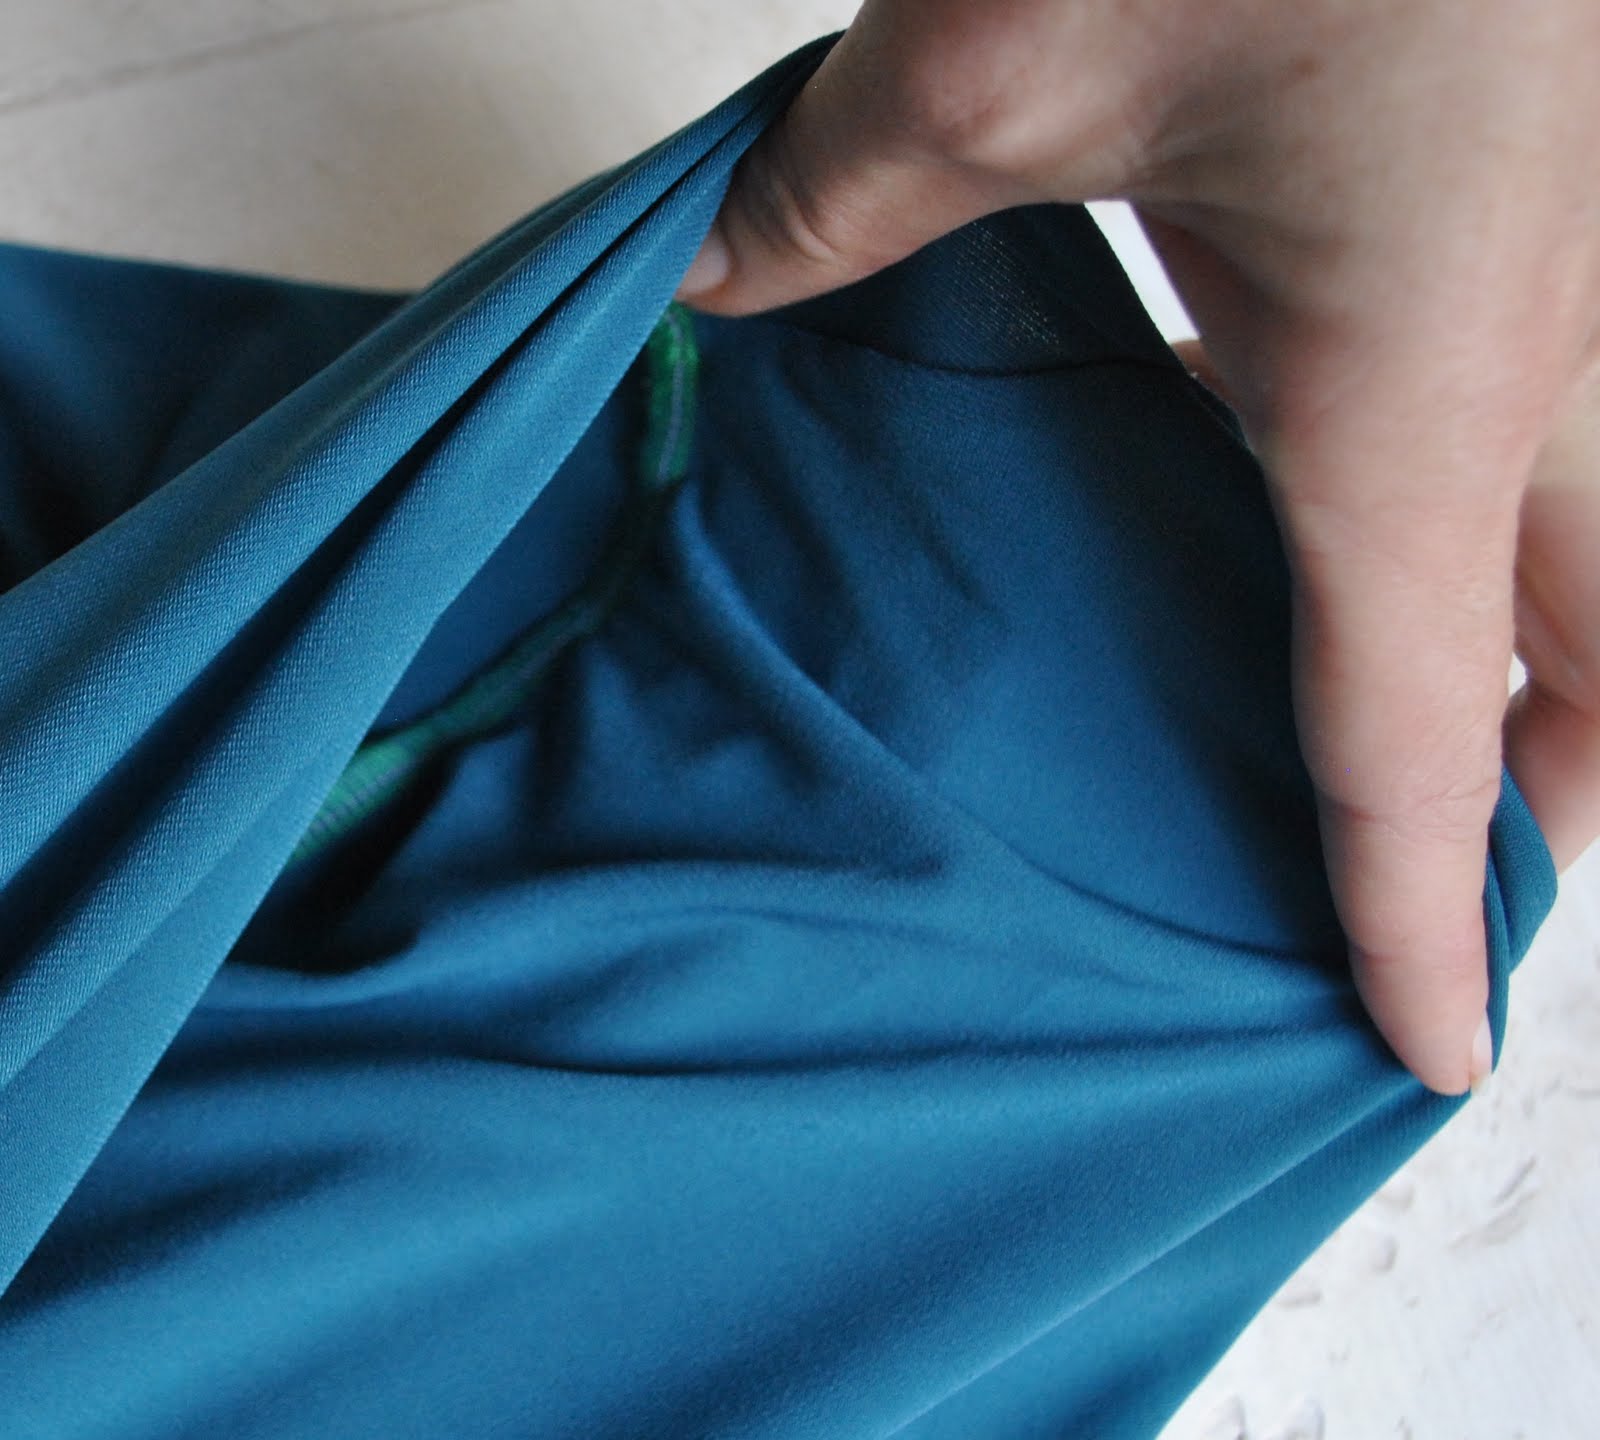
For the left side seam of the dress piece, I cut and sewed bias strips of the khaki linen along the seam allowance, to stabilise the knit fabric behind where the invisible zip is inserted… and the zip was hand basted in place, again so I had complete control of matching up those zigzags as closely as was humanly possible.  Yeah; I am neurotic that way, it’s OK I admit that… but I am pretty pleased with the results.

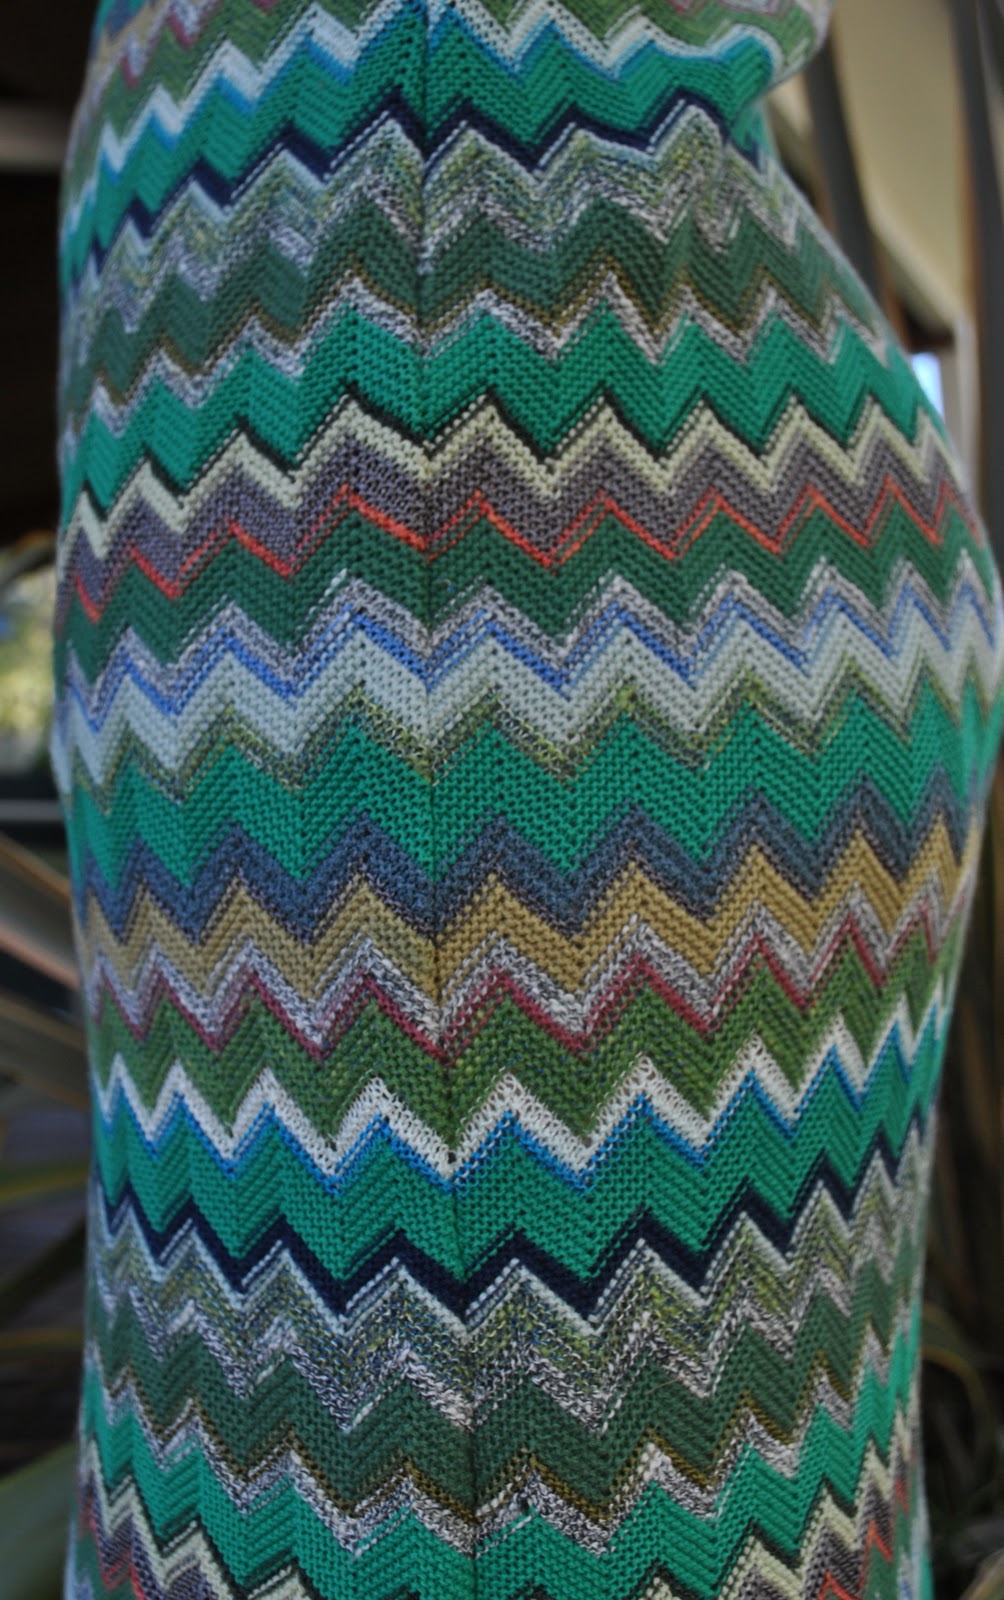
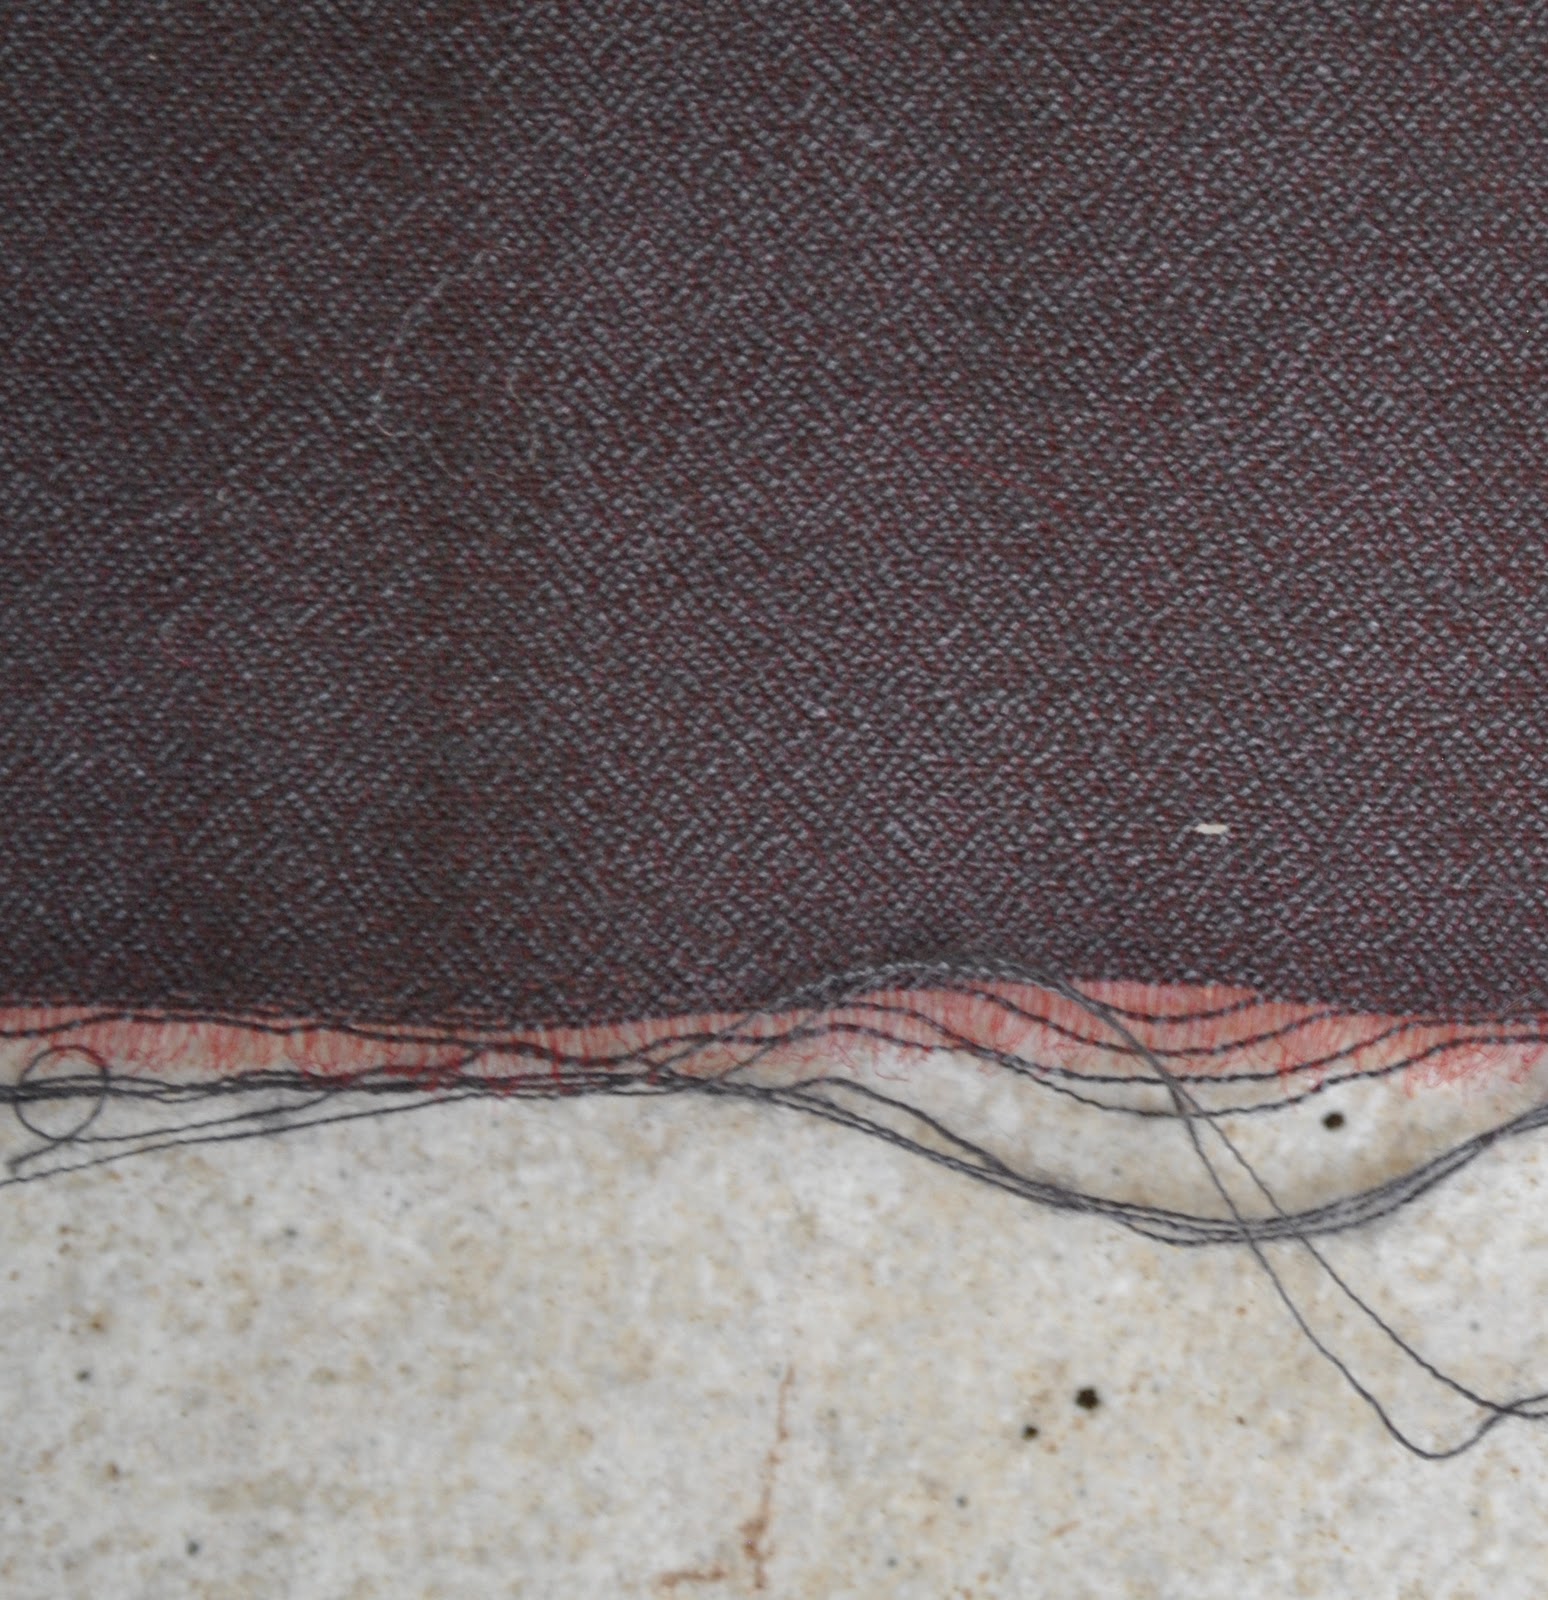
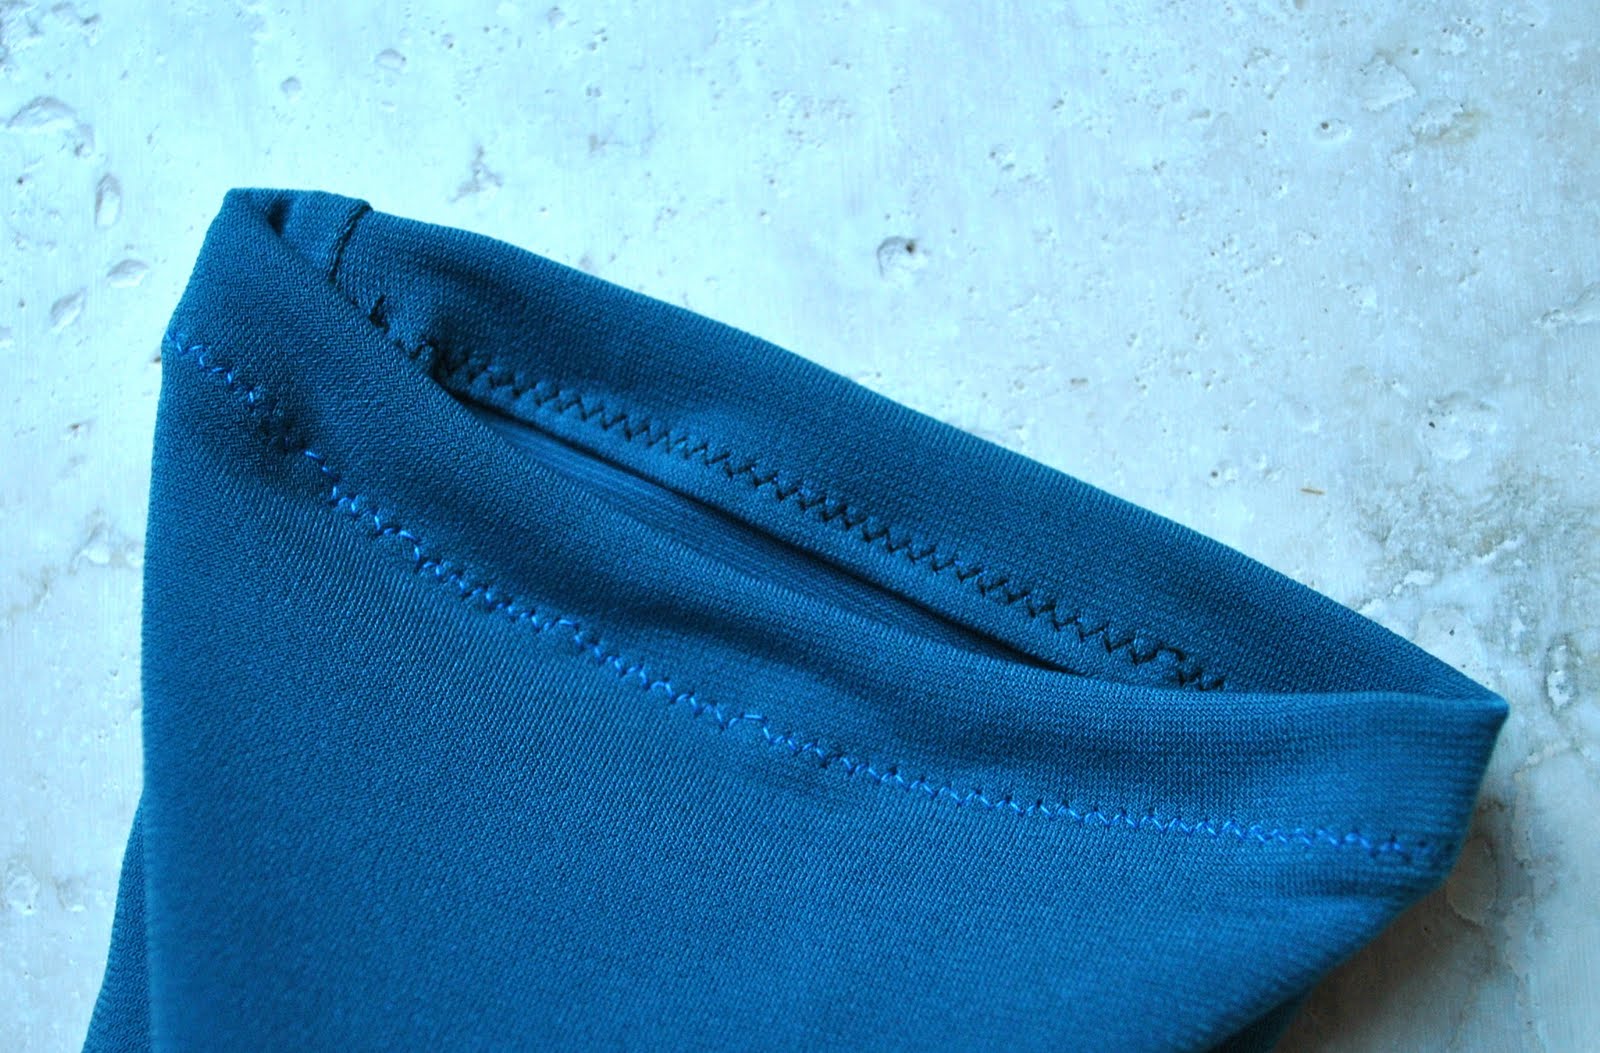
The lower hem, well unfortunately the lower edge of the fabric was not in super good nick and was already unravelling in some spots; the stitch loops were threaded through with one flimsy stay-thread which was not doing its job very well.  I carefully pulled this out bit by bit, darning where needed, hand embroidering the edge in a tightish blanket stitch leaving lumpy decorative (I hope!) blobs on the points of the zigzags.  I’m hoping it looks a bit like a crocheted edge…  just the type of crafty finish that I think finishes off this slightly rustic dress to peasant-y perfection.

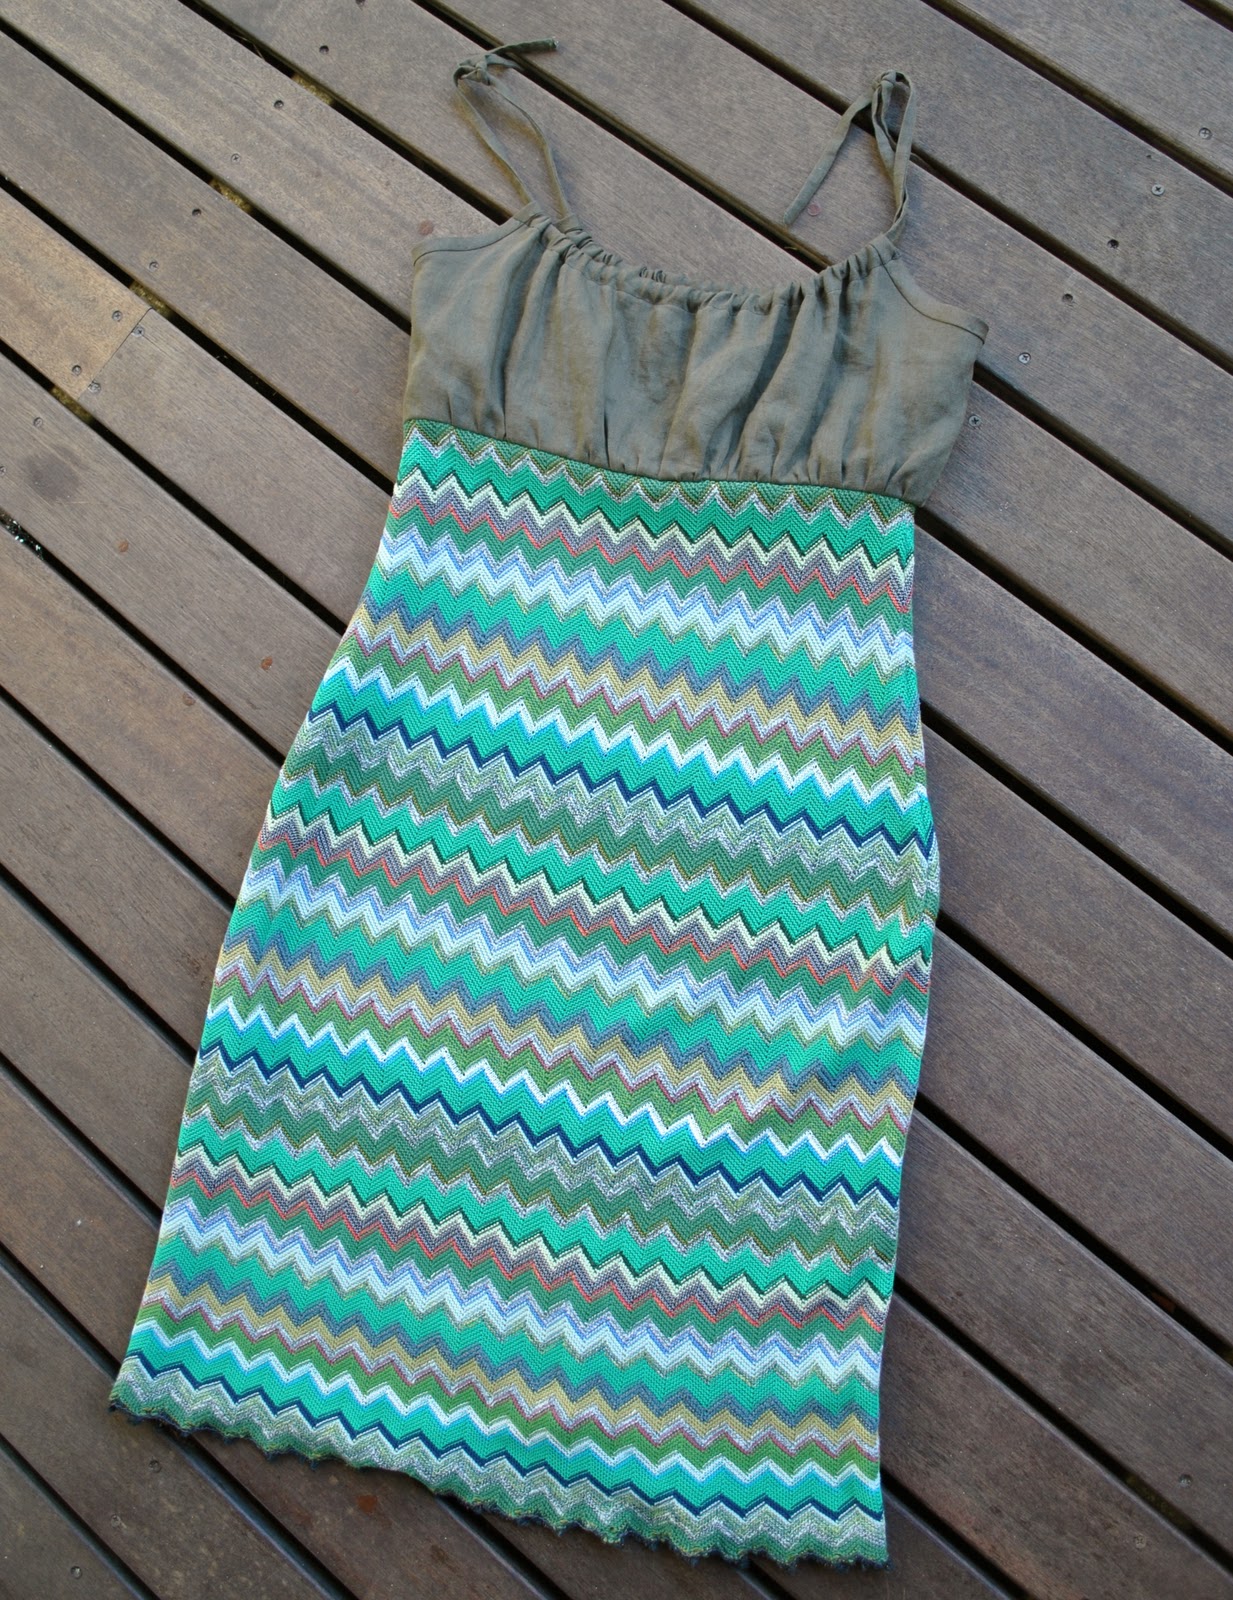
Dress; Burda 8071, khaki linen and knit fabric.
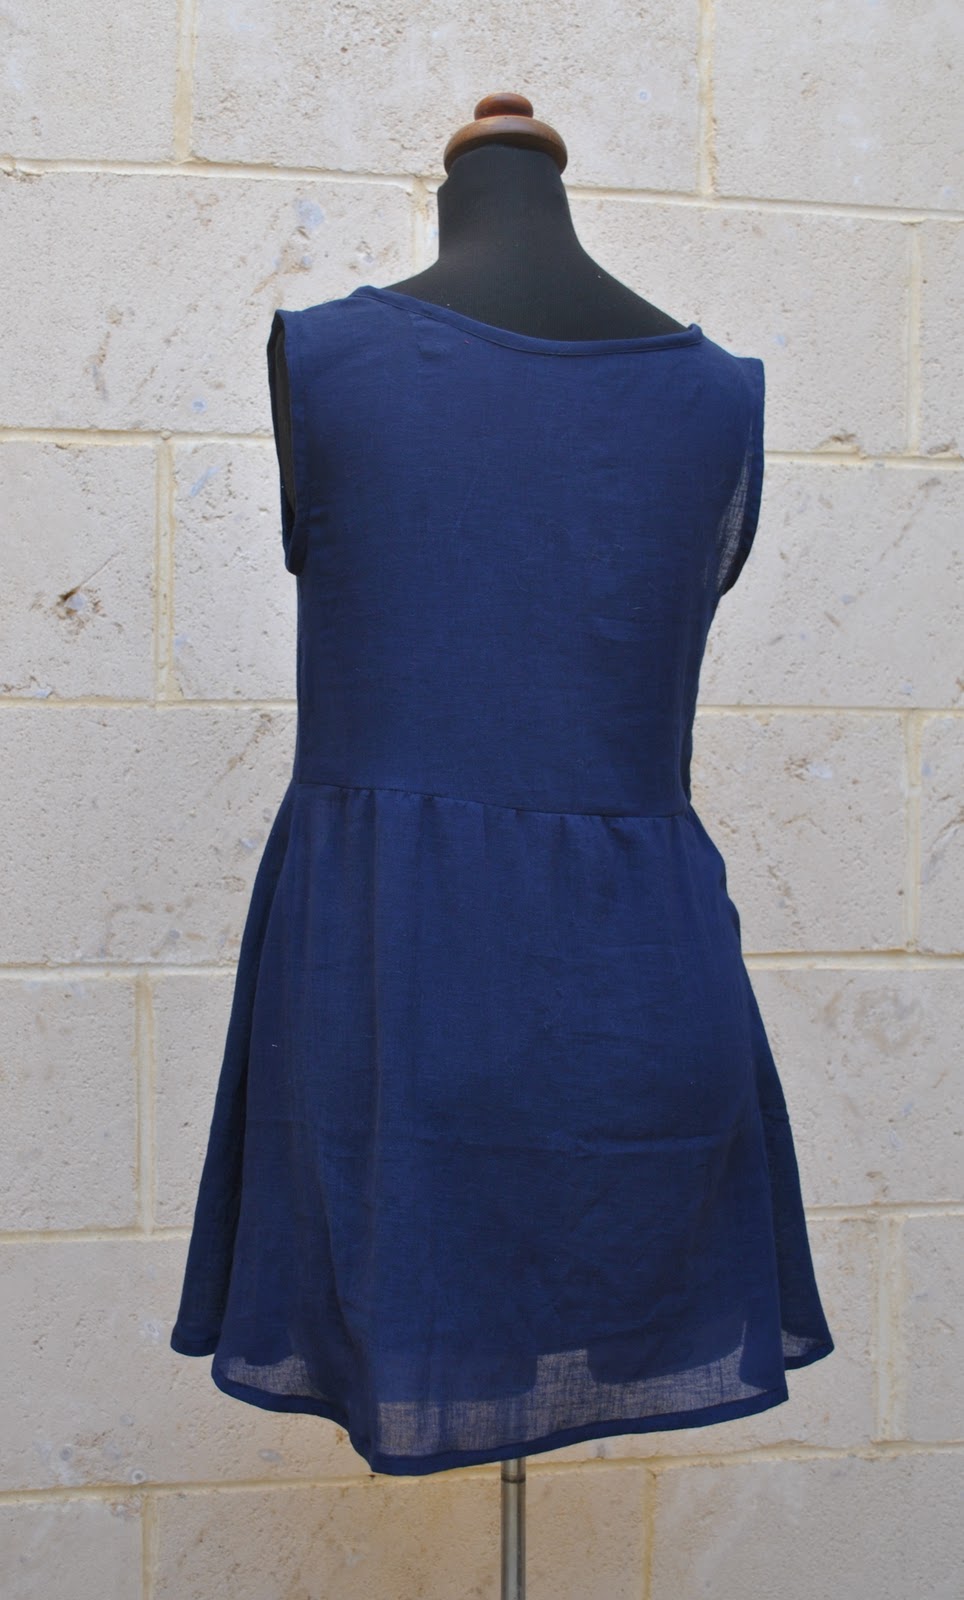
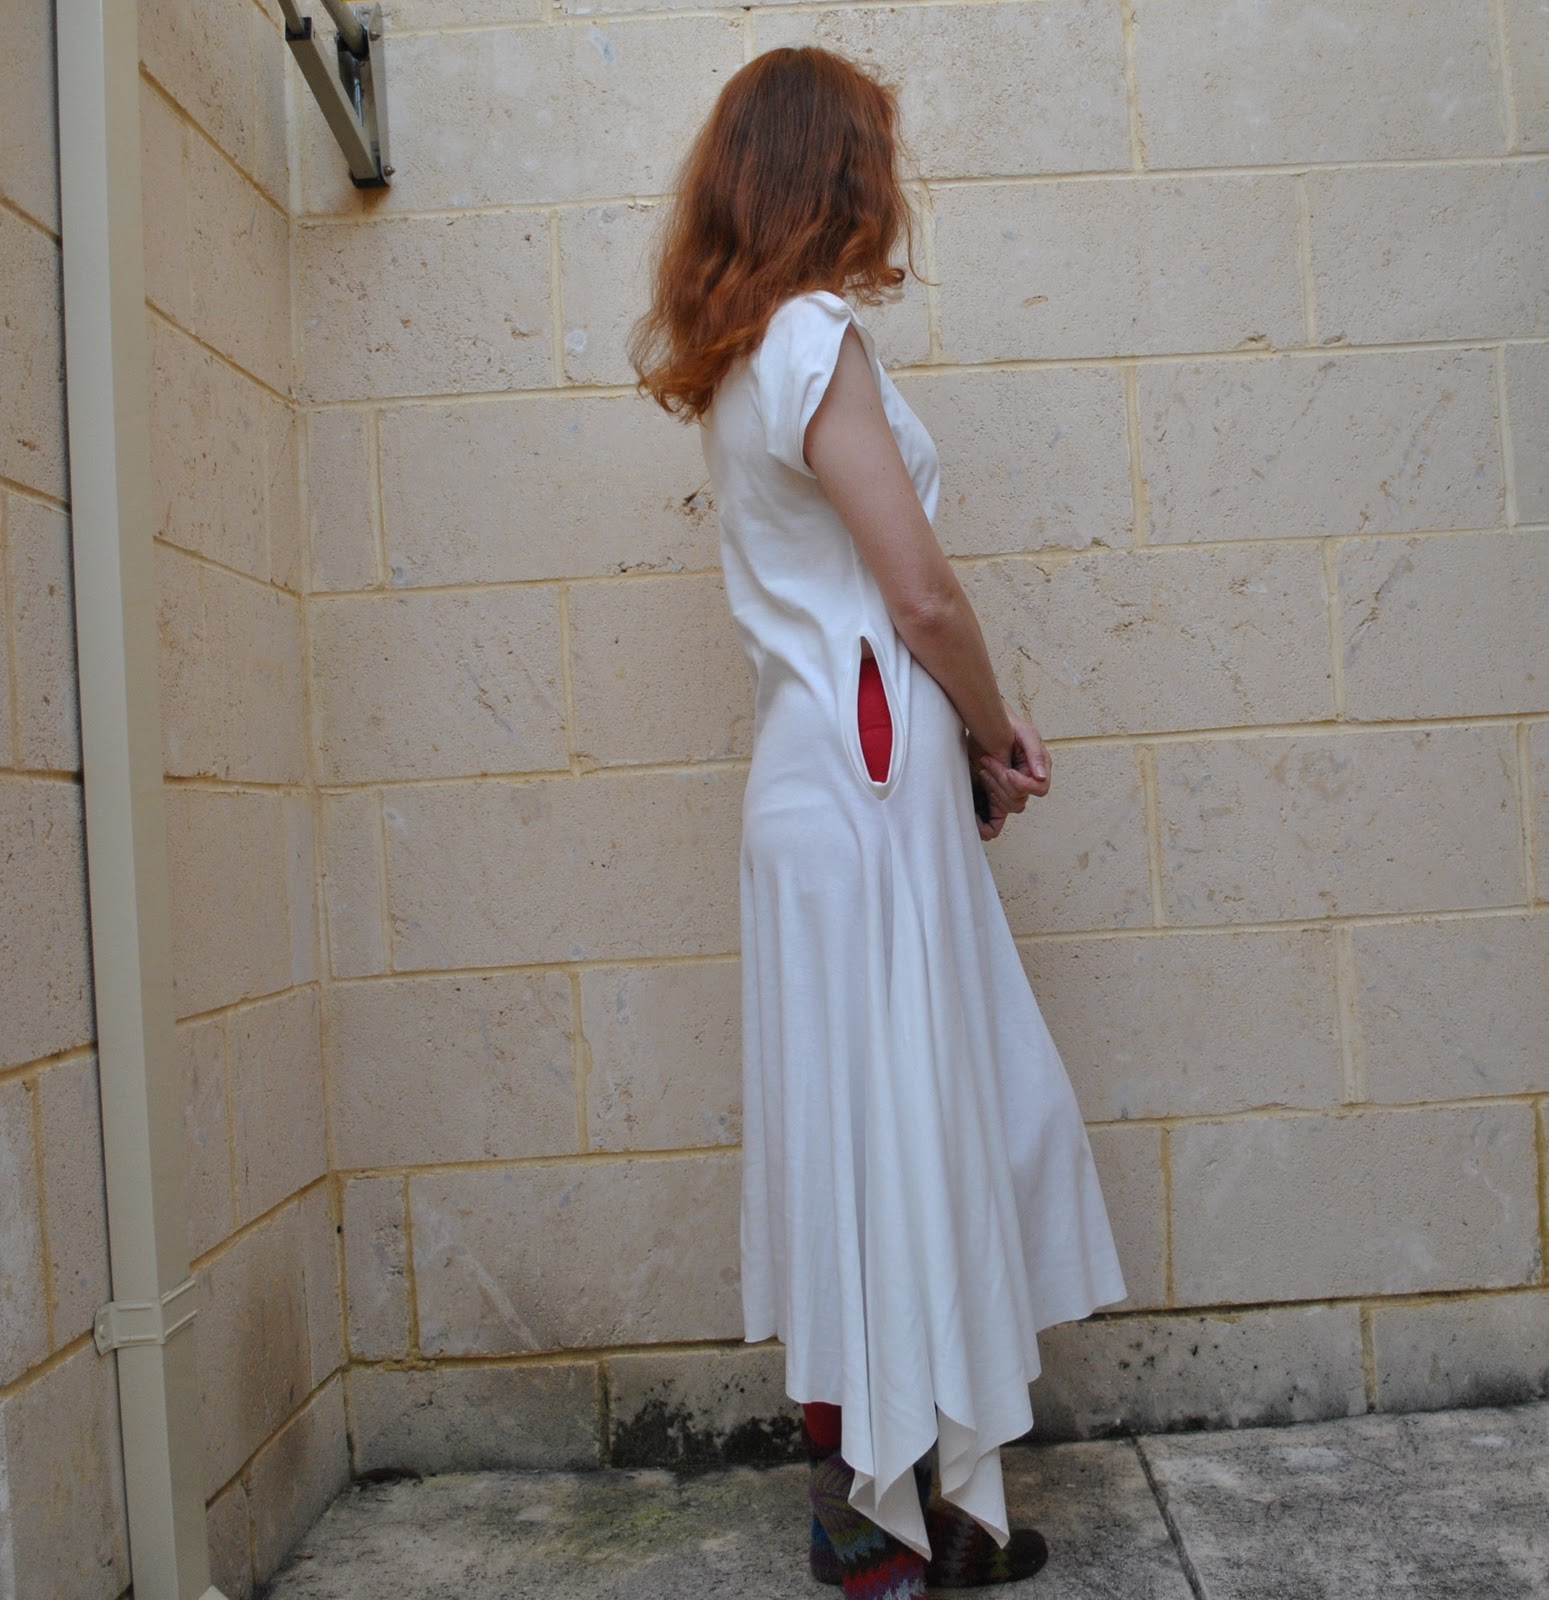
side view … and I’m chuffed that I can barely tell that side seam.

and back…  Rustic frolicking-in-the-fields would ensue, except that it is a pretty warm day…
pinterestmail

Cassie’s dress

I made a dress for Cassie.
Soooo, in clothing my boys I have played about as much as I dared, adding fun little details and extra bits and bobs here and there to their handmade garments, perfecting the tailoring…  but the fact remains that  the most glorious and drool-worthy fabrics, the ones I get really excited about when I enter the fabric store, are usually best suited to girls.  It is so much harder to find really exhilarating fabrics for boys.  A daughter is such fun to dress up, and I have dressed Cassie up her entire life.  And I am still indulging in lovely fabrics and designs just for her as often as I can!
This fabric always called to both of us whenever we entered Fabulous Fabrics.  If it looks anywhere near half-divine in these pictures then let me assure you it is ten times more divine in the flesh.  So to speak.  (In the “fabric”??)  It is a fluid silk printed with an other-wordly underwater design of strange and disharmonious hues; impressionist seahorses suggested in blotches of emerald, lime and crimson, floating in a deep khaki tracery of seaweed, itself stark against a watermarked sea of unlikely cloudy pink, mauve and royal purple.
Quite beautiful, no?
To make the most of the print, I started out with a real oldie pattern that I have had for a few years, originally a gift from my friend P from her mother’s stash.  Vogue 7610 is a very simple shift dress with straight side seams (the reason I chose it) and adapted it as follows; 
(Warning: dressmaking details following, boring to anyone not interested in dressmaking)
The design had wide front shoulders gathered into the back shoulders; I redrafted these to be the same width so as to eliminate the gathering.  I decided that gathering would detract from the print and only the plainest of designs would allow it to shine as much as possible…

I laid the front and back down together, overlapping at the right side seam, and cut out the dress as one whole piece, eliminating the right side seam.  Again, to preserve the print intact as much as I could…

Instead of four separate little neckline and armhole facing pieces (unnecessarily narrow and awkward little things if I ever saw them), I cut a whole bodice facing, again all in one (pictured above) and eliminating the right side seam. I left the natural fabric selvedge in place to act as the finish to the lower edge of the bodice facing.
There was just enough fabric to make a kind of narrow obi belt with long skinny ties, but she can substitute one of her long skinny leather ones that wrap around several times about her waist if she wants to dress it down.

I left off the pocket.  I had not enough fabric.  I was left with literally tiny scraps totalling up to about 15cm square when I had finished.  Fabric efficient, or what?!
After a spot of secretive measuring of her existing dresses, plus a few surreptitious try-ons on myself, I determined that the left side seam could also be sewn up and no zip would be necessary for closure.  So simple!  So basically this is a two piece dress, with no closure.  The facings were under-stitched (in pale pink) as much as possible, the raw edges overlocked to finish, and the lower hem hand slip-stitched in emerald green.  I agonised somewhat over the thread colour here, but I think the stitches are happily near-invisible, yes?  Along with the horizontal placement of the pattern piece onto the print, achieving the perfect hem depth was the next most agonising detail; it is deep enough to make the dress short enough for her tastes, but not so deep as to cut into and unbalance the overall print placement on the dress.

pinterestmail

A tale of a purple dress

Once upon a time, an avid seamstress took a trip far far away to Melbourne.  There she visited the fabled Tessuti’s and spenteth up big on fabric.  Including a piece of slippery dippery shot rayon-y stuff in a wonderful plummy-chocolate-y sort of a colour.  The rich and gorgeous colour of a ripe eggplant.  The fabric was borne home, lovingly folded and put carefully away and just taken out every now and again for speculative draping over the seamstress’ faithful dummy Bessie, before being re-folded and tucked away again, awaiting the Perfect Project.
The months marched by.
The lovely fabric was still sitting there, taunting the seamstress, Perfect Project-less, and fast becoming that dreaded stuff; Fabric That is Too Good To Sew Up.  The seamstress realized this and took it out again, determined to make something utterly fabulous with it.  She cast about, more seriously this time, for the Perfect Project.  The beguiling dress 102 on the cover of 06/2011 Burdastyle magazine caught her eye, again… actually the very reason she bought this magazine.  It was a promising looking number for summer; loose and elegant, and just the thing for flowy slippery dippery sort of fabrics.  The seamstress did all her prep, and then bravely sliced into the precious fabric.  She made up her dress, pinned up the hem, and hung it up for the requisite couple of days (being an old hand, she knew all the rules regarding bias-cut)  Then she put it on.  Lo, and the mirror reflected back to her a frump.  A complete and utter frump.
The seamstress realized that her delicious and expensive fabric the colour of an eggplant had magical powers and had transformed her into one… just like when Cinderella was transformed into a pumpkin (oh OK OK, that was the coach not Cinders… but you getteth the idea)
Bitterly disappointed, she took it off and hung it out of sight for a few days; busied herself with easier projects, like making Pattern Magic stuff out of scraps.  Then took out the Eggplant costume again (for this is how she now thought of it)  Studied it.  Had a brainwave, and chopped off 14cm.  Pinned the hem, hung it up for the next few days again, blah blah.  Tried it on.  Lo, and the shorter length had worked wonders!  Gone was the bulbous look!  The seamstress felt victorious.  Hand-stitched a narrow hem.  And wore the dress out.  And catching sight of herself in a shop window, noticed in a certain light a sheerness to the dress, the shadow of underwear showing through, that had not previously been apparent in the bathroom mirror…  
Doh! 
She despaired, but briefly; rallied and then quickly made a little slip-on petticoat.  It was thrown together somewhat, but finally the gods were smiling on the seamstress because the petticoat was perfect. 
And they all lived happily ever after.

Details:
Dress; Burdastyle magazine 06/2011, dress 102, purple shot rayon
Petticoat; self-drafted, from lightweight navy blue polycotton (the last leftover bit after making this)

The fabric is shot rayon; with a red warp and a dark blue/grey weft, giving it an overall browny-purple hue.  Craig took this last candid photo which illustrates quite well how the fabric takes on different colours in the light (a hallmark of shot fabrics)

Pattern Description:
Flared bias-cut dress with an oval neckline which according to the magazine description “accents an alluring décolleté “ (hehehe)  Small gathered cap sleeves, inseam side pockets, no closure necessary.
Pattern Sizing:
European 36-44; I made the size 38
Did it look like the photo/drawing on the pattern envelope once you had finished sewing it?
Yes, except that mine is 14cm shorter.
Were the instructions easy to follow?
Not too convoluted, by Burdastyle standards.
What did you particularly like or dislike about the pattern?
I really love the neckline of this dress, the cute overall shape of the bodice part of the dress and the fact it will be wonderfully cool and comfortable this summer.
Unfortunately the pattern is a little… odd-looking in its finished form  :S  I think this might well be due to the bias cut, which when combined with that gathered neckline; well I should have foreseen how huge this would make the front of the dress look. I am not fond of the maternity look, been there done that and at my age I’m well past all that!!  However, looking closely at the dress I thought the baby bump effect was created partly by the length of the dress, and that the weight of the fabric caused the front to curve back inwards towards your body, in a sort of “bulbous” effect.  I took 14cm off the length and I think this drastically improved the shape of the dress.  The removal of this extra weight of fabric allowed the hemline to sit up and flip out more fully, giving more of an A-line rather than an eggplant silhouette.
Fabric Used:
Lightweight shot rayon, with a very slippery silky feel to it
Pattern alterations or any design changes you made:
Contrary to the instructions I sewed the pocket pieces to the dress before sewing up the side seams.  Why would you sew up the side seams before attaching the pockets anyway?  That doesn’t make sense to me at all.
The instructions tell you to attach the sleeve binding before sewing up the side sleeve seams… I sewed the side seams of the dress, then sleeve seams and then set in the sleeves; then I attached the binding to the lower edge of the sleeves and slipstitched it over by hand.  Just a personal preference…
The “bigness” of the dress combined with a quite long length added up to an unfortunate overall frumpiness… so I ended up taking 14cm off the length and this improved the silhouette of the dress enormously, imo.
Would you sew it again? Would you recommend it to others?
I’m curious as to whether this would look better in a straight-cut; and I might just try this out sometime…  Otherwise it might be worth reducing the width of the neckline (and thus some of the excess fabric from out of the front of the dress) to see if this reduces the unfortunate “baby bump” effect.
Would I recommend this to others? well, this would definitely make a fabulous maternity dress!
 Conclusion:
My first reaction to the unhemmed dress at the longer length was disappointment, but taking off that crucial 14cm in length and I am happy!  I really like this at the shorter length.  But I wouldn’t make this again, at least without trying a few adjustments, like taking away at least a bit of that excess fabric around the middle…
This might work better in a lightweight cotton or something else not as slippery and slithery as the fabric I chose.  Bias cut rayon is not much fun to work with.
pinterestmail

Old things…

… this will be the very last of my “old things” posts.  I promise.
I’ve done a mammoth sort-through of the photos and I think this is it!  (heaves a sigh of relief…)

Firstly, since this is the only garment in this post still in our possession (apart from the Grim Reaper come burqa outfit, that is); a cardigan I knitted for Craig.  It is knitted in the fair isle method.  Above is a picture Craig took of me wearing his cardigan on a holiday last year (isn’t he sweet, giving his cold inadequately-dressed wife his nicely pre-warmed cardigan to wear, hmmm?  What a gentleman!)
And some close-ups of the cardigan I took today…
showing the right front, and at right the wrong side of the fair isle knitting… (as is correct, the yarn is carried over at the back with no weaving in, only if the distance is four stitches or less…)

Now, some costumes…
Sam as “Link”.  I thought he was so cute in this.  He loved this little outfit and often wore it just for everyday wear.  (if you would like to see what this cute little jigger looks like now, go here…)

Sam, as… guess who?  Hehe, the famous Harry Potter, natch, compete with broomstick and Hedwig the owl.  
On that note, a black cloak is such a useful thing to have in the dress-up box.  It can be the basis for so many costumes.

Here is the same robe again, worn by Cassie as Hermione, complete with Garfield Crookshanks the cat… I threw together the skirt and tie as well, but they do not bear close inspection…!)

(I’ve shown this picture before… but here it is again just to illustrate the versatility of the plain black robe as a costume), Tim and two of his mates as Grim Reapers.  I made all three of their costumes.

Tim’s same costume again, this time worn by me to an Arabian Nights party.  I didn’t want to hire an outfit and I didn’t want to make some bejewelled thing I would never wear again, and as every single female I have seen in the Arabian region is dressed something like this, so I was like, yeah this’ll do.  I naively assumed other girls would have the same idea…  As it turned out I was literally the only female dressed (I thought) anywhere near authentically!  Also the only one not heavily sequinned and baring plenty of belly-flesh…  I confess the costume was abandoned when we decided to start dancing!  Don’t worry I had a skirt and top on underneath…

So, away from costumes now, and a ball-gown of my own design that I made for balls in years gone by (Sorry for the headless shot but my face and my hair look awful in this picture…!)  It is silk organza, overlaying silk and silk jersey layers, three layers in all.  It had a beaded and embroidered neckpiece, both beaded and embroidered by me, that is…

A dress I made for Cassie for her graduation dance at the end of primary school.  It was a simple turquoise cotton halter neck dress, the fabric had metallic gold lines randomly strewn across.  I also made her jewellery, of turquoise glass fish beads and strands of gold wire.

Some rather lovely (if I say so myself) wide-legged white pants that she wore almost constantly for a summer, and a little white broderie anglaise blouse.  Both my own design.

Going way back, and this shirt is from a Vogue designer pattern that I believe my mother still has my copy…  I know I also made and am wearing here the small-waisted and very flared skirt from the same pattern too…

I made both the skirt and top and also my necklace here.  The top was an experiment, I flipped the shoulders out in a twist to get this cowl-like effect.  It used to get a lot of compliments, believe it or not! (my friends are very kind)  We are sitting on one of our sofas in its first slipcover, made by me too…  (now looks like this)

Some more dresses.  I really regret now I never got any good pictures of these two.  The white and red one was rather nice; it was a dress, but looked like a matching skirt and camisole when I was wearing it, as it had layers in several graduated lengths.  My own design.  The patchwork dress, also my own design, took lots of planning; I bought the fabrics separately and cut and pieced them together, then made the dress.  It has smaller squares at the top, graduating to larger squares around the midriff, and then down to the largest squares at the hemline.  It is all on the bias, with a handkerchief hem, and I loved it!

A drop waisted, handkerchief hemmed dress of white dotted swiss voile, pictured against a famous backdrop.  I still have this Vogue pattern too, actually…

And that should be all folks!
From now on, I will only be showing newly made stuff here….

pinterestmail

In the pink; a cocktail dress

I came across this old thing when I was cleaning out my wardrobe…

hehehe
Well truthfully, it is a bit of an old thing, but obviously when I made it I put considerable time and effort into it (OK, I hope that that is obvious anyway 😀 ) … plus it is made of the very luxe-est fabrics that were jolly expensive!  I haven’t even worn it for a couple of years and can count on the fingers of one hand the functions we go to per year that are snazzy enough for it anyway!  Also feel like possibly it is a tad too… well… young? for me  :(( so sad to have to say that!  But I am happy to have moved on sartorially to a more sophisticated style now… but of course I am not tossing the dress out on to the Good Sammy’s pile!  Banish that thought!  Cassie might want to wear it one day.  Anyhoo since I haven’t put it up here on the blog yet then here it is having its turn.

(Later edit: I should have mentioned that this was made around 7-8 years ago now…)
Details:
Dress; partly Burda 8071, overdress of my own design, silk taffeta with embroidered and sequinned net overlay, and lined
Sandals; Sachi, bought from some little boutique in Melbourne

So; the nitty gritty…
The base dress was made using Burda 8071, of creamy/pale-pink silk taffeta.  Then an embroidered and sequinned pink net fabric was carefully cut and fitted to be an attached overlay dress. The embroidered and sequinned motifs on the pink net were lined up as to be exactly centred but offset on the front and back of the dress; so, the front has two motifs at the waist, whilst the back has one, and so on.  (I can remember this taking quite a bit of careful measuring) The net dress (being sheer) has French seams and is sandwiched between the dress and its lining at the neckline. (the lining is also Burda 8071, with the same silk taffeta bodice and a polyacetate skirt section).  The heavily and beautifully embroidered and sequinned border was left just as it is to form the lower edge of the overlay dress.
The bodice facing is part of a full dress lining, meaning the dress has three complete layers…  The dress has an invisible zip at the left side seam for closure, and the net overlay dress was hand-stitched inside the zip seam and the dress lining was turned under and slip stitched to the zip tape.  All the seams inside are turned inside the layers and there are no raw or seam edges visible inside the dress.  The hem of the base dress is hand slip-stitched, and the lining is machine stitched.
Once the dress and the overlay dress were finished; motifs from the remainder of the embroidered and sequinned overlay fabric were carefully snipped and hand-stitched together and to finish the front and back  bodice edges.  More of the net fabric was fashioned into sheer sleeves (also with French seams) and hand-stitched to the dress straps.  These themselves were then covered with more embroidered and sequinned motifs that were also arranged on the skinny straps and hand-stitched in place to hide it as much as possible.

pinterestmail

Sunset maxi-dress

I have been seeing stacks of floaty-to-the-max, hippy-dippy maxi-dresses in totally gloriously over-the-top colours and patterns in catalogues and magazines as a staple for yet another summer.  So decided I just had to make myself one.   It was a bit of a business, but I am super happy with how it turned out!  It flows and ripples beautifully around my ankles, and I feel delightfully bohemian in it.  Just hand me my poolside cocktail, will you?  I’m so ready for summer now!
I have to say in the end this is inspired by or based upon, but certainly not true to Vogue 1355, an old, possibly 90’s??  pattern that I bought on ebay… a pattern with a midi dress of lovely simplicity pictured on the cover.  My dress turned out kinda like how I thought that one looked but not really how it is
I chose a beautifully coloured and patterned polyester chiffon with a lovely design that is almost post-apocalyptic in its colours and images; fiery swirls of ivory, gold and orange, and with wispy furls of black smoke and black downy feathers floating randomly across.  Surprisingly a cheapie from Spotlight. 
This is a delightfully simple pattern, on first glance.  Nothing to it.  Just three pattern pieces, a front, a back and a shoulder strap piece.  No closure; the pieces are to be cut on the bias so the dress simply slips over your head.  Couldn’t be simpler, hmm?  Well, the truth is; this dress is that deceptive brand of simplicity.  But maybe that was mostly due to the difficulty factor inherent in working with chiffon.  The instructions with this pattern are fabulous, like gold, for working with bias cut delicates.
Hilarious random fact for the day; did you know the word “chiffon” comes from an old French word for “rag”?  Lol!

Dress; based on Vogue 1355, printed polyester chiffon, with a lining of white cotton voile

Making the dress; skip this saga if you want.
For a start, the pattern pieces come with a 3.8cm seam allowance, to allow for bias “drops” after hanging… I hadn’t seen this before but I shrugged and went with it.  Later on this turned out to be a wonderful thing…  More on this later… but first things first.
 Have you ever cut out polyester chiffon on the bias?  Yah, it’s a %$^#, right?  Moves and slides about with but the slightest breath of wind… truthfully even breathing on the fabric as you are cutting out and it will ripple slightly off the true bias so so so easily.  I’m a bit of a perfectionist when it comes to cutting out so this stage was leeeengthy.  And in hindsight I probably spent way too much unnecessary time getting this bit perfect since my final dress is unrelated to those seamlines anyway.  But I eventually got it cut out… now on to those seams.  Firstly, one has to pin it along the seam lines and hang it up for a while to allow the fabric to drop through the bias.  To be absolutely sure I left mine hanging for a week.  Then basted and tried it on.  Wait wait, I’m getting ahead of myself!  First I cut miles and miles of tissue paper strips and basted over these, then to rip the paper strips away; the ideal method for sewing delicates on the bias… then tried it on.  Straight away saw that the shape of the dress wasn’t particularly flattering.  The pattern as it is has the skirt very slightly tulip-shaped, which just serves to emphasise the figure flaws of a narrow torso-ed but slightly hippy person such as myself imo…. So, no.  Thanked the heavens for that 3.8cm seam allowance, which allowed me to alter the bodice to be smaller, and to taper the skirt out lots lots more, from a narrower waist in a straight line to the ankles, ending in the teensy weensiest seam allowance at the ankles… a far more flattering silhouette.  Re-did the seams; hung for a few more days.  Ditto for the lining.  Oh, yeah, I made a bias-cut lining dress too, identical to the dress in every way except of white cotton voile.  There is no lining stipulated in the pattern but I deemed it necessary.  Hey, that polyester chiffon is completely see-through, people!!  This was also pinned, hung, basted, tried on, re-sewn, hung for a second time; also.  Finally, when I decided all was perfect, I sewed the seams in French seams (again, with the strips of tissue paper twice, for the double lot of sewing that is the French seam), attached the shoulder straps, and joined the dress and lining dress together at the top.  Hung up for just a bit longer, just to gather mental strength for the next scary bit… the hem.  By this time, the dress just had to work out perfect or I would have been inconsolable… my overlocker is temperamental and sometimes spiteful when it comes to rolled hemming.  On this occasion I was grateful that it behaved itself.  Hemmed with a rolled hem in black on my overlocker, and a narrow double folded hem on my sewing machine for the lining.  Tried it on and was immensely relieved to see it hung at just the perfect length, and what’s more has a perfectly even hem.  Yay!!  Breathed easily for the first time.
And can now appreciate why the pattern was rated Average, in spite of just three very basic pattern pieces.  Pared back simplicity can be quite tough to get just right!

pinterestmail

Pattern Magic 3; dress with 4 sleeves

… aka; the design on page 18.  I’m sorry I don’t know the correct English translation of its name; but it is the design I picked as my favourite from the very first flick through of this marvellous book.   I apologise for the photo overload, like seriously!  Sooo many photos sorry, and particularly after my oft-repeated rant about the vanity of zillions of photos of the same blinking outfit, in one post…. yikes.  But this dress has several unusual little features, creating lots of different views that all needed picturing to appreciate them.  I tried to keep the numbers down, honestly.   The thing is; innovative fashion sometimes needs to be seen from lots of angles in order to appreciate all the little extras.  So that makes it all OK now, yah?  Still friends…?
And now guess what… this is the same dress….!

No, I’m not kidding… the back views…
still the same dress…

It is very easy to draft and make up, and I used a medium-weight cotton jersey.  I fiddled about a bit with the shaping to get a more shapely middle section, because the dress as it is is rather sacklike.  Oh, OK then, it is still pretty sacklike.  My husband commented I looked “choir-y”.  Thanks, sweetie.  Actually, I’m very happy to add another costume-y thing into my wardrobe.  Terri commented on my Futuristic Nun dress that she like the idea of me as a nun, and I have to secretly admit that I like the idea of myself as a nun too.. and a choirboy sounds like a pretty good sartorial aspiration too, methinks.
I also added length, which eventually got shaved off again, piecemeal.  It was a toss-up between having an extremely loooong dress when worn one way, and a pretty short dress when worn the other way.  I strived for the best compromise I could… and I think I can still wear this decently the short way, sans tights.

So, it has three openings at the top, which could be either sleeves or a neck-hole, whichever you prefer.  These are funnel shaped.. and I decided to leave the edges raw here.  Partially because my fabric was a little thicker than ideal, and to hem would have added some bulk and made the edges more defined.  I decided this was not what I wanted here.  When these sleeves/neckholes are acting as a scarf, you really want the whole area to be quite floppy and soft, and if I had hemmed or faced these areas they would have lost this quality…  The lower edge is similarly left raw.
There are two additional holes at mid hip height.  When you are wearing the dress at full length, they appear as sort of pocketholes, but without the actual pockets.  So, you will need to wear either tights underneath the dress, as I have here, or a long camisole.  That is unless you like for your undies to be on display…  but hey, nobody’s judging …  much.

When you use these holes as armholes, this is when the whole top bit becomes a kind of scarf.  Pretty cool, huh?  These lower holes needed proper edging, so I finished them with a narrow band overlocked in a ring, folded right sides together along the long midline, and then simply overlocked in place.

more side views…

And kbenco requested a view of the heel of Mum’s socks; so here it is.  The stripes join in a kind of star design; yup, they are pretty clever, yes?

Details:
Dress; the design on p18, drafted from the Japanese pattern book Pattern Magic 3, by Tomoko Nakamichi; ivory cotton jersey
Tights; my own design; red cotton jersey here, my tutorial for drafting your own custom fit tights here
Socks; handknit by my mother, here

pinterestmail

Pattern Magic linked-front dress

A new dress…!
This is drafted from the Japanese pattern book Pattern Magic, by Tomoko Nakamichi.  Since mine is the Japanese version I don’t know its translated name, but it is the design on p49.  There is a bit of a story behind this thing…
confession time:
This is the second version of this dress I have made; the first was an unmitigated disaster.  I was planning a three quarter length version using white chiffon (polyester-y stuff, so it was cheap, thank heavens) which I decided needed underlining as well as lining, because the seams would have shown through the fabric otherwise.  I won’t bore you with the whole saga, just cut straight to the climax which was me heaving the whole thing in the bin during a bad case of sewing-rage one night.  I don’t want to talk about it because it is still a painful memory… and if you’re wondering… (wails) yeees! I do regret chucking it out!  After only a short bit of mulling it over, I realised how I could have solved the problem I was having and now wish I had not been so hasty, but as fate would have it the bin was picked up by the rubbish truck the very next morning while I was still in the “never want to even look at it again” mood.  Oh well.  C’est la vie.  I suspect I would have had plenty more issues with it to be honest, so maybe all was for the best…
This version is completely different.  I’ve had this teal silk jersey in my stash from about eighteen months ago, and I envisioned a quick, stretchy, Metalicus-like, pull-over dress with a full-ish skirt; no zips, no underling, no lining required.  Far less fuss!
I made a petticoat to go underneath, why?  Partly because the design has an extremely low neckline.  And also; well the dress in indoor or calm weather circumstances looks like the above, but in a stiff breeze like today…

Lol!  And just so you know, stiff breezes are veeeerry common where I live, and especially during spring.  Yaas, just one of the reasons why hairstyles here are very much au naturel…  The design is completely open at the front, and whilst it would be a simple matter to sew up the front skirt seam I decided I like the idea of the contrasting colour to be a strong part of the final look.
Now, I’ve mentioned this before, but it is worth saying again; Pattern Magic is not for the fainthearted who need step-by-step instructions.  You need to have pretty solid sewing knowledge on how to construct and finish a garment before you have a go at these designs.  The designs as they are in the book give no clue about things like facings, closures, tips on construction, even details like sleeves (to sleeve or not to sleeve, that is the question) are often left up to the individual seamstress/seamster.  So for the sake of clarity I will give some details below as to how I finished off this garment… so you can skip this if you want.

Details:
Dress; drafted from Pattern Magic by Tomoko Nakamichi, teal silk jersey
Petticoat; my own design, of yellow swimwear fabric (polyester? spandex?)
Sandals; Pedro Miralles, from Soletta shoes

I drafted and cut the front neckline edge facings as part of the fronts, and folded them to the inside of the dress so the shoulder edges sat wrong sides together…
I also drafted and cut the back bodice partly on a horizontal fold, with the fold at the back neckline… so the facing of the back bodice is part of the back bodice also.  It finishes about halfway down the back bodice.  This saved having to finish off the back neckline, and also allowed me to enclose the front shoulder edges within the back shoulder edges in a nice clean close-in seam… see, the neckline has no seaming showing!  (self high five)

I felt pretty chuffed when this bit worked out OK.
I drafted a sleeve using a Tshirt I already had; that green internal stitching you see above is the sleeve set-in.  The only topstitching on this garment are the sleeve hems.  These were simply twice folding in 1cm and topstitching with a zig-zag stitch.  The bobbin thread is black while the topstitching thread is blue; and yah, I’m okay with that.

The petticoat is self-drafted, based partly on Tshirts I already had, as well as pinning and fitting to myself.  The bright yellow stretch fabric I used for the petticoat is actually swimwear fabric; so theoretically, on a hot day I can just flop in the pool in it!   It is a lot thicker than the turquoise silk jersey.  After experimenting with a few finishings for the neckline and armhole edges, I eventually settled for serging the edges to stabilise and then folding to the inside once and topstitching slowly with a wide zig-zag stitch, being careful not to stretch the fabric at all.  All the other seams are overlocked.
The lower hems on both dress and petticoat are not finished because these fabrics will not unravel or fray.  I just cut the fabric as straight and as smoothly as possible.

pinterestmail
Switch to mobile version
↓