Tag Archives: Sam

Three pin-striped shirts

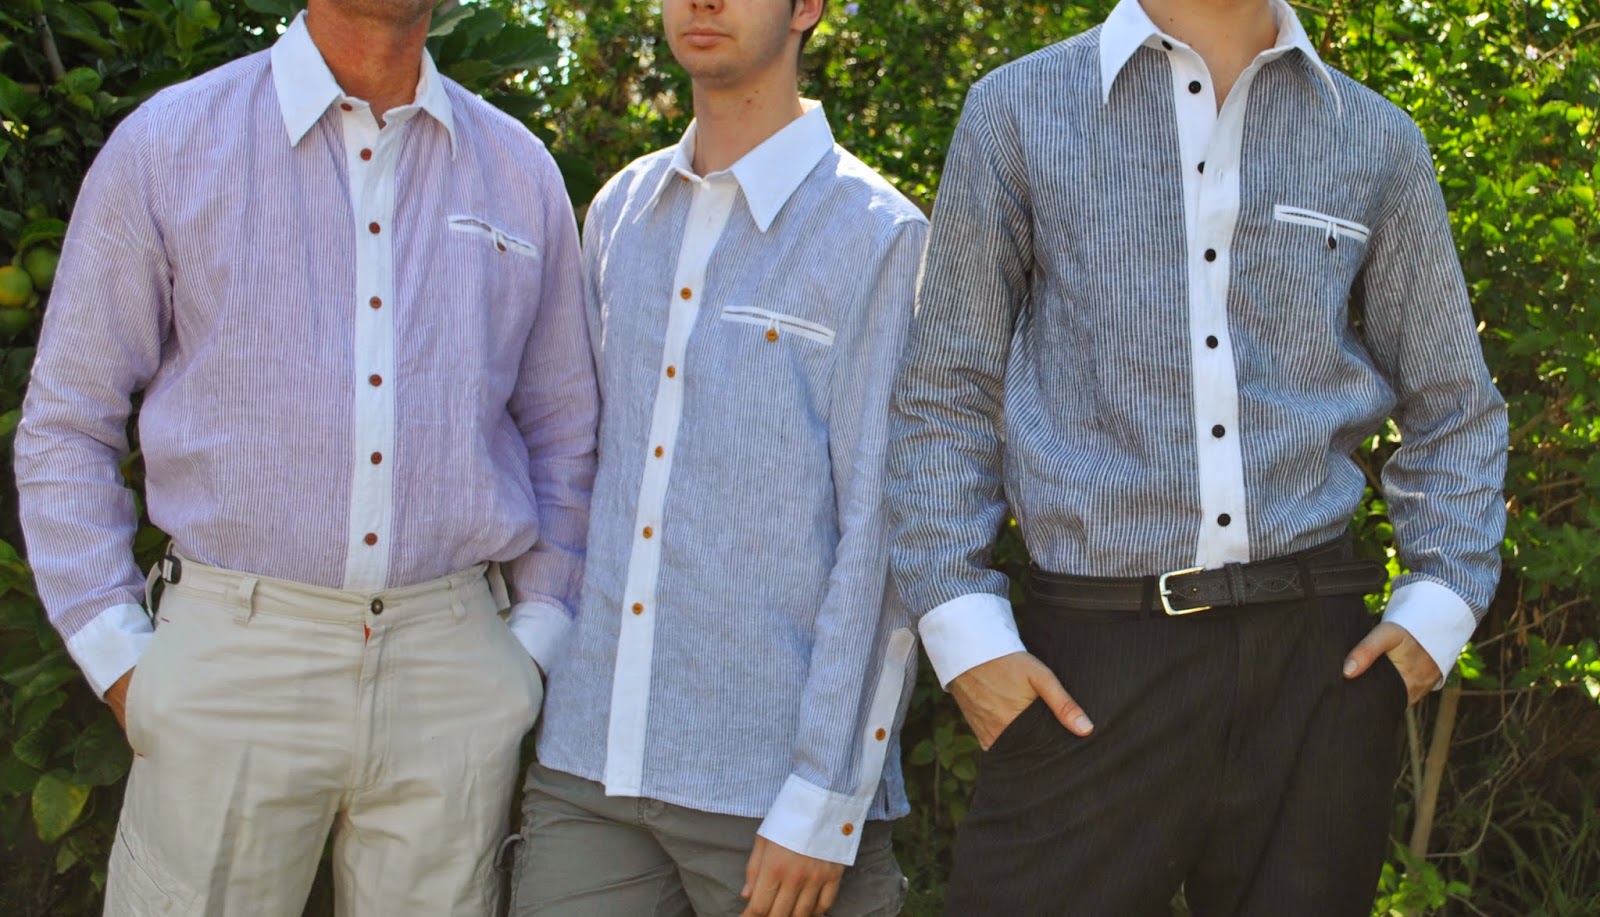
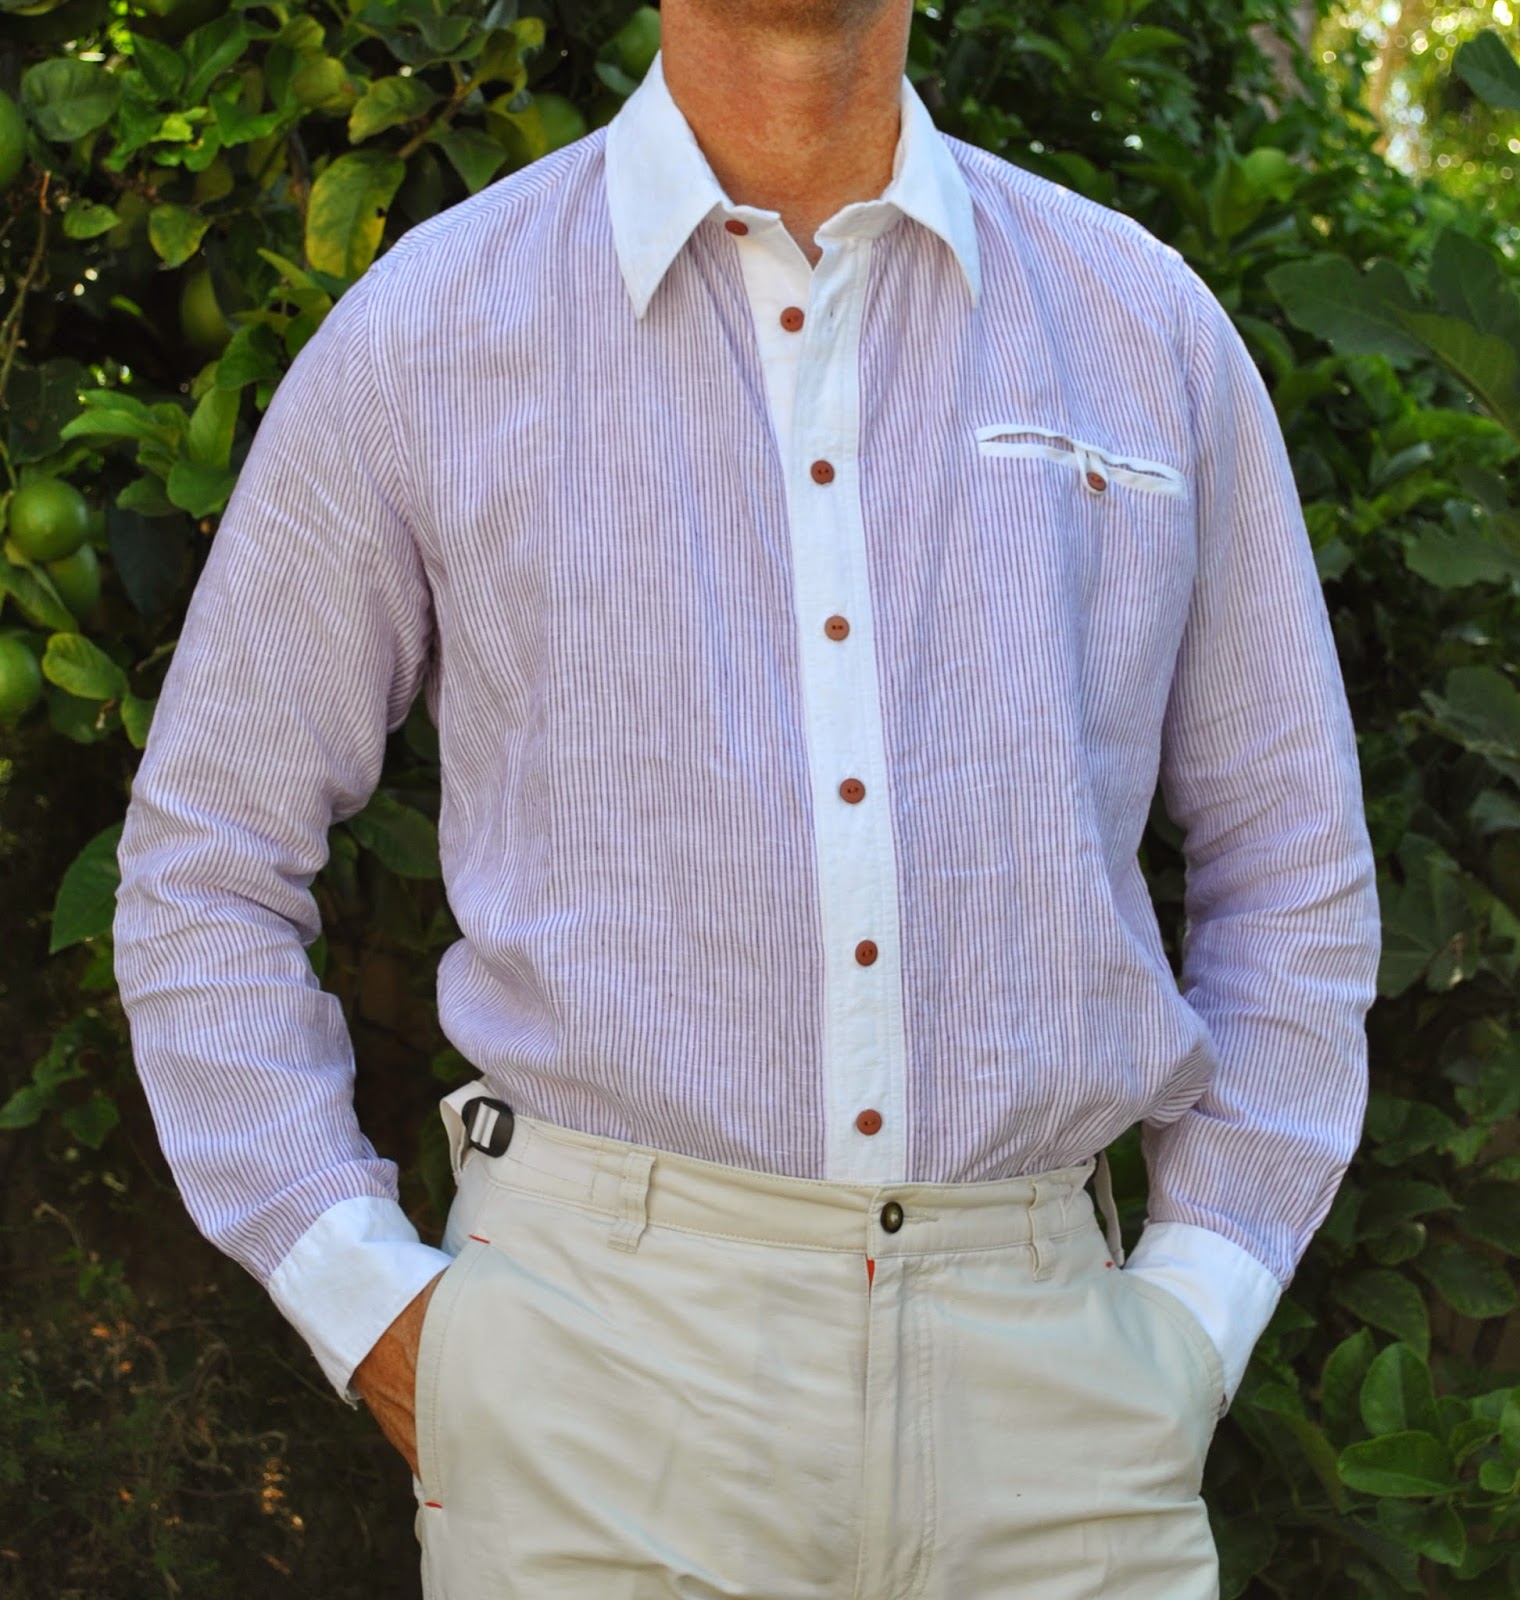
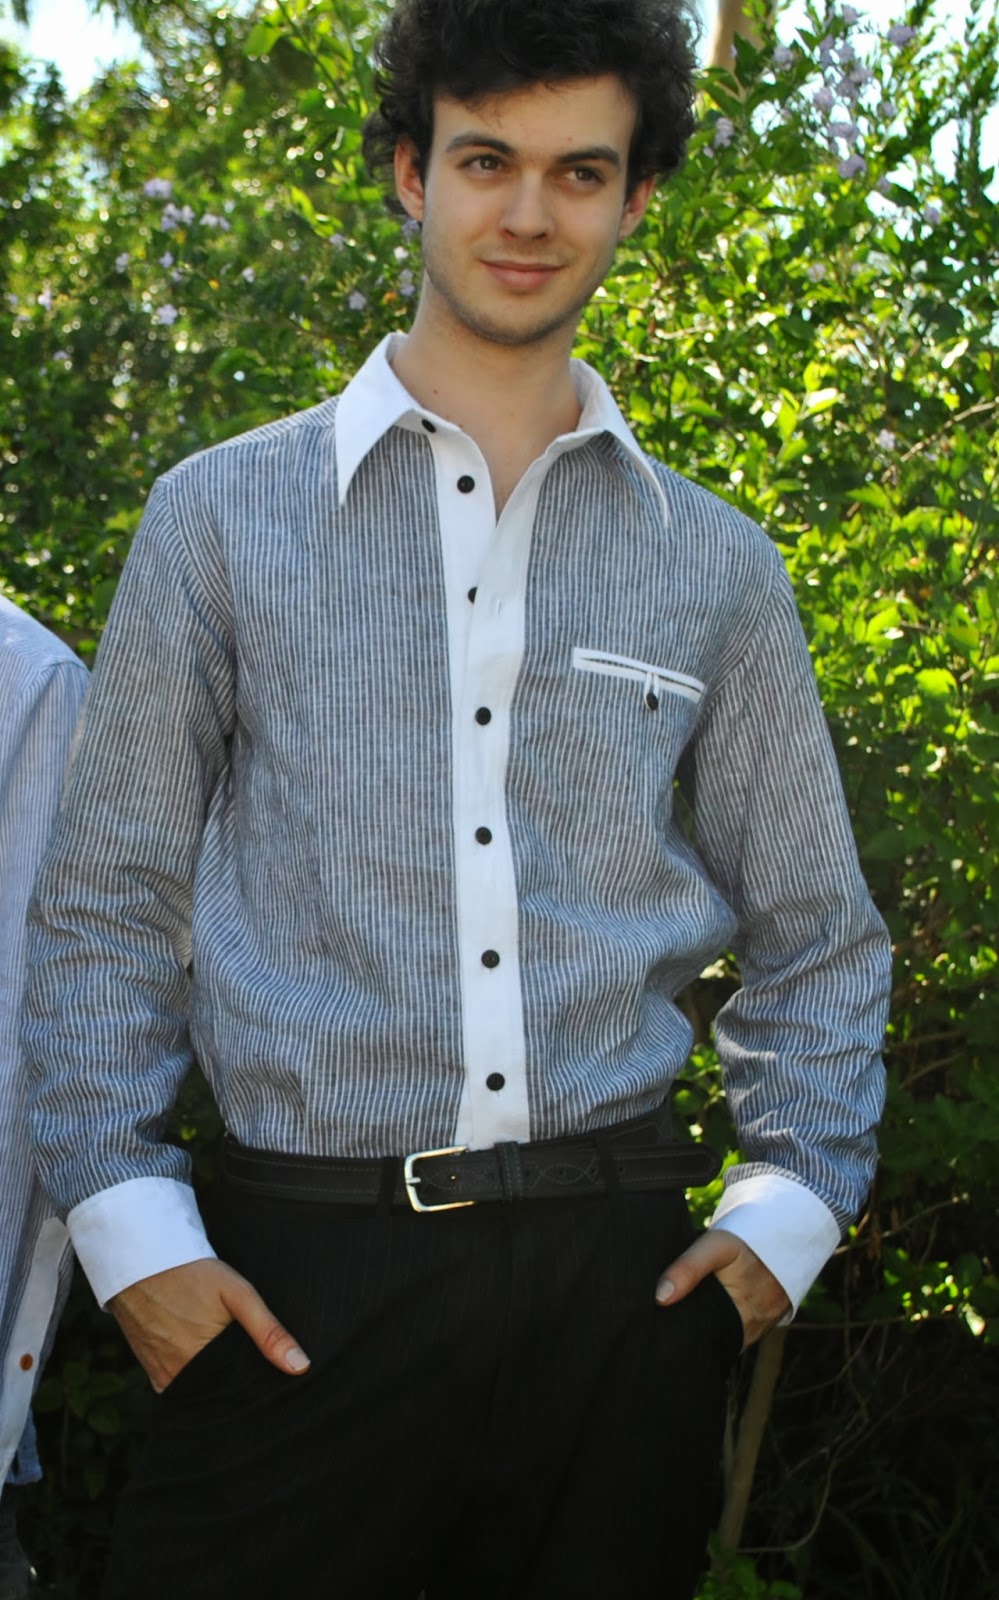
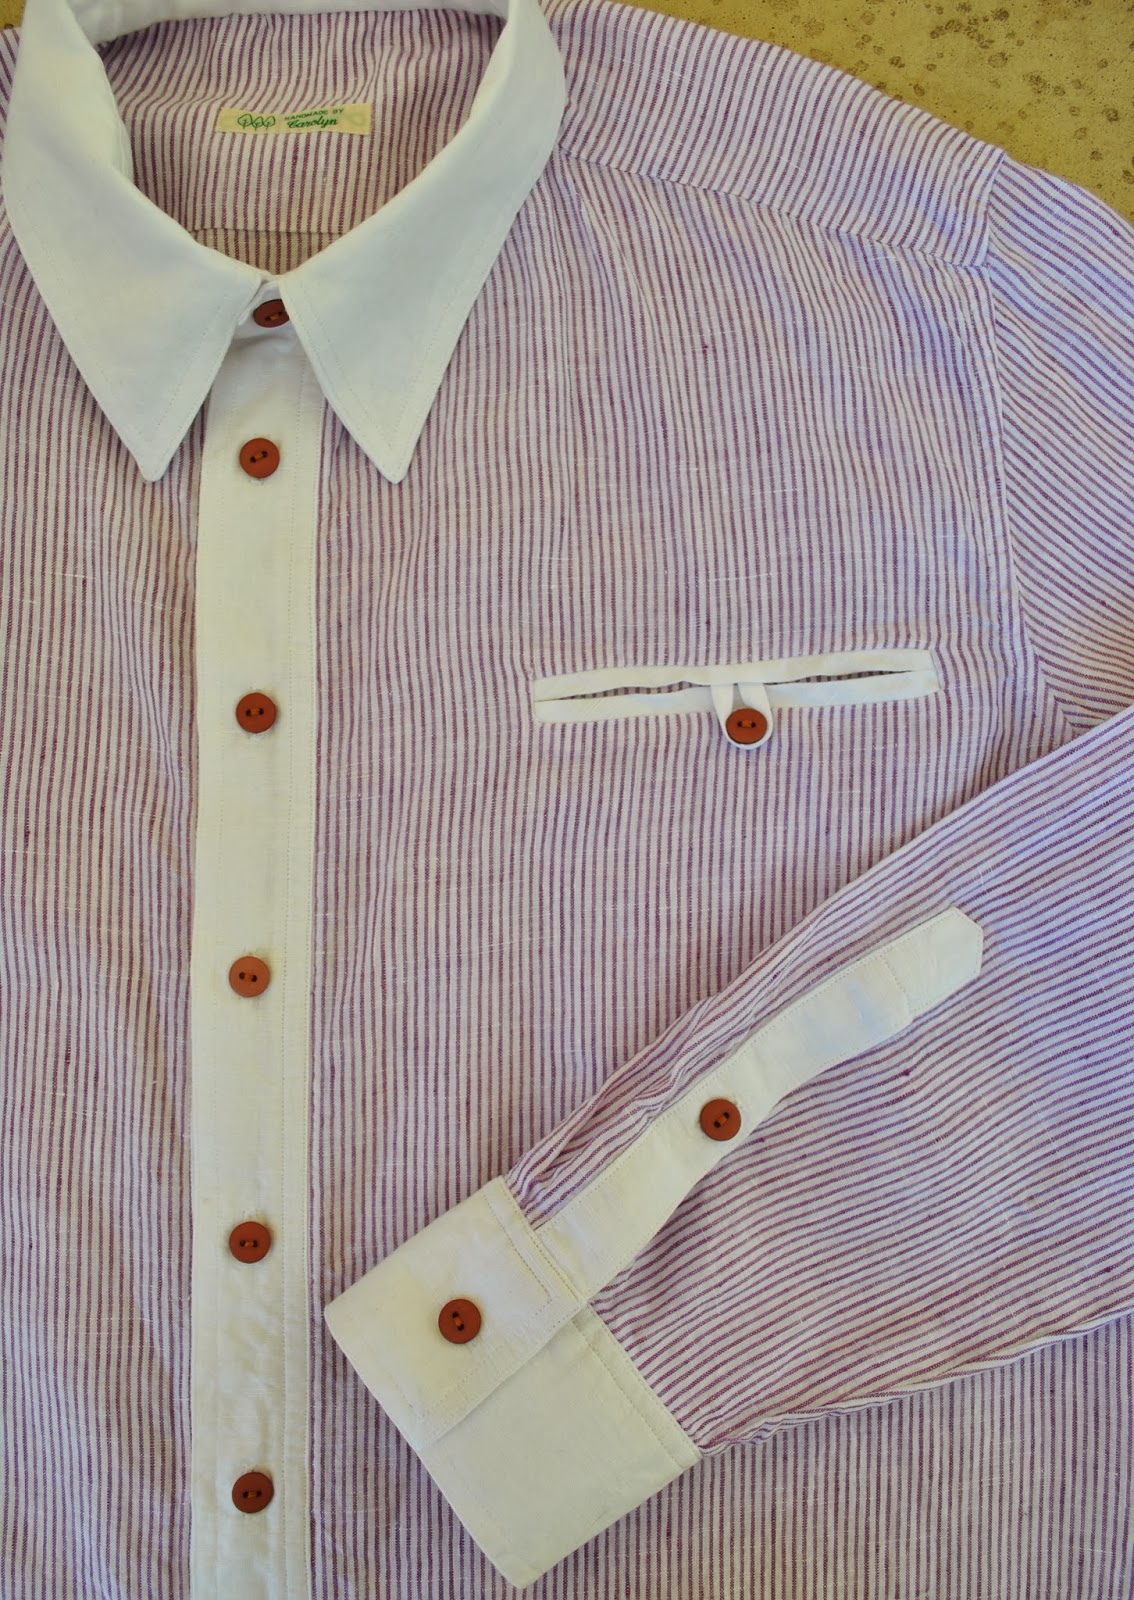
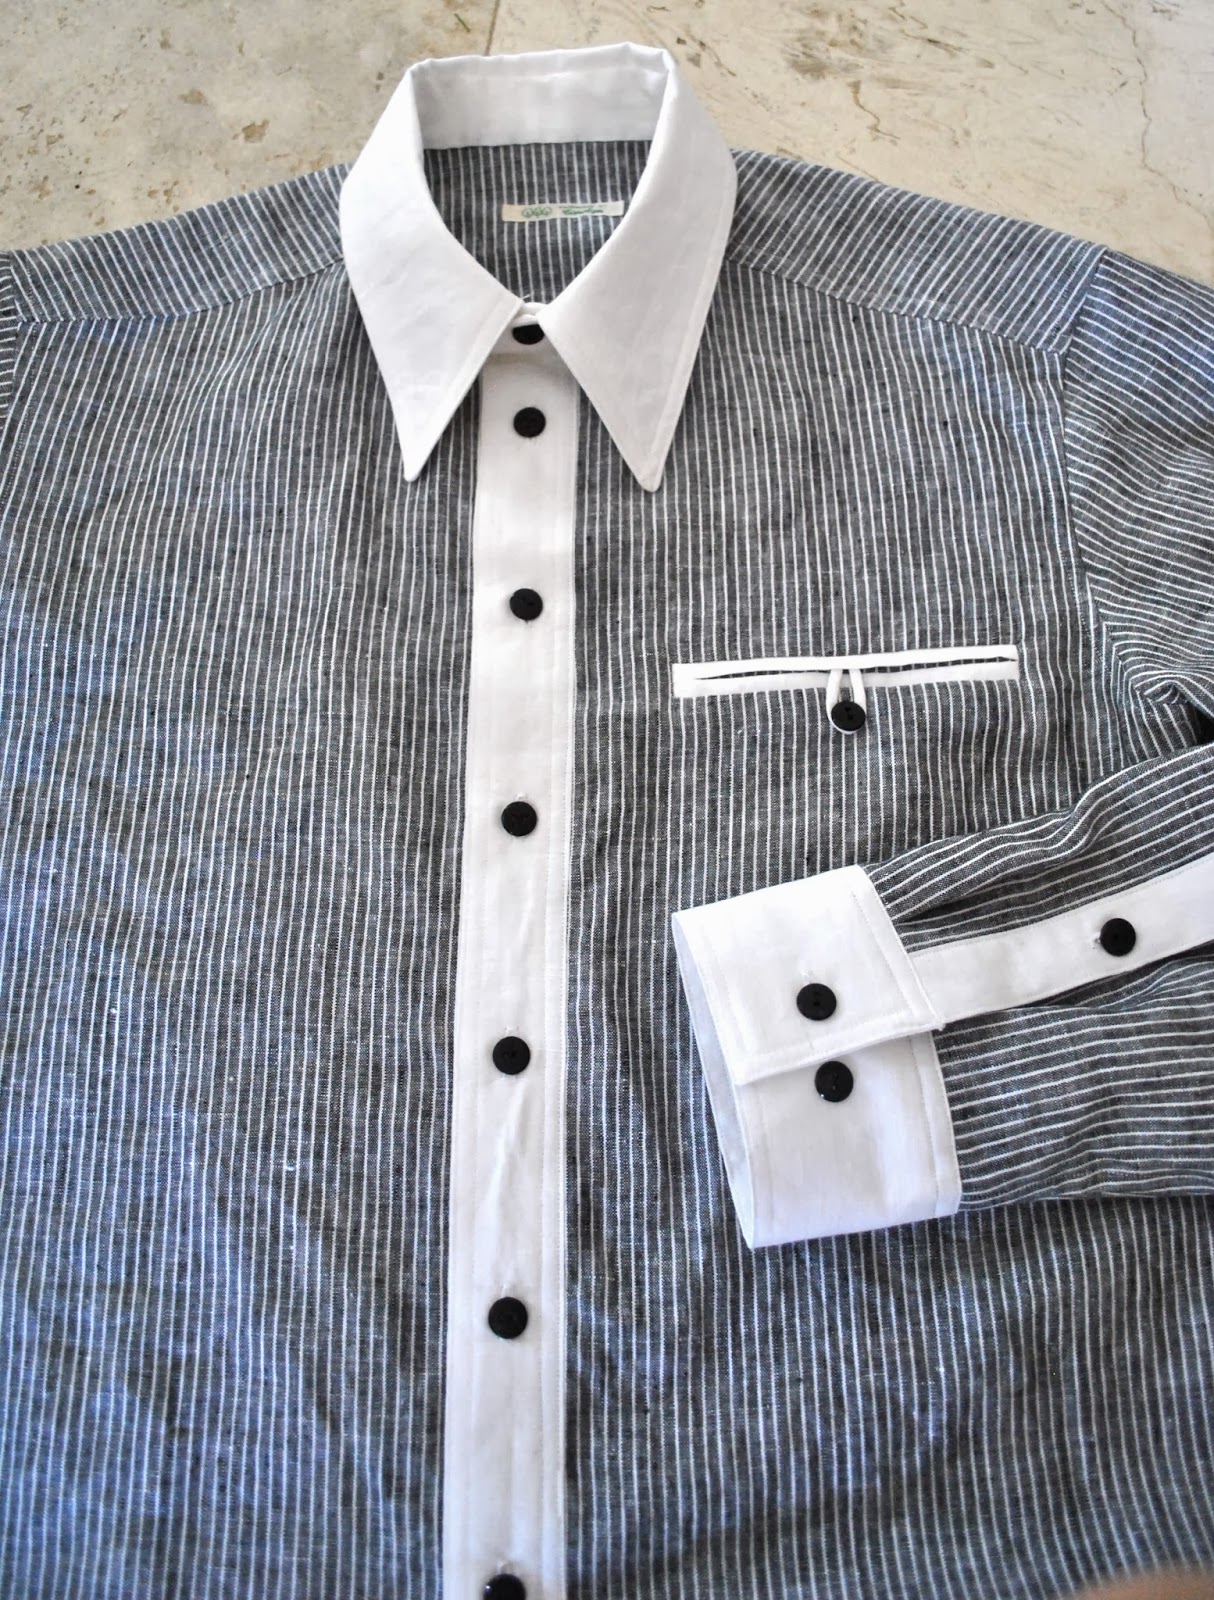
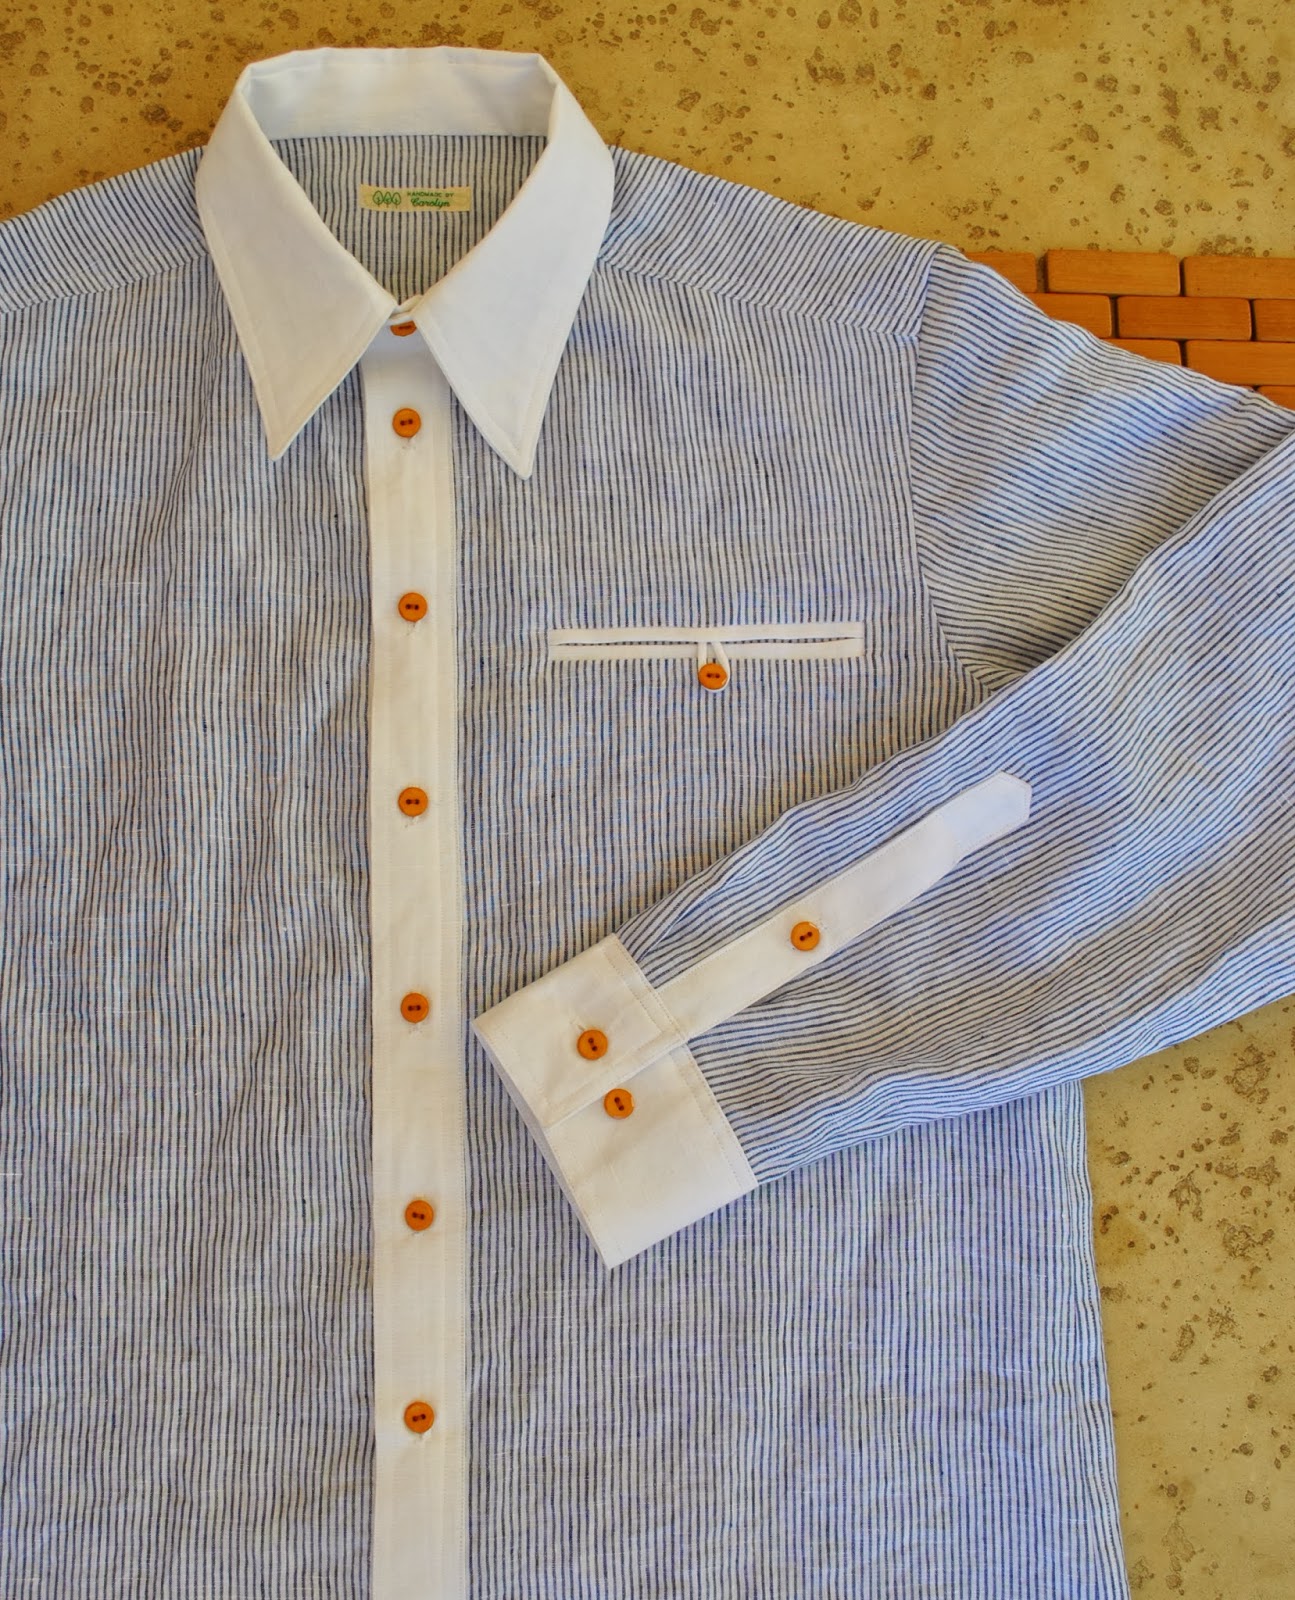
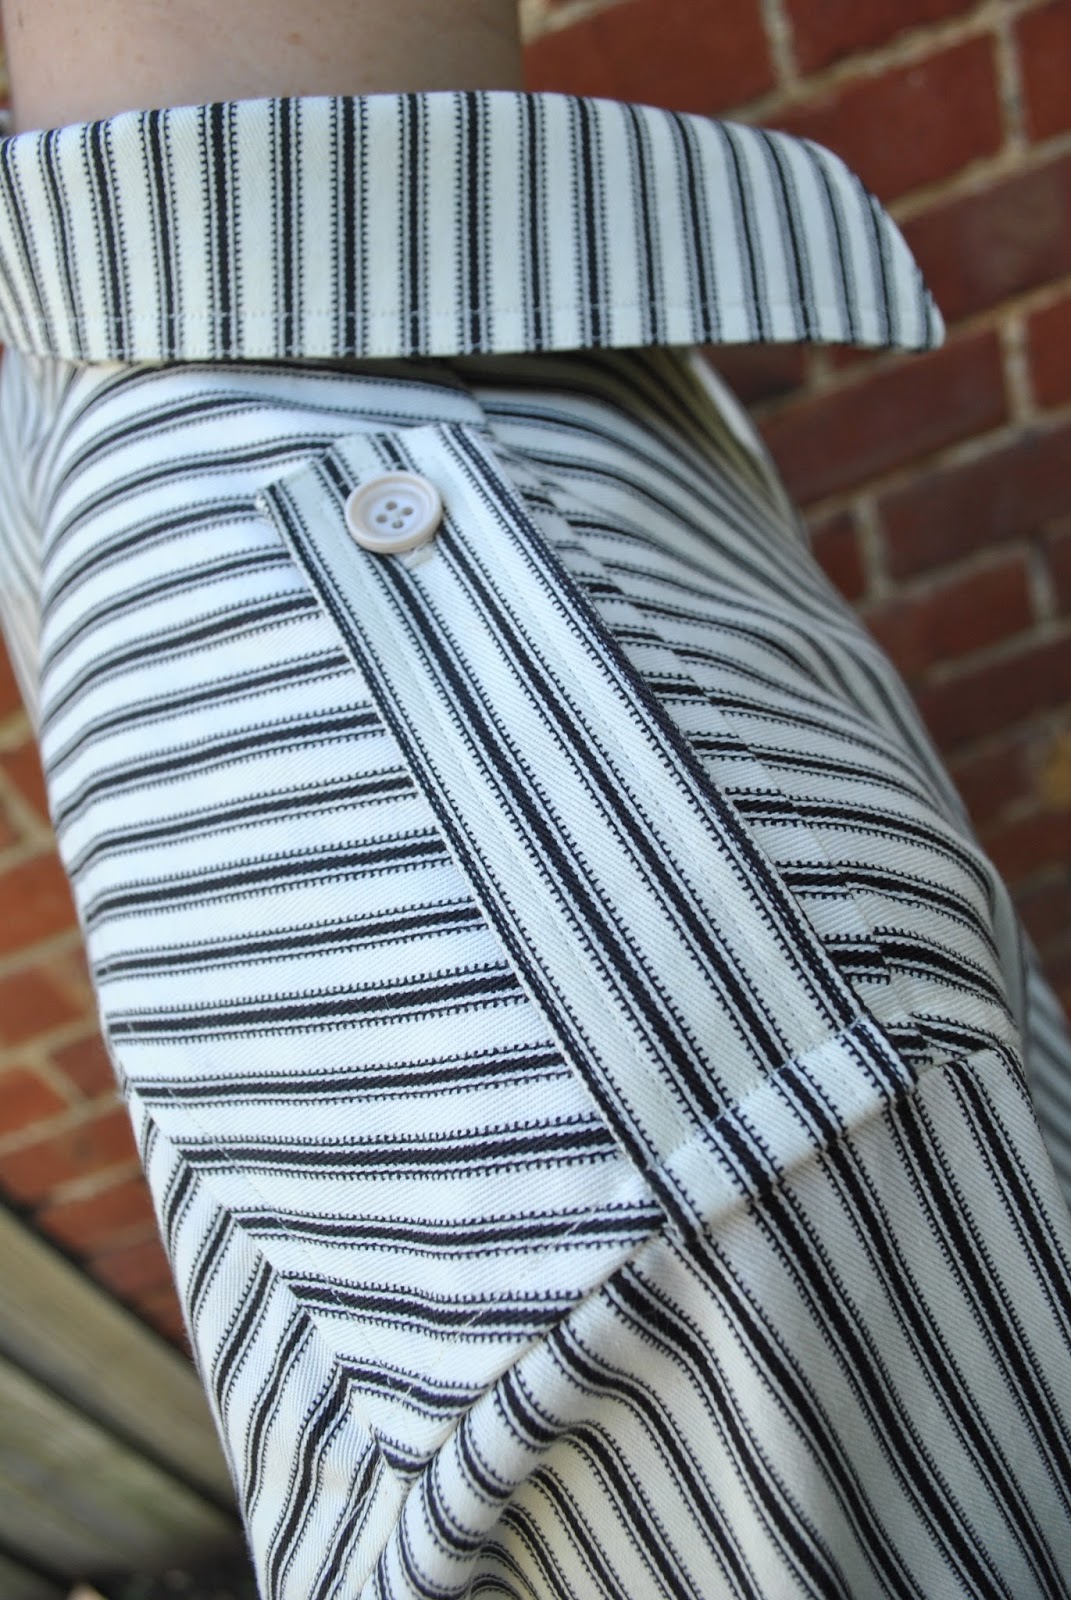
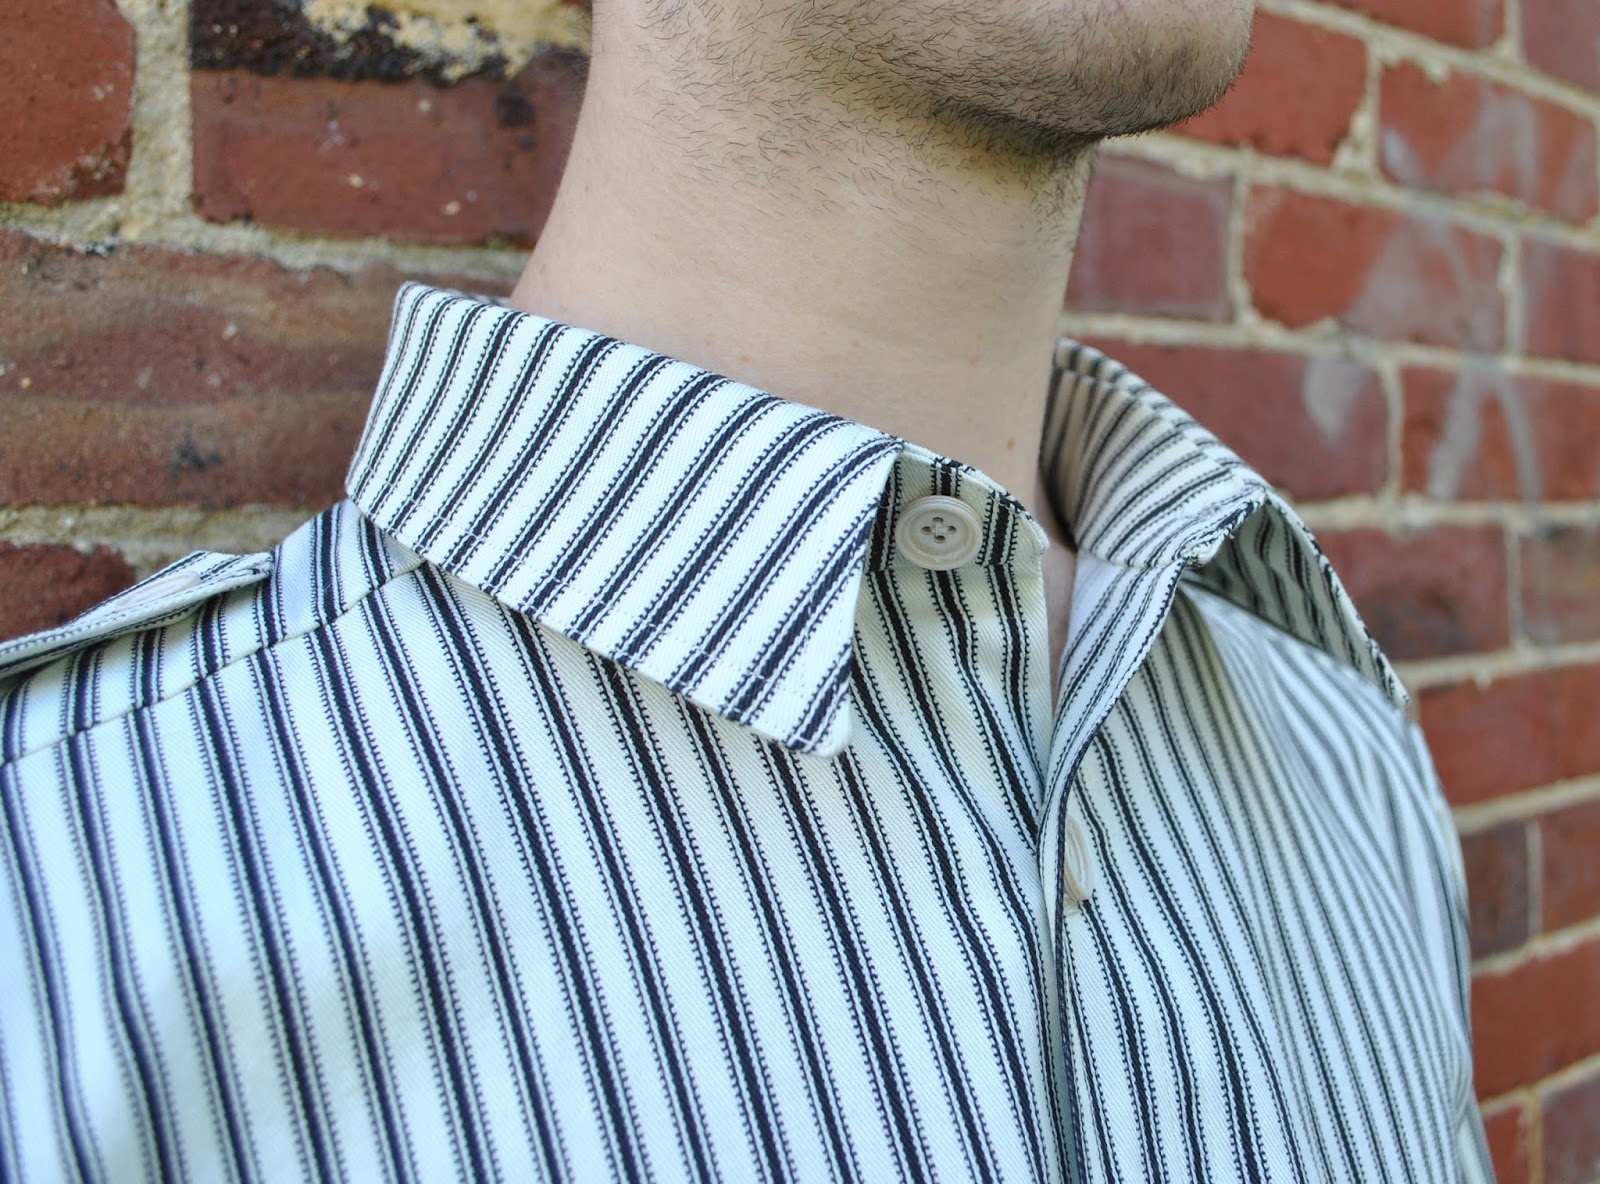
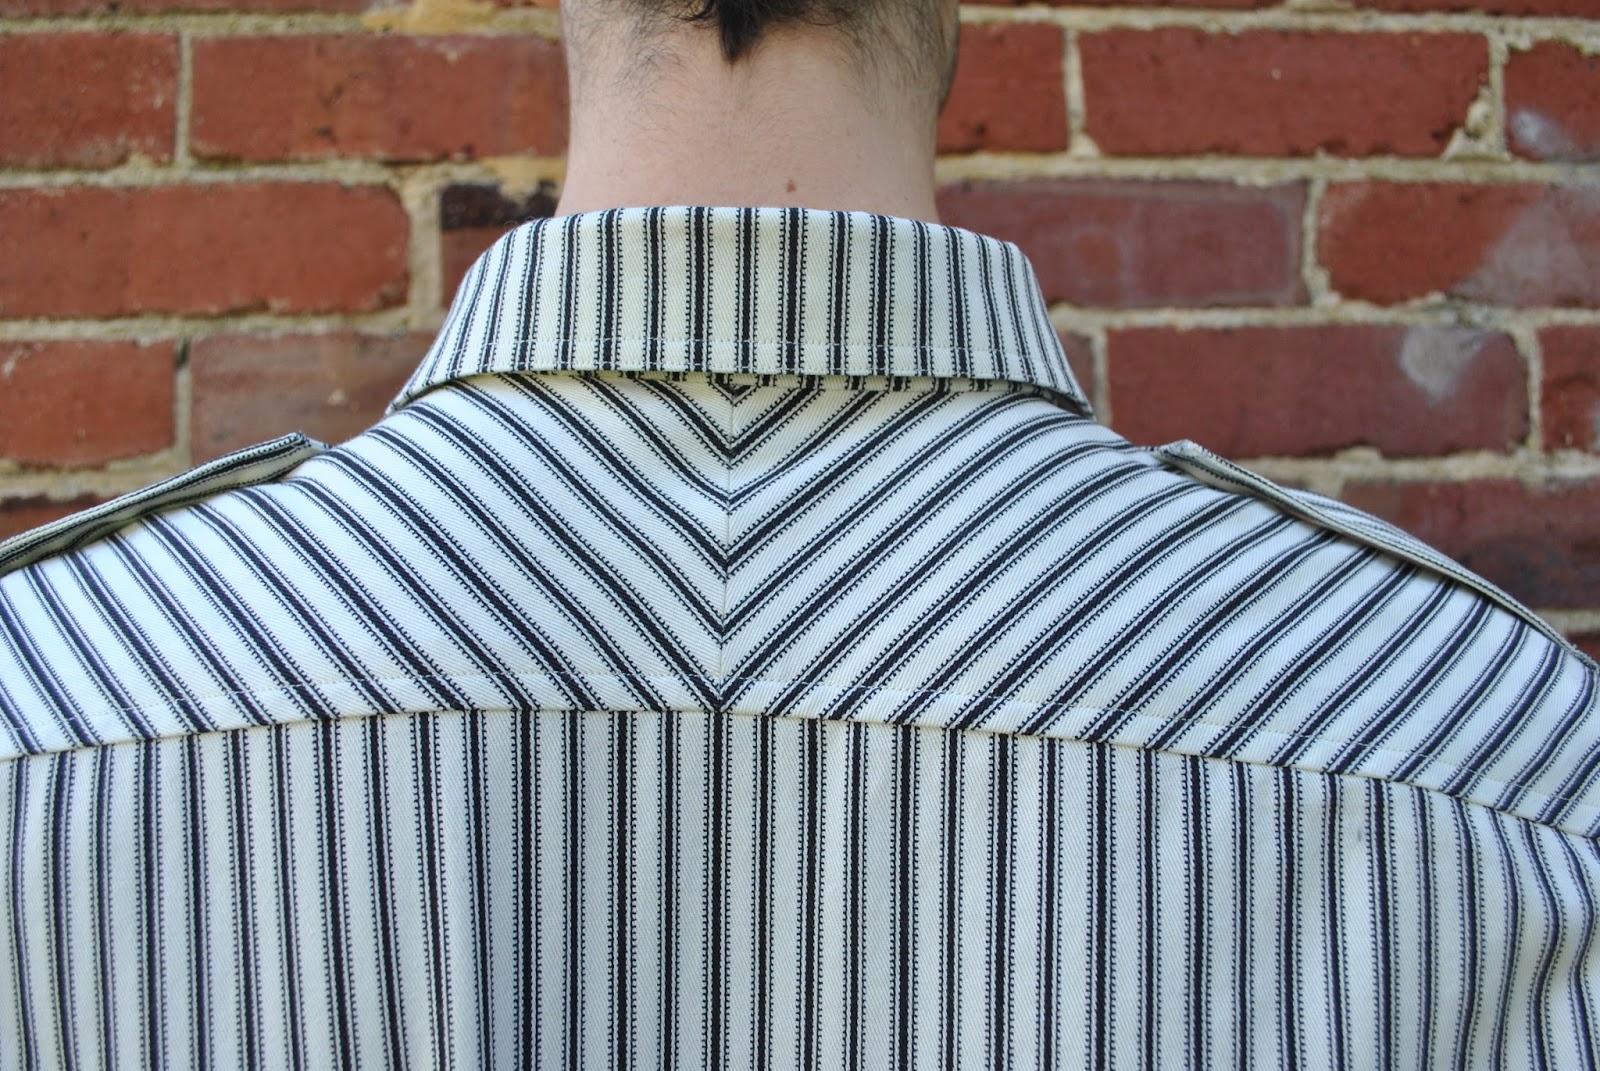
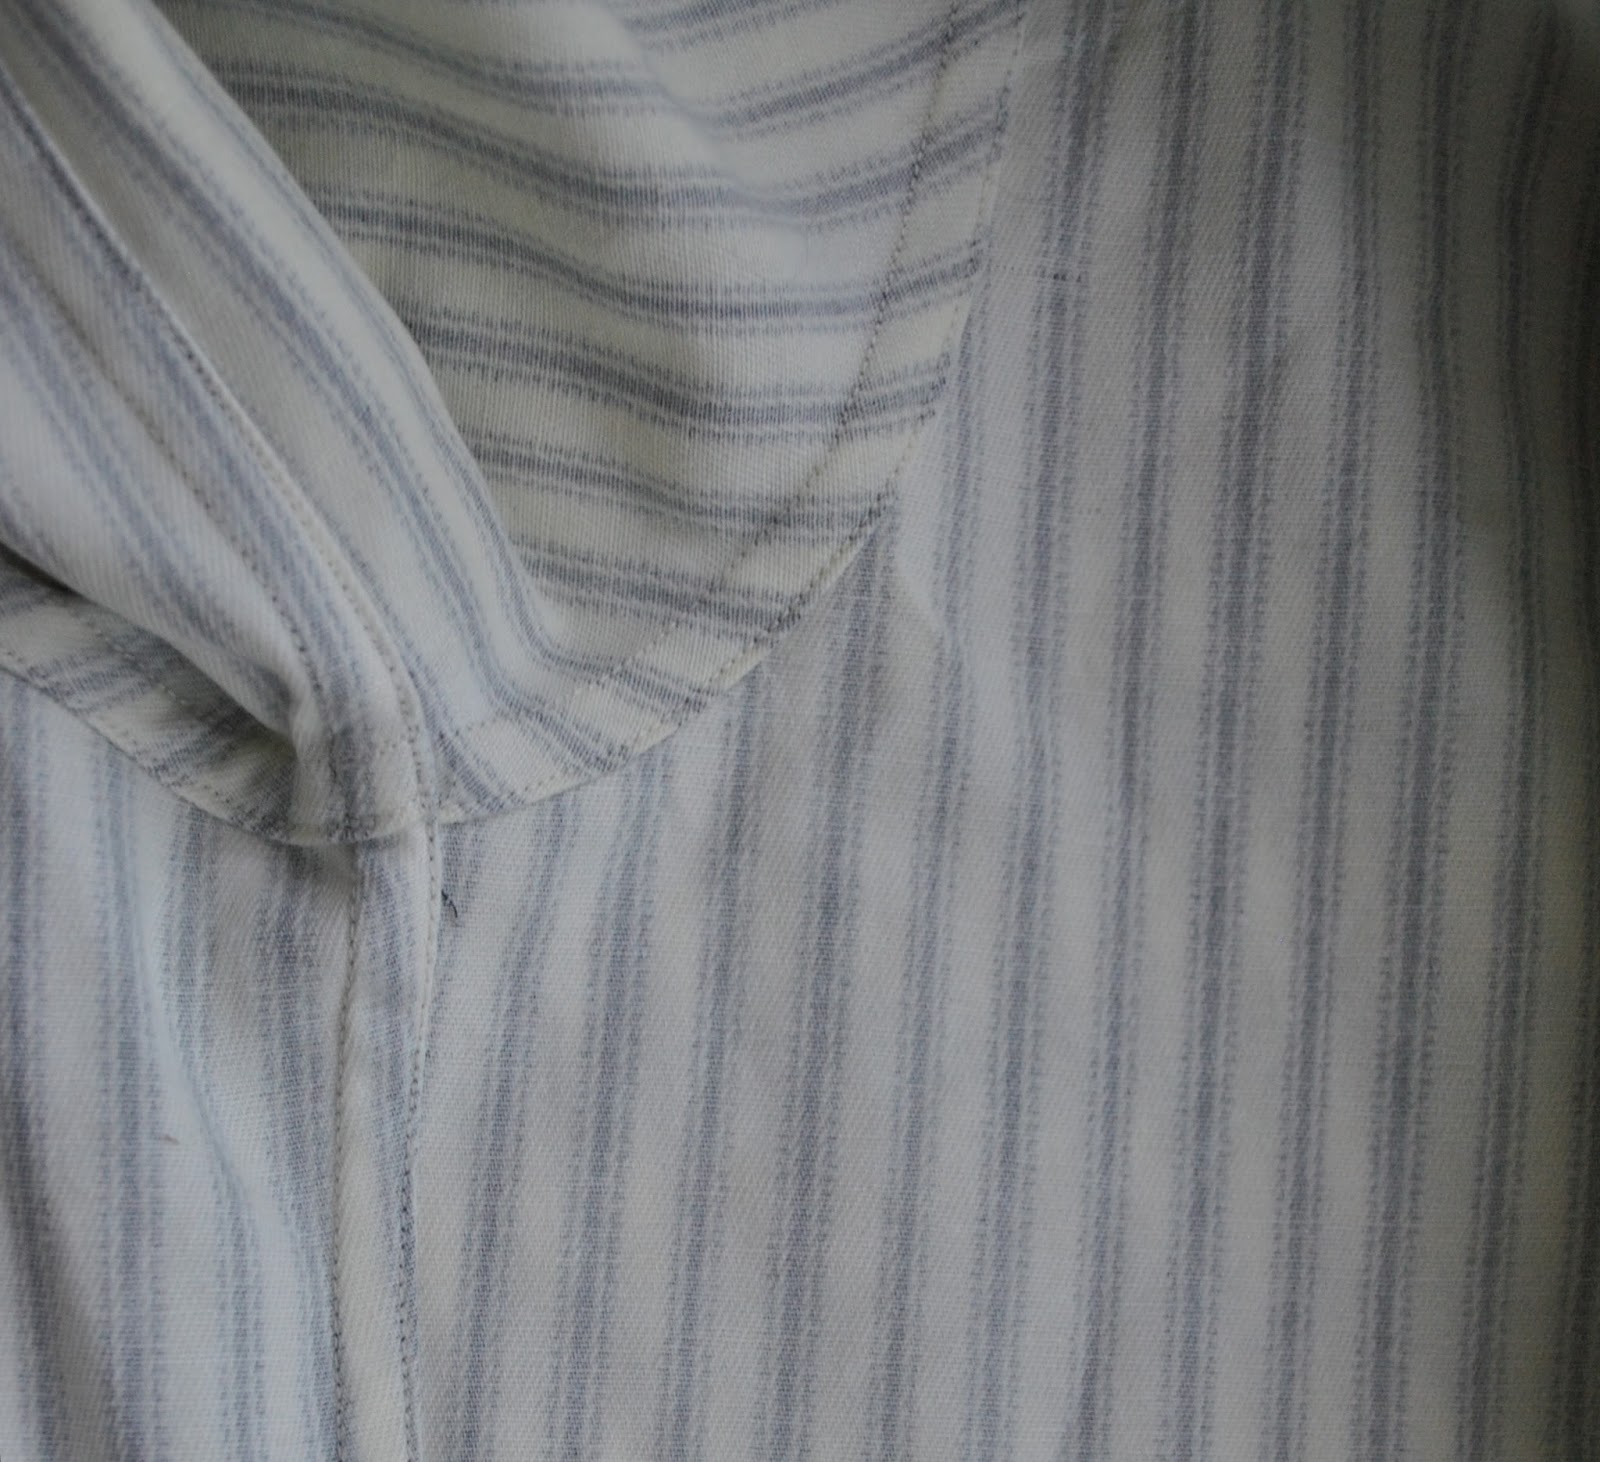
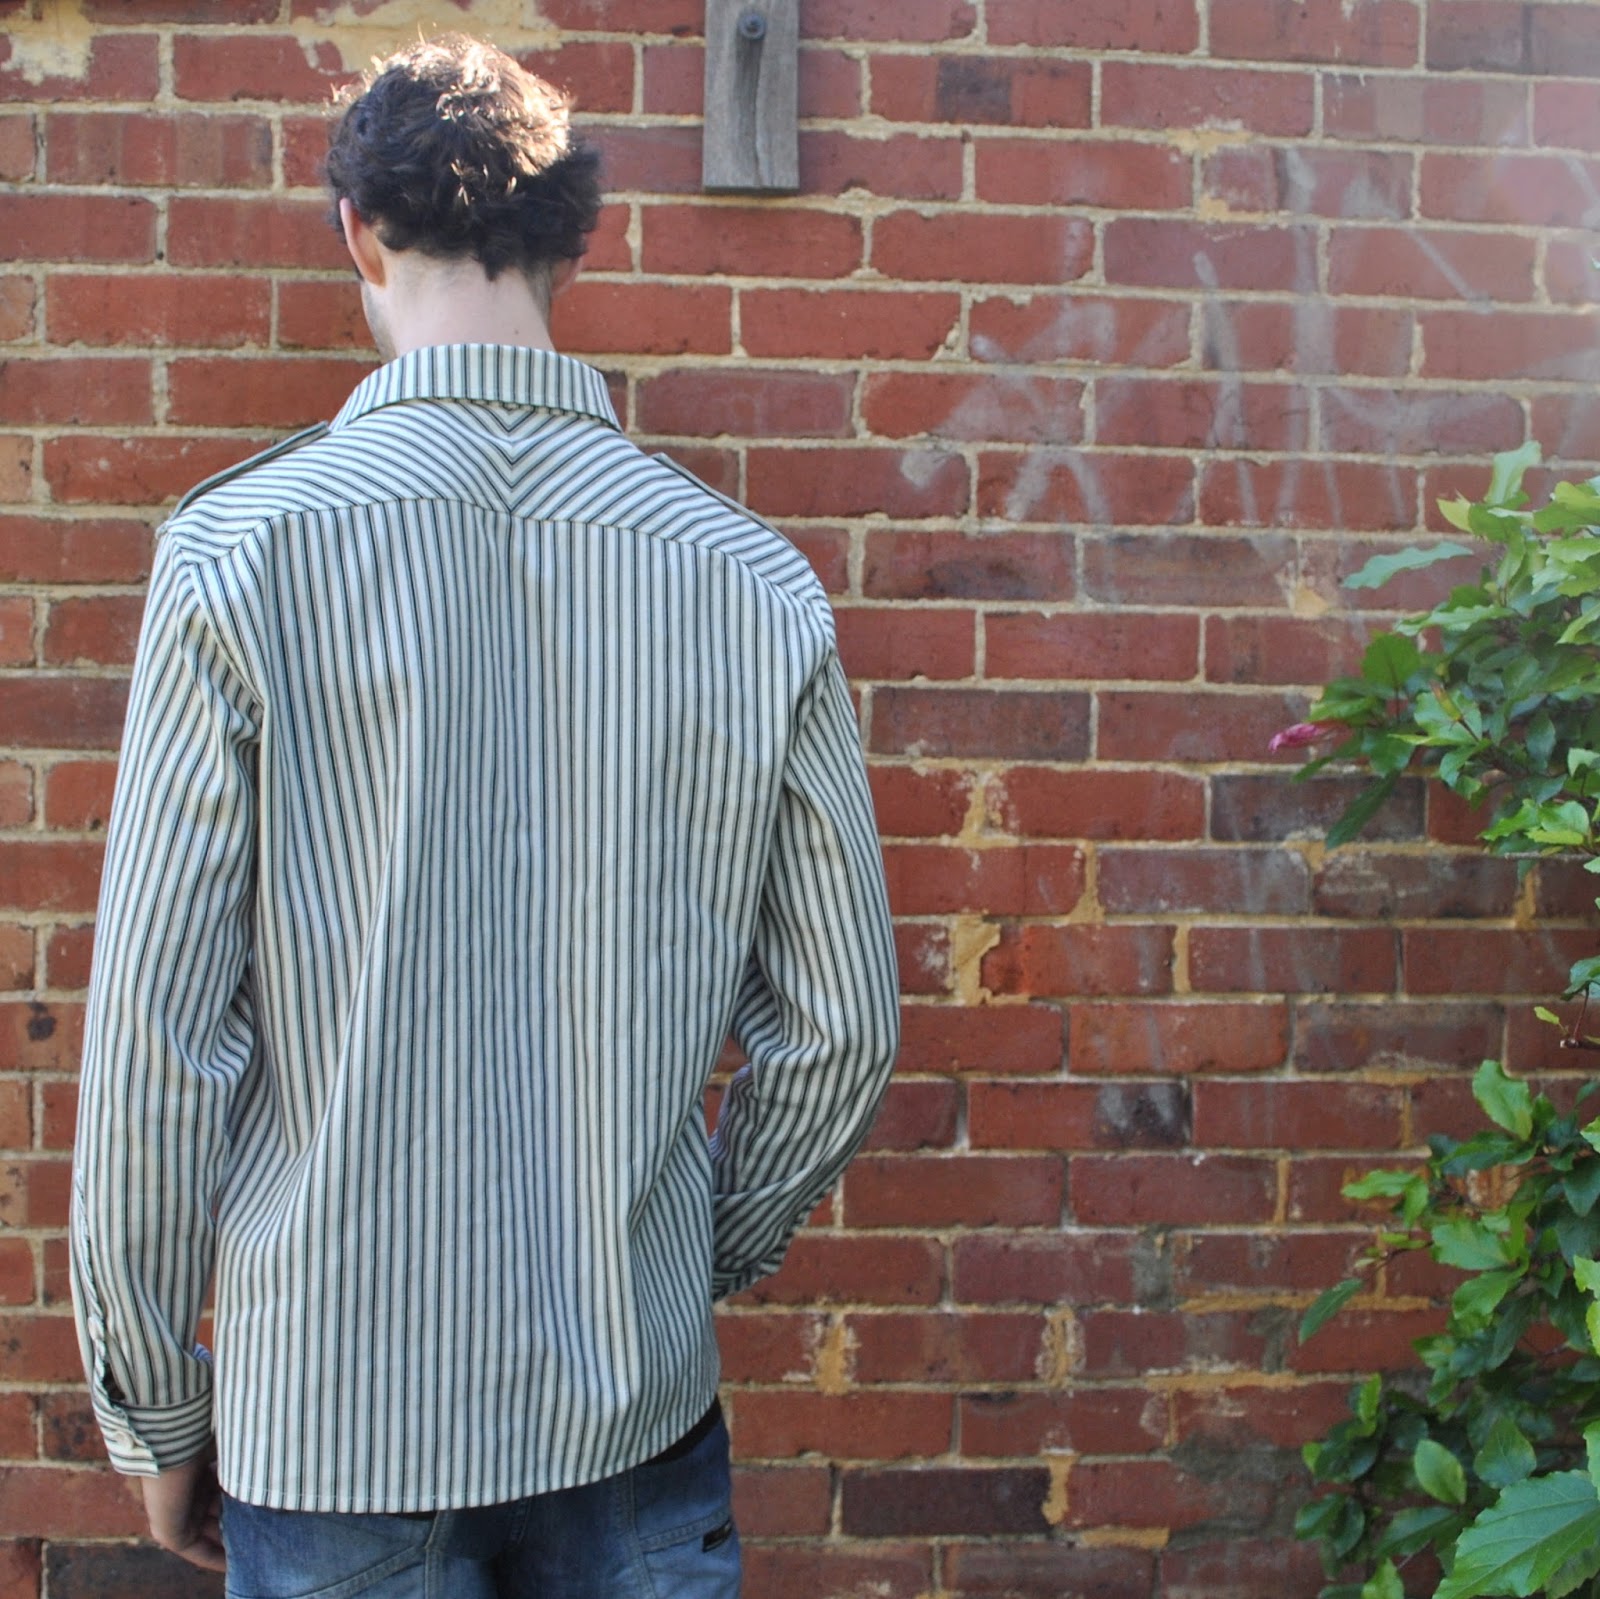
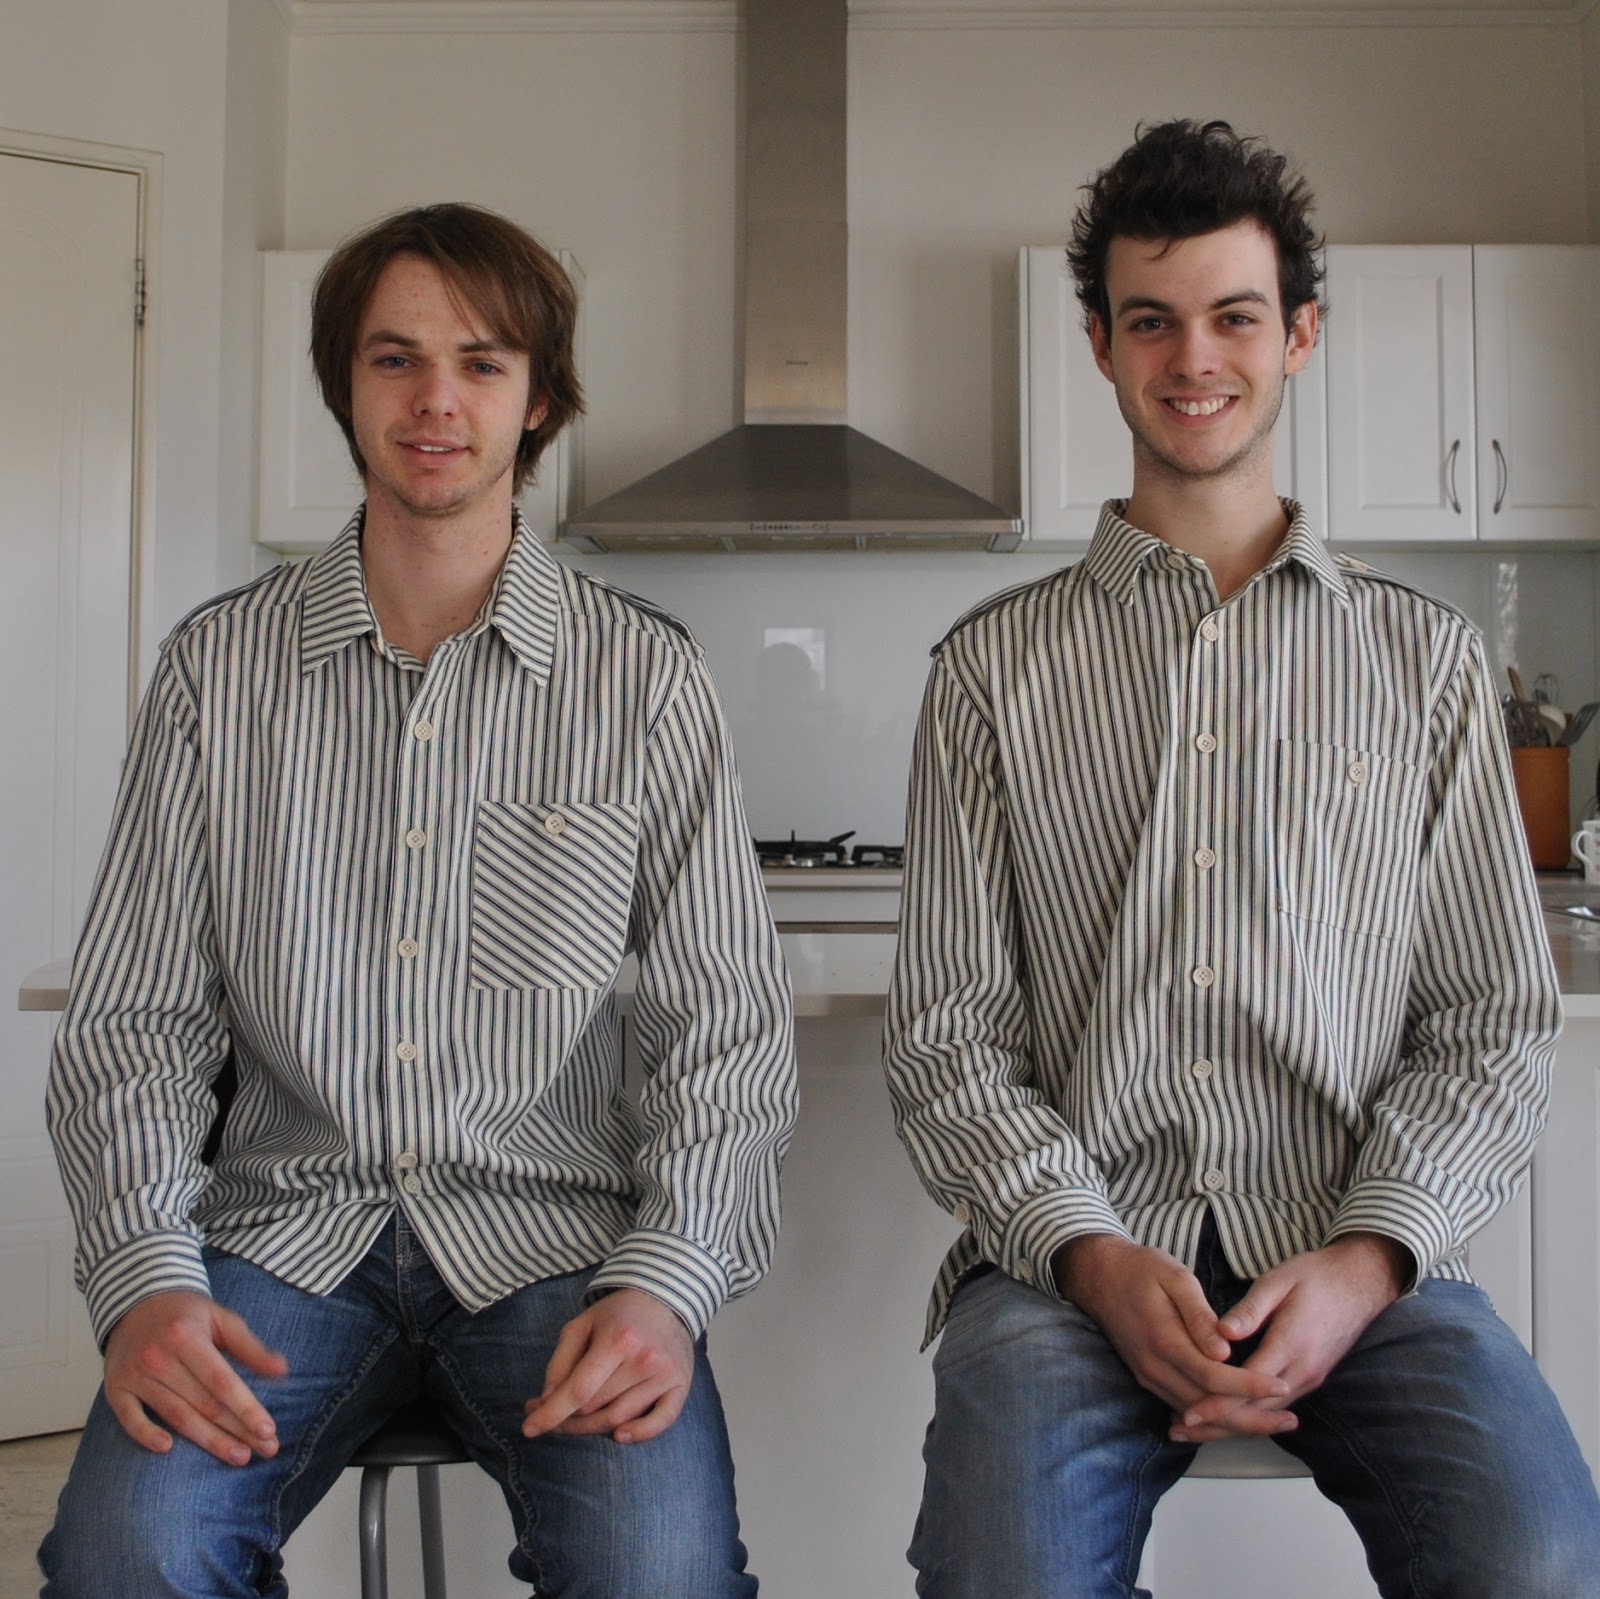
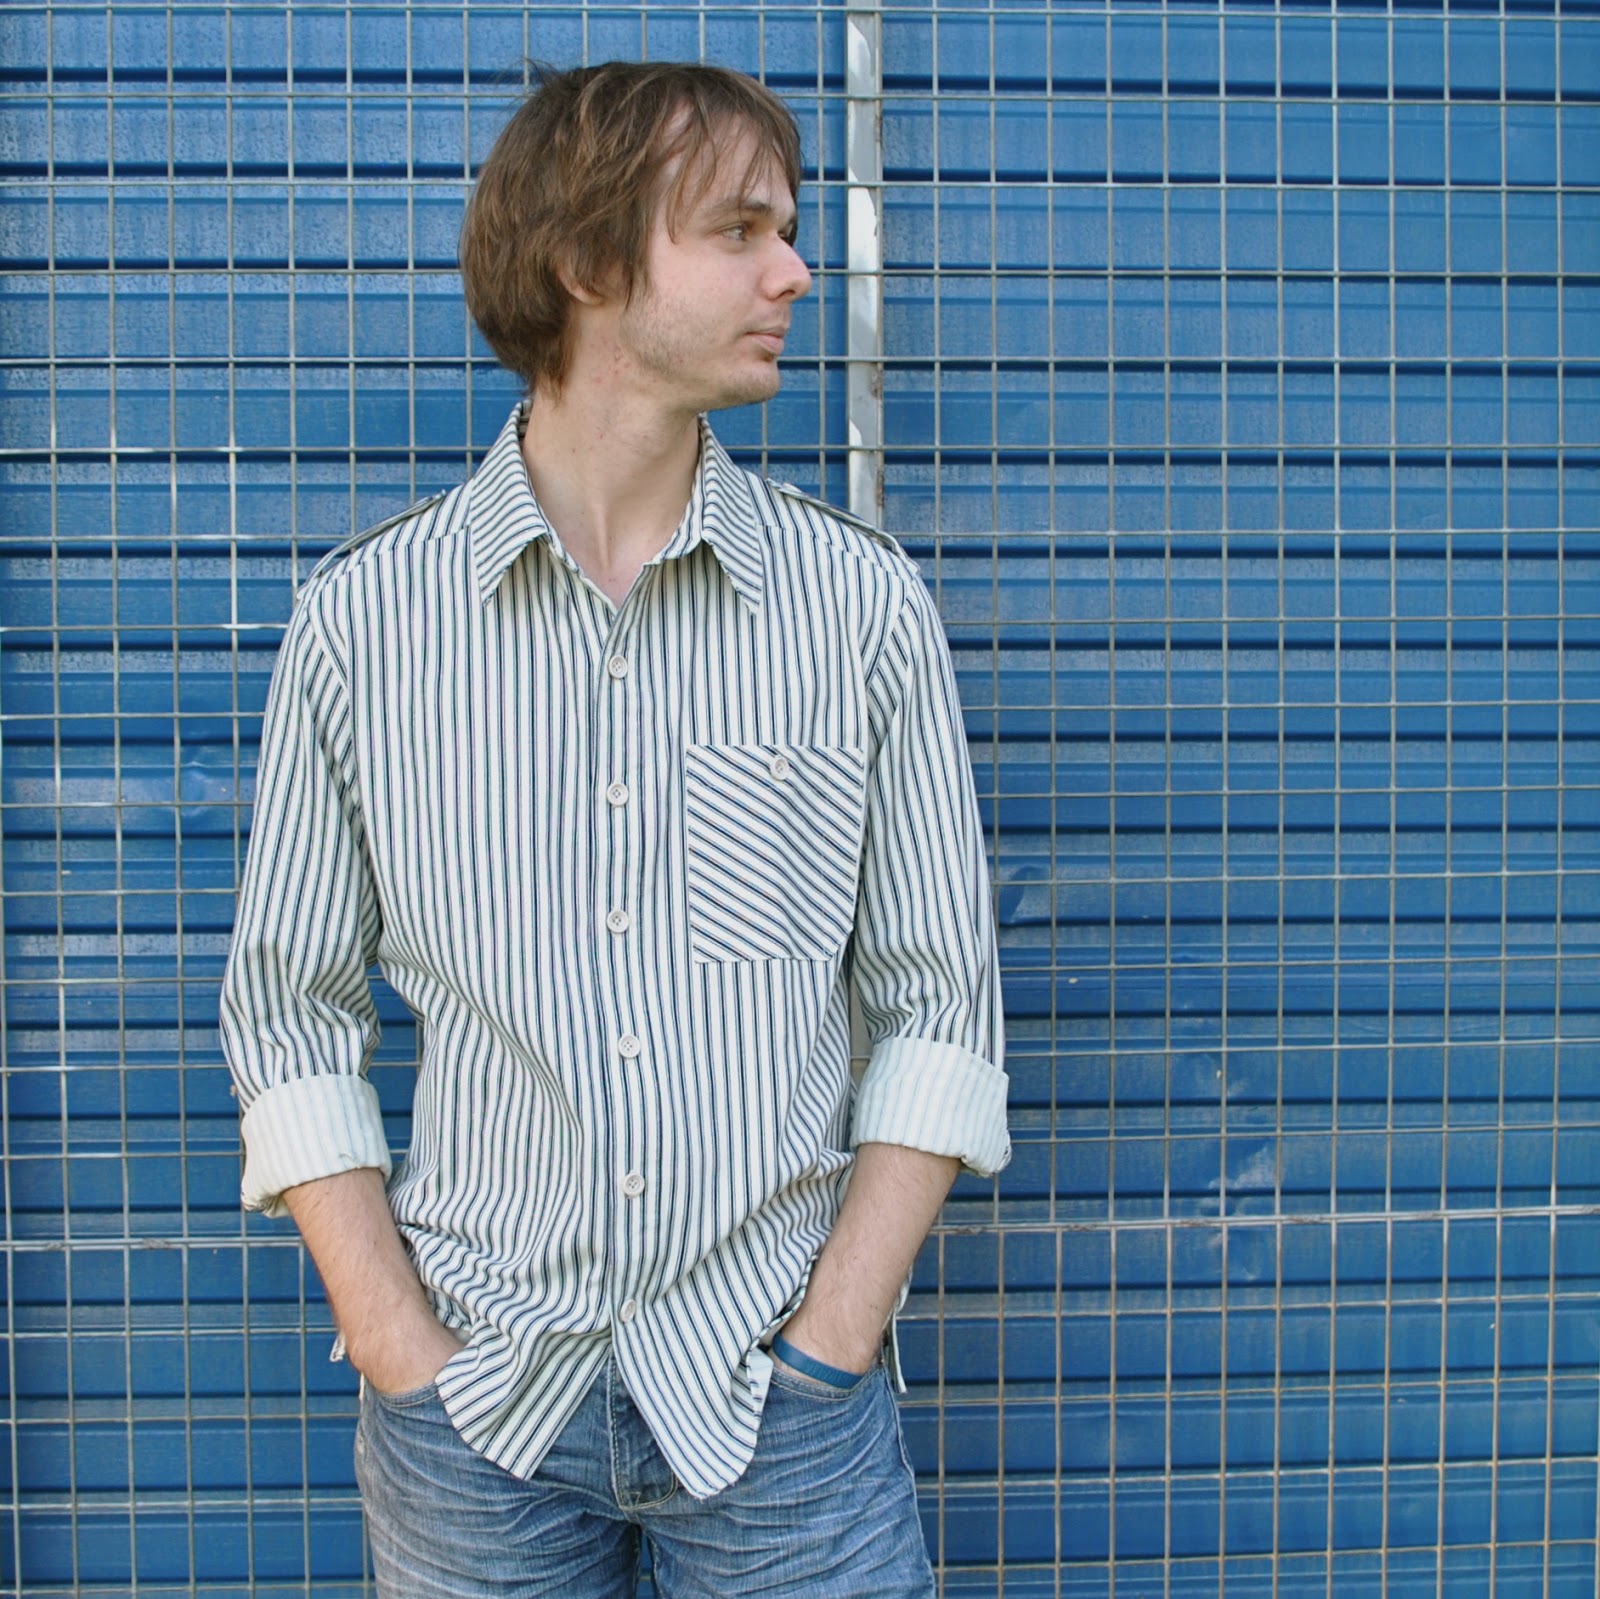
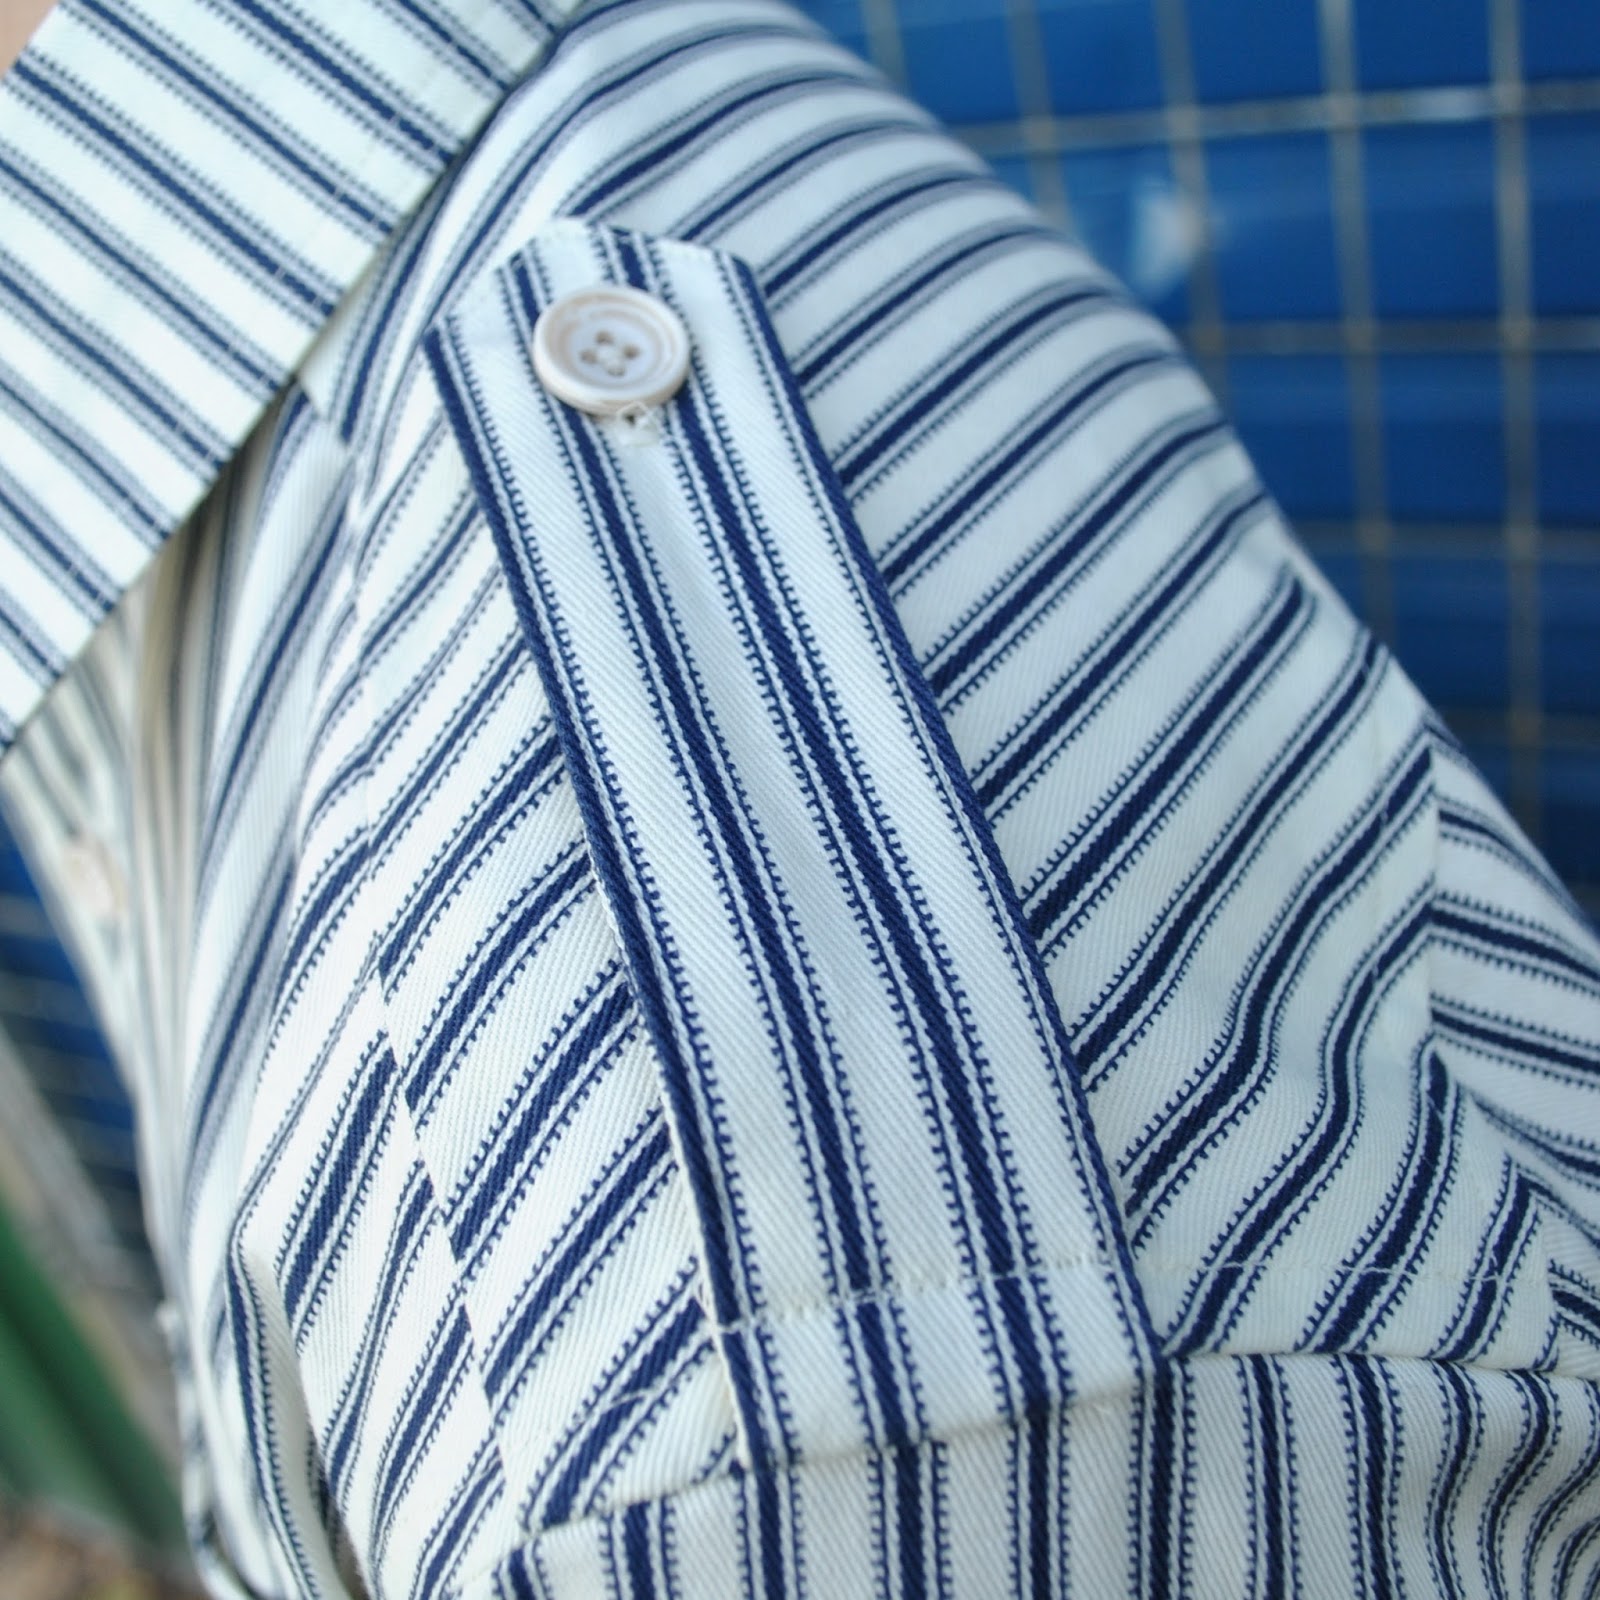
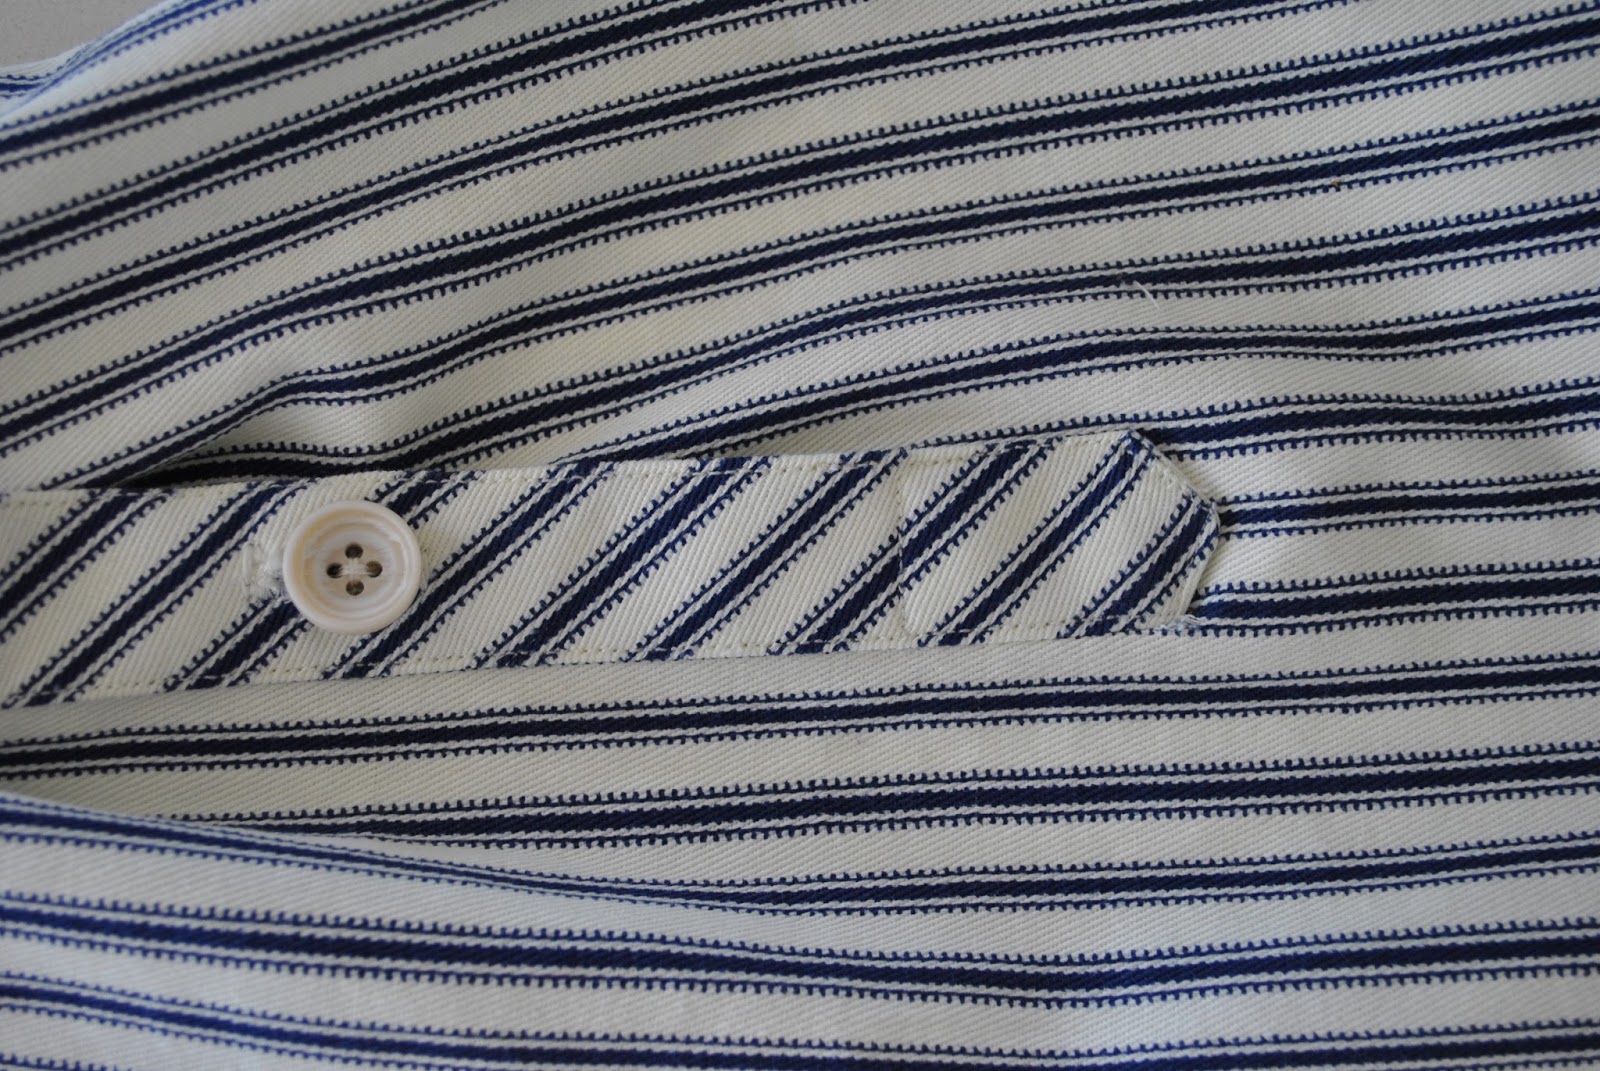
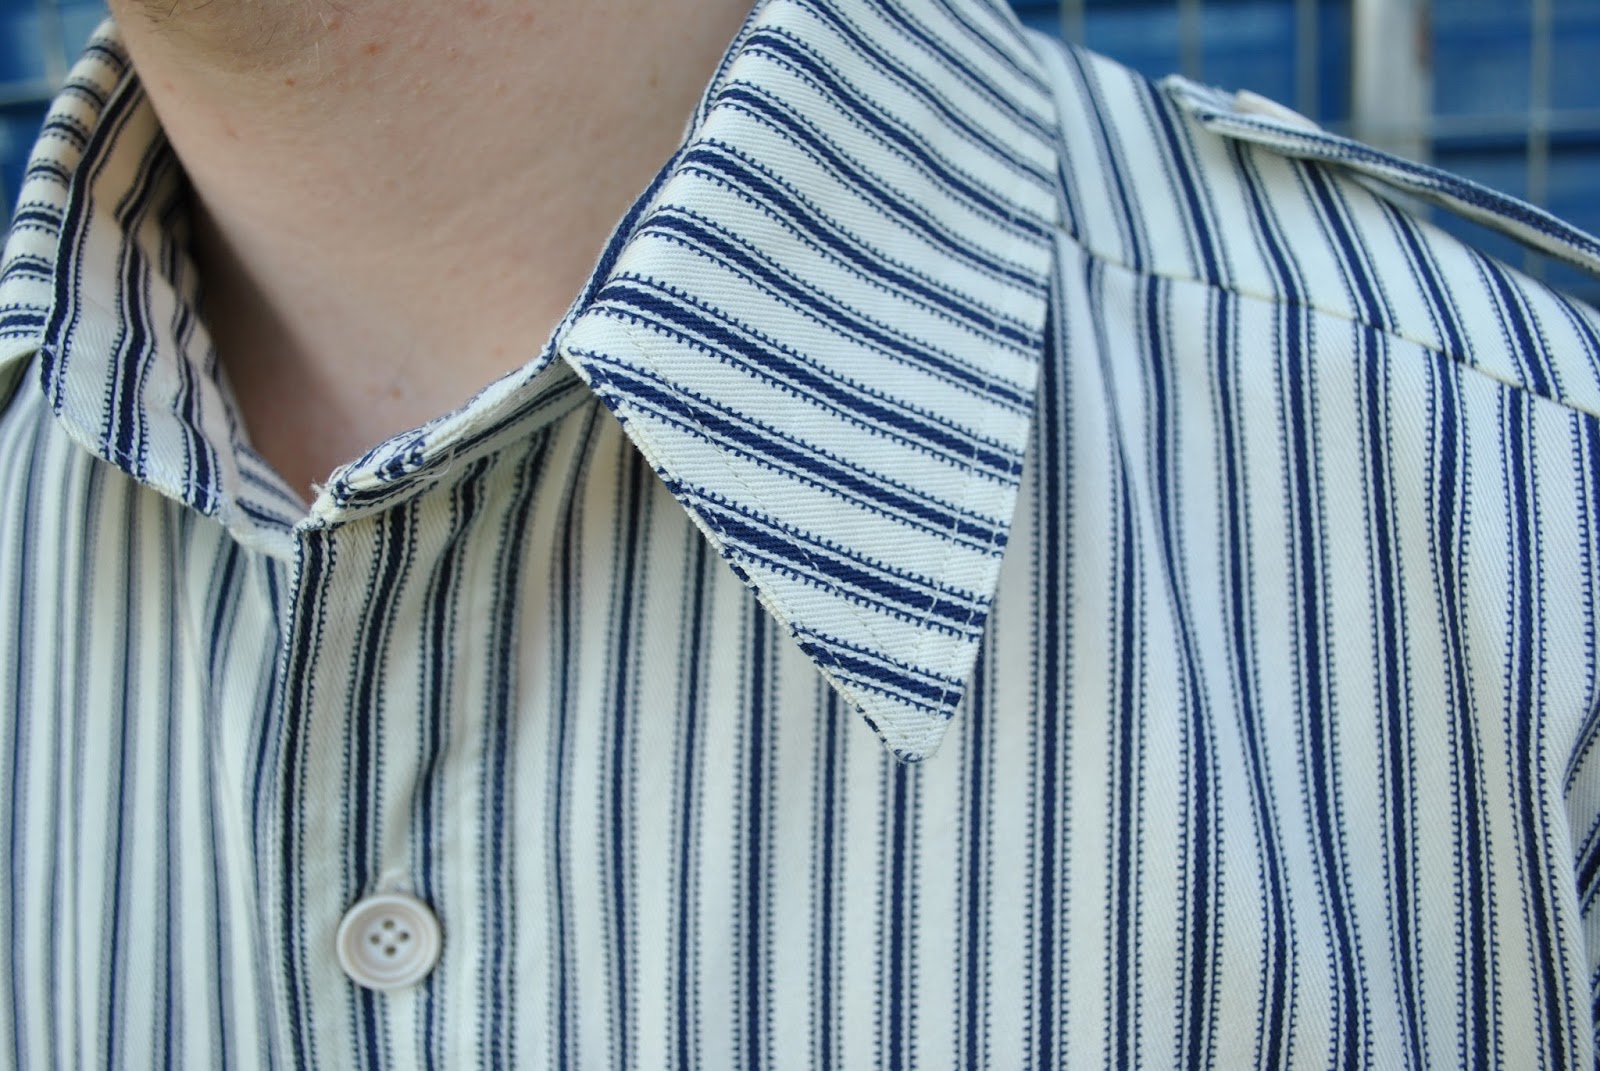
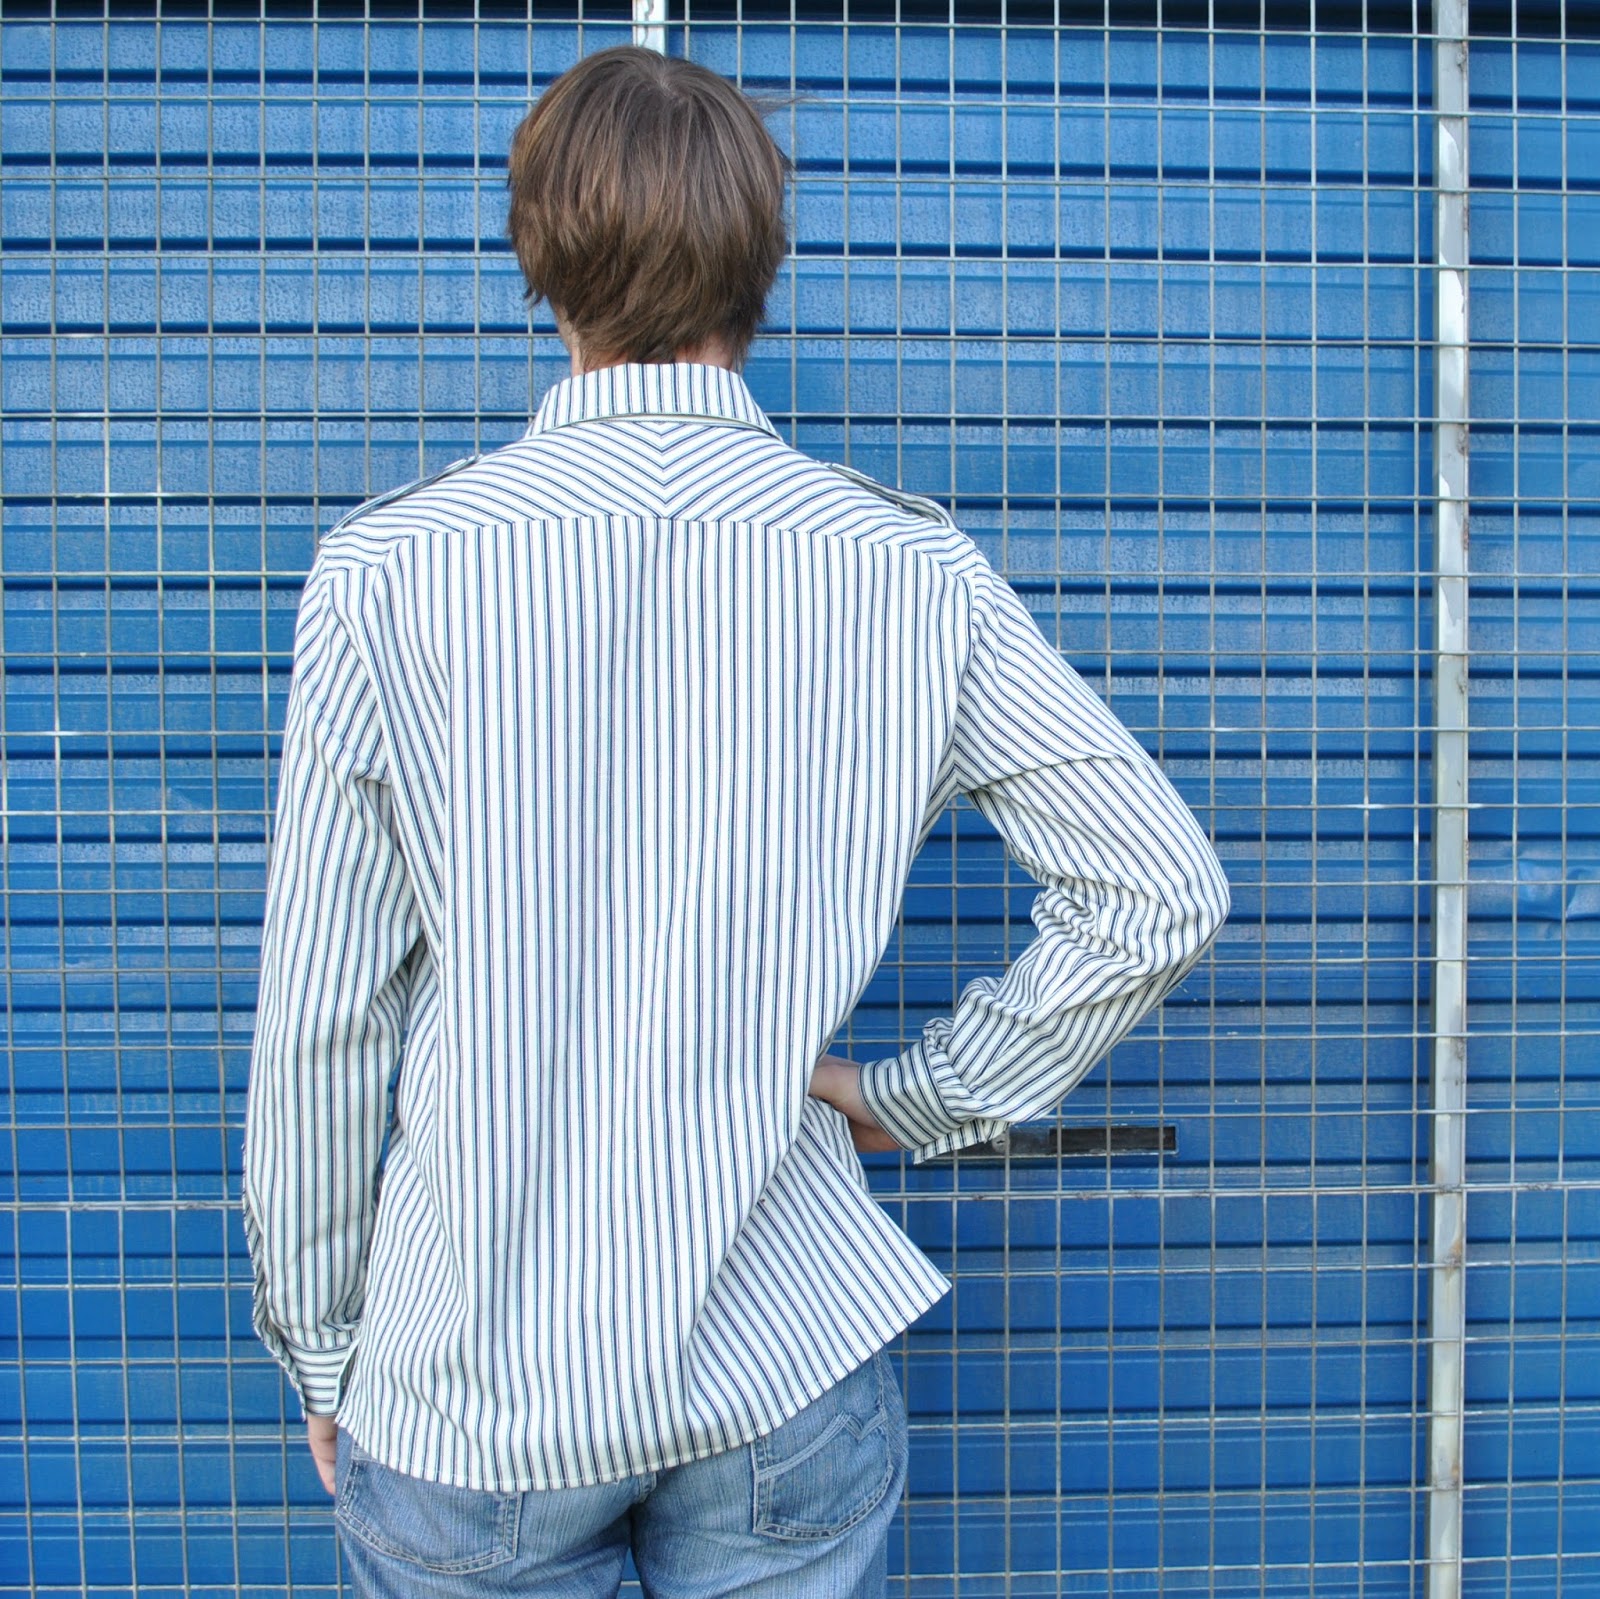
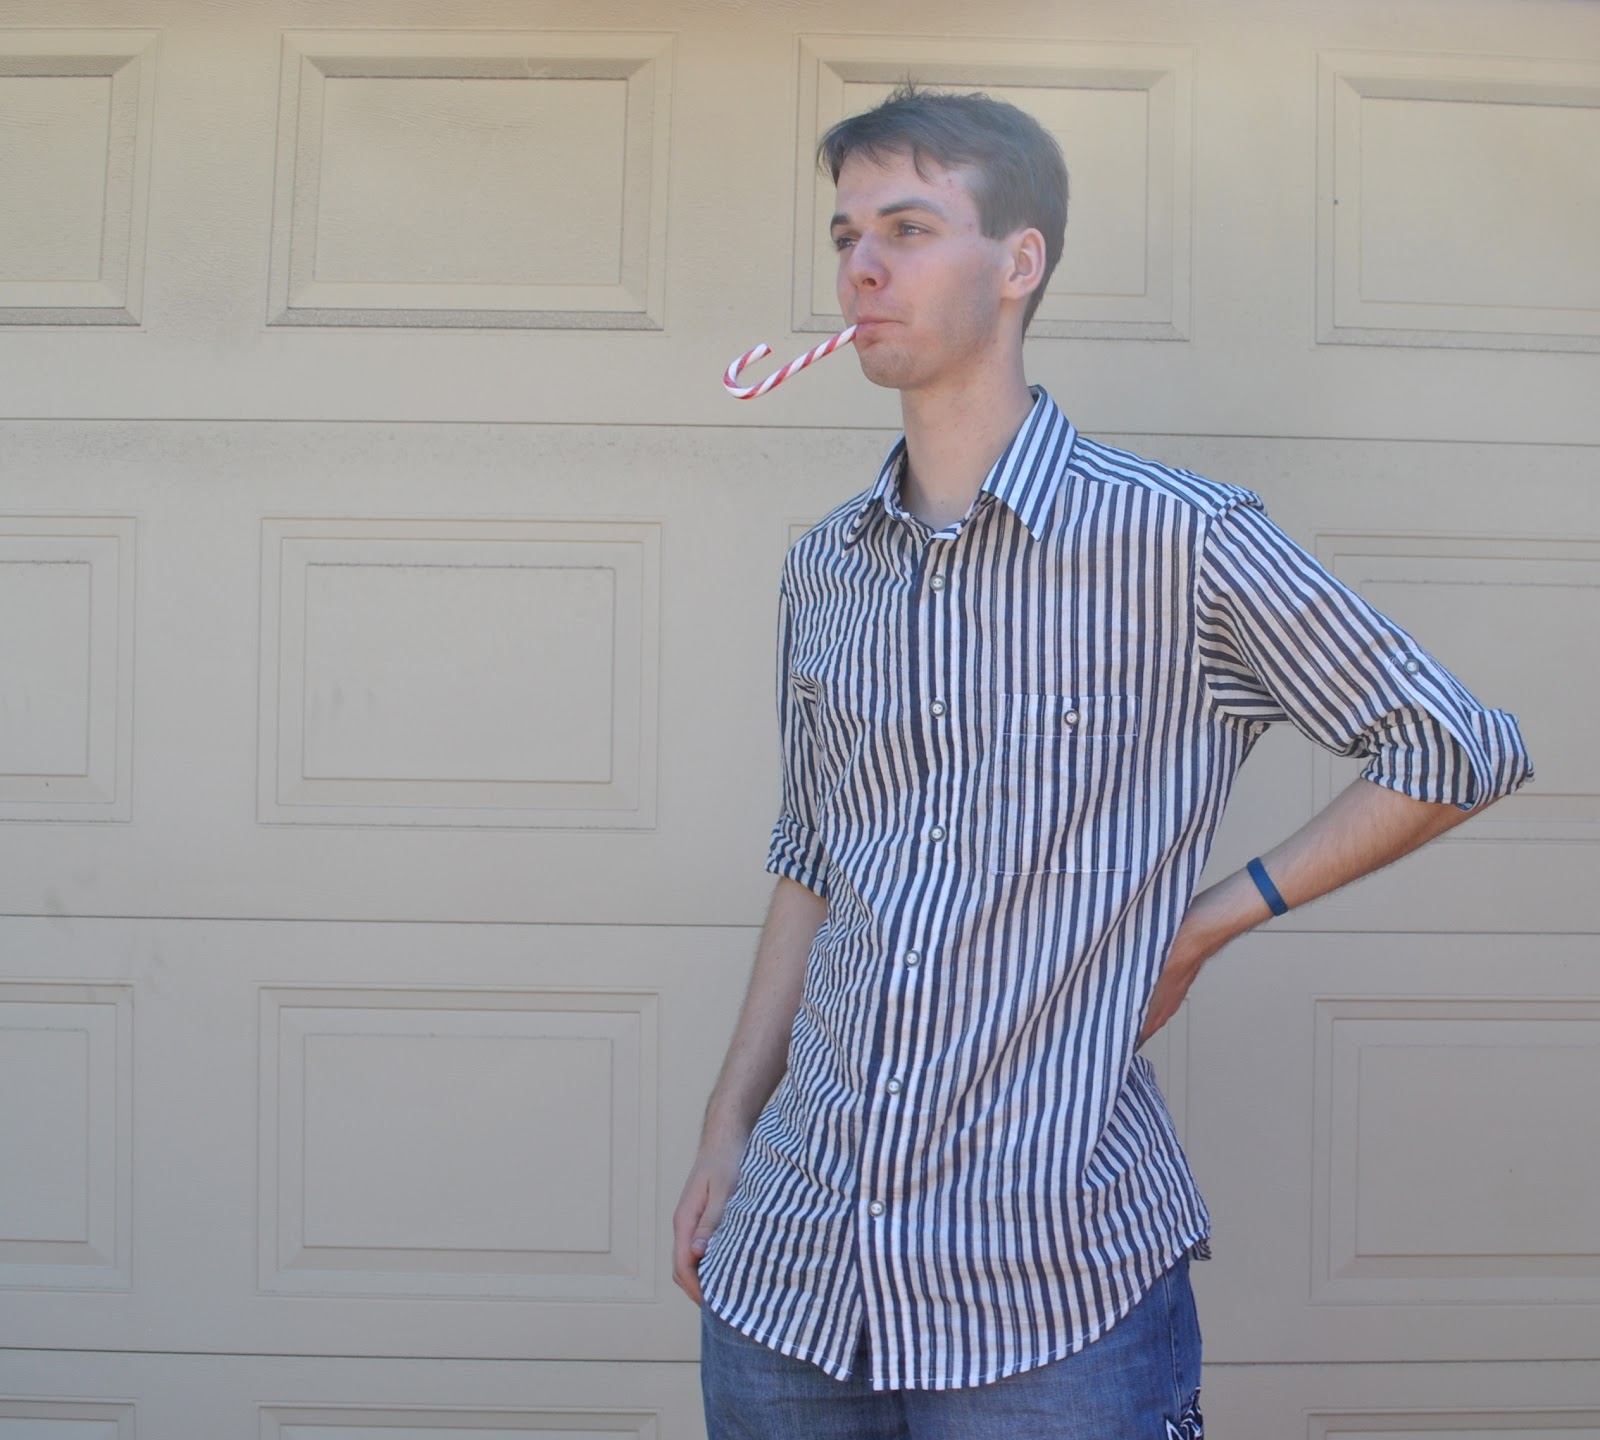
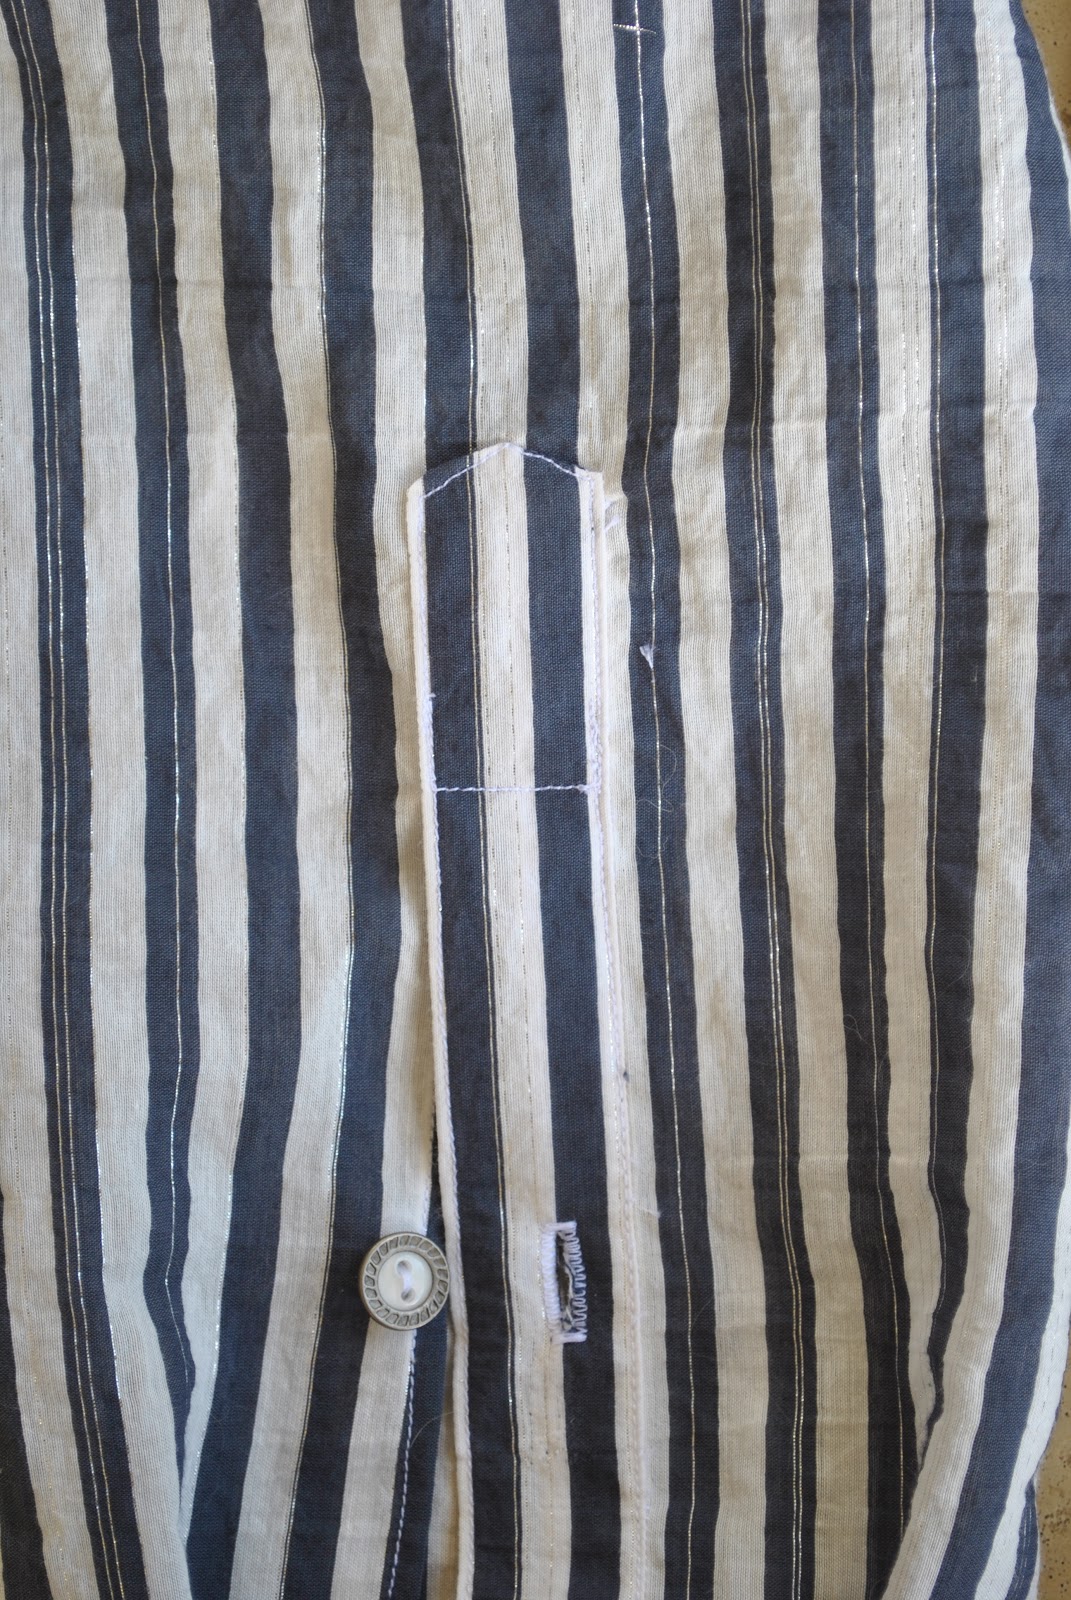
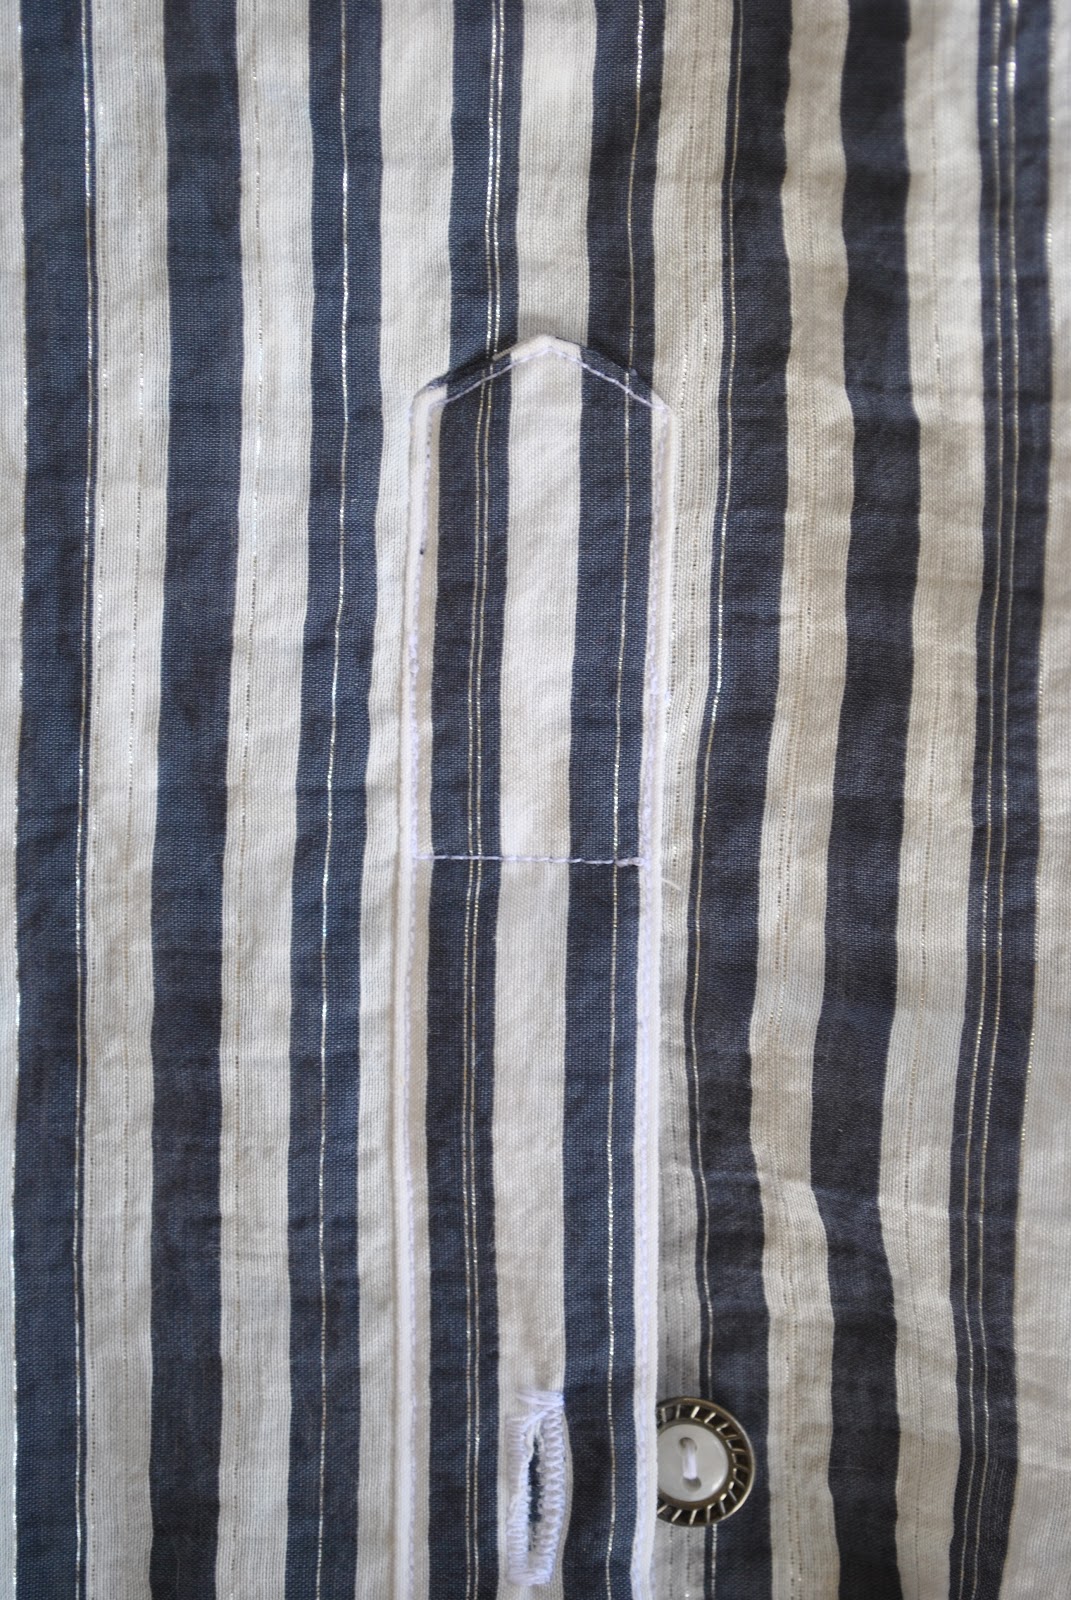
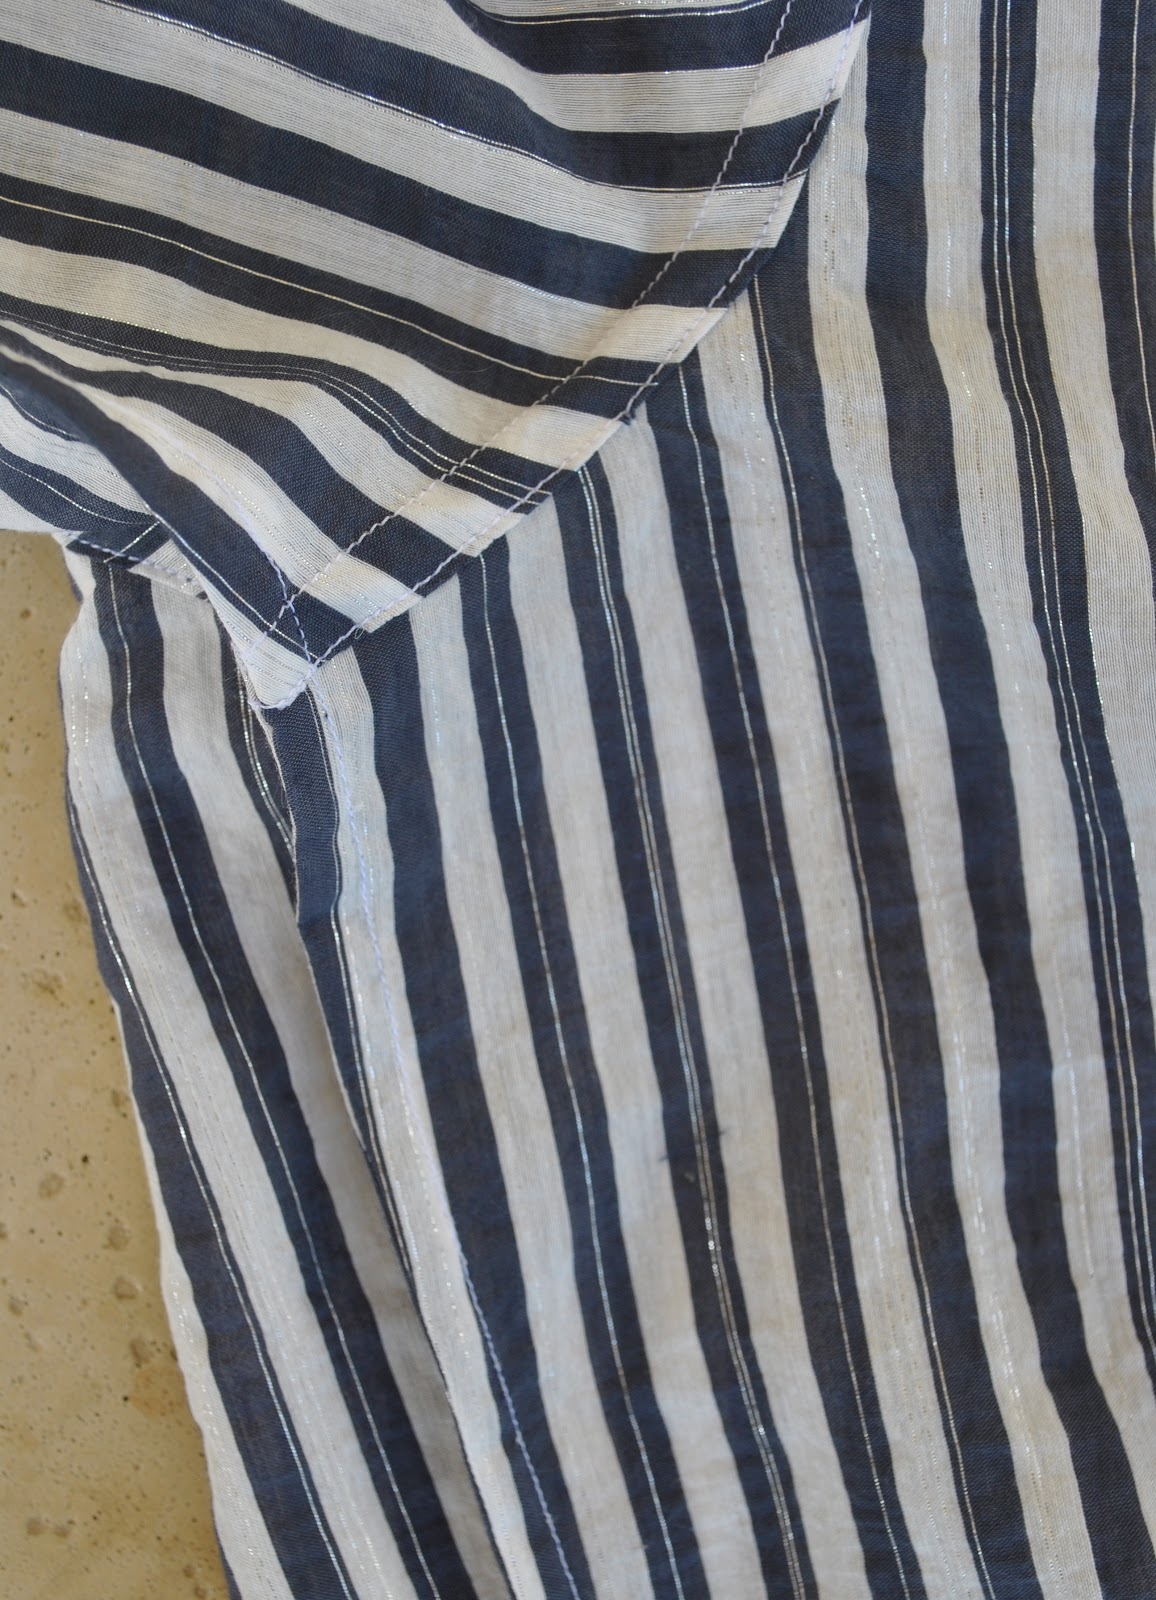
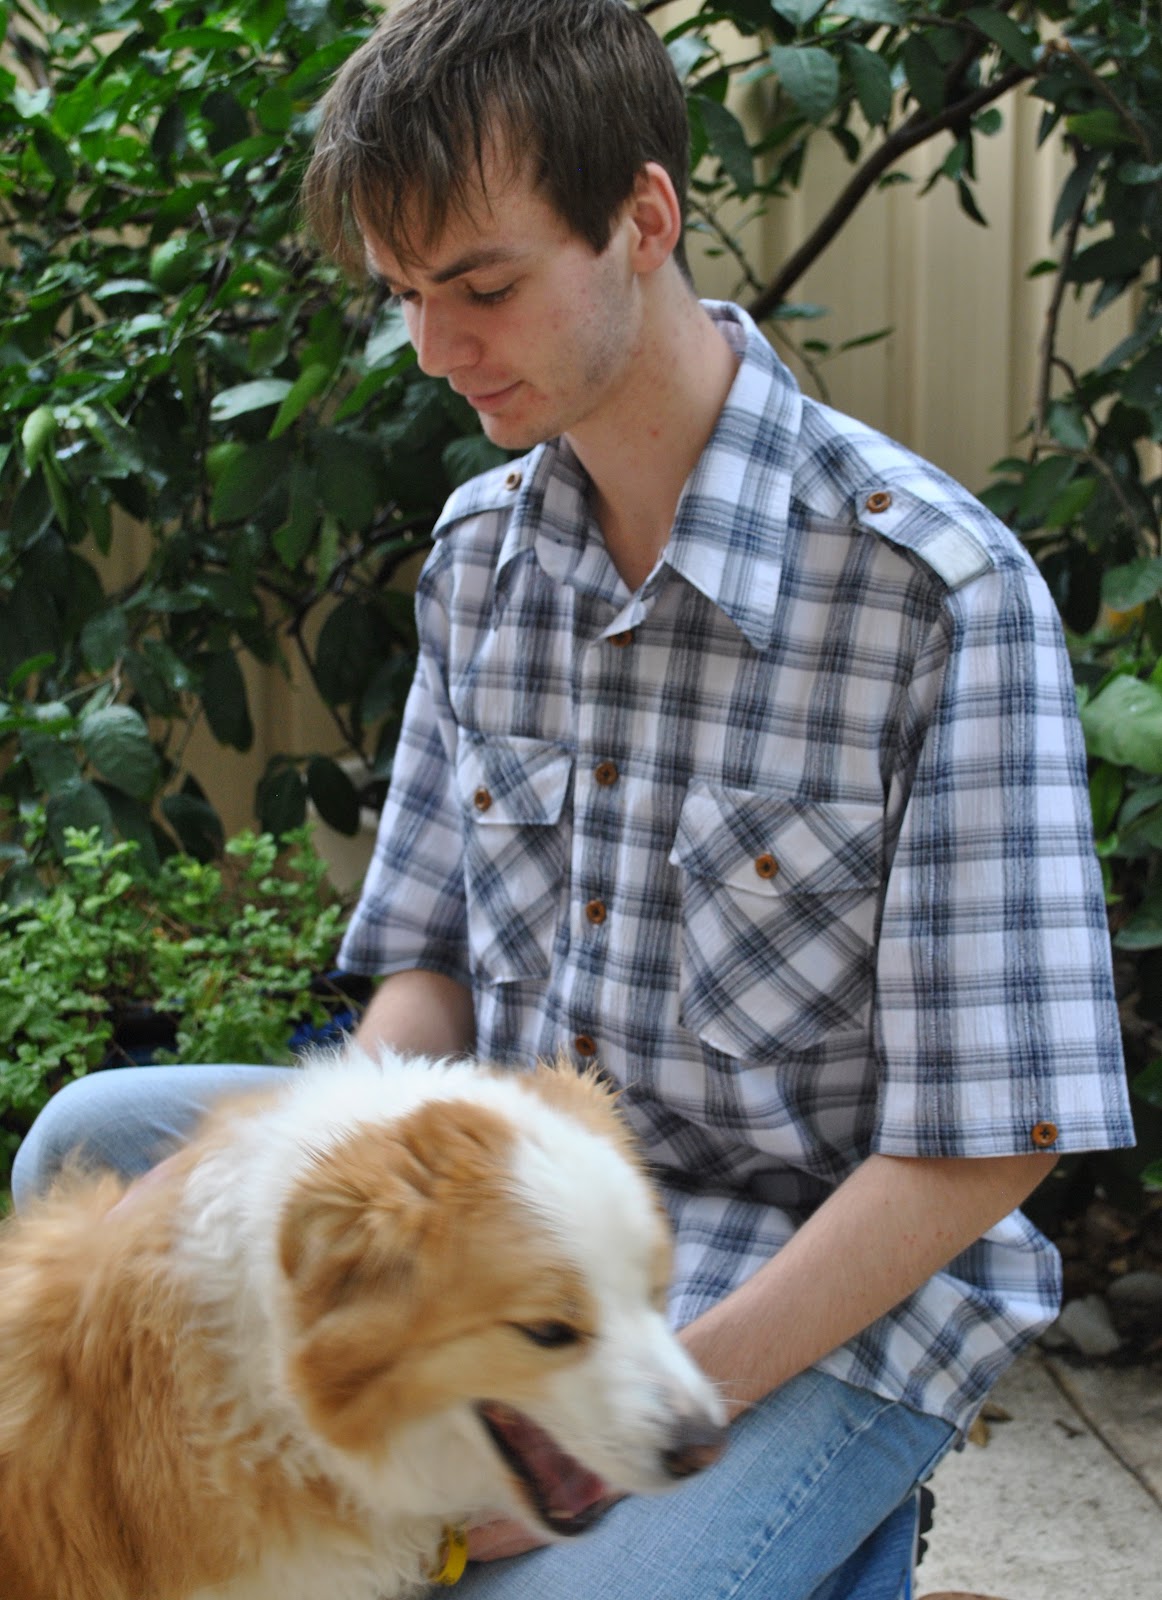
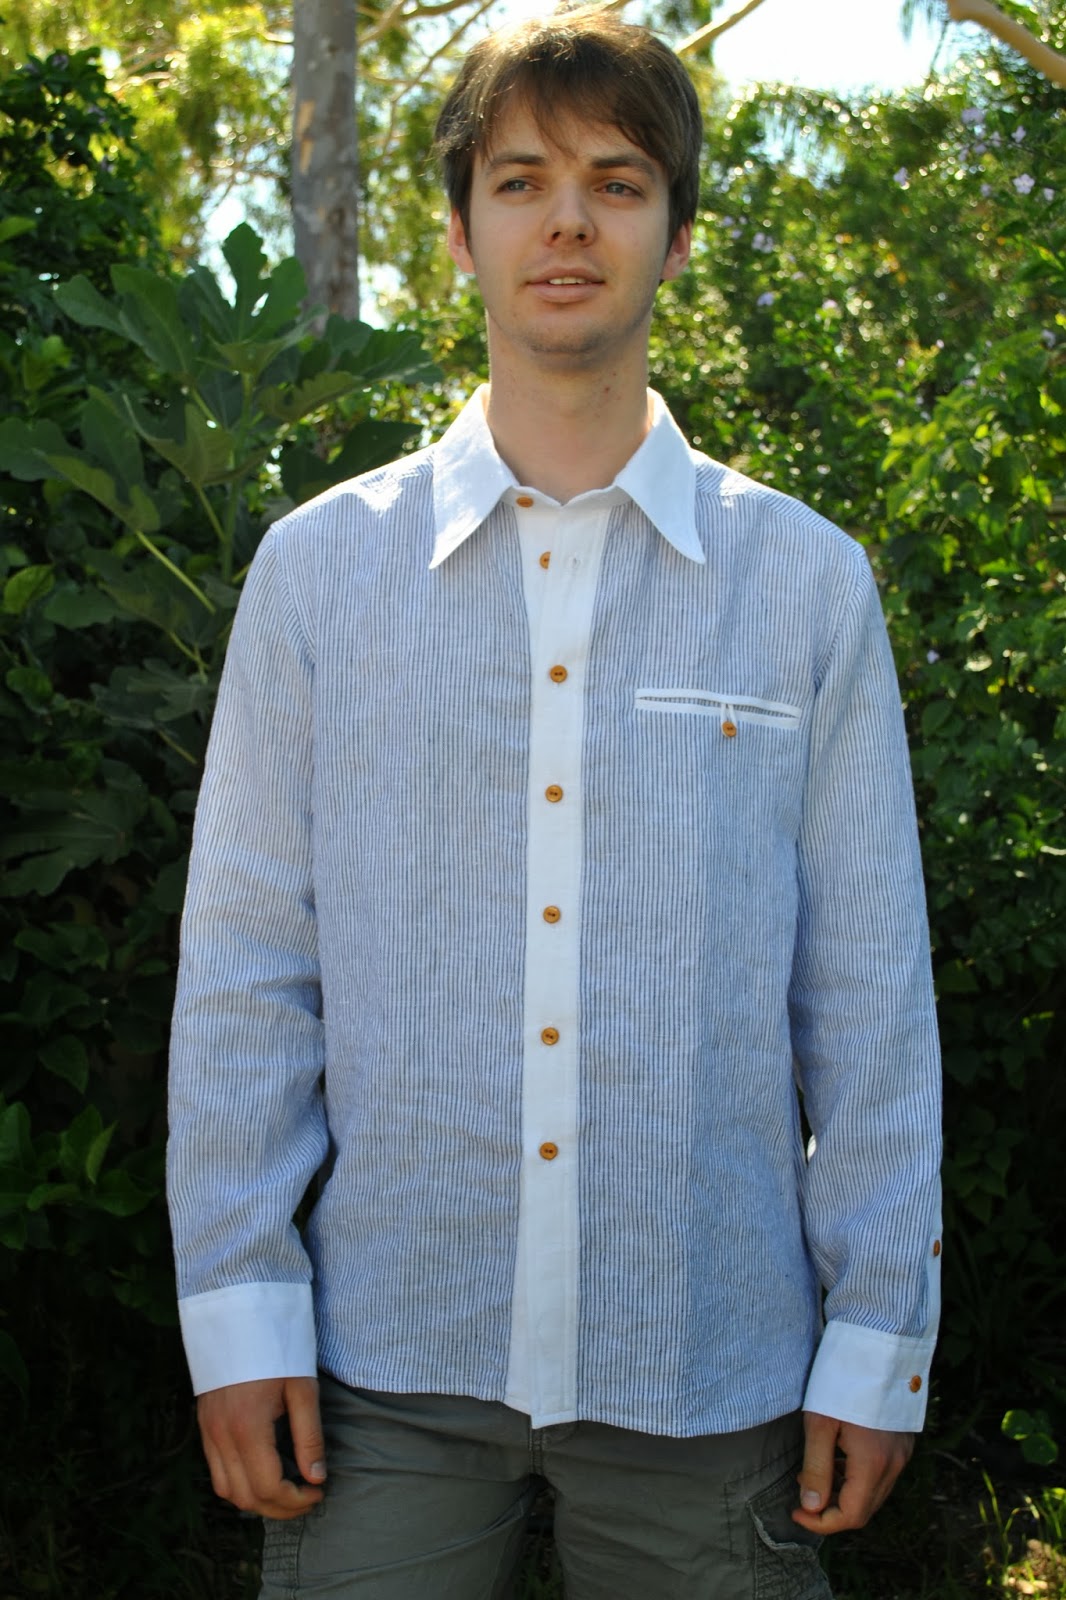
My Christmas present to my boys this year is a tailored shirt for each one; in pin-striped linen with contrasting white collar, cuffs, and buttonbands, and a double welted breast pocket with looped button closure.

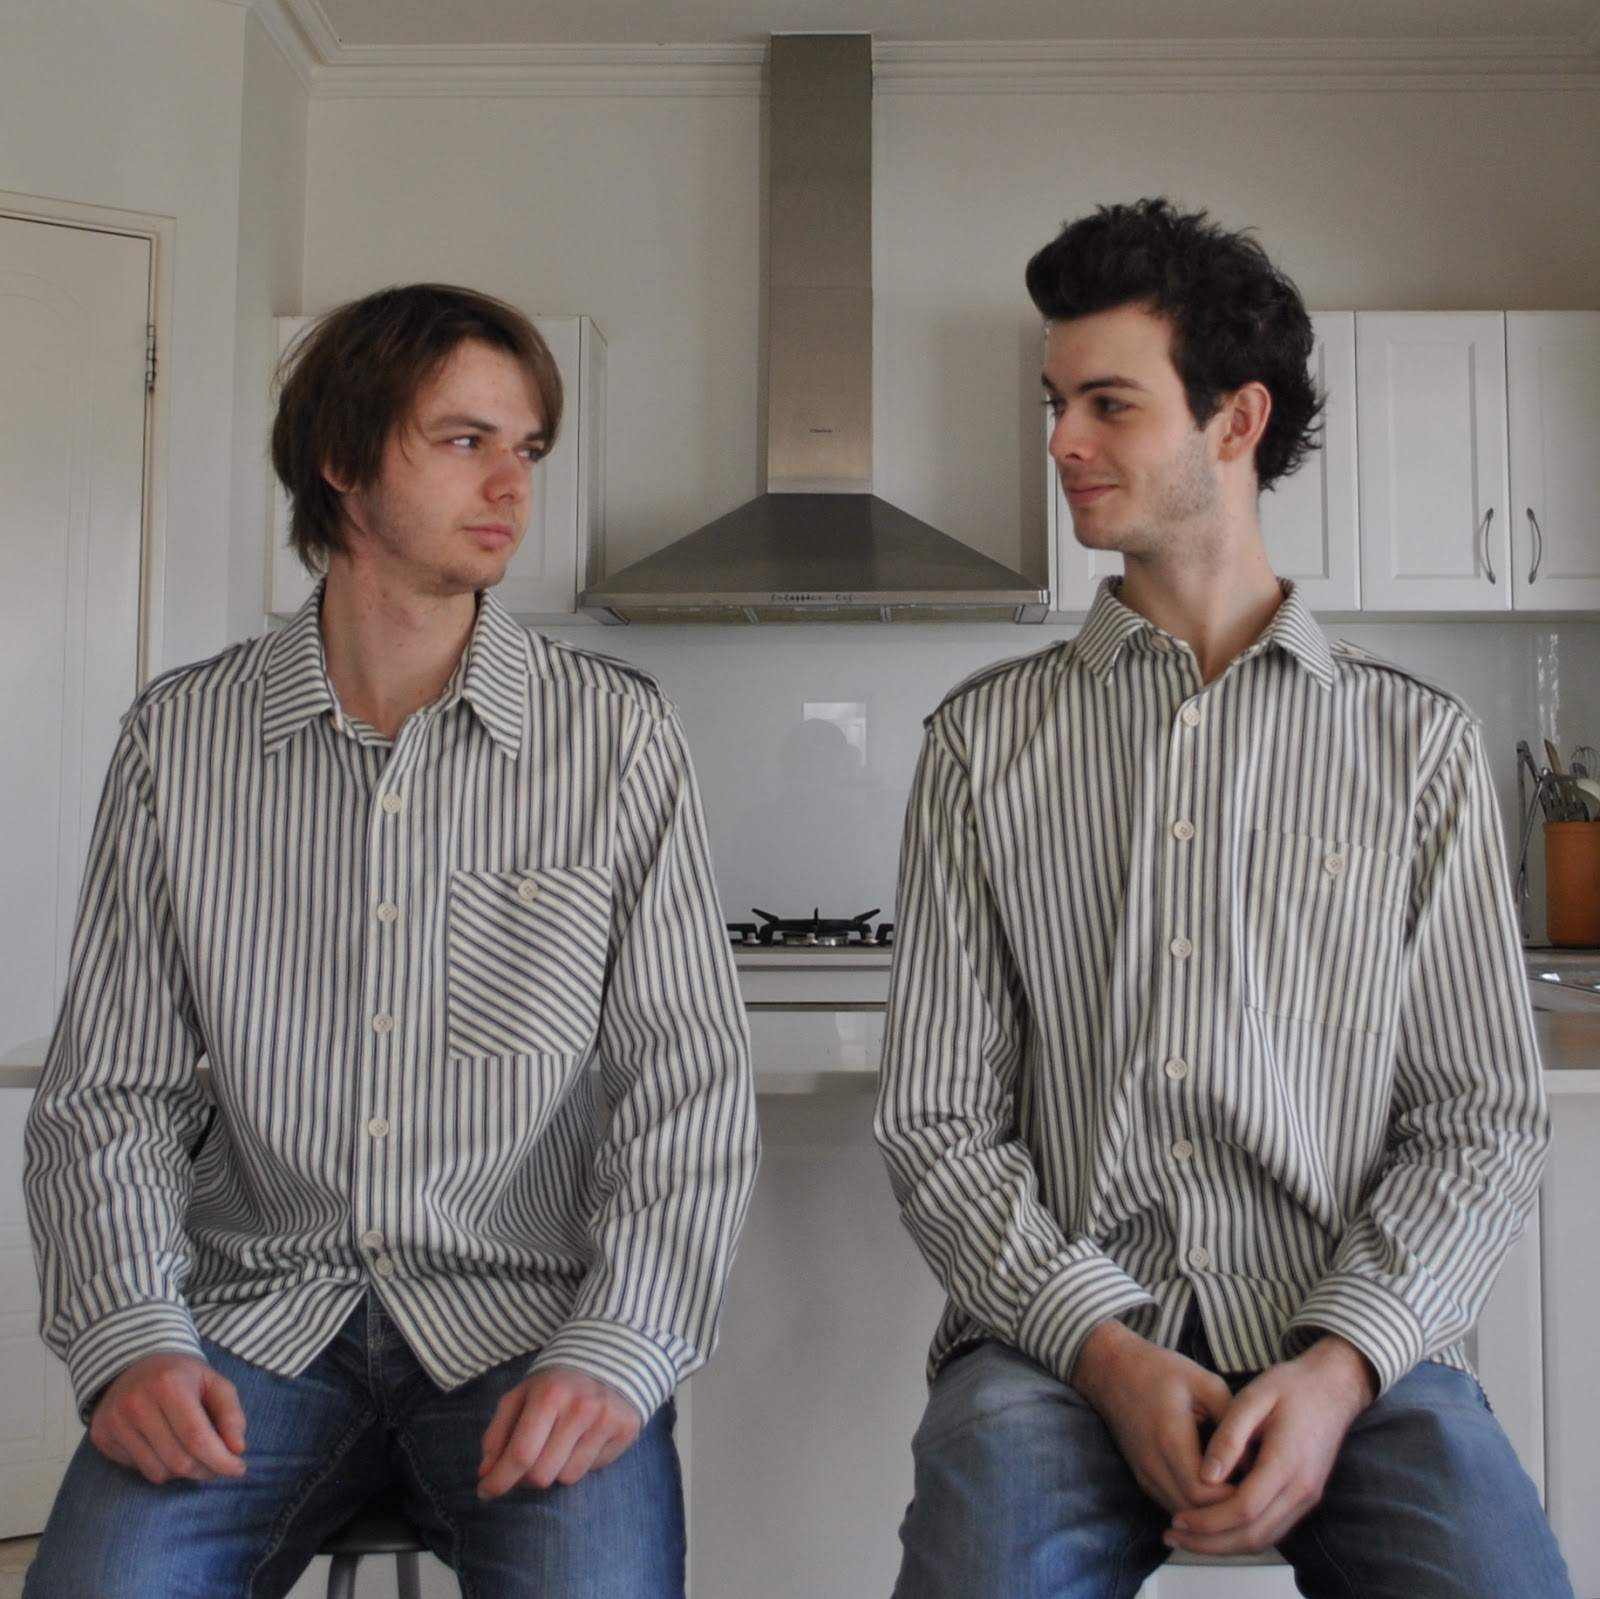
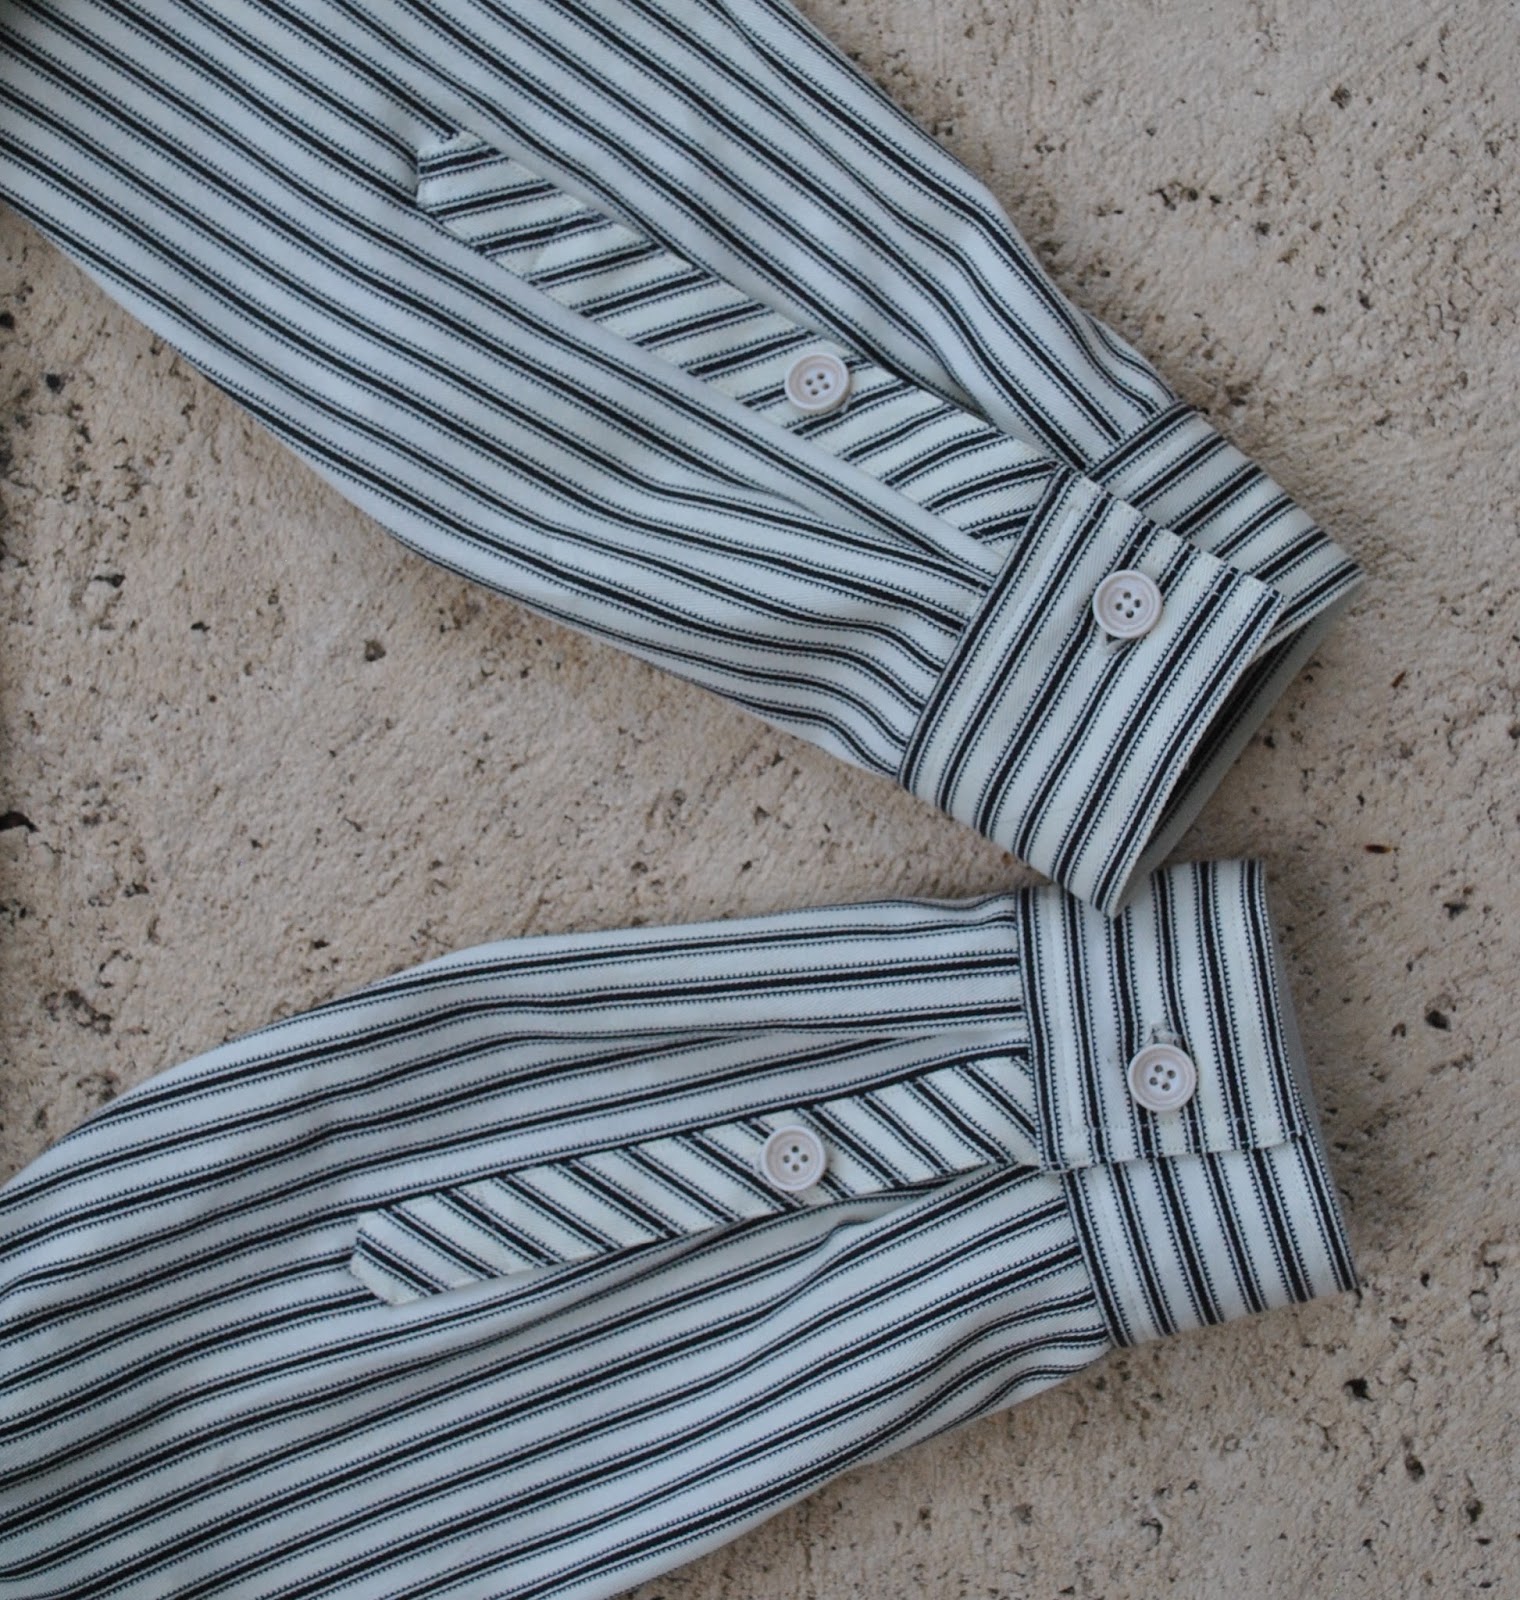
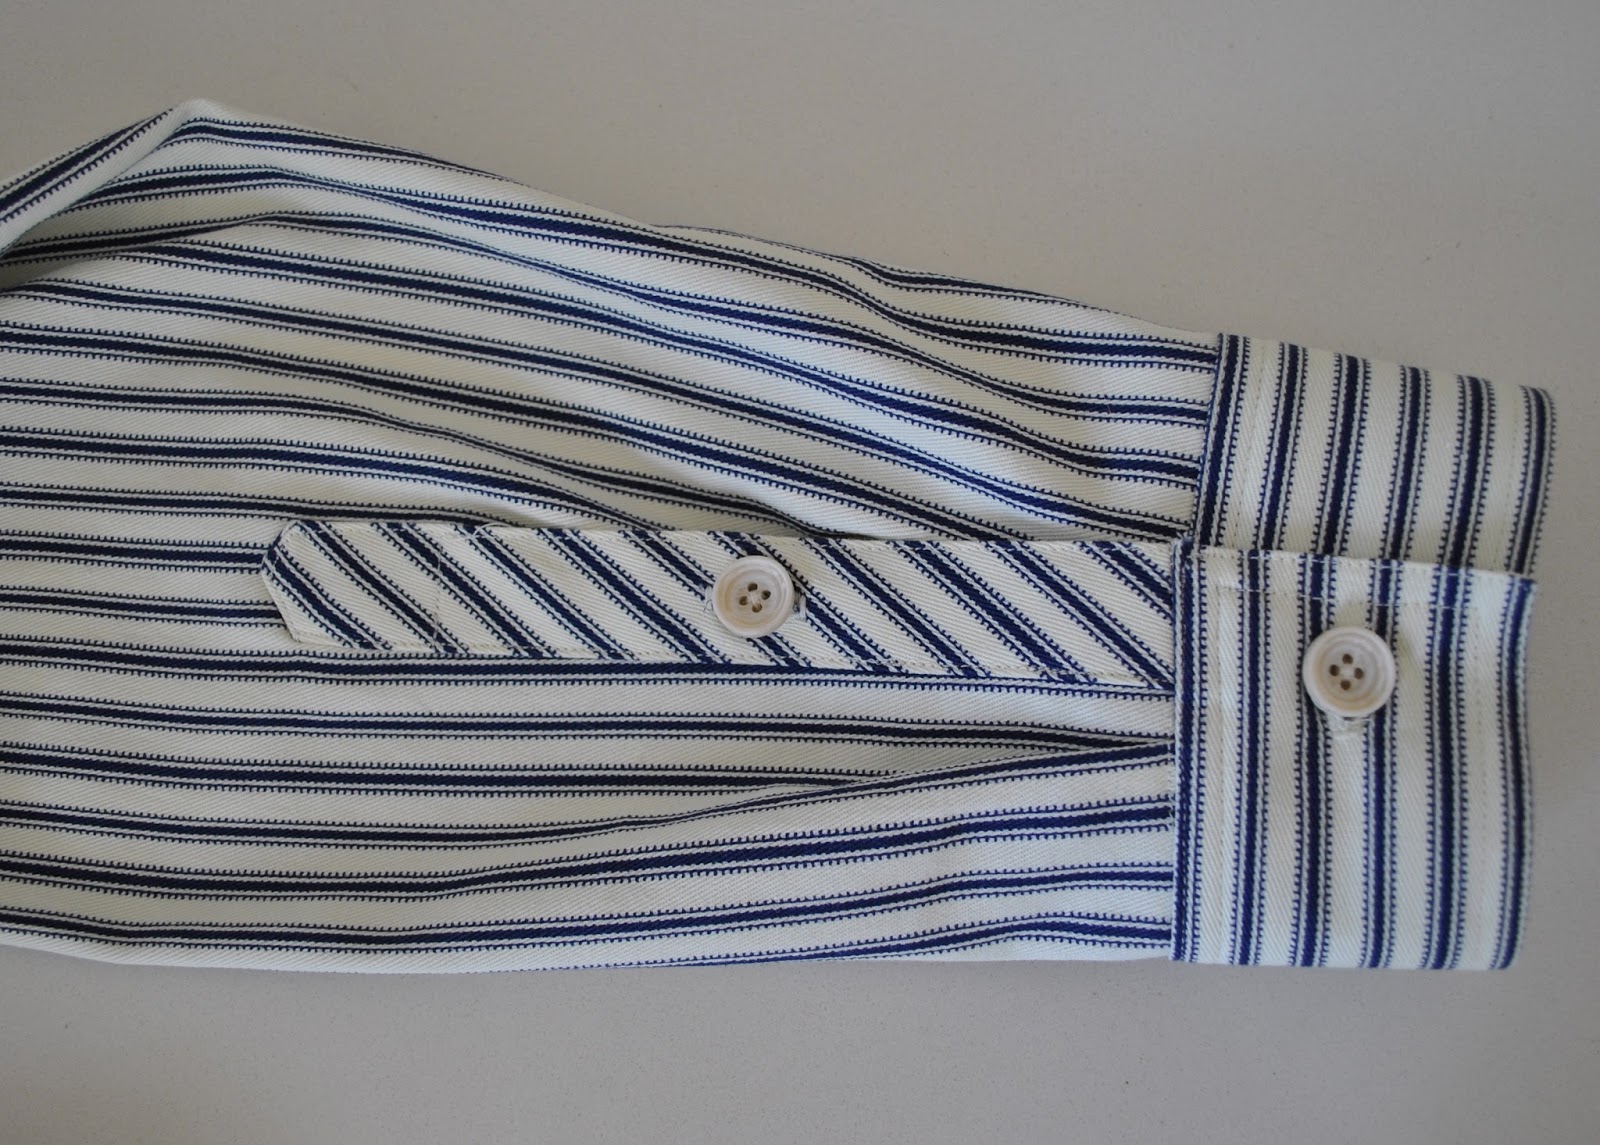
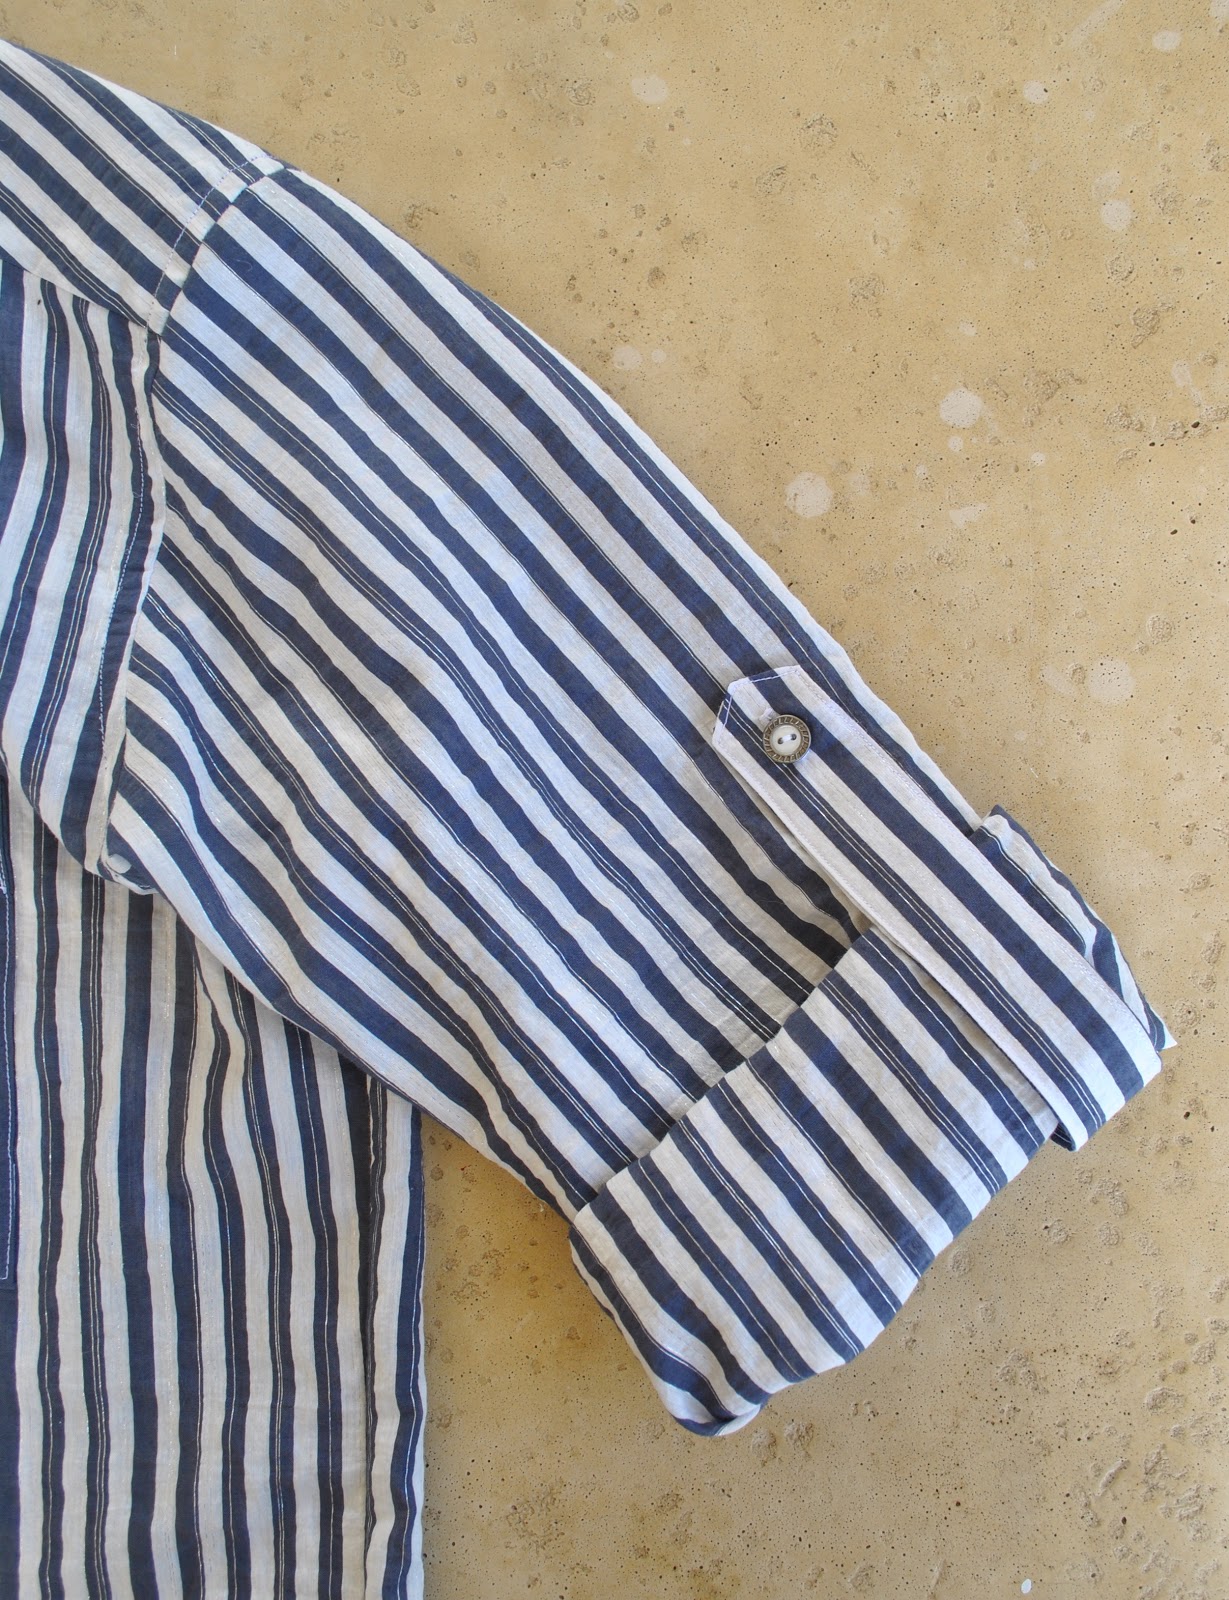
Three shirts in addition to Cassie’s outfit and Craig’s birthday shirt.  Phew!  These have kept me super busybusybusy, nose to the grindstone sewing machine for the last few weeks since we got back from Melbourne!  This is the first year I’ve made three long-sleeved shirts for Christmas, the past few years I’ve made things a little easier on myself by slipping at least one short-sleeved one in there.  The cuffs and little sleeve plackets are quite a bit of work, and a short sleeved shirt feels almost quick and easy by comparison.  In the past I’ve always given each item I make its own post, and particularly because of the amount of work that goes into a highly tailored item like a man’s shirt, I kinda reckon they deserve a post each; but this time I just couldn’t with that.  It’s all been just too much!

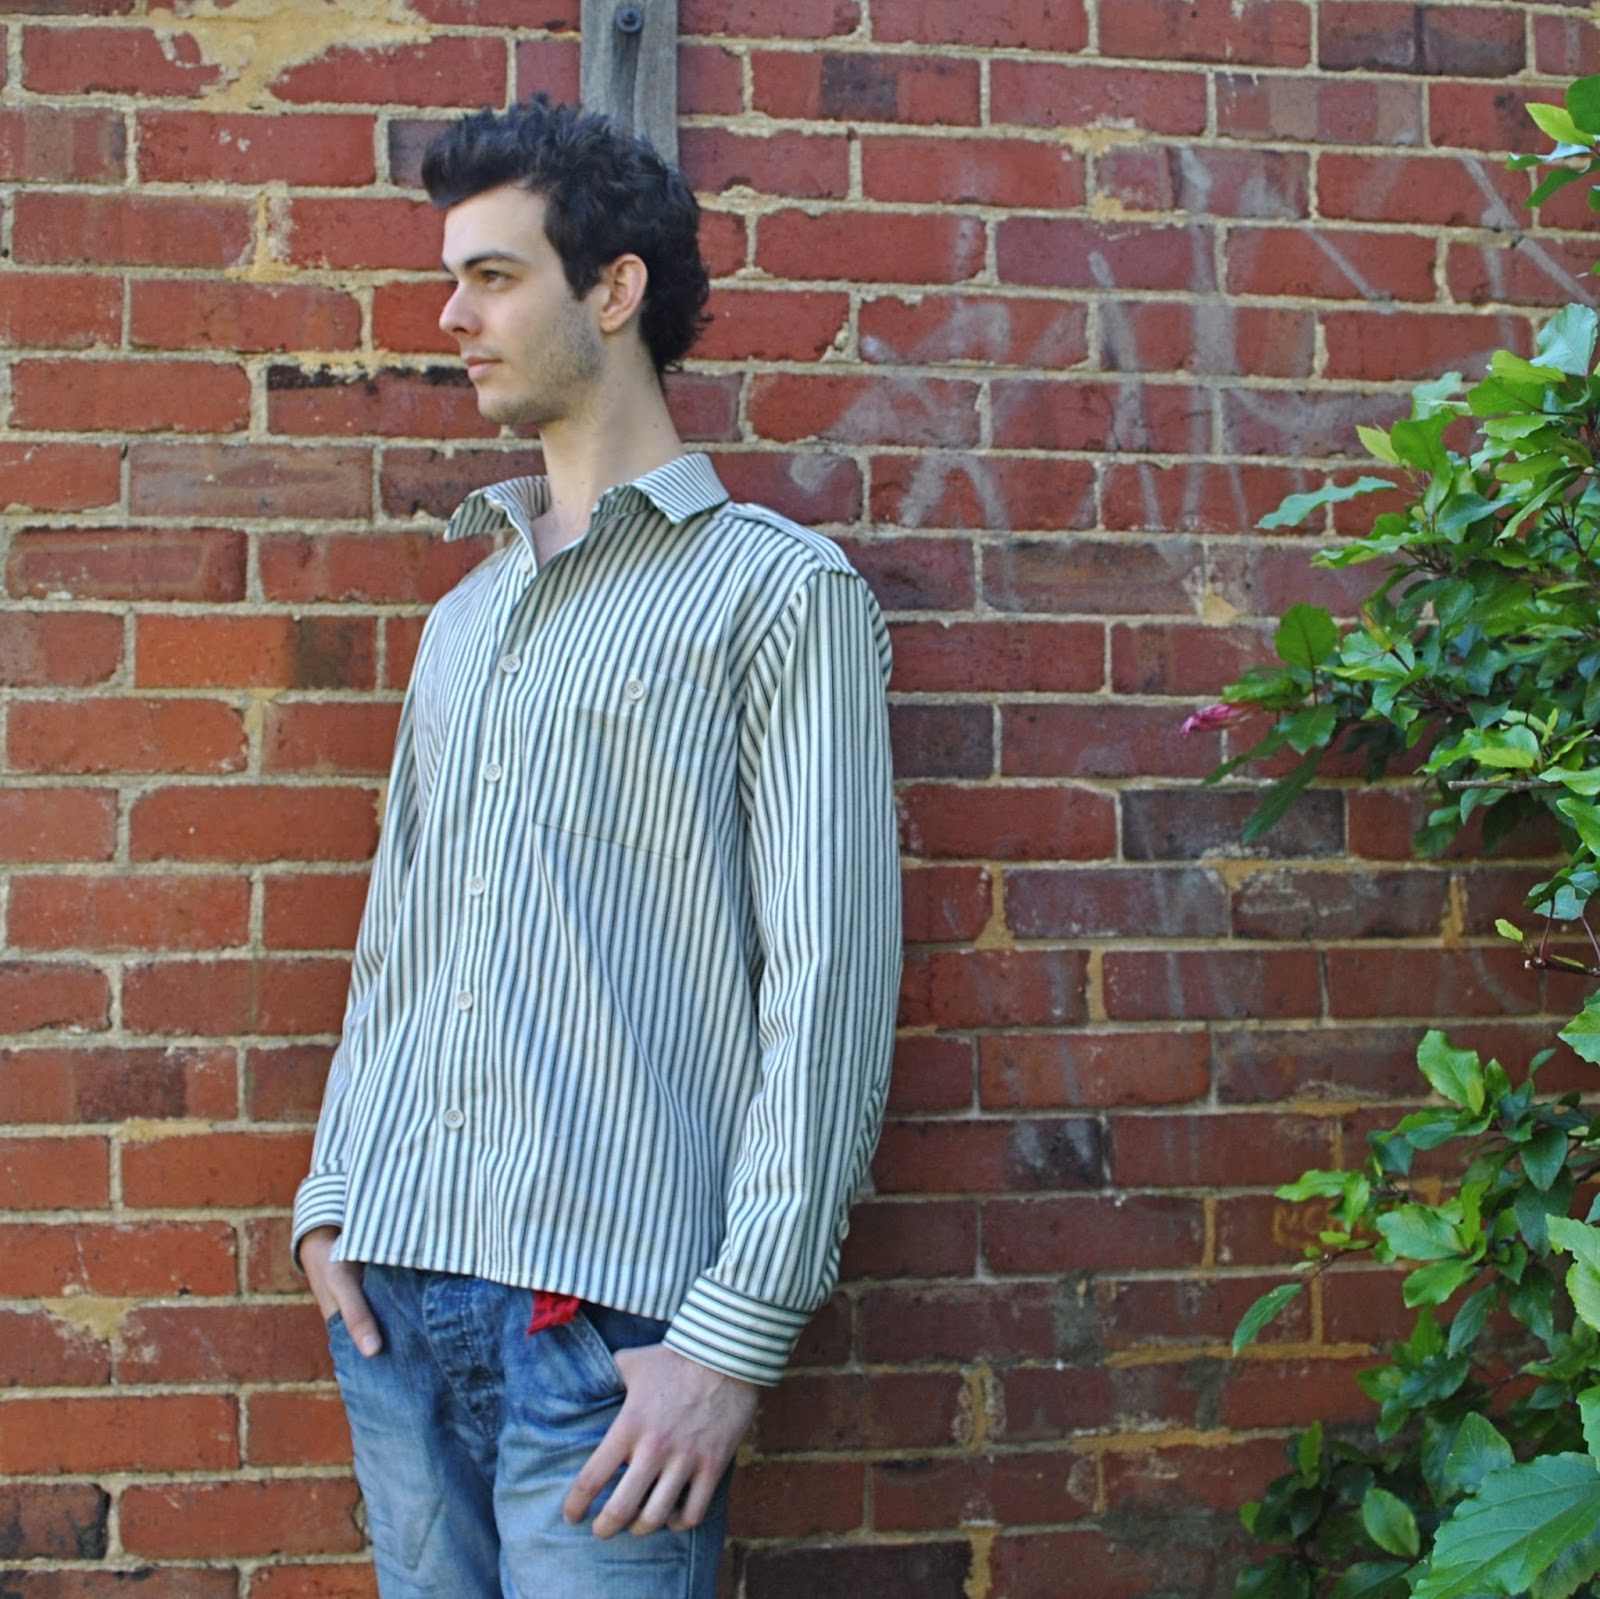
All three shirts are made using Burda 7767, with the personal fitting modifications for each of my men that I’ve fine-tuned over many many shirts.  How many of these am I up to??  Must be over 30 of them by now, I think.  

Craig’s is a white with purple pin-stripe and brown-y purple buttons, Tim’s is a charcoal with white pin/stripe and black buttons, and Sam’s is a white with blue pin-stripe and caramel-coloured buttons.  All three pin-striped linens are from Tessuti’s in Melbourne, bought during my recent girls’ weekend away with Mum and Cassie; and all the buttons are from Fabulous Fabrics.  The  white contrasting fabric is a silk/linen mix bought from Fabulous Fabrics.  I’ve totally hoarded this lovely and quite expensive stuff for aaaages and had toyed with bravely cutting into it for one for my own SWAP projects, but decided that my boys deserved the best… (deep breath, must learn to let go of precious fabrics) Fortunately I should still have enough to make something for myself.  Bonus!
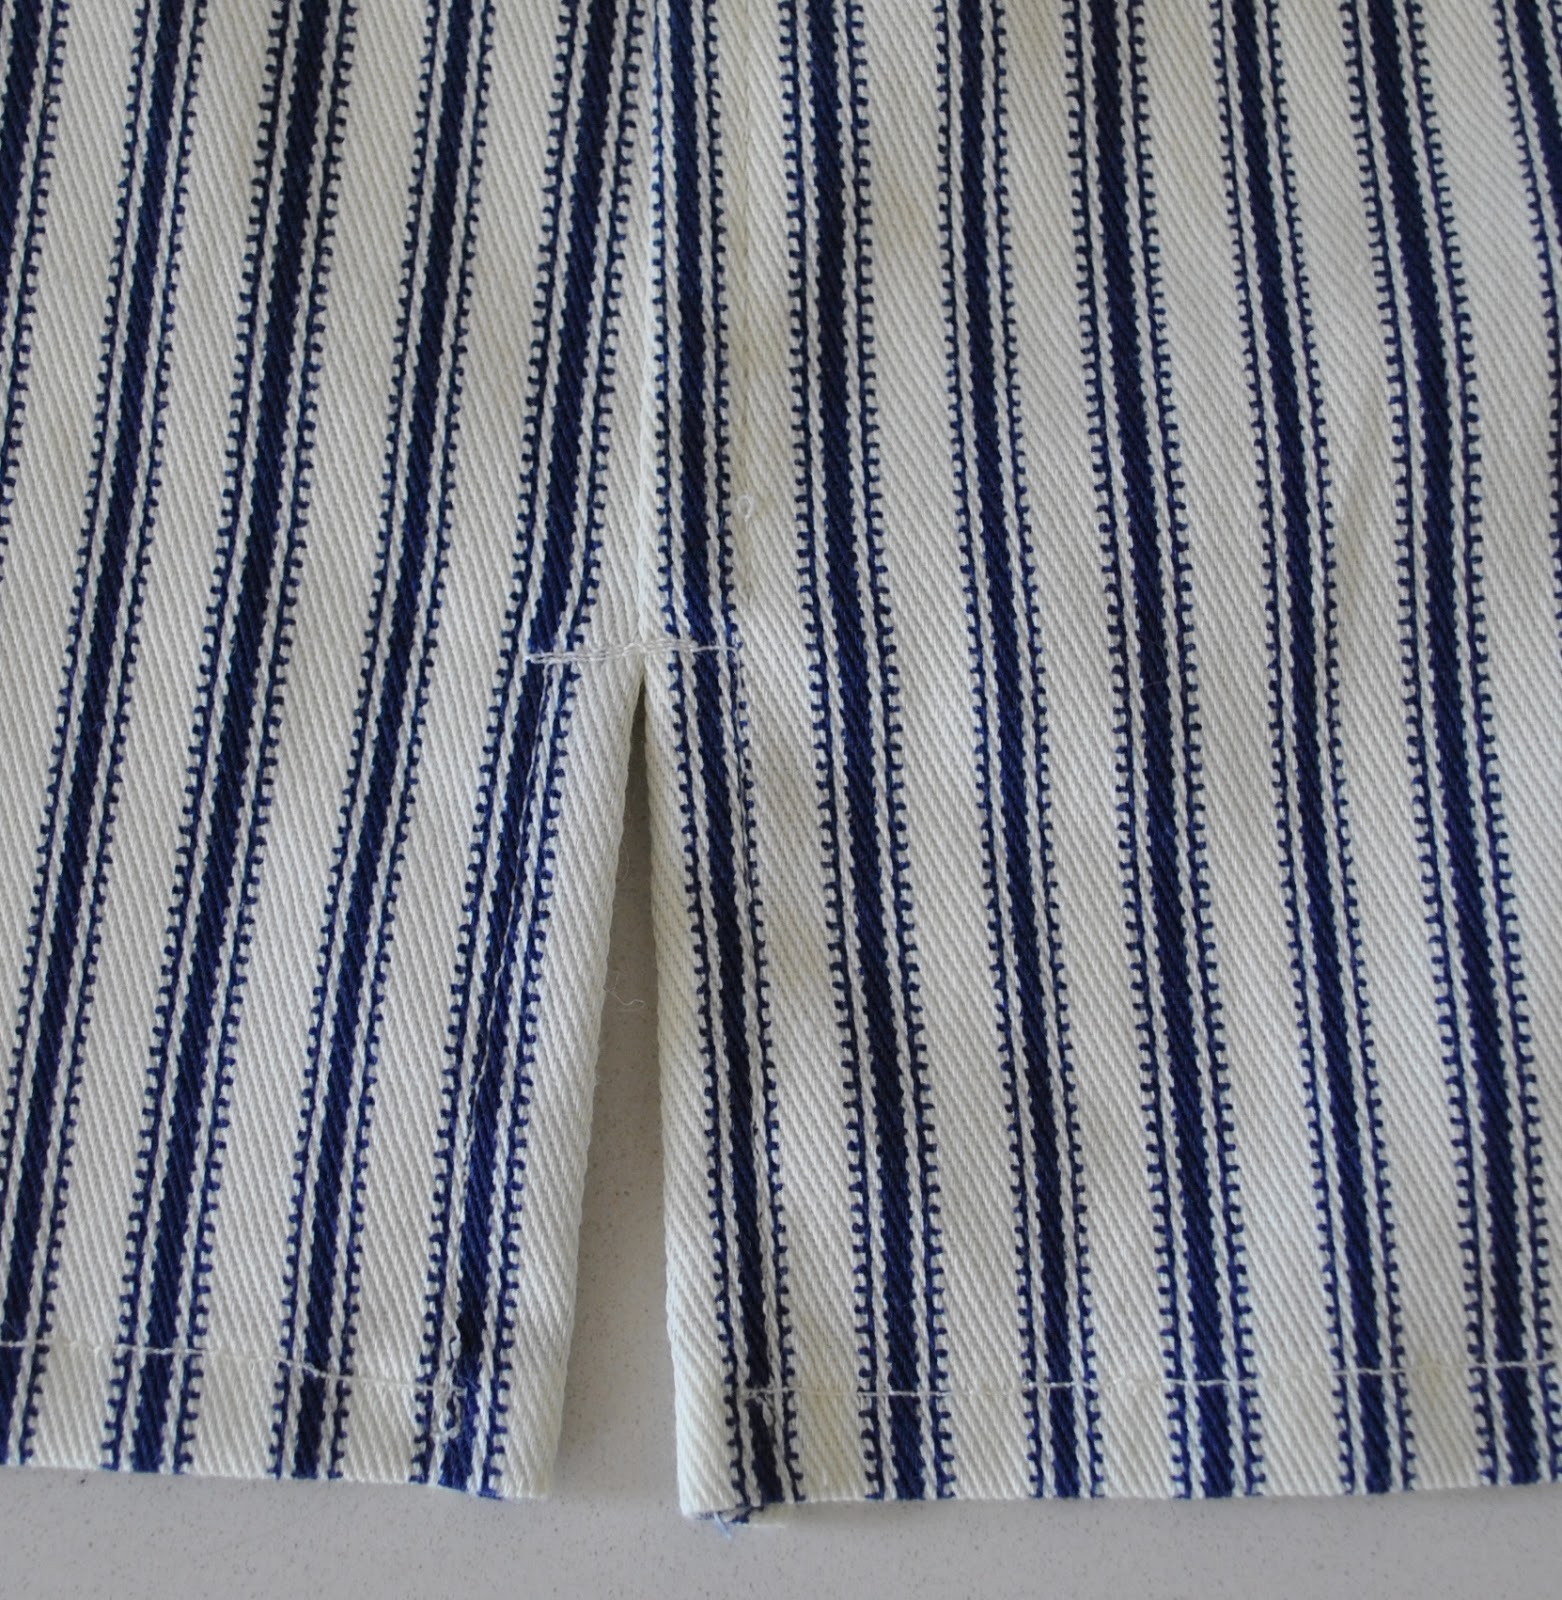
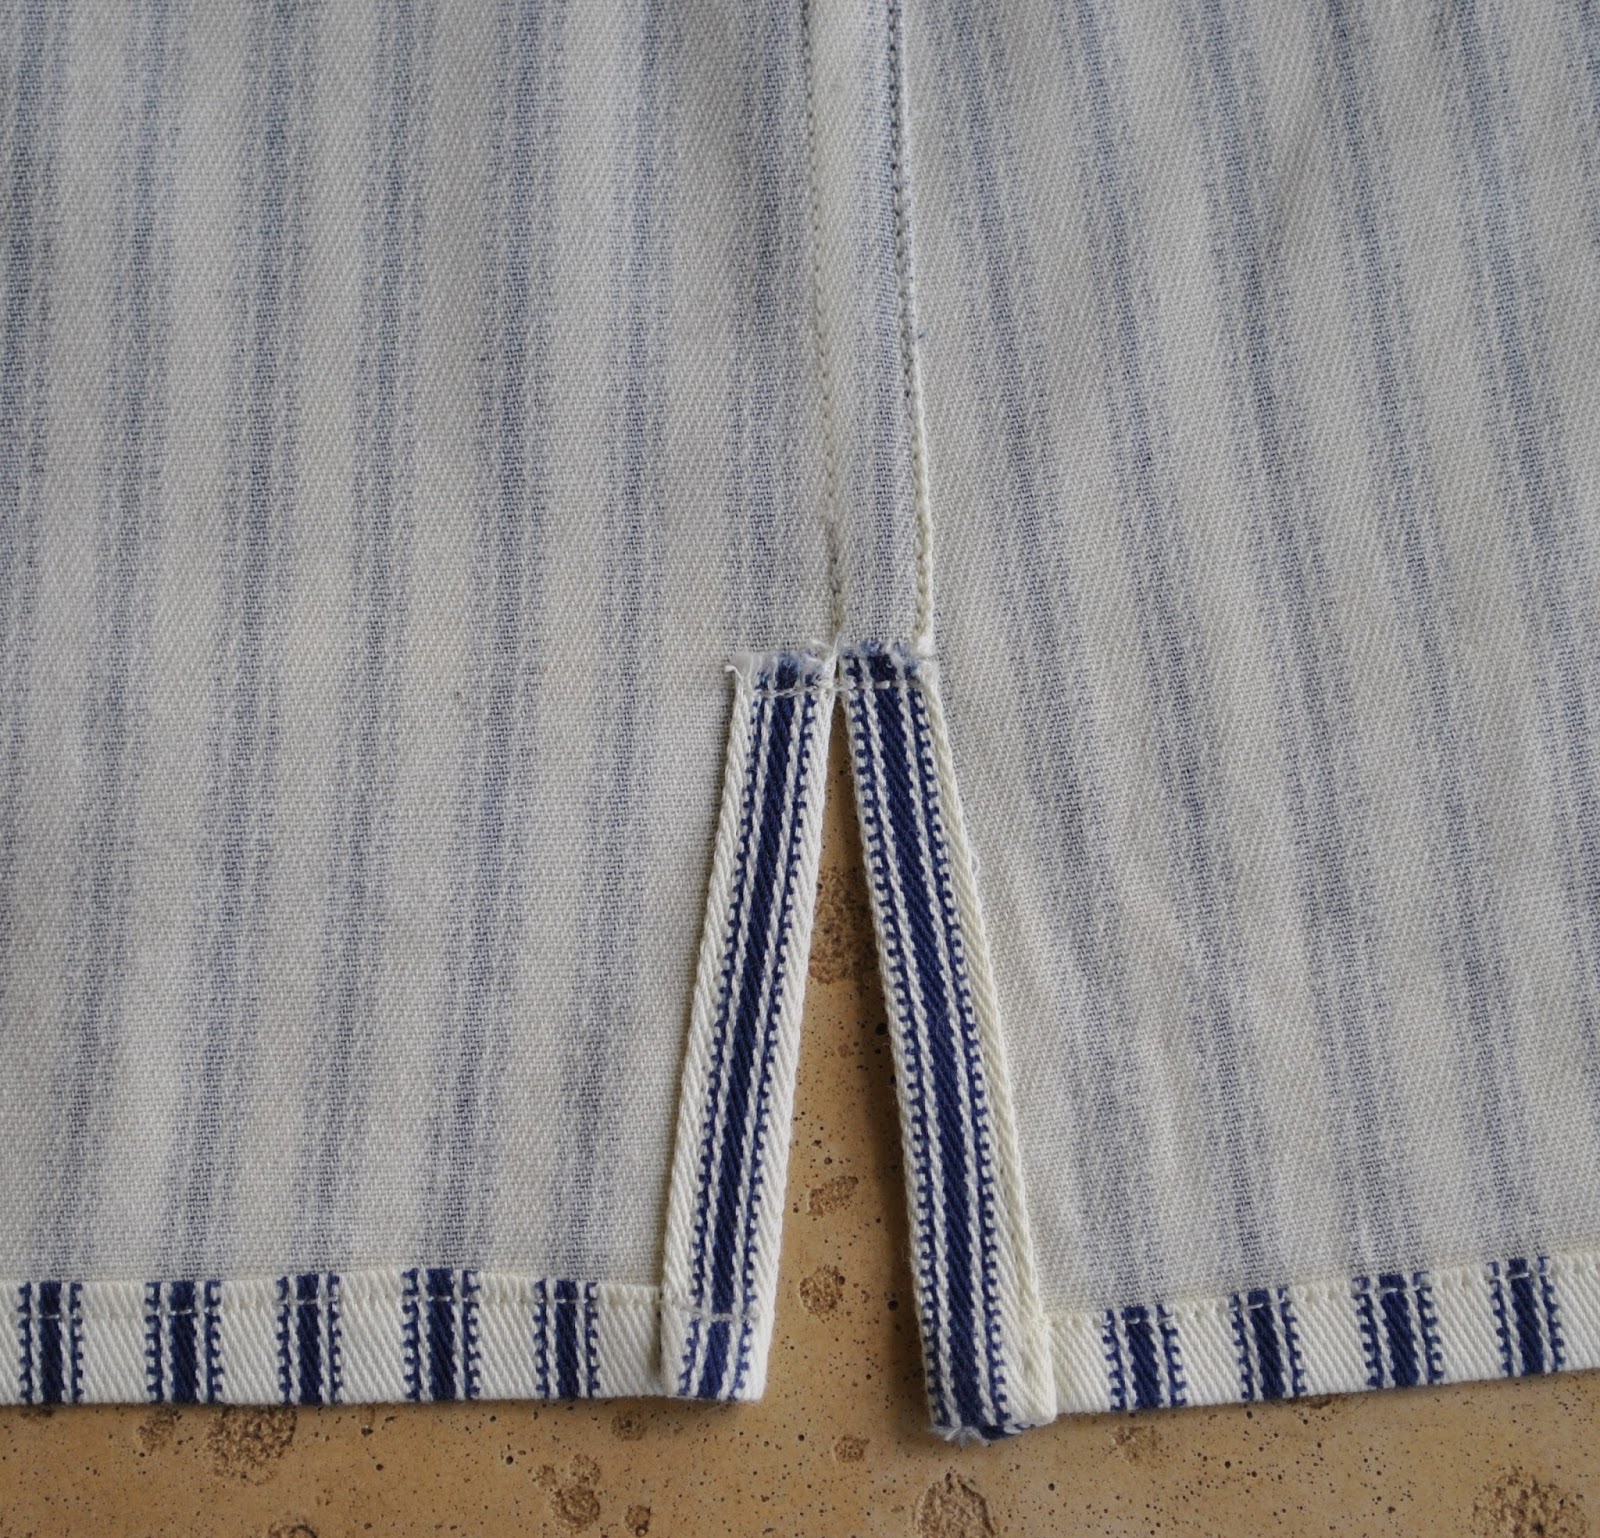
All the seams are flat-felled; I used my own tutorial for flat-felling a curved seam to get a nice finish along those sleeve caps.  Craig’s shirt has a long curved hemline because it’s more business-like, and the boys’ shirts both have straight hemlines with a lapped split side seam.

My review of this excellent pattern is here

pinterestmail

Gemini

Gemini, the twins.  
Of course my boys are not twins obviously, they are separated by several years and have one sister in between them too.  But they are both Geminis!  That picture cracks me up btw… so brotherly…  😀

So, of course the other shirt was for Tim, our eldest son!  He had a birthday recently too  🙂
The fabric for his shirt is the same that I used for Sam’s but in a different colourway; a medium weight striped cotton drill in black and cream stripes from Spotlight.  The cream background is a touch deeper in colour than the slightly lighter ivory colour that is on Sam’s navy blue and ivory shirt.
I went with an on-grain pocket this time, just for one different visual detail between the two shirts.
The other details are all almost identical: epaulettes, a smaller, slightly rounded collar, 

sleeve plackets cut on the bias.  The same buttons.

The yoke cut in two halves on the bias, with the yoke facing cut as one piece for stability reasons.  Close up, you might notice that on Tim’s shirt the black “arrow” is centred on a black stripe, whereas with Sam’s the negative space white arrow was centred on the negative space white stripe.  Little details like that tickle my fancy  🙂

Sam’s

Flat-felled armscye seam allowance as described hereflat-felled sleeve and side seams with a split hem, as detailed in the previous post.

Details:
Shirt; Burda 7767 modified, black and white striped cotton, my review of this pattern here

So, two more shirts.  Phew.  I feel like I could just about make these in my sleep now! but two in a row is just about my limit; toward the end of the second one I am getting a little shirted out and need to cleanse my palate by making something completely different before thinking about any more shirts.  Variety (in projects) is the spice of life, non?
Fortunately, my next, er make that, current project is super frivolous and super fun and I am having a ball with it.  Very very very silly and self-indulgent.  I’m having so much fun with it, that I have already roared roughly halfway through and I only bought the fabric on Saturday!  And I don’t even need it for several more weeks!!  I absolutely must slow down.  But eeeee!  It’s such a crazy and ridiculous thing, and I cannot wait to wear it and show it!

And I’m totally embarrassed that I mixed up Gemini and Cancer… when I did Cancer last month, honestly I didn’t even realise I had got it wrong until yesterday when I was browsing through birthday cards in the newsagent.  I think I got confused because my boys both have birthdays in June and are Gemini, and I just thought to myself, well that is going to work out nicely and then made a mental leap that ok then May must be Cancer and didn’t twig that Cancer came after.  You can tell I’m not too crash hot on horoscopes.

pinterestmail

Navy stripes

It was Sam’s birthday a few days back and I made a shirt for him. 

The fabric is from Spotlight, a medium-weight cotton twill in a heavy cream colour with navy blue stripes.  Ahem, stripes again, I know; but hey.  It’s so hard to find different and nice mens’ shirting fabric.  Seriously hard.  Fortunately, Sam loves stripes, so our quest to stockpile the world’s largest, handmade, striped men’s shirt collection is going great guns, thanks.

Buttons; a light bone colour, also from Spotlight.  Y’know, Spotlight gets a lot of flack for the hit and miss nature of their stuff.  And then every now and again, just when you’re about to throw up your hands in despair, you find some gems.  So I’m eating my words right now.  These buttons, and this fabric?  Awesome-sauce!
So, do I have any new revelations about tailoring a man’s shirt?  No.  Am I being mind-numbingly repetitive.  Um, probably!  I used the same ol’ pattern too.  I reeeeeeally should get some new patterns, honestly.  And no; it wasn’t really a huge birthday surprise, since for one, he did actually request it.  But I still wrapped it up so he could unwrap it on the day!
It’s made to his fit preference; loose and boxy enough to wear open over Tshirts and hoodies, if he so desires, which he frequently does. 
Features…  Epaulettes.  

There are one or two bias details, for some visual interest.  Pocket on the bias, with a pen compartment.  Sleeve plackets cut on the bias, and I loooove how this looks!  Plus, it was heaps easier having no stripe matching to worry about here  😉

Straight hem, with split side seams.
ETA: at right, showing the inside view where the flat-felled seam allowance meets the split side seam… (I will do a small tute on how I do my take on this, if anyone is interested?)

The collar is cut with much smaller, less pointy wings than the pattern piece.

I’ve been accustomed lately to flat-felling the armscye seam allowances, and French-seaming the sleeve and side seams.  Then I read an opinion somewhere that French seams were “feminine” and not suitable for a men’s shirt at all… that flat-felled seaming throughout is the only acceptable finish to a man’s shirt.  O rly??  Well, that burst my bubble.
So I felt sufficiently shamed into going with flat felled seams throughout.  Doing this up inside the sleeves of a shirt is not exactly easy.  I got a pretty nice finish, but it was fiddly business.

The yoke.  
Drastic fabric shortages   an inspired creative decision dictated that I cut it as two halves on the bias.  The yoke facing is a regular, on-grain, single piece of fabric for stability, cut from plain white cotton.

Shirt; Burda 7767 modified, navy and cream striped cotton twill.  My review of this pattern is here, and my previous Burda 7767 makes are here and here.

pinterestmail

Stripey Sam; Sam’s Christmas shirt

Next up; Sam! and I made a shirt for his Christmas pressie too.  Ohhhh yes, I have been a very very busy bee lately!
I used Burda 7767, and blue and white striped fabric from the Fabric Store, Melbourne…  bought during our trip there in September.  I think it is a cotton rayon mix, very crisp, crackly and crinkly, and it has silver lurex threads running randomly through as well.  I bought the white and silver buttons from Fabulous Fabrics.  This version has long sleeves, which can be rolled up and held in place by an arrowhead tab that buttons onto the sleeve, and a single pocket.
I received some complimentary comments about the stripe matching of the pocket on Craig’s birthday shirt, and thank you  🙂 but the truth is that stripe matching a patch pocket is NOTHING compared to the stripe matching in this shirt. 
Particularly in the case of the two sleeve cuff plackets.   I performed multiple repeats of teeny tiny precision measurements…  checking and re-checking where the stripes were going to fall on the plackets in relation to the sleeve.  Anyone who has ever sewn a tailored detail like a sleeve cuff placket will know the precision required to get these looking nice and even and perfect … and to get the stripes matching exactly like this as well?    (self high-five)  Truly I consider this one of the highest sewing achievements of my year!

Sleeve tabs… 

Of course the stripes on the pocket match up to those on the shirt too….

The armscye seams allowances are flat-felled on the inside using a gathering stitch on the sleeve cap to achieve this neatly on a curved seam; and the sleeve and side seams are French seams.

Shirt; Burda 7767 modified, my review of this pattern here; blue and white striped cotton mix with a silver lurex stripe

pinterestmail

Blue-grey hoodie

I have made a hoodie; this one for Sam.  
Sam is my quiet one; he never asks for anything, on the contrary he will firmly and testily deny that he ever needs new clothes or any new belongings at all.  But one of the fabrics in my stash was this beautifully soft jersey; a very fine quality knit in a shade of cool grey/blue that I think really is perfect for Sam’s fair colouring.  So I set about making him something new anyway.
The fabric is part of a fabulous stash I bought at the Morrison remnants sale.  This particular “remnant” was about 5-6m and cost $15.  I know, right?!  That Morrison yearly sale is well worth checking out!!

For a pattern, I used the same old hoodie of Craig’s that I used to draft his new hoodie, altered slightly to custom fit Sam.  Namely, I narrowed the body and shoulders, and raised the height of the hood.  The hood on the original Tshirt is a bit short, not really sized to be actually worn comfortably over a man’s head.  However I know Sam probably will want to wear it up every once in a while, so made it a touch taller than the original.
kbenco and Rachel both expressed an interest in seeing more specifics of that interesting combined collar/hoodie, thank you for the request, ladies!  So I took a few snaps to illustrate how it all goes together…

The hood is composed of two shapes; a hood piece cut less wide than normal, and a U-shaped collar piece, slightly wider at the bottom of the U than at the edges, that forms a combined hood edging and collar.

Sew the two hood pieces right sides together just like normal.

 Sew the two short ends of the U-shape together, right sides together, on each piece.

Lay these two pieces together, right sides together, and sew together around the entire inner shorter edge of the curve.  Turn out and press.  One layer is the outer collar; the other the facing.

Measure and mark for the holes for the drawstring in the collar; mine are situated 1cm below the lowest point of the inner curve, and 12cm apart.

You can make life easy for yourself and hammer in some eyelets, but if you are me and like to make challenges for yourself where none need exist; embroider some nice little eyelets using embroidery thread…
Only in the outer collar layer of course!  snip a tiny X for the drawstring hole.  Leave the inner (facing) layer un-snipped!!
With a double strand of embroidery thread, sew a running stitch circle around the snipped X

Back where you started, commence embroidering tight blanket stitches, situated hard up against each other, around the hole.  When completed, run the thread around underneath the stitching at the back to finish off.

From now on treat both collar layers as one; lay the right side of the collar piece against the right side of the hoodie piece, lining up the top centre seams and ensuring the hood edges join at equidistant points from the centre front of the collar piece.  Stitch together, and press.
Again treating both collar layers as one; lay the completed hood right sides together against the neckline of the top, ensuring centre fronts align and the hood seam is in the exact centre back.  Stitch together and press.

The drawstring is simply a 1m long, skinny strip of the fabric, with the long raw ends folded in on themselves, and topstitched down from the centre out to each end with a wide zig-zag stitch.  The original had fancy cover-stitching to finish it off, not having a cover-stitch machine this is my best it’ll-do.  And a perfectly fine and dandy option too, in my opinion!  Thread it through the collar and up around the hood edging with a safety pin, and tie each end off with a little knot to stop it slipping back through the hole.

The hoodie has a kangaroo pocket and a wide self-band at the lower edge.  The sleeves are hemmed using a twin needle.

Once it was finished and Sam put it on; he quietly, briefly, but spontaneously, mentioned that he liked it.  I count that as a fairly enthusiastic expression of approval of the new hoodie.

pinterestmail

The Boatshed

Isn’t it nice when you open a winter woollies drawer and discover a little something that you had finished off a few months ago, in the height of summer when you could not wear it, and suddenly you can wear it??  That is the serendipitous case with this blue cardigan… 

My location today is the Crawley Boatshed which has been here since the 30’s; a real iconic photo-spot here in Perth, it’s practically a cliche to take a photo here actually.  I felt extremely un-innovative standing here…  😀   On any weekday one has the spot to oneself, but over the weekend there is bound be a bridal party or two, or three, rocking up to have their portraits taken here.  I don’t usually like to be so obvious in my choice of locations; but it is such a beautiful little spot and it seemed logical that I should use it at least once, someday!  And since I was dropping Sam off at uni any way… so, yah…
Plus maybe I am getting a little sentimental; in a few days we are heading off on our trip, and since I am soon going to be featuring beautiful locations from another part of the world (well, hopefully!) I thought I could show off some of the nicest of the spots in my own hometown too.
So I hope my me-made May photos are almost like an enjoyable little peek at Perth; and not merely a trivial documentation of my wardrobe and what I am wearing  🙂

Details:
Tshirt; the top part of a dress drafted from the Japanese pattern book Pattern Magic 3 by Tomoko Nakamichi, white cotton jersey, details here; later chopped up to make this and a few other Tshirts, details here
Skirt; Burdastyle magazine 10/2010, skirt 136 (the Karl Lagerfeld skirt) lengthened, black suiting, details and my review of this pattern here
Cardigan; Garter stitch jacket from Jo Sharp Knit 6, in Jo Sharp Silkroad DK Tweed in colour Iceberg (the individual pattern is available by digital download here)  details here

Shoes; Enrico Antinori, from Zomp shoes

Picture taken around 12pm;  Temperature at the time 19C.
Overnight low: 11C; Today’s high: 21C
Cloudy and fine

Later edit: I almost forgot!  Today Sam wore the jacket I made for him…
Sams; jacket; Burda 7767 modified, navy corduroy, details here
pinterestmail

Comfort…

On a sartorial note; today was one of those disastrously uninspired days when I contemplated and rejected just about everything in my wardrobe.  Everything felt hideous to me!  Finally just settled on this blah blah ensemble… not very put together or super-wow or anything, but just some favourite comfy and easy-to-wear pieces.
And obviously, neither could I be bothered with an exciting photo  🙂
It is silly, because I had good intentions this morning and wanted to look nice since I had a very important function lined up: my children were taking me out today for an early Mother’s Day treat.  We had to have it today, since for the real Mother’s Day next Sunday, all of my children are working for some part of the day or another and there will be no overlapping free time in which I can spend time with all of them together.  So, today we had a firm date.  We went to Koko Black, and ate toasted sandwiches and drank hot chocolate and chatted about everyone’s lives and what we were all doing at the mo’ and it was so so so nice to hang out with them and laugh together and really listen to each other… I had the most wonderful-lest time.
I’m on cloud 9 even now.
Oh, what was I saying?  Oh yeah, I wanted to look nice for our outing, but in the end I just could not get inspired.  But who cares?  They didn’t mind.  Of course it didn’t matter a jot what I was wearing.

Picture taken around 2pm;  Temperature at the time 22C.
Overnight low: 13C; Today’s high: 23C 

Forecast was for thunderstorms and rain, but has actually been fine all day with both cloudy and sunny patches.  Maybe a dozen raindrops?  (sigh)  At least we got some rain yesterday.

Details:
Shirt; Burda 7767 modified, blue chambray cotton, details here
Skirt; originally Burda 7863 jeans, beige corduroy, details here, later converted into a skirt, details here
Shoes; Bronx, from Zomp shoes

And in a super synchronised synergy, wait for it; two of my children came downstairs rocking me-made items today!  Cassie wearing the little layered skirt I made for her using the leftovers of my Japanese wool/silk, and Sam the corduroy coat I made for him last winter.
Sigh.
I am so lucky to have them.

Cassie’s skirt; Vogue 8363 modified, rust-red wool/silk mix bought in Tokyo, details here and my review of this pattern here
Sam’s jacket; Burda 7767 modified, navy corduroy, details here

pinterestmail

The Daughter of Woman

I am paying homage to “The Son of Man” the 1964 painting by Rene Magritte.
Today’s mini-challenge within the me-made May group is to be pictured with food, or to be eating or drinking something.  So I took inspiration from that famous work of art, hehe.
Incidentally, this is also my morning tea.  
The artist later ate her subject.
🙁 for the orange

The Son of Man, Rene Magritte, 1964

Picture taken around 9.30am;  Temperature at the time 20C.
Overnight low: 16C; Today’s high: 23C 

It is very humid and the promised rain eventuated… we are getting plenty of it today!
And going by the forecast we are in for a lot more.  You may be interested to know that in Perth rain is a very very welcome occurrence, we really do not get enough.  Makes for a lovely lifestyle I agree, but the farmers will be happy today!
Details:
Top; Vogue 1247, lightweight orange cotton, details and my review of this pattern here
Skirt; Vogue 1247 lengthened and lined, curtaining fabric, satin lining, details here, and my review of this pattern here
Shoes; Enrico Antinori, from Zomp shoes
Brolly; Charlie Brown, from David Jones
And today is another joyful day of me-made synergy within my household; I was happy this morning to see Sam wearing his shirt I made for him, for Christmas last year.  A me-made bonus day!
Sams’ shirt; Burda 7767 modified, white and navy check polycotton, details here
pinterestmail
Switch to mobile version
↓