Tag Archives: Turia

a patchwork pinafore and some other things

hello!  I’m back with a few further “things I have made” ….

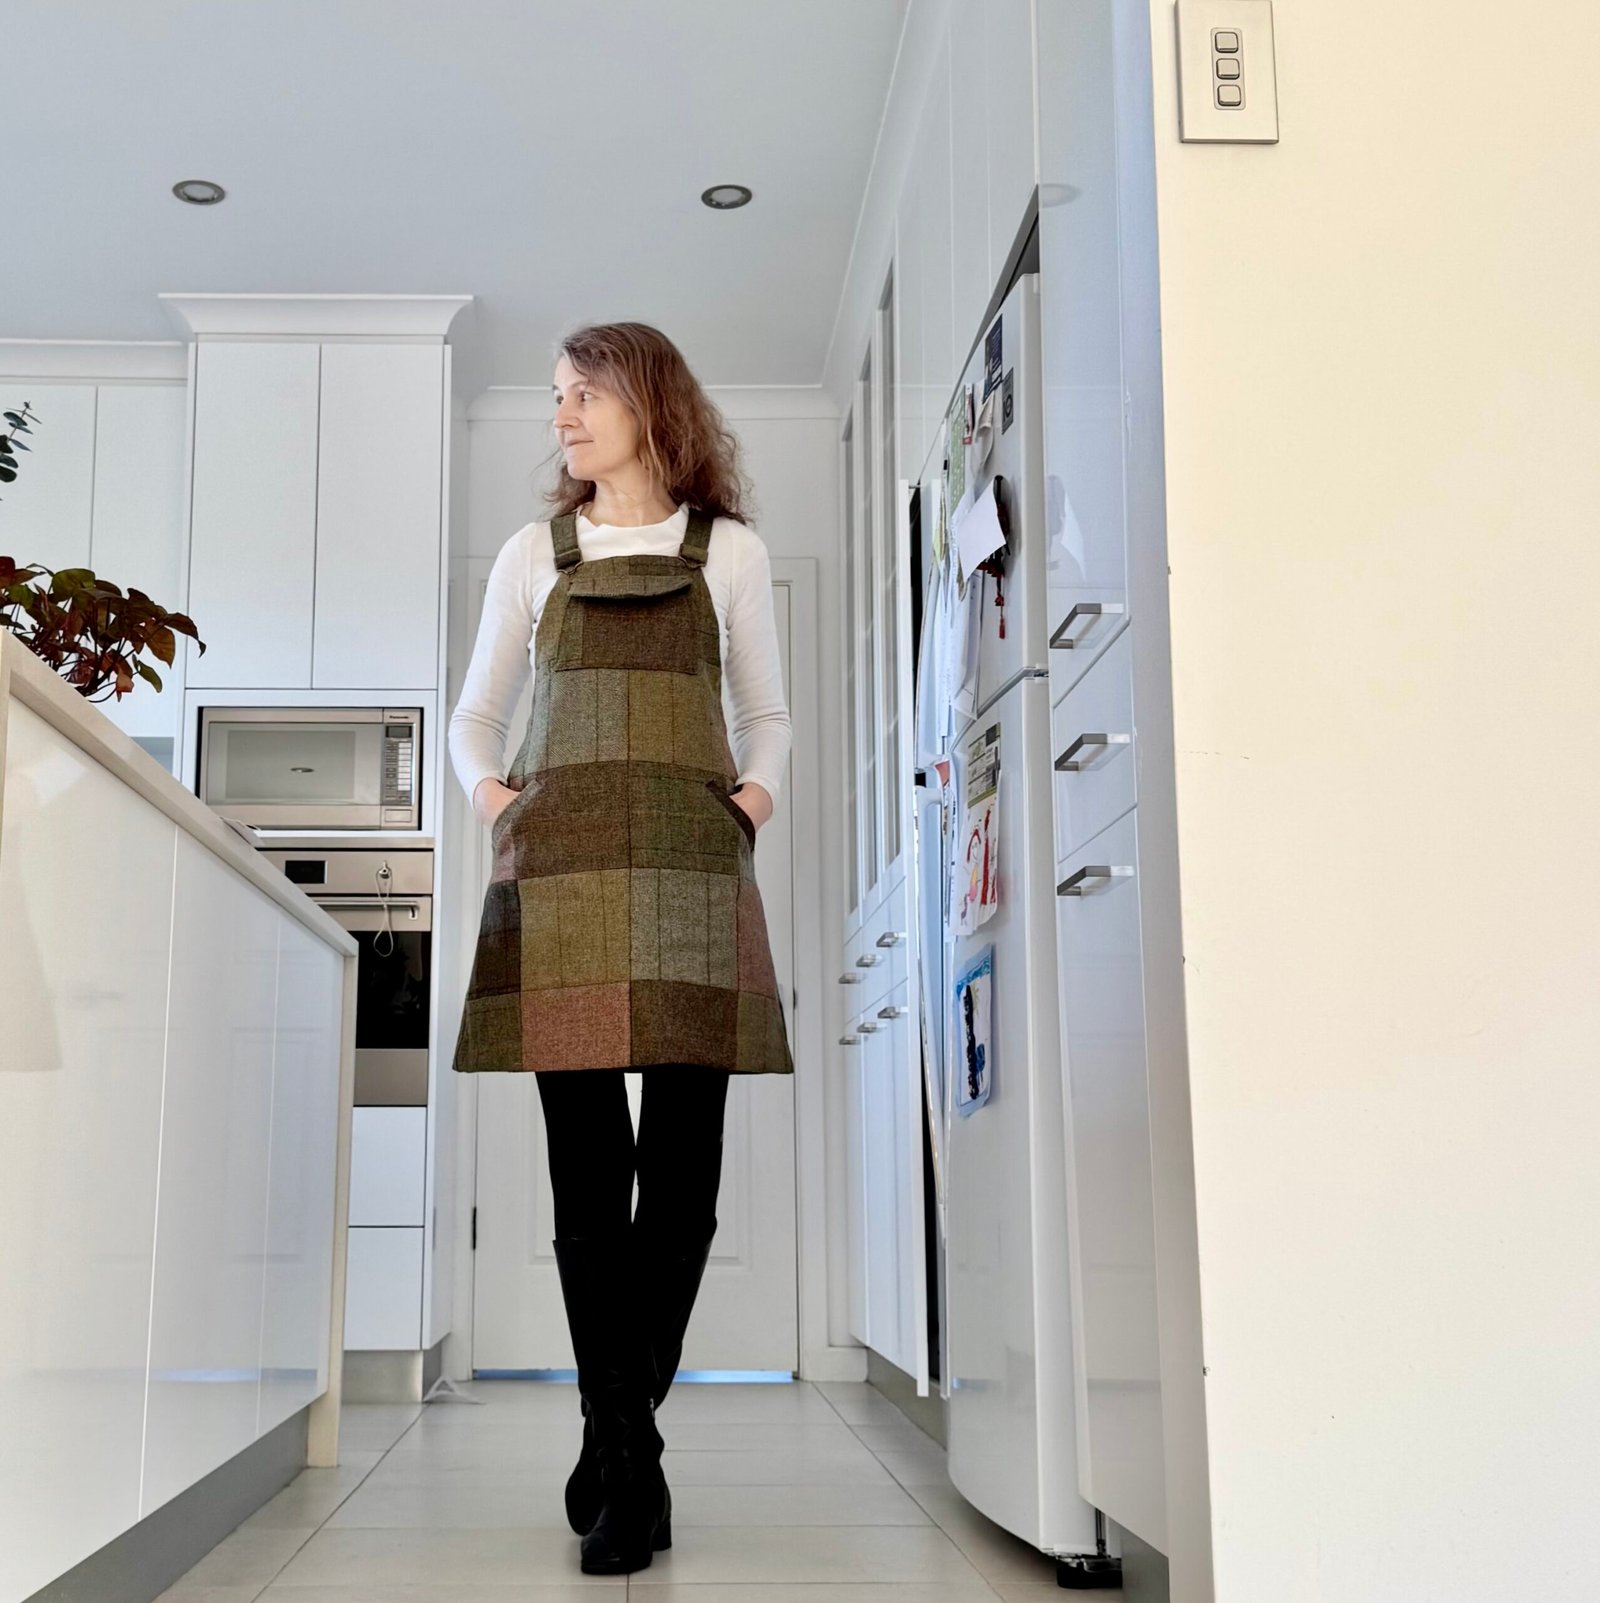
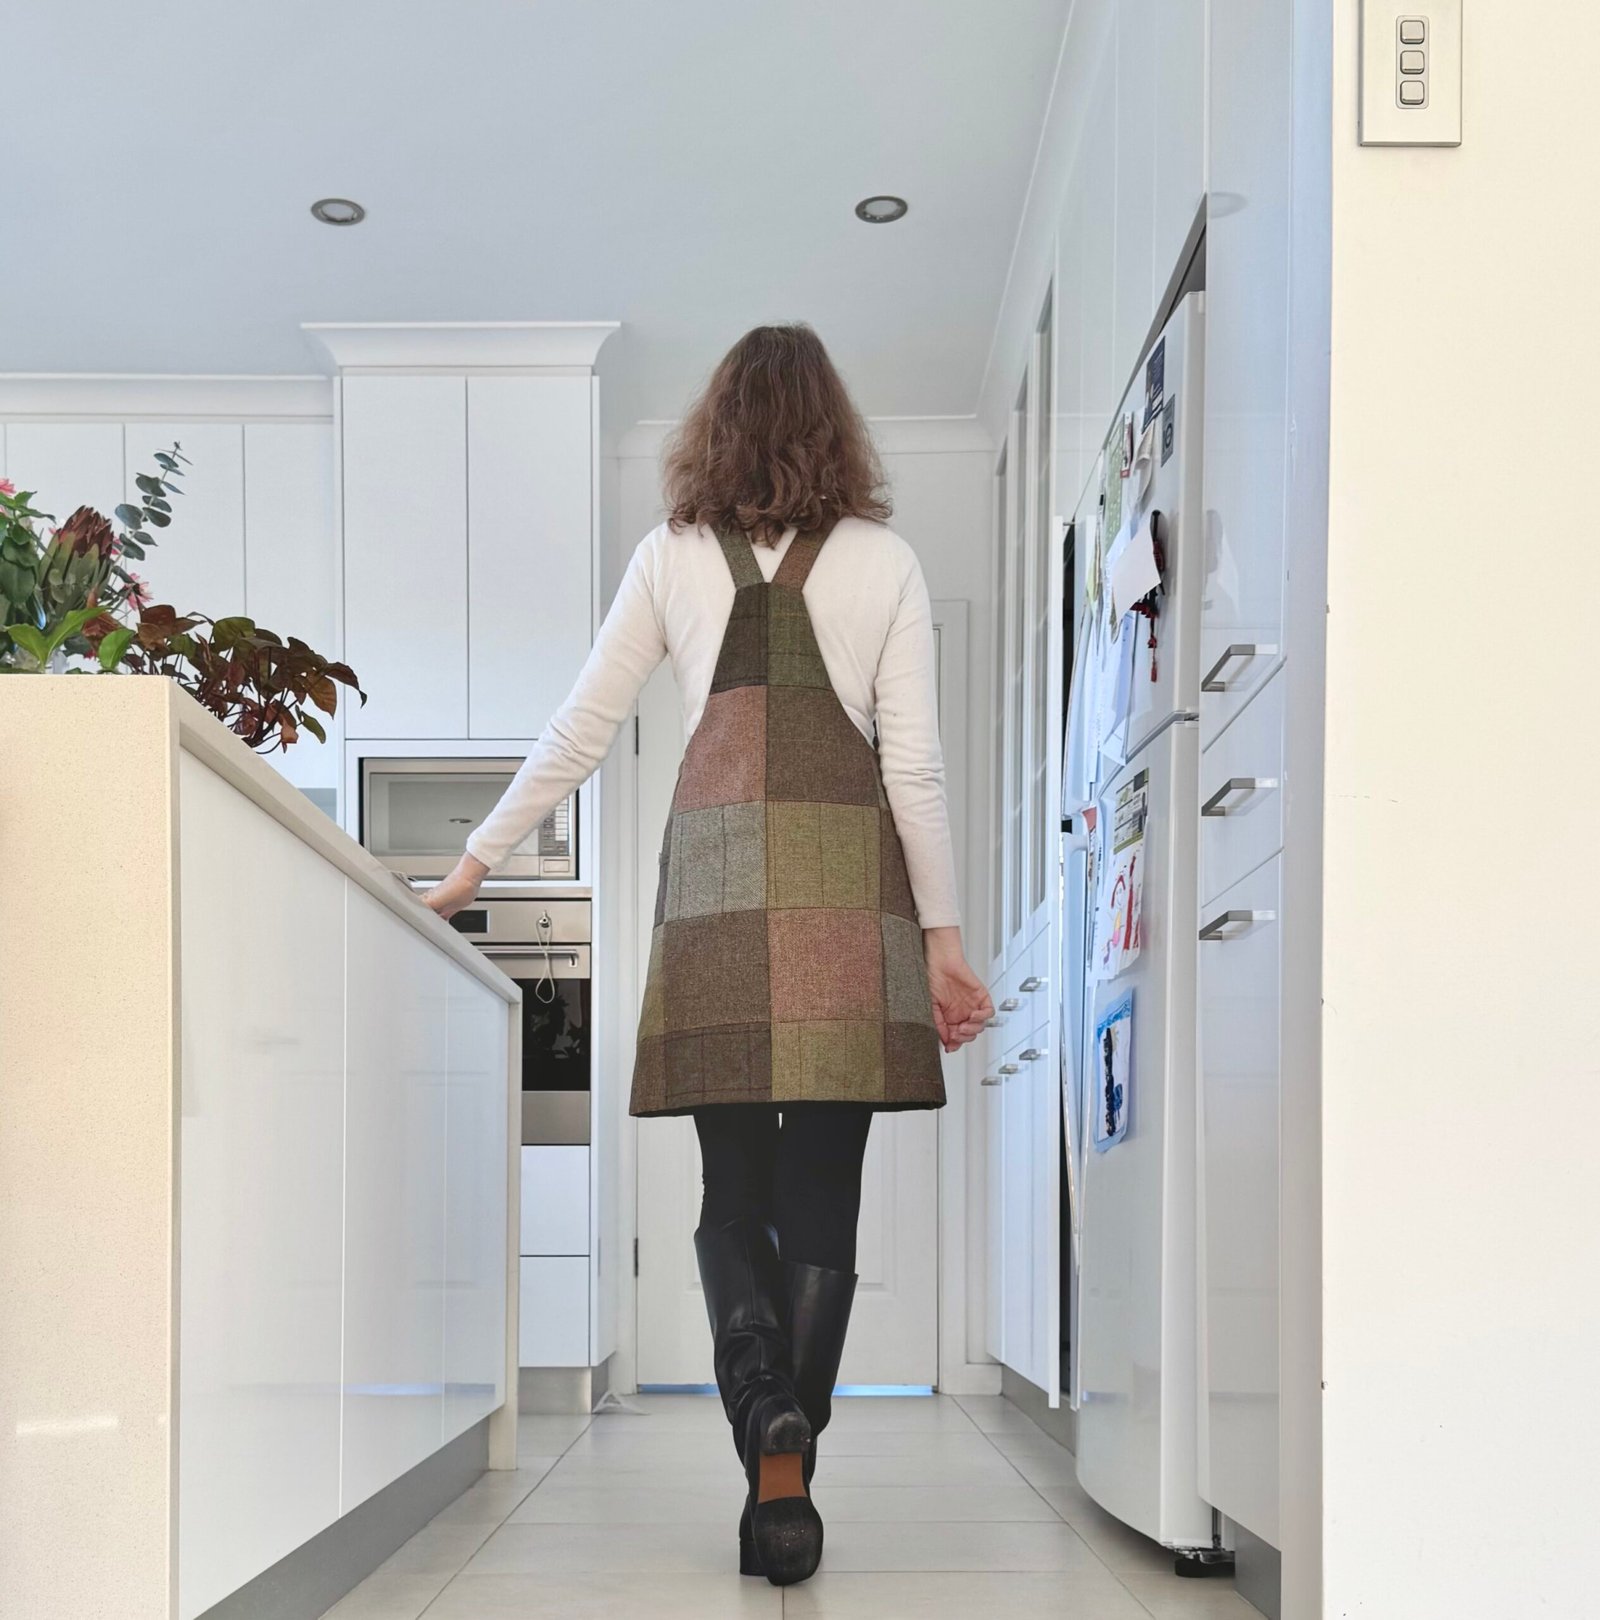
1) Finished only yesterday is this new patchwork pinafore….  Mum bought a little bundle of Irish tweed cut-offs during a visit to the UK years ago.
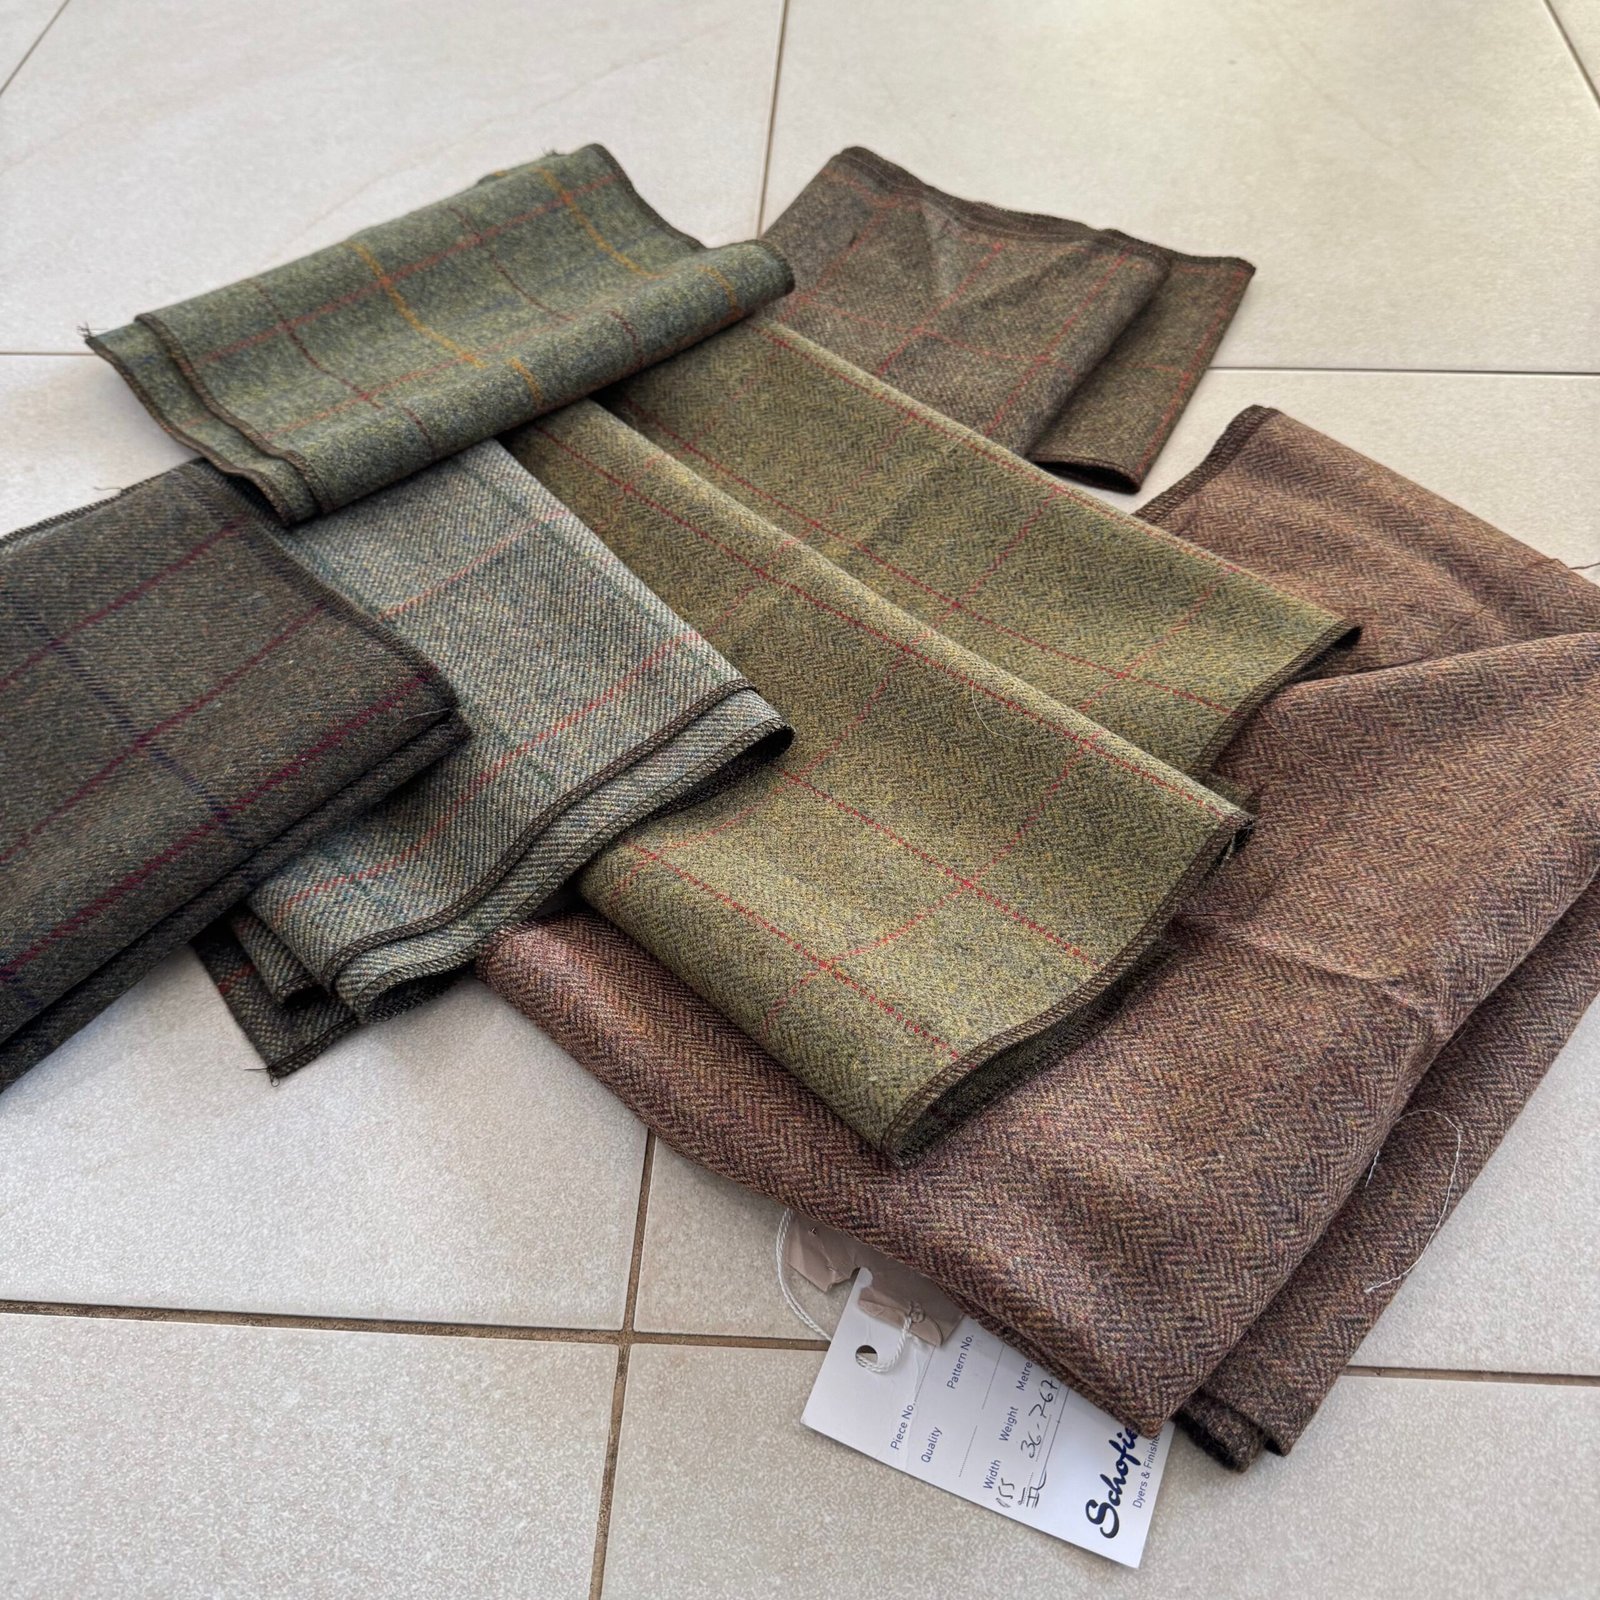
I admit to being quite intimidated by this lovely stuff for a long time!  but as my policy for the past few years is to sew my stash completely, the time came to step up, get brave and cut into it.  I used a pattern partly based upon the Pauline Alice Turia dungarees pattern, but as I’ve unfortunately thrown out my copy I made a new pattern by laying down my pink pinafore and tracing around it.
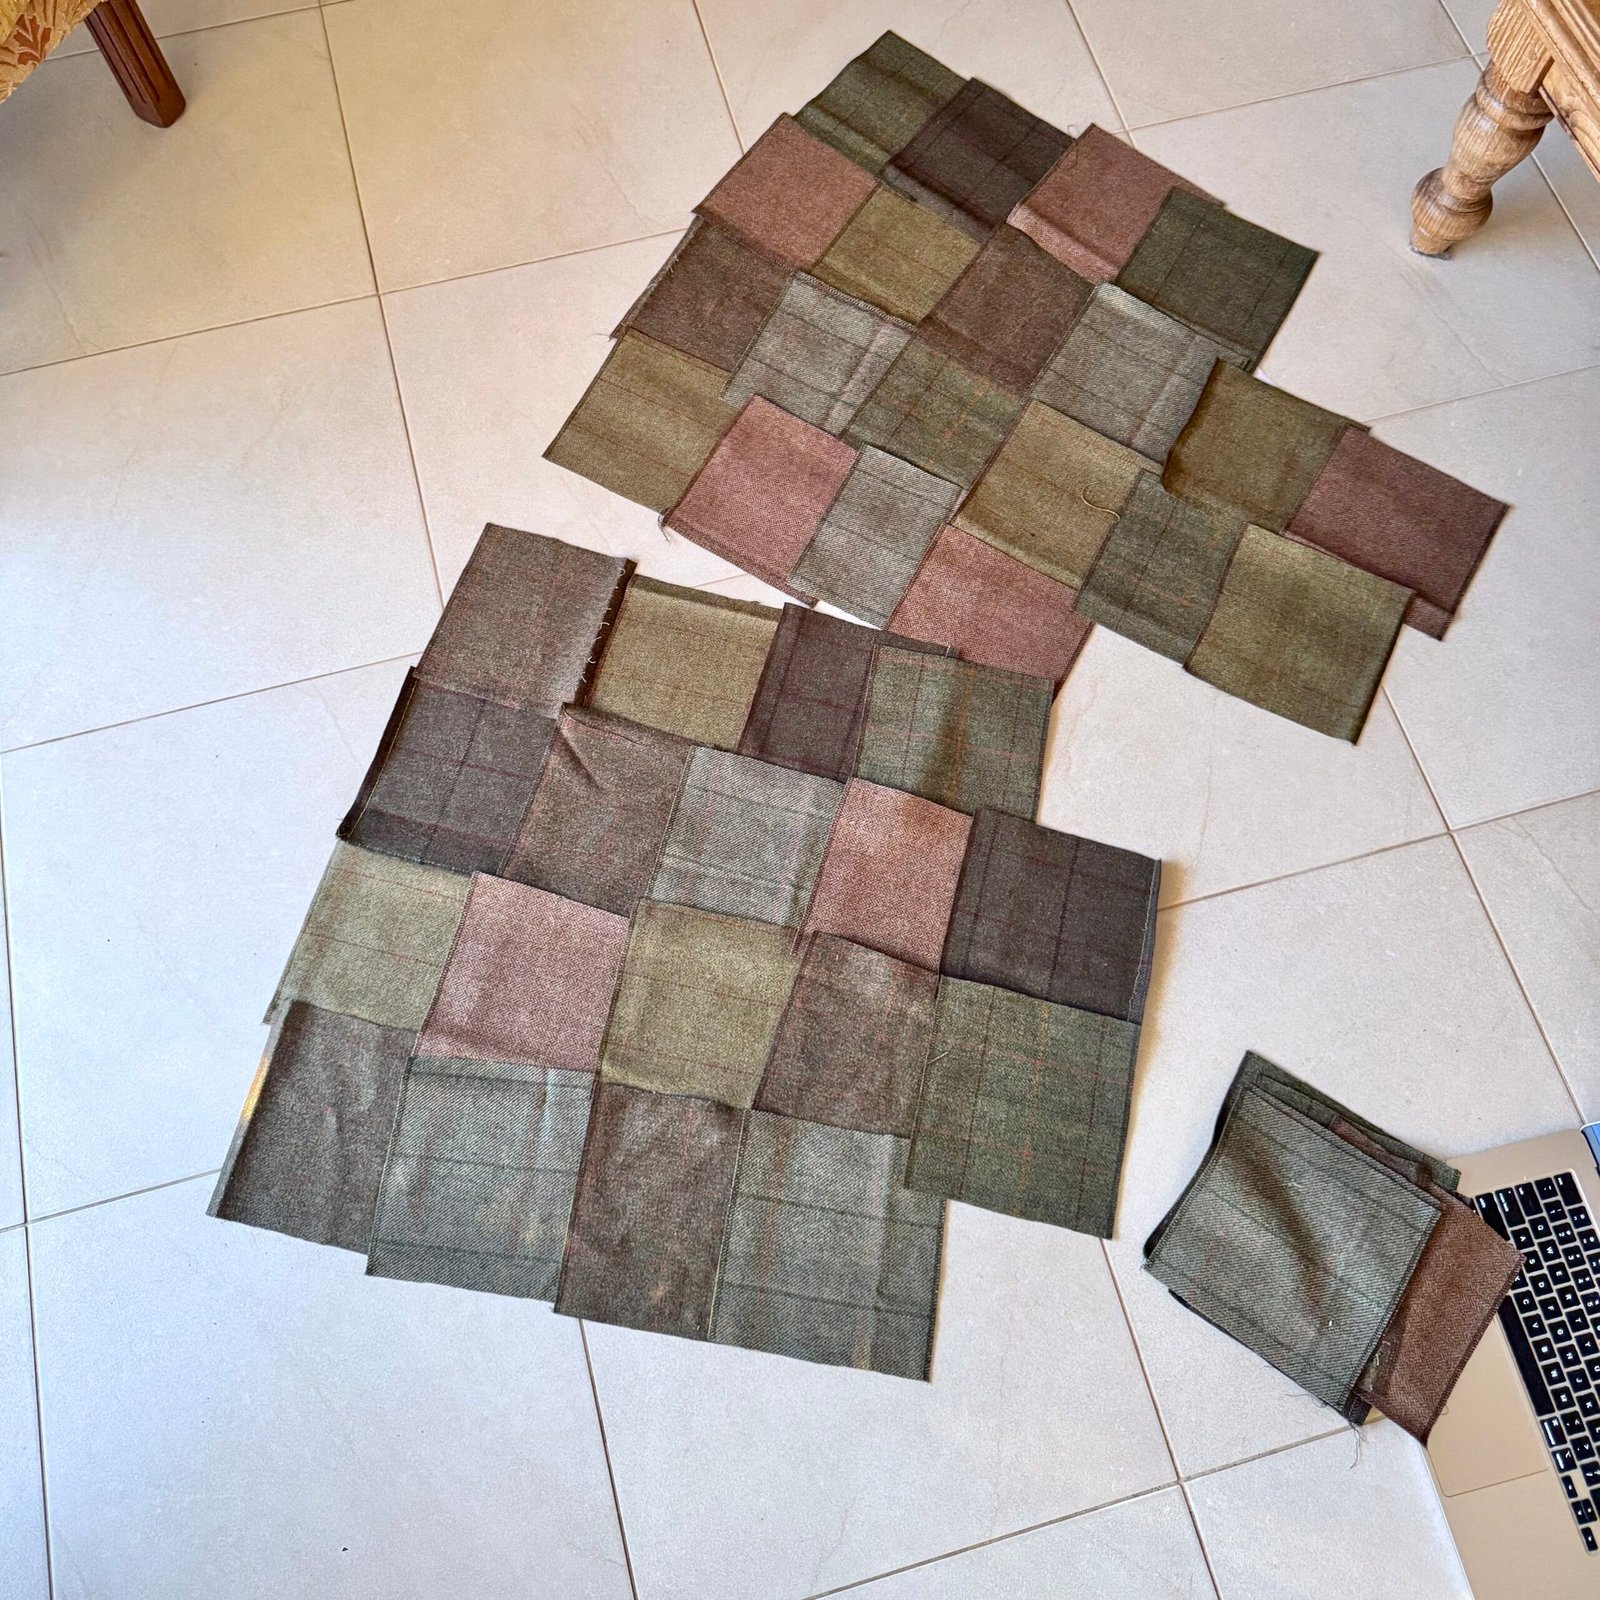
I cut the tweed into equal sized squares, dimensions based upon the narrowest of the lengths, overlocked all edges, arranged and joined them so as to fit the pattern pieces.
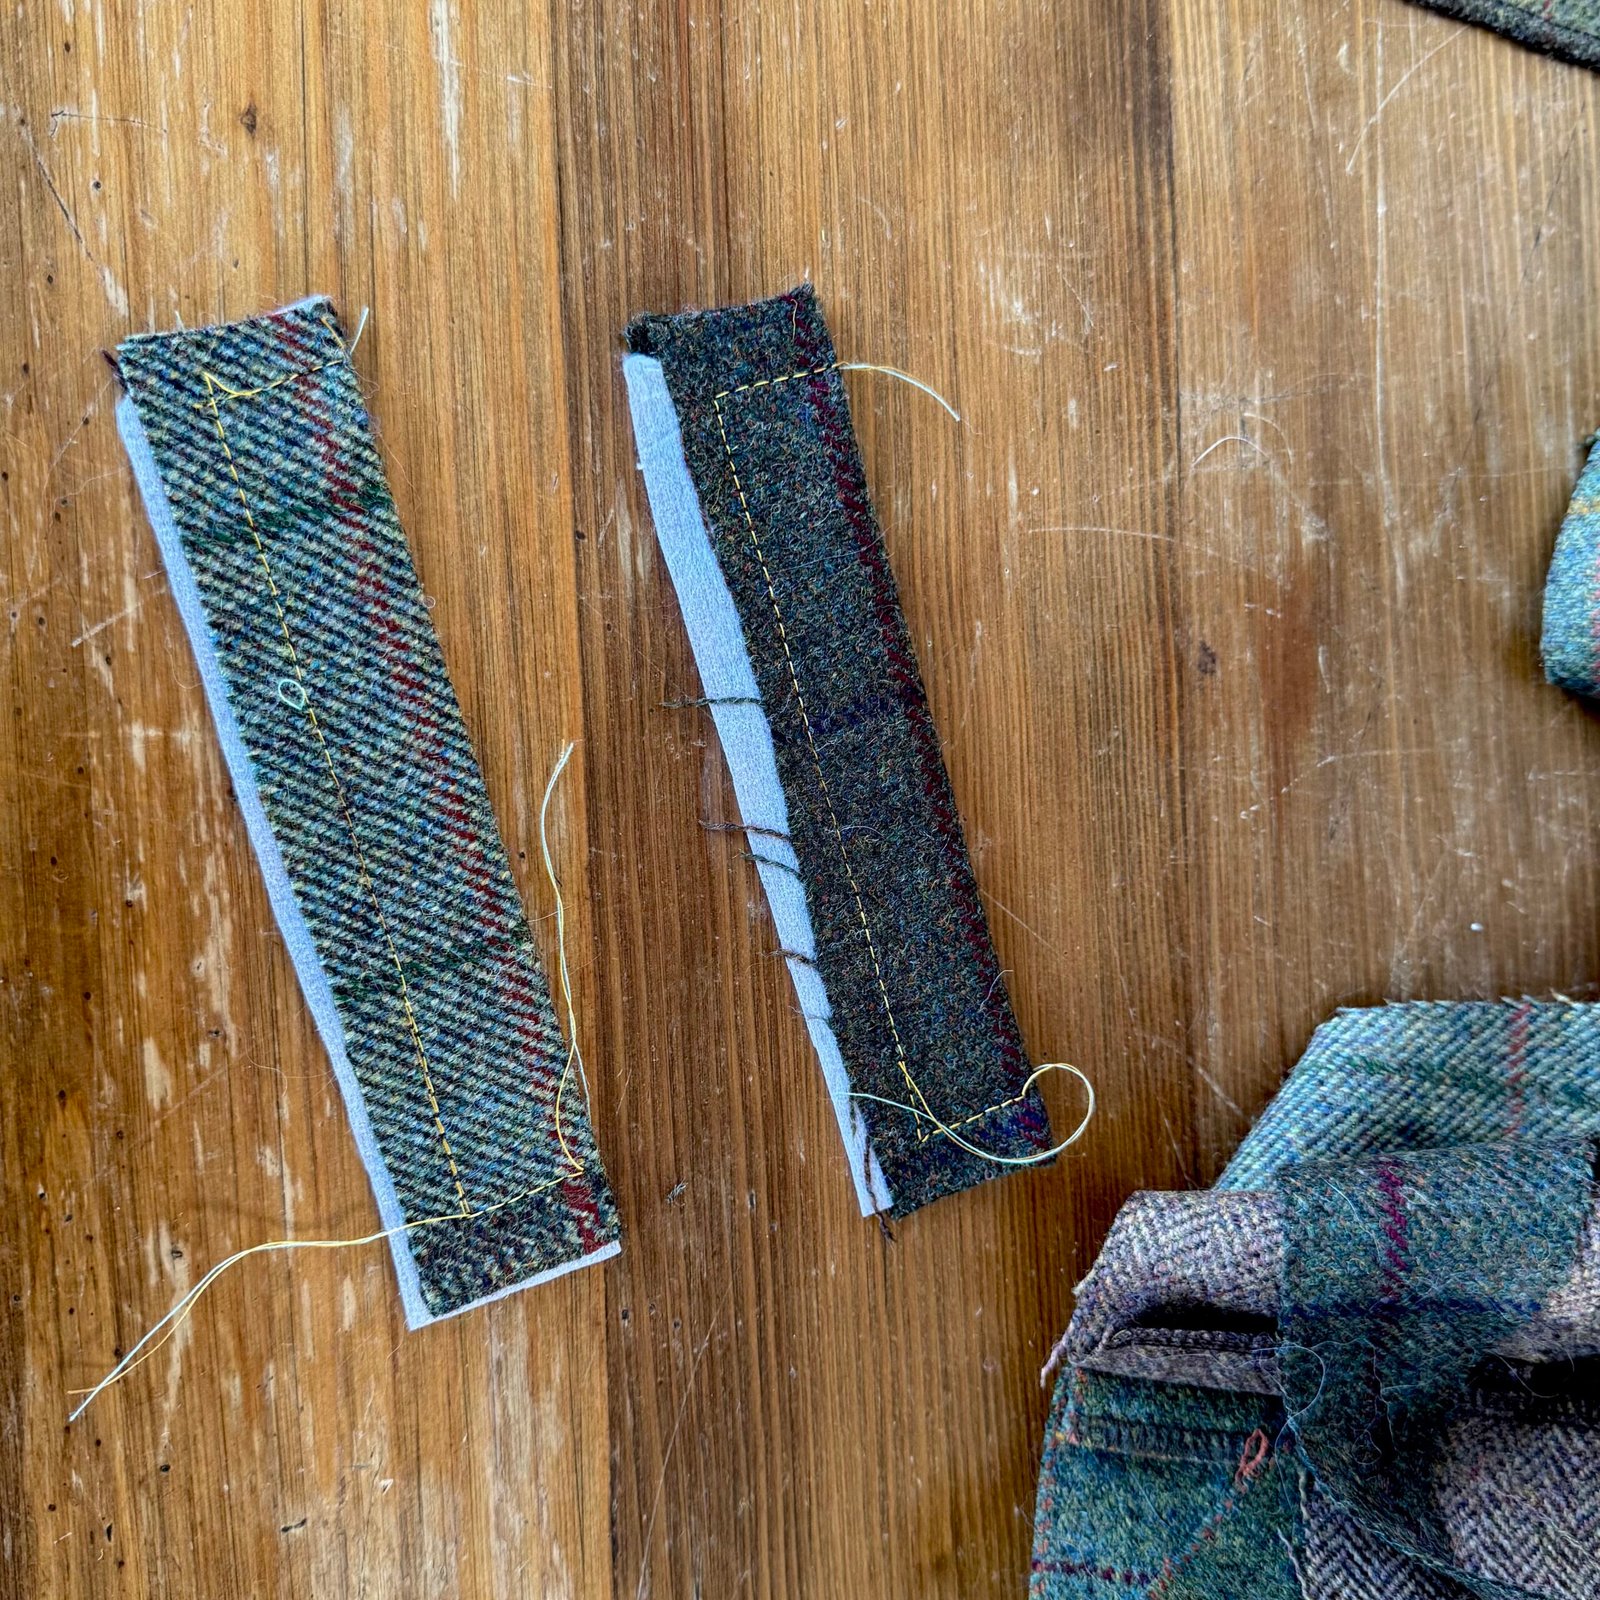
I made welt pockets just like the ones I did on my pink pinafore because they work so well for me.
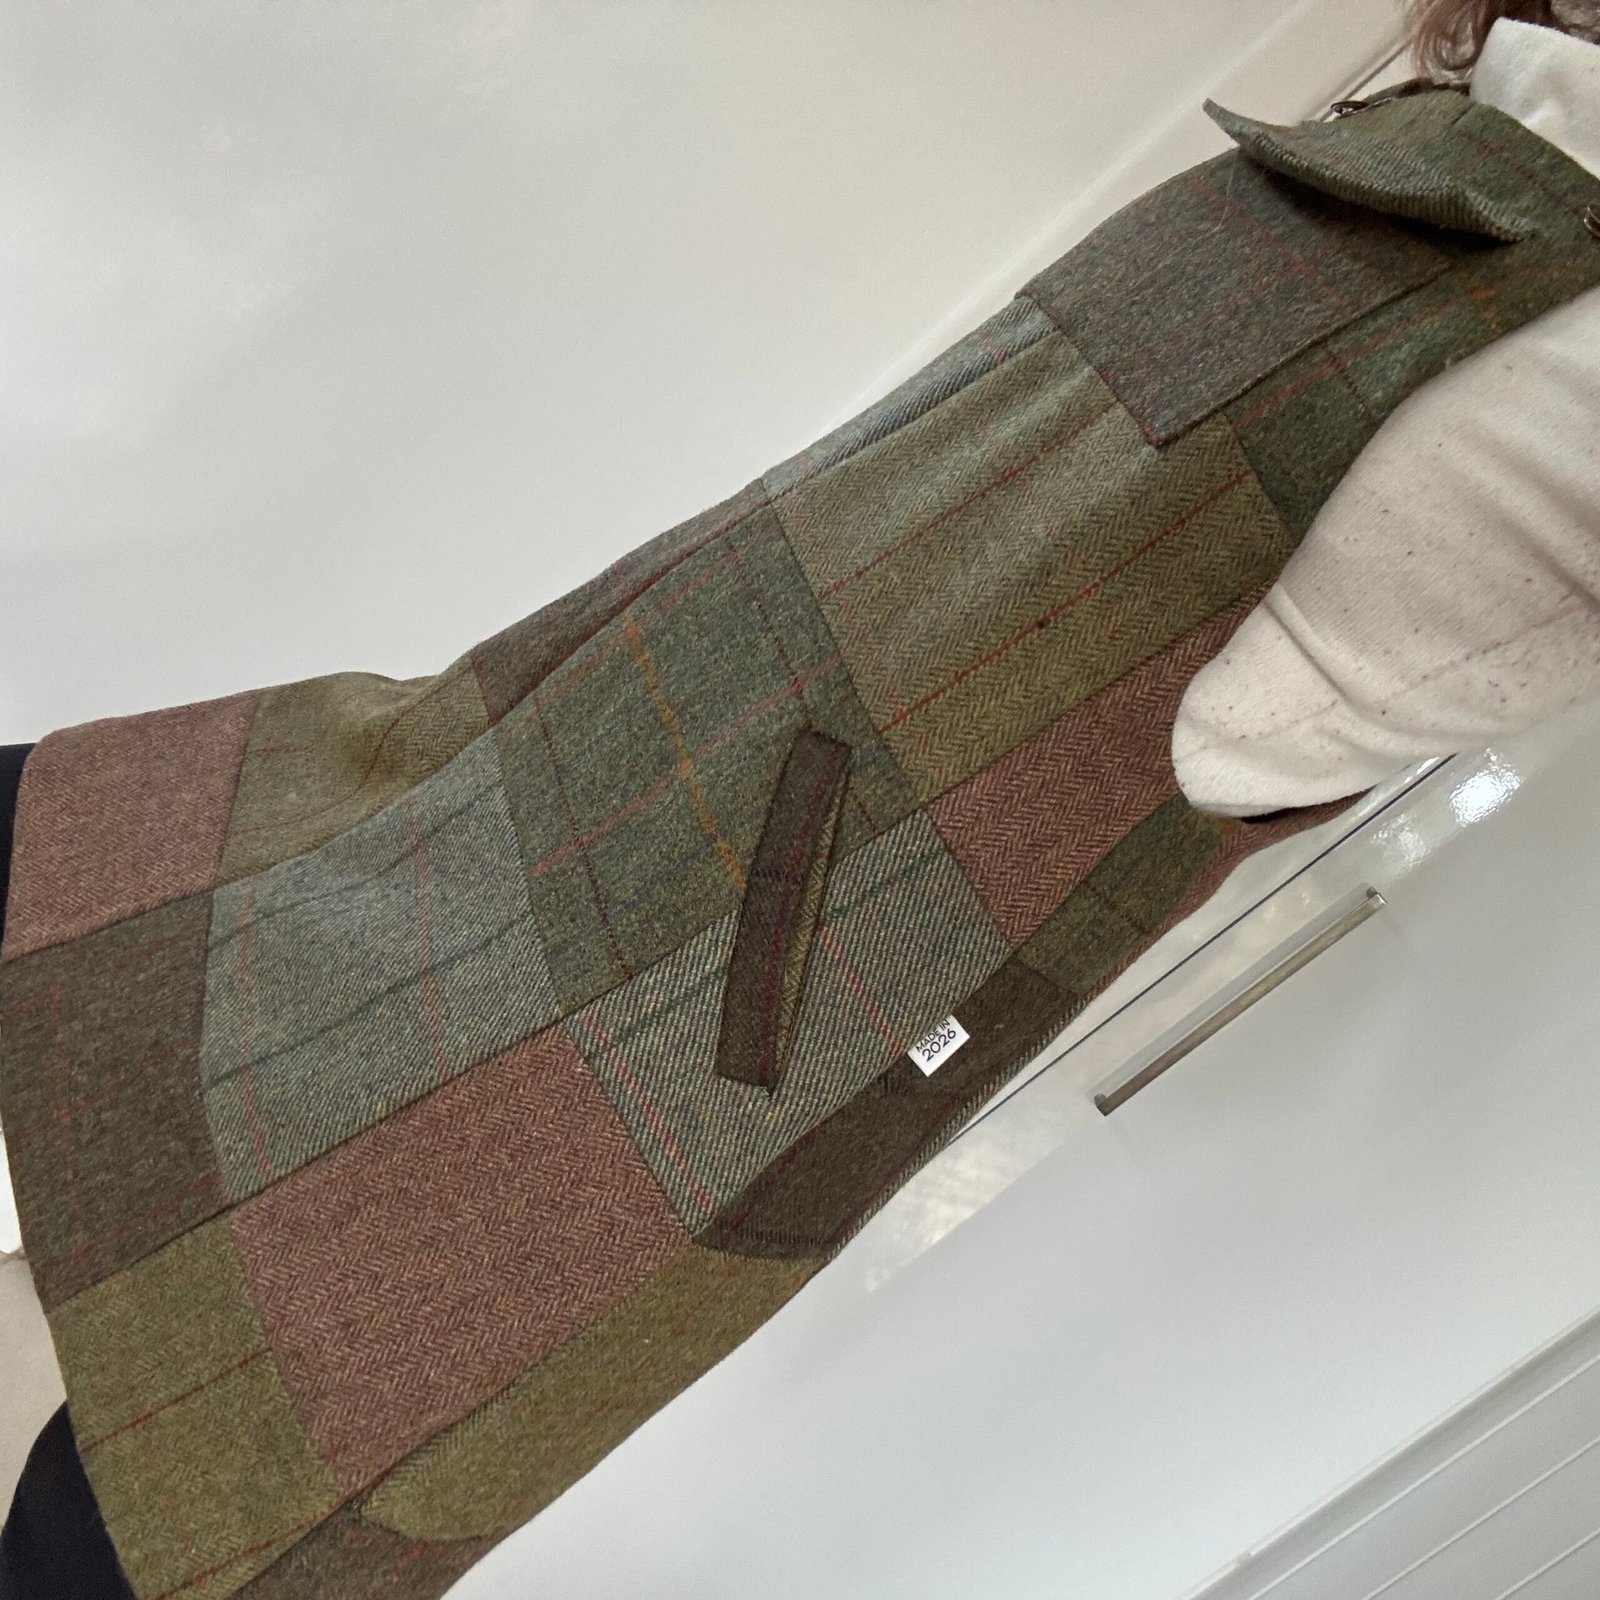
The straps are also patchwork, which created a few problems when I had to thread them through the buckles because of the sheer bulk of the fabric; but I managed to force them through eventually!  Initially I decided to line the pinafore with some lovely chocolate brown cotton that I’ve had for many years.
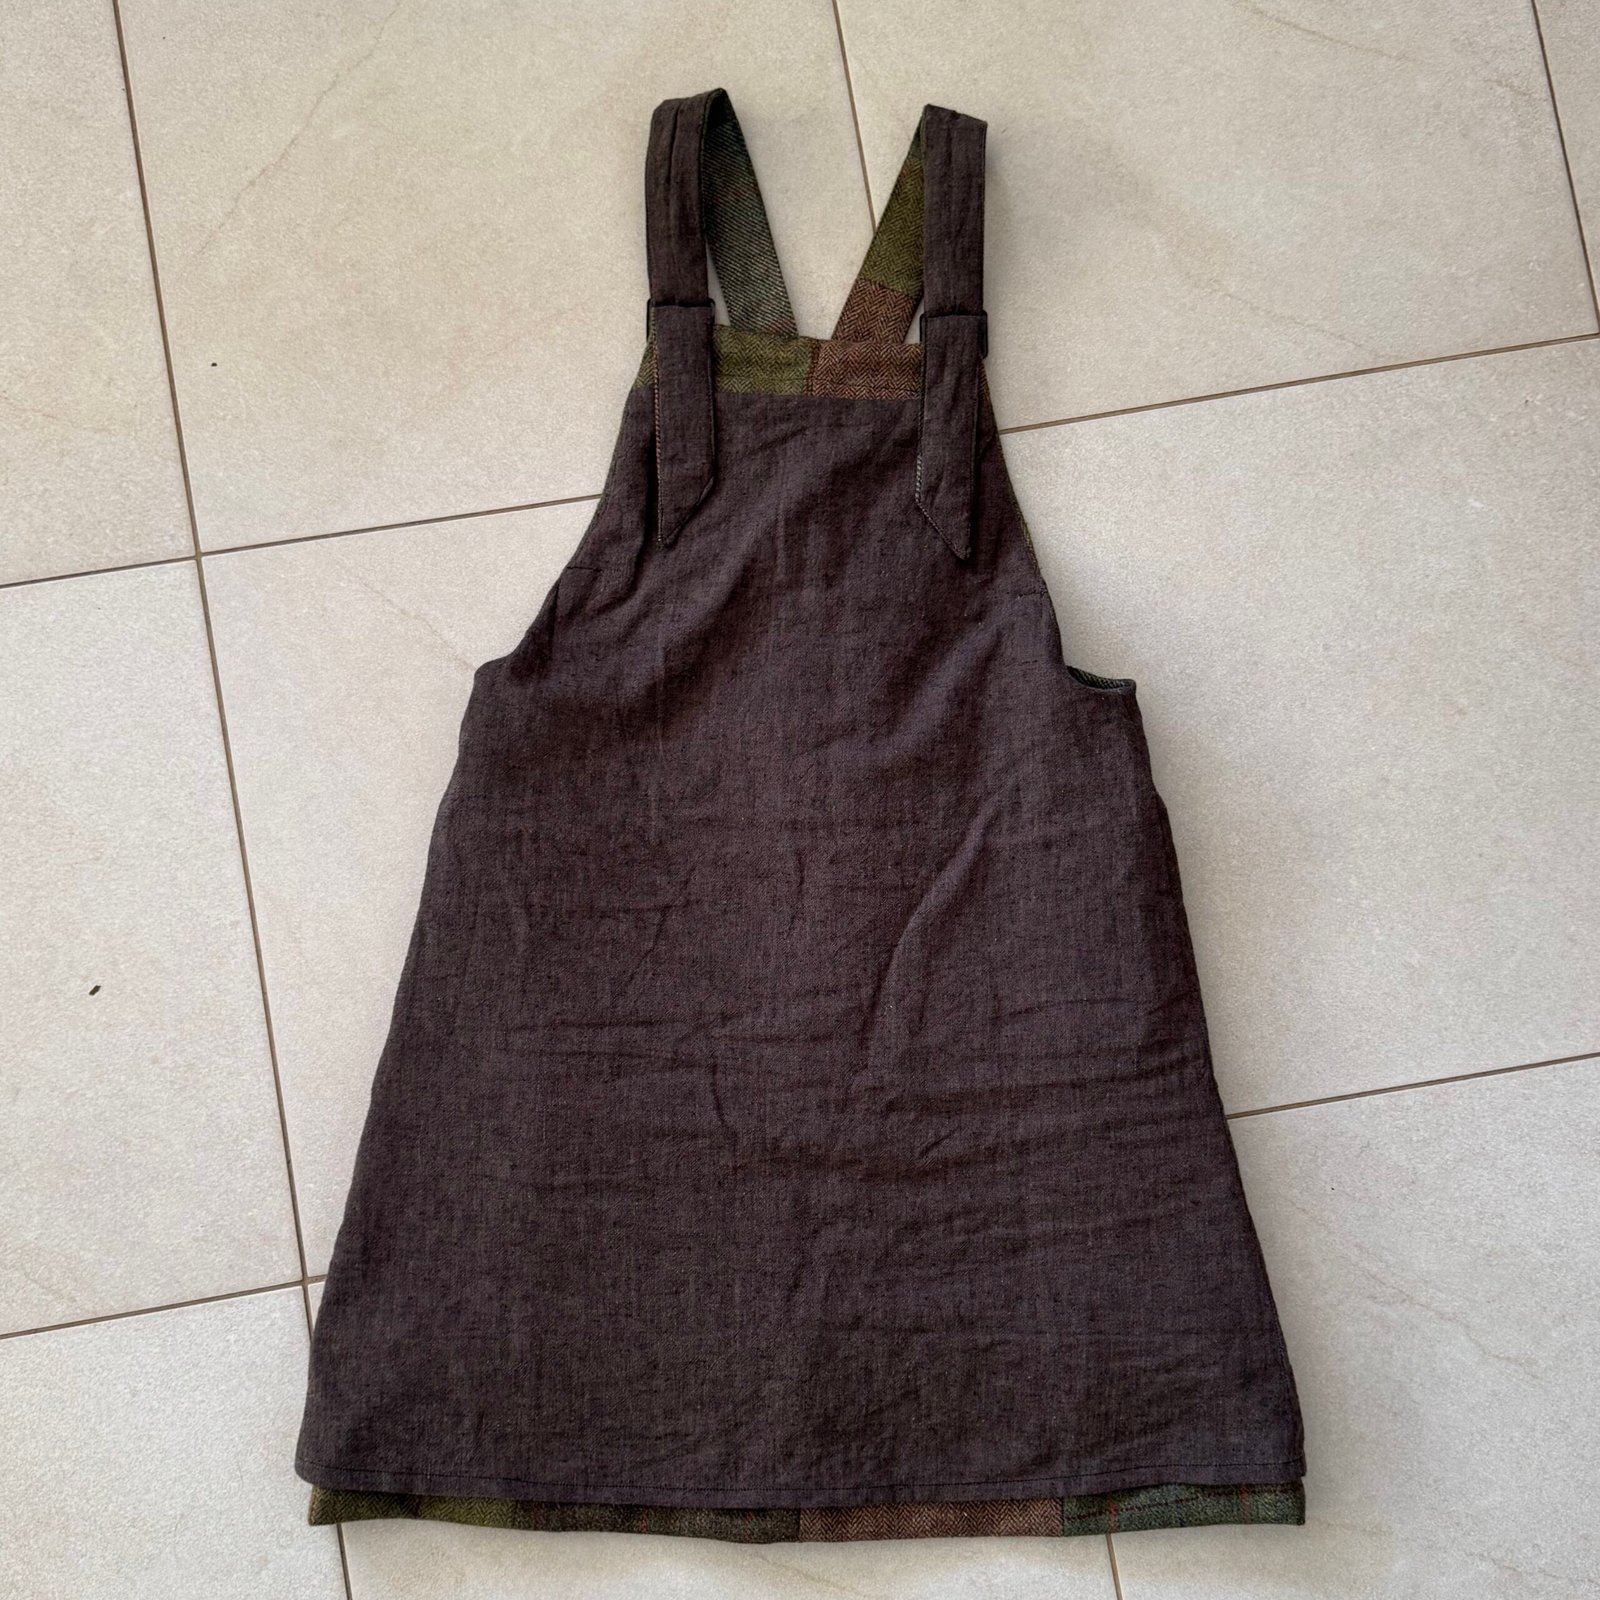
Yes, it looks pretty nice but unfortunately made it quite difficult to wear.  I realised very quickly I had to replace it with something a bit more slippery.   So I cut most away and attached a new one made of polyacetate lining fabric.  Sadly, it doesn’t look nearly as pretty now to my eyes, but it does make it SO much easier and more pleasant to wear!
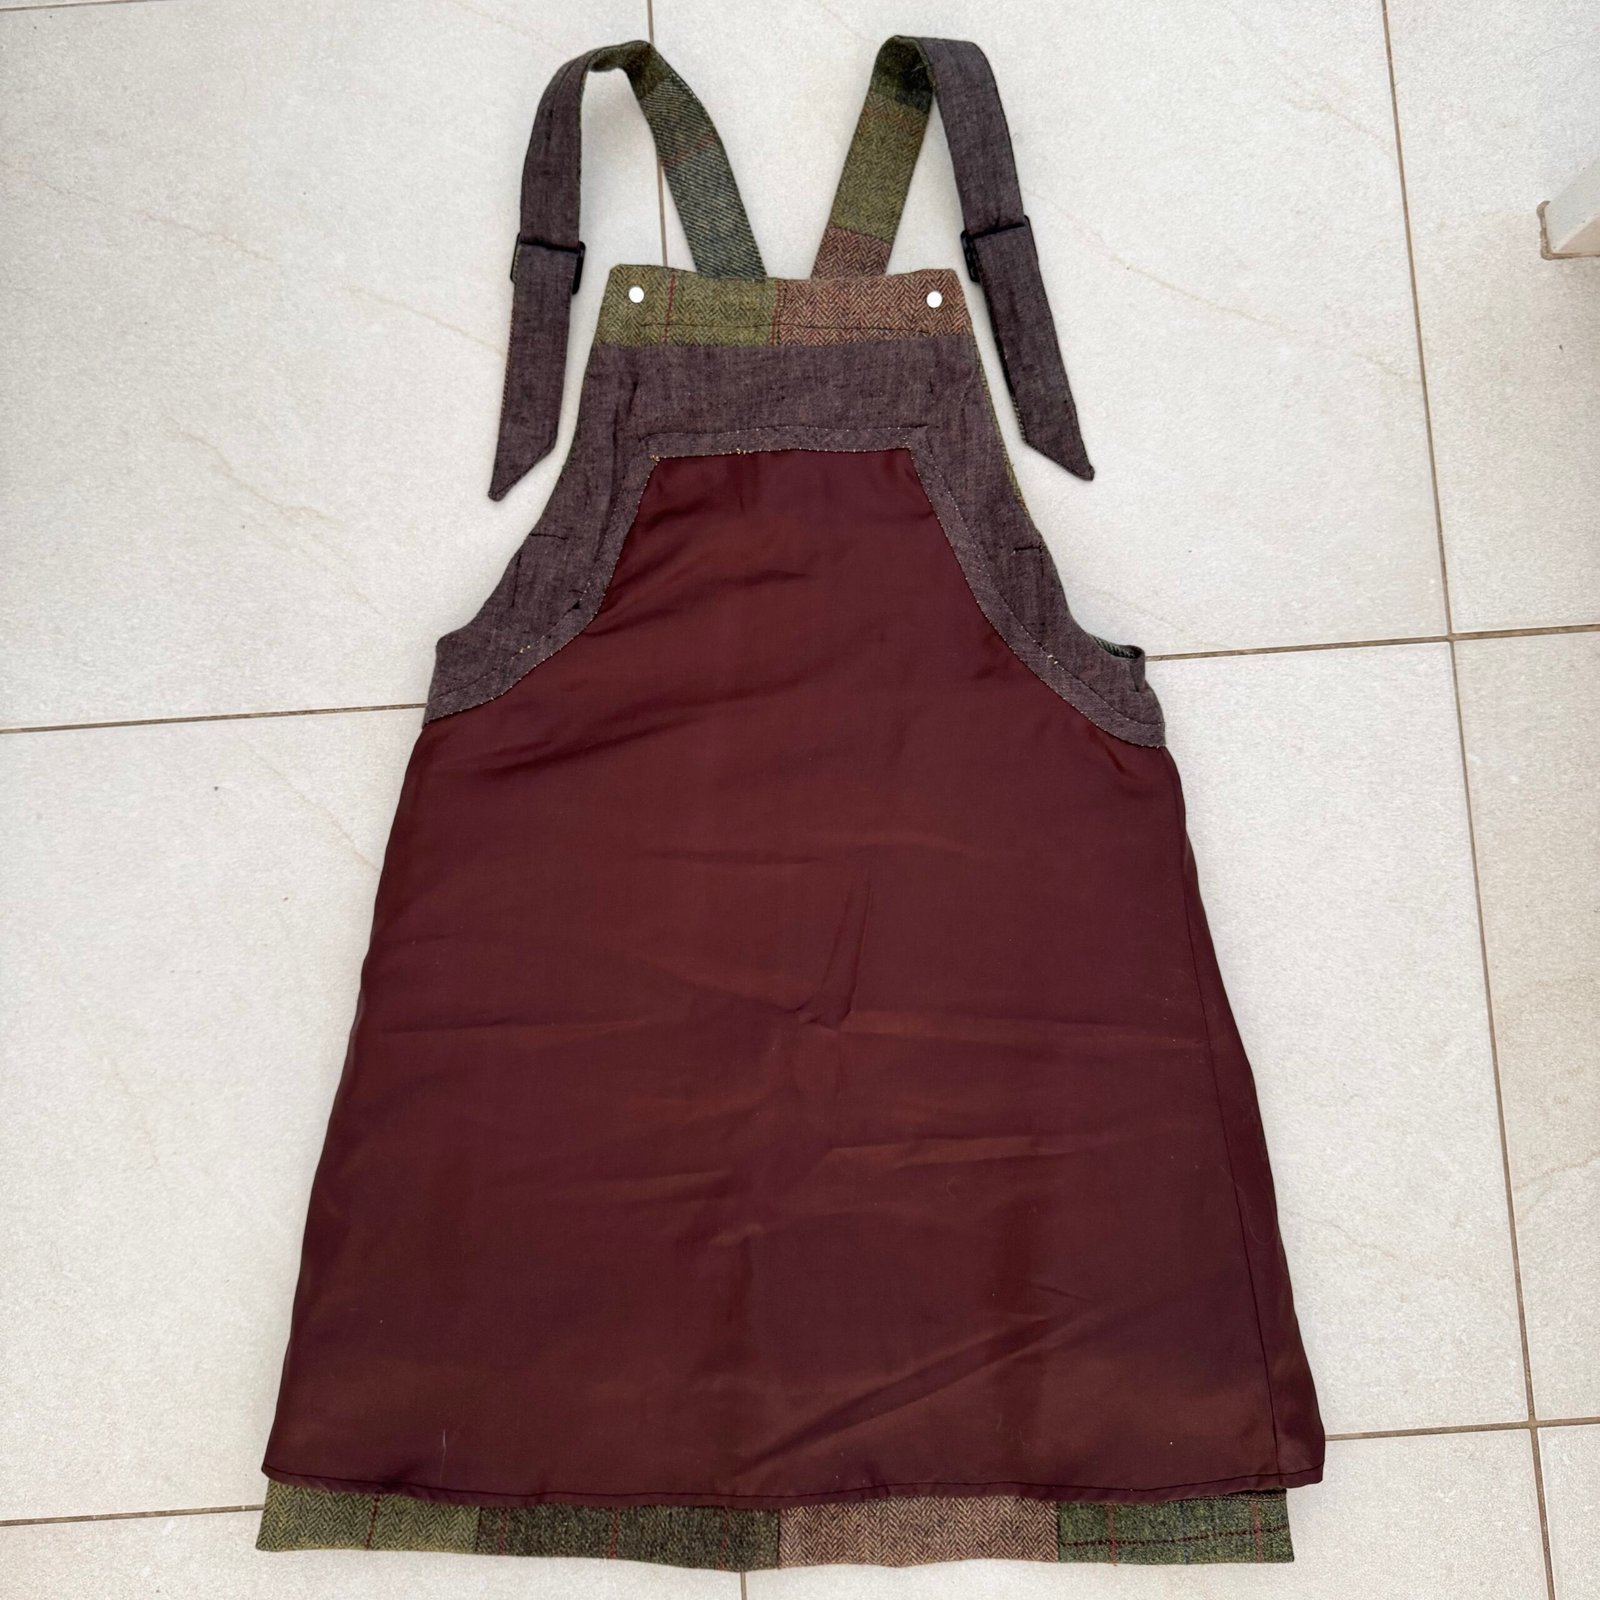
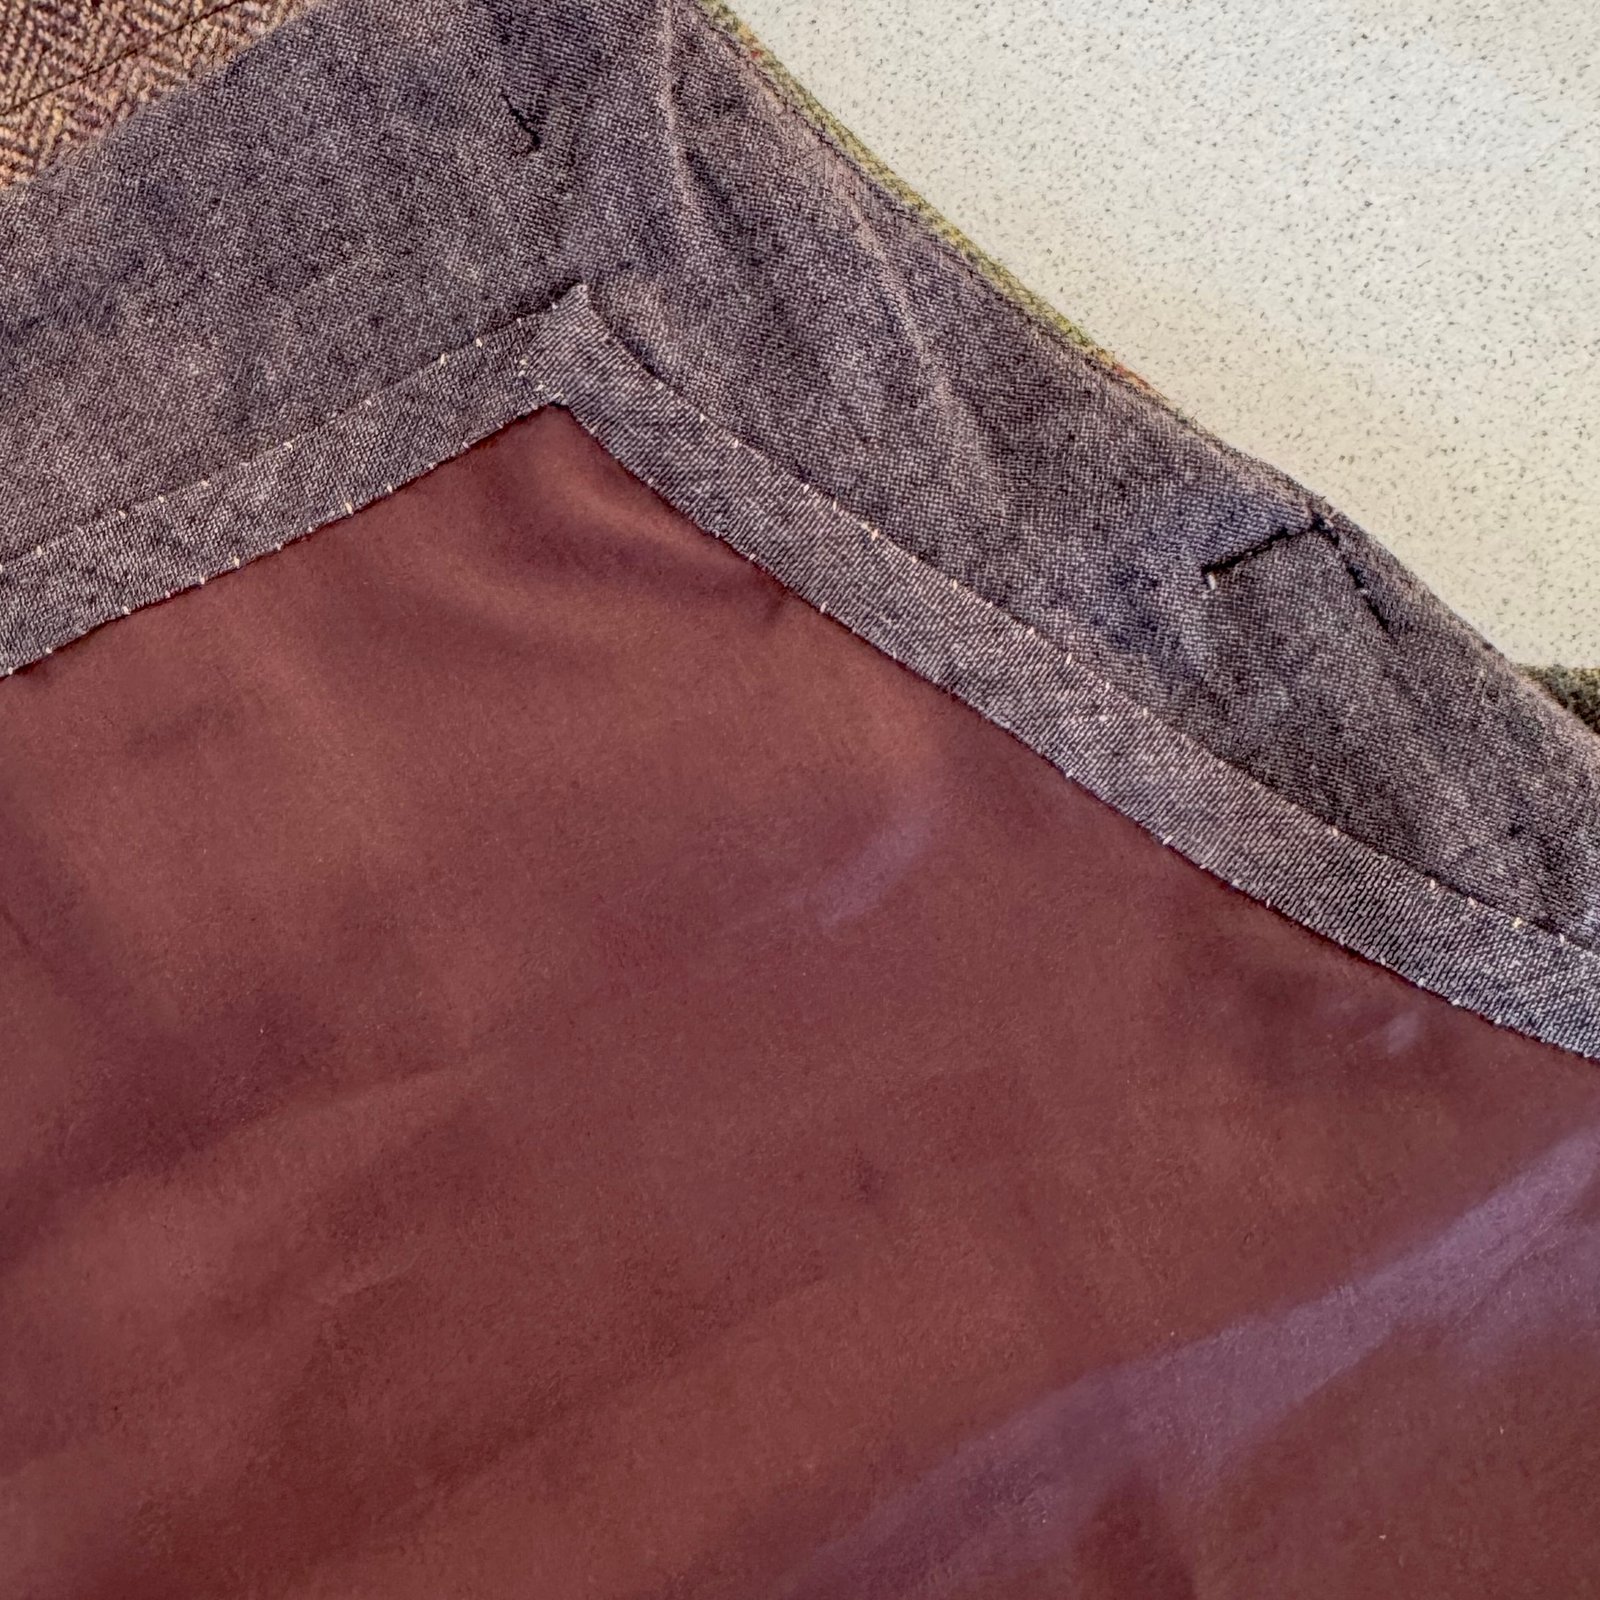
The only way to attach this securely was to press down the seam allowance around the top edge all around and basically topstitch it in place to what remained of the previous cotton lining.  However, the topstitching looked quite ugly to my eyes and I wanted it to look a little cleaner, even on the inside where no one can even see it.  SoI made a bias strip from the chocolate brown cotton, and hand stitched this over the join all around on the inside to hide it.  So much better!
Everything here was from my stash, and I’m so happy to have finally made something I love from this beautiful fabric!
2) Back in summer I made a new little dress using leftover cotton fabrics and the Esme pattern from the book “Everyday Style” by Lotte Jansdotter.  I love how it looks like a French flag!
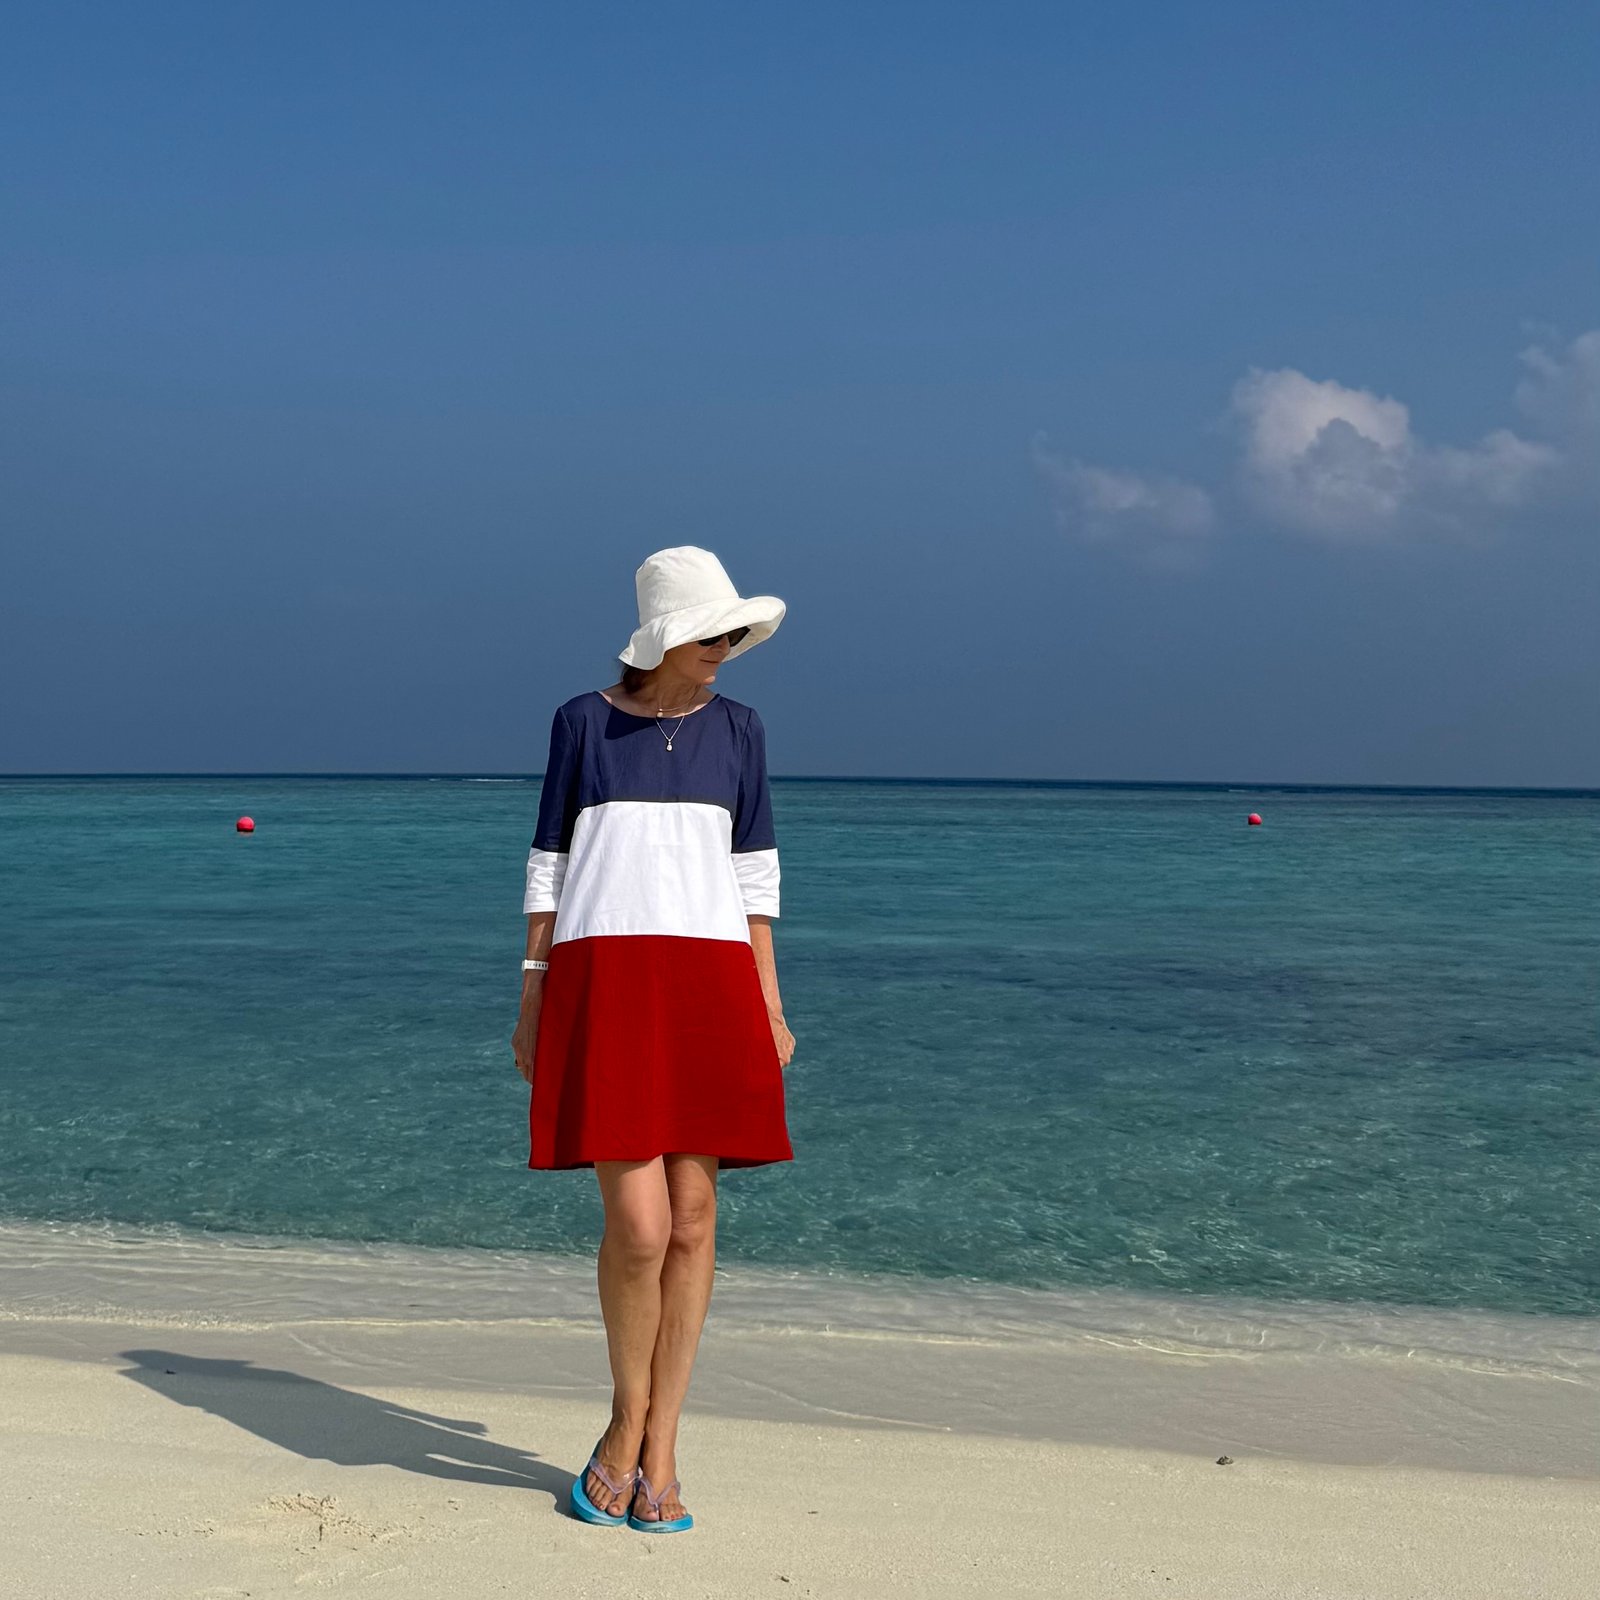
The seams look like straight lines, but in reality none of them are because of the weird shapes of the fabric scraps I was using!  All the horizontal seams are curved to differing degrees.  It was a little tricky to get a good neat result but I was actually very pleased with myself how cohesive it all looks in the end!  Of course this is a fun and cool, airy little dress to wear and I am extremely happy with it.  I’m looking forward to summer so I can get back into it again!

Again, everything from stash.

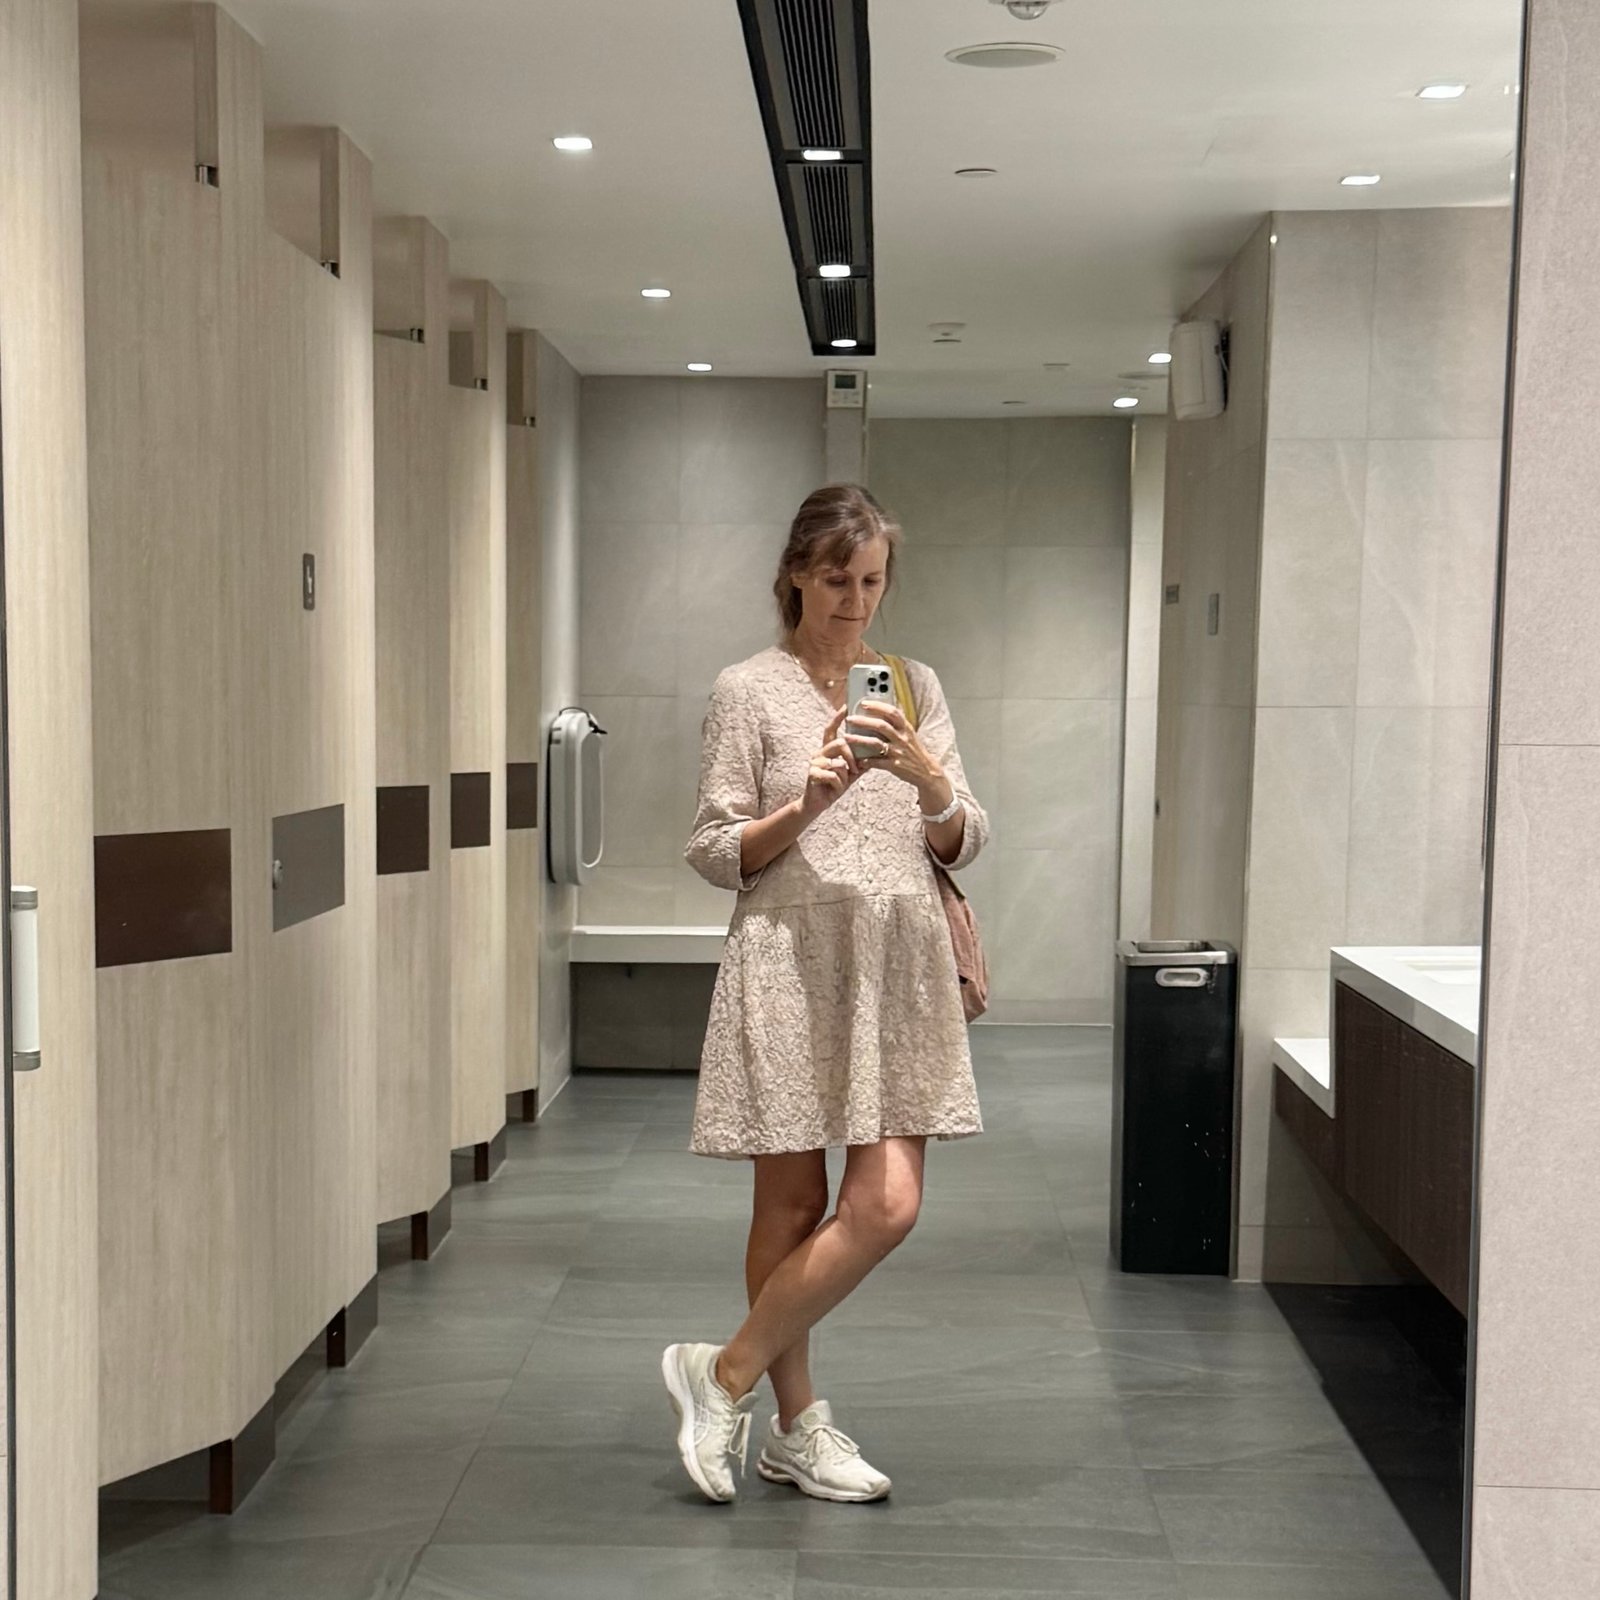
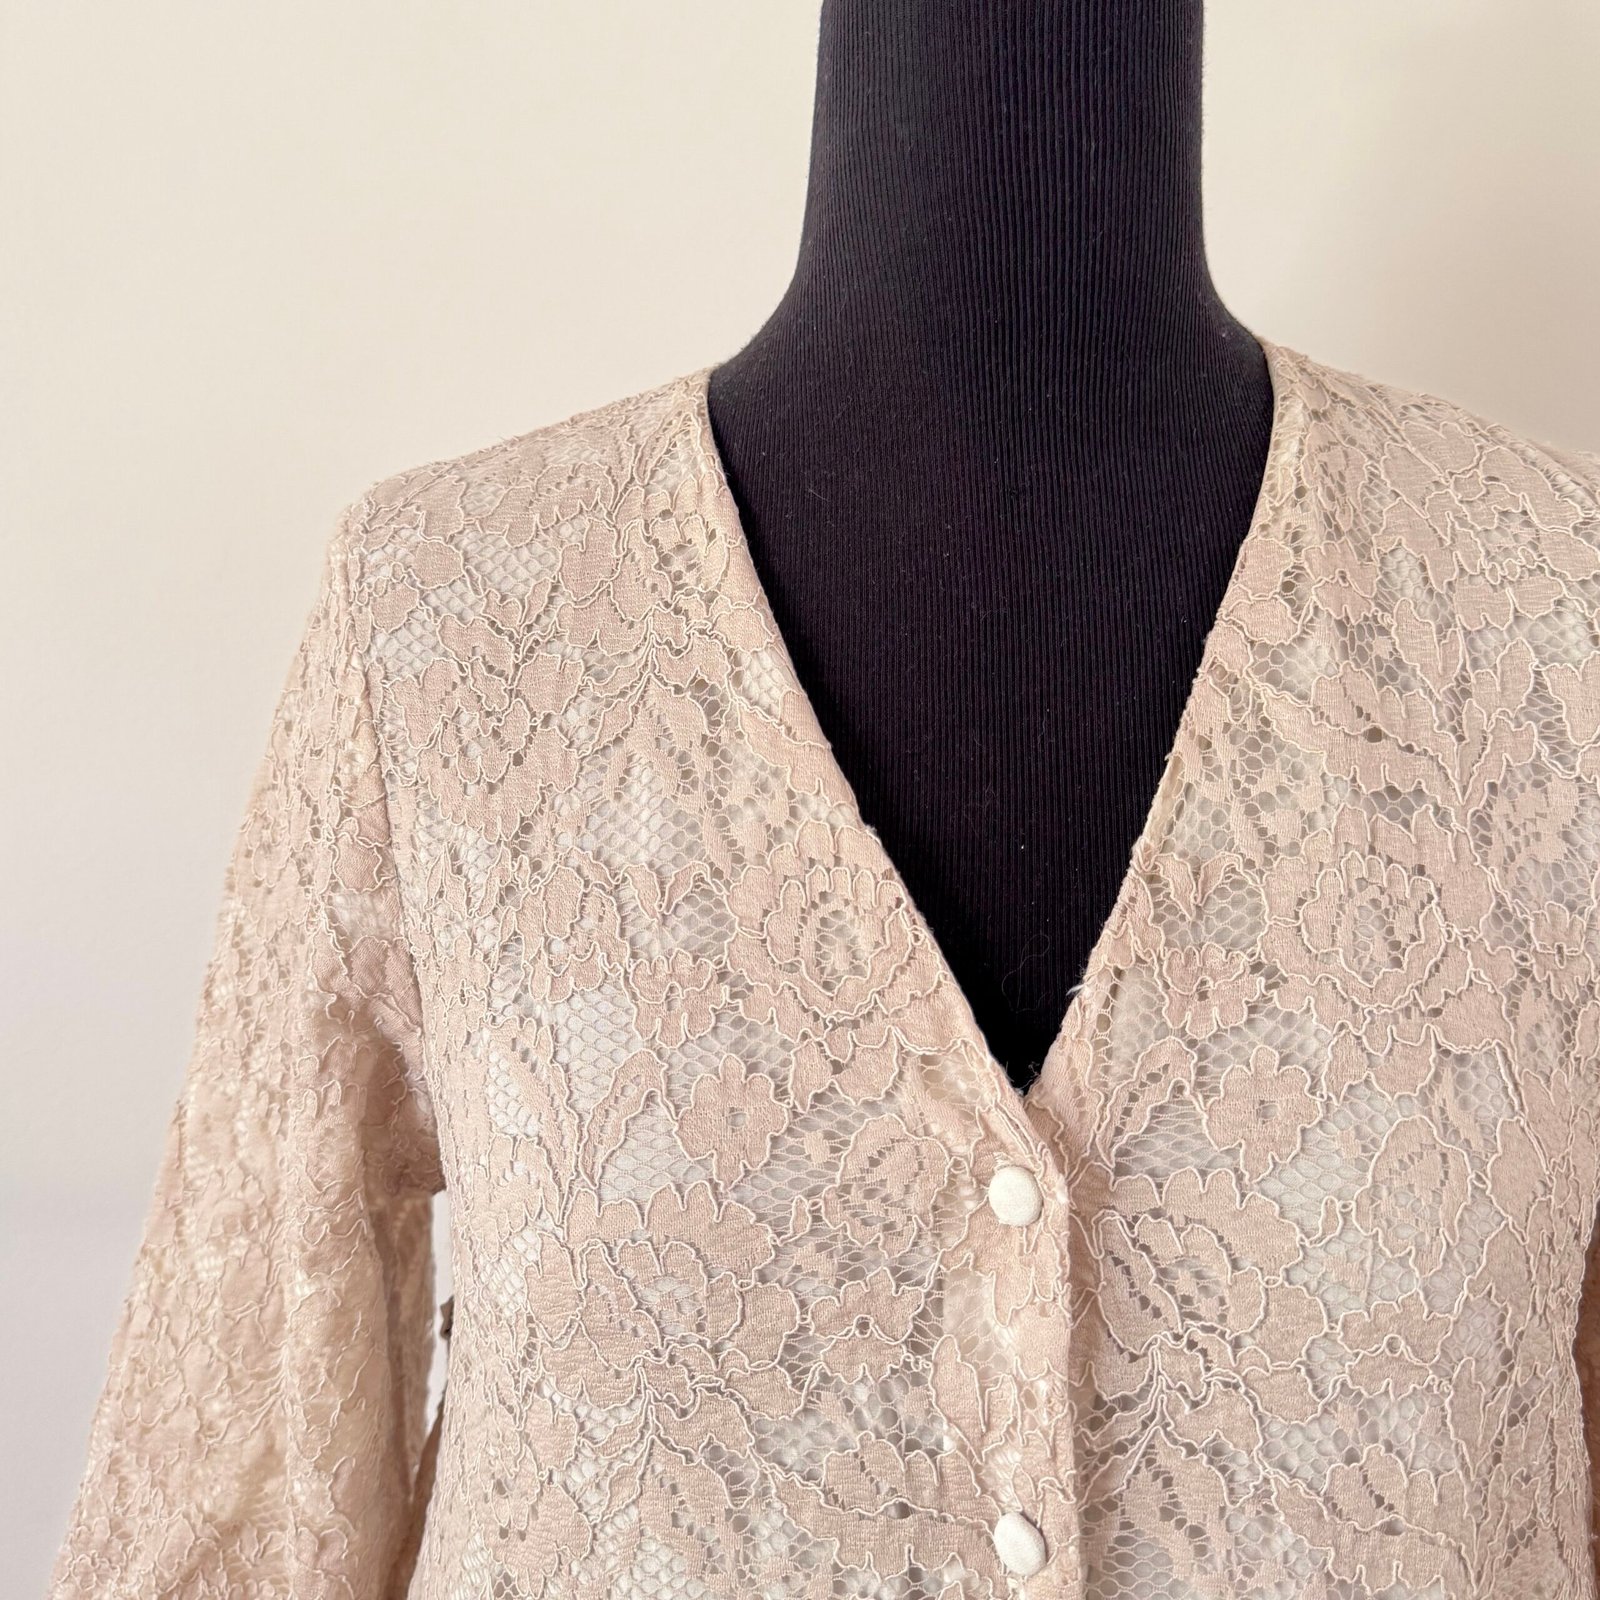
3) Also during last summer I also made this little lace dress using the Fibremood Lennox pattern and a pale “greige” lace originally from Fabulous Fabrics from many years ago.  I underlined all pieces completely with a cream coloured muslin, also bought many years ago, I think from a Morrison remnant sale.  The buttons are actually some leftovers from the covered buttons that I made for Kelly’s wedding dress, back here!  This is also all from stash, and  although I’ve worn this a tonne since I made it I took only one picture of myself wearing it… this rather terrible one, sorry.  I’m trying to get back to photographing and documenting things better.
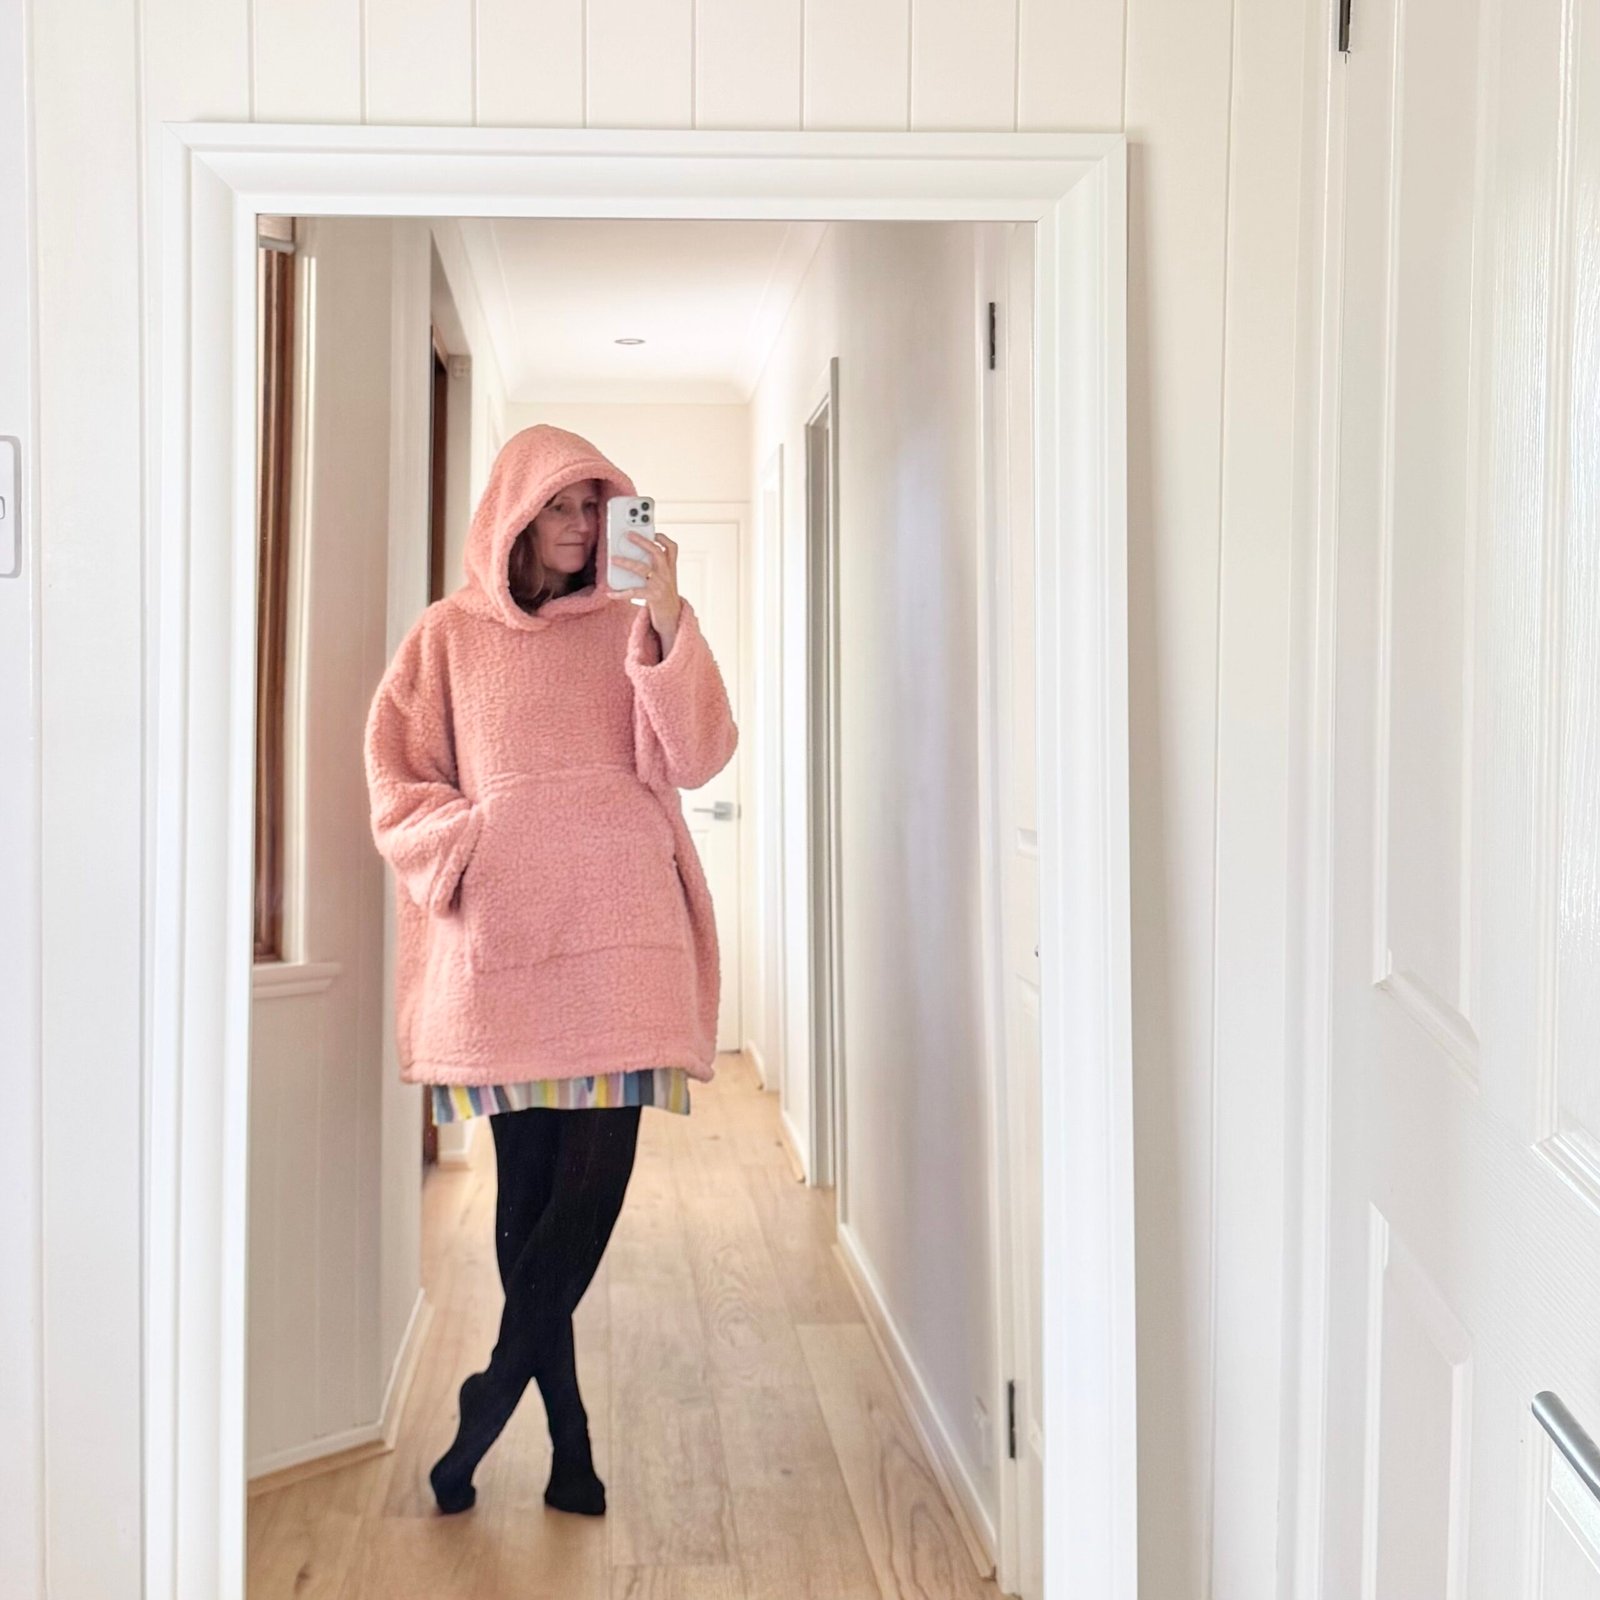
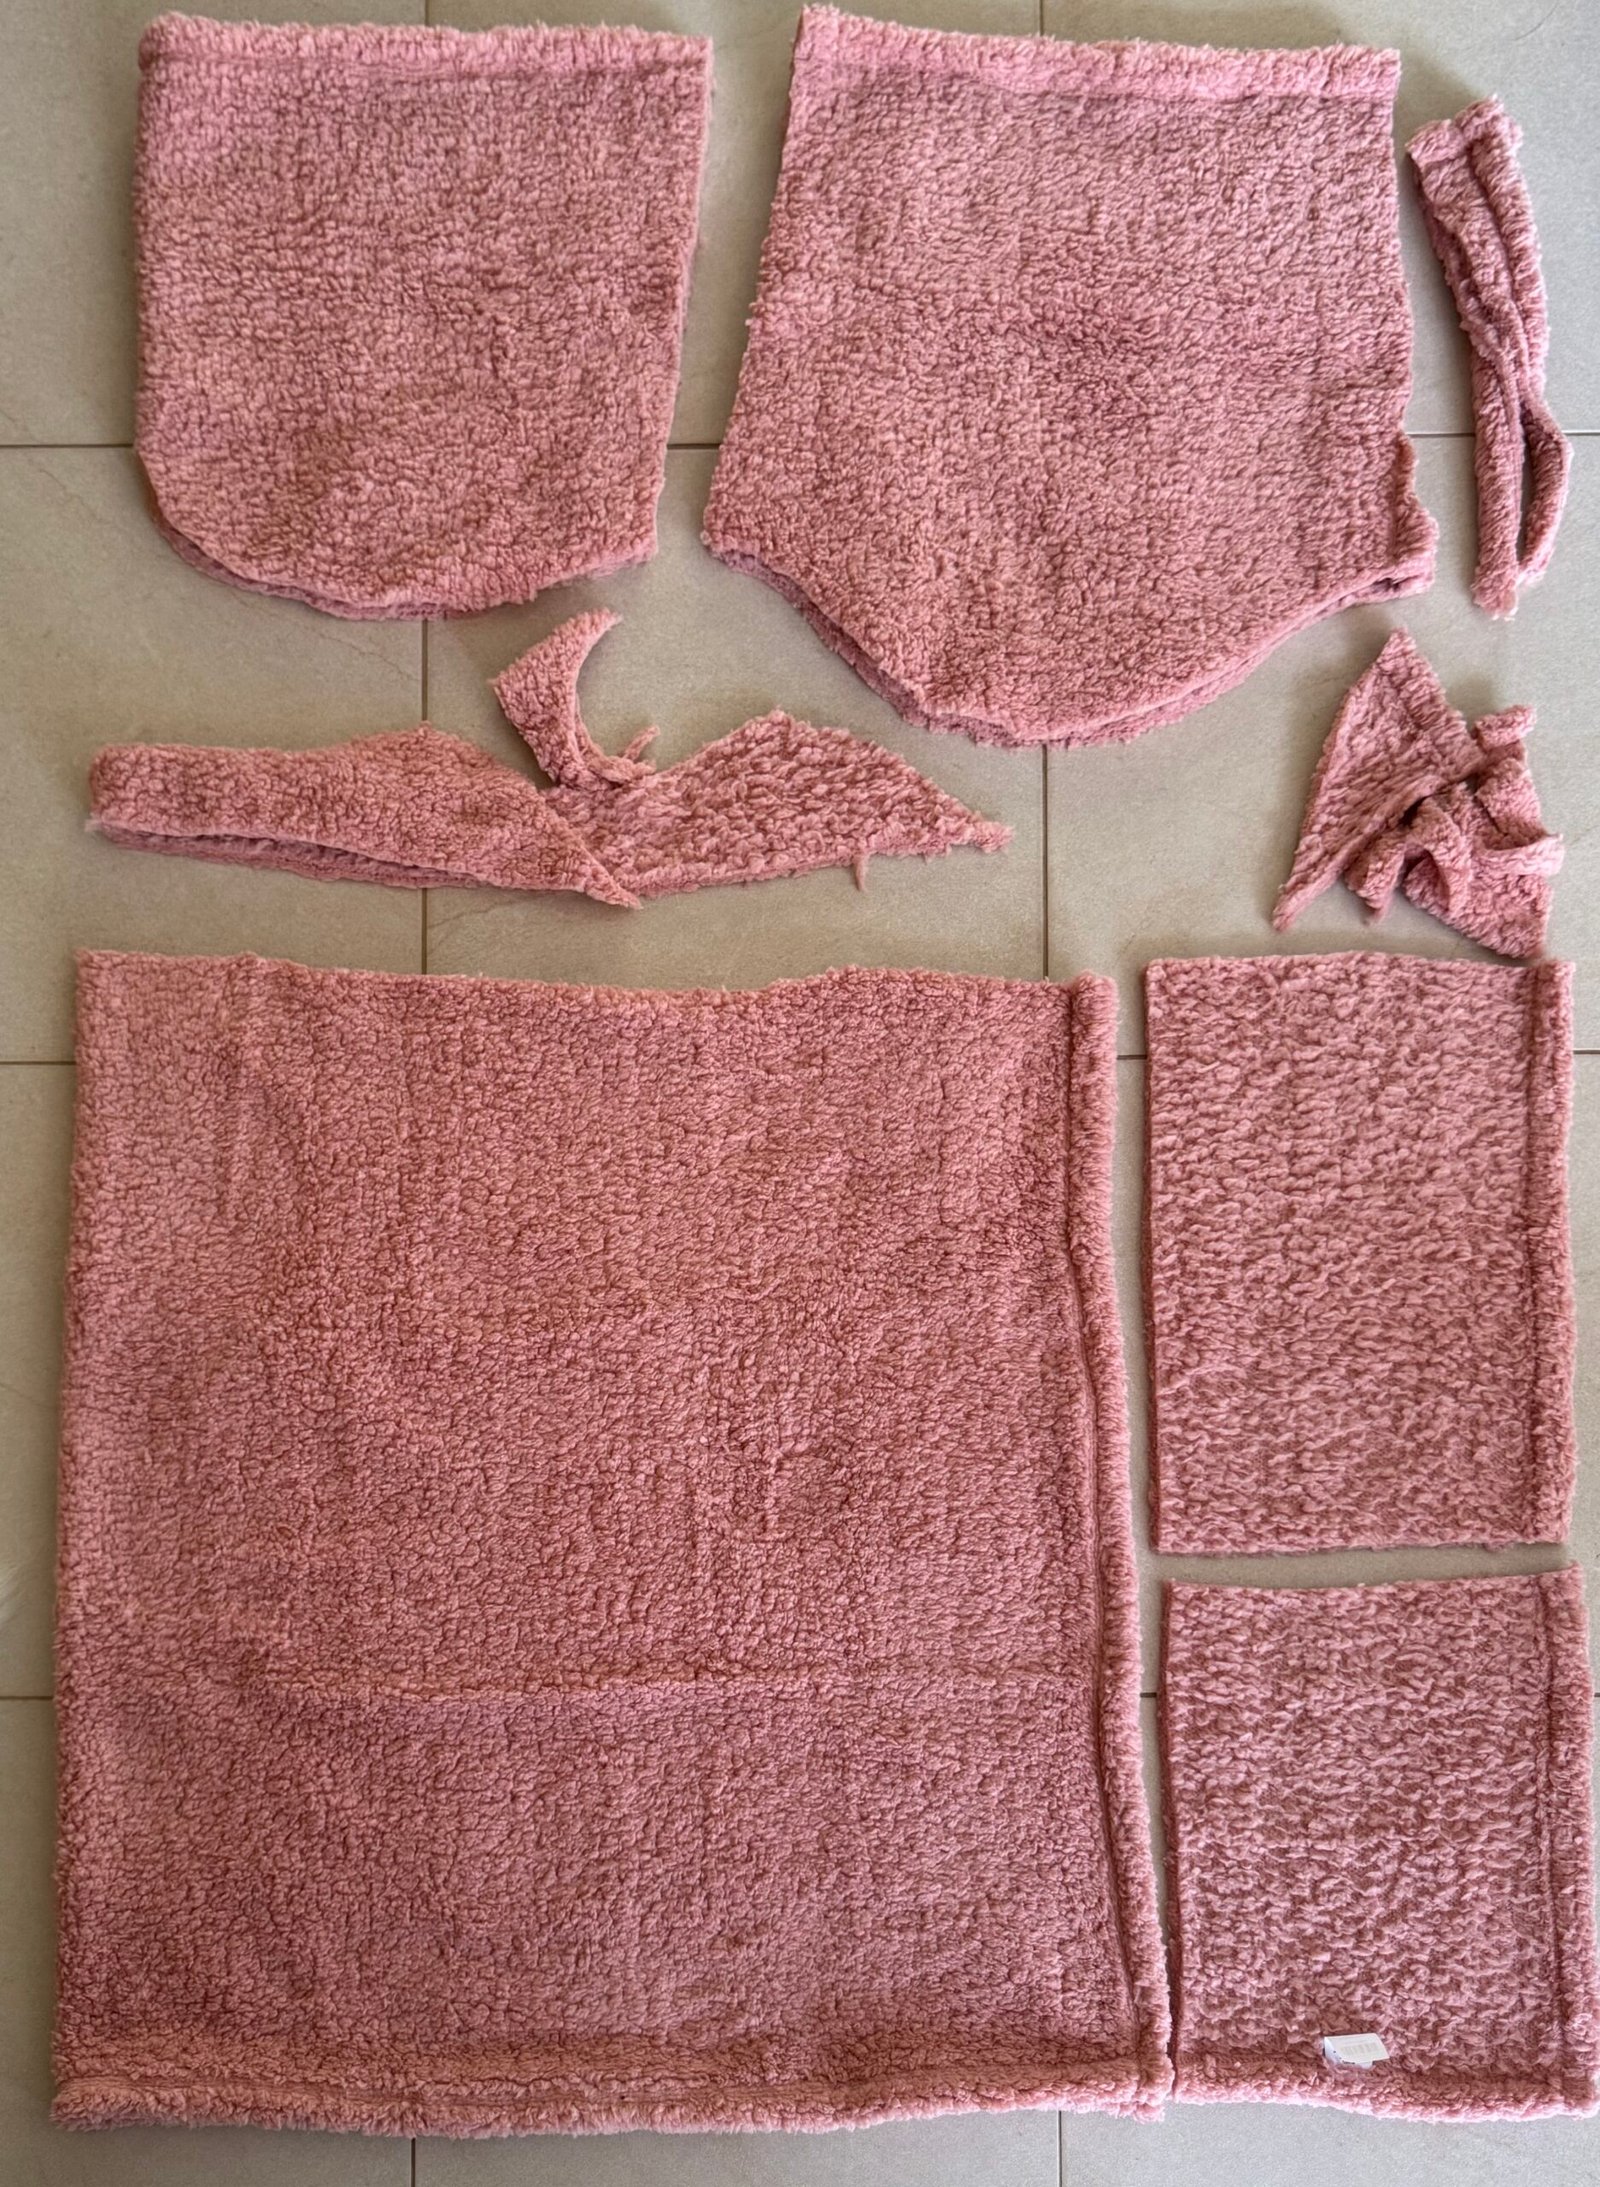
4) and 5) and oodie!! along with some new winter pyjamas.  Not particularly glamorous or exciting, and I did have to buy all new fabric but we all have to do that sometimes since we need pyjamas, yes?  I’d bought the fluffy pink blanket from Spotlight with a view to making a new dressing gown like my previous one… but the blanket was unfortunately way too small for my pattern.  So I drew up a plan that used as much of the blanket as I could, while making a functional winter coverup. I absolutely love the result!  It’s super comfy and warm and I’m in it every single evening, even during the day at home sometimes!
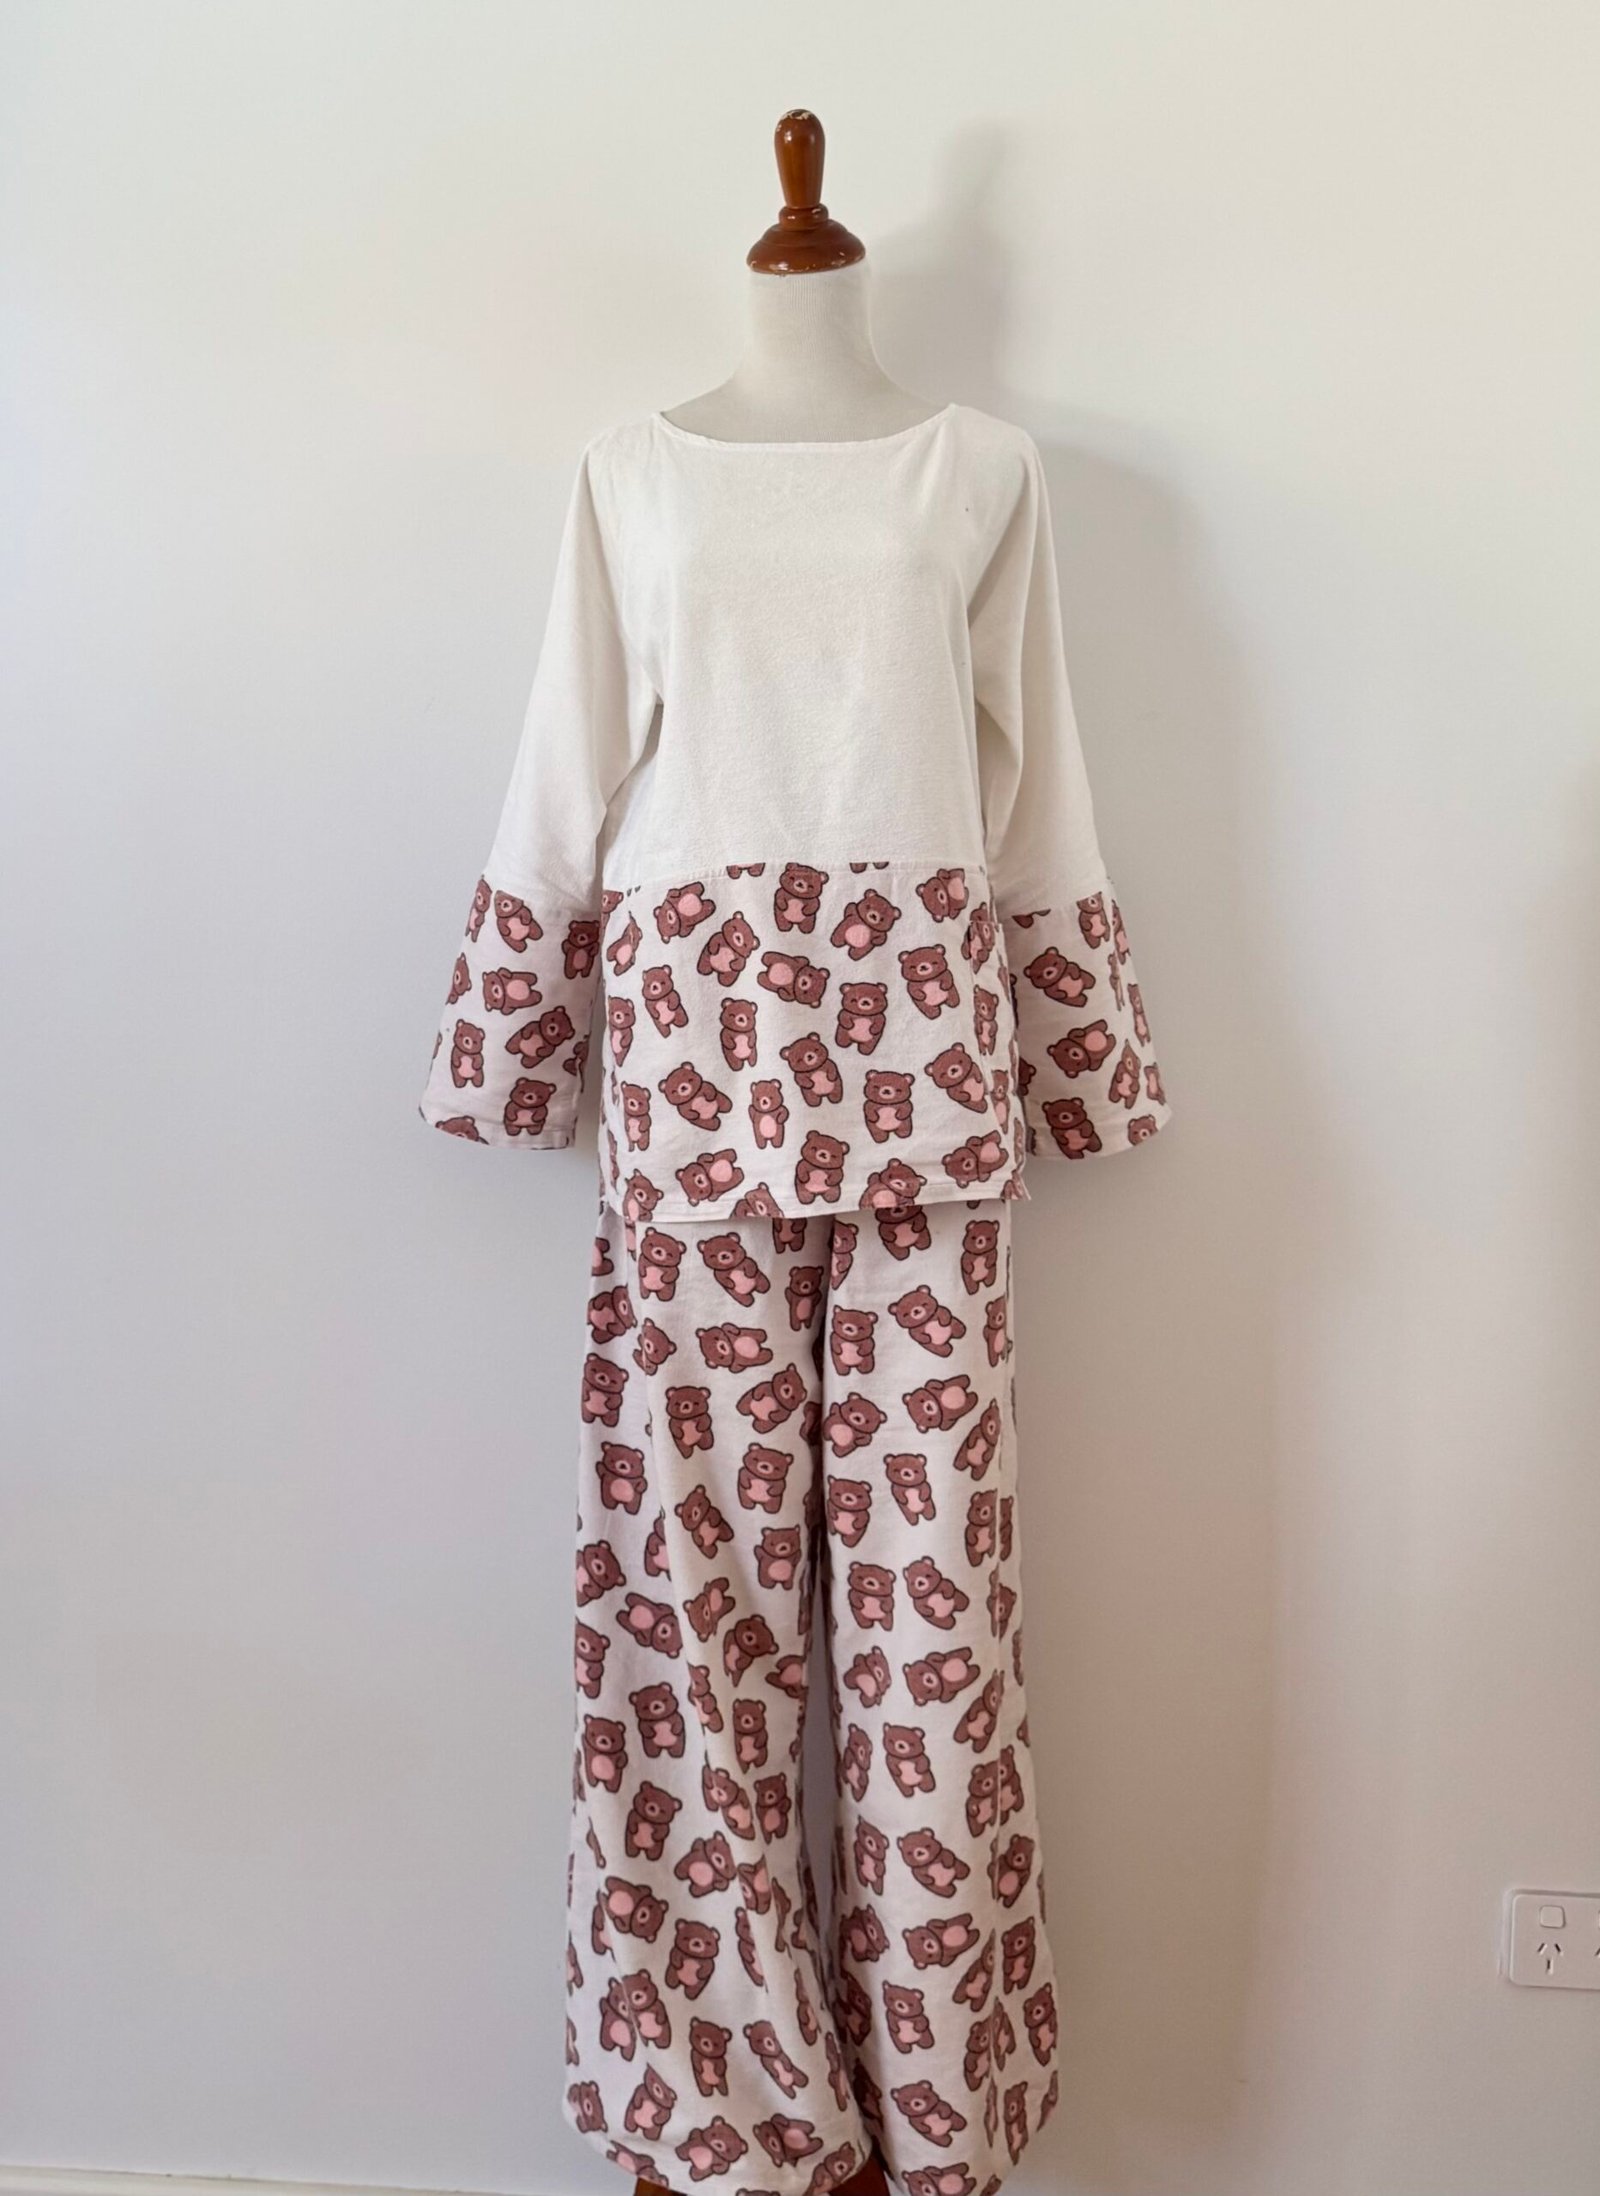
I chose the pyjama fabric simply because the pink of the teddies’ tummies perfectly matches the colour of the blanket so well.  The patterns I used  for these are my usual; the Closet Core Carolyn pyjama bottoms, and heavily modified Burda 10/2009; 121 for the top.

Finally I just want to add; thank you so much for the lovely welcome back comments on my previous post!  I do still have quite a few more things to share once I get around to taking some photos, so please stay tuned!

pinterestmail

a pink pinny

So, I loved my red velveteen pinafore so much… it’s such a lot of fun to wear.  I can’t believe I worried a little that I was too, er mature, for such a garment and I thought I might become the butt of mutton-dressed-as-lamb commentary but you know what? I wasn’t, and I’ve throughly enjoyed having a “pinny”.  So I made another! though I believe this is an improvement even upon its predecessor’s near-perfection because the pockets are a tonne better, in my opinion.

Again, I used the pauline alice Turia dungarees pattern for the bodice section, and modified so the bottom part is a skirt.  I put the pinafore on and pinned carefully so as to achieve the ideal proportion to suit my figure, but it actually turned out identical to the shape of my red one!  I’m really really happy with the shape and length of this, it’s absolutely perfect for me,I think…

I really love the front bib pocket of the Turia pattern, I think it’s super cute.

For the pockets, I got out the pattern pieces for Vogue 1115; the shape construction and placement of these pockets is also close to perfection, in my opinion!  I like my pockets to be a bit bigger, but instead of cutting the pockets bigger, I simply stitch the with a 6mm (1/4″) seam allowance instead of the regular 15mm, and boom! I have bigger pockets!

Fabric; cotton corduroy in the most totally divine shade of dusky pink!!  I saw it on Potters’ Textiles instagram and raced in immediately to snap some up!  Then, for some bizarre reason that I have absolutely no explanation for, I bought only 1.5m.  Sure; it’s quite wide; but still I was struggling to cut my pinafore out of such a small piece, especially since you do have to be strict about following the corduroy’s nap when laying out your pieces.  To be honest; I totally would have cut my pockets bigger, but was dealing with mere scraps after getting out my big, important pieces first.  Anyway, I did get everything I wanted successfully, thank goodness…  Normally you’d think, oh I can always get more fabric! but while I was buying it the lady in the store specifically mentioned that they were nearly out!

Like with my red pinny; I chose to line this one fully.  I cut the lining using three of Craig’s discarded old business shirts.  I’m kind of a stash-busting mission lately; really making an effort to reduce pieces in there that have been kept “just in case”; and particularly; fabrics/garments from my refashioning bag.  I carefully harvested all the buttons off the shirts first, of course…

these matching sets of buttons are quite valuable if you make shirts for the menfolk in your life; particularly the shirts that have those mini-buttons often found on the sleeve plackets and button-down collars.  It’s almost impossible to find the two sizes in complete matching sets like this in haberdashery stores.


So you’d think there’s loooooooads of fabric in 3 shirts; and surely more than enough to line a little pinafore??  but of course unless I want my lining to be a heavily patched/seamed, and therefore rather bulky thing, I could really only use the largest swathes of fabric from the backs of the shirts, and still had to join!  But that’s ok; I still feel good about using up at least a little bit more of the refashioning bag!  The lining for my straps was harvested from one sleeve.

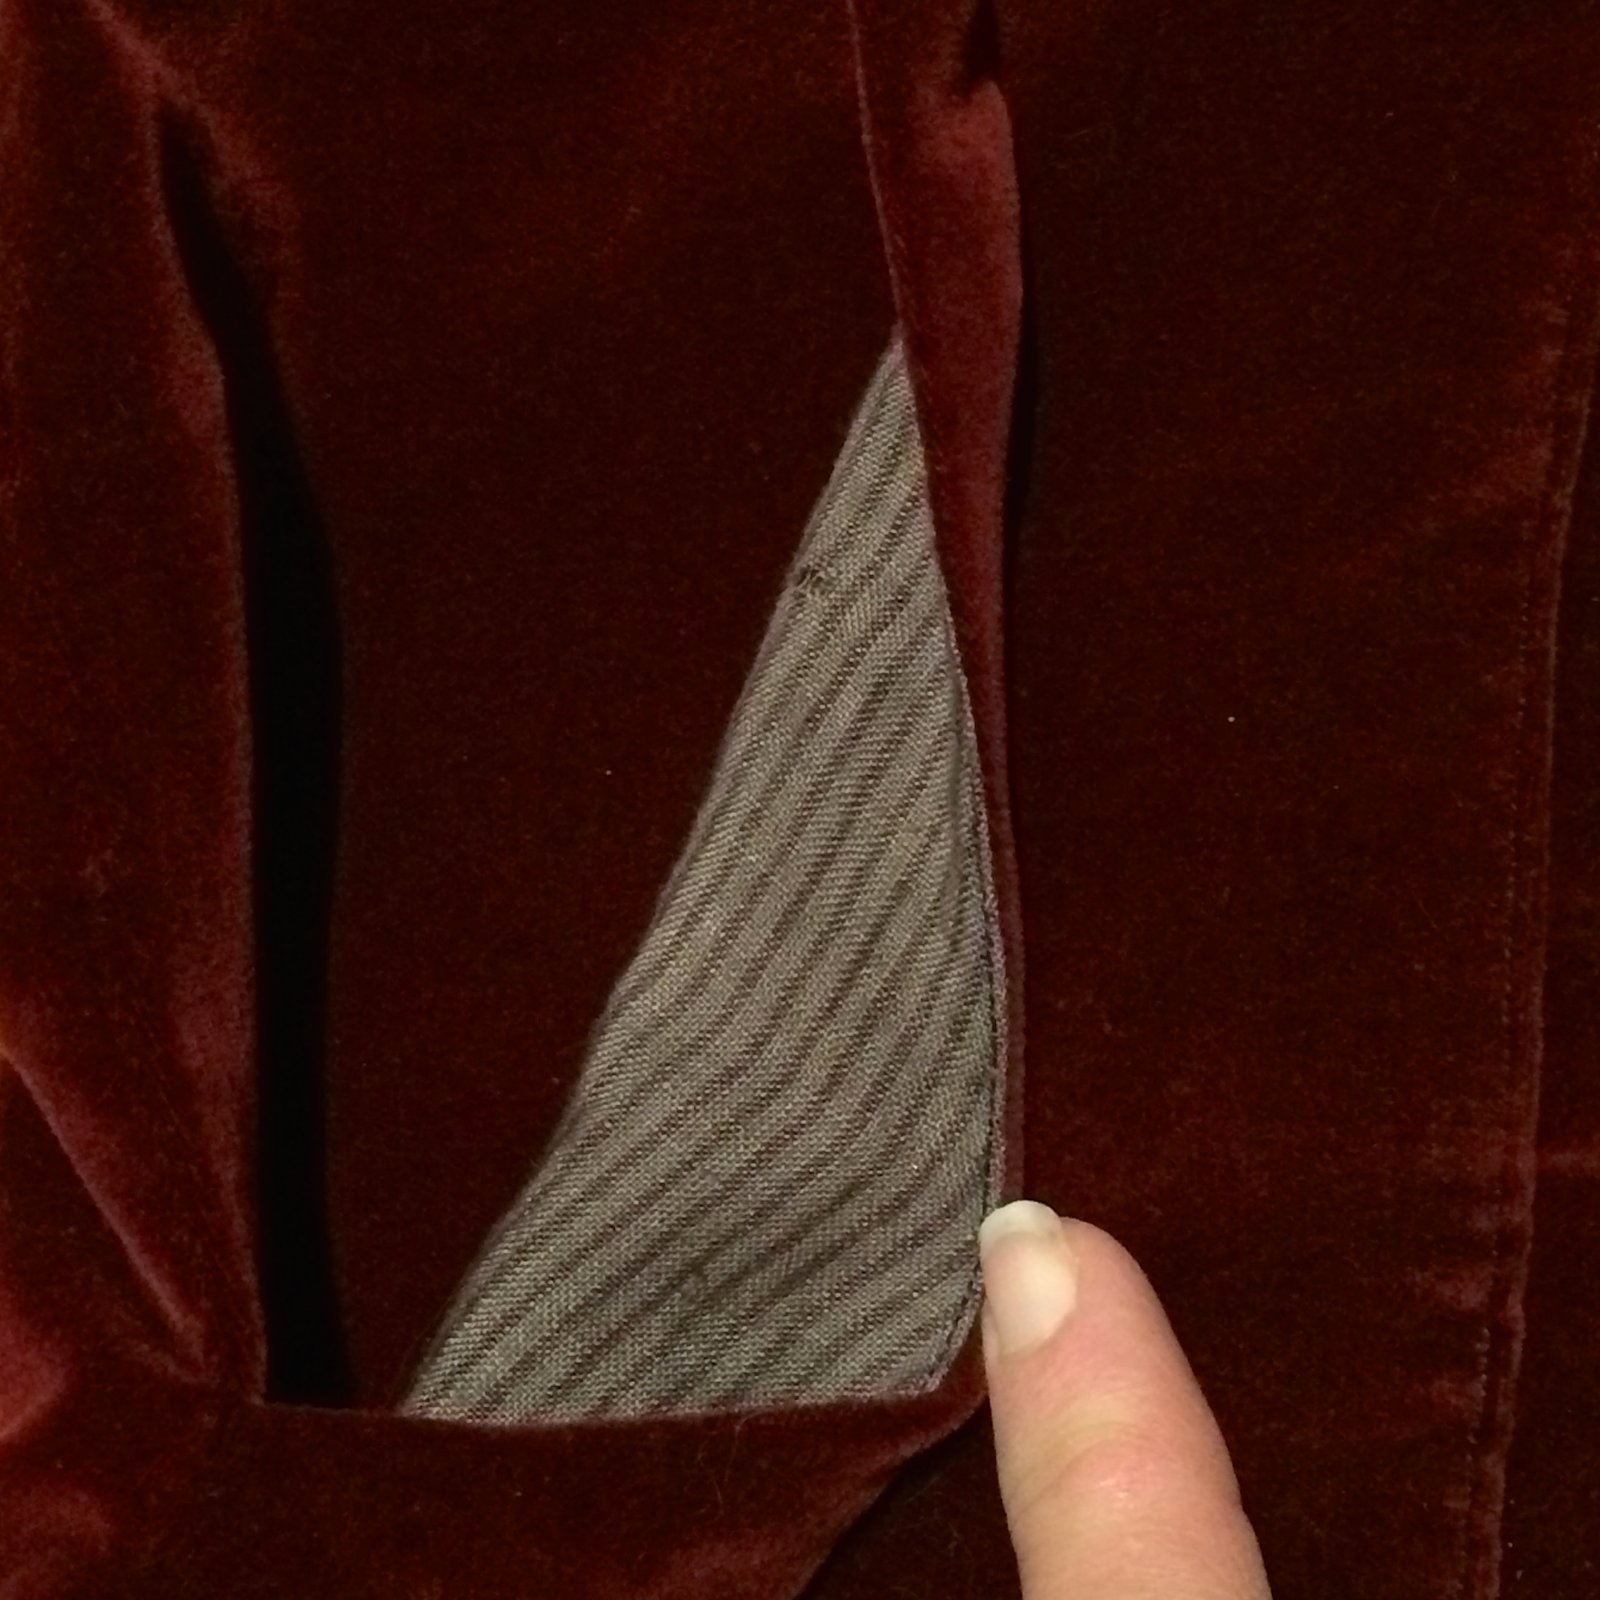
THIS! is a cautionary tale…. so, when you’re making welt pockets, and you come to the all-important, ever-so-precise task of cutting the welt opening in your dress fabric?  It’s a good idea to check that your lining fabric has been flipped up out of the way first.  Yeah.  *kicking myself BAD over this disaster…. I used my rotary cutter, and cut the most beautiful clean neat welt pocket opening through the front of my pinny…. AND THE LINING UNDERNEATH AT THE SAME TIME TOO.  Fortunately this only happened once, on just one pocket I mean, and I realised straight away.  If I’d done it for both pockets, I would have seriously considered replacing the lining, for real.  Anyway; I bandaid-ed the problem by ironing on a strip of iron-on interfacing and indulging in some furious and thorough zig-zagging.  Not the most beautiful of repairs, but experience has taught me that this is both a durable and efficient method of fixing a cut like this.

Miraculously, I unearthed a very small length of pink, bias cotton cotton voile from my stash, that I made so long ago I barely remember it.  But it was just enough to finish the hem!!  STOKED!!!

So happy with my pinny!!!!!  I’ve worn it a couple of times already, and am over the moon with it!

I am wearing it here with one of my wool-mix Nettie tees, probably one of my most worn winter tees! my self-designed and -made black tights, and my favourite motorcycle boots.

Now… for something completely different!

Recently I had a conversation with my good friend E.  Now, E is one of my closest friends, we’ve been so for decades and I hold her opinion in high regard.  At the same time! she doesn’t even know I have a sewing blog really, and though she knows I have an instagram account I’m totally sure she has never looked at it… why? because the topic of our conversation on this day was about her recent holiday with her husband, and as an extension of that; how she feels super strongly that “instagrammers” are ruining the world and are just beyond despicable, in her eyes.  In her own words; she despises instagram, because people are obsessed with taking their pictures in the most beautiful places and are thus destroying these places for everyone else, in both the taking of the photos, and the damage they do while doing so.  And not to mention they look ridiculous in their ballgowns and long tresses blowing in the wind, out on the moors, or in front of a particularly picturesque cottage, that’s not even their cottage, or whatever…..  Now… on the one hand I can certainly see her point, especially when it comes to people monopolising key beautiful tourist spots, setting up tripods and preventing other people from enjoying the view because they are prancing around right in the middle of it.  Our conversation didn’t even touch on people leaving rubbish behind, or treading on and damaging delicate flora or anything physically destructive like that! though of course that is a problem too.  My friend blames instagram completely for all this.

Now of course, I have thoughts!  I personally love instagram! though I can see too that all of her points have validity.  I know exactly the type of instagrammer to which she is referring… I have seen them myself too.  And secretly thought how silly it all looks.  And I know I might well be accused of being one of “those prancers” sometimes…!!   HOWEVER; I would argue not! since I take great care to take my own photos in complete private.  I think this is something not many readers of my blog or viewers of my instagram understand about me; I am actually a very shy and quiet person; and would be terrified to take photos of myself in front of other people.  I need complete isolation!  If there were other people there enjoying the view and taking their own pictures or whatever, you can bet your bottom dollar I am NOT going to be getting in their way, or taking my own pictures.  So while the evidence is there on my blog that I do indeed take pictures of myself in beautiful locations, I’m not really making a spectacle of myself in the action of doing it; if that makes sense.



It’s always felt logical to take photos of my new creations in my favourite spots.  It just gives me lots of pleasure to make this happen.  Should I stop? because I’m being ridiculous? or continue because it gives me joy?  rhetorical question btw, no need to answer… I don’t even know why I’m going got all this effort to explain myself really, except maybe to lay out my own thoughts coherently.  Did she strike a nerve?  maybe.  I have a sense of the ridiculousness of it all, even while I’m doing it.  But at the same time, I want to take pictures of my clothes, and I like the idea of nice photos, though my commitment to this waxes and wanes. I did actually go for a fairly long period of time where I only took pictures in my own garage, or in our own house and garden.  I don’t know if it even went noticed on my blog here because I am fortunate to have some quite picturesque corners in my garden, but yes; I went off the idea of ” real” photos “out and about” for nearly a year…

And obviously; I am super opposed to damaging the environment in any way.  If I love a beautiful spot, I definitely want it to stay beautiful for the future!  Leave only footprints and take only pictures.  Am a big proponent of that.

I’m not sure what the right answer is, but I guess I should just continue to be super vigilant and careful about taking my photos only when alone.  It’s easy to “say”, like many people do in this time of (over?)-sharing; that I don’t care what other people think of me, but obviously that would not be true!

What a weird, double life I’m living!  Maybe I should just delete all this?!

pinterestmail

a red wine pinafore

I’m wearing a new … thing. Is it a dress? Dungarees? An overall…?  we used to call these pinafores. Or a pinny.  I think it’s pretty cute anyway 🙂

I used to dress my children in corduroy dungarees when they were little, and LOVED seeing them toddle around in them, how sweet they used to look!  So maybe I’m a little nostalgic.  And maybe it could be argued that pinnies are a funny choice for a woman of my age, that they’re more suited to a younger set; but whatever… I’m just just inexplicably into them right now; I don’t always follow a trend but this one I really liked and I just wanted one.  Nowadays I’m just into wearing what I want to, and am caring less and less if it’s what I’m supposed to be wearing.  It’s kinda freeing, to be honest.

I’m trying to remember when the pinafore first crept sneakily into my head and buried itself comfortably there … was it in Japan? or Melbourne?  just the general collective subconscious?  most likely the last one…  can’t remember, but the idea got wedged in somewhere and at some point I started to fantasise about my perfect pinnie.  I could picture it exactly; velvet or velveteen, and deep purple-y/burgundy/red wine colour.  The only problem was that Spotlight had a wine-coloured corduroy, but not velveteen, and I had my heart set on velveteen… not to worry!  I bought the cherry-red velveteen with plans to dye it.  I also bought my copper-coloured buckles and jean buttons from Spotlight.

the original colour, before dyeing…

Now patterns, patterns…  There re actually precious few pinafore patterns out there.  I ended up using the pauline alice turia dungarees pattern,  I’d seen and liked Sue’s turia dungarees, especially the cute trapezoid pocket with flap on the bib, and thought I could alter the pattern to be a dress pretty easily, although I ended up altering every single pattern piece! with one exception; that front bib pocket, that attracted me in the first place!


For inspiration; I really liked this pink pinny, and this denim one too… though I preferred the pink one. .  I printed out and taped the bodice bits to the shorts bits, and cut them as one piece, like in the following picture…  you can see in the picture I’ve allowed plenty of room around the pattern pieces for custom-fitting, and I basically draped and pinned it directly on myself to get the final version!  It doesn’t even fit either of my dummies!

The front is cut on the fold as one piece, with a wider bodice and a straightish A-line skirt.  The expanse of fabric on the front is nicely cut up by those three patch pockets.  The back I cut with a similarly shaped A-line skirt, and to have a centre back seam, which I overlocked and then felled to one side; it would have been easy to cut the back on the fold as one piece too, but because I was not having any pockets on the back, I thought it needed the centre seam for some visual interest.

I cut my hip pockets to be about 2cm deeper and wider than the pattern pieces, because I wanted them to be more visually weighty than they appeared on the pattern illustration… and positioned them on the dress in an optimum position for me, which is lower than on the patten.

I also ended up cutting my shoulder straps narrower than the pattern, so as to fit into the buckles that I’d bought from Spotlight. The pattern is not intended to be lined, however because I knew I’d be wearing it with tights all winter I decided to fully line it… the bodice, shoulder straps, and all the pockets are all lined with white/purple striped linen from Tessutis in Melbourne, leftover from a shirt I made for Craig a few years ago.  For the skirt part I unearthed a navy blue polyacetate lining fabric from my stash.  I only had a very small piece of this, and by complete sheer luck it was exactly the right size and depth for my lining.

lining; the bodice and skirt are attached together at waist level and cut in the same A-line shape as the pinafore.

pocket lining

I used black thread throughout, and deep chocolate overlocking thread…  resulting in a mishmash of cherry red velveteen, white/purple lining, blue skirt lining, and black and chocolate threads .. sounds like a bizarro dog’s breakfast of a dress, yes?  Yep!

before dyeing

BUT I knew it’d be alright once it was dyed.  And you know what? I’M SO THRILLED WITH IT!  I used both iDye in Brown and some Blue, and TOOK THE PLUNGE!  eeeeek!!! Dyeing is always a little terrifying, but yeah, I couldn’t be happier with the result, the colour is perfect and EXACTLY what I wanted.  I’ve already worn this two days in the week since I finished it!

Details:

Pinafore; some wild ad-libbing upon the pauline alice Turia dungaree pattern
Tshirt; Closet Case patterns Nettie bodysuit, paprika stretch, details here
Scarf; raspberry cotton jersey, detail here
Navy cardigan; the Miette, a free pattern by Andi Satterlund, all yarn details here
Orange arm warmers; made from an old moth-eaten jumper, details here

location; Eagle Bay, in south western Australia


above is how I wore it – in the rain! – on the weekend, and below is how I’m wearing it today… it looks a little more vibrant in the blazing sun!

with self-drafted striped Tshirt, details here, and
my scarlet Miette cardigan, all yarn details here

SaveSaveSaveSaveSaveSaveSaveSave

pinterestmail
Switch to mobile version
↓