Tag Archives: Tutorial

A very simple cardigan

I made myself a cardigan; a quick fix project out of some stash fabric… and put together a little tutorial.  I did another cardigan tutorial back here, but this one is a leeetle different, although using the same pattern…
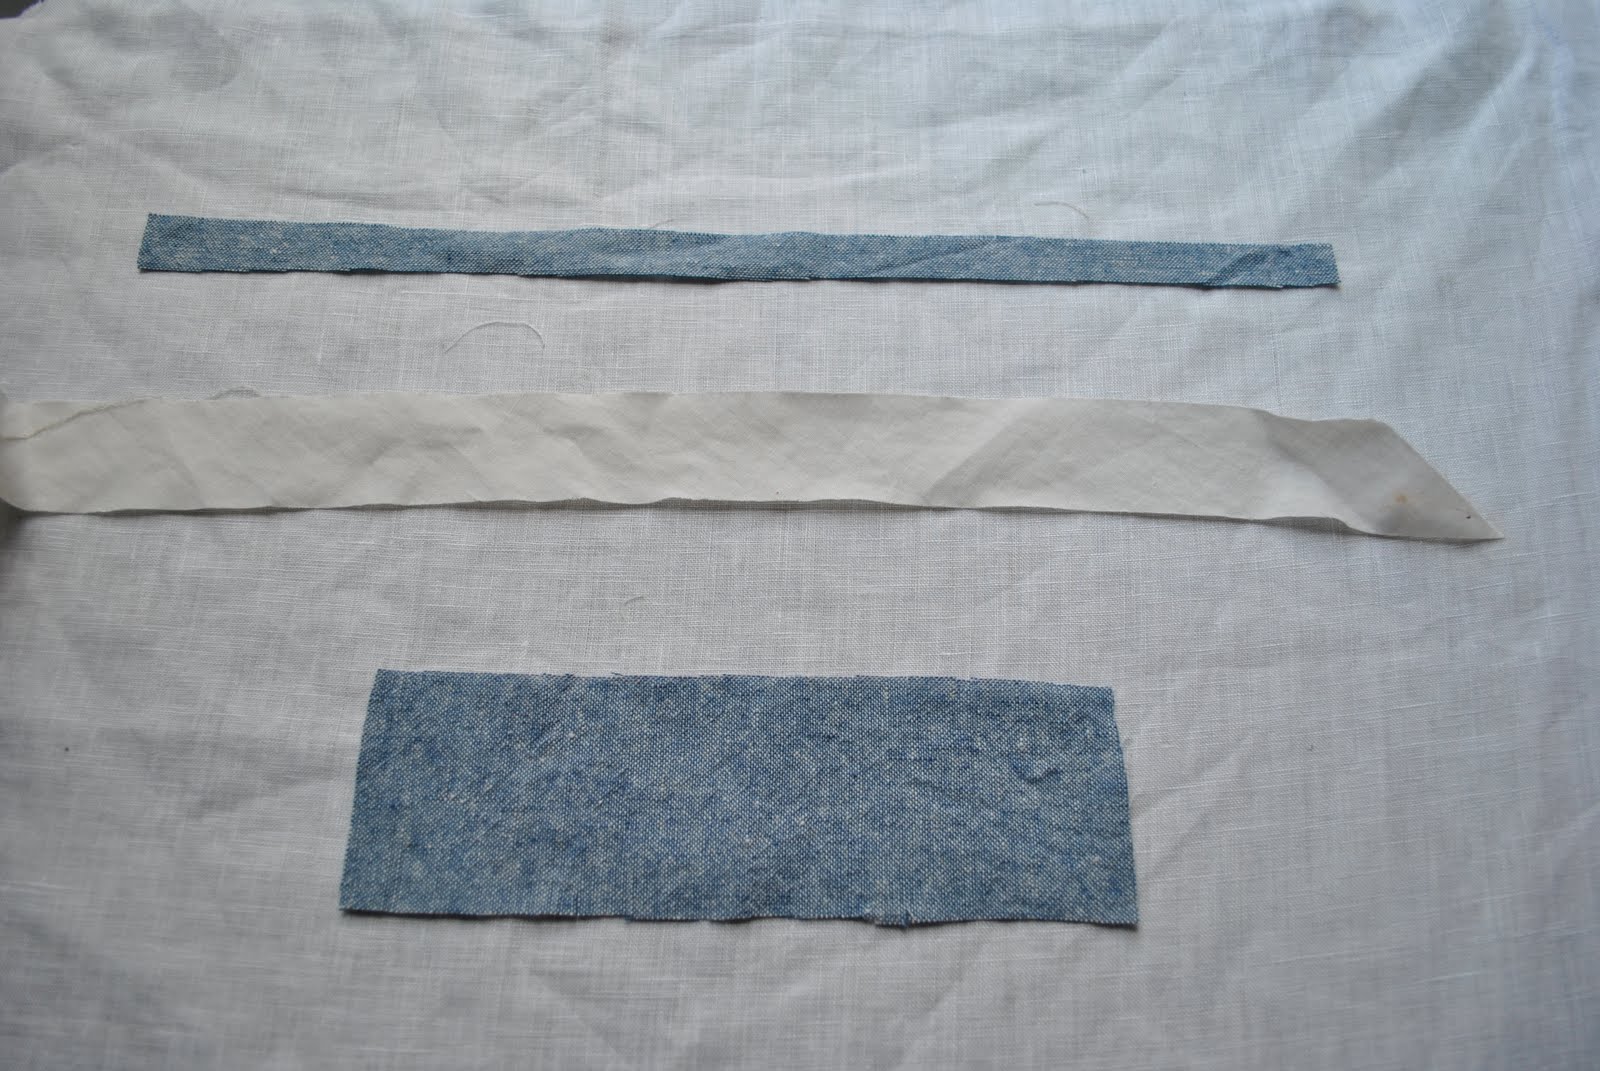
The fabric I am using is a thin but closely knit, slightly fluffy leopard print stretch jersey, and I have planned a simple single thickness cardigan.  I’m using grosgrain ribbon tape to strengthen and stabilise some seams, and have got five tiny pearl buttons to finish.
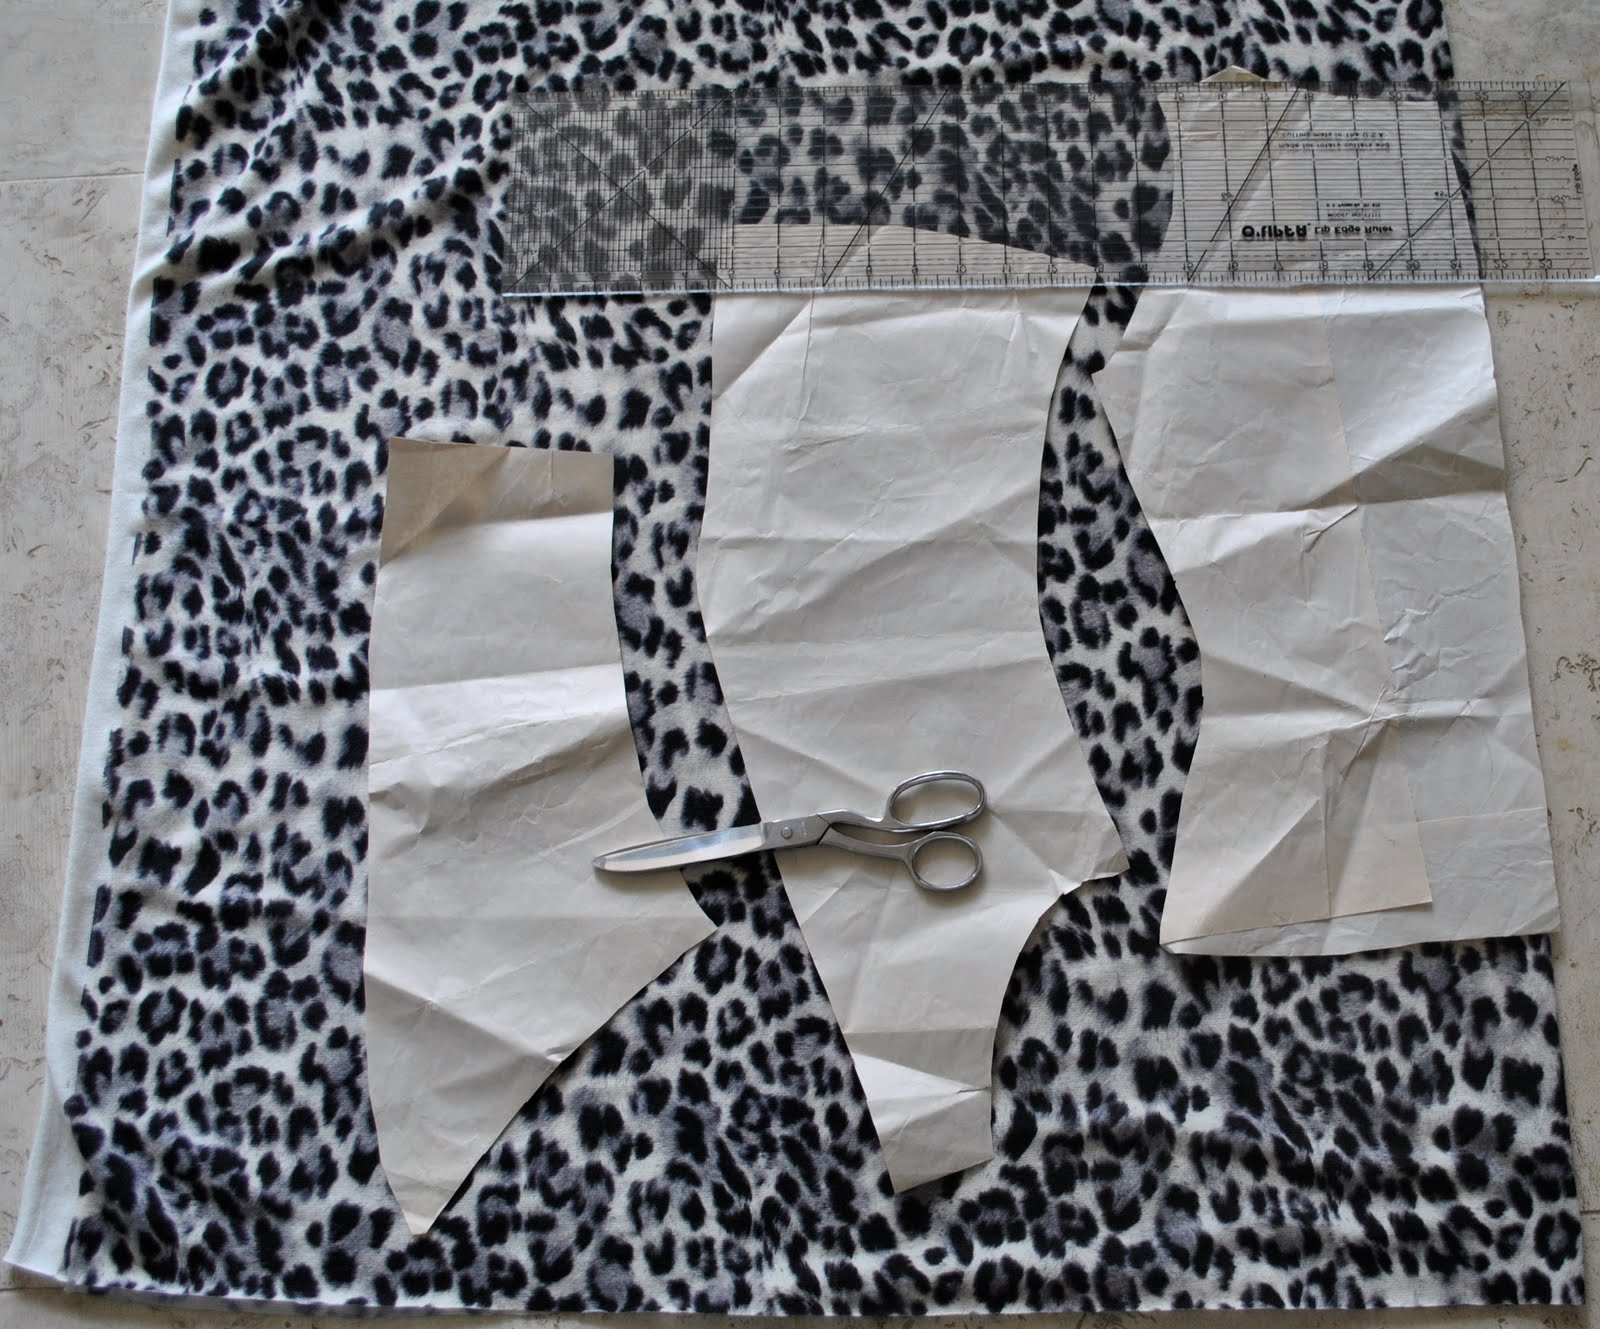
First I turned to my standby basic cardigan pattern; this I drafted using an old favourite cardigan as a basis.  I just laid down the cardigan as flat and as straight as possible and drew around all its edges… then once I had cut out the paper pattern I re-checked it against the original fabric cardigan to see it was close enough to the right dimensions.  This is a style and shape that has proven to fit me and (I think) to flatter me, so I’ve used it several times…  The back piece is laid on the fabric fold at right, the front is in the middle and the sleeve is laid out   left hand side of the fabric.  btw, this is a half sleeve, and has to be flipped over halfway through cutting to get the whole sleeve, er… now you can see how slapdash a cutter I can be…! lol.  Even though it looks a bit makeshift, and why don’t I get serious and just cut out a whole sleeve paper pattern piece; it has actually worked very well for me like this every time, so I haven’t bothered.  Lazy, I know…  Oh, and I cut the body and the sleeves longer than these pieces since I had enough fabric to do so.

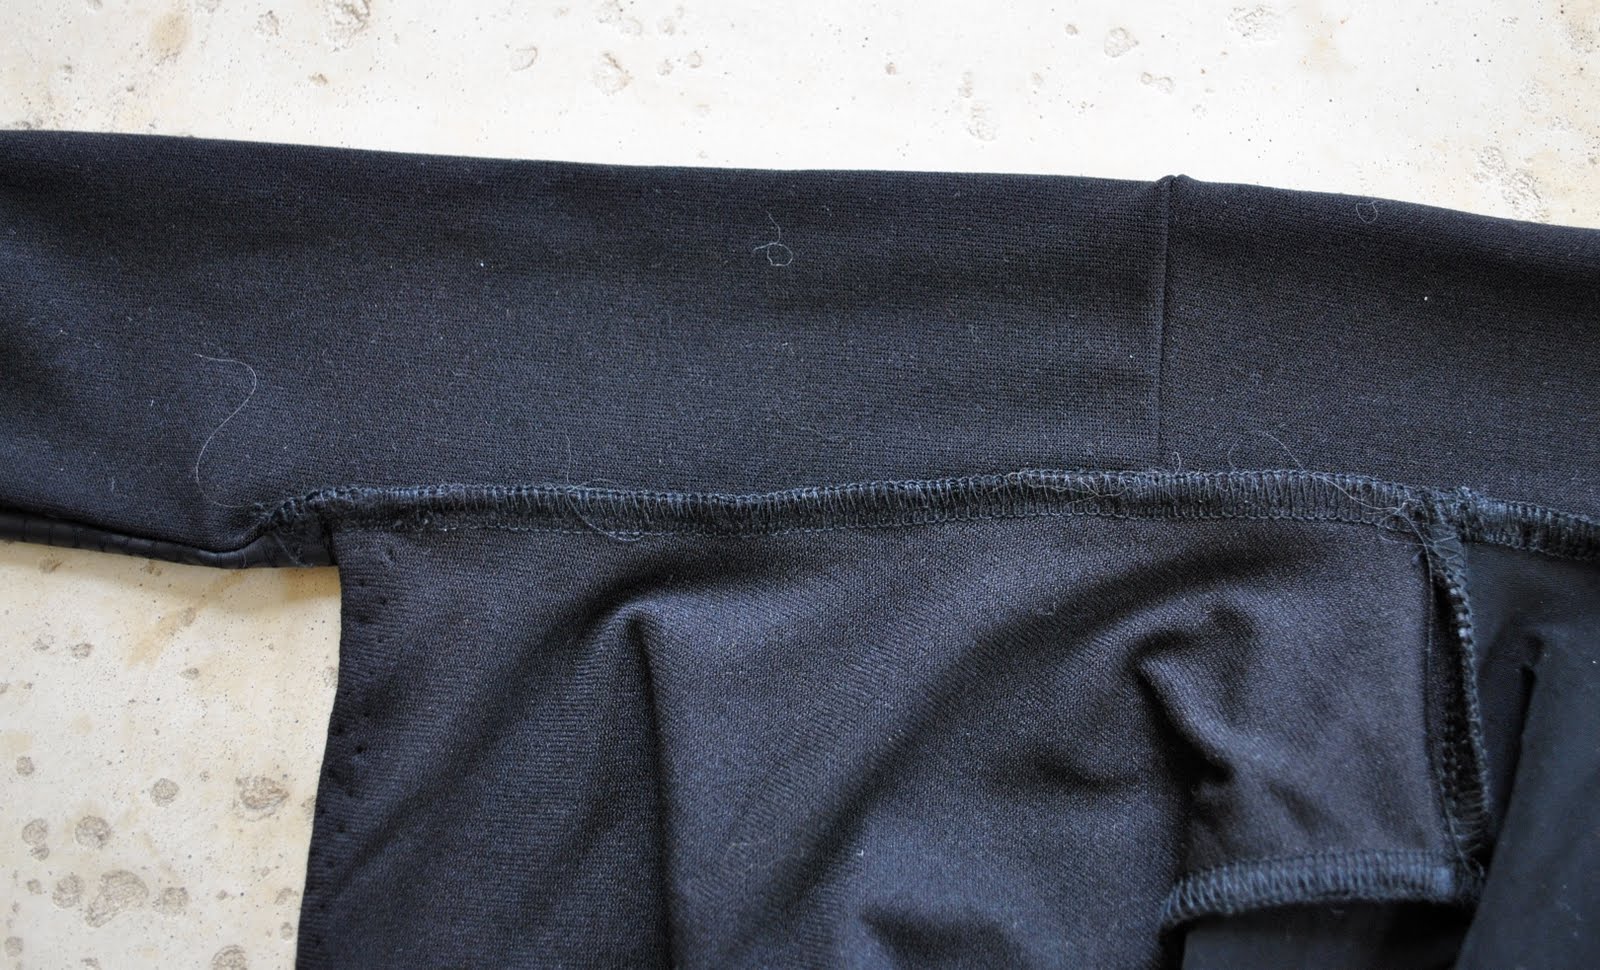
I sew the shoulder seams first, then fit the sleeve cap into the arm scye and sew these seams next…

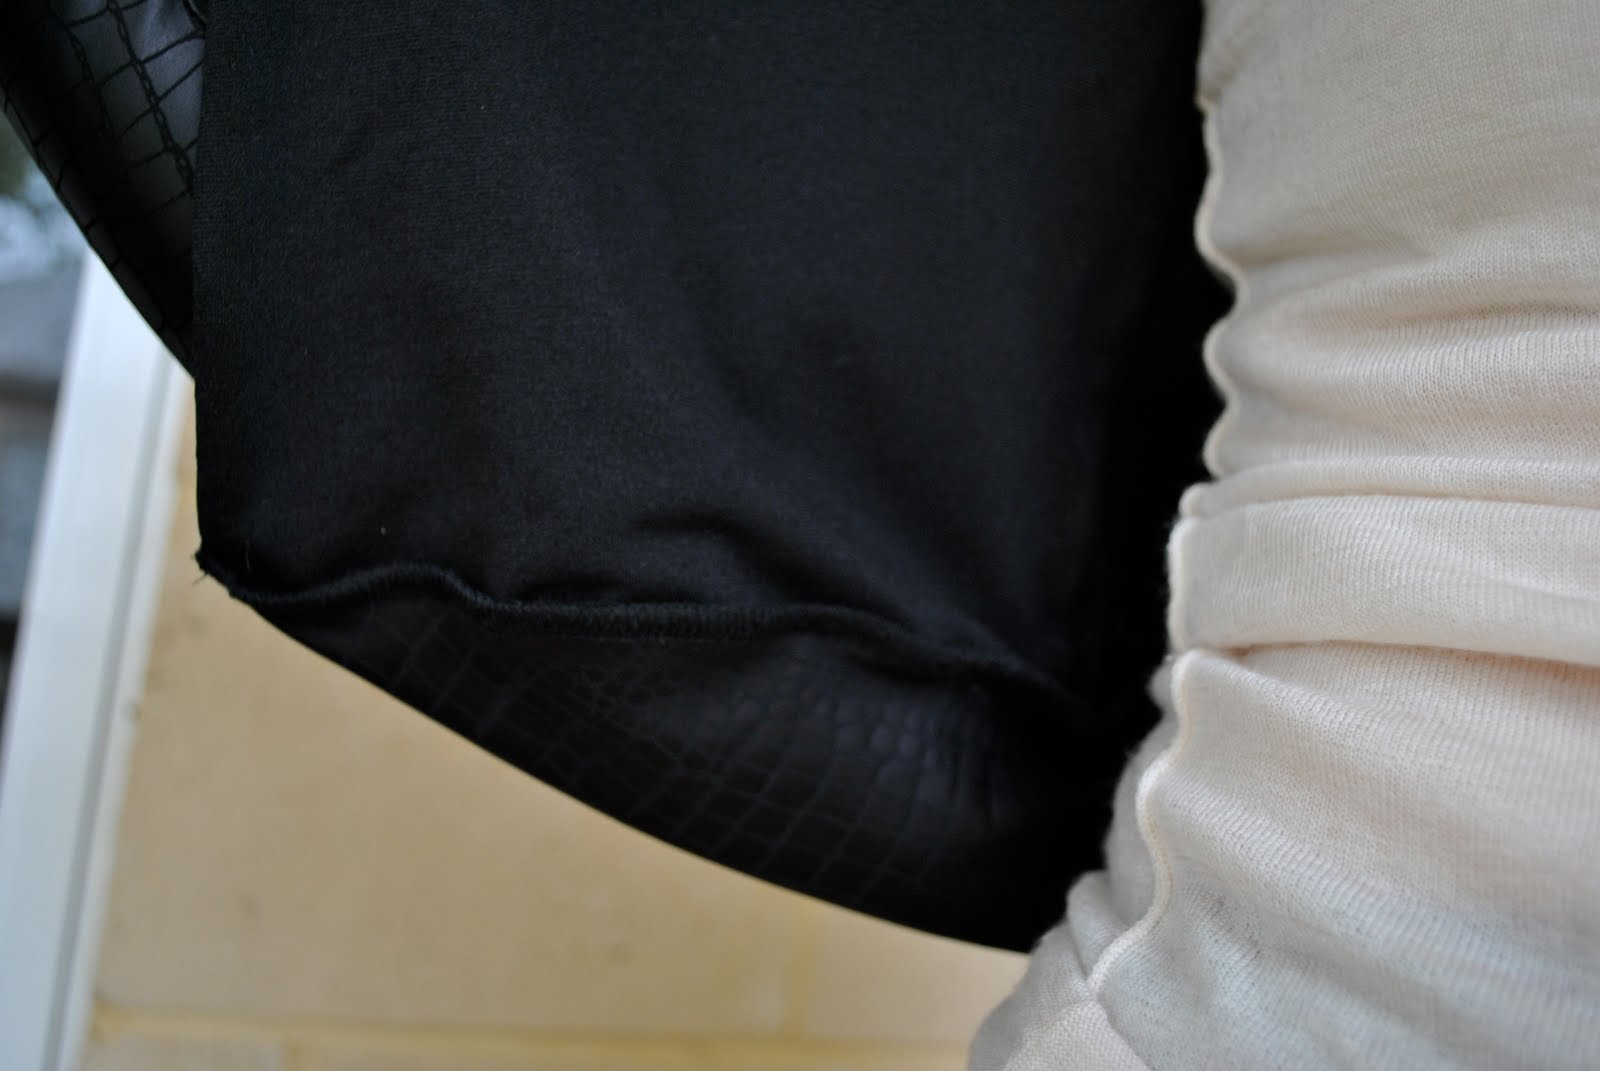
Then sew the underarm seam in one go, from the bottom hem edge right up the sides of the cardigan and on under the sleeve to the wrist edge, making sure to match up those sleeve-to-body seams to each other.

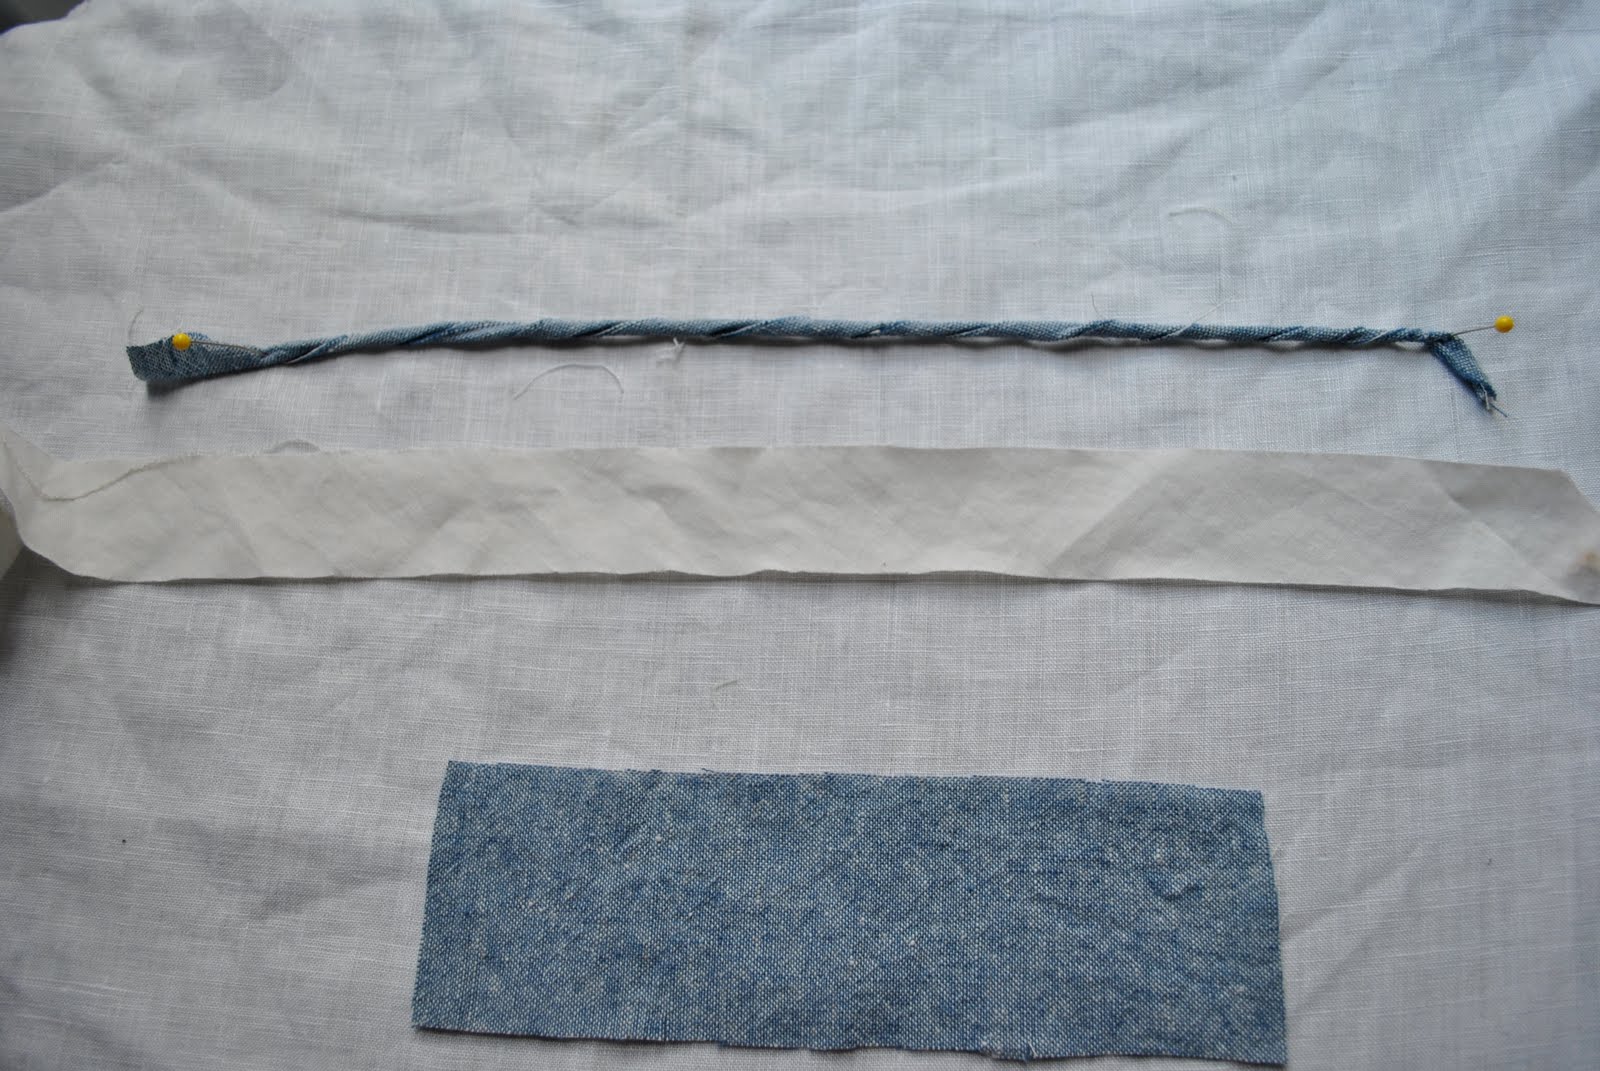
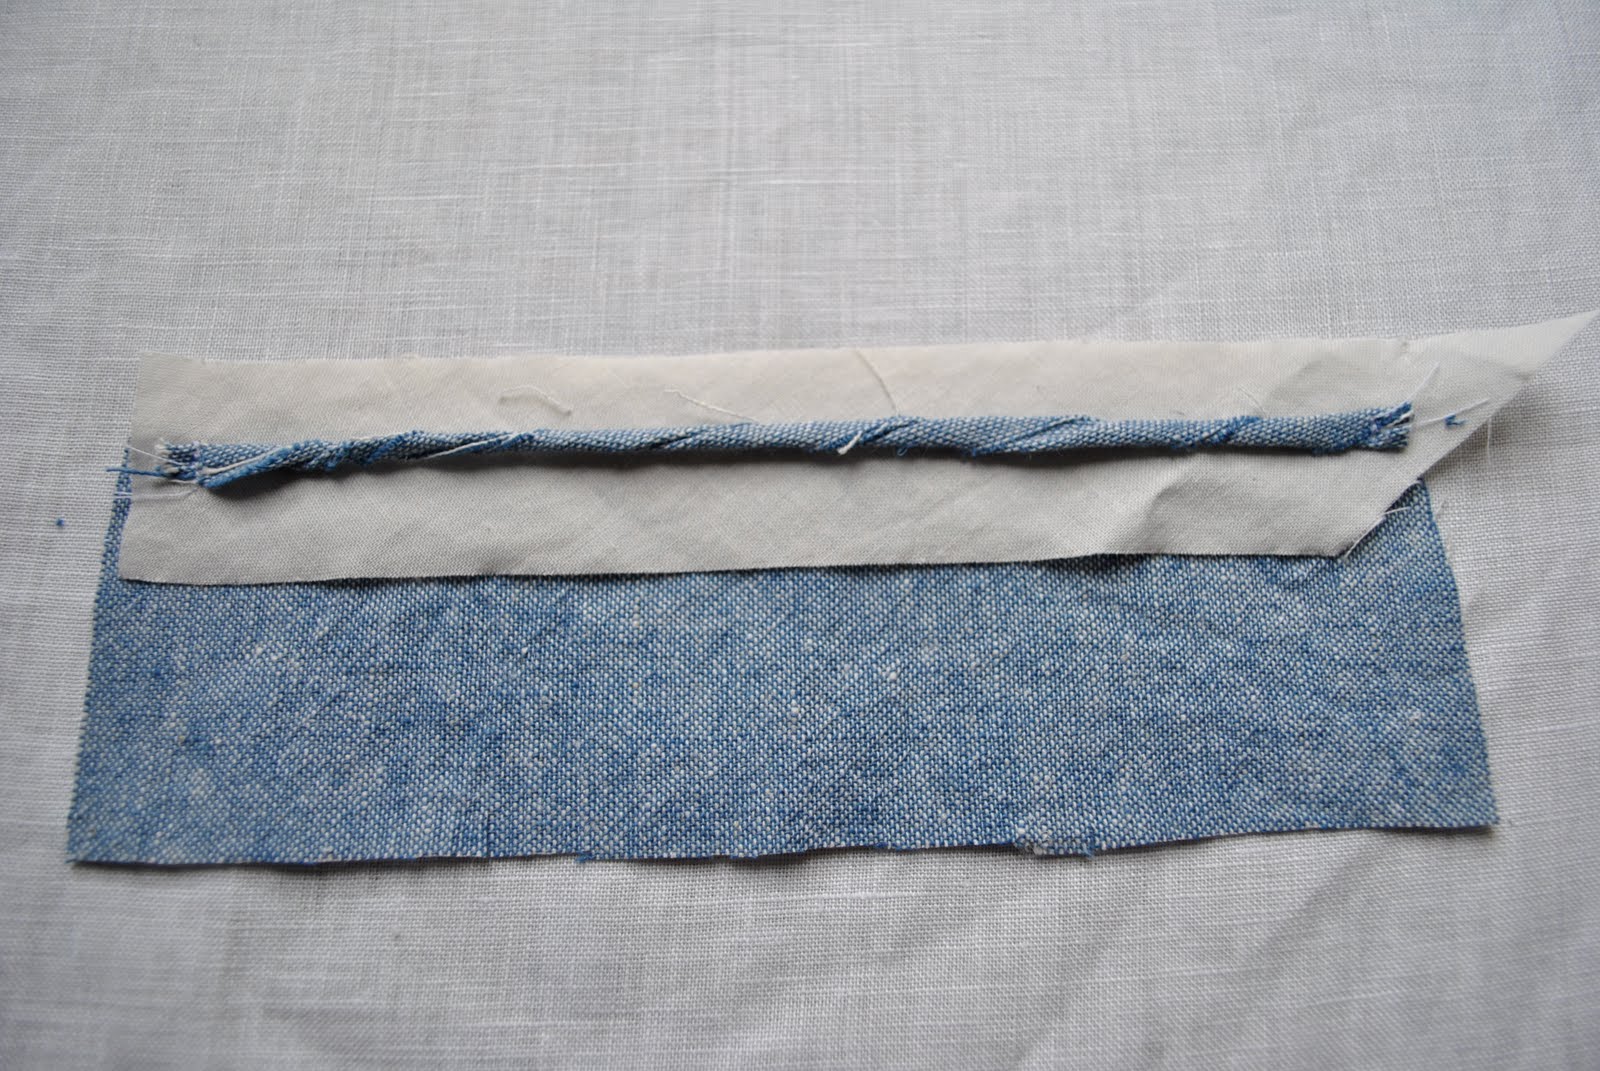
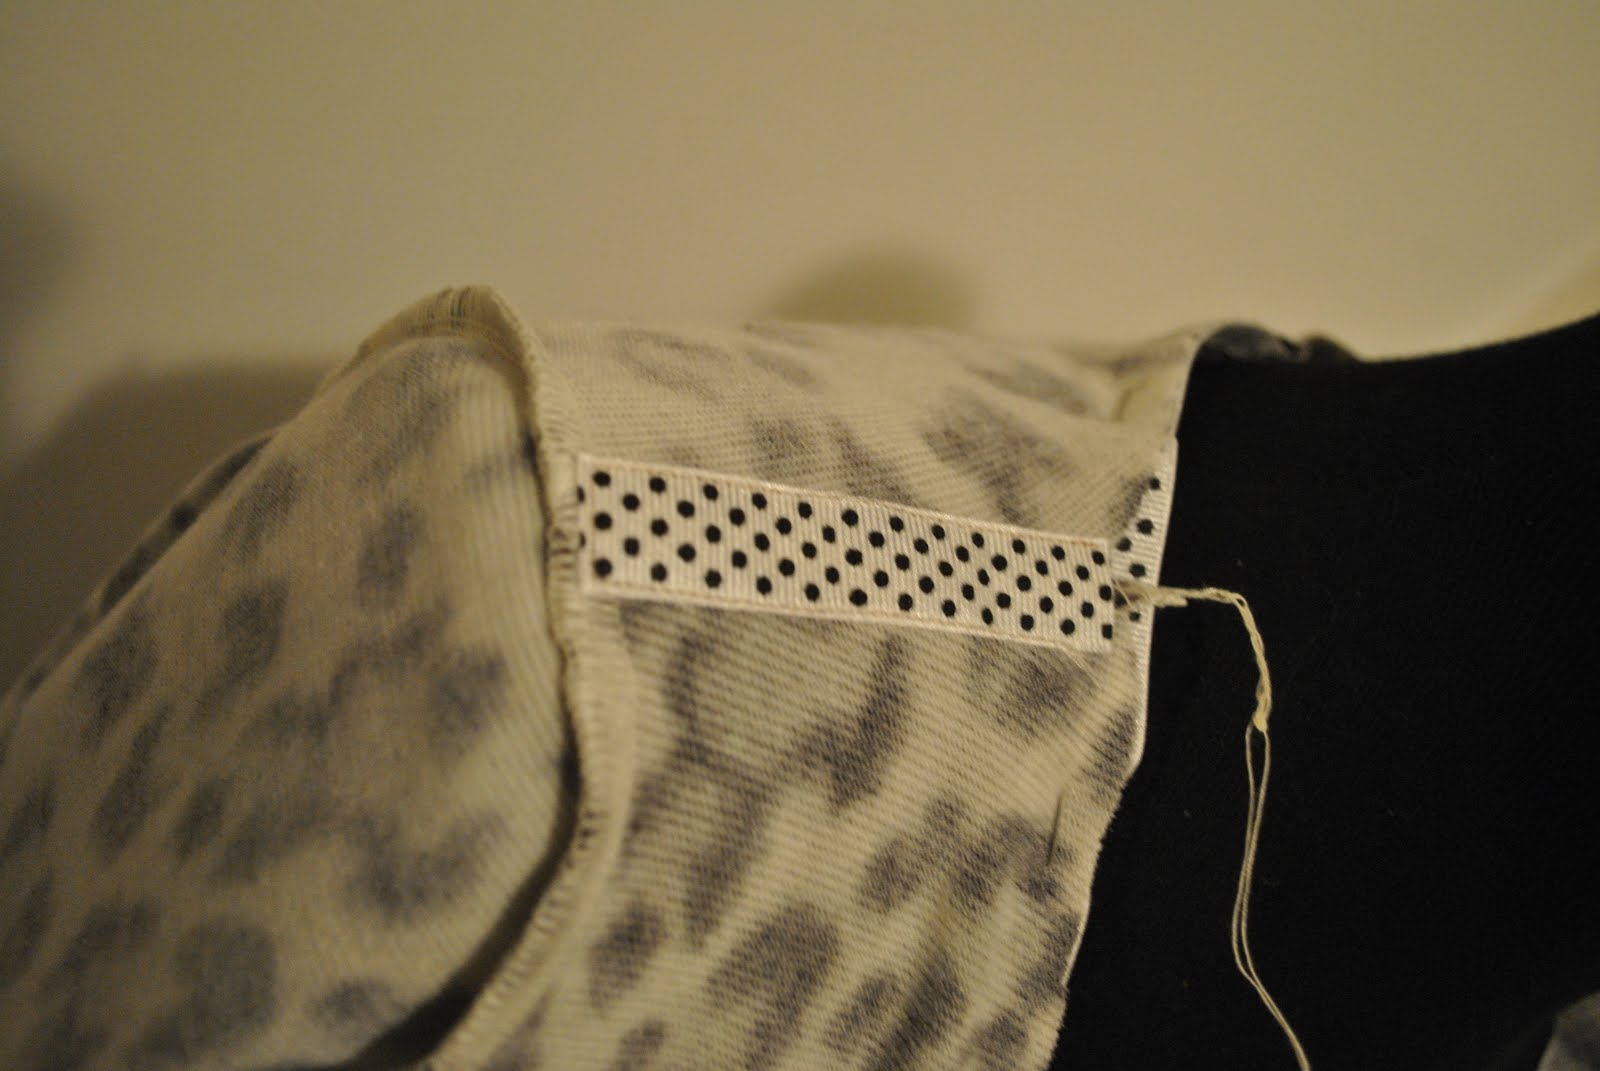
Use a short strip of grosgrain ribbon, sew it on over the shoulder seam and catching it under.  This will stabilise this seam and prevent it from stretching through wear…

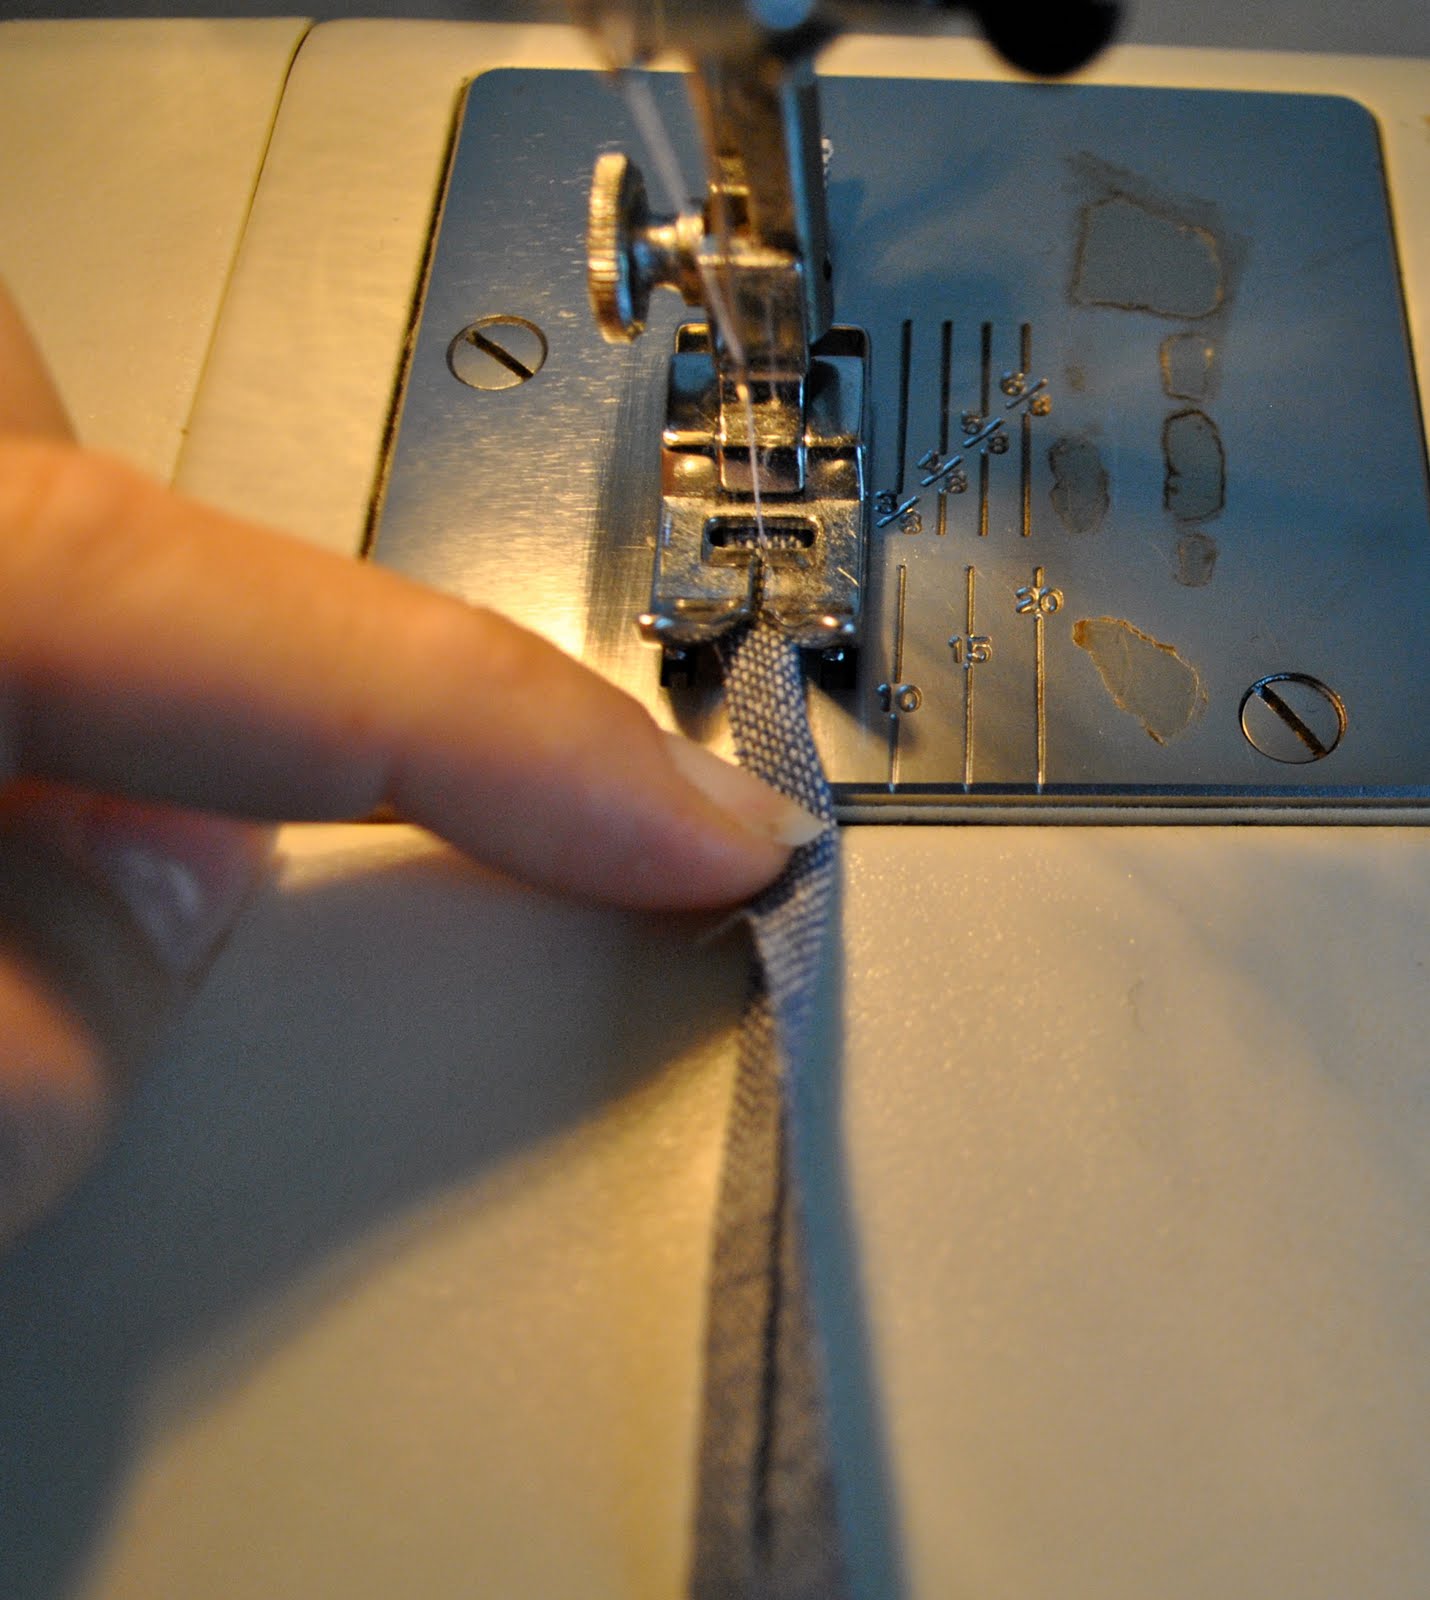
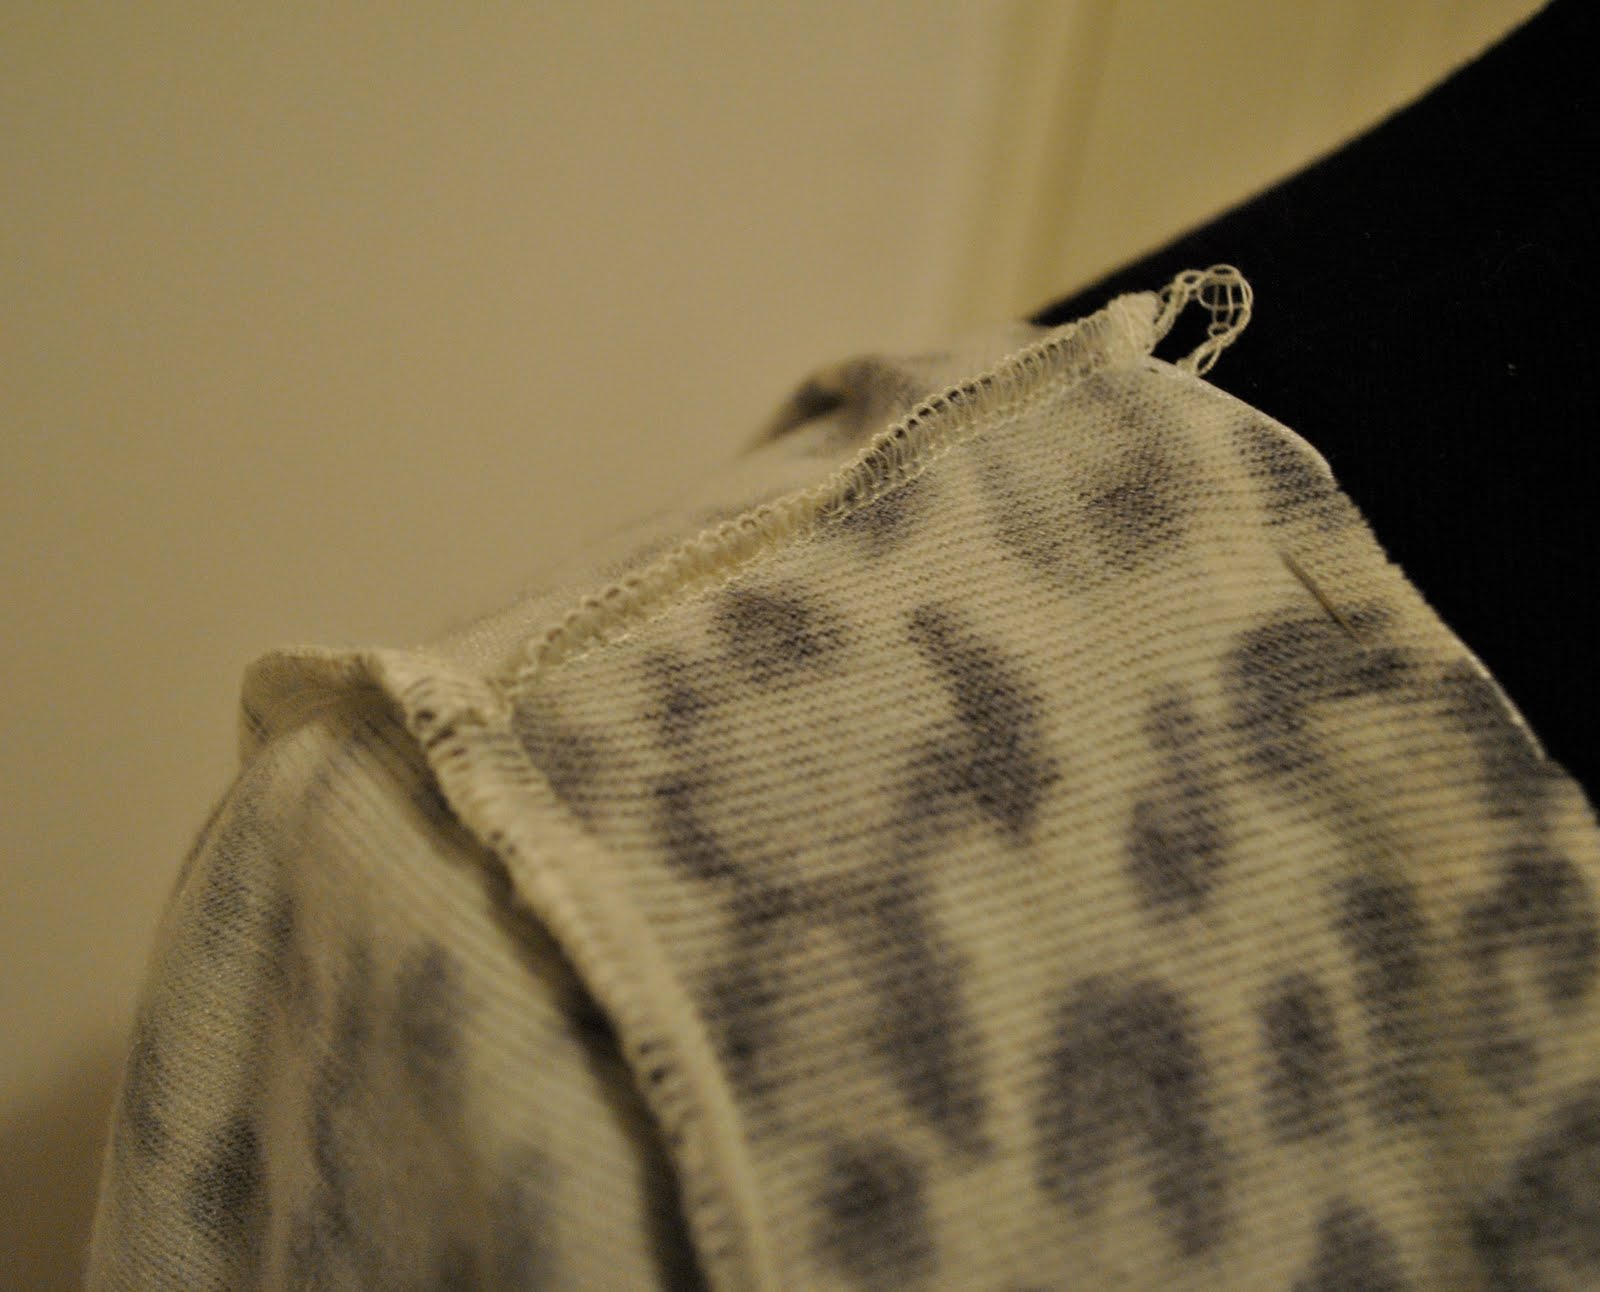
Pin the grosgrain ribbon, right sides together, all around the front and neck edge…

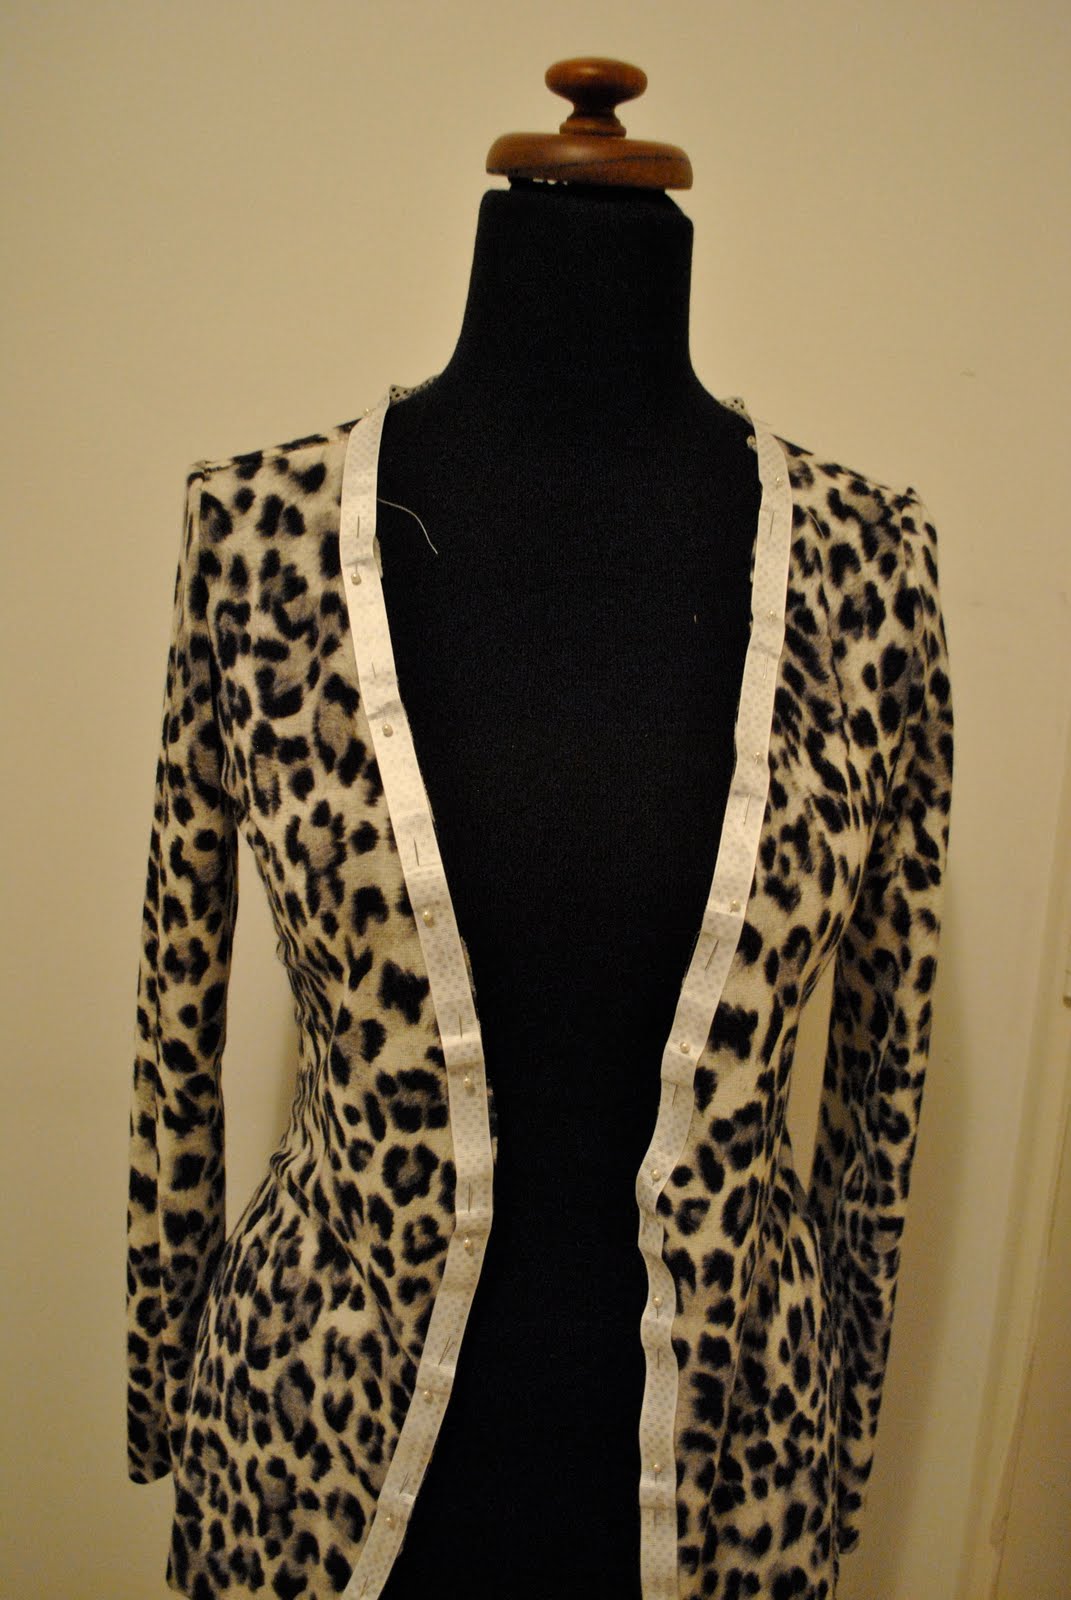
Sew the grosgrain ribbon to the edge,  as close as possible to the ridge of the ribbon edge…

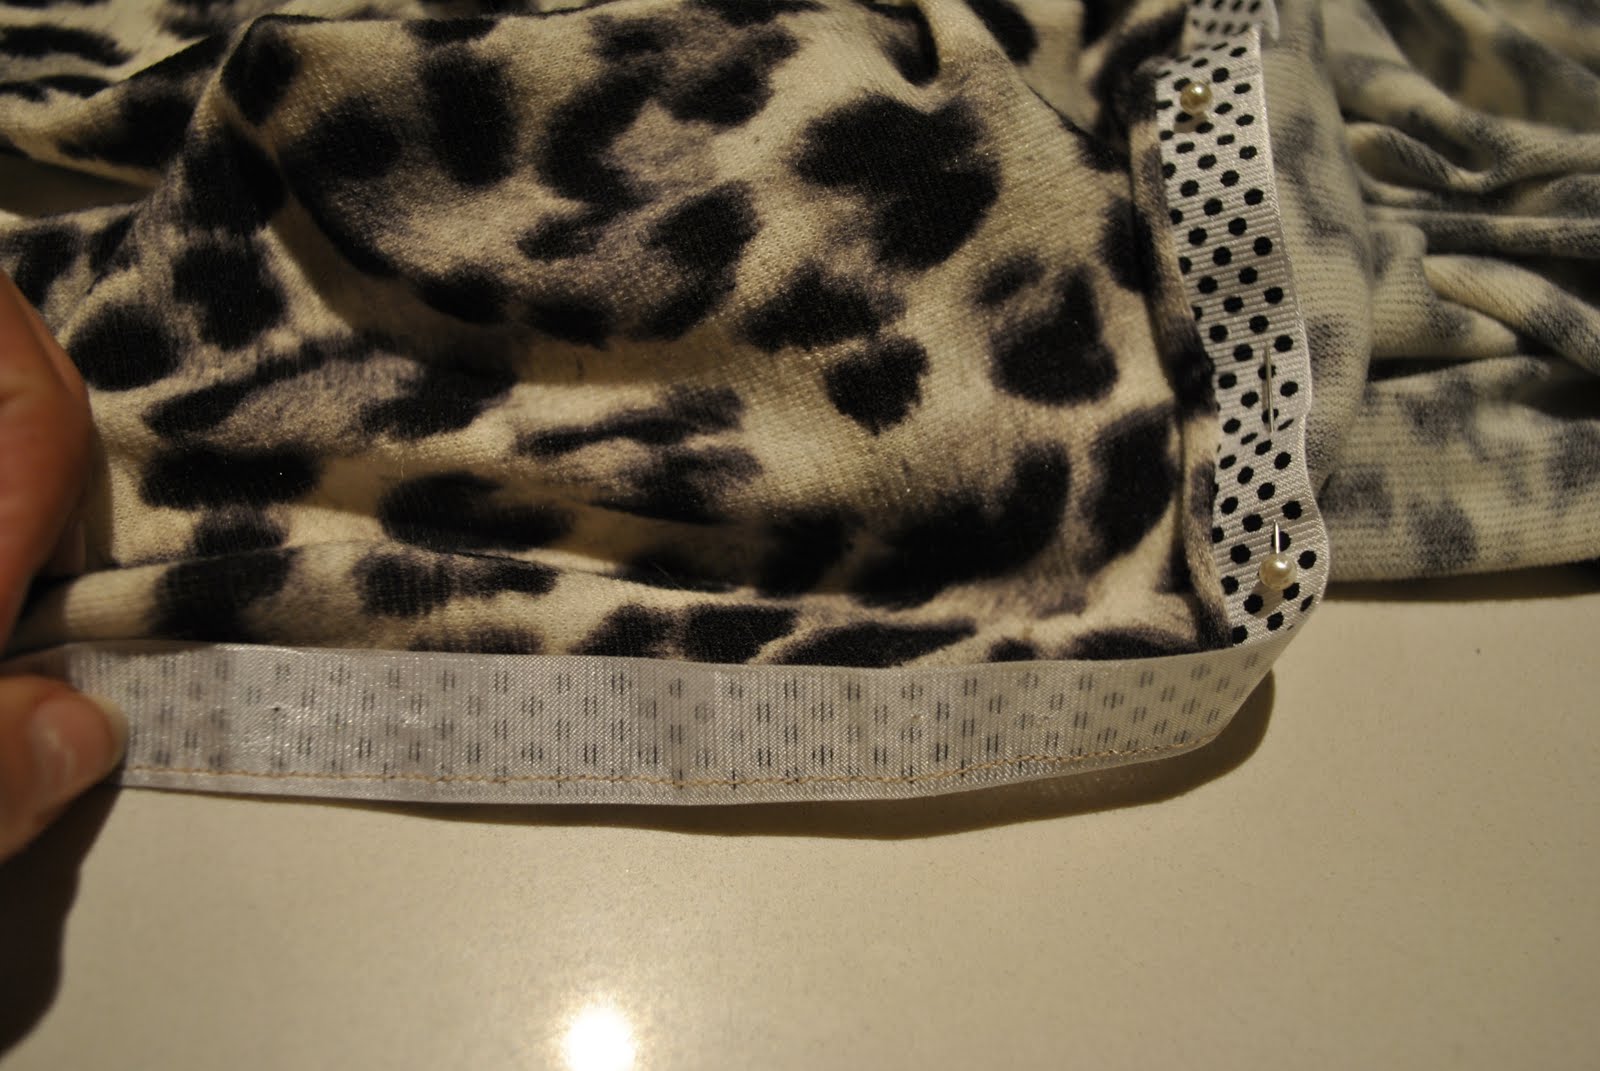
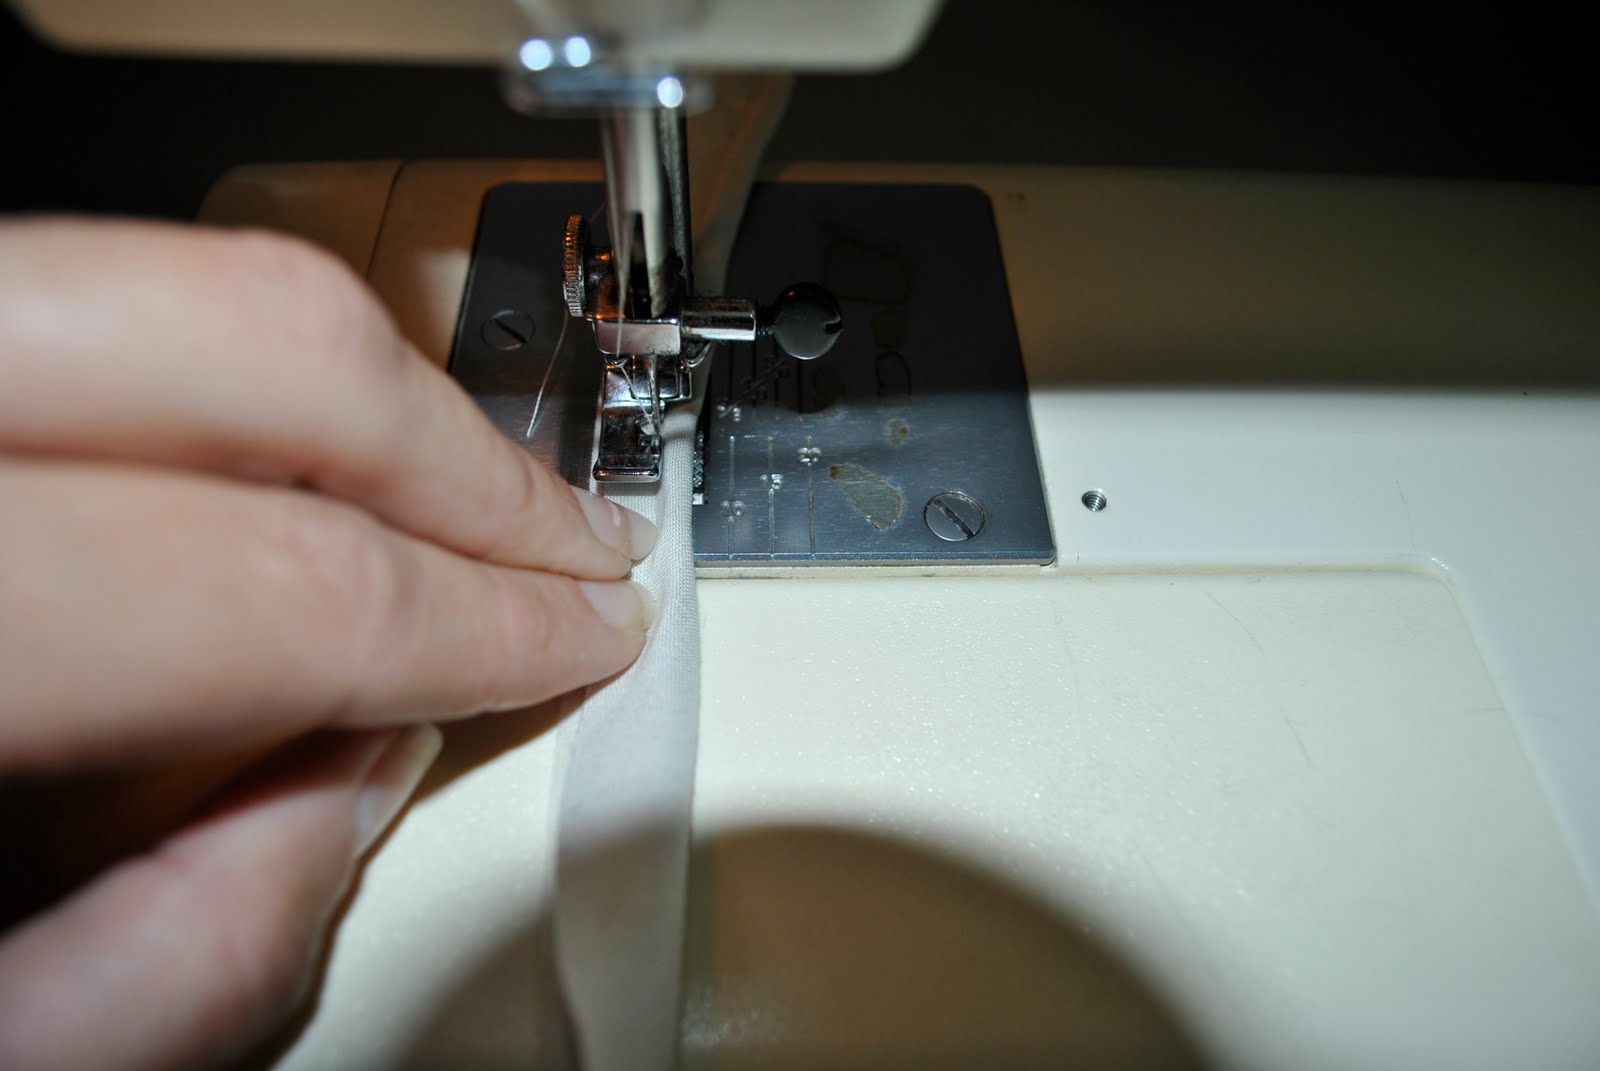
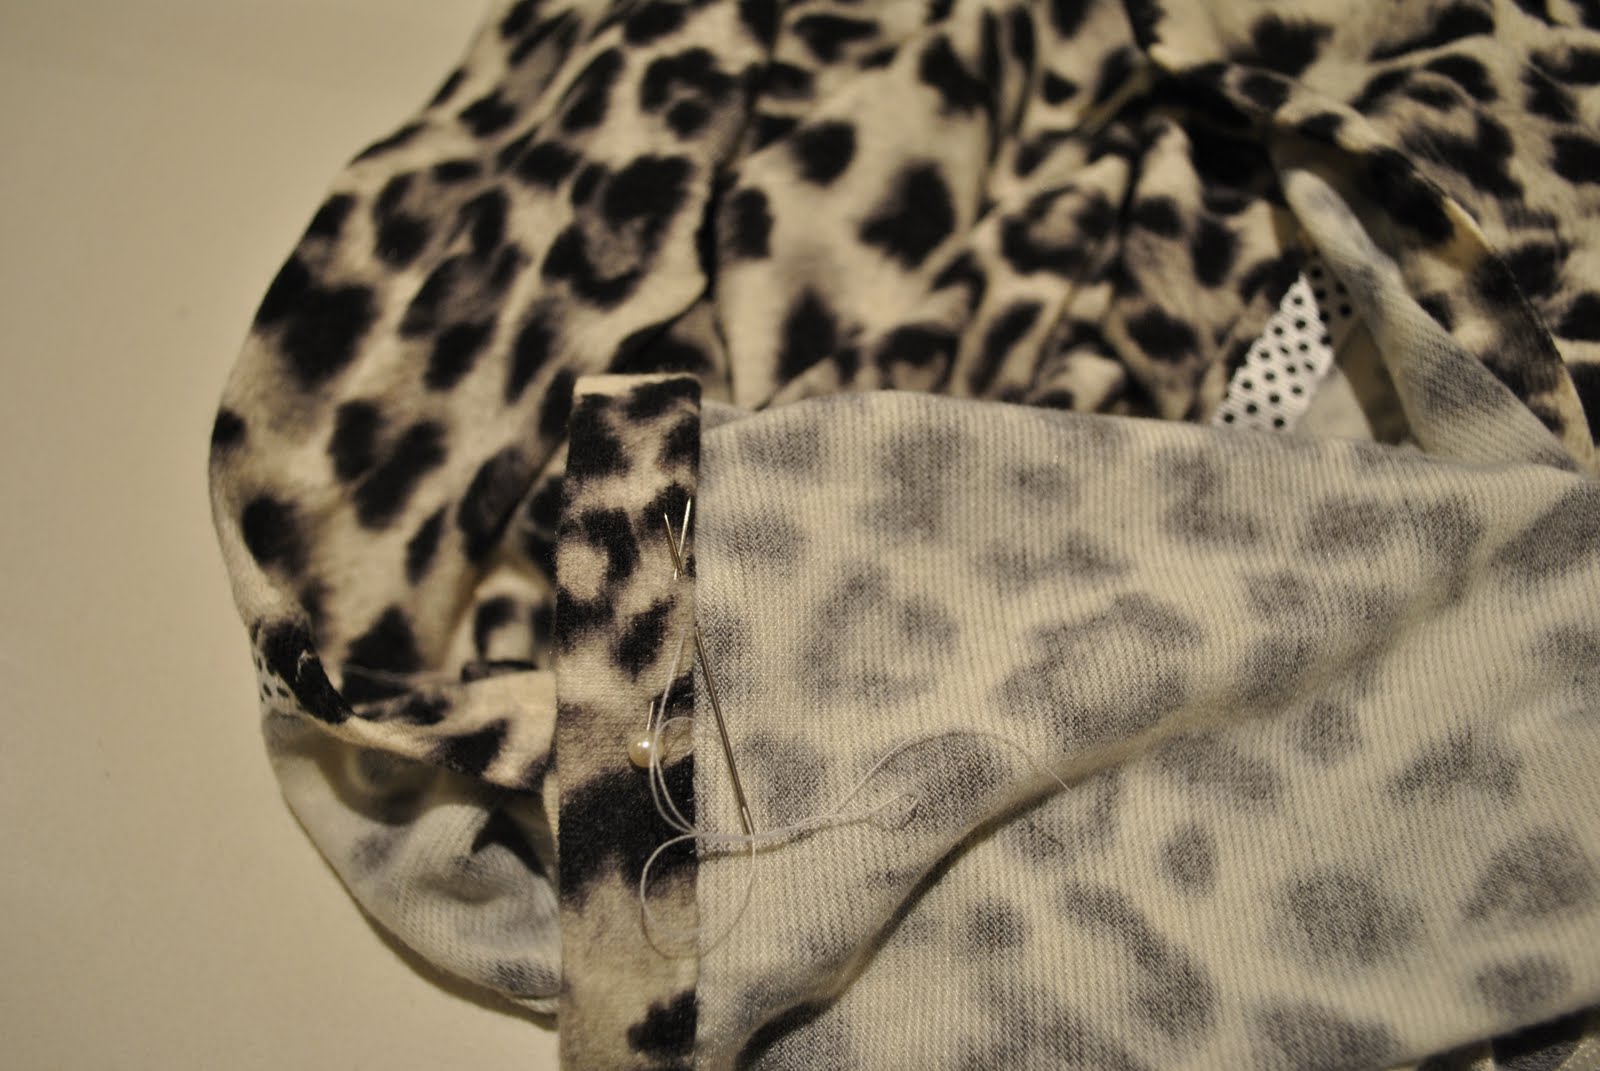
Turn the ribbon to the inside of the cardigan and invisibly hand-sew the edge of the ribbon on the inside…  Make sure the edge of the ribbon is cut off evenly on both fronts of the cardigan, and level with where you want the bottom edge to be…

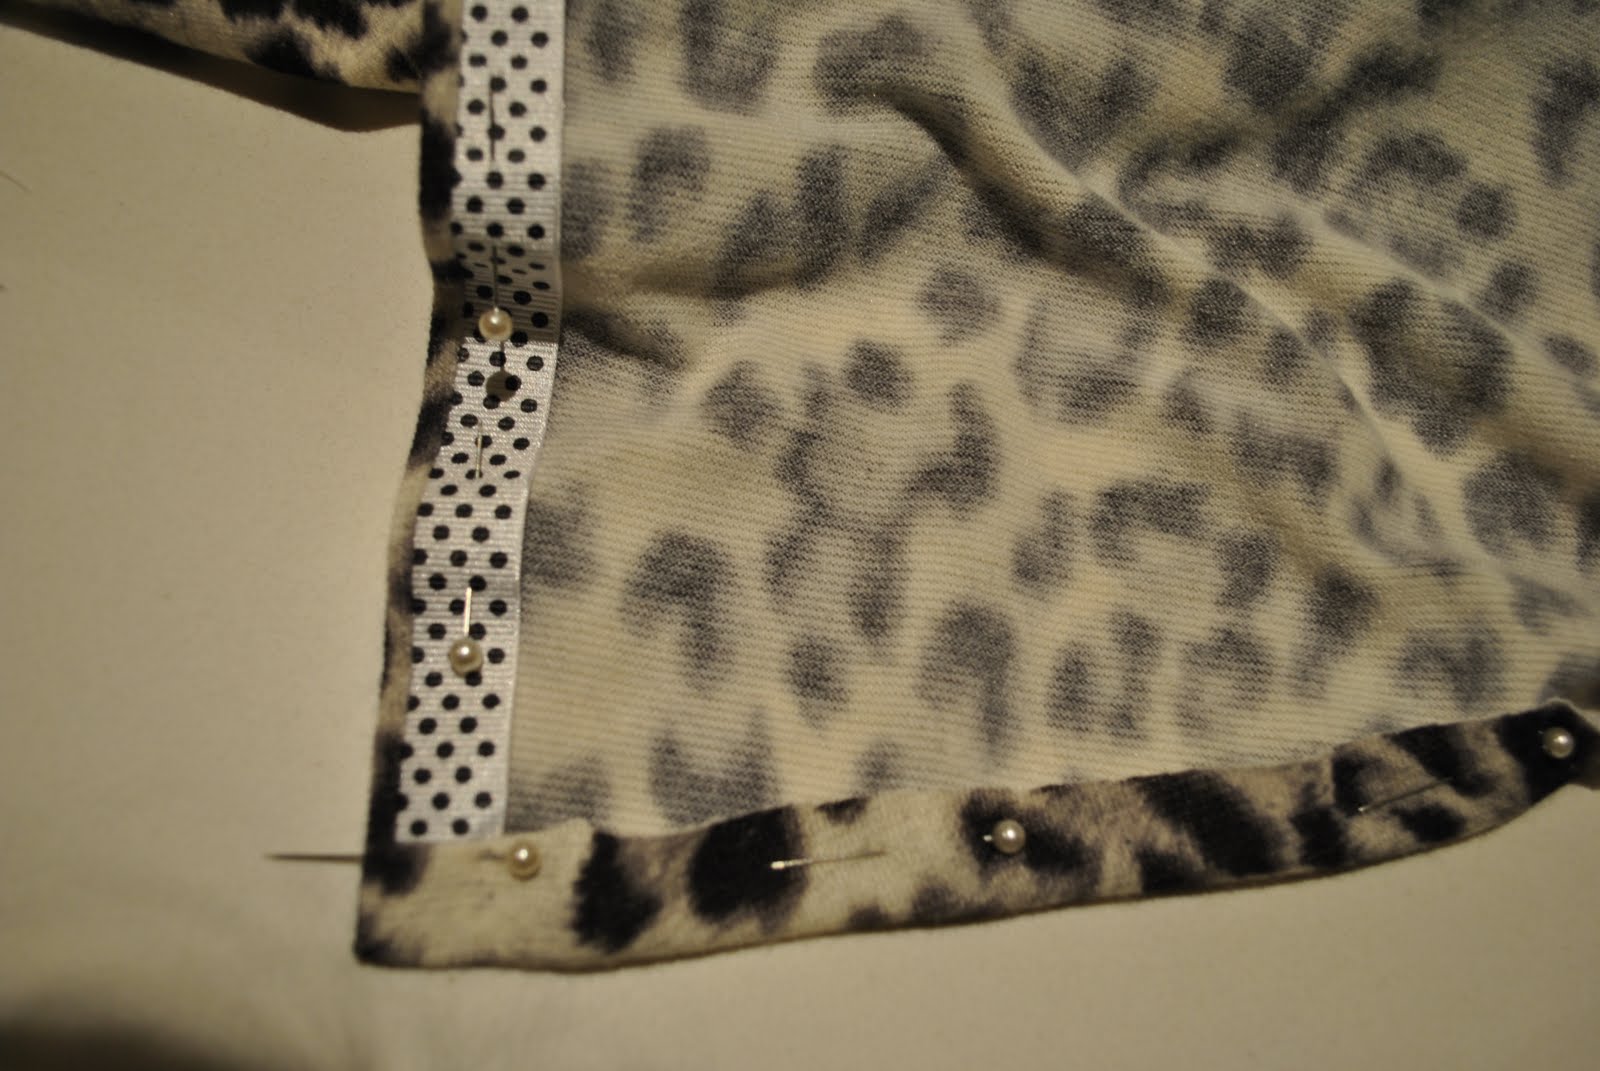
Turn up the lower edge of the cardigan twice, press and invisibly hand-stitch hem in place, also the wrist hems…

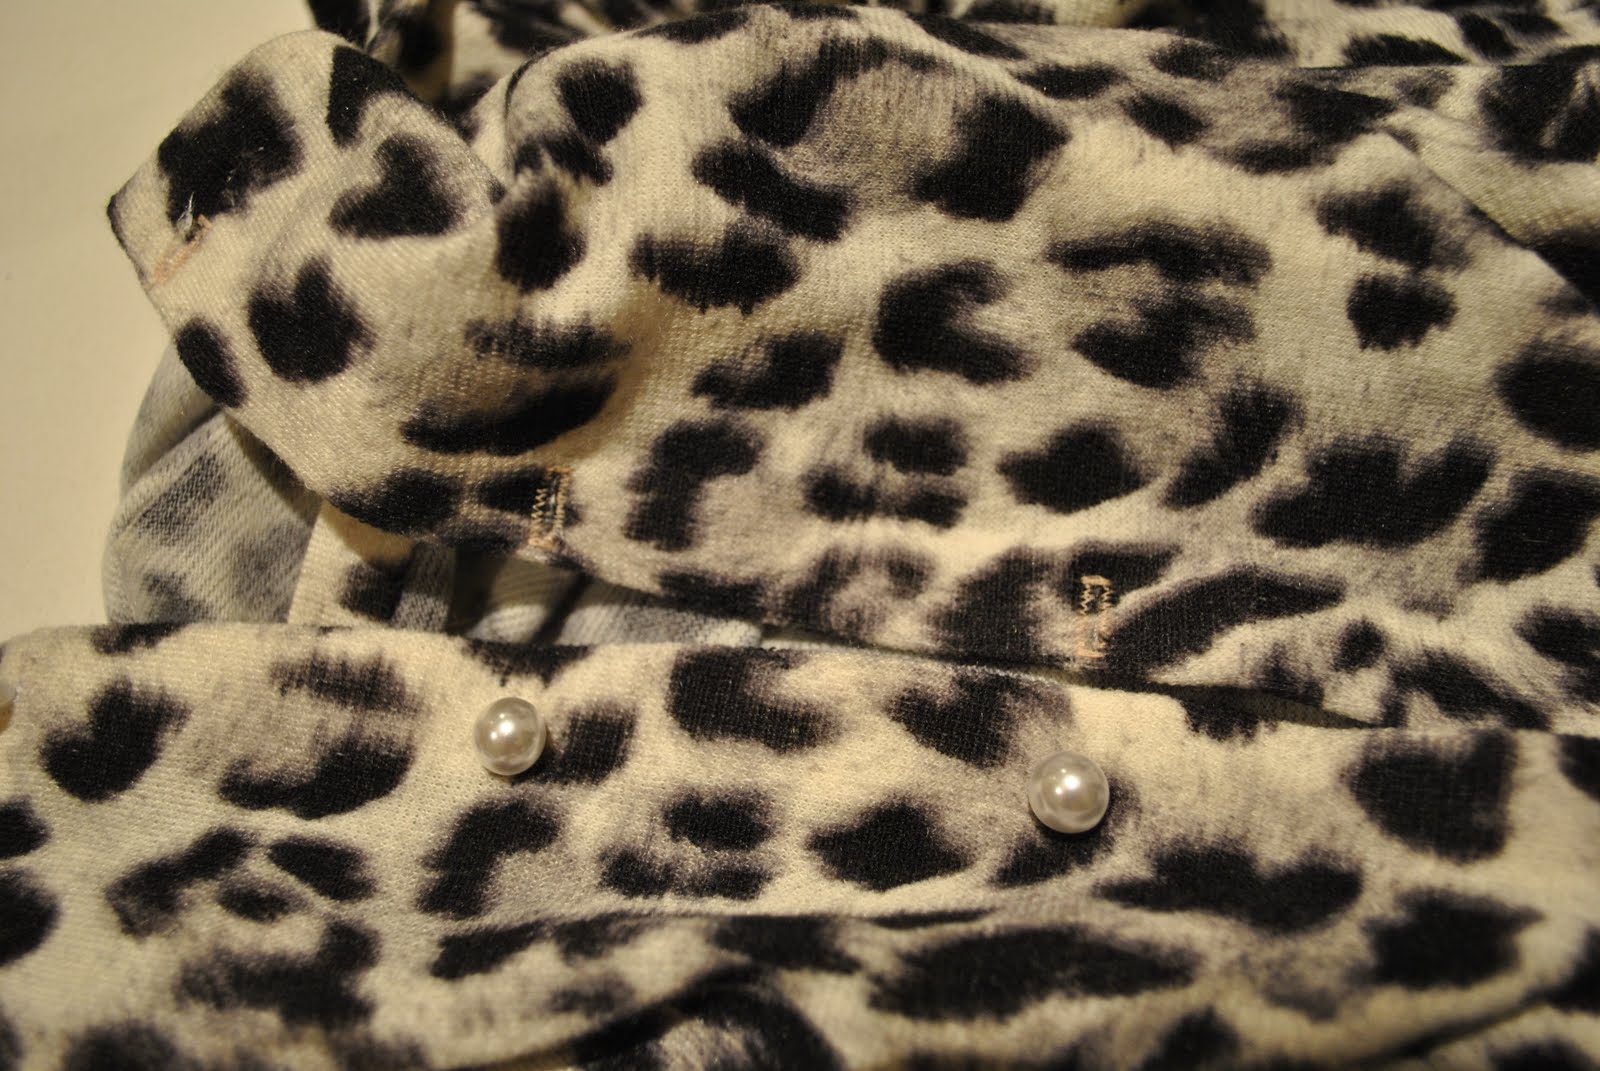
Measure where buttons and buttonholes are to be, and sew them in position.  Using a grosgrain ribbon to line the neck-edge enables you to machine sew buttonholes straight onto delicate knit fabrics easily, and also to stitch buttons on securely through the two layers without risk of light knit fabrics pulling out of shape; which they would without a strong backing…

Et voila, a very simple cardigan to provide an extra layer of colour to your ensemble, if not some warmth!

pinterestmail

On piping, and puffy sleeves…

I bought a second Vogue pattern during the recent half price sale, Vogue 1152 at right… and have been making it up using some cheap chambray cotton.  And was all happily whizzing along and halfway through when I realised I needed some piping to proceed.  And didn’t have any.  Fear not, I do not let piddly obstacles such as not having the correct materials at hand stop me from contriving some sort of substitute out of whatever is floating around in the laundry cupboard where my stash lives.  And is actually being chipped away at at a nice steady pace, thankyou for asking.  But I digress… back to the piping…  
I fashioned my own piping out of leftover scraps of the chambray and thought to take a few photos to illustrate, as I think this is a cool way to use up small scraps that are otherwise useless and save, oh OK, only a few cents, but every little bit counts, right?  As well as saving planetary resources, etc.
At first I had the bright idea of making a twisted strip of piping.  I thought of doing this as the proper piping rope you buy is twisted…  So I just cut some strips of the length required, plus about a third (roughly), this extra is to allow for length lost by twisting.

Twisted and ironed flat.  Immediately noticed was no good.  Now I think the ironing is where the problem lay.  The twisted strip appeared a nice even piece of cord and looked just right but when ironed, it flattened along the twists and developed lumps and bumps most undesirable in a piping cord… so this method had to be abandoned.

On to plan B.  Folded the strip carefully in equal thirds longwise and ironed just enough on low heat to make the creases a mere memory on the fabric…
The set the machine stitching to as loose as possible and sewed down the centre of the strip.  This created a nice fat cord-like strip that had a nature pretty close to piping…

So went ahead and encased the wannabe piping in my contrast bias binding… 

and Bob’s your uncle.  Not tooooo bad?  (They don’t look terribly even in this photo, but that is because the bottom two strips have been ironed flat while the top one was left unironed to avoid messing up those gathers above it … when I realised this I went back and hand-puffed some life back up into those two bottom contrast strips and now they match OK, for a day dress…)

So onwards and upwards.  I actually had finished this dress pretty much to the pattern, and look at these sleeves…

Anyone who knows me will know for sure that these sleeves are so not-me.  (Ha!  That was a fun sentence, no?)  So my next project is to fix up those sleeves.  And will show the finished result tomorrow…
It’s not that I don’t like puffy sleeves.  I think in the right fabric, say a very light floaty chiffon, the sleeves would flop down attractively like the dress on the pattern envelope and look fine. But in this chambray, which has a lot of body to it, the puffs are just not right.

pinterestmail

Cute patchwork skirt for a little girl

It is my youngest niece’s birthday tomorrow and I wanted to make her a frivolous and girly little skirt because she is luckily still little enough to love pretty dress-up clothes.  A dress I had made her for a previous birthday could well be the most appreciated present I’ve ever made anyone, as she wore it lots and lots.  It was a hot pink satin princess dress, with a sweetheart neckline, puffy glitter sleeves and a glittery tulle bustle and I was thrilled she was so happy with it.
For this skirt I bought this row of pretty patches joined together.  The idea for this skirt came from the very creative Sophie who owns and operates Materialize.  She had made some adorable patchwork tutus for very little girls and had joined this strip together like this when I bought it.

Now I’m making a skirt here not a tutu, and obviously the skirt was going to be way too short with just these pieces so what was necessary here? of course a petticoat!  So I bought some broderie anglaise and a little bit of broderie edging and cut to the suitable length; gathered the patched strip to fit on top.  I did it this way because I wanted the overskirt to be gathered in an apron-like fashion over a straighter petticoat…  At this point I had also removed some of the patches, partly  because I realised the strip was going to be too long and partly because I didn’t like some of the fabrics so much.  Then I attached the broderie anglaise edging strip to the bottom edge…
I also got some of this adorable lime striped bias binding to use for the tie waistband, and attached it to the top edge.  The petticoat, being a rectangle, required only a little gathering to fit my niece’s waist measurement.  Using some leftover lilac cotton I made some more bias binding to line the waistband.
The lilac bias binding was sewn to the lime stripe bias binding, leaving the skirt top open to enable turning right sides out.  Here in this photo  the waistband has been sewn together and one tie end has been turned out and pressed.
The waistband opening was slipstitched closed on the inside, and the waist ties topstitched on the right side out.  Finally the centre back of the skirt was sewn closed, leaving enough of an opening for my niece to step into the skirt.  I finished the open edges of the centre back with narrow hems.

Et voila!  This skirt would be a good way to use up scraps of leftover fabric that’s too pretty to throw out, or if you’ve ever been lured into buying a set of gorgeously co-ordinated fat quarters. 

pinterestmail

Adding a lining to a finished skirt

My bottle green basic skirt has had an update!  Well, not one you’d see, but one that will make it tons more wearable in my winter repertoire; I’ve added a lining.
The first few times I wore this in autumn I wore it on its own (see left) and all was hunky-dory.  Then as the weather turned brisker I started donning tights to keep the pegs warm and an immediate problem reared its ugly head… barely half a day had gone by before the skirt sticking to my textured tights as I walked and riding up in a most unladylike fashion became an issue… something had to be done and fast before I could decently wear this thing out in public again!!  So the next time I visited my favourite fabric shop I bought 70cm bemsilk lining in emerald green.
The pattern I used for this skirt Vogue 7303 is ordinarily an unlined skirt with an internal waistline facing and a centre back zip, which is how I made it up for this skirt (this pattern has been used a multitude of ways as followers may have noticed!).
So to line it, this is what I did…    I cut out a front (on the fold) and two backs (laid on the selvedge to get a ready-made finished edge for those centre back edges) from the lining fabric (here the skirt is inside out to show the turquoise facing band, this is invisible when the skirt is right way out);

I made up the lining skirt identical to the pattern, leaving the centre back seam un-sewn, and serged the side seams to finish;

Then the precision measuring bit (not being facetious here, it is pretty important to get these measurements as spot on as possible for a good fit).  I laid the lining skirt onto the finished skirt, so the seam allowance (1.5cm) is overhanging the top of the skirt.  In the picture the red pin is marking a point 1.5cm (5/8″) above the bottom edge of the facing, this will be the stitching line where your lining will be joined onto the facing of the skirt.  The yellow pin is marking a spot 1.5cm (5/8″) above this point; this will be the cutting line for where you can cut away the top of the lining skirt.  Mark both of these lines on your lining skirt all the way around with pins or tailors chalk.  Carefully cut along the cutting line (yellow pin line) around the top of the lining skirt.  

Unpick where you’ve previously joined the facing to the zip tape, and with right sides together and using a seam allowance of 1.5cm (5/8″), sew the lining skirt at the stitching line (red pin line) to the facing.  Serge to finish and press down.  Now sew the centre back seam of the lining skirt to finish at the base of your zip, iron down the seam allowances of the lining and pin to the zip tape.  Hand stitch lining to your zip tape…

Cut away the lining level with the base of the skirt…

Fold up 1cm, then 1cm again, press, pin and stitch as normal for a lining.

Finished!  Now I can wear my skirt with tights and no more constant re-arranging of the skirt to hang properly.

pinterestmail

Knotty blue scarf

It’s been an embarrassingly long while since I did a re-fashion.  My big bag of toss-out garments is still sitting there, taunting me.  And this re-fashion is so … trite, it’s barely worth the label “re-fashion”.  Still, in my defence, there was not a lot of fabric to play with in this one, meaning, not a lot of re-fashion options.  But I like scarves.  And, bonus, I’m making a start on incorporating some air force blue into my wardrobe for winter.  Win!
So, starting with an old tank-top of my husband’s.  This is actually the top half of a pair of summer jammies, from a men’s sleepwear range brought out by Ian Thorpe the Aussie Olympic swimmer, that I’m chopping up here.  Sorry, Thorpie…

I simply cut off the top part of the tank-top at underarm level, and the bottom seam, for a raw edge.  The side seams were cut out also to get the raw edge, and the front and back remaining rectangles cut into three roughly equal width pieces.  (OK, very roughly…)

  
These were overlocked together, right sides facing.  When overlocking I also cut out the remains of that logo….  I didn’t use matching overlocker thread, but it doesn’t matter as these seams are to be hidden by knots.  

Where I’m knotting the sides are folded in slightly, just to hide the seam stitching, and simple knots positioned to hide the seams.

Et voila, a new air force blue scarf…

Details:
Skirt; Vogue 7303 lined, winter white wool crepe
Top; Metalicus
Cardi; Metalicus
Boots; Enrico Antinori
Scarf; refashioned from old tank-top
Bag; Gucci

pinterestmail

Anatomy of a ball dress, pt 2

I apologise for the lack of progress pictures on this dress.  Pretty much I’ve had heaps of work and errands to catch up on, and am restricted to sewing in a more limited amount of spare time than I’m used to.  I hope I get it finished!!  No, I’m kidding, this dress will get finished, even if the pictures become a bit sporadic over the next week…
Oh, and thankyou everyone who commented positively on my petticoat in its early stages!  It’s so nice to receive lovely supportive comments, I’m very grateful for each and every one of them, you are all wonderfully kind people… Thankyou all so much!
So last night I finished draping the flounce to my satisfaction, folded down 1cm under the top edge and sewed it onto the petticoat with a double line of stitching.

I then inserted the zip and finished the centre back seam.  Haven’t put in a hook and eye as yet, doh!!
(Apologies for the poor quality of the following pictures.  I took these this evening and it’s too dark for outside photos…)

I handfinished the lining inside the petticoat, yes, my now well-documented obsession with having a nice looking inside; here is a photo of the inside of the bodice

And the petticoat so far.  I have to model it myself from now on because as I’ve blogged about previously, as wonderful a model as Bessie is she is bigger than me and so once the zip has gone in I can no longer do it up on her… 

The next step will be to hand hem the petticoat, which I will do in front of the idiot box tonight… stay tuned…

pinterestmail

Anatomy of a ball dress, pt 1

I’ve made a start on my ball dress.  Although I was a bit late to get started on it I’m making up for lost time now.  Yesterday I did more sewing on my daughter’s dress than I did on my own!!  And I think I’m spending way too much time on the internet, particularly my new favourite site, Po___re, yes, you know the one.  It’s way too addictive, and I’m setting a new rule for myself that I will only go on once a week from now on.  I’ve got lots of other things I prefer to do with my time, and more constructive things too, sewing being one of them.  So back to this dress!
Typically for me, I launched straight into this project and neglected to take any photos at first…  For the red petticoat component I’m using a pattern that has worked successfully for me before; Butterick 4657, with a few modifications I’ll address here as I get to them.  
I started by constructing the “velvet bra” part of the bodice.  Immediately I ran into a few challenges.  Let me outline the challenges in this part of the exercise for you:
1. The outer shell of the upper bodice is of velvet
2.  I’m working with velvet here
3.  I’m lining the bodice with some leftover silk taffeta, which frays like nobody’s business
4.  I’m working with velvet
I’d forgotten what a pain in the derriere velvet is to work with.  I’ve made things from velvet before and its thick pile makes it “flatten” first one way and then another, and makes for a very difficult seaming process if you don’t pin and baste very carefully.  I also started out with a small boo-boo, I initially sewed an easing line between the small dots on one of the bodice side fronts, rather than the front as I should have and tried unsuccessfully to sew them together with the ease stitching on the wrong piece before realising my mistake…  this completely ruined these two pieces.  As anyone who has worked with velvet knows, you just cannot unpick stitching successfully with this stuff, the fabric is too fragile and the pile is marked forever once stitched on.   With velvet it’s essential to get your stitching right first time, or else prepare yourself to cut out some new pieces.  Luckily I had bought 30cm, leaving me enough leftover to cut out a new side front and front… just.  
I’m not making the sleeves of this pattern, but using some matching velvet ribbon for thin shoulder straps… so here is the upper bodice front constructed.  At right is the inside of the same, I’m lining with silk taffeta rather than lining fabric because I’ve got enough leftover from my planned skirt frill/flounce to cut out these pieces… and I believe in waste not,want not, even in fabric… notice the mad fraying going on at the bottom there?  sheesh..

This is how I’m modifying the upper back piece; because my gown has thin shoulder straps, I cut the piece off at the upper edge of the dart as shown here…  at left is the pattern piece and at right is the piece as I cut it, without the upper half.  Because I was cutting at this point I was able to fold the dart on the paper pattern piece to eliminate it before cutting the fabric piece…  If you have the opportunity to eliminate a pesky little seam like a dart when working with a bulky fabric like velvet its a good idea to do so!

Then I measured the ribbon straps to fit me (By the way, even though I’m not mentioning it I am constantly fitting these pieces to myself and making appropriate fitting adjustments at each stage here.  You’ll thank me for sparing you photos of any of this fitting; me in a semi-attired state? No.)  I would have dearly loved to have some of those strap length modifier thingies like you get on lingerie for the straps, but they didn’t come in a matching colour, which is the only way they would be acceptable to me on an evening gown.  I contemplated painting some with nail varnish for a few seconds… but decided that would be too tacky!

And completed the upper backs, and attached them to the upper fronts at the side seams…  (Small detail: its been pinned here with the wrong front lapping over, but I got it right when I sewed it, so no biggie!) 

I then attached the middle fronts and backs, and then the lining version of these on the inside (not shown)  Why am I lining the bodice of a petticoat?  I honestly don’t know.  Blame it on my obsession that the inside of my finished garment look as good as the outside…

Here are the petticoat skirts joined together…  The raw seam edges have been overlocked to finish.

And now I’ve attached the petticoat skirt to the middle bodice.  At this stage the zip has not been inserted and the skirt is left long, longer than it will eventually be.  The next stage will be to add the silk taffeta frill/flounce I’m planning to go on this skirt.  In my planned final version of the dress; the velvet upper bodice and the planned silk taffeta frill/flounce will be the only visible parts of the petticoat.  

Stay tuned, more on this project in a couple of days…

pinterestmail

“Black-adder” cardigan

I finished this cardigan just before we set out on our trek but didn’t get time to do a post about it.
Do you remember me mentioning some rubber/plastic coated jersey knit, stamped in a kind of scaly print that I thought would be ideal to finish off my python print satin outfit, but it wasn’t?  (I know, shocking grammar, there has to be a better way of phrasing that…)  Gorgeous and unusual fabric, fell in love with it at first sight.  A tough-but-still-chic-looking leather alternative to satisfy even the most ardent PETA supporter.  I think I’ll be wearing it a lot this autumn/winter!
Ultimately this was a very easy project, sewn together completely on my overlocker and took all of about twenty minutes to put together once cut out.  I didn’t think to take any “during” photos, but I’ll provide a few construction details in case anyone wishes to reproduce this one for themselves.
So I had 70cm of this stuff and decided to make a little cardigan out of it.  I took one of my existing cardigans which I like the shape of, laid it flat and smooth as possible onto paper and drew respectively around its back, front and sleeve, adding a 1cm seam allowance.  

When I tried to lay these out on my fabric the fun began and I had to have a good long think about what was possible.  There really wasn’t enough fabric to make a full length cardigan, so there was compromise.  This end result is proof that even if you don’t have quite enough fabric to fit your vision, if you are determined and persevere and think outside the box about using all your fabric to best effect, you can still have a good outcome.  And I was determined…!
The body pieces had to be cut shorter to about waist-length.  Paradoxically this still left plenty of long strips on the edges, so I used these for the waistband, sleeve bindings, and also to add a long collar/front tie to the neckline.  I didn’t use pattern pieces for these strips, just measured myself, pinned and adlibbed.
The wrist bands are made by serging your wrist strip along its short edge into a tube.  Fold this in half wrong sides together around the circular middle of the tube.  Pin to the right side of your sewn-together sleeve and serge around the raw edges.

The waistband strip is folded in half along its long axis wrong sides together, likewise pinned to the right side of the bottom edge and raw edges simply serged together.  My waistband strip wasn’t quite long enough for proper squared edges, so I sewed the ends on a narrowing curve as they ended at the front edges, and I really like the look of how this turned out.  I got the idea for this from one of my Metalicus cardigans.

The raw edges of the fronts and the long tie collar posed their own finishing problem.  No finish seemed to look right: visible serged edges looked a bit unprofessional; topstitching looked horrendous and my ordinary machine hated the rubbery plastic finish, it kept sticking in the machine; rolled and hand-sewn edges wouldn’t have worked because this fabric does not crease or fold.  So eventually I unearthed a bit of leftover black silk jersey (leftover from this dress, made about five years ago, yes, I often keep scraps that long!!)
I had just enough to cut out two front pieces and a strip the same length as my neck piece (er, the same length once I pieced together three smaller strips, that is).  Sewing these to their corresponding fashion fabric pieces right sides together at the edges, turning right side out, then treating as one piece seemed to do the trick nicely.  I apologise that they look a bit cat-hair-y in this photo.  I did say the fabric had been sitting around a while…!  And you can probably make out the selvedge holes along the edge of the silk jersey, I really did have only just enough fabric!  Yeah, I could have bought a bit more fabric, but by now I was on a minimal-wastage mission…

And so my new cardigan.  Today has brought a tiny taste of winter to Perth (thank goodness we had fabulous weather for out trek!), so I’m dressing a bit wintery-like.

Details:
Cardigan; own design, scale print jersey knit
Top; Ezibuy
Skirt; Vogue 7303, olive green corduroy
Leggings; Metalicus
Boots; Sunday, Andrea & Joen, from Uggys in Dunsborough

pinterestmail
Switch to mobile version
↓